

Page 1
Blu-ray Disc PLAYER
BDP-HD1
Register Your Product on
www.pioneerelectronics.com
www.pioneerelectronics.ca
Operating Instructions
(US)
(Canada)
Page 2
Thank you for buying this Pioneer product.
Please read through these operating instructions so you will know how to operate your model properly.
After you have finished reading the instructions, put them away in a safe place for future reference.
CAUTION
RISK OF ELECTRIC SHOCK
DO NOT OPEN
The lightning flash with arrowhead, within
an equilateral triangle, is intended to alert
the user to the presence of uninsulated
"dangerous voltage" within the product's
enclosure that may be of sufficient
magnitude to constitute a risk of electric
shock to persons.
CAUTION:
TO PREVENT THE RISK OF ELECTRIC
SHOCK, DO NOT REMOVE COVER (OR
BACK). NO USER-SERVICEABLE PARTS
INSIDE. REFER SERVICING TO QUALIFIED
SERVICE PERSONNEL.
The exclamation point within an equilateral
triangle is intended to alert the user to the
presence of important operating and
maintenance (servicing) instructions in the
literature accompanying the appliance.
D1-4-2-3_En
IMPORTANT NOTICE – THE SERIAL NUMBER FOR THIS EQUIPMENT IS LOCATED IN THE REAR.
PLEASE WRITE THIS SERIAL NUMBER ON YOUR ENCLOSED WARRANTY CARD AND
KEEP IN A SECURE AREA. THIS IS FOR YOUR SECURITY.
D1-4-2-6-1_En
NOTE: This equipment has been tested and found to comply with the limits for a Class B digital device, pursuant to
Part 15 of the FCC Rules. These limits are designed to provide reasonable protection against harmful interference in
a residential installation. This equipment generates, uses, and can radiate radio frequency energy and, if not
installed and used in accordance with the instructions, may cause harmful interference to radio communications.
However, there is no guarantee that interference will not occur in a particular installation. If this equipment does
cause harmful interference to radio or television reception, which can be determined by turning the equipment off
and on, the user is encouraged to try to correct the interference by one or more of the following measures:
– Reorient or relocate the receiving antenna.
– Increase the separation between the equipment and receiver.
– Connect the equipment into an outlet on a circuit different from that to which the receiver is connected.
– Consult the dealer or an experienced radio/TV technician for help.
D8-10-1-2_En
Information to User
Alteration or modifications carried out without appropriate authorization may invalidate the user’s right to operate
the equipment.
D8-10-2_En
This Class B digital apparatus complies with Canadian ICES-003.
Cet appareil numérique de la Classe B est conforme à la norme NMB-003 du Canada.
D8-10-1-3_EF
CAUTION: This product satisfies FCC regulations when shielded cables and connectors are used to connect the
unit to other equipment. To prevent electromagnetic interference with electric appliances such as radios and
televisions, use shielded cables and connectors for connections.
FEDERAL COMMUNICATIONS COMMISSION DECLARATION OF CONFORMITY
This device complies with part 15 of the FCC Rules. Operation is subject to the following two conditions: (1)This
device may not cause harmful interference, and (2)this device must accept any interference received, including
interference that may cause undesired operation.
Product Name: Blu-ray Disc PLAYER
Model Number: BDP-HD1
Responsible Party Name: PIONEER ELECTRONICS SERVICE, INC.
Address: 1925 E. DOMINGUEZ ST. LONG BEACH, CA 90801-1760,U.S.A.
Phone: 1-800-421-1404
WARNING – TO PREVENT FIRE OR SHOCK
HAZARD, DO NOT EXPOSE THIS
APPLIANCE TO RAIN OR MOISTURE.
D1-4-2-1_En
C67-7-3_En
D8-10-3a_En
Page 3
READ INSTRUCTIONS — All the safety and
operating instructions should be read before the
product is operated.
RETAIN INSTRUCTIONS — The safety and
operating instructions should be retained for
future reference.
HEED WARNINGS — All warnings on the product
and in the operating instructions should be
adhered to.
FOLLOW INSTRUCTIONS — All operating and use
instructions should be followed.
CLEANING — The product should be cleaned only
with a polishing cloth or a soft dry cloth. Never
clean with furniture wax, benzine, insecticides
or other volatile liquids since they may corrode
the cabinet.
ATTACHMENTS — Do not use attachments not
recommended by the product manufacturer as
they may cause hazards.
WATER AND MOISTURE — Do not use this
product near water — for example, near a
bathtub, wash bowl, kitchen sink, or laundry
tub; in a wet basement; or near a swimming
pool; and the like.
ACCESSORIES — Do not place this product on an
unstable cart, stand, tripod, bracket, or table.
The product may fall, causing serious injury to a
child or adult, and serious damage to the
product. Use only with a cart, stand, tripod,
bracket, or table recommended by the
manufacturer, or sold with the product. Any
mounting of the product should follow the
manufacturer’s instructions, and should use a
mounting accessory recommended by the
manufacturer.
CART — A product and cart combination should be
moved with care. Quick stops, excessive force,
and uneven surfaces may cause the product
and cart combination to overturn.
VENTILATION — Slots and openings in the cabinet
are provided for ventilation and to ensure
reliable operation of the product and to protect
it from overheating, and these openings must
not be blocked or covered. The openings should
never be blocked by placing the product on a
bed, sofa, rug, or other similar surface. This
product should not be placed in a built-in
installation such as a bookcase or rack unless
proper ventilation is provided or the
manufacturer’s instructions have been adhered
to.
POWER SOURCES — This product should be
operated only from the type of power source
indicated on the marking label. If you are not
sure of the type of power supply to your home,
consult your product dealer or local power
company.
LOCATION – The appliance should be installed in a
stable location.
NONUSE PERIODS – The power cord of the
appliance should be unplugged from the outlet
when left un-used for a long period of time.
GROUNDING OR POLARIZATION
• If this product is equipped with a polarized
alternating current line plug (a plug having one
blade wider than the other), it will fit into the
outlet only one way. This is a safety feature. If
you are unable to insert the plug fully into the
outlet, try reversing the plug. If the plug should
still fail to fit, contact your electrician to replace
your obsolete outlet. Do not defeat the safety
purpose of the polarized plug.
• If this product is equipped with a three-wire
grounding type plug, a plug having a third
(grounding) pin, it will only fit into a grounding
type power outlet. This is a safety feature. If you
are unable to insert the plug into the outlet,
contact your electrician to replace your obsolete
outlet. Do not defeat the safety purpose of the
grounding type plug.
POWER-CORD PROTECTION — Power-supply
cords should be routed so that they are not likely
to be walked on or pinched by items placed
upon or against them, paying particular
attention to cords at plugs, convenience
receptacles, and the point where they exit from
the product.
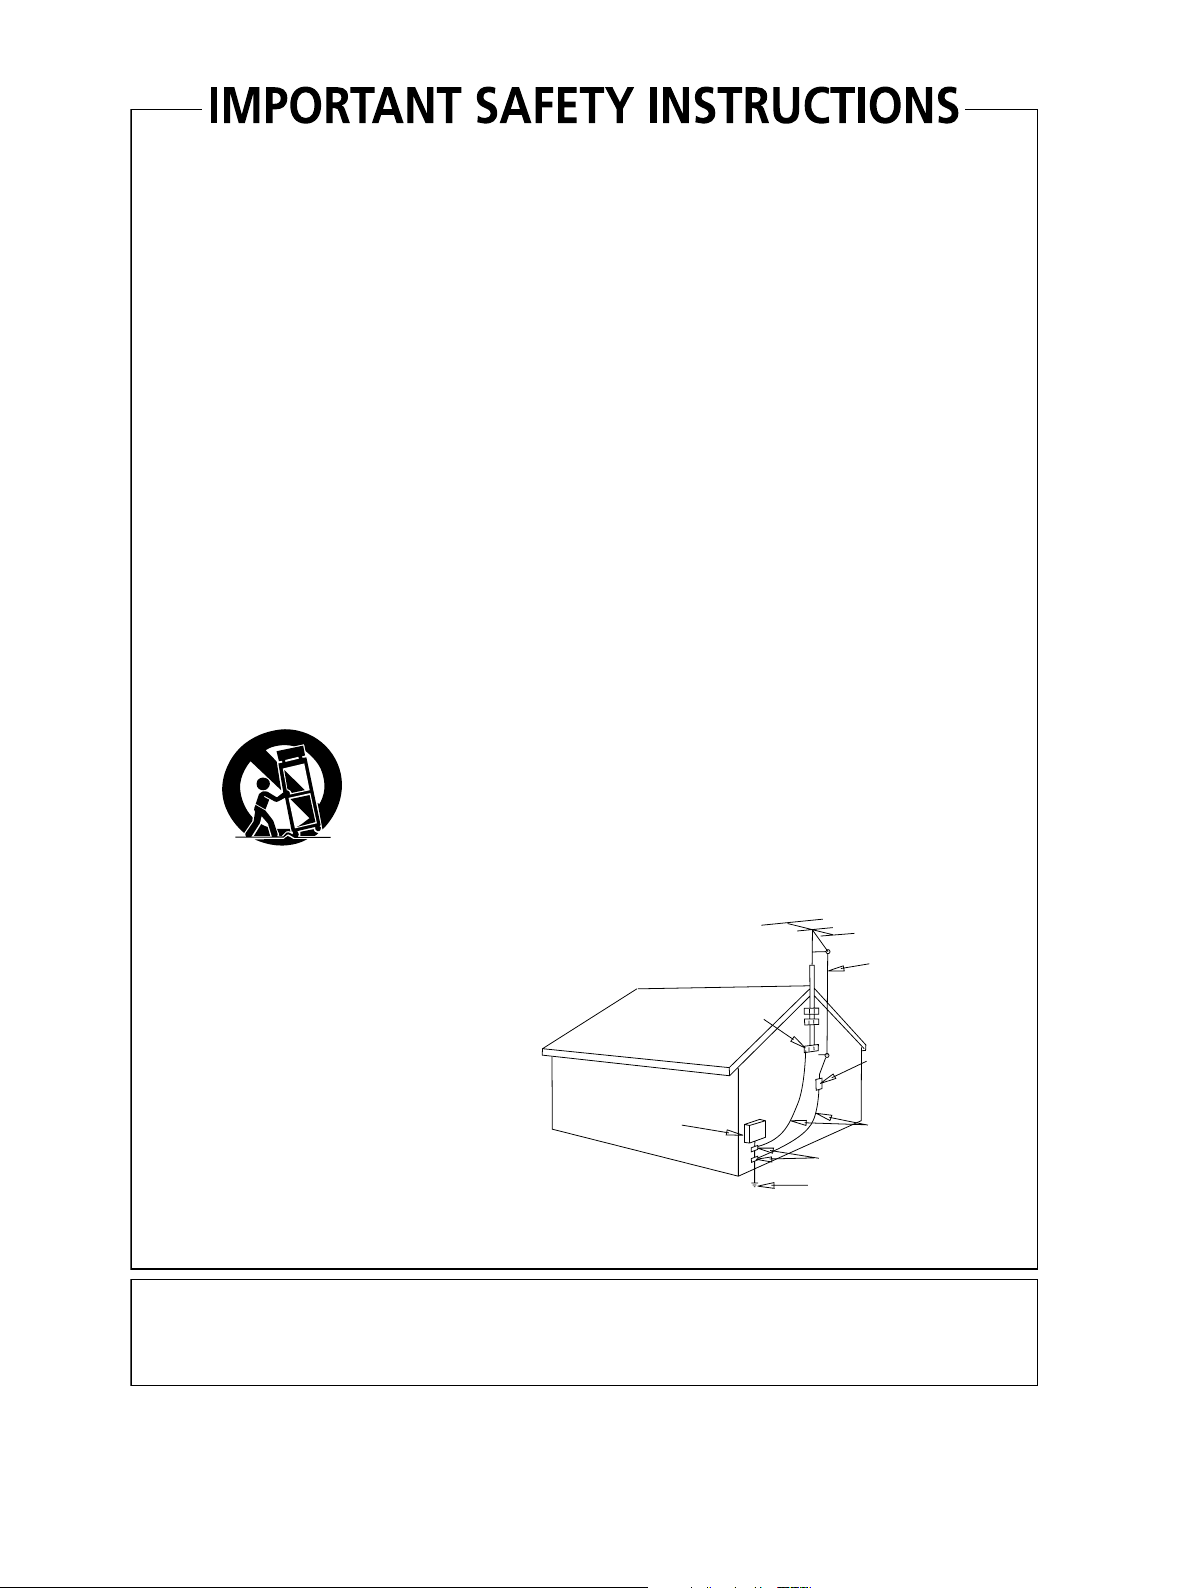
OUTDOOR ANTENNA GROUNDING — If an
outside antenna or cable system is connected to
the product, be sure the antenna or cable
system is grounded so as to provide some
protection against voltage surges and built-up
static charges. Article 810 of the National
Electrical Code, ANSI/NFPA 70, provides
information with regard to proper grounding of
the mast and supporting structure, grounding of
the lead-in wire to an antenna discharge unit,
size of grounding conductors, location of
antenna-discharge unit, connection to
grounding electrodes, and requirements for the
grounding electrode. See Figure A.
LIGHTNING — For added protection for this
product during a lightning storm, or when it is
left unattended and unused for long periods of
time, unplug it from the wall outlet and
disconnect the antenna or cable system. This
will prevent damage to the product due to
lightning and power-line surges.
POWER LINES — An outside antenna system
should not be located in the vicinity of overhead
power lines or other electric light or power
circuits, or where it can fall into such power
lines or circuits. When installing an outside
antenna system, extreme care should be taken
to keep from touching such power lines or
circuits as contact with them might be fatal.
OVERLOADING — Do not overload wall outlets,
extension cords, or integral convenience
receptacles as this can result in a risk of fire or
electric shock.
ELECTRIC
SERVICE
EQUIPMENT
Fig. A
OBJECT AND LIQUID ENTRY — Never push
objects of any kind into this product through
openings as they may touch dangerous voltage
points or short-out parts that could result in a
fire or electric shock. Never spill liquid of any
kind on the product.
SERVICING — Do not attempt to service this
product yourself as opening or removing covers
may expose you to dangerous voltage or other
hazards. Refer all servicing to qualified service
personnel.
DAMAGE REQUIRING SERVICE — Unplug this
product from the wall outlet and refer servicing
to qualified service personnel under the
following conditions:
• When the power-supply cord or plug is
damaged.
• If liquid has been spilled, or objects have fallen
into the product.
• If the product has been exposed to rain or water.
• If the product does not operate normally by
following the operating instructions. Adjust only
those controls that are covered by the operating
instructions as an improper adjustment of other
controls may result in damage and will often
require extensive work by a qualified technician
to restore the product to its normal operation.
• If the product has been dropped or damaged in
any way.
• When the product exhibits a distinct change in
performance — this indicates a need for service.
REPLACEMENT PARTS — When replacement parts
are required, be sure the service technician has
used replacement parts specified by the
manufacturer or have the same characteristics
as the original part. Unauthorized substitutions
may result in fire, electric shock, or other
hazards.
SAFETY CHECK — Upon completion of any service
or repairs to this product, ask the service
technician to perform safety checks to
determine that the product is in proper
operating condition.
WALL OR CEILING MOUNTING — The product
should not be mounted to a wall or ceiling.
HEAT — The product should be situated away from
heat sources such as radiators, heat registers,
stoves, or other products (including amplifiers)
that produce heat.
ANTENNA
LEAD IN
WIRE
GROUND
CLAMP
ANTENNA
DISCHARGE UNIT
(NEC SECTION 810-20)
GROUNDING CONDUCTORS
(NEC SECTION 810-21)
GROUND CLAMPS
POWER SERVICE GROUNDING
ELECTRODE SYSTEM
(NEC ART 250, PART H)
NEC — NATIONAL ELECTRICAL CODE
D1-4-2-2_En
CAUTION : USE OF CONTROLS OR ADJUSTMENTS OR PERFORMANCE OF PROCEDURES OTHER THAN THOSE
SPECIFIED HEREIN MAY RESULT IN HAZARDOUS RADIATION EXPOSURE.
CAUTION : THE USE OF OPTICAL INSTRUMENTS WITH THIS PRODUCT WILL INCREASE EYE HAZARD.
D6-8-2-1_En
Page 4

T
his product contains mercury. Disposal of this
material may be regulated due to environmental
considerations. For disposal or recycling information,
please contact your local authorities or the Electronics
Industries Alliance : www.eiae.org.
WARNING: Handling the cord on this product or
cords associated with accessories sold with the
product will expose you to chemicals listed on
proposition 65 known to the State of California and
other governmental entities to cause cancer and
birth defect or other reproductive harm.
Wash hands after handling
K057_En
D36-P4_A_En
This product is for general household purposes. Any
failure due to use for other than household purposes
(such as long-term use for business purposes in a
restaurant or use in a car or ship) and which
requires repair will be charged for even during the
warranty period.
K041_En
POWER-CORD CAUTION
Handle the power cord by the plug. Do not pull out the
plug by tugging the cord and never touch the power
cord when your hands are wet as this could cause a
short circuit or electric shock. Do not place the unit, a
piece of furniture, etc., on the power cord, or pinch the
cord. Never make a knot in the cord or tie it with other
cords. The power cords should be routed such that they
are not likely to be stepped on. A damaged power cord
can cause a fire or give you an electrical shock. Check
the power cord once in a while. If you find it damaged,
contact the Pioneer service center on the back cover, or
your dealer for a replacement.
This product incorporates copyright protection
technology that is protected by method claims
of certain U.S. patents and other intellectual
property rights owned by Macrovision
Corporation and other rights owners. Use of
this copyright protection technology must be
authorized by Macrovision Corporation, and is
intended for home and other limited viewing
uses only unless otherwise authorized by
Macrovision Corporation. Reverse engineering
or disassembly is prohibited.
Page 5
Page 6

Contents
01 Before you start
Features
What’s in the box
Putting the batteries in the remote control
Using the remote control
Disc/content format playback compatibility
File compatibility
Titles and chapters
DVD-Video regions
BD-ROM regions
. . . . . . . . . . . . . . . . . . . . . . . . . . . . . . . . . . . . . . . . . . . . 7
. . . . . . . . . . . . . . . . . . . . . . . . . . . . . . . . . . . . . 8
. . . . . . . . . . . . . . . . . . 8
. . . . . . . . . . . . . . . . . . . . . . . . . . . . . . . 8
. . . . . . . . . . . . . . . . . 8
. . . . . . . . . . . . . . . . . . . . . . . . . . . . . . . . . . . . . 9
. . . . . . . . . . . . . . . . . . . . . . . . . . . . . . . . . . . 10
. . . . . . . . . . . . . . . . . . . . . . . . . . . . . . . . . . . 10
. . . . . . . . . . . . . . . . . . . . . . . . . . . . . . . . . . . . 10
02 Connecting up
Rear panel
Easy connections
Using other types of video output
Connecting for HDMI output
Connecting using the component video output
Changing the video output format
Connecting using an S-Video output
Connecting for surround sound
Network connection
Controlling this player via another Pioneer component
Using an external IR receiver with this player
. . . . . . . . . . . . . . . . . . . . . . . . . . . . . . . . . . . . . . . . . 11
. . . . . . . . . . . . . . . . . . . . . . . . . . . . . . . . . . . . 12
. . . . . . . . . . . . . . . . . . . . . . . . 12
. . . . . . . . . . . . . . . . . . . . . . . . . . . 13
. . . . . . . . . . . . . 14
. . . . . . . . . . . . . . . . . . . . . . . 14
. . . . . . . . . . . . . . . . . . . . . 15
. . . . . . . . . . . . . . . . . . . . . . . . . 15
. . . . . . . . . . . . . . . . . . . . . . . . . . . . . . . . . . 16
. . . . . . . . . . . . . . . 16
03 Controls and displays
Front panel
Remote control
Front panel display
. . . . . . . . . . . . . . . . . . . . . . . . . . . . . . . . . . . . . . . . . 17
. . . . . . . . . . . . . . . . . . . . . . . . . . . . . . . . . . . . . 18
. . . . . . . . . . . . . . . . . . . . . . . . . . . . . . . . . . . 19
04 Getting Started
Switching on and setting up
Using the on-screen displays
Setting up for network use
Playing movies, music and photos
Playing BD and DVD movies
Playback controls
Frequently Asked Questions
. . . . . . . . . . . . . . . . . . . . . . . . . . . . . . . . . . . . 22
. . . . . . . . . . . . . . . . . . . . . . . . . . . . 20
. . . . . . . . . . . . . . . . . . . . . . . . . . . 21
. . . . . . . . . . . . . . . . . . . . . . . . . . . . . 21
. . . . . . . . . . . . . . . . . . . . . . . 22
. . . . . . . . . . . . . . . . . . . . . . . . . . . 22
. . . . . . . . . . . . . . . . . . . . . . . . . . . . 26
. . . . . . . 16
05 Using the Disc Navigator
Introduction
Using the Disc Navigator
. . . . . . . . . . . . . . . . . . . . . . . . . . . . . . . . . . . . . . . .27
. . . . . . . . . . . . . . . . . . . . . . . . . . . . . . .27
06 Using the Home Media Gallery
Introduction
About network playback
Using the Home Media Gallery
About Windows Media Connect
. . . . . . . . . . . . . . . . . . . . . . . . . . . . . . . . . . . . . . . .32
. . . . . . . . . . . . . . . . . . . . . . . . . . . . . . .32
. . . . . . . . . . . . . . . . . . . . . . . . . .33
. . . . . . . . . . . . . . . . . . . . . . . . .38
07 Video/Audio Adjust menu
Video Adjust
Audio Adjust
. . . . . . . . . . . . . . . . . . . . . . . . . . . . . . . . . . . . . . . .39
. . . . . . . . . . . . . . . . . . . . . . . . . . . . . . . . . . . . . . . .40
08 Initial Setup menu
Using the Initial Setup menu
About the audio output settings
Speaker Setup
. . . . . . . . . . . . . . . . . . . . . . . . . . . . . . . . . . . . . . .45
. . . . . . . . . . . . . . . . . . . . . . . . . . . .41
. . . . . . . . . . . . . . . . . . . . . . . . .44
09 Additional information
Taking care of your player and discs
Screen sizes and disc formats
Setting up the remote to control your TV
Resetting the player
BD/DVD language code list
BD/DVD country/area code list
Troubleshooting
Glossary
License
Linux Source Notice
Specifications
. . . . . . . . . . . . . . . . . . . . . . . . . . . . . . . . . . . . . . . . . . .53
. . . . . . . . . . . . . . . . . . . . . . . . . . . . . . . . . . . . . . . . . . . .54
. . . . . . . . . . . . . . . . . . . . . . . . . . . . . . . . . .47
. . . . . . . . . . . . . . . . . . . . . . . . . . . . .48
. . . . . . . . . . . . . . . . . . . . . . . . . . . . . . . . . . . . .49
. . . . . . . . . . . . . . . . . . . . . . . . . . . . . . . . . .62
. . . . . . . . . . . . . . . . . . . . . . . . . . . . . . . . . . . . . . .63
. . . . . . . . . . . . . . . . . . . . . .46
. . . . . . . . . . . . . . . . . . . . . . . . . . .47
. . . . . . . . . . . . . . . . . . .47
. . . . . . . . . . . . . . . . . . . . . . . . . .48
6
En
Page 7
Before you start 01
Chapter 1
Before you start
Features
BD-ROM playback
Blu-ray Disc is a next-generation video disc format featuring far
higher disc capacity than conventional DVD. The higher capacity
makes a whole range of new and enhanced features possible, such
as support for high-definition video up to 1920 x 1080 pixels, high
quality, surround sound audio, greater interactivity and richer
content.
BD-ROM discs are commercially produced discs (Video Distribution
format) that can contain movie and other video content, interactive
content, enhanced menu features such as pop-up menus (press
MENU
during playback for these), full-color, high-definition
animated buttons and animated menu transition effects, button
sounds (sounds are played when menu buttons are selected or
activated), high-definition bitmap subtitles supporting full-color
images with frame-accurate animation effects up to full video frame
rate, and so on.
While BD capacity is enough for most applications, the BD-ROM
standard allows for content to be spread across several discs,
removing the limit of one physical disc. Follow the on-screen
instructions during playback when using these special kinds of
discs.
BD-J application
HDMI, the HDMI logo and High-Definition Multimedia Interface are trademarks or
registered trademarks of HDMI Licensing LLC.
1080/60p and 1080/24p video output
This player supports a variety of video output resolutions, up to
1080 lines/60 frames per second, progressive (HDMI only), making
it ideal for playing high-definition Blu-ray Discs.
Pure Cinema
There are two types of video signals: Video material, with a frame
rate of 30 frames/second; and film material, that has a frame rate of
24 frames/second.
In PureCinema mode film material is converted to 60 frames/second
progressive for an exceptionally clear picture.
High quality audio
Blu-ray supports DTS, DTS-HD (DTS-HD is played back as DTS),
Dolby Digital, Dolby Digital Plus, Dolby TrueHD (Dolby Digital Plus
and Dolby TrueHD are played back as Dolby Digital) and Linear PCM
audio in up to eight channels (up to two channels for 24-bit/192 kHz
audio). Connect this player to a surround-sound AV receiver for a
true home theater experience.
The BD-ROM specification supports Java for interactive content.
The Java specification for BD-ROM is known as BD-J. This allows
content providers to put games and other interactive material linked
to specific titles on to BD-ROM discs. (This player does not support
downloadable BD-J content, direct connection to the Internet or the
retrieval of content through the Internet.)
Java and all Java-based marks are trademarks or registered trademarks of Sun
Microsystems, Inc.
© 2000-2006 Esmertec AG
Connect to a local area network
Connect this player to one or more computers in your house via
Ethernet and use them as media servers, streaming audio, video
and still image files for playback on your TV and/or audio system.
HDMI digital interface
The HDMI (High Definition Multimedia Interface) interconnect
provides high quality digital audio and video, all from a single userfriendly connector. HDMI is the first consumer electronics interface
to support uncompressed standard, enhanced, or high-definition
video plus standard to multi-channel surround sound audio, all
using one interface. You can easily connect to an HDMI-equipped
AV receiver or audio-visual device for high quality audio and video.
• Manufactured under license from Dolby Laboratories. “Dolby” and the double-D
symbol are trademarks of Dolby Laboratories.
• “DTS” and “DTS Digital Surround” are registered trademarks of Digital Theater
Systems, Inc.
Movie file playback
Video files encoded in the WMV (Windows Media* Video), MPEG-1/
2 formats are playable from DVD-R/RW, or from a connected media
server.
Music file playback
This player supports various audio formats, including WMA
(Windows Media* Audio), MP3 and WAV. You can play files stored
on DVD-R/RW, or from a connected media server.
Photo file playback
PNG, GIF and JPEG image files—including the popular EXIF format
used by most digital cameras to store picture shooting information
together with the JPEG image—are playable from DVD-R/RW, or
from a connected media server.
*
“Windows Media™” is a trademark of Microsoft Corporation.
This product includes technology owned by Microsoft Corporation and cannot be
used or distributed without a license from Microsoft Licensing, Inc.
7
En
Page 8
Before you start01
What’s in the box
Please confirm that the following accessories are in the box along
with these operating instructions when you open it:
• Remote control
• AA/R6P dry cell batteries x2
• Stereo audio cable (red/white plugs)
• Video cable (yellow plugs)
• Power cable
• Warranty card
Putting the batteries in the remote
control
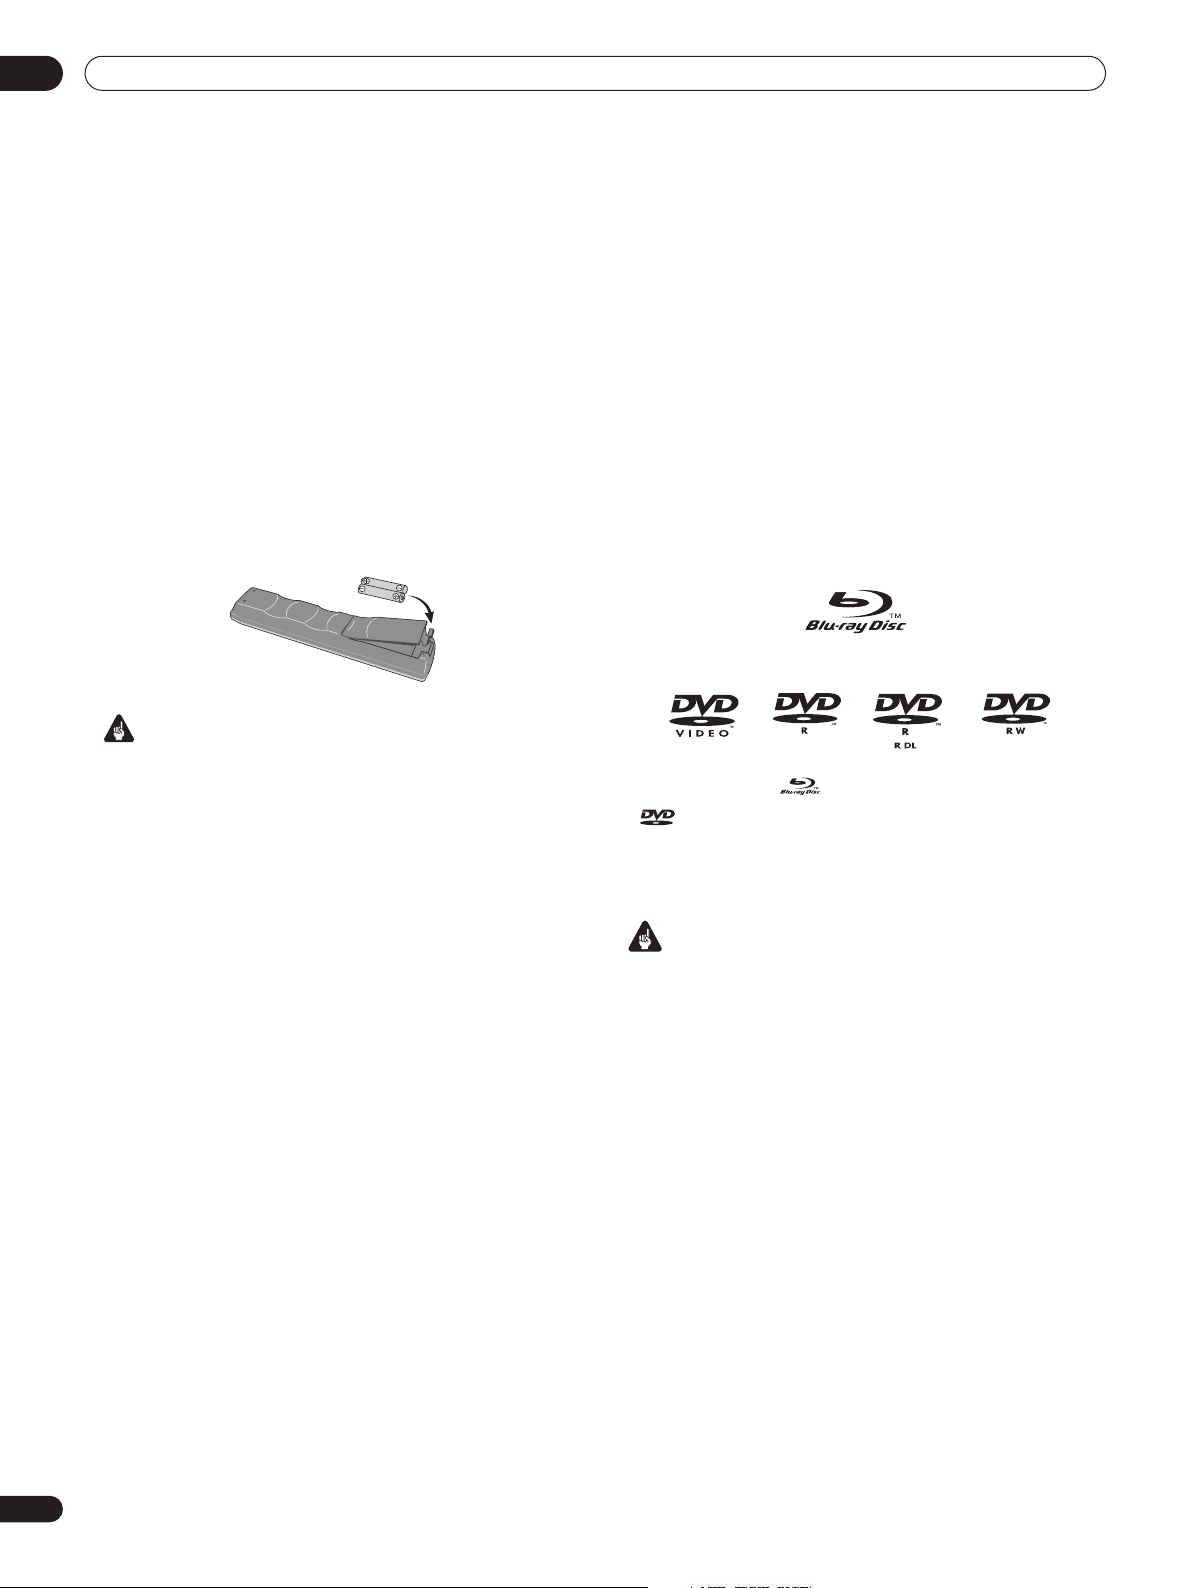
1 Insert two AA/R6P batteries into the battery compartment
following the indications (
Important
Incorrect use of batteries can result in hazards such as leakage and
bursting. Please observe the following:
• Don’t mix new and old batteries together.
• Don’t use different kinds of batteries together—although they
may look similar, different batteries may have different voltages.
• Make sure that the plus and minus ends of each battery match
the indications in the battery compartment.
• Remove batteries from equipment that isn’t going to be used for
a month or more.
• When disposing of used batteries, please comply with
governmental regulations or environmental public instruction’s
rules that apply in your country or area.
,
) inside the compartment.
WARNING
Do not use or store batteries in direct sunlight or
other excessively hot place, such as inside a car or
near a heater. This can cause batteries to leak,
overheat, explode or catch fire. It can also reduce the
life or performance of batteries.
D3-4-2-3-3_En
Using the remote control
Please keep in mind the following when using the remote control:
• Make sure that there are no obstacles between the remote and
the remote sensor on the unit.
• The remote has a range of about 23 feet (at an angle of 30º from
either side of the sensor). Use within this range in front of the
remote control sensor on the front panel.
• Remote operation may become unreliable if strong sunlight or
fluorescent light is shining on the unit’s remote sensor.
• Remote controllers for different devices can interfere with each
other. Avoid using remotes for other equipment located close to
this unit.
8
En
• Replace the batteries when you notice a fall off in the operating
range of the remote.
• When the batteries run down or you change the batteries, the TV
preset codes are automatically reset. See
to control your TV
on page 47 to reset them.
Setting up the remote
Disc/content format playback
compatibility
General disc compatibility
This player is compatible with a range of disc types (media) and
formats. Compatible discs will usually feature one of the following
logos on the disc and/or disc packaging. Note however that some
disc types, such as recordable DVD or BD, may be in an unplayable
format—see below for further compatibility information.
Blu-ray Disc (BD)
DVD-Video
•
“Blu-ray Disc” and are trademarks.
•
• This player may not be able to play perfectly every disc that
• This player is not compatible with BD-R/RE, DVD-R/RW (VR
• This player is only compatible with NTSC discs.
• Do not use 8 cm disc adapters with this player. 8 cm discs can
is a trademark of DVD Format/Logo Licensing Corporation.
features one of the logos listed above. Please contact Pioneer if
you find a disc that won’t play properly.
Important
mode), DVD-Audio, DVD-RAM, CDs or disc types other than
those listed above.
be played directly by placing then in the 8 cm disc depression in
the center of the disc tray.
BD-ROM compatibility
• BD-ROM discs should conform to the BD-ROM Profile1.
• If a disc containing DTS-HD Bitstream audio is played, this
player is only compatible with bitstream output or playback
decoding of current DVD (DTS) material (sampling rate: 48 kHz
max., 5.1 ch.).
• If a disc containing Dolby Digital Plus or Dolby TrueHD audio is
played, this player is only compatible with bitstream output or
playback decoding of current DVD (Dolby Digital) material.
• This player cannot play 8 cm BD-ROM discs.
DVD-R
DVD-R DL
DVD-RW
Page 9

Before you start 01
DVD-R/RW compatibility
• This player is compatible with DVD-R/RW discs recorded in
DVD-Video format.
• DVD-R/RW discs containing PC data can also be played. See
below for file compatibility.
• Unfinalized DVD-R/RW discs and VR mode DVD-R/RW discs
cannot be played in this player.
PC-created disc compatibility
Discs recorded using a personal computer may not be playable in
this unit due to the settings of the application software used to
create the disc. Check with the software publisher for more detailed
information.
DualDisc playback
A DualDisc is a new two -sided disc, one side of which contains DVD
content –video, audio, etc. –while the other side contains non-DVD
content such as digital audio material.
The DVD side of a DualDisc will play in this product (excluding any
DVD-Audio content).
The non-DVD, audio side of the disc is not compatible with this
player.
It is possible that when loading or ejecting a DualDisc, the opposite
side to that being played will be scratched. Scratched discs may not
be playable.
For more detailed information on the DualDisc specification, please
refer to the disc manufacturer or disc retailer.
Disclaimer Notice
This Blu-ray Disc player is not designed to play and cannot play the
DVD portion of a hybrid disc.
• MPEG-1 Audio Layer 3 (MP3)
– Variable bit-rate (VBR) is supported
– Sampling rates: up to 48 kHz
– Bit rate: up to 320 kbps
• WAVE (Linear PCM)
– Sampling rates: up to 48 kHz
Image file compatibility
• JPEG
– Baseline JPEG and progressive JPEG/Exif are supported
– Resolution: up to 4096 x 4096 pixels
• PNG
– Resolution: up to 4096 x 4096 pixels
• GIF
– Resolution: up to 4096 x 4096 pixels
File extensions
The following file extensions should be used with this player:
• Video
.wmv .mpg .mpeg
• Audio
.wma .mp3 .wav
• Image
.jpg .jpeg .png .gif
Even when files have a supported file extension, some files may not
play or display depending on the content or media server type.
File compatibility
• Compatible media: DVD-R, DVD-RW, media server on network
(some formats may not be supported depending on the media
server type).
• Even when they are in a supported format, some files may not
play or display depending on the content.
• Even when playing a supported format, some functions may not
operate properly depending on the content.
Video file compatibility
• Windows Media Video (WMV)
– WMV HD is supported
• MPEG-2 (PS/TS)
– MP@HL
• MPEG-1
Audio file compatibility
• Windows Media Audio (WMA)
– WMA9 (including variable bit-rate (VBR)), WMA9 Pro (up to
5.1 ch) are supported. WMA9 Voice and WMA Lossless are not
supported
– Sampling rates: up to 48 kHz (including WMA9 Pro)
– Bit rate: up to 192 kbps (WMA constant bit-rate (CBR));
up to 384 kbps (WMA9 variable bit-rate (VBR));
up to 768 kbps (WMA9 Pro)
En
9
Page 10
Before you start01
Titles and chapters
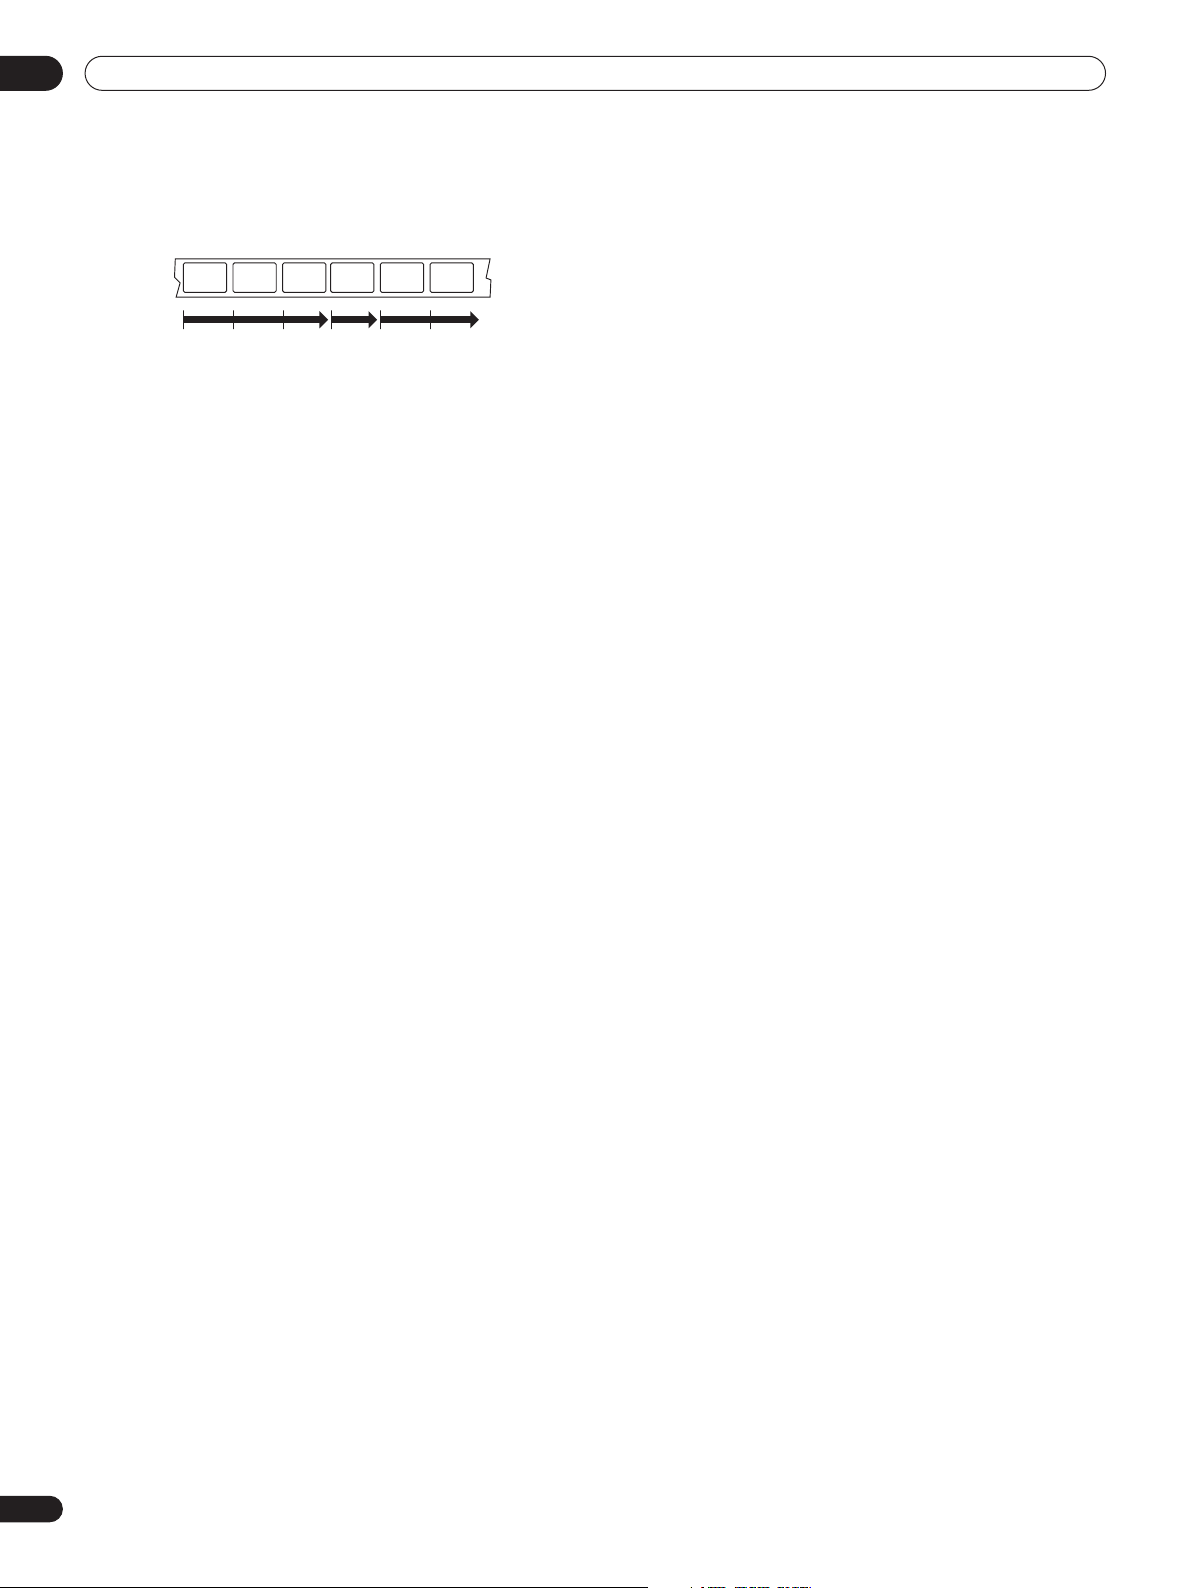
BD and DVD movie discs are divided into one or more titles. Titles
may be further subdivided into chapters.
DVD-Video regions
All commercially produced DVD movies (DVD-Video discs) carry a
region mark on the case somewhere that indicates which region(s)
of the world the disc is compatible with. This player also has a region
mark, which you can find on the rear panel. Discs from incompatible
regions will not play in this player. Discs marked
player.
The diagram below shows the various DVD regions of the world.
ALL
will play in any
This player is
REGION 1
.
BD-ROM regions
Like DVD movies, BD movie discs (BD-ROM) also carry a region
mark that indicates which region(s) of the world the disc is compatible with. This player also has a region mark, which you can find on
the rear panel. Discs from incompatible regions will not play in this
player. Discs marked
The diagram below shows the various BD-ROM regions of the world.
This player is
REGION A
ALL
will play in any player.
.
10
En
Page 11
Connecting up 02
Chapter 2
Connecting up
Rear panel
1
AC IN
2113 4 5 6 7 8 9
CONTROL
IN
IR
IN
SETTING 2
SETTING 1
IR RECEIVER
HDMI OUT
LAN(10/100)
10
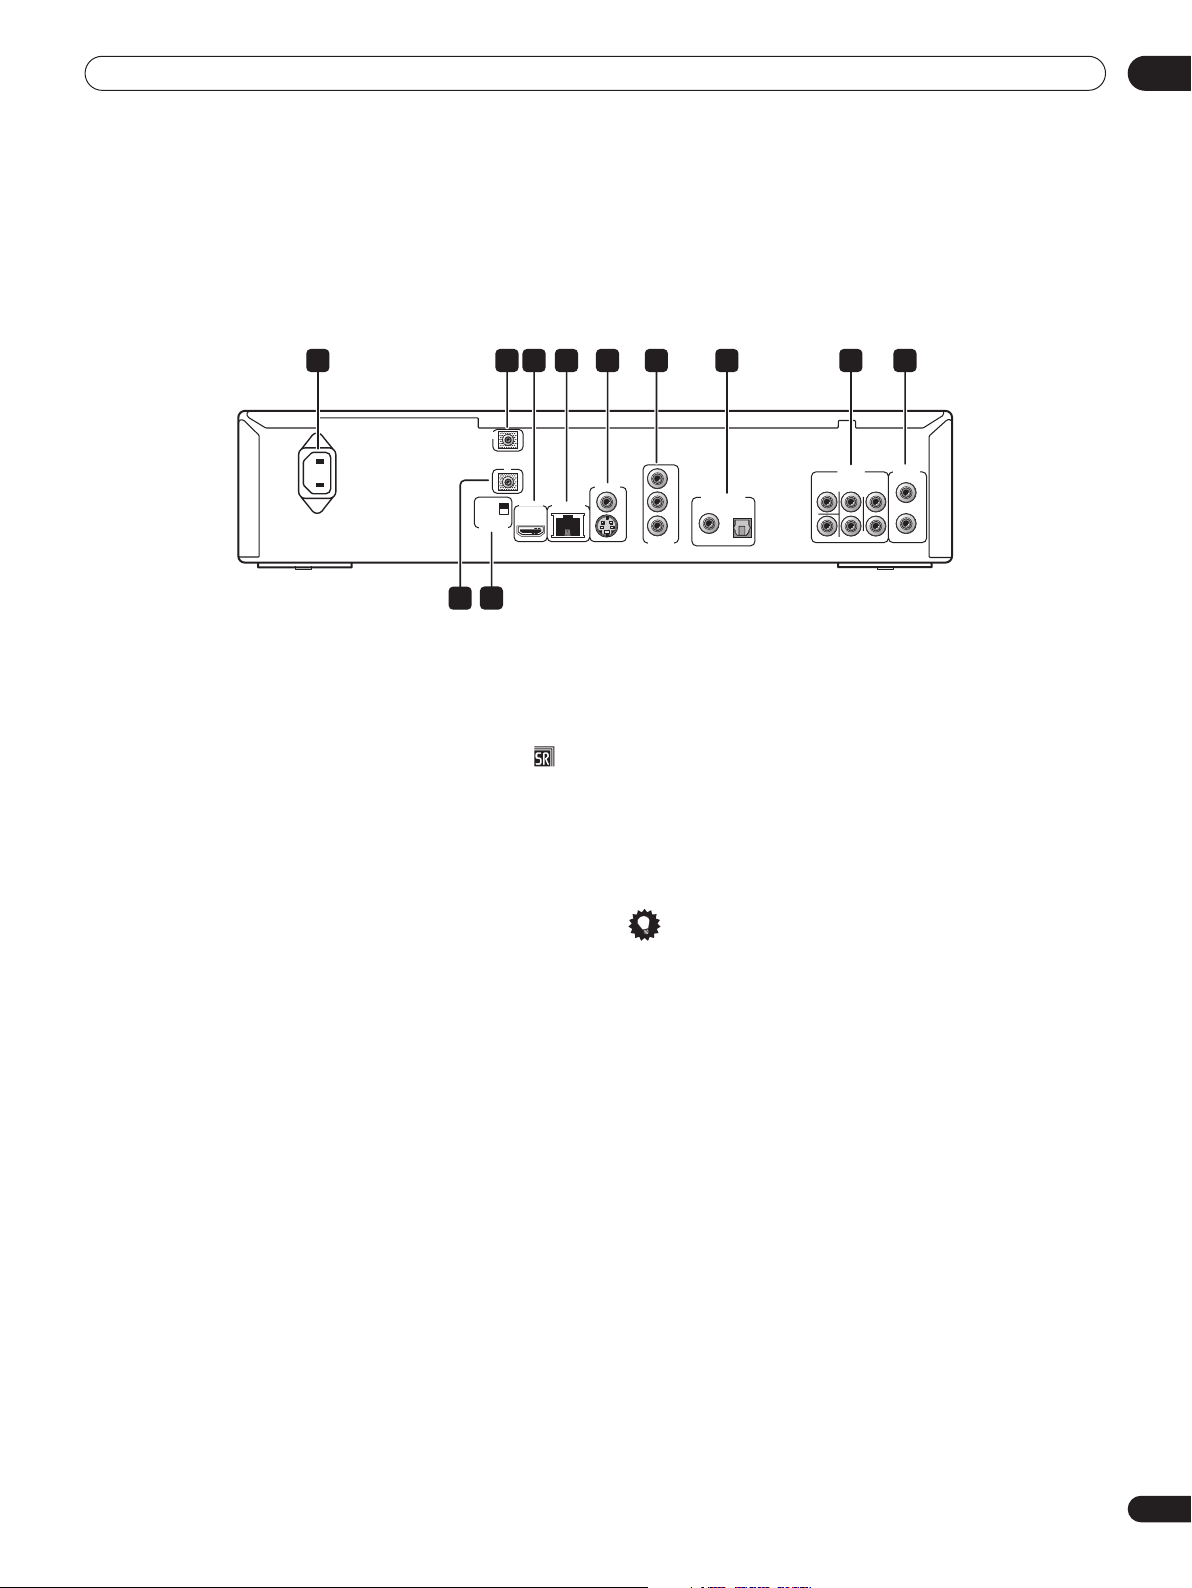
1 AC IN
Connect the supplied power cord here, then plug into a power
outlet.
2 CONTROL IN
Use to control this player from the remote sensor of another Pioneer
component with a
mark. Connect the
CONTROL IN
CONTROL OUT
CONTROL OUT
of this player using a mini-plug cord (page 16).
3 HDMI OUT
HDMI output providing a high quality interface for digital audio and
video (page 13).
4 LAN (10/100)
Ethernet port for 10base-T (10 Mbps) or 100base-TX (100 Mbps)
network connection (page 16).
5 VIDEO OUT and S-VIDEO OUT
Video output (composite) that you can connect to your TV or AV
receiver using the supplied video cable (page 12).
S-Video output that you can use instead of the VIDEO OUT jacks
(page 15).
6 COMPONENT VIDEO OUT
High quality video output for connection to a TV, monitor or AV
receiver that has component video inputs.
Connect using a commercially available three-way component video
cable (page 14).
7 DIGITAL AUDIO OUT – COAXIAL/OPTICAL
Digital audio outputs for connection to a PCM, Dolby Digital, and/or
DTS-compatible AV receiver (page 15).
terminal and bearing the
of the other component to the
AUDIO OUT
AUDIO OUT
(5.1ch)
VIDEO OUT
Y
DIGITAL AUDIO OUT
P
B
PR
S
COMPONENT
COAXIAL OPTICAL
VIDEO OUT
CENTER
SUB WOOFER
SURROUND
(2ch)
FRONT
L
L
R
R
8 AUDIO OUT (5.1ch)
Multichannel (5.1ch) analog audio outputs for connection to an AV
receiver with multichannel analog audio inputs (page 15).
9 AUDIO OUT (2ch)
Stereo analog audio outputs for connection to your TV, AV receiver
or stereo system (page 12).
10 IR IN
Jack for an external IR (infrared) remote control receiver (page 16).
11 IR RECEIVER switch
Switch to the setting compatible with your external IR remote
control receiver (page 16).
Tip
• When connecting this player to your TV, AV receiver or other
equipment, make sure that all components are switched off
and unplugged.
• You may find it useful to have the manuals supplied with your
other components handy when connecting this player.
11
En
Page 12
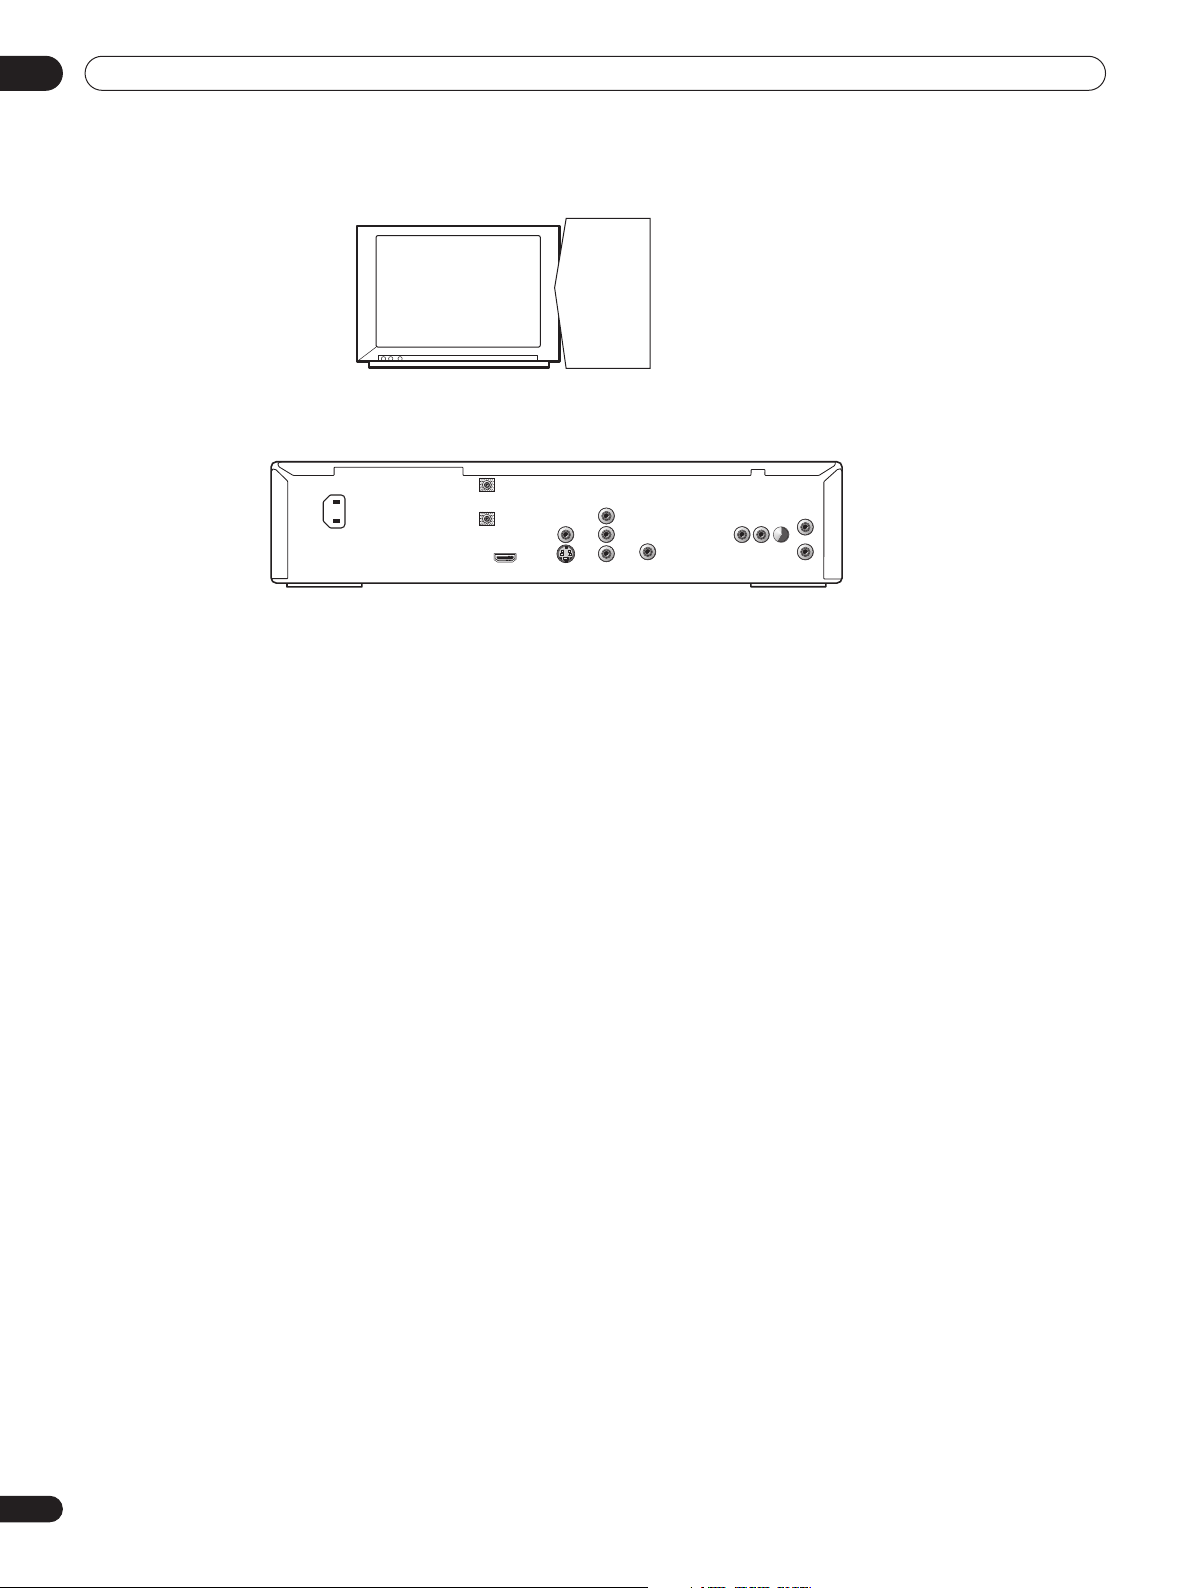
Connecting up02
Easy connections
This is a basic setup that allows you to watch discs on your TV using
just the cables supplied.
Important
• This player is equipped with copy protection technology. Do not
connect this player to your TV via a VCR using AV cables, as the
picture from this player will not appear properly on your TV. (This
player may also not be compatible with some combination TV/
VCRs for the same reason; refer to the manufacturer for more
information.)
• Do not unplug the player from the power outlet while it is
switched on.
• Do not plug this player into a switched power supply found on
some amplifiers and AV receivers.
1 Connect the VIDEO OUT and one pair of AUDIO OUT jacks
to a set of audio/video inputs on your TV.
Use the supplied red/white stereo audio and yellow video cables.
Make sure you match up the left and right audio outputs with their
corresponding inputs for correct stereo sound.
See Using other types of video output below if you want to use a
different type of connection.
2 Connect the supplied AC power cord to the AC IN inlet,
then plug into a power outlet.
Using other types of video output
This player has standard (composite), S-Video and component video
outputs, as well as an HDMI connector (for digital video/audio).
In order to be able to watch HD (high definition) BDs at their full
resolution, you should connect the player to your TV using either the
component video output, or (even better) the HDMI output.
An HDMI connection will additionally give you HD output when
watching DVDs.
If your display has neither of these connection types, an S-Video jack
is also provided, which should give slightly better video quality than
using the standard video output.
12
En
Page 13
Connecting up 02
AUDIO OUT
(5.1ch)
DIGITAL AUDIO OUT
AUDIO OUT
(2ch)
CENTER
SUB WOOFER
FRONT
SURROUND
L
L
R
R
COAXIAL OPTICAL
COMPONENT
VIDEO OUT
VIDEO OUT
LAN(10/100)
HDMI OUT
Y
S
PB
PR
SETTING 2
SETTING 1
IR RECEIVER
IR
CONTROL
IN
IN
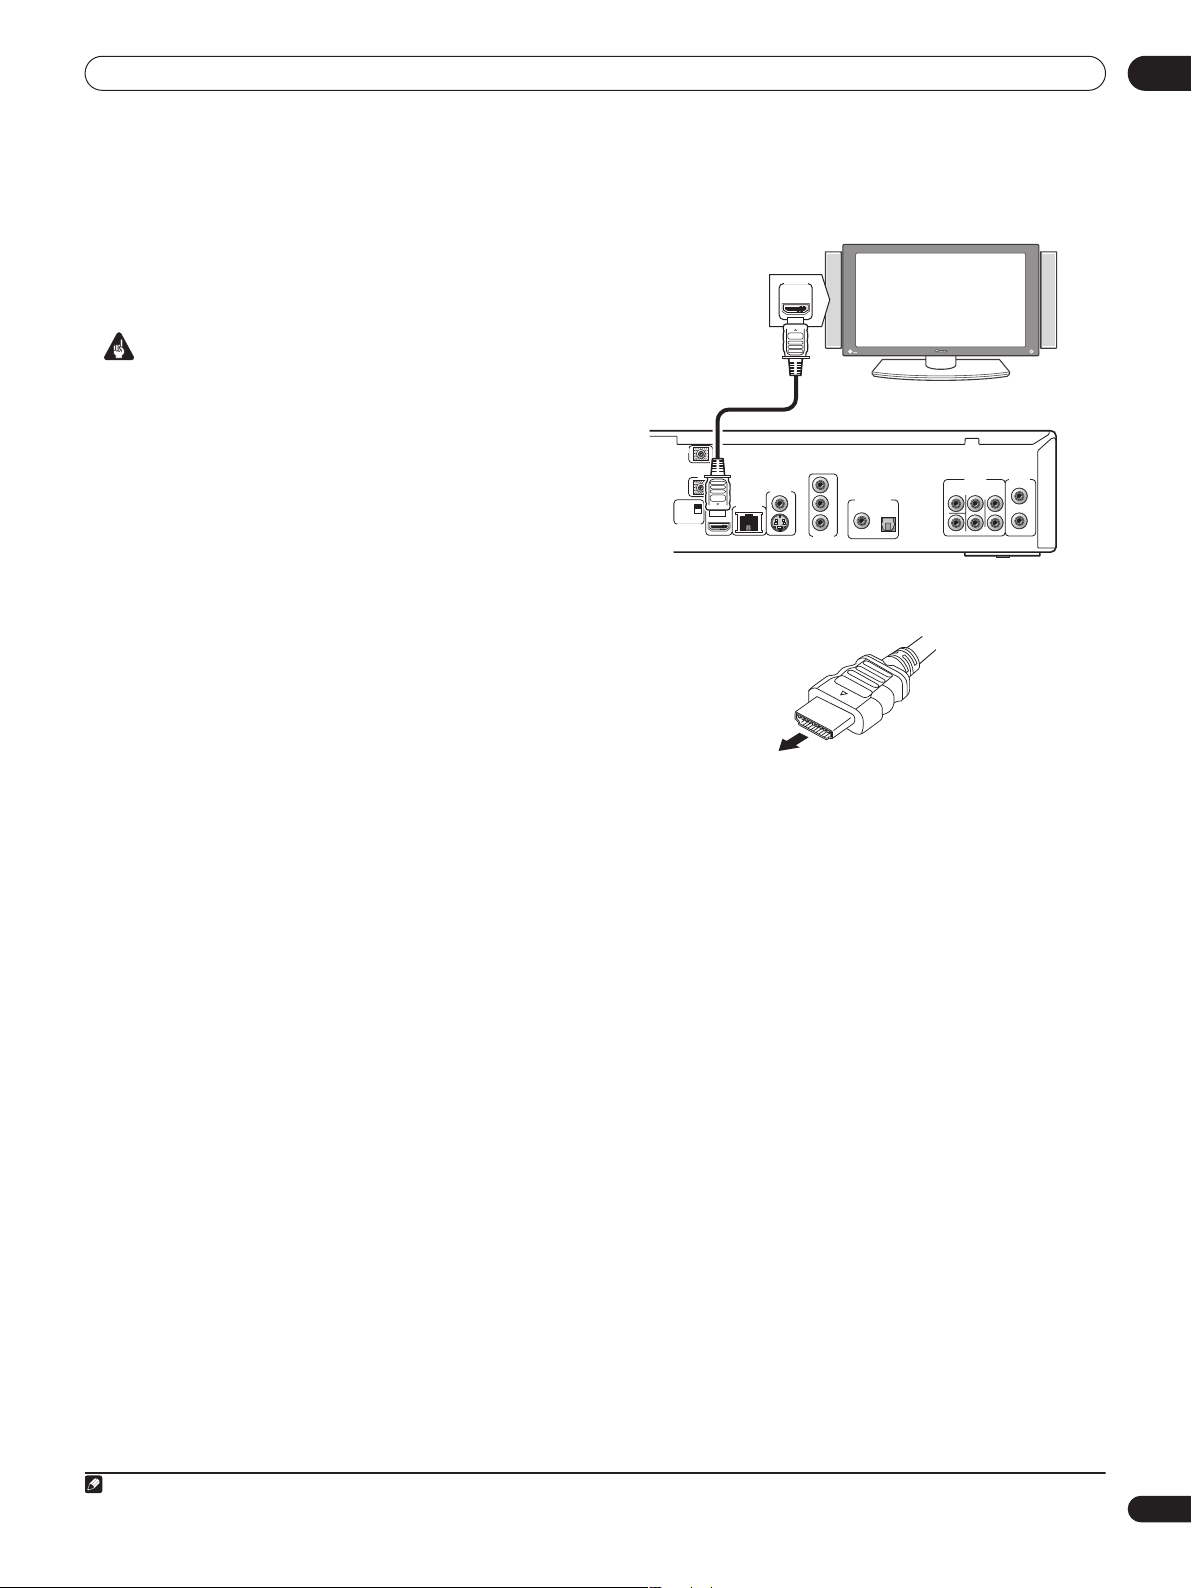
Connecting for HDMI output
If you have an HDMI or DVI (with HDCP) equipped monitor or
display, you can connect it to this player using a commercially
available HDMI cable.
The HDMI connector outputs uncompressed digital video, as well as
most digital audio formats.
Important
• This unit has been designed to be compliant with HDMI (High
Definition Multimedia Interface). Depending on the component
you have connected, using a DVI connection may result in
unreliable signal transfers.
• If you change the display connected to the HDMI output, you will
also need to change the Output Format settings to match the
new display (see Changing the video output format on page 14 to
do this).
• The HDMI connection is compatible with 8-channel linear PCM
signals (44.1 kHz to 192 kHz
bitstream and DTS (5.1 channel signals) bitstream.
• Depending on the HDMI cable being used, 1080p output may
not appear correctly.
•
If you connect a DVI device to the HDMI output of this player, ensure
that it is compliant with High Definition Content Protection (HDCP).
If you choose to connect to a DVI connector, you will need a
separate adaptor (DVIHDMI) to do so. A DVI connection,
however, does not support audio signals. Consult your local
audio dealer for more information.
1
, 16 bit/20 bit/24 bit), Dolby Digital
• Use an HDMI cable (not supplied) to connect the HDMI OUT
interconnect on this player to an HDMI interconnect on an
HDMI-compatible display.
HDMI IN
HDMI-compatible display
• The arrow on the cable connector body should be face up for
correct alignment with the connector on the player.
After switching on the player you may need to set the video output
format and HDMI color space for compatibility with your display.
See Changing the video output format on page 14 and HDMI Color
Space in Using the Initial Setup menu on page 41.
About HDMI
HDMI supports both standard and high-definition video, plus
standard and multi-channel surround-sound audio. HDMI features
include uncompressed digital video, one connector (instead of
several cables and connectors), and communication between the
AV source and AV devices such as DTVs.
HDMI was developed to provide the technologies of High Bandwidth
Digital Content Protection (HDCP) as well as Digital Visual Interface
(DVI) in one specification. HDCP is used to protect digital content
transmitted and received by DVI-compliant displays.
HDMI, the HDMI logo and High-Definition Multimedia Interface are
trademarks or registered trademarks of HDMI Licensing, LLC.
Note
1 192 kHz output is limited to 2 channels.
13
En
Page 14
Connecting up02
AUDIO OUT
(5.1ch)
DIGITAL AUDIO OUT
AUDIO OUT
(2ch)
CENTER
SUB WOOFER
FRONT
SURROUND
L
L
R
R
COAXIAL OPTICAL
COMPONENT
VIDEO OUT
VIDEO OUT
LAN(10/100)
HDMI OUT
Y
S
P
B
PR
SETTING 2
SETTING 1
IR RECEIVER
IR
CONTROL
IN
IN
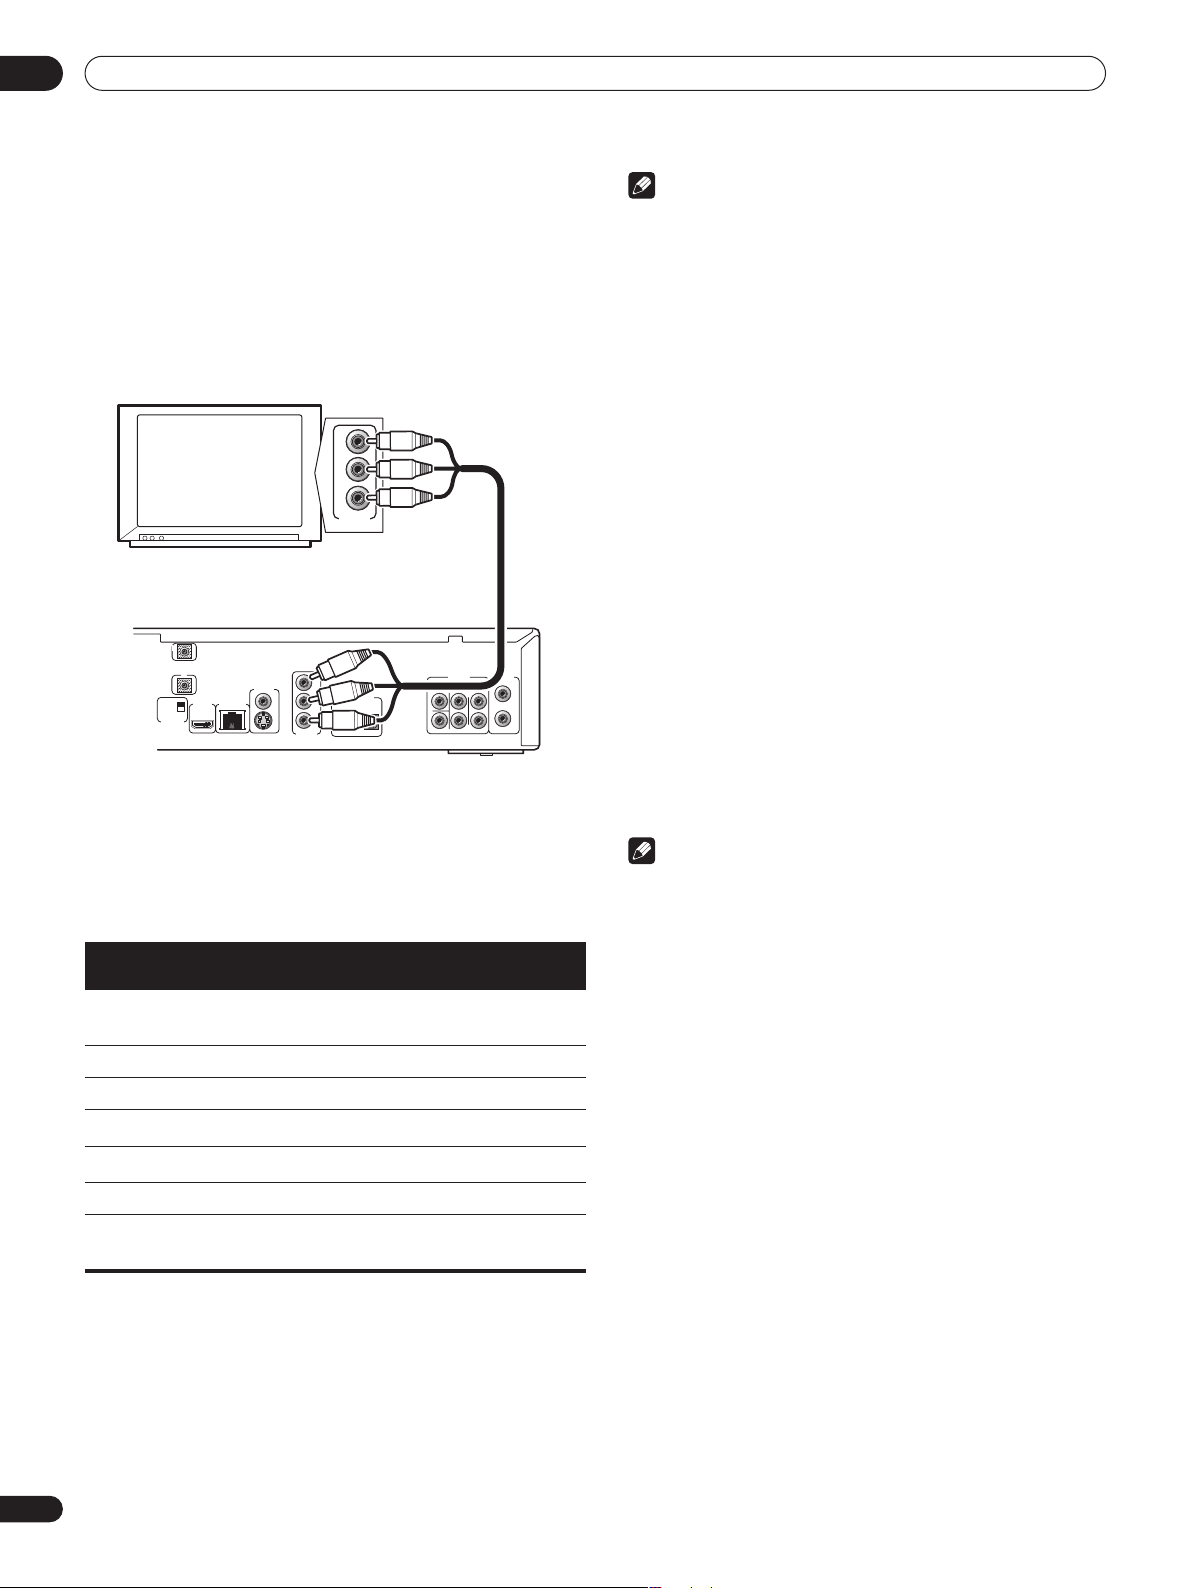
Connecting using the component
video output
You can use the component video output instead of the standard
video out jack to connect this player to your TV (or other equipment).
• Use a component video cable (not supplied) to connect the
COMPONENT VIDEO OUT jacks to a component video input on
your TV, monitor or AV receiver.
Be careful to match up the colors of the three jacks for correct
connection.
Y
B
P
PR
COMPONENT
VIDEO IN
TV
Changing the video output format
Use the OUTPUT FORMAT button located on both the front panel
and the remote control to switch the video output format for the
component and HDMI video outputs.
The table below shows the output settings.
Setting HDMI output
AUTO TV’s preferred
*3,5
format
Component
output
480/60i 480/60i
480i 480/60i 480/60i 480/60i
480p 480/60p 480/60p 480/60i
720p 720/60p
1080i 1080/60i
720/60p
1080/60i
*1,2
*1,2
1080p 1080/60p 480/60i 480/60i
Source
Direct
Dependent on
*3,5
source
Dependent on
*2,4,5
source
Video/S-Video
output
480/60i
480/60i
480/60i
Note
• Depending on your display, some of the settings may result in
the picture disappearing. In this case, press OUTPUT FORMAT
repeatedly until the picture re-appears.
• 1080/60p and 1080/24p output is only compatible with HDMI
displays. They are not compatible with the component video
output.
• When Output Format is set to 720p, 1080i or 1080p, video is
output in 16:9 format even if TV Aspect Ratio is set to 4:3
(Standard). See TV Aspect Ratio on page 41.
• If the contours of the displayed subjects look jagged or blurred,
try setting the Output Format to 480i. (If you connected this
player to your TV with the HDMI connection and the picture
disappears when you switch the Output Format to 480i, use the
component connection with the 480i Output Format or S-Video,
the standard composite connection instead.)
• Note that when using a Component Video connection with a TV
or other AV component (not using HDMI), 480/60i video may be
output in 480/60p.
24p output
For smooth presentation of 1080/24p or 720/24p video with an
HDMI-equipped display compatible with 1080/24p input, set 24p
Direct Out on this player to On (see page 41).
This player will output 1080/24p video over HDMI in the following
cases:
• 1080/24p video: When Output Format is set to Auto or Source
Direct.
• 720/24p video: When Output Format is set to Auto.
Note
• Even when 24p Direct Out is set to On, if a TV not compatible
with 1080/24p video is connected, the actual frame frequency
of the video output will be 60 Hz.
• The video output will be interrupted when switching the video
output from 1080/24p or 720/24p to other output resolutions, or
when switching to 1080/24p or 720/24p from other output
resolutions.
14
En
*1
Video output is 480i during copy protected DVD-Video playback.
*2
Video output during BD-ROM playback is 480i depending on the disc.
*3
Refer to 24p output below for conditions.
*4
The frame frequency for 1080/24p is still 60 Hz.
*5
The video output will be interrupted when switching the video output.
Page 15
Connecting up 02
DIGITAL AUDIO OUT
COAXIAL OPTICAL
COMPONENT
VIDEO OUT
VIDEO OUT
LAN(10/100)
HDMI OUT
Y
S
P
B
PR
SETTING 2
SETTING 1
IR RECEIVER
IR
CONTROL
IN
IN
AUDIO OUT
(5.1ch)
DIGITAL AUDIO OUT
AUDIO OUT
(2ch)
CENTER
SUB WOOFER
FRONT
SURROUND
L
L
R
R
COAXIAL OPTICAL
COMPONENT
VIDEO OUT
VIDEO OUT
LAN(10/100)
HDMI OUT
Y
S
PB
PR
SETTING 2
SETTING 1
IR RECEIVER
IR
CONTROL
IN
IN
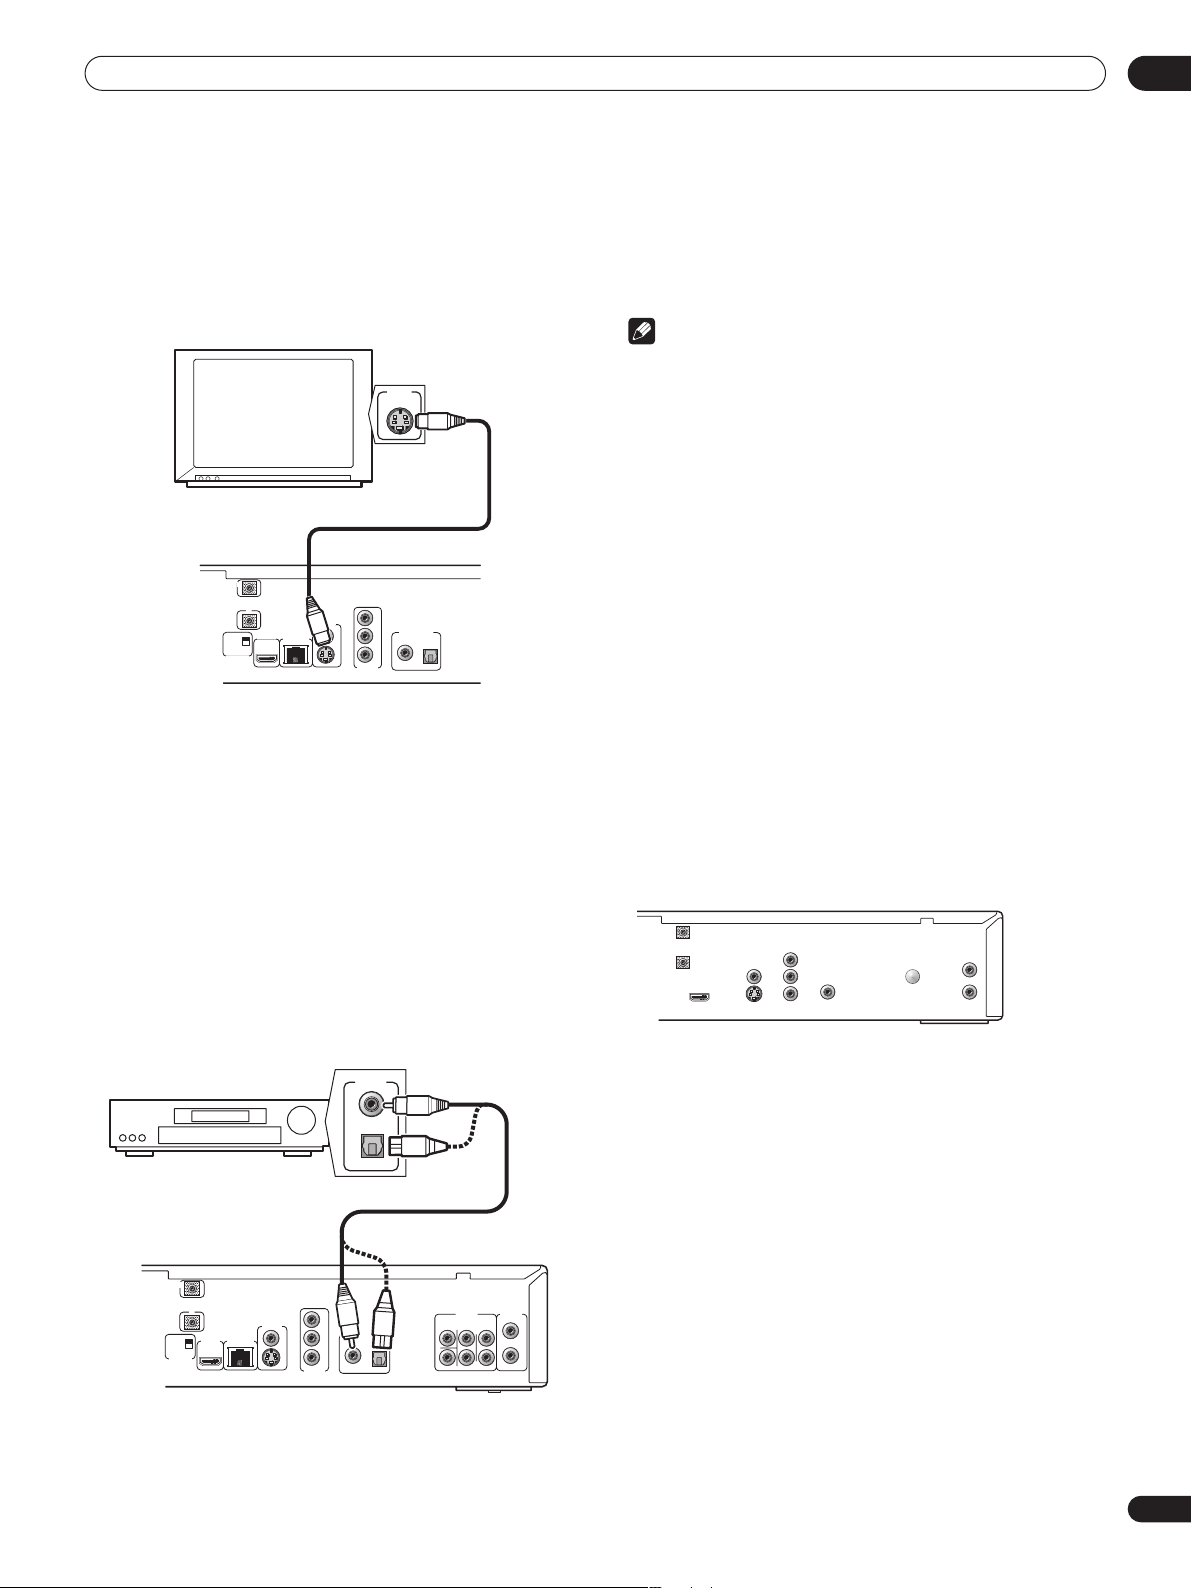
Connecting using an S-Video output
You can use the S-Video output instead of the VIDEO OUT jack to
connect this player to your TV (or other equipment).
• Use an S-Video cable (not supplied) to connect the S-VIDEO
OUT to an S-Video input on your TV, monitor or AV receiver.
Line up the small triangle above the jack with the same mark on the
plug before plugging in.
S-VIDEO
IN
TV
you should hear the plug click into position when fully inserted.
Take care not to force the plug as this may damage the shutter,
the cable and/or the player.
Coaxial connection: Use a coaxial cable (not supplied) to connect
the DIGITAL AUDIO OUT – COAXIAL jack to a coaxial input on your
AV receiver.
Note
• Linear PCM audio output over the DIGITAL AUDIO OUT jacks
is limited to 2 ch, 48 kHz.
Analog connections
• Connect the AUDIO OUT (5.1ch) jacks on this player to the
multi-channel analog inputs on your AV receiver.
Use a dedicated six-way cable (not supplied), or three sets of stereo
cables (not supplied) to connect the six channels.
Check carefully that each channel is connected to its corresponding
channel on the AV receiver.
After connecting, you can make settings for the number of speakers
connected to your system—see the Speakers section of the Initial
Setup menu on page 43 and Speaker Setup on page 45.
Connecting for surround sound
This player offers both analog and digital connections for surround
sound. The digital outputs (coaxial and optical) provide a convenient
way to connect this player to an AV receiver with built-in Dolby
Digital and/or DTS decoders. The 5.1ch analog outputs can be used
to connect to an AV receiver with multi-channel analog audio
inputs.
Check the operating instructions that came with your AV receiver for
more on these connections.
Digital connections
• Connect one of the DIGITAL AUDIO OUT jacks on this
player to a digital input on your AV receiver.
DIGITAL
AUDIO IN
COAXIAL
AV receiver
OPTICAL
Optical connection: Use an optical cable (not supplied) to connect
the DIGITAL AUDIO OUT – OPTICAL jack to an optical input on
your AV receiver.
• When inserting the plug, the protective shutter will open and
15
En
Page 16

Connecting up02
Network connection
This player can be connected to a local area network (LAN) via the
Ethernet port on the rear panel.
After making the physical connection the player needs to be set up
for network communication. This is done from the Initial Setup
menu—see Setting up for network use on page 21 for detailed
instructions.
For best performance, we recommend using a 100BASE-TX
compatible PC and Ethernet hub.
Connecting via an Ethernet hub
If you already operate one or more PCs on a local area network, you
can integrate this player by connecting it to the Ethernet hub using
a standard (also known as “straight through”) type CAT-5 LAN
(Ethernet) cable (not supplied).
In the example configuration below, this player would be able to
access content from either of the PCs.
Controlling this player via another
Pioneer component
The CONTROL IN jack allows you to control this player via the
remote control sensor of another Pioneer component—typically an
AV receiver—that has a CONTROL OUT jack. Remote control
signals are passed through to the player from the remote sensor of
the other component, allowing you greater freedom in the
placement of your player.
• Use a miniplug cord (not supplied) to connect the CONTROL
IN jack of this player with the CONTROL OUT jack of your other
Pioneer component.
Connecting directly to a PC
If you only need to use one PC to act as a media server, you can
connect this player directly to the PC using a crossed (also known
as a “cross-over”) type CAT-5 LAN (Ethernet) cable (not supplied).
Using an external IR receiver with this
player
If you prefer to keep your AV equipment in a closed cabinet, you can
use an external IR receiver (such as a Niles or Xantech unit)
connected to the IR IN jack. You can thus have just the receiver
outside of the cabinet and still be able to control the player.
Tip
• You may need to set the IR RECEIVER switch (located under the
IR IN jack) for this player to recognize the IR receiver correctly.
• This player does not supply power to the external IR receiver.
Please see the operating instructions of the IR receiver for the
power requirements.
16
En
Page 17
Controls and displays 03
Chapter 3
Controls and displays
Front panel
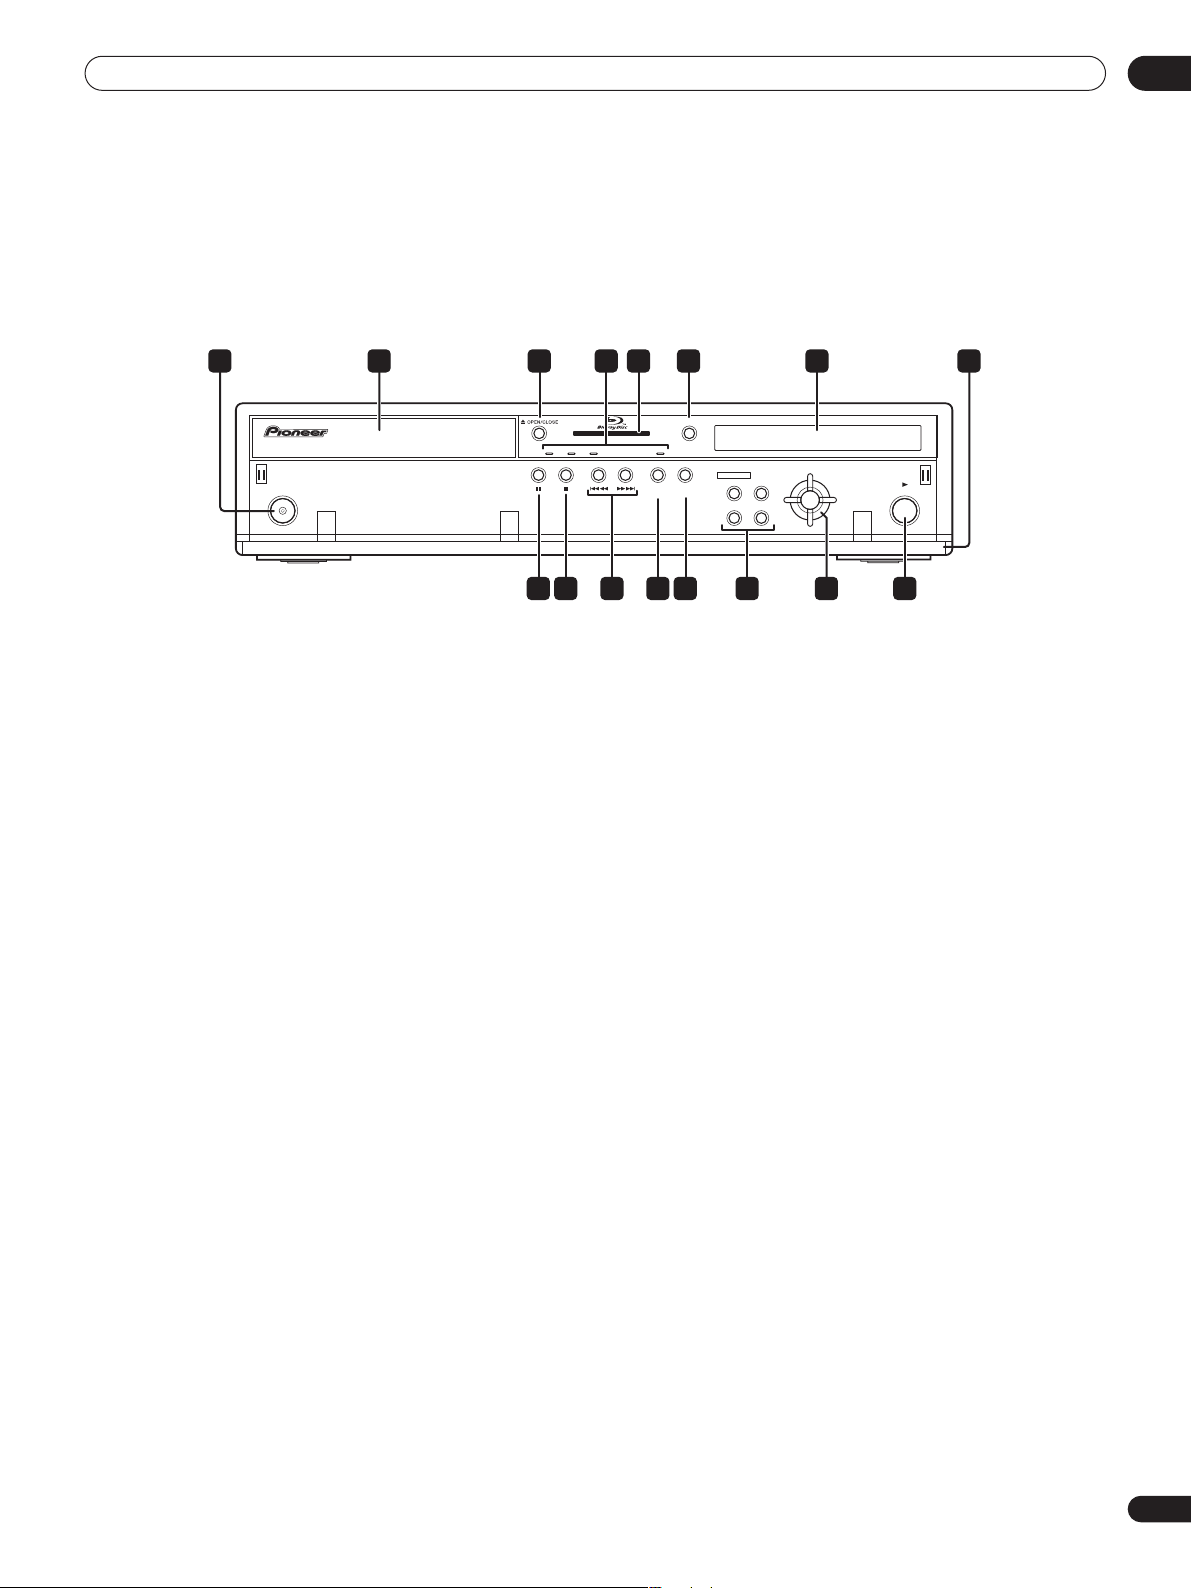
1 82 3 654 7
FL DIMMER
HD HDMI LAN FL OFF
STANDBY/ON
DISC NAVIGATOR
TOP MENU
OUTPUT
HOME MEDIA
FORMAT
GALLERY
HOME MENU
MENU
ENTER
RETURN
910111213141516
1 STANDBY/ON
Press to switch the player on (the power indicator lights blue when
the power is on) or into standby.
2 Disc tray
3 OPEN/CLOSE
Press to open or close the disc tray.
4 Indicators
• HD – Lights when the video output is 720p, 1080i or 1080p
(HDMI), or 720p or 1080i (component).
• HDMI – Lights when a device is connected via HDMI.
• LAN – Lights when there is an active local area network (LAN)
connection.
• FL OFF – Lights when the display and other indicators are
switched off.
5 Blu-ray indicator
Lights when a BD-ROM is loaded.
6 FL DIMMER
Press to change the brightness of the display. When the display and
other indicators are off, the FL OFF indicator (see above) lights.
7 Display
Shows disc status and playback information.
8 Flip-down cover
9
Press to start or resume playback.
10 /// and ENTER
Use to navigate on-screen menus.
11 Menu navigation buttons
• MENU – BD-ROM: Press to display/hide the pop-up menu.
DVD-Video: Press to display the disc menu (if there is one).
• RETURN – Press to return to a previous screen.
• DISC NAVIGATOR / TOP MENU – Press to display the top menu
of a BD-ROM or DVD-Video disc. When playing a DVD-R/RW
disc, press to display/exit the Disc Navigator.
• HOME MENU – Press to display the player’s Home Menu, from
which you can access most of the player’s functions.
12 HOME MEDIA GALLERY
Press to access the Home Media Gallery screen.
13 OUTPUT FORMAT
Press to switch the output format over HDMI and component video
outputs. See Changing the video output format on page 14.
14 Skip/scan buttons
• – Press to jump to the next chapter, track, etc. Press
and hold for fast forward scanning.
• – Press to jump back to the beginning of the current
chapter, track, etc. then to previous chapters, tracks, etc. Press
and hold for fast reverse scanning.
15
Press to stop playback (you can resume playback by pressing
(play)).
16
Press to pause playback. Press again to restart.
17
En
Page 18
Controls and displays03
Remote control
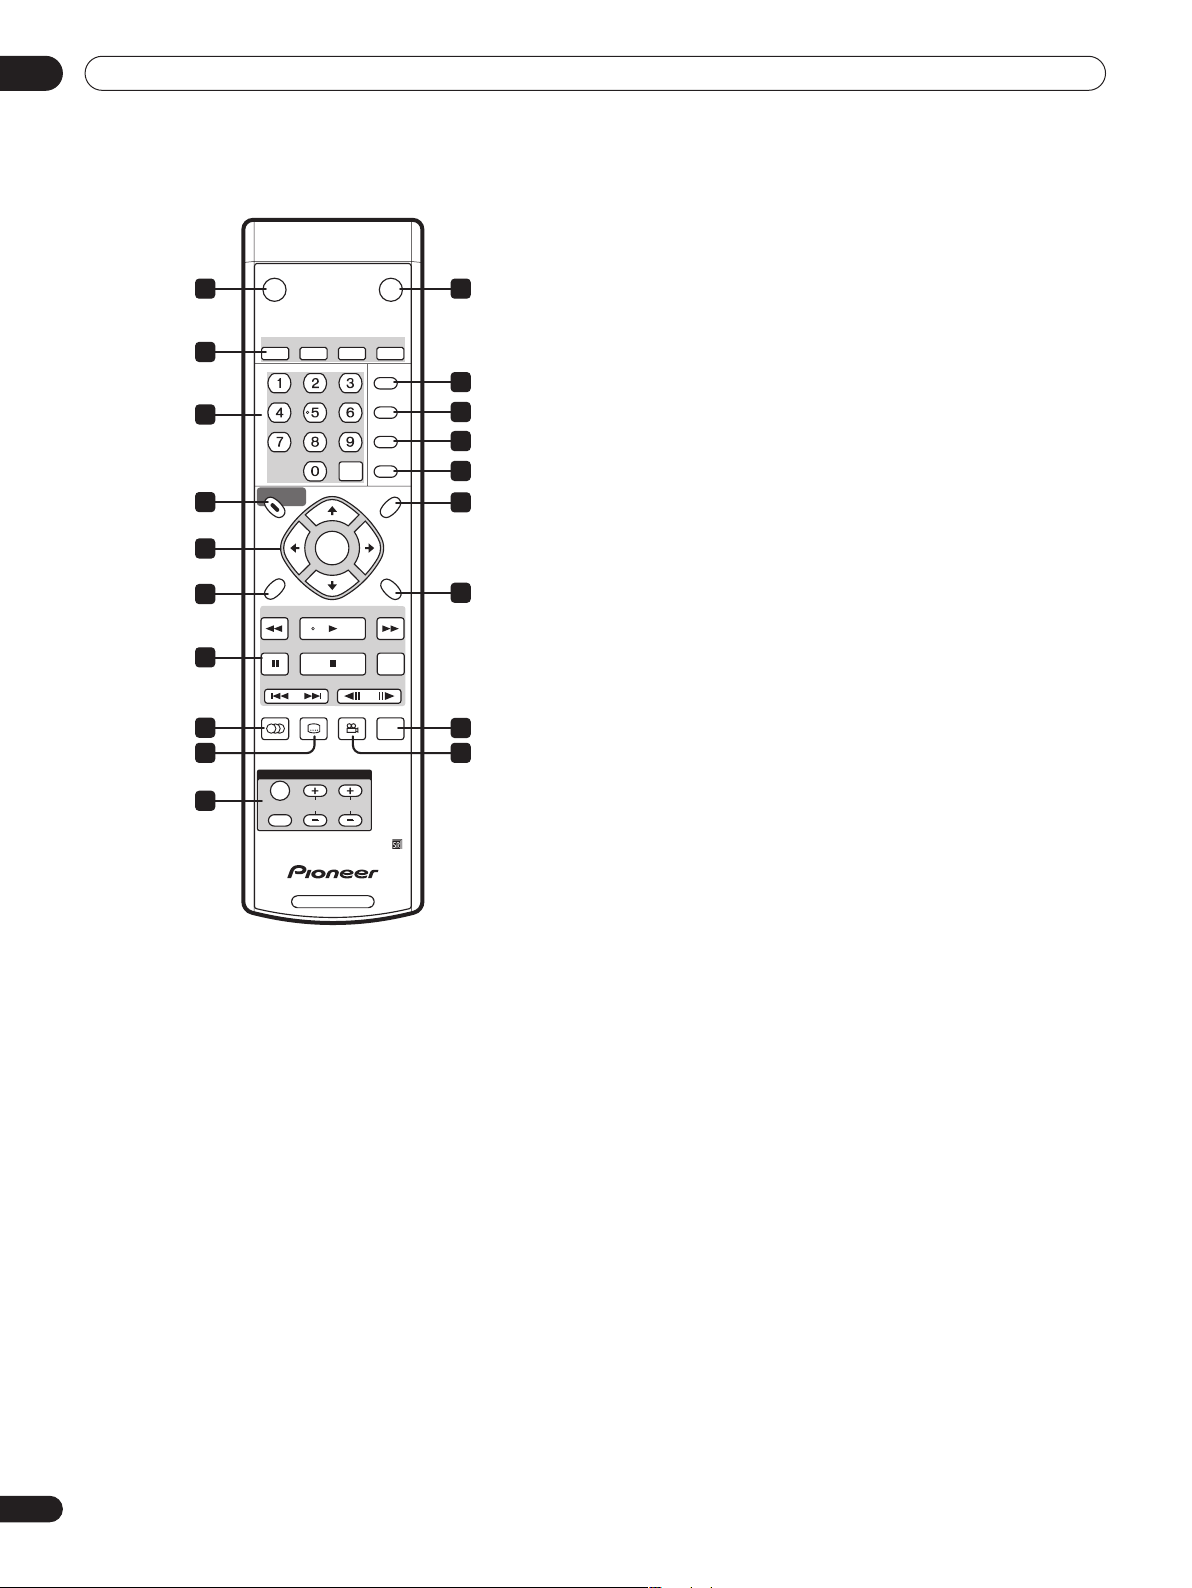
STANDBY/ON
1 2
3
BLUE RED GREEN YELLOW
4
DISC NAVIGATOR
9
TOP MENU
11
HOME
MENU
12
14
REV SCAN FWD SCAN
PAUSE ZOOM
PREV NEXT STEP/SLOW
AUDIO SUBTITLE ANGLE PLAY MODE
15
16 18
TV CONTROL
19
INPUT
SELECT
CHANNEL
BD PLAYER
1 STANDBY/ON
Press to switch the player on or into standby.
2 OPEN/CLOSE
Press to open or close the disc tray.
3 BLUE/RED/GREEN/YELLOW
Use to navigate BD-ROM menus.
4 Number buttons
Use to enter title, chapter numbers, etc.
CLEAR : Press to clear a numeric entry, etc.
5 DISPLAY
Press to display information (see page 25).
6 FL DIMMER
Press to change the brightness of the display. When the display and
other indicators are off, the FL OFF indicator (see page 17) lights.
7 OUTPUT FORMAT
Press to switch the output format over HDMI and component video
outputs (see page 14).
8 HOME MEDIA GALLERY
Press to display the Home Media Gallery screen (see page 32).
9 DISC NAVIGATOR/TOP MENU
Press to display the top menu of a BD-ROM or DVD-Video disc.
When playing a DVD-R/RW disc, press to display/exit the Disc
Navigator.
18
En
ENTER
PLAY
STOP
CLEAR
VOLUME
OPEN/CLOSE
DISPLAY
FL
DIMMER
OUTPUT
FORMAT
HOME MEDIA
GALLERY
MENU
RETURN
10 MENU
BD-ROM: Press to display/hide the pop-up menu.
DVD-Video: Press to display the disc menu (if there is one).
11 /// and ENTER
Use to navigate on-screen displays and menus. Press ENTER to
select an option or execute a command.
12 HOME MENU
Press to display the player’s Home Menu, from which you can
access most of the player’s functions.
5
6
7
8
10
13 RETURN
Press to return to a previous screen.
14 Playback controls
/ : Press to start reverse/forward scanning.
PLAY: Press to start or resume playback.
PAUSE: Press to pause playback; press again to restart.
STOP: Press to stop playback (you can resume playback by
13
pressing PLAY).
ZOOM: Press to zoom the screen when displaying a moving or
still image (see page 25).
: Press to jump to the start of the previous/next
chapter/track.
17
: Use for slow motion and step frame (see page 23).
15 AUDIO
Press to select the audio channel or language (see page 25).
16 SUBTITLE
Press to select a subtitle display (see page 25).
17 PLAY MODE
Press to change the Play Mode (repeat play, for example) (see
page 24).
18 ANGLE
Press to change the camera angle during BD-ROM or DVD-Video
movie multi-angle scene playback (see page 24).
19 TV CONTROL buttons
See also Setting up the remote to control your TV on page 47.
: Press to turn the TV on or into standby.
VOLUME +/–: Use to adjust the volume.
CHANNEL +/–: Use to select TV channel.
INPUT SELECT: Press to change the input function of the TV.
Page 19
Controls and displays 03
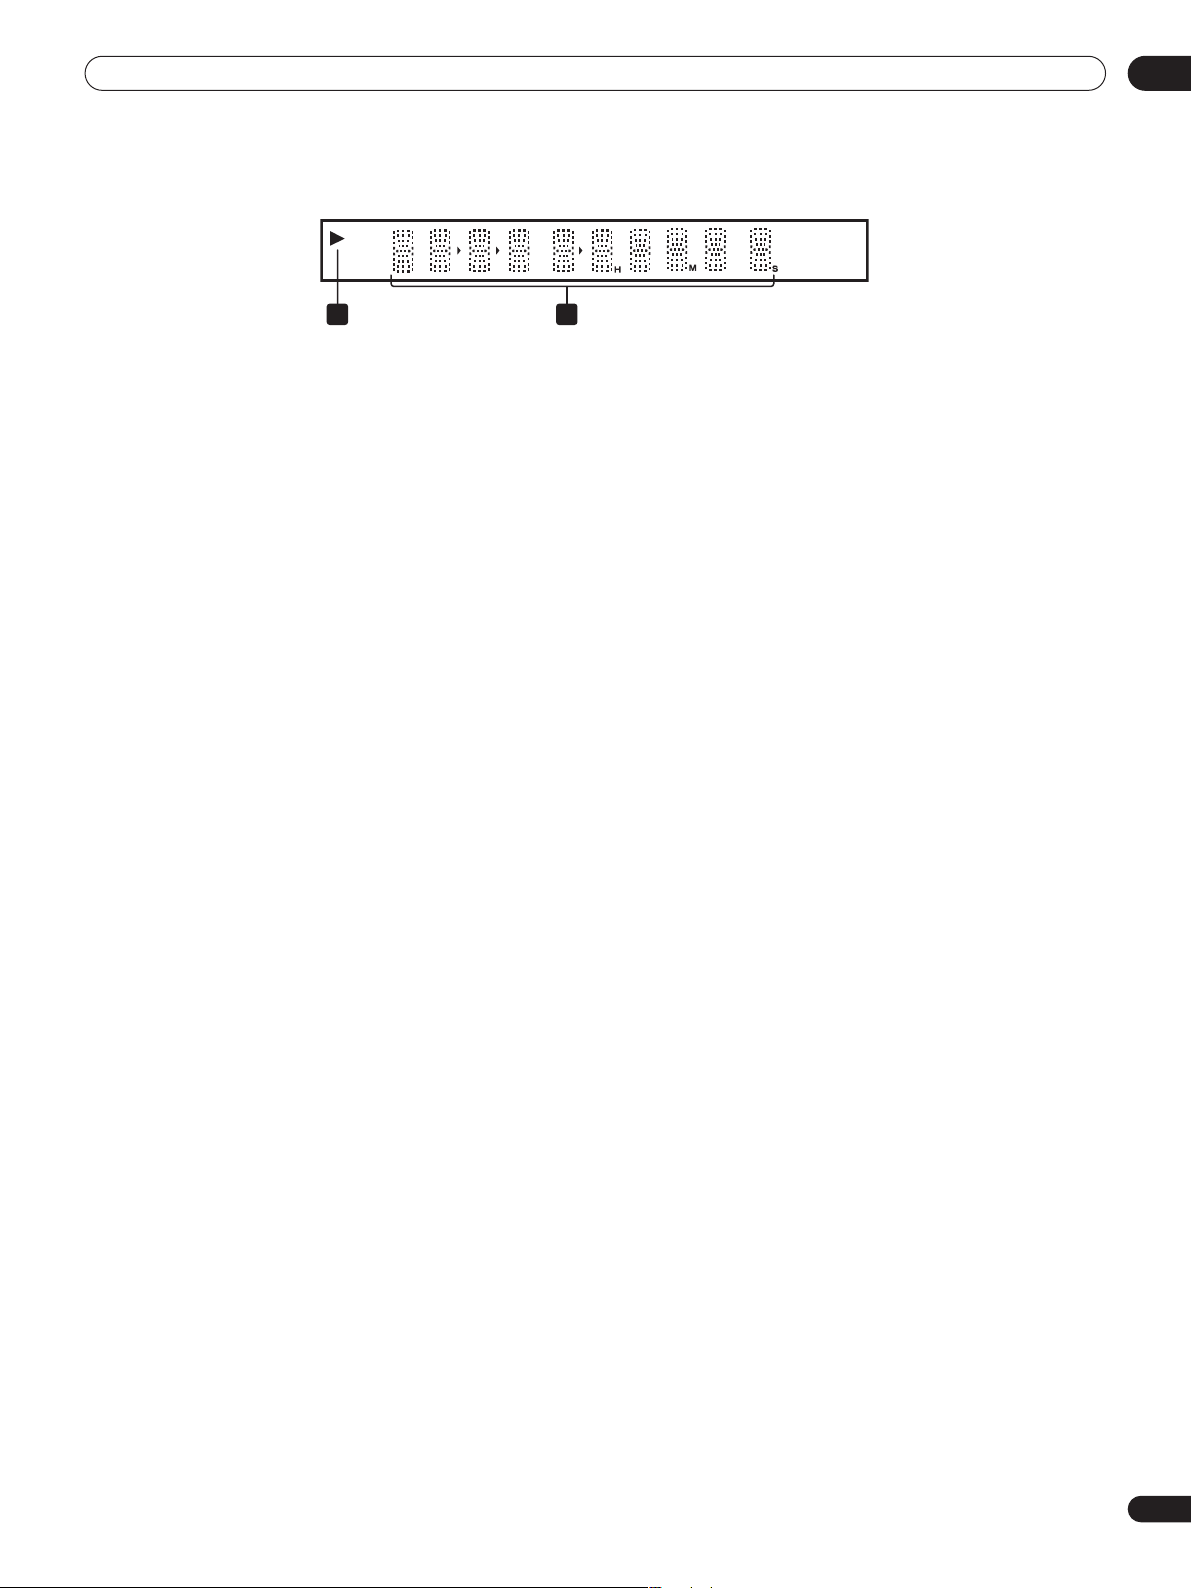
Front panel display
L
21
1
Lights during playback of a disc.
2 Character display
Shows various playback information—disc time, chapter and title
number, etc.
19
En
Page 20
Getting Started04
Chapter 4
Getting Started
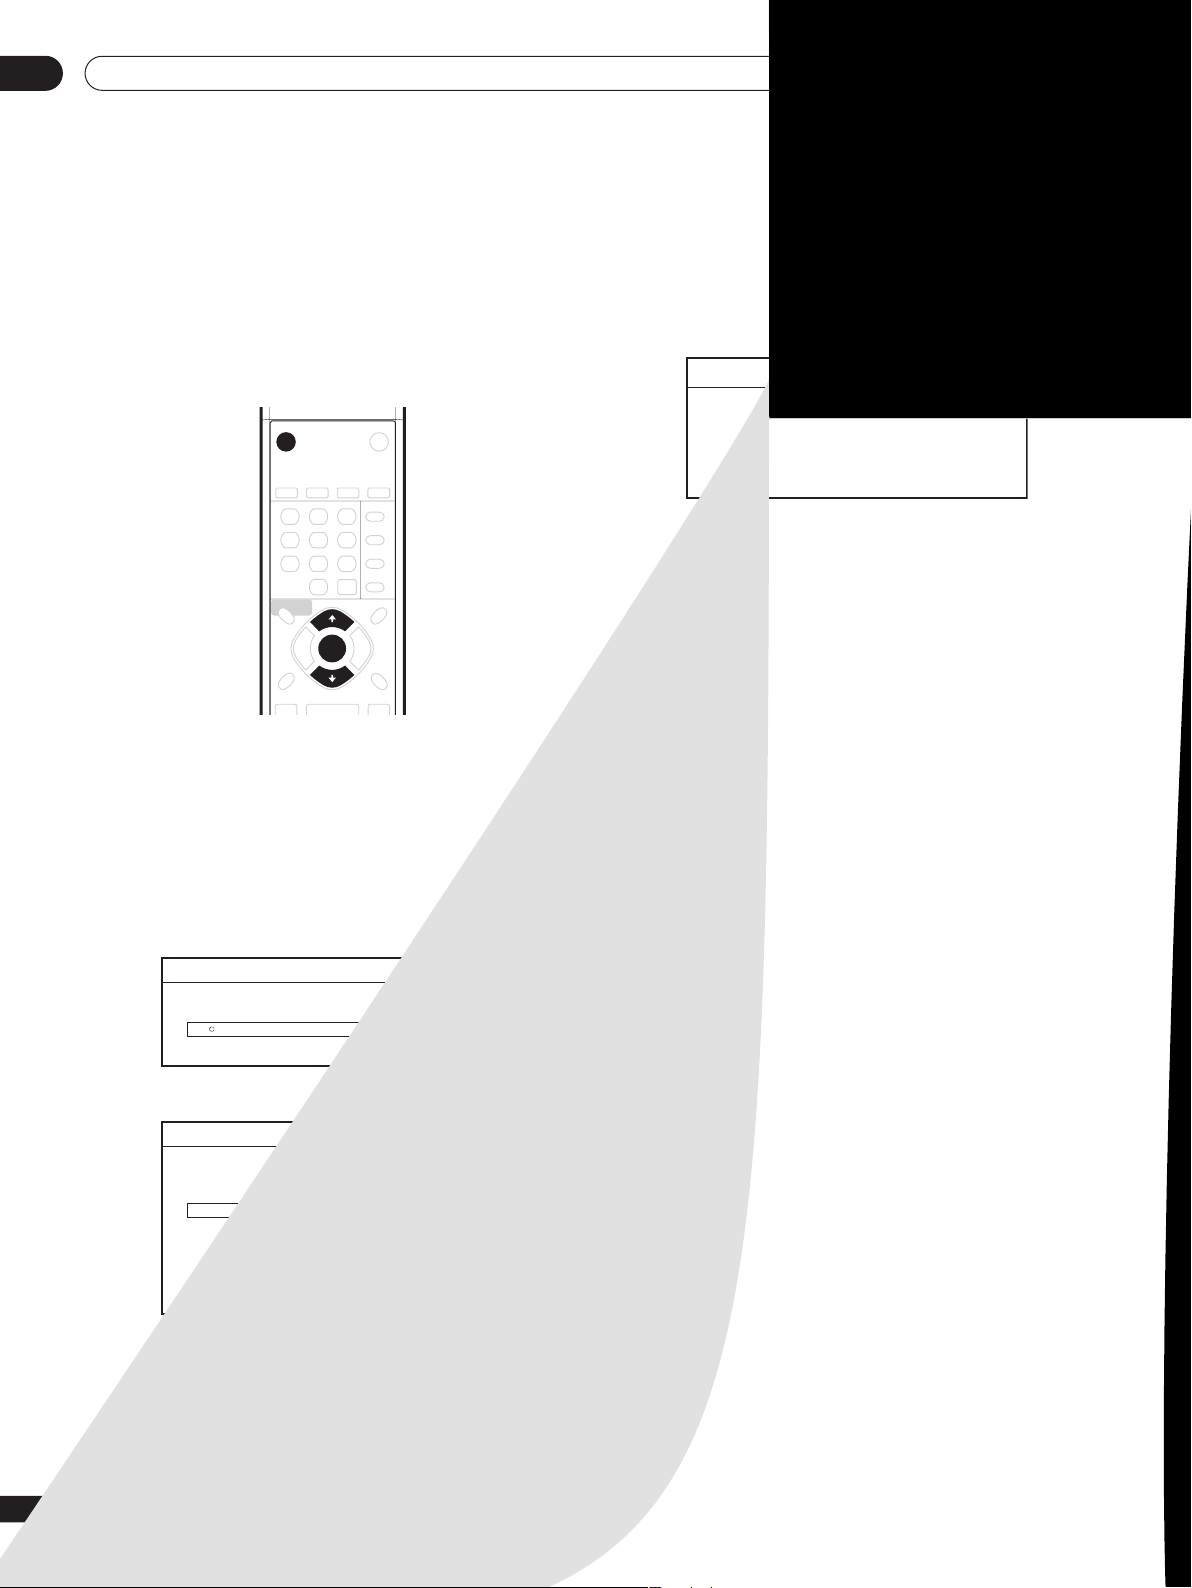
Switching on and setting up
When you switch the player on for the first time the Setup Navigator
screen appears. We recommend using this to make a few basic
player settings.
STANDBY/ON
ENTER
1 Switch on your TV and set the video input to this player.
2 Press the STANDBY/ON button on the remote control or
the front panel to switch on.
• It can take up to one minute for the unit to turn on.
• When you switch on for the first time, your TV should display the
Setup Navigator screen. (If the Setup Navigator doesn’t appear,
you can also access it from the Initial Setup menu; see page 43).
3 Use the / buttons to choose a language, then press
ENTER.
Setup Navigator
Language
English
Français
5 Use the / buttons to select the video output format
then press ENTER.
Setup Navigator
Output Video Format
Auto
480i
480p
720p
1080i
1080p
Source Direct
If you connected this player to your TV using the HDMI connector,
select from Auto, 480i (interlaced), 480p (progressive), 720p,
1080i, 1080p, or Source Direct, then skip to step 7 (the aspect ratio
will automatically be set to 16:9 (Widescreen)). Generally, the Auto
setting is recommended.
If you’re using an S-Video or composite video connection, select
S-Video/Video only.
If you’re using a component video connection, match the output
setting with the capabilities of your TV. Select from: 480i, 480p,
720p, 1080i or Don’t Know. If you select 720p or 1080i, skip the
next step since the aspect ratio will automatically be set to 16:9
(Widescreen).
6 Use the / buttons to select the aspect ratio of your TV
then press ENTER.
4 Press ENTER to start setting up using the Setup Navigator.
Setup Navigator
Before using, make some simple
settings for the BD player.
Start
Cancel
Please use the Initial Setup if you
want to make more detailed settings.
• If you don’t want to use the Setup Navigator, press to select
Cancel, then press ENTER to exit the Setup Navigator.
20
En
If you have a widescreen TV, select 16:9 (Widescreen); if you have a
standard size TV, select 4:3 (Standard).
7 Select ‘Finish Setup’ to accept the settings and exit the
Setup Navigator, or ‘Go Back’ to go through the settings again.
You can run the Setup Navigator at any time by selecting it from the
Options menu—see page 43.
Page 21
Getting Started 04
About the screen saver
If the player is stopped or paused for more than five minutes with no
other operation, the screen saver starts.
Once the screen saver has started, pressing any button on the front
panel or remote will clear it and return the player to normal
operation.
Using the on-screen displays
This player makes extensive use of graphical on-screen displays
(OSDs). You should get used to the way these work as you’ll need to
use them when setting up the player, using some of the playback
features, and when making more advanced settings for audio and
video.
All the screens are navigated in basically the same way, using the
cursor buttons (///) to change the highlighted item and
pressing ENTER to select it.
Button What it does
HOME MENU
Display/exit the on-screen display
Changes the highlighted menu item
ENTER
(RETURN)
Selects the highlighted menu item
Returns to the previous menu or screen without
saving changes
Tip
• Information at the bottom of an OSD screen explains the
currently selected menu item and shows which buttons can be
used for that screen.
Setting up for network use
If you’ve connected this player to a local area network (LAN) you may
need to make a few settings before you can use the Home Media
Gallery feature over the network.
1 Press HOME MENU and select ‘Initial Setup’.
2 Select ‘Network’.
3 Select ‘Device Name’ then ‘Next Screen’.
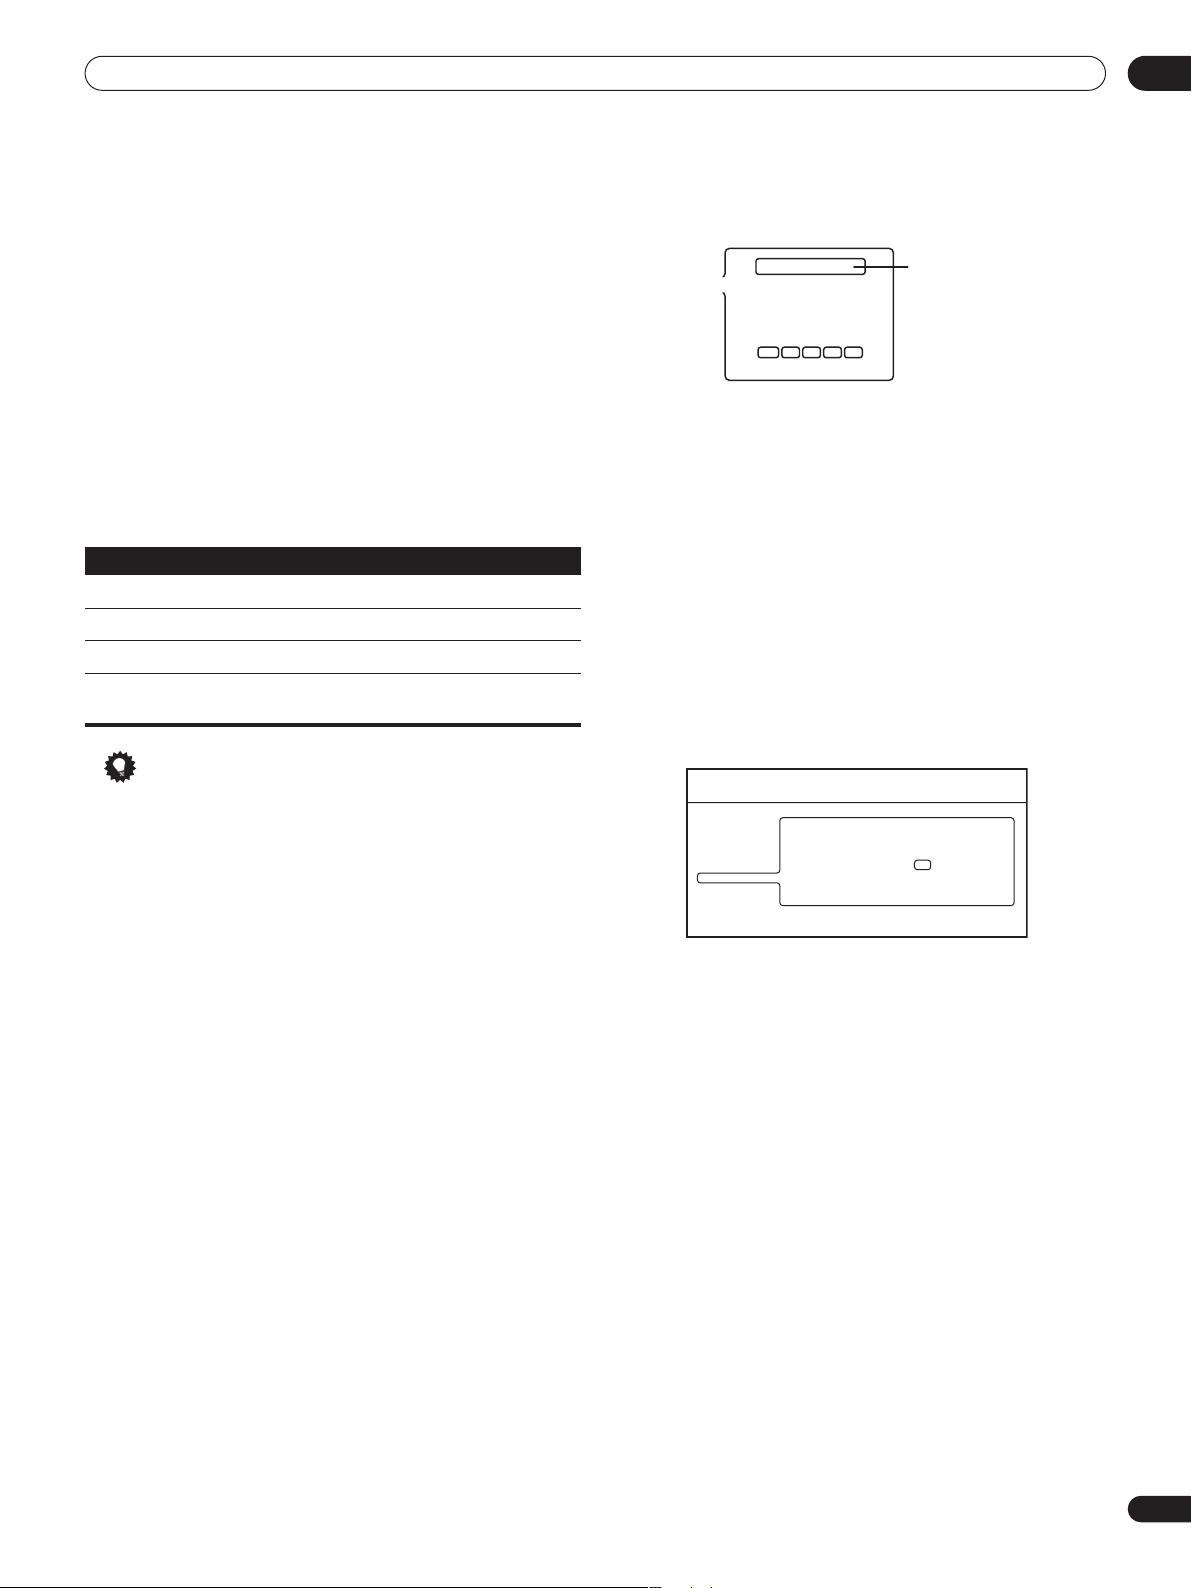
4 Use the on-screen keypad to enter a name for the player.
This is how the player will appear to connected devices on the local
area network.
Pioneer BDP-HD1
A B C D E F G H I J
K L M N O P Q R S T
U V W X Y Z , . : ;
1 2 3 4 5 6 7 8 9 0
_ - ( ) [ ] { }
SHFT ALT DEL CLRSPC
DONE CANCEL
Device
name input
• Use the /// buttons and ENTER to select characters
from the keypad.
• Select SHFT to toggle between upper and lower case.
• Select ALT to toggle between regular and special (accented,
etc.) characters (ISO 8859-1 character set).
• Select SPC to insert a space.
• Select DEL to delete the character at the current cursor position
in the name field.
• Select CLR to clear the name field.
5 Select ‘DONE’ to register the name and exit the input
screen.
• Select CANCEL to close the keypad without registering the
name.
6 Select ‘IP Configuration’ then ‘Next Screen’ to display the IP
configuration screen.
Initial Setup
Video Out
Audio Out
Language
Parental Lock
Network
Speakers
Options
IP Configuration
Auto set IP Address
IP Address
Subnet mask
Default gateway
Set the IP address.
Off
192
255 255 0
.
.
255 255 255 0
.
.
192 168 1 0
.
.
.
.
.
7 Set ‘Auto set IP Address’ to ‘On’.
If there is a DHCP server on the local area network (LAN), this player
will automatically be allocated an IP address. If you’re using a
broadband router or broadband modem that has a DHCP (Dynamic
Host Configuration Protocol) server function, select On. The IP
address will automatically be determined.
If there is no DHCP server on the network and you select On, this
player will use its own Auto IP function to determine the IP address.
• If you want to set the IP address manually, select Off then set
the IP Address, Subnet mask and Default gateway: Use the /
// buttons to select a field; use the number buttons to
enter a value. Press ENTER to finish and exit the screen.
8 Press HOME MENU to exit the Initial Setup menu.
You should now be able to use the Home Media Gallery (accessible
from the Home Menu). See Using the Home Media Gallery on
page 32 for more.
• For information on DHCP refer to the network device’s operating
instructions.
• You may need to contact your service provider or network
administrator when manually entering an IP address.
21
En
Page 22
Getting Started04
AUDIO SUBTITLE ANGLE PLAY MODE
DISPLAY
OUTPUT
FORMAT
CLEAR
PAUSE ZOOM
REV SCAN FWD SC AN
STOP
PLAY
PREV NEXT STEP/SLOW
Playing movies, music and photos
Using this player, you can enjoy watching movies, listening to music
and browsing photos, from BD and DVD discs or from a media
server on the network. How you navigate, browse and play content
varies according to the format of the content and the media:
• To play a BD or DVD movie disc (i.e., one containing BD-ROM or
DVD-Video application format), see Playing BD and DVD movies
below.
• To play a DVD-R/RW disc recorded with movie, music or photo
files, turn to Using the Disc Navigator on page 27.
• To play content from a media server, please refer to Using the
Home Media Gallery on page 32.
Playing BD and DVD movies
BD and DVD movie discs contain video titles and chapters. They
often feature disc menus, from which you can navigate the content,
choose from various audio and subtitle options, and so on.
STANDBY/ON OPEN/CLOSE
When playing BD-ROM discs:
• Commercially produced BD-ROM movie discs often go straight
to the disc menu when playback is started (sometimes preceded
by an opening sequence). Navigate through the disc menu
using the cursor keys (///) and the ENTER button. You
can also use the number buttons to select numbered items in
some menus.
• To get back to the top menu, press TOP MENU.
• Some BD-ROM discs feature pop-up menus that do not
interrupt playback; press MENU to access these.
When playing DVD-Video discs:
• Commercially produced DVD movies often go straight to the
disc menu when playback is started (sometimes preceded by an
opening sequence). Navigate the disc menu using the cursor
(///) and ENTER buttons. You can also use the number
buttons to select numbered items in some menus.
• To get back to the top menu, press TOP MENU.
• To get back to the disc menu, press MENU.
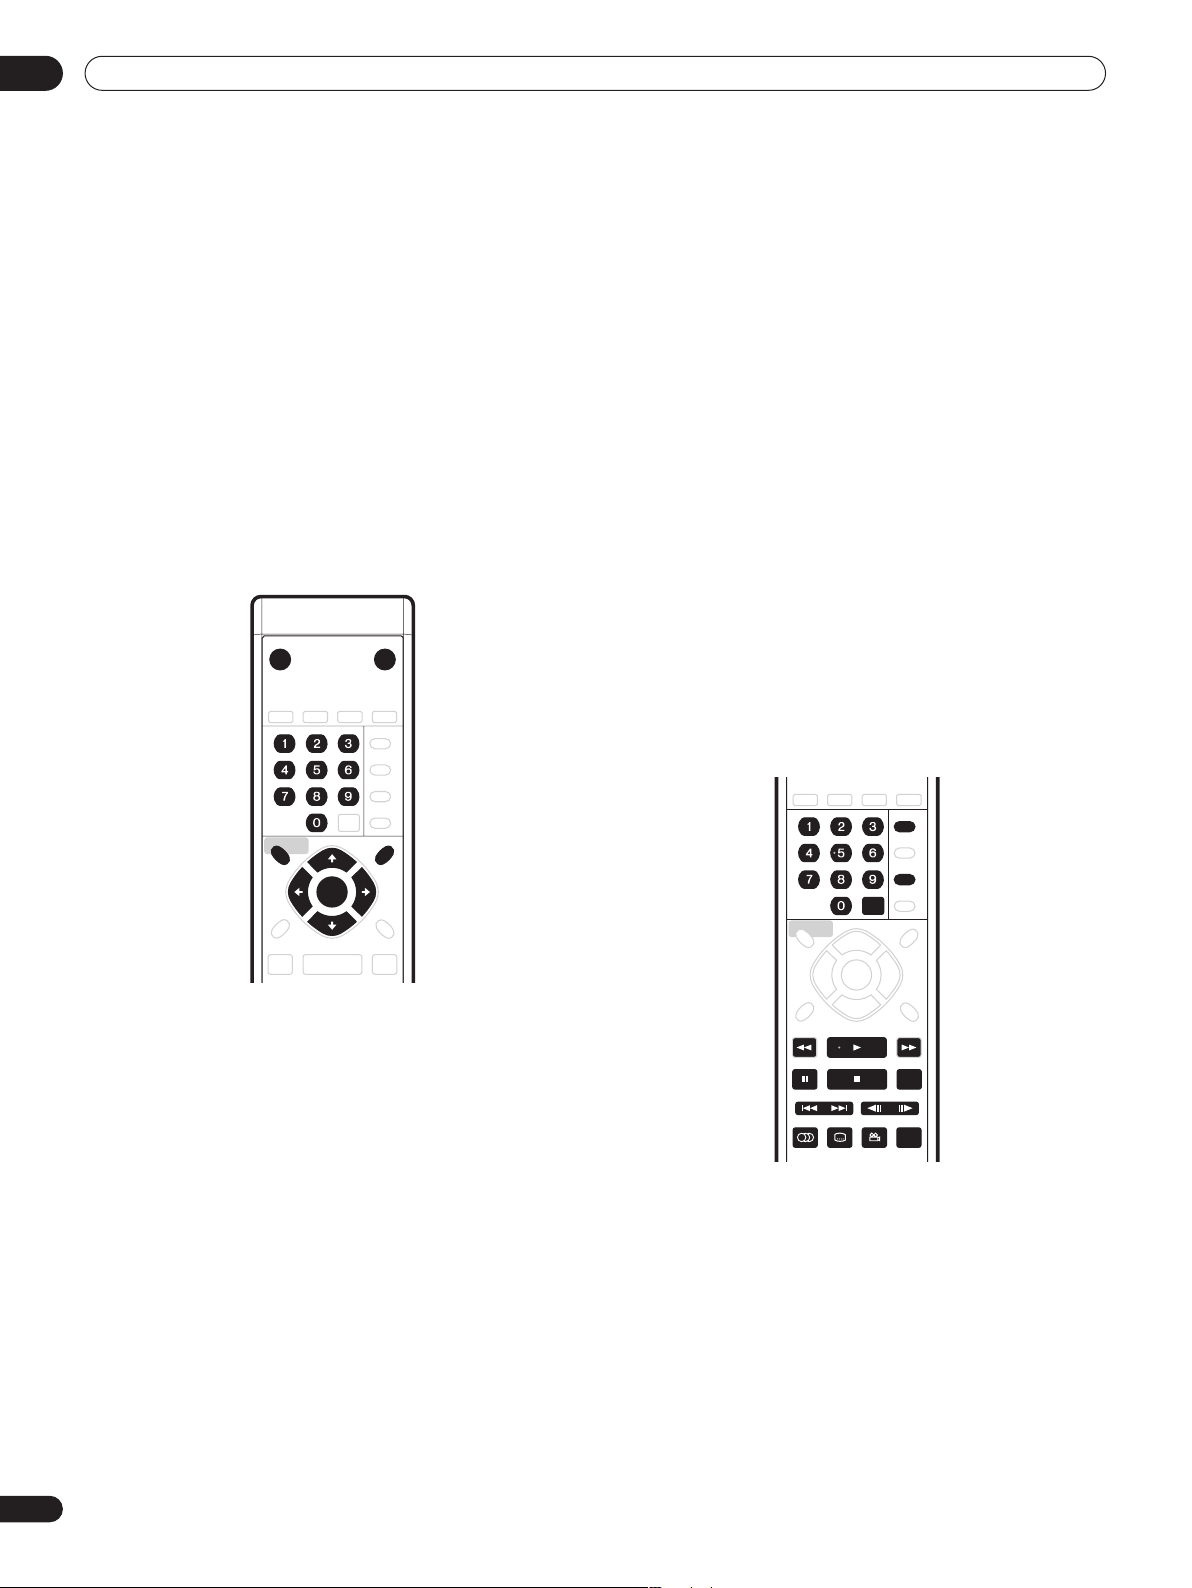
5 When you’ve finished using the player, eject the disc and
switch the player back into standby.
• To open/close the disc tray, press OPEN/CLOSE. Remove the
disc before putting the player into standby.
• Press STANDBY/ON to switch the player into standby.
Playback controls
MENU
TOP MENU
ENTER
1 If the player isn’t already on, press STANDBY/ON to
switch it on.
Also turn on your TV and make sure that it is set to the correct video
input.
2 Press OPEN/CLOSE to open the disc tray.
3 Load a disc.
Load a disc with the label side facing up, using the disc tray guide
to align the disc (if you’re loading a double-sided DVD-Video disc,
load it with the side you want to play face down).
The player will take a short while to read the disc, after which the
disc type will show up in the front panel display.
4 Press PLAY to start playback.
• Use the PAUSE and STOP buttons to pause or stop
playback. You can resume playback in either case by pressing
PLAY. See also Resuming playback on page 23.
• See Playback controls below for other controls available during
playback of BD and DVD movie discs.
22
En
Page 23
Getting Started 04
Resuming playback
STOP
The resume function offers a convenient way to restart playback
from where you stopped it previously.
Resuming playback of BD and DVD movies
If you stop playback before the end of the disc, the playback stop
position is stored so that you can resume watching the disc from the
same place later.
• To resume playback, press PLAY. Playback will start from the
stored resume position.
• Press STOP again to cancel the resume function.
Note
In the following case, the resume position is cleared:
• Eject the disc
• Use Home Media Gallery/Disc Navigator
• Switch the player off (BD-ROM only)
Resuming playback of movie, music and photo files
Movie and music files are resumed from the start of the title/track
(rather than the stop position within the title/track): photo slideshow
playback is resumed from the photo file within the slideshow.
• If you interrupt playback of a movie or slideshow by pressing
RETURN to display the Disc Navigator or Home Media Gallery
screen, you can still resume playback of the same title/
slideshow photo using the PLAY button, regardless of what is
highlighted on the screen. (Use the ENTER button to start
playback of the currently highlighted item in the Disc Navigator/
Home Media Gallery.)
• Some actions in the Disc Navigator/Home Media Gallery (such
as changing the Browse category) will cause the resume
position to be lost.
PLAY
Scanning music and video
REV SCAN FWD SCAN
You can fast-scan BD and DVD movies and music files forward or
backward at various speeds, and only forward when playing movie
1
files.
1 During playback, press or to start scanning.
• There is no sound while scanning music and video.
2 Press repeatedly to increase the scanning speed.
• The scanning speed is shown on-screen.
3 To resume normal playback, press PLAY.
• Depending on the disc, normal playback may automatically
resume when a new chapter is reached on a BD or DVD movie
disc.
• When scanning a movie or song file, normal playback will
automatically resumes when the end or beginning of the file is
reached.
Selecting titles and chapters directly
CLEAR
You can select titles and chapters directly with BD and DVD
2
movies
.
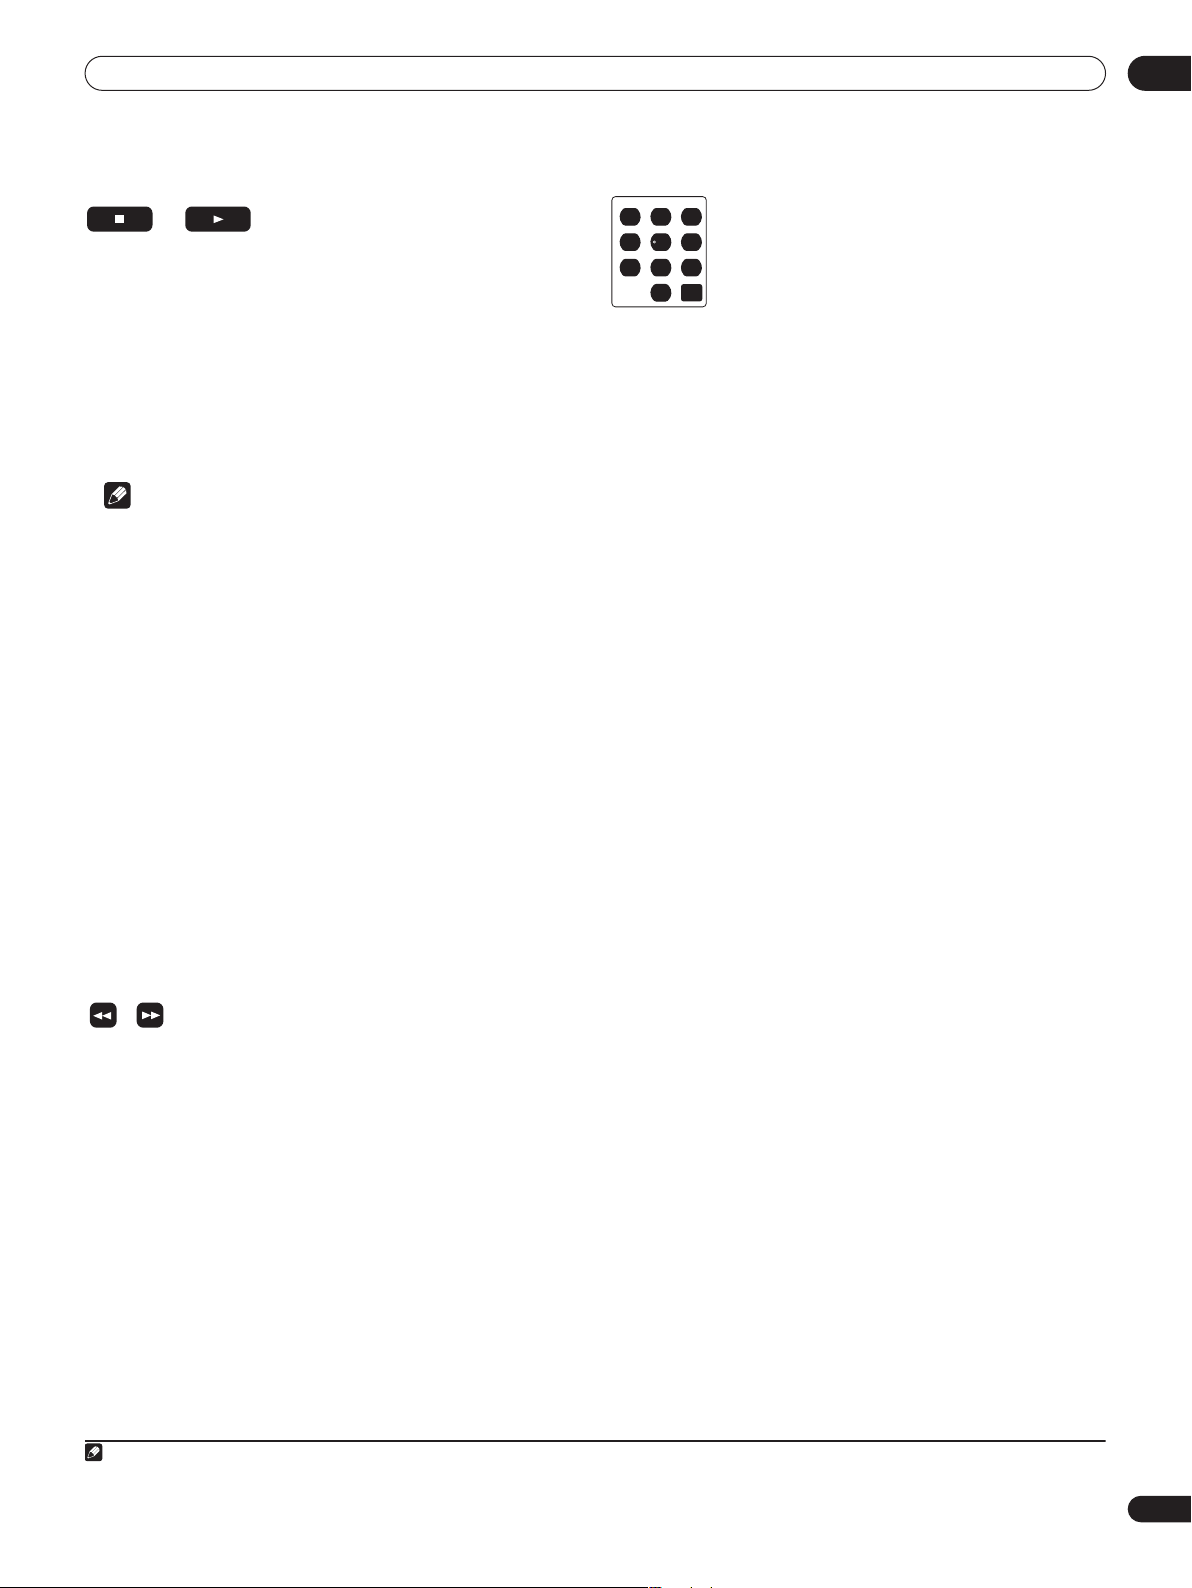
1 Use the number buttons to select a title or chapter.
• If the disc is stopped, playback starts from the selected title.
• If the disc is playing, playback jumps to the start of the selected
chapter.
Skipping content
You can skip over content during playback of BD and DVD movies,
movie and song files, and photo slideshows.
• During playback, press or to skip content.
2
When playing a BD or DVD movie, playback jumps to the start of the
previous/next chapter or title. (If the disc is stopped, playback will
start).
During movie or song file playback, the previous or next file will start
playing.
During photo slideshow playback, you can skip to the previous or
next photo.
Playing video in slow motion
You can play BD and DVD movies and movie files at different
forward slow motion speeds.
1 During playback, press to start slow motion playback.
• The slow motion speed is shown on-screen.
• There is no sound during slow motion playback.
2 Press repeatedly to change the slow motion speed.
3 To resume normal playback, press PLAY.
• Depending on the disc, normal playback may automatically
resume when a new chapter is reached.
• During slow motion playback, normal playback resumes when
the end of the file is reached.
1,3
Video step forward and step reverse
You can use step forward and step reverse when playing a BD or
DVD movie, and only forward when playing a movie file.
1
Note
1 Does not work with DRM-protected PC files.
2 With some titles on BD-ROM or DVD-Video discs it is not possible to jump to the start of the selected title or chapter.
3 This function may not be supported, depending on the content.
23
En
Page 24

Getting Started04
1 During playback, press PAUSE.
2 Press or to move the video forward or back one
1
step.
3 To resume normal playback, press PLAY.
• When playing a BD or DVD movie, normal playback may
automatically resume when a new chapter is reached.
Changing the Play Mode
Use the PLAY MODE button on the remote control to select one of
the various playback modes for BD and DVD movie discs, movie and
music files and photo slideshows.
You can’t select a Play Mode while a BD or DVD disc menu is being
displayed, or while playing some BD/DVD movie titles or PC files.
• During playback, press PLAY MODE to change the Play
Mode.
See Play Mode option compatibility below for the options available
with the disc/file you’re playing.
• Time Search (see Using time search below)
• Title Search (see Using title search below)
• Repeat Chapter (repeats the current chapter)
• Repeat Title (repeats the current title)
Using time search
You can navigate directly to a certain point in a BD or DVD movie, or
in a movie file.
3
1 During playback, press PLAY MODE and select ‘Time
Search’.
2 Use the number buttons to enter a time in hours, minutes
and seconds for playback to resume from.
For a BD or DVD movie, the time you enter should be the time into
the currently playing title. For a movie file it will be the playback time
into the file.
• For example, press 4, 5, 0, 0 to have playback start from 45
minutes into the title/file. For 1 hour, 20 minutes, press 1, 2, 0,
0, 0.
• Press CLEAR to clear the input.
3 Press ENTER to start playback from the time you entered.
Using title search
• Repeat Track (repeats the current track)
• Repeat All (repeats the current browse list)
• Random (plays the current browse list in a random order)
• Repeat Off (cancels the repeat and random modes)
The current Play Mode is displayed on-screen. Press CLEAR to
resume normal playback.
Play Mode option compatibility
The available options depend on what kind of disc/file is playing
(=available / =unavailable):
2
You can directly jump to the start of any title on a BD-ROM or
DVD-Video.
2
1 During playback, press PLAY MODE and select ‘Title
Search’.
2 Use the number buttons to select a title.
• Press CLEAR to clear the input.
3 Press ENTER to start playback of the title you selected.
Switching camera angles
Some BD and DVD movies feature scenes shot from two or more
angles—check the disc box for details.
When a multi-angle scene is playing, a icon appears on screen
to let you know that other angles are available (this can be switched
off if you prefer—see Angle Indicator on page 43).
• During playback, press ANGLE to switch the angle.
• There may be a short delay after pressing the button before the
angle changes.
24
En
Note
Page 25
Getting Started 04
Y
Zooming the screen
ZOOM
During playback of a BD or DVD movie, movie file or photo
slideshow you can zoom the screen to 2 x view or 4 x view.
1 During playback, press ZOOM to change the zoom.
Press repeatedly to cycle through: normal 2 x zoom 4 x zoom.
2 Use the cursor keys (///) to move the zoomed area
of the screen.
• The zoom mode is canceled when you stop playback.
• You can’t zoom the screen when a BD or DVD movie disc menu
is displayed.
Switching subtitles
SUBTITLE
Some BD and DVD movie discs have subtitles in one or more
languages; the disc box will usually tell you which subtitle
languages are available.
• Press SUBTITLE repeatedly to select a subtitle option.
The current subtitle language/option is displayed on-screen and in
the front panel display.
Subtitle 1/ 2 English
• To switch the subtitle display off, press SUBTITLE then
CLEAR.
• There may be a short delay after pressing the button before the
subtitles change.
Tip
• To set subtitle language preferences, see Subtitle Language on
page 42.
1
Tip
• To set audio language preferences, see Audio Language on
page 42.
Displaying disc or file information
DISPLA
Various track, chapter and title information, as well as the video
transmission rate for DVD and BD movies, can be displayed onscreen. The information available depends on the type disc or file,
and whether it’s playing or stopped.
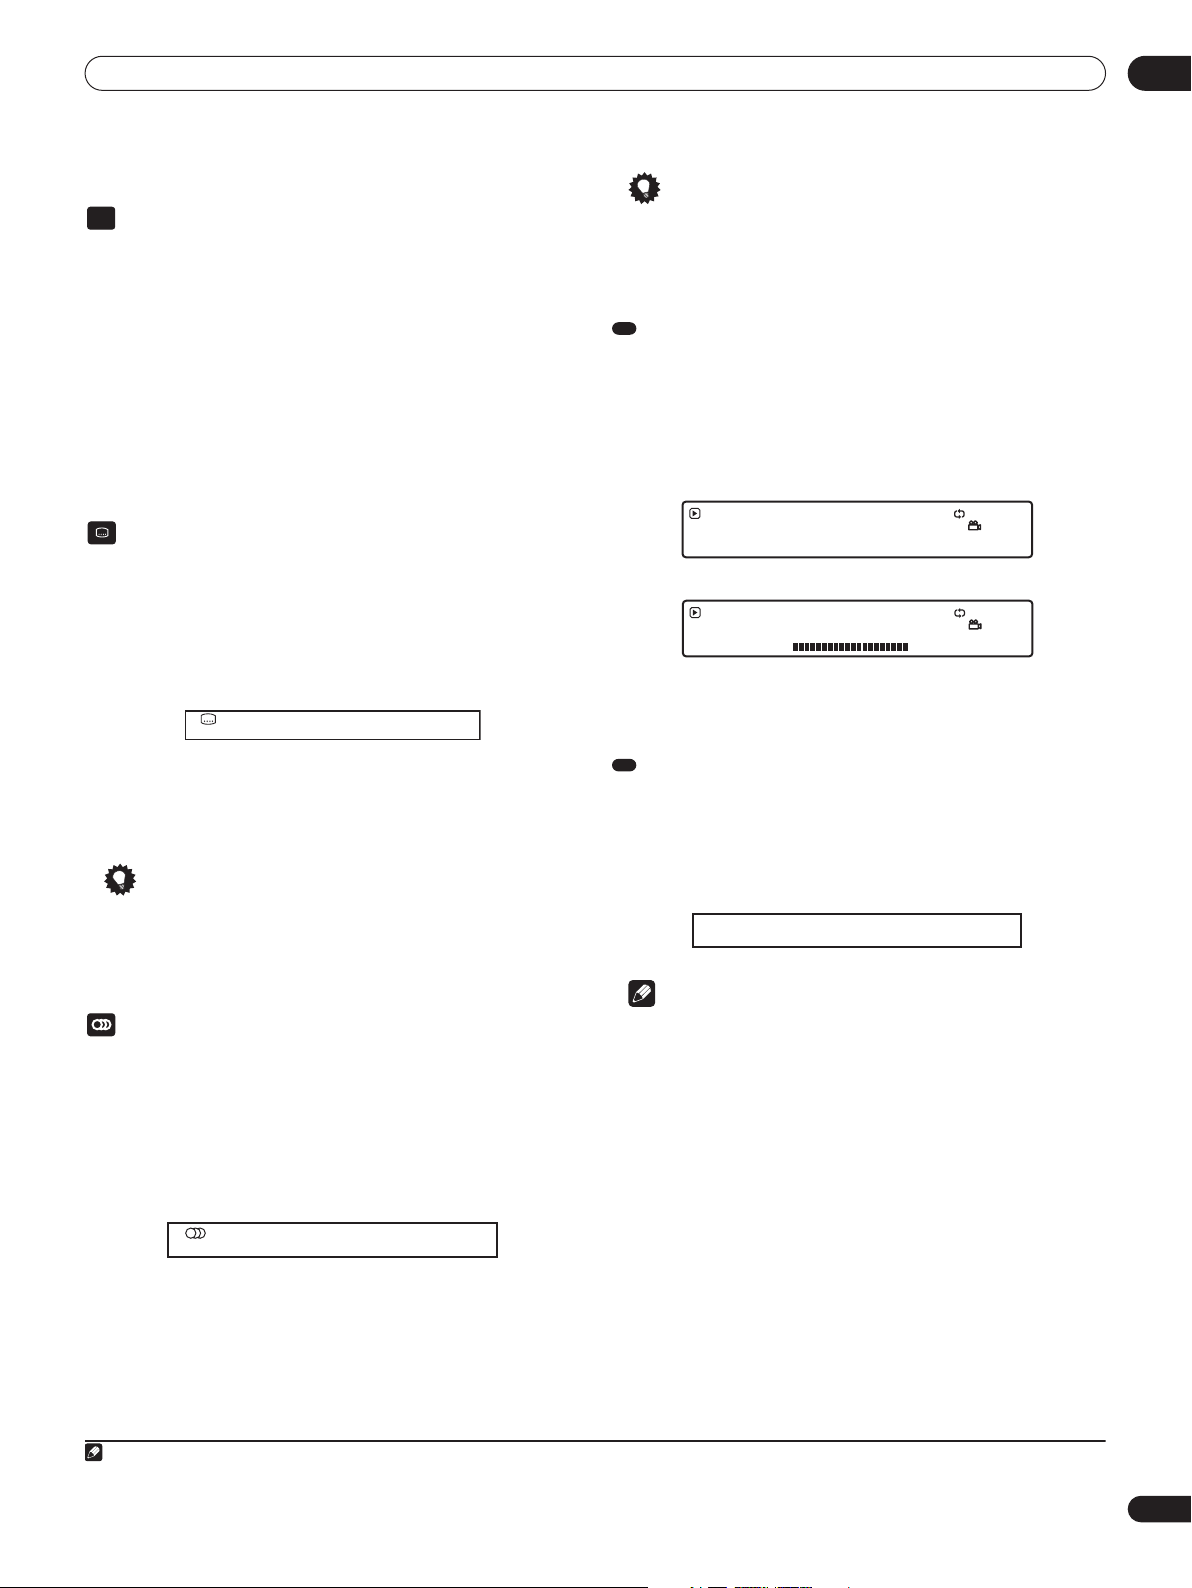
• Press DISPLAY to show/switch the information displayed.
Press DISPLAY repeatedly to change the displayed information.
Play 1–2 0 . 03 . 10
DVD-VIDEO
Chapter
Title Total
12
1h 28m 03s
Repeat Chapter
3
DVD-Video Play display 1
Play 1–2
DVD-VIDEO
Chapter Time
Chapter Total
0 . 03 . 12
0 . 02 . 43
0 . 03 . 16
Repeat Chapter
10 . 08 Mbps
DVD-Video Play display 2
Switching the video output format
OUTPUT
FORMAT
You can switch the video output format for component and HDMI
output.
• Press OUTPUT FORMAT repeatedly to select a video output
format.
The current source and output format are shown on-screen.
Output Video Format
: Source Direct Source: 1080 / 24p
(1080 / 24p)
Switching audio streams/channels
AUDIO
Note
• Depending on your display, some of the settings may result in
Some BD and DVD movie discs contain multiple audio streams that
you can select on playback. These might be different audio
languages and/or different audio formats (such as a DTS 5.1channel sound track and a Dolby Digital 2-channel sound track).
the picture disappearing. In this case, press OUTPUT FORMAT
repeatedly until the picture re-appears.
• See Changing the video output format on page 14 for more
information.
• Press AUDIO repeatedly to select an audio channel/stream
2
option.
The current option is shown on-screen.
Audio: 1/2 Dolby Digital 2/0ch
English
Switching audio languages on a BD/DVD movie
• There may be a short delay after pressing the button for the
audio channel to change.
Note
1 Some discs only allow you to change the subtitle language from the disc menu. Press MENU to access.
2 Some discs only allow you to change the audio language from the disc menu. Press MENU to access.
3 There may be instances with some discs where no information can be displayed.
25
En
Page 26

Getting Started04
Frequently Asked Questions
• Why won’t the disc I loaded play?
First check that you loaded the disc the right way up (label side
up), and that it’s clean and not damaged. See Taking care of your
player and discs on page 46 for information on cleaning discs.
If a disc loaded correctly won’t play, it’s probably an
incompatible format or disc type, such as CD. See Disc/content
format playback compatibility on page 8 for more on disc
compatibility.
• There’s no picture!
Your TV is probably not compatible with the selected video
output format. Check your TV for compatibility with progressive
scan video and higher resolutions. Press the OUTPUT FORMAT
button to switch the video output. See also Changing the video
output format on page 14.
•I can’t see any picture, or get high definition video output when
playing some BDs!
When playing some discs, there may be no composite video,
S-Video and/or component video output, or high-definition
content may be converted to standard-definition 480i or 480p
component output. This is for content protection. To view the
disc, connect the player to an HDMI-compatible display. See
Connecting for HDMI output on page 13.
•I have a widescreen TV so why are there black bars at the top and
bottom of the screen when I play some discs?
Some movie formats are such that even when played on a
widescreen TV, black bars appear at the top and bottom of the
screen. This is not a malfunction.
• I’ve connected to a HDMI/DVI compatible component but I can’t
get any signal and the front panel HDMI indicator won’t light!
Make sure that you’ve selected this player as the HDMI input in
the settings for the component you’re using. You may need to
refer to the instruction manual of the component to do this.
An HDMI connection can only be made with other HDMI
components, or a High Definition Content Protection (HDCP)compatible DVI component. See Connecting for HDMI output on
page 13 for more on HDMI compatibility.
• There’s no picture from the HDMI output!
Make sure the output format of this player matches that of the
component you have connected using HDMI. See Changing the
video output format on page 14.
• Why is the playback sample rate of the DVD only 48 kHz instead of
96 kHz?
Playback sample rate of the audio is downsampled to 48 kHz.
• My AV receiver is definitely compatible with 96 kHz Linear PCM
audio, but it doesn’t seem to work with this player. What’s wrong?
192 kHz/96 kHz BD and 96 kHz DVD discs only output digital
audio downsampled to 48 kHz through the optical and coaxial
outputs.
96 kHz 7.1ch BD discs only output digital audio downsampled to
48 kHz through HDMI output when video output is 480i or 480p
over HDMI. These are not malfunctions.
• Why is the mono audio on some discs rather quiet compared to
other discs?
When mono audio is split into the L and R channels, there may
be a small loss of volume.
• There’s no sound when connected using HDMI!
You won’t hear any sound from the HDMI output if your
component is only DVI/HDCP-compatible.
•I can’t connect to my local area network!
First of all check the settings of the media server you’re using.
Make sure that if you made the network settings automatically
on this player then you also select auto setup on the server.
(Likewise, if you made the settings manually on the server, you
should set up this player manually.)
Check also that you are using the right kind of LAN cable for the
type of connection you made: a standard straight LAN cable if
this player is connected to a hub; a crossed LAN cable for direct
connection to a PC. See also Network connection on page 16.
26
En
Page 27
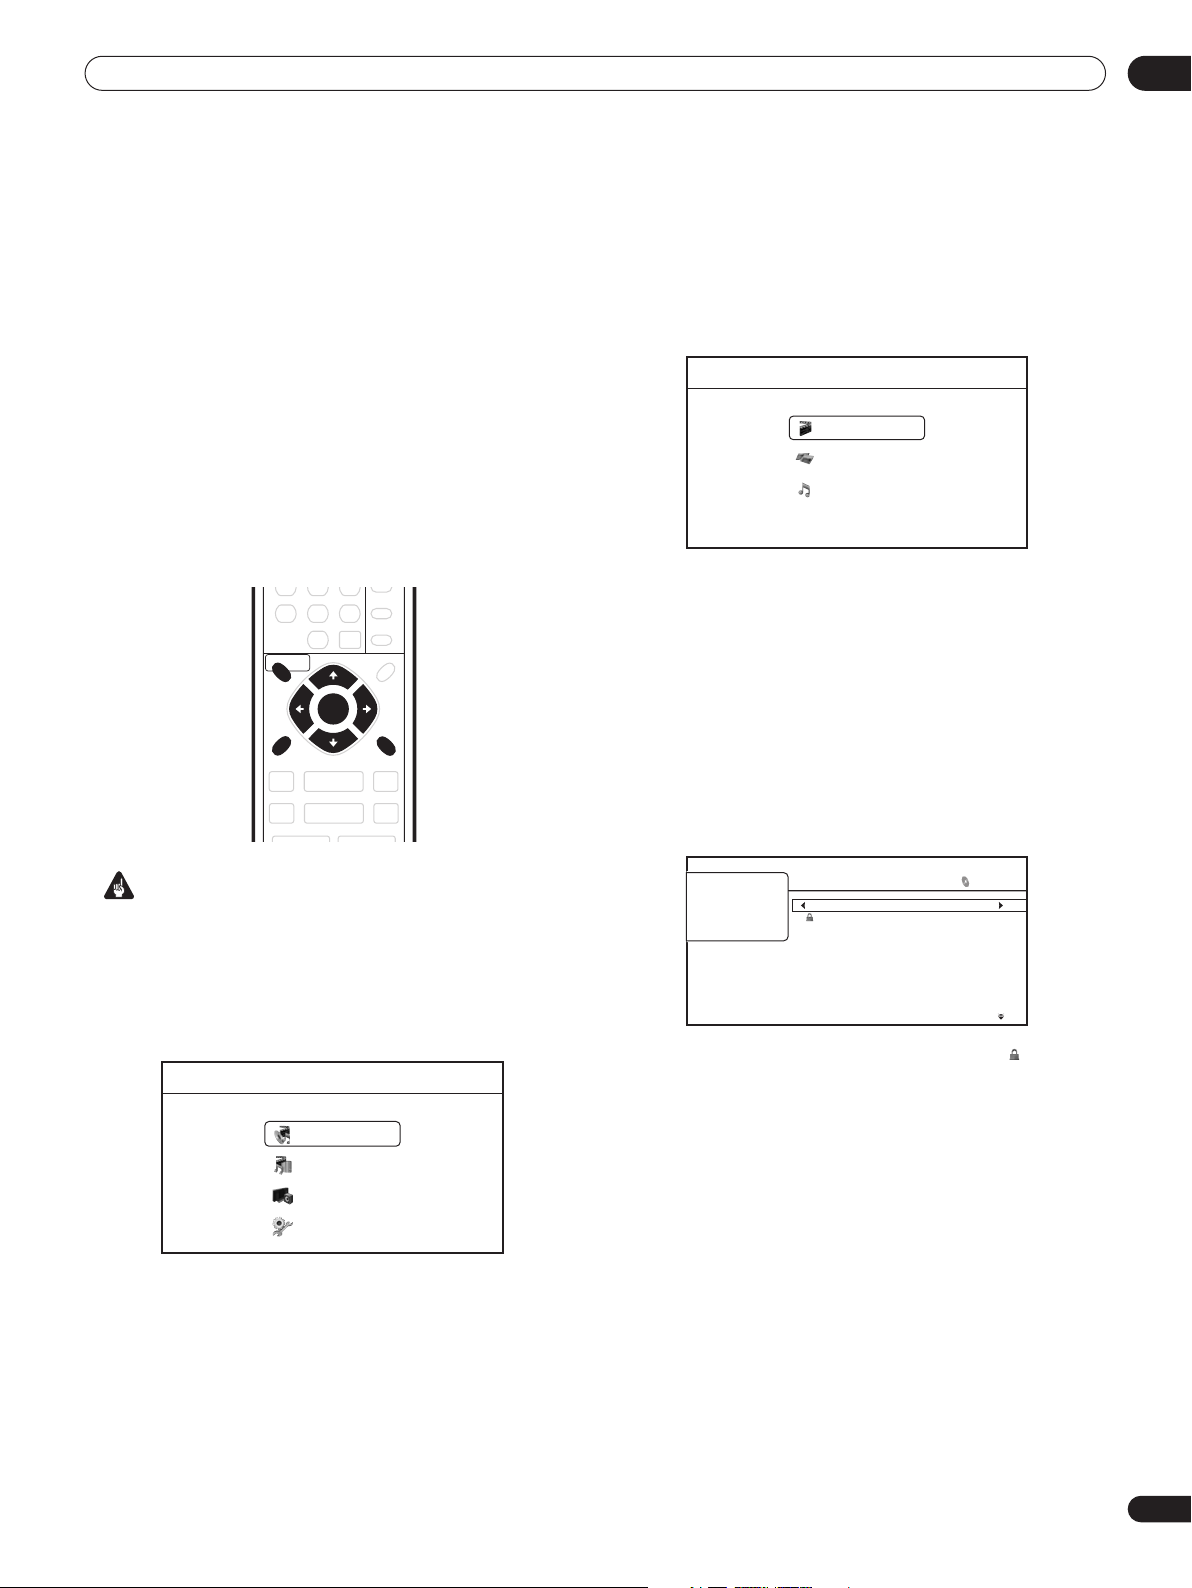
Using the Disc Navigator 05
Chapter 5
Using the Disc Navigator
Introduction
Most of the features described in this chapter make use of onscreen displays. Navigate these using the /// and ENTER.
To go back to the previous menu or screen, use the RETURN button.
The button guide at the bottom of every screen shows which buttons
do what.
Using the Disc Navigator
Use the Disc Navigator to browse through the PC files on a disc to
find what you want to play. You can use the Disc Navigator when a
disc is playing or stopped.
DISC NAVIGATOR
ENTER
HOME
MENU
Important
• It’s not possible to use the Disc Navigator with BD-ROM or DVDVideo discs.
1 Press HOME MENU and select ‘Disc Navigator’ from the onscreen display.
Alternatively, press DISC NAVIGATOR.
Home Menu
Disc Navigator
Home Media Gallery
Video/Audio Adjust
Initial Setup
RETURN
2 Select ‘Movies’, ‘Photos’ or ‘Music’.
See the sections below for more information on each of these.
Disc Navigator
Movies
Photos
Music
3 Press HOME MENU to exit the Disc Navigator screen.
Movie Navigator
The movie section of the Disc Navigator allows you to browse and
play all the compatible movie files stored on the loaded DVD-R/RW
disc (non-movie files are not displayed).
See also File compatibility on page 9 for more on compatible file
types.
• If you haven’t already done so, select ‘Disc Navigator’ from
the Home Menu, then ‘Movies’.
You should see a list of all the movie files found on the disc, together
with their playing times.
All Movies
Scallop-man 3
Closer
Discount store
Date: 2006
Genre: Action
Format: WMV
School of legend
Advance in the future part-2
The EEL
World Baseball
Dream on the way
Finding a southpaw
Dear Customer
• Movie files that appear in the list with a lock icon ( ) are DRM
protected and cannot be played.
• Use the / buttons to change the current selection
(highlighted in yellow).
On the left side of the screen you can see file information, such as
the genre, date and file format, for the current selection.
• Press ENTER to play the currently highlighted movie.
Press PLAY to start or resume playback from the last title played.
20 items
1:31
1:02
1:31
1:25
1:33
1:26
1:57
1:36
1:18
1:18
27
En
Page 28
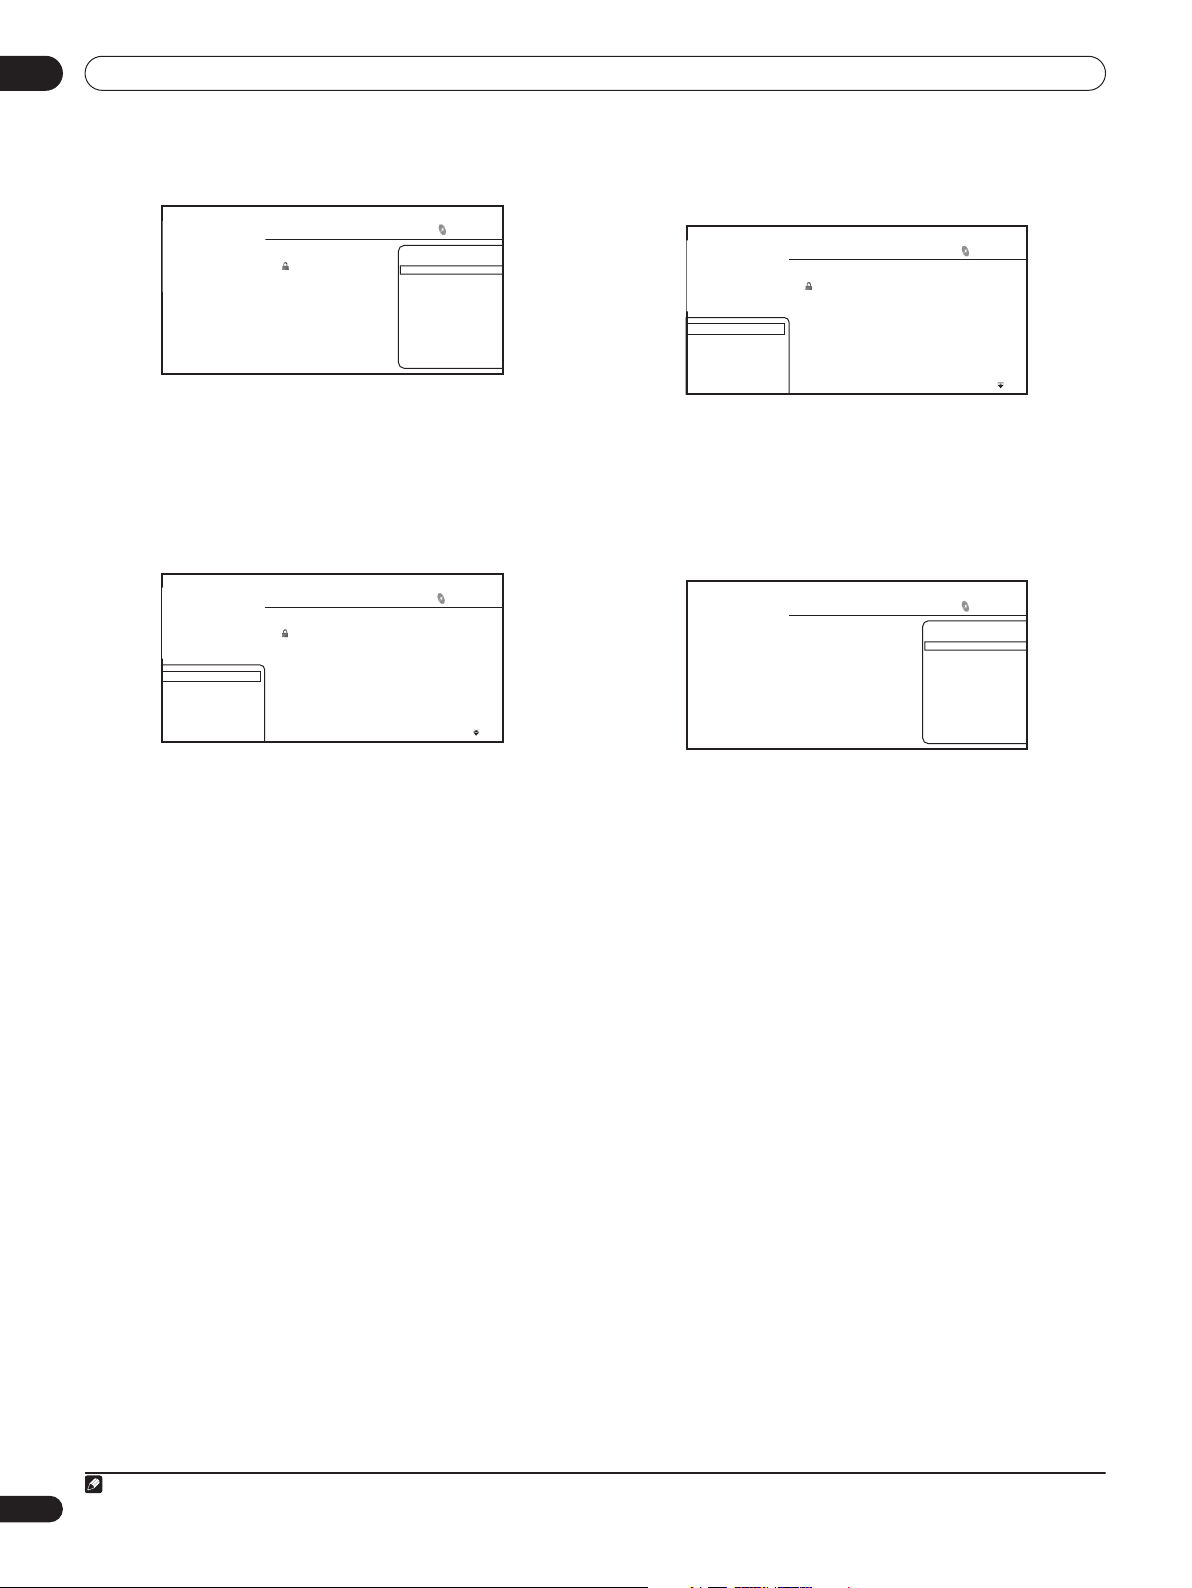
Using the Disc Navigator05
• Press to display the Movie Options menu:
20 items
Movie Options
Play from Beginning
Add to Quicklist
Date: 2006
Genre: Action
Format: WMV
All Movies
Scallop-man 3
Closer
Discount store
School of legend
Advance in the future part-2
The EEL
World Baseball
Dream on the way
Finding a southpaw
Dear Customer
• Play from Beginning: Play the selected movie from the
beginning.
• Add to Quicklist: Add the selected movie to your Quicklist. The
Quicklist feature is a useful way to organize movie files for handy
selection and playback. The Quicklist can contain up to 25
1
movies.
• Press to display the Browse menu:
20 items
1:31
1:02
1:31
1:25
1:33
1:26
1:57
1:36
1:18
1:18
All Movies
Browse
Search
Sort
All Movies
Scallop-man 3
Closer
Discount store
School of legend
Advance in the future part-2
The EEL
World Baseball
Dream on the way
Finding a southpaw
Dear Customer
Depending on the browse menu, certain options may not be
selectable.
• All Movies: Display all movie files found on the disc.
• Browse: Browse movies by genre, Quicklist, or folder. See also
Browsing movies below.
• Search: Find a movie by entering a name (or a few letters) to
search for. The search results are narrowed down as you enter
more letters. See also Searching movies below.
• Sort: Sort movies by date (oldest first or most recent first) or
alphabetically by title or genre (‘A’ first or ‘Z’ first).
Browsing movies
The Browse sub-menu gives you three ways to browse movies.
20 items
1:31
1:02
1:31
1:25
1:33
1:26
1:57
1:36
1:18
1:18
Go back
Genres
Quicklist
Folders
All Movies
Scallop-man 3
Closer
Discount store
School of legend
Advance in the future part-2
The EEL
World Baseball
Dream on the way
Finding a southpaw
Dear Customer
• Go back: Return to the previous menu.
• Genres: Display all movie genres and how many movies are in
each one. Select a genre and press ENTER to see the list of
movies in that genre.
• Quicklist: Display a list of all the movies currently in your
Quicklist. Press to display the Movie Options menu, where
you can start playback or remove movies from the Quicklist:
20 items
Movie Options
Date: 2006
Genre: Action
Format: WMV
Quicklist
Scallop-man 3
Closer
Discount store
School of legend
Advance in the future part-2
The EEL
World Baseball
Dream on the way
Finding a southpaw
Dear Customer
• Folders: Display a list of folders and movie files. Select a folder
and press ENTER to see the list of subfolders/movies files in that
folder.
Searching movies
From the Search sub-menu you can enter a few (up to 20) characters
of a movie title or genre. As each character is entered into the
search field the search results are dynamically updated, narrowing
down the list of movies until you can see the one you’re looking for.
Note
1 The Quicklist is lost when the player is switched off.
28
En
• Use the /// and ENTER buttons to select characters
from the keypad.
• Select SHFT to toggle between upper and lower case.
• Select ALT to toggle between regular and special (accented,
etc.) characters (ISO 8859-1 character set).
• Select SPC to insert a space.
• Select DEL to delete the character at the current cursor position
in the search field.
• Select CLR to clear the search field.
• Select DONE to close the keypad and select movies or genres
from the search results; select CANCEL to close the keypad and
clear the search results.
Page 29
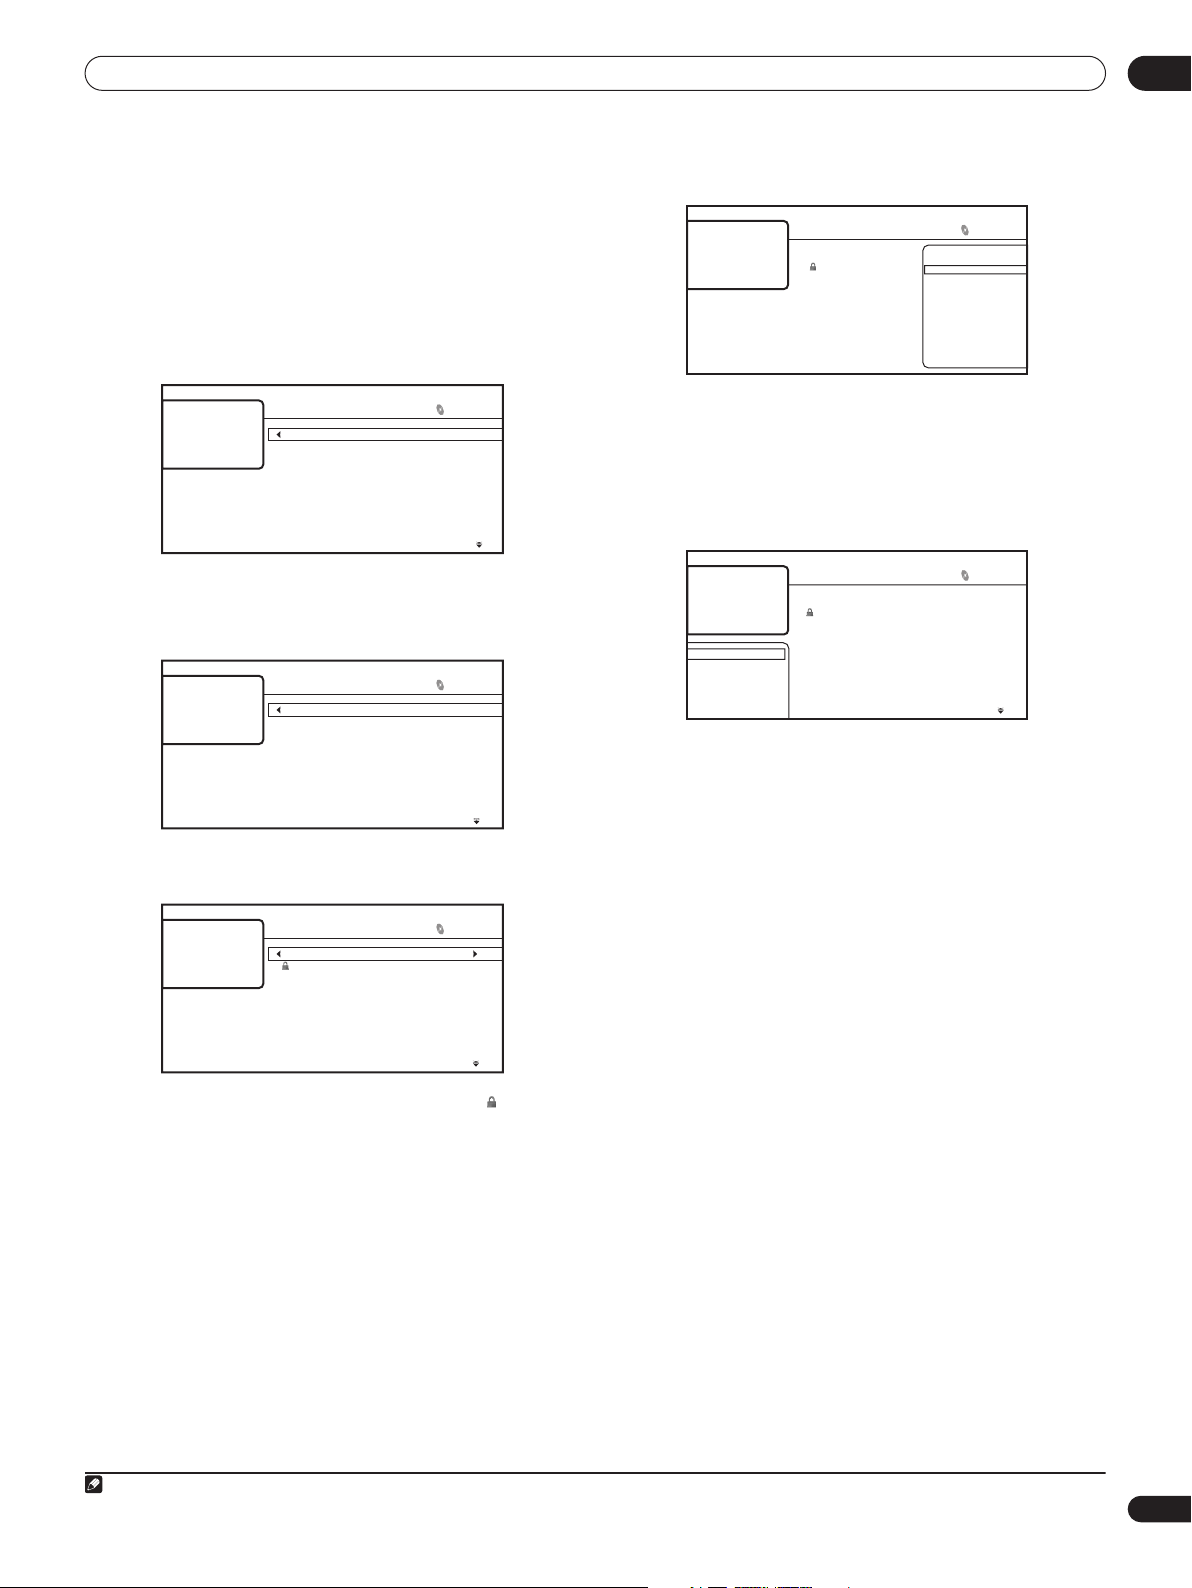
Using the Disc Navigator 05
Music Navigator
The music section of the Disc Navigator allows you to browse and
play all the compatible music files found on the loaded DVD-R/RW
disc (non-music files are not displayed).
See also File compatibility on page 9 for more on compatible file
types.
• If you haven’t already done so, select ‘Disc Navigator’ from
the Home Menu, then ‘Music’.
You should see a list of the artist names on the disc.
Artists
Black Pappers
David Jack
Eric Gilberto
King
Michael Beck
Pioneer All Stars
Rock'n Roll Brothers
The Fishes
Treetop
William And Marry
1 Use the / buttons to change the current selection
(highlighted in yellow).
2 Press ENTER to display the Album list.
Pioneer All Stars
Acoustic Guitar
Best of Pioneer All Stars
Cooking Or Eating
Family
Good!!
Morning Glory
Poker Face
Song for You
Tokyo
Two-Tone
3 Select the Album you want to listen to and press ENTER to
display the Song list.
Acoustic Guitar
Electrified
End Of The Road
Into The Arena
Artist: Pioneer All Stars
Album: Acoustic Guitar
Genre: Rock
Format: WMA
Keep On Running
Never Let You Go
Open Your Eyes
Pictures Of My Life
Real Sound
Rush Street
Take The Time
20 items
1 Album
2 Albums
4 Albums
1 Album
1 Album
1 Album
4 Albums
2 Albums
5 Albums
2 Albums
20 items
20 Songs
13 Songs
10 Songs
12 Songs
18 Songs
11 Songs
18 Songs
10 Songs
13 Songs
21 Songs
20 items
9:31
8:00
7:31
3:55
6:33
5:26
4:57
9:36
6:18
6:18
• Press to display Song Options menu:
Artist: Pioneer All Stars
Artist:Depeche Mode
Album: Acoustic Guitar
Album: Remixes 81-04
Genre: Rock
Genre: Alternative
Format: WMA
Format: WMA
Acoustic Guitar
Electrified
End Of The Road
Into The Arena
Keep On Running
Never Let You Go
Open Your Eyes
Pictures Of My Life
Real Sound
Rush Street
Take The Time
Song Options
Play song
Add to Quicklist
20 items
• Play Song: Play the selected song from the beginning.
• Add to Quicklist: Add the selected song to your Quicklist. The
Quicklist feature is a useful way to organize music files for handy
selection and playback. The Quicklist can contain up to 25
1
songs.
• Press to display the Browse menu:
All Songs
Browse
Search
Sort
Now Playing
Acoustic Guitar
Electrified
End Of The Road
Into The Arena
Keep On Running
Never Let You Go
Open Your Eyes
Pictures Of My Life
Real Sound
Rush Street
Take The Time
20 items
9:31
8:00
7:31
3:55
6:33
5:26
4:57
9:36
6:18
6:18
Depending on the browse menu, certain options may not be
selectable.
• All Songs: Display all songs (files/tracks) found on the disc.
• Browse: Browse songs by Artist, Album, Genre, Quicklist or
Folder. See also Browsing songs on page 30.
• Search: Find a song by entering a name (or a few letters) to
search for. The search results are narrowed down as you enter
more letters. See also Searching songs on page 30.
• Sort: Sort songs by date (oldest first or most recent first), or
alphabetically by song title, artist, album or genre (‘A’ first or ‘Z’
first).
• Now Playing: Display song information (track name, artist,
album, genre, etc.) and playback information. See also Now
playing song information on page 30.
• Music files that appear in the list with a lock icon ( ) are DRM
protected and cannot be played.
• Use the / buttons to change the current selection
(highlighted in yellow).
On the left side of the screen you can see file information, such as
the artist and album name, genre and file format, for the current
selection.
• Press ENTER to play the currently highlighted music.
Press PLAY to start or resume playback from the last track played.
The display shows the Now Playing screen.
Note
1 The Quicklist is lost when the player is switched off.
29
En
Page 30
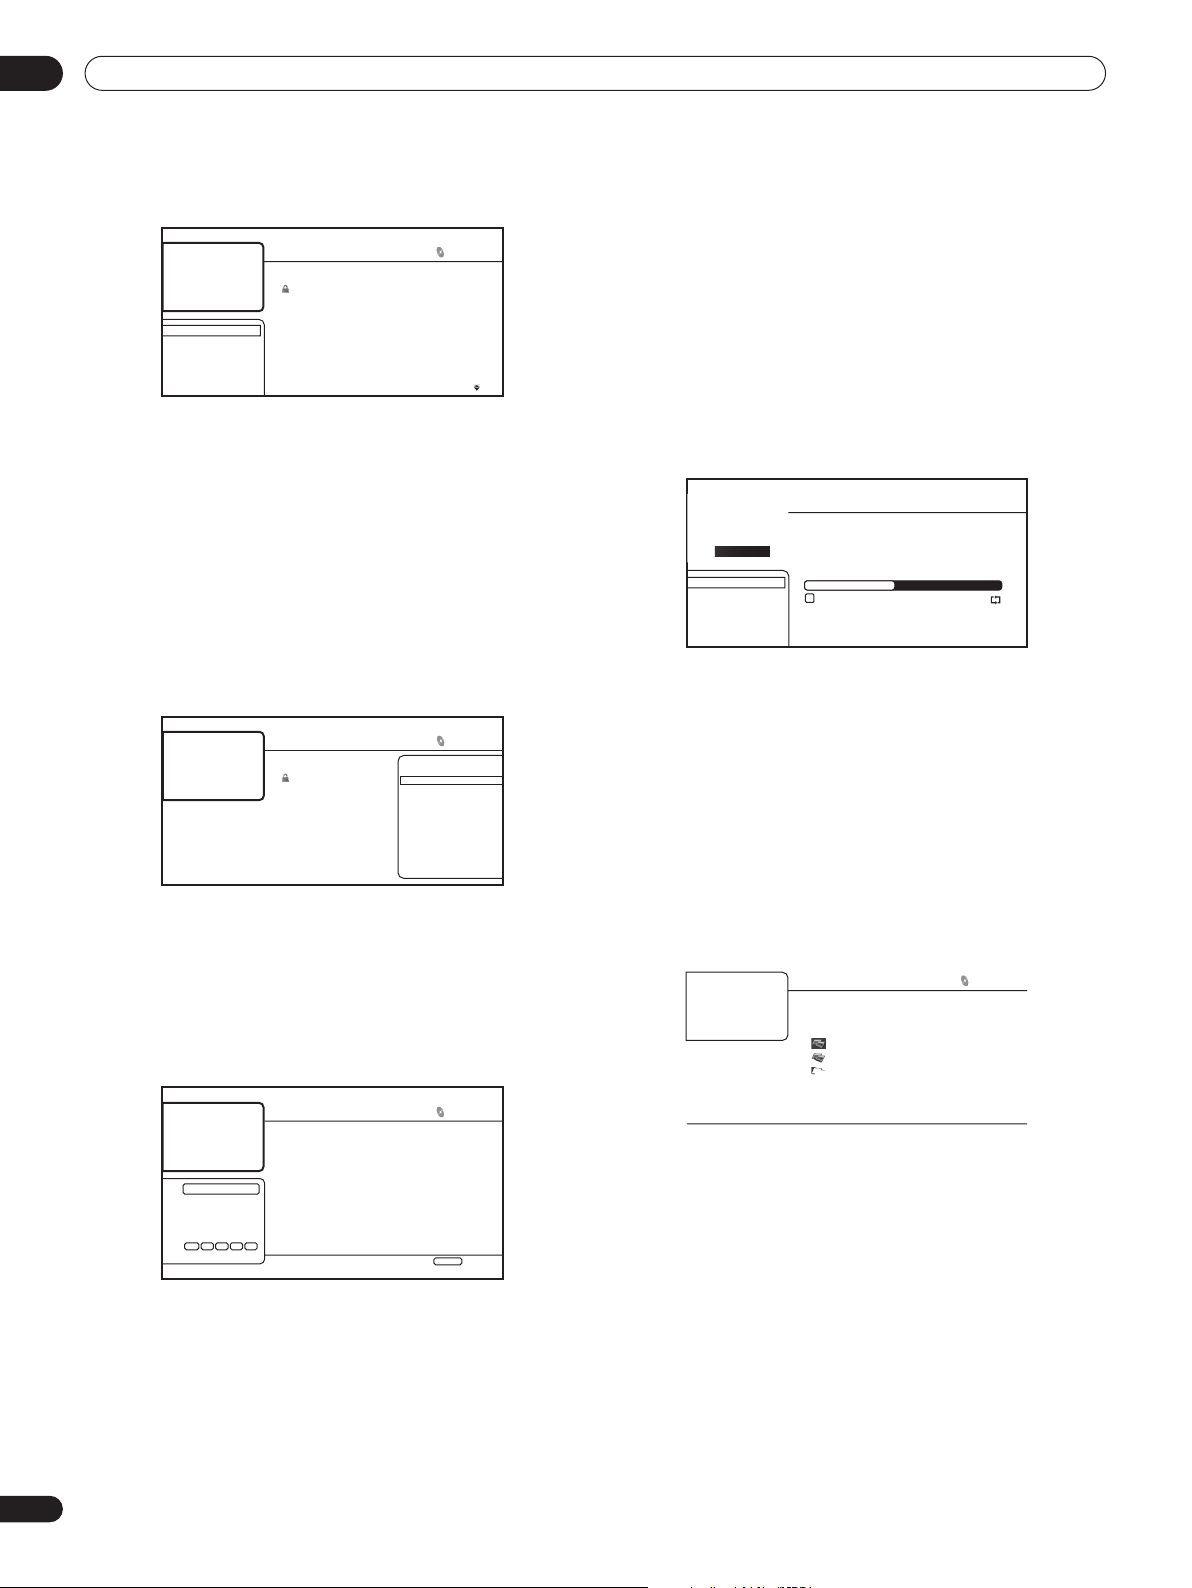
Using the Disc Navigator05
Browsing songs
The Browse sub-menu gives you various ways to browse songs.
Go back
Artists
Albums
Genres
Quicklist
Folders
Acoustic Guitar
Electrified
End Of The Road
Into The Arena
Keep On Running
Never Let You Go
Open Your Eyes
Pictures Of My Life
Real Sound
Rush Street
Take The Time
20 items
9:31
8:00
7:31
3:55
6:33
5:26
4:57
9:36
6:18
6:18
• Go back: Return to the previous menu.
• Artists: Display a list of artists, and how many albums are
associated with each. Select an artist and press ENTER to see
the album list by that artist.
• Albums: Display a list of albums, and how many songs are
associated with each. Select an album and press ENTER to see
the list of songs on that album.
• Genres: Display all music genres, and how many songs are in
each one. Select a genre and press ENTER to see the list of
artists in that genre.
• Quicklist: Display a list of all the songs currently in your
Quicklist. Press to display the Song Options menu, where
you can start playback or remove songs from the Quicklist:
20 items
Song Options
Play Song
Remove
Artist: Pioneer All Stars
Album: Acoustic Guitar
Genre: Rock
Format: WMA
Quicklist
Electrified
End Of The Road
Into The Arena
Keep On Running
Never Let You Go
Open Your Eyes
Pictures Of My Life
Real Sound
Rush Street
Take The Time
• Folders: Display a list of folders and song files. Select a folder
and press ENTER to see the list of subfolders/songs.
Now playing song information
The Now Playing screen shows detailed information about the song
playing, including:
• Artist and song title
• Progress bar (elapsed time and song length)
• Album name
• Genre
• File format
• Browse Menu
• Play Status
• Play Mode
• Next/Previous Song Names
Now Playing
Acoustic Guitar
All Songs
Browse
Search
Sort
Now Playing
Pioneer All Stars
Real Sound
Genre: Rock Format: MP3
Previous Song
Pictures Of My
3:10 / 5:51
Rush Street
Next Song
Photo Navigator
The photo section of the Disc Navigator allows you to browse and
display all the compatible photo files found on the loaded DVD-R/
RW disc (non-photo files are not displayed).
See also File compatibility on page 9 for more on compatible file
types.
• If you haven’t already done so, select ‘Disc Navigator’ from
the Home Menu, then ‘Photos’.
You should see a list of folders/photo files from the disc.
1 Use the / buttons to change the current selection
(highlighted in yellow).
Searching songs
From the Search sub-menu you can enter a few characters (up to 20)
of a song title, genre, artist, or album. As each character is entered
into the search field the search results are dynamically updated,
narrowing down the list until you can see the one you’re looking for.
R _
A B C D E F G H I J
K L M N O P Q R S T
U V W X Y Z , . : ;
1 2 3 4 5 6 7 8 9 0
_ – ( ) [ ] { }
SHFT ALT DELSPC CLR
DONE CANCEL
Search Results
Reason
Real Sound
Rolling a Dices
Rush Street
4 items
Home Menu
1:31
1:02
1:31
1:25
See Searching movies on page 28 for how to use the screen keypad.
30
En
Folders
Folder1
Folder2
File1
File2
File3
File4
6 items
2 Select a folder and press ENTER to see the list of photos and
subfolders within the folder.
Exit
• Use the / buttons to change the current selection
(highlighted in yellow).
• Press ENTER to start full-screen slideshow playback from the
currently selected photo.
• Press PLAY to start or resume slideshow playback from the
last photo displayed.
Page 31
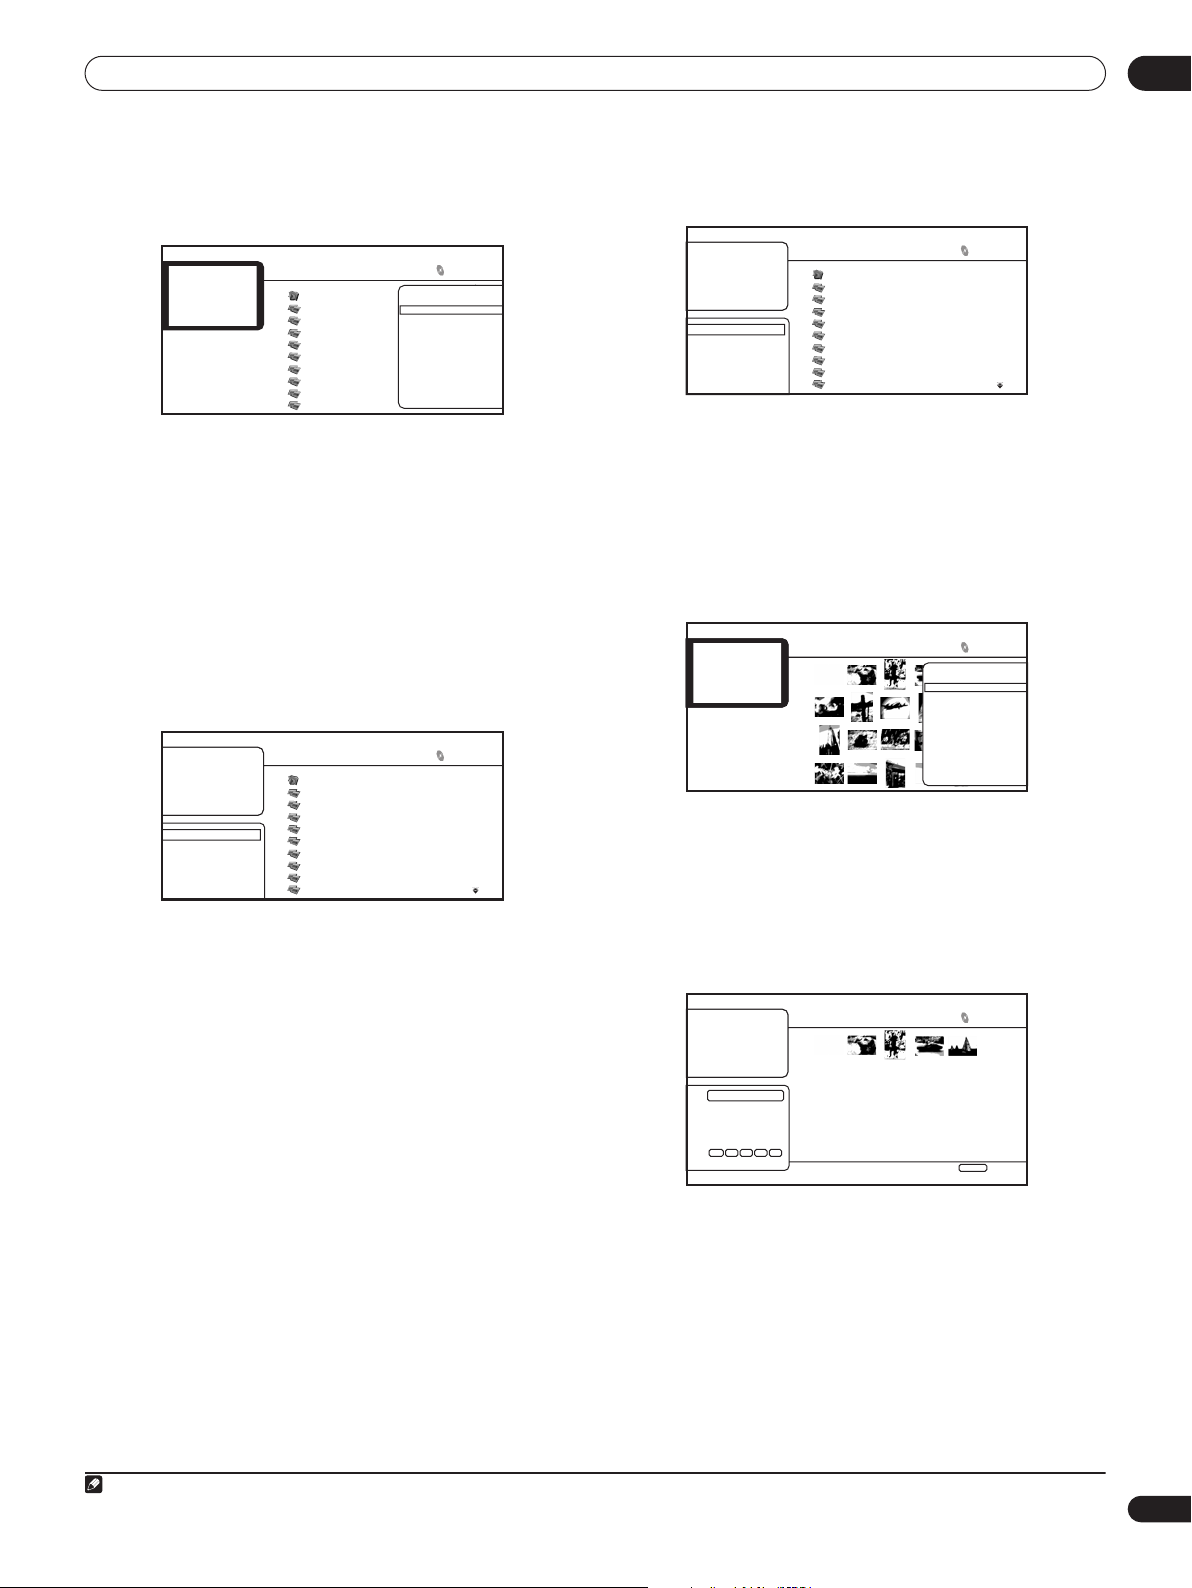
Using the Disc Navigator 05
• Press to display the photo options menu.
• Press ENTER to display the photo options menu when
displaying photos in thumbnail view.
Photo Options
Slideshow
Add to Quicklist
30 items
Date: 1/23/2006
Resolution: 196 x 298
Format: JPEG
Folder1
Go back
file_001
file_002
file_003
file_004
file_005
file_006
file_007
file_008
file_009
• Slideshow: Start full-screen slideshow playback from the
currently selected photo. During the slideshow, press to
advance to the next photo; to go back to the previous photo;
PAUSE to pause the slideshow; STOP to stop and exit the
slideshow; ZOOM to enlarge the picture on the screen (see also
Zooming the screen on page 25).
• Add to Quicklist: Add the selected photo to your Quicklist. The
Quicklist feature is a useful way to organize photos for handy
selection and slideshow playback. The Quicklist can contain up
to 25 photos.
1
• Press to display the browse menu.
• From the left-most column, press to display the browse menu
when displaying photos in thumbnail view:
30 items
All Photos
Browse
Search
Sort
Folder1
Go back
file_001
file_002
file_003
file_004
file_005
file_006
file_007
file_008
file_009
Depending on the browse menu, certain options may not be
selectable.
• All Photos: Display all photos found on the disc as thumbnail
files.
• Browse: Browse photos by Date, Quicklist or Folder. See also
Browsing photos below.
• Search: Find a photo by entering a name (or a few letters) to
search for. The search results are narrowed down as you enter
more letters. See also Searching photos below.
• Sort: Sort photos by date (oldest first or most recent first), or
alphabetically by name (‘A’ first or ‘Z’ first).
Browsing photos
The Browse sub-menu gives you several ways to browse photos.
30 items
Go back
Date
Quicklist
Folders
Folder1
Go back
file_001
file_002
file_003
file_004
file_005
file_006
file_007
file_008
file_009
• Go back: Return to the previous menu.
• Date: Browse photos as thumbnails by date (year and month).
Select a year then press ENTER to further browse by month.
Select a month and press ENTER to see the photos taken that
month.
• Quicklist: Display thumbnails of all the photos currently in your
Quicklist. Press ENTER to display the Photo Options menu, from
where you can start slideshow playback or remove photos from
the Quicklist:
Photo Options
Slideshow
Remove
25 items
File: sample.jpg
Date: 1/23/2006
Resolution: 196 x 298
Format: JPEG
Quicklist
• Folders: Display a list of folders and photo files on the disc.
Select a folder and press ENTER to see the subfolders/photos.
Searching photos
From the Search sub-menu you can enter a few (up to 20) characters
of a photo title. As each character is entered into the search field the
search results are dynamically updated, narrowing down the list of
photos until you can see the one you’re looking for.
5 items
Home Menu
Exit
R _
A B C D E F G H I J
K L M N O P Q R S T
U V W X Y Z , . : ;
1 2 3 4 5 6 7 8 9 0
_ – ( ) [ ] { }
SHFT ALT DELSPC CLR
DONE CANCEL
Search Results
Note
1 The Quicklist is lost when the player is switched off.
See Searching movies on page 28 for how to use the screen keypad.
31
En
Page 32
Using the Home Media Gallery06
Chapter 6
Using the Home Media Gallery
Introduction
The Home Media Gallery allows you to browse and play movies,
music and photos stored on media servers connected on an
identical Local Area Network (LAN) as the player. This unit allows
playing files stored on a Microsoft Windows XP computer with
Windows Media Connect and a DLNA-compatible digital media
server (PC and Consumer Electronics).
About network playback
The network playback function of this unit uses the following
technologies:
Windows Media Connect
See About Windows Media Connect on page 38 for details, including
how to install it on your PC.
PlaysForSure
PlaysForSure is a marketing certification given by Microsoft. The
PlaysForSure logo makes it easy to find digital media stores and
devices that work together. Digital media purchased from online
stores carrying the PlaysForSure logo is available for use on this
unit.
This unit complies with PlaysForSure Requirements Specification
for Network Devices Version 1.21.
The PlaysForSure logo, Windows Media and the Windows logo are trademarks or
registered trademarks of Microsoft Corporation in the USA and other countries.
Windows Media DRM
Microsoft Windows Media Digital Rights Management (WMDRM) is
a platform to protect and securely deliver content for playback on
computers, portable devices and network devices. Home Media
Gallery functions as a WMDRM 10 for networked devices. WMDRMprotected content can only be played on media servers supporting
WMDRM.
Content owners use WMDRM technology to protect their intellectual property,
including copyrights. This device uses WMDRM software to access WMDRMprotected content. If the WMDRM software fails to protect the content, content
owners may ask Microsoft to revoke the software’s ability to use WMDRM to play or
copy protected content. Revocation does not affect unprotected content. When you
download licenses for protected content, you agree that Microsoft may include a
revocation list with the licenses. Content owners may require you to upgrade
WMDRM to access their content. If you decline an upgrade, you will not be able to
access content that requires the upgrade.
This product is protected by certain intellectual property rights of Microsoft. Use or
distribution of such technology outside of this product is prohibited without a license
from Microsoft.
DLNA
DLNA CERTIFIED Audio/Video/Image Player
The Digital Living Network Alliance (DLNA) is a cross-industry
organization of consumer electronics, computing industry and
mobile device companies. Digital Living provides consumers with
easy sharing of digital media through a wired or wireless network in
the home.
The DLNA certification logo makes it easy to find products that
comply with the DLNA Interoperability Guidelines. This unit
complies with DLNA Interoperability Guidelines v1.0.
When a PC running DLNA server software or other DLNAcompatible device is connected to this player, some setting changes
of software or other devices may be required. Please refer to the
operating instructions for the software or device for more
information.
DLNA and DLNA CERTIFIED are trademarks and/or service marks of Digital Living
Network Alliance.
Content playable over a network
Even when encoded in a compatible format, some files may not play
correctly. See File compatibility on page 9. Some functions may not
be supported depending on the server type or version used.
About playback behavior over a network
• Playback may stall when the PC is switched off or any media
files stored on it are deleted while playing content.
• If there are problems within the network environment (heavy
network traffic, etc.) content may not be displayed or played
properly (playback may be interrupted or stalled). For best
performance, a 100BASE-TX connection between player and PC
is recommended.
• Playback performance will vary with the power and condition
(seek time of the hard disk, etc.) of the PC being used.
• If several clients are playing simultaneously, as the case may be,
playback is interrupted or stalled.
• Depending on the security software installed on a connected PC
and the setting of such software, network connection may be
blocked.
• Problems with the PC may cause malfunctions.
Pioneer is not responsible for any malfunction of the player and/or
the Home Media Gallery features due to communication error/
malfunctions associated with your network connection and/or your
PC, or other connected equipment. Please contact your PC
manufacturer or Internet service provider.
32
En
Page 33
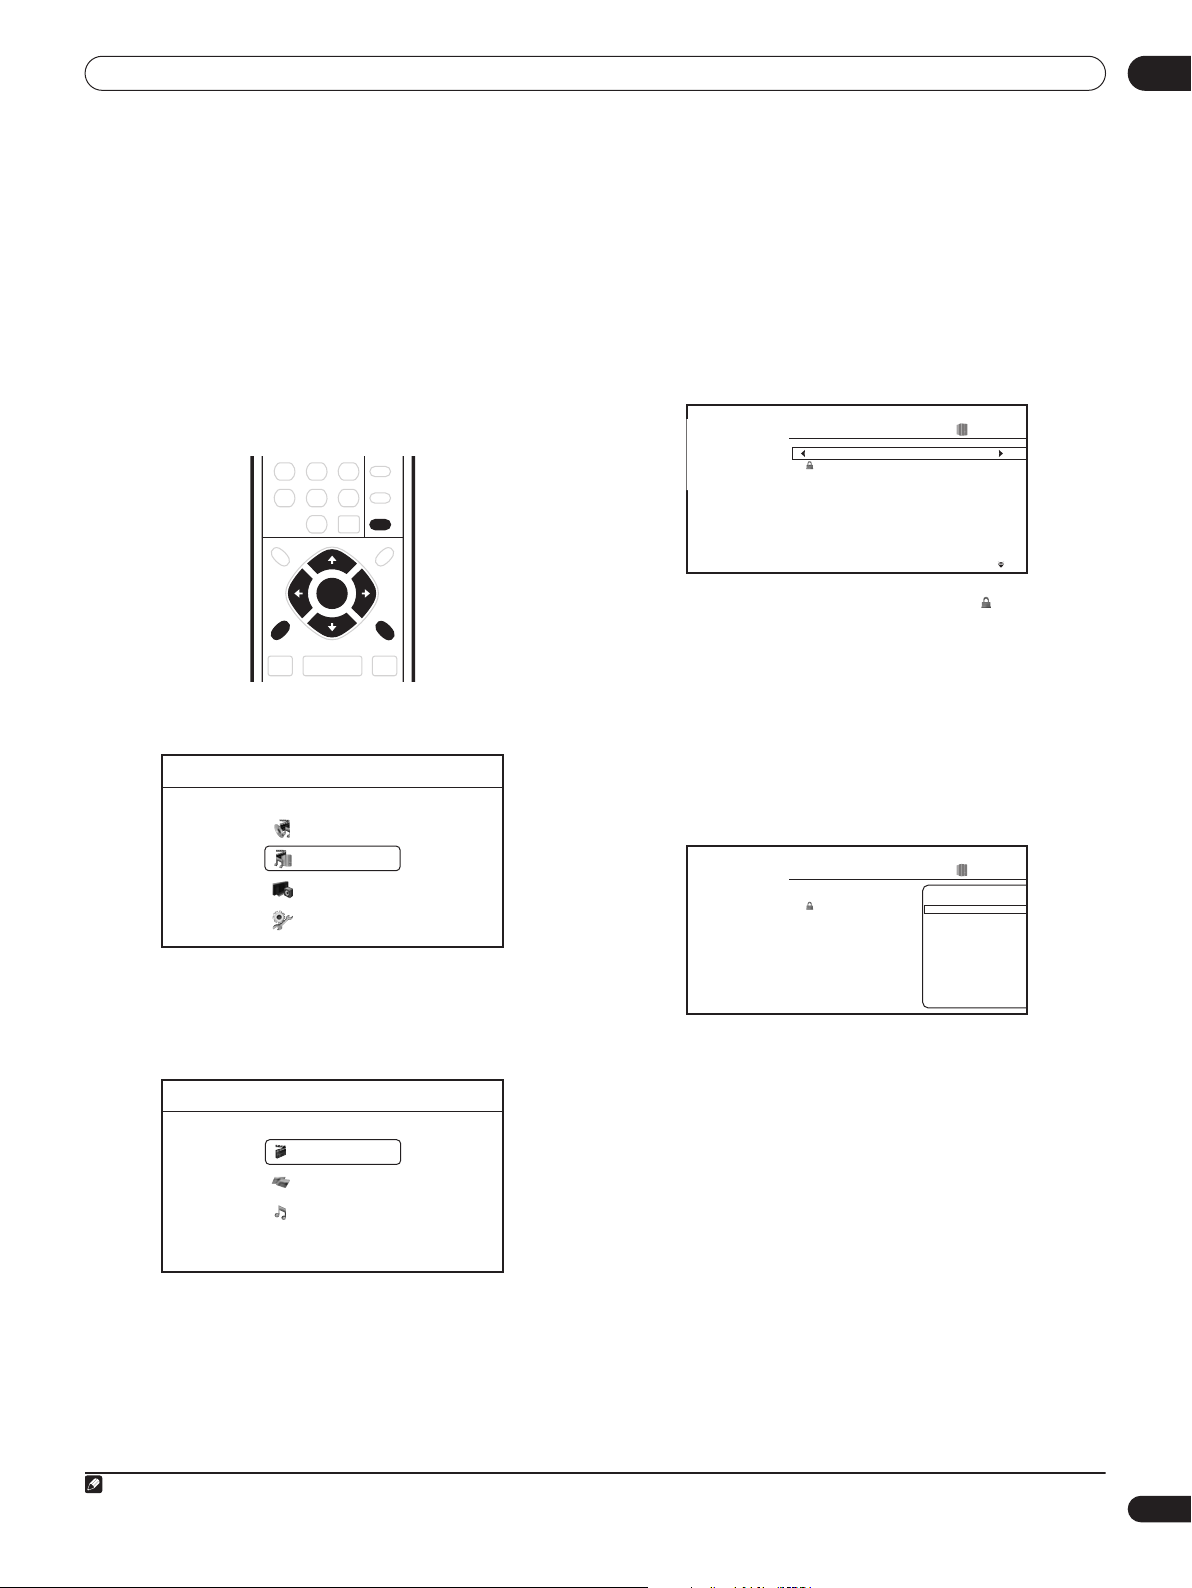
Using the Home Media Gallery 06
About the network settings
This unit uses DHCP and Auto IP functionality to make all the
network settings automatically.
If you are using a broadband router or a broadband modem with a
DHCP server function, setup should be completely automatic with
no manual settings required.
Using the Home Media Gallery
Before using the Home Media Gallery, make sure that you have
connected the player to the network and made the necessary
settings. See Network connection on page 16 and Setting up for
network use on page 21 for more information.
HOME MEDIA
GALLERY
ENTER
HOME
MENU
1 Press HOME MENU and select ‘Home Media Gallery’ from
the on-screen display.
Home Menu
Disc Navigator
Home Media Gallery
Video/Audio Adjust
Initial Setup
• Alternatively, press HOME MEDIA GALLERY.
• The Home Media Gallery is only available when the network or
server contains movies, photos or music files.
2 Select ‘Movies’, ‘Photos’ or ‘Music’.
Home Media Gallery
Movies
Photos
Music
RETURN
Movie Navigator
From the movie section of the Home Media Gallery you can browse
and play all the compatible movie files found on your local area
network (non-movie files are not displayed).
See also File compatibility on page 9 for more on compatible file
types.
• If you haven’t already done so, select ‘Home Media Gallery’
from the Home Menu, then ‘Movies’.
You should see a list of all the movie files found on the selected
server, together with their playing times.
All Movies
Scallop-man 3
Closer
Discount store
Date: 12/01/2006
Genre: Adventure
Format: WMV
School of legend
Advance in the future part-2
The EEL
World Baseball
Dream on the way
Finding a southpaw
Dear Customer
Movie files that appear in the list with a lock icon ( ) are DRMprotected and cannot be played.
• Use the / buttons to change the current selection
(highlighted in yellow).
On the left side of the screen you can see file information, such as
the genre, date and file format, for the current selection.
• Press ENTER to play the currently highlighted movie.
• Press PLAY to start or resume playback from the last title
played.
• Press to display the Movie Options menu:
All Movies
Scallop-man 3
Closer
Discount store
Date: 12/01/2006
Genre: Adventure
Format: WMV
School of legend
Advance in the future part-2
The EEL
World Baseball
Dream on the way
Finding a southpaw
Dear Customer
• Play from Beginning: Play the selected movie from the
beginning.
• Add to Quicklist: Add the selected movie to your Quicklist. The
Quicklist feature is a useful way to organize movie files for handy
selection and playback. The Quicklist can contain up to 25
1
movies.
1214 items
1214 items
Movie Options
Play from Beginning
Add to Quicklist
1:31
1:02
1:31
1:25
1:33
1:26
1:57
1:36
1:18
1:18
• On selecting an option, a list of movies, photos or music files
that the player finds on the selected server is displayed. From
here you can browse, play and sort network files.
• See the sections below for more information on each part of the
Home Media Gallery.
3 Press HOME MENU to exit the Home Media Gallery screen.
Note
1 The Quicklist is lost when the player is switched off.
33
En
Page 34
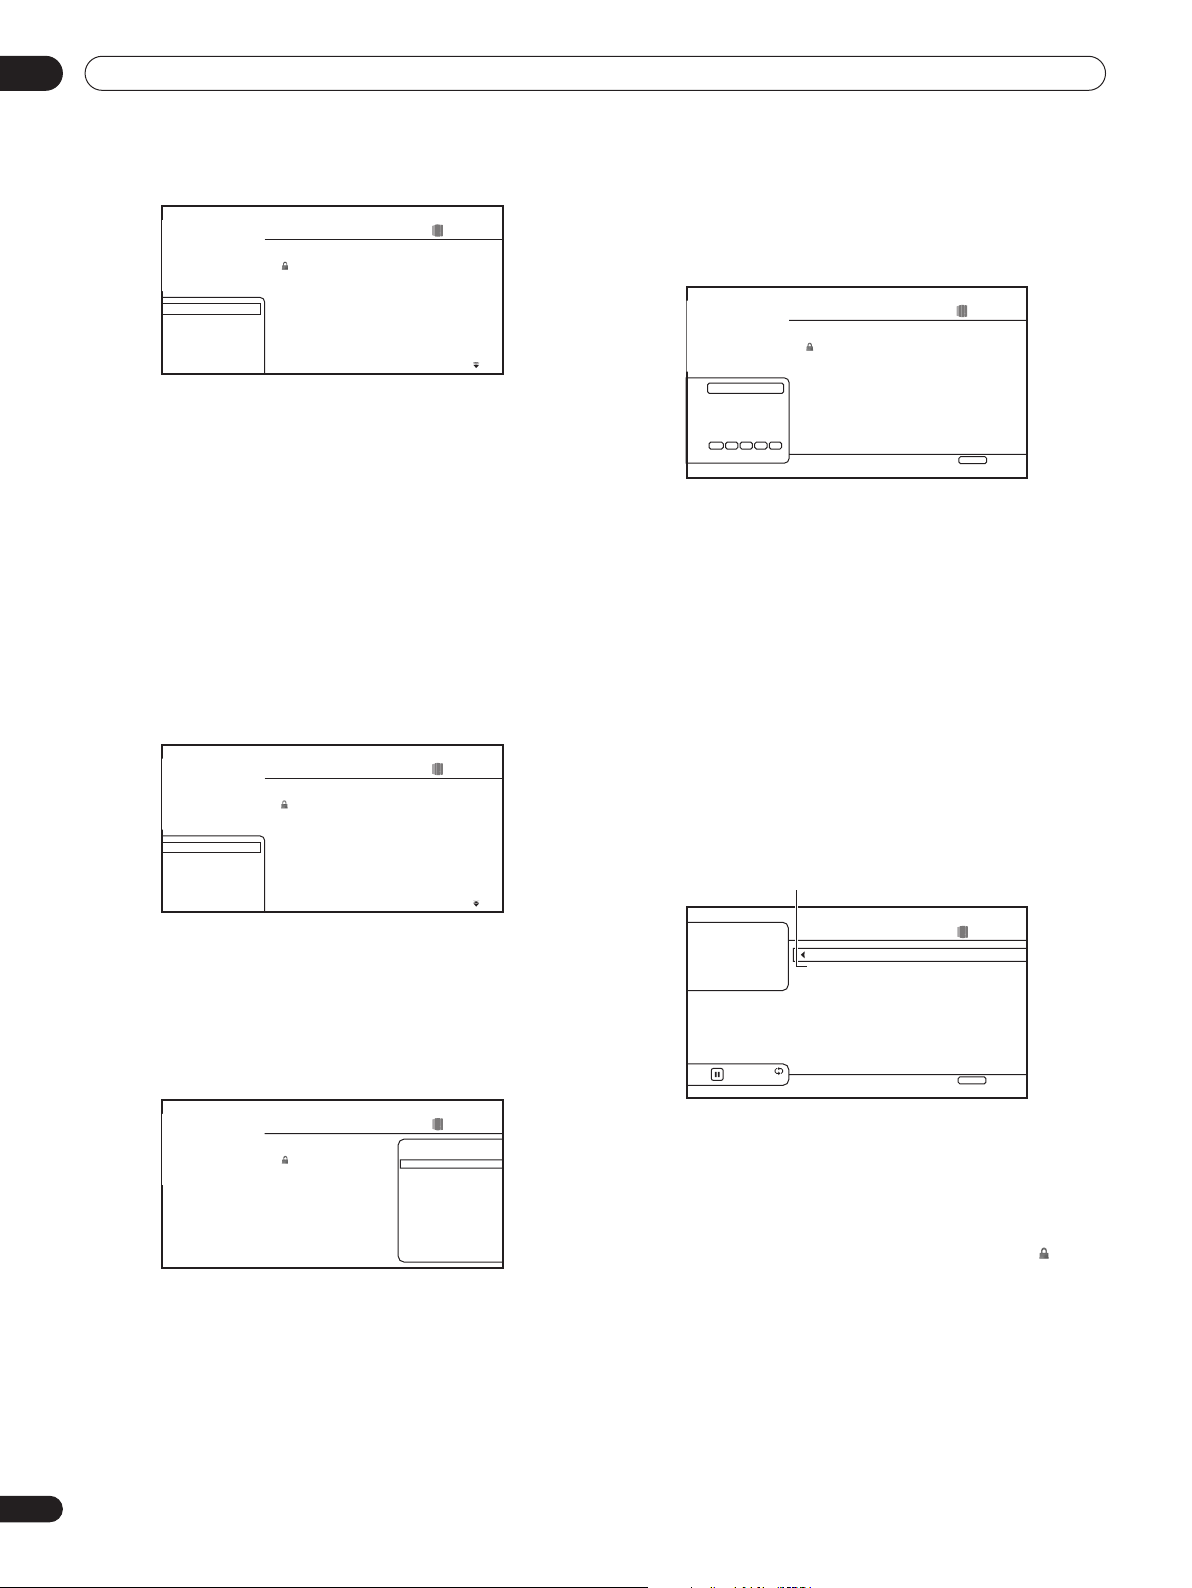
Using the Home Media Gallery06
• Press to display the Browse menu:
1214 items
1:31
1:02
1:31
1:25
1:33
1:26
1:57
1:36
1:18
1:18
All Movies
Browse
Search
Sort
Movie Sources
All Movies
Scallop-man 3
Closer
Discount store
School of legend
Advance in the future part-2
The EEL
World Baseball
Dream on the way
Finding a southpaw
Dear Customer
Depending on the browse menu, certain options may not be
selectable.
• All Movies: Display all movie files found on the selected server.
• Browse: Browse movies by genre, Quicklist or folder. See also
Browsing movies below.
• Search: Find a movie by entering a name (or a few letters) to
search for. The search results are narrowed down as you enter
more letters. See also Searching movies below.
• Sort: Sort movies by date (oldest first or most recent first), or
alphabetically by title or genre (‘A’ first or ‘Z’ first).
• Movie Sources: Display servers on the network. See also Movie
sources below.
Browsing movies
The Browse sub-menu gives you three ways to browse movies.
1214 items
1:31
1:02
1:31
1:25
1:33
1:26
1:57
1:36
1:18
1:18
Go back
Genres
Quicklist
Folders
All Movies
Scallop-man 3
Closer
Discount store
School of legend
Advance in the future part-2
The EEL
World Baseball
Dream on the way
Finding a southpaw
Dear Customer
• Go back: Return to the previous menu.
• Genres: Display all movie genres and how many movies are in
each one. Select a genre and press ENTER to see the list of
movies in that genre.
• Quicklist: Display a list of all the movies currently in your
Quicklist. Press to display the Movie Options menu, where
you can start playback or remove movies from the Quicklist:
Searching movies
From the Search sub-menu you can enter a few (up to 20) characters
of a movie title or genre. As each character is entered into the
search field the search results are dynamically updated, narrowing
down the list of movies until you can see the one you’re looking for.
4 items
Home Menu
1:31
1:02
1:31
1:33
Exit
S _
A B C D E F G H I J
K L M N O P Q R S T
U V W X Y Z , . : ;
1 2 3 4 5 6 7 8 9 0
_ – ( ) [ ] { }
SHFT ALT DELSPC CLR
DONE CANCEL
Search Results
Scallop-man 3
Say No
School of legend
Seesaw
• Use the /// and ENTER buttons to select characters
from the keypad.
• Select SHFT to toggle between upper and lower case.
• Select ALT to toggle between regular and special (accented,
etc.) characters (ISO 8859-1 character set).
• Select SPC to insert a space.
• Select DEL to delete the character at the current cursor position
in the search field.
• Select CLR to clear the search field.
• Select DONE to close the keypad and select a movie or genre
from the search results; select CANCEL to close the keypad and
clear the search results.
Movie sources
From the movie sources window you can see all the servers found
on the network and change the selected server.
Current server
Microsoft
Windows Media Connect
2.0
192.168.11.2
Authorized
Pause
SomeSongTil
Movie Sources
3:30
Family Room Media Center
Living Room DVD Recorder
Den Computer
3 items
Home Menu
DLNA
WMC
WMC
Exit
34
En
24 items
Movie Options
Play from Beginning
Remove
Date: 12/01/2006
Genre: Adventure
Format: WMV
Quicklist
Scallop-man 3
Closer
Discount store
School of legend
Advance in the future part-2
The EEL
World Baseball
Dream on the way
Finding a southpaw
Dear Customer
• Folders: Display a list of folders and movie files. Select a folder
and press ENTER to see the list of movies and subfolders within
the folder. (The folder configuration may change depending on
the server type.)
• Some servers found on the network may not be available for the
following reasons:
– The player is collecting file information from the server.
– There are no playable movie files on the server.
– This player is not authorized for the PC (Windows Media
Connect only). See also Authorizing this player on page 38.
• Servers not currently available appear with a lock icon ( ) in the
server list.
Page 35
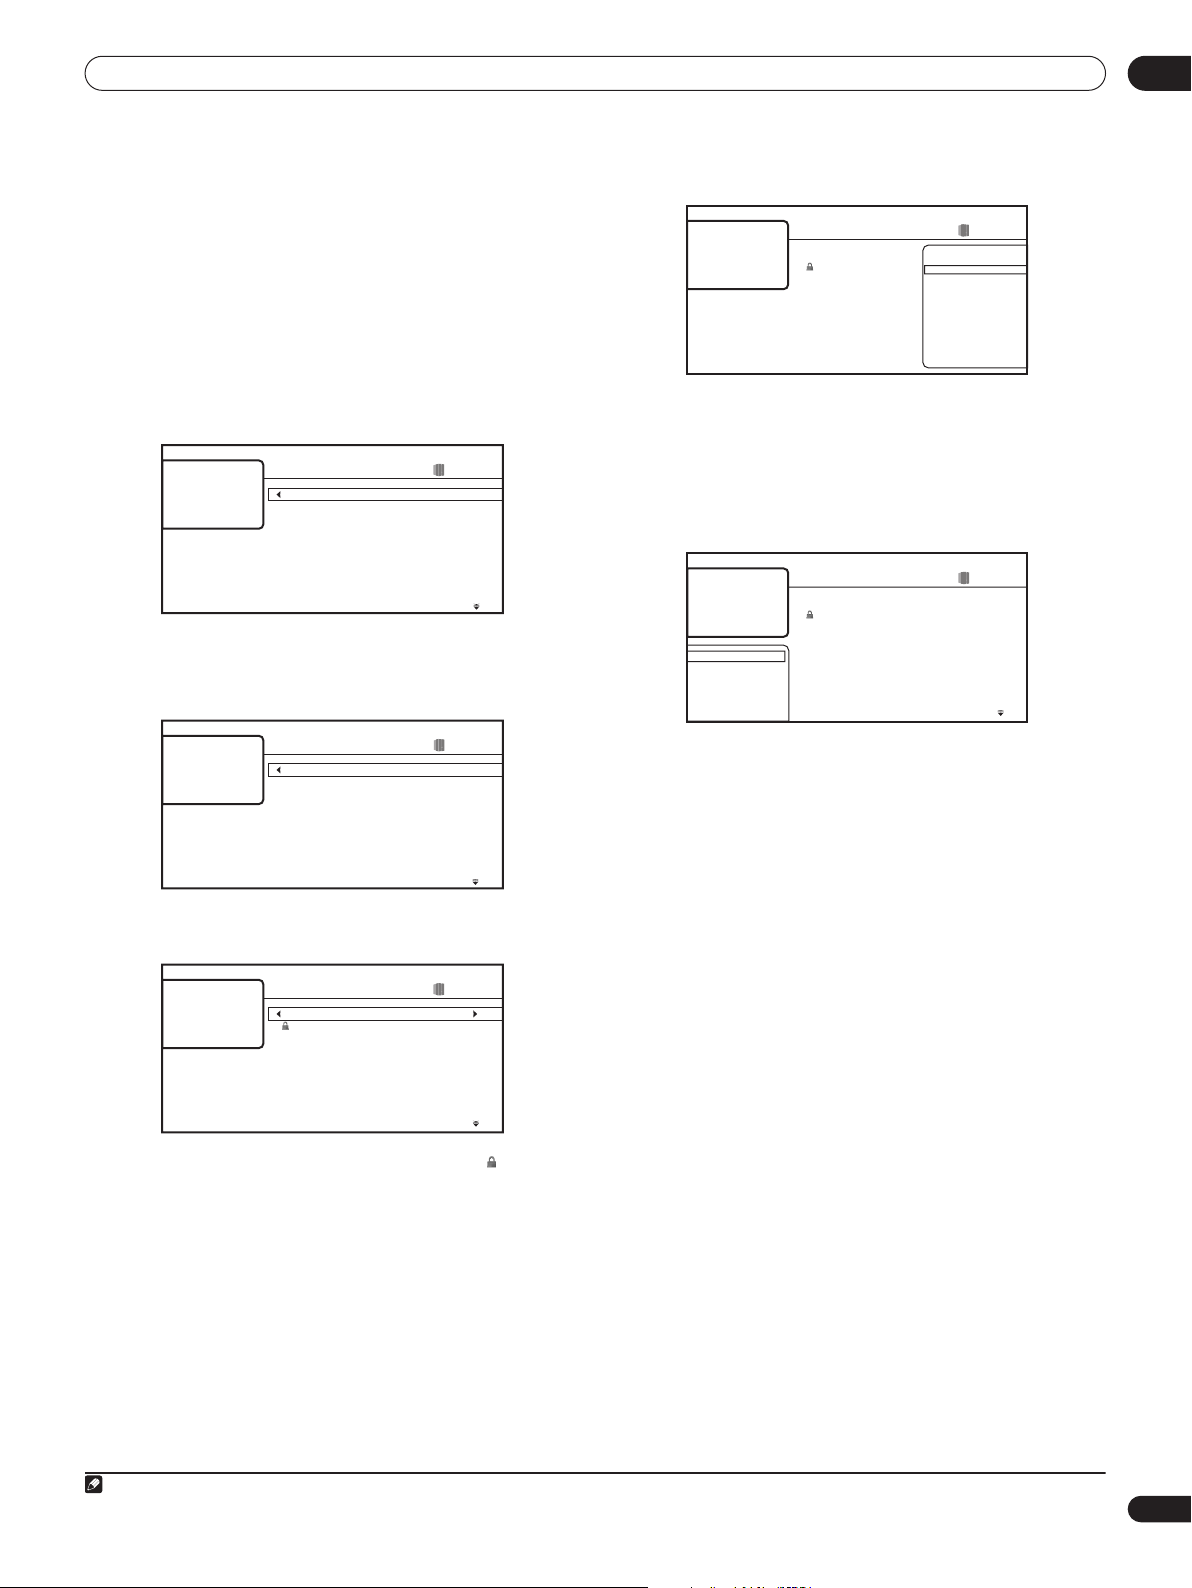
Using the Home Media Gallery 06
Music Navigator
From the music section of the Home Media Gallery you can browse
and play all the compatible song files found on your local area
network (non-music files are not displayed). You can also play a
photo slideshow in the Photo Navigator while playing music (see
Photo Navigator on page 37).
See also File compatibility on page 9 for more on compatible file
types.
• If you haven’t already done so, select ‘Home Media Gallery’
from the Home Menu, then ‘Music’.
You should see a list of all the artist names found on the selected
server.
Artists
Black Pappers
David Jack
Eric Gilberto
King
Michael Beck
Pioneer All Stars
Rock'n Roll Brothers
The Fishes
Treetop
William And Marry
1 Use the / buttons to change the current selection
(highlighted in yellow).
2 Press ENTER to display the Album list.
Pioneer All Stars
Acoustic Guitar
Best of Pioneer All Stars
Cooking Or Eating
Family
Good!!
Morning Glory
Poker Face
Song for You
Tokyo
Two-Tone
3 Select the Album you want to listen to and press ENTER to
display the Song list.
Acoustic Guitar
Electrified
End Of The Road
Into The Arena
Artist: Pioneer All Stars
Album: Acoustic Guitar
Genre: Rock
Format: WMA
Keep On Running
Never Let You Go
Open Your Eyes
Pictures Of My Life
Real Sound
Rush Street
Take The Time
1214 items
1 Album
2 Albums
4 Albums
1 Album
1 Album
1 Album
4 Albums
2 Albums
5 Albums
2 Albums
1214 items
20 Songs
13 Songs
10 Songs
12 Songs
18 Songs
11 Songs
18 Songs
10 Songs
13 Songs
21 Songs
1214 items
9:31
8:00
7:31
3:55
6:33
5:26
4:57
9:36
6:18
6:18
• Press to display Song Options menu:
Artist: Pioneer All Stars
Artist:Depeche Mode
Album: Acoustic Guitar
Album: Remixes 81-04
Genre: Rock
Genre: Alternative
Format: WMA
Format: WMA
Acoustic Guitar
Electrified
End Of The Road
Into The Arena
Keep On Running
Never Let You Gohe
Open Your Eyes
Pictures Of My Life
Real Sound
Rush Street
Take The Time
Song Options
Play song
Add to Quicklist
1214 items
• Play Song: Play the selected song from the beginning.
• Add to Quicklist: Add the selected song to your Quicklist. The
Quicklist feature is a useful way to organize music files for handy
selection and playback. The Quicklist can contain up to 25
1
songs.
• Press to display the Browse menu:
All Songs
Browse
Search
Sort
Now Playing
Music Sources
Acoustic Guitar
Electrified
End Of The Road
Into The Arena
Keep On Running
Never Let You Go
Open Your Eyes
Pictures Of My Life
Real Sound
Rush Street
Take The Time
1214 items
9:31
8:00
7:31
3:55
6:33
5:26
4:57
9:36
6:18
6:18
Depending on the browse menu, certain options may not be
selectable.
• All Songs: Display all songs (files/tracks) found on the server.
• Browse: Browse songs by Artist, Album, Genre, Playlist,
Quicklist or Folder. See also Browsing songs on page 36.
• Search: Find a song by entering a name (or a few letters) to
search for. The search results are narrowed down as you enter
more letters. See also Searching songs on page 36.
• Sort: Sort songs by date (oldest first or most recent first), or
alphabetically by song title, artist, album or genre (‘A’ first or ‘Z’
first).
• Now Playing: Display song information (track name, artist,
album, genre, etc.) and playback information. See also Now
playing song information on page 36.
• Music Sources: Display servers on the network. See also Music
sources on page 36.
• Music files that appear in the list with a lock icon ( ) are DRMprotected and cannot be played.
• Use the / buttons to change the current selection
(highlighted in yellow).
On the left side of the screen you can see file information, such as
the artist and album name, genre and file format, for the current
selection.
• Press ENTER to play the currently highlighted music.
• Press PLAY to start or resume playback from the last track
played.
• The display shows the Now Playing screen.
Note
1 The Quicklist is lost when the player is switched off.
35
En
Page 36
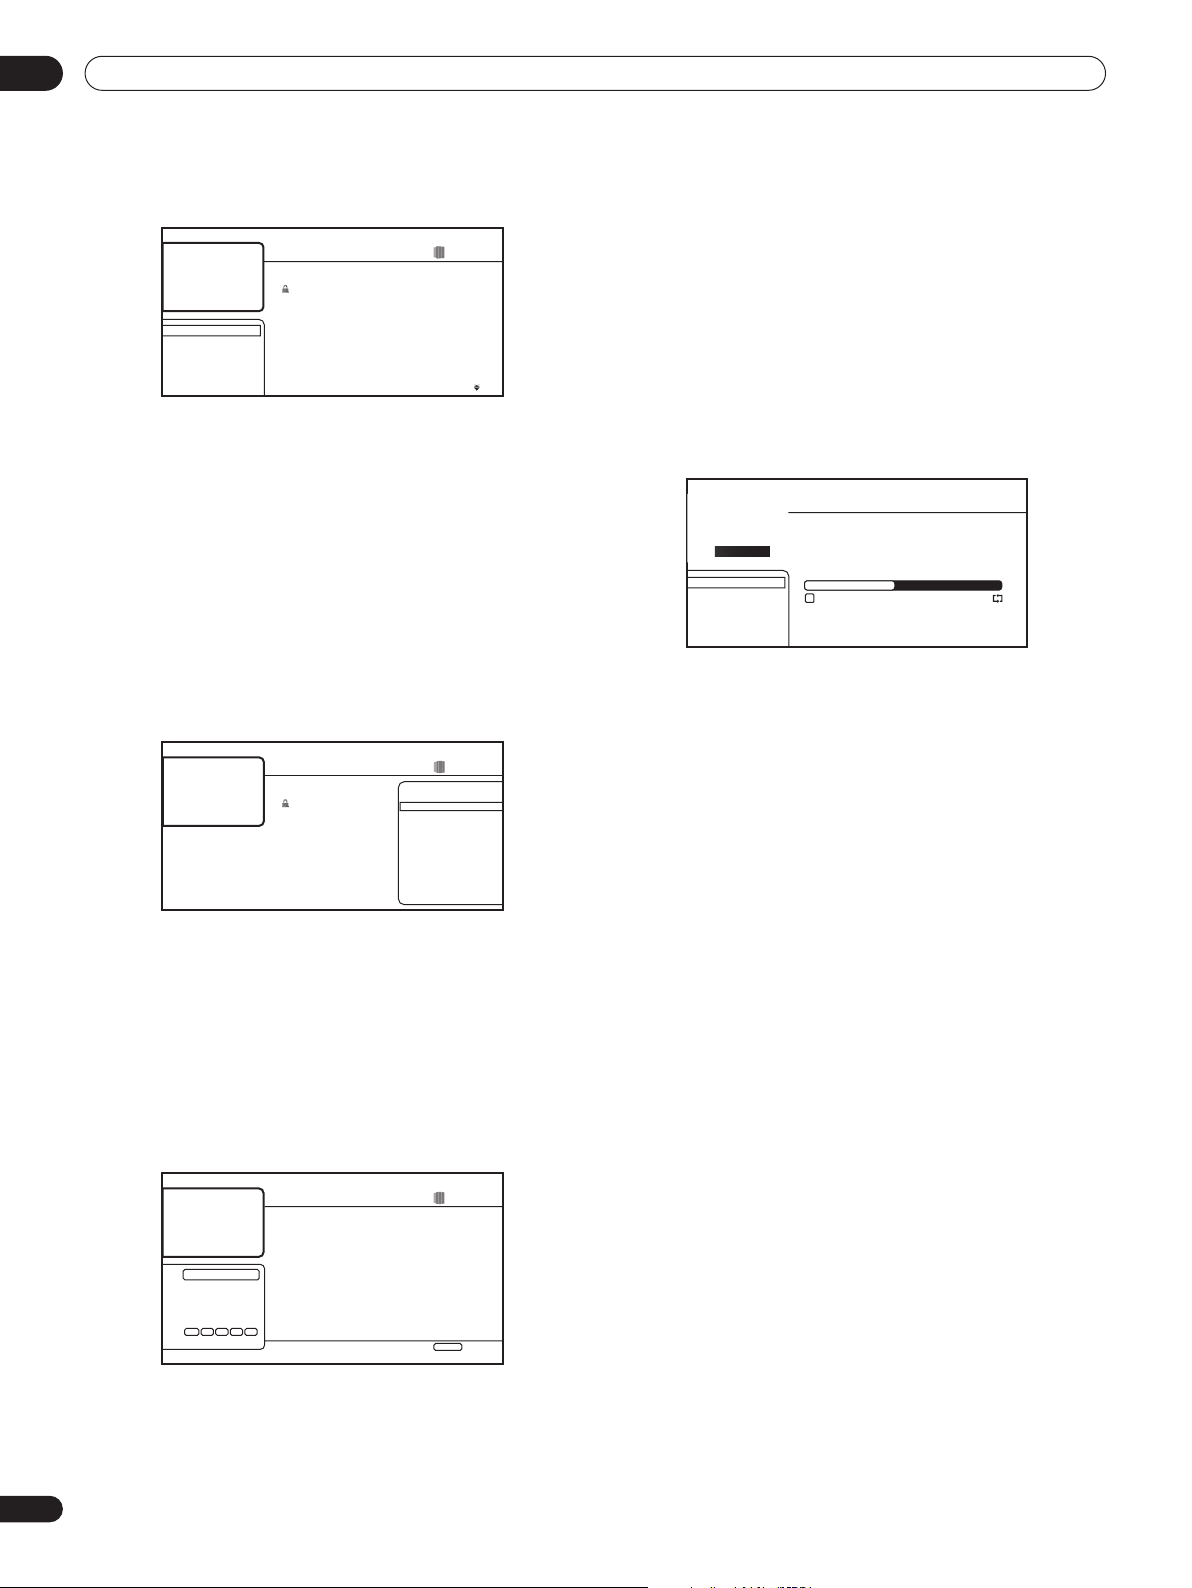
Using the Home Media Gallery06
Browsing songs
The Browse sub-menu gives you various ways to browse songs.
Go back
Artists
Albums
Genres
Playlists
Quicklist
Folders
Acoustic Guitar
Electrified
End Of The Road
Into The Arena
Keep On Running
Never Let You Go
Open Your Eyes
Pictures Of My Life
Real Sound
Rush Street
Take The Time
1214 items
9:31
8:00
7:31
3:55
6:33
5:26
4:57
9:36
6:18
6:18
• Go back: Return to the previous menu.
• Artists: Display a list of artists, and how many albums are
associated with each. Select an artist and press ENTER to see
the album list by that artist.
• Albums: Display a list of albums, and how many songs are
associated with each. Select an album and press ENTER to see
the list of songs on that album.
• Genres: Display all music genres, and how many songs are in
each one. Select a genre and press ENTER to see the list of
artists in that genre.
• Playlists: Display the server Playlists.
• Quicklist: Display a list of all the songs currently in your
Quicklist. Press to display the Song Options menu, where
you can start playback or remove songs from the Quicklist:
Song Options
Play song
Remove
24 items
Artist: Pioneer All Stars
Album: Acoustic Guitar
Genre: Rock
Format: WMA
Quicklist
Electrified
End Of The Road
Into The Arena
Keep On Running
Never Let You Go
Open Your Eyes
Pictures Of My Life
Real Sound
Rush Street
Take The Time
Now playing song information
The Now Playing screen shows detailed information about the song
playing, including:
• Artist and song title
• Progress bar (elapsed time and song length)
• Album name
• Genre
• File format
• Browse menu
• Play status
• Play Mode
• Next/Previous song names
Now Playing
Acoustic Guitar
All Songs
Browse
Search
Sort
Now Playing
Music Sources
Pioneer All Stars
Real Sound
Genre: Rock Format: MP3
Previous Song
Pictures Of My
3:10 / 5:51
Next Song
Rush Street
Music sources
From the music sources window you can see all the servers found
on the network and change the selected server. See Movie sources
on page 34 for more information.
• Folders: Display a list of folders and song files. Select a folder
and press ENTER to see the list of songs and subfolders within
the folder. (The folder configuration may change depending on
the server type.)
Searching songs
From the Search sub-menu you can enter a few characters (up to 20)
of a song title, genre, artist or album. As each character is entered
into the search field the search results are dynamically updated,
narrowing down the list of songs until you can see the one you’re
looking for.
R _
A B C D E F G H I J
K L M N O P Q R S T
U V W X Y Z , . : ;
1 2 3 4 5 6 7 8 9 0
_ – ( ) [ ] { }
SHFT ALT DELSPC CLR
DONE CANCEL
Search Results
Reason
Real Sound
Rolling Dice
Rush Street
4 items
Home Menu
1:31
1:02
1:31
1:25
See Searching movies on page 34 for how to use the screen keypad.
36
En
Exit
Page 37
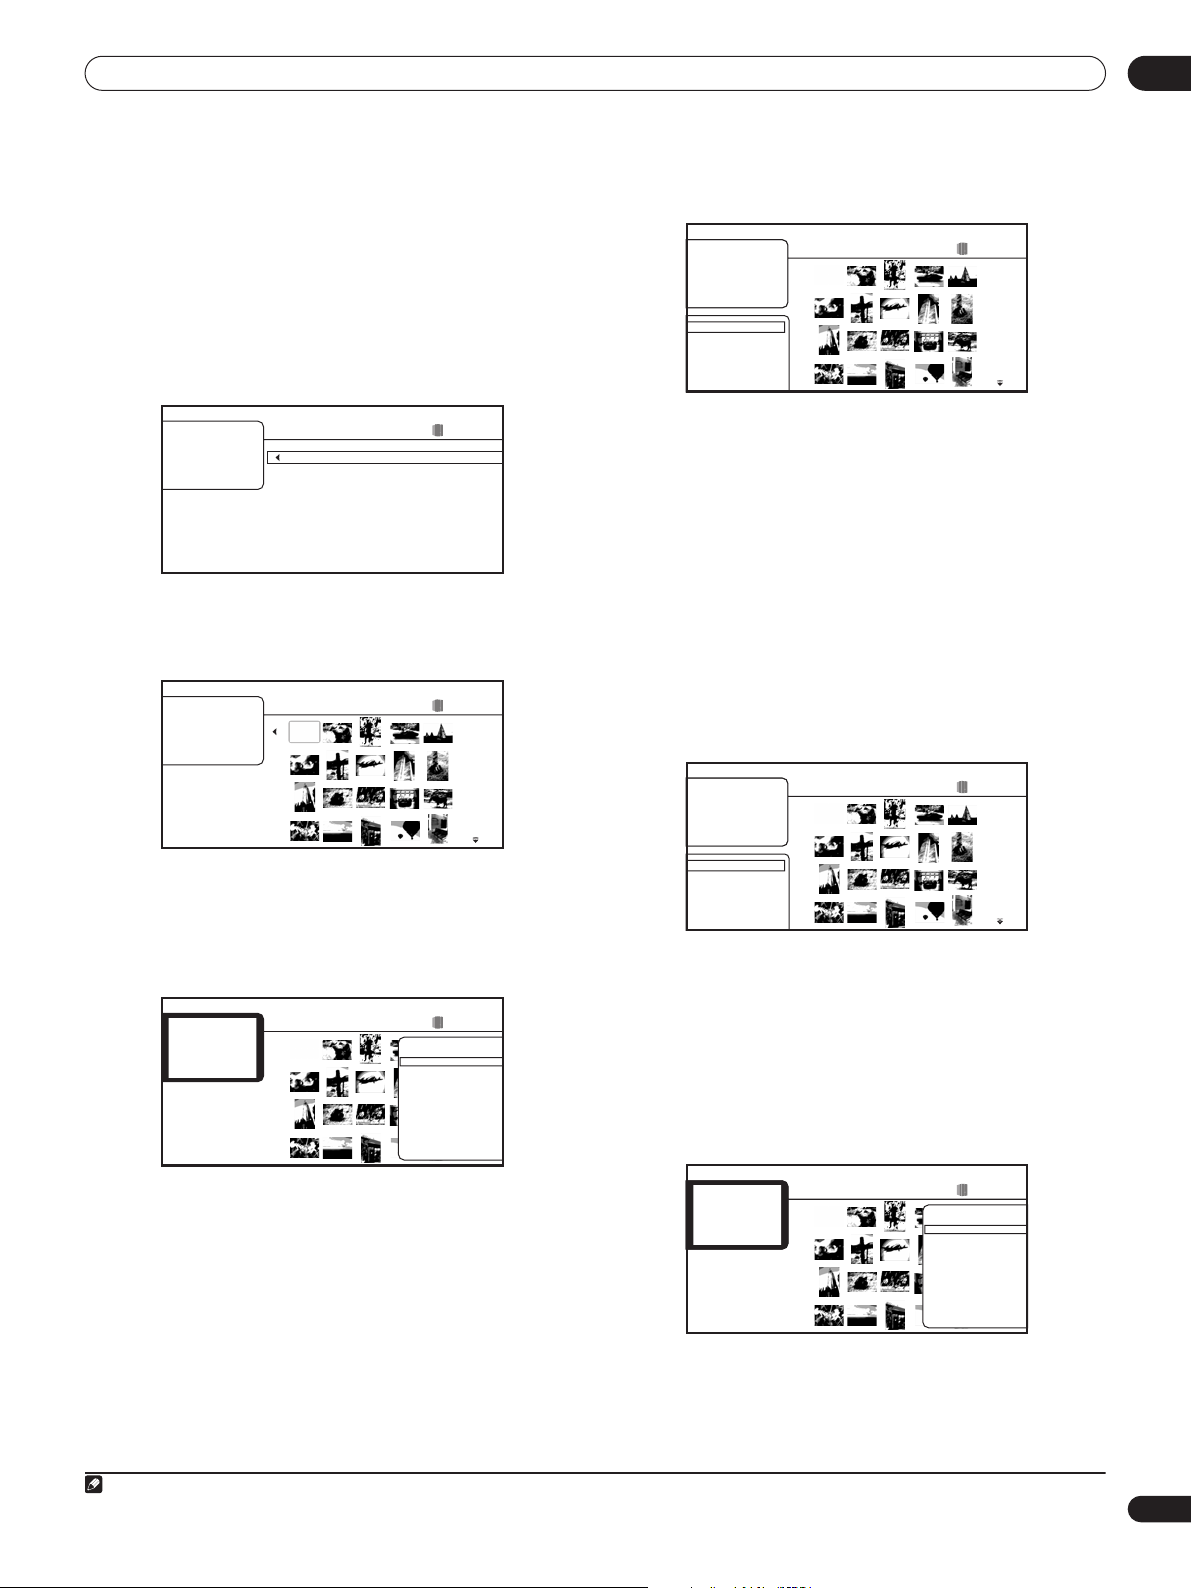
Using the Home Media Gallery 06
Photo Navigator
The photo section of the Home Media Gallery allows you to browse
and display all the compatible photo files found on your local area
network (non-photo files are not displayed). You can play a photo
slideshow in the Photo Navigator while playing music.
See also File compatibility on page 9 for more on compatible file
types.
• If you haven’t already done so, select ‘Home Media Gallery’
from the Home Menu, then ‘Photos’.
You should see a list of albums from the selected server.
Albums
Family
My_Favorite
School
Sports
Summer_Vacation
Winter_Vacation
1 Use the / buttons to change the current selection
(highlighted in yellow).
2 Press ENTER to display the selected photo list.
Summer_Vacation
File: sample.jpg
Date: 12/06/2006
Resolution: 2196 x 1298
Format: JPEG
6 items
1214 items
• From the left-most column, press to display the Browse
menu:
1214 items
All Photos
Browse
Search
Sort
Photo Sources
Summer_Vacation
Depending on the browse menu, certain options may not be
selectable.
• All Photos: Display all photos found on the server.
• Browse: Browse Album, Date, Quicklist or Folder. See also
Browsing photos below.
• Search: Find a photo by entering a name (or a few letters) to
search for. The search results are narrowed down as you enter
more letters. See also Searching photos on page 38.
• Sort: Sort photos by date (oldest first or most recent first), or
alphabetically by name (‘A’ first or ‘Z’ first).
• Photo Sources: Display servers on the network. See also Photo
sources on page 38.
Browsing photos
The Browse sub-menu gives you several ways to browse photos.
Summer_Vacation
1214 items
• Use the /// buttons to change the current
thumbnail selection (highlighted in yellow).
• Press PLAY to start or resume slideshow playback from the
last photo displayed.
• Press ENTER to display the Photo Options menu:
Photo Options
Slideshow
Add to Quicklist
1214 items
File: sample.jpg
Date: 12/06/2006
Resolution: 2196 x 1298
Format: JPEG
Summer_Vacation
• Slideshow: Starts full-screen slideshow playback from the
currently selected photo. During the slideshow, press to
advance to the next photo; to go back to the previous photo;
PAUSE to pause the slideshow; STOP to stop and exit the
slideshow; ZOOM to enlarge the picture on the screen (see also
Zooming the screen on page 25).
• Add to Quicklist: Add the selected photo to your Quicklist. The
Quicklist feature is a useful way to organize photos for handy
selection and slideshow playback. The Quicklist can contain up
to 25 photos.
1
Go back
Albums
Date
Quicklist
Folders
• Go back: Return to the previous menu.
• Albums: Display a list of server albums.
• Date: Browse photos by date (year and month). Select a year
then press ENTER to further browse by month. Select a month
and press ENTER to see the photos taken that month.
• Quicklist: Display thumbnails of all the photos currently in your
Quicklist. Press ENTER to display the Photo Options menu,
where you can start slideshow playback or remove photos from
the Quicklist:
Photo Options
Slideshow
Remove
24 items
File: sample.jpg
Date: 12/06/2006
Resolution: 2196 x 1298
Format: JPEG
Quicklist
• Folders: Display a list of folders and photo files. Select a folder
and press ENTER to see a list of photos and subfolders within
the folder. (The folder configuration may change depending on
the server type.)
Note
1 The Quicklist is lost when the player is switched off.
37
En
Page 38
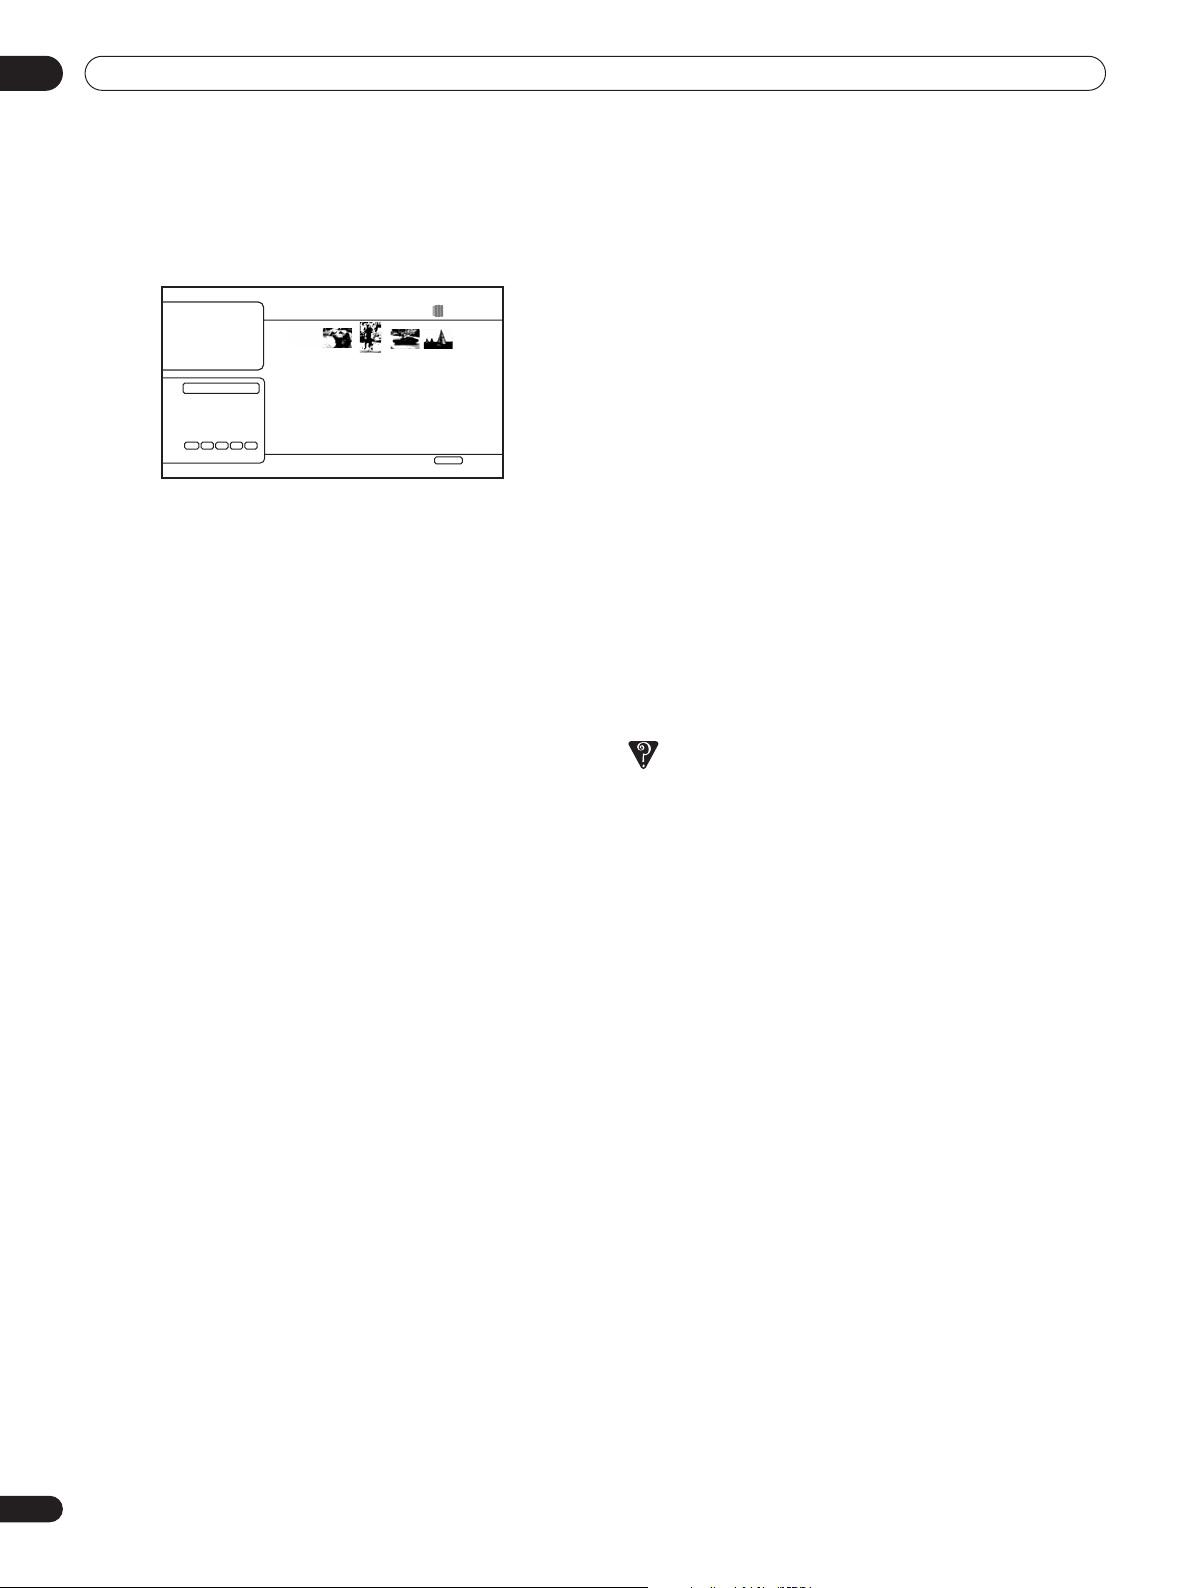
Using the Home Media Gallery06
Searching photos
From the Search sub-menu you can enter a few (up to 20) characters
of a photo title. As each character is entered into the search field the
search results are dynamically updated, narrowing down the list of
photos until you can see the one you’re looking for.
5 items
Home Menu
Exit
R _
A B C D E F G H I J
K L M N O P Q R S T
U V W X Y Z , . : ;
1 2 3 4 5 6 7 8 9 0
_ – ( ) [ ] { }
SHFT ALT DELSPC CLR
DONE CANCEL
Search Results
See Searching movies on page 34 for how to use the screen keypad.
Photo sources
From the photo sources window you can see all the servers found on
the network and change the selected server. See Movie sources on
page 34 for more information.
About Windows Media Connect
Windows Media Connect is software to deliver music, photos and
movies from a Microsoft Windows XP computer to home stereo
systems and TVs.
With this software, you can play back files stored on the PC through
various devices wherever you like in your home.
Installing Windows Media Connect
Before installing Windows Media Connect, make sure that Windows
XP Service Pack 2 is installed. Licensed Windows XP users can
download them at no charge from the Microsoft Website, or via
Windows Update.
• See the Microsoft Web site for details regarding minimum
system requirements and installation procedures.
• Download the Windows Media Connect software.
This can be downloaded either directly from the Microsoft Website,
or via Windows Update.
Authorizing this player
In order to be able to browse and play files from a Windows XP PC
with Windows Media Connect this player must be authorized. This
happens automatically when the player makes a connection over
the network to the PC. If not, please authorize this player manually
on the PC.
FAQ
• Some files don’t show up. Where are they?
– File names that don’t end with one of the permitted extensions
won’t be recognized by this player. See also File compatibility on
page 9.
38
En
Page 39
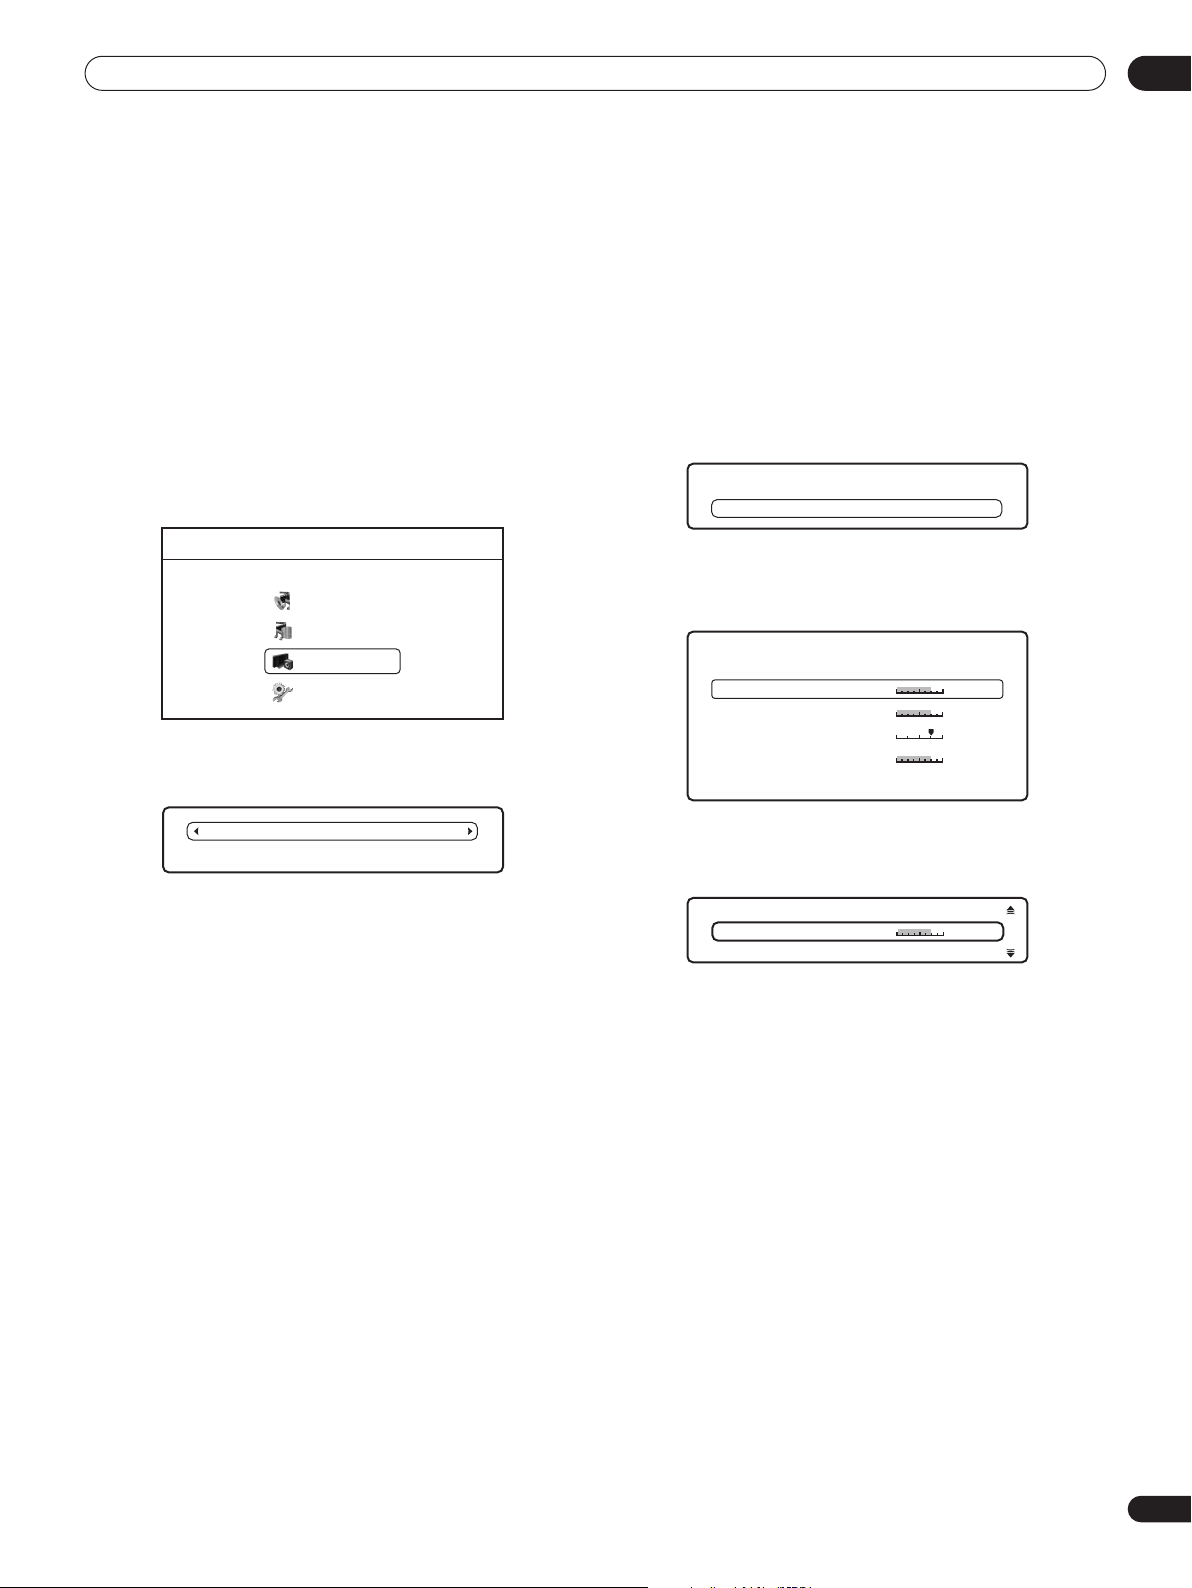
Video/Audio Adjust menu 07
Chapter 7
Video/Audio Adjust menu
From the Video/Audio Adjust menu you can make various settings that affect how video is presented on your TV and how the sounds. Items
in the Video/Audio Adjust menu can only be changed during playback.
Video Adjust
• Default setting: Standard
From the Video Adjust screen you can select the Standard
or Cinema video presentation or define presets of your own in
Memory 1 to 3.
1 Press HOME MENU and select ‘Video/Audio Adjust’ from
the on-screen display.
Home Menu
Disc Navigator
Home Media Gallery
Video/Audio Adjust
Initial Setup
2 Select ‘Video Adjust’.
3 Use the / buttons to select a preset.
Standard
Detailed Settings
• Standard – Standard setting
• Cinema – Optimized for watching movies
• Memory1–3 – Use for saving your own presets (see Creating
your own presets below)
4 Press ENTER or RETURN to make the setting and exit the
Video Adjust screen.
Creating your own presets
You can create up to three presets of your own.
1 Select one of the Memory presets.
2 Press to select ‘Detailed Settings’ then press ENTER.
Memory 1
Detailed Settings
3 Adjust the picture quality settings.
• Use the / buttons to select a setting.
• Use the / buttons to adjust the current setting.
Memory 1
White Level
Black Level
Hue
Chroma Level
Min
Min
Green Red
Min
Select a setting then press ENTER to display just that setting. This
gives you more screen area in which to see the effects of changes
you make.
Memory 1
White Level
Min
• Press ENTER or RETURN to go back to full-screen display.
You can adjust any or all of the following picture quality settings:
• White Level – Adjusts the intensity of white.
• Black Level – Adjusts the intensity of black.
• Hue – Adjusts the overall color balance between red and green.
• Chroma Level – Adjusts how saturated colors appear.
4 Press RETURN to save the preset and exit the Detailed
Settings screen.
Max
Max
Max
Max
39
En
Page 40
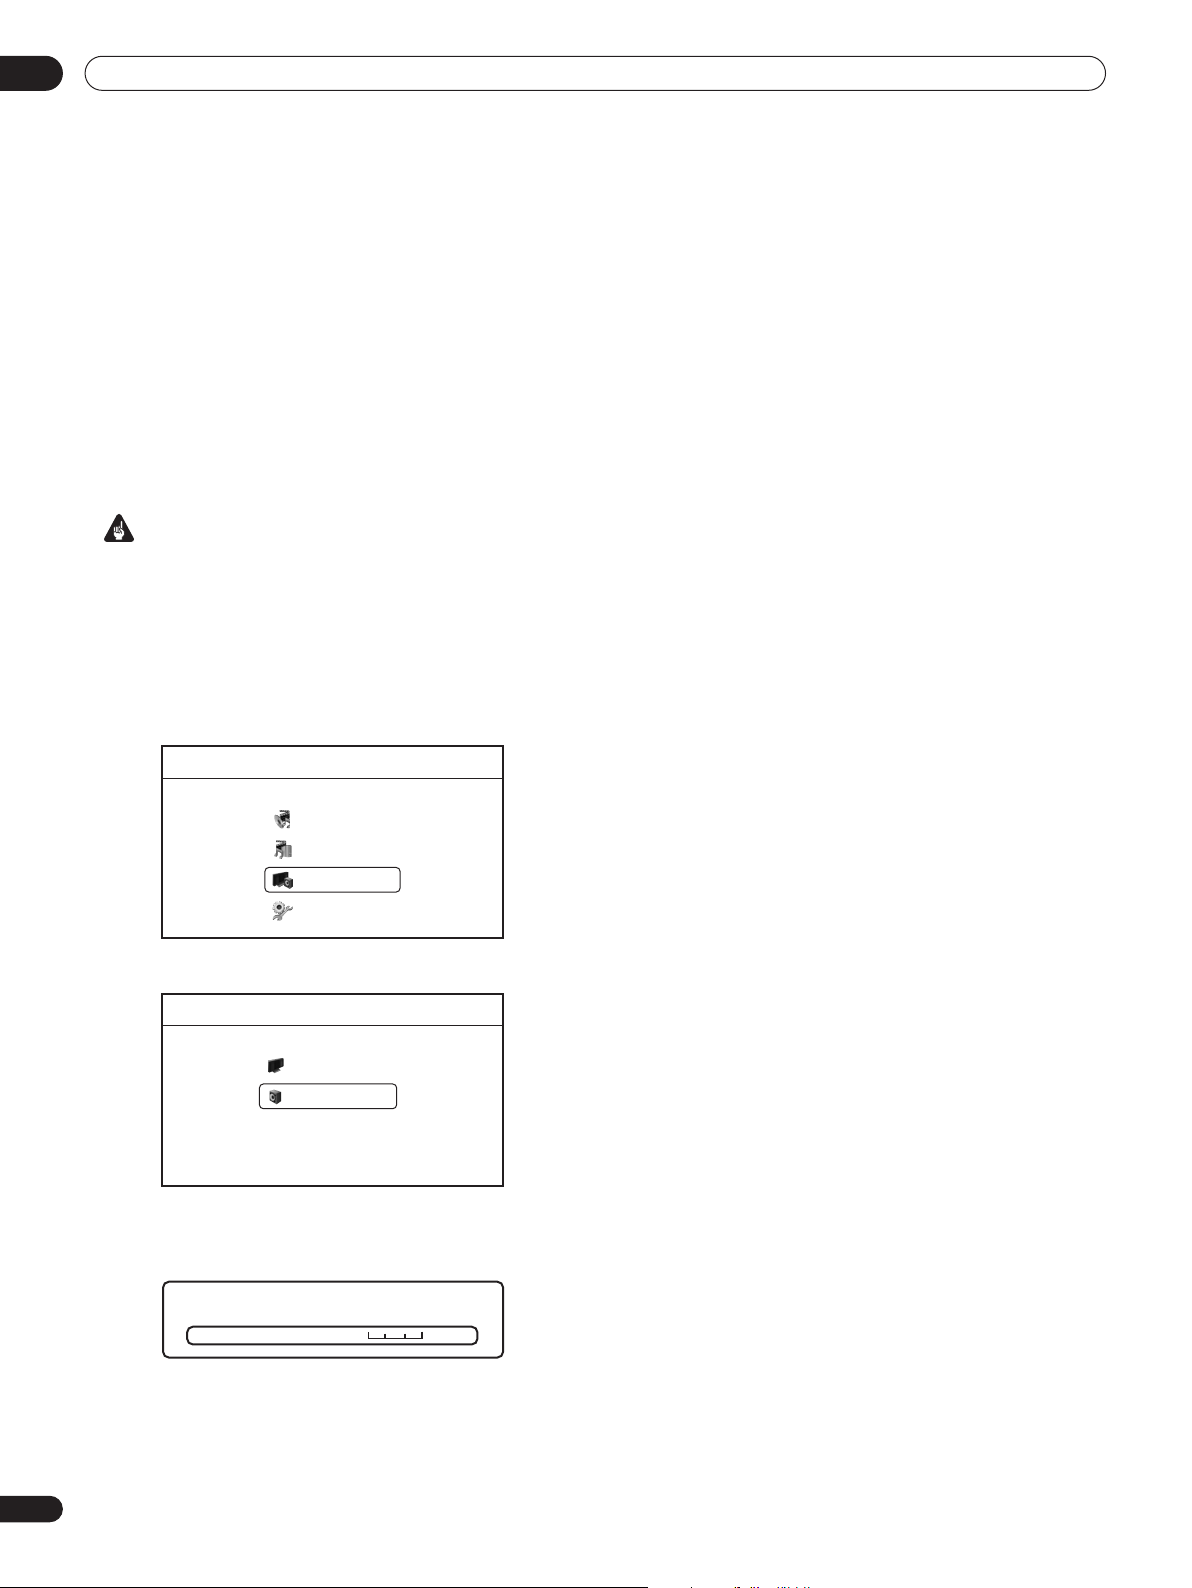
Video/Audio Adjust menu07
Audio Adjust
From the Audio Adjust menu you can set the Audio DRC (Dynamic
Range control).
Audio DRC
• Default setting: Off
When watching Dolby Digital BD and DVD discs, as well as PC files
with Dolby Digital audio, at low volume, it’s easy to lose the quieter
sounds completely—including some of the dialog. Switching Audio
DRC (Dynamic Range Control) to On can help by bringing up the
quieter sounds, while controlling loud peaks.
How much of a difference you hear depends on the material you’re
listening to. If the material doesn’t have wide variations in volume,
you may not notice much change.
Important
• Audio DRC is effective with the following types of audio:
– Analog audio from the AUDIO OUT (2ch) and AUDIO OUT
(5.1ch) jacks.
– PCM audio from the DIGITAL AUDIO OUT and HDMI OUT
jacks (see also About the audio output settings on page 44).
1 Press HOME MENU and select ‘Video/Audio Adjust’ from
the on-screen display.
Home Menu
Disc Navigator
Home Media Gallery
Video/Audio Adjust
Initial Setup
2 Select ‘Audio Adjust’.
Video/Audio Adjust
Video Adjust
Audio Adjust
3 Highlight Audio DRC, then use the
/ buttons to change to ‘Off’, ‘Level 1’, ‘Level 2’ or ‘Max’ as
required.
Audio Adjust
Audio DRC
Off
4 Press ENTER or RETURN to make the setting and exit the
Audio Adjust screen.
40
En
Max
Page 41
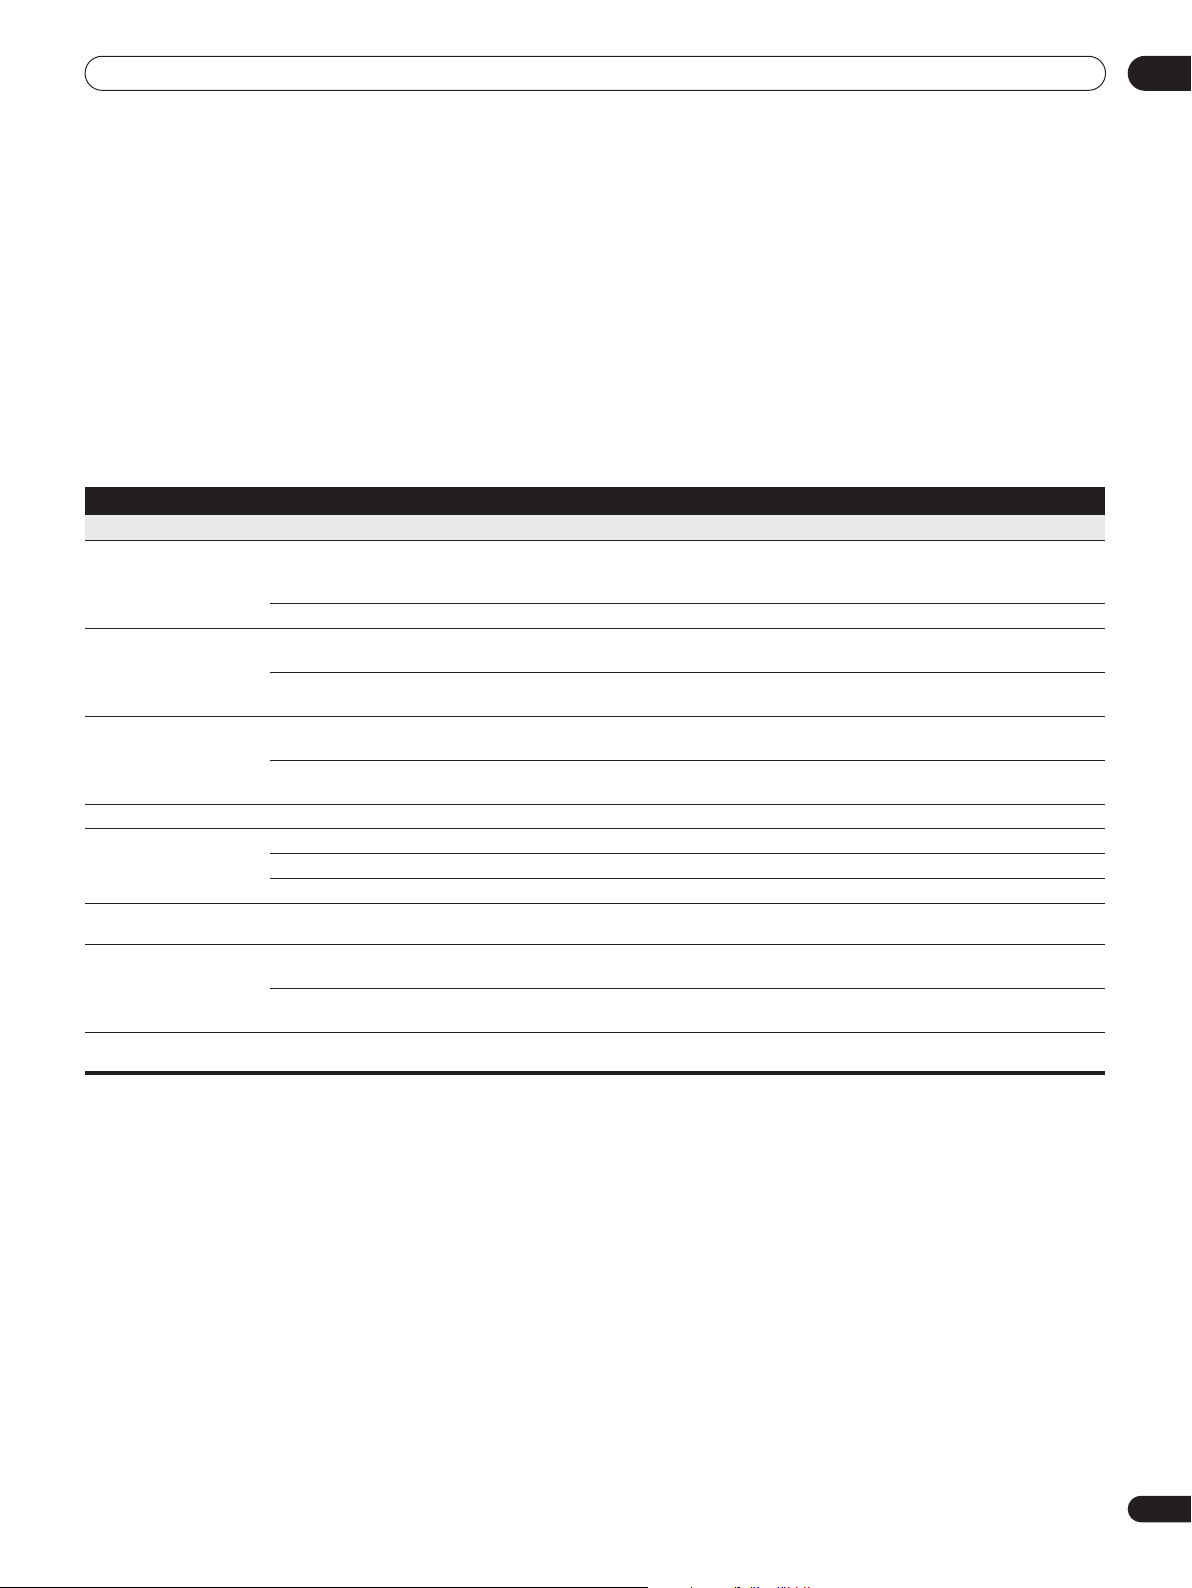
Initial Setup menu 08
Chapter 8
Initial Setup menu
Using the Initial Setup menu
The Initial Setup menu is where you can set various player options for sound, picture, language and so on. Note that settings can only be
changed when the player is stopped.
If no button (remote or front panel) is pressed for more than five minutes, the screen saver starts.
If you disconnect the player from the wall outlet before switching the player off, any new settings made during that session will be lost.
• Press HOME MENU and select ‘Initial Setup’.
In the table below, the default option is marked with a •.
Setting Options Explanation
Video Out
TV Aspect Ratio
4:3 Video Out
DVD 16:9 Video Out
Some discs contain only Letter Box or Pan & Scan presentation so the video output will depend on the disc.
HDMI Color Space
When using an HDMI monitor that accepts only RGB input, this player outputs RGB video even if this setting is set to YCbCr. If the monitor is DVI-compatible, the player
outputs RGB (0–255) color space. If however the picture looks unnatural, set it to RGB (16–235).
24p Direct Out
When 24p Direct Out is On, you may experience some picture disturbance when the video switches between video and film material. See also Changing the video output
format on page 14.
4:3 (Standard) Select if you have a standard 4:3 TV. See Changing the video output format on page 14.
When Output Format is set to 720p, 1080i or 1080p, video is output in 16:9 widescreen format even
if TV Aspect Ratio is set to 4:3 (Standard).
16:9 (Widescreen) • Select if you have a widescreen 16:9 TV.
Full 4:3 video material is output without black bars on either side of the picture if the TV Aspect Ratio
setting (above) is set to 16:9 (Widescreen).
Normal • 4:3 video material is output with black bars on either side of the picture if the TV Aspect Ratio setting
(above) is set to 16:9 (Widescreen).
Letter Box • If the TV Aspect Ratio setting (above) is set to 4:3 (Standard), select this if you prefer letterbox pre-
sentation of 16:9 format DVDs.
Pan & Scan If the TV Aspect Ratio setting (above) is set to 4:3 (Standard), select this if you prefer Pan & Scan pre-
sentation of 16:9 format DVDs.
YCbCr • This is the standard setting for HDMI-compatible devices.
RGB (16–235) Use this setting if colors appear overly rich and the black too deep on the RGB (0–255) setting.
RGB (0–255) Use if colors are weak and black appears to ‘float’ on the RGB (16–235) setting.
On Gives smooth movement in BD/DVD film material video. This setting is only effective when the player
is connected to a 1080 / 24p-compatible TV using HDMI.
Off • Choose this setting if you notice picture disturbance when the video switches between video and
film material.
41
En
Page 42
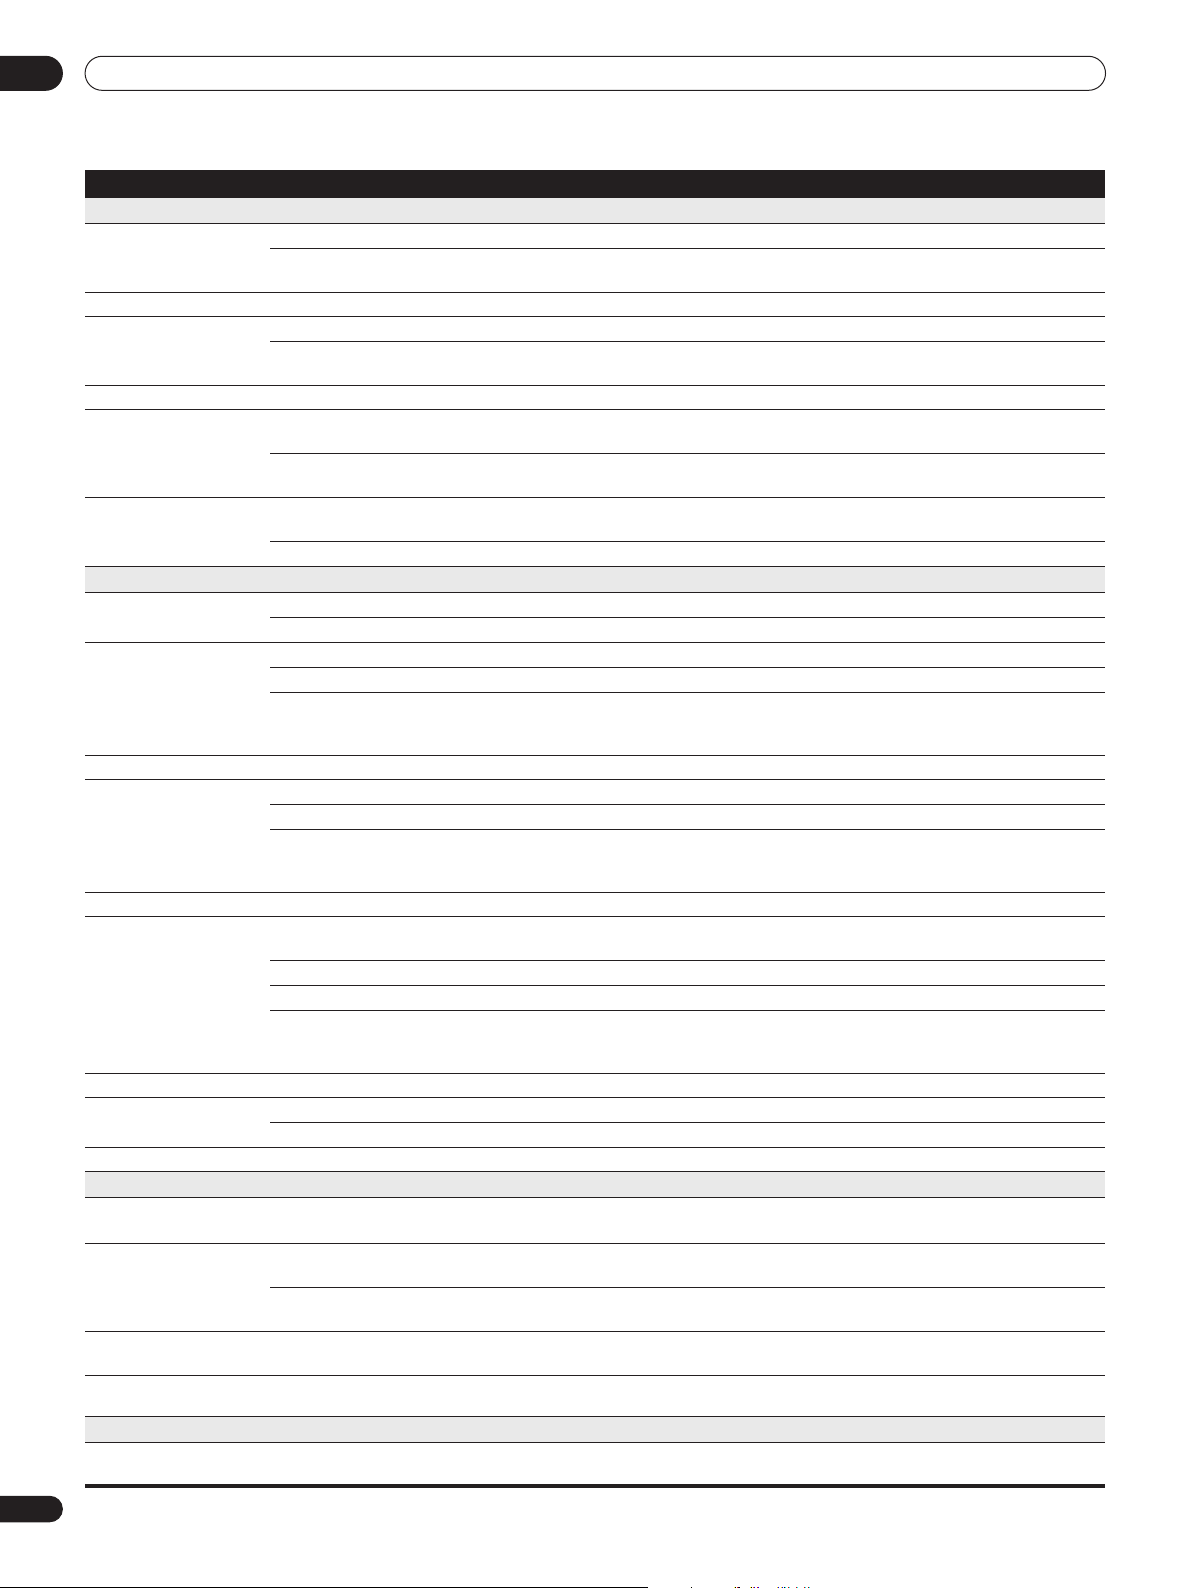
Initial Setup menu08
Setting Options Explanation
Audio Out
Dolby Digital Out
This setting is effective in digital audio outputs.
DTS Out
This setting is effective in digital audio outputs.
DTS Downmix
HDMI Audio Out
Language
OSD Language
Audio Language
Discs do not necessarily have audio in your selected language. Also, some discs override the Audio Language preference.
Subtitle Language
Discs do not necessarily have subtitles in your selected language. Also, some discs override the Subtitle Language preference.
BD/DVD Menu
Language
Discs do not necessarily have menus in your selected menu language.
Subtitle Display
Some discs may override these settings.
Parental Lock
Change Password
(Set Password)
DVD Parental Lock
BD Parental Lock
Only certain discs have parental lock features. Check the disc packaging to see what features the disc has. If you forget your password you can reset it by resetting the player
to its factory settings. See Resetting the player on page 47.
Network
IP Configuration
Dolby Digital • Outputs a Dolby Digital signal when a Dolby Digital source is being played.
Dolby Digital PCM Converts Dolby Digital sources to Linear PCM output. Use if your connected equipment doesn’t sup-
DTS • Outputs a DTS signal when a DTS source is being played.
DTS PCM Converts sources with DTS audio to Linear PCM output. Use if your connected equipment doesn’t
Stereo • If you’ve selected DTS PCM in DTS Out above, you can choose the way the DTS signal is
Lt / Rt Downmixes to a 2-channel signal compatible with Dolby surround matrix decoders. (This allows you
Auto • Dolby Digital and DTS sources are output as a bitstream signal. However, depending on the HDMI
PCM All audio signals are converted to Linear PCM.
English • Sets the language of the on-screen displays to English.
Français Sets the language of the on-screen displays to French.
English • Sets both the BD-ROM and DVD-Video default audio language to English.
French Sets both the BD-ROM and DVD-Video default audio language to French.
Other Continue to the next screen to set the default audio language for BD-ROM and DVD-Video disc play-
English • Sets the default subtitle language for BD-ROM and DVD-Video playback to English.
French Sets the default subtitle language for BD-ROM and DVD-Video playback to French.
Other Continue to the next screen to set the default subtitle language for BD-ROM and DVD-Video disc
w/Subtitle Language •
English Sets the language of BD-ROM and DVD-Video menus to English.
French Sets the language of BD-ROM and DVD-Video menus to French.
Other Continue to the next screen to set the default menu language for BD-ROM and DVD-Video disc
On • Select to have BD-ROM and DVD-Video discs display subtitles.
Off Select to switch off subtitle display.
Next Screen Set or change the password necessary to play BD or DVD discs that have level/age restrictions. In
Change Level Enter your password and then set the parental lock level. Discs with a lock level higher than that set
DVD Country Code Enter your password and then set a country/area code. This ensures that you see the scenes
Change Age
Restriction
Next Screen Continue to the next screen to input IP address details. See Setting up for network use on page 21 for
port Dolby Digital audio.
support DTS audio.
downmixed PCM audio. Stereo downmixes the signal to 2-channel stereo.
to hear surround sound if your AV receiver or amplifier has Dolby Pro Logic capability.)
device connected and the content being played, Linear PCM audio may be output.
back. You can select the language name or enter the code number (see BD/DVD language code list
on page 48 for the code list).
playback. You can select the language name or enter the code number (see BD/DVD language code
list on page 48 for the code list).
Sets the language of BD-ROM and DVD-Video menus to the same as that set for the subtitle language.
menus. You can select the language name or enter the code number (see BD/DVD language code list
on page 48 for the code list).
order to change the password, you’ll need to first enter your existing one.
in the player will require the password to play.
intended for your country or area. See BD/DVD country/area code list on page 48.
Enter your password and then set the age restriction.
more detailed information.
42
En
Page 43
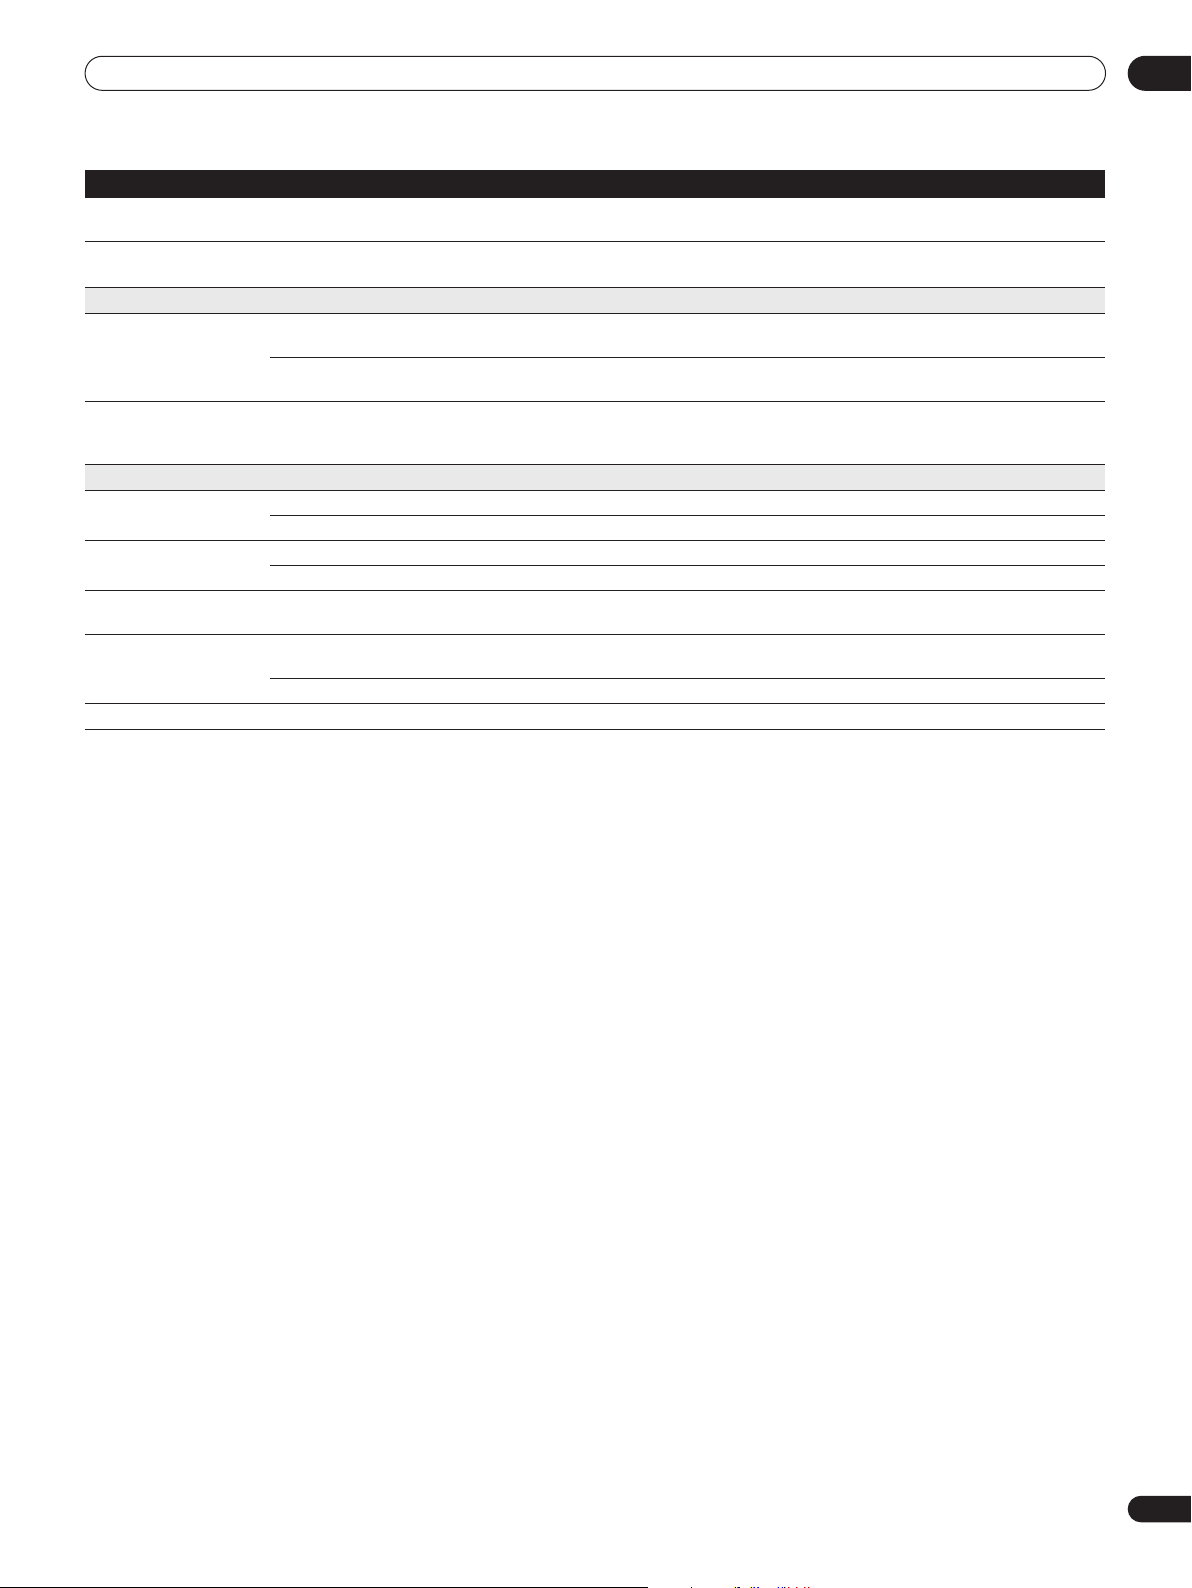
Initial Setup menu 08
Setting Options Explanation
Device Name
Display Network
Config.
Speakers
Audio Output Mode
Speaker Setup
Options
On Screen Display
Angle Indicator
BD Country Code
Auto Power Off
Setup Navigator
Next Screen Continue to the next screen to set the name of this player as it will appear to other devices on the
network. See Setting up for network use on page 21 for more detailed information.
Next Screen Continue to the next screen to see a summary of your network settings.
2 Channel • Set if you connected this player to an amplifier using only the front left/right channels of the AUDIO
OUT (5.1ch) outputs.
5.1 Channel Set if you connected this player to an amplifier using all 5.1 channels of the AUDIO OUT (5.1ch) out-
puts. On this setting the audio output from the AUDIO OUT (2ch) jacks will be incorrect.
Next Screen Continue to the next screen to specify which speakers are connected to your system.
This setting affects how audio is output from the multichannel analog outputs. See Speaker Setup on
page 45 for more detailed information.
On • The player displays operation displays (Stop, Play, etc.) on-screen.
Off Switches off the on-screen operation displays.
On • A camera icon appears on-screen during multi-angle scenes on a BD-ROM or DVD-Video disc.
Off Nothing is indicated on-screen when a multi-angle scene is showing.
Next Screen Set a country/area code to ensure that you see the scenes intended for your country or area. See BD/
DVD country/area code list on page 48.
On • If the player is stopped or paused for more than 30 minutes with no operation by the user, the player
automatically switches itself off.
Off No automatic power off.
Start Select to start the Setup Navigator. See also Switching on and setting up on page 20.
43
En
Page 44
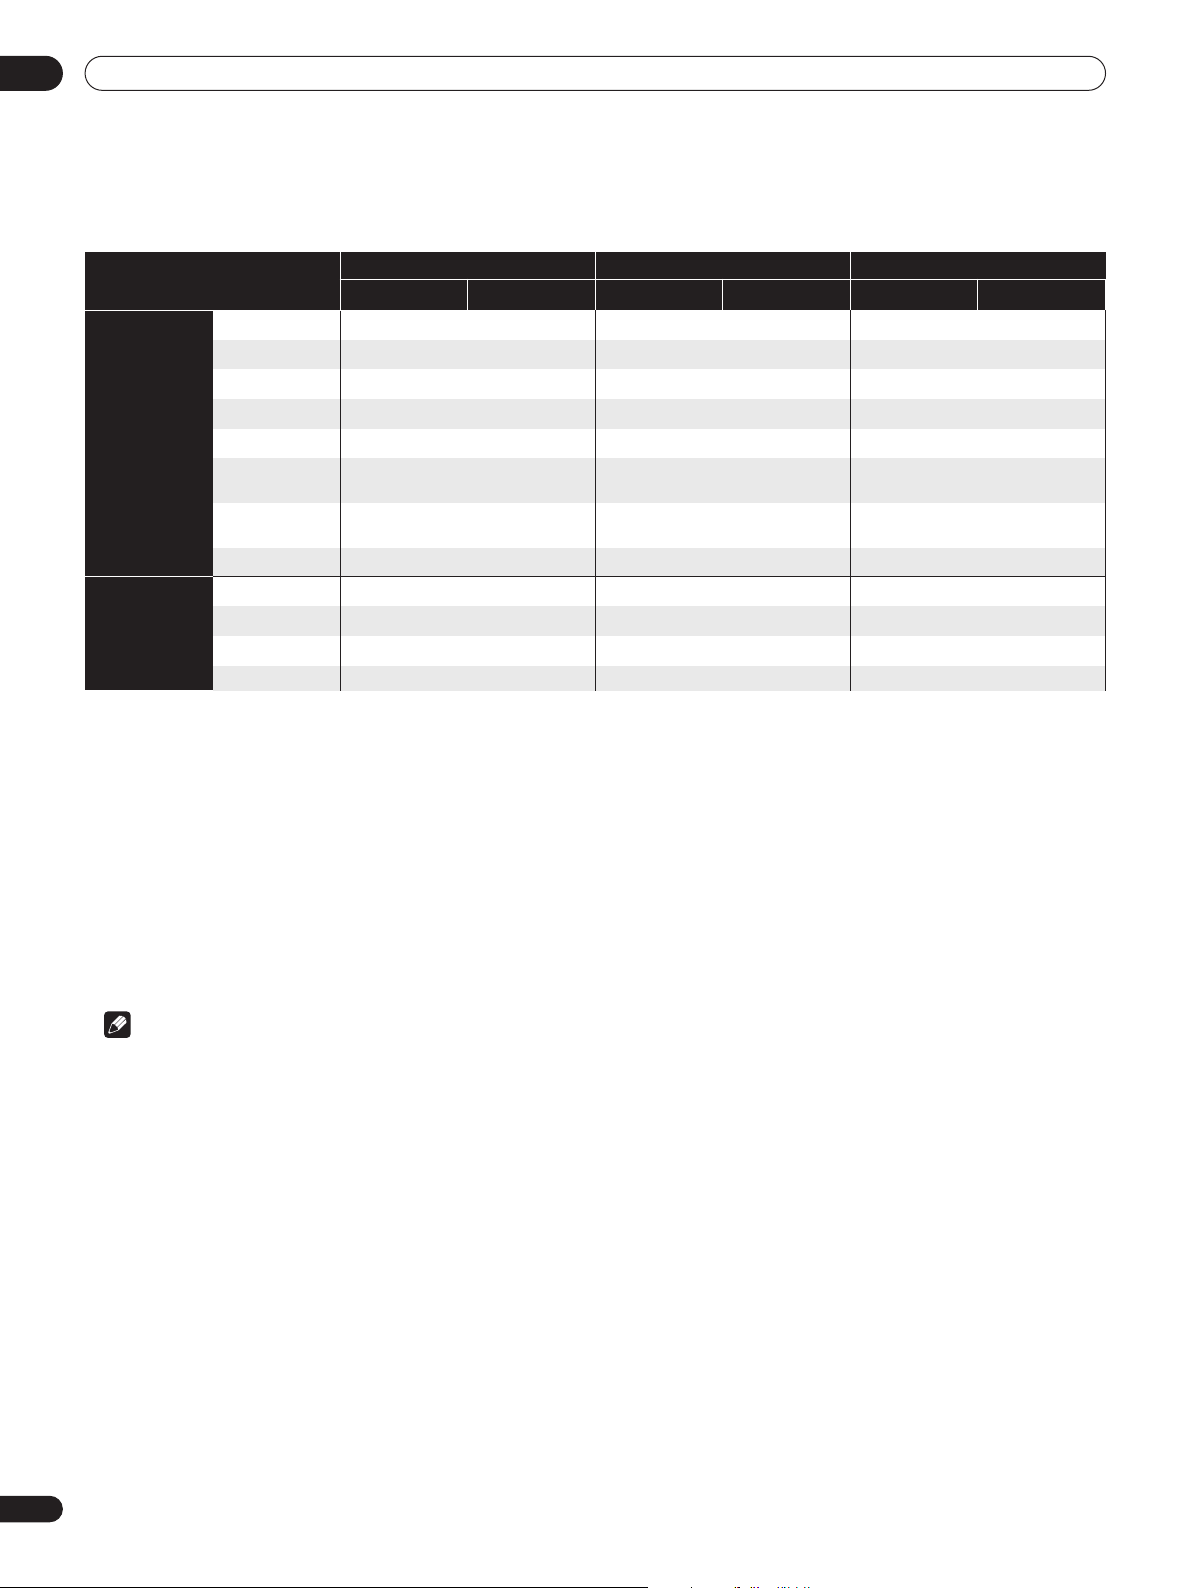
Initial Setup menu08
About the audio output settings
The table below shows how the audio settings you make in the Initial Setup menu (page 41) affect the output to the analog (2ch/5.1ch), digital
and HDMI outputs with various types of disc/files.
Disc audio format
BD-ROM
DVD-Video
Dolby Digital
Dolby Digital plus
Dolby TrueHD
DTS
DTS-HD
Linear PCM
*12
7.1ch
Linear PCM
*12
5.1ch
Linear PCM 2ch
Dolby Digital
DTS
2ch downmix PCM
2ch downmix PCM
2ch downmix PCM
2ch downmix PCM
2ch downmix PCM
2ch downmix PCM
2ch downmix PCM
*12
2ch PCM 2ch PCM 2ch PCM 2ch PCM 2ch PCM 2ch PCM
2ch downmix PCM
2ch downmix PCM
MPEG 2ch PCM 2ch PCM 2ch PCM 2ch PCM 2ch PCM
Linear PCM 2ch PCM 2ch PCM 2ch PCM 2ch PCM 2ch PCM 2ch PCM
*1
2 Channel or 5.1 Channel setting (see Audio Output Mode on page 43).
*2
Dolby DigitalPCM or DTSPCM setting (see Dolby Digital Out and DTS Out on page 42).
*3
Dolby Digital or DTS setting (see Dolby Digital Out and DTS Out on page 42).
*4
PCM or Auto setting (see HDMI Audio Out on page 42).
*5
Only the independent substream is output.
*6
Only the Dolby substream is output.
*7
Only the core substream is output.
*8
If the HDMI device you are using is not compatible with these compressed formats, the signal is output as linear PCM.
*9
If the connected HDMI device is compatible with fewer channels of Linear PCM audio than this player, the output will be adjusted to be compatible with the HDMI device.
*10
Outputs 2 ch downmix PCM when the sampling rate is 192 kHz.
*11
Even if there is interactive audio, interactive audio is not mixed.
*12
Interactive audio is not mixed when the sampling rate is 192 kHz or 96 kHz.
*13
When the video output of HDMI is 480i or 480p, output sampling rate is automatically downsampled to 48 kHz.
Analog outputs Digital outputs HDMI output
2ch
*1
5.1ch PCM
5.1ch PCM
5.1ch PCM
5.1ch PCM
5.1ch PCM
5.1ch downmix PCM
5.1ch PCM
5.1ch PCM
5.1ch PCM
5.1ch
*10
*1
PCM convert
*2
2ch downmix PCM
2ch downmix PCM
2ch downmix PCM
2ch downmix PCM
2ch downmix PCM
2ch downmix PCM 2ch downmix PCM
2ch downmix PCM 2ch downmix PCM
2ch downmix PCM
2ch downmix PCM
Bitstream
Dolby Digital
Dolby Digital
Dolby Digital
*11
DTS
*7,11
DTS
Dolby Digital
DTS
*3
*11
*5,11
*6,11
PCM
5.1ch PCM
5.1ch PCM
5.1ch PCM
5.1ch PCM
5.1ch PCM
7.1ch PCM
5.1ch PCM
5.1ch PCM
5.1ch PCM
*4
*9
*9
*9
*9
*9
*9,13
*9, 10
*9
*9
Auto
Dolby Digital
Dolby Digital
Dolby Digital
*8,11
DTS
*7,8,11
DTS
7.1ch PCM
5.1ch PCM
Dolby Digital
*8
DTS
2ch PCM
*4
*8,11
*5,8,11
*6, 8,11
*9,13
*9,10
*8
44
En
Note
• Output sampling rate is 48 kHz through the digital audio
outputs.
• MPEG audio is always output as linear PCM.
Page 45
Initial Setup menu 08
Speaker Setup
You only need to make this setting if you connected this player to your
amplifier using the 5.1 channel analog outputs.
This setting does not affect any digital audio output.
Use the Speaker Setup screen to tell the player what kinds of
speakers you have connected.
1 Press HOME MENU and select ‘Initial Setup’.
2 Select ‘Speakers’.
3 Select ‘Speaker Setup’, then ‘Next Screen’.
4 Use the / buttons to select a speaker.
Initial Setup
Video Out
Audio Out
Language
Parental Lock
Network
Spekaers
Options
5 Use the / buttons to change the speaker setup.
Specify which speakers you have in your setup:
• C (Center): Yes or No
• Ls / Rs (Surround): Yes or No
• L / R (Main): Small or Large
(This setting is only applicable if the C and Ls/Rs speakers are
present.)
6 Press ENTER to save the settings and exit the Speaker
Setup screen.
Speaker Setup
C
Ls/Rs
L/R
Yes
Yes
Large
45
En
Page 46
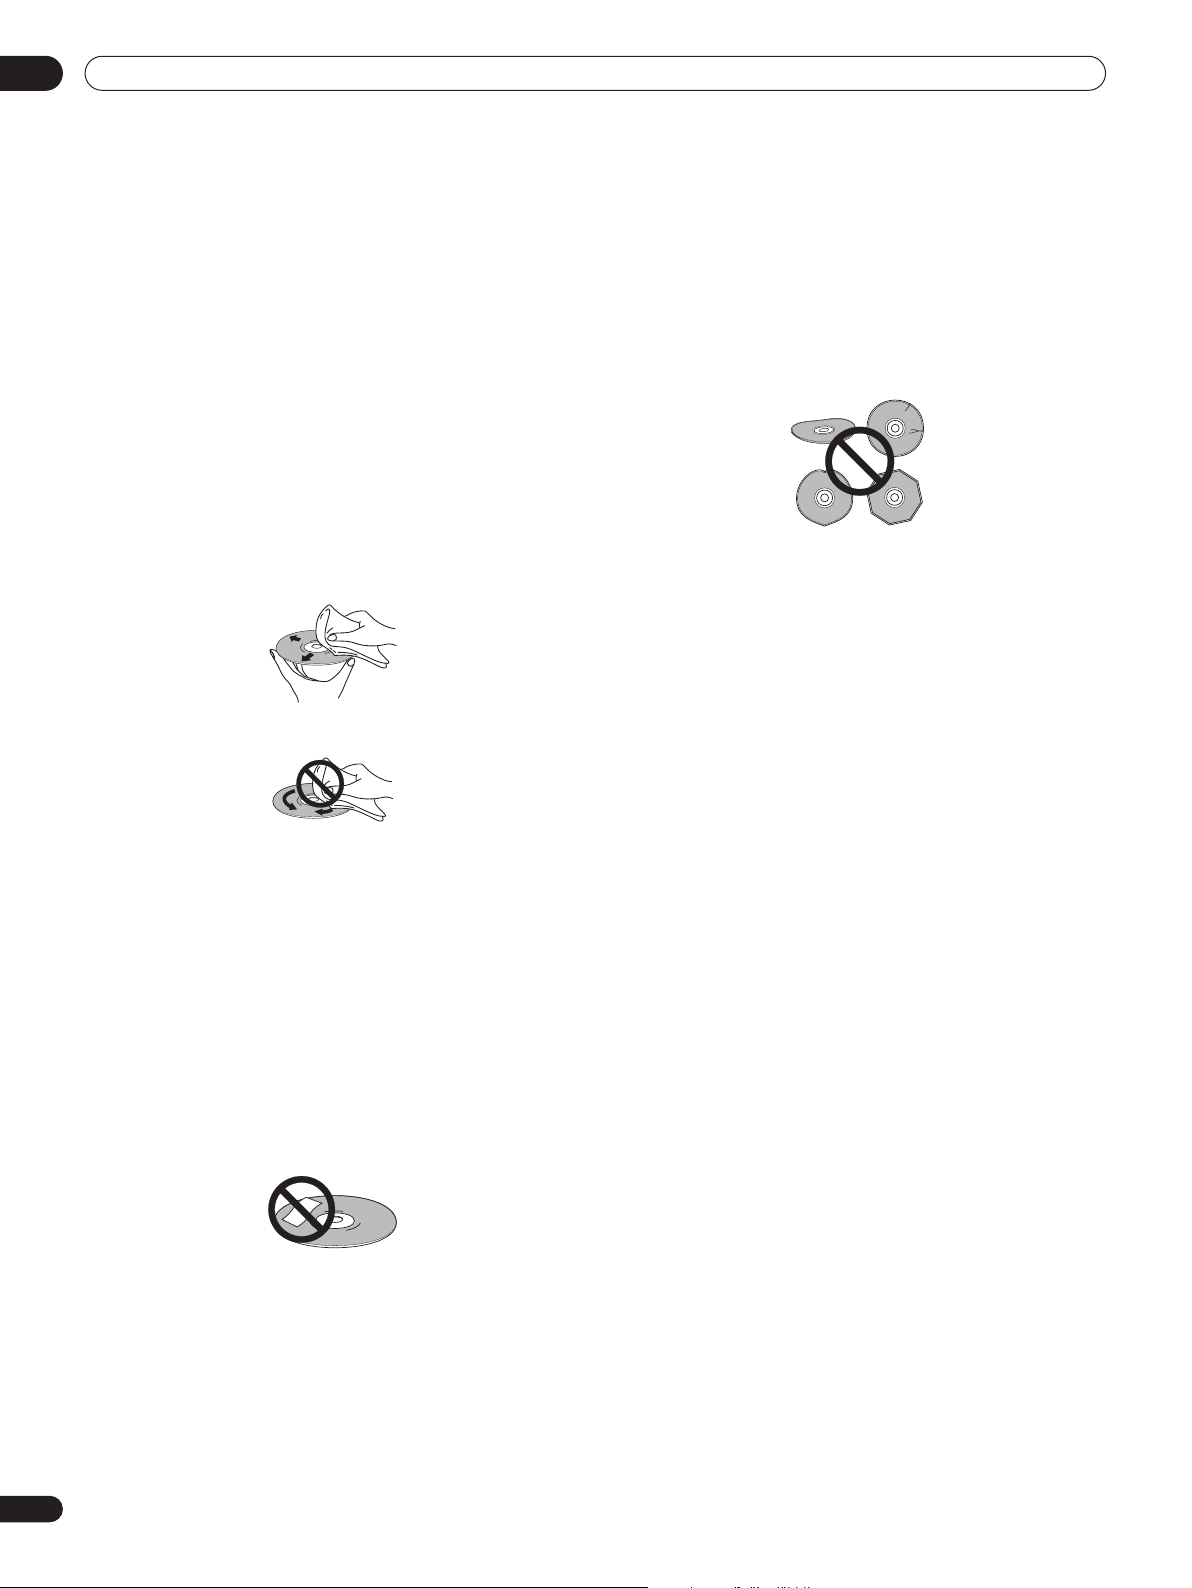
Additional information09
Chapter 9
Additional information
Taking care of your player and discs
Handling discs
When holding discs of any type, take care not to leave fingerprints,
dirt or scratches on the disc surface. Hold the disc by its edge or by
the center hole and edge.
Damaged or dirty discs can affect playback performance. Take care
also not to scratch the label side of the disc. Although not as fragile
as the recorded side, scratches can still result in a disc becoming
unusable.
Should a disc become marked with fingerprints, dust, etc., clean
using a soft, dry cloth, wiping the disc lightly from the center to the
outside edge as shown in the diagram below.
Wipe lightly from the center of the disc using straight strokes.
Don’t wipe the disc surface using circular strokes.
If necessary, use a cloth soaked in alcohol, or a commercially
available DVD/BD cleaning kit to clean a disc more thoroughly.
Never use benzine, thinner or other cleaning agents, including
products designed for cleaning vinyl records.
Storing discs
Although BD and DVD discs are more durable than vinyl records,
you should still take care to handle and store discs correctly. When
you’re not using a disc, return it to its case and store upright. Avoid
leaving discs in excessively cold, humid, or hot environments
(including under direct sunlight).
Don’t glue paper or put stickers onto the disc, or use a pencil, ballpoint pen or other sharp-tipped writing instrument. These could all
damage the disc.
Damaged and odd-shaped discs
Discs spin at high speed inside the player. If you can see that a disc
is cracked, chipped, warped, or otherwise damaged, don’t risk using
it in your player—you could end up damaging it.
This player is designed for use with conventional, fully circular discs
only. Use of shaped discs is not recommended for this product.
Pioneer disclaims all liability arising in connection with the use of
shaped discs.
Do not use any kind of adapter when playing 8 cm DVD discs. This
size disc can be played in this player without an adapter; just use the
smaller disc guide in the disc tray.
Cleaning the pickup lens
The player’s lens should not become dirty in normal use, but if for
some reason it should malfunction due to dust or dirt, consult your
nearest Pioneer-authorized service center. Although lens cleaners
for DVD players are commercially available, we advise against using
them since some may damage the lens.
Problems with condensation
Condensation may form inside the player if it is brought into a warm
room from outside, or if the temperature of the room rises quickly.
Although the condensation won’t damage the player, it may
temporarily impair its performance. For this reason you should leave
it to adjust to the warmer temperature for about an hour before
switching on and using.
For more detailed care information see the instructions that come
with discs.
Do not load more than one disc into the player at a time.
46
En
Page 47

Additional information 09
Hints on installation
We want you to enjoy using this product for years to come, so please
bear in mind the following points when choosing a suitable location
for it:
Do...
• Use in a well-ventilated room.
• Place on a solid, flat, level surface, such as a table, shelf or
stereo rack.
Don’t...
• Use in a place exposed to high temperatures or humidity,
including near radiators and other heat-generating appliances.
• Place on a window sill or other place where the player will be
exposed to direct sunlight.
• Use in an excessively dusty or damp environment.
• Place directly on top of an amplifier, or other component in your
stereo system that becomes hot in use.
• Place the player on top of or immediately next to the television
or monitor as you may experience interference.
• Use in a kitchen or other room where the player may be exposed
to smoke or steam.
• Use on a thick rug or carpet, or cover with cloth—this may
prevent proper cooling of the unit.
• Place on an unstable surface, or one that is not large enough to
support all four of the unit’s feet.
Moving the player
If you need to move this unit, first remove the disc, if there’s one
loaded, and close the disc tray. Next, press STANDBY/ON to
switch the power to standby, checking that the power off indication
in the display goes off. Wait at least 10 seconds. Lastly, disconnect
the power cord.
Never lift or move the unit during playback—discs rotate at a high
speed and may be damaged.
Screen sizes and disc formats
BD-ROM and DVD-Video discs come in several different screen
aspect ratios, ranging from TV programs, which are generally 4:3, to
CinemaScope widescreen movies, with an aspect ratio of up to
about 7:3.
Televisions, too, come in different aspect ratios; ‘standard’ 4:3 and
‘widescreen’ 16:9.
Widescreen TV users
If you have a widescreen TV, the TV Aspect Ratio setting (page 41) of
this player should be set to 16:9 (Widescreen).
When you watch discs recorded in 4:3 format, you can use the TV
controls to select how the picture is presented. Your TV may offer
various zoom and stretch options; see the instructions that came
with your TV for details.
Please note that some movie aspect ratios are wider than 16:9, so
even though you have a widescreen TV, these discs will still play in
a ‘letter box’ style with black bars at the top and bottom of the
screen.
Standard TV users
If you have a standard TV, the TV Aspect Ratio setting (page 41) of
this player should be set to 4:3 (Standard).
Setting up the remote to control your
TV
1 Input the manufacturer code.
While holding down the TV CONTROL button, input the two digit
code from the table below that corresponds to the make of your TV.
For example, if you have a Pioneer TV, press and hold TV CONTROL
, then press 0, 0 on the remote control.
2 Confirm that the TV is responding to the programmed
code.
On the remote, press the TV CONTROL button. If the TV switches
on (or into standby if it was on previously), then you have the correct
code.
If nothing happens when you press the TV CONTROL button,
start again from step 1 using a different code.
• Some manufacturers have several codes. Try each one until you
find the one that works.
Preset code list
Manufacturer Preset Code
Aiwa 38
Funai 36
GE 11, 28
General 29
Goldstar 10, 23
Gradiente 30
Hitachi 06, 24, 25
JVC 13
Magnavox 12
Mitsubishi 09
NEC 37
Panasonic 08, 22
Philips 07, 45
Pioneer 00
RCA 01, 15, 16, 17, 18, 39, 40
Sanyo 14, 21, 43
Sharp 02, 19, 27, 41, 42
Sony 04
Toshiba 05, 26
Zenith 03, 20
Resetting the player
Use this procedure to reset all the player’s settings to the factory
default.
1 Make sure that the player is on.
2 Press and hold STOP and press STANDBY/ON.
The player turns off with all settings reset.
47
En
Page 48

Additional information09
BD/DVD language code list
Language (Language code letter), Language code
Japanese (ja), 1001
English (en), 0514
French (fr), 0618
German (de), 0405
Italian (it), 0920
Spanish (es), 0519
Dutch (nl), 1412
Russian (ru), 1821
Chinese (zh), 2608
Korean (ko), 1115
Greek (el), 0512
Afar (aa), 0101
Abkhazian (ab), 0102
Afrikaans (af), 0106
Amharic (am), 0113
Arabic (ar), 0118
Assamese (as), 0119
Aymara (ay), 0125
Azerbaijani (az), 0126
Bashkir (ba), 0201
Byelorussian (be), 0205
Bulgarian (bg), 0207
Bihari (bh), 0208
Bislama (bi), 0209
Bengali (bn), 0214
Tibetan (bo), 0215
Breton (br), 0218
Catalan (ca), 0301
Corsican (co), 0315
Czech (cs), 0319
Welsh (cy), 0325
Danish (da), 0401
Bhutani (dz), 0426
Esperanto (eo), 0515
Estonian (et), 0520
Basque (eu), 0521
Persian (fa), 0601
Finnish (fi), 0609
Fiji (fj), 0610
Faroese (fo), 0615
Frisian (fy), 0625
Irish (ga), 0701
Scots-Gaelic (gd), 0704
Galician (gl), 0712
Guarani (gn), 0714
Gujarati (gu), 0721
Hausa (ha), 0801
Hindi (hi), 0809
Croatian (hr), 0818
Hungarian (hu), 0821
Armenian (hy), 0825
Interlingua (ia), 0901
Interlingue (ie), 0905
Inupiak (ik), 0911
Indonesian (in), 0914
Icelandic (is), 0919
Hebrew (iw), 0923
Yiddish (ji), 1009
Javanese (jw), 1023
Georgian (ka), 1101
Kazakh (kk), 1111
Greenlandic (kl), 1112
Cambodian (km), 1113
Kannada (kn), 1114
Kashmiri (ks), 1119
Kurdish (ku), 1121
Kirghiz (ky), 1125
Latin (la), 1201
Lingala (ln), 1214
Laothian (lo), 1215
Lithuanian (lt), 1220
Latvian (lv), 1222
Malagasy (mg), 1307
Maori (mi), 1309
Macedonian (mk), 1311
Malayalam (ml), 1312
Mongolian (mn), 1314
Moldavian (mo), 1315
Marathi (mr), 1318
Malay (ms), 1319
Maltese (mt), 1320
Burmese (my), 1325
Nauru (na), 1401
Nepali (ne), 1405
Norwegian (no), 1415
Occitan (oc), 1503
Oromo (om), 1513
Oriya (or), 1518
SPanjabi (pa), 1601
Polish (pl), 1612
Pashto, Pushto (ps), 1619
Portuguese (pt), 1620
Quechua (qu), 1721
Rhaeto-Romance (rm), 1813
Kirundi (rn), 1814
Romanian (ro), 1815
Kinyarwanda (rw), 1823
Sanskrit (sa), 1901
Sindhi (sd), 1904
Sangho (sg), 1907
Serbo-Croatian (sh), 1908
Sinhalese (si), 1909
lovak (sk), 1911
Slovenian (sl), 1912
Samoan (sm), 1913
Shona (sn), 1914
Somali (so), 1915
Albanian (sq), 1917
Serbian (sr), 1918
Siswati (ss), 1919
Sesotho (st), 1920
Sundanese (su), 1921
Swedish (sv), 1922
Swahili (sw), 1923
Tamil (ta), 2001
Telugu (te), 2005
Tajik (tg), 2007
Thai (th), 2008
Tigrinya (ti), 2009
Turkmen (tk), 2011
Tagalog (tl), 2012
Setswana (tn), 2014
Tonga (to), 2015
Turkish (tr), 2018
Tsonga (ts), 2019
Tatar (tt), 2020
Twi (tw), 2023
Ukrainian (uk), 2111
Urdu (ur), 2118
Uzbek (uz), 2126
Vietnamese (vi), 2209
Volapük (vo), 2215
Wolof (wo), 2315
Xhosa (xh), 2408
Yoruba (yo), 2515
Zulu (zu), 2621
BD/DVD country/area code list
Country/Area, Country/Area code, Country/Area code letter
Argentina, 0118, ar
Australia, 0121, au
Austria, 0120, at
Belgium, 0205, be
Brazil, 0218, br
Canada, 0301, ca
Chile, 0312, cl
China, 0314, cn
Denmark, 0411, dk
Finland, 0609, fi
France, 0618, fr
Germany, 0405, de
Hong Kong, 0811, hk
India, 0914, in
Indonesia, 0904, id
Italy, 0920, it
Japan, 1016, jp
Korea, Republic of, 1118, kr
Malaysia, 1325, my
Mexico, 1324, mx
Netherlands, 1412, nl
New Zealand, 1426, nz
Norway, 1415, no
Pakistan, 1611, pk
Philippines, 1608, ph
Portugal, 1620, pt
Russian Federation, 1821, ru
Singapore, 1907, sg
Spain, 0519, es
Switzerland, 0308, ch
Sweden, 1905, se
Taiwan, 2023, tw
Thailand, 2008, th
United Kingdom, 0702, gb
United States of America, 2119, us
48
En
Page 49
Additional information 09
Troubleshooting
Incorrect operation is often mistaken for trouble or malfunction. If you think that there is something wrong with this component, check the
points below. Sometimes the trouble may lie in another component. Inspect the other components and electrical appliances being used. If
the trouble cannot be rectified after checking the items below, please contact customer services. In the US, call Toll Free (800) 421-1404.
(Telephone lines are open Monday through Friday 6:00 AM to 4:30 PM (Pacific Time) and Saturday 8:00 AM to 4:30 PM (Pacific Time).) In
Canada, call Local (905) 479-4411, or Long distance +1(877) 283-5901. (Telephone lines are open Monday through Friday 9:00 AM to 5:15 PM
(EST).)
Playback
Problem Remedy
The disc won’t play or is automatically
ejected after loading.
Picture freezes and the front panel and
remote control buttons stop working.
No picture/No color. • Incorrect video connections: Check that connections are correct and that plugs are inserted fully.
The video output is set to 720p/1080i/
1080p, but the actual output is 480i or
480p.
Screen is stretched or aspect does not
change.
Picture disturbance during playback or
dark image.
No audio, or audio is distorted. • No audio is output during slow motion playback or when scanning contents.
The analog audio is OK, but there appears
to be no optical/coaxial digital audio
signal.
• Make sure the disc is free from dirt and dust and is not damaged (see Taking care of your player and
discs on page 46).
• Make sure the disc is loaded with the label side face-up and aligned properly in the disc tray guide.
• Incompatible region: If the region on a BD-ROM or DVD-Video disc does not match the region on the
player, the disc cannot be used (see BD-ROM regions and DVD-Video regions on page 10).
• Condensation inside the player: Allow time for condensation to evaporate. Avoid using the player
near an air-conditioning unit.
• Make sure the disc is compatible with this player (see Disc/content format playback compatibility on
page 8).
• Press (stop), then start playback again ((play)).
• Press the front panel STANDBY/ON button to switch the power off, then switch back on and
restart playback. If the power fails to switch off, press and hold STANDBY/ON for 20 seconds until
the power switches off. Then switch on again by pressing STANDBY/ON.
• Unplug from the wall socket, then plug back in and switch on again by pressing
switch the player on.
Also check the video cable for damage.
• TV/monitor or AV amplifier settings are incorrect: Check the instruction manual of the connected
equipment.
• Depending on your display, some of the settings may result in the picture disappearing. In this case,
press OUTPUT FORMAT repeatedly until the picture re-appears. (see Changing the video output
format on page 14).
• Some BD-ROM discs output video only over HDMI.
• For copy-protection purposes, DVD-Video and some BD-ROM discs output 480i/480p over the
component output.
• The TV Aspect Ratio or 4:3 Video Out setting in the Initial Settings menu is incorrect. See TV Aspect
Ratio and 4:3 Video Out on page 41 for how to set these correctly for your TV/monitor.
• When Output Format is set to 720p, 1080i or 1080p, video is output in 16:9 Widescreen format even
if TV Aspect Ratio is set to 4:3 (Standard).
• This player is compatible with Macrovision System copy guard. Some discs include a copy
prevention signal, and when this type of disc is played back, stripes etc., may appear on some sections
of the picture depending on the TV. This is not a malfunction.
• Due to the player’s copy protection circuits, connection of this device through a VCR or an AV
selector may cause picture problems. This is not a malfunction.
• Check your amplifier/receiver’s settings (volume, input function, speaker settings, etc.).
• Check that the disc is free from dust and dirt, and that it is not damaged (Taking care of your player
and discs on page 46).
• Check that all interconnects are firmly inserted.
• Check that the plugs and terminals are free of dirt, oxide, etc. and clean if necessary. Also check the
cable for damage.
• Make sure the player’s output is not connected to the amplifier’s phono (turntable) inputs.
• Check the Audio Output Mode on page 43. If this is set to 5.1 Channel, output from the AUDIO OUT
(2ch) jacks will be incorrect.
• Check the Speaker Setup on page 45.
• For copy-protection purposes, some BD-ROM discs only output audio over optical/coaxial and
HDMI.
• Check that the Dolby Digital Out and DTS Out settings (see Audio Out on page 42) are suitable for
your amplifier/receiver—check the instruction manual that came with your amplifier/receiver (also
check that the output settings on your amplifier/receiver are correct).
STANDBY/ON to
49
En
Page 50
Additional information09
Problem Remedy
Cannot play multi-channel audio. • Check the audio options available from the disc menu.
• Multi-channel 192 kHz audio is output in 2 channels.
• Check that the Dolby Digital Out and DTS Out settings (see Audio Out on page 42) are suitable for
your amplifier/receiver—check the instruction manual that came with your amplifier/receiver.
• If you connected this player to your amplifier/receiver using the 5.1 channel analog outputs, make
sure the Audio Output Mode on page 43 and Speaker Setup on page 45 are set correctly.
• If you connected this player to your amplifier/receiver using HDMI, or the optical/coaxial digital
outputs, make sure that the output settings on your amplifier/receiver are correct (refer to the
instruction manual that came with your amplifier/receiver).
Noise is output when DTS audio is played. • If this unit is connected to a non-DTS compatible amplifier or decoder using a digital audio cable, set
DTS Out to DTSPCM. If you do not do this, noise will be output when you play a DTS disc.
Cannot output 96 kHz or 192 kHz digital
audio from optical/coaxial digital output.
Disc containing PC files won’t play. • Make sure the disc is compatible with this player (see Disc/content format playback compatibility on
No picture or High Definition video output
when watching a BD.
• The player does not output digital audio from the optical/coaxial jacks at this sampling rate. The
digital output is automatically downsampled.
page 8).
• This player is compatible with multi-border discs, but only plays the first border.
• Check that the file complies to one of the supported formats, bit rates or profiles (see File
compatibility on page 9). Also check that the file is not damaged.
• If the message Cannot play this format is displayed when you try to play PC files, check the file
formats.
• This player cannot play DRM-protected content on DVD and DRM-protected titles appear in the Disc
Navigator with a lock icon
• For copy-protection purposes, composite, S-video and component video output may not possible.
See Connecting for HDMI output on page 13 to connect using HDMI.
().
HDMI troubleshooting
Problem Remedy
No HDMI video output.
(A connected HDMI component doesn’t
work with this player.)
Colors are too rich or too weak, or black is
too deep or appears to ‘float’.
No HDMI audio output. • If you have connected to an HDCP-compatible DVI component, there won’t be any audio output from
• This unit has been designed to be compliant with HDMI (High Definition Multimedia Interface).
Depending on the component you have connected, unreliable signal transfers may result.
• If you connect a DVI device to the HDMI output of this player, ensure that it is compliant with High
Definition Content Protection (HDCP).
• If the front panel HDMI indicator is unlit then:
– Make sure that you’ve selected this player as the HDMI input in the settings for the component
you’re using. You may need to refer to the instruction manual of the component to do this.
– Check that the HDMI cable is connected properly and that the cable isn’t damaged.
• If the front panel HDMI indicator is lit:
– Depending on your display, some of the settings may result in the picture disappearing. In this case,
press OUTPUT FORMAT repeatedly until the picture re-appears (see Changing the video output format
on page 14).
• Depending on the HDMI cable being used, 1080p output may not appear correctly.
• Use a different HDMI Color Space setting (see HDMI Color Space on page 41).
the HDMI terminal. Connect using the optical/coaxial digital outputs (or the analog outputs).
• This player does not output multi-channel 192 kHz audio. Press AUDIO during playback to switch
between the available audio streams.
50
En
Page 51

Additional information 09
Network troubleshooting
Problem Remedy
Home Media Gallery is not available. • LAN indicator is unlit:
– Check the physical connections (hub, 100BASE-TX/10BASE-T or crossed cable and other cable
quality when cabled directly to a PC).
– If the player is connected to a network via a hub, make sure that the Ethernet (CAT-5 LAN) cable
you’re using is a ‘standard’ or ‘straight through’ type.
– If the player is connected directly to a PC, make sure that the Ethernet (CAT-5 LAN) cable you’re
using is a ‘crossed’ or ‘crossover’ type.
• LAN indicator is lit:
– If this player’s IP address is set automatically, make sure that the media server’s address is also set
automatically. If the IP address of the media server has been set manually, set the IP address of the
player manually too (see also Network settings page 42).
– Check the logical connections (IP address setup, DHCP, etc.). Confirm that the IP address is correct
if acquired using DHCP or Auto-IP in the Network Config. screen that follows the Initial Setup menu
(see Network settings page 42).
– Confirm that the media server is on and not in standby or sleep mode.
– Check the network and other settings on the media server.
– Check that this player and the media server are on the same Local Area Network (LAN).
– Check if the media server (Windows Media Connect or DLNA-compliant) is running. Restart if
necessary.
– Check if the media server is setup correctly for file sharing, if the target folder has been deleted or if
one or more folders has become corrupted on the server.
– Check if the PC is operating properly. Reboot the PC after confirming its specifications and setup.
A connected media server does not show
up in the source list in the Home Media
Gallery.
A media server shows up in the source list
but is not available (a lock icon
appears).
Content different from last time appears
on the network (missing items, etc.).
Cannot play or display. • Check the physical connections (hub, 100BASE-TX/10BASE-T, or crossed cable and other cable
()
• Confirm that the media server is on and not in standby or sleep mode.
• Check the network and other settings on the media server.
• Check that this player and the media server are on the same Local Area Network (LAN).
• Check if the media server (Windows Media Connect or DLNA-compliant) is running. Restart if
necessary.
• Check if the media server is setup correctly for file sharing, if the target folder has been deleted or if
one or more folders has become corrupted on the server.
• Check if the PC is operating properly. Reboot the PC after confirming its specifications and setup.
• Check that there are playable files on the media server.
• After adding a new media server, exit the Home Media Gallery then, after a few moments, re-enter it.
• Check the media server setup. If a client is registered (authorized) manually, the setup procedure
may have to be run again. An option “Not Allowed” may have been selected for connections.
• Check that there are playable files on the media server.
• After adding a new media server, exit the Home Media Gallery then, after a few moments, re-enter it.
• If the player cannot connect to the same server as last time (because it is switched off, for example),
the player will connect to another server on the network. To see content on a particular server, make
sure it is running and then select it as the source in the Home Media Gallery (see page 34).
quality when cabled directly to a PC).
• Check if the file complies to the supported format, bit rate or profile (see page 9). Also check if the
file is damaged.
• If the message Cannot play this format is displayed when you try to play PC files, check the file
formats.
• It takes time to capture and display a large-sized image; during this time you may have to wait to
operate the player.
• This player cannot play DRM-protected content stored on a DLNA server (not Windows Media
Connect server). In the Home Media Gallery DRM-protected titles appear with a lock icon () next to
them.
• Some files that comply with one of the supported formats may not play or be displayed.
• Check if there are too many files on the server.
• Check if the PC is operating properly. Reboot the PC after confirming its specification and setup.
51
En
Page 52

Additional information09
Problem Remedy
Image or sound is interrupted or distorted
(block noise appears).
Genre (movie), Playlist (music), Album
(photo) or folder configuration differs from
one server to another.
An available server is selected but cannot
be navigated.
Miscellaneous troubleshooting
Problem Remedy
It is taking a long time for the unit to start
up.
The power automatically switches off. The Auto Power Off function switches the player into standby if no operation is performed for 30
The remote control doesn’t seem to work. • The CONTROL IN jack on the rear panel is connected: Point the remote control at the connected
Settings are canceled. • When the power is cut due to power failure or by unplugging the power cord during operation,
• Check the physical connections (hub, 100BASE-TX/10BASE-T, or crossed cable and other cable
quality when cabled directly to a PC). It is strongly recommended to use 100BASE-TX for playback
quality and display speed.
• When connected by a wireless LAN, check if the bit rate is sufficient.
• Check that the file complies with the supported format, bit rate or profile (see File compatibility on
page 9). Also check if the file is damaged.
• Some files that comply with one of the supported formats may not play or be displayed.
• Check if the PC is operating properly. Reboot the PC after confirming its specification and setup.
• The configuration may change depending on server type. This is not a malfunction.
• Check if the server is correctly set up for file sharing, if the target folder has been deleted, or if one or
more folders have been corrupted on the server.
• Check if there are too many files on the server.
It can take up to one minute for the system to start up once you press the STANDBY/ON button.
This does not mean that the player is experiencing problems.
minutes while the player is stopped or paused. See Auto Power Off on page 43.
component to control this player.
• The remote control is too far from the player, or the angle with the remote sensor is too wide: Use the
remote within its operating range (see Using the remote control on page 8).
• The batteries are exhausted: Put in new ones (see Putting the batteries in the remote control on
page 8).
• If you are using an external IR receiver, you may need to set the IR RECEIVER switch (see Using an
external IR receiver with this player on page 16).
settings will be canceled. See Moving the player on page 47 for proper shutdown instructions.
52
En
Page 53

Additional information 09
Glossary
Analog audio
An electrical signal that directly represents sound. Compare this to
digital audio which can also be an electrical signal, but is an indirect
representation of sound. See also Digital audio.
Aspect ratio
The width of a TV screen relative to its height. Conventional TVs are
4:3 (in other words, the screen is almost square); widescreen
models are 16:9 (the screen is almost twice as wide as it is high).
BD-J
BD-J is the Java specification for BD-ROM, allowing content
providers to put interactive material linked to specific titles on the
disc.
Default Gateway
Default Gateway is a node on a computer network that serves as an
access point to another network. A default gateway (such as a
computer and router) is used to forward all traffic that is not
addressed to a station within the local subnet.
DHCP (Dynamic Host Configuration Protocol) Server
A DHCP server is a server that allocates IP addresses to hosts
(network devices). In most cases, a broadband router serves as a
DHCP server in a home network.
Digital audio
An indirect representation of sound by numbers. During recording,
the sound is measured at discrete intervals by an analog-to-digital
converter, generating a stream of numbers. On playback, a digitalto-analog converter generates an analog signal based on these
numbers. See also Sampling frequency and Analog audio.
DRM (Digital Rights Management)
DRM is one of several technologies that controls access to and use
of digital data, such as music, movies and other copyrighted
contents.
Dynamic range
The difference between the quietest and loudest sounds possible in
an audio signal (without distorting or getting lost in noise). Dolby
Digital and DTS soundtracks are capable of a very wide dynamic
range, delivering dramatic cinema-like effects.
Ethernet
A frame-based computer networking technology for local area
networks (LANs). This player supports 100BASE-TX and 10BASE-T.
File extension
A tag added to the end of a filename to indicate the type of file. For
example, “.jpg” indicates an JPEG image file.
HDMI
HDMI (High-Definition Multimedia Interface) is a high-speed digital
interface which has the capability to support standard or highdefinition video plus standard to multi-channel surround-sound
audio on a single digital connection.
HDMI, the HDMI logo and High-Definition Multimedia Interface are trademarks or
registered trademarks of HDMI Licensing LLC.
Interactive audio
Interactive audio is Linear PCM (LPCM) audio activated by a BDROM application and mixed with the primary audio. It is typically
used to provide dynamic sounds associated with interactive
applications, such as button sounds.
Interlaced video
A method of displaying a picture in which odd-numbered lines are
updated in one pass, then even-numbered lines updated in the next.
See also Progressive scan video.
IP (Internet Protocol) address
A unique number that devices use in order to identify and
communicate with each other on a network utilizing the Internet
Protocol standard, such as ‘192.168.0.1’. No duplicate numbers are
allowed in the network.
LAN cable
A cable that has an 8-pin modular plug on each end and is different
from a telephone plug which has 4 pins. A straight cable is used
when connecting this player to a home network via a hub. A crossover cable is used when connecting directly to a PC. Use category 5
(CAT-5) LAN cables.
MAC (Media Access Control) address
An address attached to the port of any device. The MAC address
cannot be changed.
PCM (Pulse Code Modulation)
A common system of encoding digital audio. Excellent quality, but
requires a lot of data compared to formats such as Dolby Digital and
MPEG audio. For compatibility with digital audio recorders and AV
amplifiers with digital inputs, this unit can convert Dolby Digital,
DTS and MPEG audio to PCM. See also Digital audio.
Pop-up menu (BD only)
A context-sensitive menu that can be used without interrupting
playback of a BD.
Progressive scan video
Also called non-interlaced video, this method of displaying a picture
updates all the lines in one pass, resulting in a more stable, flickerfree image than interlaced video (for a given scanning rate). See also
Interlaced video.
Regions (DVD-Video and BD-ROM)
These associate discs and players with particular areas of the world.
This unit will only play discs that have a compatible region code (i.e.,
the same code as your player). You can find the region code of your
unit by looking on the rear panel. Some discs are compatible with
more than one region (or all regions).
Note that the region systems for DVD and BD are not the same.
Sampling frequency
The rate at which sound is measured to be turned into digital audio
data. The higher the rate, the better the sound quality, but the more
digital information is generated. For example, a sampling frequency
of 44.1 kHz means 44 100 samples (measurements) per second. See
also Digital audio.
Subnet mask
The IP address is divided into the network address part and the host
address part. The subnet mask is expressed as ‘255.255.255.0’. In
most cases, the subnet mask is automatically assigned by the
DHCP server.
53
En
Page 54

Additional information09
License
[MPEG4IP]
This software is based in part on Mozilla Public License 1.1 see http://www.mozilla.org/MPL/ for information.
[OpenSSL]
OpenSSL License
Copyright (c) 1998-2004 The OpenSSL Project. All rights reserved.
Redistribution and use in source and binary forms, with or without modification, are permitted provided that the following conditions are met:
1. Redistributions of source code must retain the above copyright notice, this list of conditions and the following disclaimer.
2. Redistributions in binary form must reproduce the above copyright notice, this list of conditions and the following disclaimer in the documentation and/or
other materials provided with the distribution.
3. All advertising materials mentioning features or use of this software must display the following acknowledgment: “This product includes software developed
by the OpenSSL Project for use in the OpenSSL Toolkit. (http://www.openssl.org/)”
4. The names “OpenSSL Toolkit” and “OpenSSL Project” must not be used to endorse or promote products derived from this software without prior written
permission. For written permission, please contact [email protected].
5. Products derived from this software may not be called “OpenSSL” nor may “OpenSSL” appear in their names without prior written permission of the
OpenSSL Project.
6. Redistributions of any form whatsoever must retain the following acknowledgment: “This product includes software developed by the OpenSSL Project for
use in the OpenSSL Toolkit (http://www.openssl.org/)”
THIS SOFTWARE IS PROVIDED BY THE OpenSSL PROJECT “AS IS'' AND ANY EXPRESSED OR IMPLIED WARRANTIES, INCLUDING, BUT NOT LIMITED TO,
THE IMPLIED WARRANTIES OF MERCHANTABILITY AND FITNESS FOR A PARTICULAR PURPOSE ARE DISCLAIMED. IN NO EVENT SHALL THE OpenSSL
PROJECT OR ITS CONTRIBUTORS BE LIABLE FOR ANY DIRECT, INDIRECT, INCIDENTAL, SPECIAL, EXEMPLARY, OR CONSEQUENTIAL DAMAGES
(INCLUDING, BUT NOT LIMITED TO, PROCUREMENT OF SUBSTITUTE GOODS OR SERVICES; LOSS OF USE, DATA, OR PROFITS; OR BUSINESS
INTERRUPTION) HOWEVER CAUSED AND ON ANY THEORY OF LIABILITY, WHETHER IN CONTRACT, STRICT LIABILITY, OR TORT (INCLUDING NEGLIGENCE
OR OTHERWISE) ARISING IN ANY WAY OUT OF THE USE OF THIS SOFTWARE, EVEN IF ADVISED OF THE POSSIBILITY OF SUCH DAMAGE.
This product includes cryptographic software written by Eric Young ([email protected]). This product includes software written by Tim Hudson
([email protected]).
Original SSLeay License
Copyright (C) 1995-1998 Eric Young ([email protected])
All rights reserved.
This package is an SSL implementation written by Eric Young ([email protected]). The implementation was written so as to conform with Netscapes SSL.
This library is free for commercial and non-commercial use as long as the following conditions are aheared to. The following conditions apply to all code found
in this distribution, be it the RC4, RSA, lhash, DES, etc., code; not just the SSL code. The SSL documentation included with this distribution is covered by the
same copyright terms except that the holder is Tim Hudson ([email protected]).
Copyright remains Eric Young's, and as such any Copyright notices in the code are not to be removed. If this package is used in a product, Eric Young should
be given attribution as the author of the parts of the library used. This can be in the form of a textual message at program startup or in documentation (online
or textual) provided with the package.
Redistribution and use in source and binary forms, with or without modification, are permitted provided that the following conditions are met:
1. Redistributions of source code must retain the copyright notice, this list of conditions and the following disclaimer.
2. Redistributions in binary form must reproduce the above copyright notice, this list of conditions and the following disclaimer in the documentation and/or
other materials provided with the distribution.
3. All advertising materials mentioning features or use of this software must display the following acknowledgement: “This product includes cryptographic
software written by Eric Young ([email protected])”
The word 'cryptographic' can be left out if the rouines from the library being used are not cryptographic related:-).
4. If you include any Windows specific code (or a derivative thereof) from the apps directory (application code) you must include an acknowledgement: “This
product includes software written by Tim Hudson ([email protected])”
THIS SOFTWARE IS PROVIDED BY ERIC YOUNG “AS IS'' AND ANY EXPRESS OR IMPLIED WARRANTIES, INCLUDING, BUT NOT LIMITED TO, THE IMPLIED
WARRANTIES OF MERCHANTABILITY AND FITNESS FOR A PARTICULAR PURPOSE ARE DISCLAIMED. IN NO EVENT SHALL THE AUTHOR OR
CONTRIBUTORS BE LIABLE FOR ANY DIRECT, INDIRECT, INCIDENTAL, SPECIAL, EXEMPLARY, OR CONSEQUENTIAL DAMAGES (INCLUDING, BUT NOT
LIMITED TO, PROCUREMENT OF SUBSTITUTE GOODS OR SERVICES; LOSS OF USE, DATA, OR PROFITS; OR BUSINESS INTERRUPTION) HOWEVER
CAUSED AND ON ANY THEORY OF LIABILITY, WHETHER IN CONTRACT, STRICT LIABILITY, OR TORT (INCLUDING NEGLIGENCE OR OTHERWISE) ARISING
IN ANY WAY OUT OF THE USE OF THIS SOFTWARE, EVEN IF ADVISED OF THE POSSIBILITY OF SUCH DAMAGE.
The licence and distribution terms for any publically available version or derivative of this code cannot be changed. i.e. this code cannot simply be copied and
put under another distribution licence [including the GNU Public Licence.]
[tiff]
Copyright (c) 1988-1997 Sam Leffler
Copyright (c) 1991-1997 Silicon Graphics, Inc.
THE SOFTWARE IS PROVIDED “AS-IS” AND WITHOUT WARRANTY OF ANY KIND, EXPRESS, IMPLIED OR OTHERWISE, INCLUDING WITHOUT LIMITATION,
ANY WARRANTY OF MERCHANTABILITY OR FITNESS FOR A PARTICULAR PURPOSE. IN NO EVENT SHALL SAM LEFFLER OR SILICON GRAPHICS BE LIABLE
FOR ANY SPECIAL, INCIDENTAL, INDIRECT OR CONSEQUENTIAL DAMAGES OF ANY KIND, OR ANY DAMAGES WHATSOEVER RESULTING FROM LOSS OF
USE, DATA OR PROFITS, WHETHER OR NOT ADVISED OF THE POSSIBILITY OF DAMAGE, AND ON ANY THEORY OF LIABILITY, ARISING OUT OF OR IN
CONNECTION WITH THE USE OR PERFORMANCE OF THIS SOFTWARE.
54
En
Page 55

Additional information 09
[Howl]
Copyright (c) 2003, 2004 Porchdog Software All rights reserved.
THIS SOFTWARE IS PROVIDED BY THE COPYRIGHT HOLDERS AND CONTRIBUTORS “AS IS” AND ANY EXPRESS OR IMPLIED WARRANTIES, INCLUDING,
BUT NOT LIMITED TO, THE IMPLIED WARRANTIES OF MERCHANTABILITY AND FITNESS FOR A PARTICULAR PURPOSE ARE DISCLAIMED. IN NO EVENT
SHALL THE COPYRIGHT OWNER OR CONTRIBUTORS BE LIABLE FOR ANY DIRECT, INDIRECT, INCIDENTAL, SPECIAL, EXEMPLARY, OR CONSEQUENTIAL
DAMAGES (INCLUDING, BUT NOT LIMITED TO, PROCUREMENT OF SUBSTITUTE GOODS OR SERVICES; LOSS OF USE, DATA, OR PROFITS; OR BUSINESS
INTERRUPTION) HOWEVER CAUSED AND ON ANY THEORY OF LIABILITY, WHETHER IN CONTRACT, STRICT LIABILITY, OR TORT (INCLUDING NEGLIGENCE
OR OTHERWISE) ARISING IN ANY WAY OUT OF THE USE OF THIS SOFTWARE, EVEN IF ADVISED OF THE POSSIBILITY OF SUCH DAMAGE.
This software is based in part on Apple Public Source License or the recent’s rights thereunder see http://developer.apple.com/ for information.
[UPNPLib/Intel Stack]
This software is based in part on Intel License see http://www.intel.com/ for information.
[JPEG image compression]
If only executable code is distributed, then the accompanying documentation must state that “this software is based in part on the work of the Independent
JPEG Group”.
[libpng]
COPYRIGHT NOTICE, DISCLAIMER, and LICENSE:
If you modify libpng you may insert additional notices immediately following this sentence. libpng version 1.2.6, December 3, 2004, is Copyright (c) 2004 Glenn
Randers-Pehrson, and is distributed according to the same disclaimer and license as libpng-1.2.5 with the following individual added to the list of Contributing
Authors
Cosmin Truta
libpng versions 1.0.7, July 1, 2000, through 1.2.5 - October 3, 2002, are Copyright (c) 2000-2002 Glenn Randers-Pehrson, and are distributed according to the
same disclaimer and license as libpng-1.0.6 with the following individuals added to the list of Contributing Authors
Simon-Pierre Cadieux
Eric S. Raymond
Gilles Vollant
and with the following additions to the disclaimer:
There is no warranty against interference with your enjoyment of the library or against infringement. There is no warranty that our efforts or the library will fulfill
any of your particular purposes or needs. This library is provided with all faults, and the entire risk of satisfactory quality, performance, accuracy, and effort is
with the user.
libpng versions 0.97, January 1998, through 1.0.6, March 20, 2000, are Copyright (c) 1998, 1999 Glenn Randers-Pehrson, and are distributed according to the
same disclaimer and license as libpng-0.96, with the following individuals added to the list of Contributing Authors:
Tom Lane
Glenn Randers-Pehrson
Willem van Schaik
libpng versions 0.89, June 1996, through 0.96, May 1997, are Copyright (c) 1996, 1997 Andreas Dilger Distributed according to the same disclaimer and license
as libpng-0.88, with the following individuals added to the list of Contributing Authors:
John Bowler
Kevin Bracey
Sam Bushell
Magnus Holmgren
Greg Roelofs
Tom Tanner
libpng versions 0.5, May 1995, through 0.88, January 1996, are Copyright (c) 1995, 1996 Guy Eric Schalnat, Group 42, Inc.
For the purposes of this copyright and license, “Contributing Authors” is defined as the following set of individuals:
Andreas Dilger
Dave Martindale
Guy Eric Schalnat
Paul Schmidt
Tim Wegner
The PNG Reference Library is supplied “AS IS”. The Contributing Authors and Group 42, Inc. disclaim all warranties, expressed or implied,
including, without limitation, the warranties of merchantability and of fitness for any purpose. The Contributing Authors and Group 42, Inc. assume no liability
for direct, indirect, incidental, special, exemplary, or consequential damages, which may result from the use of the PNG Reference Library, even if advised of
the possibility of such damage.
Permission is hereby granted to use, copy, modify, and distribute this source code, or portions hereof, for any purpose, without fee, subject to the following
restrictions:
1. The origin of this source code must not be misrepresented.
2. Altered versions must be plainly marked as such and must not be misrepresented as being the original source.
3. This Copyright notice may not be removed or altered from any source or altered source distribution.
The Contributing Authors and Group 42, Inc. specifically permit, without fee, and encourage the use of this source code as a component to supporting the PNG
file format in commercial products. If you use this source code in a product, acknowledgment is not required but would be appreciated.
A “png_get_copyright” function is available, for convenient use in “about” boxes and the like: printf(“%s”,png_get_copyright(NULL)); Also, the PNG logo (in PNG
format, of course) is supplied in the files “pngbar.png” and “pngbar.jpg (88x31) and “pngnow.png” (98x31).
Libpng is OSI Certified Open Source Software. OSI Certified Open Source is a certification mark of the Open Source Initiative.
Glenn Randers-Pehrson
glennrp at users.sourceforge.net
December 3, 2004
[zlib]
This software is based in part on zlib see http://www.zlib.net for information.
55
En
Page 56

Additional information09
[FreeType]
The FreeType Project is copyright (C) 1996-2000 by David Turner, Robert Wilhelm, and Werner Lemberg. All rights reserved except as specified below.
THE FREETYPE PROJECT IS PROVIDED `AS IS' WITHOUT WARRANTY OF ANY KIND, EITHER EXPRESS OR IMPLIED, INCLUDING, BUT NOT LIMITED TO,
WARRANTIES OF MERCHANTABILITY AND FITNESS FOR A PARTICULAR PURPOSE. IN NO EVENT WILL ANY OF THE AUTHORS OR COPYRIGHT HOLDERS
BE LIABLE FOR ANY DAMAGES CAUSED BY THE USE OR THE INABILITY TO USE, OF THE FREETYPE PROJECT.
[GIFLIB]
The GIFLIB distribution is Copyright (c) 1997 Eric S. Raymond
THE SOFTWARE IS PROVIDED “AS IS”, WITHOUT WARRANTY OF ANY KIND, EXPRESS OR IMPLIED, INCLUDING BUT NOT LIMITED TO THE WARRANTIES
OF MERCHANTABILITY, FITNESS FOR A PARTICULAR PURPOSE AND NONINFRINGEMENT. IN NO EVENT SHALL THE AUTHORS OR COPYRIGHT HOLDERS
BE LIABLE FOR ANY CLAIM, DAMAGES OR OTHER LIABILITY, WHETHER IN AN ACTION OF CONTRACT, TORT OR OTHERWISE, ARISING FROM, OUT OF OR
IN CONNECTION WITH THE SOFTWARE OR THE USE OR OTHER DEALINGS IN THE SOFTWARE.
[libhttp]
Copyright (c) 2000-2004 Dag-Erling Smørgrav
All rights reserved.
Redistribution and use in source and binary forms, with or without modification, are permitted provided that the following conditions are met:
1. Redistributions of source code must retain the above copyright notice, this list of conditions and the following disclaimer in this position and unchanged.
2. Redistributions in binary form must reproduce the above copyright notice, this list of conditions and the following disclaimer in the documentation and/or
other materials provided with the distribution.
3. The name of the author may not be used to endorse or promote products derived from this software without specific prior written permission.
THIS SOFTWARE IS PROVIDED BY THE AUTHOR ``AS IS'' AND ANY EXPRESS OR IMPLIED WARRANTIES, INCLUDING, BUT NOT LIMITED TO, THE IMPLIED
WARRANTIES OF MERCHANTABILITY AND FITNESS FOR A PARTICULAR PURPOSE ARE DISCLAIMED. IN NO EVENT SHALL THE AUTHOR BE LIABLE FOR
ANY DIRECT, INDIRECT, INCIDENTAL, SPECIAL, EXEMPLARY, OR CONSEQUENTIAL DAMAGES (INCLUDING, BUT NOT LIMITED TO, PROCUREMENT OF
SUBSTITUTE GOODS OR SERVICES; LOSS OF USE, DATA, OR PROFITS; OR BUSINESS INTERRUPTION) HOWEVER CAUSED AND ON ANY THEORY OF
LIABILITY, WHETHER IN CONTRACT, STRICT LIABILITY, OR TORT (INCLUDING NEGLIGENCE OR OTHERWISE) ARISING IN ANY WAY OUT OF THE USE OF
THIS SOFTWARE, EVEN IF ADVISED OF THE POSSIBILITY OF SUCH DAMAGE.
The following copyright applies to the base64 code:
Copyright 1997 Massachusetts Institute of Technology
Permission to use, copy, modify, and distribute this software and its documentation for any purpose and without fee is hereby granted, provided that both the
above copyright notice and this permission notice appear in all copies, that both the above copyright notice and this permission notice appear in all supporting
documentation, and that the name of M.I.T. not be used in advertising or publicity pertaining to distribution of the software without specific, written prior
permission. M.I.T. makes no representations about the suitability of this software for any purpose. It is provided “as is” without express or implied warranty.
THIS SOFTWARE IS PROVIDED BY M.I.T. “AS IS''. M.I.T. DISCLAIMS ALL EXPRESS OR IMPLIED WARRANTIES WITH REGARD TO THIS SOFTWARE,
INCLUDING, BUT NOT LIMITED TO, THE IMPLIED WARRANTIES OF MERCHANTABILITY AND FITNESS FOR A PARTICULAR PURPOSE. IN NO EVENT SHALL
M.I.T. BE LIABLE FOR ANY DIRECT, INDIRECT, INCIDENTAL, SPECIAL, EXEMPLARY, OR CONSEQUENTIAL DAMAGES (INCLUDING, BUT NOT LIMITED TO,
PROCUREMENT OF SUBSTITUTE GOODS OR SERVICES; LOSS OF USE, DATA, OR PROFITS; OR BUSINESS INTERRUPTION) HOWEVER CAUSED AND ON
ANY THEORY OF LIABILITY, WHETHER IN CONTRACT, STRICT LIABILITY, OR TORT (INCLUDING NEGLIGENCE OR OTHERWISE) ARISING IN ANY WAY OUT
OF THE USE OF THIS SOFTWARE, EVEN IF ADVISED OF THE POSSIBILITY OF SUCH DAMAGE.
[Vera.ttf/VeraMono.ttf]
Copyright (c) 2003 by Bitstream, Inc. All Rights Reserved. Bitstream Vera SansBitstreamVeraSans-RomanRelease 1.10 Copyright (c) 2003 by Bitstream, Inc. All
Rights Reserved. Bitstream Vera is a trademark of Bitstream, Inc.
[TinyLogin]
This software is copyright 1988 - 1994, Julianne Frances Haugh. All rights reserved.
[Shadow Utilities]
This software is copyright 1988 - 1994, Julianne Frances Haugh. All rights reserved.
Bigelow & Holmes Inc and URW++ GmbH Luxi font license
[Luxi fonts]
Luxi fonts copyright (c) 2001 by Bigelow & Holmes Inc. Luxi font instruction code copyright (c) 2001 by URW++ GmbH. All Rights Reserved. Luxi is a registered trademark of Bigelow & Holmes Inc.
THE FONT SOFTWARE IS PROVIDED “AS IS”, WITHOUT WARRANTY OF ANY KIND, EXPRESS OR IMPLIED, INCLUDING BUT NOT LIMITED TO ANY
WARRANTIES OF MERCHANTABILITY, FITNESS FOR A PARTICULAR PURPOSE AND NONINFRINGEMENT OF COPYRIGHT, PATENT, TRADEMARK, OR
OTHER RIGHT. IN NO EVENT SHALL BIGELOW & HOLMES INC. OR URW++GMBH. BE LIABLE FOR ANY CLAIM, DAMAGES OR OTHER LIABILITY,
INCLUDING ANY GEN-ERAL, SPECIAL, INDIRECT, INCIDENTAL, OR CONSEQUENTIAL DAMAGES, WHETHER IN AN ACTION OF CONTRACT, TORT OR
OTHERWISE, ARISING FROM, OUT OF THE USE OR INABILITY TO USE THE FONT SOFTWARE OR FROM OTHER DEALINGS IN THE FONT SOFT-WARE.
56
En
Page 57

Additional information 09
[GNU GENERAL PUBLIC LICENSE]
Version 2, June 1991
Copyright (C) 1989, 1991 Free Software Foundation, Inc., 51 Franklin Street, Fifth Floor, Boston, MA 02110-1301 USA
Everyone is permitted to copy and distribute verbatim copies of this license document, but changing it is not allowed.
Preamble
The licenses for most software are designed to take away your freedom to share and change it. By contrast, the GNU General Public License is intended to
guarantee your freedom to share and change free software--to make sure the software is free for all its users. This General Public License applies to most of
the Free Software Foundation's software and to any other program whose authors commit to using it. (Some other Free Software Foundation software is covered
by the GNU Lesser General Public License instead.) You can apply it to your programs, too.
When we speak of free software, we are referring to freedom, not price. Our General Public Licenses are designed to make sure that you have the freedom to
distribute copies of free software (and charge for this service if you wish), that you receive source code or can get it if you want it, that you can change the
software or use pieces of it in new free programs; and that you know you can do these things.
To protect your rights, we need to make restrictions that forbid anyone to deny you these rights or to ask you to surrender the rights. These restrictions translate
to certain responsibilities for you if you distribute copies of the software, or if you modify it.
For example, if you distribute copies of such a program, whether gratis or for a fee, you must give the recipients all the rights that you have. You must make
sure that they, too, receive or can get the source code. And you must show them these terms so they know their rights.
We protect your rights with two steps: (1) copyright the software, and (2) offer you this license which gives you legal permission to copy, distribute and/or modify
the software.
Also, for each author's protection and ours, we want to make certain that everyone understands that there is no warranty for this free software. If the software
is modified by someone else and passed on, we want its recipients to know that what they have is not the original, so that any problems introduced by others
will not reflect on the original authors' reputations.
Finally, any free program is threatened constantly by software patents. We wish to avoid the danger that redistributors of a free program will individually obtain
patent licenses, in effect making the program proprietary. To prevent this, we have made it clear that any patent must be licensed for everyone's free use or not
licensed at all.
The precise terms and conditions for copying, distribution and modification follow.
GNU GENERAL PUBLIC LICENSE
TERMS AND CONDITIONS FOR COPYING, DISTRIBUTION AND MODIFICATION
0. This License applies to any program or other work which contains a notice placed by the copyright holder saying it may be distributed under the terms of
this General Public License. The “Program”, below, refers to any such program or work, and a “work based on the Program” means either the Program or
any derivative work under copyright law: that is to say, a work containing the Program or a portion of it, either verbatim or with modifications and/or
translated into another language. (Hereinafter, translation is included without limitation in the term “modification”.) Each licensee is addressed as “you”.
Activities other than copying, distribution and modification are not covered by this License; they are outside its scope. The act of running the Program is not
restricted, and the output from the Program is covered only if its contents constitute a work based on the Program (independent of having been made by
running the Program). Whether that is true depends on what the Program does.
1. You may copy and distribute verbatim copies of the Program's source code as you receive it, in any medium, provided that you conspicuously and
appropriately publish on each copy an appropriate copyright notice and disclaimer of warranty; keep intact all the notices that refer to this License and to
the absence of any warranty; and give any other recipients of the Program a copy of this License along with the Program.
You may charge a fee for the physical act of transferring a copy, and you may at your option offer warranty protection in exchange for a fee.
2. You may modify your copy or copies of the Program or any portion of it, thus forming a work based on the Program, and copy and distribute such
modifications or work under the terms of Section 1 above, provided that you also meet all of these conditions:
a) You must cause the modified files to carry prominent notices stating that you changed the files and the date of any change.
b) You must cause any work that you distribute or publish, that in whole or in part contains or is derived from the Program or any part thereof, to be licensed
as a whole at no charge to all third parties under the terms of this License.
c) If the modified program normally reads commands interactively when run, you must cause it, when started running for such interactive use in the most
ordinary way, to print or display an announcement including an appropriate copyright notice and a notice that there is no warranty (or else, saying that
you provide a warranty) and that users may redistribute the program under these conditions, and telling the user how to view a copy of this License.
(Exception: if the Program itself is interactive but does not normally print such an announcement, your work based on the Program is not required to
print an announcement.)
These requirements apply to the modified work as a whole. If identifiable sections of that work are not derived from the Program, and can be reasonably
considered independent and separate works in themselves, then this License, and its terms, do not apply to those sections when you distribute them as
separate works. But when you distribute the same sections as part of a whole which is a work based on the Program, the distribution of the whole must
be on the terms of this License, whose permissions for other licensees extend to the entire whole, and thus to each and every part regardless of who
wrote it.
Thus, it is not the intent of this section to claim rights or contest your rights to work written entirely by you; rather, the intent is to exercise the right to
control the distribution of derivative or collective works based on the Program.
In addition, mere aggregation of another work not based on the Program with the Program (or with a work based on the Program) on a volume of a
storage or distribution medium does not bring the other work under the scope of this License.
3. You may copy and distribute the Program (or a work based on it, under Section 2) in object code or executable form under the terms of Sections 1 and 2
above provided that you also do one of the following:
a) Accompany it with the complete corresponding machine-readable source code, which must be distributed under the terms of Sections 1 and 2 above
on a medium customarily used for software interchange; or,
b) Accompany it with a written offer, valid for at least three years, to give any third party, for a charge no more than your cost of physically performing source
distribution, a complete machine-readable copy of the corresponding source code, to be distributed under the terms of Sections 1 and 2 above on a
medium customarily used for software interchange; or,
57
En
Page 58

Additional information09
c) Accompany it with the information you received as to the offer to distribute corresponding source code. (This alternative is allowed only for
noncommercial distribution and only if you received the program in object code or executable form with such an offer, in accord with Subsection b
above.)
The source code for a work means the preferred form of the work for making modifications to it. For an executable work, complete source code means
all the source code for all modules it contains, plus any associated interface definition files, plus the scripts used to control compilation and installation
of the executable. However, as a special exception, the source code distributed need not include anything that is normally distributed (in either source
or binary form) with the major components (compiler, kernel, and so on) of the operating system on which the executable runs, unless that component
itself accompanies the executable.
If distribution of executable or object code is made by offering access to copy from a designated place, then offering equivalent access to copy the source
code from the same place counts as distribution of the source code, even though third parties are not compelled to copy the source along with the object
code.
4. You may not copy, modify, sublicense, or distribute the Program except as expressly provided under this License. Any attempt otherwise to copy, modify,
sublicense or distribute the Program is void, and will automatically terminate your rights under this License. However, parties who have received copies, or
rights, from you under this License will not have their licenses terminated so long as such parties remain in full compliance.
5. You are not required to accept this License, since you have not signed it. However, nothing else grants you permission to modify or distribute the Program
or its derivative works. These actions are prohibited by law if you do not accept this License. Therefore, by modifying or distributing the Program (or any work
based on the Program), you indicate your acceptance of this License to do so, and all its terms and conditions for copying, distributing or modifying the
Program or works based on it.
6. Each time you redistribute the Program (or any work based on the Program), the recipient automatically receives a license from the original licensor to copy,
distribute or modify the Program subject to these terms and conditions. You may not impose any further restrictions on the recipients' exercise of the rights
granted herein.
You are not responsible for enforcing compliance by third parties to this License.
7. If, as a consequence of a court judgment or allegation of patent infringement or for any other reason (not limited to patent issues),
conditions are imposed on you (whether by court order, agreement or otherwise) that contradict the conditions of this License, they do not excuse you from
the conditions of this License. If you cannot distribute so as to satisfy simultaneously your obligations under this License and any other pertinent obligations,
then as a consequence you may not distribute the Program at all. For example, if a patent license would not permit royalty-free redistribution of the Program
by all those who receive copies directly or indirectly through you, then the only way you could satisfy both it and this License would be to refrain entirely from
distribution of the Program.
If any portion of this section is held invalid or unenforceable under any particular circumstance, the balance of the section is intended to apply and the
section as a whole is intended to apply in other circumstances.
It is not the purpose of this section to induce you to infringe any patents or other property right claims or to contest validity of any such claims; this section
has the sole purpose of protecting the integrity of the free software distribution system, which is implemented by public license practices. Many people have
made generous contributions to the wide range of software distributed through that system in reliance on consistent application of that system; it is up to
the author/donor to decide if he or she is willing to distribute software through any other system and a licensee cannot impose that choice.
This section is intended to make thoroughly clear what is believed to be a consequence of the rest of this License.
8. If the distribution and/or use of the Program is restricted in certain countries either by patents or by copyrighted interfaces, the original copyright holder
who places the Program under this License may add an explicit geographical distribution limitation excluding those countries, so that distribution is
permitted only in or among countries not thus excluded. In such case, this License incorporates the limitation as if written in the body of this License.
9. The Free Software Foundation may publish revised and/or new versions of the General Public License from time to time. Such new versions will be similar
in spirit to the present version, but may differ in detail to address new problems or concerns.
Each version is given a distinguishing version number. If the Program specifies a version number of this License which applies to it and “any later version”,
you have the option of following the terms and conditions either of that version or of any later version published by the Free Software Foundation. If the
Program does not specify a version number of this License, you may choose any version ever published by the Free Software Foundation.
10.If you wish to incorporate parts of the Program into other free programs whose distribution conditions are different, write to the author to ask for permission.
For software which is copyrighted by the Free Software Foundation, write to the Free Software Foundation; we sometimes make exceptions for this. Our
decision will be guided by the two goals of preserving the free status of all derivatives of our free software and of promoting the sharing and reuse of software
generally.
NO WARRANTY
11.BECAUSE THE PROGRAM IS LICENSED FREE OF CHARGE, THERE IS NO WARRANTY FOR THE PROGRAM, TO THE EXTENT PERMITTED BY APPLICABLE
LAW. EXCEPT WHEN OTHERWISE STATED IN WRITING THE COPYRIGHT HOLDERS AND/OR OTHER PARTIES PROVIDE THE PROGRAM “AS IS” WITHOUT
WARRANTY OF ANY KIND, EITHER EXPRESSED OR IMPLIED, INCLUDING, BUT NOT LIMITED TO, THE IMPLIED WARRANTIES OF MERCHANTABILITY
AND FITNESS FOR A PARTICULAR PURPOSE. THE ENTIRE RISK AS TO THE QUALITY AND PERFORMANCE OF THE PROGRAM IS WITH YOU. SHOULD
THE PROGRAM PROVE DEFECTIVE, YOU ASSUME THE COST OF ALL NECESSARY SERVICING, REPAIR OR CORRECTION.
12.IN NO EVENT UNLESS REQUIRED BY APPLICABLE LAW OR AGREED TO IN WRITING WILL ANY COPYRIGHT HOLDER, OR ANY OTHER PARTY WHO MAY
MODIFY AND/OR REDISTRIBUTE THE PROGRAM AS PERMITTED ABOVE, BE LIABLE TO YOU FOR DAMAGES, INCLUDING ANY GENERAL, SPECIAL,
INCIDENTAL OR CONSEQUENTIAL DAMAGES ARISING OUT OF THE USE OR INABILITY TO USE THE PROGRAM (INCLUDING BUT NOT LIMITED TO LOSS
OF DATA OR DATA BEING RENDERED INACCURATE OR LOSSES SUSTAINED BY YOU OR THIRD PARTIES OR A FAILURE OF THE PROGRAM TO
OPERATE WITH ANY OTHER PROGRAMS), EVEN IF SUCH HOLDER OR OTHER PARTY HAS BEEN ADVISED OF THE POSSIBILITY OF SUCH DAMAGES.
END OF TERMS AND CONDITIONS
58
En
Page 59

Additional information 09
How to Apply These Terms to Your New Programs
If you develop a new program, and you want it to be of the greatest possible use to the public, the best way to achieve this is to make it free software which
everyone can redistribute and change under these terms.
To do so, attach the following notices to the program. It is safest to attach them to the start of each source file to most effectively convey the exclusion of
warranty; and each file should have at least the “copyright” line and a pointer to where the full notice is found.
<one line to give the program's name and a brief idea of what it does.>
Copyright (C) <year> <name of author>
This program is free software; you can redistribute it and/or modify it under the terms of the GNU General Public License as published by
the Free Software Foundation; either version 2 of the License, or (at your option) any later version.
This program is distributed in the hope that it will be useful, but WITHOUT ANY WARRANTY; without even the implied warranty of MERCHANTABILITY or
FITNESS FOR A PARTICULAR PURPOSE. See the GNU General Public License for more details.
You should have received a copy of the GNU General Public License along with this program; if not, write to the Free Software Foundation, Inc., 51 Franklin
Street, Fifth Floor, Boston, MA 02110-1301 USA.
Also add information on how to contact you by electronic and paper mail.
If the program is interactive, make it output a short notice like this when it starts in an interactive mode:
Gnomovision version 69, Copyright (C) year name of author
Gnomovision comes with ABSOLUTELY NO WARRANTY; for details type `show w'. This is free software, and you are welcome to redistribute it under certain
conditions; type `show c' for details.
The hypothetical commands `show w' and `show c' should show the appropriate parts of the General Public License. Of course, the commands you use may
be called something other than `show w' and `show c'; they could even be mouse-clicks or menu items--whatever suits your program.
You should also get your employer (if you work as a programmer) or your school, if any, to sign a “copyright disclaimer” for the program, if necessary. Here is
a sample; alter the names:
Yoyodyne, Inc., hereby disclaims all copyright interest in the program ‘Gnomovision' (which makes passes at compilers) written by James Hacker.
<signature of Ty Coon>, 1 April 1989
Ty Coon, President of Vice
This General Public License does not permit incorporating your program into proprietary programs. If your program is a subroutine library, you may consider
it more useful to permit linking proprietary applications with the library. If this is what you want to do, use the GNU Lesser General Public License instead of
this License.
GNU LESSER GENERAL PUBLIC LICENSE
Version 2.1, February 1999
Copyright (C) 1991, 1999 Free Software Foundation, Inc.
51 Franklin Street, Fifth Floor, Boston, MA 02110-1301 USA
Everyone is permitted to copy and distribute verbatim copies of this license document, but changing it is not allowed.
[This is the first released version of the Lesser GPL. It also counts as the successor of the GNU Library Public License, version 2, hence the version number 2.1.]
Preamble
The licenses for most software are designed to take away your freedom to share and change it. By contrast, the GNU General Public Licenses are intended to
guarantee your freedom to share and change free software--to make sure the software is free for all its users. This license, the Lesser General Public License,
applies to some specially designated software packages--typically libraries--of the Free Software Foundation and other authors who decide to use it. You can
use it too, but we suggest you first think carefully about whether this license or the ordinary General Public License is the better strategy to use in any particular
case, based on the explanations below.
When we speak of free software, we are referring to freedom of use, not price. Our General Public Licenses are designed to make sure that you have the freedom
to distribute copies of free software (and charge for this service if you wish); that you receive source code or can get it if you want it; that you can change the
software and use pieces of it in new free programs; and that you are informed that you can do these things.
To protect your rights, we need to make restrictions that forbid distributors to deny you these rights or to ask you to surrender these rights. These restrictions
translate to certain responsibilities for you if you distribute copies of the library or if you modify it.
For example, if you distribute copies of the library, whether gratis or for a fee, you must give the recipients all the rights that we gave you. You must make sure
that they, too, receive or can get the source code. If you link other code with the library, you must provide complete object files to the recipients, so that they
can relink them with the library after making changes to the library and recompiling it. And you must show them these terms so they know their rights. We
protect your rights with a two-step method: (1) we copyright the library, and (2) we offer you this license, which gives you legal permission to copy, distribute
and/or modify the library.
To protect each distributor, we want to make it very clear that there is no warranty for the free library. Also, if the library is modified by someone else and passed
on, the recipients should know that what they have is not the original version, so that the original author's reputation will not be affected by problems that might
be introduced by others.
Finally, software patents pose a constant threat to the existence of any free program. We wish to make sure that a company cannot effectively restrict the users
of a free program by obtaining a restrictive license from a patent holder. Therefore, we insist that any patent license obtained for a version of the library must
be consistent with the full freedom of use specified in this license.
Most GNU software, including some libraries, is covered by the ordinary GNU General Public License. This license, the GNU Lesser General Public License,
applies to certain designated libraries, and is quite different from the ordinary General Public License. We use this license for certain libraries in order to permit
linking those libraries into non-free programs.
When a program is linked with a library, whether statically or using a shared library, the combination of the two is legally speaking a combined work, a derivative
of the original library. The ordinary General Public License therefore permits such linking only if the entire combination fits its criteria of freedom. The Lesser
General Public License permits more lax criteria for linking other code with the library.
We call this license the “Lesser” General Public License because it does Less to protect the user's freedom than the ordinary General Public License. It also
provides other free software developers Less of an advantage over competing non-free programs. These disadvantages are the reason we use the ordinary
General Public License for many libraries. However, the Lesser license provides advantages in certain special circumstances.
For example, on rare occasions, there may be a special need to encourage the widest possible use of a certain library, so that it becomes a de-facto standard.
To achieve this, non-free programs must be allowed to use the library. A more frequent case is that a free library does the same job as widely used non-free
libraries. In this case, there is little to gain by limiting the free library to free software only, so we use the Lesser General Public License.
In other cases, permission to use a particular library in non-free programs enables a greater number of people to use a large body of free software. For example,
permission to use the GNU C Library in non-free programs enables many more people to use the whole GNU operating system, as well as its variant, the GNU
Linux operating system.
Although the Lesser General Public License is Less protective of the users' freedom, it does ensure that the user of a program that is linked with the Library has
the freedom and the wherewithal to run that program using a modified version of the Library.
59
En
Page 60

Additional information09
The precise terms and conditions for copying, distribution and modification follow. Pay close attention to the difference between a “work based on the library”
and a “work that uses the library”. The former contains code derived from the library, whereas the latter must be combined with the library in order to run.
GNU LESSER GENERAL PUBLIC LICENSE
TERMS AND CONDITIONS FOR COPYING, DISTRIBUTION AND MODIFICATION
0. This License Agreement applies to any software library or other program which contains a notice placed by the copyright holder or other authorized party
saying it may be distributed under the terms of this Lesser General Public License (also called “this License”). Each licensee is addressed as “you”.
A “library” means a collection of software functions and/or data prepared so as to be conveniently linked with application programs (which use some of
those functions and data) to form executables.
The “Library”, below, refers to any such software library or work which has been distributed under these terms. A “work based on the Library” means either
the Library or any derivative work under copyright law: that is to say, a work containing the Library or a portion of it, either verbatim or with modifications
and/or translated straightforwardly into another language. (Hereinafter, translation is included without limitation in the term “modification”.)
“Source code” for a work means the preferred form of the work for making modifications to it. For a library, complete source code means all the source code
for all modules it contains, plus any associated interface definition files, plus the scripts used to control compilation and installation of the library.
Activities other than copying, distribution and modification are not covered by this License; they are outside its scope. The act of running a program using
the Library is not restricted, and output from such a program is covered only if its contents constitute a work based on the Library (independent of the use
of the Library in a tool for writing it). Whether that is true depends on what the Library does and what the program that uses the Library does.
1. You may copy and distribute verbatim copies of the Library's complete source code as you receive it, in any medium, provided that you conspicuously and
appropriately publish on each copy an appropriate copyright notice and disclaimer of warranty; keep intact all the notices that refer to this License and to
the absence of any warranty; and distribute a copy of this License along with the Library.
You may charge a fee for the physical act of transferring a copy, and you may at your option offer warranty protection in exchange for a fee.
2. You may modify your copy or copies of the Library or any portion of it, thus forming a work based on the Library, and copy and distribute such modifications
or work under the terms of Section 1 above, provided that you also meet all of these conditions:
a) The modified work must itself be a software library.
b) You must cause the files modified to carry prominent notices stating that you changed the files and the date of any change.
c) You must cause the whole of the work to be licensed at no charge to all third parties under the terms of this License.
d) If a facility in the modified Library refers to a function or a table of data to be supplied by an application program that uses the facility, other than as an
argument passed when the facility is invoked, then you must make a good faith effort to ensure that, in the event an application does not supply such
function or table, the facility still operates, and performs whatever part of its purpose remains meaningful. (For example, a function in a library to compute
square roots has a purpose that is entirely well-defined independent of the application. Therefore, Subsection 2d requires that any application-supplied
function or table used by this function must be optional: if the application does not supply it, the square root function must still compute square roots.)
These requirements apply to the modified work as a whole. If identifiable sections of that work are not derived from the Library, and can be reasonably
considered independent and separate works in themselves, then this License, and its terms, do not apply to those sections when you distribute them as
separate works. But when you distribute the same sections as part of a whole which is a work based on the Library, the distribution of the whole must
be on the terms of this License, whose permissions for other licensees extend to the entire whole, and thus to each and every part regardless of who
wrote it.
Thus, it is not the intent of this section to claim rights or contest your rights to work written entirely by you; rather, the intent is to exercise the right to
control the distribution of derivative or collective works based on the Library.
In addition, mere aggregation of another work not based on the Library with the Library (or with a work based on the Library) on a volume of a storage or
distribution medium does not bring the other work under the scope of this License.
3. You may opt to apply the terms of the ordinary GNU General Public License instead of this License to a given copy of the Library. To do this, you must alter
all the notices that refer to this License, so that they refer to the ordinary GNU General Public License, version 2, instead of to this License. (If a newer version
than version 2 of the ordinary GNU General Public License has appeared, then you can specify that version instead if you wish.) Do not make any other
change in these notices.
Once this change is made in a given copy, it is irreversible for that copy, so the ordinary GNU General Public License applies to all subsequent copies and
derivative works made from that copy. This option is useful when you wish to copy part of the code of the Library into a program that is not a library.
4. You may copy and distribute the Library (or a portion or derivative of it, under Section 2) in object code or executable form under the terms of Sections 1 and
2 above provided that you accompany it with the complete corresponding machine-readable source code, which must be distributed under the terms of
Sections 1 and 2 above on a medium customarily used for software interchange.
If distribution of object code is made by offering access to copy from a designated place, then offering equivalent access to copy the source code from the
same place satisfies the requirement to distribute the source code, even though third parties are not compelled to copy the source along with the object
code.
5. A program that contains no derivative of any portion of the Library, but is designed to work with the Library by being compiled or linked with it, is called a
“work that uses the Library”. Such a work, in isolation, is not a derivative work of the Library, and therefore falls outside the scope of this License.
However, linking a “work that uses the Library” with the Library creates an executable that is a derivative of the Library (because it contains portions of the
Library), rather than a “work that uses the library”. The executable is therefore covered by this License. Section 6 states terms for distribution of such
executables.
When a “work that uses the Library” uses material from a header file that is part of the Library, the object code for the work may be a derivative work of the
Library even though the source code is not. Whether this is true is especially significant if the work can be linked without the Library, or if the work is itself
a library. The threshold for this to be true is not precisely defined by law.
If such an object file uses only numerical parameters, data structure layouts and accessors, and small macros and small inline functions (ten lines or less
in length), then the use of the object file is unrestricted, regardless of whether it is legally a derivative work. (Executables containing this object code plus
portions of the Library will still fall under Section 6.)
Otherwise, if the work is a derivative of the Library, you may distribute the object code for the work under the terms of Section 6. Any executables containing
that work also fall under Section 6, whether or not they are linked directly with the Library itself.
6. As an exception to the Sections above, you may also combine or link a “work that uses the Library” with the Library to produce a work containing portions
of the Library, and distribute that work under terms of your choice, provided that the terms permit modification of the work for the customer's own use and
reverse engineering for debugging such modifications.
You must give prominent notice with each copy of the work that the Library is used in it and that the Library and its use are covered by this License. You
must supply a copy of this License. If the work during execution displays copyright notices, you must include the copyright notice for the Library among
them, as well as a reference directing the user to the copy of this License. Also, you must do one of these things:
a) Accompany the work with the complete corresponding machine-readable source code for the Library including whatever changes were used in the work
(which must be distributed under Sections 1 and 2 above); and, if the work is an executable linked with the Library, with the complete machine-readable
“work that uses the Library”, as object code and/or source code, so that the user can modify the Library and then relink to produce a modified executable
containing the modified Library. (It is understood that the user who changes the contents of definitions files in the Library will not necessarily be able to
recompile the application to use the modified definitions.)
60
En
Page 61

Additional information 09
b) Use a suitable shared library mechanism for linking with the Library. A suitable mechanism is one that (1) uses at run time a copy of the library already
present on the user's computer system, rather than copying library functions into the executable, and (2) will operate properly with a modified version of
the library, if the user installs one, as long as the modified version is interface-compatible with the version that the work was made with.
c) Accompany the work with a written offer, valid for at least three years, to give the same user the materials specified in Subsection 6a, above, for a charge
no more than the cost of performing this distribution.
d) If distribution of the work is made by offering access to copy from a designated place, offer equivalent access to copy the above specified materials from
the same place.
e) Verify that the user has already received a copy of these materials or that you have already sent this user a copy.
For an executable, the required form of the “work that uses the Library” must include any data and utility programs needed for reproducing the executable
from it. However, as a special exception, the materials to be distributed need not include anything that is normally distributed (in either source or binary
form) with the major components (compiler, kernel, and so on) of the operating system on which the executable runs, unless that component itself
accompanies the executable.
It may happen that this requirement contradicts the license restrictions of other proprietary libraries that do not normally accompany the operating
system. Such a contradiction means you cannot use both them and the Library together in an executable that you distribute.
7. You may place library facilities that are a work based on the Library side-by-side in a single library together with other library facilities not covered by this
License, and distribute such a combined library, provided that the separate distribution of the work based on the Library and of the other library facilities is
otherwise permitted, and provided that you do these two things:
a) Accompany the combined library with a copy of the same work based on the Library, uncombined with any other library facilities. This must be distributed
under the terms of the Sections above.
b) Give prominent notice with the combined library of the fact that part of it is a work based on the Library, and explaining where to find the accompanying
uncombined form of the same work.
8. You may not copy, modify, sublicense, link with, or distribute the Library except as expressly provided under this License. Any attempt otherwise to copy,
modify, sublicense, link with, or distribute the Library is void, and will automatically terminate your rights under this License. However, parties who have
received copies, or rights, from you under this License will not have their licenses terminated so long as such parties remain in full compliance.
9. You are not required to accept this License, since you have not signed it. However, nothing else grants you permission to modify or distribute the Library or
its derivative works. These actions are prohibited by law if you do not accept this License. Therefore, by modifying or distributing the Library (or any work
based on the Library), you indicate your acceptance of this License to do so, and all its terms and conditions for copying, distributing or modifying the Library
or works based on it.
10.Each time you redistribute the Library (or any work based on the Library), the recipient automatically receives a license from the original licensor to copy,
distribute, link with or modify the Library subject to these terms and conditions. You may not impose any further restrictions on the recipients' exercise of
the rights granted herein. You are not responsible for enforcing compliance by third parties with this License.
11.If, as a consequence of a court judgment or allegation of patent infringement or for any other reason (not limited to patent issues), conditions are imposed
on you (whether by court order, agreement or otherwise) that contradict the conditions of this License, they do not excuse you from the conditions of this
License. If you cannot distribute so as to satisfy simultaneously your obligations under this License and any other pertinent obligations, then as a
consequence you may not distribute the Library at all. For example, if a patent license would not permit royalty-free redistribution of the Library by all those
who receive copies directly or indirectly through you, then the only way you could satisfy both it and this License would be to refrain entirely from distribution
of the Library.
If any portion of this section is held invalid or unenforceable under any particular circumstance, the balance of the section is intended to apply, and the
section as a whole is intended to apply in other circumstances.
It is not the purpose of this section to induce you to infringe any patents or other property right claims or to contest validity of any such claims; this section
has the sole purpose of protecting the integrity of the free software distribution system which is implemented by public license practices. Many people have
made generous contributions to the wide range of software distributed through that system in reliance on consistent application of that system; it is up to
the author donor to decide if he or she is willing to distribute software through any other system and a licensee cannot impose that choice.
This section is intended to make thoroughly clear what is believed to be a consequence of the rest of this License.
12.If the distribution and/or use of the Library is restricted in certain countries either by patents or by copyrighted interfaces, the original copyright holder who
places the Library under this License may add an explicit geographical distribution limitation excluding those countries, so that distribution is permitted
only in or among countries not thus excluded. In such case, this License incorporates the limitation as if written in the body of this License.
13.The Free Software Foundation may publish revised and/or new versions of the Lesser General Public License from time to time. Such new versions will be
similar in spirit to the present version, but may differ in detail to address new problems or concerns.
Each version is given a distinguishing version number. If the Library specifies a version number of this License which applies to it and “any later version”,
you have the option of following the terms and conditions either of that version or of any later version published by the Free Software Foundation. If the
Library does not specify a license version number, you may choose any version ever published by the Free Software Foundation.
14.If you wish to incorporate parts of the Library into other free programs whose distribution conditions are incompatible with these, write to the author to ask
for permission. For software which is copyrighted by the Free Software Foundation, write to the Free Software Foundation; we sometimes make exceptions
for this. Our decision will be guided by the two goals of preserving the free status of all derivatives of our free software and of promoting the sharing and
reuse of software generally.
NO WARRANTY
15.BECAUSE THE LIBRARY IS LICENSED FREE OF CHARGE, THERE IS NO WARRANTY FOR THE LIBRARY, TO THE EXTENT PERMITTED BY APPLICABLE LAW.
EXCEPT WHEN OTHERWISE STATED IN WRITING THE COPYRIGHT HOLDERS AND/OR OTHER PARTIES PROVIDE THE LIBRARY “AS IS” WITHOUT
WARRANTY OF ANY KIND, EITHER EXPRESSED OR IMPLIED, INCLUDING, BUT NOT LIMITED TO, THE IMPLIED WARRANTIES OF MERCHANTABILITY
AND FITNESS FOR A PARTICULAR PURPOSE. THE ENTIRE RISK AS TO THE QUALITY AND PERFORMANCE OF THE LIBRARY IS WITH YOU. SHOULD THE
LIBRARY PROVE DEFECTIVE, YOU ASSUME THE COST OF ALL NECESSARY SERVICING, REPAIR OR CORRECTION.
16.IN NO EVENT UNLESS REQUIRED BY APPLICABLE LAW OR AGREED TO IN WRITING WILL ANY COPYRIGHT HOLDER, OR ANY OTHER PARTY WHO MAY
MODIFY AND/OR REDISTRIBUTE THE LIBRARY AS PERMITTED ABOVE, BE LIABLE TO YOU FOR DAMAGES, INCLUDING ANY GENERAL, SPECIAL,
INCIDENTAL OR CONSEQUENTIAL DAMAGES ARISING OUT OF THE USE OR INABILITY TO USE THE LIBRARY (INCLUDING BUT NOT LIMITED TO LOSS
OF DATA OR DATA BEING RENDERED INACCURATE OR LOSSES SUSTAINED BY YOU OR THIRD PARTIES OR A FAILURE OF THE LIBRARY TO OPERATE
WITH ANY OTHER SOFTWARE), EVEN IF SUCH HOLDER OR OTHER PARTY HAS BEEN ADVISED OF THE POSSIBILITY OF SUCH DAMAGES.
END OF TERMS AND CONDITIONS
61
En
Page 62

Additional information09
How to Apply These Terms to Your New Libraries
If you develop a new library, and you want it to be of the greatest possible use to the public, we recommend making it free software that everyone can redistribute
and change. You can do so by permitting redistribution under these terms (or, alternatively, under the terms of the ordinary General Public License).
To apply these terms, attach the following notices to the library. It is safest to attach them to the start of each source file to most effectively convey the exclusion
of warranty; and each file should have at least the “copyright” line and a pointer to where the full notice is found.
<one line to give the library's name and a brief idea of what it does.>
Copyright (C) <year> <name of author>
This library is free software; you can redistribute it and/or modify it under the terms of the GNU Lesser General Public License as published by the Free Software
Foundation; either version 2.1 of the License, or (at your option) any later version.
This library is distributed in the hope that it will be useful, but WITHOUT ANY WARRANTY; without even the implied warranty of MERCHANTABILITY or FITNESS
FOR A PARTICULAR PURPOSE. See the GNU Lesser General Public License for more details.
You should have received a copy of the GNU Lesser General Public License along with this library; if not, write to the Free Software Foundation, Inc., 51 Franklin
Street, Fifth Floor, Boston, MA 02110-1301 USA
Also add information on how to contact you by electronic and paper mail.
You should also get your employer (if you work as a programmer) or your school, if any, to sign a “copyright disclaimer” for the library, if necessary. Here is a
sample; alter the names:
Yoyodyne, Inc., hereby disclaims all copyright interest in the library `Frob' (a library for tweaking knobs) written by James Random Hacker.
<signature of Ty Coon>, 1 April 1990
Ty Coon, President of Vice
That's all there is to it!
Linux Source Notice
The software programs used on this product include the Linux operating system. The Linux contains software licensed for use based on the terms of a GNU
General Public License. The machine readable copy of the corresponding source code is available for the cost of distribution.
To obtain a copy, please visit http://www.pioneerelectronics.com/ for more information.
Details of the GNU General Public License can be found at the GNU website (http://www.gnu.org).
62
En
Page 63
Additional information 09
Specifications
General
System . . . . . . . . . . . . . . . . . . . . . . . . . . . . . . . . . . . . Blu-ray Disc PLAYER
Power requirements. . . . . . . . . . . . . . . . . . . . . . . . . . . . . AC 120 V, 60 Hz
Power consumption . . . . . . . . . . . . . . . . . . . . . . . . . . . . . . . . . . . . . . .39 W
Power consumption (standby) . . . . . . . . . . . . . . . . . . . . . . . . . . . . . 0.5 W
Weight . . . . . . . . . . . . . . . . . . . . . . . . . . . . . . . . . . . . . . 6.3 kg (13 lb 15 oz)
Dimensions . . . . . . . . . . . . . . . . .420 mm (W) x 94 mm (H) x 359 mm (D)
Operating temperature . . . . . . . . . . . . . . . . . . . . . . . . . . +5 °C to +35 °C
Operating humidity . . . . . . . . . . . . . . . . . 5 % to 85 % (no condensation)
(BD-ROM, DVD-Video, DVD-R/RW, network file playback)
9
/16 in. (W) x 4 5/8 in. (H) x 14 3/16 in. (D))
(16
HDMI output
HDMI output . . . . . . . . . . . . . . . . . . . . . . . . . . . . . . . . . . . . . . . . . . . .19 pin
Component Video output (Y, PB, PR)
Output level . . . . . . . . . . . . . . . . . . . . . . . . . . . . . . . . . . . Y: 1.0 Vp-p (75 Ω)
Jacks . . . . . . . . . . . . . . . . . . . . . . . . . . . . . . . . . . . . . . . . . . . . . . RCA jacks
PB, PR: 0.7 Vp-p (75 Ω)
S-Video output
Y (luminance) - Output level . . . . . . . . . . . . . . . . . . . . . . . . . 1 Vp-p (75 Ω)
C (color) - Output level . . . . . . . . . . . . . . . . . . . . . . . . . . 286 mVp-p (75 Ω)
Jack . . . . . . . . . . . . . . . . . . . . . . . . . . . . . . . . . . . . . . . . . . . . . S-Video jack
Video output
Output level . . . . . . . . . . . . . . . . . . . . . . . . . . . . . . . . . . . . . . 1 Vp-p (75 Ω)
Jack . . . . . . . . . . . . . . . . . . . . . . . . . . . . . . . . . . . . . . . . . . . . . . . . RCA jack
Audio output (1 stereo pair)
Output level . . . . . . . . . . . . . . . . . . . . . . . . . . . . . . . . .During audio output
Number of channels . . . . . . . . . . . . . . . . . . . . . . . . . . . . . . . . . . . . . . . . . 2
Jacks . . . . . . . . . . . . . . . . . . . . . . . . . . . . . . . . . . . . . . . . . . . . . . . RCA jack
200 mVrms (1 kHz, –20 dB)
Audio output (multi-channel/L, R, C, SW, LS, RS)
Output level . . . . . . . . . . . . . . . . . . . . . . . . . . . . . . . . During audio output
200 mVrms (1 kHz, –20 dB)
Number of channels . . . . . . . . . . . . . . . . . . . . . . . . . . . . . . . . . . . . . . . . . 6
Jacks . . . . . . . . . . . . . . . . . . . . . . . . . . . . . . . . . . . . . . . . . . . . . . RCA jack
Audio characteristics
Frequency response. . . . . . . . . . . . . . . . . . . . . . . . . . . . . . . 4 Hz to 22 kHz
S/N ratio . . . . . . . . . . . . . . . . . . . . . . . . . . . . . . . . . . . . . . . . . . . . . . 114 dB
Dynamic range. . . . . . . . . . . . . . . . . . . . . . . . . . . . . . . . . . . . . . . . 102.5 dB
Total harmonic distortion . . . . . . . . . . . . . . . . . . . . . . . . . . . . . . . .0.001 %
Wow and flutter . . . . . . . . . . . . . . . . . . . . . . . . . . . Limit of measurement
(0.001 % W. PEAK) or lower
Digital output
Optical digital output . . . . . . . . . . . . . . . . . . . . . . . . . Optical digital jack
Coaxial digital output. . . . . . . . . . . . . . . . . . . . . . . . . . . . . . . . . . RCA jack
Other terminals
LAN terminal . . . . . . . . . . . . . . . . . . . . . . . . . . . . . . . . . . . . . Ethernet jack
10 BASE-T/100 BASE-TX
Control in . . . . . . . . . . . . . . . . . . . . . . . . . . . . . . . . . . . . . . Minijack (3.5 ø)
IR in . . . . . . . . . . . . . . . . . . . . . . . . . . . . . . . . . . . . . . . . . . . Minijack (3.5 ø)
Accessories
Remote control. . . . . . . . . . . . . . . . . . . . . . . . . . . . . . . . . . . . . . . . . . . . . . 1
AA/R6P dry cell batteries . . . . . . . . . . . . . . . . . . . . . . . . . . . . . . . . . . . . . 2
Stereo audio cable (red/white plugs) . . . . . . . . . . . . . . . . . . . . . . . . . . . . 1
Video cable (yellow plugs). . . . . . . . . . . . . . . . . . . . . . . . . . . . . . . . . . . . . 1
Power cable . . . . . . . . . . . . . . . . . . . . . . . . . . . . . . . . . . . . . . . . . . . . . . . . 1
Warranty card. . . . . . . . . . . . . . . . . . . . . . . . . . . . . . . . . . . . . . . . . . . . . . . 1
These operating instructions
The specifications and design of this product are subject to change without notice.
This product includes FontAvenue® fonts licenced
by NEC corporation. FontAvenue is a registered
trademark of NEC Corporation.
63
En
Page 64

Should this product require service in the U.S.A. and you wish to locate the nearest
Pioneer Authorized Independent Service Company, or if you wish to purchase replacement
parts, operating instructions, service manuals, or accessories, please call the number
shown below.
8 0 0 – 4 2 1 – 1 4 0 4
Please do not ship your product to Pioneer without first calling the Customer Support
Division at the above listed number for assistance.
Pioneer Electronics (USA) Inc.
Customer Support Division
P. O. BOX 1760, Long Beach,
CA 90801-1760, U.S.A.
For warranty information please see the Limited Warranty sheet included with your product.
Should this product require service in Canada, please contact a Pioneer Canadian
Authorized Dealer to locate the nearest Pioneer Authorized Service Company in Canada.
Alternatively, please contact the Customer Satisfaction Department at the following
address:
Pioneer Electronics of Canada, Inc.
Customer Satisfaction Department
300 Allstate Parkway, Markham, Ontario L3R OP2
1(877)283-5901
For warranty information please see the Limited Warranty sheet included with your product.
Si ce produit doit être réparé au Canada, veuillez vous adresser à un distributeur autorisé
Pioneer du Canada pour obtenir le nom du Centre de Service Autorisé Pioneer le plus près
de chez-vous. Vous pouvez aussi contacter le Service à la clientèle de Pioneer:
Pioneer Électroniques du Canada, Inc.
Service à la clientèle
300, Allstate Parkway, Markham, Ontario L3R OP2
1(877)283-5901
Pour obtenir des renseignements sur la garantie, veuillez vous reporter au feuillet sur la
garantie restreinte qui accompagne le produit.
PIONEER, ELITE, SOUND.VISION.SOUL, and the Pioneer, Elite and
sound.vision.soul logos are trademarks of Pioneer Corporation.
PIONEER CORPORATION
4-1, Meguro 1-Chome, Meguro-ku, Tokyo 153-8654, Japan
PIONEER ELECTRONICS (USA) INC.
P.O. BOX 1540, Long Beach, California 90810-1540, U.S.A. TEL: (800) 421-1404
PIONEER ELECTRONICS OF CANADA, INC.
300 Allstate Parkway, Markham, Ontario L3R OP2, Canada TEL: 1-877-283-5901
PIONEER EUROPE NV
Haven 1087, Keetberglaan 1, B-9120 Melsele, Belgium TEL: 03/570.05.11
PIONEER ELECTRONICS ASIACENTRE PTE. LTD.
253 Alexandra Road, #04-01, Singapore 159936 TEL: 65-6472-7555
PIONEER ELECTRONICS AUSTRALIA PTY. LTD.
178-184 Boundary Road, Braeside, Victoria 3195, Australia, TEL: (03) 9586-6300
PIONEER ELECTRONICS DE MEXICO S.A. DE C.V.
Blvd.Manuel Avila Camacho 138 10 piso Col.Lomas de Chapultepec, Mexico,D.F. 11000 TEL: 55-9178-4270
S018_A_EF
Published by Pioneer Corporation.
Copyright © 2006 Pioneer Corporation.
All rights reserved.
K002_A_En
<VRB1410-A>Printed in Japan<06I00000>
 Loading...