


Not to exact scale – shows pole
and connector placement only.
3-way Corner Connectors
Assembled Sizes: Model 45 – 2.5’W x 2.5’D x 7.1’H
Model 90 – 3.6’W x 3.6’D x 7.1’H
Model 150 – 4.6’W x 4.6’D x 7.1’H
BEFORE YOU BEGIN:
Make sure you have a clear, unobstructed area to work in. Lay out all poles and connectors,
grouped according to their size and/or shape. 2 PEOPLE are recommended to safely lift and
fit tent body over assembled frame.
Lay out tent body, unzip all doors, then fully expose
rubberized floor tray and smooth it flat. Start frame
assembly with floor poles first, inside floor tray as shown.
INSTRUCTIONS
TM
Models 45, 90 & 150
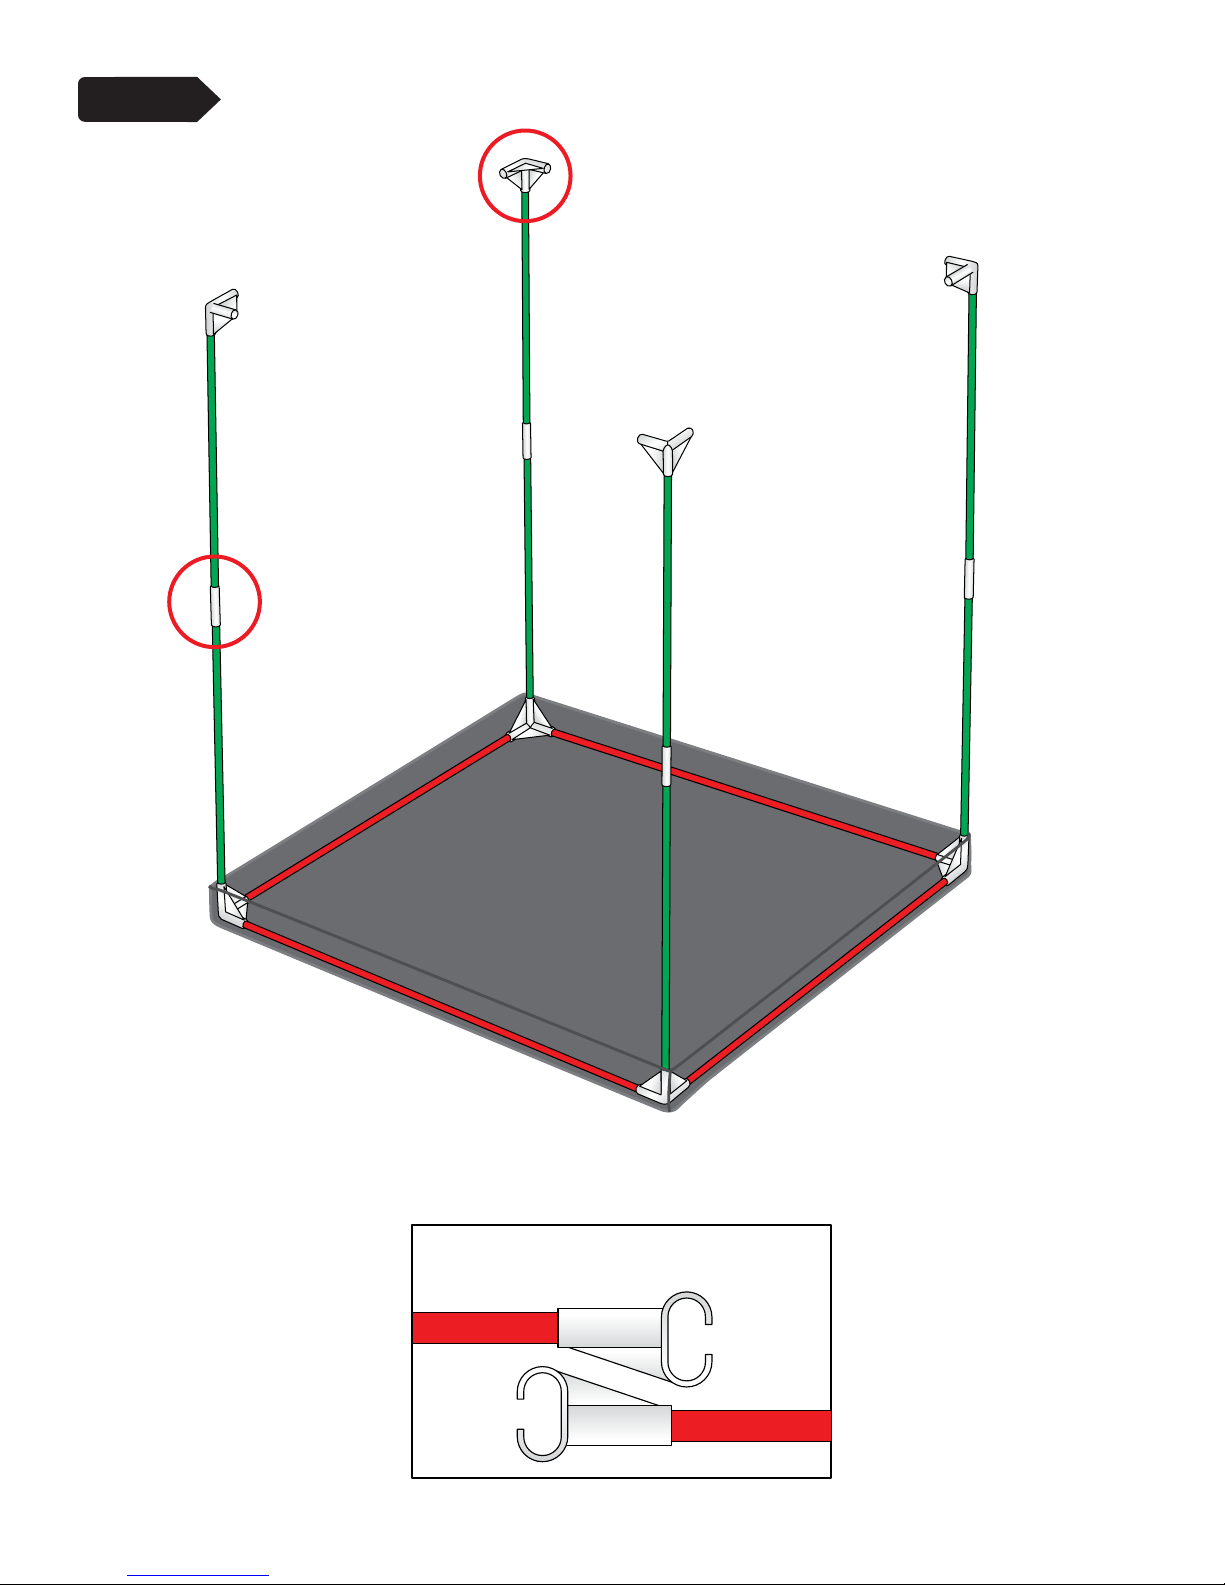
STEP 1
2 PEOPLE
Recommended
for Assembly
CONNECTOR
IMPORTANT! Make sure all poles
are fully inserted into connectors.
CONNECTOR
POLE
POLE
WRONG
RIGHT
Part #706652 Model 45
Part #706654 Model 90
Part #706658 Model 150
sun-huts.com
8
Straight Pole Connectors
3-way Corner Connectors
Equipment Hanger Connectors
11
PARTS LIST
4
8
6
2
2
2
1
Window Covers
Vent Covers
Equipment Straps
Floor & Ceiling Poles
Model 150: 54"
1372mm
Model 90: 41"
1042mm
Model 45: 28"
712mm
Wall Poles
41.4"
1052mm (all models
)
Removable Mylar Floor Insert
Ceiling Pole
UPPER
POLE
POSITION
LOWER
POLE
POSITION
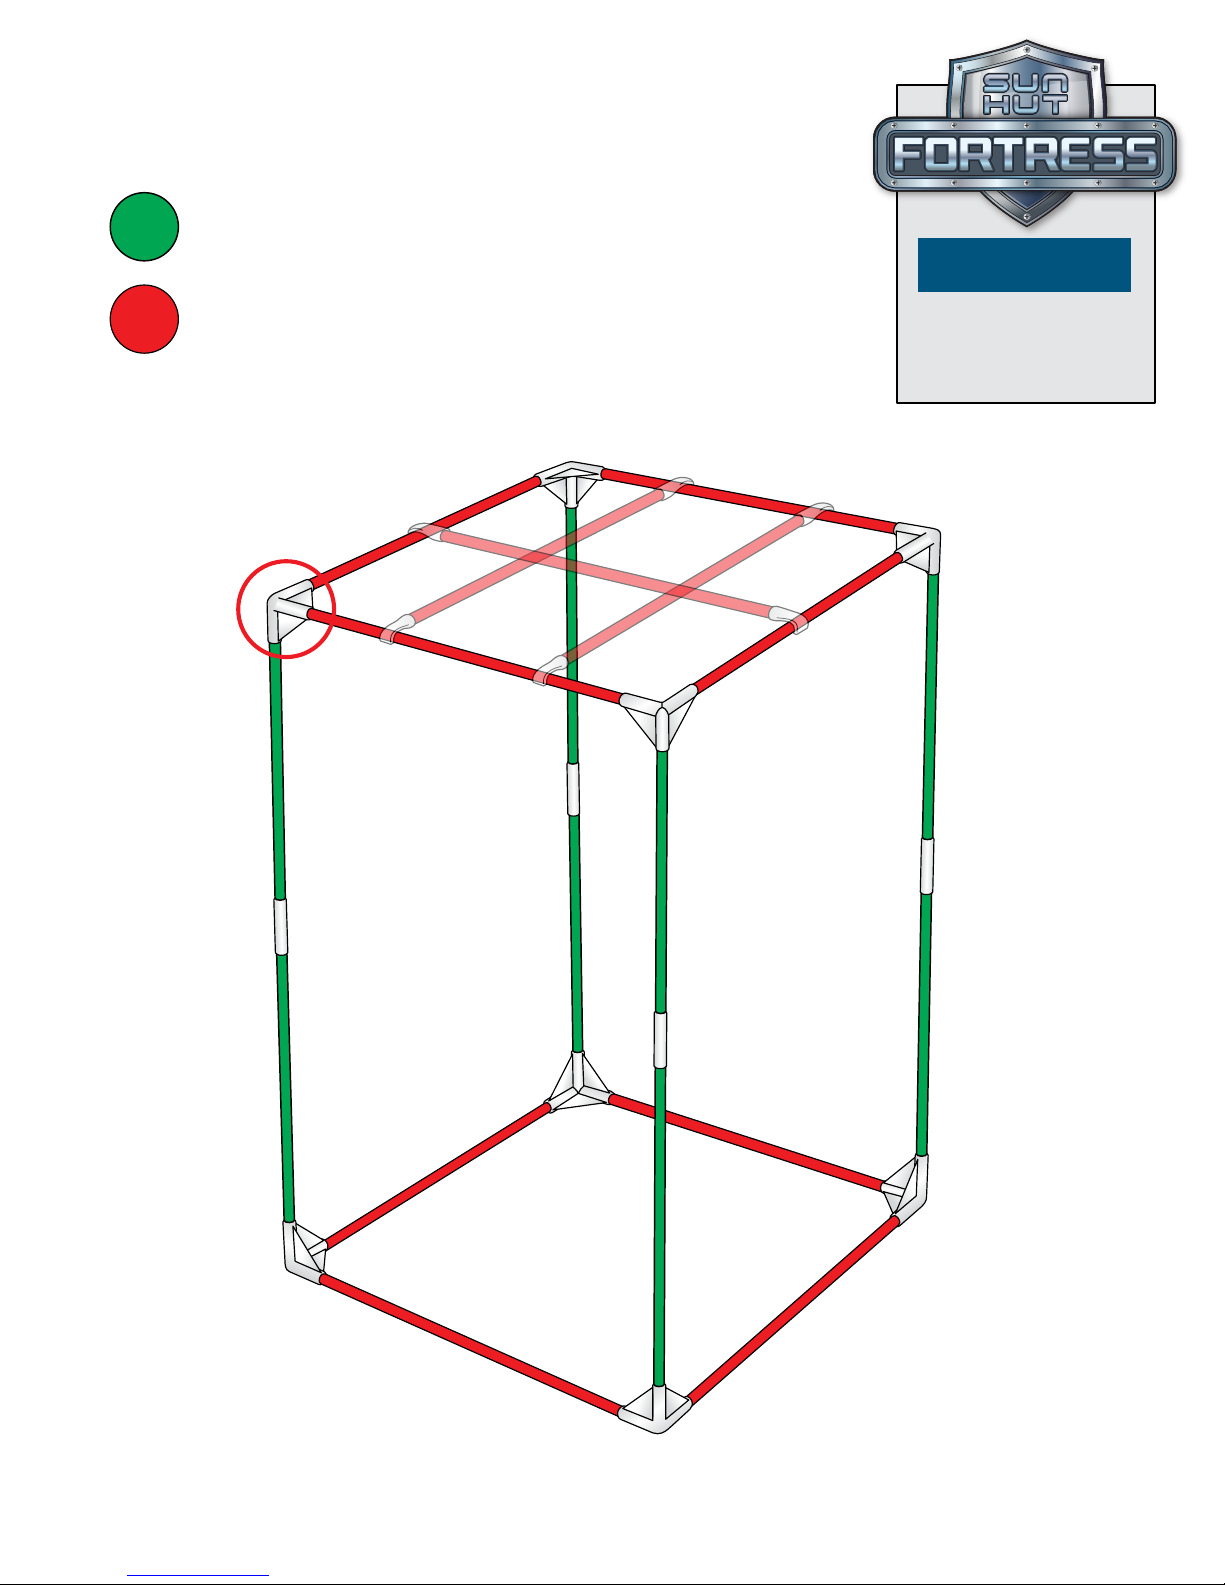
3-way Corner
Connectors
Orientation of Equipment Hanger Connectors
depends on upper or lower pole position.
Fig. A
Straight Pole
Connectors
Add wall poles and 3-way Corner Connectors at top.
STEP 2
Ceiling Pole

Equipment Hanger
Connectors
Equipment Hanger Poles
Ceiling Poles
Assemble Ceiling Poles and Equipment Hanger Poles.
STEP 3
SEE FIG. A
1 Upper Pole
2 Lower Poles

Carefully lift tent body and fit over completely assembled frame (2 people are recommended for this job –
1 person attempting to force the tent body over the frame could cause damage). After tent body is evenly
placed, zip doors closed and make final adjustments to fit. Move equipment in and start growing!
STEP 4
Sonic Welded Irrigation Line
Access Ports:
Located 2 per side, these reinforced,
light-tight access ports allow reservoir
and other plumbing to be placed
outside grow tent.
Distributed exclusively by Sunlight Supply, Inc. www.Sunlight Supply.com
©2014 Sunlight Supply, Inc. 4/14
1. Drill hole with bit
sized for tubing.
2. Insert tubing
through hole.
OPTIONAL ACCESSORIES
1. #706590 Elastic Support (4/pack)
2. #706592 2' x 3.33' Elastic Trellis (1/pack)
3. #706594 4' x 5' Elastic Trellis (1/pack)
4. #706596 Support Strap (2/pack)
5. #706598 16mm S Hook (5/pack)
6. #706600 22mm S Hook (5/pack)
1
2
3
4
5
6
FRAME ASSEMBLY DIAGRAM
Not to exact scale – to show pole and connector placement only.
8
11
41.4" Wall Poles
1052mm
54" Floor & Ceiling Poles
1372mm
3-way Corner
Connectors
150
Product #706658
Assembled Dimensions:
4.6'W x 4.6'D x 7.1'H
 Loading...