

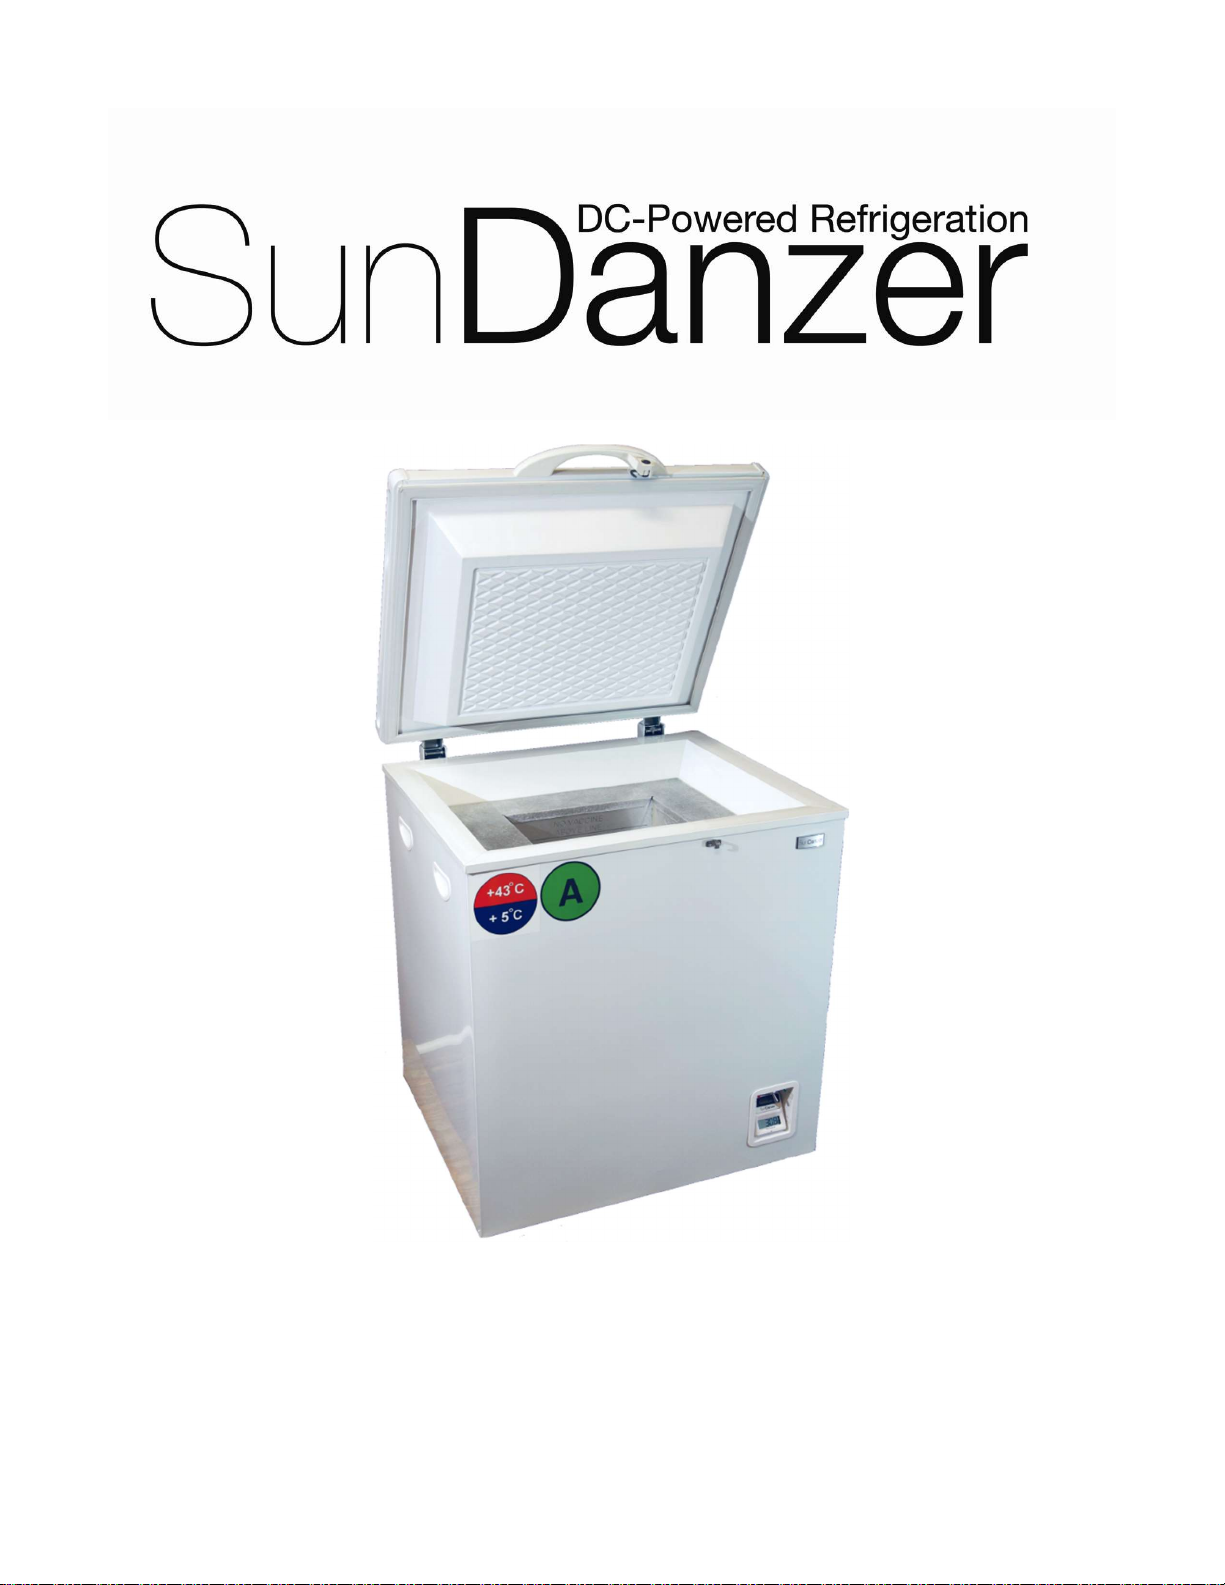
BFRV15 User Manual
Solar Powered Battery-Free Vaccine Storage
Version: 11.2018
[1]
About your BFRV15
The SunDanzer BFRV15 is a World Health Organization pre-qualified Solar Direct-Drive Battery-Free Refrigerator
designed for vaccine storage. It connects directly to the photovoltaic (PV) solar array and requires no batteries
or charge controllers to operate. Temperatures are maintained using a proprietary phase-change material,
which ensures the vaccine compartment always stays between 2° C and 8° C.
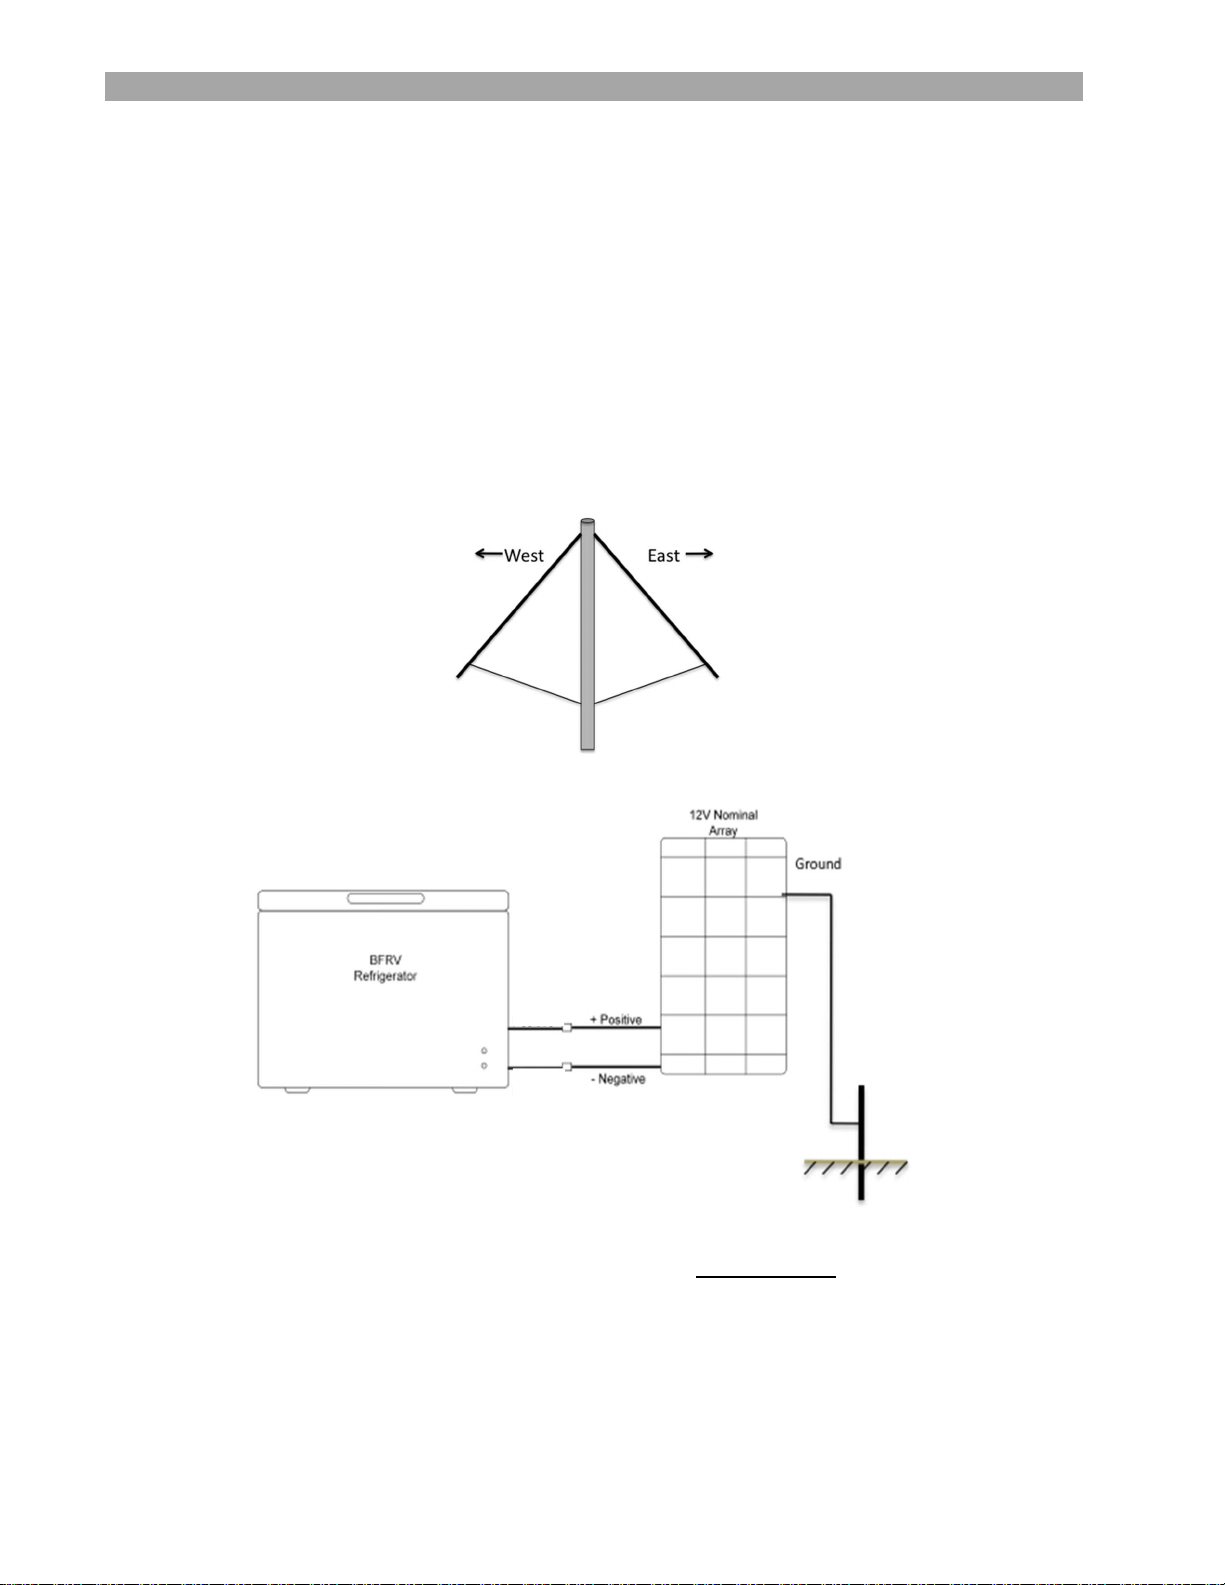
East/West Array
One of the innovative features of the SunDanzer direct drive system is an east/west orientation of the solar
modules (available separately). Two 100-watt modules face east, and two 100-watt modules face west. This
orientation ensures maximum compressor run time. For further information, please see the solar installation
manual.
Electronics Diagram
This appliance operates on 12V DC only!
Under no circumstances should this appliance be connected to an AC (alternating
current) power source.

[2]
Health and Safety Guidance
Please ensure you understand all warnings before installing or using the appliance. If you are unsure about any
of the warnings, contact SunDanzer or your local product dealer for assistance.
Prior to Installation
Upon delivery, verify the appliance is complete and was not damaged during transport. Do not connect an
appliance if the electrical supply cables or refrigerant circuit is damaged. Contact SunDanzer or your local
product dealer for assistance.
General Safety
The appliance is heavy; take care when moving.
Always power off the unit using the switch on the front of the refrigerator. Wait 5 minutes after
powering off to allow the capacitor to drain to a safe voltage.
When moving or servicing, disconnect the refrigerator from the solar power.
Ensure the electrical cord does not become bent and the unit is not placed on top of the cord.
Do not store any containers with flammable vapors or liquids in or around the appliance, such as organic
solvents, spray cans, gas cans, etc. Danger of explosion!
Do not use other electrical appliances inside the refrigerator.
Only use an authorized refrigeration technician to service the appliance. Use of an unauthorized
technician may void the warranty.
The appliance contains R-134a refrigerant and Polyol Esters lubricant oil in the refrigerant circuit line.
Care must be taken when handling the appliance to prevent damage to the circuit.
Child Safety
There is DANGER OF SUFFOCATION if a child becomes trapped inside! Keep children from playing in, on,
or around the appliance and securely lock when not in use.
Post Installation
Allow the appliance to settle for 2 hours before turning on to allow the refrigerant oil to settle.
If the appliance has been standing on the side or end, allow it to stand in the upright position for 12
hours before turning on.
The unit has an on-off switch located on the front of the unit. The switch should remain in the “on”
position after installation.
Operation
The SunDanzer refrigerating appliance, like any DC refrigerating appliance, requires care unique from appliances
plugged into an electric utility. Prudent operation is the key to extended service.

Starting the Appliance
After the appliance has been properly connected to the 12 VDC power source and the sun is shining, the
compressor will automatically turn on and the cabinet will begin cooling.
Allow the refrigerator to cool for at least 3 days prior to adding vaccines to ensure it has had enough
time to cool the thermal storage packs.
Holdover
This unit is equipped with thermal storage packs to provide cooling when the appliance lacks power
In the case of power failure, monitor the externally mounted thermometer.
The approximate holdover time the internal temperature will remain within temperature range if the
thermal storage packs begin fully frozen:
Days without
power
7 77° 25°
5 90° 32°
3.5 110° 43°
Ambient
Temperature (° F)
Ambient
Temperature (° C)
[3]
Temperature Control
The temperature within the appliance is controlled by a sensor situated below the perforated aluminum
floor. The appliance automatically detects ambient conditions and no temperature adjustment is
necessary.
Operating Lights Lights
GREEN = refrigerator is receiving power
RED Flashing = product operational error, consult Troubleshooting Section
Opening and Closing the Lid
NEVER USE EXCESSIVE FORCE ON INSET HANDLE TO OPEN THE LID!
To ensure maximum performance of the appliance the lid should remain closed.
The lid is fitted with a uniform sealing strip to prevent warm air and moisture from entering the
appliance compartment.
Be sure the lid and seal are free from obstructions.
Overfilling or unlevel installation of the appliance will prevent a good seal.
When the lid is opened, the air inside the appliance becomes slightly warmer and expands. When the
lid is closed again, the air is cooled quickly and contracts. This may lead to a vacuum and difficulty
opening the lid immediately which is normal. Wait for a few moments until the vacuum has equalized
and then open gently.

[4]
Loading Appliance
Before adding vaccine be sure the internal temperature is within the acceptable range of 2°C to 8°C.
Allow the cabinet to cool for at least 3 sunny days after initial installation before adding vaccines. This
ensures the appliance has had enough time to cool the thermal storage packs.
Do not place any vaccine above the marked maximum fill line.
Always keep vaccines stored in tightly sealed packaging or containers and allow some space for air to
circulate around them.
Cleaning Appliance
Never use abrasive or corrosive cleaning agents, steel wool, scouring sponges, chemical cleaning agents, or
highly perfumed cleaning products to clean the unit as these will damage the surface and leave behind a strong
odor.
Wash the outside of the cabinet with warm water and a mild soap or detergent.
Defrosting is not necessary.
Wipe down or drain condensation from unit compartment weekly. Dry vaccine boxes as necessary.
Remove the aluminum floor cover and use dry cloth to absorb any standing water or condensation.
Wash the inside of the appliance with 1-liter lukewarm water and two tablespoons baking soda applying
with a soft sponge or towel.
After cleaning, thoroughly rinse and dry.

[5]
[6]
SYMPTOM
SOLUTION
Compressor is
operating but
will not
Compressor is connected to power,
The lid will not open.
Digital Thermostat is blinking, but
Compressor immediately turns off
Yellow/orange liquid at bottom of
Diagnostic and Repair Procedures
Normal Operating Sounds
When the compressor is on, the refrigerant is being pumped around the cabinet and you will hear a whirring
sound or pulsating noise from the compressor.
Troubleshooting
Allow the appliance at least 3 days from initial turn-on to
cool unit.
but not operating.
compressor is not operating.
(i.e., 1-minute intervals).
cabinet.
Send an SMS text message to a SunDanzer technician for further assistance +1 (520) 329-5329
become cold.
Verify the cabinet has adequate ventilation around the
sidewalls allowing it to transfer heat properly. (See
Installation section).
Verify the ambient temperature is not exceeding the rated
temperature range of 5°F (-15°C) to 113°F (45°C).
Verify refrigerant level is ~198g.Check for refrigerant leaks.
Check if 19 to 22V DC is present at the appliance. If not,
check all connections.
Check the polarity is correct; “+” is connected to “+”, and “-“
to “-“.
Verify PV system is assembled improperly.
Verify ECU connections are correct.
Check for low power voltage.
Ensure the lock is not engaged.
Check if the lid has just been opened. If so, leave for a few
minutes to allow the air pressure to equalize and try again.
DO NOT USE EXCESSIVE FORCE ON THE INSET HANDLE TO
OPEN THE LID!
See chart on Fault Code Errors for the compressor ECU.
Check capacitor for possible failure.
Check voltage at capacitor.
Check for phase change material leaking.

Fault Code Errors for Compressor ECU
5-blinks
Thermal cut
-
out of electronic unit
4-blinks
Minimum motor speed error
3-blinks
Motor start error
2-
blinks
Not Applicable
1-
blink
Battery protection cut
-
out
1 PCB-7.4 Digital Thermostat
Digital Thermostat
PCB 7.4
1
Capacitor 180000 mF
Capacitor, 180000
microfarad
Capacity
E36D350HPN184MDA5M
1
ECU212
BD50 Electronic Unit
- High Current
101N02
12 1 BD50 Compressor
12V DC
Compressor
101Z0203
A flashing red LED light display on the bottom right side of the refrigerator will provide an error code.
ERROR
CODE
ERROR TYPE
[7]
(If the refrigeration system has been too heavily loaded, or if the ambient temperature is high,
the electronic unit will run too hot).
(If the refrigeration system is too heavily loaded, the motor cannot maintain minimum speed
at approximately 1,850 rpm).
(The rotor is blocked or the differential pressure in the refrigeration system is too high (>5 bar).
(The voltage is outside the cut-out setting).
Itemized list of spare parts
Quantity
Item Description Part No.

[8]
Resource recovery and recycling
At the end of the appliance’s life
Do not dispose of the appliance with any other household waste.
It is the end user’s responsibility to dispose of the equipment by
handing it over to a designated collection point for the recycling of
electrical waste and electronic equipment.
The separate collection and recycling of your waste equipment at
the time of disposal will help to conserve natural resources and
ensure recycling in a manner that protects human health and the
environment.
For more information about where you can drop off your waste
equipment for recycling, please contact your local city office, your household waste disposal
service, environmental agency, or the dealer you purchased the product from.
The refrigerant must be completely drained and collected by an authorized technician for recycling
prior to disposal.

[9]
SMS Text 1.520.329.5329
SunDanzer Warranty
CUSTOMER RESPONSIBILITIES
The following items are the responsibility of the customer and are not covered in the warranty:
• Proper care and use of the appliance as described in user’s manual.
• Damage to the interior or exterior finish or components after delivery.
• Proper power supply, fuse, wiring, and connections.
• Service required because of alteration, misuse, abuse, flooding, fire, lightning, or acts of God.
• Replacement of light bulbs.
WARRANTY STATEMENT
SUNDANZER WARRANTS, TO THE ORIGINAL OWNER, THAT THIS PRODUCT IS FREE FROM DEFECTS IN
WORKMANSHIP AND MATERIAL FOR A PERIOD OF TWO YEARS FROM THE PURCHASE DATE.
THIS WARRANTY SHALL BE LIMITED TO REPAIRING OR REPLACING, AT SUNDANZER’S OPTION AND WITHOUT
CHARGE TO THE PURCHASER, DEFECTIVE COMPONENTS.
ALL WARRANTY WORK SHALL BE PERFORMED AT A SUNDANZER APPROVED FACILITY.
SHIPPING CHARGES RELATED TO RETURNING THE DEFECTIVE PRODUCT TO THE SUNDANZER FACILITY ARE NOT
COVERED UNDER THIS WARRANTY, HOWEVER, THIS WARRANTY COVERS SHIPPING CHARGES RELATED TO
RETURNING THE REPAIRED PRODUCT TO THE CUSTOMER WITHIN THE CONTINENTAL UNITED STATES. OUTSIDE THE
CONTINENTAL UNITED STATES, ALL SHIPPING CHARGES ARE THE RESPONSIBILITY OF THE CUSTOMER AND ARE
NOT COVERED BY THIS WARRANTY.
THIS WARRANTY DOES NOT APPLY TO DAMAGE OR WEAR TO THE PRODUCT CAUSED BY ACCIDENT, ABUSE, MISUSE,
NEGLECT, UNAUTHORIZED ALTERATION OR REPAIR, OR IF THE PRODUCT WAS NOT INSTALLED IN ACCORDANCE
WITH SUNDANZER PRINTED INSTALLATION AND OPERATING INSTRUCTIONS.
TO OBTAIN SERVICE UNDER THIS WARRANTY, THE DEFECTIVE PRODUCT MUST BE RETURNED TO SUNDANZER
TOGETHER WITH A RETURN MATERIAL AUTHORIZATION (RMA) NUMBER AND COMPLETED FORM.
ANY PRODUCT REPAIRED OR REPLACED UNDER THIS WARRANTY WILL BE WARRANTED FOR THE
BALANCE OF THE WARRANTY PERIOD WITH RESPECT TO THE ORIGINAL PURCHASED PRODUCT.
SUNDANZER WILL NOT BE LIABLE FOR ANY INCIDENTAL OR CONSEQUENTIAL DAMAGES, LOSSES, OR
EXPENSES ARISING FROM INSTALLATION, USE OR ANY OTHER CAUSES.
THERE ARE NO EXPRESS OR IMPLIED WARRANTIES, INCLUDING MERCHANTABILITY OR FITNESS FOR A PARTICULAR
PURPOSE, WHICH EXTEND BEYOND THOSE WARRANTIES DESCRIBED OR REFERRED TO ABOVE.
SunDanzer
420 E Aviation #110
Tucson, AZ 85714
(520) 882-9100
Medical@sundanzer.com
www.sundanzer.com
 Loading...