


HTTP://WWW.SUNCTI.CO.TH User Manual
User Manual
S03 Series
IP Phone
Version 1.1
Contents Catalogue
1

HTTP://WWW.SUNCTI.CO.TH User Manual
1 INTRODUCTION...................................................................................................3
2 INSTALLATION.....................................................................................................3
2.1 Appearance..........................................................................................................................3
2.2 Package List ........................................................................................................................4
2.3 Installation............................................................................................................................4
2.4 Check installation by ICON of LCD....................................................................................4
3 PRODUCT OVERVIEW ........................................................................................5
3.1 Software Features.................................................................................................................5
3.2 Hardware Specifications ......................................................................................................6
4 BASIC OPERATIONS............................................................................................6
4.1 Get familiar with Keypad.....................................................................................................6
4.2 Dialing or Making Calls.......................................................................................................6
4.3 Answering Calls ..................................................................................................................7
4.4 Call hold...............................................................................................................................7
4.5 Call Transfer........................................................................................................................7
4.6 Three-way Calling...............................................................................................................8
5 CONFIGURATION GUIDE ................................................................................8
5.1 Config IP Phone through Keypad .......................................................................................8
5.1.1 Minimum configuration ...................................................................................................8
5.2 Config IP Phone through Web browser...............................................................................9
5.2.1 Access to IP Phone Configuration Menu..........................................................................9
5.2.2 User Verification ...........................................................................................................10
5.2.3 Network Configuration .................................................................................................10
5.2.4 VoIP Configuration .......................................................................................................11
5.2.5. System Reboo
5.2.6 Config Manage (Save and Clear Configuration)............................................................14
5.2.7 System Manage ..............................................................................................................15
6 FIRMWARE UPGRADE......................................................................................17
6.1 FTP Web update.................................................................................................................17
6.2 URL Update .......................................................................................................................17
6.3 IP Phone System Report………………………………………………………………….17
7 DEFAULT FACTORY SETTING ........................................................................18
8. General System Connect of IP Phone………………………………………………19
t...............................................................................................................12
2

HTTP://WWW.SUNCTI.CO.TH User Manual
Introduction
About This Manual
This Manual provides basic information on how to install and connect S03 IP Phone to the
network. It also includes features and functions of S03 IP phone components, and how to use them
correctly. We sincerely hope you could enjoy the convenience and capabilities brought forward by
our products.
Before Getting Started
Before you can connect S03 to the network and use it, you must have a high-speed Internet
connection installed. A high-speed connection includes environments such as XDSL, cable
modem, and a leased line.
S03 IP Phone
S03 IP phone is a stand-alone device, which requires no PC to make Internet calls. S03 IP phone
supports both data and voice thru IP network, and also provides all the features and functionalities
of conventional phone and more.
Our IP phone guarantees clear and reliable voice quality on IP network, which is fully compatible
with SIP industry standard and able to interoperate with many other SIP compliant devices and
software on the market.
Notice
This publication describes the instruction for S03 series IP phone functions only. We reserve the
rights to do any changes or make enhancements of this publication without further notice. The
most updated electronic revision of user manual can be downloaded from WISH’s website:
www.wishproduct.com timely, thanks for your understanding and continuous support.
Installation
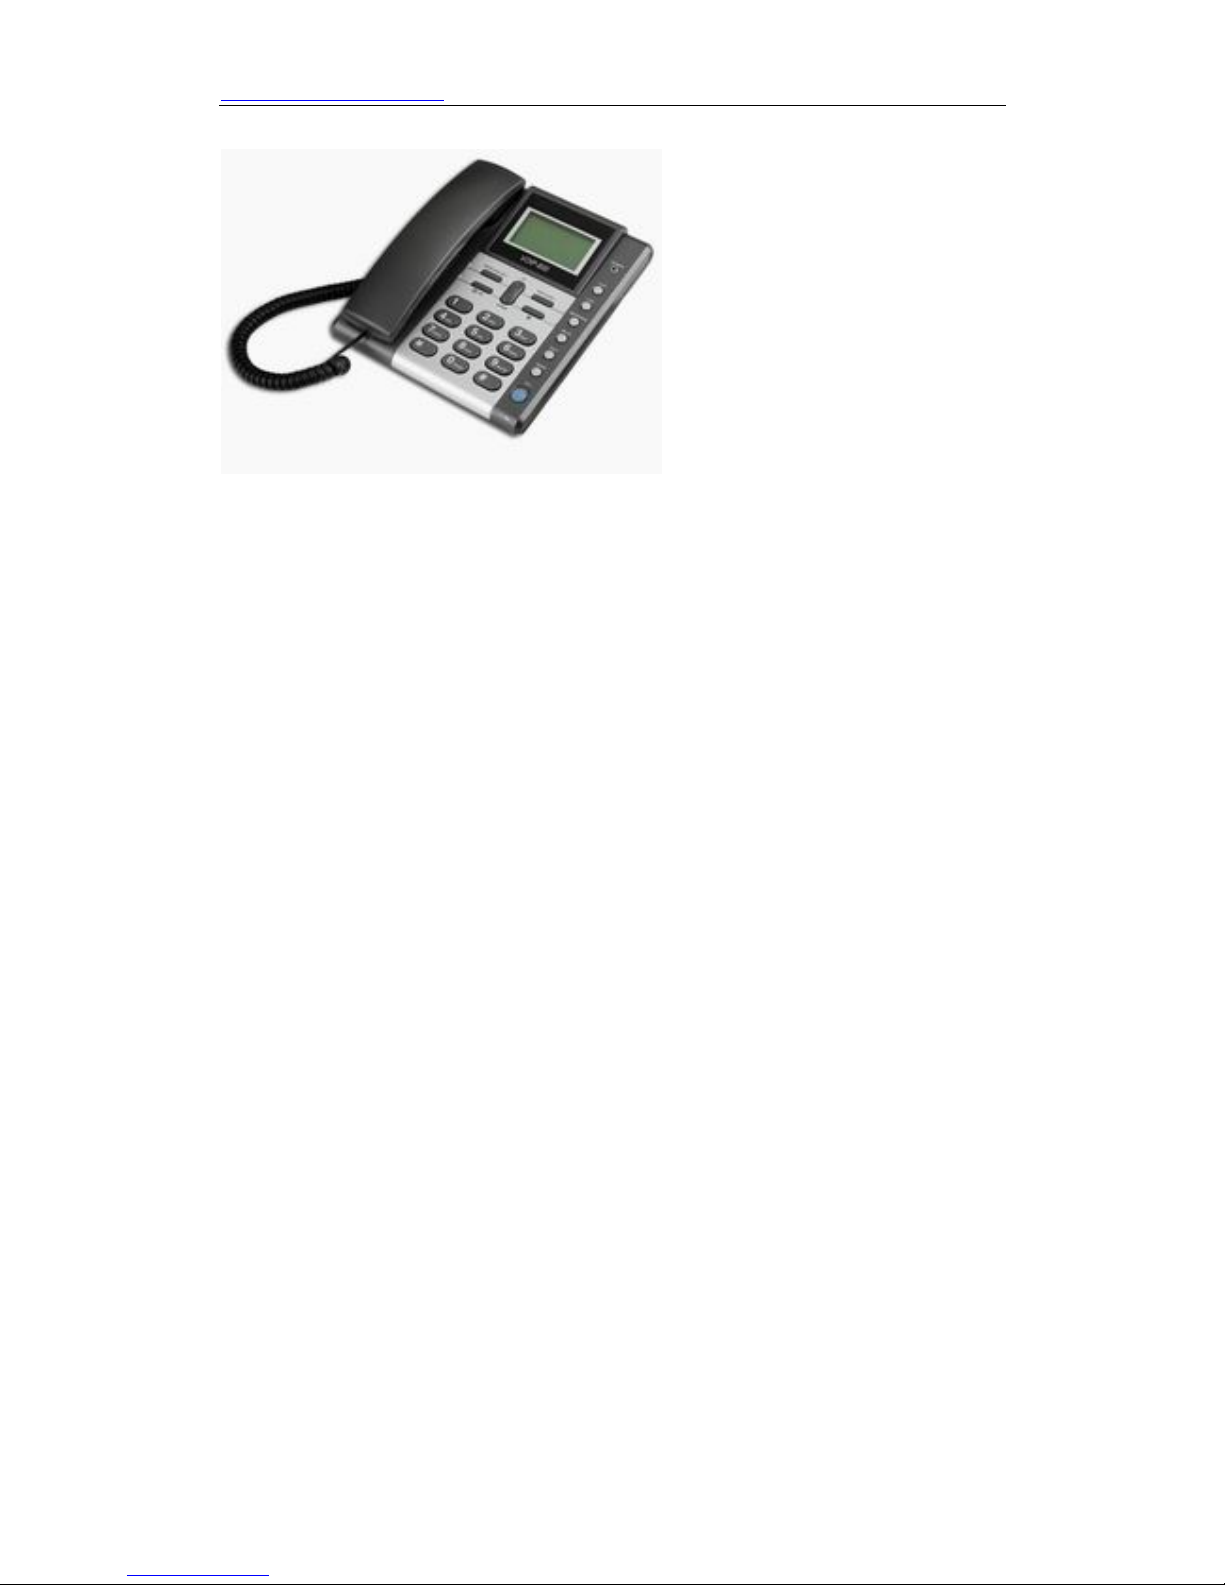
2.1 Appearance
S03 series IP phone are designed to look like the conventional telephones. The following photo
illustrates the appearance of S03 IP phone.
3
HTTP://WWW.SUNCTI.CO.TH User Manual
2.2 Package list
1) One S03 IP phone (Main body + Handset + Cord)
2) One Straight Ethernet cable
3) One universal power adapter
4) One User Manual
Warning: Although the adapter of S03 series IP Phone is compliant with UL standard,
please do not attempt to use other difference power adapter or cut off power supply
during configuration or updating phone. Using other power adapter may damage S03
series phone and will void the manufacturer warranty.
Caution: All operations of our product must abide by the instructions provided by IP
Phone manufacturer. Any Changes or modifications to this product without formal
authorization by manufacturer, or operation of S03 series phone in any way other
than the instructions stated on this user manual will void the manufacturer warranty.
2.3 Installation
1) Insert handset cord into the handset jack and left jack of IP Phone
2) Insert the power adapter’s plug into the phone front Power jack (DC 5V) and the 2-prong plug
end of which into grounded power outlet
3) Remove the LAN cable for Internet connection from your PC and connect it to WAN port of
S03, then follow below installation checking way
2.4 Check Installation by LATTICE of LCD
S03 IP Phone has a 75mmx24mm LCD that can display three lines of below characters each. Here
is the display when all segments illuminate:
The LCD is equipped with a backlight. When the phone is in the normal idle state, the backlight is
off. Whenever an event occurs, the backlight turns on automatically and brings the user’s attention.
The definitions for each character displayed on LCD described as below table.
4

HTTP://WWW.SUNCTI.CO.TH User Manual
Product Overview
S03 IP Phone is a next generation IP network telephone based on industry open standard SIP
(Session Initiation Protocol) and H.323.Built on innovative technology, S03 series IP Phone offer
customer superb sound quality and rich functionalities at mass-affordable price.
3.1 Software Features
Support two modes: Bridge and Router (NAT&NAPT)
Network Protocols: TCP/UDP/IP,ICMP,HTTP,DHCP Client ( WAN Interface),DHCP
Server(LAN Interface),DNS Client, DNS Relay, SNTP,FTP, TFTP
VOIP Protocols: Support H323 (V4) & SIP (RFC3261, RFC3262, RFC3264, RFC3265)
synchronously
Voice Codecs: G.711(A-law/U-law),G.723.1(High/low), G.729
NAT transversal: Support STUN client, AVS and Citron etc. Can modify SIP register port,
HTTP server port, Telnet server port and RTP port
Support two SIP server synchronously:Can register two different SIP Server, and can make a
call by either proxy
Support standard voice features such as numeric Caller ID Display, Call Waiting, Hold, ransfer,
Do-Not-disturb, Forward, in-band and out-of-band DTMF, Hotline (off-hook autodial), auto
answer, ban outgoing
Full duplex hand free speakerphone, redial, call log, volume control, voice record with indicator
Support standard encryption and authentication (DIGEST using MD5, MD5-sess)
Support Silence Suppression, VAD (Voice Activity Detection), CNG (Comfort Noise
eneration), Line Echo Cancellation (G.168), and AGC (Automatic Gain Control)
Provide easy configuration thru manual operation (phone keypad, Web interface and Telenet)
or automated centralized configuration file via TFTP or HTTP
Support firmware upgrade via TFTP/FTP and HTTP
Support syslog, can send event of phone to syslog server
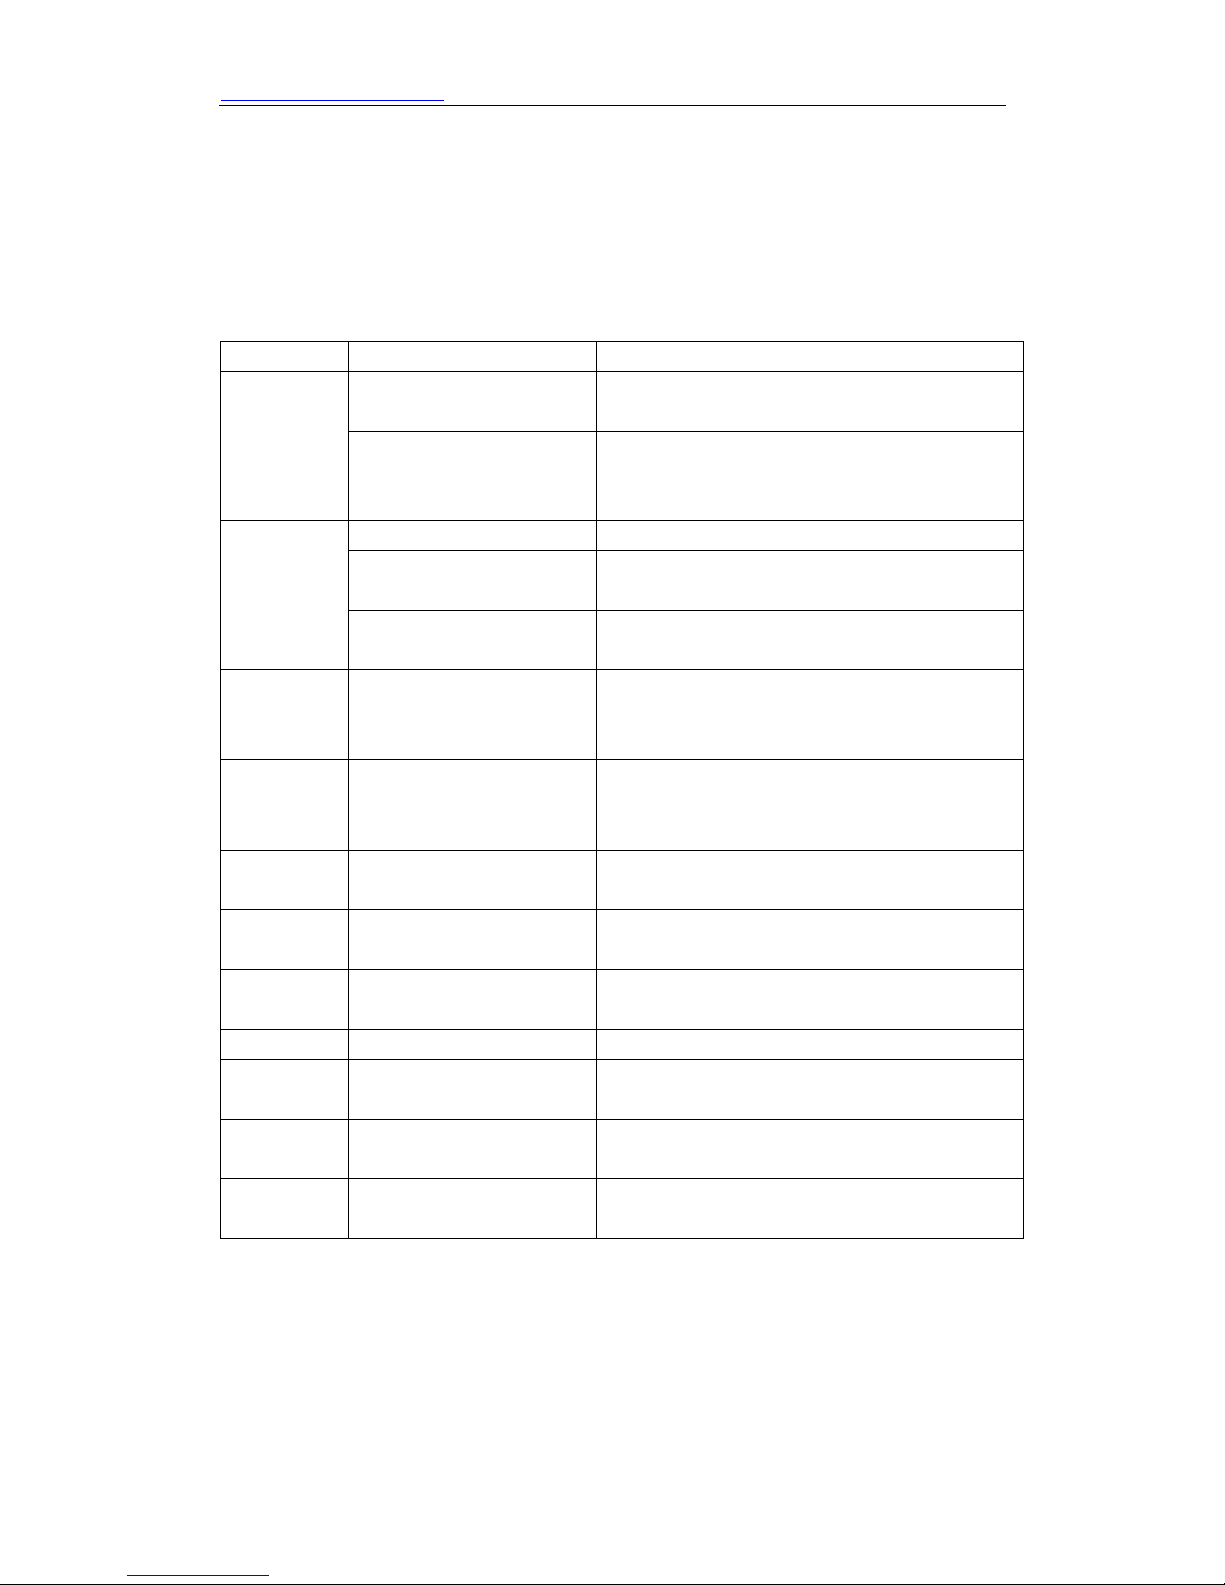
3.2 Hardware Specifications
The below table describes the hardware specifications of S03 Phone
Item S03
Power Adapter Input: 100-240VAC 50~60Hz
Output: +5VDC, 500mA
CPU DSP621 PSB21553 150MHz
WAN 10/100Base T RJ-45 for LAN Port
Power Consumption Idle: 1.4W / Active: 1.8W
LCD size 65×24mm
Operating Temperature 0~40℃(32°~104℉)
Storage Temperature -10°~60℃(14°~140℉)
Relative Humidity 10~65% (Non-condensing)
Dimension (W×H×D) 20.5×22.5×7.5cm
Weight (packaging included) 0.80kg
5
HTTP://WWW.SUNCTI.CO.TH User Manual
Certification CE / FCC Part 15 Class B
BASIC OPERATIONS
4.1 Get Familiar with Keypad
S03 phone has a 25-button keypad. Definitions of each state as below
Key Button Mode Definitions
Key Button Mode Definitions
In the dial-up mode
0 -9
*
# In the dial-up mode
DISPLAY In the IDLE mode
ENTER
HOLD
REDIAL In the dial-up mode
H.F In the IDLE mode Enter hands-free mode
UP
DOWN
XFER
In the keypad configure
mode
In the dial-up mode As one part of phone number when call out
In the call hold mode
In the keypad configure
mode
In the keypad configure
mode
In the keypad configure
ode
In the keypad
configure mode
In the keypad
configure mode
In the keypad
configure mode
Decimal digit number 0-9, star and pound keys
are usually used to make phone calls
Rapid first button press display the digit
number 0-9,rapid second button press display
the English character or others
Ready to call a third party’s number to make
three-way (or conference) calling
Equal to the dots notation when input IP
address
As one part of phone number if “#” is the first
dialed number, otherwise as the ending symbol
to end up dialing
Continuous thrice press display assigned IP
address of WAN Port, gateway’s IP address and
the phone number registered on public server
Confirm configuration or enter submenu mode
Temporarily hold the active call
Redial the number last dialed, or force a
call to go out immediately before timeout
Go back to previous menu item or
increase handset/speakerphone volume
Go down to lower menu items or reduce
handset/speakerphone volume
In the keypad
configure mode
4.2 Dialing or Making Calls
4.2.1 Dialing general PSTN Phone or extension.
There are three dialing modes:
1. Pick up handset or press SPEAKER button, and then enter the phone numbers, IP phone will
6

HTTP://WWW.SUNCTI.CO.TH User Manual
send out the numbers with the DTMF tones.
2. In the off hook mode or Hands-free mode, Press the REDIAL button directly to redial the
number last called. Once pressed, the last dialed number will be displayed on the LCD with
DTMF tones and an outgoing call is sent.
3. Make use of Speed dialing mode: enter PBOOK→SPEED DIAL→INPUT
INDEX submenu to input the index which correspond to the phone number you want to dial, then
the phone could automatically dial the number.
4.2.2 IP to IP calling
Making IP to IP calling is nearly same as dialing general PSTN Phone, there are three ways to set
IP phone number and domain
1. “Peer to Peer” calling mode: direct make calls and no need to set phone number thru proxy
server (user could refer to Dial peer setting on web configuration charter).The phone should be
operated under following condition (satisfy one option)
Both two phones are assigned the public IP address individually
Both two phones using private IP address should be on the same LAN.
2. Dialing the IP number configured by public agency, both two phones should be already
registered on the public server.
3. Dialing the IP number configured by private agency, both two phones should be already
registered on the private server.
Examples:
To dial a number on the proxy, such as 1001, simply pick up handset or press speakerphone, dial
1001 and then press the REDIAL button.
To dial a PSTN number such as 83429400, you might need to enter in some prefix number
followed by the phone number. Please check with your VoIP service provider to get the
information. If your phone is assigned with a PSTN-like number such as 83429400, most likely
you just follow the rule to dial 83429400 as if you were calling from a regular analog phone,
followed by pressing the REDIAL button.
4.3 Answering Calls
There are three ways to receive incoming calls:
Pick up handset to receive incoming calls
Press the H.F button to receive incoming calls
Start-up the voice message function (Press REC button) to record the incoming calls, afterwards
listen to voice messages thru phone audio play
Operations: Enter REC→RECEIVED→NEW→LIST NO submenu
Note: User can switch from a hands-free call to handset by picking up the handset. To switch from
a handset call to a hands-free call, press hands-free button, and then hang up the handset.
4.4 Call hold
Pressing the HOLD button during current conversation enables you put an active calling on hold
temporarily while a second call is answered or made, press this button again will go back to the
previous call.
7

HTTP://WWW.SUNCTI.CO.TH User Manual
4.5 Call transfer
Press the XFER button enables users could transfer an incoming call to transfer the incoming call
to the third party’s number. When both sides are on conversation, users could inform the called
person to announce the call will be transferred and then press the XFER button, dial another
telephone number when you hear the dial tone, then the incoming call will be transferred to
another line and users conclude the previous telephone conversation.
4.6 Three-Way Calling
S03 phone support three-way (or conference) Calling. That is users could talk to more than one
person (up to two) at the same time.
Process: press CONF or HOLD button →Dial third party’s number->put through→ press HOLD
button again
Once the three-way initiator concludes the three-way calling, the other two sides can not continue
the conversation call and hand up automatically.
Configuration Guide
5.1 Config IP Phone through Keypad
Below is the configuration procedure for basic operations:
5.1.1 Minimum configuration
1. Network configuration:
1. Host Configuration
1. IP Configuration
1. IP Address
2. MAC Address
3. Net Mask Configuration
1. Net Mask Address
4. Host Name
5. Domain Name
1.Domain Name
2.Domain Name Se
6. DHCP
1.Enable
2.Disable
8

HTTP://WWW.SUNCTI.CO.TH User Manual
2. Router Configuration
1. Gateway Address
3. DNS Server
4. Call Manager
3. Password
1. Enter Password
4. Reboot
1. Reboot Now
2. Reboot Later
Press the button select list item
Press”*”
Sound clew
Number Function User Input
**** Come in sound clew
100# Web setup
1# start
110# DHCP setup
use“*”replace“.”.“#”exit
120# IP address setup
130# Gateway setup
140# Network mask setup
sample:172*16*21*10#
use“*”replace“.”.“#”exit
use“*”replace“.”.“#”exit
2# stop
# return list
press“#”return
press“#”return
press“#”return
5.2 Config IP Phone through Web browser
5.2.1 Access to the IP Phone configuration menu
The IP Phone Web Configuration Menu can be accessed by the following URI:
http://Phone-IP-Address. The IP address can be set to either WAN IP address or
LAN IP address, default factory setting of WAN configuration is DHCP Client model, default
LAN IP address is “192.168.10.1”.
If connect PC with IP Phone LAN port and config to obtain IP address automatically, you could
check the default gateway IP namely LAN IP address of IP Phone. The procedure as below
9

HTTP://WWW.SUNCTI.CO.TH User Manual
5.2.2 User verification
Users are requested to make verification when config or browse the IP phone thru web pages,
users can direct login the config menu by inputting username and password as below ,
Guest account: both default username and password are “guest”, enable users to browse IP
Phone parameter with low-level user interface
Administrator account: both default username and password are “admin”, enable users to
configurate IP Phone with high-level user interface
5.2.4 Network configuration
Network configuration includes LAN Config.
Two models (Static /DHCP) are paratactic. Users can set the right model base on actual
requirements.
Connect network to internet thru Static mode
10

HTTP://WWW.SUNCTI.CO.TH User Manual
Default network config is static model; Users need to set below parameters LAN Configuration
This web page displays the LAN parameter configuration. Please note once the bridging mode is
selected, the LAN configuration will be no longer effective.
Configuration Example
Config LAN: generally config one private IP address
Start LAN DHCP Service and NAT or not: default setting is start
Start Bridge Mode or not(transparent mode): Once start Bridge Mode, some parts of LAN config
will be disabled, and the phone will no longer set IP address for LAN physical port,LAN and
WAN will join in the same network;
5.2.3 VoIP Configuration
This section is to config signaling protocol for the SIP Server and Client.
User can configure specific parameter of H323 signaling protocol on this page;
11

HTTP://WWW.SUNCTI.CO.TH User Manual
Definition of each parameter described as below
SIP[Unregistered]
Configuration
SIP register state ; if register successfully, show“Registered”
in the square bracket , otherwise show Unregistered
Register Server address Set SIP register server IP address
Set proxy server IP address(usually SIP will provide the same
Proxy Server address
Register Server Port Set SIP register server signal port
Proxy Server Port Set SIP proxy server signal port
Register Username
Proxy Username Set the SIP proxy server account username
configuration of proxy server and register server, if
different(such as different IP addresses), then each server's
configuration should be modified separately)
Set SIP register server account username(Usually it is the same
with the config port number)
Register Password Set password of SIP register server account
Proxy Password
Domain Realm
Local SIP Port Set local signal port,the default is 5060
Phone Number Set assigned phone number
Register Expire Time Set expire time of SIP server register, default is 120 seconds
Detect Interval Time Set detection interval time of server, default is 120 seconds
RFC Protocol Edition
Set password of SIP register account
Set the domain realm (Usually it is same with registered server
and proxy server IP address)
Enable the phone to use protocol edition. When the phone need to
communicate with phones using SIP1.0 such as
CISCO5300 and so on, need to modify into RFC2543. the default is
12

HTTP://WWW.SUNCTI.CO.TH User Manual
to RFC3261;
DTMF Mode Set DTMF sending mode
User Agent Set the user agent if have, default is common
Enable Register Configure enable/disable register
Auto Detct Server Set the phone enables to detect server automatically
Enable Pub Outbound
Proxy
Server Auto Swap
SIP (Default Protocol) Set SIP as the default signaling protocol
Configure to enable to use public outbound proxy
Configure main and backup auto-swap server;if the phone enables
main and backup server function,the automatic detection and
auto-swap functions should both be chosen
After finished the aforesaid network and VoIP configurations on the phone and network
communication has been implemented,the user can make VoIP calls by the calling register and
proxy server.
Note:
Some ISP internet may inhibit the phone to register and cancel the register in process, so user had
better cancel apply or register soon and then submit registration repeatedly. Server may stop
response of dialogue machine, then the phone receives no register/cancel login request and
registration state will show incorrectness!
5.2.4 Config Manage (Save and Clear Configuration)
Configuration Example
Firstly users should get the account info from VOIP Operator (Including Server IP address, port,
username, password etc.) and follow below procedure.
Config registered server and proxy server IP address and signaling port. (Support DNS for
registered server and proxy server)
* Config the username and password for registered server and proxy server.
* Config the phone number (Usually phone number is same with SIP account)
Remark: due to the above register username is “client”, so the phone number is different from SIP
account)
Remark: due to the above register username is “client”, so the phone number is different from SIP
account)
13

HTTP://WWW.SUNCTI.CO.TH User Manual
5.2.5. System Reboot
Once any change of phone configuration is made, users need to reset IP phone to go into effect.
Users should save the modified configuration before system reboot, otherwise the phone system
configuration will go back to last saved setting. The system reboot interface as below
5.2.6 CODECS Setup
14

HTTP://WWW.SUNCTI.CO.TH User Manual
5.2.7 System Manage
1. Account Manage
Users can edit users (add or delete) account and modify existing users’ authority on this web page.
2. Time Set
Setting time zone and SNTP (Simple Network Time Protocol) server according to users location,
users could manual adjust date and time on this web page.
Definition of each parameter described as below
Operation Example
15

HTTP://WWW.SUNCTI.CO.TH User Manual
Add one new account
Click “Add” button →input User name (No-Modify) →Choosing User level from dropdown menu
→set new user password →confirm password account info, return to account configuration
interface by clicking “Change Password” button
Owing to the phone's default account:accounts of the administrator level-admin account and the
ordinary level-guest account are all weak account and weak password, the username and
password will be easily to guess on public network, so the user had better modify the
administrator and ordinary user.
Enter with manager level when making modification,create a administrator account and a browse
account (you'd better not set the name as admin, administrator, guest, etc.),set password and then
save configuration,entering with new manager account, delete default manager and browse
account and save configuration,security will be enhanced!
3. Ringer Tone Set
6.1 Web Update
16

HTTP://WWW.SUNCTI.CO.TH User Manual
On this page, user can select the upgrade document (firmware or config file) from hard disk of the
computer directly to run the system upgrade. After upgrade completed , reset the phone and it
will be usable immediately.
STEP:
Enter Update menu →WEB Update submenu→ click “browse” button→ download upgrade
document from hard disk (firmware or config file provided by manufacturer) → click “Update”
button →reboot IP phone to go into effect
Note:
Under system upgrade progress, IP Phone may not be restarted normally due to some
system reason (e.g. electricity shut off), users can re-download under protected mode.
6.1FTP or TFTP server before using FTP update way.
6.2 URL Update way.
Definition of each parameter described as below
6.3 IP Phone System Reboot
Once any change of phone configuration is made, users need to reset IP phone to go into effect.
Users should save the modified configuration before system reboot, otherwise the phone system
configuration will go back to last saved setting. The system reboot interface as below
17

HTTP://WWW.SUNCTI.CO.TH User Manual
7. Default Factory Setting
Gain IP address thru DHCP mode, the static IP address of WAN Port is 192.168.1.176, the IP
address of LAN port is 192.168.10.1.Default is to start the DHCP service and NAT function.
Default communication protocol is to use SIP, SIP port is 5060
Default HTTP port is 80, Telnet port is 23
Default number end is “#” button
Default user account is admin and guest
Default phone time is to use SNTP protocol to get GMT
8. General System Connect of IP Phone
18

HTTP://WWW.SUNCTI.CO.TH User Manual
19
 Loading...