

Page 1
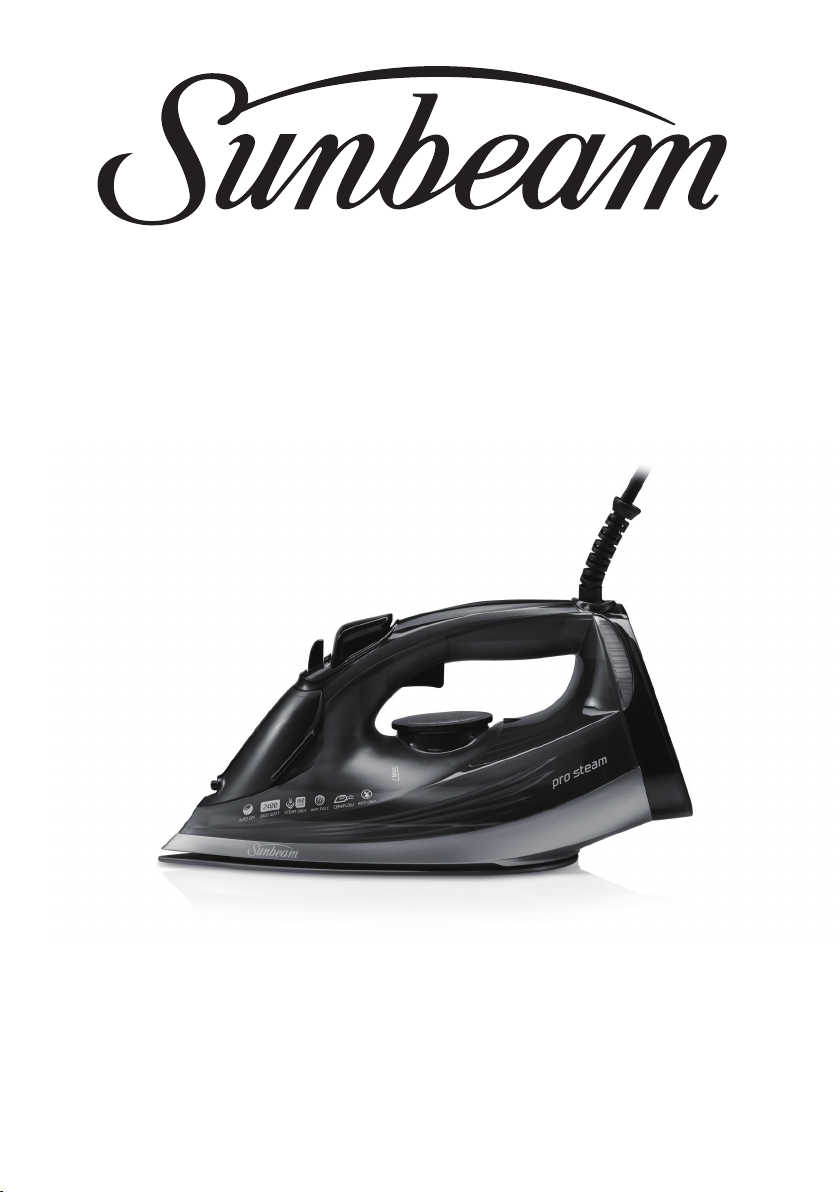
PROSTEAM® SONIC IRON
User Guide
SRC4700
Page 2
Contents
Sunbeam’s Safety Precautions 1
Features of your ProSteam
Using your ProSteam
Care and Cleaning of your ProSteam
Ironing Chart 8
®
Iron 2
®
Iron 4
®
Iron 6
Page 3
Sunbeam’s Safety Precautions
SAFETY PRECAUTIONS FOR YOUR IRON
• Do not leave a hot iron within reach of children. If
they come into contact with a hot iron it could lead
to serious burns.
• Iron only on an ironing board.
• An iron takes approximately 30 minutes to cool
down. Allow the iron to cool completely before
storing.
• Do not wind the cord around the soleplate while the
iron is still hot.
Sunbeam is very safety conscious when
designing and manufacturing consumer products, but
it is essential that the product user also exercise care
when using an electrical appliance. Listed below are
precautions which are essential for the safe use of an
electrical appliance:
Waiting on Front
• Read carefully and save all the instructions
provided with an appliance.
• Always turn the power off at the power outlet before
you insert or remove a plug. Remove
by grasping the plug - do not pull on the cord.
Cover from Energi
• Turn the power off and remove the plug when the
appliance is not in use and before cleaning.
• Do not use your appliance with an extension cord
unless this cord has been checked and tested by a
qualified technician or service person.
• Always use your appliance from a power outlet of the
voltage (A.C. only) marked on the appliance.
• This appliance is not intended for use by persons
(including children) with reduced physical, sensory
or mental capabilities, or lack of experience and
knowledge, unless they have been given supervision
or instruction concerning use of the appliance by a
person responsible for their safety.
• Children should be supervised to ensure that they
do not play with the appliance.
• The temperature of accessible surfaces may be high
when the appliance is operating.
• Never leave an appliance unattended while
in use.
• Do not leave the iron unattended while it is plugged
into the power outlet.
• Always unplug the iron from the power outlet before
filling or emptying the water tank.
• The iron must be used and rested on a stable
surface.
• The iron is not to be used if it has been dropped, if
there are visible signs of damage
or if it is leaking.
• When placing the iron on its heel rest, ensure the
surface on which it is placed is stable.
• Do not use an appliance for any purpose
other than its intended use.
• Do not place an appliance on or near a hot gas
flame, electric element or on a heated oven.
• Do not place on top of any other appliance.
• Do not let the power cord of an appliance hang over
the edge of a table or bench top or touch any hot
surface.
• Do not operate any electrical appliance with a
damaged cord or after the appliance has been
damaged in any manner. If damage is suspected,
return the appliance to the nearest Sunbeam
Appointed Service Centre for examination, repair or
adjustment.
• For additional protection, Sunbeam recommend
the use of a residual current device (RCD)
with a tripping current not exceeding 30mA in
the electrical circuit supplying power to your
appliances.
• Do not immerse the appliance in water
or any other liquid unless recommended.
• Appliances are not intended to be operated
by means of an external timer or separate remote
control system.
• This appliance is intended to be used in household
and similar applications such as: staff kitchen areas
in shops, offices and other working environments;
farm houses; by clients in hotels, motels and other
residential type environments; bed and breakfast
type environments.
Hot Surface
Do Not Touch
If you have any concerns regarding the performance and use of your appliance, please visit www.sunbeam.
com.au or www.sunbeam.co.nz or contact the Sunbeam Consumer Service Line.
Ensure the above safety precautions are understood.
This symbol indicates, temperature of accessible
surfaces may be high when the appliance is operating
and for some time after use.
1
Page 4
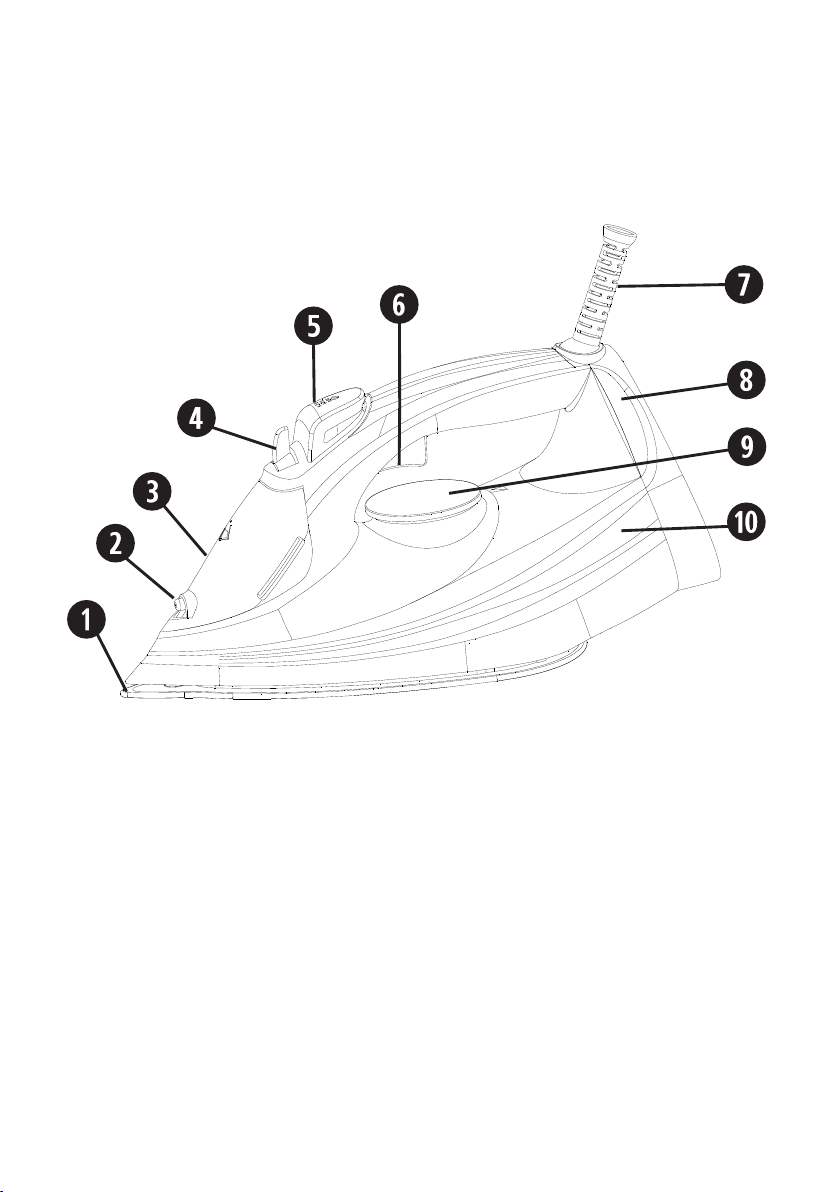
Features of your Sunbeam ProSteam® Iron
Waiting on Front
Cover from Energi
1. Soleplate
2. Spray nozzle
3. Water filling inlet
4. Steam control & self-clean slider
5. Spray button
2
6. Burst of steam button
7. Power cord protector
8. Temperature indicator light
9. Temperature control dial
10. Water tank
Page 5

Features of your Sunbeam ProSteam® Iron
2400 watts for fast heat up
Provides faster initial heat up and rapid heat recovery during ironing. The 2400W element
helps to maintain your selected temperature, and provides superior shot of steam output.
1
CeraFlow™ Soleplate
Up to 7x more scratch resistant vs. other
coatings (comparing vs stainless steel)*.
Extra tough ceramic soleplate for speed,
agility and durability.
2
Spray nozzle
Waiting on Front
3
Easy-fill water inlet
Holds 300ml of water for high steam
performance without having to refill the
tank regularly.
Cover from Energi
4
Steam control & self-clean slider
Allows you to select the desired steam
output for each garment.
5
Spray button
Pressing the spray button provides a fine
mist spray to dampen hard-to-iron fabrics.
6
Burst of steam button
Powerful shot of steam: Pressing the shot
of steam button instantly produces a
powerful shot of steam to remove stubborn
wrinkles.
Vertical shot of steam: Pressing the shot of
steam button with the iron in an upright
position produces a vertical shot of steam,
which is ideal for steaming curtains and
suits, and removing creases from delicate
fabrics.
7
Power cord protector
8
Temperature indicator light
9
Temperature control dial
Allows you to select the desired
temperature for each garment.
10
Water tank
3
Page 6

Using your ProSteam® Iron
Before first use
Remove any adhesive stickers, plastic covers
or cardboard sleeves from the soleplate.
Ensure that all adhesive is removed by
rubbing the soleplate with a cloth dampened
with methylated spirits.Fill the water tank and
then empty the water. This will rinse out any
foreign particles remaining in the water tank
from the manufacturing process.
NOTE: When turned on for the first time, your
new iron may give off vapours for up to 10
minutes. This is due to the initial heating of
the materials used. It is safe, not detrimental
to the performance of the iron, and will not
reoccur.
Waiting on Front
Filling the iron with water
Before filling the iron with water ensure the
power is turned off and the plug is removed
from the power outlet. The iron can be filled
Cover from Energi
with water while it is hot.
Place the iron on its heel and open the water
inlet cover.
Slowly pour water into the water inlet until
the maximum water level is reached. Do not
exceed the maximum water level indicator.
Push the water inlet cover firmly to close.
NOTE: The special soleplate design allows
you to use tap water with your iron without
affecting the steam performance. However in
very hard water areas, Sunbeam recommends
the use of distilled water, or water which has
been demineralised.
Do not fill the iron with fabric conditioner,
starches or any other solution as these will
damage the steam mechanism. Do not use
contaminated water.
Ironing Tips
• Start by ironing those items of laundry
that require the lowest temperature
(e.g. synthetics). Finish by ironing
fabrics which respond best to higher
temperatures and steam—such as cotton
and linen.
• If you iron a fabric made of a blend of
fibres set the temperature of your iron to
the most delicate fibre.
• Never use the burst of steam button on
silks or synthetics.
• When using starch, it should be sprayed
onto the reverse side of the fabric and the
soleplate cleaned more frequently.
• Do not iron over sharp or hard objects
such as buttons, studs or zippers as they
will scratch the soleplate of your iron.
Using your iron
1. Insert the plug into a 230/240 volt
power outlet and turn the power on. The
Temperature Indicator Light will illuminate
to indicate that the iron is switched on
and heating.
2. Turn the temperature dial to the desired
setting. The Temperature Indicator light
will illuminate to indicate that the iron
is heating to the selected temperature.
When the light goes out the iron has
reached the selected temperature and is
ready to use.
NOTE: When the temperature dial is changed
from a high setting to a lower temperature
wait until the Temperature Indicator Light
comes on and goes out again before ironing.
This will ensure that your iron has reached
the lower temperature and is not too hot for
the fabric being ironed.
4
Page 7

Using your ProSteam® Iron
For example, you have been ironing using the
lll
setting and want to change to the ll setting:
1. Move the temperature control dial to
the ll setting. Initially, the temperature
indicator light will not be lit because your
iron is still at a higher temperature.
2. Wait until the temperature indicator
light comes on then goes out again.
Your iron has now cooled to the correct
temperature.
Ironing without steam
If you intend to dry-iron fabrics there is no
need to fill the water tank. However, if water
is already in the water tank, you don’t need to
empty it.
Waiting on Front
1. Set the steam control to the no steam
position (0).
2. Plug your iron into the power outlet and
switch on.
Cover from Energi
3. Rotate the temperature control until the
desired setting is aligned with the dial pointer.
4. The temperature indicator light will come
on, indicating that the iron is heating
up. When the light turns off, the set
temperature has been reached and your
iron is ready to use.
Steam ironing
During steam ironing, if you do not allow
your iron to reach the selected temperature
water may drip from the soleplate.
It is recommended that for harder to iron
fabrics such as cotton and linen, steam
should be used when ironing.
When ironing cotton and linen, always select
the highest temperature. Steam should
never be used on delicate fabrics like nylons,
acrylics and synthetics.
1. Fill your iron with water.
2. Plug your iron into the power outlet and
switch on.
3. Set the temperature control to the
setting. The hotter your iron, the more
steam is generated.
lll
4. The temperature indicator light will come
on, indicating that the iron is heating up.
When the temperature indicator light
turns off, the set temperature has been
reached and your iron is ready to use.
The temperature indicator light will turn
on and off during ironing as your iron
maintains the correct temperature.
5. Adjust the steam control to select the
desired steam output.
6. Move the steam control to the high steam
(
) setting to increase the amount of
steam, or towards the off (0) setting to
decrease the amount of steam.
7. The steam can be shut off at any time
by setting the steam control to the off (0)
position.
Using the shot of steam
The temperature control dial must be set within
the ll and
between each press of the steam button.
Press the shot of steam button whenever
you have a stubborn crease that needs extra
steam. Steam will burst from the holes in the
soleplate of your iron into the fabric.
lll
setting. Wait several seconds
5
Page 8

Using your ProSteam® Iron
Vertical steam ironing
Never iron garments when they are being
worn.
1. Prepare your iron as for steam ironing.
2. Hold your iron 15cm from the fabric.
3. Press the shot of steam button as
required. Wait several seconds between
each press of the button.
Spraying
The water spray can be used to help iron
heavy fabrics or difficult areas (collars,
pockets, sleeves, creases, etc). It can also
be used when ironing delicate fabrics which
cannot be steam ironed.
Make sure there is water in the tank. Press the
Waiting on Front
spray button to produce a spray of water.
Anti-drip feature
When the temperature of your iron is
insufficient to create steam, the supply of
Cover from Energi
water is cut off automatically to avoid any
drips from the soleplate.
Anti-scale filter
Your iron is fitted with a permanent antiscale filter. This filter is fixed and cannot be
removed for cleaning.
The filter is designed to reduce the buildup of limescale inside your iron. Limescale
occurs during steam ironing due to water
hardness.
Water hardness varies from one area to
another. The effectiveness of the filter will
depend on how ‘hard’ your water is.
Auto shut off feature
ALWAYS disconnect your iron from the
power outlet after use. NEVER leave the iron
unattended with the auto shut off function in
operation.
An electronic safety device will automatically
switch the heating element off if the iron
has not been moved more than 30 seconds
when resting on its soleplate in a horizontal
position. If resting on its heel in a vertical
position, this will happen after 15 minutes.
The power light will flash whilst your iron is
in auto shut off mode. To restart your iron,
gently move it until the light stops flashing.
Care & Cleaning
After each use
1. Turn the power off and remove the plug
from the power outlet.
2. Allow the iron to cool before winding the
cord around the built-in cord wrap.
To clean after use
Always turn the power off and remove the
plug from the power outlet and the control
probe from the probe inlet before cleaning.
Allow the skillet to cool before cleaning.
6
Storage
Always store the iron on its heel rest. Do not
store the iron with the soleplate facing down,
or in the carton.
Cleaning
To clean the exterior of your iron, wipe over
with a damp soft cloth and wipe dry.
Caution: Do not use harsh abrasives, chemical
cleaners or solvents to clean the exterior of
your iron as these will damage the surface.
Page 9

Care & Cleaning
Self-cleaning
Only press the self-clean slider when you
want to activate the self cleaning system. Never
press the self-clean dial when ironing.
The self-clean function removes scale and
impurities. Use the self-clean function once
every two weeks. If the water in your area is very
hard, the self clean function should be used
more frequently.
1. Ensure your iron is switched off and
unplugged from the power outlet.
2. Set the steam control to the no steam
position.
3. Fill your iron with water to the MAX level.
Waiting on Front
4. Stand your iron on its heel rest, plug in
and switch on at the mains supply.
5. Set the temperature control to the highest
(MAX) setting. Allow your iron to heat up
Cover from Energi
until the temperature indicator light turns off.
6. Unplug your iron and hold it over a sink
with the soleplate facing downwards.
Warning: Be careful not to touch the
iron’s hot surfaces.
7. Push and hold the steam control slider
to the self-clean position. Hot water and
steam will be ejected from the holes in
the soleplate along with any impurities.
8. Slowly rock the iron side-to-side and front
to back for 30 seconds. When rocking
the iron, dip the nose of the iron slightly
below the rear to make certain the water
circulates completely.
9. Release the self-clean slider after 30
seconds and pour out the remaining water
out of the fill hole.
10. Rest the iron soleplate horizontally on an
old piece of cloth (cotton or towelling is
ideal) to dry.
11. Plug in the iron and turn the temperature
control to the lll setting.
12. When the temperate indicator light turns
off, iron an old piece of cloth to allow any
remaining water to escape.
13. Stand your iron on its heel rest and let
the iron heat for two minutes to ensure
that the iron is dried out completely.
14. After use, switch off and unplug your iron
from the mains supply and allow it to
fully cool before storing.
Cleaning the steam holes
To remove build up from the steam holes
which may affect steam performance, use
a cotton wool tip moistened in methylated
spirits.
Cleaning the CeraFlow™ soleplate
Wipe the soleplate with a damp soft cloth
after each use. If polyester has burnt to the
soleplate, iron a damp cotton cloth while hot.
Caution: Do not use scouring pads, abrasives
or harsh cleaners to clean your CeraFlow™
soleplate, as these will scratch and damage
the surface.
7
Page 10
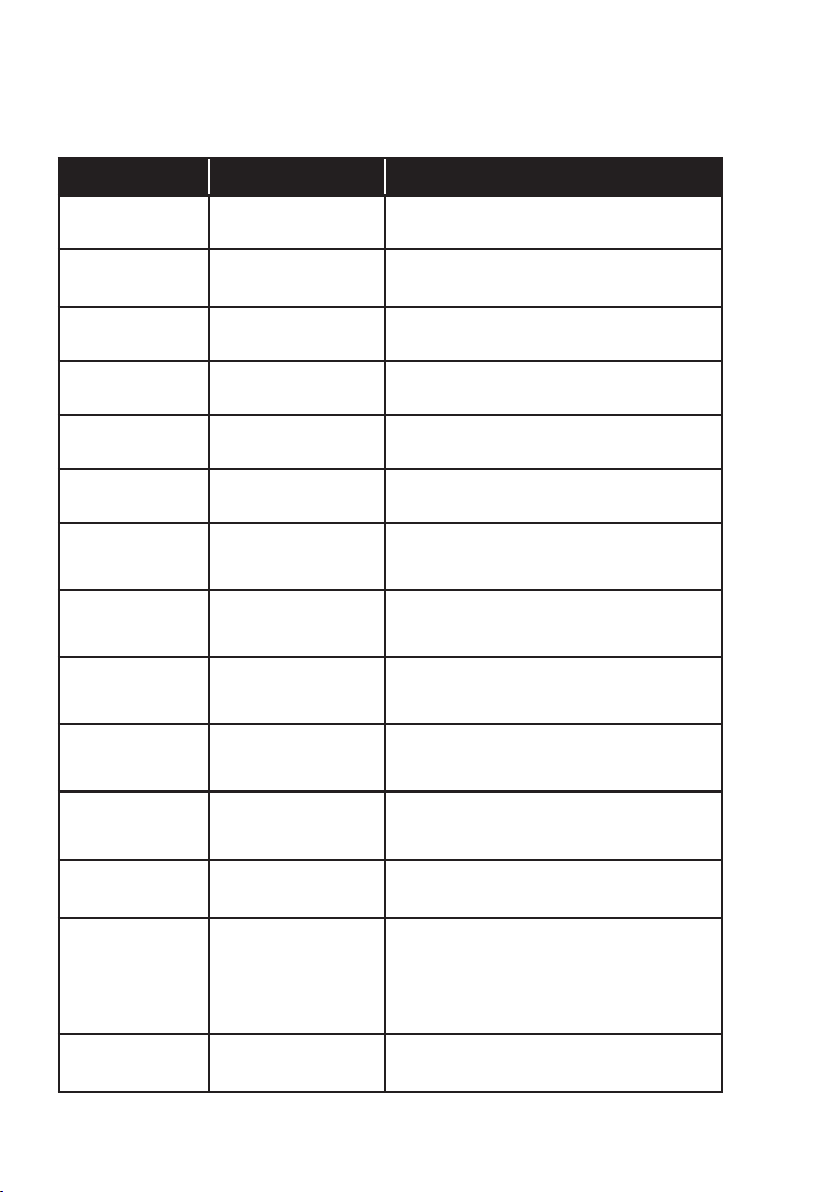
Ironing Chart
Fabric Temp setting Ironing Ironing recommendation
Acrylic
Acetate
Nylon
Polyester
Rayon
Waiting on Front
Viscose
Silk
Cover from Energi
Cotton Blends
Wool
Wool Blends
Corduroy
MIN
•
MIN
•
MIN
•
SYNTH
•
SYNTH
•
SYNTH
•
SILK
• •
WOOL
• •
WOOL
• •
WOOL
• •
COTTON
• • •
Dry iron on reverse side of fabric
Dry iron on reverse side of fabric
while still damp
Dry iron on reverse side of fabric
Dry iron on reverse side of fabric
Dry iron on reverse side of fabric
Dry iron on reverse side of fabric
Iron on reverse side of fabric. Use an ironing
cloth to prevent shine marks
and use regular shots of steam
Check label and follow manufacturer’s
instructions. Use setting for the fibre
requiring the lowest setting
Steam iron on reverse side of fabric
or use an ironing cloth. Brush gently
to raise the fibres
Steam iron on reverse side of fabric
or use an ironing cloth. Brush gently
to raise the fibres
Steam iron on reverse side of fabric
or use an ironing cloth. Brush gently
to raise the fibres
Cotton
Linen
Denim
8
COTTON
• • •
LINEN
• • •
LINEN
• • •
Steam iron while still damp or use spray
to dampen. Use medium to high steam
Iron on reverse side of fabric or use an
ironing cloth to prevent shine marks,
especially with dark colours. Iron while
still damp or use spray to dampen.
Use medium to high steam
Iron while still damp or use spray
to dampen. Use maximum steam
Page 11
2 year
Year
Waiting on Front
Cover from Energi
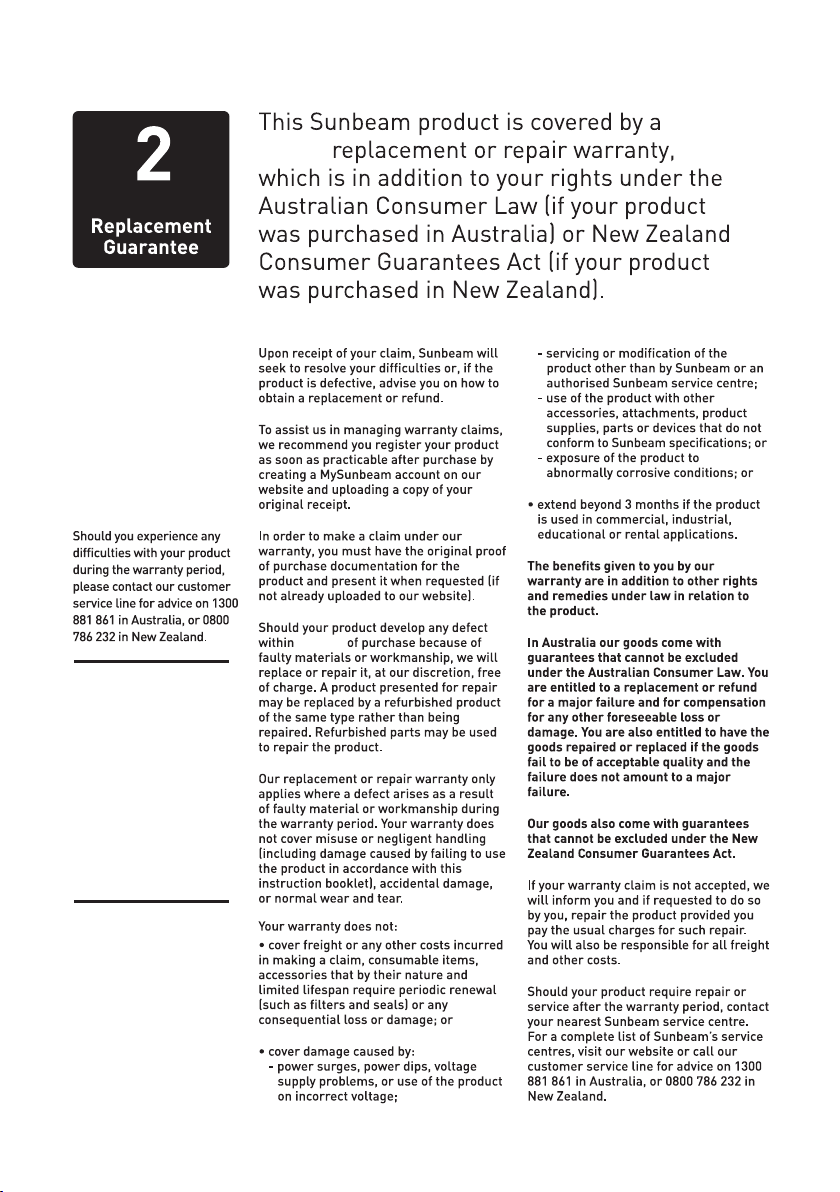
2 years
Australia
www.sunbeam.com.au
1300 881 861
New Zealand
www.sunbeam.co.nz
0800 786 232
9
Page 12

Need help with your appliance?
Contact our customer service team
or visit our website for information
and tips on getting the most from
your appliance.
Australia | visit www.sunbeam.com.au
phone 1300 881 861
New Zealand | visit www.sunbeam.co.nz
phone 0800 786 232
NEWELL AUSTRALIA PTY LTD. ABN 68 075 071 233
Sunbeam is a registered trade mark.
Made in China to Sunbeam’s specification.
Due to minor changes in design or otherwise,
the product you buy may differ slightly from the one shown here.
Approved by the appropriate electrical regulatory authorities.
© Copyright Sunbeam 2023.
09/23
SRC4700_23EM1 (ANZ)_GCDS-LD
P.N. NWL0001611006
 Loading...