

Cyclone MKV 2 Multimedia Enclosure
Page 1.
Version 1.2
CYCLONE
-MKV-
2
Full HD 1080p
HDMI Network Media Player Enclosure
User manual

Cyclone MKV 2 Multimedia Enclosure
Page 2.
Version 1.2
Contents:
Safety Instructions: ..........................................................................................5
Product Details:................................................................................................7
Packaging List:.............................................................................................7
Front View:...................................................................................................7
Back View:....................................................................................................9
Remote Control:.........................................................................................10
User Interface: ...............................................................................................13
Main Menu:.................................................................................................13
Browser Menu:...........................................................................................14
Setup Menu:...............................................................................................15
Installing a Hard Disk Drive:...........................................................................16
Basic Setup:...................................................................................................17
Connecting Power:.....................................................................................17
AV Cable:...................................................................................................17
Component output connection (YPbPr)......................................................18
HDMI Cable:...............................................................................................19
Optical Cable (Audio Only):........................................................................19
USB Host Interface:....................................................................................20
Direct PC Connection via USB:..................................................................20
Connection and Network Setup:.................................................................21
Wired Connection:......................................................................................22
DHCP IP (Auto): .....................................................................................22
Fixed IP (Manual): ..................................................................................22
Wireless:.....................................................................................................23

Cyclone MKV 2 Multimedia Enclosure
Page 3.
Version 1.2
Viewing Multimedia:....................................................................................... 24
Movie Playback:.........................................................................................24
Movie Playback Options: ........................................................................25
Audio Playback:..........................................................................................27
Audio Playback Options:.........................................................................28
Image Playback:.........................................................................................29
Image Playback Options:........................................................................29
Slideshow Viewing with Background Music:...........................................30
File Copy:.......................................................................................................31
Copy / Move:..............................................................................................31
Configuring File Sharing with Windows XP:...................................................33
Configuring File Sharing with Windows Vista:................................................34
UPnP: ............................................................................................................ 35
Playlist ...........................................................................................................35
Playlist Creation: ........................................................................................36
Playlist Media Playback:.............................................................................36
Removing Files from Playlist:.....................................................................36
Network Media Access: .................................................................................37
Settings:.........................................................................................................39
Audio Settings Menu:.................................................................................39
Video Settings Menu:.................................................................................39
Network Settings Menu:.............................................................................42
System Settings Menu: ..............................................................................43
MISC Settings Menu: .................................................................................44
BitTorrent/Samba Installation:....................................................................45

Cyclone MKV 2 Multimedia Enclosure
Page 4.
Version 1.2
Neighbour Web Interface: ..........................................................................46
BitTorrent Download:..................................................................................47
Adding a New Torrent: ...............................................................................48
BitTorrent Settings:.....................................................................................49
Visit Neighbour:..........................................................................................51
Account Management: ............................................................................... 51
Firmware Upgrade:........................................................................................53
Formatting a Hard Disk Drive:........................................................................54
Troubleshooting:............................................................................................54
Product Specifications: ..................................................................................57
Media Codec Information:..............................................................................58
Maintenance Notice:......................................................................................59

Cyclone MKV 2 Multimedia Enclosure
Page 5.
Version 1.2
Safety Instructions:
READ THESE INSTRUCTIONS:
All safety and operating instructions should be read before this product is
used.
KEEP THESE INSTRUCTIONS:
These safety and operating instructions should be retained for future
reference.
FOLLOW ALL INSTRUCTIONS:
All operating instructions should be followed.
AVOID USING PRODUCT NEAR WATER:
Do not use this product near a water source.
ALWAYS CLEAN WITH A DRY CLOTH:
Clean using a soft, dry cloth only.
HEAT:
Do not install near a heat source, such as radiators or other apparatus that
produce high level heat.
POWER OUTAGE:
Avoid use of the product during electrical storms. Disconnect device when
not in use for long periods.
SERVICING:
If product is or becomes defective please refer to a qualified service
technician.

Cyclone MKV 2 Multimedia Enclosure
Page 6.
Version 1.2
AVOID BLOCKING AIR VENTS:
Do not block the air vents in order to avoid heat build up. A minimum of 5cm
is recommended to maintain free air flow.
PROTECT THE POWER CORD:
Prevent the power cord from being walked on and being pulled with sudden
force. Protect the cord from being pinched, particularly at plugs and the point
where they exit the device.
DO NOT DROP:
Do not drop the player as this will cause irreversible damage.
ONLY USE RECOMMENDED ACCESSORIES:
It is recommended to use only manufacturer approved accessories to avoid
any compatibility issues or damage to the product.
HARD DRIVE AND OTHER MEDIA STORAGE DEVICE:
We will not be liable in any way for damage as a consequence of loss or
recovery of data on the hard drive and other attached media storage.
Customers are advised to backup data before using this device.
We are not liable for compatibility issues with the media storage unit. It is
recommended that customers buy a compatible storage media unit for this
player.
Cyclone MKV 2 Multimedia Enclosure
Page 7.
Version 1.2
Product Details:
Packaging List:
Please ensure that the following items are included in the box when opened.
If any items are missing, please contact your supplier immediately.
Media Player 1 x
Power Adapter 1 x
Remote Control 1 x
AV Cable 1 x
Support CD 1 x
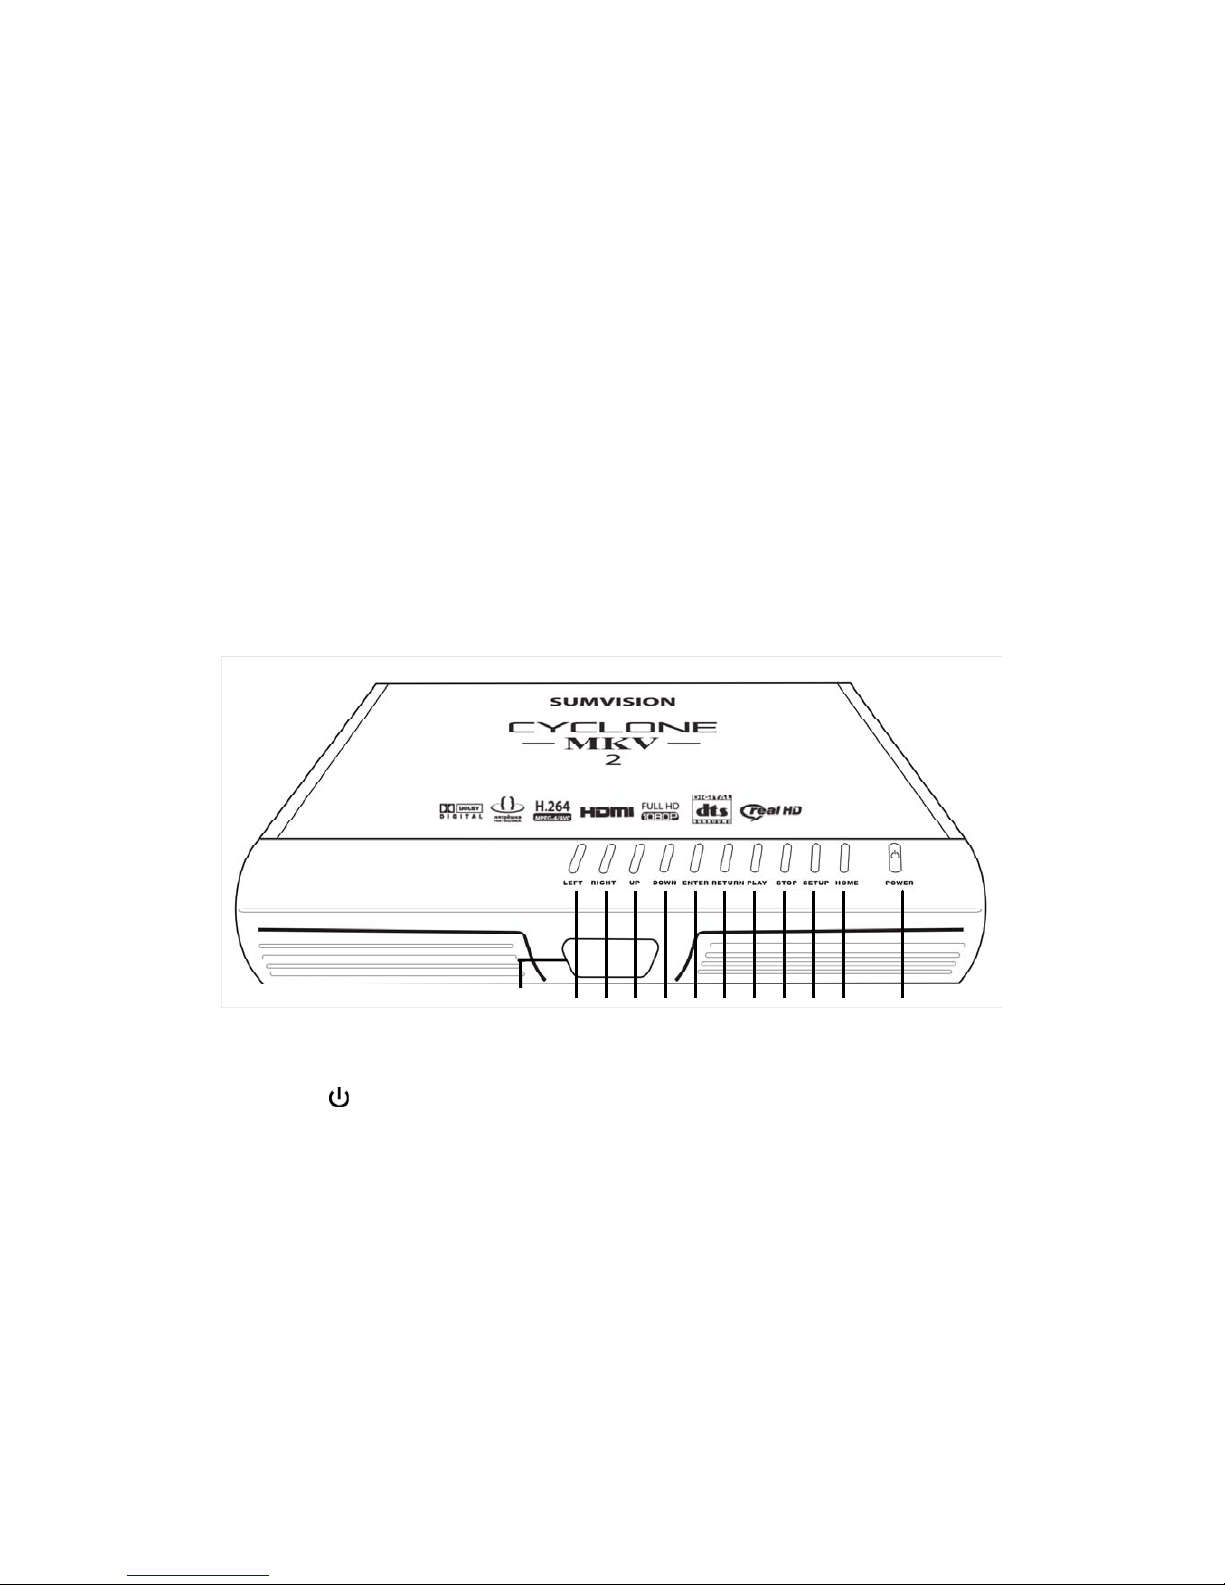
Front View:
1
Press to switch the player on or go into standby
mode. The LED will light up blue when switched
on. It will light up red when switched to standby
mode.
2 HOME Press to return to the player’s main menu.
3 SETUP Press to enter the player’s setup menu.
4 STOP Press to stop media playback.
5 PLAY Press to resume media playback.
12 11 10 9 8 7 6 5 4 3 2 1

Cyclone MKV 2 Multimedia Enclosure
Page 8.
Version 1.2
6 RETURN Press to return to the previous menu.
7 ENTER Pressing this button will confirm or select an
action.
8 DOWN Press to move onscreen cursor down.
9 UP Press to move onscreen cursor up.
10 RIGHT Press to move onscreen cursor right.
11 LEFT Press to move onscreen cursor left.
12 IR Infrared sensor. LED light display.
Cyclone MKV 2 Multimedia Enclosure
Page 9.
Version 1.2
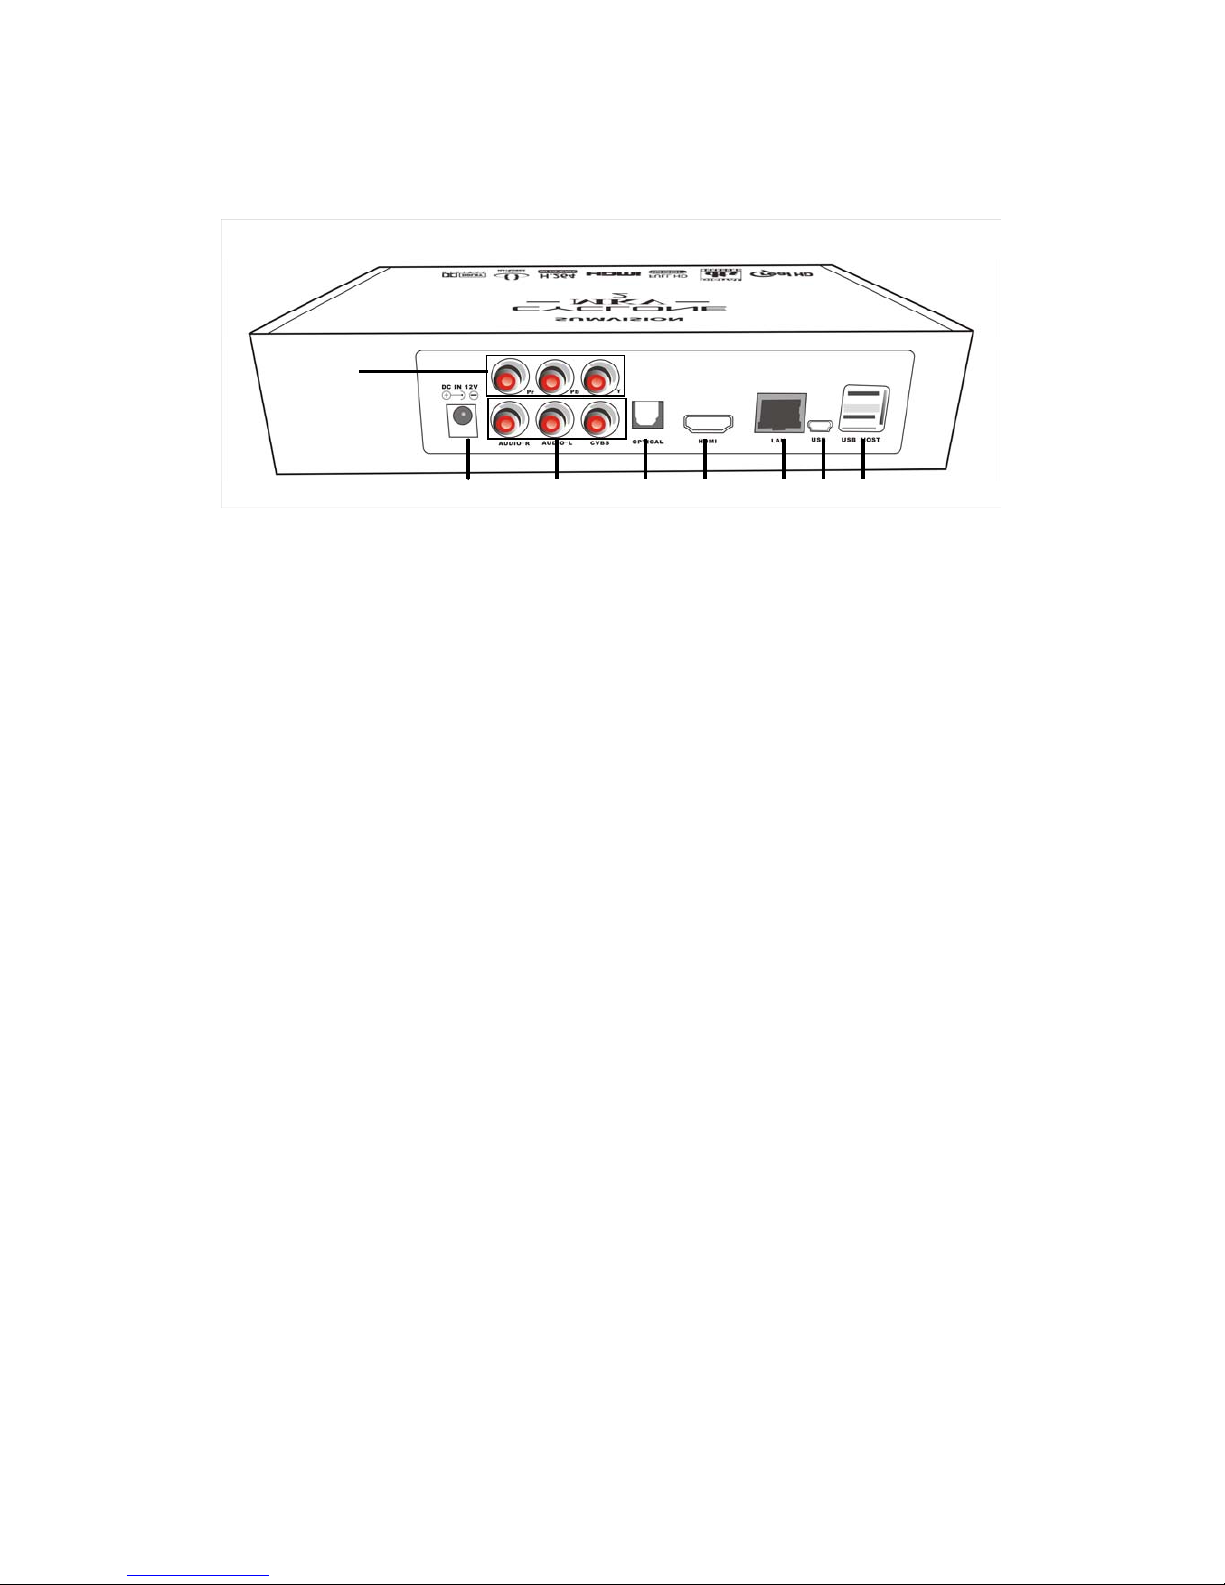
Back View:
1 DC IN 12V Power port.
2 Component YPbPr component video output
3 AV Out Composite video output.
4 Optical Optical audio output to connect to a surround
sound system.
5 HDMI High definition video output port. Used to display
high quality video and audio.
6 LAN 10/100 network port to connect the media player
to a wired network.
7 USB USB 2.0 port. Used for file transfers when
connected to a PC.
8 USB Host USB Host port to connect to multiple external
storage devices.
① ③ ④ ⑤ ⑥ ⑦ ⑧
②
Cyclone MKV 2 Multimedia Enclosure
Page 10.
Version 1.2
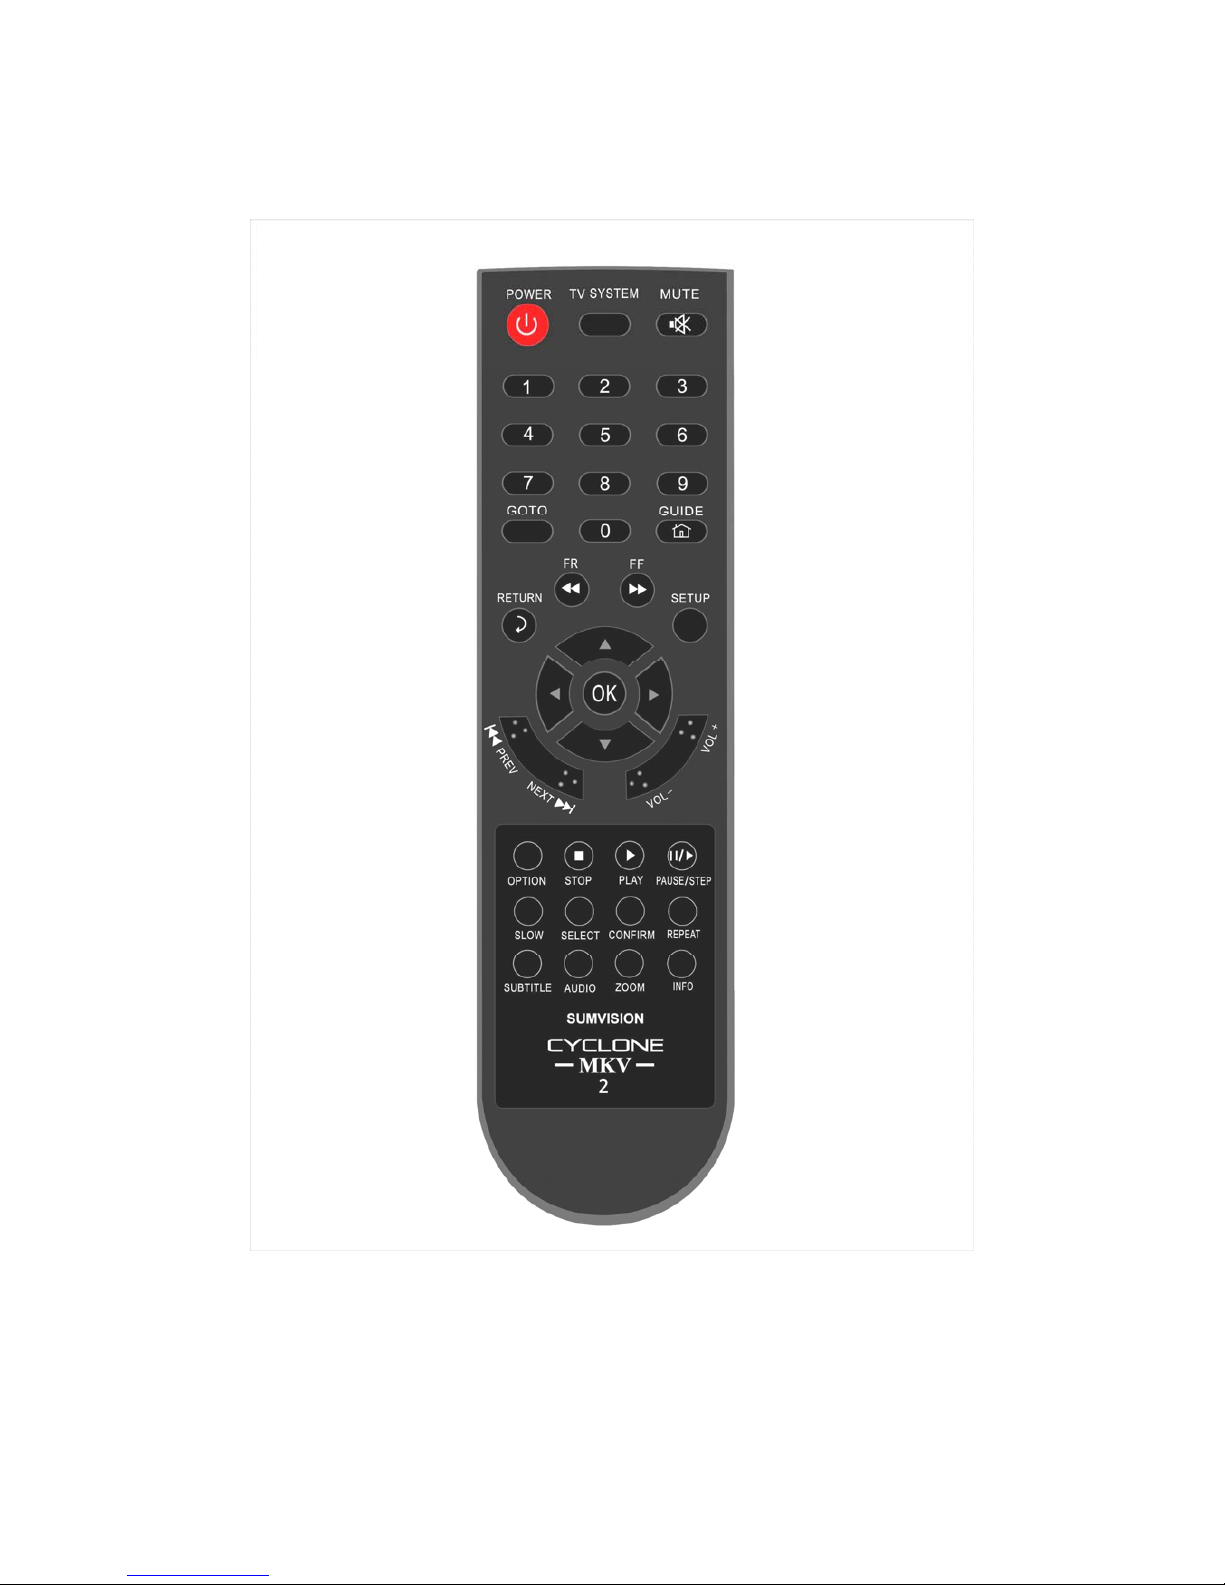
Remote Control:

Cyclone MKV 2 Multimedia Enclosure
Page 11.
Version 1.2
Power Switches the Cyclone MKV 2 on and off from standby
mode.
Mute Switches on and off audio output.
TV System Toggles the Cyclone MKV 2 between NTSC, PAL, 480p,
576p, 720p 50Hz, 720p 60Hz, 1080i 50Hz, 1080i 60Hz,
1080p 50Hz and 1080p 60Hz.
0-9 Number Keys.
GoTo Press to select movie chapter.
Guide Returns user to main menu.
Return Returns user to the previous menu.
FR Press to fast rewind. Toggles fast rewind by
X2, X4, X8, X16 and X32.
FF Press to fast forward. Toggles fast forward by
X2, X4, X8, X16 and X32.
Setup Press to enter the setup menu.
UP Navigation button. Moves cursor up.
Down Navigation button. Moves cursor down.
Left Navigation button. Moves cursor left.
Right Navigation button. Moves cursor right.
OK Pressing this button confirms or selects an action.
Prev Press to return to previous file. Also scrolls page up on
list.
Next Press to go to next file. Also scrolls page down on list.
Vol + Press to increase audio volume.
Vol - Press to decrease audio volume.
Option Opens the option menu to rename or delete files.
Stop Stops media playback.
Pause/Step Press to pause media playback. Press continuously for
step by step playback.

Cyclone MKV 2 Multimedia Enclosure
Page 12.
Version 1.2
Repeat Press to set repeat options: Chapter, Title or Off.
Play Press to resume media playback.
Select Press to select files or folder to be copied in copy mode.
Press to select the file and then press “confirm” to add or
delete file in the playlist
Confirm Press to add or delete option in playlist
Info Press to display time, title and other information when
playing video and image files.
Subtitle Switch on subtitles if available.
Slow Press to activate slow motion. Toggles slow motion by
X1, X3/4, X1/2, X1/4, X1/8 and X1/16.
Press PLAY to resume regular play speed.
Audio Press to toggle between different audio outputs.
Zoom Press to zoom video or image files on display.
Video zoom levels: X2, X3, X4 and X8.
Image zoom levels: X2, X4, X8 and X16.
Cyclone MKV 2 Multimedia Enclosure
Page 13.
Version 1.2
User Interface:
The Cyclone MKV 2 user interface has been designed to allow easy access to
the media player’s many features.
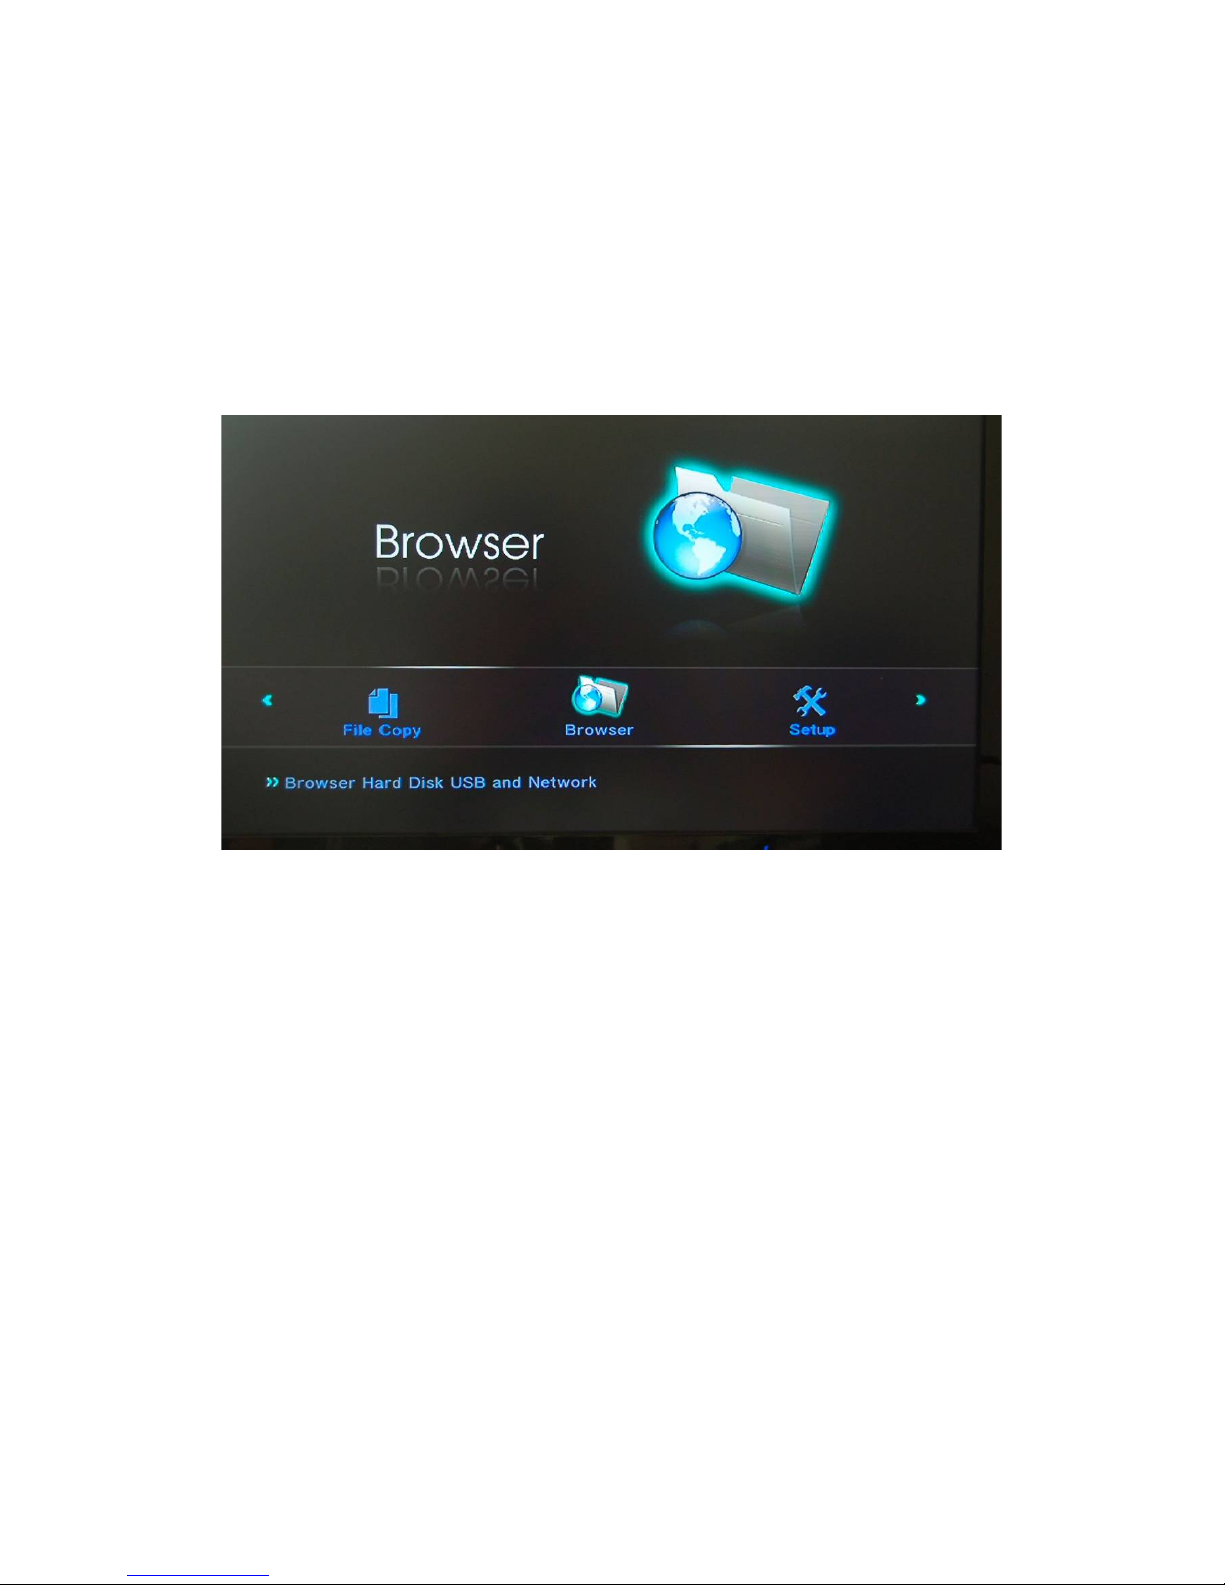
Main Menu:
Upon starting the Cyclone MKV 2 this menu will be displayed first.
File Copy:
Provides access to the media player’s file management capabilities. It
provides access to the file copy and move functions.
Browser:
Provides access to media locations.
Setup:
Provides access to the Setup Menu.
IMS:
Provides access to Internet services.
Cyclone MKV 2 Multimedia Enclosure
Page 14.
Version 1.2
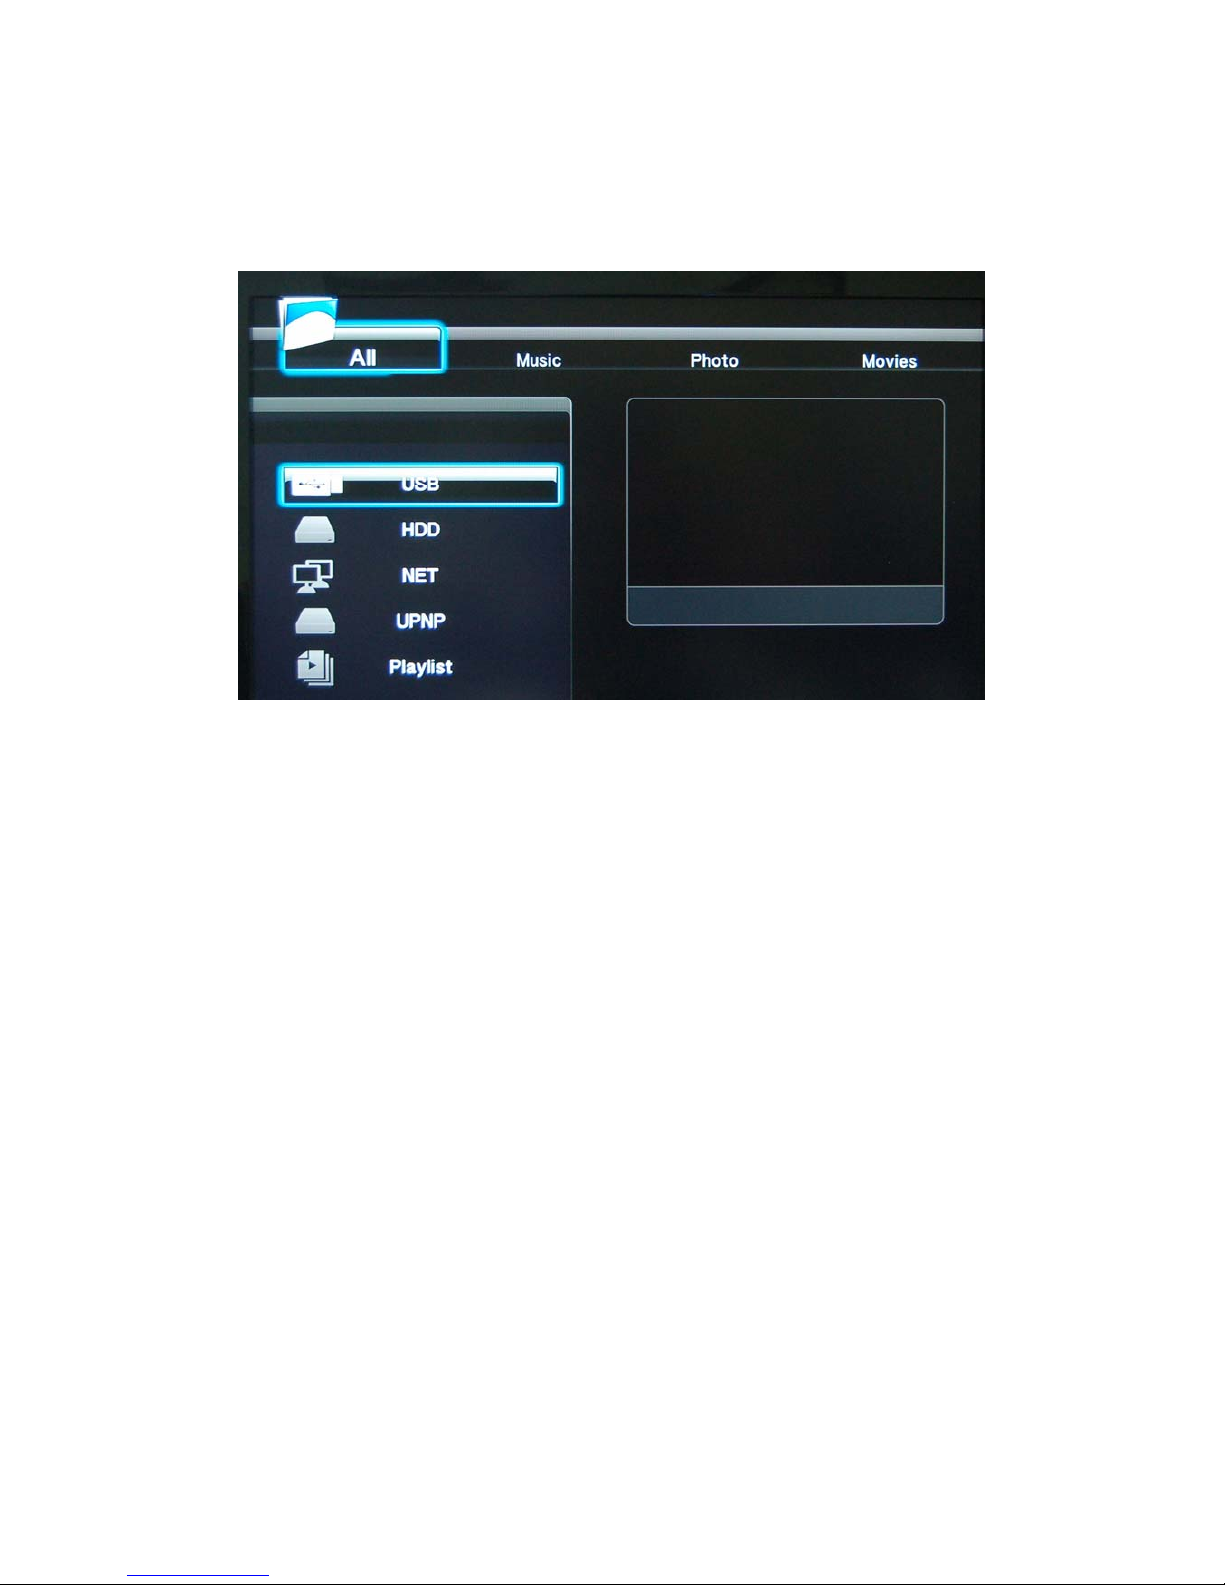
Browser Menu:
This menu provides access to media locations.
USB:
Provides access to multimedia files on connected external USB hard drives.
HDD:
Provides access to multimedia files on the local HDD.
NET:
Provides access to multimedia files located over your Local Area Network.
UPnP:
Provides UPnP shared files over your Local Area Network.
Playlist :
Provides access to playlist creation and playlist playback.
Cyclone MKV 2 Multimedia Enclosure
Page 15.
Version 1.2
Setup Menu:
Audio:
Provides access to audio configuration settings.
Video:
Provides access to video configuration settings.
Network:
Provides access to network configuration settings.
System:
Provides access to internal system configuration settings.
MISC:
Provides access to image configuration settings and other aspects of the
media player.

Cyclone MKV 2 Multimedia Enclosure
Page 16.
Version 1.2
Installing a Hard Disk Drive:
Installing a HDD into the Cyclone MKV 2 enclosure can be done without the
need of any tools.
Important Notice: It is advised to wear an antistatic wristband to prevent
electrostatic discharge from damaging any electrical
devices.
Before installing the HDD into the enclosure, please ensure that the Cyclone
MKV 2 has been disconnected from its power source.
When the Cyclone MKV 2 is free of all cables, open the HDD compartment
door. This is located on the right hand side of the enclosure.
Gently but firmly insert the HDD into the compartment until the locking
mechanism clicks.
Once the HDD is locked in place, close the compartment door.
After installing the HDD, format it using the built-in format utility. The format
utility can be accessed from the setup menu. Select the System tab and
scroll down to HDD Format. For more information please refer to this
manual’s formatting section.
Important Notice: It is advised not to install a HDD that already contains
data on it, as the formatting process will erase all data
currently on the HDD.
Important Notice: If you wish to use the optional BitTorrent and Samba
functions, it is advised to install the required files at this
point. The initial installation of these functions requires a
HDD format. All subsequent installations do not require a
HDD format. For more information please refer to this
manual’s BitTorrent/Samba section.
To remove the HDD from the enclosure please ensure that the Cyclone MKV
2 has been disconnected from its power source.
Open the compartment door located right of the enclosure.
Once opened located the latch on the left side of the compartment. Firmly
press to the Latch to release the HDD.
Remove the HDD and close the compartment door.
Tip: Press the HDD into the enclosure whilst pressing the release latch.
This will make it easier to release the HDD.
Cyclone MKV 2 Multimedia Enclosure
Page 17.
Version 1.2
Basic Setup:
Important Notice: If you wish to use the optional BitTorrent and Samba
features, it is advised to install the required files first. This
is because the initial installation requires the HDD to be
formatted after completion and may result in data loss.
Please refer to this manual’s BitTorrent and formatting
sections for more information.
To setup up your media enclosure you will need to connect it to your TV set
and supply power to the MKV 2 enclosure. You may also wish to connect the
Cyclone MKV 2 to your surround sound system, wireless or wired network
and attach an external hard drive.
First of all examine the back of your TV set and locate its AV ports. Please
make sure you have the correct cables for your chosen setup.
Connecting Power:
Please ensure the power socket switch is in the off position before plugging in
the power adapter to the wall.
Connect the power adapter (supplied) to the back of your Cyclone MKV 2 and
plug the power into the power socket. You will notice the standby LED is now
lit.
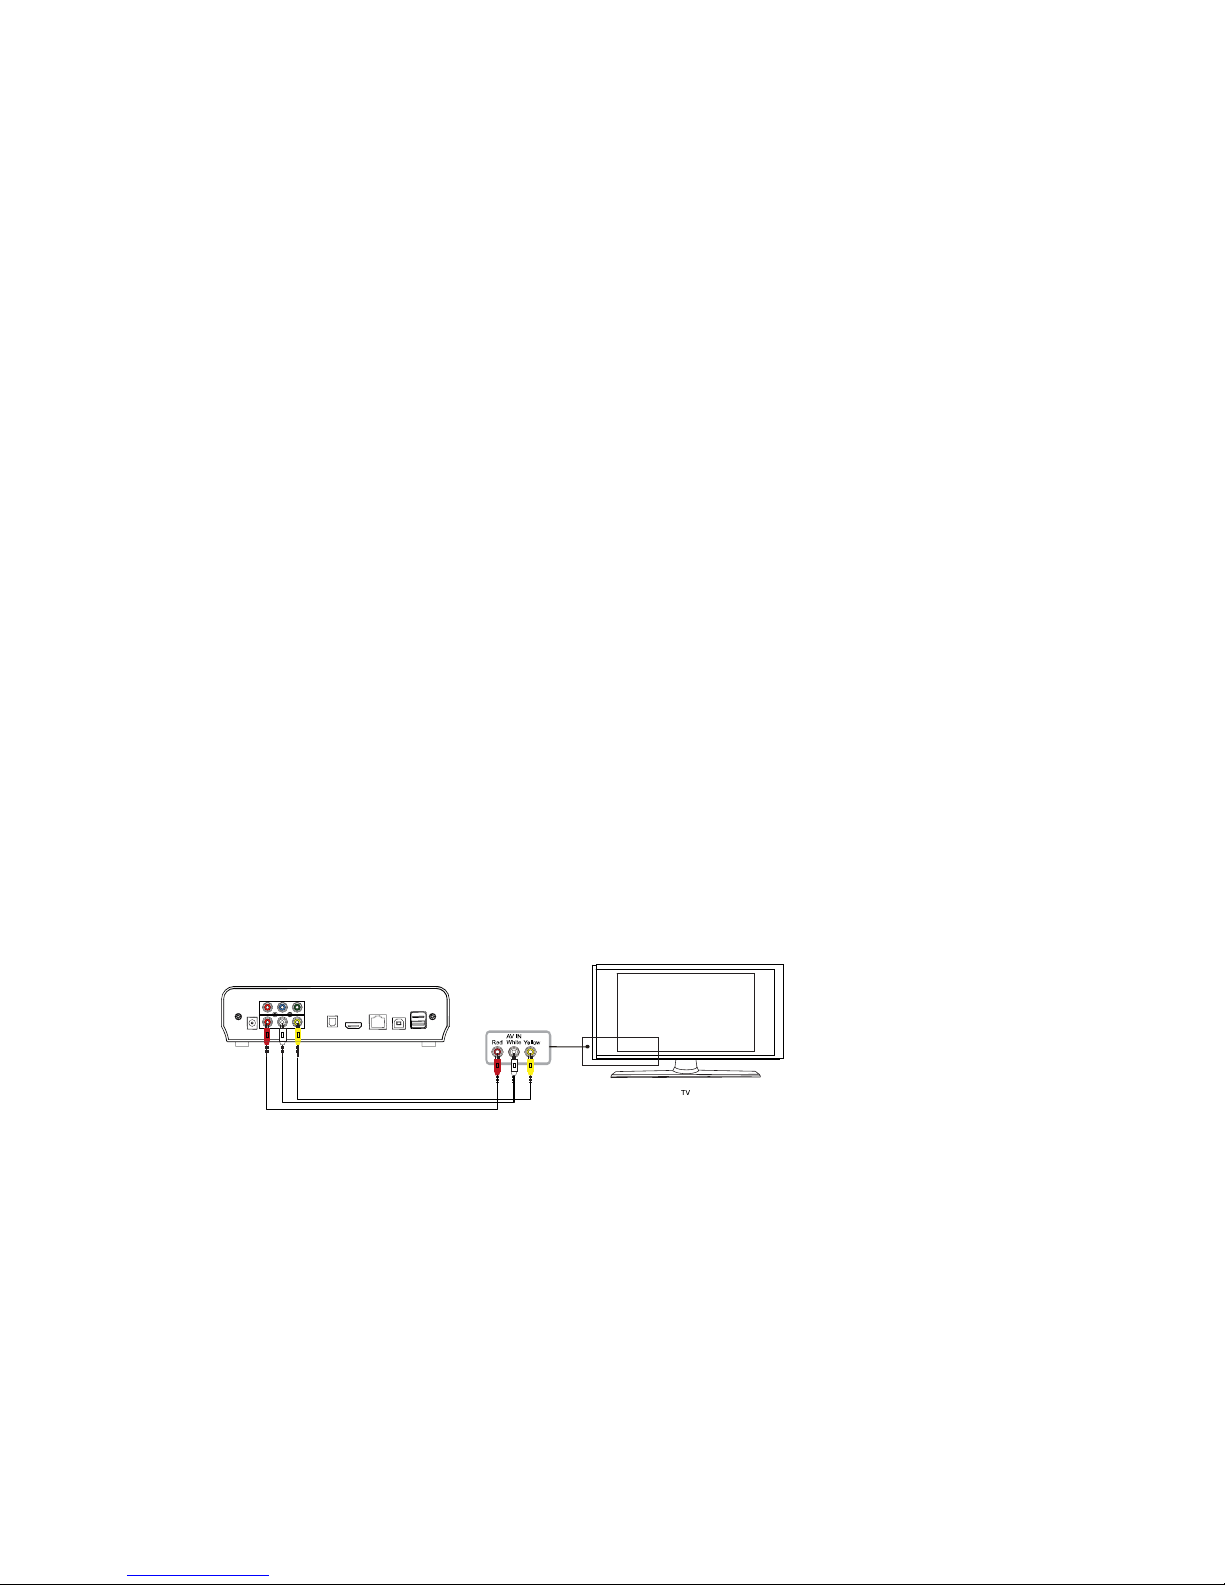
AV Cable:
Connecting the Cyclone MKV 2 to your TV will allow you to view multimedia in
standard definition.
Using the AV lead (supplied), connect the 3.5mm jack into the 3.5mm
composite port on the back of the Cyclone MKV 2. On the other end of the
cable plug the red, yellow and white connectors into the corresponding input
ports of your TV.
Switch on your TV and select AV mode, if required.
Cyclone MKV 2 Multimedia Enclosure
Page 18.
Version 1.2
Press the POWER button on the remote control to switch on the Cyclone
MKV 2.
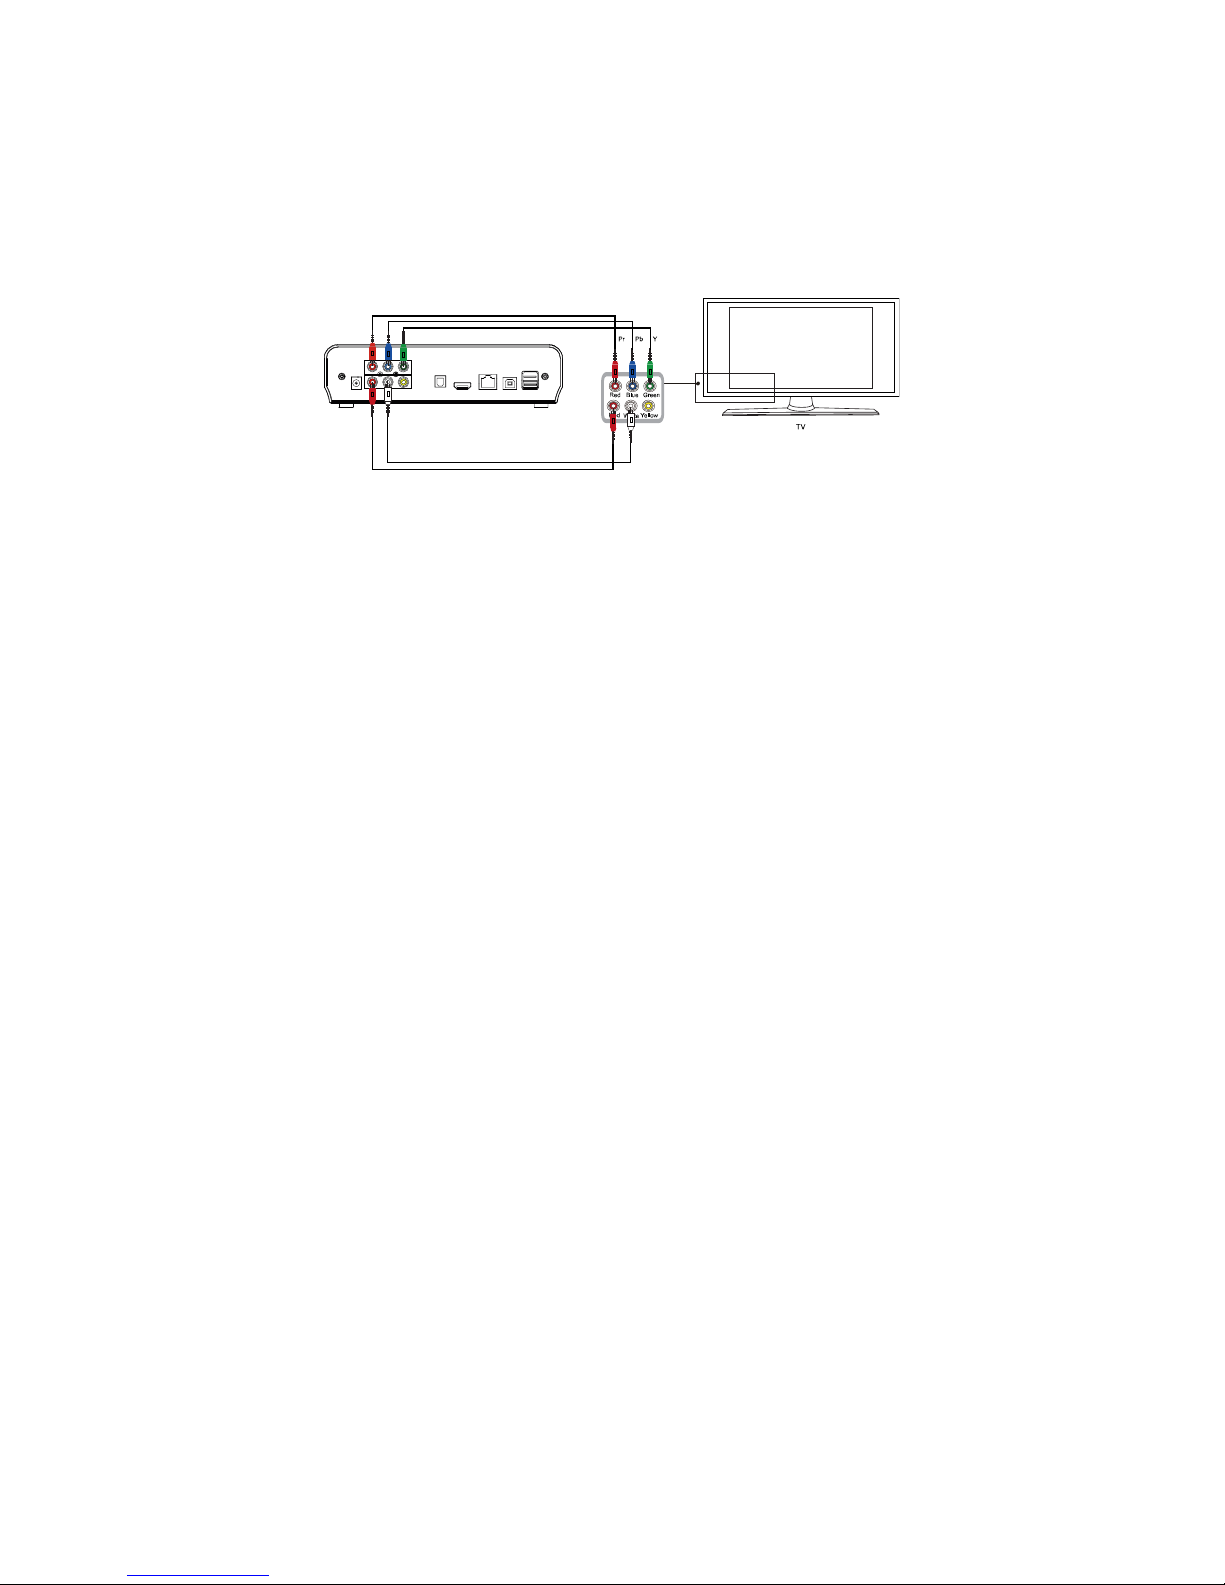
Component output connection (YPbPr)
Connecting the Cyclone MKV 2 to your TV via the component ports (YPbPr)
will provide a higher quality visual output than is possible with composite.
To connect the player via component cable*, plug the Red (Pr), Blue (Pb) and
Green (Y) connectors into the associated ports. On the other end of the cable
plug the Red, Blue and Green connectors into the corresponding input ports
of your TV.
It is important to note that the component cable will only carry video signals;
therefore you will need to plug in a separate AV cable for sound signals.
With the supplied AV cable, connect the Red and White connectors into the
Red and White audio output ports of the media player. At the other end of the
cable plug the Red and White connectors into the corresponding audio input
ports of your TV
Switch on your TV and select the appropriate input mode, if required.
It is not required to plug in the Yellow connector since the video signal is
provided by the component cable.
Press the standby button on the remote control to switch on the Cyclone MKV
2.
* Please note component cable is not included with this product.

Cyclone MKV 2 Multimedia Enclosure
Page 19.
Version 1.2
HDMI Cable:
Connecting your Cyclone MKV 2 to your TV via HDMI provides the highest
quality of visual output and high quality audio in a single cable. HDMI output
can provide video resolutions of up to 1080p**.
Connect the HDMI cable* to the HDMI output interface on the back of the
Cyclone MKV 2. Connect the other end of the cable to your TV HDMI input
port.
Switch on your TV and select HDMI mode, if required.
Press the standby button on the remote control to switch on the Cyclone MKV
2.
* Please note HDMI cable is not included with this product.
** Please note that the device can display 570p / 720p / 1080i and 1080p
resolutions, however not all HDTVs are able to display higher resolutions.
Please consult TV user manual.
Optical Cable (Audio Only):
Connecting your Cyclone MKV 2 to your surround sound system via optical
cable provides high quality digital audio output. Digital audio signals through
optical cable are less susceptible to interference from nearby electrical
devices giving better quality.
Connect the optical cable* to the port labelled optical on the back of the
Cyclone MKV. Connect the other end of the cable to an identically shaped
port in your surround sound system.
Enter the Cyclone MKV 2 audio setup and select “SPDIF Output.” Once
selected, choose one of the digital audio options “LPCM DUAL CH” or “RAW”.
This should now enable sound to your surround sound system.

Cyclone MKV 2 Multimedia Enclosure
Page 20.
Version 1.2
* Please note optical cable is not supplied with this product.
USB Host Interface:
The Cyclone MKV 2 comes with two USB Host ports, allowing for quick and
easy external media storage expansion. It is compatible with standard
external hard disk drives, flash drives, digital cameras, card readers and other
data storage devices.
To connect your external hard disk drive to your Cyclone MKV 2, please turn
off the media player. Connect the USB cable to the USB port on the external
hard disk drive and the media player.
Please note that some external hard disk drives may require more power than
a standalone USB port can provide. In such cases please use the AC adapter
included with your external hard disk drive.
Direct PC Connection via USB:
The Cyclone MKV 2 is also capable of acting as an external USB storage
device.
Plug the power adapter into the Cyclone MKV 2, as your PC may not detect
the player if there is insufficient power.
Using a USB cable*, connect one end to the media player and the other into
any available USB port.
Once connected, it may take a moment for your PC to recognise the player as
an external storage device.
* Please note USB cable is not supplied with this product.
Please note a hard disk drive must be installed in the enclosure.
Important Notice: Do not disconnect the power whilst connected to the PC
and transferring data, as this may cause serious damage.

Cyclone MKV 2 Multimedia Enclosure
Page 21.
Version 1.2
Connection and Network Setup:
With UPnP and Samba Client support your Cyclone MKV 2 is able to play
media files stored on a PC directly through the local area network via a router.
Connect a RJ45 Ethernet cable* into the Ethernet port. Connect the other
end of the cable into your router.
The Cyclone MKV 2 also allows wireless connectivity. To connect to your
network wirelessly plug in a compatible Wireless N USB Adapter into an
available USB port on the Cyclone MKV 2.
This section should be done once you have setup your video output and the
TV is displaying the main menu.
To setup your network select the “setup” icon on the main menu. Alternatively,
press the SETUP button on the remote control.
Navigate to the “Network” setup screen. On this screen you will be given the
option “Wired LAN Setup” and “Wireless Setup”.
* Please note RJ45 cable is not supplied with this product.

Cyclone MKV 2 Multimedia Enclosure
Page 22.
Version 1.2
Wired Connection:
If you are connecting your Cyclone MKV 2 via Ethernet cable select “Wired
LAN Setup”.
You will be given two options to choose from.
DHCP IP (Auto):
This option is recommended for novice and regular users. Choosing this
option will allow your router to automatically assign a dynamic IP address to
your Cyclone MKV 2.
Highlight DHCP IP and press OK to select it. You will then be given a choice
of options. If the operation is successful then the acquired IP address will be
displayed on the screen with other details such as the Subnet Mask and
Gateway.
Fixed IP (Manual):
This option is recommended for advanced users, as it requires modifying the
Cyclone MKV 2’s network settings. This option allows a user to assign the
Cyclone MKV 2 a static IP address. The IP Address, Subnet Mask and
Gateway all have to be set manually. Please consult the user manual of your
router.
Use the buttons and the number keys to input the relevant information into the
provided fields.
Once all the details have been entered, press OK to confirm the settings.
If the given IP Address is accepted, a screen will appear displaying the
network settings of the Cyclone MKV 2.

Cyclone MKV 2 Multimedia Enclosure
Page 23.
Version 1.2
Wireless:
The Cyclone MKV 2 is also able to connect to a wireless network via a
wireless USB Dongle.
Please note that this functionality requires a wireless USB dongle to be
connected to the Cyclone MKV 2.
To connect a wireless dongle to the Cyclone MKV 2, insert it into an available
USB port. When the player is switched on the Cyclone MKV 2 will
automatically detect the wireless dongle.
If the wireless dongle has been detected, the words “WiFi Plug In” will display
on the top left hand side of the screen.
When the wireless dongle has been detected by the Cyclone MKV 2 player,
select the “setup” icon on the main menu.
Navigate to the “Network” setup screen and select “Wireless Setup”
On the next screen you will be required to setup a configuration profile.
The Cyclone MKV 2 provides multiple configuration profiles, allowing the
player to connect to multiple wireless networks.
For this example we will use the profile labelled “connection 1”.
After you have selected “connection 1,” three options will be given to you,
“Infrastructure (AP),” “Peer to Peer (Ad-Hoc)” and “WPS (AP).”
Infrastructure (AP) This mode allo ws the Cyclone MKV 2 to join a
wireless network. This mode uses a central
connection point, usually a router.
Peer to Peer (Ad-Hoc) This mode allows the Cyclone MKV 2 to
directly connect to a wireless device without
the need of a router.

Cyclone MKV 2 Multimedia Enclosure
Page 24.
Version 1.2
WPS (AP) Wi-Fi Protected Setup. This mode allows the
Cyclone MKV 2 to join a wireless network.
This mode uses a central connection point,
usually a router.
Note: This mode requires a WPS enabled
dongle and router.
Select “Infrastructure (AP)”, this will cause the Cyclone MKV 2 to perform a
scan for wireless networks within its range. Networks that the player has
detected will display their network names (SSID) along with their security
protocols, such as WEP, WPA and WPA2. The signal strength of each
network will also be displayed.
Select the name of your network and press OK.
If your network is protected by a security password, an onscreen keyboard will
appear allowing you to enter the required password.
Enter the network security password and press OK.
Once this is done the Cyclone MKV 2 will begin its Connection Testing mode.
This mode will attempt to acquire an IP Address and connect you to your
network.
Once the player has finished acquiring an IP Address a Test OK screen will
appear displaying information such as IP Address, Subnet Mask and Gateway,
amongst others.
You have now successfully connected to your local wireless network.
Viewing Multimedia:
The Cyclone MKV 2 is a full featured multimedia player, providing a wide
range of functionality.
By using its “Browse” menu you can easily play movies, music and image files
that are stored on an external storage device.
Movie Playback:
Playing movies using the Cyclone MKV 2 is very simple.
When you have attached an external storage device that contains movie files,
i.e. external hard drive, USB flash drive etc, the MKV 2 may require a few
moments to detect all the files.

Cyclone MKV 2 Multimedia Enclosure
Page 25.
Version 1.2
Using the Cyclone MKV 2 remote control, navigate to “Browse” and press OK
to select it. This will take you to the Browse Menu. Once in the Browse menu,
use the navigation buttons to select the device type that the movies are stored
on.
E.g., if you want to view movies that are stored on an attached USB hard
drive, select USB.
Once the device type has been selected, use the navigation buttons on the
remote control to navigate to the folder or file the movie is located in.
When you have found the movie you wish to view navigate to it. You will
notice that on the right side of the screen a small preview of the movie will
play.
To play the highlighted movies press OK on the remote control.
Movie Playback Options:
During movie playback, there are a number of functions to choose from.
Pressing PAUSE/STEP will PAUSE the movie. Pressing PAUSE/STEP
repeatedly will play the movie step by step. Pressing PLAY will resume movie
playback.
Pressing FF will fast forward movie playback. Pressing it repeatedly will
increase playback speeds by X1.5, X2, X4, X8, X16 and X32.
Pressing FR will rewind movie playback. Pressing it repeatedly will increase
rewind speed by X1.5, X2, X4, X8, X16 and X32.
Pressing MUTE will switch off sound from movie playback. Pressing it again
will switch on sound again.
Pressing the NEXT button twice will play the next file on the list.
Pressing the PREV button twice will play the previous file on the list.
Pressing the REPEAT button will cause the file to repeat playback after it has
finished playing. Repeatedly pressing it will cycle through several repeat
options.
Repeat Title: The file currently playing will replay continuously.
Repeat DIR: All files in the current folder/directory will replay
continuously.
Repeat CANCEL: Cancels all repeat operations.

Cyclone MKV 2 Multimedia Enclosure
Page 26.
Version 1.2
Pressing the ZOOM button will activate zoom mode. Pressing the zoom
button repeatedly will change zoom levels to 2X, 3X, 4X and 8X.
Pressing the AUDIO button during playback will allow you to select the audio
options.
After pressing the INFO button, the following menu will appear.
Pressing the INFO button again, the following menu will appear providing
detailed information on the current file playing.
After pressing the GOTO button you will be able to jump to any part of the
movie by typing the desired time into the given fields.

Cyclone MKV 2 Multimedia Enclosure
Page 27.
Version 1.2
To select the desired time select the field and using the navigation buttons,
scroll up or down until the correct digit becomes available. The time format is
HH:MM:SS
Pressing the SUBTITLE button during playback will activate subtitles in the
movie. This function depends on whether subtitles are available to view in the
movie.
The Cyclone MKV 2 also support a number of subtitle file formats, including
SSA, SMI, SRT, and SUB.
To view these supported subtitle files, put the video file and the subtitle file
into the same folder. Press the SUBTITLE button on the remote.
Audio Playback:
Playing audio media using the MKV 2 is very simple. It supports a variety of
audio formats including MP3, WMA, AAC and OGG.
Using the Cyclone MKV 2 remote control, navigate to “Browse” and press OK
to select it. This will take you to the Browse menu. Once in the Browse menu,
use the navigation buttons to select the device type that the audio files are
located in.
Once the device type has been selected, use the navigation buttons on the
remote control to navigate to the folder the audio file is located in.

Cyclone MKV 2 Multimedia Enclosure
Page 28.
Version 1.2
When you have located the audio file you wish to play, highlight it. On the
right side of the screen you will be given a preview of the audio file’s tag
information. Tag information depth may vary from file to file, but may include
Title, Artist’s Information, Album Art, amongst others.
Audio Playback Options:
During playback, there are a number of options to choose from.
Pressing PAUSE/STEP will pause the audio file. Pressing PLAY will resume
audio playback.
Pressing the FF button will speed up audio playback. Pressing it repeatedly
will increase playback speed up by X1.5, X2, X4, X8, X16 and X32.
Pressing the FR button will rewind audio playback. Pressing it repeatedly will
increase rewind speed by X1.5, X2, X4, X8, X16 and X32.
Pressing the MUTE button will switch off sound from audio playback. Pressing
it again will switch on sound again.
Pressing NEXT will jump to the next page on the list
Pressing the PREV button will jump to the previous page on the list.
Pressing the REPEAT button will cause the file to repeat playback after it has
finished playing. Pressing it repeatedly will cycle through several repeat
options.
Repeat 1: The file currently playing will repeat continuously.
Repeat ALL: All files in the current folder/directory will replay
continuously.
Repeat Off: Cancels all repeat operations.

Cyclone MKV 2 Multimedia Enclosure
Page 29.
Version 1.2
Image Playback:
Playing image files using the Cyclone MKV 2 is very simple and supports a
variety of image formats.
Using the Cyclone MKV 2 remote control, navigate to the “Browse” and press
OK to select it. This will take you to the Browse menu. Once in the Browse
menu, use the navigation buttons to select the device type that the images are
stored in.
Once the device type has been selected, use the navigation buttons on the
remote control to navigate to the folder that the images are located in.
When you have located the image file you wish to view, highlight it. You will
notice on the right of the screen a small preview of the image will display.
To view the highlighted image in full screen press OK on the remote control.
Please note that it may take a moment to display an image depending on its
size.
Image Playback Options:
During image playback, there are a number of options to choose from.
Pressing the NEXT button will play the next file on the list.
Pressing the PREV button to play the previous file on the list.
Pressing the NAVIGATION buttons on the remote control allows you to rotate
image files.
LEFT Button Rotate the image 90 degrees anti-clockwise.
RIGHT Button Rotate the image 90 degrees clockwise.
Pressing the ZOOM button will activate zoom mode. Pressing the zoom
button repeatedly will change image zoom levels to 2X, 4X, 8X and X16.
Pressing the INFO button will cause the following menu will appear.

Cyclone MKV 2 Multimedia Enclosure
Page 30.
Version 1.2
After pressing the INFO button again, the following menu will appear providing
detailed information on the current file playing.
Slideshow Viewing with Background Music:
The Cyclone MKV 2 has the capability to play music in the background whilst
displaying a slideshow.
Folder Play: This method requires all the image and music files to be
put into one folder.
Once all the files are in the same folder, navigate to the
folder, enter it and press OK on the first file.
This will initiate slideshow playback.

Cyclone MKV 2 Multimedia Enclosure
Page 31.
Version 1.2
File Copy:
The Cyclone MKV 2 comes equipped with file copy, move and delete
functions.
Copy / Move:
The file copy function allows you to copy files between USB devices, HDD
and storage devices connected via wired LAN.
From the main menu select Copy File to enter the file management menu.
This will bring up the Copy interface. You will notice that the interface is split
into two columns. The column on the left side of the screen indicates where
the file is located and is labelled Source. The column on the right side of the
screen indicates the destination where the file will be copied to. This column
is labelled Destination.
To copy / move a file from one device to another, the source of the file must
be select first. This can be done by using the NAVIGATION buttons.
In the source column navigate to the file you wish to copy. To select the file
you wish to copy / move, use the NAVIGATION buttons on the remote control
to navigate to the file. Depending on how the directory has been structured,

Cyclone MKV 2 Multimedia Enclosure
Page 32.
Version 1.2
you may have to navigate through multiple folders to access the file you want
to copy / move.
Press the SELECT button on the remote control. You will notice that a small
tick icon will now be displayed next to the file. This indicates that the file has
been selected for copying / moving.
You can also select multiple files or whole folders.
Once the files have been selected, press the RIGHT button to jump to the
Destination column. Navigate to the desired directory you wish to copy /
move the files to and press the RIGHT button. This will cause the Cyclone
MKV 2 to begin copying / moving the files over.
Please note that there are instructions at the bottom of the screen to help you.

Cyclone MKV 2 Multimedia Enclosure
Page 33.
Version 1.2
Configuring File Sharing with Windows XP:
File sharing over a network lets you access media files or folders on your PC,
from your Cyclone MKV 2.
To allow your Cyclone MKV 2 to access multimedia file over a network, there
are two prerequisites.
Folder Sharing and Security Settings.
Ensure that the Cyclone MKV 2 and the PC are
configured to use the same Gateway and Subnet Mask.
Navigate to the folder you wish to share over the network and select it, do not
enter the folder.
Right click on the folder, and a small menu will appear near the mouse pointer.
Select “sharing and Security” from this menu.
A properties box will now appear. In this box click on the tab labelled
“Sharing”.
Once in the Sharing tab there are two radio buttons labelled “Do not share this
folder” and “Share this folder”.
Select the “Share this folder” radio button to enable other computers to
access media files from it.
You may also want to set permissions for the folder. This will allow or prevent
users from making changes to the media files.
To set permissions, click on the “Permissions” button. This will bring up the
Permissions window.
In this window will be displayed the permissions, Full Control, Change and
Read.
Full Control: Gives the user full control of the folders content. It is
highly advised not to allow this option.
Change: This option allows a user to modify the contents of the
shared folder.
Read: This option allows a user to access the media files only.
Tick the appropriate tick boxes best suited for your requirements.
When you have finished, click on “Apply” and then “OK”. This will take you
back to the previous window.

Cyclone MKV 2 Multimedia Enclosure
Page 34.
Version 1.2
When done click “Apply” and then “OK” to confirm the settings.
Media files should now be accessible through the Cyclone MKV 2.
Important Notice: Sharing files over a network may lead to severe security
issues because it gives other users access to your
computer.
Configuring File Sharing with Windows Vista:
File sharing over a network lets you access media files or folders on your PC,
from your Cyclone MKV 2.
Navigate to the folder you wish to share over the network and select it, do not
enter the folder.
Right click on the folder, and a small menu will appear near the mouse pointer.
Select “Properties” from this menu.
A properties box will now appear. In this box click on the tab labelled
“Sharing”.
Once in the sharing tab click on the “Advanced Sharing” button. This should
bring up the Advanced Sharing window.
In this window, please ensure that the tick box for “Share this folder” has been
ticked. This will enable other computers to access media files from it.
You may also want to set permissions for the folder. This will allow or prevent
users from making changes to the media files.
To set permissions, click on the “Permissions” button. This will bring up the
Permissions window.
In this window will be displayed the permissions, Full Control, Change and
Read.
Full Control: Gives the user full control of the folders content. It is
highly advised not to allow this option.
Change: This option allows a user to modify the contents of the
shared folder.
Read: This option allows a user to access the media files only.
Tick the appropriate tick boxes best suited for your requirements.

Cyclone MKV 2 Multimedia Enclosure
Page 35.
Version 1.2
When you have finished, click on “Apply” and then “OK”. This will take you
back to the previous window.
When done click “Apply” and “OK” to confirm the settings.
Important Notice: Sharing files over a network may lead to severe security
issues because it gives other users access to your
computer.
UPnP:
UPnP functionality included in the Cyclone MKV 2 enables it to connect with
other UPnP enabled devices to stream media over a network.
Before using the UPnP functionality of the Cyclone MKV 2, your PC will need
to be UPnP enabled.
There are a variety of free applications that you can download, which will
allow you to share your media over a network. Two of the most popular ones
are TVersity and TVMOBiLi, but there are many others.
Install an UPnP application onto your PC, such as one of the examples given
above. Please consult the user manual provided with your chosen application
for installation instructions.
When the application is installed on your PC please ensure that both, it and
the Cyclone MKV 2 are connected to your network.
On the Cyclone MKV 2, navigate to and enter the Browser menu. Once in the
Browser menu navigate to UPnP and press OK.
All the devices that are connected to the network and have UPnP enabled will
be displayed here.
To access media files from UPnP enabled devices, select the device the
media is located.
Once in the device navigate to the media file you wish to view and press OK
on the remote control.
This will activate the media player’s streaming. Depending on your network,
the Cyclone MKV 2 may take a moment to begin streaming media.
Playlist
The playlist function of the Cyclone MKV 2 allows you to create playlists using
files stored on the player’s internal hard disk drive.

Cyclone MKV 2 Multimedia Enclosure
Page 36.
Version 1.2
Playlist Creation:
To create a playlist, first enter the “Browser” interface.
Once on the Browser interface, navigate to the directory where your media
files are stored.
Select the media files you wish to add to the playlist by pressing on the
SELECT button on the remote control.
Once the files have been selected a red tick will be displayed next to the files.
To add the selected files into the playlist press on the CONFIRM button on the
remote control.
The selected file will now be added to the playlist.
Playlist Media Playback:
Navigate from the Main menu to the playlist interface.
Once in the playlist interface select the file to begin playlist playback.
Removing Files from Playlist:
To remove media files from the playlist, navigate to the playlist.
Navigate to the file you wish to remove and press SELECT on the remote
control. Once selected a red tick will display next to the file.
Press on the CONFIRM button on the remote control.
This will remove the selected file from the playlist.
Notice: Only documents in the player’s hard disk can be added to the playlist.
Documents in other peripherals cannot be added.
Important Notice: If the hard disk drive is partitioned, please ensure that the
first partition is set as the primary partition. If the first
partition is an extended partition, this function may not
work.

Cyclone MKV 2 Multimedia Enclosure
Page 37.
Version 1.2
Network Media Access:
When the Cyclone MKV 2 is connected to a network it has the ability to
stream multimedia content from it.
To access media from the network, navigate to the browser menu. Once in
the browser menu, a list of possible media locations will be displayed. Select
NET from the list to go to the Net menu.
On this menu will be displayed a list of folders, depending on whether there
are sharable open or working groups available.
Also listed will be two folders labelled “My Shortcuts” and “My Neighbours”.
My Shortcuts: This feature allows a user to add links to their favourite
network locations.
To add links to your favourite network locations, select and enter “My
Shortcuts”.
Press the OPTION button on the remote control to enter the setup interface.
Select “Add” to create a new link for computers that have enabled network
share.
Enter the User ID and password of the appointed folder, and select YES to
complete the setup.

Cyclone MKV 2 Multimedia Enclosure
Page 38.
Version 1.2
My Neighbours: Gives access to all network shared folders.
To access network shared folders, select and enter “My Neighbours”
Navigate to the location where the desired media is and press OK.
Depending on whether the folder is password protected, you may be required
to enter a User ID and password.

Cyclone MKV 2 Multimedia Enclosure
Page 39.
Version 1.2
Settings:
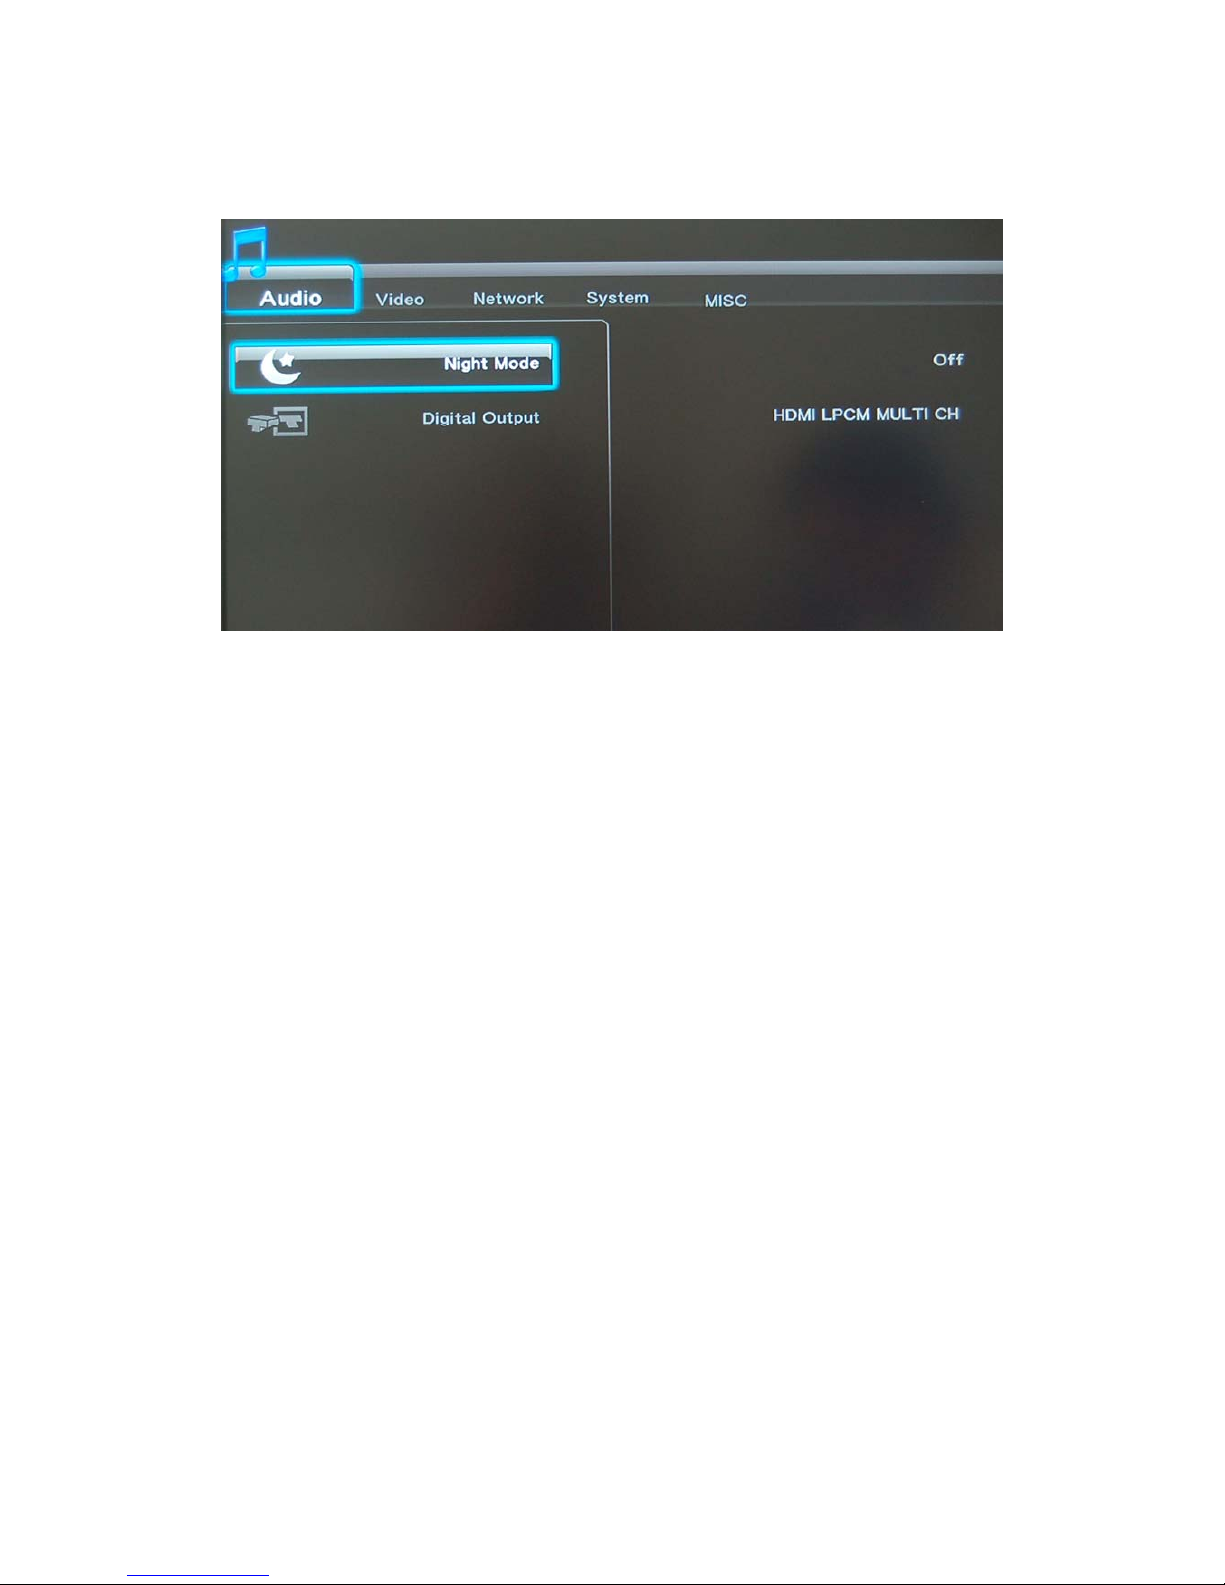
Audio Settings Menu:
This menu provides access to the media player’s audio configuration settings.
Night Mode:
This function affects the overall dynamic capability and SPL (sound pressure
level).
This function can be activated or deactivated by selecting ON or OFF.
Digital Output:
Allows you to select between HDMI LPCM , HDMI LPCM MULTI CH
, HDMI RAW , SPDIF LPCM and SPDIF RAW options.
To select a Digital output, use the NAVIGATION buttons.
Video Settings Menu:
This menu provides access to the media player’s video configuration settings.

Cyclone MKV 2 Multimedia Enclosure
Page 40.
Version 1.2
Aspect Ratio:
Allows you to select different aspect ratios.
To adjust the display aspect ratio, use the NAVIGATION buttons to select one
of the following.
Pan Scan 4:3 Select this option when connected to a standard TV.
Crops a widescreen image to 4:3
(May result in the edges of an image being cut off).
Letter Box 4:3 Select this option when connected to a standard TV.
Playback of widescreen formats will have black bars
above and below the image.
16:9 Select this option when connected to a 16:9 TV.
16:10 Select this option when connected to a 16:10 TV.
Zoom Out:
This feature will activate or deactivate the Cyclone MKV 2’s zooming out
feature.
This feature can be activated or deactivated by selecting ON or OFF.
Brightness:
This function allows a user to adjust the video output brightness levels.
To adjust the brightness levels use the NAVIGATION buttons to select the
desired level.
Contrast:
This function allows a user to adjust the video output contrast levels.

Cyclone MKV 2 Multimedia Enclosure
Page 41.
Version 1.2
To adjust contrast levels use the NAVIGATION buttons to select the desired
level.
Hue:
This function allows a user to adjust video output hue levels.
To adjust hue levels use the NAVIGATION buttons to select the desired level.
Saturation:
This function allows a user to adjust video output saturation levels.
To adjust saturation levels use the NAVIGATION buttons to select the desired
level.
Digital Noise Reduction:
This feature helps reduce the amount of image noise that may occur during
video playback. However results may vary depending on the video file.
This function can be activated or deactivated by selecting ON or OFF.
Video System:
This function allows you to select the TV system or screen resolution.
To select different TV systems and resolutions, use the NAVIGATION buttons.
HDMI Auto Select this option when connected to a TV via HDMI cable.
When this option is selected, the MKV 2 will automatically
select the correct display resolution for your TV.
NTSC Select this option when connected to a standard analogue
TV system.
For America and Pacific countries.
PAL Select this option when connected to a standard analogue
TV system.
For European countries.
480p Select this option for an output resolution of 710.85 x 486.
576p 50Hz Select this option for an output resolution of 720 x 576.
720p 50Hz Select this option for an output resolution of 1080 x 720
with a frame rate of 50 hertz.
720p 60Hz Select this option for an output resolution of 1080 x 720
with a frame rate of 60 hertz.

Cyclone MKV 2 Multimedia Enclosure
Page 42.
Version 1.2
1080i 50Hz Select this option for an output resolution of 1920 x 1080
with a frame rate of 50 hertz. This option uses interlaced
scanning.
1080i 60Hz Select this option for an output resolution of 1920 x 1080
with a frame rate of 60 hertz. This option uses interlaced
scanning.
1080p 50Hz Select this option for an output resolution of 1920 x 1080
with a frame rate of 50 hertz. This option uses
progressive scanning.
1080p 60Hz Select this option for an output resolution of 1920 x 1080
with a frame rate of 60 hertz. This option uses
progressive scanning.
1080p 24Hz:
Most movies that are produced on film, rather than on video, are traditionally
captured at a frame rate of 24 frames per second.
This feature allows the Cyclone MKV 2 to display movies in their native 24 fps
form.
The Cyclone MKV 2 must be connected to a HD TV that is capable of
accepting a 1080p 24Hz signal, for this feature to function.
To activate or deactivate this feature select ON or OFF.
Network Settings Menu:
This menu provides access to the media player’s network configuration
settings.
Wired LAN Setup:

Cyclone MKV 2 Multimedia Enclosure
Page 43.
Version 1.2
This allows the user to setup the Cyclone MKV 2’s wired network
configurations.
Wireless Setup:
This allows the user to setup the Cyclone MKV 2’s wireless network
configurations.
System Settings Menu:
This menu provides access to the media player’s system configuration
settings.
Menu Language:
This function allows you to select the on screen display language.
To change the on screen display language, use the NAVIGATION buttons to
select the desired language.
Text Encoding:
This function allows you to select the Text Encoding languages for subtitles.
To adjust the text encoding, use the NAVIGATION buttons to select the
desired one.
Login Control:
This function allows you to set permissions on the BitTorrent management
interface.
This feature can be activated or deactivated by selecting ON or OFF.
BT and SAMBA:

Cyclone MKV 2 Multimedia Enclosure
Page 44.
Version 1.2
This function allows you to start or stop BitTorrent and Samba services.
BitTorrent and Samba services can be activated or deactivated by selecting
ON or OFF.
System Update:
This function shows the software/firmware version currently installed on the
player and allows a user to update the Cyclone MKV 2’s firmware.
HDD Format
This function allows you to format the HDD.
Restore Default:
This function allows you to restore the Cyclone MKV 2 to its original default
factory settings.
MISC Settings Menu:
This menu provides access to the media player’s miscellaneous configuration
settings.
Resume Play:
When this function is activated, the Cyclone MKV 2 will record the last
location where the movie was stopped. When the movie is played again it will
ask whether you wish to continue from where the movie was stopped.
This function can be activated and deactivated by selecting ON or OFF.
Slide Show Timing:

Cyclone MKV 2 Multimedia Enclosure
Page 45.
Version 1.2
This option allows you to select the time duration of an image before it goes to
the next image in the list.
To adjust the timing, use the NAVIGATION buttons to select the desired time
duration.
Transition Effect:
The transition effect is a visual effect that determines how images display in a
slideshow.
Ken Burns Effect:
The Ken Burns effect is a special effect that causes the image to zoom in and
out whilst being viewed.
This special effect can be activated and deactivated by selecting ON or OFF.
Background Music:
The background music function allows you to play background music whilst in
slide show mode.
To activate this function select ON. To deactivate it select OFF.
Screensaver:
This gives you the option to switch on or off the Cyclone MKV 2’s screensaver.
If the screensaver is switched on, the player will start the screen saver after
five minutes of inactivity.
Movie Preview:
When activated, this function will display a small preview of the movie on the
right hand side of the screen.
This option allows you to switch on or off the movie preview screen function.
BitTorrent/Samba Installation:
Important Notice: If this function has not been installed previously, it is
advised to install it first.

Cyclone MKV 2 Multimedia Enclosure
Page 46.
Version 1.2
Install BitTorrent/Samba is simple,you just have to format the HDD. After the
HDD have formated complete, the BitTorrent/Samba have been installed
complete also.
How to format the HDD you can jump to the chapter of Formatting a Hard
Disk Drive.
Please connect the MKV 2 enclosure to your network if you have not already
done so.
Important Notice: It is illegal to download copyrighted material without the
expressed consent of the owner.
Notice: P2P type file sharing can cause you to accidently download viruses
and other malware. Use at your own risk.
Neighbour Web Interface:
The Cyclone MKV 2 allows you access to its BitTorrent services through its
integrated web server.
To access the web server, type in the IP address that is assigned to your
Cyclone MKV 2, into the browser of your choice.
To find your IP address, select “Setup” from the main menu and go to the
network tab.
Depending on whether login controls have been set to on or off, a login
screen will appear.
The default username and password are as follows;
Username: admin
Password 123
Note: User names and passwords are case sensitive. It is advised to change
your password as soon as possible. It is advised to choose a strong
password. A strong password should be at least eight characters in length
and contain a combination of both alphabetical and numerical characters. It
should also consist of both uppercase and lowercase characters.

Cyclone MKV 2 Multimedia Enclosure
Page 47.
Version 1.2
Once successfully logged into the web service, the Neighbour Web home
page will display.
This page will display information regarding the Cyclone MKV 2’s BitTorrent
and System status. Also displayed is the available space on the HDD.
BitTorrent Download:
This section of Neighbour Web provides access to the BitTorrent service
interface. It gives an overview of the activity of the torrent downloads as well
as details of individual downloads.
To return to the Neighbour Web home page, click on “Home,” located in the
top right of the screen.
Start Clicking on this button will start a newly acquired torrent
file. It will also restart a previously stopped torrent
download.
Stop Clicking on this button will stop the selected torrent
download.
X Torrent Clicking on this button will permanently delete the
selected torrent download.

Cyclone MKV 2 Multimedia Enclosure
Page 48.
Version 1.2
Refresh Clicking on this button will refresh the current page.
Down Clicking on this button will move the selected torrent
download down the list and lower its priority.
Up Clicking on this button will move the selected torrent
download up the list and give it greater priority.
Settings Clicking on this button will give access to the BitTorrent
settings page.
Add New Torrent Clicking on this button will add a new torrent file for
download.
Adding a New Torrent:
To add a new torrent to the download list, click on the “Add new torrent”
button.
This will load the ‘Add new torrent’ page.
Select ‘Add new torrent’ into add new torrent file page.

Cyclone MKV 2 Multimedia Enclosure
Page 49.
Version 1.2
Once the page has loaded, click on the “Browse” button. This will bring up a
browse box. Navigate to the location where a torrent file is stored on your
computer and select it.
Note: A torrent file usually has the file extension “.torrent”
Once you have selected a torrent file, click on the “Open” button. This will
close the browse box and return you to the previous screen. The file path of
the torrent file should now be displayed in the available field.
Click on the “Yes” button to add the selected torrent file to the download list.
Confirm and add the selected torrent file to the download list by clicking on the
“Yes” button.
A “Loading…” animation will display before returning to the BitTorrent main
page.
The selected torrent file will now be displayed on the list in this page.
Click the “Start” button to begin the download.
By clicking on the torrent file name, information about that particular download
will be displayed on the lower half of the screen.
To edit torrent download operations, such as start, stop, or adjust priorities etc,
select the download.
In the “No.” column there is a tick box on the left of the torrent number. Click
on this box and a tick will appear inside the box. This indicates that the
download has been selected.
BitTorrent Settings:
This page gives access to BitTorrent settings and allows you to configure
settings such as maximum download and upload rates etc.

Cyclone MKV 2 Multimedia Enclosure
Page 50.
Version 1.2
Save Setting Clicking on this button will save any changes that have
been made and return the user back to the BitTorrent
page.
Return Clicking on this button will return the user to the BitTorrent
download page without saving any changes made.
Default Clicking on this button will revert back to the default
settings.
The page is organised into three sections labelled, Rate, Seed Setting and
Simultaneous Setting.
Rate:
Max Download Rate This sets the maximum download speed that
downloads can reach.
0 = no maximum limit.
Default setting for this field is 0.
Max Upload Rate This sets the maximum upload speed that
downloads can reach.
0 = no maximum limit.
Default setting for this field is 20.
Idle Setting This sets the number of idle hours required
before the player automatically starts the next
priority download.
Seed Setting:
Seeding Time This sets the amount of time you wish to
upload the file once it is completed.
Setting this to 0 disables file uploading.
Default setting for this field is 24 hours
Auto Delete Torrent This setting configures whether the initial
torrent file (.torrent) is deleted once the
download has been completed.

Cyclone MKV 2 Multimedia Enclosure
Page 51.
Version 1.2
Default setting for this field is NO.
Note: If this setting is set to “YES,” only the
initial .torrent file is deleted. The actual
downloaded file itself will still be stored in the
player.
Simultaneous Settings:
Max Simultaneous Downloads This setting configures the number of
downloads that can be run simultaneously.
Default setting for this field is 4.
Click on the “Save Setting” button to save any changes made and return to
the BitTorrent Download page.
Clicking on the “Return” button will return you to the BitTorrent download page.
Visit Neighbour:
The visit neighbour page allows you to access files from the player’s local
HDD.
Upon entering the visit neighbour page, depending on whether login controls
are activated you will be asked to enter a username and password.
Account Management:
This section allows you to change the login password.
The default username and password are as follows;
Username admin
Password 123
To change your login password, enter your new password into the “Password”
and “Password Again” fields.

Cyclone MKV 2 Multimedia Enclosure
Page 52.
Version 1.2
Press enter and a confirmation box informing you that the password change
has been successful will appear.
Click on “OK” to return to the Neighbour Web home page.
Note: Usernames and passwords are case sensitive.
Note: It is advised to choose a strong password to protect against
unauthorised access. A strong password should be at least eight characters
in length and contain a combination of both alphabetical and numerical
characters. It should also insist of both uppercase and lowercase characters.

Cyclone MKV 2 Multimedia Enclosure
Page 53.
Version 1.2
Firmware Upgrade:
We may periodically release new firmware updates to improve the Cyclone
MKV 2’s functionality, add new features or fix any reported bugs that may
have been missed during testing.
Caution: Please do not turn off the power when upgrading the firmware.
The latest firmware updates can be found at http://www.sumvision.com.cn
To update the Cyclone MKV 2’s firmware download the firmware update from
the Sumvision website.
Please note that firmware update files for the Cyclone MKV 2 are usually
compressed into a RAR archive file.
Extract the files from the archive.
Transfer all the extracted files to an empty USB pen drive. It is advised to
transfer the files into the USB pen drive’s root directory and not in a folder as
this may cause the player to not detect the update.
Insert the pen drive containing the update into the Cyclone MKV 2.
Switch on the Cyclone MKV 2 and from the main menu, select setup to
navigate to the “System” setup menu.
From this menu select System Update. Once on the System update screen
select System Upgrade by pressing OK on the remote control.
The Cyclone MKV 2 will now begin upgrading the firmware. You will notice
the player reboot and display the firmware upgrading animation. Do not turn
off the power until the upgrade has been completed.
.
Important Notice: It is advised to backup all important data before
performing a system upgrade.

Cyclone MKV 2 Multimedia Enclosure
Page 54.
Version 1.2
Formatting a Hard Disk Drive:
If you have installed a hard disk drive into the Cyclone MKV 2 enclosure, you
may be required to format it.
Using the remote control, navigate to the setup menu. Alternatively, press the
setup button on the remote control.
Once in the setup menu, navigate to the system tab and select “HDD Format.”
On the right side of the screen will appear the option HDD 1. Select this and
press “OK.”
A Warning notice will appear informing you that all data stored inside the HDD
will be erased.
To proceed select OK, otherwise select Cancel to exist.
When you have selected OK a format screen will appear.
On this screen select “Format” if you wish to proceed. Select “Back” to cancel
the procedure.
Once you have selected “Format,” an animation will display indicating that the
HDD is being formatted. This may take a few moments depending on the
hard disk drive.
Do not turn off the power until the formatting has been completed.
Important Notice: Please note that this process will erase any files on the
HDD. It is advised to backup all important data before
performing a system format.
Troubleshooting:
No display or sound output to TV:
This problem may have several causes.
Please check that you have selected the correct AV channel on your TV that
is assigned with the input port.
For example, if you have connected the device to the TV through the ports
labelled AV3, select Channel AV3.
If you have determined that the device has been connected correctly, it may
be set to the incorrect video output mode. To select a different video output

Cyclone MKV 2 Multimedia Enclosure
Page 55.
Version 1.2
mode, press the “TV System” button on the Cyclone remote control. Wait a
few moments for your TV and media player to implement the changes.
Repeat this procedure until video output is correctly displaying on the TV.
The display output is in black and white:
This is a common problem in which your TV maybe set to a different encoding
system to your media player and is not a serious issue.
To solve this issue go to the setup menu and navigate to “Video.” Scroll down
to “Video System” and select the appropriate encoding system.
For example; if your TV runs on PAL then select the PAL option. Like wise, if
your TV is running on NTSC then select the NTSC option
Media files are only partially listed in the browser:
The media filter function may be active. When the media filter is active only
the media files types that correspond to the active media filter are displayed.
For example; if you select the media filter “Music”, then only audio media files
will be displayed. No image or movies files will be displayed.
If you want to view all supported media files, select the “ALL” media filter.
Screen goes blank during a firmware update:
On rare occasions, the display via HDMI is incorrect during a firmware update.
Please ensure that the device is also connected to your TV via the supplied
composite cable during the firmware update. When the screen goes blank,
select the composite connection as the active input on your TV.
Unable to copy files onto an external storage device:
To use the copy function of your media player, the device, or partition that you
want to copy the data onto must be formatted with one of the following file
systems: FAT, FAT32, NTFS or EXT3.
Please use only targets formatted with FAT, FAT32, NTFS or EXT3 for
copying onto. Otherwise you will receive an error message.
The player no longer responds:
If the Cyclone MKV 2 no longer responds to the remote control, the batteries
may be dead. Please replace them with new ones.

Cyclone MKV 2 Multimedia Enclosure
Page 56.
Version 1.2
Obstruction of the infrared’s field of vision may also cause unresponsiveness
in the player. Please remove all potential obstructions between the player
and remote control
Please clean the infrared receiver.
No audio output:
Please check that the volume for your TV, home entertainment system and
Cyclone has not been set too low. Also check that the sound has not been
switch off via the mute button.
The audio digital output may also be incorrectly configured.
If you have connected the media player via HDMI cable, please ensure that
HDMI RAW, LPCM Dual Channel or LPCM Multi-Channel output is selected.
If you have connected the media player via optical cable, please ensure that
SPDIF RAW or LCMP Dual Channel output is selected.
The player has failed during Firmware upgrade:
To recover the Cyclone MKV 2 from a firmware upgrade failure, power off the
player and disconnect the power cable.
Insert a USB pen drive containing the firmware. Please note that only the
firmware update files should be on the pen drive.
Connect the power cable back into the Cyclone MKV 2 and switch it on. This
should cause the player to attempt to reinstall the software.
Receiving Generic Volume cannot be stopped message:
This is usually caused when the USB device is still being accessed. To
resolve this, close all programs that may be accessing data from the player
and try the safety remove icon again.
Alternatively, close all programs and wait for approximately 30 seconds. This
should give the operating system enough time to stop all processes accessing
data from the player. Click on the safety remove icon.
If the issue persists, switch off the player and disconnect the USB cable from
the computer.

Cyclone MKV 2 Multimedia Enclosure
Page 57.
Version 1.2
Product Specifications:
TV System Compatibility: PAL, NTSC, Auto
Video Codec Support: H.264, MKV, RM/RMVB, WMV9, MPEG 1/2/4,
Xvid, HD DivX, FLV
Video Container Support: MKV, TS, M2TS, TP, TRP, WMV, IFO, ISO,
VOB, DAT, AVI, MPG, MOV, RM,
RMVB, DIVX, XVID, FLV
Video Resolution: H.264, MKV, RM/RMVB, WMV9, TS and HD
DivX supports up to 1920 x 1080p @ 30fps
Audio Support: MP3, WMA, WAV, AAC, OGG, Dolby Digital
Video Output: Composite Video, Component Video, HDMI
Audio Output: Stereo, Digital HDMI, Optical SPDIF
Image Support: JPEG, JPG, BMP, PNG, GIF
Subtitle Support: SSA, SMI, SRT, SUB, SUB + IDX
Network Connections: RJ45 10/100M, IEEE 802.11 b/g/n
HDD: 3.5” SATA HDD
External Storage Support: external HDD, USB pen drives, portable,
via USB Host
Language Support: English, French, German, Traditional Chinese,
Simplified Chinese, Spanish, Italian, Dutch,
Russian
Power Input: Universal AC 100 ~ 240V 50/60Hz
Power: DC 12V, 2A

Cyclone MKV 2 Multimedia Enclosure
Page 58.
Version 1.2
Media Codec Information:
Video Support:
Codec Format Resolution
DAT 320 x 240 MPEG-1
MPG 720 x 576
VOB 720 x 576
MPG 1920 x 1080p
TS 1920 x 1080p
M2TS 1920 x 1080p
TP 1920 x 1080p
MPEG-2
TRP 1920 x 1080p
AVI 1920 x 1080p MPEG-4, DivX, Xvid
MKV 1920 x 1080p
VC-1 WMV 1920 x 1080p
AVI 1920 x 1080p
MOV 1920 x 1080p
H.264
MKV 1920 x 1080p
RM / RMVB RM / RMVB 1920 x 1080p
Audio Support:
MP3 Supported
WMA Supported
WAV Supported
AAC Supported
OGG Supported
Dolby Digital Supported
Image Support:
JPG / JPEG Supported
BMP Supported
PNG Supported
GIF Supports static images only
Please note that features and specifications are subject to change without notice.

Cyclone MKV 2 Multimedia Enclosure
Page 59.
Version 1.2
Maintenance Notice:
To protect the normal use of all accessories, please make sure you
understand and pay attention to the following points.
Only use power adapters with power input AC100 ~ 240V, output DC
12V/2A. Using power adapters of any other specification may result in
the device being damaged beyond repair.
Under normal working conditions, the power adapter will be warm.
Please keep the Cyclone MKV 2 and its power adapter in a well
ventilated area.
Do not place the device on the bed, sofa or similar surface as this may
inhibit the device’s ventilation.
Do not attempt to repair the device yourself or disassemble it. Even
when the device is unplugged from the mains power, it may still hold
enough charge to cause serious harm.
If the power cord is broken or has become stripped of its protective
layer, it is highly advised to switch off the device and remove the power
cord immediately.
If the device has come into contact with any liquid, it is highly advised
to switch off the device immediately and remove the power cord from
the mains power.
Do not place any foreign object on top of the device as this may cause
interference with the Cyclone MKV 2.

Cyclone MKV 2 Multimedia Enclosure
Page 60.
Version 1.2
FCC
CAUTION: Changes or modifications not expressly approved by
the part responsible for the compliance could void the user’s
authority to operate the equipment.
Class B
Note: This equipment has been tested and found to comply with
the limits for a Class B digital device, pursuant to part 15 of the
FCC Rules. These limits are designed to provide reasonable
protection against harmful interference in a residential installation.
This equipment generates uses and can radiate radio frequency
energy and, if not installed and used in accordance with the
instructions, may cause harmful interference to radio
communications. However, there is no guarantee that interference
will not occur in a particular installation. If this equipment does
cause harmful interference to radio or television reception, which
can be determined by turning the equipment off and on, the user is
encouraged to try to correct the interference by one of the following
measures:
- Reorient or relocate the receiving antenna.
- Increase the separation between the equipment and the
receiver.
- Connect the equipment into an outlet on a circuit different
from that to which the receiver is connected.
- Consult the dealer or an experienced radio/TV technician for
help.
This marking shown on the product, accessories or literature,
indicates that the product and its electronic accessories (e.g.
charger, headset, USB cable) should not be disposed of with
other household waste at the end of their working life.
To prevent possible harm to the environment or human health
from uncontrolled waste disposal, please separate these items
from other types of wastes and recycle them responsibly to
promote the sustainable reuse of material resources.
Household users should contact either the retailer where they purchased this
product, or their local government office, for details of where and how they
can take this item for environmentally safe recycling.
Business users should contact their supplier and check the terms and
conditions of the purchase contract.
This product should not be mixed with other commercial wastes for disposal.
All rights reserved.
All other brand names or trademarks are the properties of their respective
owners.
 Loading...