

Page 1
INSTALLATION INSTRUCTIONS FOR BEER DISPENSER TAP KITS
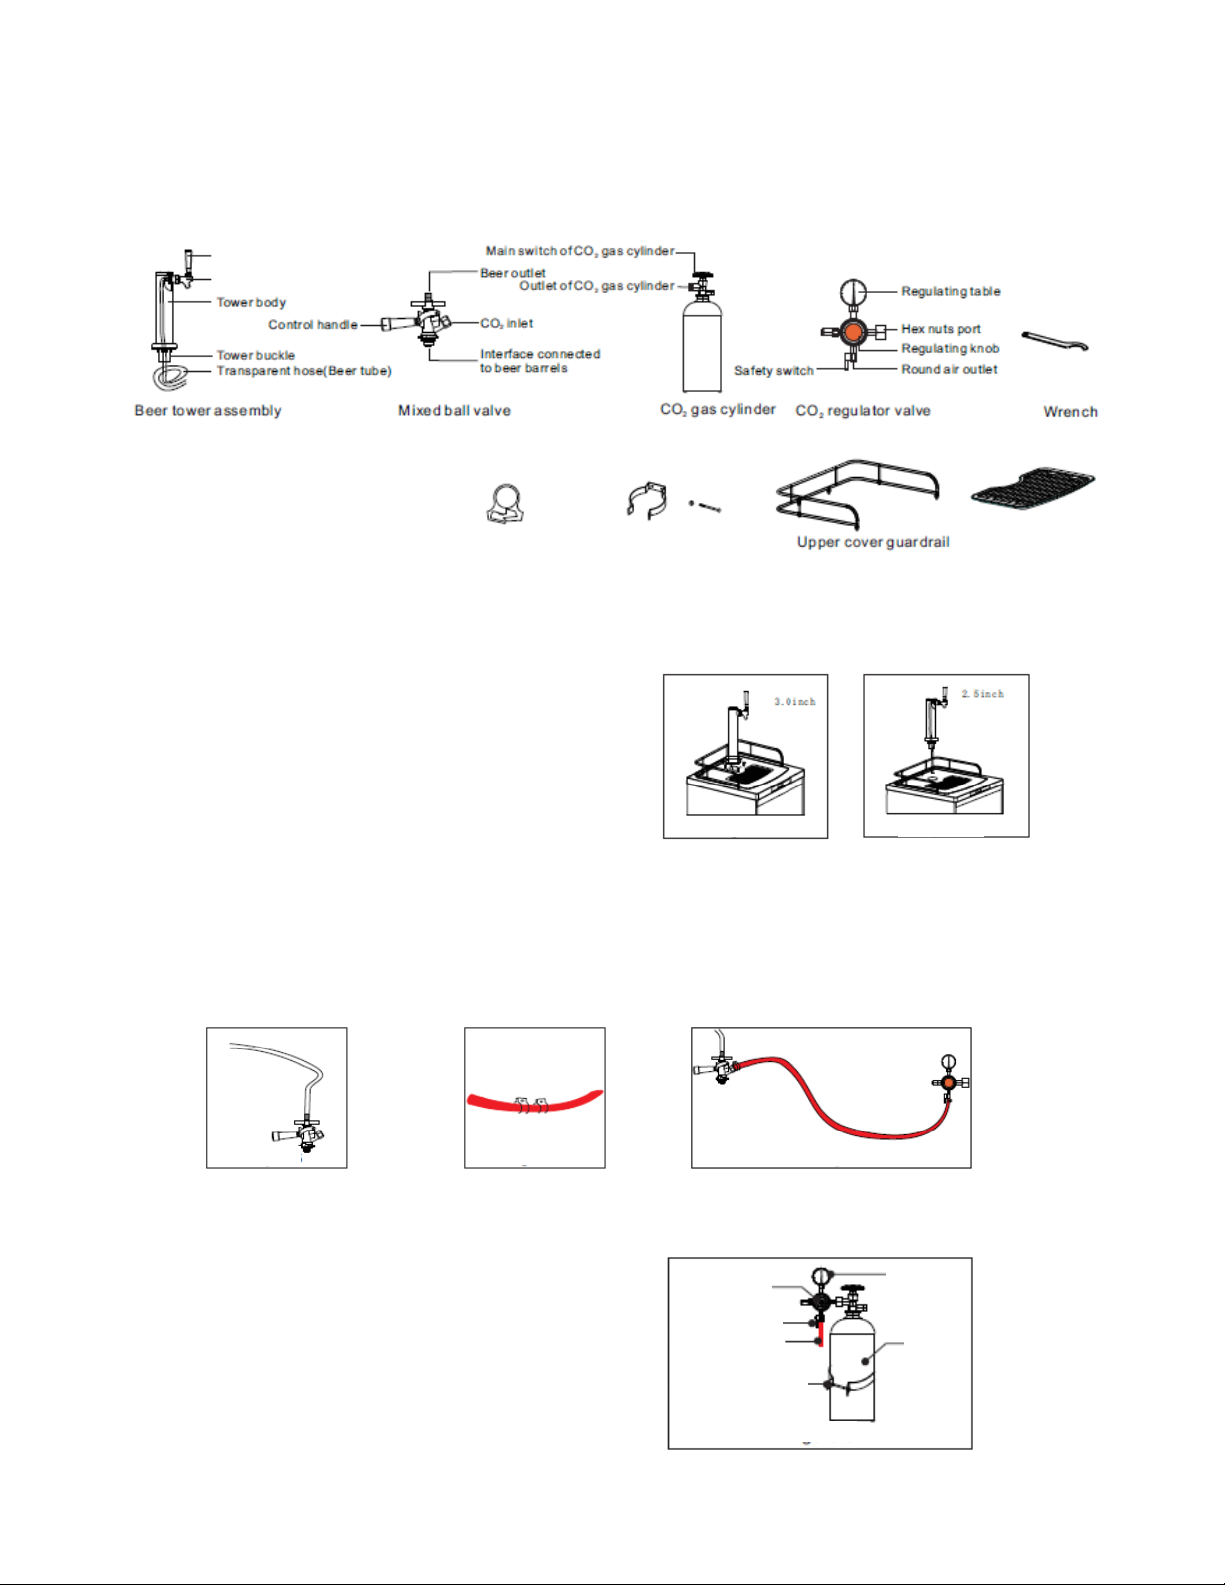
Installation components
Installation steps
1. Install the beer tower assembly and the mixed ball valve:
a) Plug the beer tower assembly into the top cover of the beer dispenser:
3.0” tower: This does not require a tower
buckle. Put beer tower directly over the
hole at the top of the beer dispenser’s
upper surface. Fix the beer tower assembly with screws directly on the upper surface of the beer dispenser. (See Fig. 1).
2.5” tower: This requires the tower buckle.
Place the beer tower at the hole in the upper surface of the beer dispenser at an inclination of 60,
and rotate 60 clockwise along the card slot.Be sure the tap is facing toward the front of the
machine. Attach the beer tower with washers (See Figure 2).
b) Take out the accessories of the mixed ball valve. Attach the transparent hose to the beer outlet of
the mixed ball valve (See Figure 3).
2. Install CO2 gas cylinder and CO2 regulator valve:
a) Fix the two CO2 hose clamps on the red
CO2 tube (See Figure 4).
b) Connect the ends of the red CO2 tube
respectively to the CO2 intake port of the
mixed ball valve and the round outlet of
the CO2 regulator valve. Lock these
connections firmly with the two clamps on
the red CO2 tube (See Figure 5).
Tap handle
Draft beer tap
CO2 hose clamp
CO2 tank bracket and bolt
(not included on SBC695)
Drip tray assembly
CO2 regulator
valve
Safety switch
Red CO2 tube
Bracket and retainer
of CO2 tank
Regulating
table
CO2 gas
cylinder
Figure 2
Figure 1
Figure 3
Figure 4
Figure 5
Figure 6
Page 2
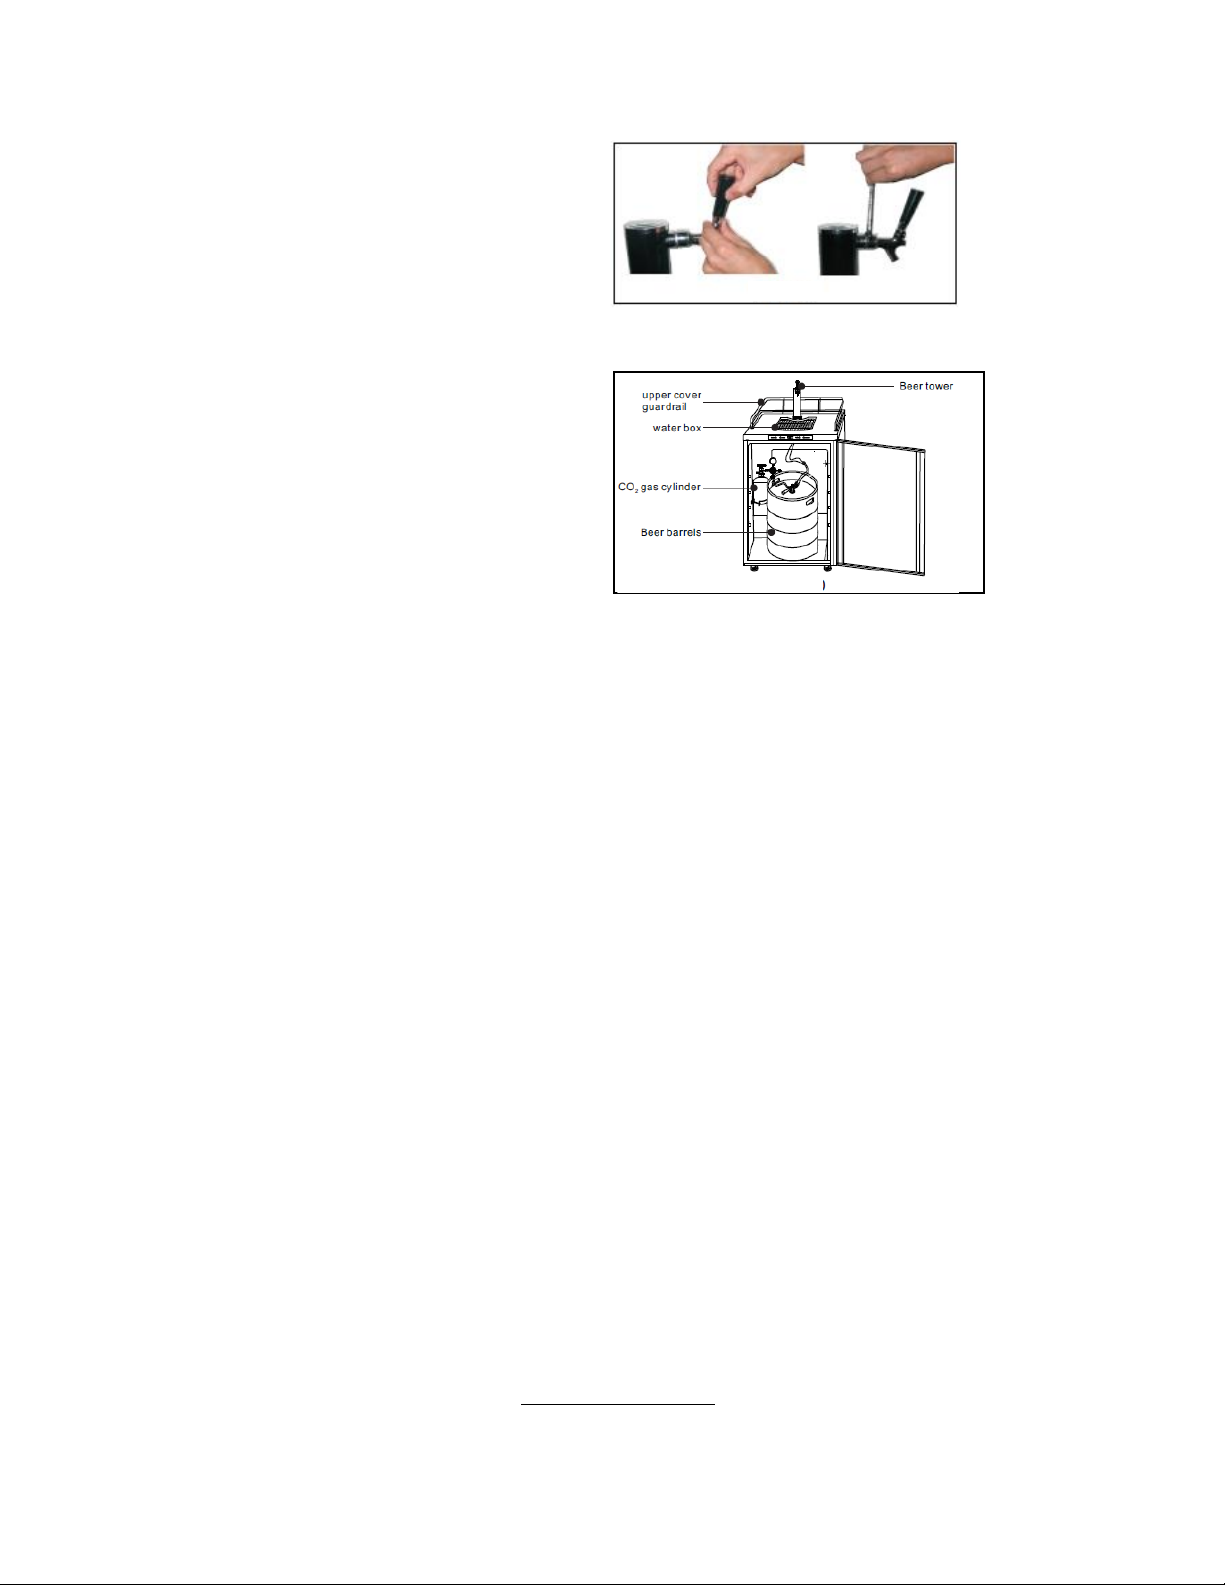
c) Using the wrench, tighten the CO2 regulator table valve with the hex nut port to the gas outlet of the
CO2 tank (See Figure 6).
d) Place the CO2 tank and CO2
regulator valve component into the
cabinet and fix the CO2 tank with
tank bracket and bolt (See Figure 7).
Note: SBC695 models do not include the bracket
3. Install the beer keg:
Place the beer keg into the cabinet and
firmly connect the keg’s opening to the
connection port of the mixed ball valve
(See Figure 8).
Note: To place a keg into the cabinet,
use the keg handle to move the keg
to the front of the open beer
dispenser, then carefully tip the keg
so that the raised bottom edge contacts the edge of the cabinet. Finally, lift the keg handle to raise
the keg to the level of the floor of the cabinet and push the keg into place.
4. Install tap handle and beer tap:
Screw the tap handle clockwise into the beer tap to make a firm connection. Then connect the tap to
the beer tower components and tighten with a wrench (See Figure 7).
5. Install upper cover guardrail and drip tray:
Set the upper cover guardrail and drip tray on top of the beer dispenser (See Figure 8).
Notes:
• When replacing the beer keg, first turn off the safety switch on the CO2 regulator valve and
remove the mixed ball valve to take out the keg.
• When replacing the CO2 gas cylinder, remember to turn off the main switch of the CO2 gas
cylinder and the safety switch on the CO2 regulator valve. Afterwards, use a wrench to loosen the
hexagonal nut port connecting the CO2 regulator valve with the CO2 tank. Then, using a wrench,
remove the fixed bolt of the CO2 tank to take out the CO2 tank.
• During the installation process, be sure that all parts are connected tightly and that there are no
gas leaks.
• When connecting the hose to the connection port, you can dip the ends into warm water to make
the connection easier.
• If the high-pressure compressed gas in the CO2 tank is not handled properly, it could be
dangerous:
a. Make a note of the D.O.T. testing date on the cylinder neck before installation. If it is more
than 5 years old, don’t use the product. Return it to the gas supplier.
b. Keep gas cylinder away from heat sources. Unused cylinders should be placed upright in a
cool, ventilated place (preferably at 70F).
Summit Appliance Division · Felix Storch, Inc. · www.summitappliance.com · 718-893-3900 · [email protected]
Figure 7
Figure 8
 Loading...