

Page 1
30" WINE COOLER Model SWC3066
30” BEVERAGE CENTER Model SWBV3067
BEFORE USE, PLEASE READ AND FOLLOW
ALL SAFETY RULES AND OPERATING INSTRUCTIONS
Write the Serial Number here
______________________
SIDE-BY-SIDE, 2-ZONE MODELS
Owner’s Manual
Felix Storch, Inc.
Summit Appliance Division
770 Garrison A v enue
Bronx, NY 10474
www.summitappliance.com
Page 2

IMPORTANT SAFETY INSTRUCTIONS
WARNING To reduce the risk of fire, electrical shock or injury when using
your appliance, follow these basic precautions
• Read all instructions before using the wine cooler .
• Plug into a grounded 3-prong outlet. Do not remove grounding prong, do not use an adapter,
and do not use an extension cord.
• It is recommended that a separate circuit, serving only your wine cooler, be provided. Use
receptacles that cannot be turned off by a switch or pull chain.
• Never clean wine cooler parts with flammable fluids. These fumes can create a fire hazard or
explosion.
• Before proceeding with cleaning and maintenance operations, make sure the power line of
the unit is disconnected.
• Do not connect or disconnect the electric plug when your hands are wet.
• Unplug the wine cooler or disconnect the power before cleaning or servicing. Failure to do so
can result in electrical shock or death.
• Do not attempt to repair or replace any part of your appliance unless it is specifically
recommended in this manual. All other servicing should be referred to a qualified technician.
• Do not store or use gasoline or any other flam mab le vapors and liquids in the vicinity of this or
any other appliance. The fumes can create a fire hazard or explosion.
• Use two or more people to move and install the wine cooler. Failure to do so can result in back
or other injury.
• To ensure proper ventilation for your appliance, the front of the unit must be completely
unobstructed. Choose a well-ventilated area with temperatures above 61
°
95
F (35°C). This unit must be installed in an area pr ot ected from the elements, such as wind,
°
F (16°C) and below
rain, water spray or drips.
• The wine cooler should not be located next to ovens, grills or other sources of high heat .
• The wine cooler must be installed with all electrical connections in accordance with state and
local codes. A standard electrical supply (115V AC only, 60 Hz), properly grounded in
accordance with the National Electrical Code and local codes and ordinances, is required.
• Do not kink or pinch the power supply cord of the appliance.
• The fuse (or circuit breaker) size should be 15 amps.
• It is important for the wine cooler to be leveled in order to work properly. You may need to
make several adjustments to level it.
• Although the unit has been tested at the factory, due to transit and storage, you should clean
the appliance before use.
• Do not use solvent-based cleaning agents or abrasives on the interior. These cleaners may
damage or discolor the interior.
• Do not use this apparatus for other than residential purposes.
2
Page 3

DANGER! Risk of child entrapm ent
Child entrapment and suffocation are not problems of the past. Junked or abandoned
appliances are still dangerous, even if they will “just sit in the garage a few days”.
• Before you throw away your old wine cooler or any appliance: Remove the door.
Leave the shelves in place so that children may not easily climb inside.
• Never allow children to operate, play with, or crawl inside the appliance.
- SAVE THESE INSTRUCTIONS -
INSTALL ATION INSTRUCTIONS
Before Using Your Appliance
• Remove the exterior and int er ior packing.
• Before connecting the appliance to the power so ur ce, let it st and upright for ap proxim ately 2 hours .
This will reduce the possibility of a malfunction in the cooling system from handling during
transportation.
• Clean the interior surface with lukewarm water using a soft cloth.
• Install the handle on the left sid e of the door.
Installation of Your Appliance
• This appliance is designed for free standing or built-in (fully recessed) installation. If free standing,
the unit should have at least 4” of clearance at both sides, at the top and at the back to allow for
adequate ventilation. I f it is built -in, leave at least 3/16” at both sides, 1/ 16” at t he top and 2” at the
rear . Be sur e t hat airflow under the appliance is not blocked.
• Place your appliance on a floor that is strong enough to support it when it is fully loaded. To level
your appliance, adjust the front leveling legs at the bottom of the Wine Cooler .
• Locate the appliance away from direct sunlight and sources of heat (stove, heater, radiator, etc.).
Direct sunlight may affect the acrylic coating and heat sources may increase electrical
consumption. Very cold ambient temperatures may also cause t he unit not to perform properly.
• Avoid locating the unit in moist areas.
• Plug the appliance into an exclusive, properly installed-grounded wall outlet. Do not under any
circumstances cut or remove the third (ground) prong from the power cord. Any questions
concerning power and/or grounding should be directed toward a certified and authorized products
service center.
• The two handles are stored inside the unit. Instal l on e on each door using the screws (supplied).
Defrosting
While it is running, the appliance defrosts itself every 8 hours. The defrosting process lasts about 30
minutes. The melt water collects in the evaporator drip tray where it evaporates automatically.
During the process of defr osting, the displayed t emperature may be higher than the set temperature.
NOTE: You may notice condensation on t he o uter s urfac e o f the glass doors. This occurs when water
vapor from the air contacts the cold surface of the doors and the vapor condenses on the glass,
3
Page 4
causing a fogging effect. In extreme situations, water can even drip off the doors, indicating
excessive humidity in the environment.
OPERATION
Recommended temperatures for chilling wine:
Red Wines: 15 - 18
Dry / White Wines: 9 - 14
Sparkling Wines: 5 - 8
The cabinet temperatures may vary slightly depending on whether or not the interior light is ON or
OFF, and whether the bottles are locat ed on the upper/middle or lower section of the cabi net.
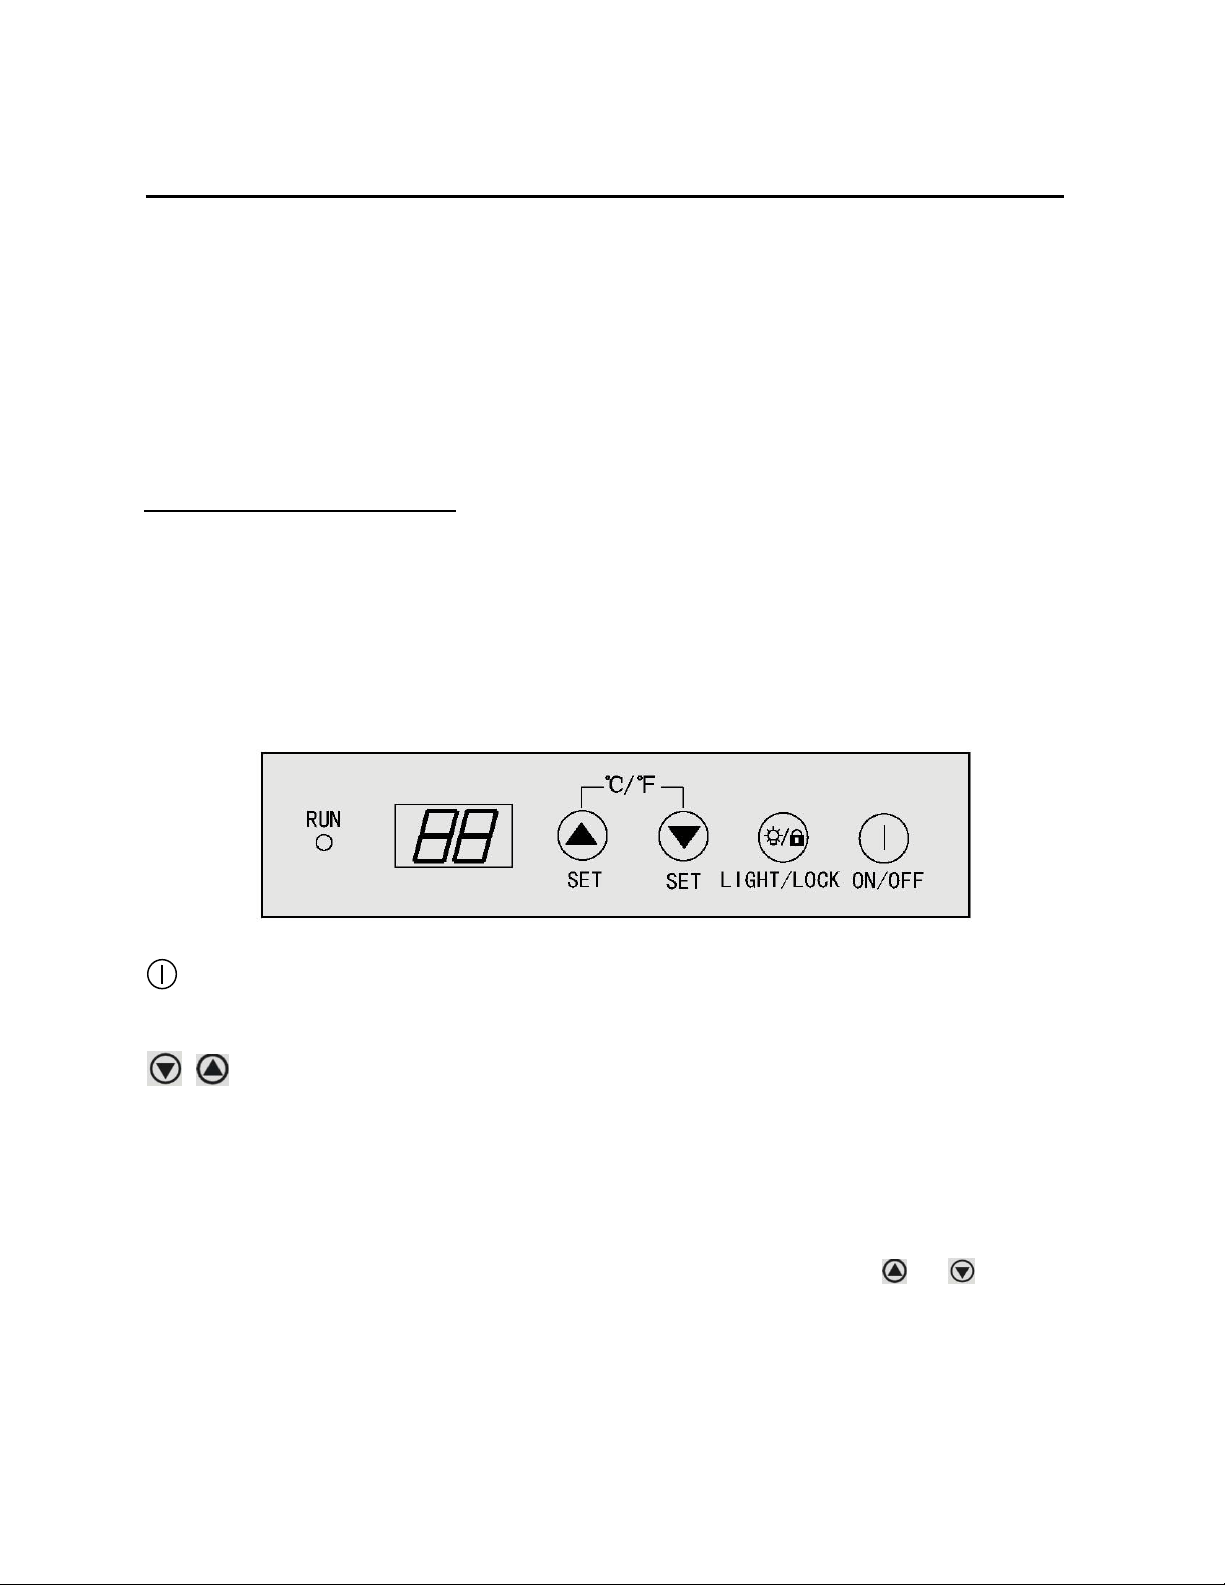
The Controls of Your Appliance
NOTE: There are two cont r ol panels, each operating a separate zone. Each zone can be set
independently but the pro cedur e is the same for both, as described below:
°
C (59 - 64.4°F)
°
C (48.2 - 57.2°F)
°
C (41 - 46.4°F)
The appliance should be placed where the a mb ient temperature is between 16 - 35
°
C (61 - 95°F). If
the ambient temperature is above or below this range, the performance of the unit may be affected.
For example, placing your unit in extr emely cold or hot conditions may cause interior te mperatures to
fluctuate.
ON/OFF Power
To turn the appliance on or off, press the ON/OFF button for 3 seconds.
Setting the temperature control
Each cooling compartment of the appliance (left and right) is independently controlled. To set the
temperature:
1. C onnect the power cord to a properly grounded outlet. In the event of a power interruption, all
previous temperature settings are automatically erased and each compartment will default to a
preset temperature of 12°C (53.6°F).
2. S et the desired cooling temperature by pressing the corresponding buttons or to raise or
lower the set temperature. Each depression of the button will scroll through the available
temperature settings ( for each c ompart ment), raising or low ering th e set temperature 1 degree at a
time. The temperature selected will flash in the LED display for approximately 5 seconds, then
revert back to displaying the internal temperature of that zone.
4
Page 5

3. The temperature sett i ng can be adjusted from 2℃ to 20℃ (36°F to 68°F).
NOTE: To save energy and prolong the working life of the compr essor , we advise you not
to set both zones at or below 5
℃ (41
°F) at the same time.
4. To view the “set” temperature at any time, press either button or once and the “set”
temperature for that compartment will flash in t he LED display for 5 seconds.
RUN
Indicator light illuminat es t o signify the cooling mode is currently in operation.
LIGHT/LOCK
You can turn the interior light ON or OFF by pushing the button marked with the “bulb” symbol. The
light will turn off automatically if it remains ON for 10 minutes. Pushing the button marked with the
“bulb” symbol again will turn the light b ack on. For optimum st orage o f wine, keep th e light o ff except
when viewing.
LIGHT/LOCK
Press and hold the "LIGHT/LOCK" button for 3 seconds. The control panel will lock and can not be
operated again until the button is pressed again. After that, it will operate normally.
Temperature Conversion
This unit has the option t o disp lay t e mperatur es in either Celsiu s or F ahren he it. To ch ang e the s ett ing,
press and hold both buttons ( and ) simultaneously for approximately 3 seconds.
NOTES:
• If the unit is unplugge d, tu rned o f f or if th ere i s a p o wer fa ilure, you must w ait 3 to 5 minutes be fore
restarting the unit. If you at t empt t o r est ar t bef or e t his time delay, the Wine Cooler will not work.
• When you use the appliance for the first time, or restart the appliance after it's been shut off for a
long time, there could be a few degrees difference between the temperature you select and the
one indicated on the LED readout. This is normal and is due to the length of the inactivation time.
Once the appliance has been running for a few hours, everything should be back to n ormal.
5
Page 6

CARE AND MAINTENANCE
Cleaning Your Appliance
1. Turn off the power, unplug the appliance, and remove all items including shelves and racks.
2. Wash the inside surfaces with a warm water a nd b a king sod a so luti on. The so lutio n sh ould c ons ist
of about 2 tablespoons of baking soda to a quart of water.
3. Wash the shelves with a mild detergent sol ution.
4. Wring excess water out of the sponge or cloth when cleaning the area of the controls, or any
electrical parts.
5. Wash the exterior of the cooler with a warm solution of mild liquid detergent. Rinse well and wipe
dry with a clean soft cloth.
Defrosting
Defrosting of t he inside the appliance occurs automatically during operation. Approximately every 8
hours, the compressor will stop running for about 30 minutes. During defrosting the temperature will
be higher than you set . The defrost water is collec ted by the ev apor ating t ra y above the co mpresso r
and evaporates automatically.
Power Failure
Most power failures are corrected within a few hours and should not affect the temperature of your
appliance if you minimize t he number of ti mes the d oor is opened. If your pow er is going t o be of f for a
longer period of time, you need to t ake the proper steps to pr ot ect your contents.
Vacation Time
Leave the appliance operating during vacations of less than three weeks. If you turn off the appliance
for extended periods, leave the door slightly ajar to prevent odor building up inside.
Transporting Your Appliance
If you need to move your appliance once the box has been discarded:
1. Securely tape down all loose items (shelves) inside your appliance.
2. Turn the adjustable legs up to the base to avoid d amage.
3. Tape the door shut .
4. Be sure the appliance stays secure in the upright position during transportation. Also protect the
outside of the appliance wit h a bl anket or similar item.
Energy Saving Tip
The appliance should be located in the coolest area of the room, away from heat-producing
appliances and out of dire ct sunlight.
6
Page 7
The door gasket does not seal pr operly.
The light button is “OFF”.
The shelves are out of posit io n.
PROBLEMS WITH YOUR APPLIANCE
You can solve many common problems easily, saving you the cost of a possible service call. Try the
suggestions below to see if y ou can solve the problem before calling the servicer.
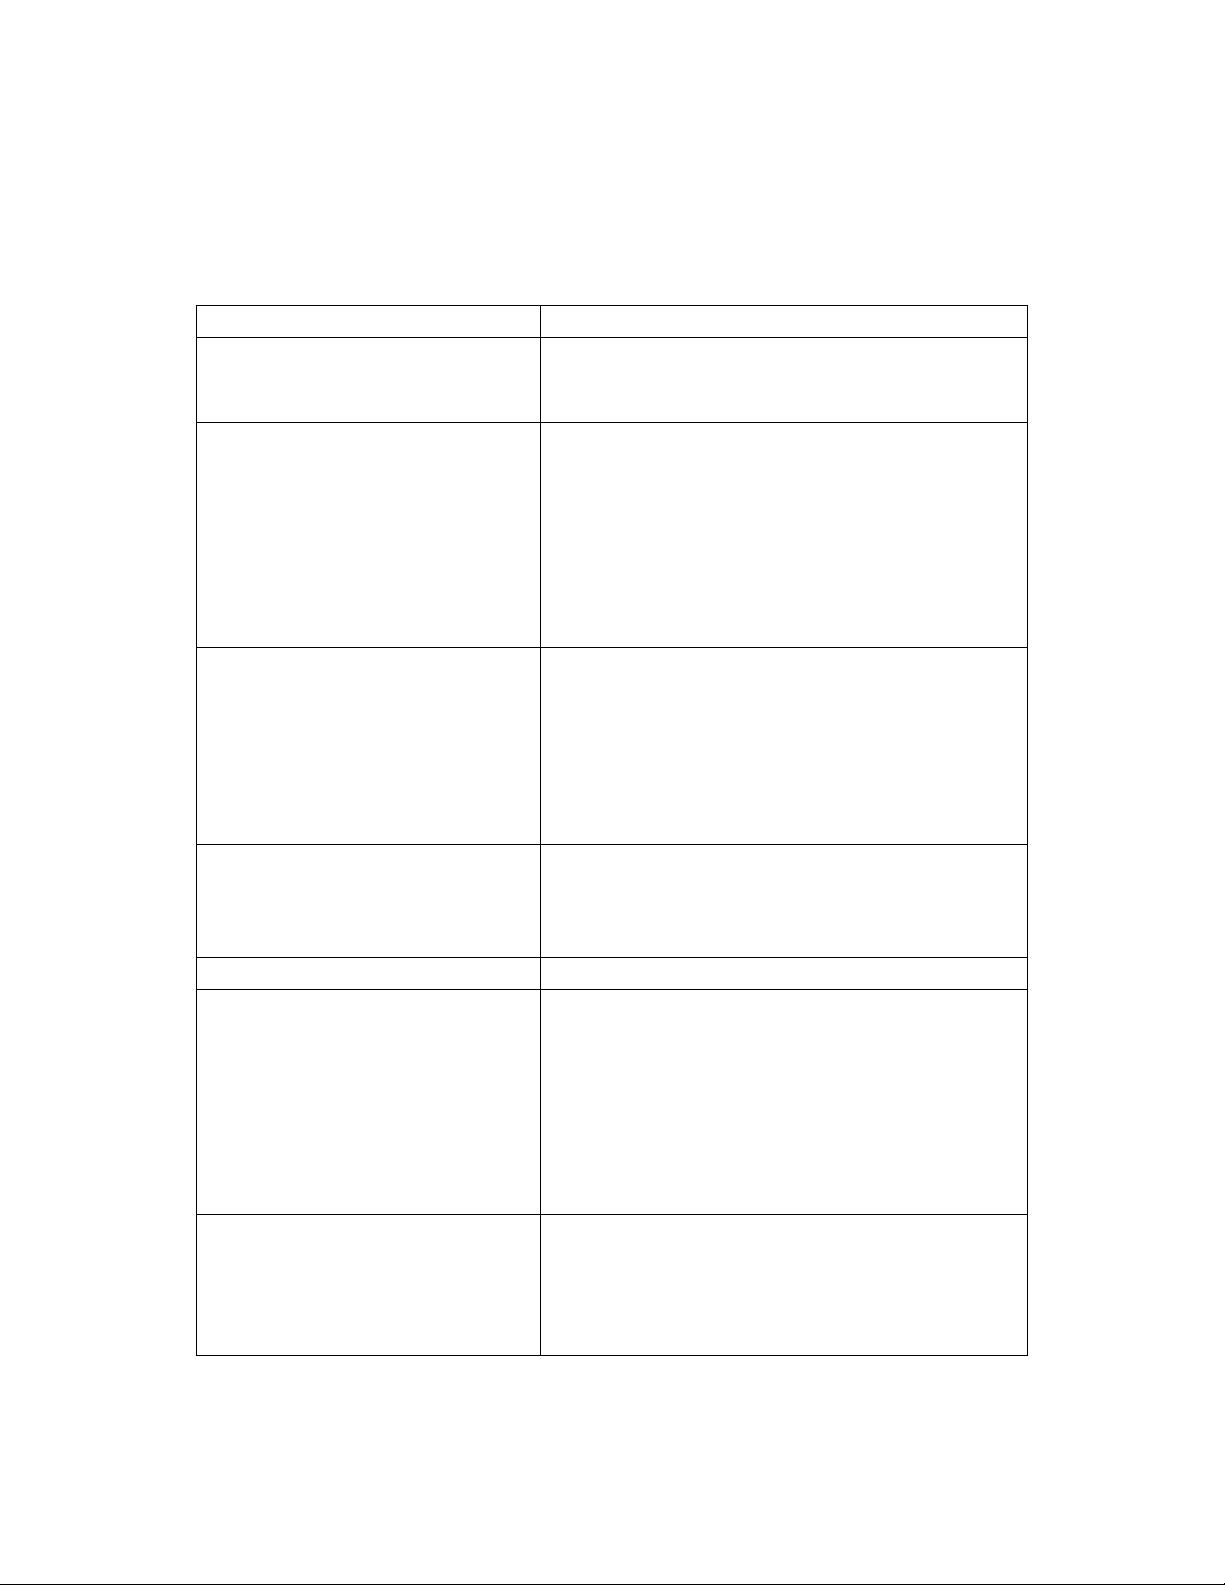
TROUBLESHOOTING GUIDE
PROBLEM POSSIBLE CAU SE
Appliance does not oper at e.
Appliance is not cold enou gh.
Not plugged in.
The appliance is turned off.
Circuit breaker has trippe d or a fus e has blown.
Check the temperature co nt r ol set t ings. Both
compartments should not be se t at or below
5°C (41°F) at the same time.
External environment may require a higher
setting.
The door is opened too often.
The door is not closed completely.
Turns on and off frequently.
The light does not work.
Vibrations
The appliance seems to make too
much noise.
The door will not close proper ly.
The room temperature is hotter than normal.
A large amount of contents has been added to the
Wine Cooler.
The door is opened too often.
The door is not closed completely.
The temperature control i s not set correctly.
The door gasket does not seal properly.
Not plugged in.
Circuit breaker has trippe d or a fus e has blown.
The bulb has burned out.
Check to assure that the appliance is level.
Some noise may come from the flow of the
refrigerant, which is nor m al.
As each cycle ends, you may hear gurgling
sounds caused by the flow of refrigerant in your
appliance.
Contraction and expansio n of the inside w alls may
cause popping and crackli ng noises.
The appliance is not level.
The appliance is not level.
The door was reversed and not pr operly
re-installed.
The gasket is dirty.
NOTE: This appliance is intended to be used exclusively for the stor age of wine and
beverages.
7
Page 8
Rvsd Sept. 19, 2013
FELIX STORCH, INC.
cancer or birth defects or other reproductive harm. For more information, visit:
Chemicals known by the manufacturer to be present in this product in concentrations higher
LIMITED WARRANTY
ONE-YEAR LIMITED WARRANTY
Within the 48 contiguous United States, for one year from the date of purchase, when this appliance is operated and maintained
according to instructions attached to or furnished with the product, warrantor will pay for factory-specified parts and repair labor to
correct defects in materials or workmanship. Service must be provided by a designated service company. Outside the 48 states, all
parts are warranted for one year from manufacturing defects. Plastic parts, shelves and cabinets are warranted to be manufact ured
to commercially acceptable standards, and are not covered from damage during handling or breakage.
5-YEARS COMPRESSOR WARR ANTY
1. The compressor is covered for 5 years.
2. Replacement does not include labor.
ITEMS WARRANTOR WILL NOT PAY FOR:
1. Service calls to correct the installation of your appliance, to instruct you how to use your appliance, to replace or
repair fuses or to correct wiring or plumbing.
2. Service calls to repair or replace appliance light bulbs or broken shelves. Consumable parts (such as filters) are
excluded from warranty coverage.
3. Damage resulting from accident, alteration, misuse, abuse, fire, flood, acts of God, improper installation,
installation not in accordance with electrical or plumbing codes, or use of products not approved by warrantor.
4. Replacement parts or repair labor costs for units operated outside the United States.
5. Repairs to parts or systems resulting from una uthorized modifications made to the appliance.
6. Expenses for travel and transportation for product service in remote locations.
7. The removal and reinstallation of your appliance if it is installed in an inaccessible location or is not installed in
accordance with published installat ion in stru ctio ns.
DISCLAIMER OF IMPLIED WARRANTIES – LIMITATION OF REMEDIES
CUSTOMER'S SOLE AND EXCLUSIVE REMEDY UNDER THIS LIMITED WARRANTY SHALL BE PRODUCT REPAIR AS
PROVIDED HEREIN. IMPLIED WARRANTIES, INCLUDING WARRANTIES OF MERCHANTABILITY OR FITNESS FOR A
PARTICULAR PURPOSE, ARE LIMITED TO ONE YEAR. WARRANTOR SHALL NOT BE LIABLE FOR INCIDENTAL OR
CONSEQUENTIAL DAMAGES. SOME STATES DO NOT ALLOW THE EXCLUSION OR LIMITATION OF INCIDENTAL OR
CONSEQUENTIAL DAMAGES, OR LIMITATIONS ON THE DURATION OF IMPLIED WARRANTIES OF MERCHANTABILITY OR
FITNESS, SO THESE EXCLUSIONS OR LIMITATIONS MAY NOT APPLY TO YOU. THIS WARRANTY GIVES YOU SPECIFIC
LEGAL RIGHTS AND YOU MAY ALSO HAVE OTHER RIGHTS, WHICH VARY FROM STATE TO STATE.
WARNING! This product may contain chemicals known to the state of California to cause
www.summitappliance.com/prop65
than threshold limits: NONE.
770 Garrison Avenue
Bronx, NY 10474
Phone: (718) 893-3900
Fax: (718) 842-3093
www.summitappliance.com
For parts and accessory ordering,
troubleshooting and helpful hints, visit:
www.summitappliance.com/support
8
Printed in China
 Loading...