

Page 1
Felix Storch, Inc.
COUNTERTOP DISPL AY FREEZER
Model SCFU386
Instruction Manual
BEFORE USE, PLEASE READ AND FOLLOW ALL SAFETY RULES AND OPERATING INSTRUCTIONS.
Write Serial No. (on rating label) here:
____________________________
770 Garrison Avenue
Bronx, NY 10474
www.summitappliance.com
Page 2

2
TABLE OF CONTENTS
Appliance Safety .........................................................................
3
Important Safeguards ................................................................
3-4
Location of Parts, Control Panel ...............................................
5
Technical Information ................................................................
6
Installation Instructions .............................................................
6-7
Moving and Installing Your Appliance ....................................
6
Electrical Connection ..............................................................
7
Operating Your Appliance .........................................................
7-9
Turning On the Freezer ..........................................................
7-8
Storing Items in the Unit .........................................................
8
Defrosting the Unit ..................................................................
8
Interior Light ……………………………………………………...
8
Anti-Sweat Switch …………………………….…………………
8
Door Lock ..............................................................................
9
Normal Phenomena ................................................................
9
Care and Maintenance ...............................................................
9-10
Cleaning Your Appliance ................... ...... ...............................
9
Power Failure .........................................................................
10
Vacation Time .........................................................................
10
Moving Your Appliance ...................... .... ................................
10
Power Cord .............................................................................
10
Energy-Saving Tips ................................................................
10
Troubleshooting .........................................................................
11
Limited Warranty ........................................................................
12
Page 3
3
APPLIANCE SAFETY
Your safety and the safety of others ar e very important.
We have provided many important safety messages in this manual and on your appliance. Always read
and obey all safety messages.
This is the Safety Alert Symbol. The symbol alerts you to potential hazards that
can kill or injure you and others. All safety messages will follow the Safety
Alert Symbol and either the words DANGER or WARNING.
DANGER means that failure to heed this safety
statement may result in severe personal injury or
death.
WARNING means that failure to heed this safety
statement may result in extensive product
damage, serious personal inj ury, or death.
All safety messages will alert you about the potential hazard, tell you how to reduce the chance of injury,
and let you know what can happen if the instructions are not followed.
IMPORTANT SAFEGUARDS
Before the appliance is used, it must be properly positioned and installed as
described in this manual, so read the manual carefully. To reduce the risk of fire,
electrical shock or injury when using the appliance, follow basic precautions,
including the following:
• Plug into a grounded 3-prong outlet, do not remove grounding prong, do not use an adapter, and do
not use an extension cord.
• Replace all panels before oper ati ng.
• It is recommended that a separate circuit serving only your appliance be provided. Use receptacles
that cannot be turned off by a switch or pull chain.
• Never clean appliance parts with f lam mable fluids. These fumes can create a fire hazard or explosion.
And do not store or use gasoline or other flammable vapors and liquids in the vicinity of this or any
other appliance. The fumes can create a fire hazard or explosion.
• Before proceeding with cleaning and maintenance operations, make sure the power line of the unit is
disconnected.
• Do not connect or disconnect the electric plug when your hands are wet.
Page 4
4
• Unplug the appliance or disconnect power before cleaning or servicing. Failure to do so can result in
electrical shock or death.
• Do not attempt to repair or replace any part of your appliance unless it is specifically recommended in
this manual. All other servicing should be referred to a qualified technician.
FOLLOW WARNING CALLOUTS BELOW ONLY WHEN APPLICABLE TO YOUR MODEL
• Use two or more people to move and install the appliance. Failure to do so can result in back or other
injury.
• To ensure proper ventilation for your appliance, the front of the unit must be completely unobstructed.
Choose a well-ventilated area with temperatures above 60°F (16°C) and below 90°F (32°C). This unit
must be installed in an area protected from the elements, such as wind, rain, water spray or drips.
• The appliance should not be located next to ovens, grills or other sources of high heat.
• The appliance must be installed with all electrical, water and drain connections in accordance with
state and local codes. A standard electrical supply (115 V AC only, 60 Hz), properly grounded in
accordance with the National Electrical Code and local codes and ordinances, is required.
• Do not kink or pinch the power supply cord of the app l i anc e.
• The size of the fuse (or circuit breaker) should be 15 amperes.
• It is important that the appliance be level in order to work properly. You may need to make several
adjustments to level it.
• All installations must be in accordance with local plumbing code requirements.
• Make certain that the pipes are not pinched, kinked or damaged during installation.
• Check for leaks after connection.
• To avoid deformation, never place hot or heavy items on top of the freezer.
• Never allow children to operate, play with or crawl inside the appliance.
• Do not use solvent-based cleaning agents or abrasives on the interior. These cleaners may damage
or discolor the interior.
• Use this appliance only for its intended purpose as described in this Instr uct ion Manua l .
• Keep fingers out of the “pinch point” areas. Clearances between the door and cabinet are necessarily
small. Be careful closing door when children are in the area.
Risk of child entrapment!
Child entrapment and suffocation are not problems of the past. Junked or abandoned appliances are
still dangerous, even if they will “just sit for a few days” .
Before discarding your old refrigerator:
• Take off the doors.
• Leave the shelves in place so that children may not easily climb inside.
- SAVE THESE INSTRUCTIONS -
Page 5
5
Temperature control, light
sweat switch
Gasket
Interior light
(self-closing)
Temperature
Adjustable feet (4)
switch and anti-
Control Panel
LOCATION OF PARTS
(on back of cabinet)
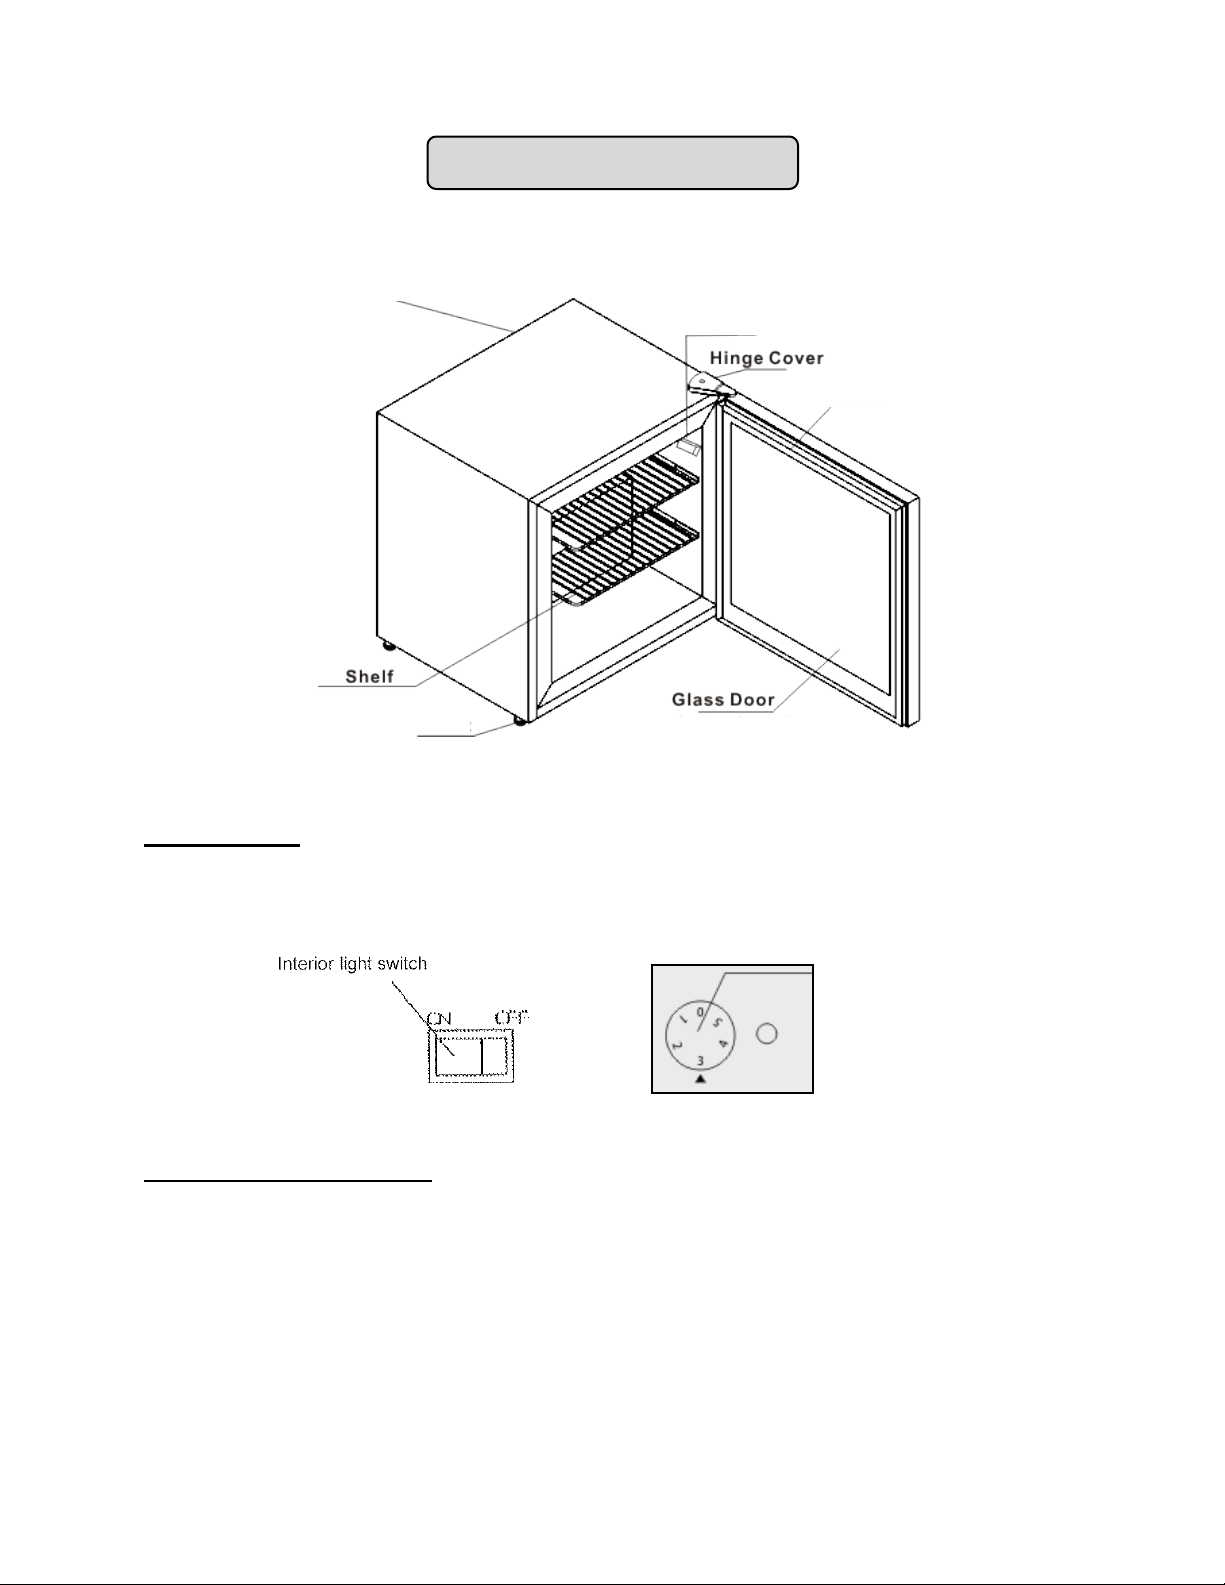
For switching the interior light on and off and for adjusting the storage temperature, use
the control panel located on the back of the cabinet.
control dial
Temperature Control Dial
Turn this dial clockwise for colder temperatures. The dial has been set at position " 3 "
at the factory.
Page 6

6
TECHNICAL INFORMATION
Model SCFU386
Climate Class N
Installation Free-standing
Capacity 2.0 ft3
Electrical Input 115V AC 60Hz
Power Input 155W
Rated Current 4.0A
Refrigerant R134a, 3.18 oz
Lamp Wattage 8W
Unit Weight 83 lbs
Unit Dimensions 24.7" W X21.7"D X 23.4"H
NOTE: Specifications ar e su bj ect to change without notice.
INSTALLATION INSTRUCTIONS
This appliance is meant for free-standing installation; it should not be built-in.
Do not put heavy items on top of the unit.
Do not store or install the appliance outdoors.
This appliance is designed for the storage of frozen items. Do not use it to store
medicine or other medical products.
Moving and Installing Your Appliance
• When transporting, keep the unit vertical as much as possible. The angle between
the vertical and the side of the unit should never exceed 45° since this could affect
the compressor and result in abnormal operation. Never turn the unit upside down.
• Remove the packing materials and place the unit on a level and sturdy floor near a
power socket.
• Leave at least 4" of space at the back, sides and top of the unit to ensure adequate
ventilation. Level the unit with the four adjustabl e feet .
• Keep the unit away from heat sources and avoid direct sunlight.
• Never place the unit in a location with high humidity or where water can reach it.
• It is recommended that you install the appliance in a place where the ambient
temperature is between 78º and 89ºF (26º to 32ºC). If the ambient temperature is
above or below the recommended temperatures, the performance of the unit may be
affected. For example, placing your unit in extremely cold or hot conditions may
cause interior temperatures to fluctuate.
Page 7

7
Electrical Connection
Improper use of the grounded plug can result in the risk of electrical shock. If the
power cord is damaged, have it replaced by a qualified electrician or an
authorized service center.
Never ground the unit through a gas, heating, or tap water pipe or the grounded
wire of a single-ph ase power supply.
This appliance requires a standard 115/120 Volt AC ~ 60Hz three-prong grounded
electrical outlet. Have the wall outlet and circuit checked by a qualified electrician to
make sure the outlet is properly grounded. When a standard 2-prong wall outlet is
encountered, it is your responsibility and obligation to have it replaced with a properly
grounded 3-prong wall outlet.
To prevent accidental injury, the cord should be secured behind the appliance and not
left exposed or dangling. Do not use an extension cord.
The appliance should always be plugged into an exclusive, properly grounded wall
outlet which has a voltage rating that matches the rating label on the appliance. This
provides the best performance and also prevents overloading wiring circuits that could
cause a fire hazard from overheating. Never unplug the appliance by pulling on the
power cord. Always grip the plug firmly and pull straight out from the receptacle. Repair
or replace immediately all power cords that have become frayed or otherwise damaged.
Do not use a cord that shows cracks or abrasion damage along its length or at either
end. When moving the appliance, be careful not to damage the power cord.
OPERATING YOUR APPLIANCE
NOTES:
1. This freezer is designed to operate at 0°F, with an operating range of
-4 to +5°F.
2. It is not designed to bring room-temperature items below the freezing
point, but to keep pre-frozen products at temperature.
3. Clean the unit before using it, and be sure it is level.
Turning On the Freezer
• After moving the unit, let it stand for at least 30 minutes before plugging it in.
• Connect the unit to a power supply. Be sure the door is closed. Flick the light switch
on the back of the cabinet to be sure the power connection is active. After about 1½
hours, the temperature inside the cabinet should be suitable for normal use, but in
any case, keep the unit empty for at least an hour after power is connected.
The temperature control and the interior light switch are both located on the back of the
cabinet.
Page 8

8
• The temperature should be adjusted according to ambient temperature and the food
items being stored. As y ou can see fro m the il l ust r ati on on pag e 5, the temperature
control can be adjusted on a scale of 1 through 5, with 5 being the coldest setting.
(The control is set at 3 at the factory.)
• The control should be set at an appropriate position before the appliance is used,
since frequent adjustment during use is not advisable. Normally in summer when the
ambient temperature is high, the control should be set at 2. In winter, when the
ambient temperature is low, a setting of 4 is appropriate.
• When the temperature control is set a 0, the appliance stops running.
CAUTION
• If power is disconnected, do not try to restart the freezer within 5 minutes of the
power disconnect.
• Do not make holes through the walls of the unit in order to mount other items.
• Avoid splashing water on the unit.
• Do not store medical or pharmaceutical products in the unit.
• Keep the keys of the door lock out of the reach of children.
Storing Items in the Unit
• Avoid putting a large number of items into the unit at one time. Leave some space
around the items to allow an unimpeded flow of cold air.
• To lower energy consumption and prolong the life of the compressor, avoid putting
warm food into the unit. Only foods that are cold or at room temperature or already
frozen should be put into the freezer.
• Never store any flammable, explosive or corrosive materials in or near the freezer.
• Beer and other beverages, fresh flowers, medicine and injectables should not be
placed in the freezer.
Defrosting the Unit
If there is a heavy frost buildup in the SCFU386, remove the contents and disconnect
the power. Any frost that has accumulated will melt. Wipe up the melt water with a clean
sponge or soft cloth, then dry the unit thoroughly. Finally, reconnect the power.
Interior Light
The rocker switch on the back of the cabinet controls the interior light. Pressing the
switch turns the light on and off.
Anti-Swea t Switch
This switch, located next to the light switch on the back of the cabinet, can be turned on
when the ambient temperature is extremely low. It prevents moisture from depositing on
the interior of the glass door.
Page 9

9
Door Lock
Your unit is provided with a lock and set of keys.
The keys are located inside the plastic bag that contains the Instruction Manual. Insert
the key into the lock and turn it clockwise to unlock the door. To lock the door, do the
reverse operation, making sure the metal pin is engaged completely. Remove the key
and put it in a secure place for safekeeping, out of the reach of children.
Normal Phenomena
You may notice the following phenomena occurring with your appliance. They are
normal and should not be a cause for alarm.
• If you hear a sound like water flowing, this is refrigerant flowing through the pipes.
• When freezer is running, the compressor and condenser feel warm, or even hot.
• Under conditions of high humidity, moisture forms on the outer cabinet or doors.
This can be wiped away with a soft clean, dry cloth.
CARE AND MAINTENANCE
Cleaning Your Appliance
• Turn off the power, unplug the appliance, and remove all items inside.
• Wash the inside surfaces with a solution of warm water and baking soda (about 2
tablespoons of baking soda to a quart of water).
• Wash the shelves with a mild detergent solution.
• Wash the outside cabinet with warm water and mild liquid detergent. Rinse well and
wipe dry with a clean soft cloth. Wring excess water out of the sponge or cloth when
cleaning the area where the controls are located, or any electrical parts.
• Use warm water to clean oil or fruit juice stains on the door gasket to retain its
elasticity. Putting a little talcum powder on the surface of the gasket will prolong its
service life.
• To avoid damaging the surfaces of the unit, do not use steel wool, a steel brush or
any abrasive material when cleaning.
Failure to unpl ug the appliance duri ng cleaning could res ult in electrical
shock or other personal injury
Young children and infirm persons should not operate the appliance
.
without supervision.
Young children should be war n ed not to pl ay with the appliance.
Page 10

10
Power Failure
Most power failures are corrected within a few hours and should not affect the
temperature of your freezer if you minimize the number of times the doors are opened.
If the power is going to be off for a longer period of time, you need to take the proper
steps to protect the contents.
Vacation Time
• Short vacations: Leave freezer operating during vacations of less than three weeks.
• Long vacations: If the freezer will not be used for several months, remove all items
and turn off the appliance. Clean and dry the interior thoroughly. To prevent odor
and mold growth, leave the door open slightly.
Moving Your Appliance
1. R emov e all food items from the freezer.
2. Securely tape down the shelves and any other loose items inside the freezer.
3. Tape the door shut.
4. Keep the freezer in its upright position during transportation. Also, protect the
outside with a blanket or similar covering.
Power Cord
If the power cord is damaged, it must be replaced by the manufacturer, its service agent
or a similarly qualified person in order to avoid an electrical hazard.
Energy-Saving Tips
• The appliance should be located in the coolest area of the room, away from heat-
producing appliances and out of dir ect sunl i g ht.
• Ensure that the unit is adequately ventilated. Never cover air vents.
• Do not keep the door open any longer than necessary.
Page 11
11
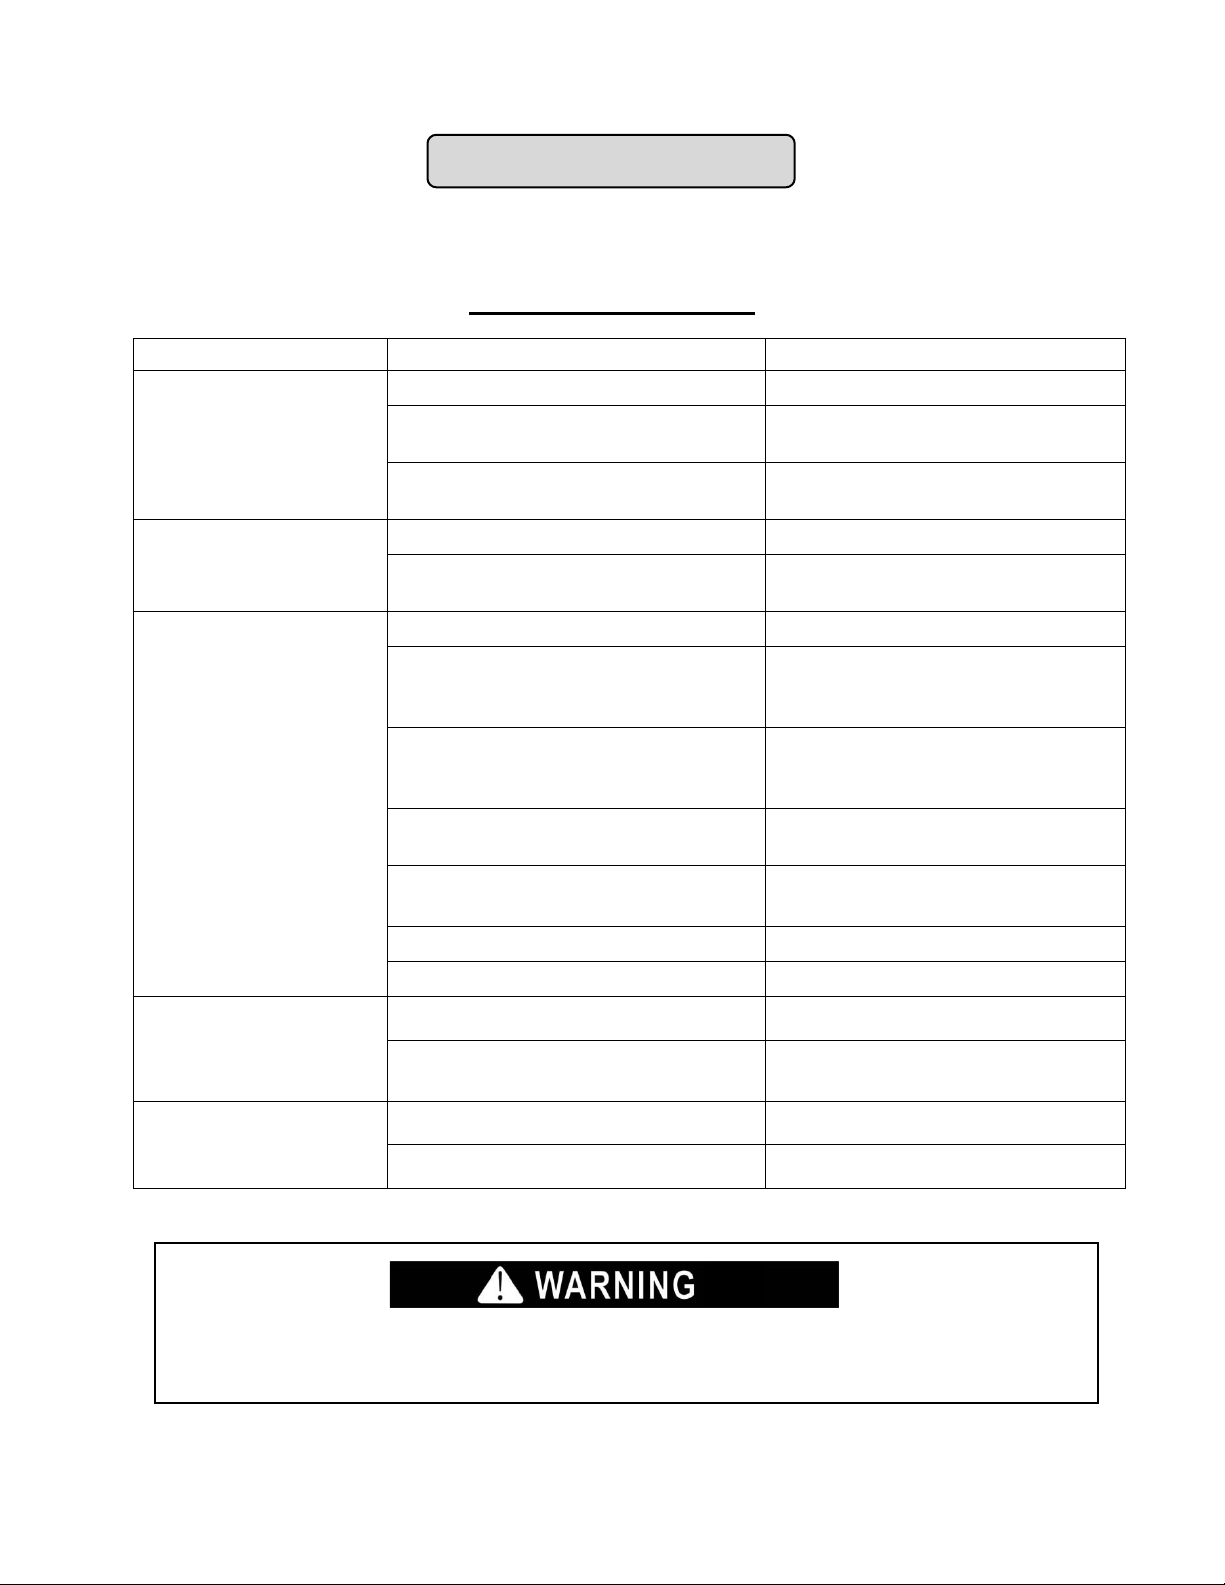
TROUBLESHOOTING
You can solve many common problems easily, saving you the cost of a possible service call.
Try the suggestions below to see if you can solve the problem before calling the servicer.
Troubleshooting Guide
PROBLEM POSSIBLE CAUSE SOLUTION
Adjust temperature control.
Reconnect the plug to power
source.
Reset circuit breaker or replace
fuse.
The unit does not
operate.
Temperature control is set to 0
Bad plug connection
Tripped circuit breaker or blown fuse
The internal
temperature is too low.
The internal
temperature is too high.
Compressor operates
continuously.
Operation is too noisy.
Temperature control is set too high.
Thermostat does not work.
Temperature control is set too low.
Poor heat dissipation and ventilation
of condenser
Too much warm food was put in at
one time.
Too much food stored at one time.
Doors were opened frequently or
held open too long.
Thick frost
Freezer is too near a source of heat.
The appliance is not level.
The freezer is too close to a wall or
cabinet.
Adjust temperature control.
Call our service department for
repair suggestions.
Adjust temperature control.
Allow more space at back of
freezer. Be sure ventilation slots
are clear.
Allow food to come to room
temperature before putting into
freezer.
Reduce the quantity of stored
food.
Decrease frequency and length of
time of door opening.
Defrost.
Relocate the unit.
Level or relocate the appliance.
Move the unit away from the
adjacent surface.
Light is not on.
If the freezer develops problems that cannot be solved by referring to the char t above,
do not try to dismantle the unit yourself. This could void your warranty. Instead, refer
to an authorized service center or call SUMMIT Customer Service at 1-800-932-4267.
Light switch is off.
Bulb is burned out.
Turn on switch at back of cabinet.
Call Service Center.
Page 12

12
LIMITED WARRANTY
FELIX STORCH, INC.
For parts and accessory ordering,
WARNING! This product may contain chemicals known to the state of California
ONE-YEAR LIMI TED WARR ANTY
Within the 48 contiguous United States, for one year from the date of purchase, when this appliance is operated and
maintained according to instructions attached to or furnished with the product, warrantor will pay for factory-specified
parts and repair labor to correct defects in materials or workmanship. Service must be provided by a designated
service company. Outside the 48 states, all parts are warranted for one year from manufacturing defects. Plastic
parts, shelves and cabinets are warranted to be manufactured to commercially acceptable standards, and are not
covered from damage during handling or breaka ge.
5-YEAR COMPRESSOR WARRANTY
1. The compressor is covered for 5 years.
2. Replacement does not include labor.
ITEMS WARRANTOR WILL NOT PAY FOR:
1. Service calls to correct the installation of your appliance, to instruct you how to use your appliance, to replace or
repair fuses or to correct wiring or plumbing.
2. Service calls to repair or replace appliance light bulbs or broken shelves. Consumable parts (such as filters) are
excluded from warranty coverage.
3. Damage resulting from accident, alteration, misuse, abuse, fire, flood, acts of God, improper installation,
installation not in accordance with electrical or plumbing codes, or use of products not approved by warrantor.
4. Replacement parts or repair labor costs for units operated outside the United States.
5. Repairs to parts or systems resulting from unauthorized modificatio ns made to the app lian c e.
6. E xpenses for travel and transportation for product service in remote locations.
7. The removal and reinstallation of your appliance if it is installed in an inaccessible location or is not installed in
accordance with published installation instructio ns.
DISCLAIMER OF IMPLIED WARRANTIES; LIMITATION OF REMEDIES
CUSTOMER'S SOLE AND EXCLUSIVE REMEDY UNDER THIS LIMITED WARRANTY SHALL BE PRODUCT
REPAIR AS PROVIDED HEREIN. IMPLIED WARRANTIES, INCLUDING WARRANTIES OF MERCHANTABILITY
OR FITNESS FOR A PARTICULAR PURPOSE, ARE LIMITED TO ONE YEAR. WARRANTOR SHALL NOT BE
LIABLE FOR INCIDENTAL OR CONSEQUENTIAL DAMAGES. SOME STATES DO NOT ALLOW THE EXCLUSION
OR LIMITATION OF INCIDENTAL OR CONSEQUEN TIAL DAMAGES, OR LIMITATIONS ON THE DURATION OF
IMPLIED WARRANTIES OF MERCHANTABILITY OR FITNESS, SO THESE EXCLUSIONS OR LIMITATIONS MAY
NOT APPLY TO YOU. THIS WARRANTY GIVES YOU SPECIFIC LEGAL RIGHTS AND YOU MAY ALSO HAVE
OTHER RIGHTS, WHICH VARY FROM STATE TO STATE.
to cause cancer or birth defects or other reproductive harm. For more information,
visit: www.summitappliance.com/p rop 65
Chemicals known by the manufacturer to be present in this product in concentrations
higher than threshold limits: NONE.
770 Garrison Avenue
Bronx, NY 10474
Phone: (718) 893-3900
Fax: (844) 478-8799
www.summitappliance.com
troubleshooting and helpful hints, visit:
www.summitappliance.com/support
Printed in China
 Loading...