

Page 1
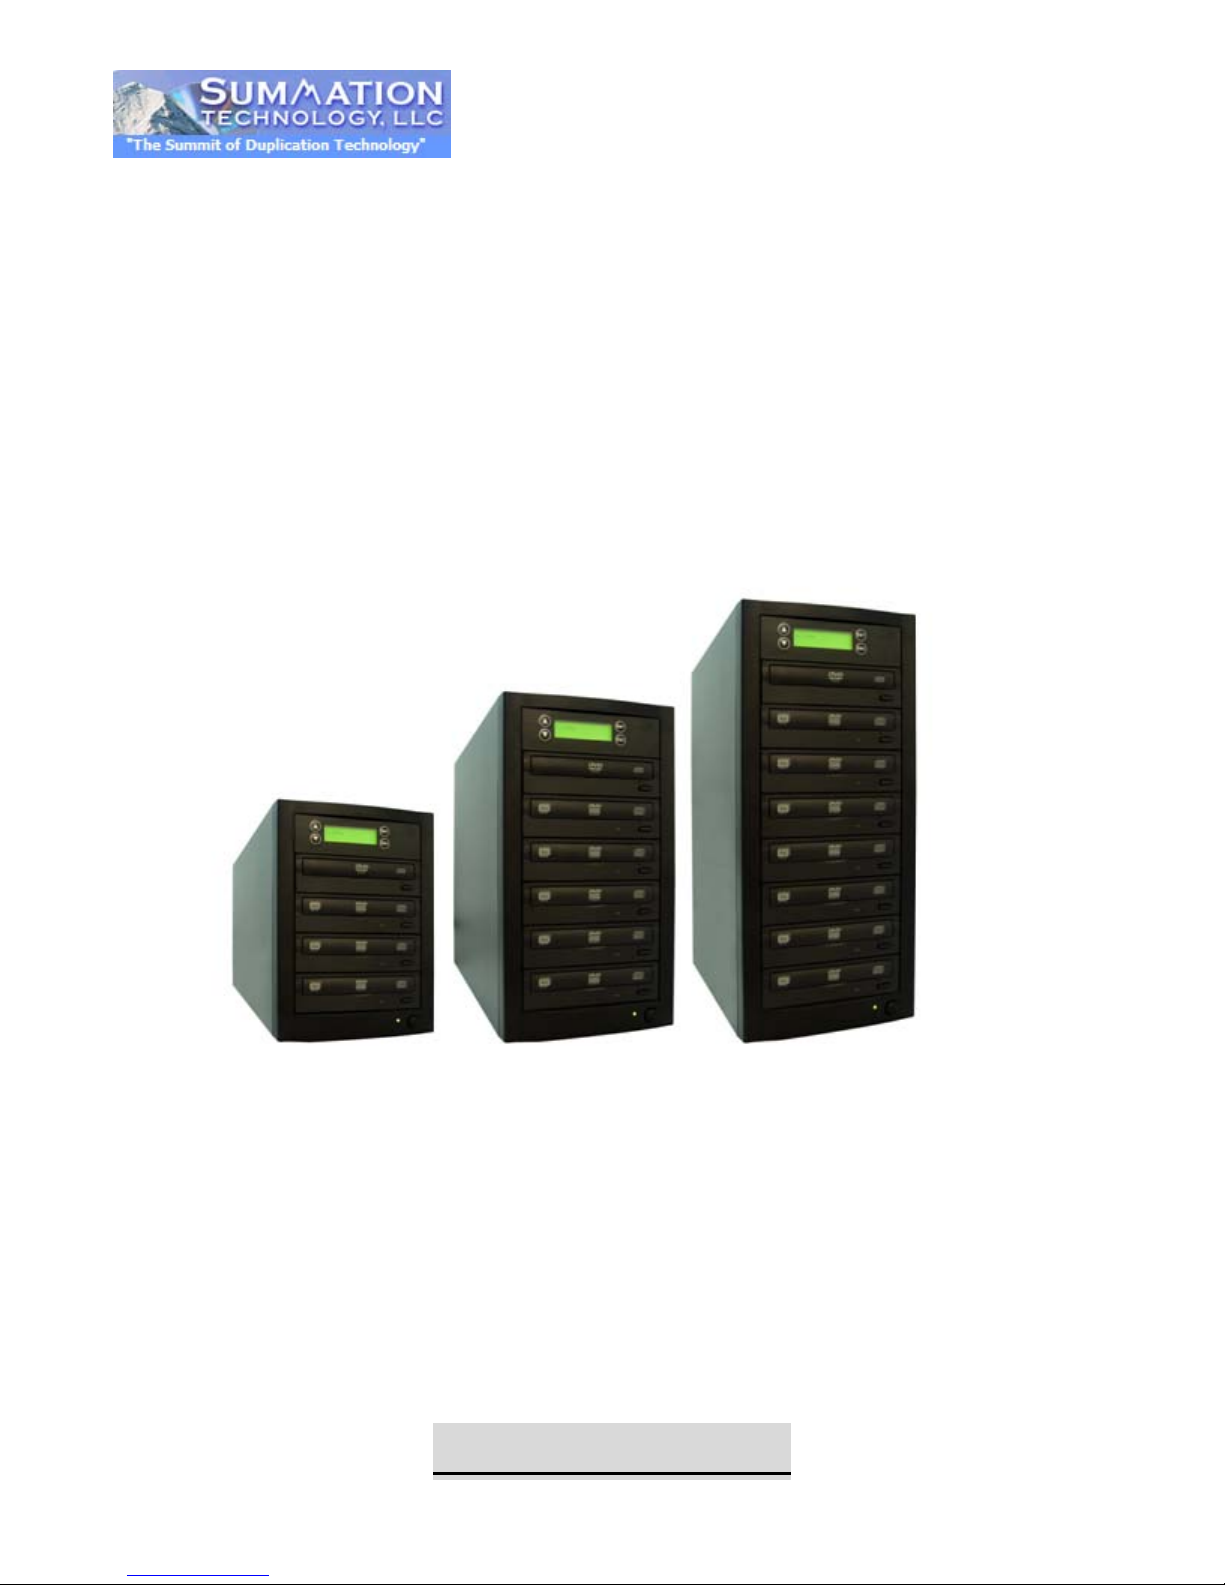
SummitPro
DVD/CD Disc Duplicator
250GB Hard Drive
USERS MANUAL
Page 2

CONTENT
Introduction
Control Panel
Menu Overview
Operation Guide
1. Copy
2. Test
3. Copy & Verify
4. Copy & Compare
5. Verify
6. Compare Disc
7. Set Burn Speed
8. Select Source
9. Audio Track Edit
10. Utility
10.1 Pre-scan
10.2 Quick Erase
10.3 Full Erase
10.4 Eject All Disc
10.5 Disc Info.
10.6 Drive Info.
10.7 System Info.
10.8 Update BIOS
10.9 Copy Counter
11. Setup
11.1 Auto Start Time
11.2 Display Mode
11.3 Button Beep
11.4 Eject on Start
11.5 Reader Speed
11.6 Language
11.7 Clear Setup
11.8 Advanced Set up
11.8.1 Power on Time
11.8.2 Start-up Menu
11.8.3 Skip Read Error
11.8.4 Change Bad Master Disc
11.8.5 CD Overburn
11.8.6 Copy C D-text
11.8.7 Copy UPC/ISRC
11.8.8 Show HDD Image Name
11.8.9 Boot Password
11.8.10 Set Password
11.8.11 Copy Special Format Disc
12. Image Manager
12.1 Select Image
12.2 Disc to Image
12.3 Reader Speed
12.4 Show Image Info.
12.5 Rename Image
12.6 Delete Image
12.7 Show HDD Info.
12.8 Format HDD
12.9 Load & Copy
13. Trouble Shooting Guide and FAQ’s
Page 3

INTRODUCTION
The SummitPro stand-alone DVD/CD Disc Duplicator, featuring 24X DVD SATA drives. The system will copy 1
through11 (depending on the number of targets on your duplicator) discs at a time at maximum speeds of 48x on
CD’s and 24x on DVD’s.
An easy to use operating control panel includes a LCD screen and 4 push buttons. All operating messages and
information including function list, instructions, operating status, or error messages will be in real time display on
the screen. Users can easily read and follow the instructions on the LCD to complete their duplication jobs,
usually without referring to the User Manual.
Getting Started
Thank you...
...for choosing the SummitPro Standalone DVD Duplicator. T hese duplicators are sec ond to none in terms of
speed and accuracy and we hope it will be a valuable addition to your organization for years to come.
Unpacking and Inspection
When unpacking your unit, inspect the carton and packaging material for damage. Damages that may have
occurred during sh ipping coul d cause ali gnment and operation err ors. An y damages f ound upon rec eipt of your
unit should be immediatel y reported to Summation Technology.
Important!: Keep your packaging! In the event you need to ship the unit back to the factory for repair, the
product must be ship ped in the m anner in which it was received. Other c ontainers are not satisfactor y and may
void your warranty! If the container is lost or destroyed, another may be purchased from Summation Technology.
Choosing a Location
Placing your unit in an uns uitable locatio n can cause a num ber of problem s. Many problem s can be avoided by
following these guidelines.
• The unit must be placed on a f lat, level surface. A tilt to the unit’s bas e can cause errors in calibratio n
during use. The surface must also be relatively stable and resistant to bumps and jarring.
• The surface the unit is placed on must be abl e to hold 100+ pounds a nd be resistant to bowing under
such weight.
• Place the unit in a location with adequate a ir circulation. Closets or ca binets are not suitable as heat
build-up can cause th e unit to malfunc tion. Likewise, d o not place the unit on or near an y heat sources
such as heating vents or server racks.
The unit must not be placed in an area with direct sunlight, excessive dust,
Page 4

1. Read these instructions - All the safety and
9. Do not defeat the safety purpose of the grounding-
dropped.
Important Safety instructions
Please be aware of the following installation and operation precautions.
operating instructions should be read before use of
this system.
2. Keep these instructions - The safety and operating
instructions should be retained for future reference.
3. Heed all warnings - All warnings on the system and in
the operating instructions should be adhered to.
4. Follow all instructions - All operating and use
instructions should be followed.
5. Do not use this system near water - for example,
near a bathtub, washbowl, kitchen sink, laundry tub, in a
wet basement or near a swimming pool, etc.
6. Clean only with a damp cloth. This system should be
cleaned only as recommended by the manufacturer.
7. Install in accordance with the manufacturers
instructions. Do not block any of the ventilation
openings. For example, the system should not be situated
on a bed, sofa, rug, or similar surface or placed in a built-in
installation, such as a bookcase or cabinet that may
impede the flow of air through the ventilation openings.
8. Do not install near any heat sources such as
radiators, heat registers, stoves, or other products that
produce heat.
type plug. A grounding type plug has two blades and a third
grounding prong. The third prong is provided for your
safety. When the provided plug does not fit into your outlet,
consult an electrician for replacement of the obsolete
outlet.
10. Protect the power co rd from being walked on or
pinched particularly at plugs, convenience receptacles, and
the point where they exit from the system.
11. Only use attachments/accessories specified by the
manufacturer.
12. Use only with a cart, stand,
bracket, or table specified by the
manufacturer, or sold with the system.
When a cart is used, use caution
when moving the cart/system
combination to avoid injury from tipover.
13. Unplug this system during lightning storms or when
unused for long periods of time.
14. Refer all servicing to qualified service personnel.
Servicing is required when the system has been damaged
in any way, such as power-supply cord or plug is damaged,
liquid has been spilled on, been exposed to moisture or
extreme heat, does not operate normally, or has been
Page 5

Copyright and Trademark Statement
The information contained in this work is the exclusive property of Summation Techno logy, LLC, and any
respective copyright owners. This work is protected under United States copyright law and other international
copyright treaties and conventions. No part of this work may be reproduced or transmitted for commercial
purposes, in any form or by any means, electronic or mechanical, including photocopying and recording, or by
any information storage or retrieval system, except as expressly permitted in writing.
Disclaimer--This document has been produced for informational purposes only and as a service to our
customers. The systems intended use is for copying and editing of personal audio and video data. An y
attempted use of this equipment for the duplication of copy-protected materials is a criminal act and the
manufacturer is not responsible for such illegal recordings.
Warranty and Limitation of Liability--THE INFORMATION AND/OR MATERIALS CONTAINED HEREIN ARE
PROVIDED “AS IS,” WITHOUT WARRANTY OF ANY KIND, EITHER EXPRESS OR IMPLIED, INCLUDING,
BUT NOT LIMITED TO, THE IMPLIED WARRANTIES OF MERCHANTABILITY AND FITNESS FOR A
PARTICULAR PURPOSE.
The Company shall not be liable for direct, indirect, special, incidental, or consequ enti al damages related to your
decision document, even if we are advised of the possibility of such damage.
The information in this document is subject to change without notice.
Summation Technology and the Summation Technology logo are the legal properties of Summation Technology,
LLC.
Page 6
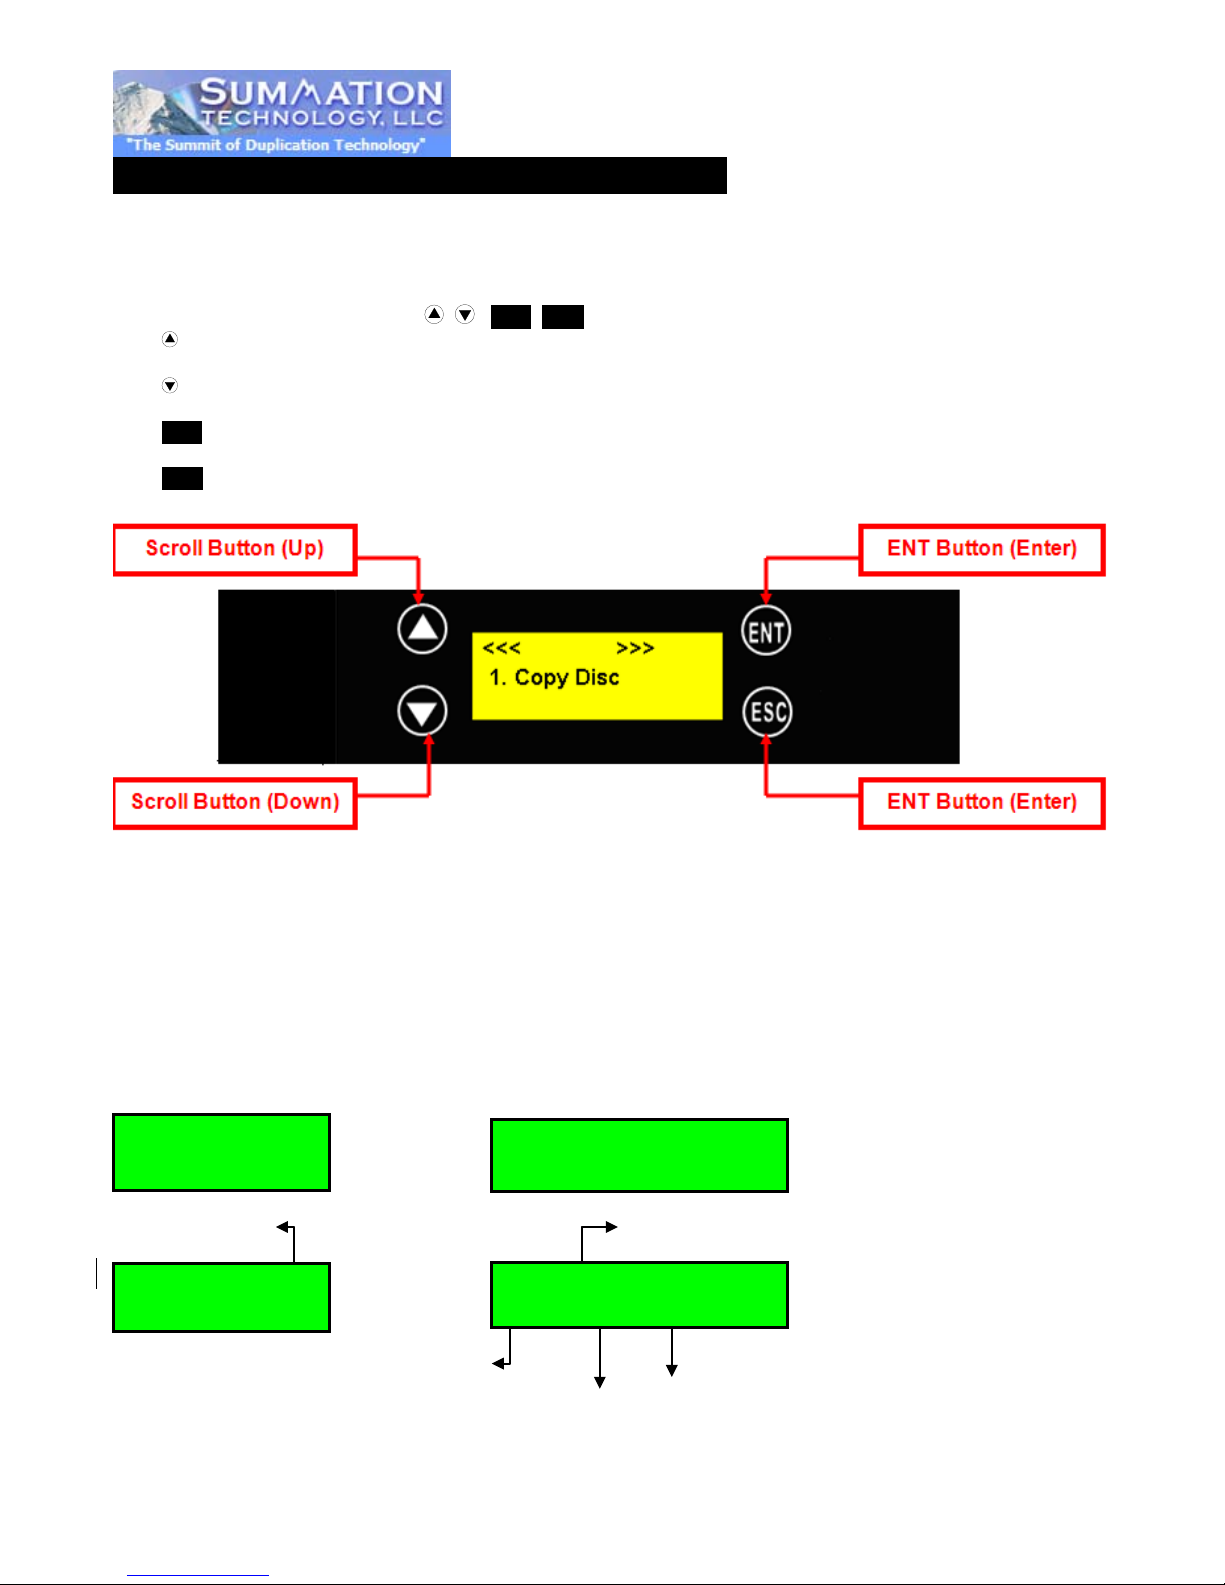
LCD FRONT PANEL
LCD Front Panel
Copy 4315M
Copy 2:30 4315M
Copy
■■■□□□□ 45%
Copy 4315M
Copy finished %
Current copy speed
Copied size
Source size
1. Control Buttons
There are 4 control buttons: , , ENT, ESC
: UP; Backward; Use this button to navigate backward in the menu.
: Down; Forward; Use this button to navigate forward in the menu.
ENT : Enter, Execute the function
ESC : Escape, Go back to previous function
2. LCD Screen
The LCD Screen is a 2x16 Mono LCD screen. The system will display function information, messages and
instructions on the LCD.
Note:
There are two display modes to show information on the LCD while copying. You can change the display
mode in “Setup” 11.2. The default setting is “Basic” mode.
4315M
45% 6.2X 1942M
← Basic
Advance # 1→
←Advance # 2
Advance # 3→
45% 1942M
Copy time elapsed
45% 6.2X 1942M
Page 7
to all target disc(s) simultaneously.
Simulates the copy process, but no data is recorded onto the blank disc(s).
Note: Test mode can only be done with DVD-R and CD-R media only.
disc(s) to ensure readability of the copied disc(s).
Copies the master CD/DVD, and then immediately follows the copy process with
Note: The “Compare” function cannot be used with audio CDs.
disc(s) can be read back.
Verifies the presence of data on the copied disc(s) to ensure that the copied
disc(s) can be read back.
Allows the speed settings to be changed for various formats
duplicator, including the Hard Disk Drive (HDD).
Allows for the selection of individual track(s) from different master audio CDs to
create custom compilation.
selected track(s) onto all target discs.
Closes the target discs when all of the track(s) are burned on to all target discs.
step.
Displays the information regarding the track(s) on the disc(s) and how much
space is remaining on the target disc(s).
the master disc can be copied in the duplicator.
Erases all rewritable media (CD-RW and DVD+/-RW, DVD+/-RW DL).
Erases all rewritable media (CD-RW and DVD+/-RW, DVD+/-RW DL).
Ejects all disc trays, including source drive.
Displays basic information of the discs inserted, such as disc type, amount of
displays the media book type, available space and speed of the media.
Displays information of all drives in the duplicator including the Reader, HDD (if
present) and Writer drive(s).
Displays the duplicator controller information, such as the hardware version,
compatible with the duplicator before performing the update.
duplicator.
Menu Overview
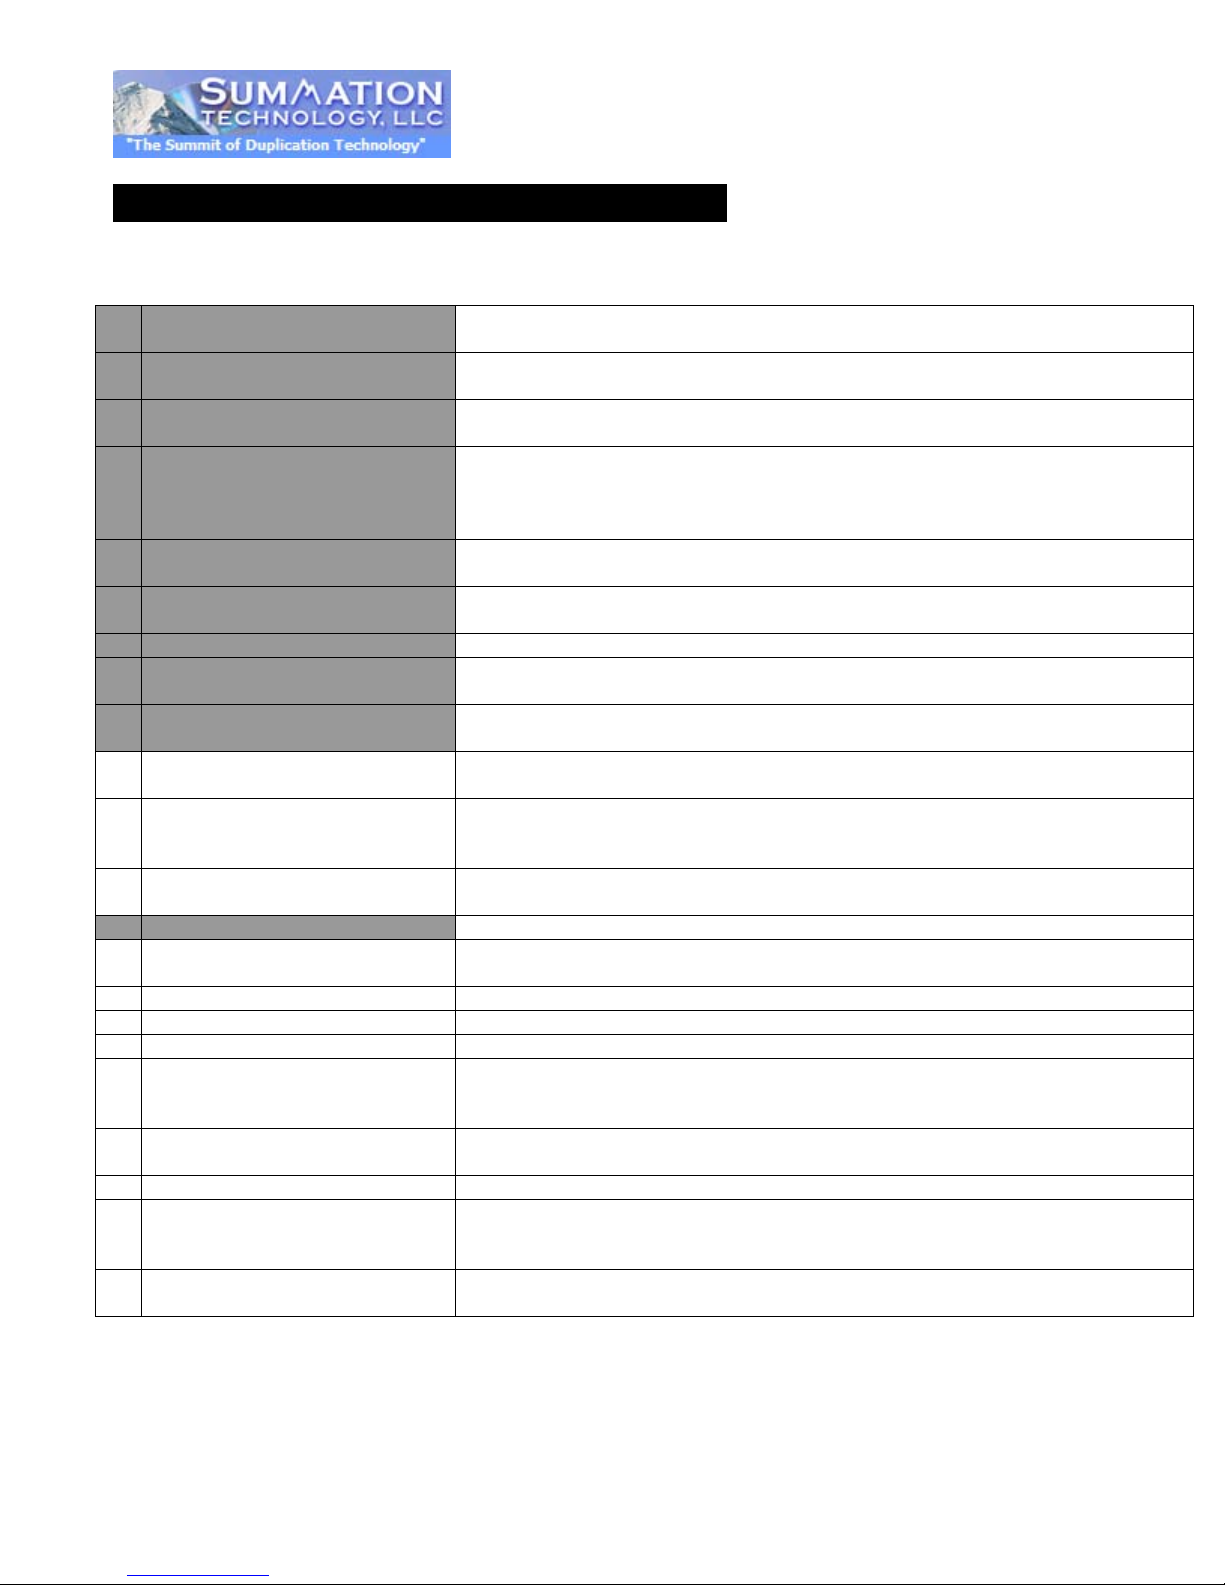
Below is a quick reference chart of the functions available on the SummitPro DVD Duplicators.
1. COPY
2. TEST
Copies the master CD/DVD. All contents of the master disc will be duplicated on
3. COPY & VERIFY
4. COPY & COMPARE
5. VERIFY
6. COMPARE
7. SET BURN SPEED
8. SELECT SOURCE
9. TRACK EDIT
9.1 COPY TRACK
9.2 CLOSE DISC
9.3 DISC INFO
10. UTILITY
10.1 PRE-SCAN
Copies the master CD/DVD, and then verifies the presence of data on the copied
a bit-for-bit comparison between the master disc and copied disc(s) to ensure
exact duplication.
Verifies the presence of data on the copied disc(s) to ensure that the copied
Allows the source drive to be changed to any of the available drives in the
Allows the selection of individual track(s) from the master CD and copies the
Note: The copied disc(s) will NOT play back without this step. Do NOT skip this
Performs a scan on the master disc before the copy process starts and ensures
10.2 QUICK ERASE
10.3 FULL ERASE
10.4 EJECT ALL DISCS
10.5 DISC INFO
10.6 DRIVE INFO
10.7 SYSTEM INFO
data on disc for master disc(s) (in MB) and media book type. For blank media,
Updates the firmware for the controller.
10.8 UPDATE BIOS
10.9 COPY COUNT
Note: Please make sure that the firmware is approved by the manufacturer and
Counts the number of successful and failed copies of CD and DVD made by the
Page 8
Allows the duplicator to automatically start one of six following functions once the
are closed: Copy, Test, Copy & Verify, Copy & Compare, Verify and Compare.
Sets the amount of information displayed on the LCD during the performance of
various functions.
Enables or disables the audio feedback when buttons are pressed.
Allows the duplicator to eject disc tray(s) with disc present inside upon boot-up.
Sets the speed at which discs are read during various processes.
Portuguese for selection.
Resets all settings back to original factory settings
Sets system warm up time from 5 sec to 99 sec. Default is 15 seconds.
Assigns a command to be displayed first after the duplicator has been
initialized.
Enables the option to halt the duplication process if there is an error on the
errors as the master disc.
error is detected on the master disc.
Enables or disables the duplication of over burned CDs.
Enables or disables the copying of the CD sub code (CD-TEXT) information for
audio CD’s.
Enables or Disables copying UPC/ISRC.
HDD as the source drive.
Sets password protection for machine boot-up.
Sets password for entry to Set-up Menu.
Enable or disable copying special format discs.
To select Image file as Sources to be copied to discs.
To copy Source Disc to HDD and save as Image file.
ONLY when performing 12.2 Disc -> Image function, you can set the Reading
Speed of reading the master source disc.
To check image file information and file size.
Change the name of an image file stored on the HDD.
To delete image file in HDD. If the file is selected as source file, you are not able
to delete it unless you go back to 12.1 to re-select
To check the information in HDD, such as how many discs are stored and HDD
available space.
This feature will allow you to format the HDD. However, you will not be able to
Consolidates the imaging and burning process into one step.
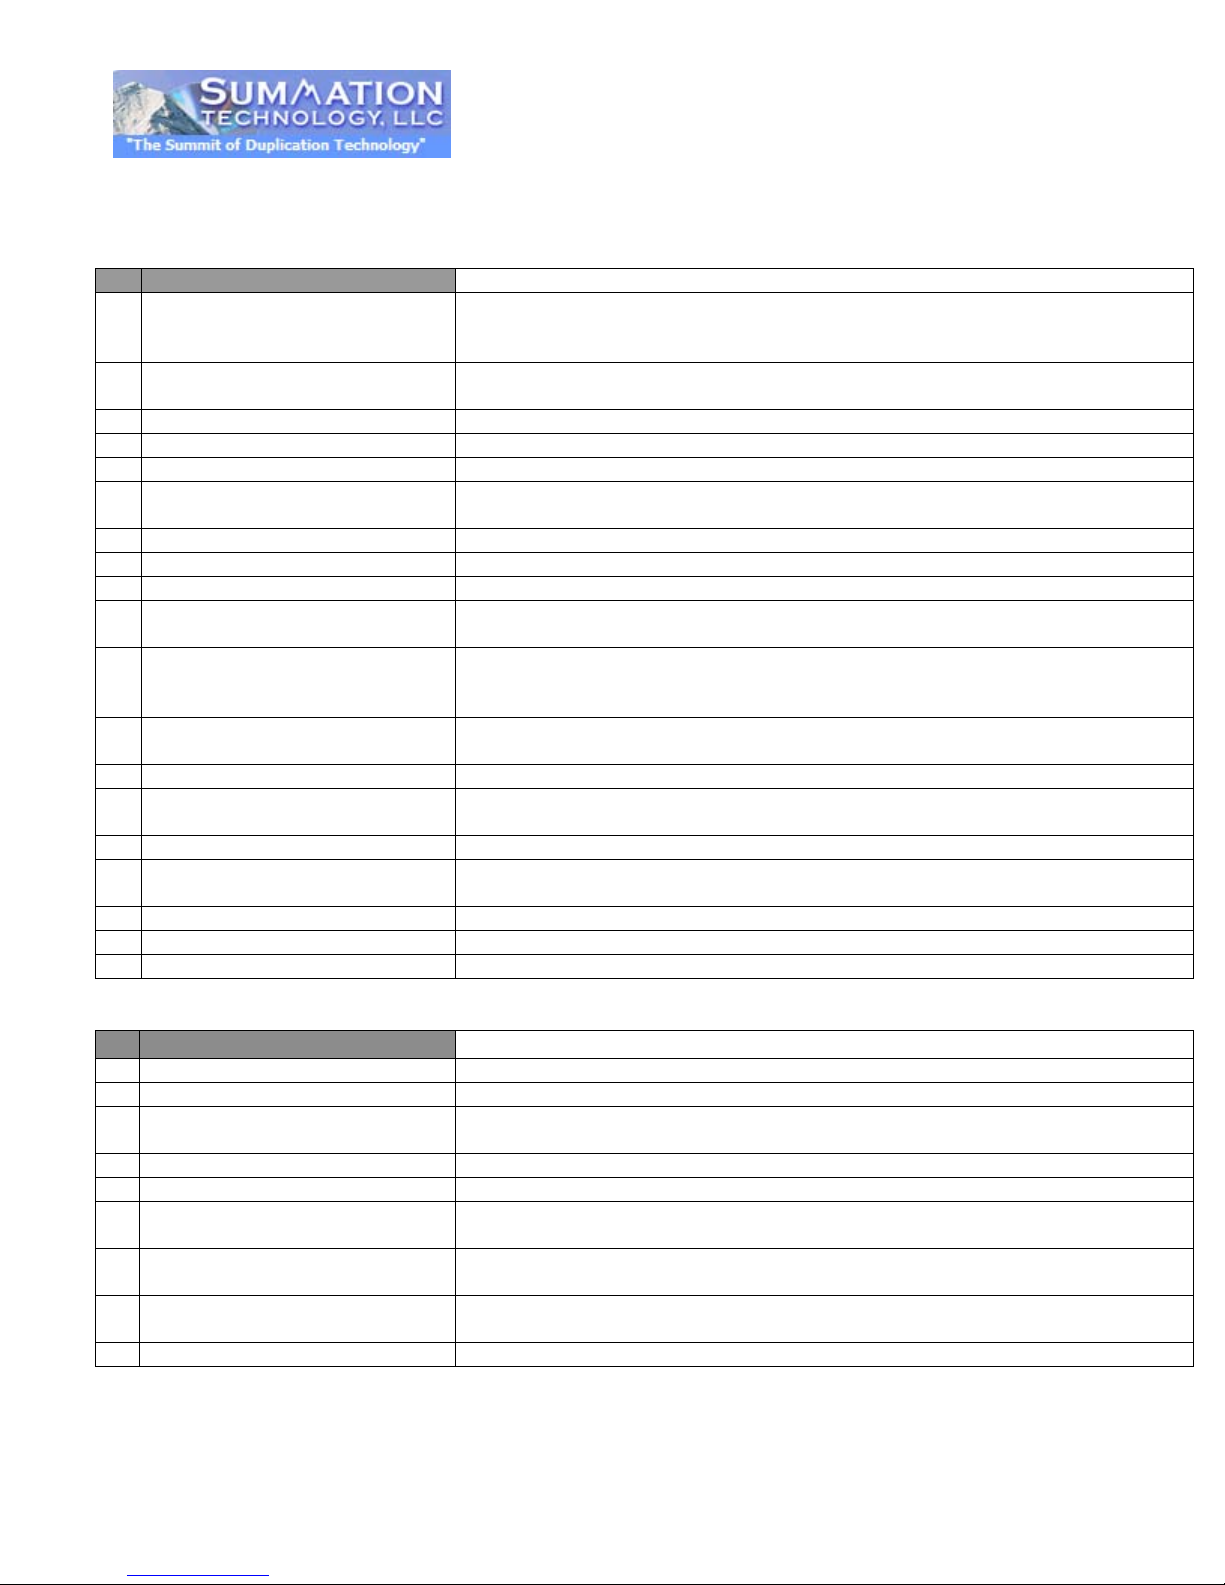
11. SETUP
11.1 AUTO START TIME
11.2 DISPLAY METHOD
11.3 BUTTON BEEP
11.4 EJECT ON START
11.5 READER SPEED
11.6 LANGUAGE
11.7 CLEAR SET-UP
11.8 ADVANCED SET-UP
11.8.1 POWER ON TIME
11.8.2 START-UP MENU
11.8.3 SKIP READ ERROR
11.8.4 CHANGE BAD MASTER DISC
11.8.5 CD OVER BURN
11.8.6 COPY CD TEXT
11.8.7 COPY UPC/ISRC
11.8.8 SHOW HDD IMAGE NAME
master disc and desired number of target disc(s) are inserted and the drive trays
Sets system language interface, there are English, Japanese, Spanish and
master disc. Disables the option to allow the process to continue with the same
Enables or disables changing of a master disc during the copy process when an
Allows the image name to be displayed on the LCD screen when selecting the
11.8.9 BOOT PASSWORD
11.8.10 SET PASSWORD
11.8.11 COPY SPECIAL FORMAT DISC
12. Image Manager
12.1 Select Image
12.2 Disc==> Image
12.3 Reader Speed
12.4 Show Image Info
12.5 Rename Image
12.6 Delete Image
12.7 Show HDD Info
12.8 Format HDD
12.9 Load & Copy
format the HDD if the HDD image was selected as source.
Page 9
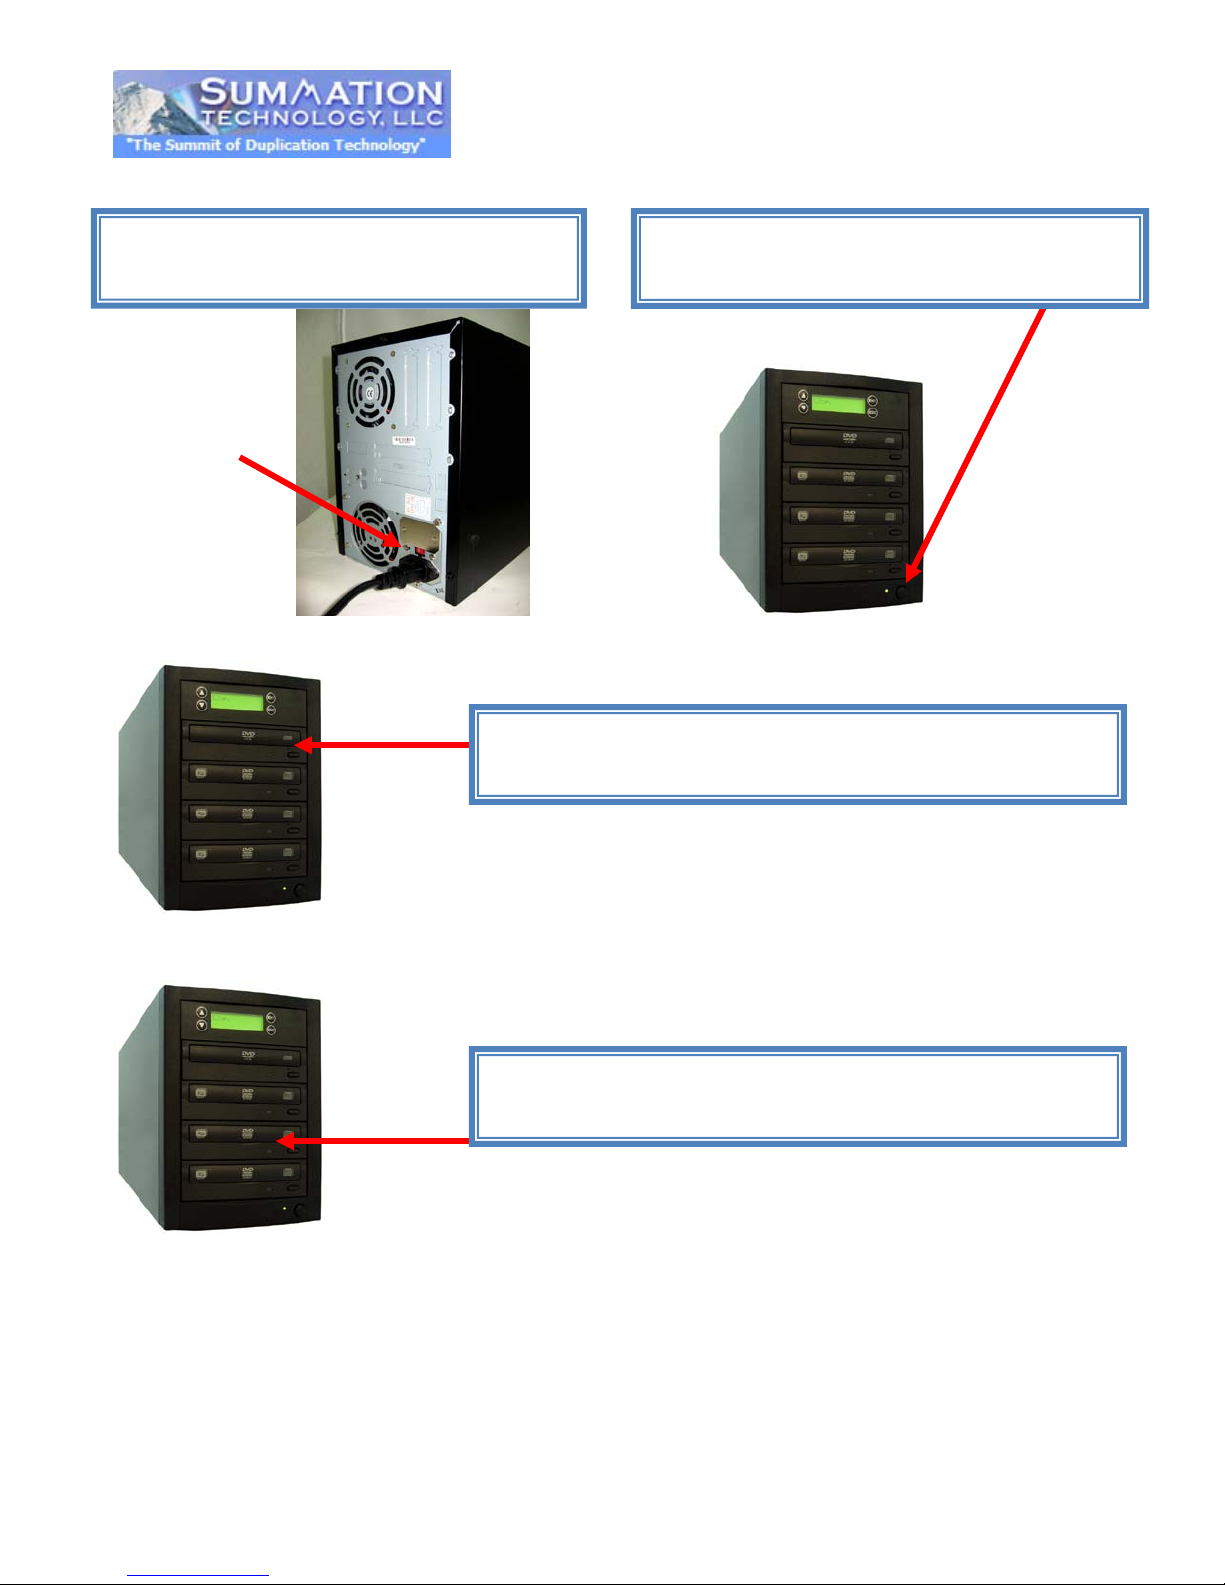
Step 1: Plug in power cord to back of the unit.
Step 2: Turn on power button and wait for LCD
Step 3: Eject reader tray (top drive) and insert source disc.
Step 4: Eject writer trays and insert the blank discs. Close
QUICK START GUIDE
to read “Copy”.
Close reader tray.
writer trays.
Product Introduction
That’s all!! Your duplicator will do the rest and eject the copied disc in a few
minutes automatically.
Page 10
Operation Guide
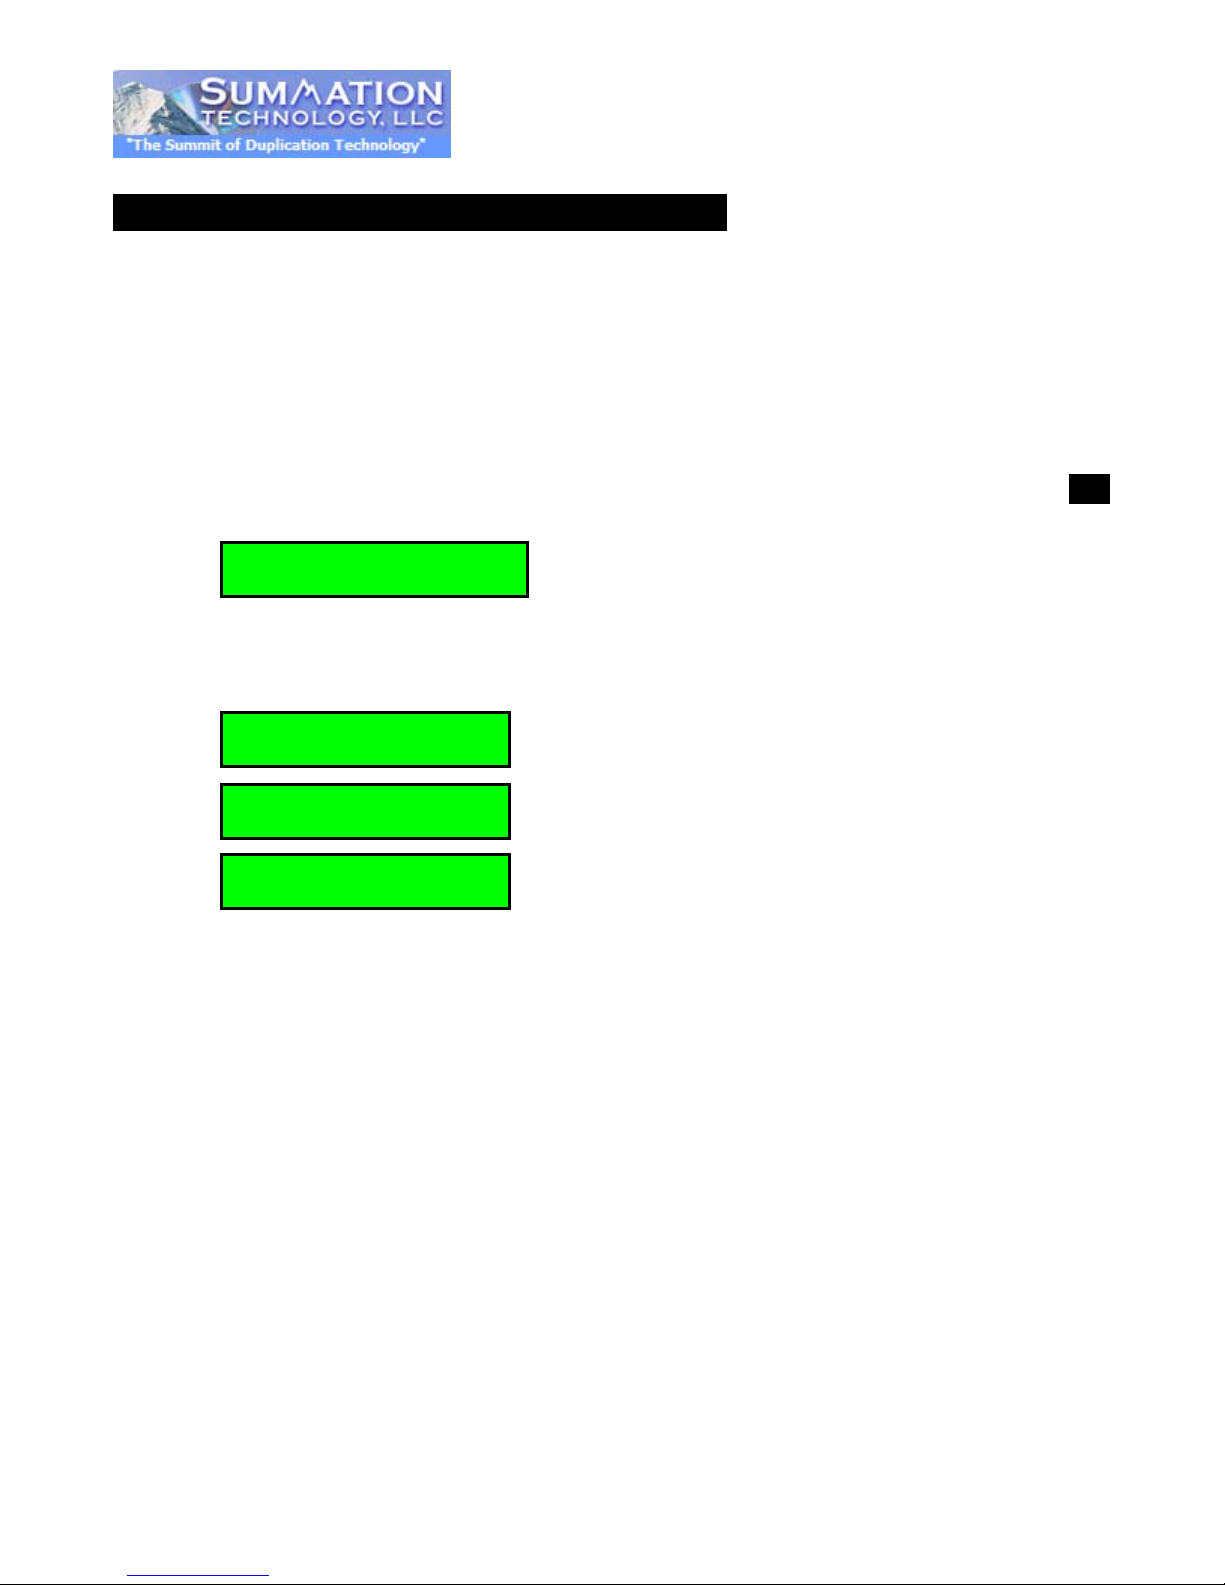
1. Copy 4315M
Copy 4315M
Loading Disc
Copy 4315M
Copy DVD 4315M
■■■□□□□ 45%
OPERATING GUIDE
1. COPY
This operation will guide you to copy your Master Disc to a Blank CD/DVD disc.
①. Turn on the duplicator.
②. Eject Drive tray of the Top Drive and place the Master disc in the tray and Close the drive tray.
③. Eject Drive tray of the Bottom Drive and place blank disc on the tray and close the tray. Press ENT
to execute CD/DVD copy.
④. When the system starts the copy process, it will: Load the Disc, Analyze the Disc, and then start to
⑤. Once the copy process is completed, the disc trays wil l ej ec t and t he dis p lay will read “Copy Result:
1 disc detected
Copy. During the copy process, the LCD will display the Master Disc ’s data size and completion
percentage of copy process.
Analyze Disc…
Pass X, Fail Y,” with X being the number of successful copies, and Y being the number of failed
copies. To reduce copy failure, please refer to the troubleshooting section of the manual.
Page 11

2. Test 4315M
1 disc detected
Test 4315M
Test 4315M
Analyze Disc...
TEST DVD 4315M
■■■□□□□ 45%
2. TEST
①. This function simulates the copying process. The process is the same as COPY but it won’t write
anything on the recordable discs.
②. Press , to navigate the function menu to 2. TEST and press ENT to execute it.
③. The system will auto-detect the blank disc and start to simulate the process of COPY, just pr es s
ENT to execute.
★☆
Loading Disc
When simulation process finished, all disc tray of test-success will eject automatically and LCD will
show the amount of PASS and FAIL.
Note: TEST is unable to support DVD+R blank discs.
★☆
Note: If you put rewritable disc into writer’s tray for TEST, the rewritable disc data will be erased
completely.
Page 12
3. Copy & Verify
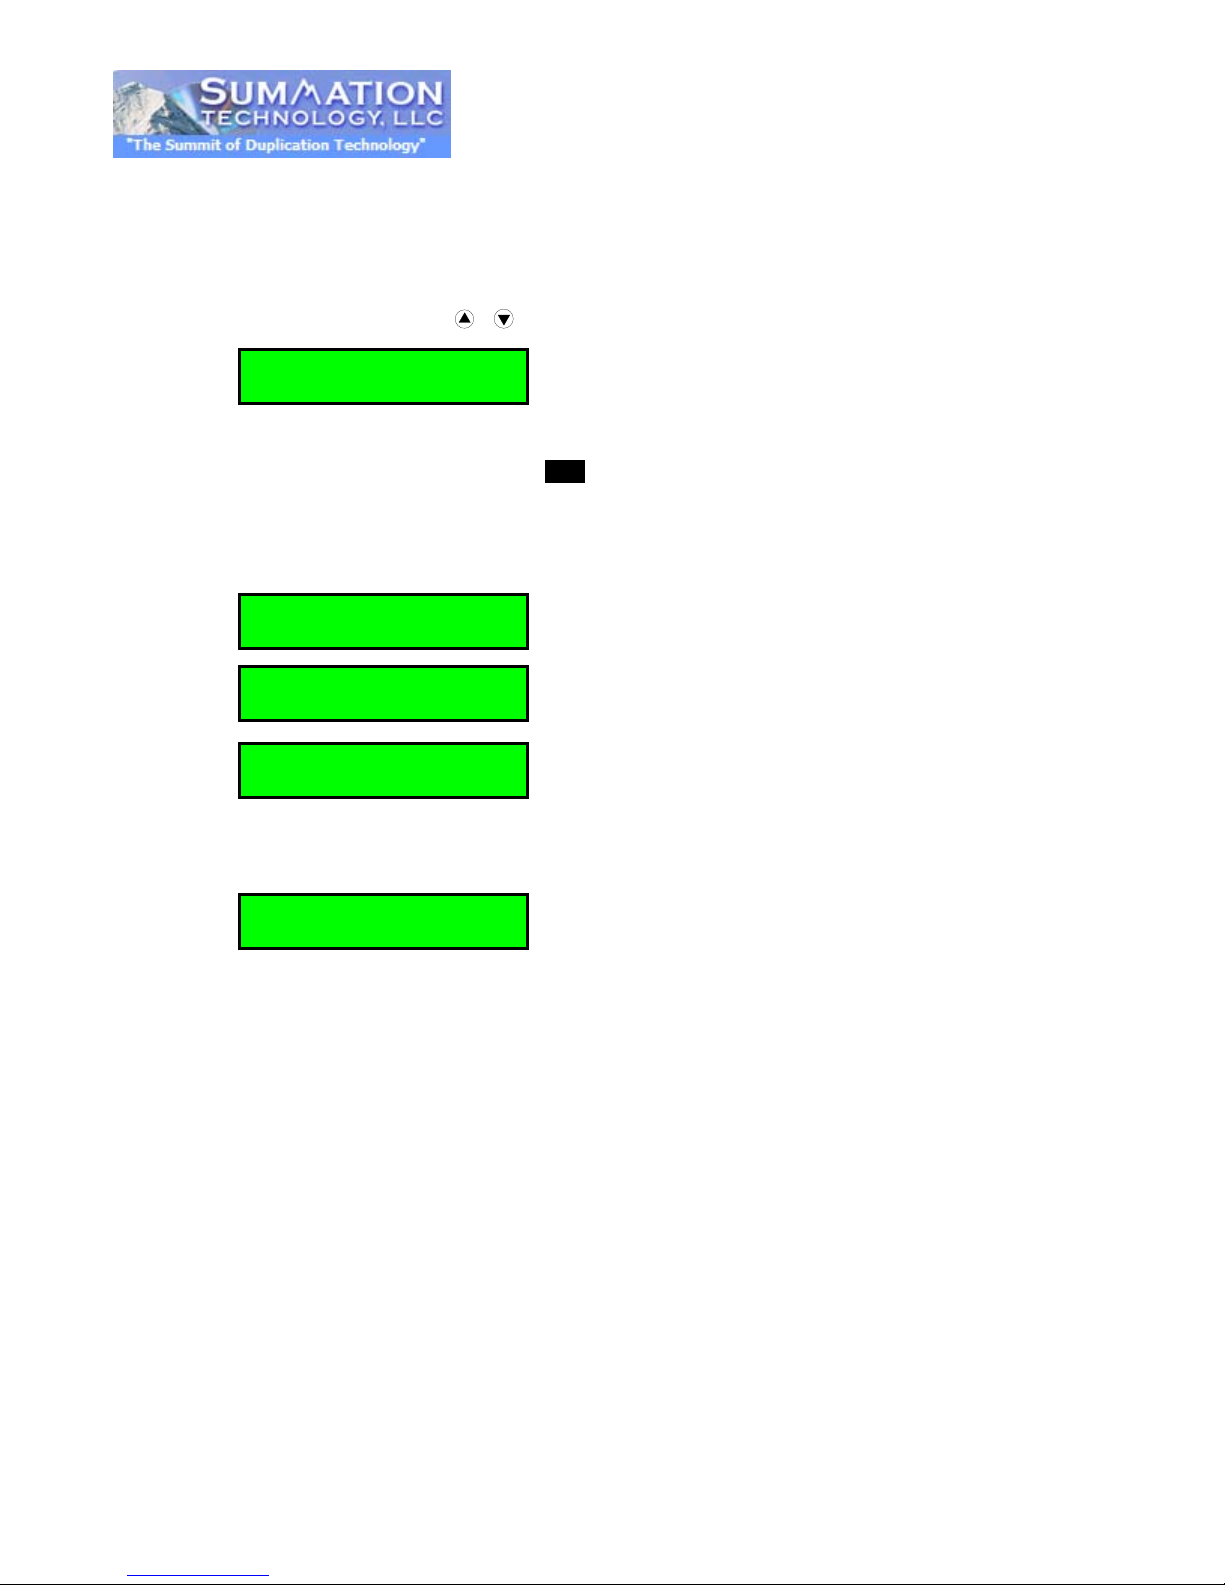
1 disc detected
Copy & Verify
Copy & Verify
Copy DVD 4315M
■■■□□□□ 45%
Verify DVD 4315M
■■■□□□□ 45%
3. COPY & VERIFY
This option will make a copy first and then verify copied discs immediately for ensuring disc readability.
①. Before starting this process, please make sure that the Master Disc and blank disc are placed in
the correct drives. Press
, to navigate the function menu to “3. COPY&VERIFY.”
②. The system will automatically detect and disp lay how many blank discs were det ected. When the
system is ready to copy, just press ENT to execute CD/DVD coping.
③. When the system s tarts the copy process, it wil l Load the disc, Ana lyze the disc, and th en start the
Copy process. During the copy process, the LCD will display Master Disc’s data size and
completion percent age of copy process.
Loading Disc
Analyze Disc…
④. Once the copy process is completed the bottom drive will open briefly, and then automatically
close again to begin the Verify process.
⑤. After a completed Copy & Verify process, a successful disc will eject automatically.
Page 13

4. Copy & Compare
Copy & Compare
Loading Disc
Copy DVD 4315M
■■■□□□□ 45%
Compare
■■■□□□□ 45%
4. COPY & COMPARE
This function will perform the copy process, and immediately follows with a comparison between the
master disc and the copied disc(s) to ensure the copies are exact duplicates of the master disc. This
command is especially useful for DVDs, data CDs and video CDs.
①. Before starting this process, please make sure that the Master Disc and blank discs are in the
correct drives.
②. The system will automatically detec t and displa y how many blank disc s were detected. Pr ess ,
to navigate the function menu to 4. COPY&COMPARE.
1 disc detected
③. Press ENT to execute CD/DVD coping.
④. When the system starts copy process, it will: Load the disc, Analyze the disc, and then start the
Copy process. During the c op y process , the LCD will dis play Master Disc’s data size and
completion percent age of copy process.
⑤. When copying is finished, the system will eject the bottom drive briefly, and then close again,
continuing the Comparison process to ensure the data of copied discs the same as source disc.
DVD 4315M
⑥. When the Comparison process is finished, a successful disc will eject automatically.
Page 14
5. Verify
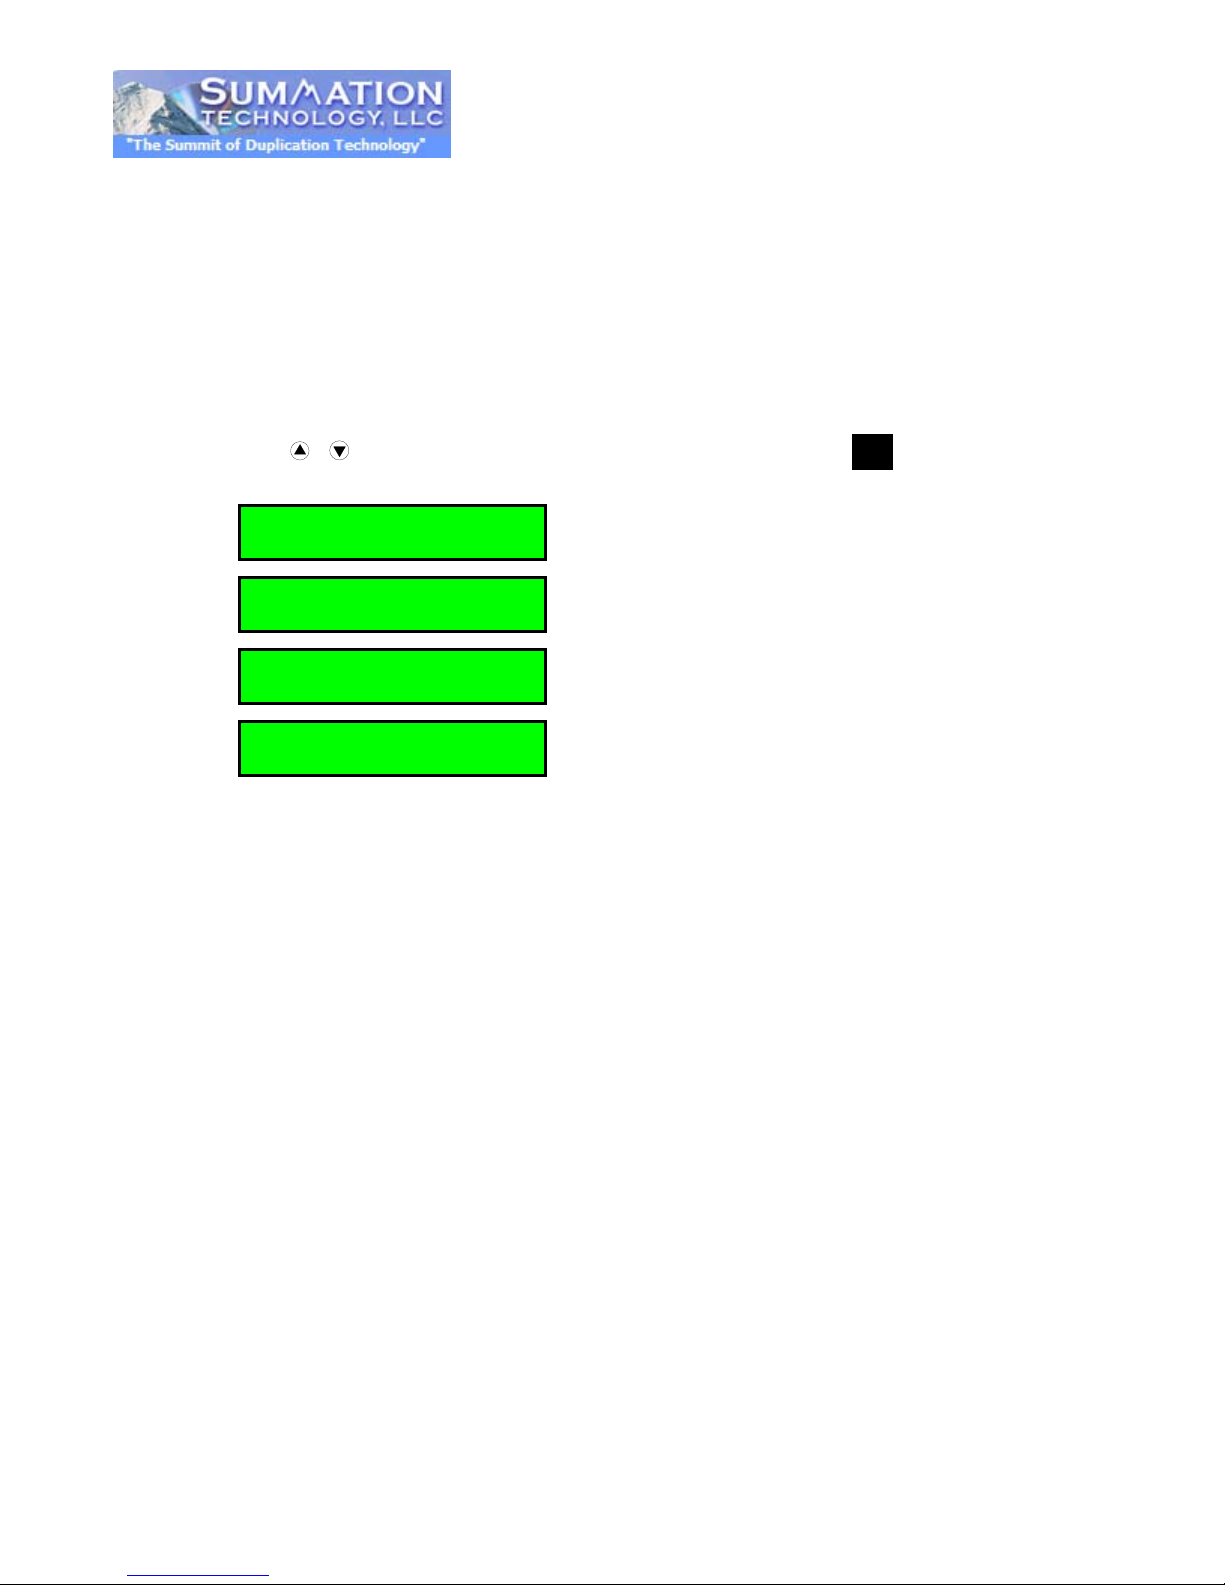
1 disc detected
Verify DVD 4315M
Loading Disc
Verify DVD 4315M
Analyze Disc…
Verify DVD 4315M
■■■□□□□ 45%
5. VERIFY
This function will perform the copy process, and immediately follow with the verification
process on all target discs. This command is especially useful for audio CD duplication.
Note: The verification process uses a Disc Readability Check to individually check the presence of data on each
copy. This process does not compare the contents of duplicated discs against that of the master. It only verifies
that the duplicated discs are readable.
①. Put Master disc and blank disc into the duplicator.
②. Press , to navigate the f unction m enu to 5. Verif y. Then, press ENT, the duplicator will Load
the disc, Analyze the disc, and start the Verification process automatically.
③. When the Verification process is finished, a successfully Verified disc will eject automatically.
Page 15
6. Compare
Compare
Compare
Compare
6. COMPARE
This command compares copied disc(s) to the Master disc and ensures that the copies
are exact duplicates of the master disc. This command is especially useful for DVDs, data CDs and
video CDs.
Note: The Compare process is a bit-by-bit comparison between the master disc and the copied discs. This operation ensures
that all of the copi es are completely identi cal to the Master disc. This command is not applicable to audio CDs.
①. Put Master disc and blank disc into the duplicator.
②. Press , to navigate the function menu to 6. Compare. Then, press ENT, the duplic ator will:
Load the disc, Analyze the disc and start the Comparison automatically.
1 disc detected
DVD 4315M
Loading Disc
DVD 4315M
Analyze Disc…
DVD 4315M
■■■□□□□ 45%
③. When a Comparison was finished, a successfully Compared disc will eject automatically.
★☆
Note: ONLY DATA Discs can utilize Compare Function
Page 16
[Burn Speed]
CD = 52
7. Set Burn Speed
[Burn Speed]
DVD = 8
[Burn Speed]
Audio CD = 40
7. SELECT SPEED
This operation will allows you to adjust and sel ect dup lication s peed on t hree differ ent disc t ypes of CD,
Audio CD, and DVD.
①. Press , to navigate to function 7. Select Speed, and press ENT.
②. You will see three disc types of CD, Audio CD, and DVD. Move , to select disc type and press
ENT to confirm your selection.
③. Press , to set burn speed and press ENT to confirm.
Page 17
D#1:DVD-ROM
8. Select Source
Source Drive ==>
8. SELECT SOURCE
This option allows you to set master reading source from any Optical Drive. In this unit it will always be
the top drive.
①. Press , to navigate to function 8. Select Source and press ENT.
②. Press , to select HDD or Optical Drive with assigned number as Reading Source and press
ENT to complete your selection.
Source〔D#1〕==>
D#1: DVD-ROM
Page 18
9. Track Edit
[Track Edit]
1. Copy Track
Track Used 59:15
1 2 3 4 5 6 7 8
b a c
d e
9 10 11 12 OK
Track 01 04:39
9. TRACK EDIT
This process will guide you to select and combine audio tracks from various CDs onto a single
customized audio CD.
9.1 Copy Track:
①. Press , to navigate to function 9. Track Edit and pr e s s ENT. You will see the sub-catalog of
1. Copy Track and press ENT again.
②. The display will read “Waiting Master Disc”. Insert the first Master Disc and press ENT.
③. Once the Master Disc is successfully read, the LCD screen will read “Waiting…Blank Disc”. Insert
blank disc into the bottom drive and press ENT.
④. Once the system has recognized the audio CD and blank disc, the LCD screen will show the song
list as numbers.
⑤. Press , to navigate to the track number that you want and press ENT to select. Continue your
selections by pressing ENT for every track you wish to select. A letter “a, b, c, d,..” will appear on
top of each selected track.
1 2 3 4 5 6 7 8
⑥. After you have finished selecting tracks from this disc, press and move cursor to the end “OK”.
Press ENT to complete and burn it.
⑦. Your submitted selections will be copied to the blank disc, the system LCD screen shows copy
progress as below.
Copy…… 00:04
⑧. When duplication was finished, the LCD shows CD-R’s usage and free space for report.
15 Free 20:42
⑨. The display will now read “[Edit Track] 1. Copy Track”. If you would like to add tracks from another
CD press ENT and repeat steps 4-6 for each new Master CD. If your selections of tracks are
complete, proceed to step 9.2.
★☆
Note: Once you finished 9.1 copy Audio Track, you NEED to perform “9.2 Close Disc” on this CD,
otherwise your customized audio CD will NOT be able to play on CD player.
Page 19
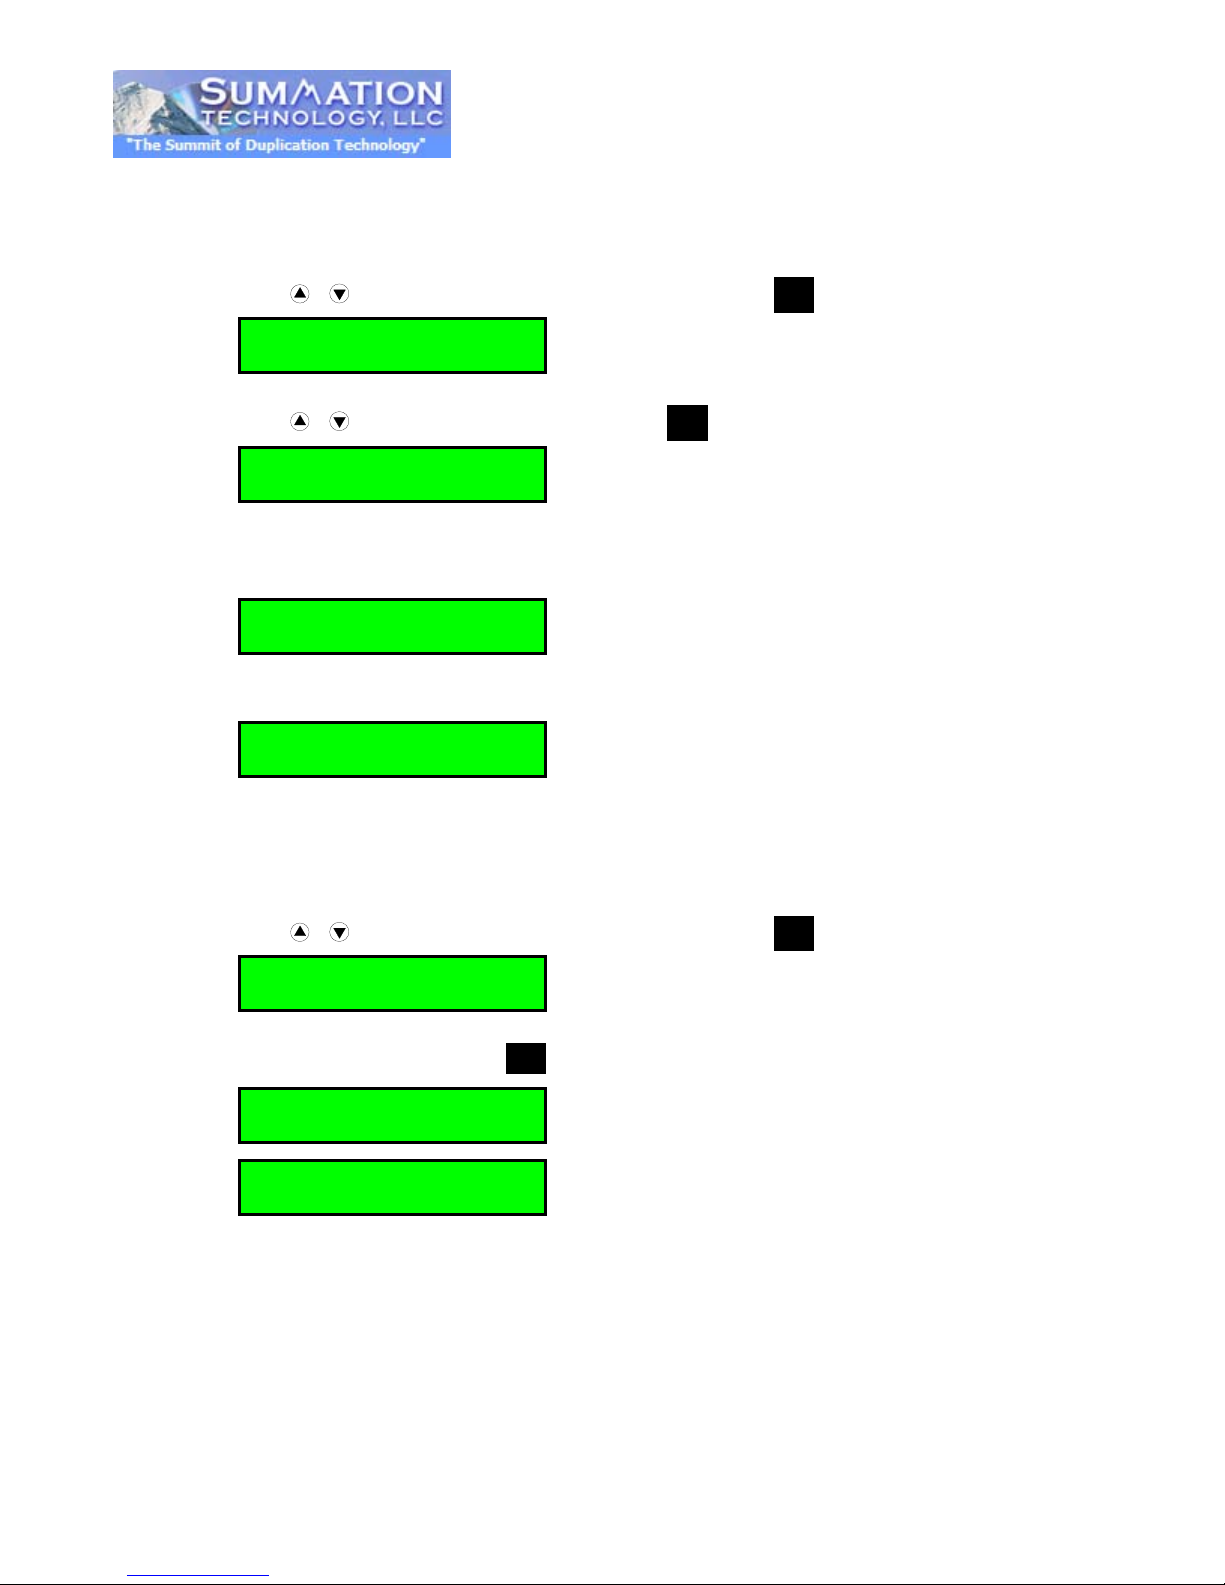
[Track Edit]
2. Close Disc
[Track Edit]
[1] 79:59
Finalizing Disc
Finished!
9. Track Edit
9. Track Edit
9.2 Close Disc
This process is the last procedure to ensure CD-R/CD-RW disc of copied tracks is a playable Audio CD.
①. Press , to navigate to function 9. Track Edit and pr e s s ENT.
②. Press , to select 2. Close Disc and press ENT to start close disc process.
③. When the system executes the Close Disc process, you will see the message on the LCD.
④. After the process is complete, the writer drive will eject the tray automatically, and you will see
“Finished!” on the LCD screen.
9.3 Disc Info.
This feature allows you to check your disc status, such as available capacity.
①. Press , to navigate to function 9. Track Edit and pr e s s ENT.
②. Select 3. Disc Info, and press ENT.
3. Disc Info.
CD-R Use 27:53
Page 20
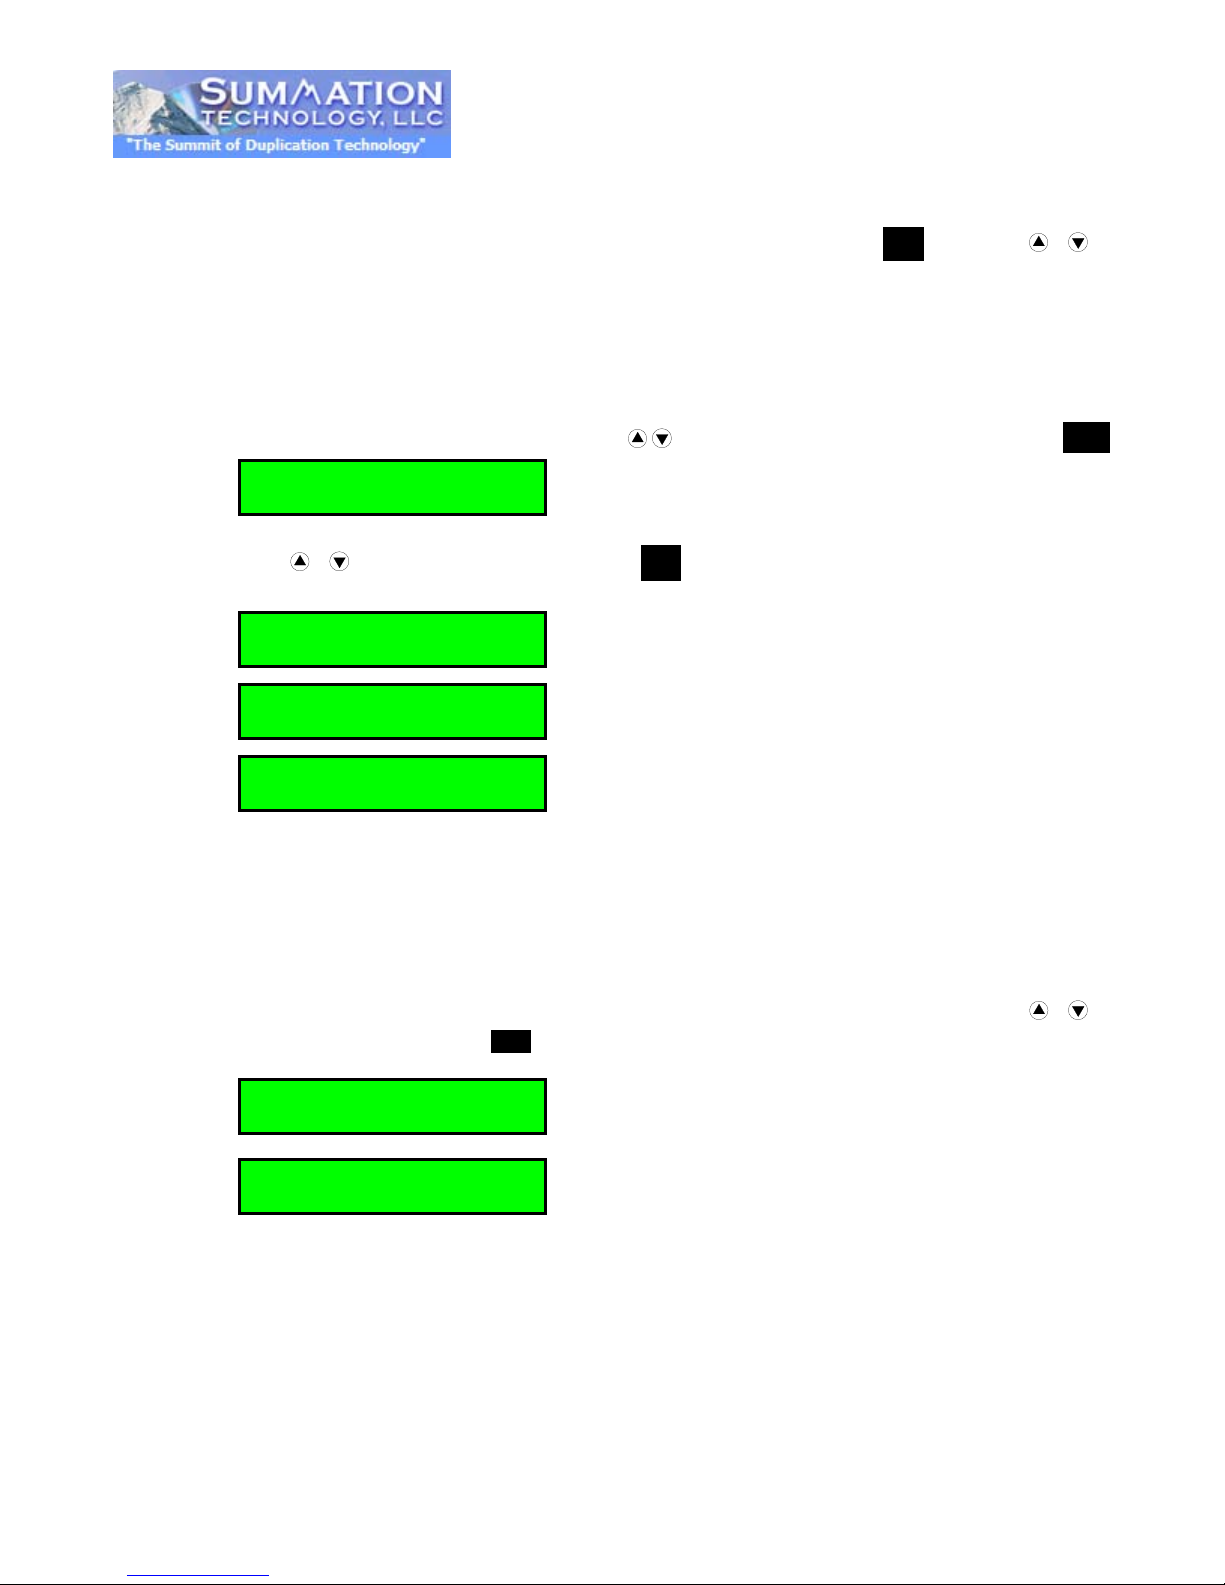
10. Utility
Quick Erase Disc
_ O _ _ _ O _ o
[Utility]
2. Quick Erase
[Utility]
PreScan DVD4315M
Prescan DVD4315M
■■■□□□□ 45%
10. UTILITY
This function group includes several Disc related functions. You can press ENT and move , to
select function you want.
10.1 Pre-scan
This feature Pre-scans the Master dis c to make sure it can be duplica ted correctly before you tr y to go
through the copy process.
①. Put the Master disc i nto t he top drive. Press , to na viga t e to f unc t ion 10. Utility an d pres s ENT.
②. Press , to select 1. Pre-scan, and press ENT. The system starts to execute the Master disc
check.
10.2 Quick Erase
This operation can qu ickly erase data of re-writable disc in the bottom drive. When erasing process is
finished, the drive t r a y will e j ec t automatically.
The duplicator can erase different types of r e-writable discs sim ultaneously. You can pl ace re-writable
discs you would lik e to erase in any tray of writers. Under sub-catalog of 10. Utility, press
select 2. Quick Erase, and press ENT for execution.
When done, disc trays will eject automatically.
★
1. Prescan
PASS!
☆
Note: If you see “O” “o” blinking, it means Erasing in process.
If you see “F” “f” blinking, it means new DVD+RW Disc Formatting is processing.
, to
Page 21
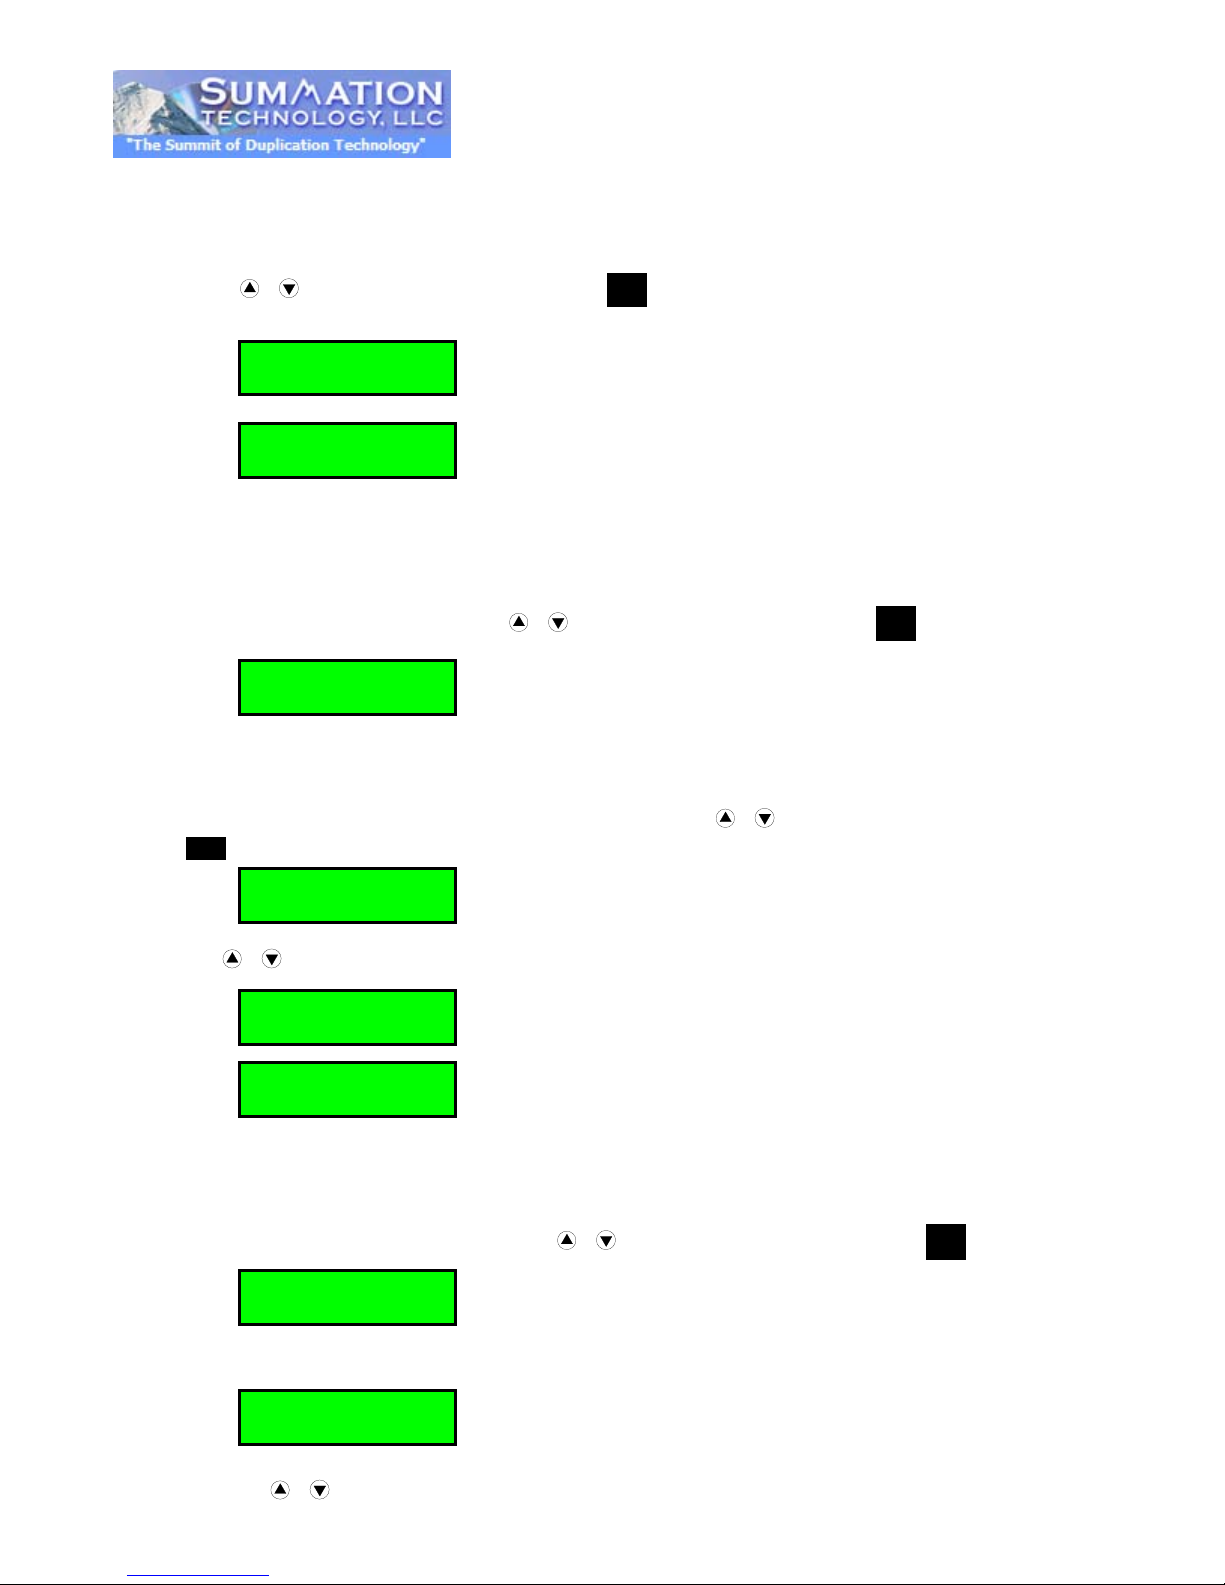
10.3 Full Erase
Full Erase Disc
_ O _ _ _ o _ _
[Utility]
[1] 4X,2X
[Utility]
[Utility]
[2]
[Utility]
[1]Port1.0 1.03
ASUS DVD-E616A2
This operation will com pletel y erase all data of re-writable d iscs in the W riter Trays. It tak es longer tim e
than Quick Erase. When finished, the writer drives will eject the drive tray automatically.
Place re-writable d is cs you would l ike to er ase in an y tra y of writer dri ves. Un der 10. Utility sub-catalog,
press , to select 3. Full Erase, and press ENT for execution.
3. Full Erase
When complete, drive tray will eject automatically.
10.4 Eject All Discs
Eject all discs, including Master disc and all discs of writer trays.
Under 10. Utility sub-catalog, press , to select 4. Full Erase, and press ENT for execution.
4.Eject All Disc
10.5 Disc Info.
This feature will show disc’s basic information such as disc type, data length, and available space.
Put discs into any tray. Under 10. Utility sub-catalog, press
, to select 5. Disc Info. and press
ENT for execution.
Use
5. Disc Info.
, to get each disc info.
DVD-RW blank 4483MB
No Disc
10.6 Drive Info.
This feature will allow you to check the CD-ROM drive’s major component information included
manufacturer, model number and firmware version etc.
①. Under 10. Utility sub-catalog, press , to select 6. Drive Info., and press ENT for execution.
6. Drive Info.
②. The duplicator assigns serial number to each drive from top to down. #1 is a Reader and others
(#2 ~ #12) are writers.
Use , to get drive info.
Page 22
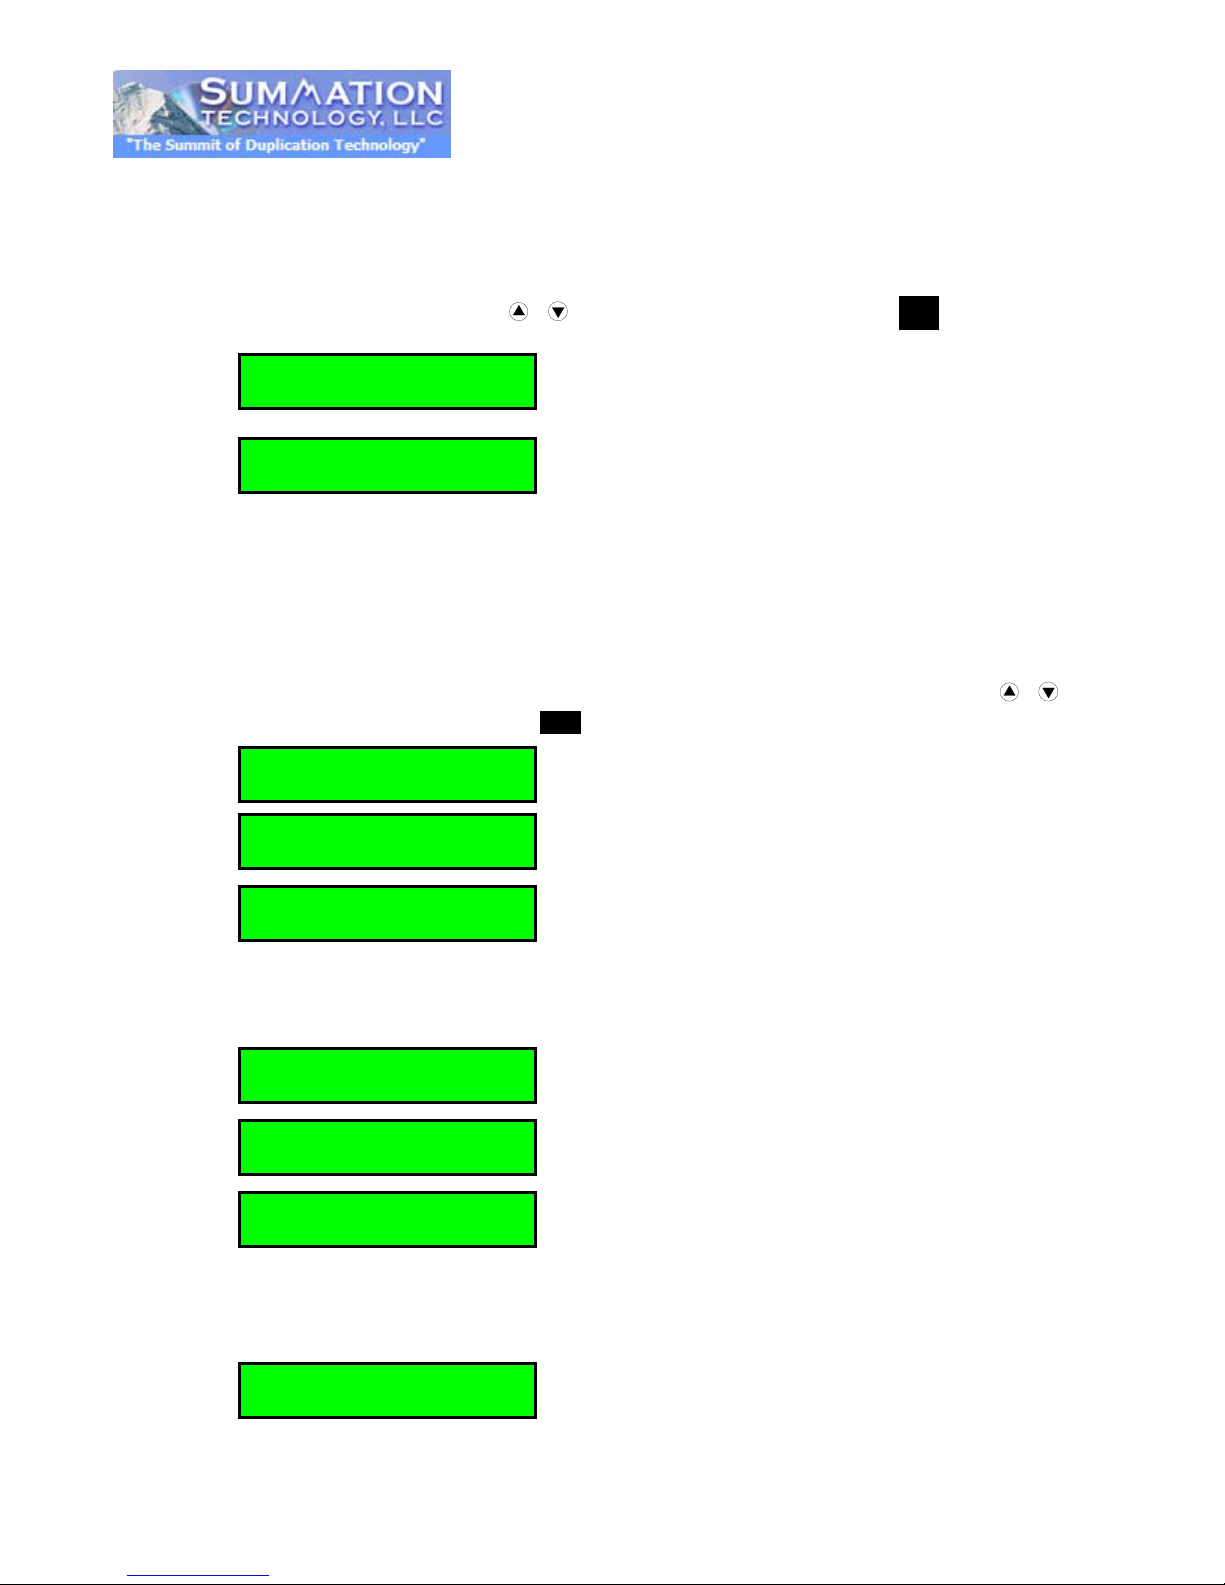
U468 32MB
[Utility]
Flash Complete
TURN OFF POWER &
[Utility]
8. Update BIOS
Update Firmware
Upgrade BIOS
Upgrade BIOS
Check Firmware
10.7 System Info.
This feature can pr ovide information on th e system, including cont roller model number, RAM capacit y,
and firmware version.
Under 10. Utility sub-catalog, press , to select 7. System Info., and press ENT for execution.
10.8 Update BIOS
This operation will update your duplicator’s firmware and reopen it. You need to insert Summation
Technology’s Certified Firmware Update CD.
7. System Info.
Ver:1.64
①. Insert the Certified Update CD into the Top Drive. Under 10. Utility sub-catalog, press , to
select 8. Update BIOS, and press ENT for execution.
Waiting Disc…
Identify Disc
②. The system will start executing firmware update automatically. When finished, the update CD will
be ejected automatically.
Complete!
7%
③. When finished, the update CD will be ejected automatically and ask you to restart system.
TURN ON AGAIN!
④. Please turn off the power a while then start the system again. The system will re-boot. You can
observe if the update firmware is new or not.
Page 23
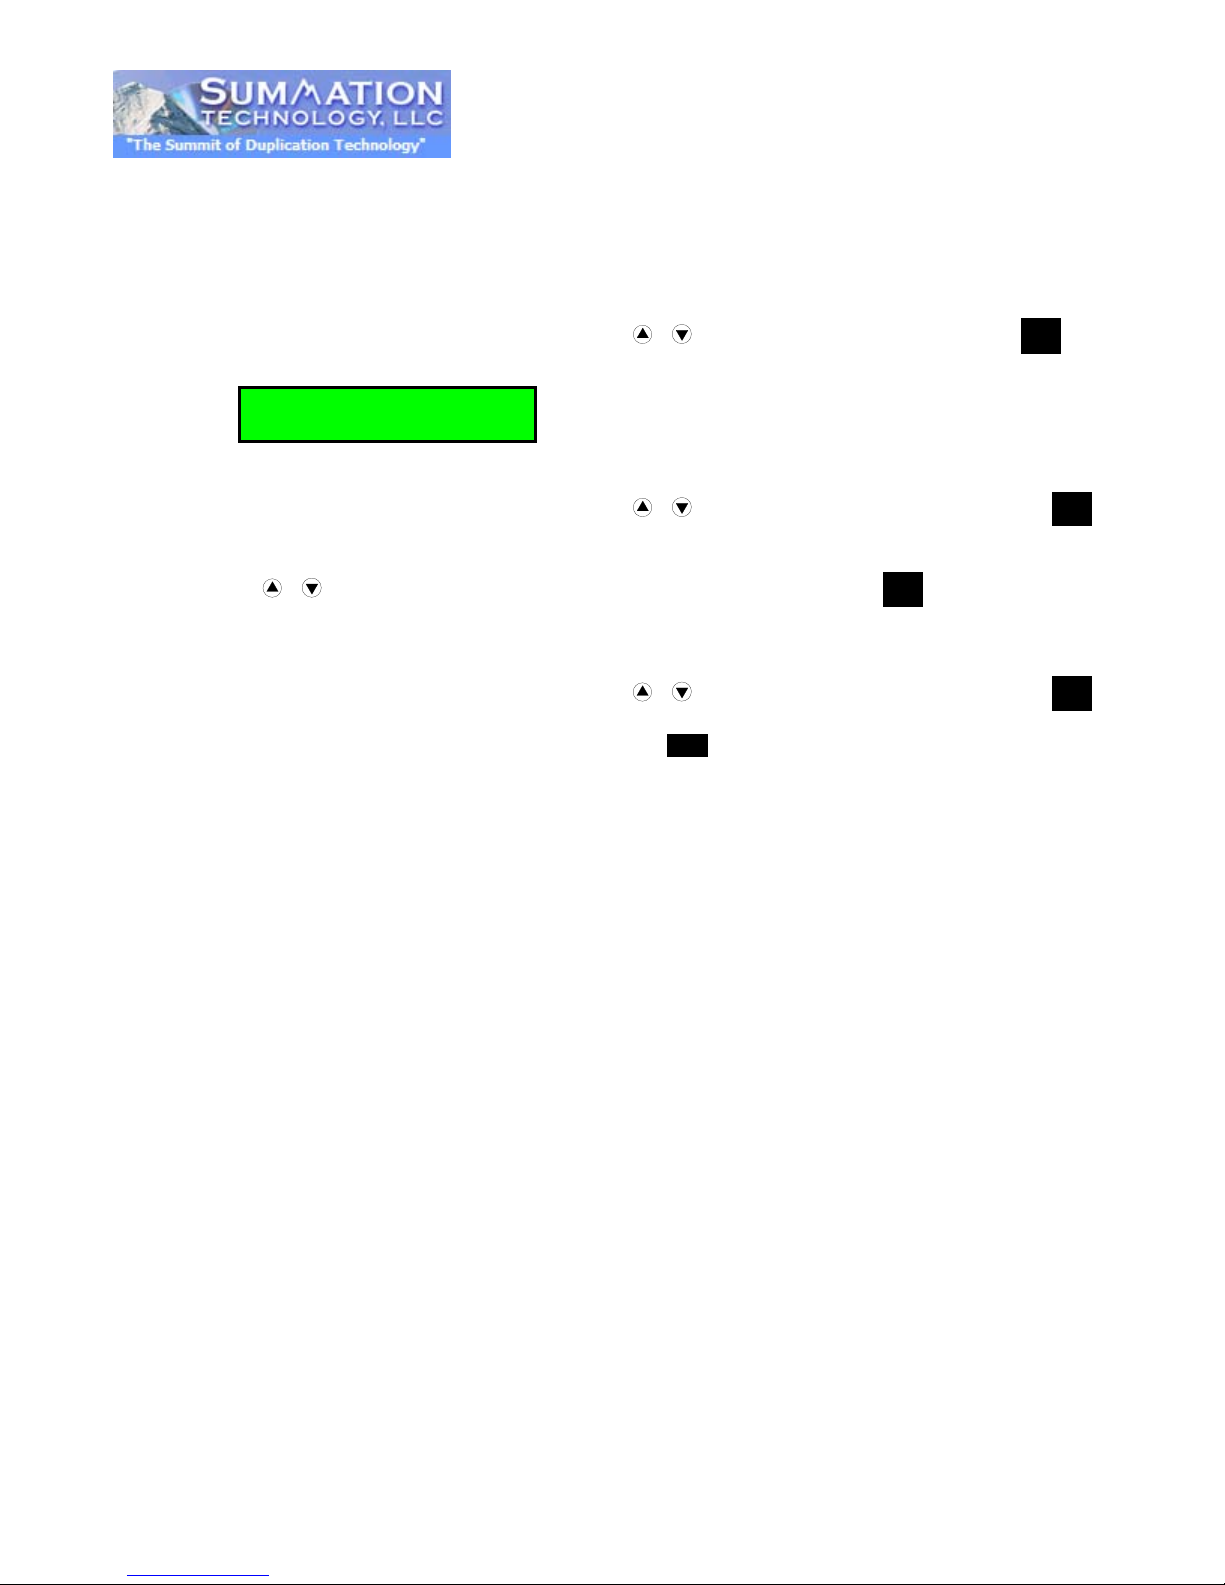
CD P12 F0
10.9 Copy Counter
This operation will record duplication results, duplicated quantity, and total amount of successful and
unsuccessful CD/DVD duplicated.
10.9.1 Show Count
Under 10.9 Copy Counter sub-catalog, pres s , to select 1. Show Count, and press ENT. The
LCD will show the number of duplicated discs that pass (P) and fail (F).
DVD P30 F0
10.9.2 Enable Counter
Under 10.9 Copy Counter sub-catalog, pres s , to select 2. Enable Counter, and press ENT
for entry.
Use , to open (enable) or close (disable) counter function, and press ENT to confirm it.
10.9.3 Clear Counter
Under 10.9 Copy Counter sub-catalog, pres s , to select 3. Enable Counter, and press ENT.
The system will pop up the confirm window, press ENT again to ensure that counter goes back to
zero.
Page 24
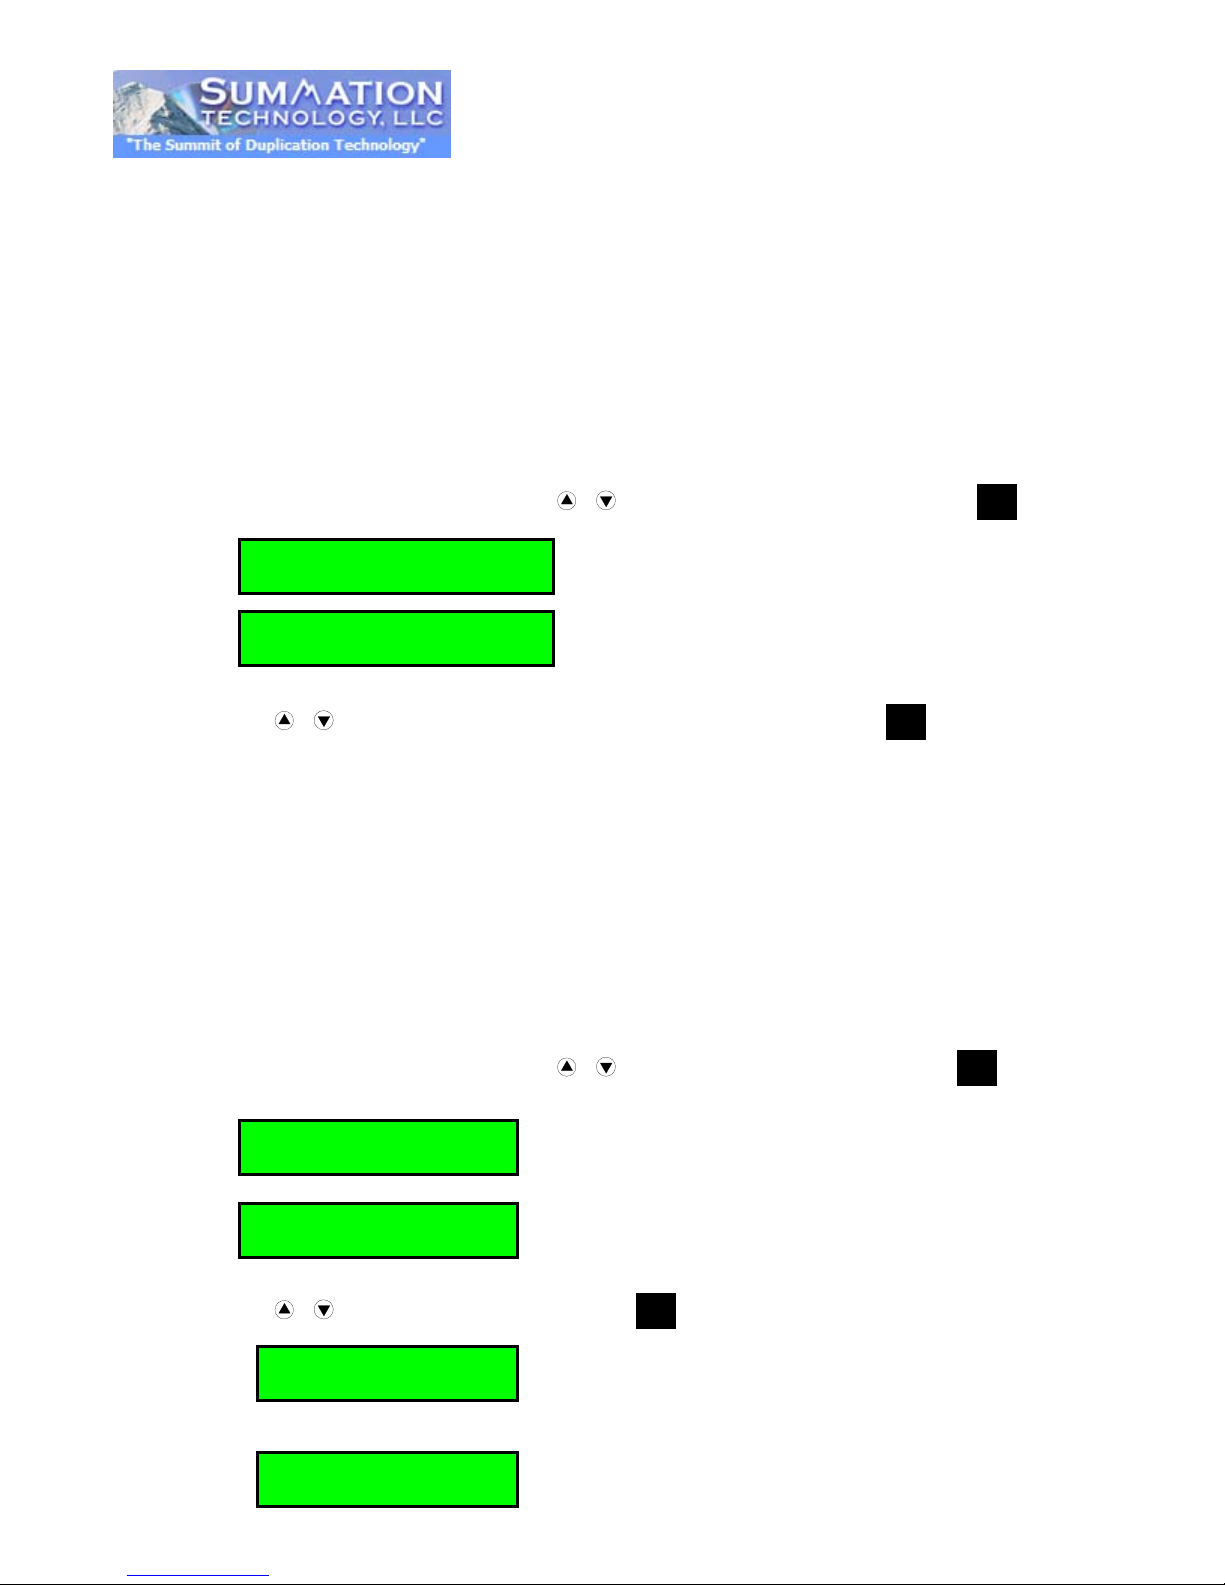
[Setup]
[Auto Start Time]
[Display Mode]
Basic
[Setup]
Copy DVD 4315M
■■■□□□□ 45%
Copy 2:30 4315M
11. SETUP
This function group provides features which allow changing of manufacturer’s default settings.
11.1 Auto Start Time
When the duplicator detects that master and blank discs are inserted at the same time, the system will
execute the copy process automatically. The system default of auto-copy is 5 seconds after detected
master and blank discs. You can set “Off” to disable auto-start or re-set the time (1~99 seconds) as you
want to activate this feature. This setting is available for modes of COPY, TEST, VERIFY, COPMARE,
COPY & VERIFY, COP Y & COMPARE.
①. Under 11. Setup sub-catalog, press , to select 1. Auto Start Time, and press ENT for entry.
1. Auto Start Time
5 seconds
②. Use , to set seconds from 1 to 99 seconds. OFF is 0 second. Press ENT for confirmation.
★☆
Note: If you set “Off”, then LCD screen will not show how many blank discs are detected in writer
trays.
11.2 Display Method
There are two modes: Basic or Advanc e d whic h you can select. The “Basic” mode displays a progress
bar, along with the amount of total data in MB on the master DVD (or in time for the master CD). The
“Advanced ” mode displays the percentage of the process completed, the amount of data
transferred and the total amount of data on the master disc.
①. Under 11. Setup sub-catalog, press , to select 2. Display Mode, and press ENT for entry.
2. Display Mode
②. Use , to select display mode and press ENT for confirmation.
←Basic
← Advanced
45% 4X 1942M
Page 25
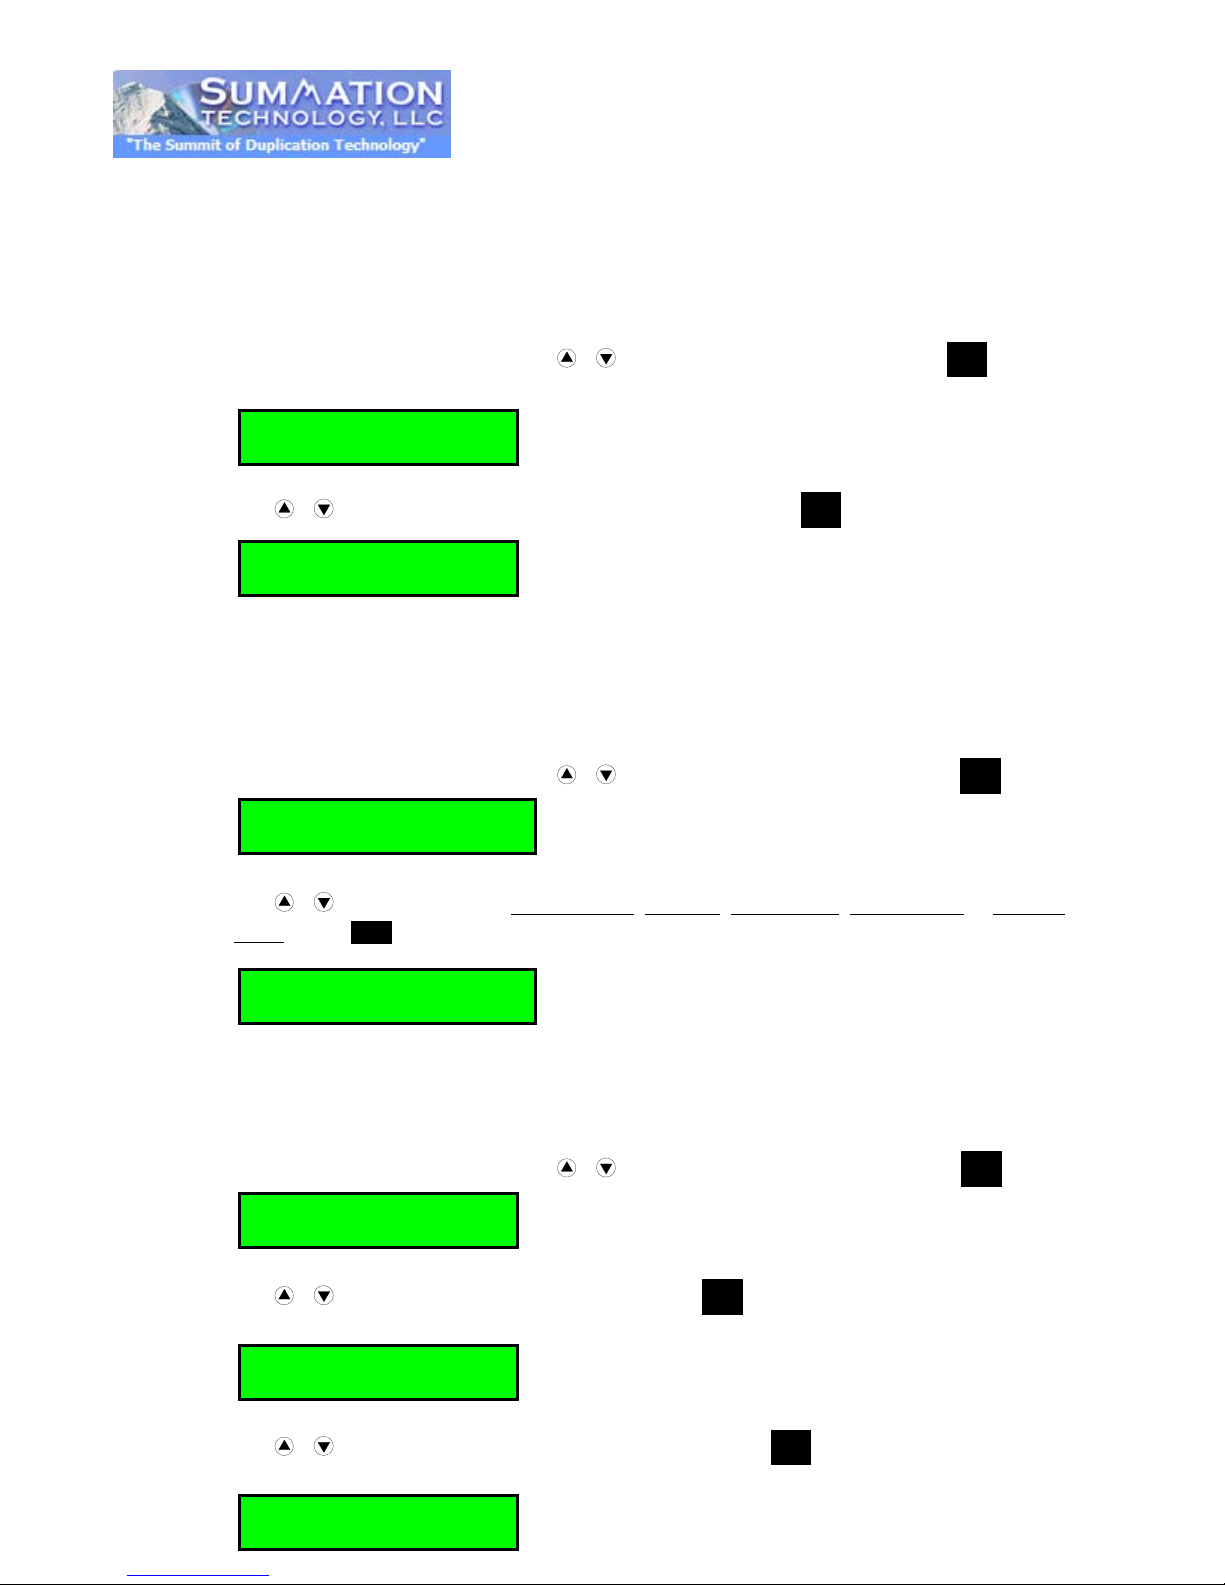
[Setup]
[Button Beep]
ON
[Setup]
4. Eject On Start
4. Eject On Start
[Setup]
[Reader Speed]
CD=48
[Reader Speed]
11.3 Button Beep
You can choose whether you want to hear a beep when you press a button or not.
①. Under 11. Setup sub-catalog, press , to select 3. Button Beep, and press ENT for entry.
3. Button Beep
②. Use , to open (ON) or close (OFF) this function and press ENT for confirmation.
11.4 Eject On Start-up
Under this operation, you can set the system to eject all disc trays or only master source disc tray when
the system is powered on and after going through its diagnostic check.
①. Under 11. Setup sub-catalog, press , to select 4. Eject On Start, and press ENT for entry.
②. Use , to select function of Eject All Disc, No Eject, Eject Target, Eject Source or Eject All
Trays. Press ENT for confirmation.
11.5 Reader Speed
This feature allows you to set reading speed of Master drive.
Eject All Disc
①. Under 11. Setup sub-catalog, press , to select 5. Reader Speed, and press ENT for entry.
5. Reader Speed
②. Use , to adjust reading speed of CD and press ENT for confirmation.
③. Use , again to adjust reading speed of DVD and press ENT for completion.
DVD=18
Page 26
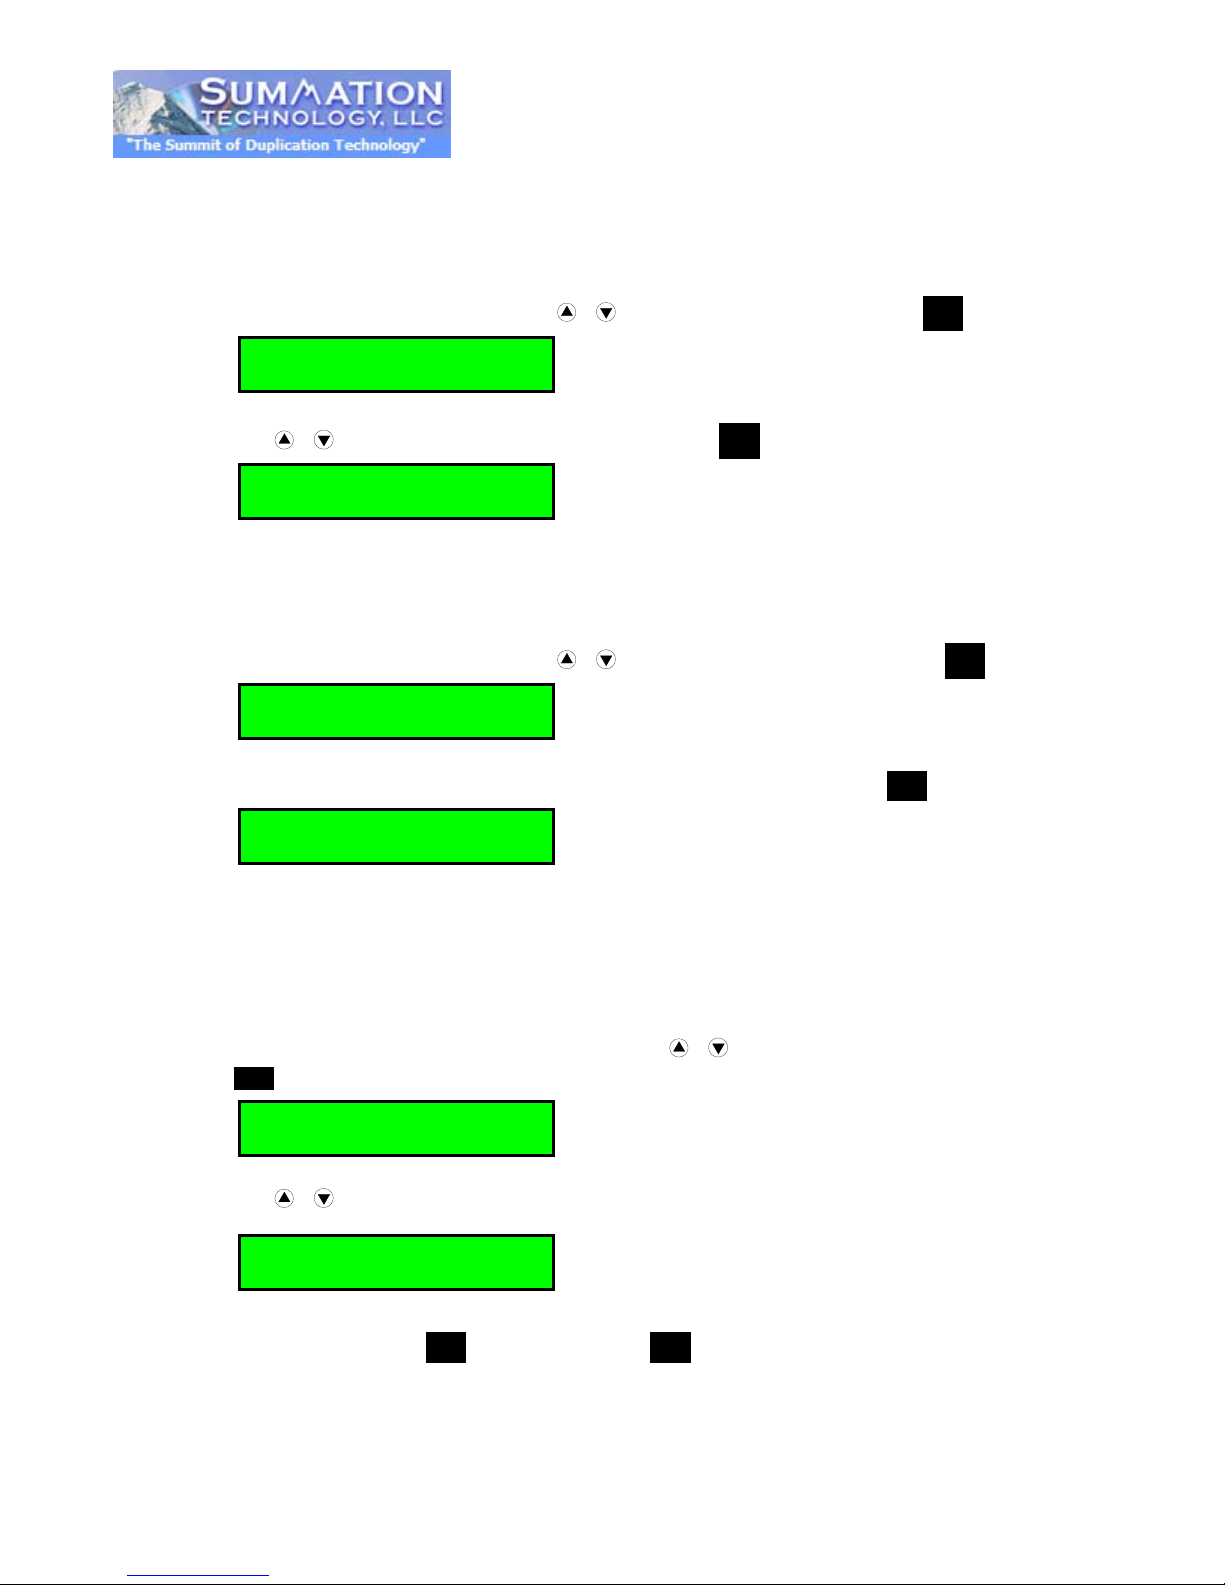
[Advanced Setup]
1. Power On Time
Power On Delay
[Setup]
6. Language
[Language]
[Setup]
Warning..
11.6 Language
Set system language interface, options are: English, Japanese, Spanish and Portuguese.
①. Under 11. Setup sub-catalog, press , to select 6. Language, and press ENT for entry.
②. Use , to select the la ngu a ge you want and press ENT for confirmation.
11.7 Clear Set-up
Reset all of the operations and back to the Manufacturer’s default setting.
English
①. Under 11. Setup sub-catalog, press , to select 7. Clear Set up, and press ENT for entry.
7. Clear Setup
②. The system will ask you “Clear Parameter To Default?” If you want, press ENT for selection.
11.8 Advanced Set up
11.8.1 Power On Time
You can set the system warm up time from 5 seconds to 255 seconds after system power on.
Clear Parameter
①. Under 11.8 Advanced Setup sub-catalog, press , to select 1. Power On Time, and press
ENT for entry.
②. Use , to set seconds.
15 seconds
③. After selection, press ENT to save it and press ESC to leave this sub-menu.
Page 27
[Startup Menu]
[Advanced Setup]
[Advanced Setup]
3. Skip Read Error
[Skip Read Error]
[Advanced Setup]
4. Change Bad Mas
[Change Bad Mas]
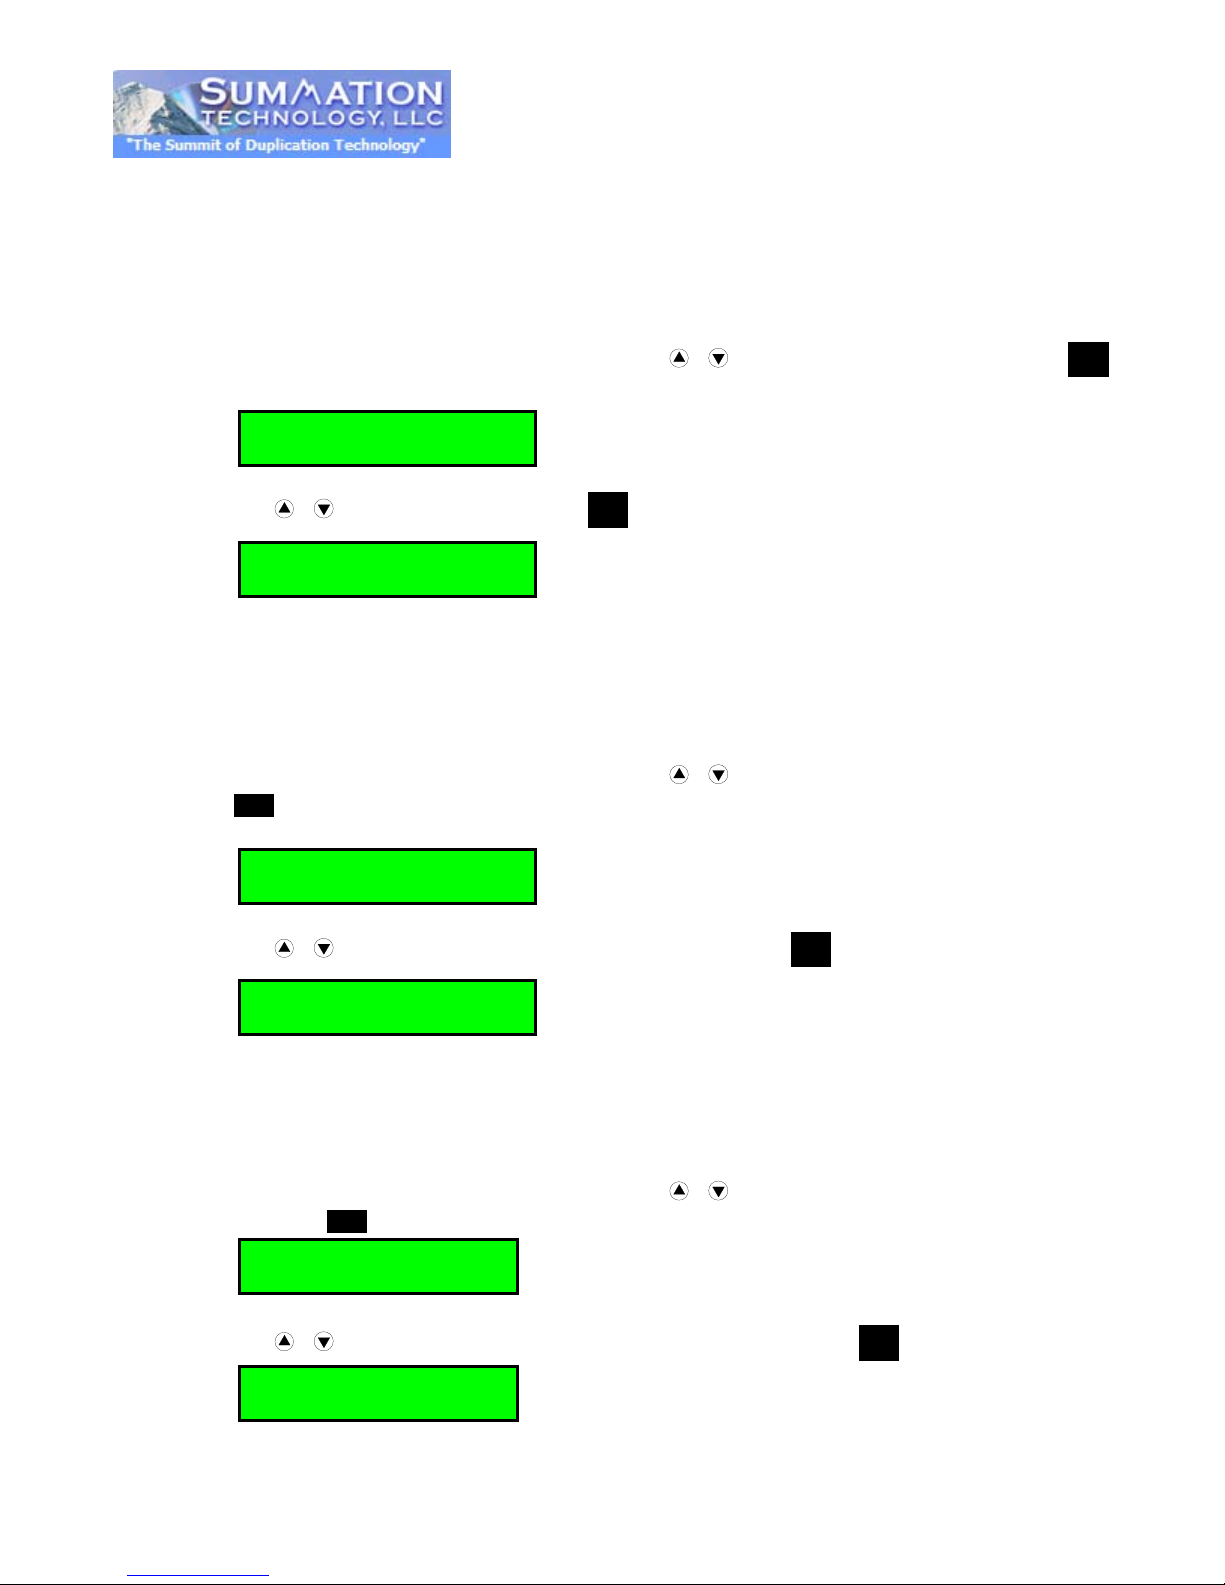
11.8.2 Startup Menu
This function sets the command to be displayed first when the machine is powered up and
initialized. All primary commands are available to be set for Start-up: Copy, Test, Copy & Verify,
Copy & Compare, etc. The default start-up menu is COPY.
①. Under 11.8 Advanced Setup sub-catalog, press , to select 2. Startup Menu, and press ENT
for entry.
2. Startup Menu
②. Use , to select function and press ENT for confirmation.
11.8.3 Skip Read Error
This function allows the duplicator to skip uncorrectable read errors on the master DVD or CD.
This feature can be turned ON or OFF.
1. Copy Disc
①. Under 11.8 Advanced Setup sub-catalog, press , to select 3. Skip Read Error, and press
ENT for entry.
②. Use , to open (Yes) or close (No) this function and press ENT for confirmation.
11.8.4 Change Bad Master Disc
If this operation is ‘Enabled”, the system will eject the Master disc and ask for another Master disc when
it finds a Master disc unreadable.
Yes
①. Under 11.8 Advanced Setup sub-catalog, press , to select 4. Change Bad Master Disc,
and press ENT for entry.
②. Use , to open (Enable) or close (Disable) this function and press ENT for confirmation.
Disable
Page 28
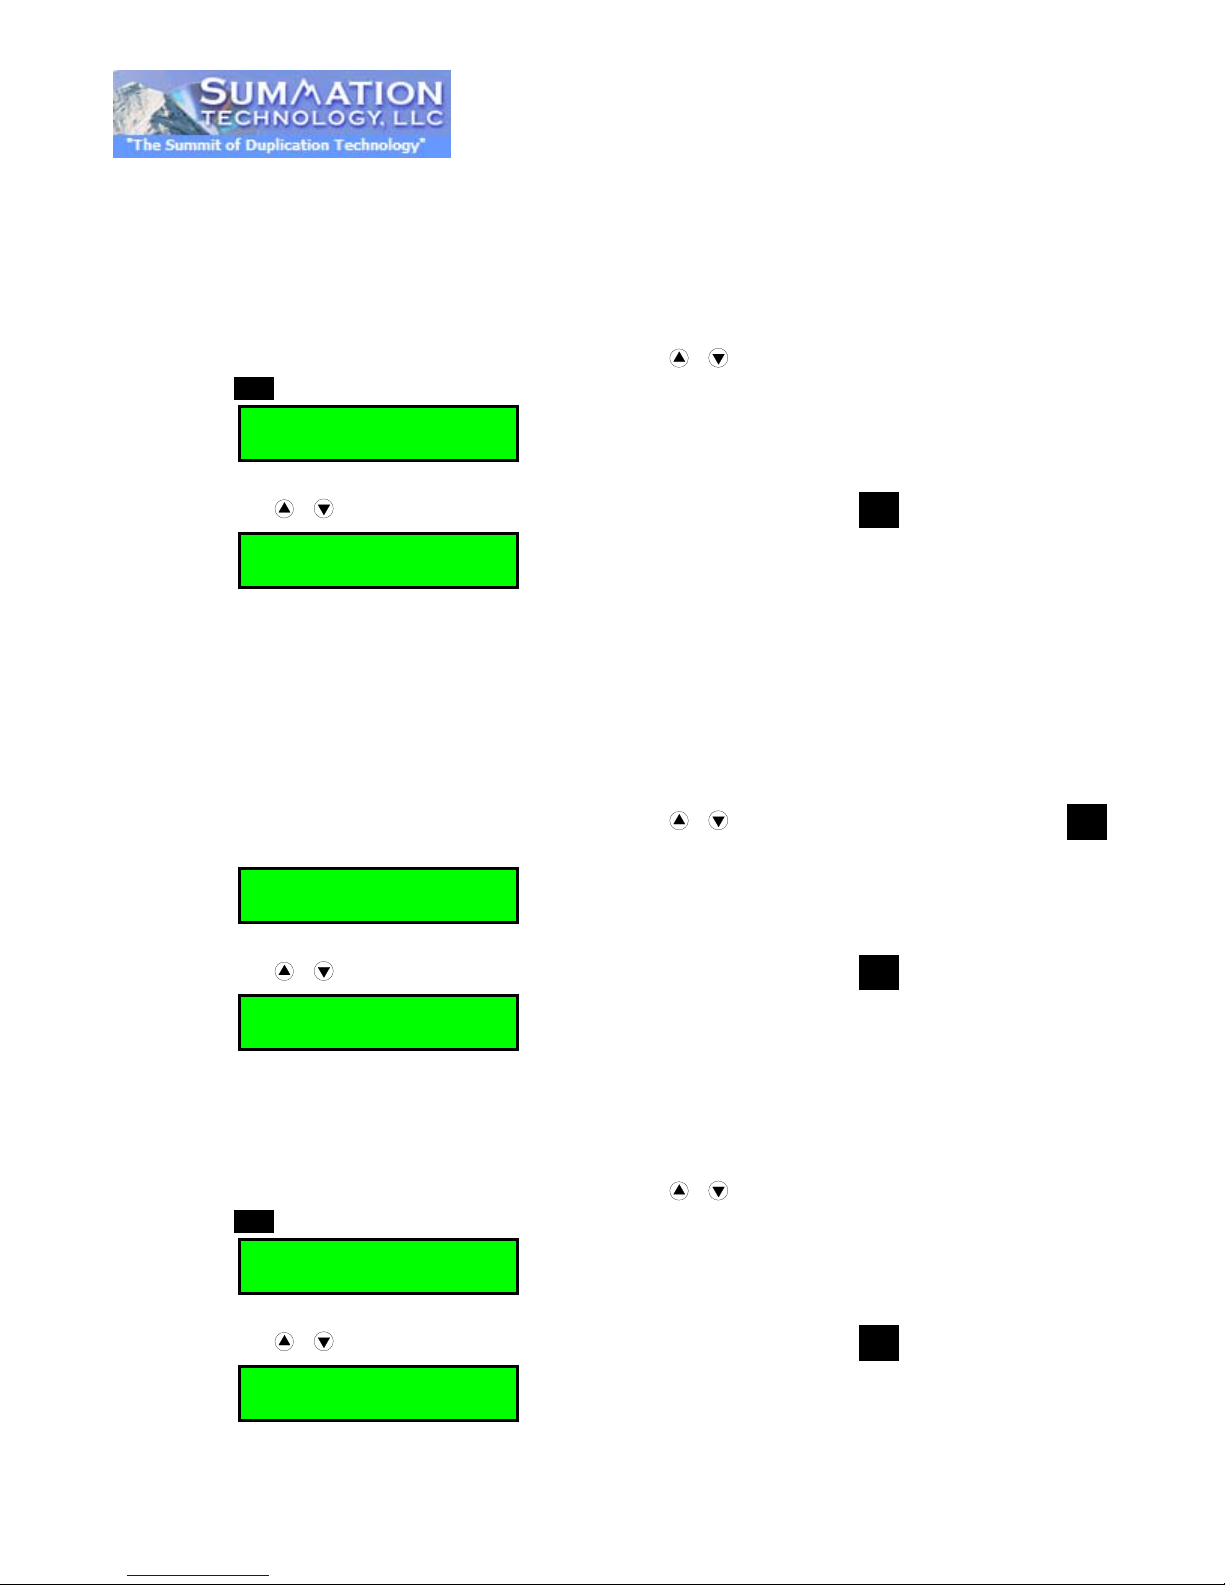
[Advanced Setup]
[CD Overburn]
Disable
[Advanced Setup]
[Copy CD-text]
[Advanced Setup]
7. copy UPC/ISRC
[Copy UPS/ISRC]
11.8.5 CD Over Burn
This function allows the copying of CDs that have been burned over their maximum capacity.
NOTE: The target disc(s) must be the same capacity as the Master disc.
①. Under 11.8 Advanced Setup sub-catalog, press , to select 5. CD Over Burn, and press
ENT for entry.
5.CD Overburn
②. Use , to open (Enable) or close (Disable) this function and press ENT for confirmation.
11.8.6 Copy CD-text
This function allows the copying of the CD-TEXT on the master disc(s) to the target disc(s).
①. Under 11.8 Advanced Setup sub-catalog, press , to select 6. Copy CD-text, and press ENT
for entry.
6. Copy CD-text
②. Use , to open (Enable) or close (Disable) this function and press ENT for confirmation.
11.8.7 Copy UPC/ISRC
Disable
③. Under 11.8 Advanced Setup sub-catalog, press , to select 7. Copy UPC/ISRC, and pr ess
ENT for entry.
④. Use , to open (Enable) or close (Disable) this function and press ENT for confirmation.
Disable
Page 29
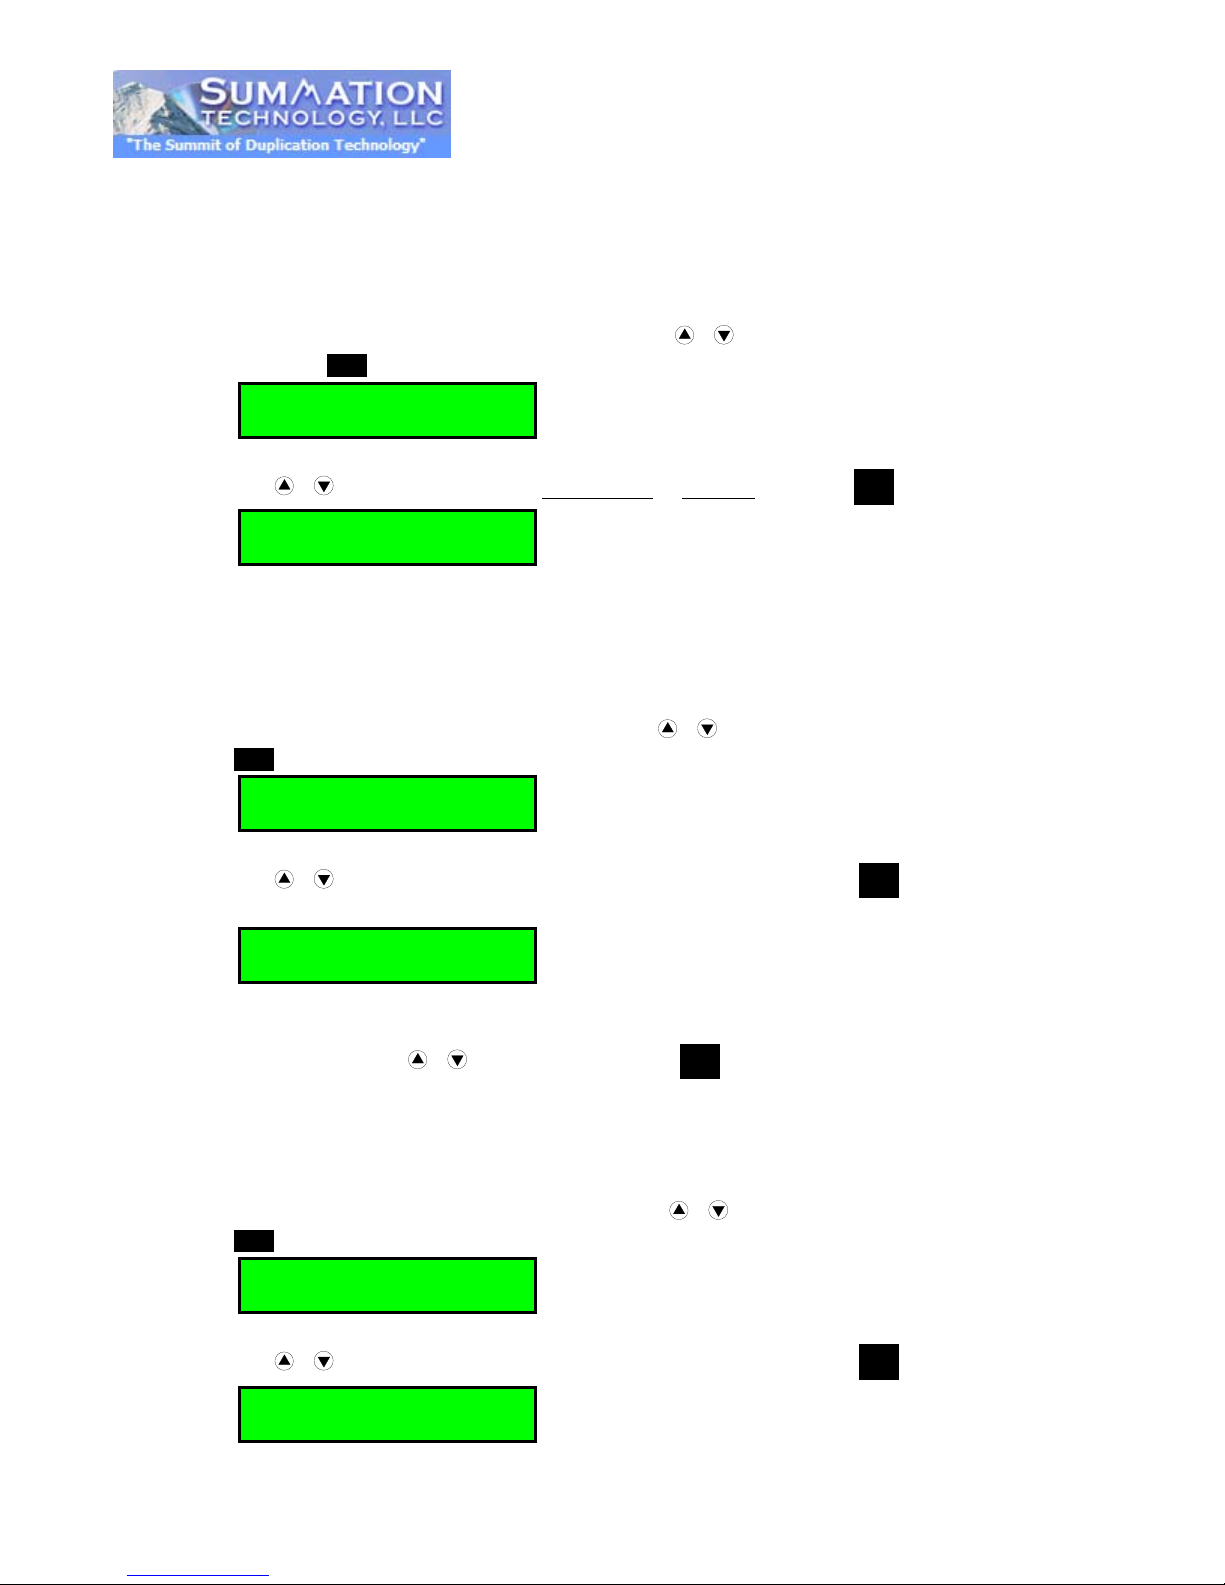
[Advanced Setup]
8. Show HDD Image
[Show HDD Image]
[Advanced Setup]
[Boot Password]
Disable
[Advanced Setup]
[Set Password]
Disable
11.8.8 Show HDD Image Name (Only for units with Hard Drive Installed)
①. Under 11.8. Advanced Setup sub-catalog, press , to select 8. Show HDD Image Name,
and press ENT for entry.
②. Use , to select display of the image name or capacity and pres s ENT for confirmation.
11.8.9 Boot Password
This function allows you to use and set-up password protection for the duplicator before the boot-up
process can be started. The boot password prevents anyone unauthorized from using the duplicator
system.
Image Name
①. Under 11. Advanced Setup sub-catalog, press , to select 9. Boot Password, and press
ENT for entry.
9. Boot Password
②. Use , to open (Enable) or close (Disable) this function and press ENT for confirmation.
③. After selecting “Enable”, you will see the password setting frame. There are 6 numbers for your
setting. Please use , to set letters and press ENT for completion.
11.8.10 Set Passw o rd
This function sets password protection for the duplicator before the setup settings can be
altered. The setup password prevents unauthorized changes to the system.
①. Under 11.8 Advanced Setup sub-catalog, press , to select 10. Set Password, and press
ENT for entry.
10. Set Password
②. Use , to open (Enable) or close (Disable) this function and press ENT for confirmation.
Page 30
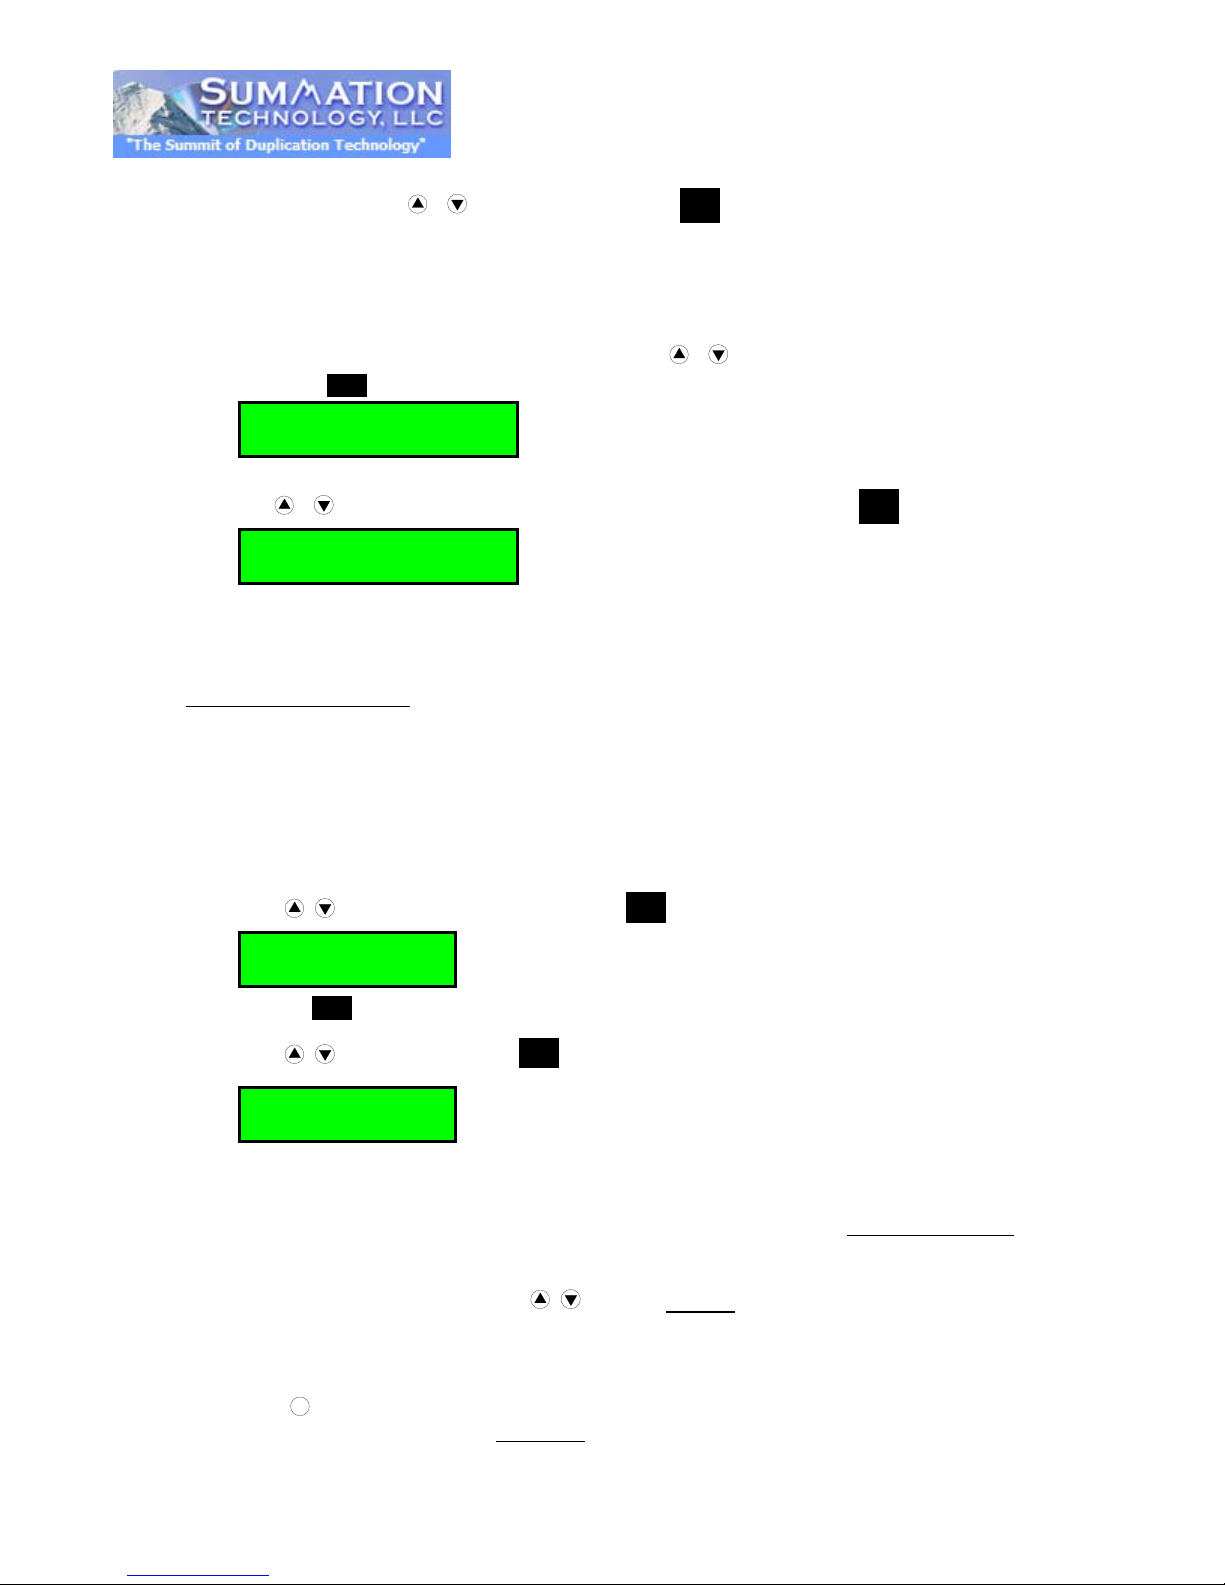
③. After selecting Enabl e, you wil l see the password setting frame. There are 6 numbers for your
[Advanced Setup]
[Special Format Disc]
[Select Image]
A001 DVD 4469M
[Image Manager]
1. Select Image
setting. Please use , to set letters and press ENT for completion.
11.8.11 Copy Special Format Disc
①. Under 11.8 Advanced Setup sub-catalog, press , to select 11. Copy Special Format Disc,
and press ENT for entry.
11. Special Format
②. Use , to open (Enable) or close (Disable) this function and press ENT for confirmation.
12. IMAGE MANAGER (For Duplicator with HDD Installed)
This function will guide you to perform various Hard Drive related operations. Please refer to 12.9
ABOUT HDD MANAGER
feature.
12.1 Select Image
This function will guide you to select an Image file as the source and make a co p y f r o m the HDD to
Blank Discs. When this operation is selected, the system will set the HDD as the source drive
automatically. Please refer to 12.1.1 for instructions on how to make Hard Drive-to-Disc Copies.
Disable
to get more information about the special function and advantages of this
①. Press , to 12. HDD Manager and press ENT. And select 1. Select Image.
Press ENT
②. Press , to select and press ENT to confirm.
12.1.1 Make Hard Drive-to-Disc Co pies
①. Make sure Reading Source is set to Hard Drive. Once you have done 12.1 Select Image, the
Reading Source will automatically be set HDD.
②. Go back to main menu and Press , to select 1. Copy
③. Please insert blank discs into writer trays. (If there is a disc in the Reader tray, it will be ignored)
④. Press
start copying if you turned on Auto Start
OK
to start copying. When all writer trays are fulfilled with blank disc, the system will auto
⑤. When finished, the passed copied disc will automatically eject.
.
Page 31
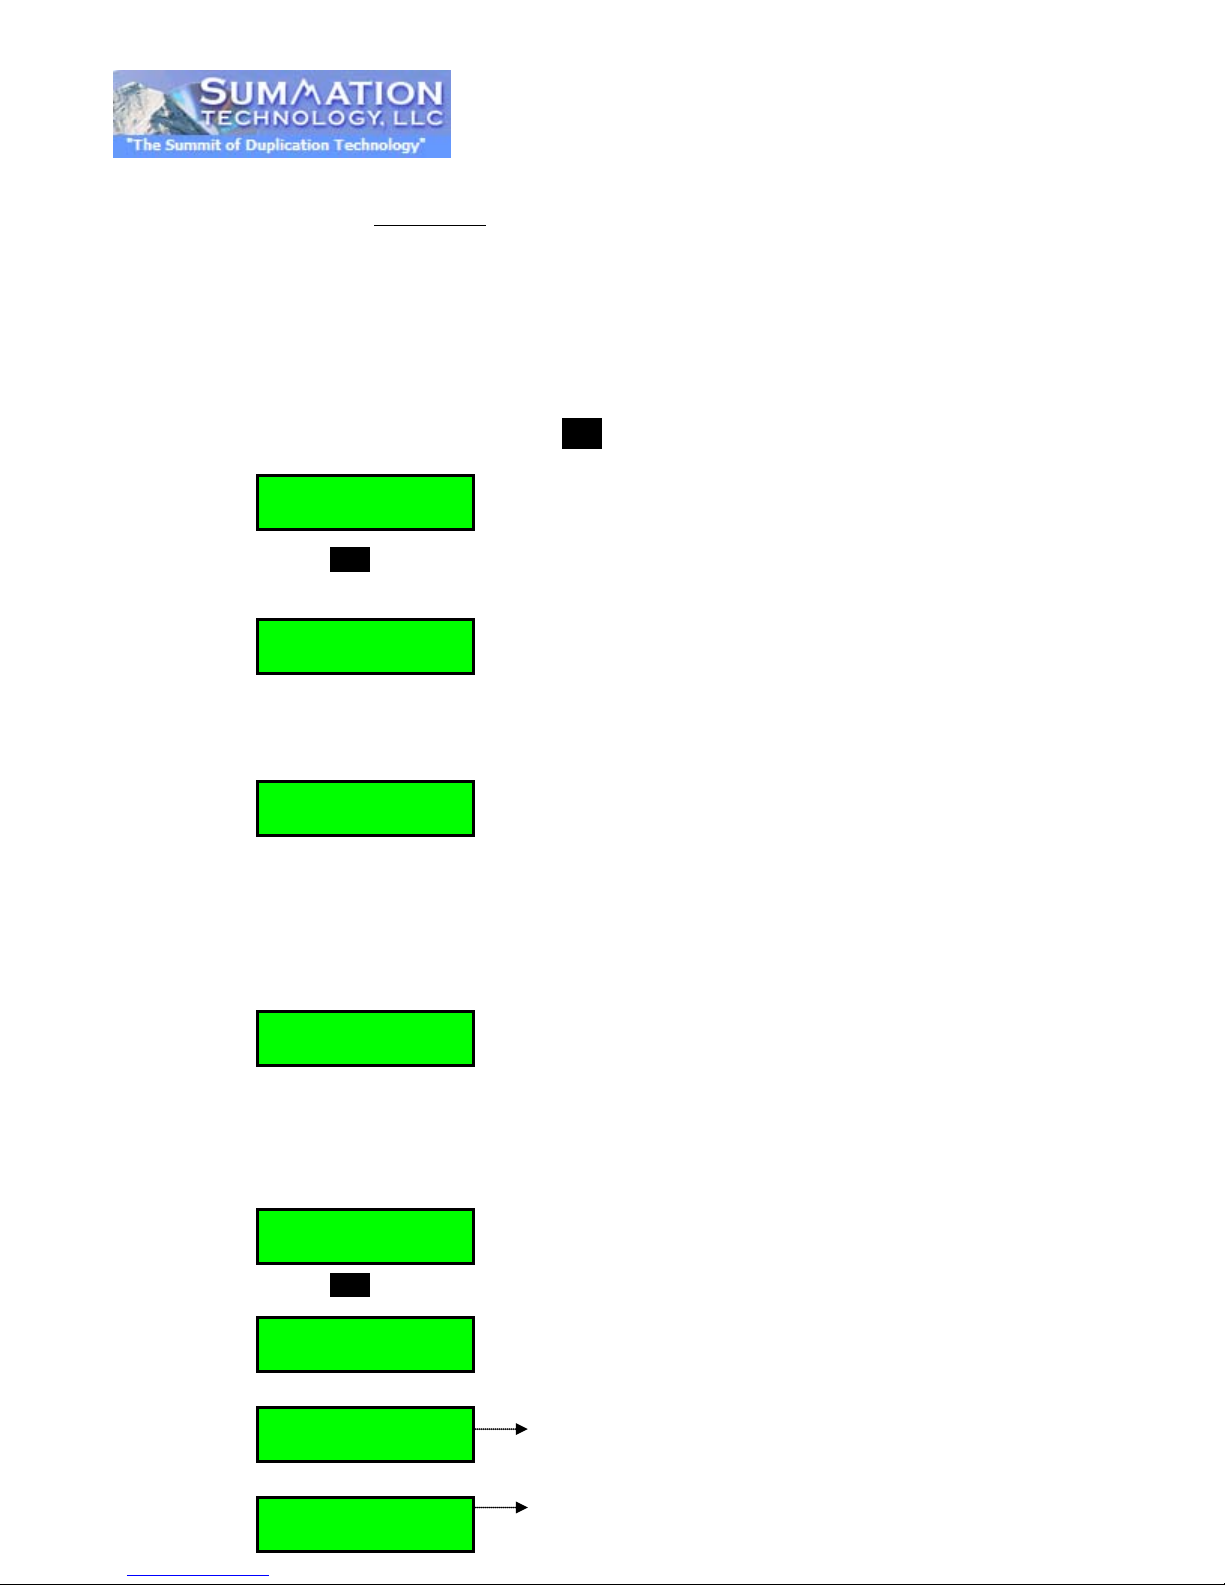
3875MB DVD disc
CD disc image with 65
[Disc ==> A001]
10% 446MB
** The source disc loaded to HDD as
[Image Manager]
2. Disc => Image
Press ENT
[Disc ==> A001]
Finished
Press ENT
01 [A001]
[Image Manager]
01 [A001]
02 [A003]
[Image Manager]
3.Reader Speed
★☆Note: Once you have select HDD Image, the Reading Source will be automatically set in HDD. If you would like to make Disc –to- Disc
Copies, then you have to go back to 8.Select Source
12.2 Disc => Image
This function will guide you to load your master source disc onto the Hard Drive and save as an image
file.
and select DVD-ROM as your Reading Sourc e.
①. Place Master Source Disc onto any Drive,
②. Select 12.2 Disc -> Im age and pres s ENT
image file A001
☆
Note: The source disc can be placed in any Reader or any one of the Writer Drives.
12.3 Set Reader Speed
This function will guide you to set the Reading Speed of reading the master source disc
.
★☆
Note: this function is ONLY available when loading Source Disc to HDD
12.4 Show Image Info.
This function allows you to check image file information of Image file number, Disc type, and its file size.
4. Image Info.
!
DVD 4469MB
DVD 3875MB
CD 65:28
image file A001
min 28 sec, file name
A003
Page 32
01 [A001]
Select the image file you would like
[Image Manager]
6. Delete Image
Press ENT
DVD 4372M
Complete!
[Image Manager]
Press ENT
01 [A001]
DVD 4469MB
[Edit Image Name]
DVD 4469M
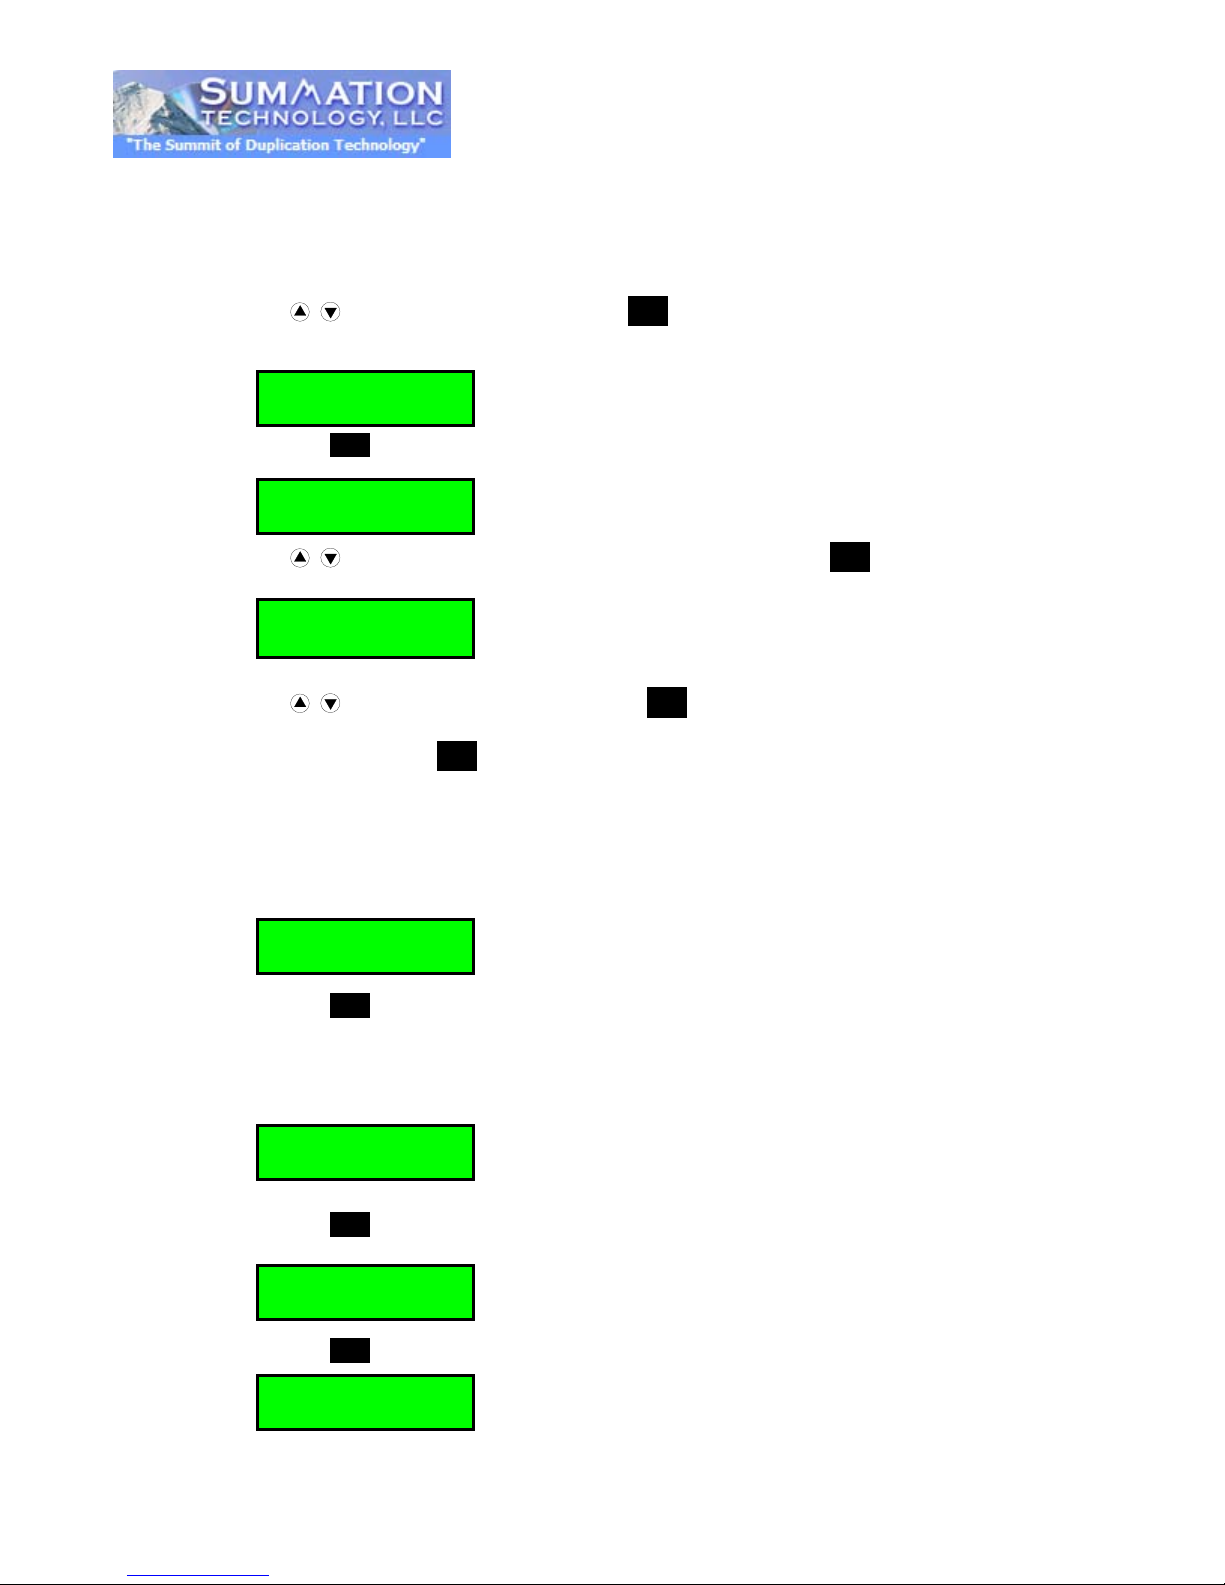
12.5 Rename Image
This function allows you to rename your image file in 8 characters.
①. Press , to 12. HDD Manager and press ENT. And select 5. Rename Image.
5. Rename Image
②. Press , to choice the image file you want to rename and press ENT.
[A001______]
③. Press , to choice the character and press ENT to the next space, you can name the image file
for max. 8 characters (no space in the 8 characters).
④. Once you finish, press ENT to confirm.
12.6 Delete Image
This function allows you to delete image file in HDD. If the file has been selected as source file, you
are not able to delete it unless you go back to 12.1 to re-select other image as source.
to delete
DVD 4469MB
Press ENT and execute delete
Confirm Delete?
Press ENT to confirm
Page 33
Press
to confirm format
to confirm and start executing
format
>>>Warning<<<
Format HDD?
[Image Manager]
[Format HDD]
[Format HDD]
Complete!
[Image Manager]
Press ENT
Used: 0CD 7DVD
[Load & Copy]
[Image Manager]
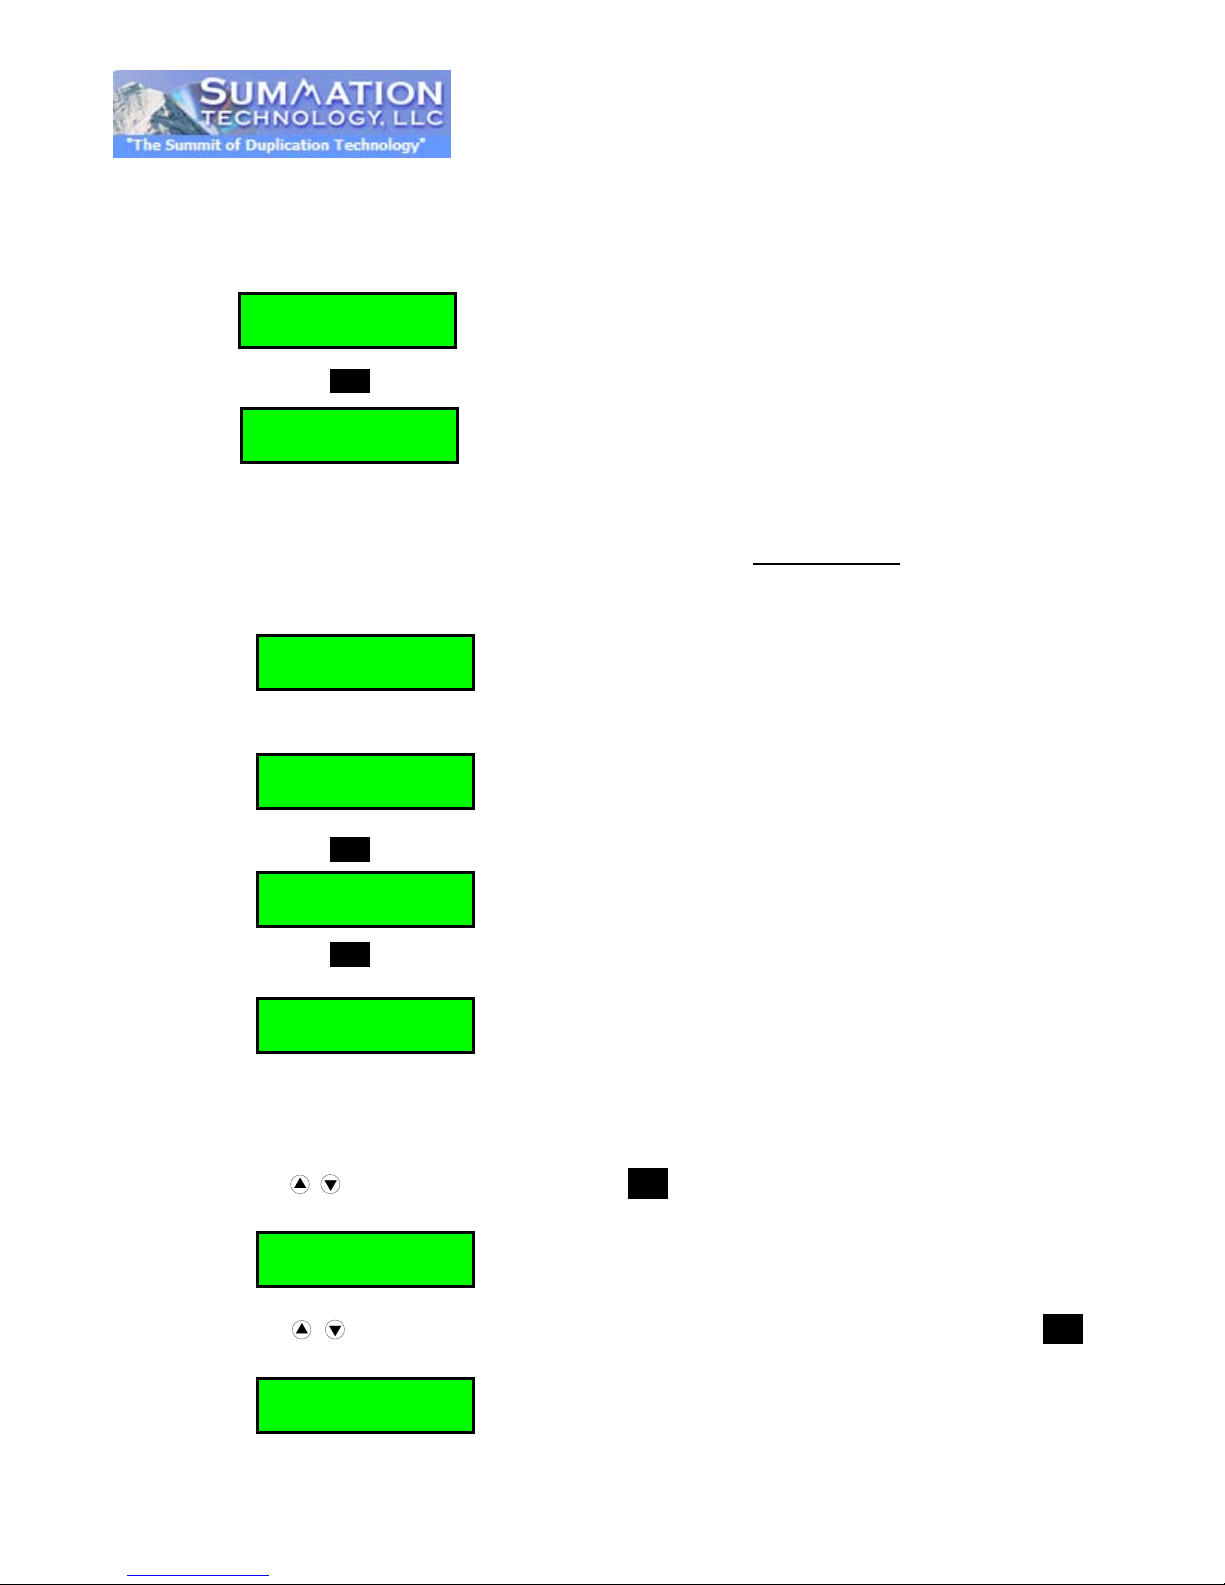
12.7 HDD Info.
This function allows you to check the information of HDD, such as how many discs are stored and the
rest space available in HDD.
12.8 Format HDD
This feature will allow you to format the HDD. However, you will not be able to format the HDD if the
HDD image was selected as Reading Source. You should go to 8. Select Source
as Reading Source, then you shall be able to format HDD.
7. HDD Info.
Free: 41CD 8DVD
Press
Press ENT
8. Format HDD
OK
ENT
Complete!
to select Optical Drive
12.9 Load & Copy
This function allows you to load the master disc to hard drive and make a copy simultaneously.
①. Press , to 12. HDD Manager and press ENT. And select 9. Load & Copy.
9. Load & Copy
②. Press , to choose between “Synchronize”, “Load First” and “Off” and then press ENT to
confirm.
Synchronize
Page 34

Used: 0 DVD 0CD
40GB / 5GB = 8 DVD
40GB / 1 GB = 40 CD
[image info]
[image info]
A001 DVD 3875MB
3875MB DVD disc
Or
12.8 ABOUT HDD MANAGER
Our duplicator has a high ly intelligent and d ynamic HDD m anagement tec hnology. Traditional methods
of formatting a H DD, in which the num ber of partitions is determ ined by dividing your Hard Drive ‘s total
capacity by 5GB for DVD o r 1GB for CD. In t his way, you ha ve to decide ho w many partiti ons for DVD
or CD before you start f orm at your Hard Drive. Many times you are not able to pre dict how many DVD’s
or CD’s you will be l oad ing to the H ar d Dr ive. You can then potenti all y creat e many incomplete partiti ons.
Our Hard Drive Manager gives you a smarter and more dynamic way to manage your HDD.
Our Dynamic HDD Manager has following special features:
12.8.1 Auto Detect Disc Capacity and Dynamically Assign Partitions
①. When first time format your built-in HDD, our duplicato r will automatically divide the HD D into number
of partitions into 1GB. You don’t have to predict and select DVD or CD partition in the beginning.
②. You can go to check HDD information in function 12.6 HDD Info, the Hard Drive’s capacity is presented
in terms of how man y DVD or CD disc s you can load. F or example, if your built-in HDD is 40GB, then
the system will show the HDD available capacity:
Note: DVD is calculated by 5GB, and CD is calculated by 1GB.
Free: 8 DVD 40CD
③. Every time you lo ad a source dis c, the duplicat or will auto de tect the dis c capacity and ass ign correct
partitions for it. For example, if you loaded a 4GB single-layer DVD disc into HDD as a disc image,
system will automatically detect and assign a 4GB partition for it.
12.8.2 Sm ar t Image File Management:
①. When Discs are loaded into HDD as stored disc image. The system will assign a file name to the
image file beginning from A001~A250.
★
Note: Each time a new disc image is loaded, the system will auto search and assign the lowest
available number as file na me. For example, if ther e is no file has been d eleted, the file name w ill be
assigned by sequenc e from A001, A 002, and A003 till A250. Howev er, if there is a file delet ed, such
as A003, then the f ile name wil l be held. W hen next time ther e is a new disc image stored, then the
lowest number of A003 will be assigned as this new disc image’s file name.
②. You are allowed to delete an image file b y executing 12.5 delete im age. Once you deleted a n image
file, the file name will be left em pty and hold for futur e’s new loaded image file. T he existing file nam e
will not be changed or moved ahead due to the deletion.
③. You can check your image file information in function 12.4 Image Info. The image information will
present the image file name, Disc type and file size.
A003 CD 65:28
image file A001
CD disc image with 65 min
A003
28 sec, file
Page 35

13. Troubleshooting Guide
There are no end-user serviceable components that can be replaced in the CD/DVD
Duplicator. Please contact Summation T ech n ol og y for warranty repairs and service.
No LCD display.
- Please check if the power cord is connected properly and the utility power is supplied.
Please check if the fan of power supply is rotating. If not, it might be broken.
Error message shown on LCD.
- Reboot the duplicator.
- Change master disc and try again.
CD Drive doesn’t read disc and shows error message.
- Check the format of master disc.
- Use other Master disc or other duplicator to test master.
Switches do not function.
- Task busy. Please wait.
- Restart unit.
- Faulty controller board.
Copy completed but disc is not readable / executable.
- Test with another CD-ROM/DVD-ROM.
Failure rate is high.
- Lower writing speed and try again.
- Quality of blank disc is poor.
- Quality of master disc is poor.
- Rated speed of discs does not match writers. Ensure discs meet writers rated speed.
- Update the latest BIOS version. See manufacturer for latest firmware updates.
FAQ’s
What if the Duplicator will not power on?
Make sure the unit is plugged into a proper power source and the unit is turned “on.”
What if the duplicator is having trouble making a copy, what can be done?
The most common problem with discs playing but not duplicating can be attributed to overall quality. Some
factors affecting disc quality include brand of blank media used, physical damage, and write quality. It is
important that the disc is free of damage or blemishes and produced on a high quality brand of media
.
Make sure that the “master” disc has been finalized.
Make sure the “master” DVD is not encrypted or is not a copy protected original.
Make sure you have high quality, blank pieces of media.
Make sure your master disc and blank disc are the same format. (-R to –R or +R to +R)
Make sure you’re not trying to copy a CD to a DVD or DVD to CD.
Try using a different brand of blank media.
Page 36

What if the duplicator is having trouble reading a DVD, what can be done?
Make sure you have Content on the “master” disc.
Make sure the “master” disc in good condition. (Disc is not scratched)
Make sure the disc is placed in the drive properly. (Data side down)
Make sure the “master” disc has been finalized.
What does "Stand-Alone" mean?
No computer is required to make copies of DVDs. Plug it in, turn it on, insert source DVD and blank media, close
the drive trays and the duplicator starts copying.
Can I copy Hollywood DVD movies with a SummitPro duplicator?
No, commercial movies are copy protected and cannot be copied with this or any duplicator. You can cop y your
own video creations.
Can I copy CDs in a SummitPro DVD duplicator?
Yes, you can copy CDs in this duplicator. Just use blank CD-R Media that is certified at least 40X, and use the
same process used to duplicate a DVD.
Can I copy DVDs to CD Media in SummitPro duplicators?
No, DVDs will only copy to blank DVD Media.
How do I clean my SummitPro duplicator?
The best maintenance for your duplicator is preventive maintenance. Using a system in an area with excessive
dust, smoke, or other contaminants is not recommended since it will increase error rates and reduce hardware
life expectancy. Some light cleaning can be performed; you can use a can of compressed air for dusting out
drives.
Need Technical Support?
Technical support is part of every solution we sell at Summation Technology. Should you need assistance in operation of any
equipment or system you have purchased from Summation Technology, please contact us by phone, or send us an e-mail.
For phone support, please call 1 888 -340-3738 between 8:00am–5:00pm MST Monday thru Friday (excluding holidays).
E-mail: [email protected]
 Loading...