

Page 1
Integrated Dual Installation
(Hinge to Hinge)
subzero.com 800.222.7820
CONTENTS
1 Heater
1 Grommet, plastic
2 Screw, #8–18 x
5
⁄8"
2 Trim, edge guard
1 Plug, 4-pin
2 Tape, black
2 Bracket, mounting hinge–top
1 Bracket, mounting bottom
2 Screw, #10 x
2 Screw,
2 Screw, #10–24 x
1
⁄2"
1
⁄4" –20 x 1⁄2"
1
⁄2"
1 Trim, center
2 Screw, #10 x
2 Screw, #8–32 x
3
⁄4" self drilling
1
⁄2"
1 Instructions
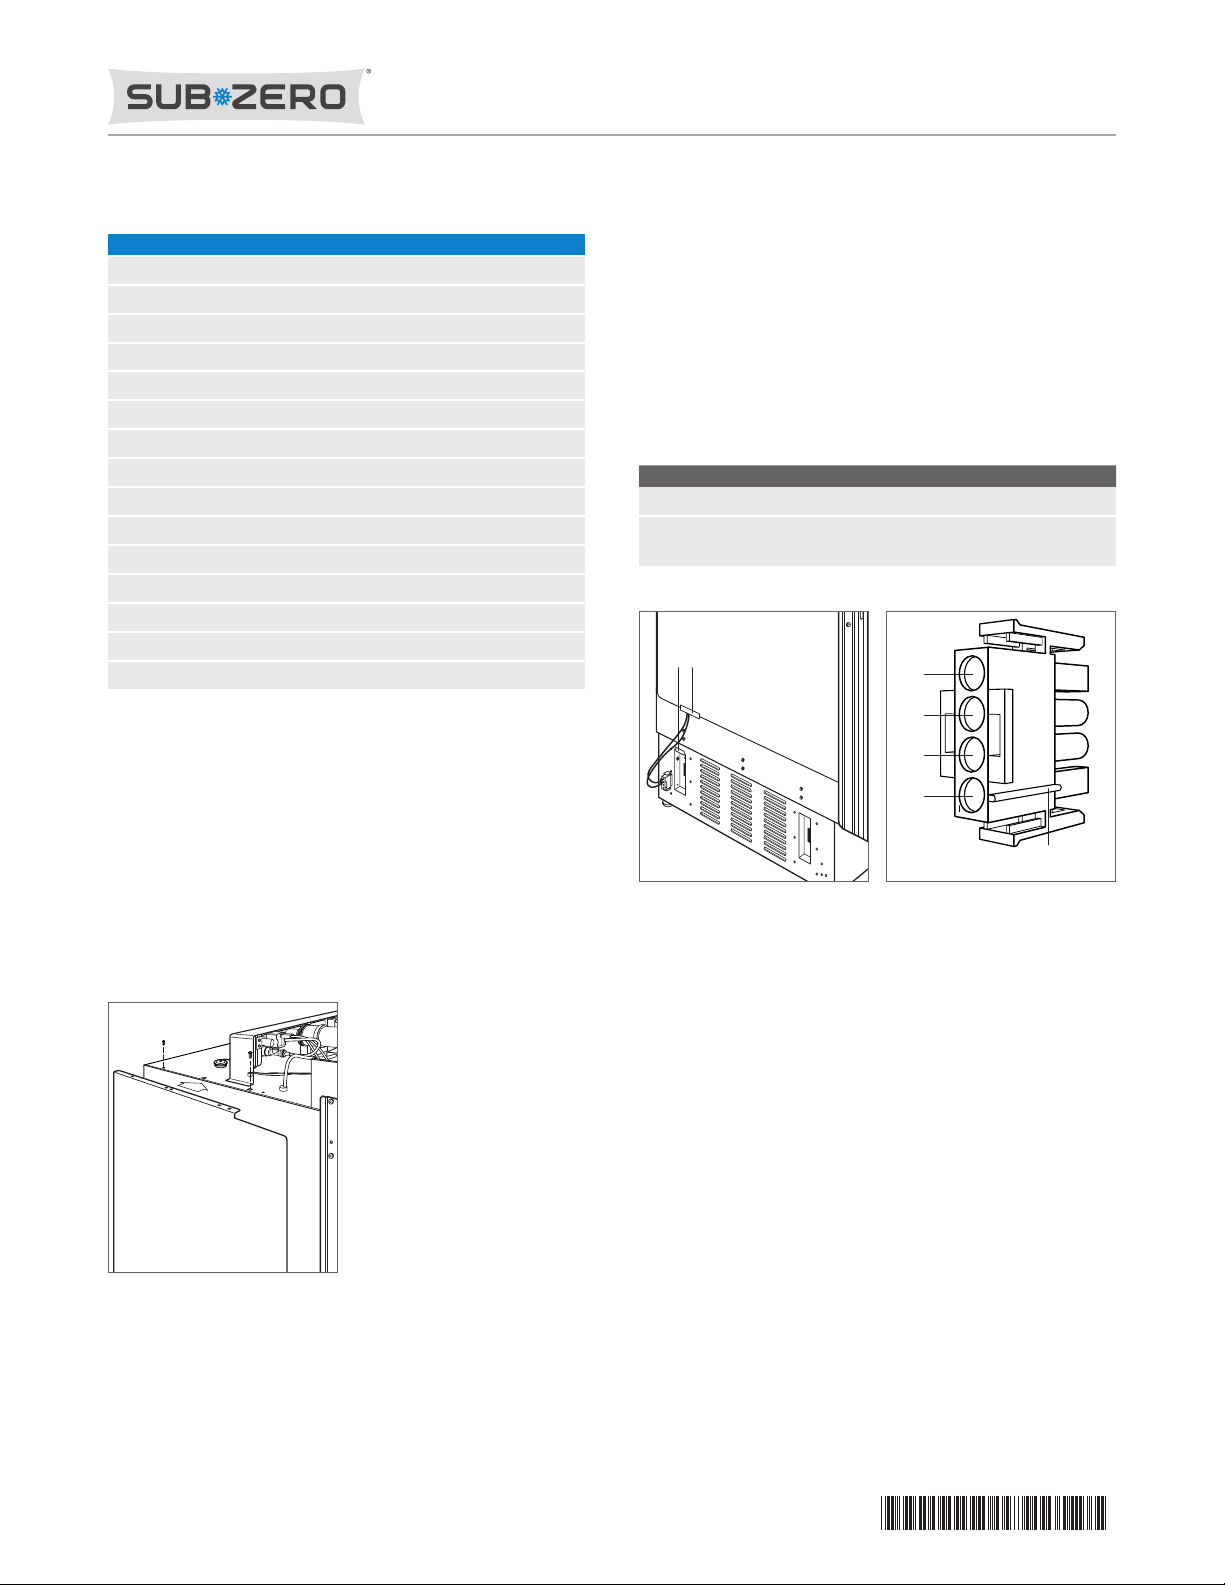
HEATER INSTALLATION
1 Insert a plastic grommet in the front square hole along
the top edge of the unit, then tap into position.
2 Remove the paper backing from the tape on the back of
the heater.
3 Place heater panel on the left side of the unit being
installed on the right, insert two screws along the top
edge, then press rmly to secure.
Refer to the illustration below.
4 Install edge guard along the upper edge of the opening
and bottom of the heater panel where wires pass. Edge
guard must be trimmed to t.
5 Place leads from heater into the correct pin position on
connector. Pin position is dependent on the model being
installed. Refer to pin placement illustration and chart
below. Place excess wire into opening or secure to the
side of the unit with tape provided.
MODEL WIRE PLACEMENT
All Refrigerator, Wine (Single Door) 2, 4
All Freezer, Combination and Wine
(Door and Drawers)
EDGE
GUARDS
Electrical connection.
Pin placement.
1, 2
4
3
2
1
PIN ONE
REFERENCE
Heater placement.
7029832 REV-C 02/2016
page 1 of 2
Page 2
Integrated Dual Installation
(Hinge to Hinge)
subzero.com 800.222.7820
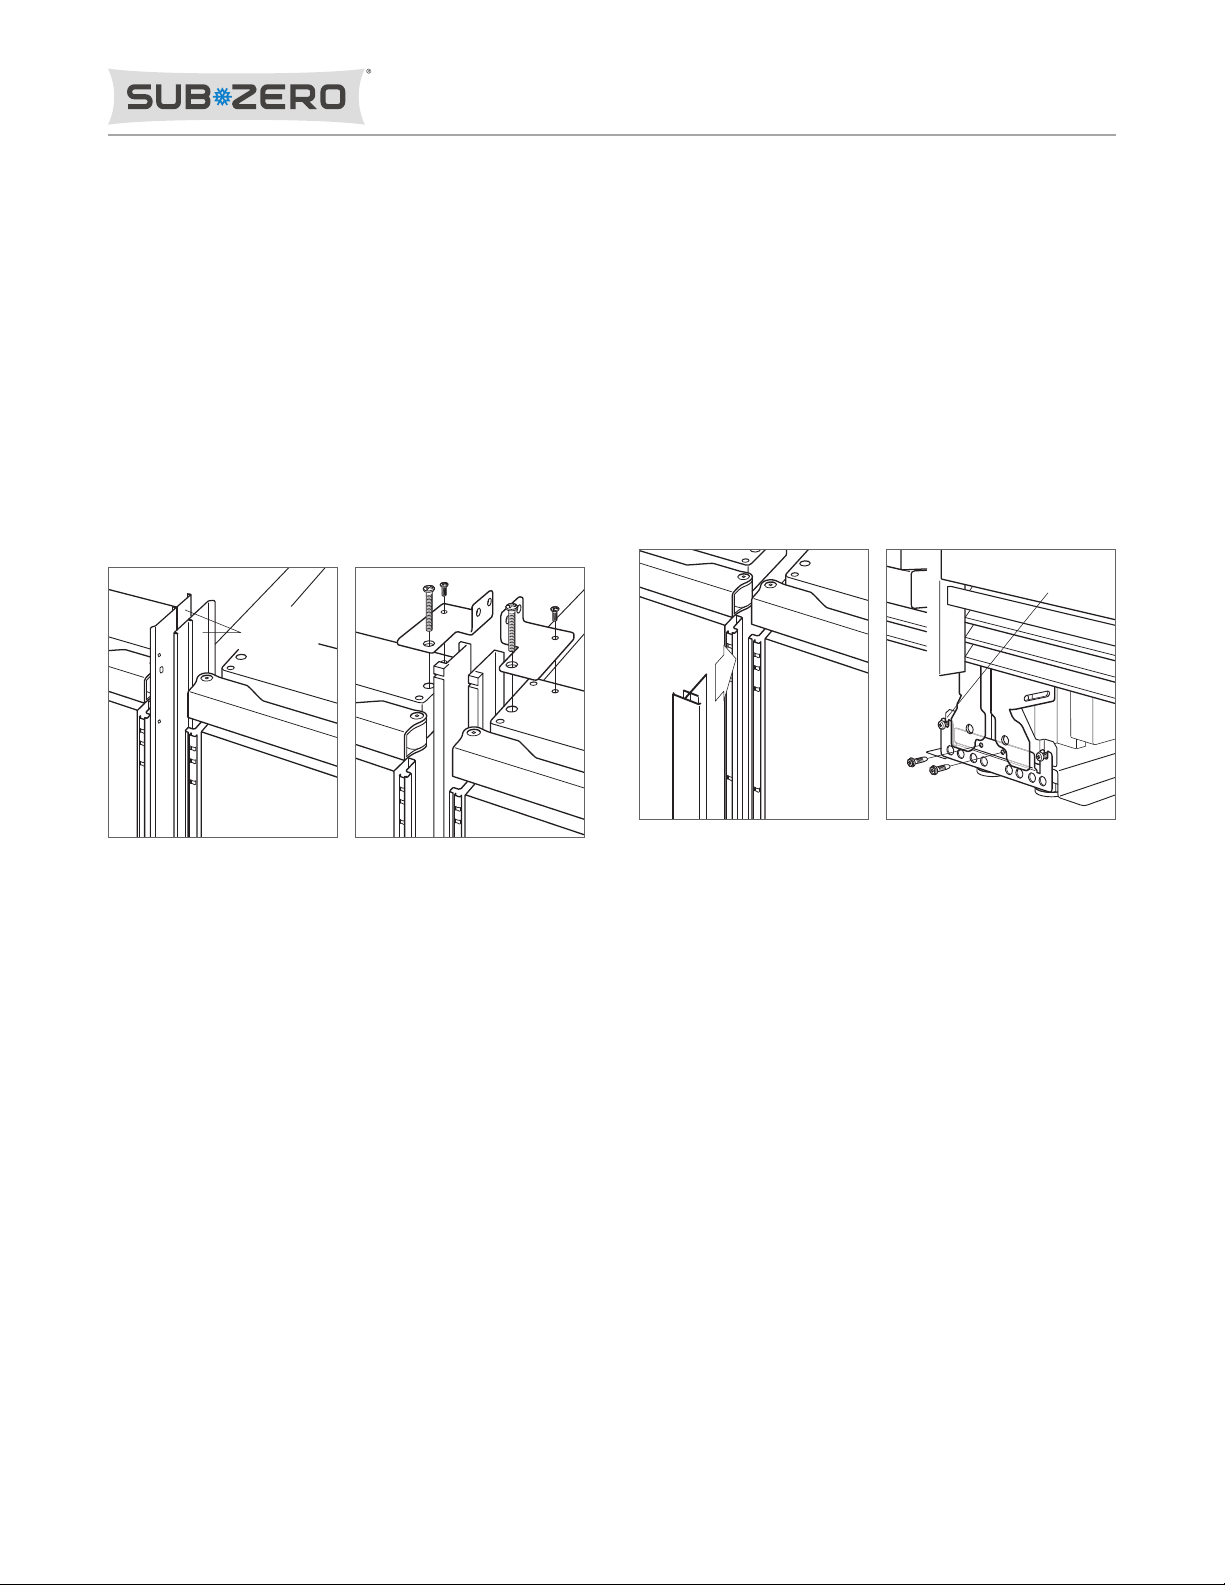
6 Remove the existing side mounting brackets from the
center of each unit. Refer to the illustrations below.
7 Once the brackets are removed, install tape to the front
edge of the heater to prevent interference when second
unit is installed. Refer to the illustration below.
8 Install the top brackets using the existing hinge screws
and two #10 x
9 Once the top brackets are secure, install unit into the
1
⁄2" screws. Refer to the illustration below.
right side of the opening, then install the left.
10 With both units in the opening, use two
1
⁄4" –20 x 1⁄2"
screws to secure the top brackets together.
SIDE
MOUNTING
BRACKETS
11 Verify the top of the trim is aligned with the top of the
opening, then press to install.
12 Slightly loosen the two bottom unit tray screws and
insert the bottom bracket into position. Tighten each
3
screw then install two #10 x
⁄4" self drilling screws to
secure the bracket.
13 Slightly loosen the two bottom unit tray screws. For 18"
models, drill out rivet and replace with a #8–32 x
1
⁄2"
screw. Insert the bottom bracket into position. Tighten
5
each screw then install two #10 x
⁄8" self drilling screws
to secure the bracket.
REMOVE RIVET
18" MODEL ONLY
Side brackets.
Top brackets.
Center trim installation.
Bottom bracket.
page 2 of 2
 Loading...