

Page 1

ML-1 & ML-1M
MAGNETIC LOCATORS
INSTRUCTION MANUAL
7-YEAR WARRANTY
SEARCH OR SURVEY WITH THE ML-1
“PIN-POINTING” THE TARGET
REPLACING THE BATTERIES
The ML-3L and ML-3S are guaranteed to be free of defect in
materials and workmanship for 7 years to the original end user/
purchaser.
Only authorized SSI repair personnel can repair units. Abuse,
battery acid and water damage are explicitly excluded from
warranty.
SubSurface Instruments, it’s owners, employees and assigns
shall not be liable for any action, inaction, injury, property or
consequential damage sustained or expenses incurred from the
use or misuse of this product.
When searching for a target, walk slowly, sweeping the locator
back & forth in front of you. If your target is small or very deep,
use a higher Gain setting and walk slower sweeping the locator
from side to side on a slow motion. Normally a medium setting
on the GAIN and a little less than normal walking pace will do
fine.
NOTE: Any ‘ferrous’ metal objects on your person, such as watches,
pocket knives, large belt buckles, cell phones and steel-toed shoes will
interfere if the locator is brought to close to them, or is operated on the
higher setting.
Upon locating the target using the “Search or Survey” method,
you can detect the exact location of a target such as a “PK”,
“Mag Nail”, or other steel or iron target by following these steps:
1. Change the GAIN setting to the lowest setting that will still
define the target, by using the “GAIN UP” or “Gain Down”
button.
2. Bring the locator to a vertical position by simply allowing it to
swing vertical, while you hold the unit loosely by the handle.
3. Move the locator back & forth in such a fashion as to create
an imaginary “X” pattern over the target.
4. Move the center of the imaginary “X” directly over the target
by positioning the crossing position of the “X” at the “Peak” of
the signal response.
The ML-1does not have a
Low Battery indicator, erratic
behavior, such as no Gain
change and unable to turn the
unit off, can be an indication of
this condition.
The ML-1M produces a
“flashing” battery icon in the lower right corner of the LCD, this
is an indication that only 5% of battery life is remaining and you
should replace batteries soon.
1. Remove and disposed the old batteries. Look for the “+”
and “-” markings in the battery box and insert the new
batteries accordingly.
2. Once both batteries are installed and you double-checked
the polarity of both batteries, check for correct operation of
the instrument.
3. Once operation is verified, replace the battery box cover.
You can use a coin to turn the capture screw in the battery
box cover, do not over-tighten.
Liability under this warranty is absolutely
limited to repair, service or replacement
of the instrument, at the sole discretion of
SubSurface Instruments. No other warranty
is expressed or implied.
SubSurface Instruments, Inc.
1230 Flightway Drive
De Pere, WI 54115 USA
Toll free: 855.422.6346
Fax: 920.347.1791
Email: [email protected]
Website: www.ssilocators.com
Page 2
1
2
3
4
5
6
MODEL VERSIONS
LOCATOR OPERATION
MAINTENANCE
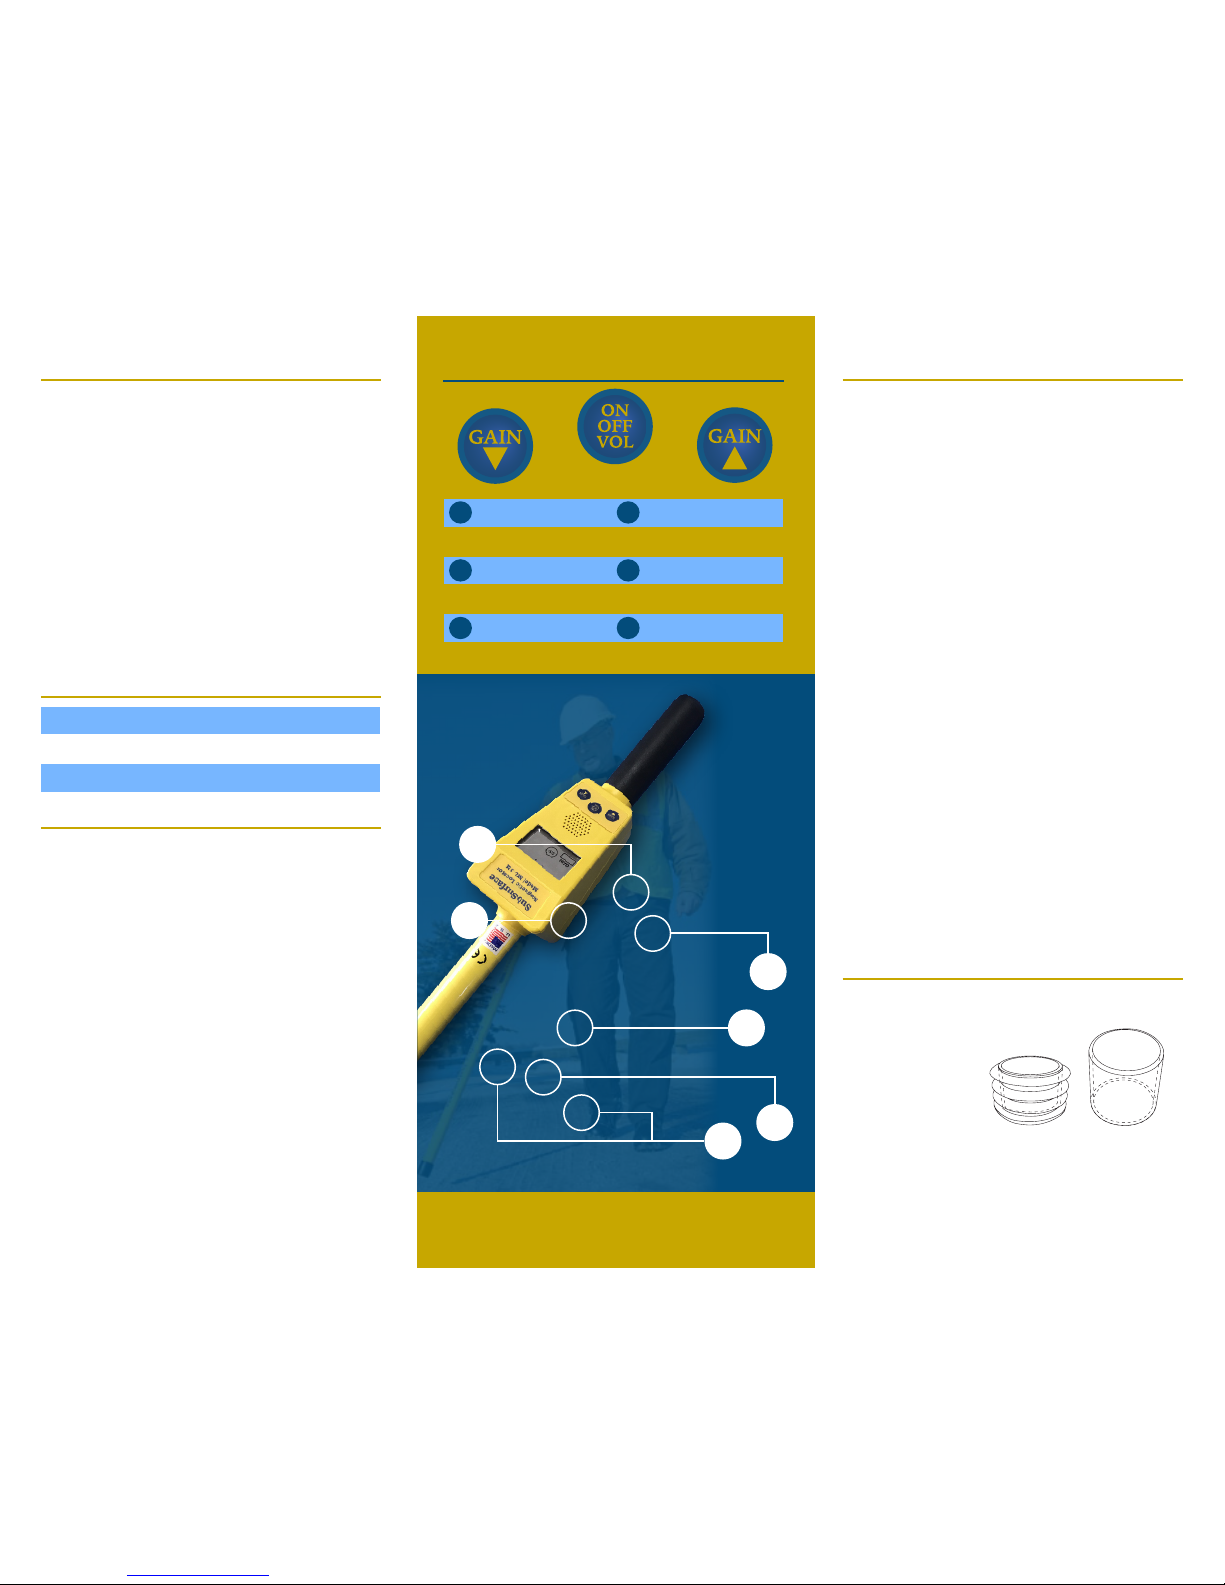
ML-1 SERIES KEY FUNCTIONSML-1 SERIES Magnetic Locators USING THE ML-1 KEYPAD
The ML-1M is one of SSI’s longest-enduring and industryleading products for magnetic detection. Whether you’re seeking
corner markers (iron or steel), well casings, steel drums or septic
tank handles, this is the go-to magnetic locator for you.
And for good reason. The ML series offers simple one-handed
operation with an easy-to-learn keypad featuring only three
buttons - no menus or cumbersome instructions to follow. The
audio unit has the volume built into the on/off key; just hold
down the key while it cycles through the settings. The ML-1M
features strong mono-tube construction, providing structural
integrity you can count on.
In addition to the features of the original ML-1, the ML-1M is
metered, offering you added features without added complexity.
The digital meter provides for visual signal strength, polarity
indication, gain setting plus battery life display. These versions
are engineered to operate identically with the same controls.
Microprocessor Control:
The volume and Gain settings are set in the processor memory. It
remembers the last settings used. So when you turn the unit back
on, it will be adjusted to your previous settings.
Polarity & Signal Strength:
Displays the polarity symbol and the strength of the signal by
increasing the bar count to the specific polarity direction, until the
maximum strength is reached.
Gain Display:
It displays the sensitivity level at what the unit is currently
operating. It shows 8 different bars, representing each sensitivity
level.
Speaker:
The speaker volume is controlled by pressing and holding
down the ON/OFF button. It will cycle from “Low” to “High”.
Repeating the cycle until the button is released. Release the
button at the desired volume, this setting contains 7 different
volume levels, allowing you to adjust the unit’s settings to your
desire working conditions.
Power ON/OFF/VOL:
Press this button once to turn the unit “ON” and “OFF”. It also
controls the volume.
Gain (Sensitivity) Controls:
Depress the button with the “Down Arrow” to decrease the
sensitivity and depress the “Up Arrow” button to increase the
sensitivity. There are 8 sensitivity levels and they will change one
click at a time.
Turn the power on or off by pressing the ON/OFF button on the
keypad. Press and hold the same button to increase the volume.
To change the Gain (sensitivity) settings, repeatedly press the
gain up button to increase the sensitivity, and the gain down
button to decrease the sensitivity.
Each push of the gain button changes the sensitivity up or
down ONE increment at a time, out of 8 possible settings. A
microprocessor remembers the gain settings, and when turned
back on, the locator returns to the last used setting before it was
turned off. If you are using the ML-1 and don’t know what gain
setting you’re on, press the gain down button several times (more
than 7), to ensure that you are on the lowest setting. Then press
the gain up button and count up to 7 (or vice versa down from
the highest setting.) If starting from the lowest setting, 3 or 4 clicks
up is a good setting to begin locating. Use the LCD Display on
the ML-1M to determine the gain setting and signal strength of
the unit.
(All of our “ML” series locators have sensitivity settings that are
more ‘linear’. Beware of competitor models which take larger
non-linear ‘jumps’ between settings, which give the impression
that their unit is more sensitive on lower settings.)
To ensure the correct functionality of your unit, make sure the
Crutch tip and end cap are in good condition, these will prevent
water and dust to enter the unit.
SubSurface Instruments, offers extra accessories to replace
damaged parts like battery packs, battery caps, crutch tips and
end caps.
You will find more information about our Magnetic Locators at:
www.ssilocators.com
1 2
3 4
5 6
Polarity Display
Model Meter Low Batt.
ML-1 NO Meter No Indicator
ML-1M LCD Display Flashing Icon
Gain Strength Display
Signal Strength Display Speaker
Power/Volume Button Gain Control Up-Down
 Loading...