

StuntCams SC-HDGB User Manual
User Manual
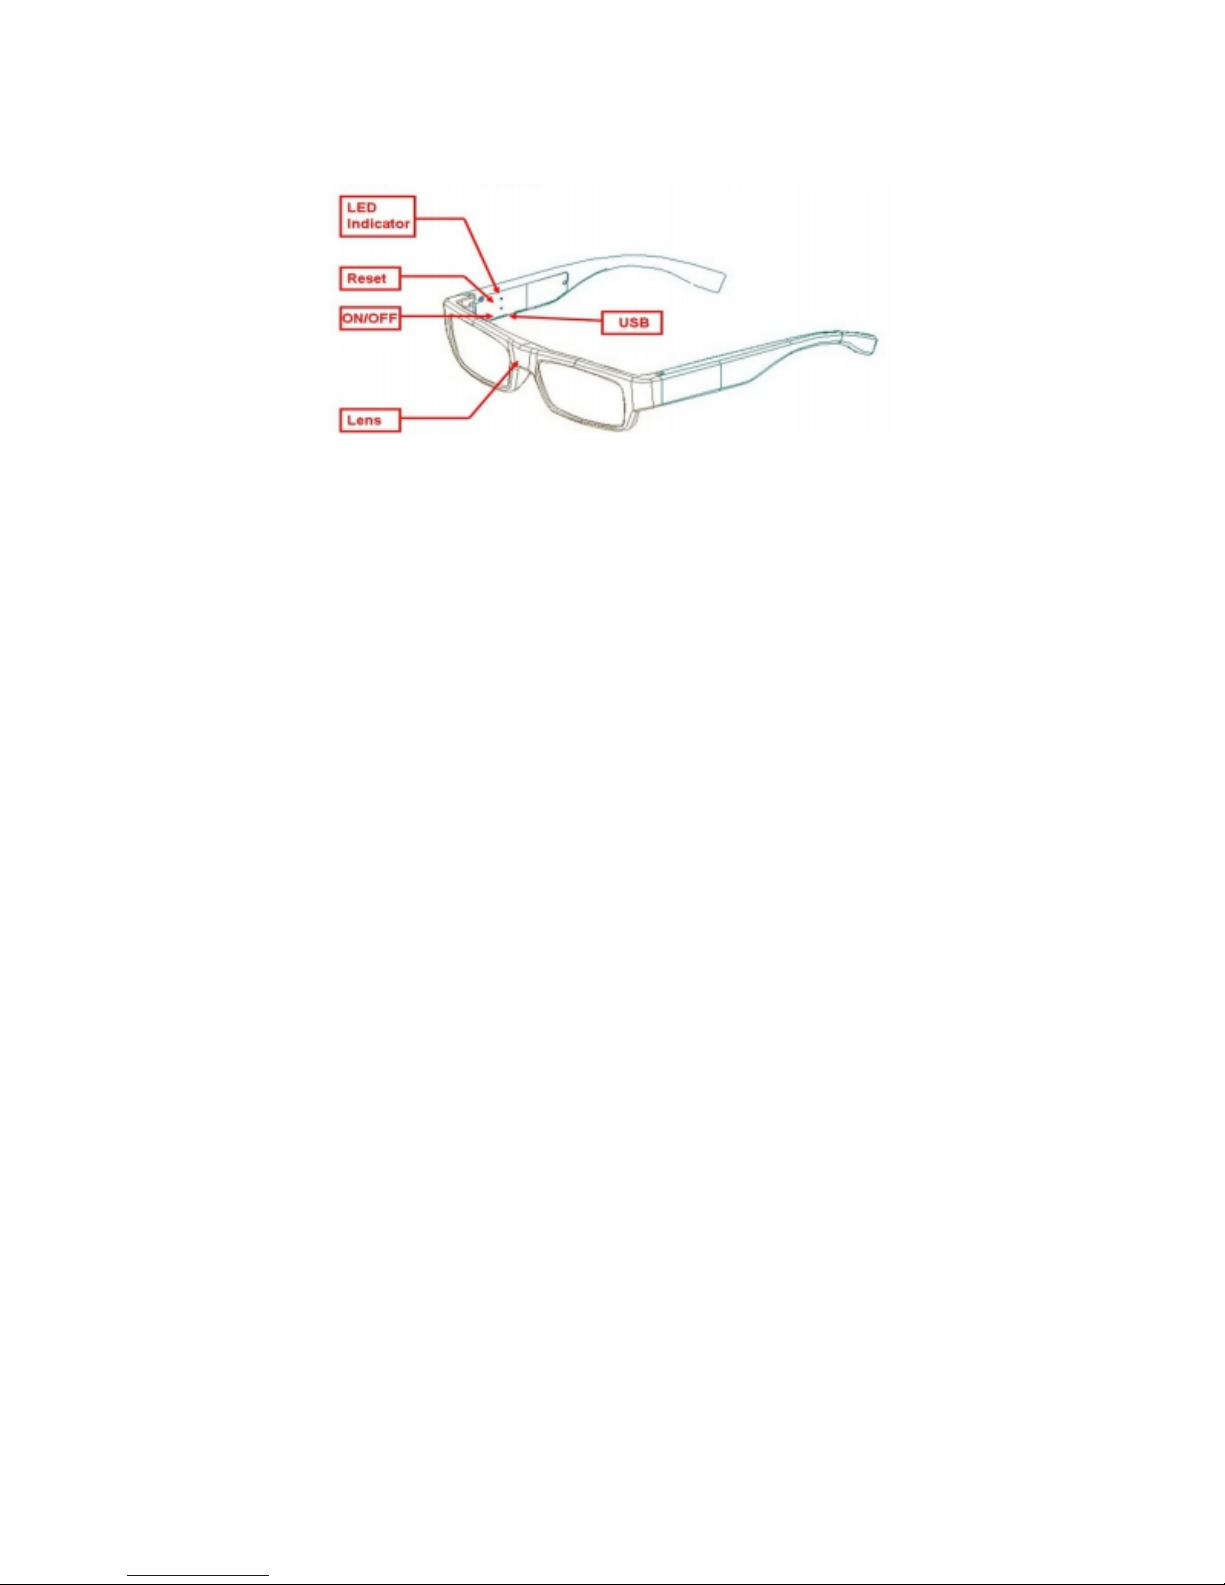
Product diagram
The product has an internal, rechargeable battery; charge the battery fully before you use it in the first
time. The battery can be charged by following ways:
1) By connecting to PC: Using the USB cable provided, plug the product into your computer's
USB port.
2) By battery charger: Plug the product into electrical outlet using the USB cable.
During charging, the yellow indicator light will blink. When the battery’s power is full, the blue
indicator light turns on.
Note: when the battery’s power is low, the yellow, the blue indicator will blink for
seconds, and then the product will shut down automatically.
Recording:
Press and hold the Record/Stop button for about 3 seconds to turn on and start recording, the
blue light will turn on and then the yellow light will turn on and flash slowly 10 times and then turn off.
Click the Record/Stop button to stop the video. The files will automatic save, the blue lights will
stay on when finished. If the continuous recording time is over 15 minutes, the product will save the
current recording data, and then restart video recording automatically.
To obtain better video, be in a well lit room or outside, staying at least two feet from the target.
Power off:
Press and hold the Record/Stop button for about 3 seconds, the yellow and blue indicators will
flash quickly 3 times and then turn off to indicate that the product is off.
Connecting to PC:
When the product is in Standby Mode or turned off, you can insert the product into the USB
port of your PC. Do not connect the product to the computer during video recording or while taking a
photo. A removable disk symbol will appear on the computer screen. To disconnect from the computer,
right click on a removable disk symbol and select “eject.”
When connected to a PC, if there is no response for 30 seconds, disconnect the product and
reconnect again.

IP Camera:
After connecting to a PC, press and hold the Record/Stop button for about 3 seconds, the
computer will automatically install the camera driver and show a camera icon. Click to display the
images. Press and hold the Record/Stop button for about 3 seconds again, the camera icon will
disappear to return to disk connection mode.
Removable disk:
When connected the to a PC you can copy, move, or delete files.
Setting time:
The product has the function of real-time display, the date and time will be shown on the image.
The format is “year-month-day hour:minutes:seconds.”
To set or correct the date and time:
1. Edit a text file according to the format of “20130101010101”.
2. Connect the product to computer, save the modified file “timerset.txt” to the root
directory of the product memory.
3. Disconnect the product from computer; turn the product on, the time will be set up
automatically.
Auto power off function:
The product will shut down automatically in following three conditions:
• The battery’s power is low
• The memory is full
• If there is operation for 3 minutes in Standby Mode
Reset function:
If the product is not working normally for an unknown reason, reset the product by pressing the
the reset button inside the hole. If the reset does not solve the problem consult your local dealer.
Specifications:
• View Angle: 62°
• Video Format: AVI
• Frame Rate: 30fps
• Operation System: 2000/XP/Vista
• Voice Sampling: 16KHz
• USB Interface: USB 2.0
• Store Temperature: -20°- 80°
• Battery type: Lithium battery
• Continuous recording time: 90minutes
Packing Contents:
• User Manual
• USB cable
• Glasses cloth
• Mirror bracket
 Loading...