

Page 1
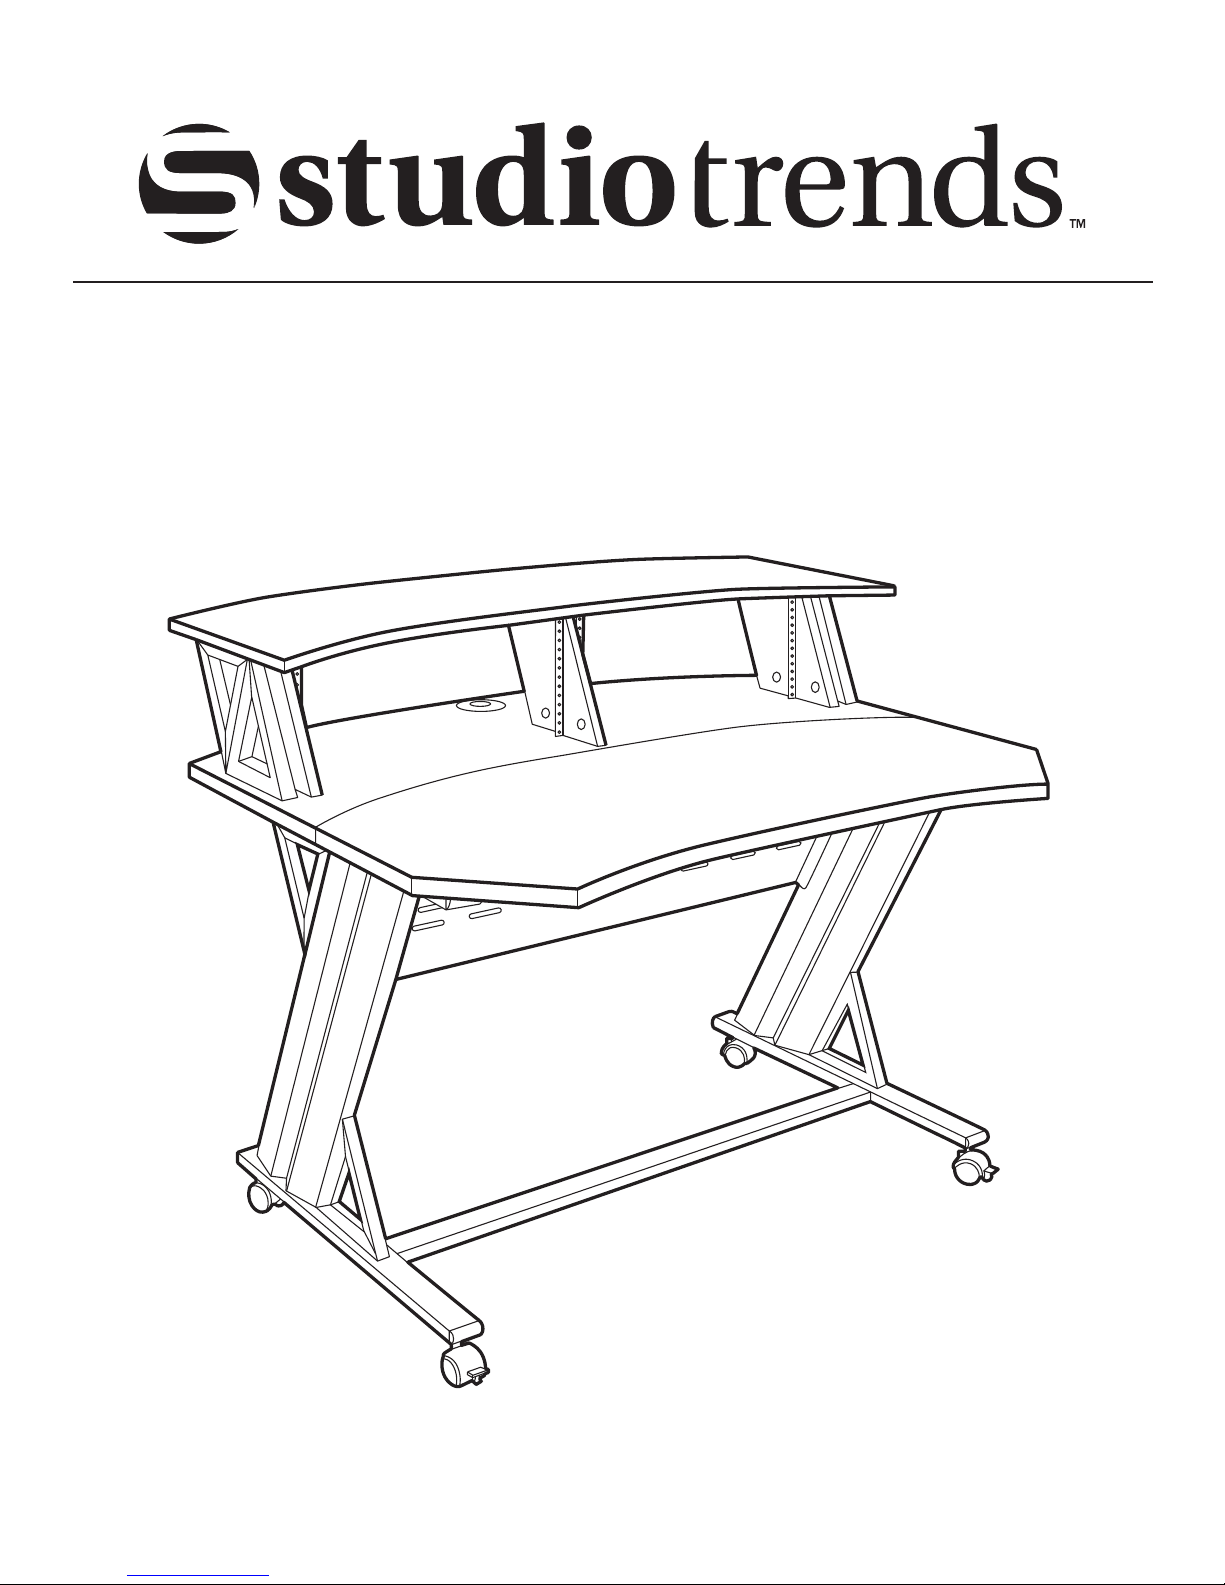
STLD46
46” STUDIO DESK
www.studiotrendsdesign.com
ASSEMBLY
INSTRUCTIONS
Page 2
Congratulations on your purchase of this quality Studio Trends™ product. By following the easy
assembly instructions found in this manual, you’ll have your new desk built and ready for use in
very little time.
IMPORTANT ASSEMBLY TIPS
Tip 1: Having a second person or “helper” makes assembling the desk much easier.
Tip 2: Be sure to assemble your desk on a soft, flat surface. If you have hardwood floors, use a
blanket or the packing materials as a working surface to protect the desk and floor.
Tip 3: We include two wrenches, however you’ll also need a Phillips-head screw driver.
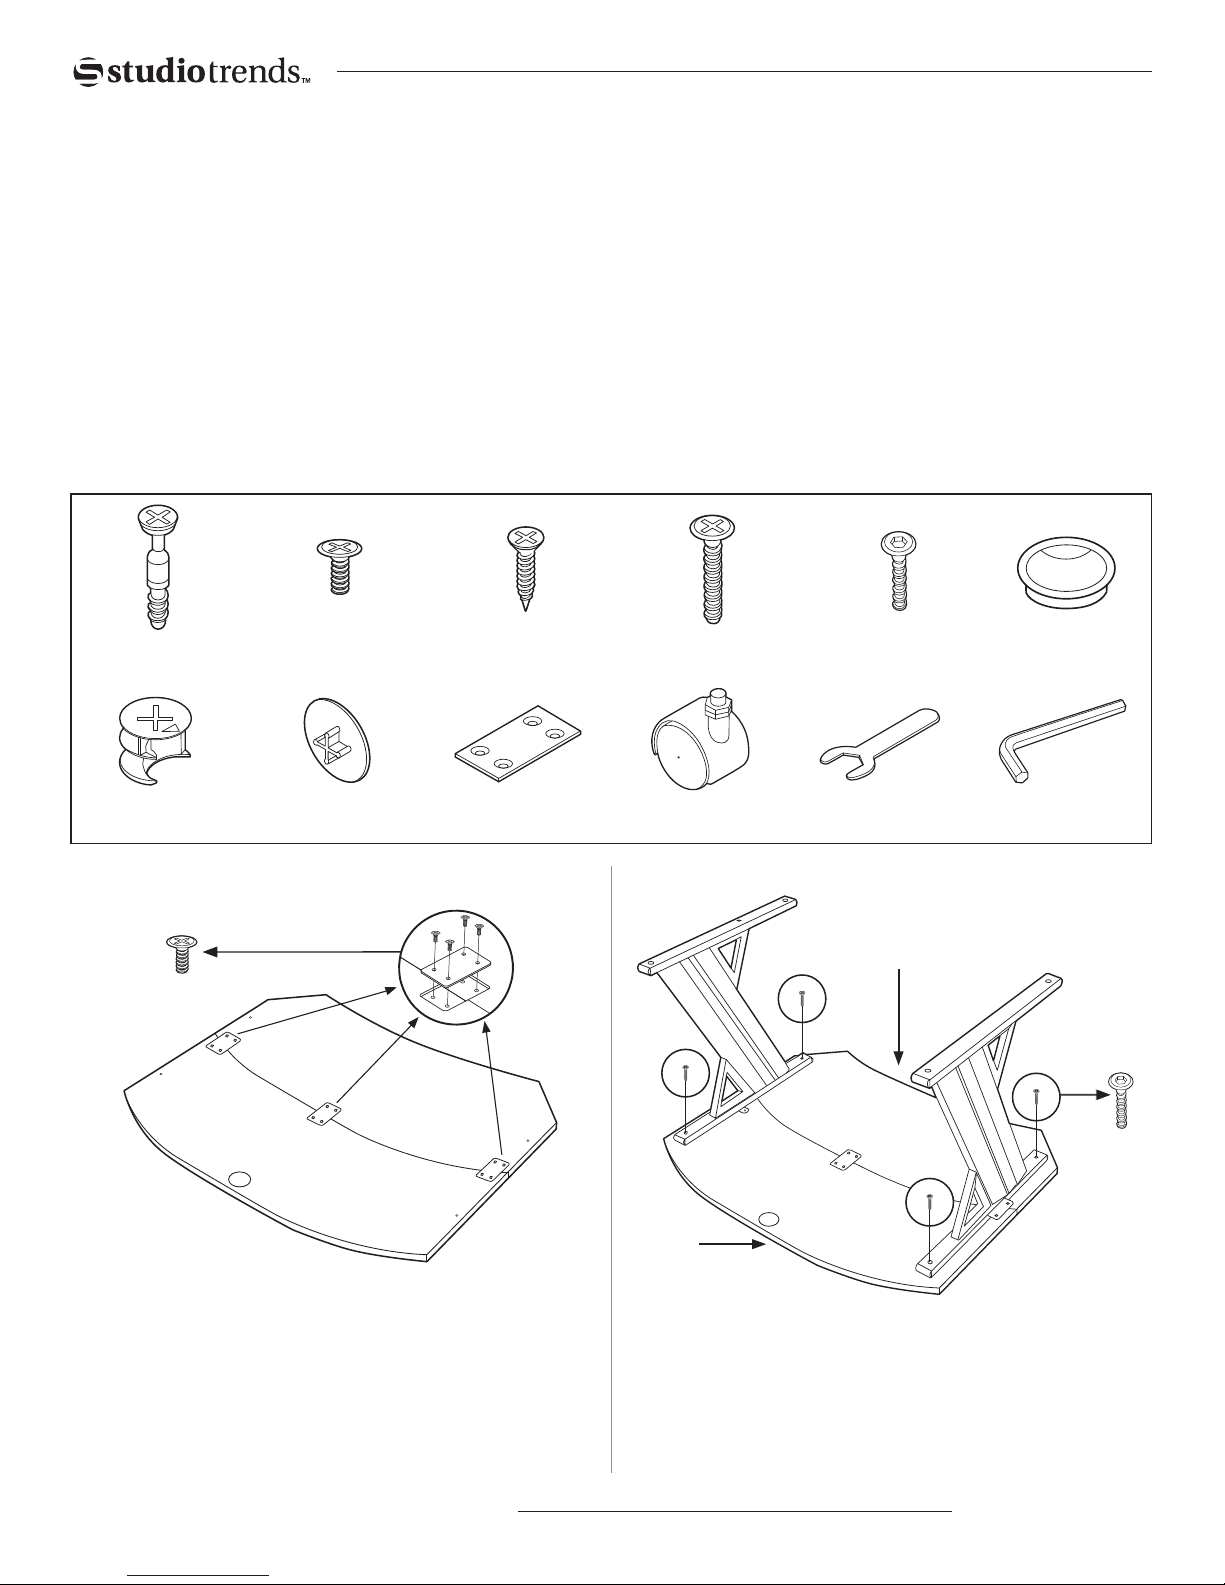
NOTE: The included hardware parts are illustrated below.
Cam Lock (12x)
½” Phillips Screw (12x)
⅝” Phillips Screw (6x)
I-Bracket (3x)Klix Cam (12x)
1 ½” Phillips Screw (4x)
1. 2.
½” Phillips Screw
Back of
Caster (4x)Cam Cover (12x)
Desk
Grommet (1)½” Hex Screw (6x)
Open Wrench (2x) Hex Wrench (1x)
Front of
Desk
1½” Phillips
Screw
Place the two sections of the tabletop face down. Be sure to
align the edge and seam so they are flush. Attach the three
I-brackets using the ½” Phillips screws (12x). Tighten all
the screws finger tight. Check the alignment, then tighten
screws fully using a Phillips-head screwdriver.
STLD46 ASSEMBLY INSTRUCTIONS
Attach the two legs to the bottom of the desk with the 1½”
Phillips-head screws (4x). Tighten screws only finger tight
for now.
www.studiotrendsdesign.com
Page 3
3.
3.
½” Hex
Screw
⅝” Phillips Screw
4.
½” Hex Screw
⅝” Phillips Screw
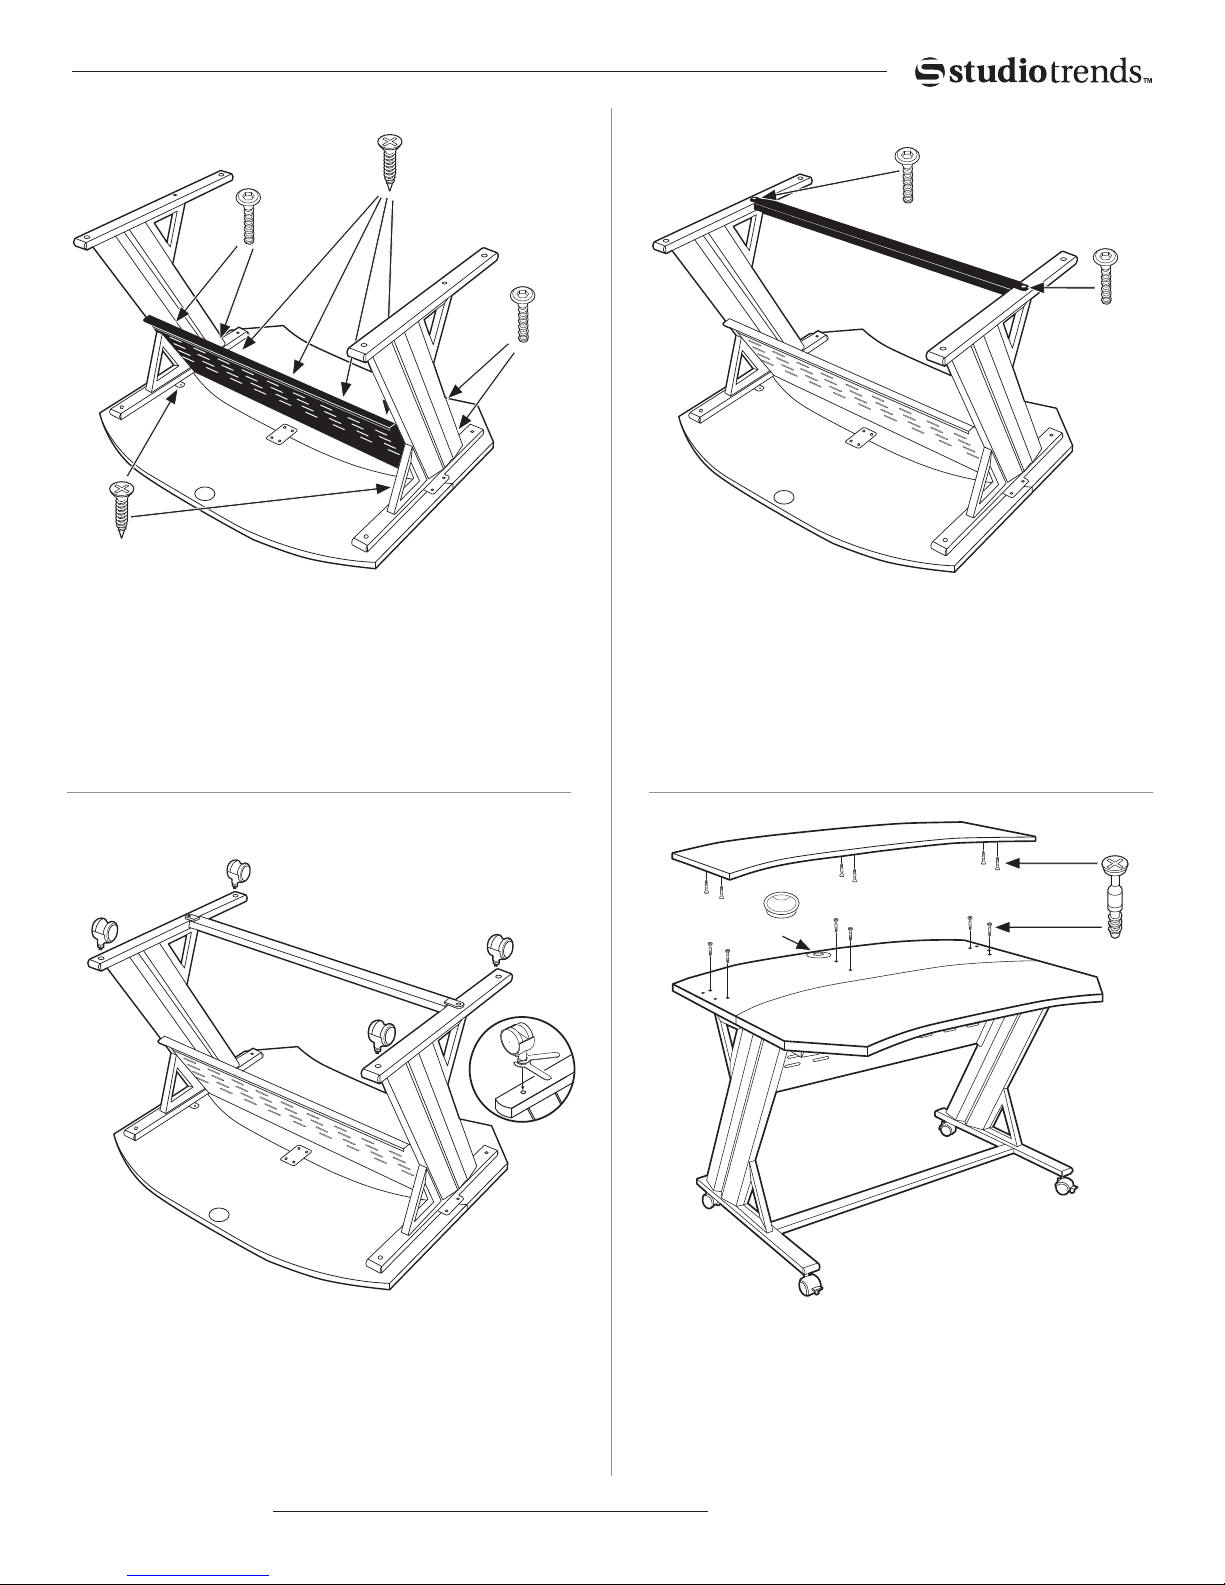
Attach the modesty panel to both legs using the ½” hex
screws (4x). Tighten fully. Then install the ⅝” Phillips
screws (2x), attaching the modesty panel to the desktop.
Then, using the remaining ⅝” Phillips screws (4x), attach
the legs to the desktop.
5.
½” Hex
Screw
½” Hex Screw
Attach the crossmember bracket to both legs using the
½” hex screws (2x). Check the alignment of the assembly,
adjust if necessary, then tighten screws fully.
6.
Desk Shelf
With the included Open wrenches, install the casters (4x).
Position the brake-equipped casters on the “front” of the
desk. Please note that these wheels are height adjustable,
enabling you to match the height of the desk with other
furniture.
Grommet
Cam Lock
With the help of a friend, turn the desk up on its wheels.
Install the cable management port grommet. Then install
the cam locks (6x) into the desktop. Install the rest of the
cam lock screws (6x) into the bottom of the desk shelf.
www.studiotrendsdesign.com
STLD46 ASSEMBLY INSTRUCTIONS
Page 4
7. 8.
Klix Cam
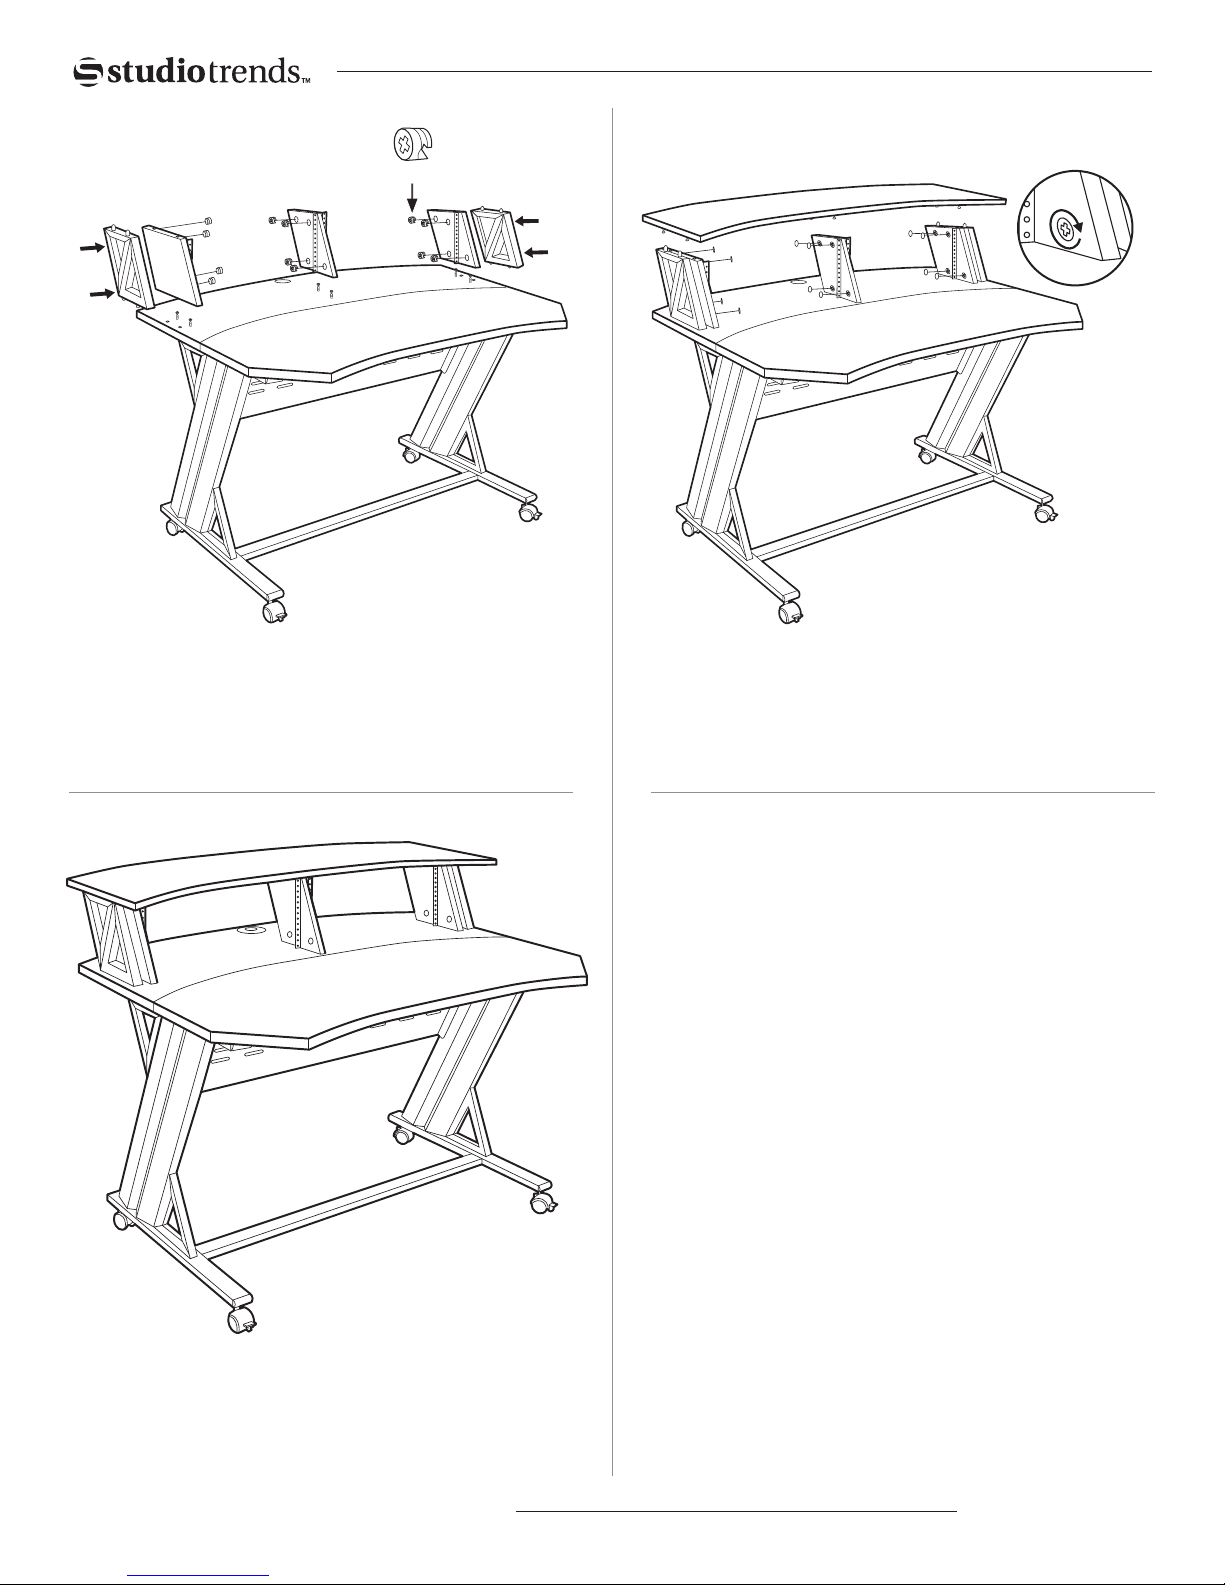
Insert Klix cams (4x) into each of the rack mount walls by
doing the following: Point arrows toward the pre-drilled
cam holes. Push cams into holes. Then place the decorative
triangular pieces into place next to the side walls.
Place the desk shelf on top of the rack mount walls and
tighten the Klix cams clockwise using a Phillips-head
screwdriver. Use caution not to over-tighten Klix cams.
To complete the assembly, place the cam covers (12x) into
place.
For customer service and replacement parts:
www.studiotrendsdesigns.com
One (1) Year Limited Warranty
Subject to the limitations set forth below, Studio Trends(TM) hereby
represents and warrants that the components of this product shall be
free from defects in workmanship and materials, including implied
warranties of merchantability or fitness for a particular purpose, subject
to normal use and service, for one (1) year to the original owner from the
date of purchase.
Retailer and manufacturer shall not be liable for damages based upon
inconvenience, loss of use of product, loss of time, interrupted operation
or commercial loss or any other incidental or consequential damages
including but not limited to lost profits, downtime, goodwill, damage to
or replacement of equipment and property, and any costs of recovering,
reprogramming, or reproducing any program or data stored in equipment
that is used with Studio Trends(TM) products. This guarantee gives you
specific legal rights. You may have other legal rights which vary from
state to state. Some states do not allow limitations on how long an
implied warranty lasts, so the above limitation may not apply to you.
Your new Studio Trends 46” desk is now ready to use for
years of reliable service.
STLD46 ASSEMBLY INSTRUCTIONS
California Prop 65 Warning: This product may contain a chemical[s]
known to the state of California to cause cancer, birth defects, or other
reproductive harm.
Studio Trends
P.O. Box 5111
Thousand Oaks, CA 91359-5111
All trademarks and registered trademarks mentioned herein are
recognized as the property of their respective holders.
Made in China
www.studiotrendsdesign.com
1101-9531
 Loading...