

Page 1
ASSEMBLY MANUAL
Can be applied for PRO LINE Classic and PRO LINE S and SL series
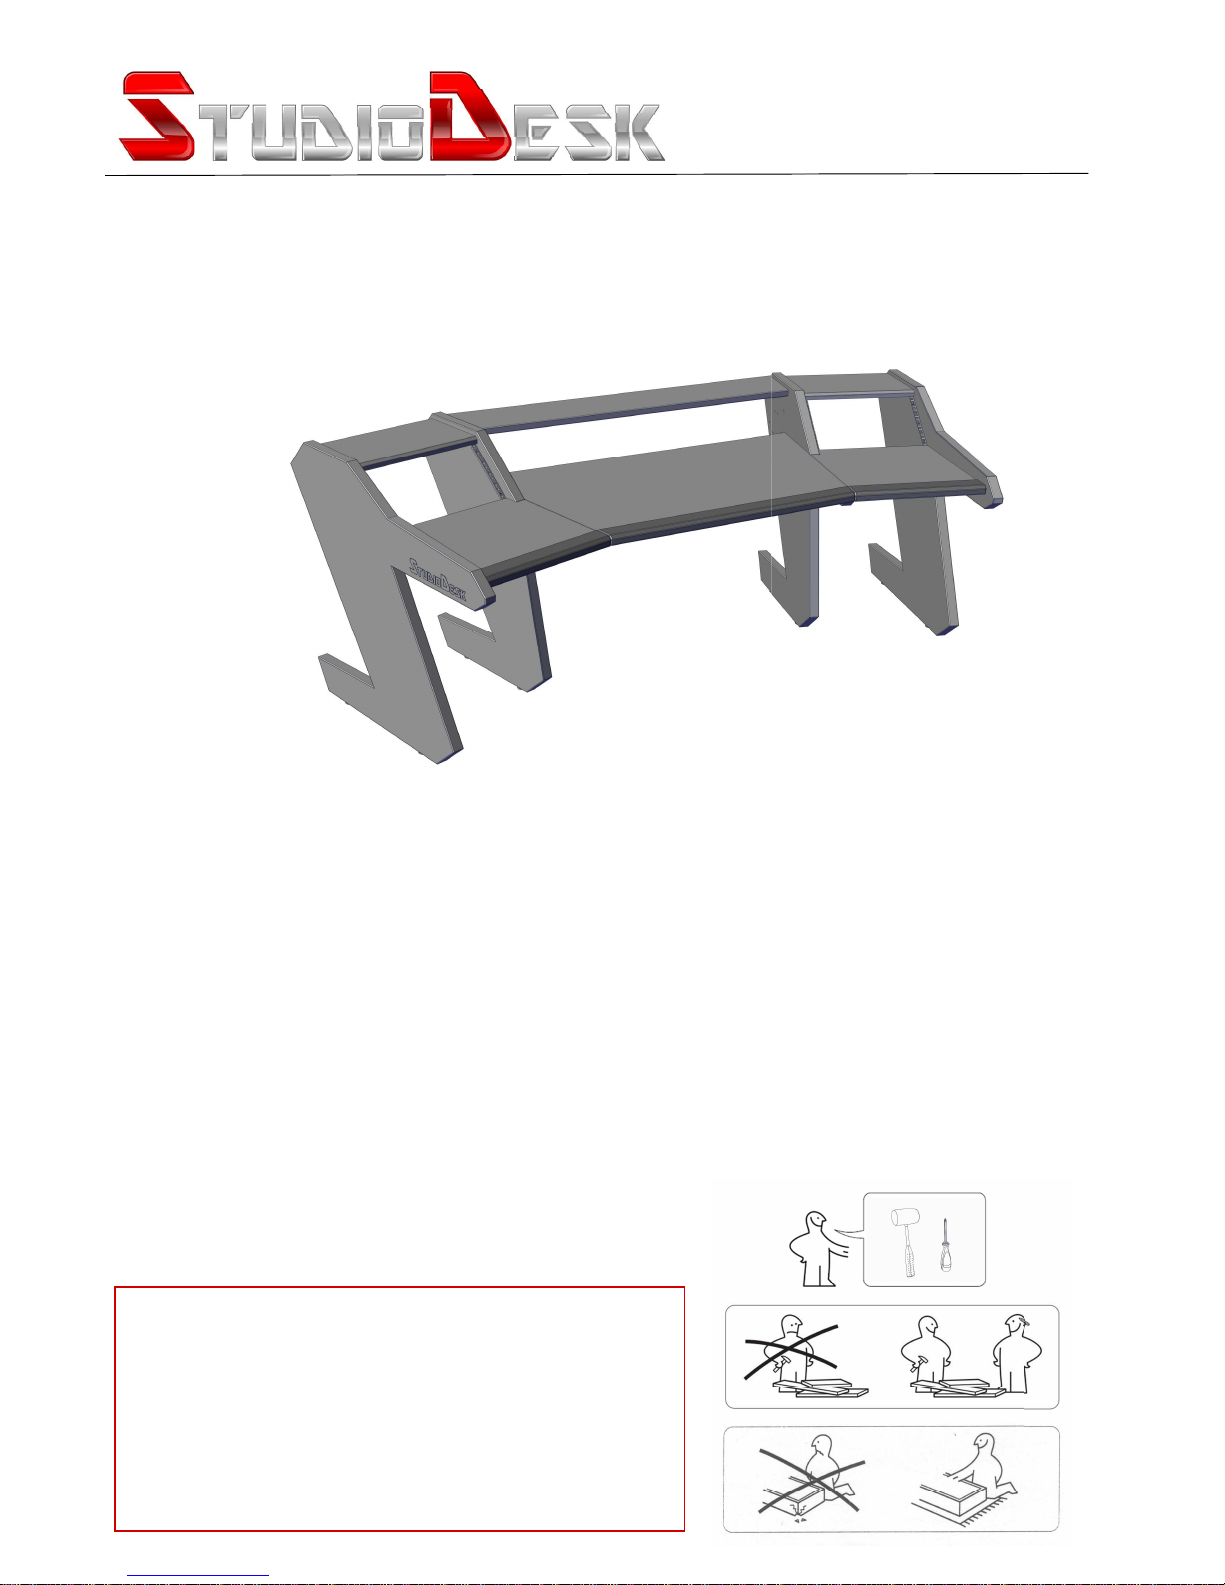
NOTE: In order to avoid injury or damages,
please do not try to assemble your desk alone.
PRO - Line is a heavy desk, which requires
at least two people to carry out assembly.
Please assemble on soft surface to avoid
scratches to the lacquer.
!
www.studiodesk.net
Page 2
The Desk You Deserve
Thank you for making StudioDesk your desk of choice!
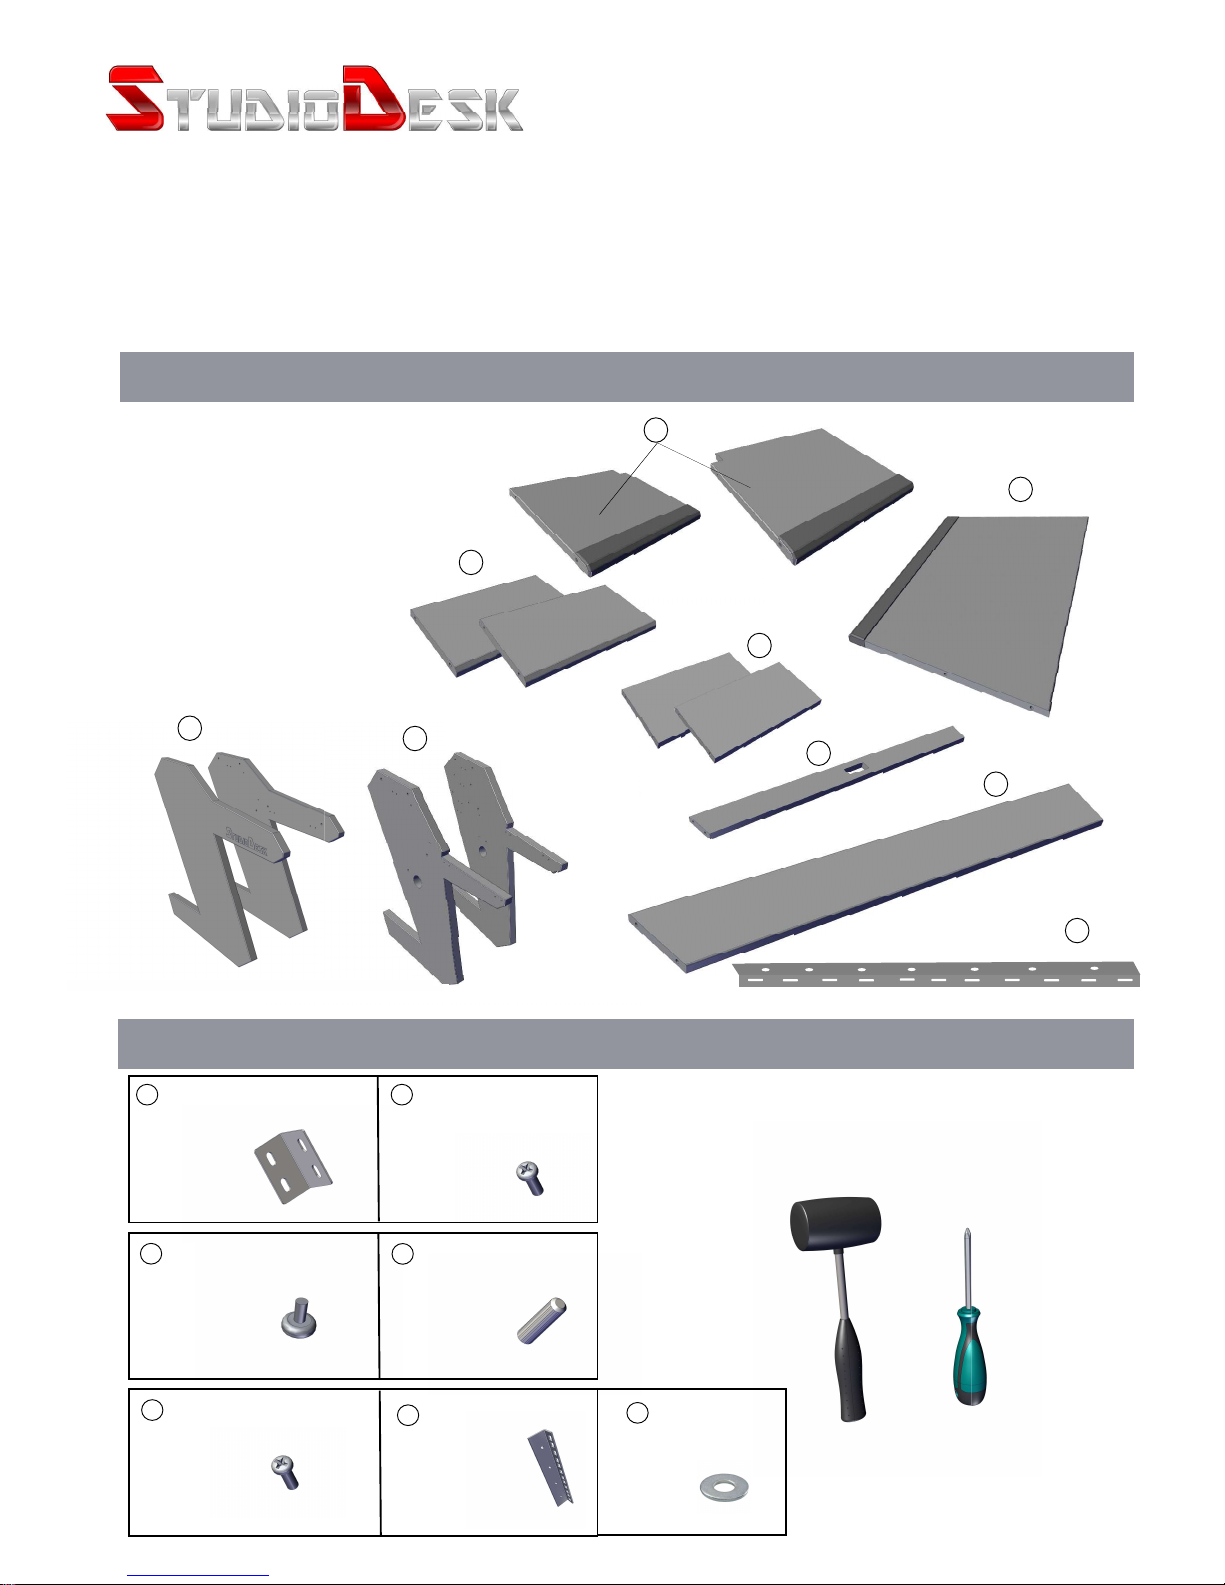
Before beginning assembly of your desk, let’s get familiar with the parts you have received in your package.
Please match the corresponding numbers on this page with the drawings.
1. Main Desk Surface
2. Left and right desk surfaces
3. Strengthening boards
4. Top shelf’s
5. Cable management
6. Video monitor’s shelf
7. Outer Legs - (left and right)
8. Inner legs - (left and right)
9. Strengthening bar
Hardware
Wooden parts
Tools needed
(Not included)
Rubber hammer
Phillips Screwdriver
9
Metal corner
20 pcs
Desk tips
8 pcs
10
M6 Screw
90 pcs
11
M6 Screws for
Rack rails
12
Wooden Dowels
34 pcs
13
Rack rails 5 U
4 pcs
14
2
4
3
7
8
5
6
1
L
R
L
R
L
R
9
4 pcs
15
Washers
7 pcs
Page 3
1
Step One
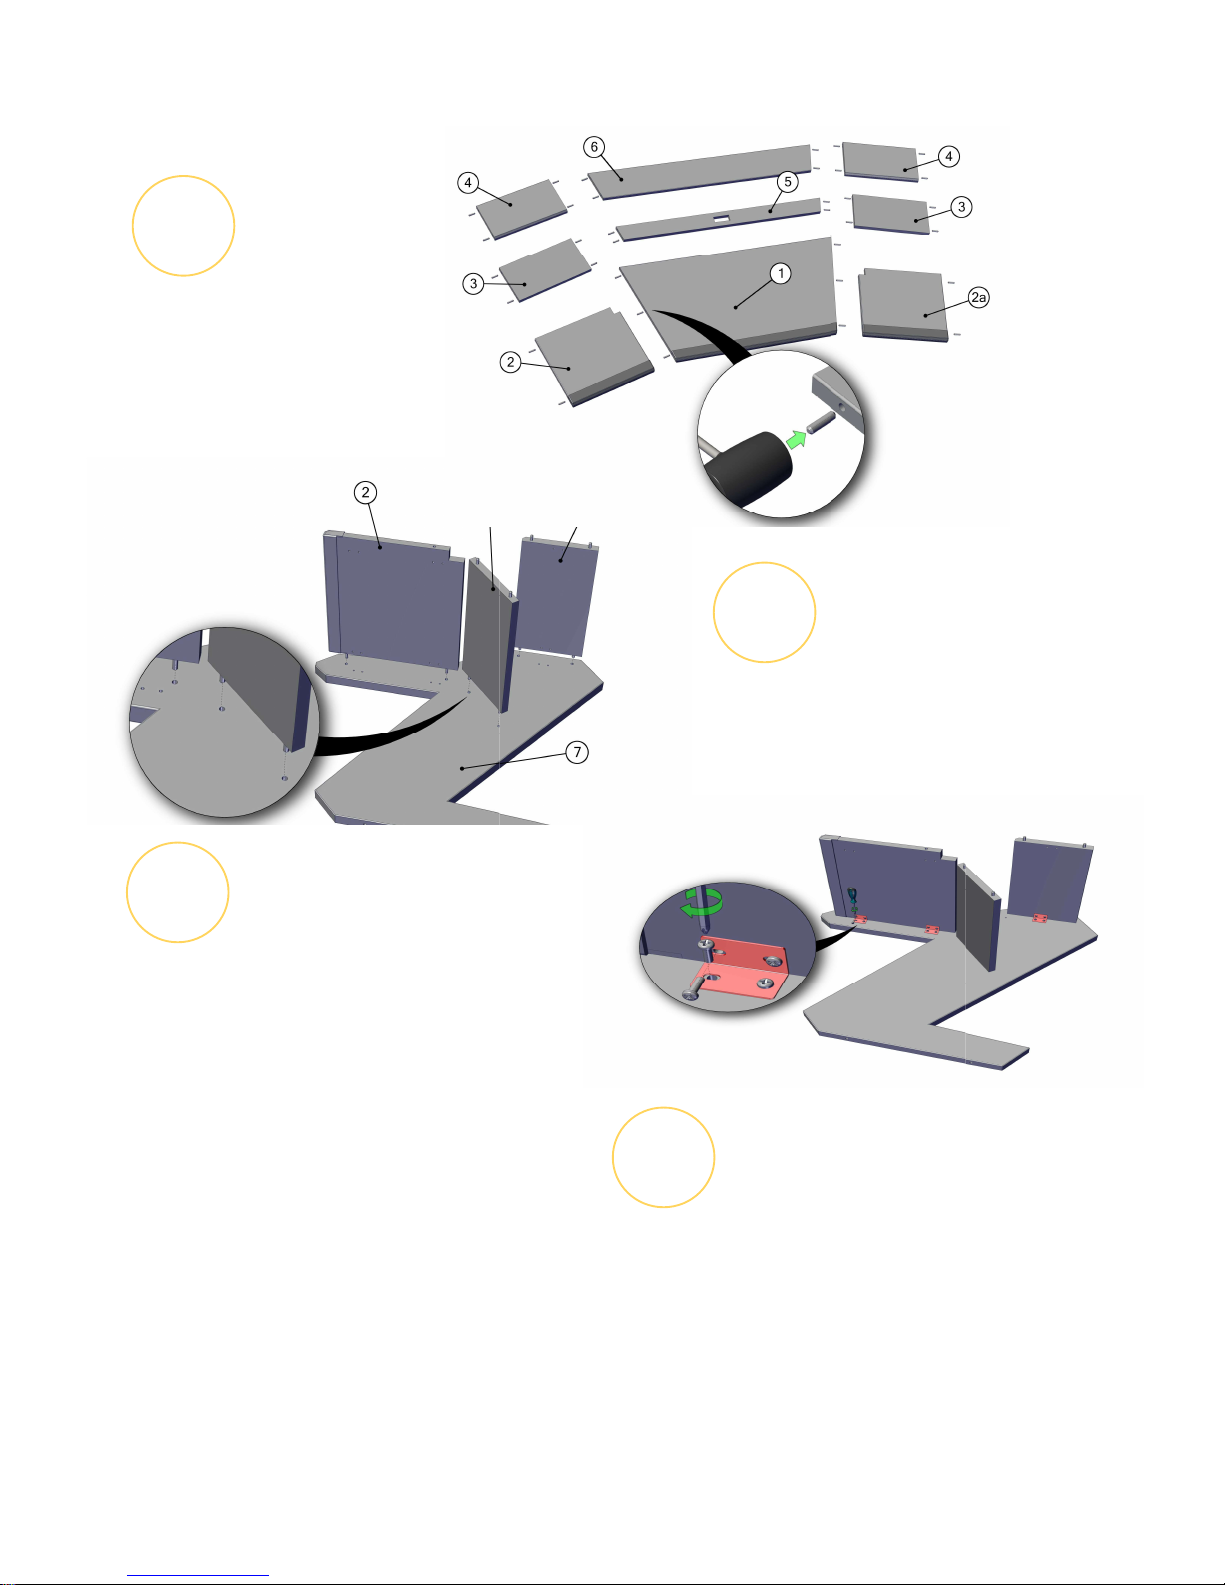
Insert dowels (13) into the holes as
shown in the illustration. Use a
rubber hammer if needed.
3
Step Three
Fix assembled parts together using
metal corners (9) and M6 screws (11)
as shown in the illustration.
8
10
11
4
Step Four
Place inner leg to assembled section onto the
corresponding holes on the leg. Take special care
to avoid scratching the lacquered surface. Push the
Inner leg down until the dowels seat properly in their
respective holes. Use a rubber hammer, if needed.
Usually it is not necessary.
2
Step Two
Assemble parts together on dowels
as shown in the illustration.
www.studiodesk.net
Page 4
5
Step Five
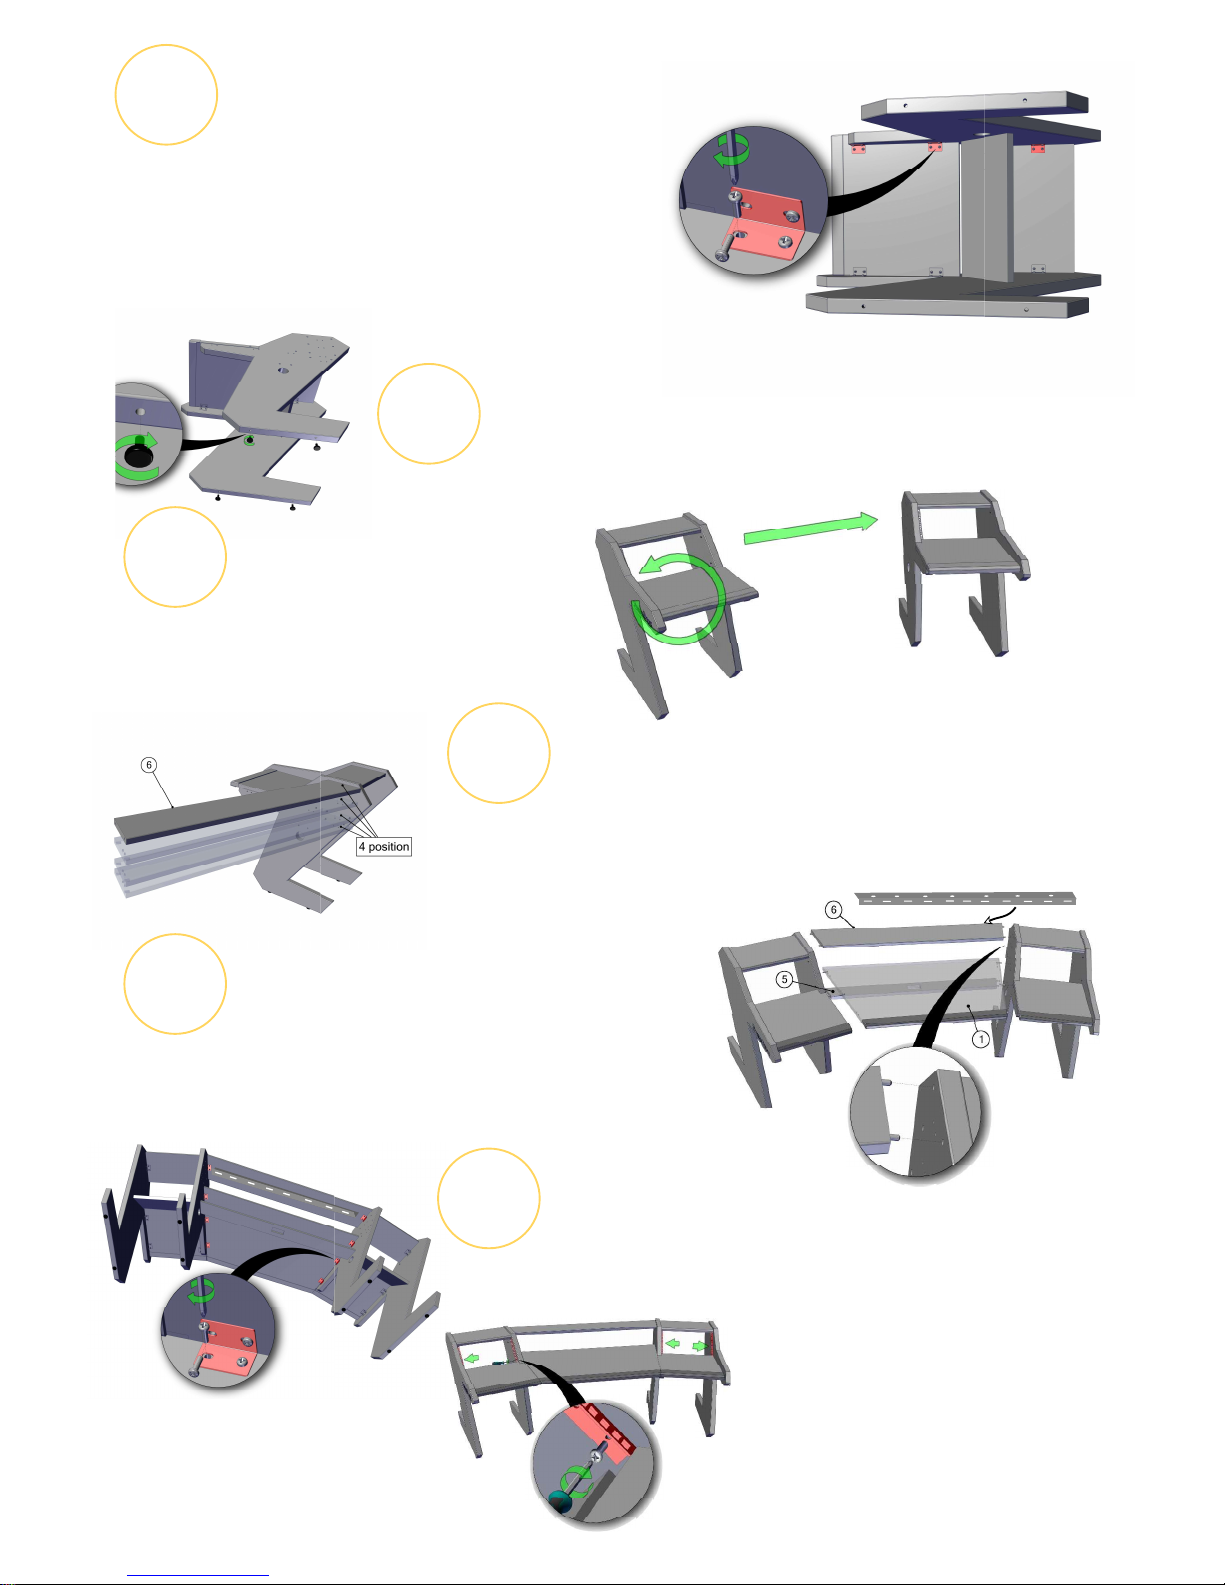
Once dowels are in place and boards sit tight to the leg,
use metal corners (9) and M6 screws (11) to fix the
middle section to the leg. Repeat procedure with right
Module. Note! Turn the metal corner’s shorter edge downward
Step Six
7
Step Seven
8
10
Connect two modules with middle parts one
by one shown on the illustration. Desk will stand
freely on dowels. Push the modules closer
until the dowels seat properly in their respective
holes in legs and and desk surfaces are tight to each
other.
6
Screw the desk tips to the legs on both left and right module.
Decide on which position you are going to have your video monitor
shelf. There is 4 positions to chose from. Install strengthening bar to
the bottom of the video monitor shelf using M6 Screws and washers.
8
Step Eight
9
Step Nine
Fix middle section to the legs using metal corners (9)
and M6 screws (11)
Note! Turn the metal corner’s shorter edge downward
10
Step Ten
Fix rack rails (14) to the legs using
M6 screws (12). Positions for the
screws are predefined.
Please read appendix manual in this step.
Turn modules on it’s standing position
and position them on proximity of the length
of the main desk surface.
 Loading...