

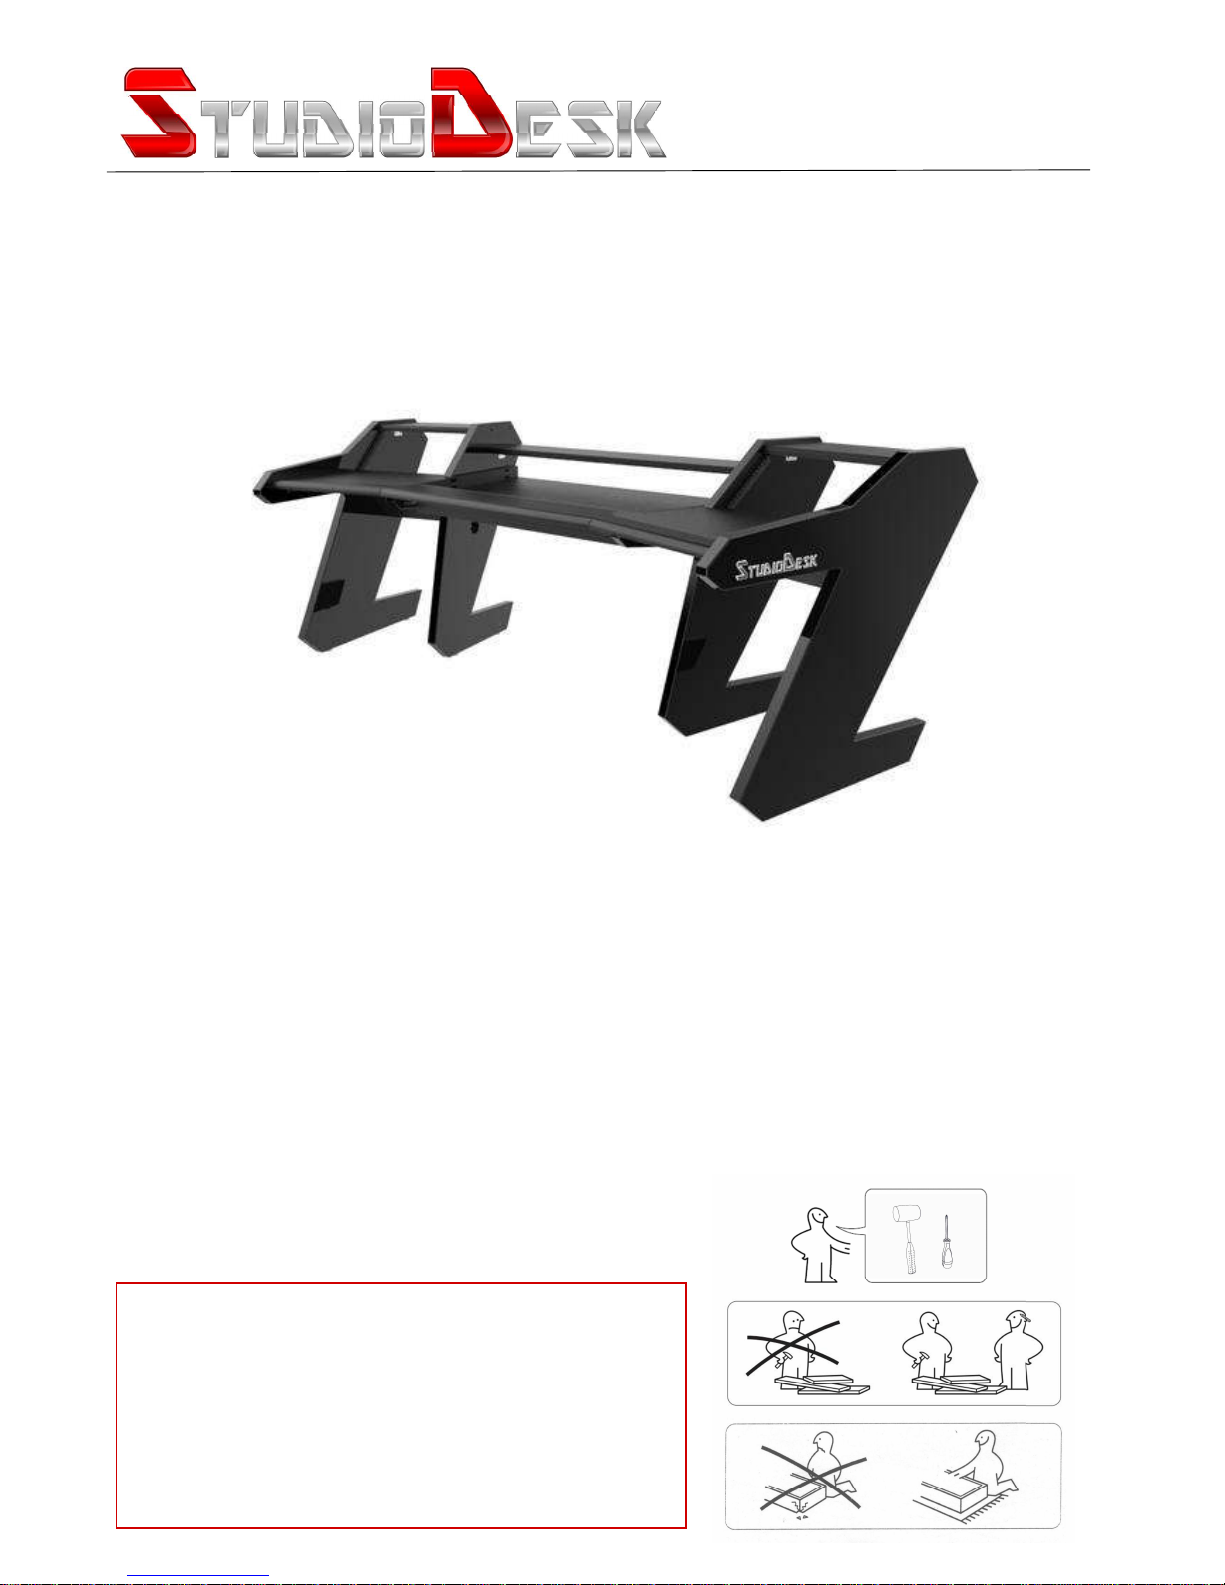
ASSEMBLY MANUAL
Pro Line M Series
Can be applied to any desk with Levelling system.
NOTE: In order to avoid injury or damages,
please do not try to assemble your desk alone.
PRO - Line is a heavy desk, which requires
at least two people to carry out assembly.
Please assemble on soft surface to avoid
scratches to the lacquer.
!
www.studiodesk.net
The Desk You Deserve
Thank you for making StudioDesk your desk of choice!
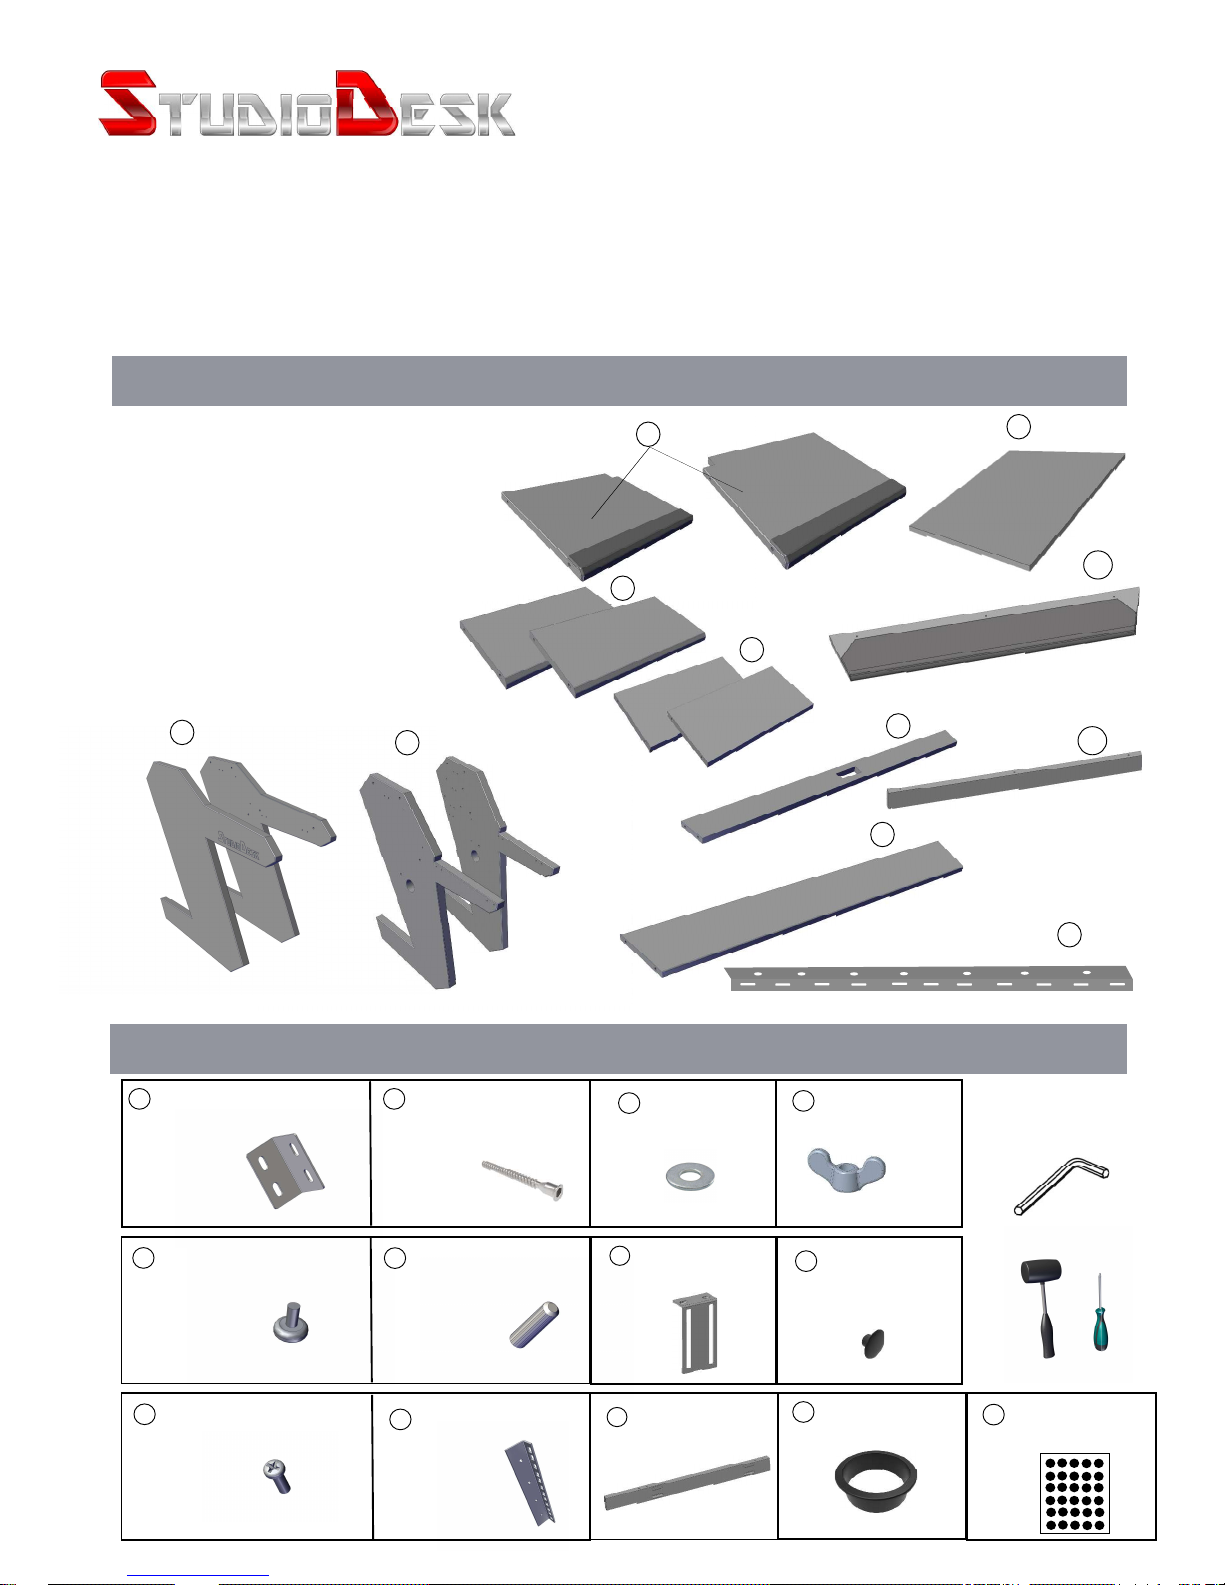
Before beginning assembly of your desk, let’s get familiar with the parts you have received in your package.
Please match the corresponding numbers on this page with the drawings.
1. Main Desk Surface
2. Left and right desk surfaces
3. Strengthening boards
4. Top shelf’s
5. Cable management
6. Video monitor’s shelf
7. Outer Legs - (left and right)
8. Inner legs - (left and right)
9. Strengthening bar
and cable management
10. Armrest
11. Armrest support
Hardware
Wooden parts
9
Metal bracket
16 pcs
Desk tips
8 pcs
10
M6 Screw
111 pcs
11
Confirmat screw
60 mm
12
Wooden Dowels
30 pcs
13
Rack rails 5 U
4 pcs
14
2
4
3
7
8
5
6
1
L
R
L
R
L
R
9
3 pcs
Levelling system holder
2 pcs
11
15
Washers
7 pcs
Rubber hammer
Phillips Screwdriver
16
17
Levelling bracket
8 pcs
18
10
Nut for levelling system
8 pcs
Plastic caps
for Confirmats
3 pcs
19
Wrench Imbus
(Included)
Tools needed
20
Cable inlays
2 pcs F60
21
Stickers
to cover
inserts not in use

1
Step One
Insert dowels (13) into the holes as
shown in the illustration. Use a
rubber hammer if needed.
3
Step Three
Fix assembled parts together using
metal corners (9) and M6 screws (11)
as shown in the illustration.
8
10
4
Step Four
Place inner leg to assembled section onto the
corresponding holes on the leg. Take special care
to avoid scratching the lacquered surface. Push the
Inner leg down until the dowels seat properly in their
respective holes. Use a rubber hammer, if needed.
Usually it is not necessary.
2
Step Two
Assemble parts together on dowels
as shown in the illustration.
www.studiodesk.net

5
Step Five
Once dowels are in place and boards sit tight to the leg,
use metal corners (9) and M6 screws (11) to fix the
middle section to the leg. Repeat procedure with right
Module. Note! Turn the metal corner’s shorter edge downward
Step Six
7
Step Seven
8
10
6
Screw the desk tips to the legs on both left and right module.
Decide on which position you are going to have your video monitor
Shelf. There is 2 positions to chose from. Install strengthening bar (9) to
the bottom of the video monitor shelf using M6 Screws and washers.
8
Step Eight
Turn modules on it’s standing position
and position them on proximity of the length
of the main desk surface.
9
Install levelling system (17) holder to both modules
as shown on the illustration using M6 screw.
Install levelling bracket (16) to levelling system (17)
holders. Four of them should be installed at this point.
Two on each module - left and right module.
Step Nine

11
Step Eleven
Bring side modules to the closer distance
to be able to install video monitor shelf,
cable management part and front armrest.
Install one by one boards starting with the
front armrest (10), followed by video monitor
shelf (6) and end with Cable management
part (5). At this point boards are standing on
dowels only, so be very careful with the movements
to prevent any of the boards on the floor. Push modules
close enough so the boards will sitting tight to the legs.
Fix all boards with metal brackets (9) and M6
Screws (12).
6
5
10
12
Step Twelve
Place main desk board on previously installed
levelling brackets by inserting it from the back side.
Level main desk surface on your need. Fasten
the screws on levelling bracket to desk surface and
Fix all of screws once satisfied with the height.
For perfect levelling use a water levelling tool if you
have it.
10
Step Ten
Decide on which height you want to have your top
monitor shelf and fix the metal bracket (9) on the
supporting position (1) using M6 Screws. Add another
levelling brackets (16) to already installed brackets (16) as
shown on the diagram left (2). Make sure all levelling
brackets are set on the same height.
Levelling system allows you to set main desk surface up to
9 cm in depth. Take into account that the Desk surface is
25 mm thick. Fix bracket (9) on the position where your
armrest will sit (3) using M6 screws. Brackets will help you
holding panels in the next step.
2
1
3

13
Step Thirteen
Install armrest support (11) using Confirmat screws (12)
Install rack rails to your using M6 screws. All holes are predefined with
Screws inserts for easy installation.
14
Step Fourteen
Congratulations!
Your desk is ready to put all your valuable gear on it.
 Loading...