

Page 1
The Desk You Deserve
ASSEMBLY MANUAL
Enterprise Series
NOTE: In order to avoid injury or damages,
please do not try to assemble your desk alone.
The Beat is massive and heavy desk and requires
at least two people to carry out assembly.
Please assemble on soft surface to avoid
scratches to the lacquer.
!
www.studiodesk.net
Video Assembly manual is also available.
Search for Enterprise desk - Video assembly manual on the YouTube.
Page 2
15
Cage nuts and
M6 x 16 Screws
12 pcs each
The Desk You Deserve
Thank you for making StudioDesk your desk of choice!
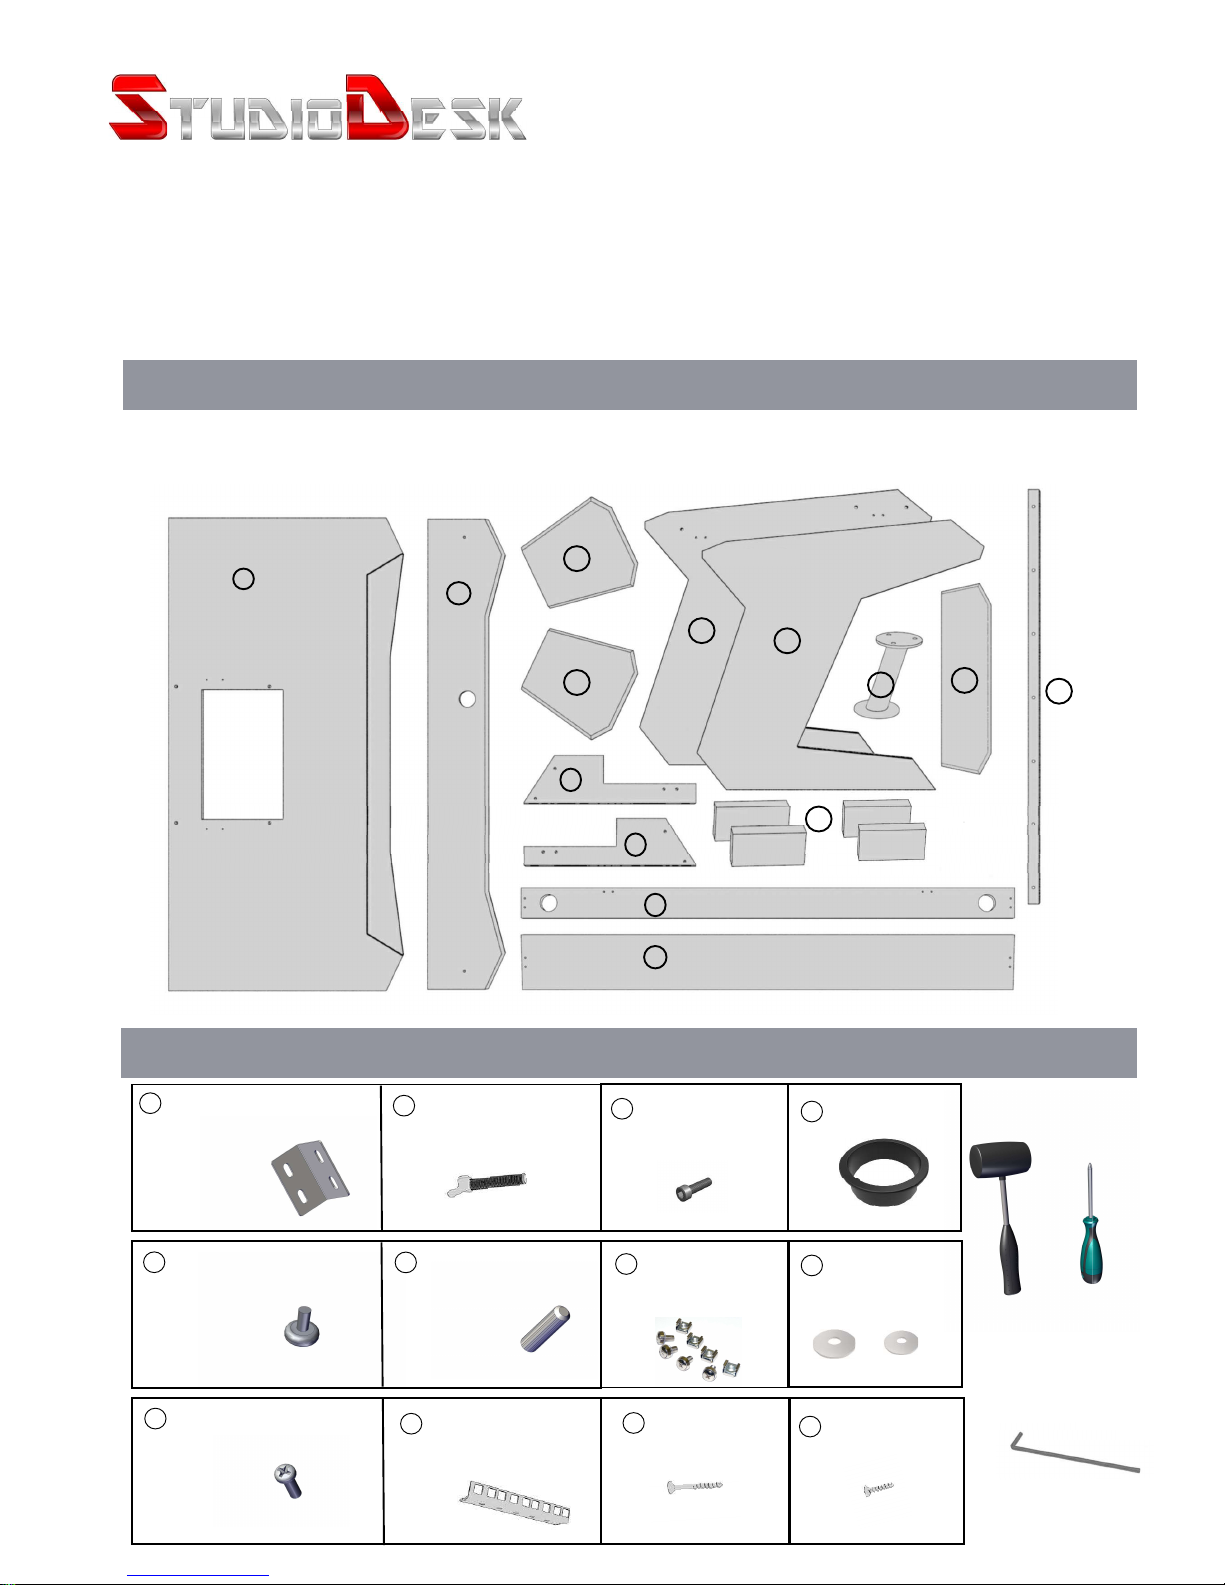
Before beginning assembly of your desk, let’s get familiar with the parts you have received in your package.
Please match the corresponding numbers on this page with the drawings.
1. Desk Surface 2. Strengthening boards a, b. 3. Rack dividers - (Left and right) 4. Speaker shelves
5. Legs (left and right) 6. Support pieces 7. Rack top shelf 8. Strengthening Bar 9. Speaker shelf base
9. Top shelf
Hardware
Wooden parts
Tools needed
(Not included)
Rubber hammer
8
Metal brackets
14 pcs
Desk tips
4 pcs
9
M6 Screw
59 pcs
10
Wooden Dowels
26 pcs
12
Rack rails 3 U
2 pcs
13
11
Butterfly screws
70 x 8 mm 2 pcs
M6 Screws
hexagon
12x6 mm 8 pcs
14
1
2
a
b
2
3
L
3
R
4
4
5
5
L
R
6
7
8
9
x2
9
Phillips Screwdriver
Hexagon Wrench
Included
16
Screw for wood
40 x 4 8pcs
Screw for wood
20mm 14 pcs
17
18
19
Cable entry
60 mm 3 pcs
Washers
M6 x 7
M8 x 2
1462 mm
Page 3
1
Step One
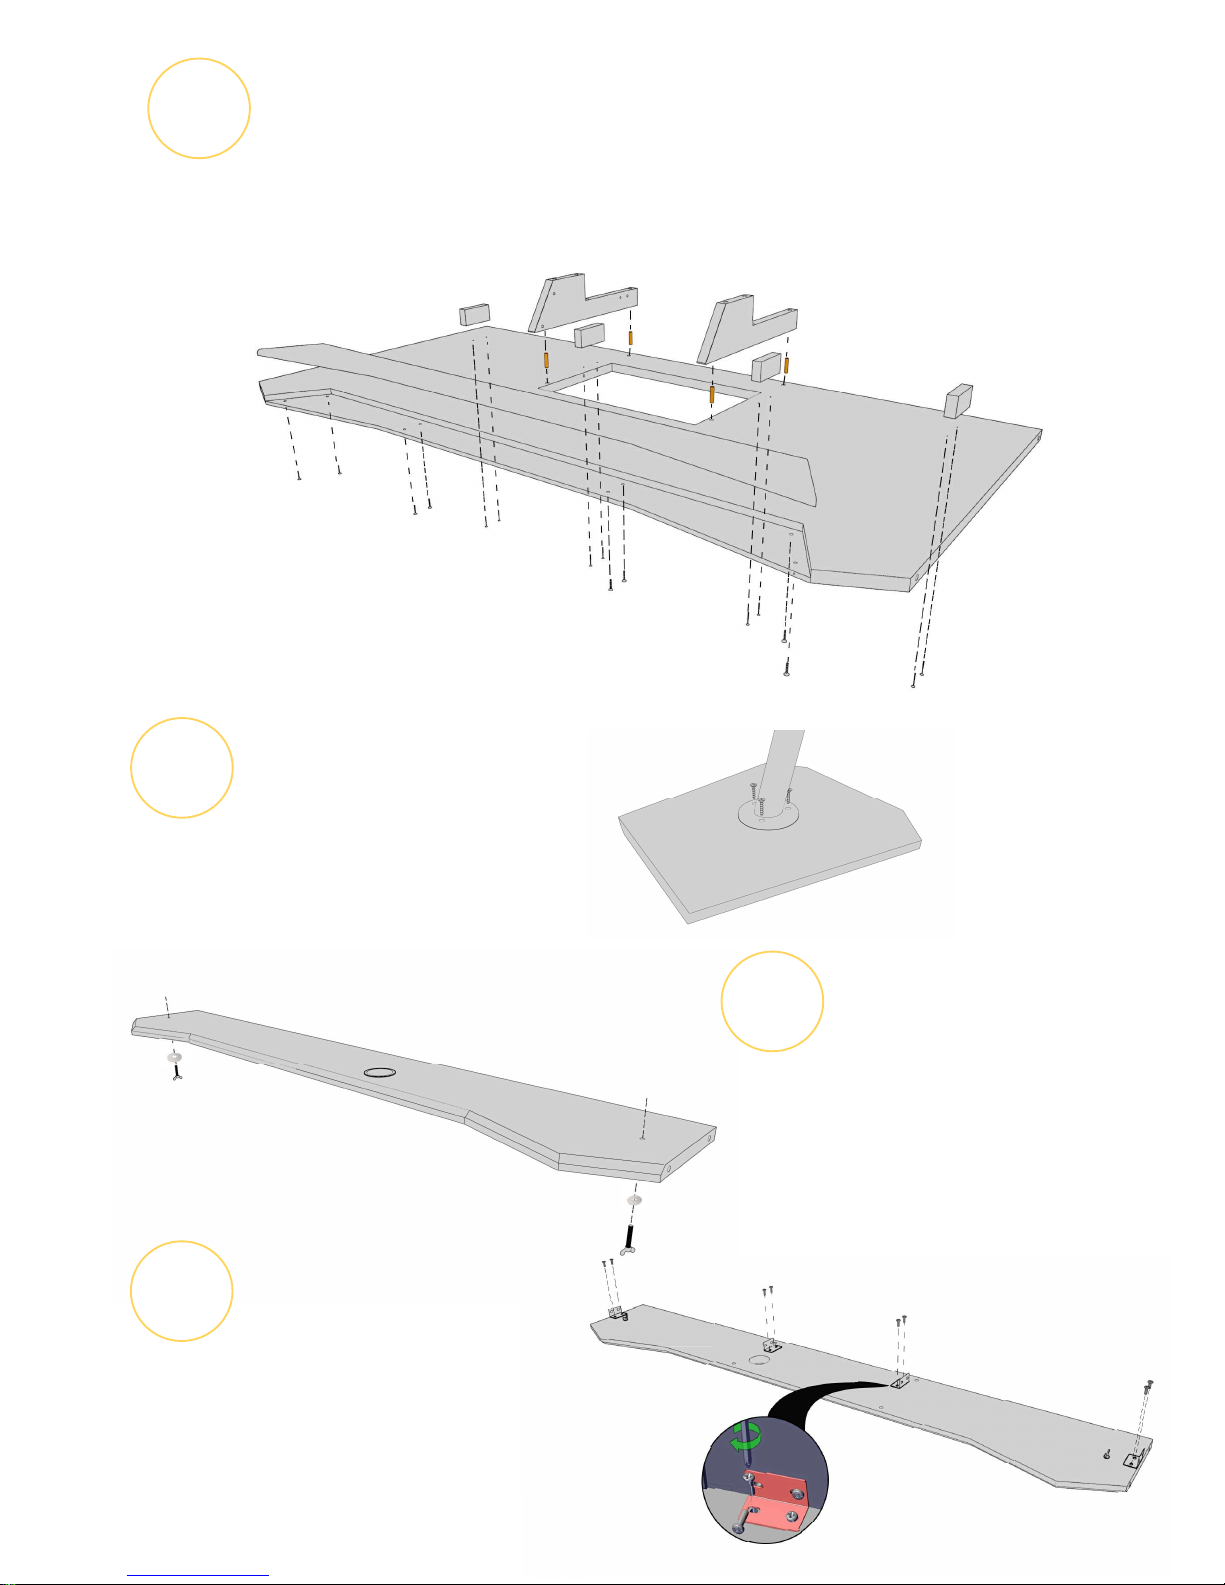
Insert dowels (12) into the holes as shown on the illustration,
fix armrest to the desk surface using screws for wood 20 mm (17).
Fix support pieces to the desk surface using screws for wood
40 mm (16). Install rack dividers (3) on the dowels as shown below.
2
Step Two
Fix speaker shelf base (9) to the speaker
Shelves using screws for wood (17) 20 mm.
All holes are predefined.
8
10
www.studiodesk.net
Insert Butterfly screws (11) and washers M8 (18) to
the top shelf (9) as Illustrated on the left.
3
Step Three
4
Step Four
Install metal brackets (8) to the bottom side of the
Top shelf (9).
Page 4
5
Step Five
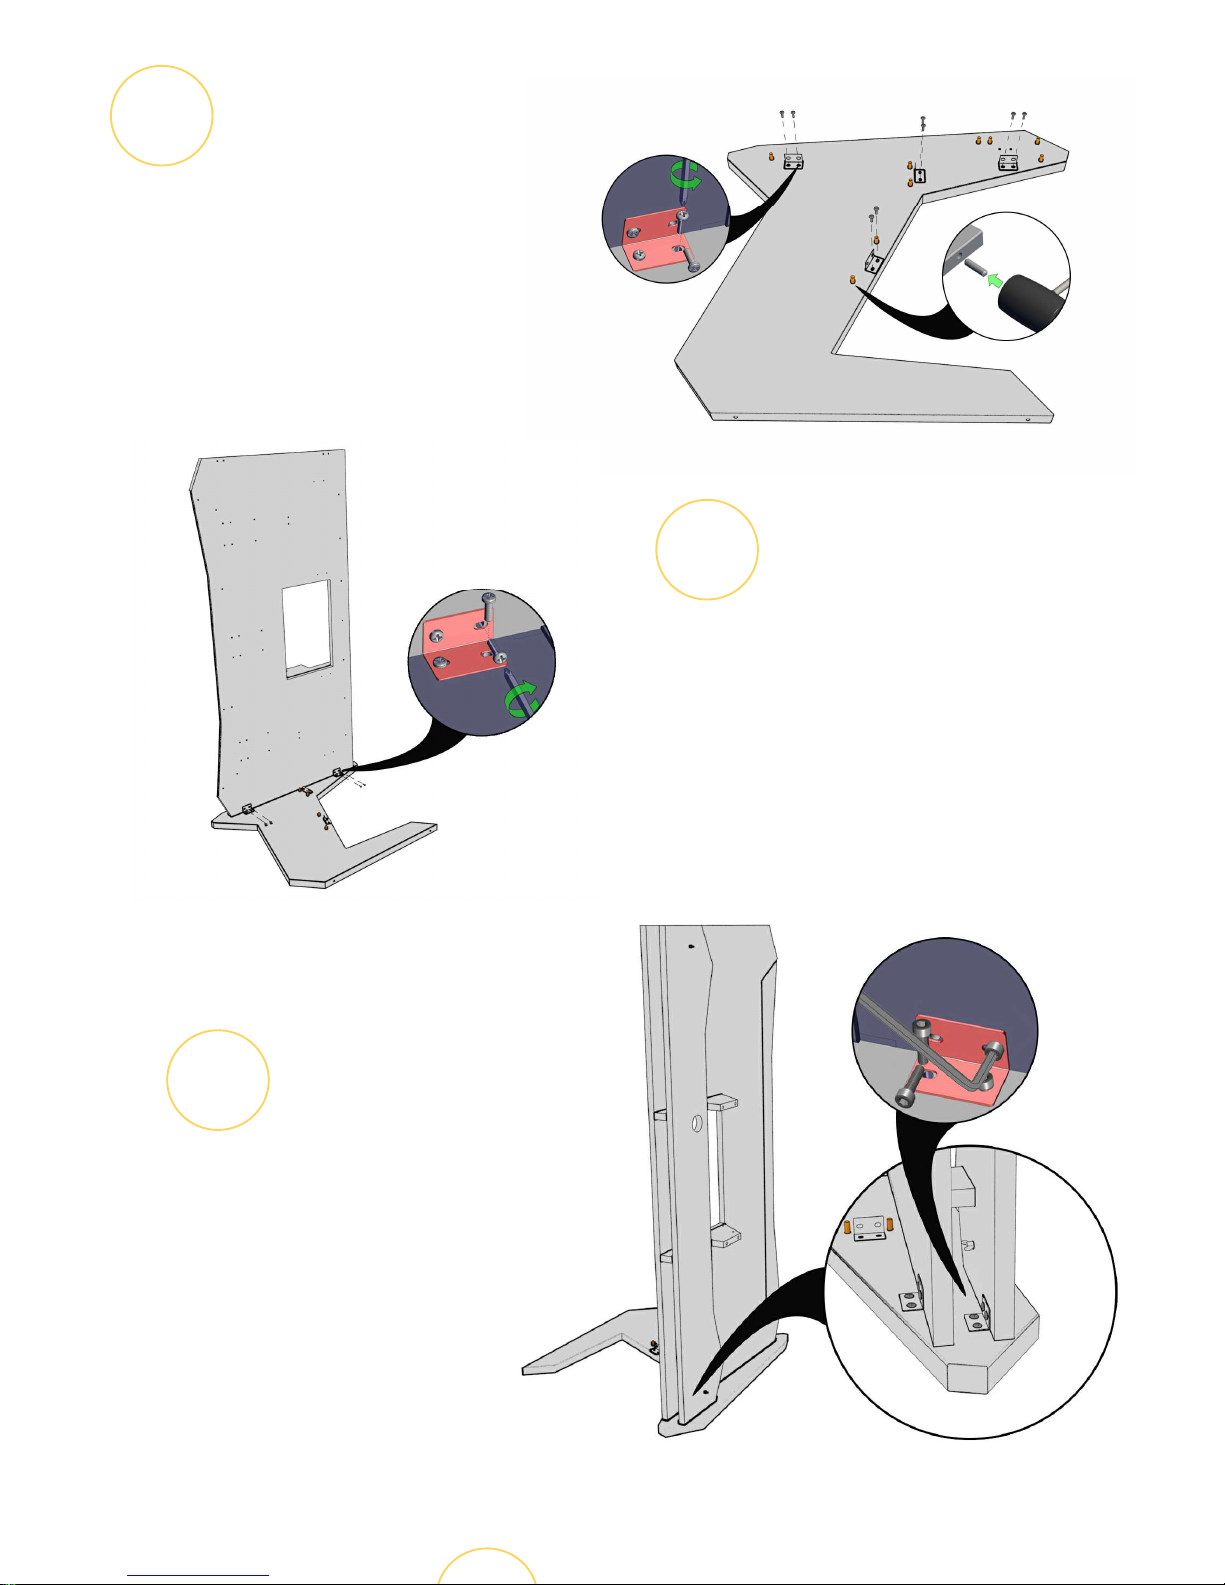
Insert dowels 12 in the left desk leg. Use rubber
Hammer if required. Install metal brackets (8)
to the leg with M6 screws (10) as shown on the
illustration - right.
8
10
14
6
Step Six
Carefully place desk surface to dowels and
fix it with a metal brackets (8) and
M6 screws (10)as shown on the illustration.
7
Step Seven
Install top shelf (9) to the leg and fix it using
metal brackets (8) and M6 screws with
Hexagon head. Use included hexagon
Wrench as shown on the illustration.
Page 5
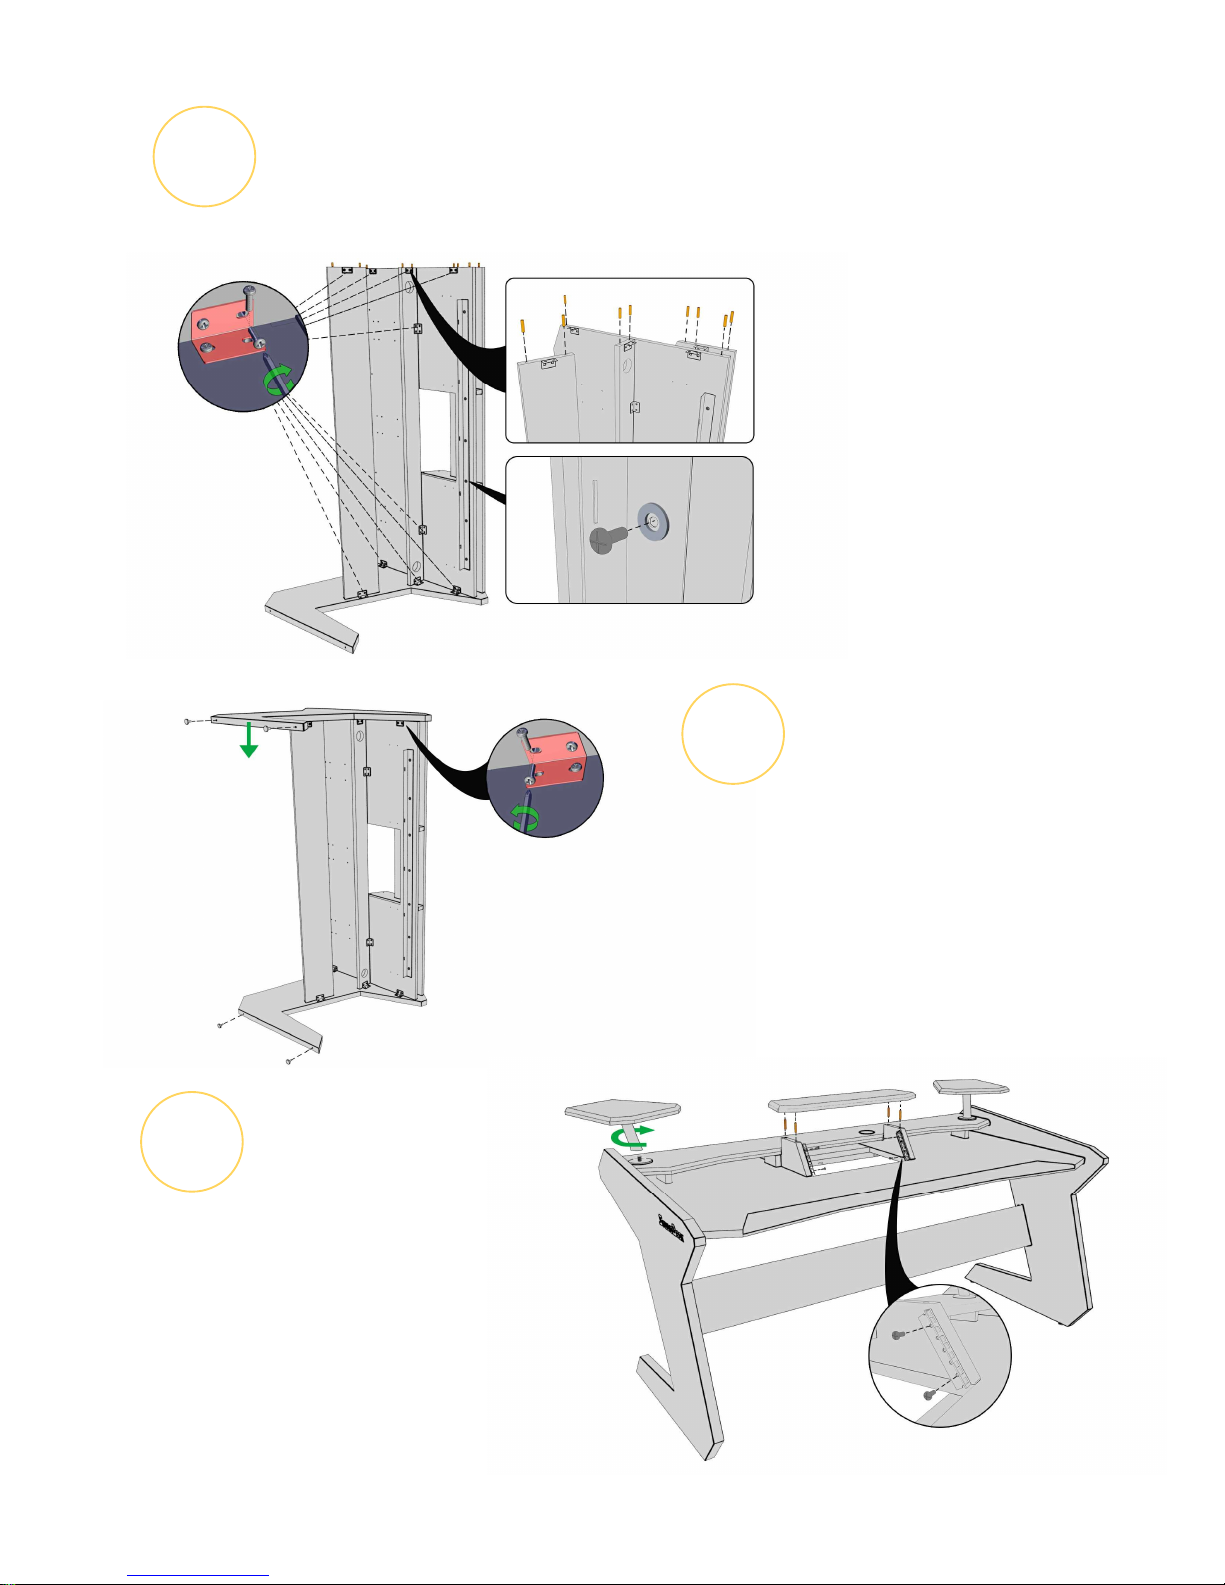
8
Step Eight
Install Strengthening boards as shown on the illustration
Below using Metal brackets (8) and M6 screws 10.
Fix the metal bar (must be installed) to the desk surface
using M6 Screws and M6 washers.
10
Step Ten
Congratulations, your brand new desk is ready!
Install Right leg (5) on top of the
Vertical parts. All dowels must be aligned
on corresponding vertical parts before pushing
leg down. NOTE - minimum 2 people are
needed to do this step. Fix leg using
Metal brackets (8) and M6 screws (10).
Install Desk tips (9).
9
Step Nine
Turn desk into standing position. Install speaker
shelf's as shown on the illustration (right) by turning
Speaker base on butterfly screw. Hold screw with your
hand from the bottom.
Place rack shelf (7) on the top of the dowels (12) and
Install rack rails (13) using M6 screws (10).
Insert cage nuts (15) on desired position.
 Loading...