

Page 1
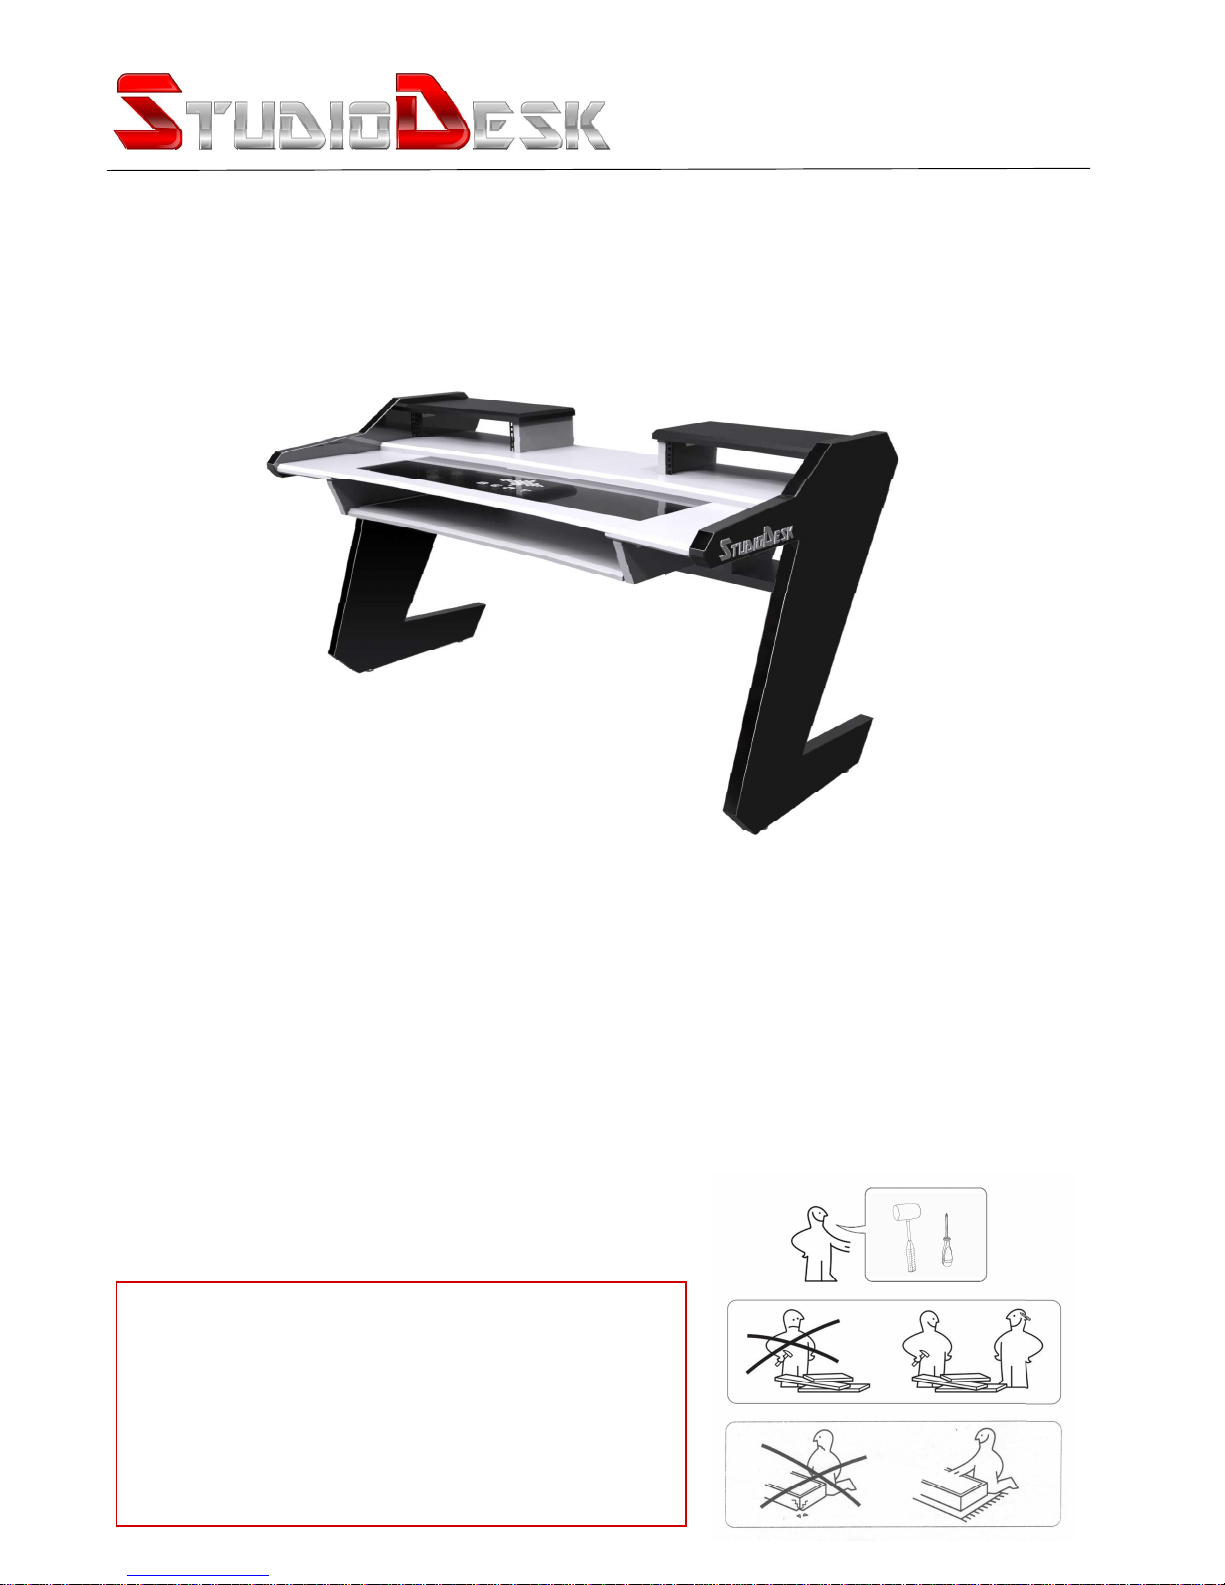
The Desk You Deserve
ASSEMBLY MANUAL
Beat Series
For Beat desk Limited edition please use other manual.
NOTE: In order to avoid injury or damages,
please do not try to assemble your desk alone.
The Beat is massive and heavy desk and requires
at least two people to carry out assembly.
Please assemble on soft surface to avoid
scratches to the lacquer.
!
www.studiodesk.net
Page 2
15
Cage nuts and
M6 Screws
16 pcs each
The Desk You Deserve
Thank you for making StudioDesk your desk of choice!
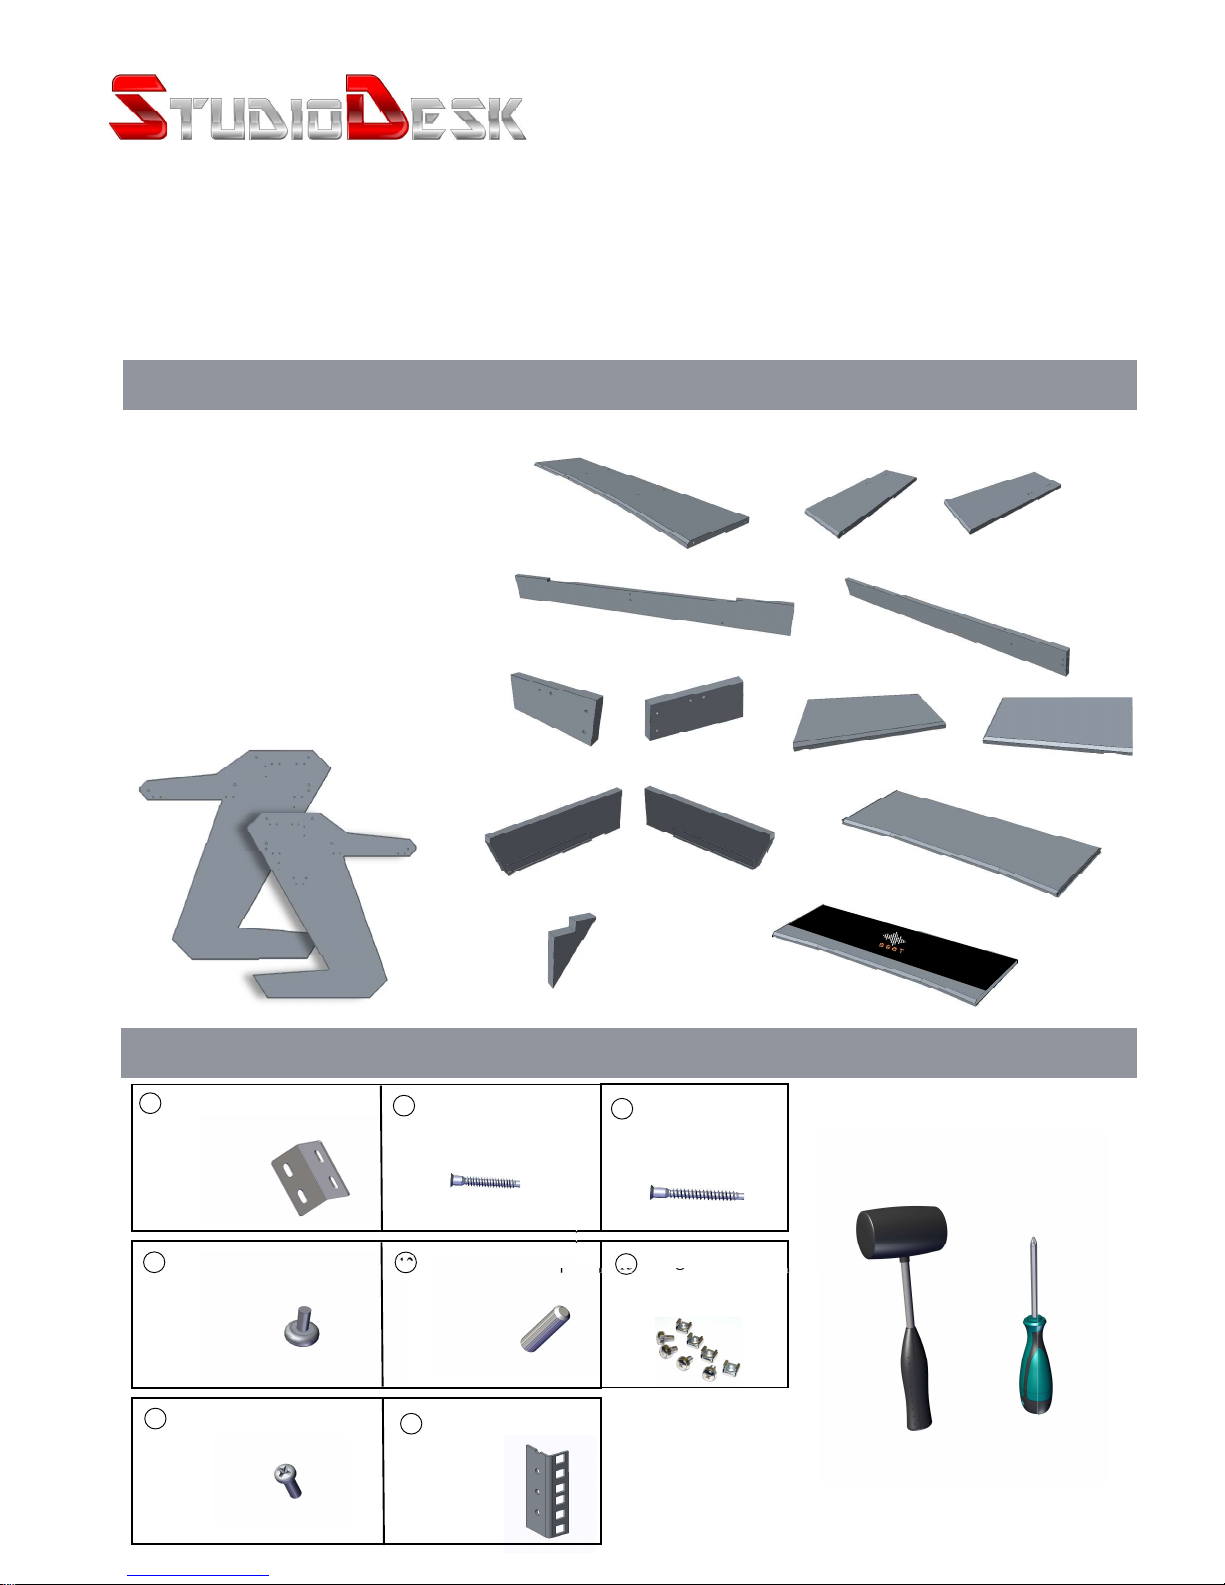
Before beginning assembly of your desk, let’s get familiar with the parts you have received in your package.
Please match the corresponding numbers on this page with the drawings.
1. Desk Surfaces a, b, c.
2. Strengthening boards a, b.
3. Shelf dividers - (Left and right)
4. Top shelf's (Left and right)
5. Keyboard tray holders (left and right)
6. Keyboard tray board
7. Legs (left and right)
8. Glass desk surface
9. Support piece
Hardware
Wooden parts
Tools needed
(Not included)
Rubber hammer
Phillips Screwdriver
8
Metal corner
18 pcs
Desk tips
4 pcs
9
M6 Screw
80 pcs
10
Wooden Dowels
34 pcs
12
Rack rails
4 pcs
13
L
R
1 a
1 b
1 c
2 a
2 b
3 left
3 right
4 left
4 right
5 left
5 right
6
7 left
7 right
11
Confirmat screw
40x7 mm 6 pcs
Confirmat screw
70x7 mm 4 pcs
14
5 9
8
Page 3
1
Step One
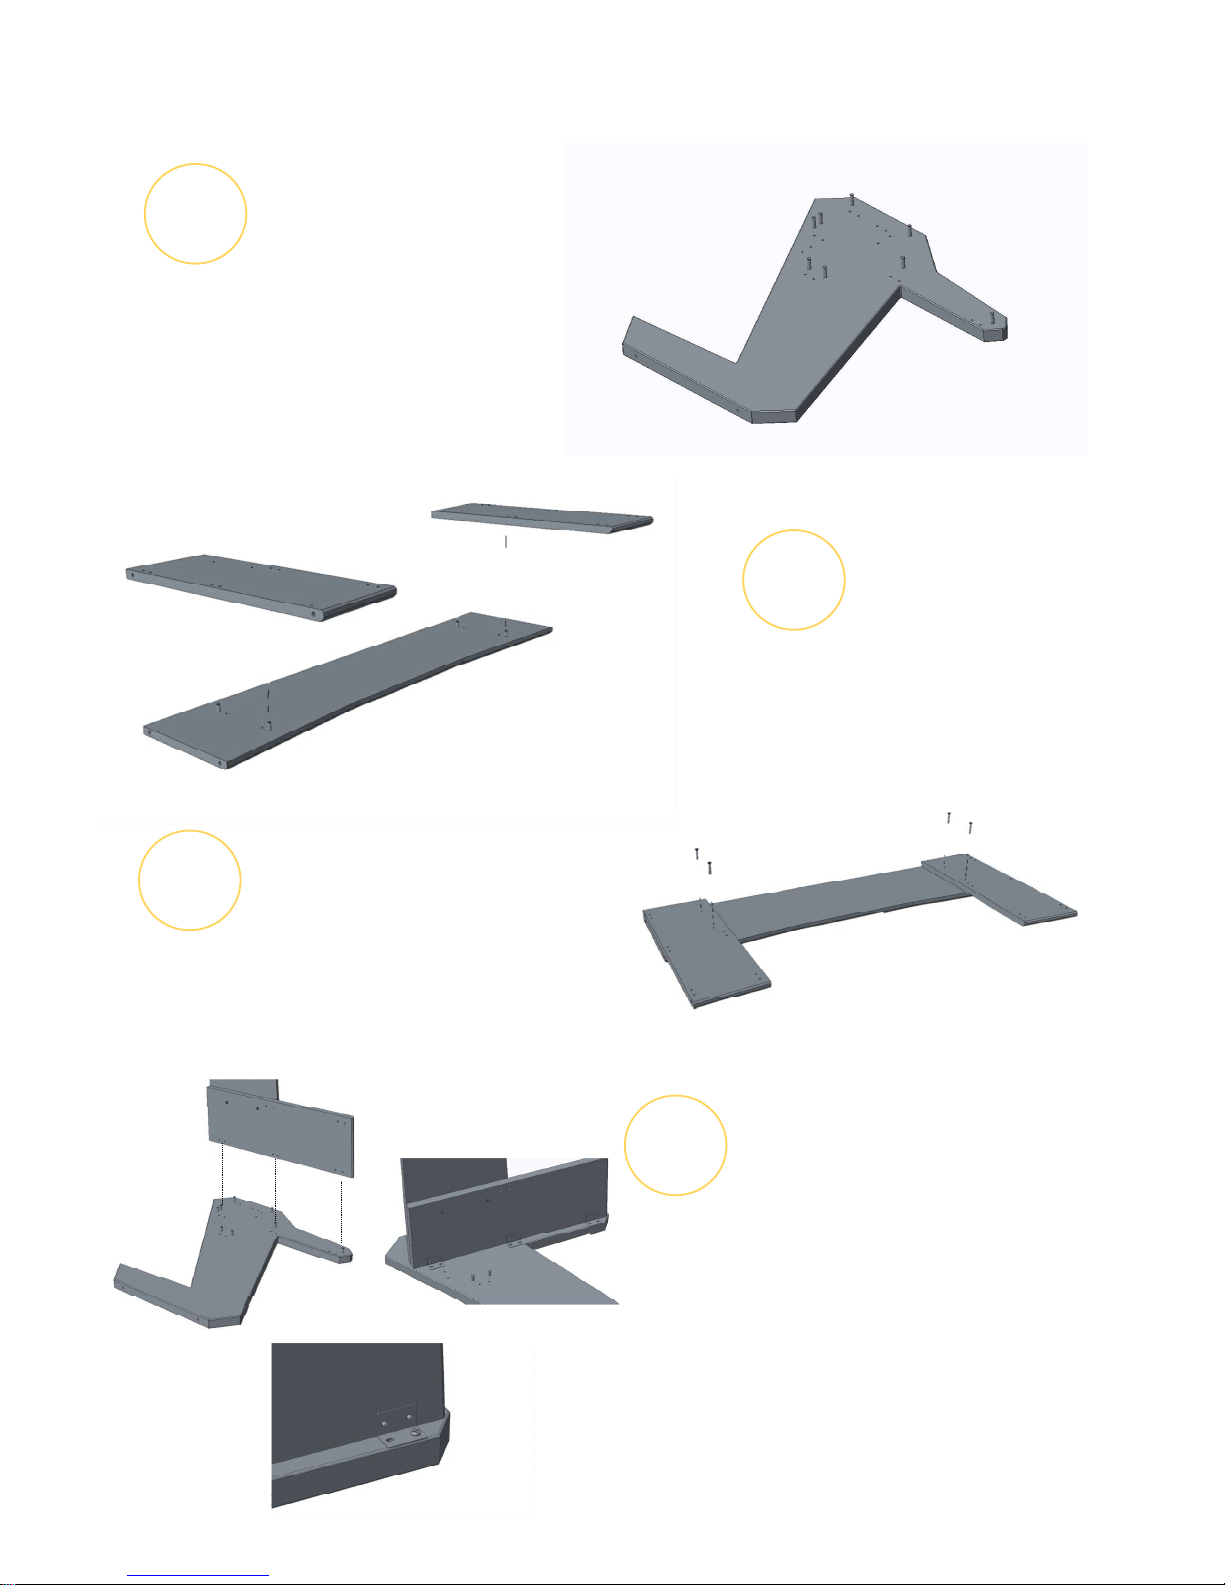
Insert dowels (12) into the holes on both
Legs as shown in the illustration. Use a
rubber hammer if needed.
3
Step Three
Fix assembled parts together using
confirmat screws (11) 40x7mm
as shown in the illustration.
8
10
11
4
Step Four
Place the assembled middle section onto the
Corresponding dowels holes on the right leg.
Take special care to avoid scratching the lacquered
surface. Push the middle section down until the
dowels seat properly in their respective holes.
Fix surfaces together using metal corners (8) and
M6 Screws (10).
2
Step Two
Assemble parts 1a, 1b and 1c
together with the dowels as shown
in the illustration.
www.studiodesk.net
Page 4
5
Step Five
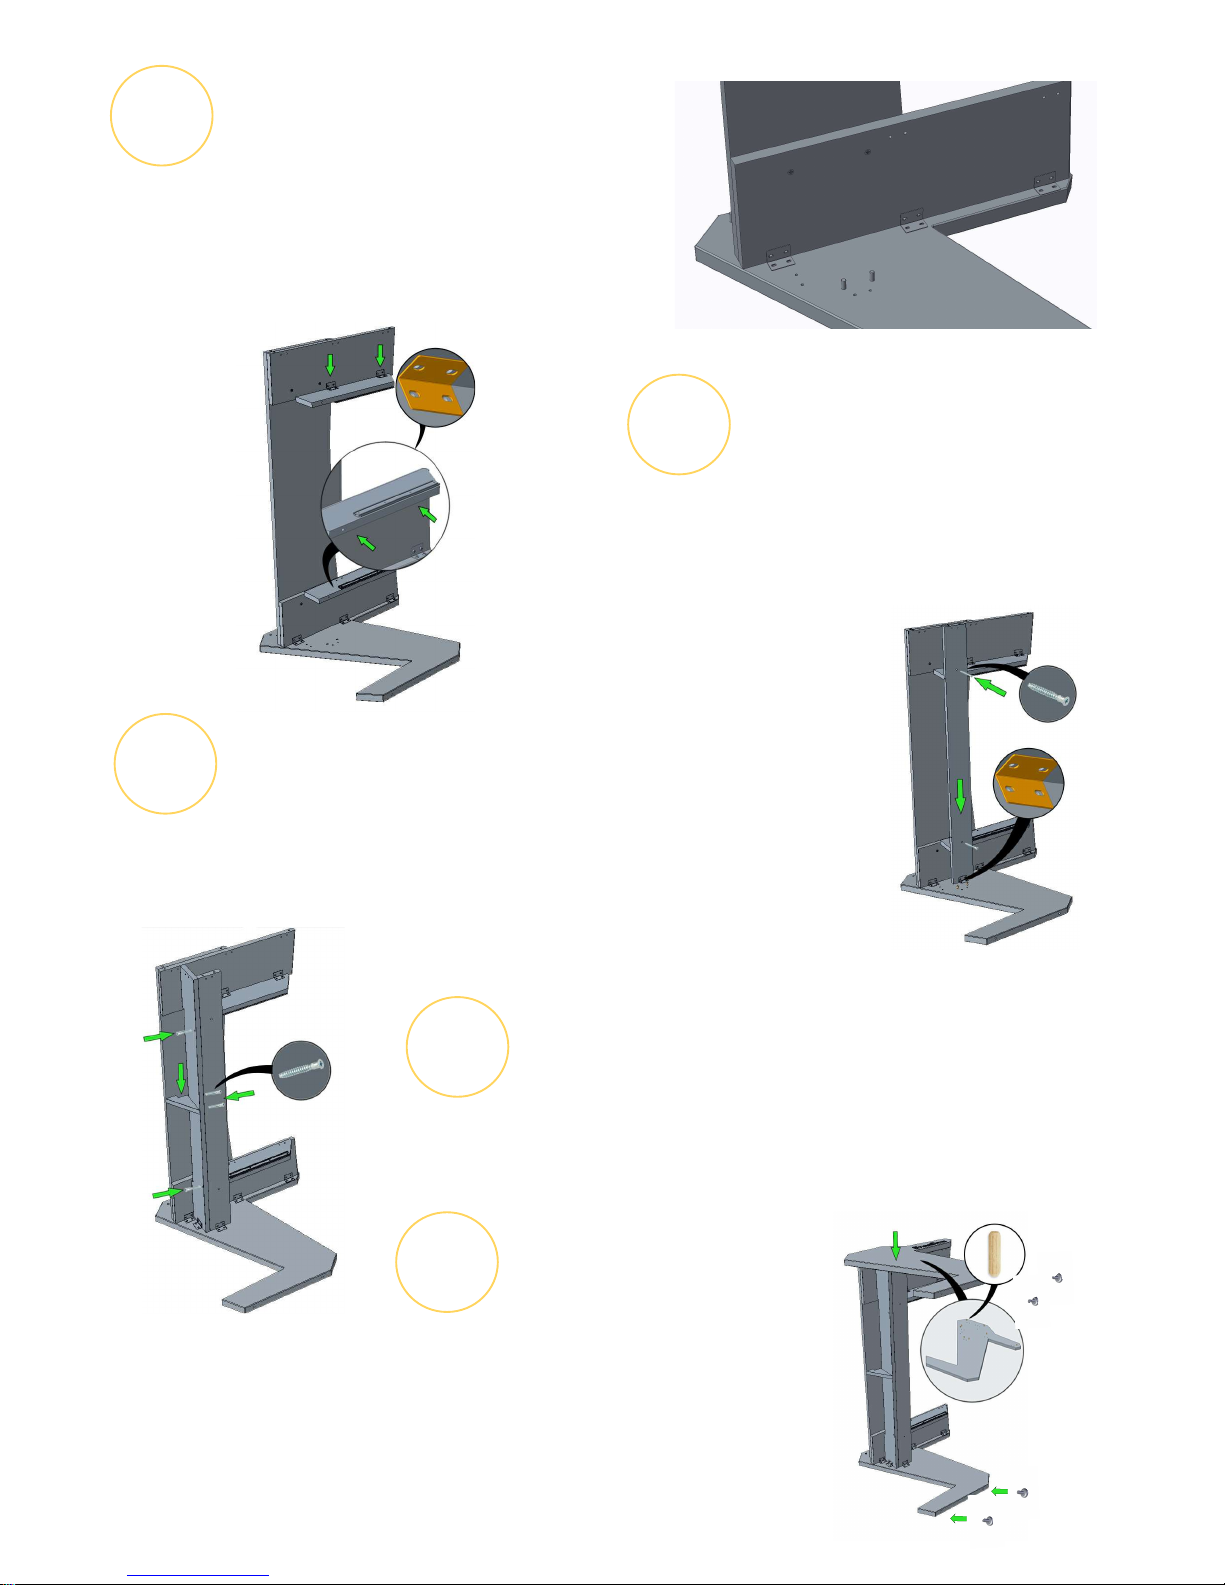
Once dowels are in place and boards sit tight to the leg,
use metal brackets (8) and M6 screws (10) to fix the
middle section to the leg.
Note! Turn the metal corner’s shorter edge downward
6
Step Six
7
Step Seven
Install strengthening board to the leg (2B) as shown on the drawing
on the right using wooden dowels. Fix it with two confirmat screws (14)
and metal brackets (8).
8
Step Eight
Install vertical strengthening board (2s) and fix it with the
Confirmat Screws of appropriate size (14). Use shorter
Confirmat screws to fix support piece (11)
9
Step Nine
Install wooden dowels (12) into the leg and install it
on the central part of the desk. Fix it using metal
brackets (8) and M6 screws (10). While in this position
Install desk tips (9) on the screw by just screwing it in
predefined holes on the legs.
8
10
Fix keyboard tray holders (5) in place using Metal brackets (8).
14
14
11
14
9
9
Page 5
10
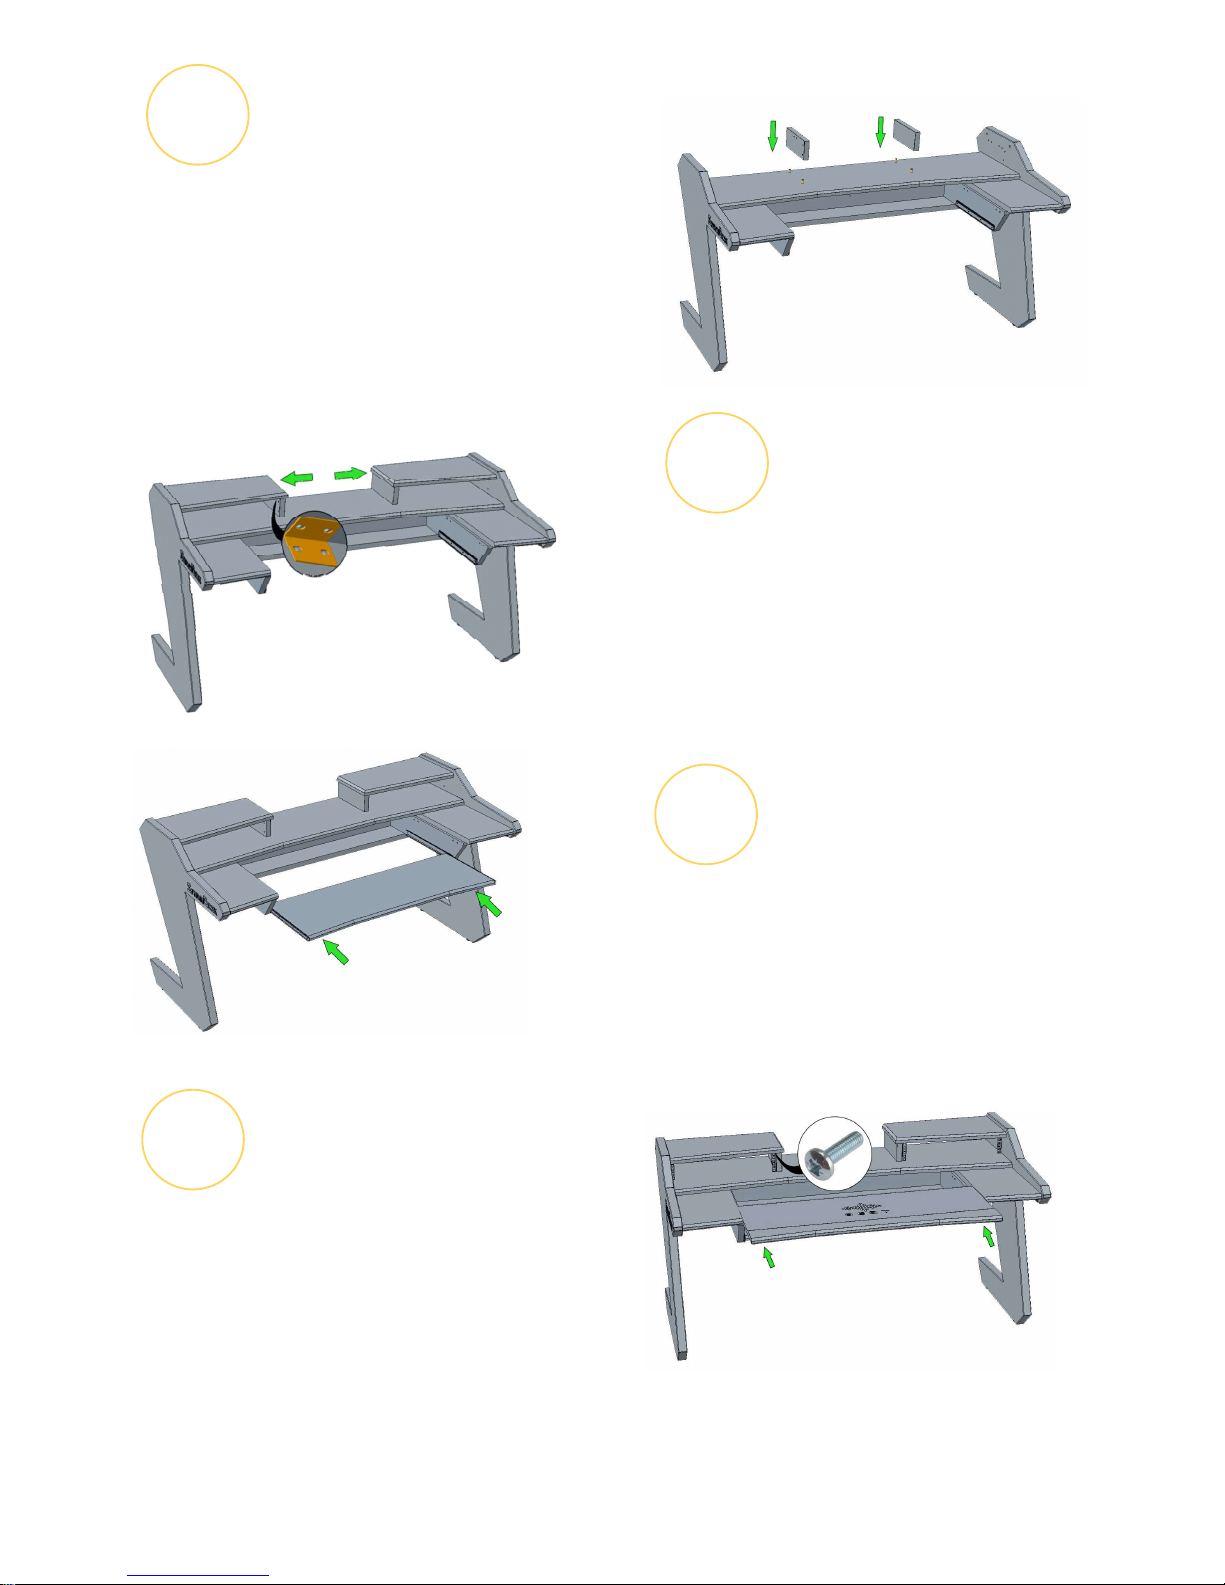
Step Ten
Bring desk into the standing position.
Install shelf dividers (3) on the wooden
Dowels. Rack screw inserts must be
turned properly as shown on illustration.
12
Step Twelve
Install Keyboard tray by pushing it
Inside the rails. Pull out mechanisms
are equipped with safety stoppers.
3L
3R
13
Step Thirteen
Install main desk surface (8) by pushing
it inwards as shown on the drawing.
Install rack rails ( 13) using M6 (10) screws.
Congratulations, your brand new desk is ready!
11
Step Eleven
Install top shelves (4) to dowels
And fix it using metal corners (8)
And M6 screws (10).
 Loading...