

Page 1
Near Source Converter
Operations Manual
0678001500
0678001501
0678001502
0678001503
0678001504
Page 2

Page 3

Contents
English ............................................................................................................. 1
Français ......................................................................................................... 19
Deutsch .......................................................................................................... 39
Italiano .......................................................................................................... 59
Português ...................................................................................................... 79
Español .......................................................................................................... 99
Nederlands.................................................................................................... 119
Dansk ........................................................................................................... 139
Suomi ........................................................................................................... 157
Norsk ............................................................................................................ 175
Svenska ........................................................................................................ 193
Polski ............................................................................................................ 211
Ελληνικά ....................................................................................................... 231
Türkçe ........................................................................................................... 251
Русский ........................................................................................................ 271
简体中文 ................................................................................................... 291
日本語 ........................................................................................................ 307
한국어 ....................................................................................................... 325
Page 4

Page 5

1
Contents
1. Warnings and Cautions .......................................................................3
1.1 Warnings ........................................................................................... 3
1.2 Cautions ............................................................................................. 3
1.3 Notes ................................................................................................... 4
2. About Your Product...............................................................................5
2.1 Product Description ...................................................................... 5
2.2 Intended Use.................................................................................... 5
2.3 Indications for Use ......................................................................... 5
2.4 Intended Patient Population ...................................................... 5
3. Symbol Denition .................................................................................6
4. Installation ..............................................................................................8
5. Using the Equipment ..........................................................................10
6. Cleaning and Sterilization .................................................................11
7. Maintenance.........................................................................................13
7.1 Preventative Maintenance ........................................................ 13
8. Troubleshooting ..................................................................................14
9. Environmental Specications ...........................................................15
9.1 Operating Conditions ................................................................. 15
9.2 Storage and Shipping Conditions .......................................... 15
9.3 Latex Policy ..................................................................................... 15
10. Product Disposal ...............................................................................15
Page 6

2
11. Technical Specications ................................................................... 16
12. Stryker Limited Warranty ................................................................17
13. Service and Claims ............................................................................ 17
14. Contact Information .........................................................................18
14.1 Technical Support Contact Information ..............................18
14.2 Customer Service Contact Information ...............................18
Page 7
3
1. Warnings and Cautions
Read this manual and follow its instructions carefully. Pay special
attention to the words WARNING, CAUTION, and Note.
Warning: The personal safety of the patient or user may
be involved. Disregarding this information could result in
injury to the patient or user.
Caution: Follow the servicing procedures or precautions
to prevent damage to the equipment.
Warning: A lightning bolt is intended to warn of the
presence of hazardous voltages. Refer all service to
authorized personnel.
Note: Special information to make maintenance easier or
important information more clear.
To avoid potential serious injury to the user and the patient and/or
damage to this device, the user must adhere to the following warnings
and cautions.
1.1 Warnings
1. No modication of this equipment is allowed. Do not remove the
cover. There are no user serviceable parts inside.
2. Not suitable for use in an oxygen rich environment.
3. The Near Source Converter should not be used with primary video
displays.
4. The Near Source Converter is not intended to interact with or
contact any part of the patient’s body or tissue.
1.2 Cautions
1. Caution: Federal law restricts this device to sale by or on the order
of a licensed medical practitioner
Page 8

4
1.3 Notes
1. It is recommended that you only connect the transmitter to the
wall plate with the provided shielded Cat6 cable.
2. Use the wall plate RJ45 (Cat6) connector for the NSC cable only. The
wall plate does not supply network access.
Page 9

5
2. About Your Product
2.1 Product Description
The Near-Source Converter Box (NSCB) is a device intended to convert
the video signal from a DVI-D, RGB-HV, SDI, S-Video/Composite Video
format into a digital DVI video format.
2.2 Intended Use
The Near Source Converter is intended to be used for converting video,
from mobile devices rolled into the OR into a common video format
requiring one wall plate instead of many. The Near Source Converter
will perform the following functions. The converter will be installed
on the mobile device, accepting common video formats including
SDI, S-Video, VGA, and DVI and convert them to a single video format,
HDbaseT. The video signal is then sent via a CAT6 cable to a passive
wall plate with a single connector, and nally into the SPI2/SPI3/
SPI3Lite with an HDbaseT to DVI converter.
2.3 Indications for Use
The Near Source Converter is indicated to be used with various
auxiliary video outputs in operating rooms where the need for
secondary video displays exists. The primary users are hospital sta
including doctors and nurses.
2.4 Intended Patient Population
The Near Source Converter is intended to be used for any patient
receiving a surgical procedure requiring mobile device images on a
secondary display.
Page 10
6
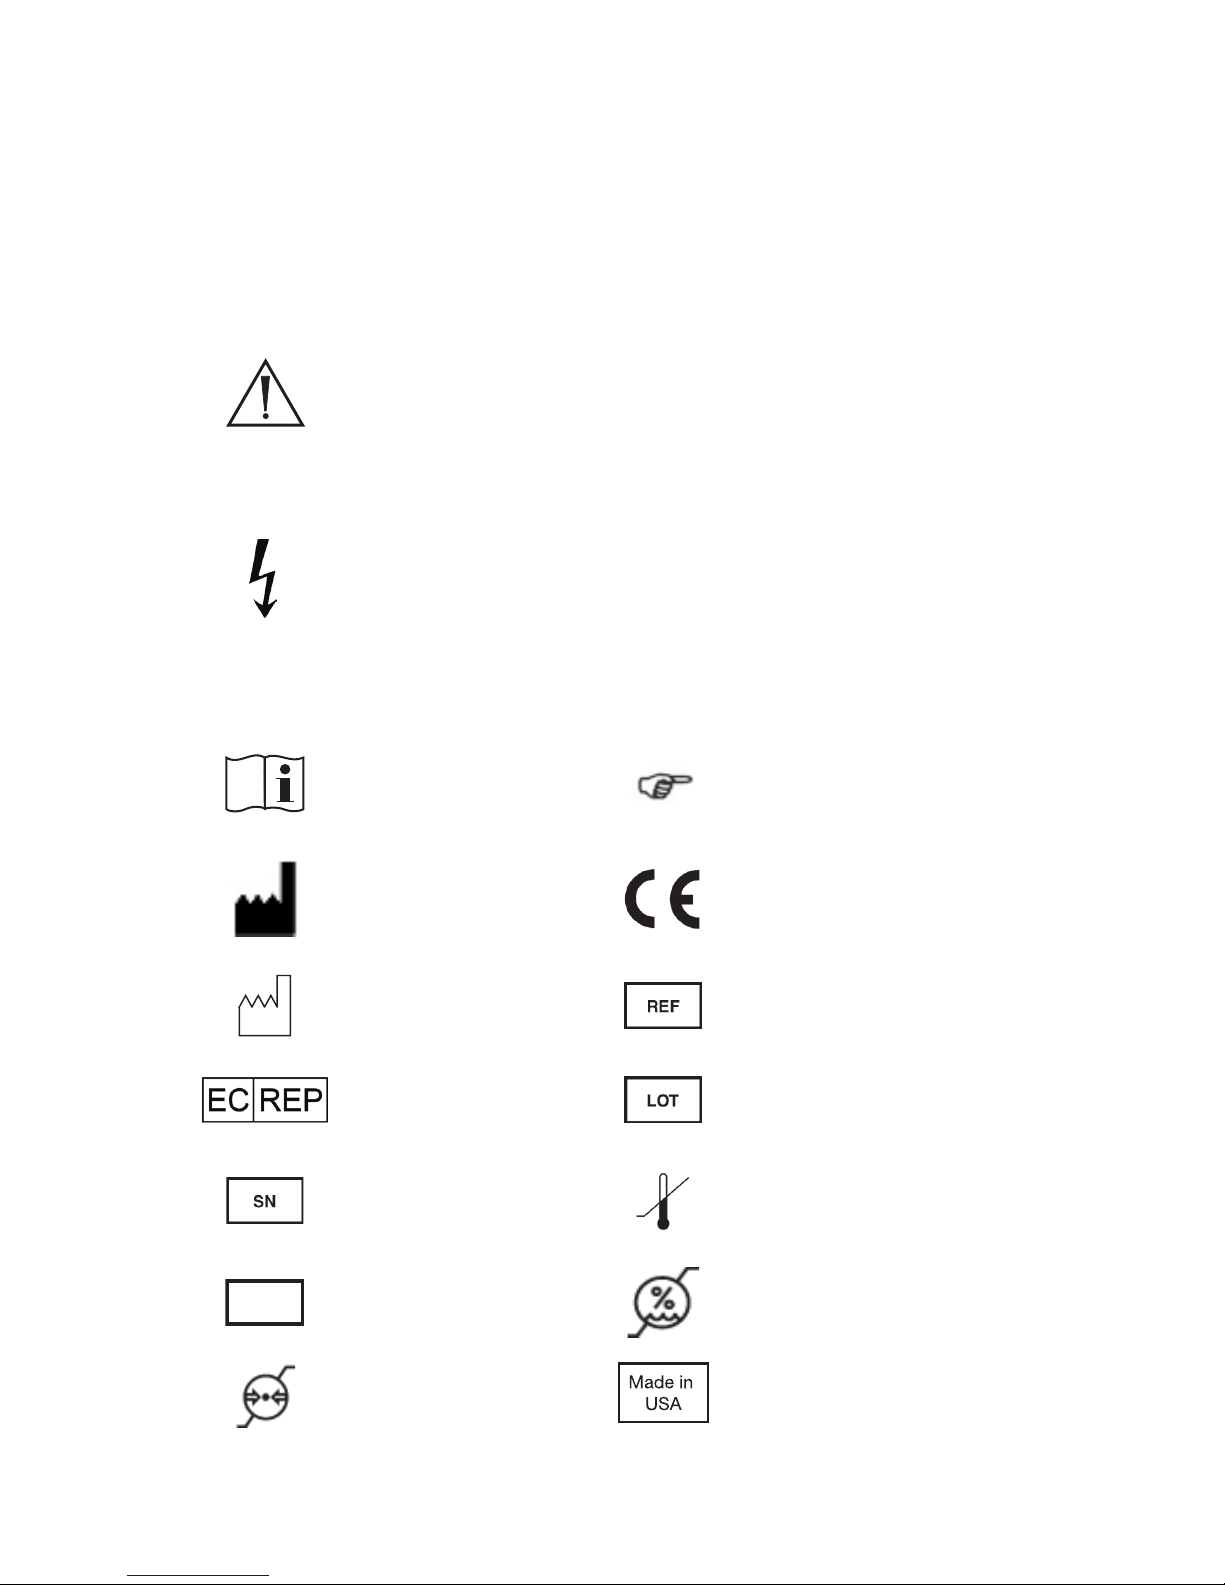
3. Symbol Denition
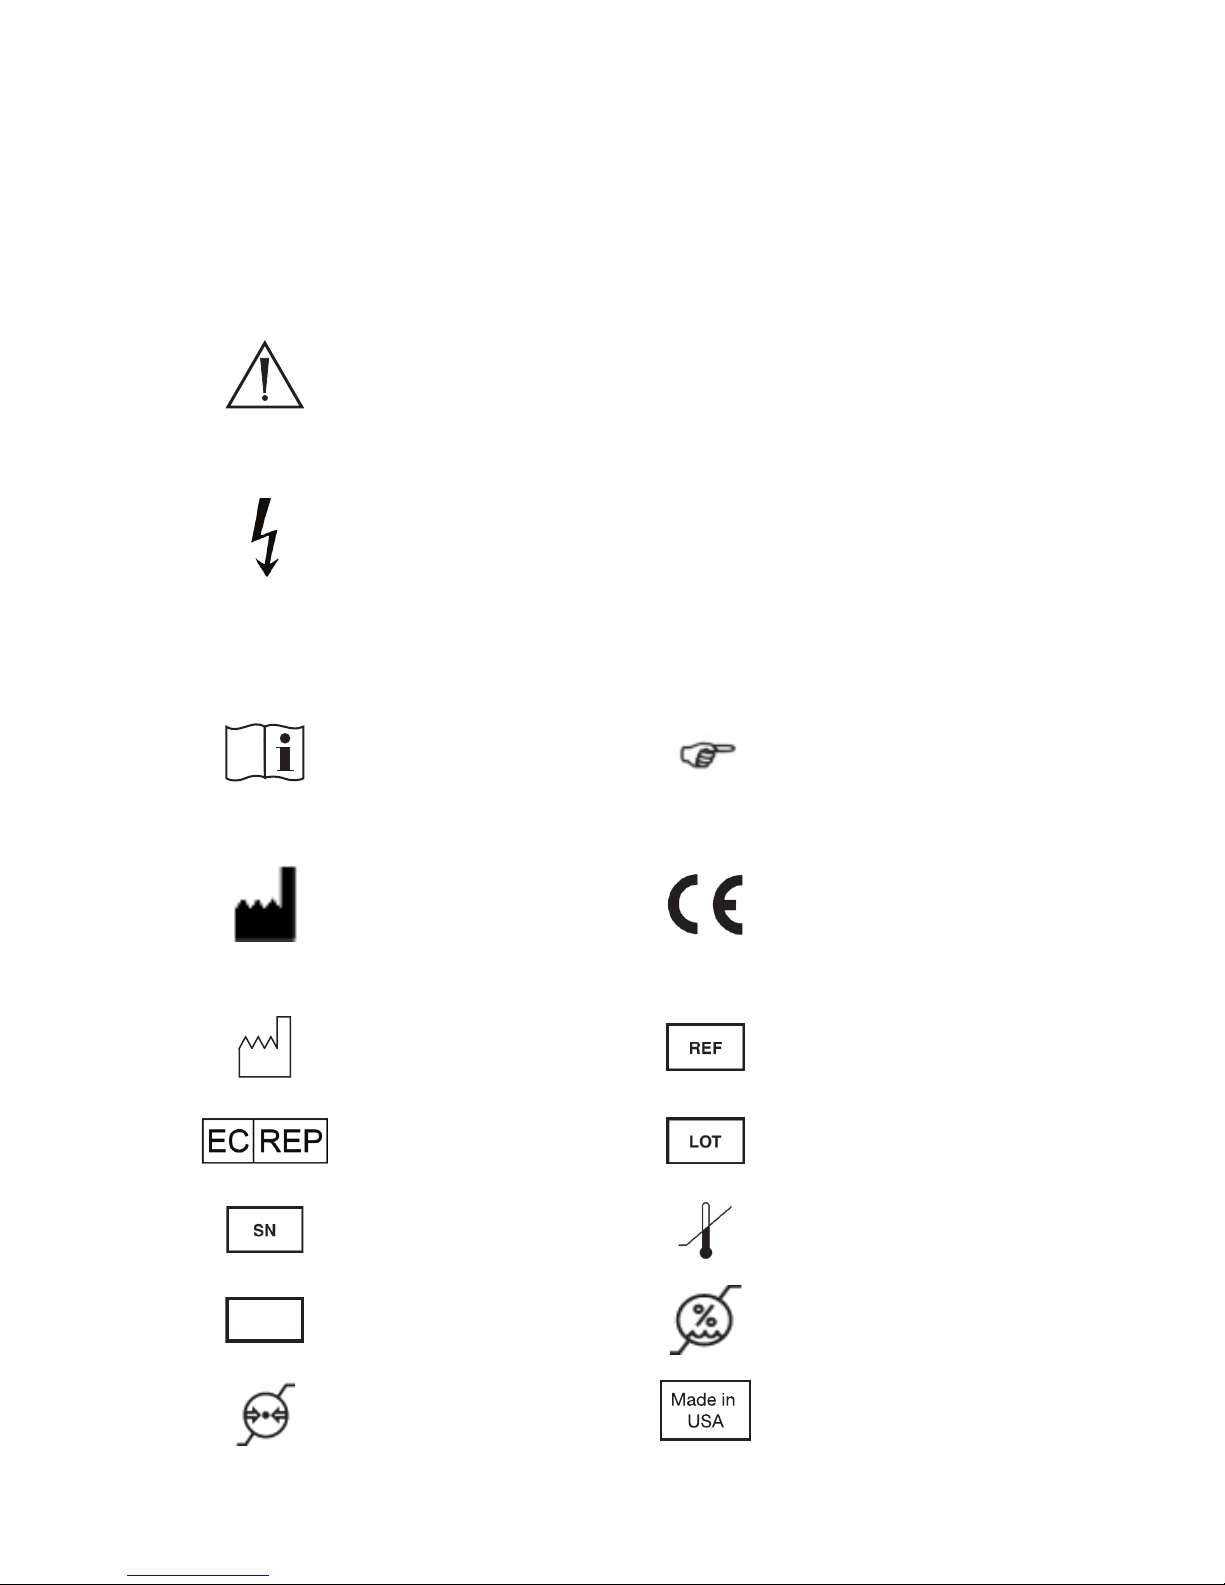
Warnings
When this symbol appears on a device, it refers the
user to the Operations and Maintenance manual for
important safety information. When it appears in the
manual, it is meant to alert the user to the presence
of important safety, operating, and maintenance
instructions.
A lightning bolt indicates the presence of hazardous
voltage. Refer all service to authorized personnel.
Packaging/Labeling
Consult
instructions for
use
Identies
helpful tips and
information
The manufacturer
of the device
Compliance
to European
Community
Directive
93-42-EEC
Date of
manufacture
Product/part
number
European
Representative
Lot or batch
number
Product/serial
number
Temperature limits
QTY
Quantity Humidity limits
Relative pressure
limits
Made in USA
Page 11

7
For U.S. audience only - Caution: Federal Law (USA)
restricts this device to sale by or on the order of a
physician.
Device
Refers the user to important safety operating and
maintenance (service) instructions in the literature
accompanying the equipment.
Denotes compliance to CSA Standard C22.2, 60601.1,
AAMI ES 60601-1.
In accordance with European Community Directive
2002/96/EC on Waste Electrical and Electronic
Equipment, the product must not be disposed of as
unsorted municipal waste but should be collected
separately.
We request that you contact Stryker when you plan to
withdraw this device from service.
Page 12

8
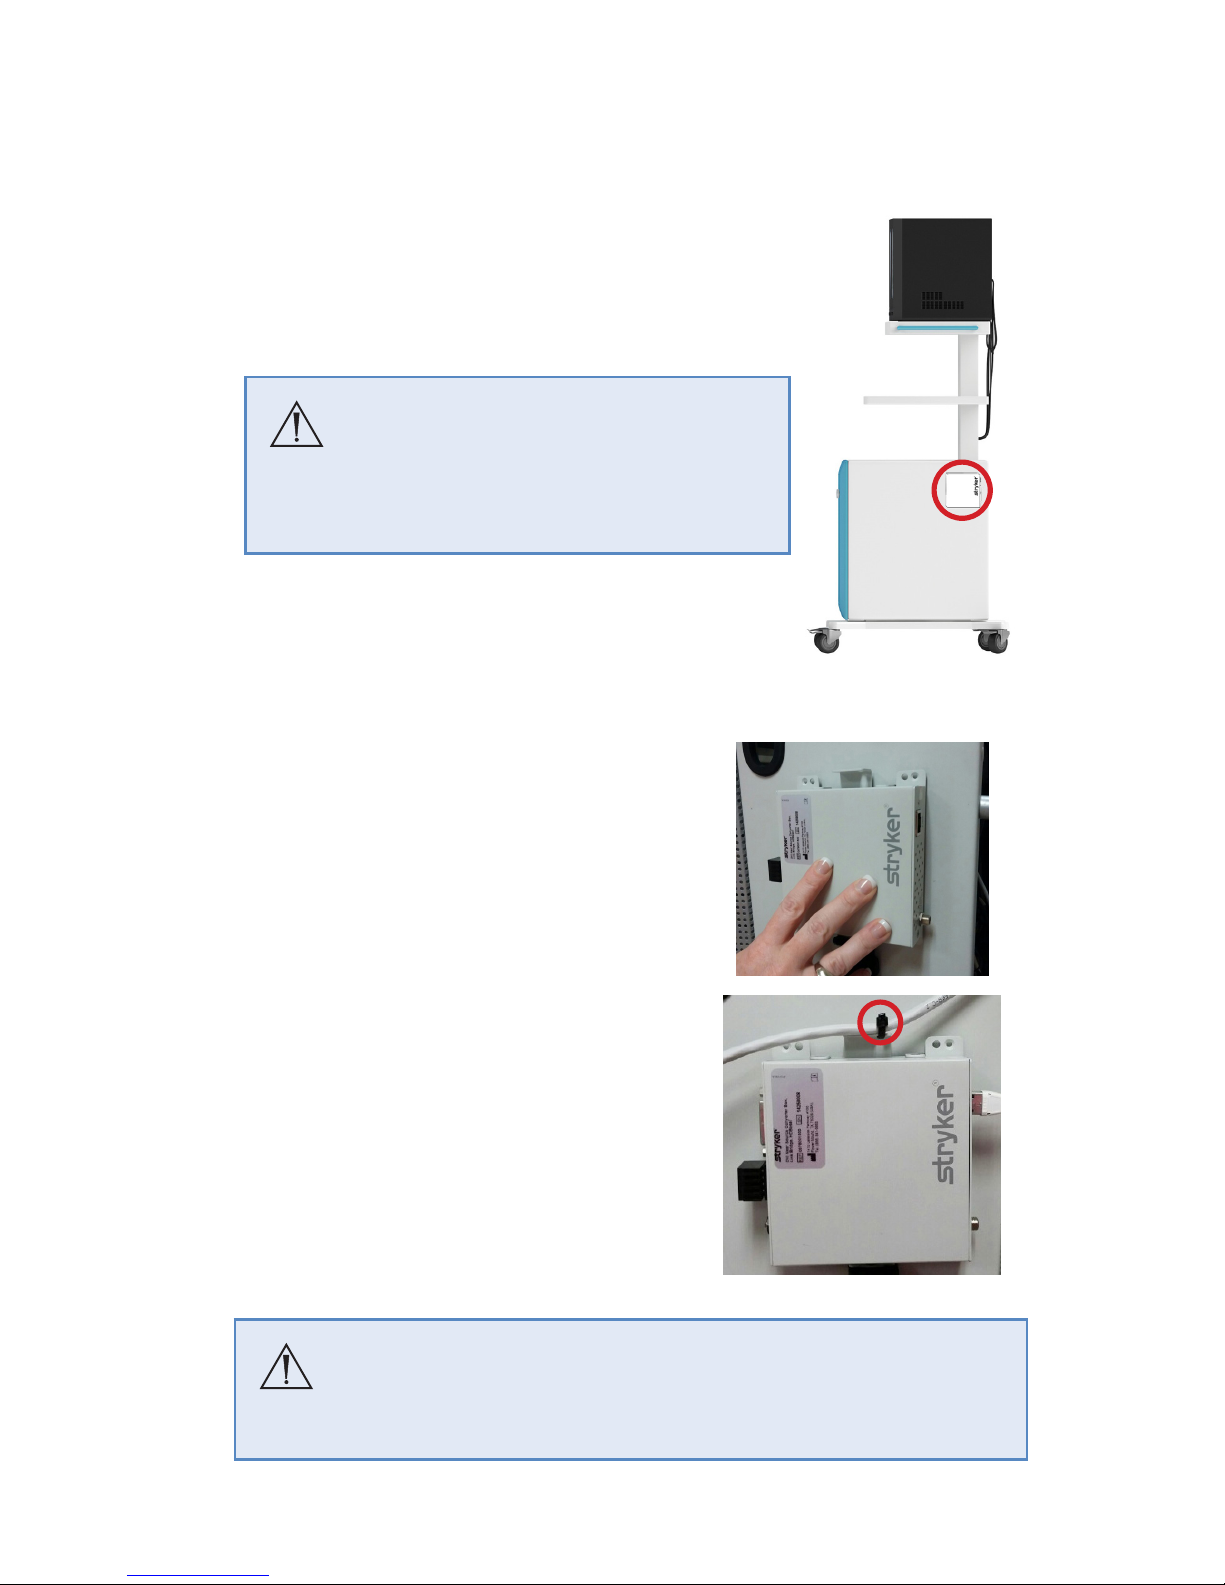
4. Installation
To install the transmitter box, do the following:
1. Find a location for the Transmitter Box
that is on a at surface clear of adjacent
obstructions. Make sure that the location is
within reach of the 6 ft video cable.
Caution
It is important to select the
location carefully, as the adhesive
is dicult to remove.
2. Prepare the installation surface area with
an alcohol pad. This is necessary for a
strong bond and to prevent damage to the
equipment.
3. Remove the adhesive back from the
bracket.
4. Press and hold the box assembly
against the prepared installation
surface for 10 seconds.
5. Connect the RJ-45 plug into the
“Link” port. Use a cable tie to attach
the cable to the hole in the stando
at the top of the bracket. Give a
minimum 8-12” of cable from the
connector to the stando.
Caution
Make sure to attach the cable to the bracket for strain
relief to prevent damage to the RJ-45 plug.
Page 13
9
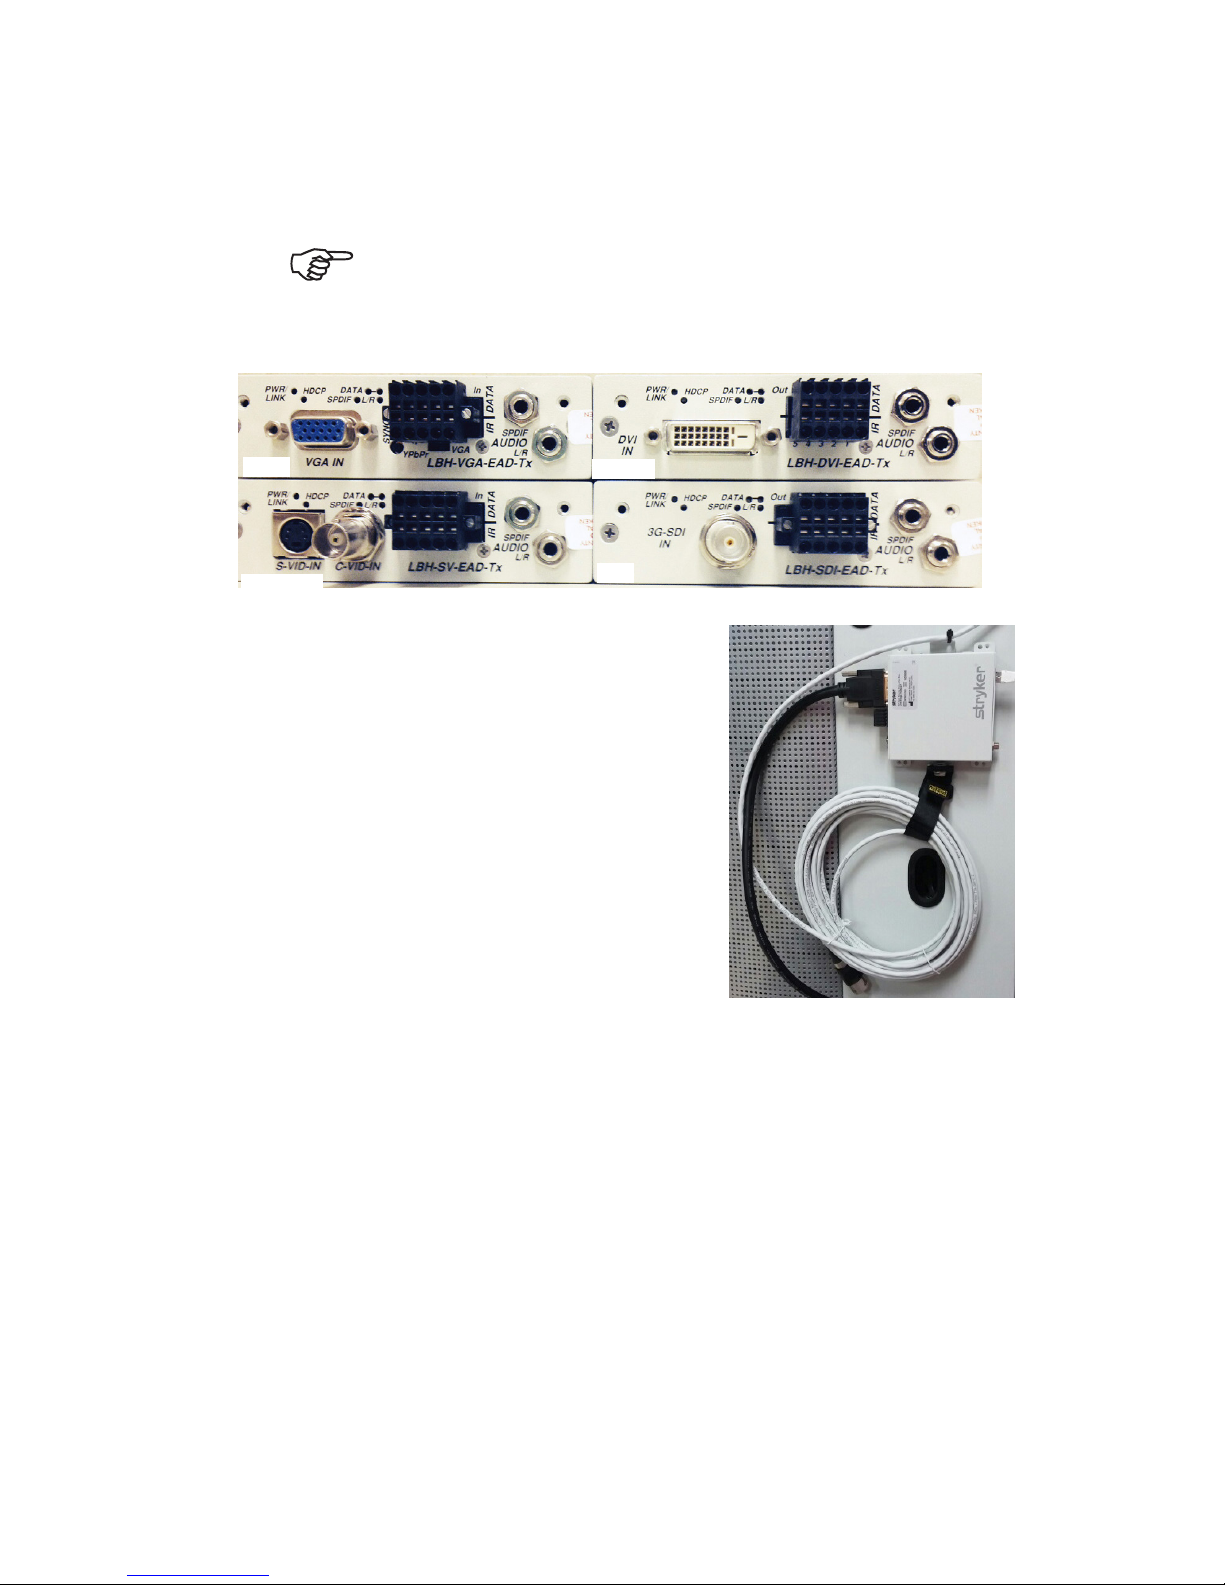
6. Connect the device or cart video output signal with the 6 ft video
cable (either SDI, DVI-D, VGA, or S-Video) to the Transmitter Box
video input.
Note: The S-Video Transmitter Box is also
compatible with a Composite input.
DVI-D
SDI
VGA
S-Video
7. Coil excess cable and secure it together
with hook and loop tape. Put the cable
loop onto the bottom of the bracket.
Page 14
10
5. Using the Equipment
1. Power on the device connected to the Transmitter Box and check
that it is set to Output Video.
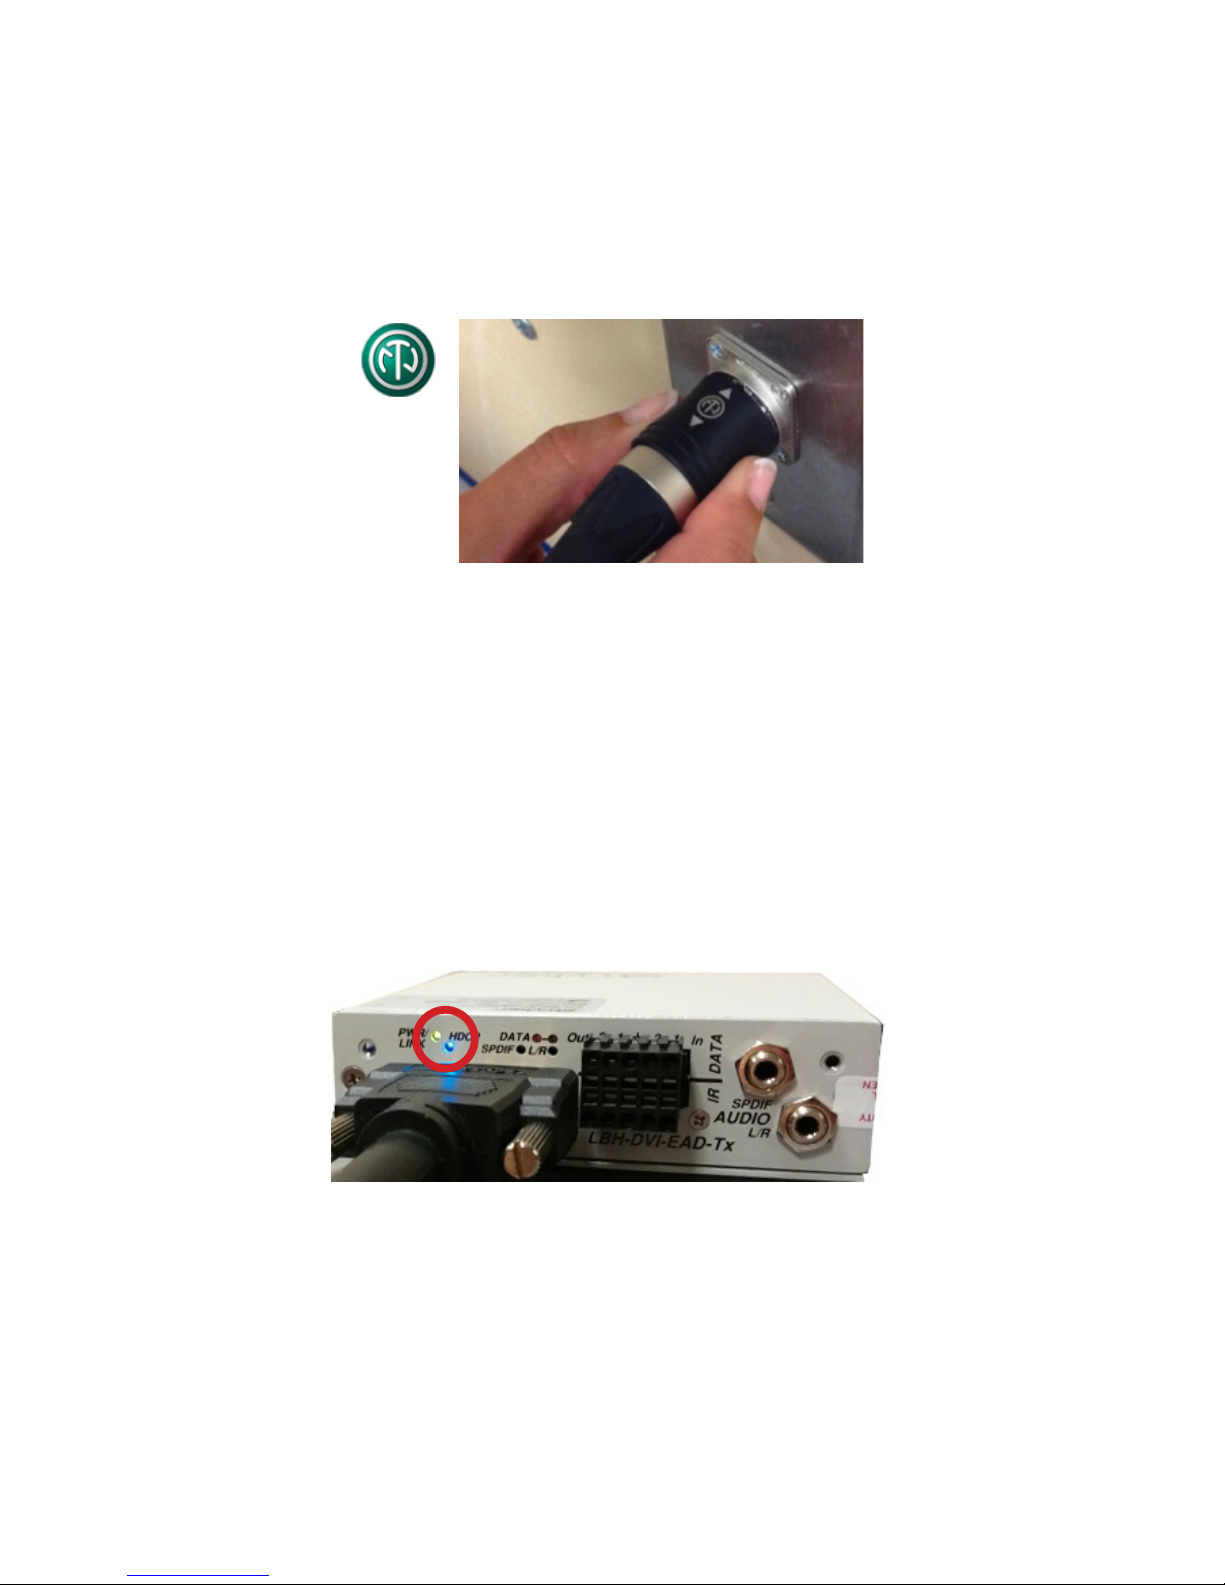
2. Connect the 10m Neutrik cable connector to the Neutrik wall plate.
Make sure that the Neutrik symbol is on the top.
3. Connect the other end of the Neutrik cable to the transmitter box.
4. Coil excess cable and secure it with the hook and loop tape on the
bracket
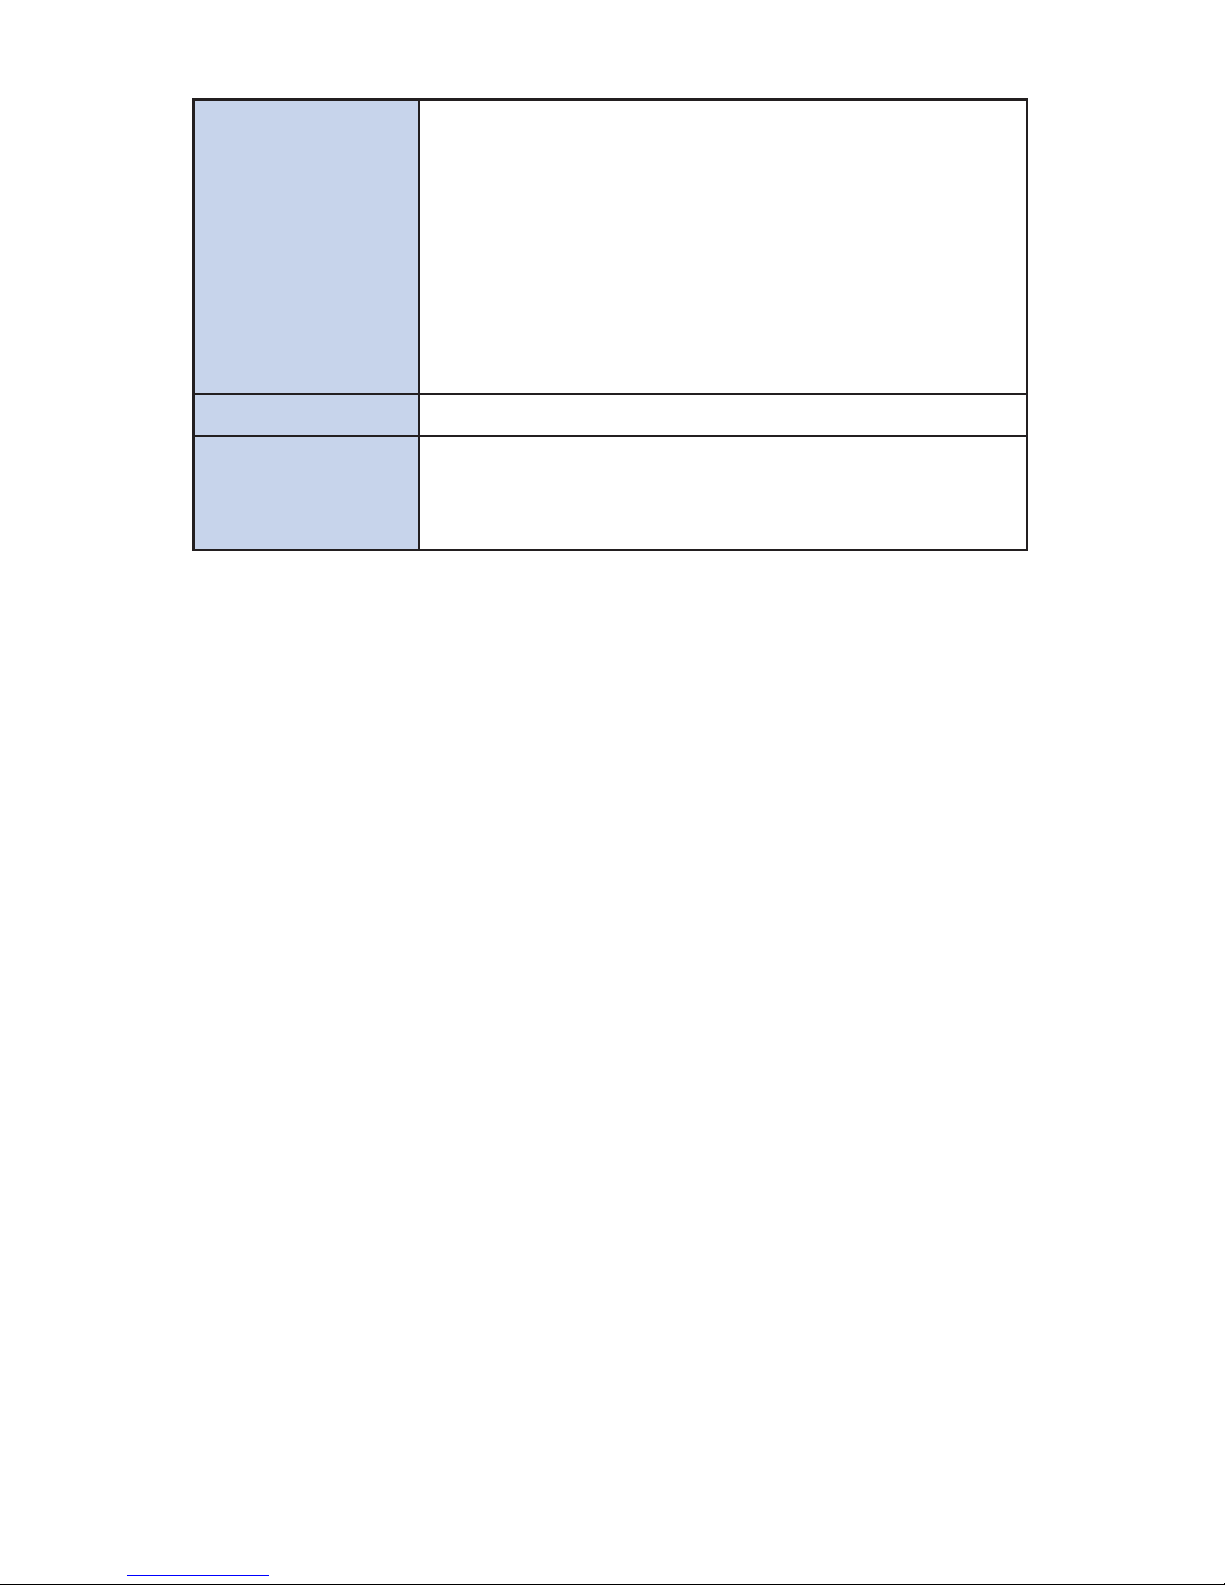
5. The Power LED on the Transmitter Box will illuminate once it is
connected.
• When connected, video will stream in approximately 30 seconds.
• If there is not an available source for SDI, DVI, or VGA, there will
not be a video signal.
• A solid blue screen appears for an SV connection, even if there is
no source video.
6. To disconnect the Neutrik cable from the wall plate, hold the
connector then squeeze and pull to disengage.
Page 15

11
6. Cleaning and Sterilization
WARNING
To avoid electric shock and potentially fatal injury,
unplug the converter from the electric outlet before
cleaning.
Caution
• Do not sterilize the converter.
• Do not immerse the converter in any liquid.
• Do not allow liquid to drip onto the converter or
collect on any of its surfaces.
• Do not spray cleaning liquid directly onto the
converter, power button, or connectors. Spray the
cleaning liquid onto a cloth, and use the cloth to
wipe the converter.
• Do not use corrosive cleaning solutions to clean
the converter.
Point of Use Wipe excess soil from all components using
disposable paper towels.
Preparation for
Cleaning
Properly prepare a cleaning agent according to
the detergent manufacturer’s recommendations.
Cleaning agents may include:
• Enzol Enzymatic Detergent
• Isopropyl Alcohol
• Soap and Water Solution
• Bleach and Water Solution
Page 16
12
Cleaning:
Manual Method
1. Apply cleaning agent to a soft, clean, lint-free
cloth.
2. Clean debris from the Near Source Converter,
wall plate, and product labels. Do not spray
cleaning products directly onto the Near
Source Converter or wall plate.
3. Dry the Near Source Converter and wall plate
with a lint-free cloth.
Disinfection Not applicable
Maintenance,
Inspection, and
Testing
Inspect the apparatus before and after use.
Do not continue using the equipment if it is
damaged.
Page 17

13
7. Maintenance
1. Do not continue to use the cable if it is damaged. Damage
includes:
• Nicks
• Cuts or abrasions to the cable jacket
• Cracked, crushed, or deformed connectors
• Any other damage that may interfere with the integrity of the
cable
7.1 Preventative Maintenance
The cable and wall plate connector are wear items and may need to
be replaced after an extended period of time in operating rooms that
have a high case turnover and usage. Please contact Stryker Technical
Support for a preventative maintenance request .
Page 18

14
8. Troubleshooting
Note: There are no user serviceable parts or
adjustments.
If the system video is intermittent or does not show, do the following:
1. Make sure that the PWR/LINK LED is illuminated green.
• If it is not on, check that the cable is correctly connected to the
wall plate.
• If it is on, disconnect the cable from the wall plate and then
reconnect it.
2. Examine the RJ45 connector condition for signs of damage.
Note: The gold-plated contacts on the RJ45
connector may show wear, which is normal.
3. Check that the video is routed correctly through the SPI.
4. If the video still is not present, contact Stryker Technical Support.
Page 19
15
9. Environmental Specications
9.1 Operating Conditions
Dry-Bulb Temperature 10°-40°C
Relative Humidity 30-75% (Non-Condensing)
Maximum Dew Point 28°C
Elevation 70-106kPA (0-3050 m)
9.2 Storage and Shipping Conditions
Dry-Bulb Temperature 5°-70°C
Relative Humidity 10-90% (Non-Condensing)
Elevation 70-106kPA (0-3050 m)
The system shall follow the ASTM D4169, assurance level II.
9.3 Latex Policy
Stryker Communications guarantees that all of the Near Source
Converter equipment including accessories, packaging material, labels,
pouches, or other similar items do not contain latex.
10. Product Disposal
Dispose of this device according to local laws and hospital practices.
Page 20

16
11. Technical Specications
Dimensions 4.17”(W) x 4.1”(D) x 1.1”(H)
Power Consumption +24VDC @ 1.0 Amps (Max.)
POH (Power over HDBT) on either Tx or Rx units
The Near Source Converter requires a shielded Cat6 cable to reduce
noise interference
Page 21

17
12. Stryker Limited Warranty
This warranty applies to customers in the United States only. Outside
of the USA, contact your Stryker sales representative or your local
Stryker subsidiary.
Stryker warrants that its products shall be free of defects of material
and workmanship for a period of one (1) year after date of installation.
Stryker will provide all parts and service required to restore equipment
under warranty to good working condition, which may include
shipment of replacement parts and phone service consultation to
conduct minor repairs.
Any modications to this warranty policy are not valid unless made
with explicit written approval of Stryker.
This warranty covers all Stryker products with the exception of
disposable parts.
This warranty does not cover any cosmetic or supercial damage
to product. Any modication to product by Customer without the
approval of Stryker will immediately void this warranty in its entirety.
This warranty covers only Stryker products and only such products that
were installed or, if necessary, reinstalled by Stryker personnel. The NSC
Transmier Kit may be installed by hospital personnel per the provided
instrucons, and will be subject to this warranty.
This warranty is valid only to the original purchaser of Stryker products
directly from a Stryker authorized agent. The warranty cannot be
transferred or assigned by the original purchaser.
13. Service and Claims
Shipping is FOB Origin. Title transfers to customer upon shipment.
Stryker assumes responsibility for loss or damage during shipping.
Please contact Technical Support (866) 841-5663 for inside the U.S.,
Page 22

18
(972) 410-7100 for international, or your Stryker representative if your
shipment is lost or damaged.
If you need to return any item, contact Customer Service for an
RMA number. After receiving an RMA number, package the item as
described by Customer Service. Ship the item to the following address:
Stryker Communications
(RMA#_____)
571 Silveron Blvd.
Flower Mound, TX 75028
Toll Free (inside the U.S): (866) 841-5663
International: (972) 410-7100
14. Contact Information
14.1 Technical Support Contact Information
Contact Technical support for technical questions.
Stryker Technical Support: (866) 841-5663
Stryker Technical Support Fax: (972)410-7594
Email: comm.techservices@stryker.com
14.2 Customer Service Contact Information
Contact Stryker Customer Service with questions or concerns.
Stryker Communications
571 Silveron Blvd.
Flower Mound, TX 75028
Toll Free: (866) 841-5663
(972) 410-7100
For international service locations, refer to the Stryker website at the
following URL:
www.stryker.com
Page 23

19
Sommaire
1. Avertissements et mises en garde ..................................................21
1.1 Avertissements..............................................................................21
1.2 Mises en garde ..............................................................................22
1.3 Remarques ...................................................................................... 22
2. À propos de votre produit .................................................................23
2.1 Description du produit ...............................................................23
2.2 Utilisation prévue ......................................................................... 23
2.3 Indications d’utilisation .............................................................23
2.4 Population de patients prévue ................................................23
3. Signication des symboles ................................................................24
4. Installation ............................................................................................26
5. Utilisation de l’équipement ............................................................... 28
6. Nettoyage et désinfection .................................................................29
7. Maintenance.........................................................................................31
7.1 Maintenance préventive ............................................................31
8. Dépannage ...........................................................................................32
9. Caractéristiques environnementales ..............................................33
9.1 Conditions d’utilisation .............................................................. 33
9.2 Conditions de stockage et d’expédition .............................. 33
9.3 Politique relative à l’utilisation de latex ...............................33
10. Mise au rebut du produit .................................................................33
Page 24

20
11. Caractéristiques techniques ...........................................................34
12. Garantie limitée de Stryker .............................................................35
13. Service après-vente et réclamations .............................................36
14. Contact ................................................................................................37
14.1 Coordonnées de l’assistance technique ..............................37
14.2 Coordonnées du service clientèle .......................................... 37
Page 25
21
1. Avertissements et mises en garde
Lire ce manuel et en respecter attentivement les instructions.
Porter une attention particulière aux termes AVERTISSEMENT,
MISEEN GARDE et Remarque.
Avertissement: la sécurité personnelle du patient ou
del’utilisateur peut être mise en cause. Le non-respect
deces informations pourrait causer des blessures au
patient ou à l’utilisateur.
Mise en garde: respecter les procédures ou précautions
d’entretien an de ne pas endommager l’équipement.
Avertissement: le symbole éclair avertit l’utilisateur
de la présence d’une tension électrique dangereuse.
Faire appel au personnel agréé pour toute assistance
technique.
Remarque: informations spéciales facilitant l’entretien
ou permettant de clarier des données importantes.
An d’éviter tout risque de blessure grave au patient et à l’utilisateur
et/ou d’endommagement de l’appareil, l’utilisateur doit respecter les
avertissements et mises en garde suivants.
1.1 Avertissements
1. Aucune modication de cet équipement n’est autorisée. Ne pas retirer
le couvercle. L’équipement ne contient pas de pièces réparables
parl’utilisateur.
2. Ne doit pas être utilisé dans un environnement enrichi en oxygène.
3. Le convertisseur de format ne doit pas être utilisé avec des achages
vidéo principaux.
4. Le convertisseur de format n’est pas prévu pour interagir ou entrer
en contact avec une partie du corps ou des tissus du patient.
Page 26

22
1.2 Mises en garde
1. Mise en garde: conformément à la législation en vigueur,
cet appareil ne peut être vendu que par un médecin ou
surprescription médicale
1.3 Remarques
1. Il est recommandé de brancher l’émetteur à la plaque murale
uniquement avec le câble Cat6 blindé fourni.
2. Utiliser le connecteur RJ45 (Cat6) de la plaque murale
exclusivement pour le câble du convertisseur. La plaque murale
nedonne aucun accès au réseau.
Page 27

23
2. À propos de votre produit
2.1 Description du produit
Le boîtier du convertisseur de format (NSCB) est un appareil
permettant de convertir le signal vidéo d’un format vidéo DVI-D,
RGB-HV, SDI, S-Vidéo/Composite à un format vidéo DVI numérique.
2.2 Utilisation prévue
Le convertisseur de format est conçu pour convertir des vidéos provenant
d’appareils mobiles introduits dans le bloc opératoire en un format
vidéo classique ne nécessitant qu’une seule plaque murale. Le
convertisseur de format est doté des fonctions présentées ci-après.
Le convertisseur doit être installé sur un appareil mobile adapté
aux formats vidéo classiques tels que SDI, S-Vidéo, VGA et DVI et
les convertir en un format vidéo unique, HDbaseT. Le signal vidéo
est envoyé via un câble CAT6 à une plaque murale passive munie
d’un connecteur unique, puis au SPI2/SPI3/SPI3-Lite muni d’un
convertisseur HDbaseT-DVI.
2.3 Indications d’utilisation
Le convertisseur de format est conçu pour être utilisé avec diverses
sorties vidéo auxiliaires dans un bloc opératoire au sein duquel
des achages vidéo secondaires sont nécessaires. Les principaux
utilisateurs sont les membres du personnel hospitalier, dont les
médecins et les inrmiers/ères.
2.4 Population de patients prévue
Le convertisseur de format est conçu pour être utilisé pour n’importe
quel patient dont l’intervention chirurgicale nécessite de projeter des
images issues d’un appareil mobile sur un achage secondaire.
Page 28
24
3. Signication des symboles
Avertissements
La présence de ce symbole sur un appareil renvoie
l’utilisateur au manuel d’utilisation et de maintenance
an qu’il y prenne connaissance d’informations
importantes concernant la sécurité. Lorsqu’il apparaît
dans le manuel, il vise à attirer l’attention de l’utilisateur
sur la présence d’instructions de sécurité, d’utilisation et
de maintenance importantes.
Le symbole de l’éclair avertit de la présence d’une
tension dangereuse. Faire appel au personnel agréé pour
toute assistance technique.
Conditionnement/Étiquetage
Consulter
lesinstructions
d’utilisation.
Indique des conseils
etinformations utiles
Fabricant
del’appareil
Conformité
à la Directive
européenne93-42-CEE
Date de
fabrication
Numéro de produit/
référence
Représentant
européen
Numéro de lot
Numéro
deproduit/
desérie
Limites de température
QTY
Quantité Limites d’humidité
Limites
depression
Fabriqué aux États-Unis
Page 29

25
Pour les utilisateurs américains uniquement–Mise
engarde: conformément à la législation en vigueur
auxÉtats-Unis, cet appareil ne peut être vendu que par
un médecin ou sur prescription médicale.
Appareil
Renvoie l’utilisateur à d’importantes consignes
desécurité liées au fonctionnement et à la maintenance
se trouvant dans les documents joints à l’équipement.
Indique que l’appareil est conforme à la norme
CSAC22.2, 60601.1, AAMI ES 60601-1.
Conformément à la Directive européenne
2002/96/CE relative aux déchets d’équipements
électriques etélectroniques, le produit ne doit pas
êtremis au rebut comme les déchets ménagers
ordinaires mais collecté séparément.
Nous demandons aux utilisateurs de prendre contact
avec Stryker au moment où ils comptent mettre
ceproduit dénitivement hors service.
Page 30
26
4. Installation
Pour installer le boîtier de l’émetteur, procéder comme suit:
1. Placer le boîtier de l’émetteur sur une surface
plane, loin de tout objet susceptible de
l’entraver. Veiller à ce que le boîtier se trouve
à proximité du câble vidéo de 1,83m.
Mise en garde
Le choix de l’emplacement
ason importance car l’adhésif
estdicile à éliminer.
2. Préparer la surface d’installation avec
un tampon d’alcool. Cela est nécessaire
pour une bonne adhérence et pour éviter
d’endommager l’équipement.
3. Ôter la partie arrière adhésive
dusupport.
4. Maintenir le boîtier appuyé contre
la surface d’installation préparée
pendant 10secondes.
5. Brancher la che RJ-45 dans le port
«Link». Utiliser un collier de serrage
de câble pour maintenir le câble
contre l’orice de l’entretoise située
au-dessus du support. Laisser au moins
20,3 à 30,5cm de câble entre
leconnecteur et l’entretoise.
Mise en garde
Veiller à attacher le câble au support pour la réduction
de tension an de ne pas endommager la che RJ-45.
Page 31

27
6. À l’aide du câble vidéo de 1,83m, raccorder la sortie vidéo de l’appareil
ou du chariot (SDI, DVI-D, VGA ou S-Vidéo) à l’entrée vidéo du boîtier
de l’émetteur.
Remarque: le boîtier de l’émetteur S-Vidéo est
également compatible avec une entrée Composite.
DVI-D
SDI
VGA
S-Vidéo
7. Enrouler l’excédent de câble
puislemaintenir avec la bande
auto-agrippante. Suspendre le câble
enroulé à la partie inférieure
dusupport.
Page 32

28
5. Utilisation de l’équipement
1. Mettre l’appareil raccordé au boîtier de l’émetteur sous tension puis
vérier qu’il est bien sur Sortie vidéo.
2. Brancher le connecteur du câble 10m Neutrik à la plaque murale
Neutrik. S’assurer que le symbole Neutrik est vers le haut.
3. Brancher l’autre extrémité du câble Neutrik au boîtier de l’émetteur.
4. Enrouler l’excédent de câble puis le maintenir sur le support avec
labande auto-agrippante.
5. La DEL d’alimentation sur le boîtier de l’émetteur s’allume dès
laconnexion.
• Une fois la connexion établie, la vidéo est diusée dans les
30secondes environ.
• En l’absence de source SDI, DVI ou VGA disponible, il ne peut pas
y avoir de signal vidéo.
• Un écran bleu apparaît en cas de connexion SV, même s’il n’y a pas
de vidéo source.
6. Pour débrancher le câble Neutrik de la plaque murale, saisir et presser
le connecteur puis tirer dessus.
Page 33

29
6. Nettoyage et désinfection
AVERTISSEMENT
An d’éviter une décharge électrique et des blessures
potentiellement fatales, débrancher le convertisseur
de la prise électrique avant le nettoyage.
Mise en garde
• Ne pas stériliser le convertisseur.
• Ne pas plonger le convertisseur dans un liquide.
• Ne laisser aucun liquide pénétrer dans
leconvertisseur ni s’accumuler sur ses surfaces.
• Ne pas pulvériser de nettoyants liquides
directement sur le convertisseur, le bouton
marche/arrêt ou les connecteurs. Pulvériser
lenettoyant liquide sur un chion puis passer
lechion sur le convertisseur.
• Ne pas utiliser de solutions nettoyantes corrosives
pour nettoyer le convertisseur.
Point
d’application
Nettoyer toute salissure sur les composants
àl’aide de serviettes en papier jetables.
Préparation
aunettoyage
Préparer un agent de nettoyage conformément
aux recommandations du fabricant du détergent.
Les agents de nettoyage peuvent inclure:
• Détergent enzymatique Enzol
• Alcool isopropylique
• Solution à base d’eau et de savon
• Solution à base d’eau et d’eau de Javel
Page 34

30
Nettoyage:
méthode
manuelle
1. Appliquer l’agent de nettoyage sur un chion
doux, non pelucheux et propre.
2. Éliminer tous les débris présents sur
leconvertisseur de format, la plaque murale
et les étiquettes produit. Ne pas pulvériser
les produits nettoyants directement sur le
convertisseur de format ou la plaque murale.
3. Sécher le convertisseur de format et la plaque
murale à l’aide d’un chion non pelucheux.
Désinfection Sans objet
Maintenance,
inspection
ettests
Inspecter l’appareil avant et après utilisation. Il est
interdit de continuer à utiliser l’équipement s’il
estendommagé.
Page 35

31
7. Maintenance
1. Il est interdit de continuer à utiliser le câble s’il est endommagé.
Types d’endommagements possibles:
• Entailles
• Coupures ou abrasions sur la gaine du câble
• Connecteurs craquelés, écrasés ou déformés
• Tout autre endommagement susceptible de compromettre
l’intégrité du câble
7.1 Maintenance préventive
Le câble et le connecteur de la plaque murale sont des pièces
d’usure,elles peuvent nécessiter un remplacement après un certain
temps d’utilisation dans un bloc opératoire très souvent utilisé. Merci
de contacter l’assistance technique de Stryker pour solliciter une
maintenance préventive.
Page 36

32
8. Dépannage
Remarque: l’équipement ne contient pas de pièces
réparables ni de réglages manipulables par
l’utilisateur.
Si la vidéo sur le système est intermittente ou n’apparaît pas, procéder
comme suit:
1. S’assurer que la DEL PWR/LINK est allumée en vert.
• Si elle est éteinte, vérier que le câble est correctement branché
à la plaque murale.
• Si elle est allumée, débrancher le câble de la plaque murale puis
le rebrancher.
2. Examiner le connecteur RJ45 pour voir s’il est endommagé.
Remarque: les contacts plaqués or du connecteur
RJ45 peuvent montrer des signes d’usure, cela est
tout à fait normal.
3. Vérier que la vidéo est correctement routée via le SPI.
4. Si la vidéo n’apparaît toujours pas, contacter l’assistance technique
de Stryker.
Page 37

33
9. Caractéristiques environnementales
9.1 Conditions d’utilisation
Température sèche 10 à 40°C
Humidité relative 30 à 75% (sans condensation)
Point de rosée maximal 28°C
Altitude 70 à 106kPA (0 à 3050m)
9.2 Conditions de stockage et d’expédition
Température sèche 5 à 70°C
Humidité relative 10 à 90% (sans condensation)
Altitude 70 à 106kPA (0 à 3050m)
Le système doit être conforme à la normeASTMD4169, niveau
d’assuranceII.
9.3 Politique relative à l’utilisation de latex
StrykerCommunications garantit que les équipements du convertisseur
de format, y compris les accessoires, matériaux d’emballage, étiquettes,
poches et autres articles similaires, ne contiennent pas de latex.
10. Mise au rebut du produit
Éliminer cet appareil dans le respect des réglementations locales
etdes pratiques hospitalières en vigueur.
Page 38

34
11. Caractéristiques techniques
Dimensions 10,60cm (l)x10,40cm
(P)x2,80cm (H)
Consommation électrique +24VCC à 1A (max.)
POH (Power over HDBT, alimentation électrique par HDBT) que ce soit
sur les émetteurs ou les récepteurs
Le convertisseur de format nécessite un câble Cat6 blindé pour limiter
les interférences sonores
Page 39

35
12. Garantie limitée de Stryker
Cette garantie n’est valable que pour les utilisateurs résidant
auxÉtats-Unis. En dehors des États-Unis, contacter le représentant
Strykerou la liale Stryker locale.
Stryker garantit que ses produits sont dépourvus de défaut matériel
ou de main-d’œuvre pendant une période d’un (1) an après la date
d’installation. Stryker fournira toutes les pièces et l’assistance technique
requises pour remettre l’équipement sous garantie en bon état
defonctionnement, ce qui pourrait inclure l’expédition de pièces
de remplacement et une consultation téléphonique pour eectuer
depetites réparations.
Toute modication de cette politique de garantie n’est pas valide,
saufsi elle est eectuée avec l’approbation écrite explicite de Stryker.
Cette garantie couvre tous les produits Stryker à l’exception des
piècesjetables.
Elle ne couvre aucun dommage esthétique ou superciel du produit.
Toute modication du produit par le client sans l’approbation de
Stryker annule immédiatement cette garantie dans son intégralité.
Cette garantie couvre exclusivement les produits Stryker et
uniquement ceux qui ont été installés ou, si nécessaire, réinstallés par
le personnel de Stryker. Le kit de l’émetteur du convertisseur peut être
installé par le personnel hospitalier conformément aux instructions
fournies et est couvert par la présente garantie.
Cette garantie s’applique uniquement à l’acquéreur initial du produit
Stryker ayant eectué son achat directement auprès d’un agent agréé par
Stryker. La garantie ne peut être ni transférée ni cédée par l’acheteur
d’origine.
Page 40

36
13. Service après-vente et réclamations
Mode d’expédition: FAB origine. Le titre de propriété est transféré
auclient à l’expédition. Stryker assume la responsabilité des pertes
oudes dommages survenus lors de l’expédition. Contacter
l’assistancetechnique au +1 (866) 841-5663 pour les États-Unis
ouau+1 (972) 410-7100 pour l’international, ou votre représentant
Stryker si la cargaison est perdue ou endommagée.
Pour retourner un article, contacter le service clientèle an d’obtenir
un numéro d’autorisation de retour d’article (RMA). Après avoir reçu
un numéro RMA, emballer l’article en suivant les indications du service
clientèle. Expédier l’article à l’adresse suivante:
Stryker Communications
(RMA#_____)
571 Silveron Blvd.
Flower Mound, TX 75028, USA
Appel gratuit (États-Unis): +1 (866) 841-5663
International: +1 (972) 410-7100
Page 41

37
14. Contact
14.1 Coordonnées de l’assistance technique
Contacter l’assistance technique pour toute question d’ordre
technique.
Assistance technique de Stryker: +1 (866) 841-5663
Fax de l’assistance technique de Stryker: +1 (972) 410-7594
Courrier électronique: comm.techservices@stryker.com
14.2 Coordonnées du service clientèle
Contacter le service clientèle de Stryker pour toute question
outoutproblème.
Stryker Communications
571 Silveron Blvd.
Flower Mound, TX 75028, USA
Appel gratuit: +1 (866) 841-5663
+1 (972) 410-7100
Pour les adresses à l’international, se reporter au site Web de Stryker
àl’adresse suivante:
www.stryker.com
Page 42

Page 43

39
Inhalt
1. Warnhinweise und Vorsichtsmaßnahmen ..................................... 41
1.1 Warnhinweise ................................................................................ 41
1.2 Vorsichtsmaßnahmen ................................................................42
1.3 Hinweise .......................................................................................... 42
2. Informationen zu Ihrem Produkt .....................................................43
2.1 Produktbeschreibung .................................................................43
2.2 Verwendungszweck .................................................................... 43
2.3 Indikationen ...................................................................................43
2.4 Zielpopulation ............................................................................... 43
3. Erläuterung der Symbole ...................................................................44
4. Installation ............................................................................................46
5. Verwendung des Geräts .....................................................................48
6. Reinigung und Sterilisation ...............................................................49
7. Wartung.................................................................................................51
7.1 Vorbeugende Wartung ..............................................................51
8. Fehlersuche ..........................................................................................52
9. Umgebungsbedingungen .................................................................53
9.1 Betriebsbedingungen ................................................................53
9.2 Betriebs- und Lagerungsbedingungen ...............................53
9.3 Latexfreie Lieferung ....................................................................53
10. Entsorgung des Produkts ................................................................53
Page 44

40
11. Technische Daten ..............................................................................54
12. Stryker – Eingeschränkte Garantie ................................................55
13. Kundendienst und Garantieansprüche ...............................................56
14. Kontaktangaben ...............................................................................57
14.1 Kontaktdaten des technischen Kundendienstes ..............57
14.2 Kontaktdaten des Kundendienstes .......................................57
Page 45

41
1. Warnhinweise und
Vorsichtsmaßnahmen
Lesen Sie dieses Handbuch bitte sorgfältig durch, und befolgen Sie
die darin enthaltenen Anweisungen genau. Achten Sie besonders
auf die Begrie WARNUNG, VORSICHT und Hinweis.
Warnung: Diese Hinweise betreen die Sicherheit des
Patienten oder des Benutzers. Wenn diese Informationen
nicht beachtet werden, können Benutzer und Patient
Verletzungen erleiden.
Vorsicht: Beachten Sie die Wartungsverfahren und
Sicherheitsmaßnahmen, um eine Beschädigung des
Geräts zu vermeiden.
Warnung: Der Blitz weist auf gefährliche Spannungen
hin. Wartungsarbeiten dürfen nur von autorisiertem
Personal durchgeführt werden.
Hinweis: Hierbei handelt es sich um Anmerkungen, die
die Wartung vereinfachen oder wichtige Informationen
verdeutlichen.
Um das Risiko ernsthafter Verletzungen des Benutzers und des
Patienten und/oder Beschädigungen dieses Geräts zu vermeiden,
sind die nachstehenden Warnhinweise und Vorsichtsmaßnahmen
zubeachten.
1.1 Warnhinweise
1. Es dürfen keine Änderungen am Gerät vorgenommen werden.
Entfernen Sie die Abdeckung nicht. Im Gerät sind keine Teile,
dievom Benutzer gewartet werden müssen.
2. Das Gerät darf nicht in einer sauerstoreichen Umgebung
verwendet werden.
Page 46

42
3. Der Near-Source-Konverter sollte nicht für primäre
Videoausgabenverwendet werden.
4. Der Near-Source-Konverter ist nicht für eine Interaktion mit oder
Berührung von Körper- oder Gewebeteilen des Patienten vorgesehen.
1.2 Vorsichtsmaßnahmen
1. Vorsicht: Laut US-Bundesgesetz darf dieses Gerät nur durch einen
Arzt oder auf Anordnung eines zugelassenen Arztes verkauft werden
1.3 Hinweise
1. Es wird empfohlen, nur den Transmitter mit demdafür vorgesehenen
geschirmten Cat6-Kabel an der Wandsteuerungseinheit anzuschließen.
2. Verwenden Sie den RJ45-(Cat6)-Stecker der Wandsteuerungseinheit
ausschließlich für das NSC-Kabel. Die Wandsteuerungseinheit
unterstützt keinen Netzwerkzugang.
Page 47

43
2. Informationen zu Ihrem Produkt
2.1 Produktbeschreibung
Die Near-Source-Konverter-Box (NSCB; Near Source Converter Box)
ist für die Umwandlung des Videosignals von einem DVI-D-,
RGB-HV-, SDI-, S-Video-/Composite-Videoformat in ein digitales
DVI-Videoformatbestimmt.
2.2 Verwendungszweck
Der Near-Source-Konverter ist für die Umwandlung von Videos
aufmobilen Geräten, die im OP verwendet werden, in ein gängiges
Videoformat vorgesehen, wofür statt vieler Wandsteuerungseinheiten
nur eine Wandsteuerungseinheit erforderlich ist. Der Near-SourceKonverter verfügt über die folgenden Informationen. Der Konverter
wird auf demmobilen Gerät installiert, empfängt gängige Videoformate,
einschließlich SDI, S-Video, VGA und DVI und wandelt diese in ein
einziges Videoformat, HDbaseT, um. Das Videosignal wird dann über
ein CAT6-Kabel an eine passive Wandsteuerungseinheit miteinem
Stecker und schließlich an das SPI2/SPI3/SPI3Lite mit einem
HDbaseT-in-DVI-Konverter übertragen.
2.3 Indikationen
Der Near-Source-Konverter ist für die Verwendung mit unterschiedlichen
zusätzlichen Videoausgängen in OPs vorgesehen, wo die Notwendigkeit
für eine zweite Videoanzeige besteht. Die Hauptnutzer sind
Klinikmitarbeiter, einschließlich Ärzte und Krankenschwestern.
2.4 Zielpopulation
Der Near-Source-Konverter ist für die Verwendung an Patienten
vorgesehen, bei denen ein chirurgischer Eingri vorgenommen
wird, der wiederum eine zweite Anzeige von Bildern von mobilen
Gerätenerfordert.
Page 48

44
3. Erläuterung der Symbole
Warnhinweise
Dieses Symbol auf einem Gerät weist den Benutzer
aufwichtige Sicherheitsinformationen im BedienungsundWartungshandbuch hin. Wenn dieses Symbol
imHandbuch dargestellt ist, wird der Benutzer
dadurchaufwichtige Sicherheits-, BedienungsundWartungsanweisungen hingewiesen.
Ein Blitz warnt vor Stromschlaggefahr. Wartungsarbeiten
dürfen nur von autorisiertem Personal durchgeführt
werden.
Verpackung/Etiketten
Gebrauchsan weisung
befolgen.
Weist auf
hilfreiche
Tipps und
Informationen hin
Hersteller
des Geräts
Konformität
mitder
EU-Richtlinie
93/42/EWG
Herstellungsdatum
Produkt-/
Bestellnummer
Vertretung
inEuropa
Chargennummer
Produkt-/
Serienummer
Temperatur grenzwerte
QTY
Menge
Luftfeuchtigkeitsgrenz werte
Relative
Druckgrenzwerte
Hergestellt
indenUSA
Page 49

45
Nur für Benutzer in den USA – Achtung: Laut USBundesgesetz darf diese Vorrichtung nur an einen
Arztbzw. auf ärztliche Anordnung verkauft werden.
Gerät
Weist den Benutzer auf wichtige Sicherheits-,
Bedienungs- und Wartungsanweisungen in der
Begleitdokumentation des Produkts hin.
Symbol für die Konformität mit der CSA-Norm C22.2,
60601.1, AAMI ES 60601-1.
Weist darauf hin, dass das Produkt gemäß EU-Richtlinie
2002/96/EG über die Behandlung von Elektro- und
Elektronik-Altgeräten nicht im unsortierten Hausmüll
entsorgt werden darf, sondern separat behandelt
werden muss.
Wir bitten Sie, sich an Stryker zu wenden, wenn Sie die
Außerbetriebnahme des Geräts planen.
Page 50

46
4. Installation
So installieren Sie die Transmitter-Box:
1. Suchen Sie eine Stelle für die Transmitter-Box
aus, die eine ache Oberäche aufweist und
in deren Umgebung sich keine Hindernisse
benden. Stellen Sie sicher, dass das
1,83-m-Videokabel bis zu dieser Stelle reicht.
Vorsicht
Es ist wichtig, dass diese Stelle
sorgfältig ausgewählt wird,
da die Klebeäche nur schwer
wieder entfernt werden kann.
2. Bereiten Sie die Stelle, an der Sie die
Transmitter-Box installieren möchten, mit
einem mit Alkohol getränkten Pad vor.
Dies ist erforderlich, um eine gute Haftung
zuermöglichen und um eine Beschädigung
des Geräts zu vermeiden.
3. Entfernen Sie die Schutzfolie von
derKlebeäche an der Halterung.
4. Drücken Sie die Box 10Sekunden
lang auf die vorbereitete Stelle.
5. Schließen Sie den RJ-45-Stecker
amLink-Port an. Befestigen Sie
das Kabel mit einem Kabelbinder
in der Önung, die aufgrund des
Abstandhalters oben an der Halterung
besteht. Das Kabel zwischen Stecker
und Abstandhalter sollte mindestens
20,3cm bis 30,5 cm lang sein.
Page 51

47
Vorsicht
Das Kabel muss an der Halterung befestigt werden,
damit für die entsprechende Zugentlastung gesorgt
und somit eine Beschädigung des RJ-45-Steckers
vermieden wird.
6. Schließen Sie das Gerät oder das Scart-Video-Ausgangssignal mit
dem 1,83-m-Videokabel (entweder SDI, DVI-D, VGA oder S-Video)
an den Videoeingang der Transmitter-Box an.
Hinweis: Die S-Video-Transmitter-Box ist auch
miteinem Composite-Eingang kompatibel.
DVI-D
SDI
VGA
S-Video
7. Rollen Sie überschüssiges Kabel auf
und binden Sie es mit dem Klettband
zusammen. Befestigen Sie die
Kabelschlaufe unten an der Halterung.
Page 52

48
5. Verwendung des Geräts
1. Schalten Sie das an der Transmitter-Box angeschlossene Gerät
einund überprüfen Sie, ob es auf „Ausgabevideo“ eingestellt ist.
2. Schließen Sie den Stecker des Neutrik-Kabels (10m) an der NeutrikWandsteuerungseinheit an. Überprüfen Sie, ob das Neutrik-Symbol
nach oben zeigt.
3. Schließen Sie das andere Ende des Neutrik-Kabels an der
Transmitter-Box an.
4. Rollen Sie überschüssiges Kabel auf und befestigen Sie es mit dem
Klettband an der Halterung.
5. Sobald das Kabel angeschlossen wurde, leuchtet die LED-Anzeige
auf der Transmitter-Box auf.
• Nach dem Anschluss dauert die Videoübertragung circa
30Sekunden.
• Wenn für SDI, DVI oder VGA keine Quelle verfügbar ist, wird kein
Videosignal ausgegeben.
• Bei einem SV-Anschluss wird konstant ein blauer Bildschirm
angezeigt, auch wenn kein Quellvideo verfügbar ist.
6. Halten Sie den Stecker fest, drücken Sie ihn zusammen und
ziehen Sie das Kabel heraus, um das Neutrik-Kabel von der
Wandsteuerungseinheit zu trennen.
Page 53

49
6. Reinigung und Sterilisation
WARNUNG
Trennen Sie den Konverter vor der Reinigung von
derStromquelle, da ansonsten Stromschlaggefahr
und das Risiko einer tödlichen Verletzung besteht.
Vorsicht
• Konverter nicht sterilisieren.
• Konverter nicht in Flüssigkeiten tauchen.
• Achten Sie darauf, dass keine Flüssigkeiten
inden Konverter eindringen oder sich auf
seinerOberäche sammeln.
• Keine Reinigungsüssigkeiten direkt auf den
Konverter, die Ein/Aus-Taste oder die Stecker sprühen.
Reinigungsüssigkeit auf ein Tuch sprühen und den
Konverter mit dem Tuch abwischen.
• Reinigen Sie den Konverter nicht mit ätzenden
Reinigungslösungen.
Einsatzort Überschüssige Verunreinigungen
mit Einweg-Papiertüchern von allen
Komponenten abwischen.
Reinigungsvorbereitung Bereiten Sie gemäß den Herstelle-
rempfehlungen eine Reinigungslösung
vor. Folgende Reinigungsmittel können
eingesetztwerden:
• Enzymatische Reinigungslösung
Enzol
• Isopropylalkohol
• Seifenlauge
• Bleiche-Wasser-Lösung
Page 54

50
Reinigung:
Manuell
1. Tragen Sie das Reinigungsmittel
auf einem weichen, sauberen
undfusselfreien Tuch auf.
2. Entfernen Sie Verschmutzungen
vom Near-Source-Konverter,
derWandsteuerungseinheit und
den Produktetiketten. Sprühen
Sie keine Produkte direkt auf den
Near-Source-Konverter oder die
Wandsteuerungseinheit.
3. Trocken Sie den NearSource-Konverter und die
Wandsteuerungseinheit mit
einemfusselfreien Tuch.
Desinfektion Nicht zutreend
Wartung, Überprüfung
und Test
Überprüfen Sie den Apparat jeweils
vor und nach der Verwendung. Ist ein
Gerät beschädigt, darf es nicht mehr
verwendet werden.
Page 55

51
7. Wartung
1. Ist ein Kabel beschädigt, darf es nicht mehr verwendet werden.
Schäden umfassen:
• Knicke
• Schnitte oder Abrieb an der Kabelummantelung
• Rissige, gebrochene oder deformierte Stecker
• Andere Beschädigungen, die zu einer Beeinträchtigung
derIntegrität des Kabels führen könnten
7.1 Vorbeugende Wartung
Das Kabel und der Wandsteuerungseinheit-Stecker sind Verschleißteile
und müssen nach einem längeren Zeitraum in OPs, in denen eine hohe
Fluktuation (in Bezug auf die Fälle) besteht und diese Teile häug
verwendet werden, ausgetauscht werden. Wenden Sie sich an den
technischen Kundendienst von Stryker, um eine Anfrage für die
vorbeugende Wartung zu stellen.
Page 56

52
8. Fehlersuche
Hinweis: Im Gerät sind keine Teile, die vom Benutzer
gewartet werden müssen.
Wenn das Systemvideo unterbrochen oder überhaupt nicht angezeigt
wird, gehen Sie folgendermaßen vor:
1. Überprüfen Sie, ob die PWR/LINK-LED grün aueuchtet.
• Ist dies nicht der Fall, überprüfen Sie, ob das Kabel
ordnungsgemäß mit der Wandsteuerungseinheit verbunden ist.
• Wenn die LED leuchtet, trennen Sie das Kabel von der
Wandsteuerungseinheit und schließen Sie es erneut an.
2. Überprüfen Sie den RJ45-Stecker auf sichtbare Schäden.
Hinweis: Die vergoldeten Kontakte am RJ45-Stecker
weisen möglicherweise Verschleißerscheinungen
auf, was normal ist.
3. Überprüfen Sie, ob das Video ordnungsgemäß durch das SPI
geleitet wird.
4. Wenn das Video immer noch nicht angezeigt wird, wenden Sie
sichan den technischen Kundendienst von Stryker.
Page 57

53
9. Umgebungsbedingungen
9.1 Betriebsbedingungen
Trockentemperatur 10° bis 40°C
Relative Luftfeuchtigkeit 30 bis 75% (nichtkondensierend)
Max. Taupunkt 28°C
Höhe 70 bis 106kPA (0 bis 3.050m)
9.2 Betriebs- und Lagerungsbedingungen
Trockentemperatur 5° bis 70 °C
Relative Luftfeuchtigkeit 10 bis 90% (nichtkondensierend)
Höhe 70 bis 106kPA (0 bis 3.050m)
Das System muss dem ASTM D4169, Sicherheitsniveau II entsprechen.
9.3 Latexfreie Lieferung
Stryker Communications gewährleistet, dass keines der Komponenten
des Near-Source-Konverters, darunter Zubehör, Verpackungsmaterial,
Etiketten, Hüllen oder andere Elemente, Latex enthalten.
10. Entsorgung des Produkts
Dieses Gerät ist in Übereinstimmung mit den örtlichen Gesetzen
undKlinikrichtlinien zu entsorgen.
Page 58

54
11. Technische Daten
Abmessungen 10,6cm (B) x 10,4cm
(T) x 2,8cm (H)
Stromverbrauch +24VDC bei 1,0 A (max.)
POH (Power over HDBT) Tx- oder Rx-Geräten
Zur Rauschunterdrückung ist für den Near-Source-Konverter ein
geschirmtes Cat6-Kabel erforderlich.
Page 59

55
12. Stryker – Eingeschränkte Garantie
Diese Garantie hat nur für Kunden in den USA Gültigkeit. Außerhalb
der USA bitte an den zuständigen Stryker-Verkaufsvertreter oder
andiezuständige Stryker-Niederlassung vor Ort wenden.
Stryker garantiert für einen Zeitraum von einem (1) Jahr nach
demInstallationsdatum, dass die Produkte frei von Material- und
Verarbeitungsfehlern sind. Stryker stellt alle Bauteile und
Serviceleistungen bereit, die zum Wiederherstellen der
ordnungsgemäßen Funktionsweise der in die Garantie
eingeschlossenen Geräte erforderlich sind. Dies kanndie Lieferung
vonErsatzteilen sowie eine telefonische Kundendienstberatung
inBezug auf die Ausführung geringfügiger Reparaturen umfassen.
Änderungen dieser Garantiebestimmungen werden nur mit der
ausdrücklichen schriftlichen Genehmigung durch Stryker gültig.
Diese Garantie erstreckt sich auf alle Produkte von Stryker mit Ausnahme
von Einwegartikeln.
Diese Garantie schließt keine kosmetischen oder oberächlichen
Beschädigungen des Produkts ein. Alle vom Kunden ohne Genehmigung
von Stryker am Produkt vorgenommenen Änderungen führen zum
sofortigen Erlöschen der gesamten Garantie.
Diese Garantie erstreckt sich ausschließlich auf Produkte von Stryker,
dievon Stryker-Personal installiert oder ggf. neu installiert wurden. Das
NSC-Transmitter-Kit kann von Krankenhauspersonal in Übereinstimmung
mit den bereitgestellten Anweisungen installiert werden und unterliegt
dieser Garantie.
Diese Garantie gilt ausschließlich für den Ersterwerber eines Produkts
von Stryker, der dieses Produkt direkt über einen von Stryker autorisierten
Vertreter bezogen hat. Die Garantie kann vom Erstkäufer nicht auf andere
Personen übertragen werden.
Page 60

56
13. Kundendienst und Garantieansprüche
Der Versand erfolgt FOB Ursprungsland. Die Rechtsansprüche gehen
bei Lieferung auf den Kunden über. Stryker übernimmt die Haftung
für während des Versands entstandene Verluste oder Beschädigungen.
Wenn Ihre Lieferung verloren gegangen ist oder beschädigt wurde,
wenden Sie sich an den technischen Kundendienst (innerhalb der USA
unter +1 (866) 841-5663, international unter +1 (972) 410-7100) oder
an den zuständigen lokalen Stryker-Vertreter.
Fordern Sie für die Rücksendung eines Bauteils beim Kundendienst
eine RMA-Nummer an. Nach Erhalt der RMA-Nummer verpacken
Siedas Bauteil entsprechend den Anweisungen des Kundendienstes.
Senden Sie das Bauteil anschließend an folgende Adresse:
Stryker Communications
(RMA#_____)
571 Silveron Blvd.
Flower Mound, TX 75028, USA
Gebührenfrei (innerhalb der USA): +1 (866) 841-5663
International: +1 (972) 410-7100
Page 61

57
14. Kontaktangaben
14.1 Kontaktdaten des technischen
Kundendienstes
Wenden Sie sich bei Fragen an den technischen Kundendienst.
Technischer Kundendienst von Stryker: +1 (866) 841-5663
Faxnummer des technischen Kundendienstes von Stryker:
+1 (972) 410-7594
E-Mail: comm.techservices@stryker.com
14.2 Kontaktdaten des Kundendienstes
Wenden Sie sich bei Fragen an den Kundendienst von Stryker.
Stryker Communications
571 Silveron Blvd.
Flower Mound, TX 75028, USA
Gebührenfrei: +1 (866) 841-5663
+1 (972) 410-7100
Informationen zu internationalen Kundendienststandorten erhalten
Sie auf der Website von Stryker unter folgender URL:
www.stryker.com
Page 62

Page 63

59
Sommario
1. Avvertenze e precauzioni .................................................................61
1.1 Avvertenze ......................................................................................61
1.2 Precauzioni .....................................................................................62
1.3 Note ...................................................................................................62
2. Informazioni sul prodotto .................................................................63
2.1 Descrizione del prodotto...........................................................63
2.2 Uso previsto ...................................................................................63
2.3 Indicazioni per l’uso ....................................................................63
2.4 Popolazione di pazienti prevista ............................................63
3. Denizione dei simboli ......................................................................64
4. Installazione .........................................................................................66
5. Uso dell’apparecchiatura ...................................................................68
6. Pulizia e sterilizzazione ......................................................................69
7. Manutenzione ......................................................................................71
7.1 Manutenzione preventiva ......................................................... 71
8. Risoluzione dei problemi ...................................................................72
9. Speciche ambientali .........................................................................73
9.1 Condizioni per il funzionamento ............................................ 73
9.2 Condizioni di stoccaggio e trasporto .................................... 73
9.3 Policy sul lattice ............................................................................73
10. Smaltimento del prodotto ..............................................................73
Page 64

60
11. Speciche tecniche ...........................................................................74
12. Garanzia limitata di Stryker ............................................................75
13. Assistenza e reclami..........................................................................76
14. Contatti ...............................................................................................77
14.1 Referenti assistenza tecnica .....................................................77
14.2 Referenti assistenza clienti ........................................................ 77
Page 65

61
1. Avvertenze e precauzioni
Leggere questo manuale e attenersi scrupolosamente alle
istruzioni. Prestare particolare attenzione alla parola AVVERTENZA,
ATTENZIONE e Note.
Avvertenza: Informazioni che riguardano la sicurezza
personale del paziente o dell’operatore. Il mancato
rispetto di queste indicazioni può provocare lesioni al
paziente o all’utente.
Attenzione: Seguire le procedure di manutenzione o le
precauzioni per evitare danni alle apparecchiature.
Avvertenza: Il simbolo del fulmine indica la presenza
di voltaggio elettrico pericoloso. Demandare tutte le
procedure di servizio a personale autorizzato.
Nota: informazioni speciche per facilitare la
manutenzione o chiarimenti su informazioni importanti.
Per evitare possibili gravi lesioni all’utente e al paziente e/o danni
al dispositivo, l’utente dovrà procedere in base alle indicazioni di
avvertenza e di attenzione riportate di seguito.
1.1 Avvertenze
1. Non è consentita alcuna modica di questa apparecchiatura.
Non asportare la copertura di protezione. Non sono presenti
componenti sui quali l’operatore possa intervenire.
2. Non adatto per l’utilizzo in un ambiente ricco di ossigeno.
3. Il convertitore Near Source non deve essere utilizzato con
dispositivi video primari.
4. Il convertitore Near Source non è concepito per interagire o entrare
in contatto con il corpo o tessuti del paziente.
Page 66

62
1.2 Precauzioni
1. Attenzione: le leggi federali limitano la vendita solo da parte di un
professionista medico autorizzato oppure su sua prescrizione
1.3 Note
1. Si consiglia di collegare solo il trasmettitore alla piastra a parete con
il cavo Cat6 schermato in dotazione.
2. Utilizzare il connettore RJ45 per la piastra a parete (Cat6) solo per il
cavo NSC. La piastra a parete non fornisce l’accesso alla rete.
Page 67

63
2. Informazioni sul prodotto
2.1 Descrizione del prodotto
Il convertitore Near-Source (NSCB) è un dispositivo destinato a
convertire il segnale video da un formato video DVI-D, RGB-HV, SDI,
S-Video/Composito ad un formato video digitale DVI.
2.2 Uso previsto
Il convertitore Near-Source è destinato ad essere utilizzato per la
conversione di video, da dispositivi mobili ad uso in sala operatoria
in un formato video comune che richiede una sola piastra a parete
invece che varie piastre. Il convertitore Near-Source esegue le seguenti
funzioni. Il convertitore verrà installato sul dispositivo mobile e accetta
i formati video più comuni, tra cui SDI, S-Video, VGA, e DVI e li converte
in un unico formato video, HDBaseT. Il segnale video viene quindi
inviato attraverso un cavo CAT6 ad una piastra a parete passiva con un
singolo connettore ed inne in SPI2/SPI3/SPI3Lite con un convertitore
HDBaseT-DVI.
2.3 Indicazioni per l’uso
Il convertitore Near-Source è indicato per essere utilizzato con diverse
uscite video ausiliarie nelle sale operatorie dove esiste la necessità di
monitor secondari. Gli utenti principali sono il personale ospedaliero
incluso medici e infermieri.
2.4 Popolazione di pazienti prevista
Il convertitore Near-Source è destinato ad essere utilizzato per tutti i
pazienti sottoposti ad intervento chirurgico che richieda l'impiego di
immagini provenienti da dispositivi mobili su un monitor secondario.
Page 68

64
3. Denizione dei simboli
Avvertenze
Se compare questo simbolo sul dispositivo, rimanda
l’utente al manuale di funzionamento emanutenzione
per importanti informazioni di sicurezza. Se è presente
nelmanuale, segnala all’utente la presenza di
importantiistruzioni di sicurezza per il funzionamento
elamanutenzione.
Il simbolo del fulmine indica la presenza di tensione
pericolosa. Demandare tutte le procedure di servizio
apersonale autorizzato.
Confezione/etichettatura
Seguire le istruzioni
per l’uso
Identica consigli
utili e informazioni
Il produttore
deldispositivo
Conformità alla
Direttiva della
Comunità europea
93/-42/CEE
Data di
fabbricazione
Codice
prodotto/articolo
Rappresentante
europeo
Indica il numero
dilotto
Codice prodotto/
numero di serie
Limiti
ditemperatura
Quantità Limiti di umidità
Limiti di pressione
relativa
Made in USA
Page 69

65
Solo per utenti statunitensi - Attenzione: le leggi
federalidegli Stati Uniti limitano la vendita solo
dapartedi un medico oppure su sua prescrizione.
Dispositivo
Indica all’utente istruzioni importanti per la sicurezza
durante il funzionamento e la manutenzione (assistenza)
incluse nel documento di accompagnamento
dell’attrezzatura.
Indica la conformità alle norme CSA C22.2, 60601.1,
AAMI ES 60601-1.
In accordo con la direttiva della Comunità Europea
2002/96/CE relativo allo smaltimento di apparecchiature
elettriche ed elettroniche, il prodotto non deve essere
smaltito nel sistema di raccolta comunale collettivo
maseparatamente.
Si richiede di contattare Stryker quando si ha intenzione
di ritirare questo dispositivo dall’esercizio.
Page 70

66
4. Installazione
Per installare la scatola del trasmettitore, eettuare le seguenti operazioni:
1. Individuare una posizione per la scatola
deltrasmettitore che sia su una supercie
piana libera da ostacoli adiacenti. Assicurarsi
che la posizione sia entro la portata del cavo
di 1,83 m.
Attenzione
È importante selezionare
accuratamente la posizione,
inquanto l’adesivo è dicile
darimuovere.
2. Preparare la supercie di installazione con un
tampone imbevuto di alcool. È necessario per
creare un forte legame e per evitare danni
all’apparecchiatura.
3. Rimuovere l’adesivo posteriore
dallastaa.
4. Premere e tenere premuta lascatola
per 10 secondi contro lasupercie
diinstallazione preparata
precedentemente.
5. Collegare la spina RJ-45 nella porta
“Link”. Utilizzare una fascetta per
fermare il cavo nel foro nel
distanziatore nella parte superiore
della staa. Lasciare un minimo
20,3– 30,5 cm del cavo dal
connettore al distanziatore.
Page 71

67
Attenzione
Assicurarsi di collegare il cavo alla staa per scaricare
la tensione per evitare di danneggiare il connettore RJ-45.
6. Collegare il segnale di uscita video del dispositivo o del carrello con
il cavo video da 1,83 m (o SDI, DVI-D, VGA, o S-Video) per l’ingresso
video alla scatola del trasmettitore.
Nota: la scatola del trasmettitore S-Video è anche
compatibile con un ingresso composito.
DVI-D
SDI
VGA
S-Video
7. Avvolgere il cavo in eccesso e ssarlo
con velcro. Posizionare il cavo avvolto
sul fondo della staa.
Page 72

68
5. Uso dell’apparecchiatura
1. Accendere il dispositivo collegato alla scatola del trasmettitore
evericare che sia impostato su Output Video.
2. Collegare il connettore del cavo Neutrik da 10 m alla piastra
aparete Neutrik. Assicurarsi che il simbolo Neutrik sia rivolto
versol’alto.
3. Collegare l’altra estremità del cavo Neutrik alla scatola
deltrasmettitore.
4. Avvolgere il cavo in eccesso e ssarlo con velcro sulla staa.
5. Il LED di alimentazione sulla scatola del trasmettitore si illumina
una volta collegata.
• Una volta collegato, il video parte in circa 30 secondi.
• Se non è disponibile una fonte per SDI, DVI o VGA, non ci sarà
alcun segnale video.
• Viene visualizzata una schermata blu per una connessione SV,
anche in assenza di sorgente video.
6. Per scollegare il cavo Neutrik dalla piastra a parete, tenere
ilconnettore quindi premere e tirare per disimpegnarlo.
Page 73

69
6. Pulizia e sterilizzazione
AVVERTENZA
Per evitare scosse elettriche e lesioni potenzialmente
mortali, scollegare il convertitore dalla presa di corrente
prima di pulire.
Attenzione
• Non sterilizzare il convertitore.
• Non immergere il convertitore in liquido.
• Non lasciare che il liquido goccioli sul convertitore
o si raccolga su una qualsiasi delle sue superci.
• Non spruzzare liquido detergente direttamente
sul convertitore, sul pulsante di accensione,
osui connettori. Spruzzare il liquido detergente
su un panno e utilizzare il panno per pulire
ilconvertitore.
• Non usare soluzioni detergenti corrosive per pulire
il convertitore.
Punto d’uso Eliminare l’eccesso di sporco da tutti i componenti
utilizzando salviette monouso.
Preparazione
alla pulizia
Preparare correttamente un detergente in base alle
raccomandazioni del produttore del detergente.
Idetergenti possono includere:
• Detergente enzimatico Enzol
• Alcool isopropilico
• Soluzione di detergente e acqua
• Soluzione di candeggina e acqua
Page 74

70
Pulizia:
metodo
manuale
1. Applicare il detergente su un panno morbido,
pulito e privo di lanugine.
2. Pulire detriti dal convertitore Near Source,
dalla piastra a parete e dalle etichette
diprodotto. Non spruzzare prodotti
detergenti direttamente sul convertitore Near
Source osulla piastra a parete.
3. Asciugare il convertitore Near Source e la piastra
a parete con un panno privo di lanugine.
Disinfezione Non applicabile
Manutenzione,
ispezione
ecollaudo
Ispezionare l’apparecchio prima e dopo l’uso.
Non continuare a utilizzare l’attrezzatura
serisultadanneggiata.
Page 75

71
7. Manutenzione
1. Non continuare a utilizzare il cavo se risulta danneggiato. I danni
comprendono:
• Intagli
• Tagli o abrasioni al rivestimento del cavo
• Connettori spaccati, schiacciati o deformati
• Eventuali altri danni che potrebbero interferire con l’integrità
delcavo
7.1 Manutenzione preventiva
Il cavo e il connettore piatto a parete sono elementi soggetti ad usura
e potrebbe essere necessario sostituirli dopo un lungo periodo di tempo
incamere operatorie che hanno un elevato turnover di casi e un notevole
utilizzo. Contattare l’assistenza tecnica Stryker per una richiesta
dimanutenzione preventiva.
Page 76

72
8. Risoluzione dei problemi
Nota: non sono presenti componenti sui quali
l’operatore possa intervenire con manutenzione
oregolazioni.
Se il video del sistema è intermittente o non viene visualizzato,
eettuare le seguenti operazioni:
1. Assicurarsi che il LED PWR/LINK sia verde.
• Se non lo è, controllare che il cavo sia collegato correttamente
alla piastra a parete.
• Se è acceso, scollegare il cavo dalla piastra a parete e ricollegarlo.
2. Esaminare le condizioni del connettore RJ45 per segni di danni.
Nota: i contatti dorati del connettore RJ45 possono
mostrare usura, il che è normale.
3. Controllare che il video venga instradato correttamente attraverso l’SPI.
4. Se il video non è ancora presente, contattare l’assistenza tecnica Stryker.
Page 77

73
9. Speciche ambientali
9.1 Condizioni per il funzionamento
Temperatura di bulbo secco 10° – 40°C
Umidità relativa 30 – 75% (senza condensa)
Punto di rugiada massimo 28°C
Elevazione 70 – 106kPA (0-3050 m)
9.2 Condizioni di stoccaggio e trasporto
Temperatura di bulbo secco 5° – 70°C
Umidità relativa 10 – 90% (senza condensa)
Elevazione 70 – 106kPA (0 – 3050 m)
Il sistema deve seguire D4169 ASTM, livello di garanzia II.
9.3 Policy sul lattice
Stryker Communications garantisce che l’apparecchiatura convertitore
Near Source inclusi accessori, materiale di confezionamento, etichette,
sacche, o altri elementi simili non contiene lattice.
10. Smaltimento del prodotto
Smaltire questo dispositivo secondo le leggi locali e le pratiche ospedaliere.
Page 78

74
11. Speciche tecniche
Dimensioni 10,59 (L) x 10,41 (P) x 2,79 (A)
Potenza assorbita +24 VDC a 1,0 Amp (Max.)
POH (Power over HDBT) su unità Tx o Rx
Il convertitore Near Source richiede un cavo Cat6 schermato per
ridurre le interferenze di rumore
Page 79

75
12. Garanzia limitata di Stryker
La presente garanzia è valida solo per i clienti degli Stati Uniti. Al di
fuori degli Stati Uniti, contattare il rappresentante Stryker di ducia o la
liale locale Stryker.
Stryker garantisce che i suoi prodotti sono privi di difetti nei materiali
edimanodopera per un periodo di un (1) anno dalla data
diinstallazione. Stryker fornirà tutti i componenti e l’assistenza
richiestiper riportare l’apparecchiatura in garanzia a condizioni
dilavoro ottimali, mediante la spedizione dei componenti di ricambio
e consultazioni telefoniche di assistenza per la gestione delle
riparazioni minori.
Ogni modica alla presente garanzia non è da considerare valida
ameno che non venga eseguita con esplicita approvazione di
Strykerper iscritto.
Questa garanzia copre tutti i prodotti Stryker con l’eccezione
dipartimonouso.
La presente garanzia non copre gli eventuali danni cosmetici o
superciali del prodotto. Ogni modica al prodotto da parte del cliente
senza l’approvazione di Stryker invaliderà immediatamente la presente
garanzia nella sua totalità.
La presente garanzia copre solo i prodotti Stryker e solo i prodotti
installati o, se necessario reinstallati da personale Stryker. Il kit
trasmettitore NSC può essere installato da personale ospedaliero
secondo le istruzioni fornite e sarà soggetto a questa garanzia.
La presente garanzia è valida solo per l’acquirente originale di prodotti
Stryker rivoltosi a un agente autorizzato Stryker. La garanzia non
ètrasferibile né cedibile da parte dell’acquirente originale.
Page 80

76
13. Assistenza e reclami
La spedizione è franco a bordo d’origine. Il titolo viene trasferito
alcliente al momento della spedizione. Stryker si assume le responsabilità
per gli eventuali smarrimenti o danni durante il trasporto. Contattare
ilSupporto tecnico al numero +1 (866) 841-5663 negli Stati Uniti e
+1(972) 410-7100 per altri paesi oppure il rappresentante Stryker in
caso di smarrimento o danni relativi alla spedizione.
In caso di restituzione di un articolo, contattare il Servizio clienti
per ottenere un numero RMA. Dopo aver ricevuto il numero RMA,
confezionare l’articolo come indicato dal Servizio clienti. Spedire
l’articolo al seguente indirizzo:
Stryker Communications
(RMA#_____)
571 Silveron Blvd.
Flower Mound, TX 75028, USA
Numero verde (all’interno degli USA): +1 (866) 841-5663
Internazionale: +1 (972) 410-7100
Page 81

77
14. Contatti
14.1 Referenti assistenza tecnica
Contattare l’assistenza tecnica per le questioni tecniche.
Assistenza tecnica di Stryker:+1 (866) 841-5663
Fax assistenza tecnica di Stryker:+1 (972) 410-7594
E-mail: comm.techservices@stryker.com
14.2 Referenti assistenza clienti
In caso di domande o di dubbi contattare il Servizio di assistenza
clienti Stryker.
Stryker Communications
571 Silveron Blvd.
Flower Mound, TX 75028, USA
Numero verde: +1 (866) 841-5663
+1 (972) 410-7100
Per le sedi di assistenza internazionale, fare riferimento al sito web
diStryker al seguente URL:
www.stryker.com
Page 82

Page 83

79
Índice
1. Advertências e precauções ...............................................................81
1.1 Advertências ..................................................................................81
1.2 Precauções ...................................................................................... 82
1.3 Notas ................................................................................................. 82
2. Acerca do produto...............................................................................83
2.1 Descrição do produto ................................................................. 83
2.2 Finalidade ........................................................................................83
2.3 Indicações de utilização .............................................................83
2.4 População de pacientes a que se destina ...........................83
3. Explicação dos símbolos ....................................................................84
4. Instalação .............................................................................................. 86
5. Utilização do equipamento ...............................................................88
6. Limpeza e esterilização ......................................................................89
7. Manutenção .........................................................................................91
7.1 Manutenção preventiva .............................................................91
8. Resolução de problemas ....................................................................92
9. Especicações ambientais .................................................................93
9.1 Condições de funcionamento .................................................93
9.2 Condições de armazenamento e transporte .....................93
9.3 Política de látex .............................................................................93
10. Eliminação do produto ....................................................................93
Page 84

80
11. Especicações técnicas ....................................................................94
12. Garantia limitada da Stryker ........................................................... 95
13. Assistência e reclamações ...............................................................96
14. Informações de contacto .................................................................97
14.1 Informações de contacto
da AssistênciaTécnica ................................................................97
14.2 Informações de contacto
do Serviço de Apoio ao Cliente ...............................................97
Page 85

81
1. Advertências e precauções
Ler atentamente este manual e seguir rigorosamente as
instruções. Prestar especial atenção às palavras ADVERTÊNCIA,
PRECAUÇÃO e Nota.
Advertência: A segurança pessoal do paciente ou
doutilizador poderá ser afectada. O não cumprimento
desta informação pode resultar em ferimentos tanto
nopaciente como no utilizador.
Precaução: Seguir os procedimentos ou precauções
deassistência para evitar danos no equipamento.
Advertência: Um raio destina-se a alertar para a presença
de tensões perigosas. A assistência ao equipamento deve
ser efectuada por pessoal autorizado.
Nota: Informações especiais para facilitar a manutenção
ou esclarecer informações importantes.
Para evitar lesões graves no utilizador e no paciente e/ou danos
neste equipamento, o utilizador deve prestar atenção às seguintes
advertências e precauções.
1.1 Advertências
1. Não é permitida qualquer modicação a este equipamento.
Nãoretirar a cobertura. Este dispositivo não contém peças que
possam ser reparadas pelo utilizador.
2. Não se destina a ser utilizado num ambiente rico em oxigénio.
3. O Conversor junto à fonte não deve ser utilizado com monitores
devídeo primários.
4. O Conversor junto à fonte não foi concebido para interagir ou estar
em contacto com qualquer parte do corpo ou tecido do paciente.
Page 86

82
1.2 Precauções
1. Precaução: A lei federal limita a venda deste dispositivo a um
médico ou mediante prescrição médica
1.3 Notas
1. É recomendável só ligar o transmissor à placa de parede com
ocabo Cat6 blindado fornecido.
2. Utilizar o conector RJ45 (Cat6) da placa de parede apenas para
ocabo NSC. A placa de parede não fornece acesso à rede.
Page 87

83
2. Acerca do produto
2.1 Descrição do produto
A Caixa conversora junto à fonte (NSCB) é um dispositivo destinado
aconverter o sinal de vídeo de um formato DVI-D, RGB-HV, SDI,
S-Video/Vídeo composto num formato de vídeo DVI digital.
2.2 Finalidade
O Conversor junto à fonte destina-se a ser utilizado para converter
vídeo, a partir de dispositivos móveis utilizados dentro do BO,
numformato de vídeo comum recorrendo apenas a uma única placa
de parede. O Conversor junto à fonte irá desempenhar as funções
descritas em seguida. O conversor deverá ser instalado no dispositivo
móvel e depois de aceitar formatos de vídeo comuns como SDI,
S-Video, VGA e DVI, irá convertê-los num único formato de vídeo,
oHDbaseT. Em seguida, o sinal de vídeo é enviado através de um
caboCAT6 para uma placa de parede passiva com um único conector
e, porúltimo, para o SPI2/SPI3/SPI3Lite com um conversor de HDbaseT
para DVI.
2.3 Indicações de utilização
O Conversor junto à fonte destina-se a ser utilizado com várias
saídas de vídeo auxiliares nos blocos operatórios, nos quaisexiste
anecessidade de utilizar monitores de vídeo secundários.
Osutilizadores primários são o pessoal hospitalar, incluindo médicos
eenfermeiros.
2.4 População de pacientes a que se destina
O Conversor junto à fonte destina-se a ser utilizado para qualquer
paciente submetido a um procedimento cirúrgico para o qual seja
necessária a apresentação de imagens de dispositivos móveis num
monitor secundário.
Page 88

84
3. Explicação dos símbolos
Advertências
Quando este símbolo estiver presente num dispositivo,
recomenda-se que o utilizador consulte o Manual de
funcionamento e manutenção para obter informações
de segurança importantes. Quando aparecer no manual,
destina-se a alertar o utilizador para a presença de
instruções de segurança, funcionamento e manutenção
importantes.
Um raio indica a presença de uma tensão perigosa.
Aassistência ao equipamento deve ser efectuada por
pessoal autorizado.
Embalagem/rótulos
Consultar as
instruções de
utilização
Identica
sugestões
einformações
úteis
O fabricante
dodispositivo
Conformidade
com a Directiva
93-42-CEE da
Comunidade
Europeia
Data de fabrico
Número do
produto/peça
Representante
europeu
Número do lote
ousérie
Número do
produto/série
Limite de
temperatura
QTY
Quantidade
Limites de
humidade
Page 89

85
Limites de pressão
relativa
Fabricado nos EUA
Apenas para os utilizadores dos EUA - Precaução:
Aleifederal dos EUA limita a venda deste dispositivo
amédicos ou mediante indicação de um médico.
Dispositivo
Avisa o utilizador para consultar instruções de segurança
importantes em termos de funcionamento e de
manutenção (assistência) na literatura que acompanha
oproduto.
Indica o cumprimento do estipulado na norma
CSAC22.2, 60601.1, AAMI ES 60601-1.
De acordo com a Directiva 2002/96/CE da Comunidade
Europeia relativa a Resíduos de Equipamentos Eléctricos
e Electrónicos, o produto não deve ser eliminado
juntamente com o lixo municipal indiferenciado,
devendo antes ser recolhido em separado.
Solicitamos que entre em contacto com a Stryker
quando pretender deixar de utilizar este dispositivo.
Page 90

86
4. Instalação
Para instalar a caixa de transmissão, proceder da seguinte forma:
1. Identicar um local para a Caixa de
transmissão que seja numa superfície plana
e sem quaisquer obstruções adjacentes.
Certicar-se de que a localização está dentro
do alcance do cabo de vídeo de 1,83 m.
Precaução
É importante seleccionar
alocalização com cuidado,
umavez que o adesivo é difícil
deremover.
2. Preparar a área da superfície de instalação
com uma compressa com álcool. Esta acção
é necessária para criar uma boa aderência
eproteger o equipamento contra danos.
3. Remover o revestimento adesivo
dosuporte.
4. Pressionar continuamente
oconjunto da caixa contra
asuperfície de instalação preparada
durante 10segundos.
5. Ligar a cha RJ-45 na porta de
ligação “Link”. Utilizar uma braçadeira
para xar o cabo no orifício no
espaçador, na parte de cima
do suporte. Deixar, no mínimo,
20,3– 30,5 cm de comprimento do
cabo entre o conector e o espaçador.
Page 91

87
Precaução
Certicar-se de que o cabo é xado ao suporte de
forma a aliviar a tensão e impedir danos na cha RJ-45.
6. Ligar o dispositivo ou sinal de saída de vídeo do carrinho com
ocabo de vídeo de 1,83 m (SDI, DVI-D, VGA ou S-Video) à entrada
de vídeo da Caixa de transmissão.
Nota: A Caixa de transmissão de S-Video
é,igualmente, compatível com uma entrada
devídeo composto.
DVI-D
SDI
VGA
S-Video
7. Enrolar o cabo em excesso e prender
com uma ta de velcro. Colocar o cabo
enrolado na parte inferior do suporte.
Page 92

88
5. Utilização do equipamento
1. Ligar o dispositivo ligado à Caixa de transmissão e vericar se está
denido para saída de vídeo.
2. Ligar o conector do cabo Neutrik de 10 m à placa de parede
Neutrik. Certicar-se de que o símbolo Neutrik ca virado
paracima.
3. Ligar a outra extremidade do cabo Neutrik à caixa de transmissão.
4. Enrolar o cabo em excesso e prender com uma ta de velcro
nosuporte.
5. O LED de alimentação na Caixa de transmissão irá acender-se assim
que for ligada.
• Quando ligada, a transmissão de vídeo ocorre em
aproximadamente 30 segundos.
• Se não existir uma fonte disponível para SDI, DVI ou VGA, não irá
existir um sinal de vídeo.
• É apresentado um ecrã azul xo para uma ligação SV, mesmo
senão existir fonte de vídeo.
6. Para desligar o cabo Neutrik da placa de parede, segurar pelo
conector e apertar e puxar para soltar.
Page 93

89
6. Limpeza e esterilização
ADVERTÊNCIA
Para evitar choques eléctricos e ferimentos
potencialmente fatais, desligar o conversor da tomada
eléctrica antes da limpeza.
Precaução
• Não esterilizar o conversor.
• Não mergulhar o conversor em nenhum líquido.
• Não permitir a queda de gotas de líquido no
conversor ou acumulação de líquido em nenhuma
das suas superfícies.
• Não pulverizar o líquido de limpeza directamente
no conversor, botão de alimentação ou conectores.
Pulverizar o líquido de limpeza num pano e, em
seguida, utilizar o pano para limpar o conversor.
• Não utilizar soluções de limpeza corrosivas para
limpar o conversor.
Ponto de
utilização
Limpar a sujidade excessiva de todos
oscomponentes com toalhetes de
papeldescartáveis.
Preparação
para a limpeza
Preparar adequadamente um agente de
limpeza de acordo com as recomendações do
fabricante do detergente. Os agentes de limpeza
podemincluir:
• Detergente enzimático Enzol
• Álcool isopropílico
• Solução de sabão e água
• Solução de lixívia e água
Page 94

90
Limpeza:
Método manual
1. Aplicar o agente de limpeza num pano limpo,
macio e que não largue pêlo.
2. Limpar os resíduos do Conversor junto
àfonte, placa de parede e rótulos dos
produtos. Não pulverizar os produtos
delimpeza directamente no Conversor
juntoàfonte ou placa de parede.
3. Secar o Conversor junto à fonte e a placa de
parede com um pano que não largue pêlo.
Desinfecção Não aplicável
Manutenção,
inspecção
etestes
Inspeccionar o equipamento antes e depois da
utilização. Não continuar a utilizar o equipamento
se este estiver danicado.
Page 95

91
7. Manutenção
1. Não continuar a utilizar o cabo se este estiver danicado.
Osdanosincluem:
• Entalhes
• Cortes ou desgaste no invólucro do cabo
• Conectores com fendas, partidos ou deformados
• Quaisquer outros danos que possam interferir com a integridade
do cabo
7.1 Manutenção preventiva
O cabo e o conector da placa de parede estão sujeitos a desgaste
epoderão ter de ser substituídos depois de um longo período
de tempo de utilização intensiva nos blocos operatórios mais
requisitados. Contactar a Assistência Técnica da Stryker para solicitar
oserviço de manutenção preventiva.
Page 96

92
8. Resolução de problemas
Nota: Este dispositivo não contém peças que
possam ser reparadas ou ajustadas pelo utilizador.
Se a transmissão de vídeo do sistema for intermitente ou não aparecer,
proceder da seguinte forma:
1. Certicar-se de que o LED PWR/LINK está aceso a verde.
• Se não estiver aceso, vericar se o cabo está correctamente
ligado à placa de parede.
• Se estiver aceso, desligar o cabo da placa de parede e voltar
aligar.
2. Examinar se o conector RJ45 apresenta sinais de estar danicado.
Nota: É normal que os contactos dourados
noconector RJ45 quem gastos.
3. Vericar se o sinal de vídeo está correctamente encaminhado
através do SPI.
4. Se a transmissão de vídeo continuar a não ocorrer, contactar
aAssistência Técnica da Stryker.
Page 97

93
9. Especicações ambientais
9.1 Condições de funcionamento
Temperatura medida nos
termómetros de ampola seca
10 °C–40 °C
Humidade relativa 30–75% (Sem condensação)
Ponto máximo de condensação 28 °C
Elevação 70–106 kPA (0–3050 m)
9.2 Condições de armazenamento e transporte
Temperatura medida nos
termómetros de ampola seca
5 °C-70 °C
Humidade relativa 10-90% (Sem condensação)
Elevação 70–106 kPA (0–3050 m)
O sistema deve cumprir os requisitos da norma ASTM D4169, nível
degarantia II.
9.3 Política de látex
A Stryker Communications garante que todo o equipamento do
Conversor junto à fonte, inclusive acessórios, material de embalagem,
etiquetas, bolsas ou outros itens semelhantes, não contém látex.
10. Eliminação do produto
Eliminar este dispositivo de acordo com a legislação local e as
práticashospitalares.
Page 98

94
11. Especicações técnicas
Dimensões 10,6 cm (L) x 10,4 cm (P) x
2,8cm(A)
Consumo de energia +24 VCC a 1,0 Amps (máx.)
POH (Power over HDBT) nas unidades de transmissão ou recepção
É necessário utilizar o Conversor junto à fonte com um cabo Cat6
blindado para reduzir a interferência de ruído.
Page 99

95
12. Garantia limitada da Stryker
Esta garantia aplica-se apenas a clientes nos E.U.A. Fora dos E.U.A.,
contactar o representante de vendas da Stryker ou a lial local
daStryker.
A Stryker garante que os seus produtos estão isentos de defeitos
dematerial e de fabrico por um período de um (1) ano após a data de
instalação. A Stryker fornecerá todas as peças e assistência necessária
para reparar o equipamento, ao abrigo da garantia, de modo a que
este funcione devidamente, o que pode incluir a expedição de peças
desubstituição e o aconselhamento por telefone para efectuar
pequenas reparações.
Quaisquer alterações a esta política de garantia não são válidas,
excepto quando efectuadas com a expressa aprovação por escrito
daStryker.
Esta garantia cobre todos os produtos da Stryker à excepção das
peçasdescartáveis.
Esta garantia não cobre quaisquer danos cosméticos ou superciais
doproduto. Qualquer modicação efectuada ao produto pelo cliente,
sem a aprovação da Stryker, anulará imediatamente esta garantia na
suatotalidade.
Esta garantia cobre apenas produtos da Stryker e somente os produtos
que foram instalados ou, se necessário, reinstalados pelo pessoal
daStryker. O Kit de transmissão NSC pode ser instalado pelo pessoal
do hospital de acordo com as instruções fornecidas e irá ser abrangido
poresta garantia.
Esta garantia só é válida para o comprador original de produtos da
Stryker que os tenha adquirido directamente a um agente autorizado
daStryker. O comprador original não pode transferir ou atribuir
agarantia a terceiros.
Page 100

96
13. Assistência e reclamações
Transporte FOB para a origem. O título é transferido para o cliente
aquando da expedição. A Stryker assume a responsabilidade
por perdas ou danos ocorridos durante a expedição. Contactar
aAssistência Técnica +1 (866) 841-5663 nos EUA, +1 (972) 410-7100
anível internacional ou o representante da Stryker se a mercadoria
setiver perdido ou estiver danicada.
Se for necessária a devolução de algum item, contactar o Serviço
de Apoio ao Cliente para solicitar o número de uma “RMA” (Return
Merchandise Authorization – Autorização de devolução de produtos).
Após a recepção de um número de RMA, embalar o item conforme
referido pelo Serviço de Apoio ao Cliente. Enviar o item para
oseguinteendereço:
Stryker Communications
(RMA#_____)
571 Silveron Blvd.
Flower Mound, TX 75028, USA
Número gratuito (nos EUA): +1 (866) 841-5663
Internacional: +1 (972) 410-7100
 Loading...