


Digital Terrestrial Television Receiver
USER’S MANUAL

This symbol is intended to alert
the user to the presence of
insulated ‘dangerous voltage’
within the products enclosure
that may be of sufficient
magnitude to constitute a risk
of electric shock
This symbol is intended to alert
the user to the presence of
important operating and
maintenance instructions
accompanying this product.
CAUTION: TO REDUCE THE RISK OF ELECTRIC SHOCK,
DO NOT REMOVE COVER (OR BACK PANEL)
NO USER SERVICEABLE PARTS INSIDE
REFER SERVICING TO QUALIFIED SERVICE PERSONNEL
CAUTION
RISK OF ELECTRIC SHOCK
DO NOT OPEN
Important Safety Instructions
• Electrical connection can only be to a 240V AC mains supply.
• All safety and operating instructions should be read before the product is operated.
• All warnings on the product and in this user’s manual should be adhered to.
• The antenna cable must be earthed.
• Do not use attachments not recommended by the product manufacturer as they may cause
hazards or damage the equipment.
• Do not overload adaptors, wall sockets or extension cables as this can result in unit failure or
electrical shock.
• For cleaning, use only a dry or lightly dampened cloth. Do not use liquid cleaners or aerosol
cleaning products.
• Servicing can only be performed by qualified service personnel.
• Do not place this product in an unstable position.
2

Overview
Thank you for purchasing this Strong Digital Terrestrial Television Receiver.
This product has been manufactured in accordance with strict quality control procedures and is
fully compliant with Australian specifications.
Your new receiver will enable you to experience superior picture and sound quality, widescreen
images, extra channels and many new features.
• For a complete list of all of our digital terrestrial television receivers and satellite receivers, please
go to our website: www.strong-technologies.com
• For general enquiries, please email us at techau@strong-technologies.com
• For technical assistance, please call our Technical Support Help Line on 1 800 820 030
Main Features
• Component: Y / Pb / Pr
• Super-Video Output: 4-Pin Mini Din
• RCA/Cinch: CVBS + L/R Audio
• Dolby Digital: S/PDIF Coaxial
• 16:9 Full screen, 4:3 Letterbox and Pan & Scan
• Auto & Manual Search Modes
• Favourite Channel List
• Channel Grouping
• Fully Adjustable Menu Interface
• EPG: Electronic Program Guide
• Picture Zoom Function
• Signal Level and Quality Indicators
• Captions and Teletext
• 8 Timer Event Settings
• Parental Lock (Channels and Menus)
• Full-Function Infra-Red Remote Control
• Shows Movies, Plays Music and Shows Photos from an External USB Memory Stick
• Software Upgrade via USB Port and Serial Port
• Games
• DVB/T Compliant
• COFDM Demodulation
• Dimensions: W 250mm x D175mm x H 38mm
3

Contents
Important Safety Instructions ..........................................................................................................................................2
Overview ............................................................................................................................................................................ 3
Main Features .................................................................................................................................................................... 3
Checklist of Accessories.................................................................................................................................................. 6
Controls and Indicators.................................................................................................................................................... 7
Front panel ..................................................................................................................................................... 7
Rear panel...................................................................................................................................................... 8
Remote Control ................................................................................................................................................................. 9
Installing the batteries in the remote control ............................................................................................ 10
How to Connect............................................................................................................................................................... 11
Step 1: Connect to the antenna ................................................................................................................... 11
Step 2: Choose an installation method ........................................................................................................ 11
A: Y / Pb / Pr (Component) using the supplied RCA blue–red–green lead ............................................. 11
B. Separate S-Video (Y/C) connector ...................................................................................................... 11
C: CVBS (Composite) using the supplied RCA red–white–yellow lead ................................................... 12
Step 3: Optional connections ....................................................................................................................... 12
Dolby Digital ............................................................................................................................................. 12
Connecting a recording device (such as a VCR) ..................................................................................... 12
Getting Started ................................................................................................................................................................ 13
Minimum Set-up ........................................................................................................................................... 13
Full set-up .................................................................................................................................................... 14
Configuration................................................................................................................................................ 14
Setting the properties of the on-screen display (OSD) ............................................................................ 15
Setting the properties of the TV................................................................................................................ 16
Setting system properties......................................................................................................................... 17
Setting the time and date ......................................................................................................................... 17
Setting security options ............................................................................................................................ 19
Operation ......................................................................................................................................................................... 21
Basic operations........................................................................................................................................... 21
Selecting a channel .................................................................................................................................. 21
Adjusting the volume ................................................................................................................................ 22
Getting channel Information ..................................................................................................................... 22
TV/Radio switching................................................................................................................................... 22
Multi-language and Dolby Digital broadcasting........................................................................................ 22
Closed captions........................................................................................................................................ 23
Teletext..................................................................................................................................................... 24
Picture freeze ........................................................................................................................................... 24
Zooming in or out ..................................................................................................................................... 24
Re-searching for channels and stations................................................................................................... 24
Organising channels .................................................................................................................................... 28
Setting favourites...................................................................................................................................... 28
Moving channels ...................................................................................................................................... 30
Locking channels...................................................................................................................................... 30
Deleting one or more channels ................................................................................................................ 31
Deleting all channels ................................................................................................................................ 32
Renaming channels and stations ............................................................................................................. 33
Re-sorting channels and stations............................................................................................................. 33
Grouping channels ................................................................................................................................... 34
Edit channel details .................................................................................................................................. 35
Electronic Program Guide (EPG)................................................................................................................. 36
Opening the EPG ..................................................................................................................................... 37
Daily and Weekly modes.......................................................................................................................... 37
Using the timer ............................................................................................................................................. 38
Setting or cancelling a timer from the EPG .............................................................................................. 38
Setting or cancelling a timer from the Configuration menu ...................................................................... 39
Setting or cancelling a timer from the remote control .............................................................................. 40
4

Movies, Music & Photos ................................................................................................................................................. 41
Playing movies ............................................................................................................................................. 41
Playing music ............................................................................................................................................... 42
Showing photos............................................................................................................................................ 43
Games .............................................................................................................................................................................. 44
Box Man ................................................................................................................................................... 44
Tetris......................................................................................................................................................... 45
Hit Rat....................................................................................................................................................... 45
System Maintenance....................................................................................................................................................... 46
System information................................................................................................................................... 46
Software upgrades ................................................................................................................................... 46
Clearing and resetting data ...................................................................................................................... 47
Troubleshooting.............................................................................................................................................................. 48
Specifications.................................................................................................................................................................. 49
5
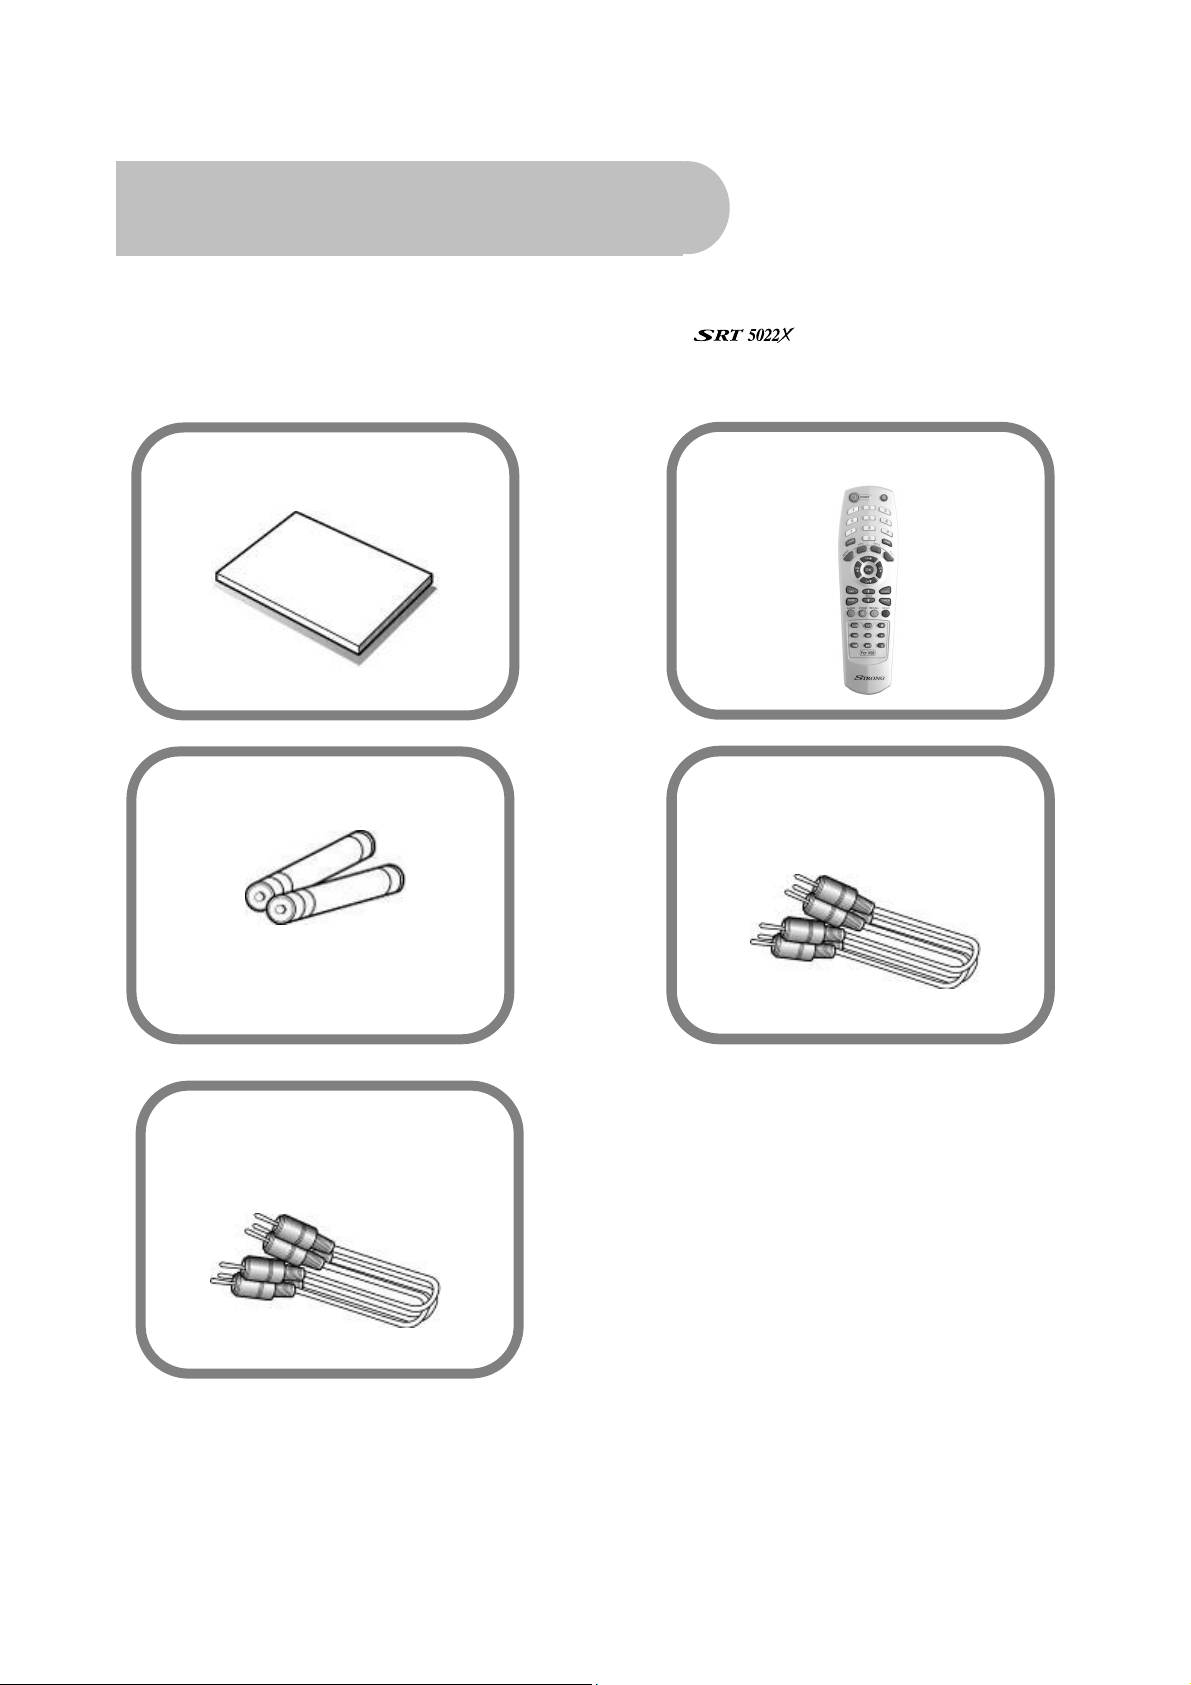
Checklist of Accessories
The following accessories have been supplied with your
contact the retailer from whom you purchased the unit.
. If any were not supplied,
User’s manual : 1
Batteries (AAA type) : 2
Remote control : 1
CVBS Composite Video and
Audio Cable
(yellow, white, red) : 1
Y / Pb / Pr Component Cable
(blue, red, green) : 1
6
Controls and Indicators
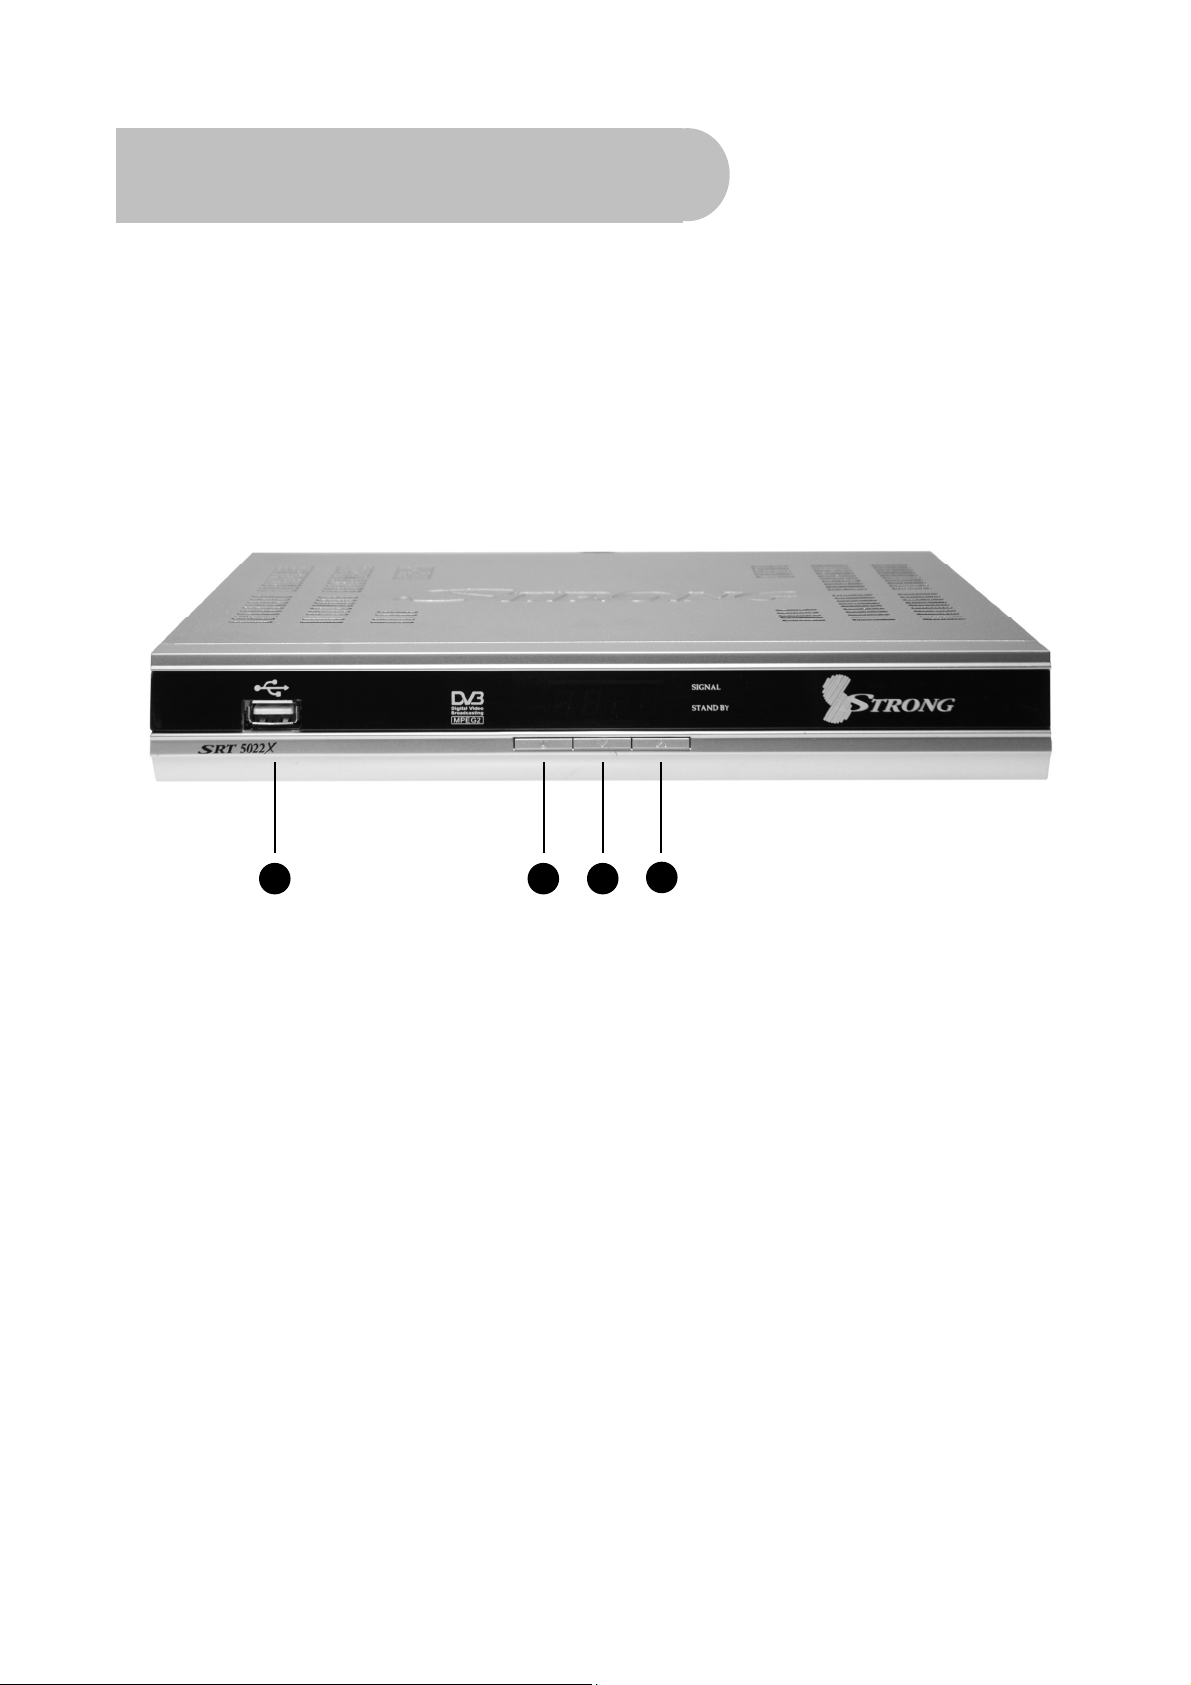
Front panel
1 2 3
1 USB port, for connecting a USB memory stick
2 To switch the receiver between stand-by mode and
power-on mode.
3 To select the next channel, or next option in a menu.
4 To select the previous channel, or previous option in a
menu.
4
7
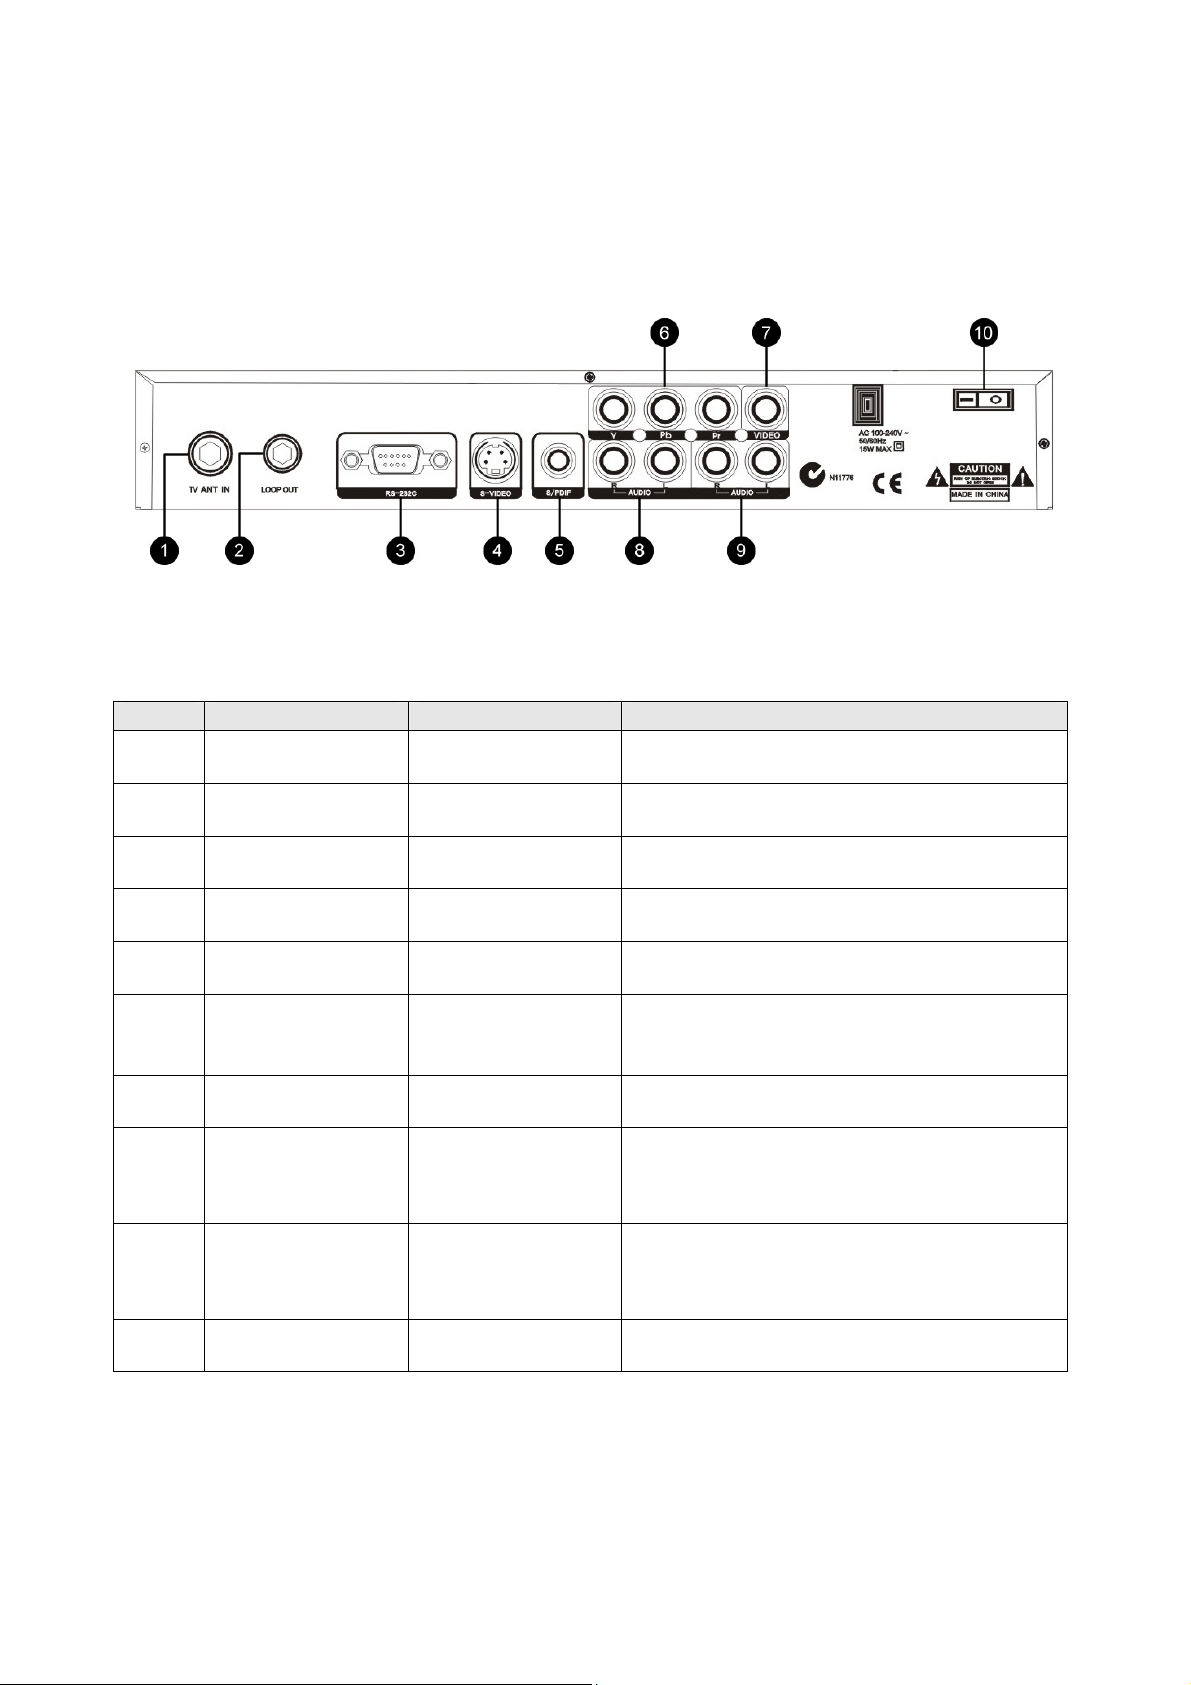
Rear panel
No. Name Connector Function
1 TV ANT IN IEC 169-24 female Input from terrestrial antenna
2 LOOP OUT IEC 169-24 female Loop-through output to VCR, etc.
3 RS-232C DB-9 Serial port
4 S-VIDEO MINI-DIN S-VHS video output
5 S/PDIF RCA cinch (black) Digital audio output (S/PDIF format)
6 Y / Pb / Pr RCA
A/V
7 Video RCA A/V RCA cinch (yellow) Composite connection
8 Audio RCA cinch
9 Audio RCA cinch
10 Power switch – To turn unit on or off
RCA cinch (green /
blue / red)
• red: right audio
• white: left audio
• red: right audio
• white: left audio
Component connection (Y / Pb / Pr)
Right & left audio for Component
connection
Right & left audio for S-Video & Composite
connections
8
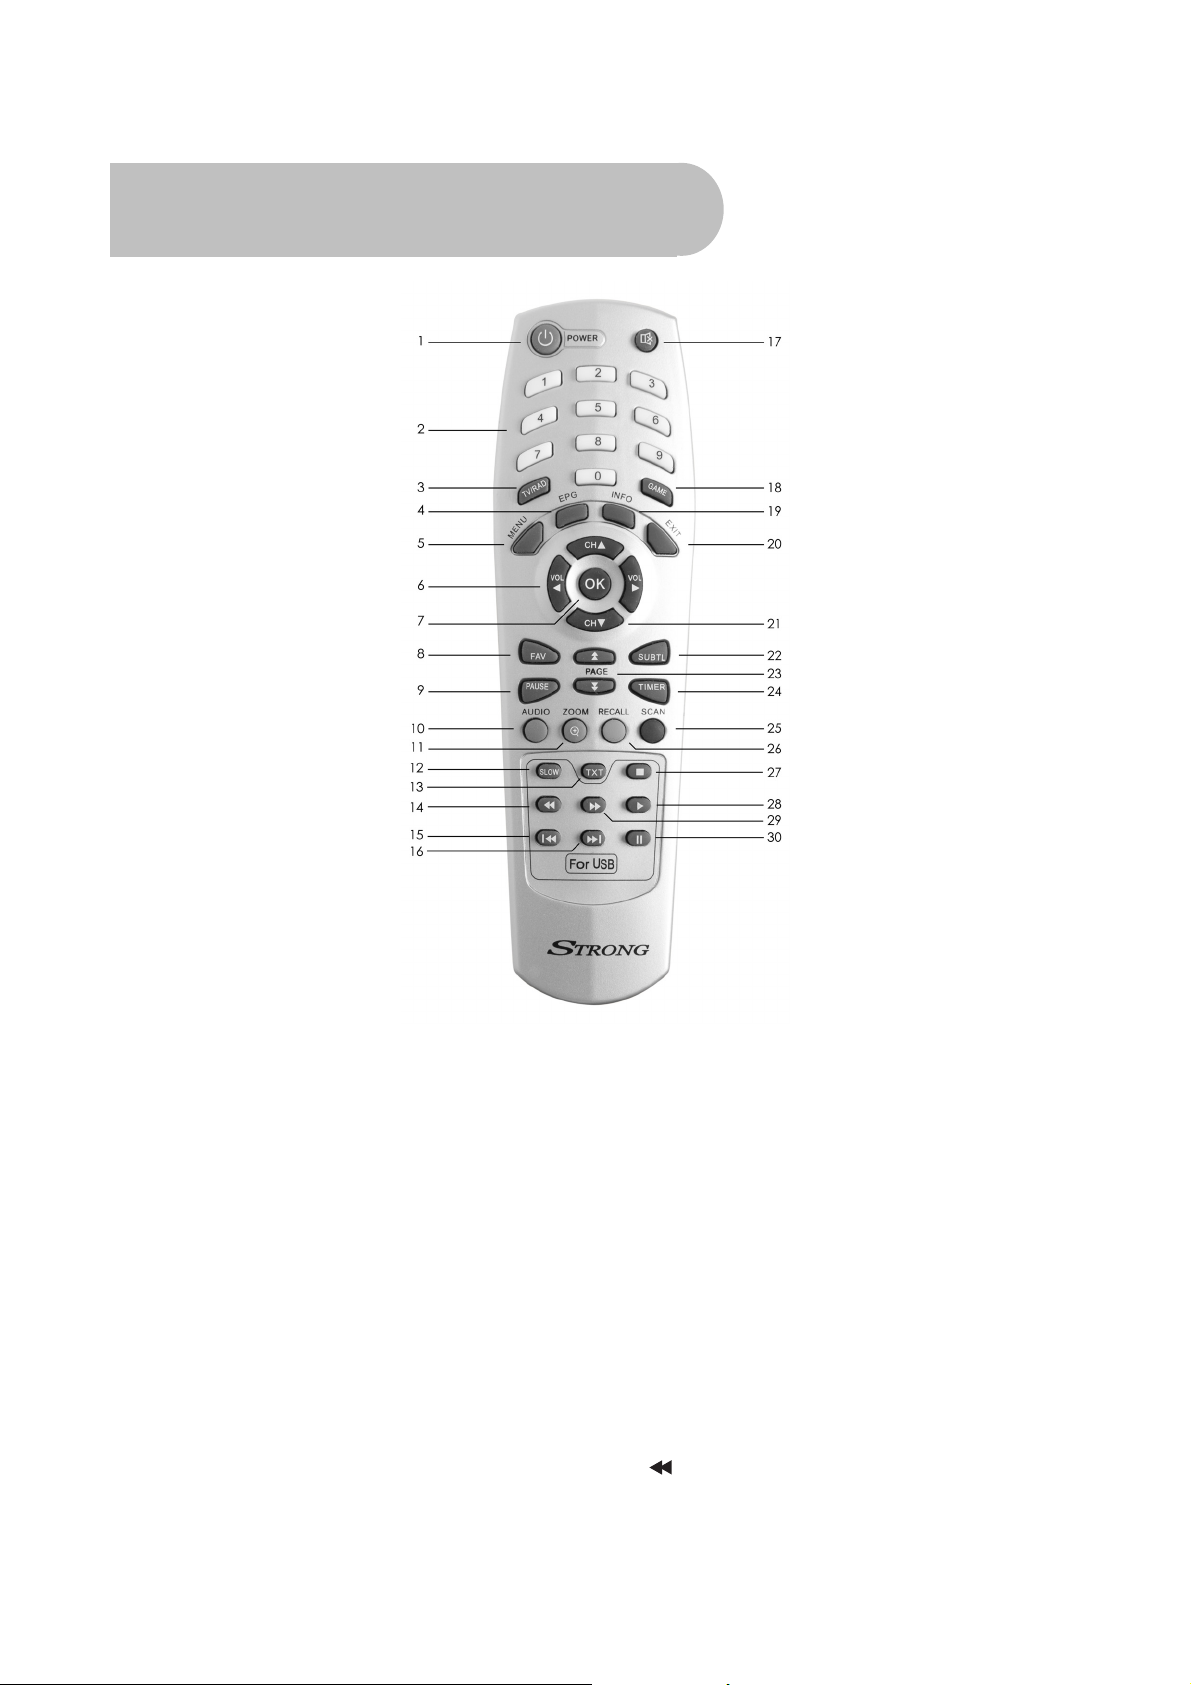
Remote Control
1. Stand-by: To switch between power-on and
stand-by modes
2. Numeric Keys (0–9): To choose a channel
directly, or to enter numeric information in a
menu
3. TV/RAD: To switch between TV and radio
(and vice versa)
4. EPG (Electronic Program Guide): To show
the TV and radio program guide
5. MENU: To display the main menu, or return
to a previous menu
6. VOL (
e/f): To change the volume in
viewing mode, or to change an option or
setting in a menu
7. OK: To show the channel list in viewing mode,
and to select an item (or confirm a choice) in
a menu
8. FAV: To display the favourites list in viewing
mode, and to select a favourite
9. PAUSE: To freeze the screen
10. AUDIO: To choose speakers (left, right or
stereo), audio format and audio language
11. ZOOM: To activate the zoom function
12. SLOW: To slow the playback of a movie
13. TXT: To show Teletext
14.
9
To fast rewind a movie or music track

15.
16.
To go to the start of a movie or music
track, or show the previous photo
To go to the end of a movie or music
track, or show the next photo
23. PAGE (
previous page ( if there is more than one
page), or to zoom in or out
24. TIMER: To display the wakeup timer
/ ): To move to the next page or
17. MUTE: To turn the sound on or off
18. GAME: To display the main games menu
19. INFO: To show information about the
current program
20. EXIT: To close the current menu and return
to normal viewing
21. CH (▲/▼): To change the channel, or to
move the cursor up or down in a menu
22. SUBTL: To turn subtitles on or off
25. SCAN: To automatically search for TV
channels and radio stations
26. RECALL: To return to the previous channel or
station
27.
To stop a movie or music track
28.
To play a movie or music track
29.
30.
To fast forward in a movie or music
track
To pause a movie or music track
Installing the batteries in the remote control
1. Press down on the retaining catch on the lid of the battery recess on the remote control and
remove the lid.
2. Insert two AAA batteries into the recess.
Be careful to insert the batteries as shown in the diagram inside the recess.
3. Replace the lid over the recess and gently push down on the lid until it snaps firmly into place.
10
How to Connect
Refer to the diagram on page 8 for the location of the sockets identified by numbers in the
procedures in this section.
Step 1: Connect to the antenna
Connect the antenna lead coming from your antenna wall plate to the TV ANT IN socket on the
(socket 1).
Step 2: Choose an installation method
There are a number of methods for connecting the , depending on your preference and
the connection types on your TV. These methods are labelled A, B and C below.
TIP: The various video connection options available provide differing degrees of video
quality. In ascending order of quality, these connections are Composite (good),
S-Video (better) and Component (best).
A: Y / Pb / Pr (Component) using the supplied RCA blue–red–green lead
For Component video, connect to your TV with the supplied Y / Pb / Pr Component cable (with blue,
red and green leads). Connect the leads between the Y, Pb and Pr sockets on the
group 6, taking care to match the colour of a lead with the colour of the socket), and the
corresponding Component sockets on your TV. (The Component sockets on the TV have the same
colour-coding.)
You will need to make separate connections for left and right audio via the audio sockets in socket
group 8. This can be done using the supplied RCA cable.
For right audio, connect the red RCA lead between the red audio socket in socket group 8 on the
and the corresponding socket on your TV.
For left audio, connect the white RCA lead between the white socket in socket group 8 on the
and the corresponding socket on your TV.
(socket
B. Separate S-Video (Y/C) connector
If your TV has a 4-pin Mini Din S-Video socket, you can connect an S-Video cable between socket 4
on the
supplied.)
You will need to make separate connections for left and right audio via the audio sockets in socket
group 9. This can be done using the supplied RCA cable.
and the corresponding S-Video socket on your TV. (An S-Video cable is not
For right audio, connect the red RCA lead between the red audio socket in socket group 9 on the
and the corresponding socket on your TV.
For left audio, connect the white RCA lead between the white socket in socket group 9 on the
and the corresponding socket on your TV.
11

C: CVBS (Composite) using the supplied RCA red–white–yellow lead
Using the appropriate colour-coding on socket 7 and socket group 9 you can connect to your TV
with the supplied RCA cable. This gives you CVBS (Composite Video) and MPEG-2 stereo audio.
For video, connect the yellow RCA lead between the yellow video socket (socket 7) on the
and the corresponding socket on your TV.
For right audio, connect the red RCA lead between the red audio socket in socket group 9 on the
and the corresponding socket on your TV.
For left audio, connect the white RCA lead between the white socket in socket group 9 on the
and the corresponding socket on your TV.
Step 3: Optional connections
Dolby Digital
Dolby digital bitstream audio S/PDIF can be achieved using a coaxial cable. (This cable is not
supplied.) The cable should be connected between socket 5 on the
socket on your Dolby Digital decoder amplifier. See “Multi-language and Dolby Digital
broadcasting” on page 22 for instructions on how to choose Dolby audio.
and the S/PDIF
Connecting a recording device (such as a VCR)
To connect a recording device (such as a VCR), connect an RF cable (not supplied) between the
LOOP OUT socket on the
(Another cable should be connected between the recording device and the TV. For instructions,
consult the user’s manual that came with your recording device or TV.)
(socket 2) and the ANT IN connector on the recording device.
12
Getting Started
Minimum Set-up
Once you have connected the to your antenna and to your television with your
preferred video and audio connections, you need to:
1. Install the batteries in the remote control (see page 10).
2. Turn on the television.
3. Plug the
4. Turn on the
diagram on page 8).
5. Select the video or AV input channel to which the
by pressing the TV/AV or VIDEO button on your TV remote control. (Refer to your TV user’s
manual for instructions.)
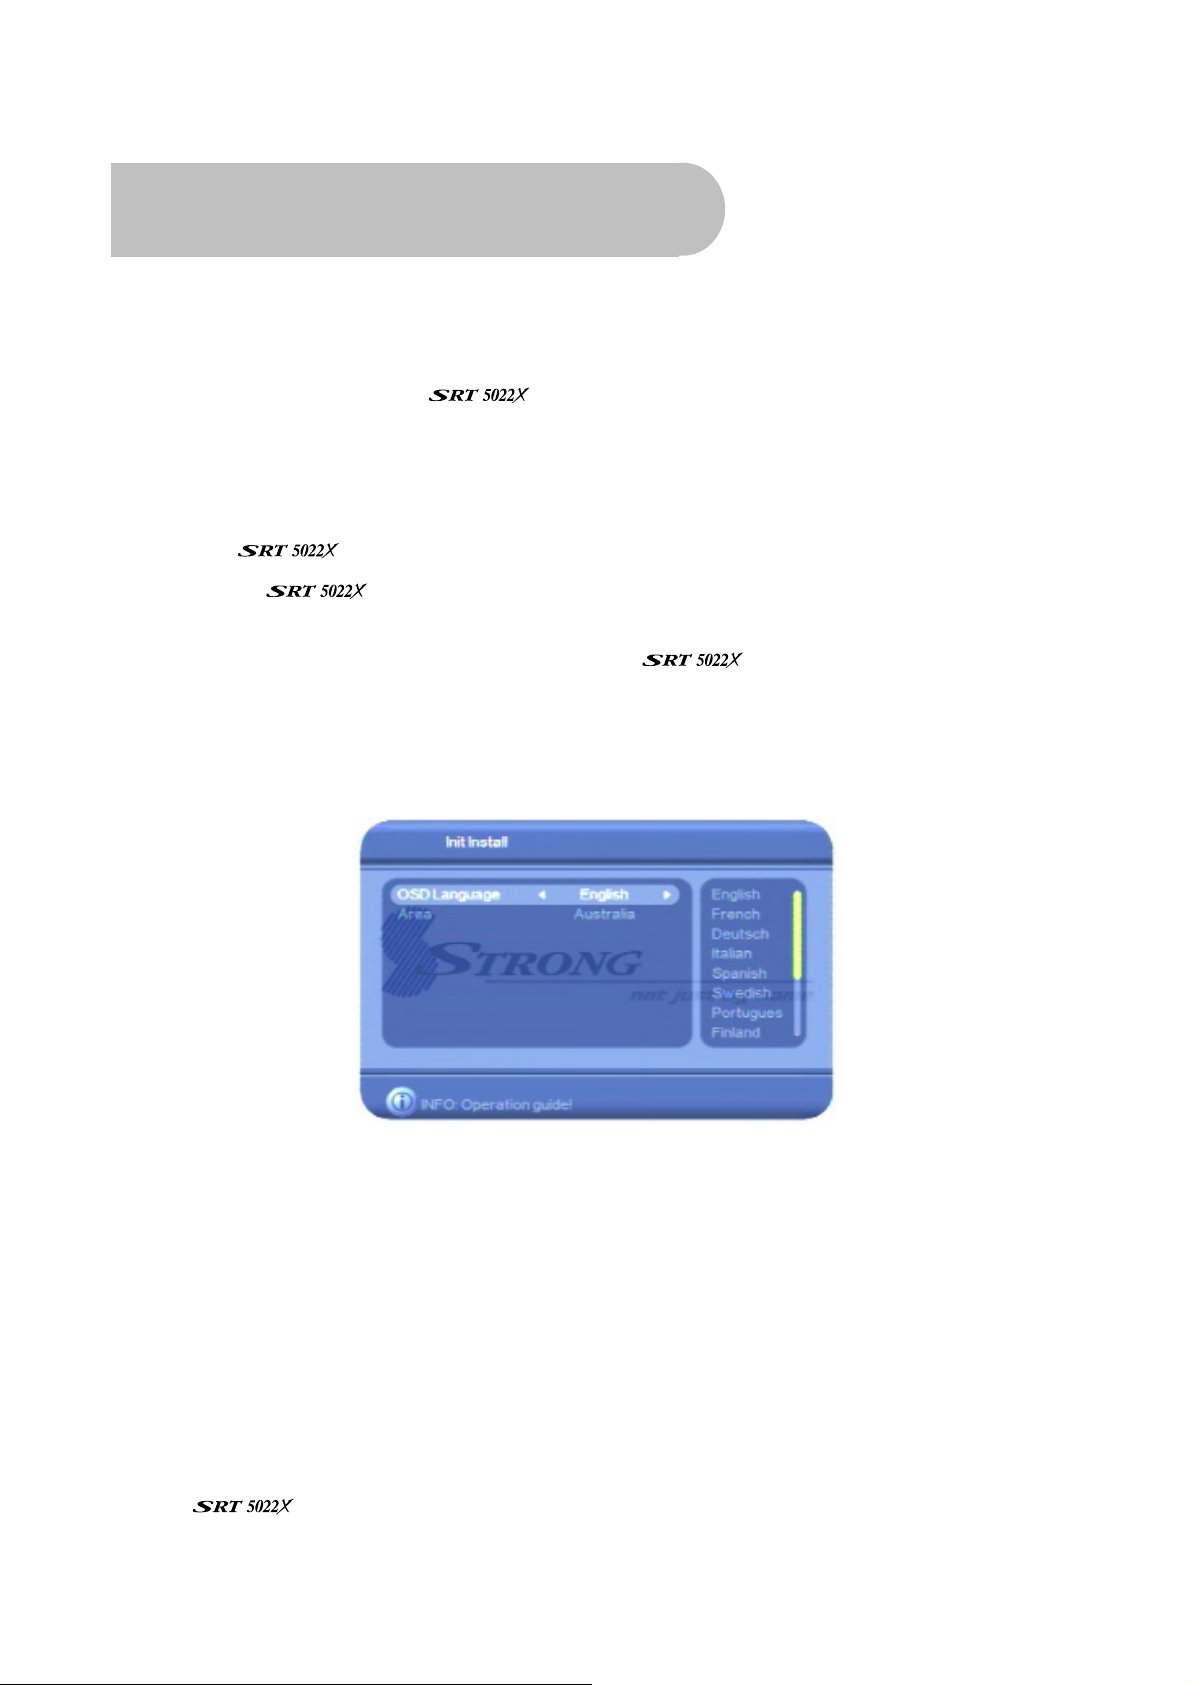
The Strong Technologies banner page briefly appears, followed by the Init Install screen (see
below).
On this screen you choose the language for the OSD (on-screen display) and your country. The
OSD language defaults to English and the country defaults to Australia. If these defaults are
suitable, go to step 9 below. Otherwise, continue with step 6 below.
into mains power and turn on the power at the mains switch.
using the power-on switch on the back of the receiver (number 9 in the
is connected: this can be done
6. Press VOL
is highlighted. Then press OK to select the highlighted language.
7. Press CH▼ or CH▲ to highlight the Area option.
8. Press VOL
press OK to select the highlighted country.
9. Press OK. A message appears asking if you want to install.
10. Press VOL
The
and lists them on the screen as it finds them.
or VOLf on the remote control and then CH▼ or CH▲ until the language you want
e
or VOLf and then CH▼ or CH▲ until the country you want is highlighted. Then
e
or VOLf to highlight Yes and then press OK.
e
now automatically scans for digital TV channels and radio stations in your area
13
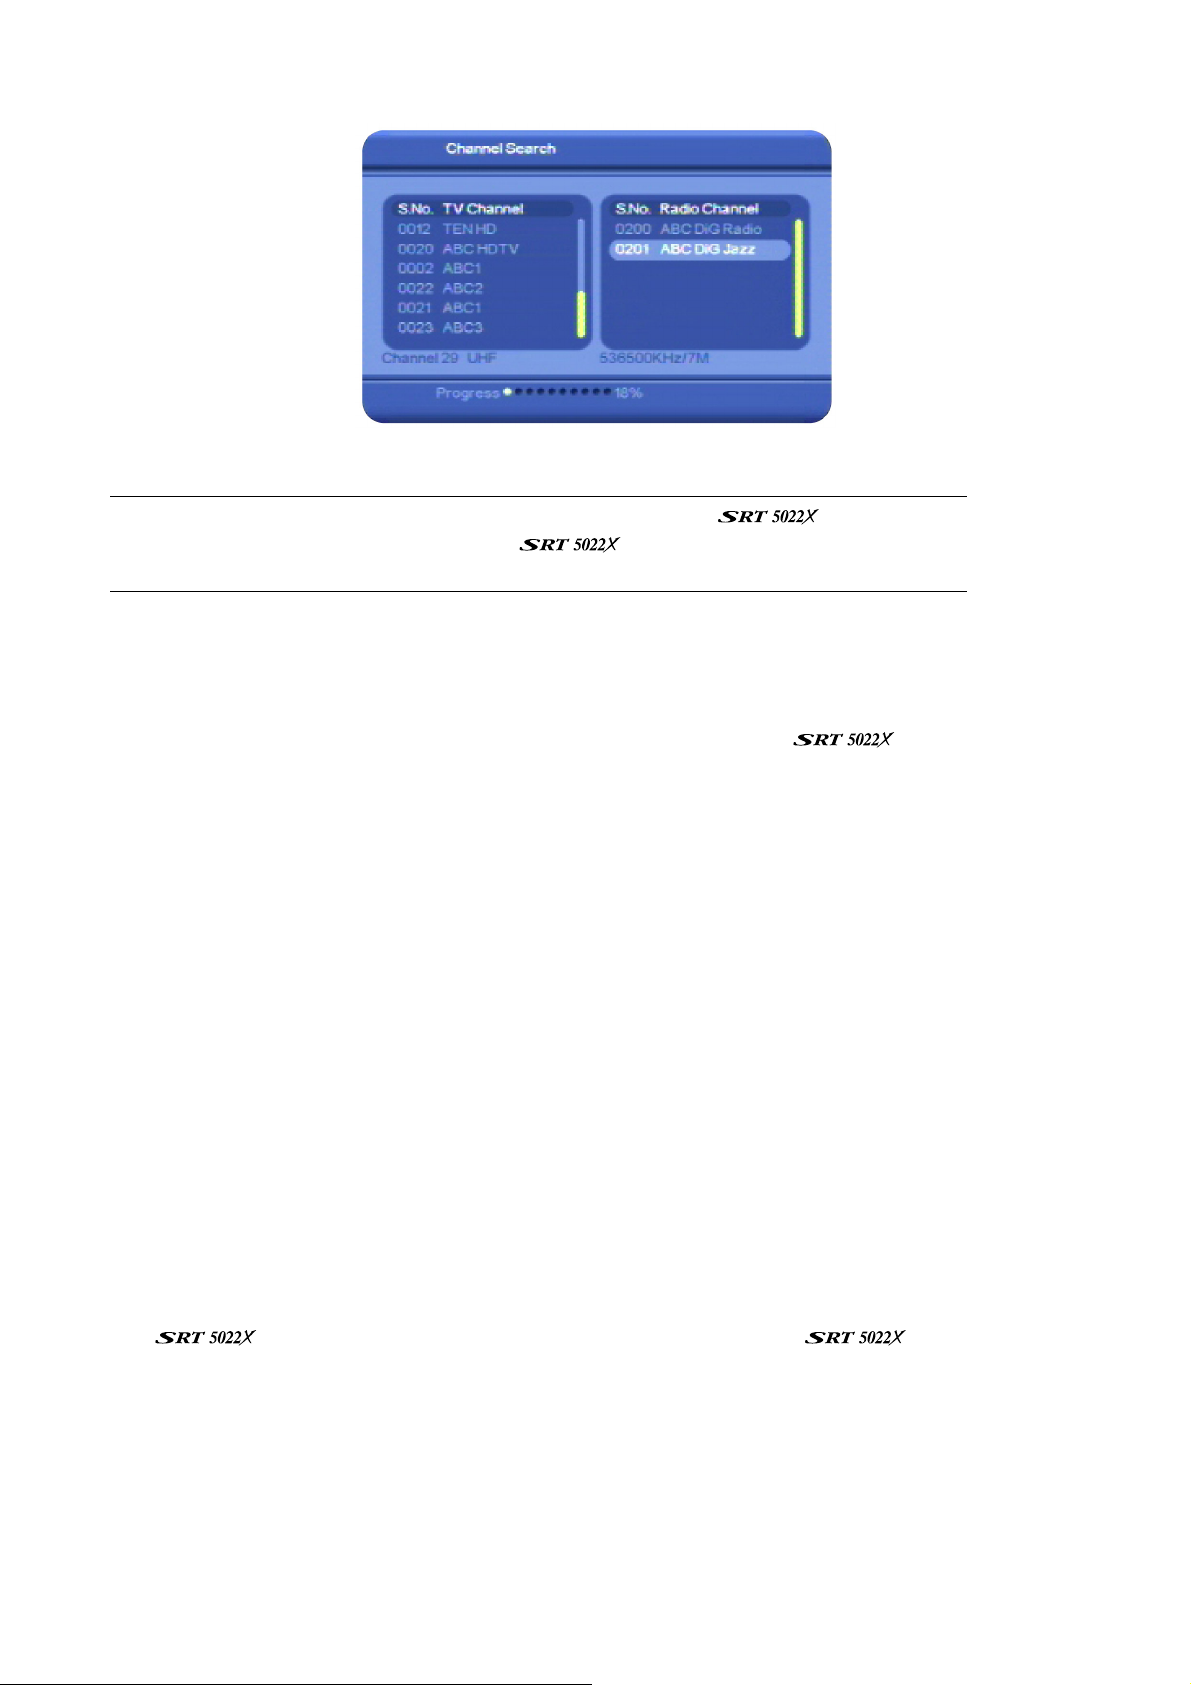
When the scanning is finished, the channel with the lowest number is displayed.
NOTE: If you get a black screen when scanning is finished, the
to show a high-definition TV channel. The cannot display high-definition
broadcasts. In this case, press CH▼ or CH▲ until a standard-definition channel appears.
Although you can start watching digital TV channels, and listen to digital radio stations, straight
away, there are a number of other set-up tasks you should do now. These are explained in the
following sections. If you do want to start watching TV or listening to radio now, go to “Basic
operations” on page 21 for instructions. You should remember to consider the rest of the set-up
tasks at another time. Doing these tasks extends your control over the
enjoyment you can get from it.
is attempting
and the
Full set-up
The other recommended set-up tasks are:
• Setting the properties of the on-screen display (OSD)
• Specifying video settings
• Specifying system settings
• Setting the date and time
• Setting a password to control access
Each if these set-up tasks is described in the next section, “Configuration”.
Configuration
Although you can start watching digital TV channels, and listen to digital radio stations, as soon as
the
the set-up tasks described in this section.
has finished its initial scan, you will get more out of your if you complete
14
Setting the properties of the on-screen display (OSD)
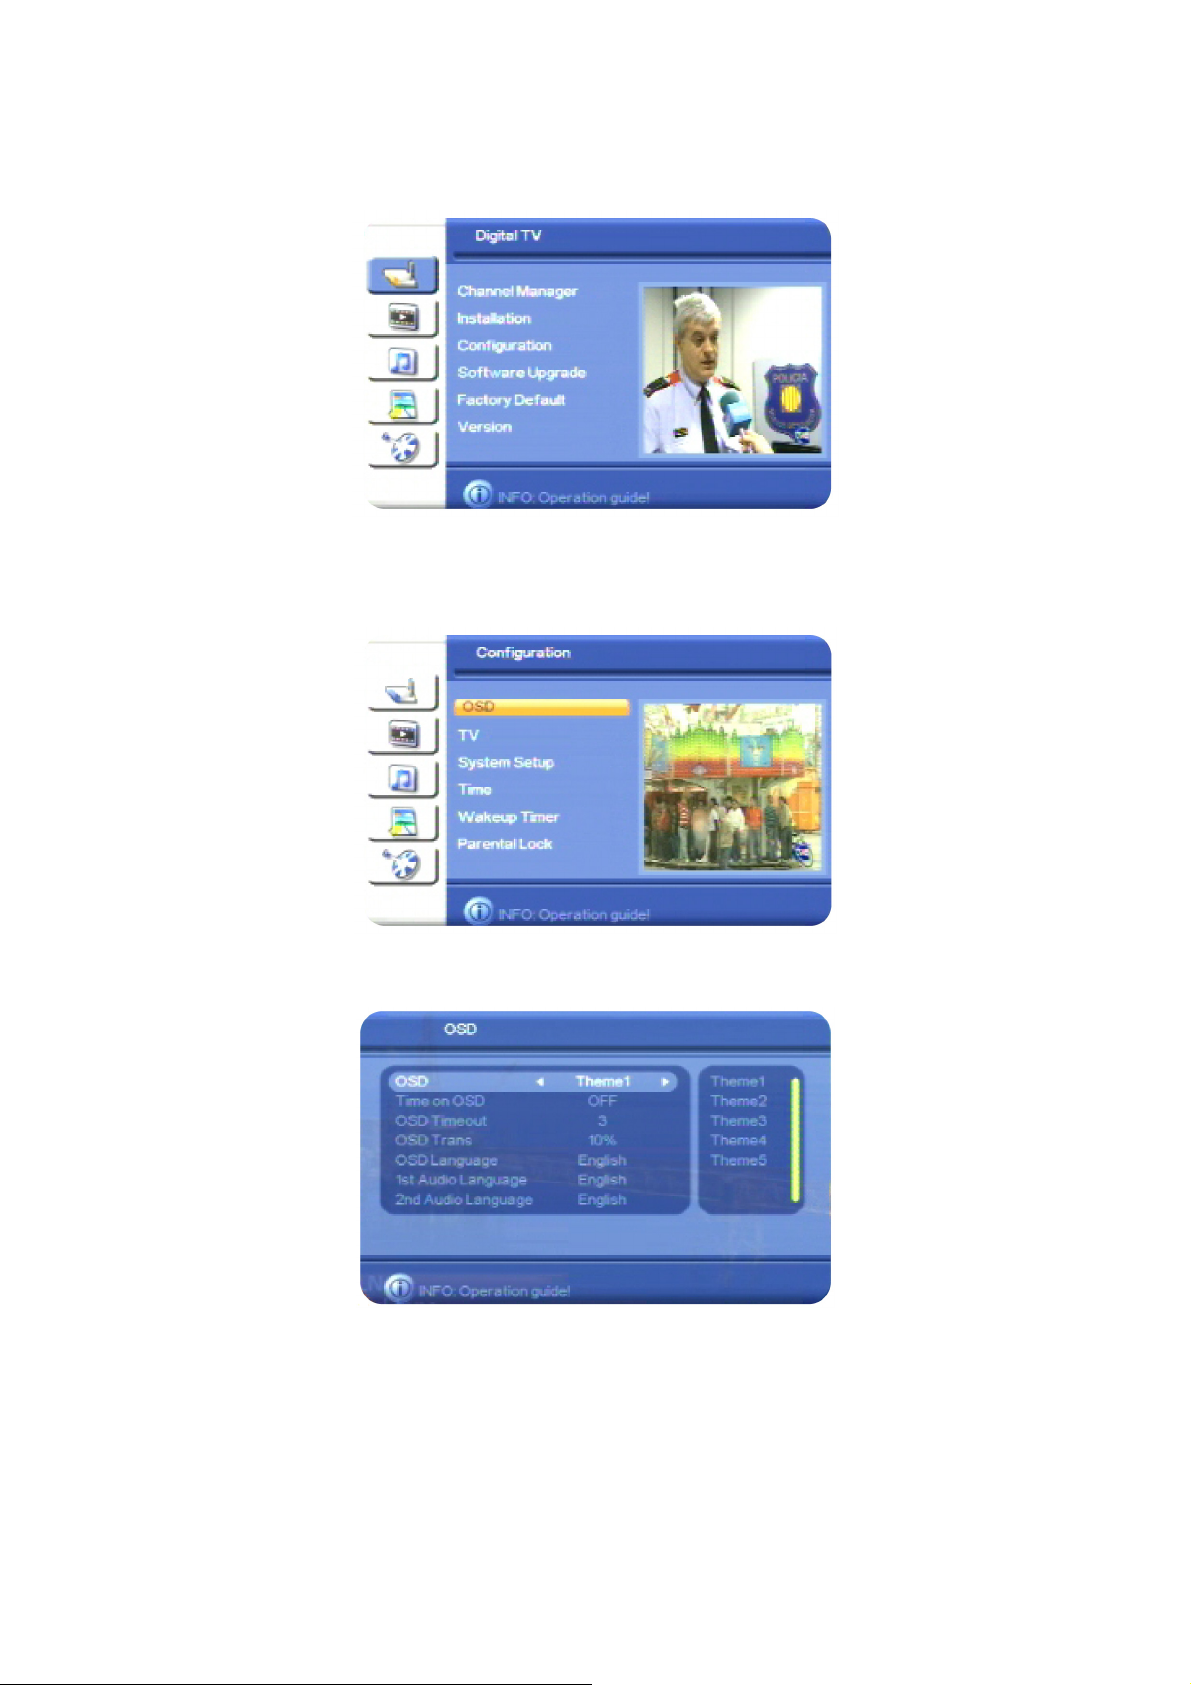
1. Press MENU on the remote control. The Digital TV menu appears.
2. Press OK. The first item in the sub-menu—Channel Manager—is highlighted.
3. Press CH▼ until Configuration is highlighted, and press OK. The Configuration menu appears.
4. With OSD highlighted, press OK. The OSD screen appears.
On this screen you can choose:
• a theme for the OSD (that is, a background colour)
• to display the time on the OSD
• the OSD timeout (that is, the number of seconds an information panel remains on the screen
before it disappears)
• the OSD transparency (that is, how much of the picture behind an information panel will be
visible through the information panel)
15

• the OSD language
• the first and second preferred audio languages (for channels that broadcast programs in
more than one language.
5. Select an option you want to change. If necessary, press CH▼ or CH▲ until the option is
highlighted.
6. With the option you want to change highlighted, press VOL
allowable values (shown in the panel at the right of the screen). Stop when the value you want
is displayed.
7. If there is another OSD option you want to change, repeat this procedure from step 5.
8. When you have finished configuring the OSD settings, press OK.
The Configuration menu re-appears. You can continue with other set-up tasks (see below), or
press EXIT to return to TV viewing.
or VOLf to step through the
e
Setting the properties of the TV
1. Press MENU on the remote control. The Digital TV menu appears.
2. Press OK. The first item in the sub-menu—Channel Manager—is highlighted.
3. Press CH▼ until Configuration is highlighted, and then press OK. The Configuration menu
appears.
4. Press CH▼ until TV is highlighted, and then press OK. The TV window appears.
On this screen you can control the following settings:
• Display Mode – PAL, NTSC or AUTO
• Aspect ratio – 4:3 (Pan & Scan or Letterbox)
or 16:9
• Video output – CVBS (Composite), S-Video
or YCbCr (Component)
5. Select an option you want to change. If necessary, press CH▼ or CH▲ until the option is
highlighted.
Note that the Video Output option should match the type of connection you have between
the
6. With the option you want to change highlighted, press VOL
allowable values (shown in the panel at the right of the screen). Stop when the value you want
is displayed.
7. If there is another TV option you want to change, repeat this procedure from step 5.
and the TV.
16
• Brightness
• Contrast
• Hue
• Saturation
or VOLf to step through the
e

8. When you have finished configuring the TV settings, press OK.
The Configuration menu re-appears. You can continue with other set-up tasks (see below), or
press EXIT to return to TV viewing.
Setting system properties
1. Press MENU on the remote control. The Digital TV menu appears.
2. Press OK. The first item in the sub-menu—Channel Manager—is highlighted.
3. Press CH▼ until Configuration is highlighted, and then press OK. The Configuration menu
appears.
4. Press CH▼ until System Setup is highlighted, and then press OK. The System Setup window
appears.
On this screen you can control the following settings:
• Equaliser settings
• Surround Sound type
• Active antenna (that is, if an antenna
booster is installed that needs power; the
can supply the power, if
necessary)
5. Select an option you want to change. If necessary, press CH▼ or CH▲ until the option is
highlighted.
6. With the option you want to change highlighted, press VOL
allowable values (shown in the panel at the right of the screen). Stop when the value you want
is displayed.
7. If there is another system set up option you want to change, repeat this procedure from step 5.
8. When you have finished configuring the system, press OK.
The Configuration menu re-appears. You can continue with other set-up tasks (see below), or
press EXIT to return to TV viewing.
• JPEG effect: to set the way
JPEG photos are displayed
• LCN (Logical Channel
Numbering)
• Area (that is, your country)
or VOLf to step through the
e
Setting the time and date
1. Press MENU on the remote control. The Digital TV menu appears.
2. Press OK. The first item in the sub-menu—Channel Manager—is highlighted.
3. Press CH▼ until Configuration is highlighted, and then press OK. The Configuration menu
appears.
17

4. Press CH▼ until Time is highlighted, and then press OK. The Time window appears.
You can set the date and time manually, or have the set the date and time
automatically based on how many hours in front of, or behind, Greenwich Mean Time your
location is.
To set the date and time automatically, follow steps 5–10 below and ignore the steps after step
10.
To set the date and time manually, follow steps 11–16 below.
5. With Timer Mode highlighted, press VOL
GMT Offset option is highlighted.
or VOLf to highlight Auto and then press CH▼. The
e
6. Press VOLf to move to the list of values for the GMT Offset.
7. Press CH▼ or CH▲ until you have highlighted the number of hours in front of, or behind,
Greenwich Mean Time your location normally is (that is, when there is no daylight saving). For
example, if you are in Melbourne, Brisbane, Hobart, Canberra or Sydney, you would press CH ▼
until +10:00 is highlighted; if you are Adelaide or Darwin, you would press CH ▼ until +09:30 is
highlighted; and if you are in Perth, you would press CH ▼ until +08:00 is highlighted.
8. Press OK.
9. If the current time has been adjusted for daylight saving, press CH▼ to highlight Summer Time
and then press VOL
10. Press OK.
The Configuration menu re-appears. You can continue with other set-up tasks (see below), or
press EXIT to return to TV viewing.
Ignore the rest of this procedure. The remaining steps are for manually setting the date and time.
or VOLf to select ON.
e
18

11. With Timer Mode highlighted, make sure Manual is selected and then press CH▼. The Date
option is highlighted.
12. Press VOL
or VOLf. An interactive calendar appears.
e
13. Press the arrow keys on the remote control to move through the calendar until the current date
is highlighted, and then press OK.
14. Press OK to highlight the Time option.
15. Press VOL
correct digit by pressing the corresponding number key on the remote control. Repeat this step
until you have entered the correct time.
or VOLf to select a digit of the time that you want to change and then enter the
e
16. Press OK.
The Configuration menu re-appears. You can continue with other set-up tasks (see below), or
press EXIT to return to TV viewing.
Setting security options
You can restrict access to the by specifying that a password must be entered in order
to:
• view a program on a channel that has been locked (Channel Lock)
• access the menus (Menu Lock)
Follow the procedure below to set or cancel security settings, or to change the password.
1. Press MENU on the remote control. The Digital TV menu appears.
2. Press OK. The first item in the sub-menu—Channel Manager—is highlighted.
3. Press CH▼ until Configuration is highlighted, and then press OK. The Configuration menu
appears.
4. Press CH▼ or CH▲ until Parental Lock is highlighted, and then press OK. The Parental Lock
window appears.
19

5. Press CH▼ or CH▲ to choose a type of security you want to set or cancel—Channel or Menu—
and then press OK.
6. Press VOL
you want to set or cancel the other type of security.
7. If you don’t want to change the default password (0000) press OK. The Configuration menu re-
appears. Press EXIT to return to TV viewing and ignore the rest of this procedure.
8. If you do want to change the default password (0000) or the last password you set, press CH▼
to highlight the Change Password option and then press OK. You can now enter the current
and new password.
or VOLf to change the setting from OFF to ON (or vice versa). Repeat from step 5 if
e
9. Enter the old password using the number keys on the remote control. Once you have entered
all four digits, the next option (Enter New Password) is highlighted.
10. Enter the new password in both the Enter New Password field and the Confirm New Password
field.
The Configuration menu re-appears. Press EXIT to return to TV viewing.
If you have activated Channel Lock, a password will now have to be entered whenever
someone wants to access a channel that has been locked. (For instructions on how to lock
particular channels, see page 28.)
If you have activated Menu Lock, a password will now have to be entered when MENU is
pressed.
20

Operation
Basic operations
Selecting a channel
There are a number of ways to select a channel (or digital radio station):
• Using the number keys on the remote control: If you know the channel number, enter the
number using the number keys on the remote control and then press OK on the remote control.
(If you don’t press OK, the channel selected appears after 2 seconds.)
NOTE: The
Some samples of LCN channel numbers are:
1 = Ten network and affiliates
2 = ABC
3 = SBS
7 = Seven network and affiliates
9 = Nine network and affiliates
• Channel list: Press OK on the remote control. This displays the Quick Select channel list. Press
CH▼ or CH▲ on the remote control to select the channel you want, press OK and then press
EXIT.
uses the Logical Channel Numbering system (LCN) by default.
If you have placed channels into groups (see “Grouping channels” on page 34), the channels
in the first group are listed on the Quick Select channel list. You can then press VOL
to display each group of channels in turn.
• Favourites list: Press FAV on the remote control to see a list of channels you have added to a
favourites list. Press CH▼ or CH▲ on the remote control to select a channel and then press OK.
See “Setting favourites” on page 33 for instructions on creating a favourites list.
• Scroll: Press CH▼ or CH▲ on the remote control to scroll through the channels in channel
number order. (You can also scroll through the channels in order by pressing the channel up
and channel down buttons on the front panel of the
• By EPG: Press EPG on the remote control, select the channel from the electronic program guide
(EPG), press OK and then EPG, MENU or EXIT. The EPG is explained on page 36.
• Previous channel: Press the RECALL button to display the previous channel.
21
.)
or VOLf
e

Adjusting the volume
While you are watching a program, press VOLeor VOLf on the remote control to decrease or
increase the volume respectively.
Turning off the sound (muting)
To turn off the sound altogether, press the MUTE button (X) on the remote control. The mute icon is
displayed on the screen. Press the MUTE button again to restore the sound.
Getting channel Information
• Press INFO on the remote control to display the information banner.
• With the information banner displayed, press INFO again to display more detailed information.
Press EXIT on the remote control to hide an information banner.
TV/Radio switching
Press TV/RAD on the remote control to switch between TV channels and radio stations (or vice
versa).
Multi-language and Dolby Digital broadcasting
If a channel is being broadcast in more than one audio language, you can choose which
language to listen to.
1. Press the AUDIO button (the red button) on the remote control. The Multiaudio window appears.
2. If more than one audio language is being broadcast, each language will be listed. Press CH▼
or CH▲ to select a language.
3. You can also select the output mode for the audio language: stereo, left speaker or right
speaker. Press VOL
or VOLf until the output mode you want is highlighted.
e
22

4. If a channel is being broadcast in Dolby Digital, the code AC-3 appears beside the entry (as in
the second entry in the example above). If you are set up to receive digital audio, choose this
option for better quality audio.
5. Press OK.
Closed captions
Closed captions are the spoken words written on the screen. This option is particularly useful for the
hard-of-hearing.
To turn on closed captions (or turn them off):
1. Press the SUBTL on the remote control when you are in normal viewing mode. The Subtitle
window appears.
2. Press VOLeor VOLf until TTX Subtitle appears (to turn on closed captions) or OFF appears (to
turn off closed captions).
3. Press OK.
23

Teletext
Teletext is a text-based data service. It is available only when the broadcasting signal carries such
data.
1. Select a channel that is broadcasting teletext.
2. Press TXT on the remote control.
3. Select a teletext page by pressing the corresponding number or colour button on the remote
control. (The page numbers available are shown on the screen.)
Press EXIT on the remote control to cancel teletext.
Picture freeze
• Press PAUSE on the remote control to freeze the display.
• Press PAUSE again to resume normal viewing.
Zooming in or out
You can zoom in on part of the display (and you can also zoom out). To do this:
1. Press ZOOM (the green button) on the remote control.
2. Zoom in by pressing PAGE
until you reach the desired magnification.
3. Press ZOOM or EXIT to cancel zooming.
or zoom out by pressing PAGE . Continue pressing a PAGE button
Re-searching for channels and stations
If you have moved locations, deleted channels or stations, or if new channels and stations have
become available, you will need to conduct another search. Three search options are available:
• Auto
• Manual
• Advanced
24

Auto search
An auto search repeats the scan the did when you first turned it on. It searches for all
channels and radio stations that can be detected in your area, and adds them to your channel list.
1. Press SCAN on the remote control.
A search commences, and channels and stations are listed on the screen as they are detected.
At the end of the scan, the channel with the lowest number is displayed.
NOTE: If you get a black screen when scanning is finished, the
to show a high-definition TV channel. The cannot display high-definition
broadcasts. In this case, press CH▼ or CH▲ until a standard-definition channel appears.
is attempting
Manual search
You can only search for TV channels, not radio stations, with the manual search feature.
There are two ways to manually search for a channel: by specifying the LCN (logical channel
number) and by specifying PID information.
Method 1: specifying the LCN (logical channel number)
1. Press MENU on the remote control. The Digital TV menu appears.
2. Press OK. The first item in the sub-menu—Channel Manager—is highlighted.
3. Press CH▼ to highlight Installation and then press OK. The Installation menu appears.
4. Press CH▼ to highlight Manual Search and then press OK. The Manual Search window appears.
25

5. Press VOL
shown in the Channel Name field.
or VOLf until the number of the channel you want to add to your channel list is
e
If the
are indicated by the dotted bars at the bottom of the window. A low intensity or quality
reading indicates that you are likely to experience difficulty receiving the channel.
6. Press OK to begin the search (or press EXIT to abandon the search).
The Channel Search window appears while the
specified. If the channel is found, the details are saved to memory and then the Installation
menu re-appears.
7. Press EXIT to return to TV viewing.
Method 2: specifying PID information
For this method, you will need to obtain PID information about the channel you want to add. This
information can be provided by the carrier or broadcaster.
1. Press MENU on the remote control. The Digital TV menu appears.
2. Press OK. The first item in the sub-menu—Channel Manager—is highlighted.
3. Press OK. The Channel Manager menu appears.
4. Press CH▼ or CH▲ until Edit Channels is highlighted and then press OK. The Edit Channels
window appears.
can detect the channel you selected, the intensity and quality of the signal
searches for the channel you
5. Press the red button on the remote control. The Add Channel window appears.
6. To specify the area or country from which the channel is being broadcast, press VOLeor VOLf,
select a country by pressing CH▼ or CH▲ until it is highlighted, and then press OK.
26

7. Press CH ▼ to select the Carrier option.
8. Press VOL
press OK.
9. Press CH▼ to select the Channel Name option.
10. Press VOL
11. Press the number keys corresponding to the character you want in the name. For example, to
enter a C, quickly press the 2 button three times. (Pressing it once enters an A; pressing it twice
gives you a B, and so on.) Continue entering characters until you have entered the new name.
The coloured buttons on the remote give you additional character editing functionality: upper
case, lower case, insert between existing characters and delete a character. Press VOL
VOL
f
12. Press OK. The new name now appears on the Add Channel screen.
13. Press CH▼ to select the Audio PID option and enter the PID using the number keys on the
remote control.
14. Press CH▼ to select the Video PID option and enter the PID.
15. Press CH▼ to select the PCR PID option and enter the PID.
16. Press OK to add the new channel. The new channel now appears in your Quick Select channel
list.
or VOLf, select a carrier by pressing CH▼ or CH▲ until it is highlighted, and then
e
or VOLf to display the on-screen keyboard.
e
to move from character to character.
e
or
NOTE: The
correct. If it is not correct and you select the new channel from a channel list, a black
screen is displayed. If you need to correct PID information, see “Edit channel details” on
page 35.
does not check that the PID information you have entered is
Advanced search
The advanced search feature lets you search for all TV channels broadcast within a range of
frequencies that you specify.
1. Press MENU on the remote control. The Digital TV menu appears.
2. Press OK. The first item in the sub-menu—Channel Manager—is highlighted.
3. Press CH▼ to highlight Installation and then press OK. The Installation menu appears.
4. Press CH▼ or CH▲ until Advanced Search is highlighted and then press OK. The Advanced
Search screen appears.
27

5. In the Freq (KHz) field, enter the frequency of the channel you want to search for. Press the
number keys on the remote control to enter digits, pressing VOL
to digit.
or VOLf to move from digit
e
6. Press CH▼ to move to the BandWidth field and press VOL
bandwidth: 6M, 7M or 8M.
7. Press OK to start the search.
The Channel Search window appears while the
range you specified. If channels are found, the details are saved to memory and then the
Installation menu re-appears.
8. Press EXIT to return to TV viewing.
or VOLf to select the appropriate
e
searches for channels within the
Organising channels
The Channel Manager sub-menu enables you to:
• create a list of favourite channels
• lock, move, delete, re-sort, group and rename channels
If you have set the channel lock or menu lock, you will have to enter the password to perform most
of these operations.
Setting favourites
You can create a favourites list of channels and then select a channel from that list. This makes it
easier to choose and switch between channels if there are many channels available in your area.
You display your favourites list by pressing FAV on the remote control. You can then select a
favourite and press OK to go straight to that favourite channel.
NOTE: You can also add radio stations to your favourites list. To display the radio stations
added to your favourites list, press TV/RAD before pressing FAV.
Follow this procedure to add a channel or station to your favourites list, or to remove it from your
favourites list.
1. Press MENU on the remote control. The Digital TV menu appears.
2. Press OK. The first item in the sub-menu—Channel Manager—is highlighted.
3. Press OK. The Channel Manager menu appears.
28

4. With Channel Organizer highlighted, press OK. The Channel Organizer window appears.
5. Press CH▼ or CH▲ until the channel or station you want to add to (or remove from) your
favourites list is highlighted.
A channel or station that is already on your favourites list has an icon of a heart beside its name.
6. Press the AUDIO button (the red button) on the remote control to add the channel or station to
your favourites list (or remove it if it is already on that list). A heart icon appears beside the
channel or station name to indicate that it is on your favourites list. (If you are removing a
channel or station from your favourites list, the heart icon disappears.)
7. If you want to add (or remove) another channel, repeat from step 5.
8. If you want to add (or remove) a radio station, press TV/RAD, select the radio station and press
AUDIO. Repeat this step to add further radio stations to your favourites list.
9. Press OK.
10. Press EXIT to return to TV viewing.
TIP: Another way of organising channels is by grouping like channels together: all news
channels, all sports channels, etc. This is explained in “Grouping channels” on page 34.
29

Moving channels
You can change the order in which channels appear in the channels list. You might do this to place
the channels you watch most often at the top of the channels list.
NOTE: You can also change the order of radio stations.
1. Press MENU on the remote control. The Digital TV menu appears.
2. Press OK. The first item in the sub-menu—Channel Manager—is highlighted.
3. Press OK. The Channel Manager menu appears
4. With Channel Organizer highlighted, press OK. The Channel Organizer window appears, listing
all your TV channels
5. If you want to move radio stations rather than TV channels, press TV/RAD on the remote control.
A list of radio stations appears. Pressing TV/RAD again redisplays the TV channels.
6. Press CH▼ or CH▲ until the channel or station you want to move is highlighted.
7. Press the RECALL button (the yellow button) on the remote. An icon appears beside the
channel or station name to indicate that it is the channel that will be moved.
8. Press CH▼ or CH▲ until the intended new position for the channel or station is highlighted.
9. Press OK. Your change is saved and the selected channel or station now appears in its new
position.
10. If you want to move another channel or station, repeat from step 6.
11. Press EXIT to return to TV viewing.
Locking channels
Locking a channel requires a password to be entered before that channel can be viewed. You
cannot lock channels unless the Channel Lock has been set to ON. (See “Setting security options”
on page 19 for instructions.)
NOTE: You can also lock radio stations.
Follow this procedure to lock an unlocked channel or station, or to unlock a locked channel or
station.
1. Press MENU on the remote control. The Digital TV menu appears.
2. Press OK. The first item in the sub-menu—Channel Manager—is highlighted.
30

3. Press OK. The Channel Manager menu appears
4. With Channel Organizer highlighted, press OK. The Channel Organizer window appears, listing
all your TV channels
5. If you want to lock (or unlock) radio stations rather than TV channels, press TV/RAD on the
remote control. A list of radio stations appears. Pressing TV/RAD again redisplays the TV
channels.
6. Press CH▼ or CH▲ until the channel or station you want to lock or unlock is highlighted.
7. Press the SCAN button (the blue button) on the remote control to lock (or unlock) the
highlighted channel or station. An icon of a padlock appears beside the channel or station
name to indicate that it is locked. (If you are unlocking a channel or station, the icon
disappears.)
8. If you want to lock or unlock another channel or station, repeat from step 6.
9. Press EXIT to return to TV viewing.
Deleting one or more channels
You can delete channels that you are never likely to watch. If you want to re-instate a channel that
you have deleted, you will need to rescan for it. See “Re-searching for channels and stations” on
page 24 for instructions.
If you want to delete all channels at once, see “Deleting all channels” on page 32.
NOTE: You can also delete radio stations.
1. Press MENU on the remote control. The Digital TV menu appears.
2. Press OK. The first item in the sub-menu—Channel Manager—is highlighted.
3. Press OK. The Channel Manager menu appears
4. With Channel Organizer highlighted, press OK. The Channel Organizer window appears, listing
all your TV channels
5. If you want to delete radio stations rather than TV channels, press TV/RAD on the remote control.
A list of radio stations appears. Pressing TV/RAD again redisplays the TV channels.
6. Press CH▼ or CH▲ until the channel or station you want to delete is highlighted.
7. Press the ZOOM button (the green button) on the remote control to mark the highlighted
channel or station for deletion. An icon appears beside the channel or station name to indicate
that it is marked for deletion.
31

8. If you want to delete another channel or station, repeat from step 6.
9. Press OK. A message appears asking if you want to delete the selected items.
10. Press VOL
11. Press EXIT to return to TV viewing.
or VOLf to select YES and then press OK.
e
Deleting all channels
You can delete all channels or all stations. If you do, you will need to conduct a search for
channels or stations before you can use the
searching for channels and stations” on page 24 for instructions.)
To delete all channels or all stations:
1. Press MENU on the remote control. The Digital TV menu appears.
2. Press OK. The first item in the sub-menu—Channel Manager—is highlighted.
3. Press OK. The Channel Manager menu appears
4. Press CH▲ to highlight Delete All and then press OK. The Delete All window appears.
as a digital receiver again. (See “Re-
5. Select what you want to delete: all TV channels or all radio stations.
6. Press OK. A message appears asking if you are sure that you want to proceed.
7. Press VOL
8. Press EXIT to return to TV viewing.
NOTE: You can also delete all channels and stations by choosing Factory Default on the
Digital TV menu.
or VOLf to select YES and then press OK.
e
32

Renaming channels and stations
1. Press MENU on the remote control. The Digital TV menu appears.
2. Press OK. The first item in the sub-menu—Channel Manager—is highlighted.
3. Press OK. The Channel Manager menu appears
4. With Channel Organizer highlighted, press OK. The Channel Organizer window appears, listing
all your TV channels.
5. If you want to rename a radio station rather than a TV channel, press TV/RAD on the remote
control. A list of radio stations appears. Pressing TV/RAD again redisplays the TV channels.
6. Press CH▼ or CH▲ until the channel or station you want to rename is highlighted.
7. Press VOL
or VOLf to display an on-screen keypad.
e
8. Press the number keys corresponding to the character you want in the new name. For example,
to enter a C, quickly press the 2 button three times. (Pressing it once enters an A; pressing it
twice gives you a B, and so on.) Continue entering characters until you have entered the new
name.
The coloured buttons on the remote control give you additional character editing functionality:
upper case, lower case, insert between existing characters and delete a character. Press
VOL
or VOLf to move from character to character.
e
9. Press OK. The new name now appears in your channel or station list.
10. Press EXIT to return to TV viewing.
Re-sorting channels and stations
1. Press MENU on the remote control. The Digital TV menu appears.
2. Press OK. The first item in the sub-menu—Channel Manager—is highlighted.
3. Press OK. The Channel Manager menu appears
4. Press CH▼ to highlight Channel Sorting and then press OK. The Channel Sorting window
appears.
33

You have three levels of sorting:
• First by area (that is, by the country from where the channel is broadcast)
• Second by type of channel: free-to-air (FTA), scrambled or all channels.
• Third by name or LCN (logical channel number) number, and in either ascending or
descending order
5. To set the first level of sorting, select First Option, press VOL
CH▲ until the sort option you want is highlighted. Press OK to select the highlighted option.
or VOLf and then press CH▼ or
e
6. To set the second level of sorting, press CH▼ to select Second Option, press VOL
then press CH▼ or CH▲ until the sort option you want is highlighted. Press OK to select the
highlighted option.
7. To set the third level of sorting, press CH▼ to select Third Option, press VOL
press CH▼ or CH▲ until the sort option you want is highlighted. Press OK to select the
highlighted option.
8. Press OK. A message appears asking if you are sure that you want to re-sort the channels.
9. Press VOL
10. Press EXIT to return to TV viewing.
or VOLf to select YES and then press OK.
e
e
or VOLf and
e
or VOLf and then
Grouping channels
You can place channels in various pre-defined groups: News, Sport, Fashion, Movies, Kids, Music
etc. When you do this, the channels displayed on the Quick Select channels list (displayed when
you press the OK button during normal viewing) will appear in the groups to which you have
assigned them. As with the Favourites list, channel groups can make it easier for you to find a
particular channel if there are many channels in your area.
To group channels (or to remove channels from previously assigned groups):
1. Press MENU on the remote control. The Digital TV menu appears.
2. Press OK. The first item in the sub-menu—Channel Manager—is highlighted.
3. Press OK. The Channel Manager menu appears.
4. Press CH▼ twice to highlight Channel Grouping and then press OK. The Channel Grouping
window appears.
34

5. Press CH▼ or CH▲ until a channel you want to add to a group is highlighted.
6. Press the number key on the remote control that corresponds to the appropriate group shown
at the right side of the window: 2 for News, 3 for Science, 4 for Sport and so on. The
corresponding icon appears beside the channel in the Group column to indicate that the
channel has been grouped.
To remove a channel from a group, select it and press 1 on the remote control.
You don’t have to add every channel to a group. Those that you don’t add to a group are
automatically placed in the None group.
7. To add another channel to a group, repeat this procedure from step 5.
8. Press OK. The channels are now assigned to the groups you chose.
9. Press EXIT to return to TV viewing.
To check that the stations have been assigned to groups, press OK during normal TV viewing.
The Quick Select channel list first shows just the channels in your first group. Press VOL
to see another group’s channels. You can select a channel in a group and press OK to start
watching that channel.
or VOLf
e
Edit channel details
Follow this procedure if you want to correct wrong PID details of a channel you have already
added to your channel list.
1. Press MENU on the remote control. The Digital TV menu appears.
2. Press OK. The first item in the sub-menu—Channel Manager—is highlighted.
3. Press OK. The Channel Manager menu appears.
4. Press CH▼ or CH▲ until Edit Channels is highlighted and then press OK. The Edit Channels
window appears.
35

5. Press CH▼ or CH▲ until the channel you want to edit is highlighted.
6. Press the yellow button on the remote control. The Edit Channels window now shows the details
of the selected channel.
7. Select the option that needs to be changed and make the change. Repeat for each option
that needs to be changed.
8. Press OK to save the changes and press EXIT to return to normal viewing.
Electronic Program Guide (EPG)
Some service providers broadcast information about their programs. This information is available on
screen via an electronic program guide (displayed by pressing EPG on the remote control). An
example is shown below.
36

All available channels are listed at the left of the screen. The current program of the currently
selected channel is listed at the top of the right panel, with the programs to follow listed below it.
Two modes are available: daily and weekly. Extended information is available about some of the
programs.
You can also set up to eight timers from the EPG. A timer is a time at which the program on a
specified channel automatically comes on (or a pre-defined message appears on the screen).
Opening the EPG
1. Press EPG on the remote control. The current channel is highlighted (at the left) and the current
and next programs are shown at the right. The current program is also highlighted.
2. To choose a different channel, press VOL
channel you are interested in is highlighted. Note that as you scroll through the channels, the
current and next programs are displayed at the right of the screen.
3. To display extended information about a displayed program, press VOL
the first program. If necessary, press CH▼ or CH▲ until the program you are interested in is
highlighted. Now press the yellow button on the remote control to display extended information
about the highlighted program.
or VOLf and then press CH▼ or CH▲ until the
e
or VOLf to highlight
e
When you are finished with the extended information, press EXIT.
4. To select a channel for watching, select it in the list of channels at the left of the screen and
press OK.
5. Close the EPG by pressing EXIT.
Daily and Weekly modes
The EPG illustrated above is in daily mode. Only the programs for the current day are shown. To see
programs for the rest of the week (and subsequent weeks), you need to display the EPG in Weekly
mode.
To display Weekly mode, open the EPG and press the green button on the remote control.
37

• To scroll through the channels, press CH▼ or CH▲.
• To scroll through the programs for a particular channel, select that channel and the press
VOL
You can also display extended information about a program in Weekly mode. Scroll to that
program and press the yellow button on the remote control. (Press EXIT to close the extended
information.)
To switch back to Daily mode, press the red button on the remote control.
or VOLf. (If you scroll past midnight, the programs for the next day are displayed.)
e
Using the timer
You can set up to eight times at which specified channels will automatically come on or turn off.
Follow this procedure to set or change a timer.
There are three ways to set or cancel a timer: from the EPG, from the Configuration menu, and by
pressing TIMER on the remote control.
Setting or cancelling a timer from the EPG
1. Press EPG on the remote control. The Electronic Program Guide appears.
2. Choose the program you want to come on at wakeup time. (This is optional at this stage. If you
don’t do it here, you can do it later in this procedure.)
3. Press the blue button on the remote control.
The Wakeup Timer window appears. If you have already set a timer, the next available timer is
shown, with information about the program you selected in the previous step showing.
38

4. If you want to change the timer number (or select a timer to cancel), move to the Timer NO
field, press VOL
appropriate timer (1 through to 8) and then press OK.
5. Press CH▼ to move to the Timer Mode field.
or VOLf to move to the timer number list, press CH▼ or CH▲ to choose the
e
6. Press VOL
highlighted. (Select Off if you are cancelling the timer. Then press OK and ignore the rest of this
procedure.)
7. Press CH▼ to move to the Wakeup Mode field.
8. If you want to change the wakeup mode, press VOL
Channel or Message—is highlighted.
If you choose Message, the message will appear on your screen at time and date you specify.
9. Press CH▼ to move to the Wakeup Channel or Wakeup Message field. (The field name varies
according to the wakeup mode you chose.)
10. If you want to change the wakeup channel or message, press VOL
selection.
11. Press CH▼ to move to the Wakeup Date field.
12. If you want to change the wakeup date, press VOL
calendar. Use the arrow keys on the remote control to select the date.
13. Press CH▼ to move to the On Time field.
14. If you want to change the wakeup time, enter the correct digits of the time using the number
keys on the remote control.
or VOLf until the timer mode you want—Off, Once, Daily, Weekly or Yearly—is
e
or VOLf until the mode you want—
e
or VOLf and make your
e
or VOLf to display an on-screen
e
15. Press CH▼ to move to the Duration field. (This field is not available if you chose Message as the
wakeup mode.)
16. If you want to change how long the channel is to stay on, enter the duration of the time using
the number keys on the remote control.
17. Press OK to save the timer settings.
18. To add another timer, repeat from step 4.
19. Press EXIT twice to return to normal viewing.
Setting or cancelling a timer from the Configuration menu
1. Press MENU on the remote control. The Digital TV menu appears.
2. Press OK. The first item in the sub-menu—Channel Manager—is highlighted.
3. Press CH▼ until Configuration is highlighted, and then press OK. The Configuration menu
appears.
39

4. Press CH▼ or CH▲ until Wakeup Timer is highlighted and then press OK. The Wakeup Timer
screen appears.
If you have already set a timer, the next available timer is shown.
5. Follow steps 4 to 18 in the previous procedure (“Setting or cancelling a timer from the EPG”).
6. When you have finished setting timers, press EXIT to return to normal viewing.
Setting or cancelling a timer from the remote control
1. Press TIMER on the remote control. The Wakeup Timer screen appears.
2. Follow steps 4 to 18 in the procedure titled “Setting or cancelling a timer from the EPG” starting
on page 38.
3. When you have finished setting timers, press EXIT to return to normal viewing.
40

Movies, Music & Photos
You can use the to play movies and music, and show photos, from files stored on a USB
memory stick. The allowable formats are MPG, DAT, VOB and AVI (for movies), MP3 and WAV (for
music) and JPEG (for photos or other graphics saved in JPEG format).
Before you begin, transfer the files you want to play or show to a USB memory stick.
NOTE: A USB memory stick is not supplied with the
.
Playing movies
1. Insert the USB memory stick into the USB port on the front of the .
2. Press MENU on the remote control. The Digital TV menu appears.
3. Press CH▼ to highlight the movie icon and then press OK. The Movie window appears, showing
a representation of your memory stick.
4. Go to the folder on the memory stick that contains the movie you want to play:
• Press OK to open the memory stick or to open a selected folder.
• Press CH▼ or CH▲ to step through the folders or files.
• Press MENU to go back up a level, to the parent folder.
5. When you find the folder, click OK to open it and then press CH▼ or CH▲ until the movie file
you want to play is highlighted.
6. Press OK or
While the movie is playing:
• Press VOL
• Press ZOOM to activate the zoom function, where you can zoom in by pressing PAGE
zoom out by pressing PAGE
on the remote control.)
• Press MENU or
• Press
• Press
to start the movie.
or VOLf to decrease or increase the volume.
e
. (Return to normal magnification by pressing the red button
to stop the movie.
to pause the movie.
to start playing the movie (or to resume a paused movie).
41
or
• Press SLOW once to slow down the movie to half speed; press it again to slow it to quarter
speed, and press it again to resume normal speed.
• Press
• Press
• Press
• Press
• Press MENU to stop playing and return to your file list.
NOTE: When one movie finishes, the next movie file in the same folder will begin playing
(providing it is of the right format).
to fast forward the movie. Repeatedly press the button to increase the speed.
to quickly rewind the movie. Repeatedly press the button to increase the speed.
to return to the beginning of the movie. The movie starts playing again.
to end the movie (and start playing the next movie if there is one in the folder).
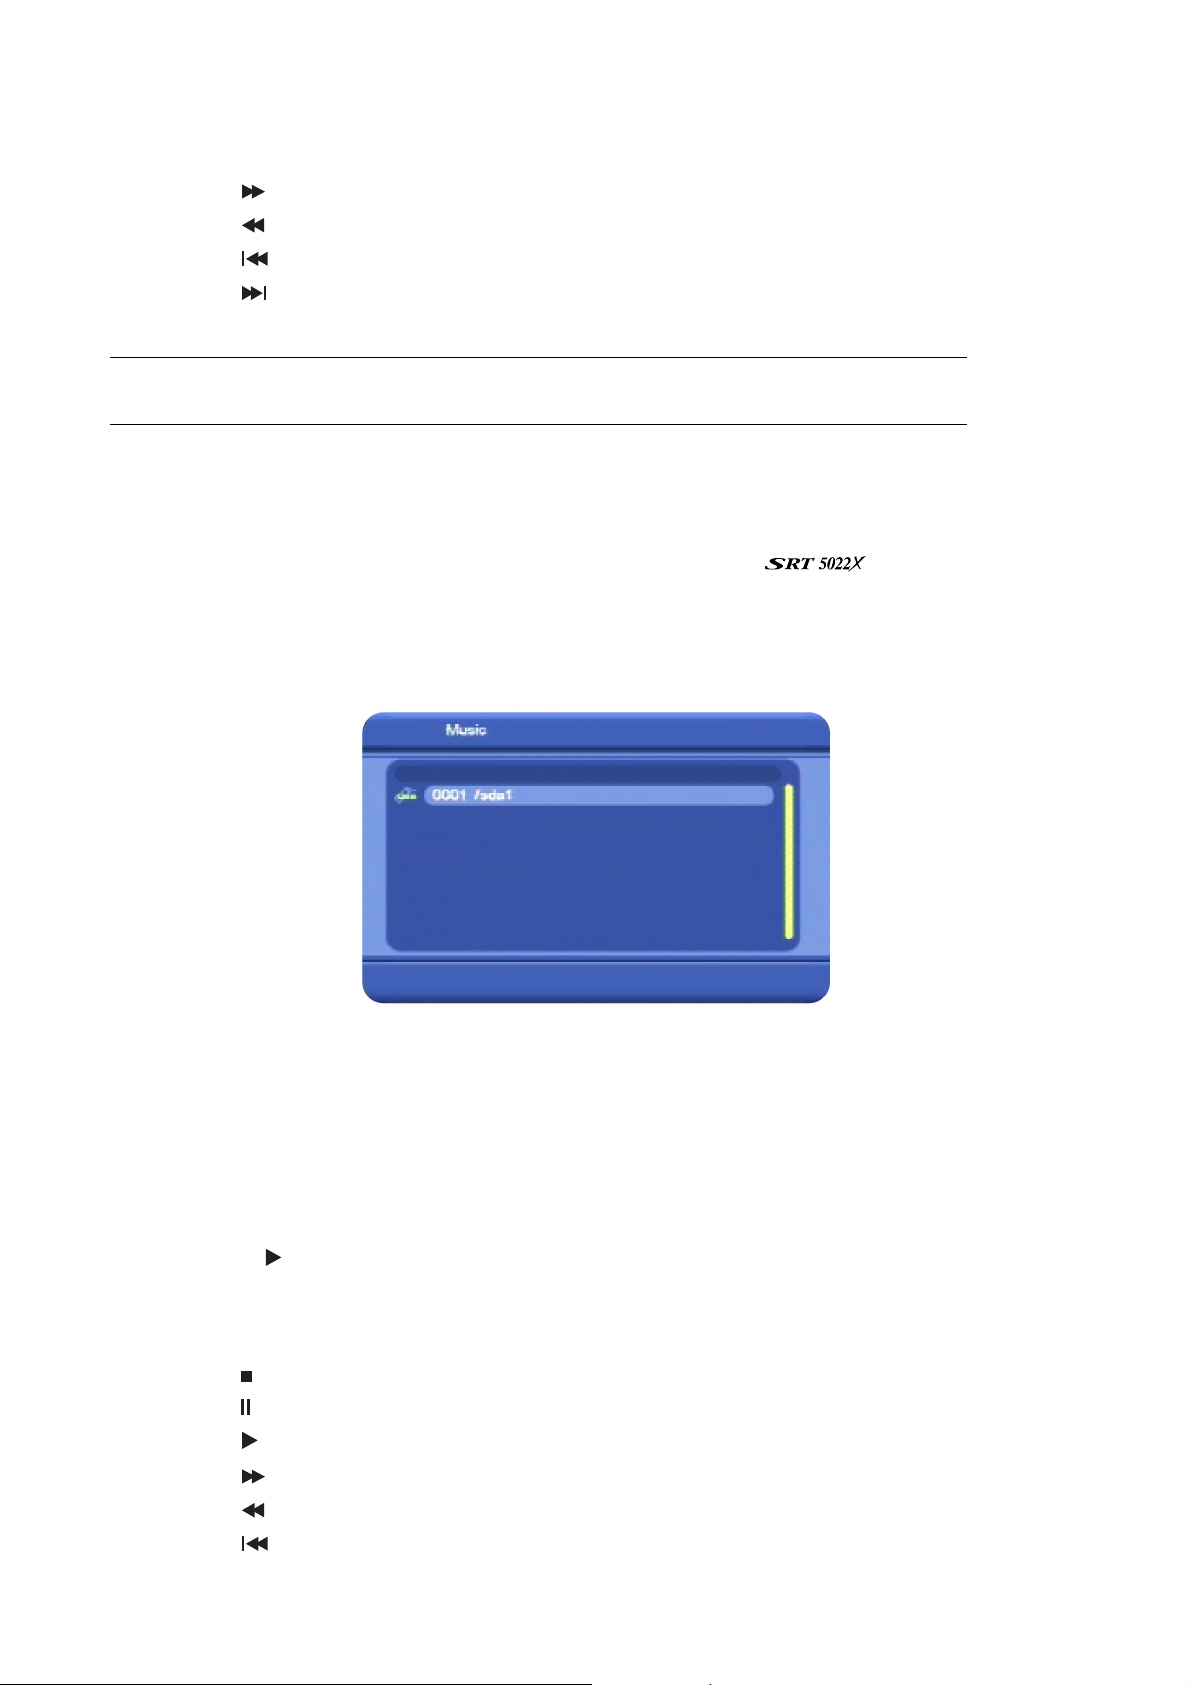
Playing music
1. Insert the USB memory stick into the USB port on the front of the .
2. Press MENU on the remote control. The Digital TV menu appears.
3. Press CH▼ twice to highlight the music icon and then press OK. The Music window appears,
showing a representation of your memory stick.
4. Go to the folder on the memory stick that contains the music file you want to play:
• Press OK to open the memory stick or to open a selected folder.
• Press CH▼ or CH▲ to step through the folders or files.
• Press MENU to go back up a level, to the parent folder.
5. When you find the folder, click OK to open it and then press CH▼ or CH▲ until the music file you
want to play is highlighted.
6. Press OK or
While music is playing:
• Press VOL
• Press to stop the track.
• Press
• Press to start playing the track (or to resume playing a paused track).
• Press
• Press
• Press
to start playing the music file.
or VOLf to decrease or increase the volume.
e
to pause the track.
to fast forward the track. Repeatedly press the button to increase the speed.
to quickly rewind the track. Repeatedly press the button to increase the speed.
to return to the beginning of the track. It starts playing again.
42

• Press
• Press MENU to stop playing and return to your file list.
NOTE: When one piece of music finishes, the next music file in the same folder will begin
playing (providing it is of an allowable format).
to end the track (and start playing the next track if there is one in the folder).
Showing photos
1. Insert the USB memory stick into the USB port on the front of the .
2. Press MENU on the remote control. The Digital TV menu appears.
3. Press CH▼ or CH▲ until the photo icon is highlighted and then press OK. The Photo window
appears, showing a representation of your memory stick.
4. Go to the folder on the memory stick that contains the photos you want to show:
• Press OK to open the memory stick or to open a selected folder.
• Press CH▼ or CH▲ to step through the folders or files.
• Press MENU to go back up a level, to the parent folder.
5. When you find the folder, click OK to open it and then press CH▼ or CH▲ until the first photo
you want to show is highlighted.
6. Press OK or
While a photo is showing:
• Press VOL
• Press CH▼ to flip the photo vertically.
• Press CH▲ to flip the photo horizontally.
• Press
• Press
• Press OK to begin a slide show. The remaining photos in the same folder will automatically
appear one after the other.
• Press ZOOM to activate the zoom function, where you can zoom in by pressing PAGE
zoom out by pressing PAGE . (Return to normal magnification by pressing the red button
on the remote control.)
• Press MENU or
• Press EXIT to return to TV viewing.
to view the selected photo on your TV screen.
or VOLfto rotate the photo 90 degrees left or right respectively.
e
to show the next photo.
to show the previous photo.
to close the photo and return to your file list.
or
43

Games
The enables you to play three popular games on your TV screen:
• Box Man
• Tetris
• Hit Rat
To select a game to play:
1. Press MENU on the remote control.
2. Press CH▼ or CH▲ until the games icon is highlighted. (This is the last icon on the main menu.)
3. Press OK twice. The games list appears.
4. If necessary, press CH▼ or CH▲ to select the game you want to play and then press OK.
Box Man
The goal of Box Man is to push each red box onto a square that has a yellow cross.
1. Press OK to start a game.
2. Use the arrow keys on the remote to position Box Man behind a box and to push the box. Aim
for squares marked with a yellow cross. Be wary of pushing a box into a corner where it cannot
be manoeuvred any further.
3. To cancel a game, press OK and then select Exit Game.
44

Tetris
The goal of Tetris is to orient a series of falling blocks so as to maximise the number of blocks that
can fit into a well. The game is over when the height of all the blocks matches the depth of the well.
Your score is the number of individual blocks you can fit into the well.
1. Press OK to start a game.
2. As the blocks drop, you can move them horizontally by pressing VOL
rotate a falling block by pressing CH▲ and speed up the fall of a block by pressing CH▼. To
help you determine how best to place the block that is currently falling, a preview of the next
block to fall is shown in the pane at the right of the screen. Press OK to pause the game and OK
again to resume.
or VOLf. You can also
e
3. To cancel a game, press OK, select Main Manu and then select Exit Game.
Hit Rat
The goal of Hit Rat is to score points by pressing a remote control key when the rat is over one of the
yellow dots. The nine yellow dots represent the numeric keys on the remote control (1–9). Press the
corresponding numeric key when the rat moves over a yellow dot.
1. Press OK to start a game.
2. To score points, press the corresponding numeric key when the rat moves over a yellow dot.
3. To cancel a game, press OK, select Main Manu and then select Exit Game.
45

System Maintenance
You can upgrade the software in your as new versions become available. Information
about the current version (and information about the hardware) is available from the menu to help
you determine if you need to upgrade. This information might also be useful if you need to obtain
technical support from Strong Technologies.
You can also reset the
, by re-instating the settings it had when it left the factory.
System information
To display system information about your , such as the software version, hardware
version and so on:
1. Press MENU on the remote control and then press OK.
2. Press CH▼ or CH▲ until Version is highlighted and then press OK.
The Version window appears.
3. Press EXIT to return to normal viewing.
Software upgrades
If a new version of the software becomes available, you can download the software to
your PC and then transfer it to your
Technologies website for announcements of software upgrades and instructions on how to obtain
an upgrade.
1. Once you have obtained an upgrade, copy it to a USB memory stick.
2. Place the USB memory stick in the USB port on the front of the
3. Press MENU on the remote control. The Digital TV menu appears.
4. Press OK. The first item in the sub-menu—Channel Manager—is highlighted.
5. Press CH▼ until Software Upgrade is highlighted, and then press OK. The Software Upgrade
menu appears.
6. Press CH▼ until Download from USB is highlighted, and then press OK. The USB Upgrade window
appears. A representation of the folders and files on the memory stick appears.
via a USB memory stick. Watch the Strong
.
46

7. Locate the software upgrade file. (Press CH▼ or CH▲ to navigate down or up through the
folders. Press OK to open a folder, or press EXIT to return to the parent folder.)
8. With the software upgrade file highlighted, press OK.
When the upgrade is finished, the
that all previous data stored on your
TIP: You can also upgrade using the RS-232C port on the back of the
will restart. Remove the USB memory stick. Note
will have been deleted.
. The
Strong Technologies website will have instructions on how to do this.
Clearing and resetting data
WARNING: This procedure returns the to its default factory settings. All data
(such as time and date, channels, stations and timers) will be lost.
1. Press MENU on the remote control and then press OK.
2. Press CH▼ or CH▲ until Factory Default is highlighted and then press OK.
3. A warning message appears asking you to confirm that you want to return the
default settings. To continue, press VOL
You will need to rescan in order to view channels or listen to radio stations.
or VOLf and then OK; otherwise press OK to cancel.
e
to its
47

Troubleshooting
There may be a number of causes of abnormal operation. Occasionally receivers can hang (just as
a PC will do from time to time). In this case, you should reset the receiver by disconnecting if from
mains power, waiting 30 seconds and then reconnecting it to mains power. If the unit is still not
operating correctly, refer to the following table for the indicated problem and likely solution.
Symptoms Possible causes Solution
AC power cord is not connected Check that the power cord is
Indicators on front
panel do not light up
plugged into the wall socket.
Make sure the power switch is on.
No picture and sound
Picture and/or audio
glitch
No sound
The cables connecting the TV and
the receiver are not properly
connected
The TV mode is not correct Check that the correct video or AV
Insufficient signal strength Check that the antenna cable is
Electrical interference Check that all antenna cabling is
The receiver or TV is in mute mode Press the MUTE button on the
Initial volume level has not been
set on your TV
Batteries not inserted Insert batteries
Make sure that the correct cable is
connected between the TV and the
receiver, and that the antenna is
connected.
input has been selected on your TV.
securely plugged in and that the
signal is adequate.
quad-shielded.
receiver and on the TV.
Select the desired TV volume level
using the TV remote control.
Batteries are flat Change the batteries in the remote
Remote control is not
working
Remote control is outside the
range of operation
Movie, music or photo
files on a USB memory
stick don’t appear
For Technical Assistance: Please call our Technical Support Help Line on 1 800 820 030
For General Enquiries: Please email us at techau@strong-technologies.com
Product Return Tracking: If you need to send your receiver to Strong Technologies for repair or
Files are not of the right format. Check that the formats are those
evaluation, please keep a record of the unit’s serial number. This will
ensure ease of tracking and identification on your behalf.
48
control.
Aim the remote control directly at
the receiver.
that can be read by the
.

Specifications
Input Connector Antenna IEC 169-2 Female
Output Connector – RF Loop Out IEC 162-2 Male
Frequency range 176MHz–860MHz
Input impedance 75Ω
Tuner
& Channel Decoder
MPEG Transport
Stream
Video Decoding
Audio Decoding
Main System
Audio & Video
In/Out
Signal level –65 to –25 dBm
IF bandwidth 6/7/8 MHz
Waveform OFDM
Carrier Mode 2k and 8k hierarchical/non hierarchical
Code Rate 1/2, 2/3, 3/4, 5/6, 7/8
Guard Interval 1/4, 1/8, 1/16, 1/32
Standard MPEG-2 ISO/IEC 13818-1
Rate Up to 15 Mbps
Profile Level MPEG-2 MP@ML
Input Rate Max 15 Mbps
Aspect Ratio 4:3, 16:9 Pan & Scan, Letter Box
Video Resolution 720 x 576, 720 x 480
Standard MPEG Layer 1,2
Sampling Rate 32, 44.1, 48KHz
Channels Single, Dual Mono, Stereo, Joint Stereo
Main Processor SPHE1002
Memory
Video Component Y / Pb / Pr Component YUV
Video SVHS 4-pin Din Connector
Video Composite RCA/Cinch, Video Output (CVBS)
USB USB 2.0
Flash Memory: 1MByte; SDRAM: 8MByte
49

STRONG TECHNOLOGIES PTY LTD.
60 WEDGEWOOD ROAD, HALLAM, VICTORIA 3803
PH: +61 3 8795 7990 FAX: +61 3 8795 7991
TECHNICAL SUPPORT: 1 800 820 030
STRONG & CO. (FAR EAST), LTD.
P. O. BOX 85, YOKOHAMA, KANAGAWA-KEN
JAPAN 231-91
www.strong-technologies.com
Email: techau@strong-technologies.com
FAX: +81 45 651-1842
© Strong Technologies Pty Ltd., 2008
 Loading...