

Street Guardian SG9665GM User Manual


2
Contents
Product safety & Precautions Pages 3-4
Camera layout & overview Pages 5-7
Description of button functions Pages 8-12
Function description Pages 13-17
Installing the DVR Pages 18-19
Menu options & defaults Pages 20-21
Technical specifications Page 22

3
Product safety & precautions
Thank you for purchasing the Street Guardian SG9665GM
digital video recorder, please read and follow the user
manual to obtain the best performance and reliability from
your product.
The camera is designed to operate at temperatures
between -10c to +60c, operating outside of these
temperatures may produce unpredictable results and
should be avoided.
Clean only with a soft dry cloth, being careful not to use
excessive pressure when cleaning the lens, the use of
liquids or cleaning fluids may damage the product and void
your warranty.
The DVR records video in full high definition 1080P/30fps
at 15Mbit/sec, a large amount of data is generated for the
video recording function. To prevent recording problems it
is recommended to use a good quality high speed Class 10
Micro SD card with a maximum capacity of 32 GB.
The DVR does not support hot plugging of the Micro SD
memory card. Be sure to remove or replace the Micro SD
card only while the recorder is powered off or the memory
card may be damaged.

4
There are no user serviceable parts in this product.
Unauthorised attempts to dismantle or repair this product
will void the warranty.
Please ensure that you install and use this product in
accordance with all local laws.
An electronic copy of this user manual and any updates are
available for download from www.streetguardian.info

5
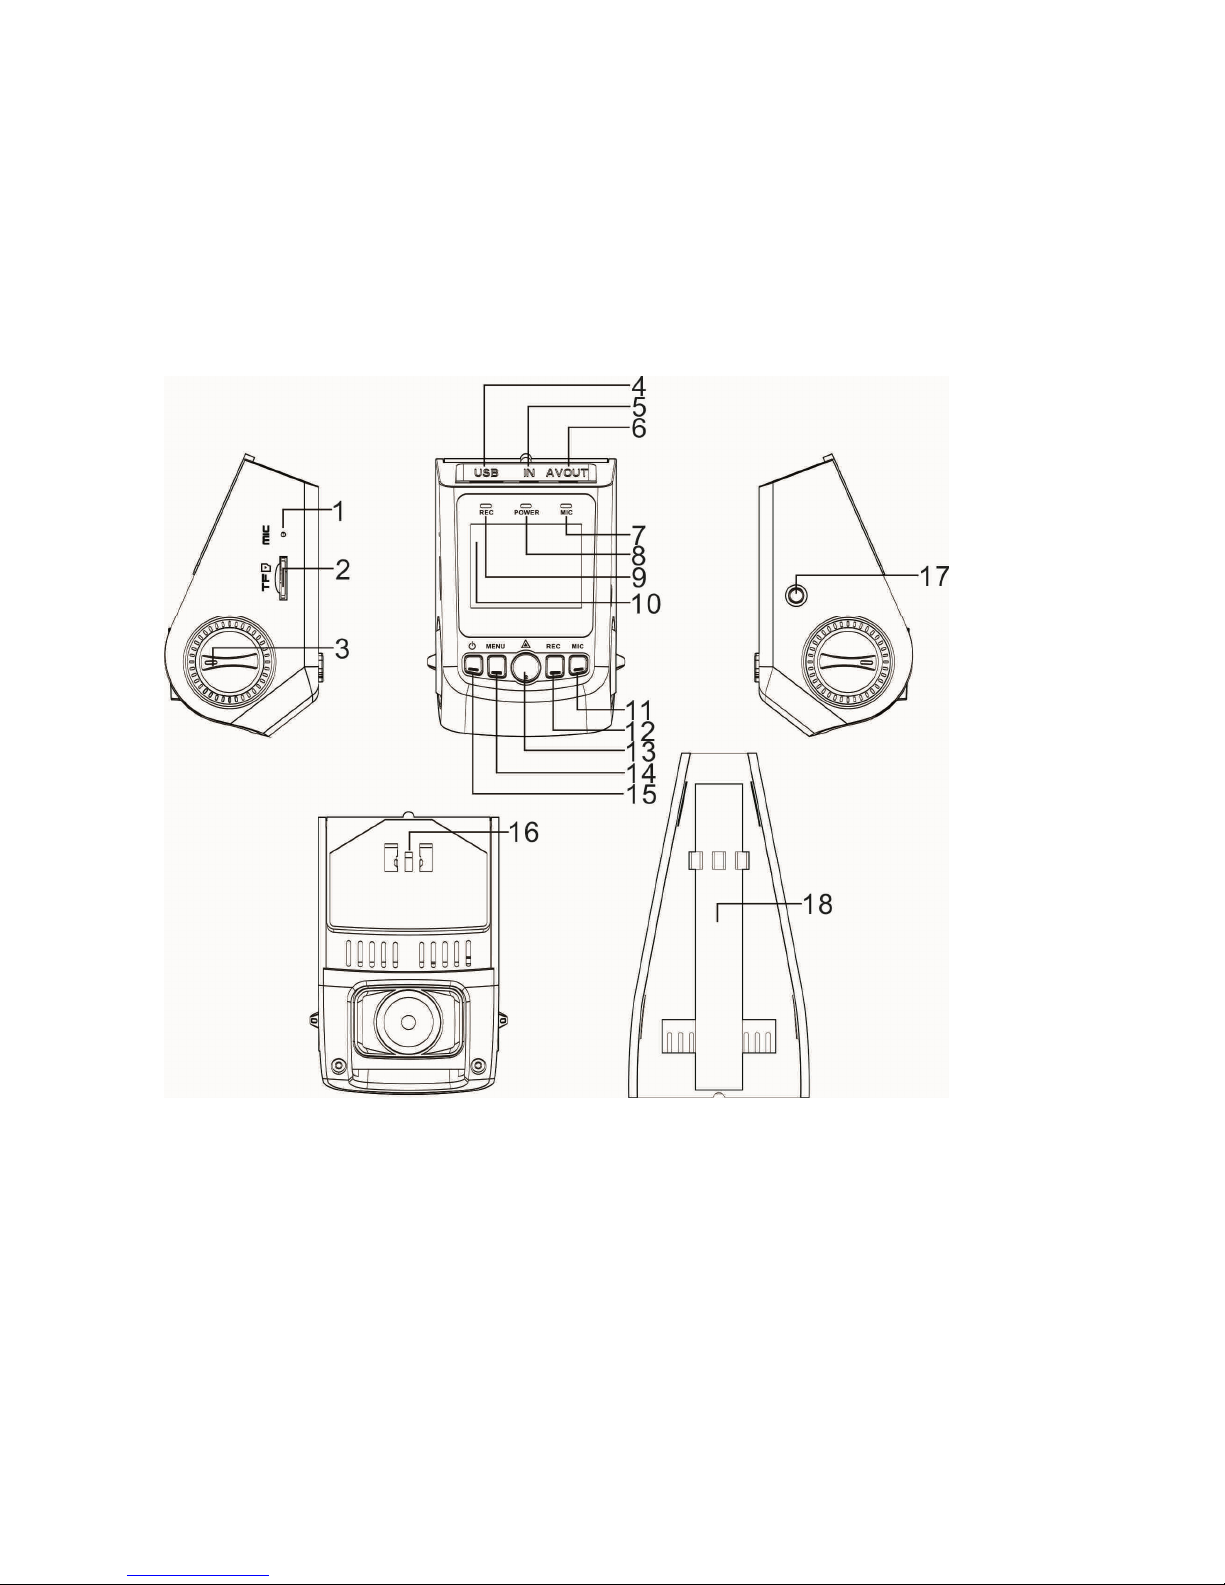
Camera layout & overview
6

7
1. Microphone 2. Micro SD card slot
3. Lens adjustment 4. USB power and data port
5. GPS input (optional, not included) 6. AV output
7. MIC indicator 8. Power indicator
9. REC indicator 10. LCD display screen
11. <MIC> button 12. <REC> button
13. <OK> button 14. <Menu> button
15. <Power> button 16. Mount pedestal
17. Reset button 18. Cable cover

8
Description of Button Functions
The buttons have different functions depending on the
current state, recording, standby or playback
1. <Power> Button
Function 1: Power on/off
When powered off, press the <Power> button to power on
the DVR. The DVR begins to work automatically.
When powered on, press and hold the <Power> button for
five seconds, the DVR will save the video recording file
automatically and will then power off.
Function 2: Backlight
When powered on a short press of the <Power> button
disables the backlight of the screen, press any button to
resume the backlight of the screen
[Note] This function only affects backlight of the screen, it
will not affect the video recording function.
 Loading...