

Streamline 300GPD-F Installation Instructions Manual
Inlet Connection
RO Inlet Connection
Pure Water Connection
Waste Water Connection
300GPD-F RO FILTRATION SYSTEM
This 300 GPD filtration system is very efficient at reducing water hardness and is simple to install and
maintain.
It is the installer’s responsibility to ensure that this appliance is plumbed in accordance with local authority’s
bye-law regulations.
INSTALLATION INSTRUCTIONS
Unscrew the three vertical filter bowls and remove the wrapping from the cartridges and reassemble.
A filter spanner is included in the kit for loosening the filter bowls. Do not over tighten filter bowls
when re-assembling.
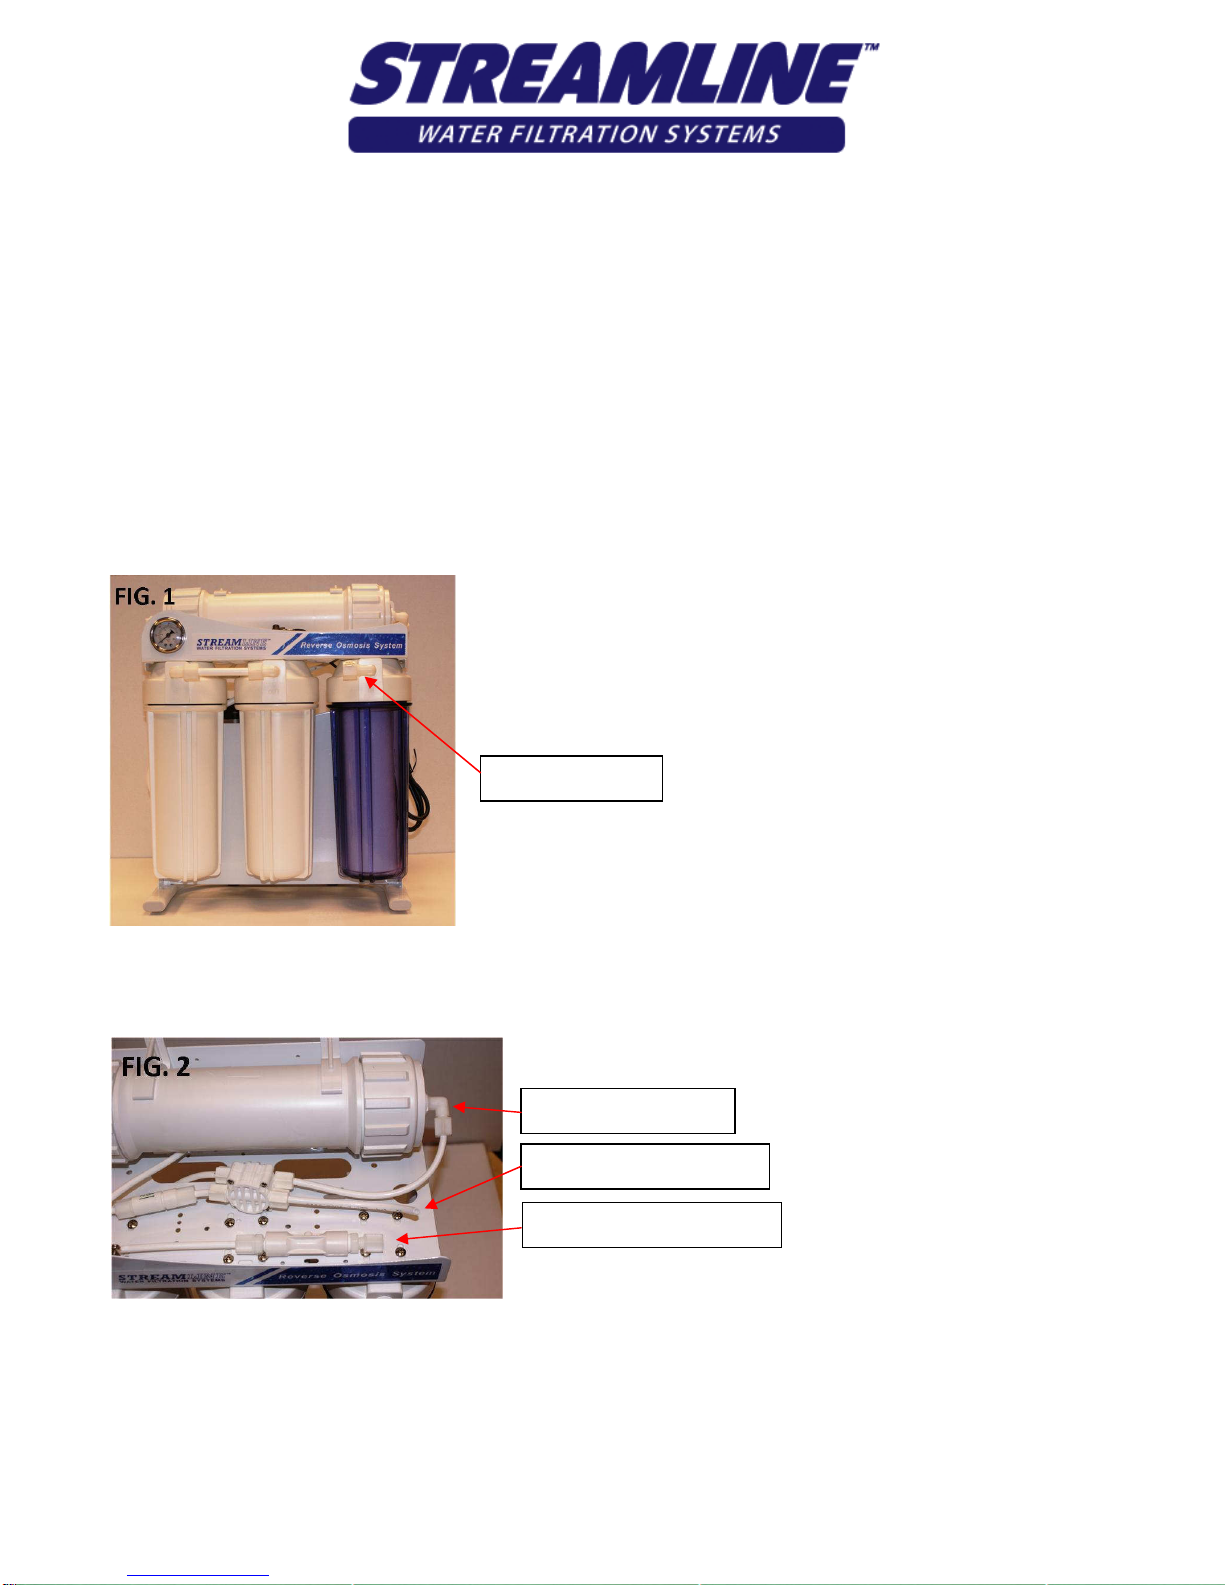
The white nylon hosetail elbow (optional kit- part no. KIT01302)
allows you to connect standard 1/2” (12mm) hose to the INLET of
the third vertical filter housing. Remove the existing elbow and
simply screw this fitting into the filter. Connect the water supply
hose to this fitting and tighten it on with a jubilee clamp. Connect
the inlet hose to the mains water
supply.(See Fig 1)
Alternatively a Hozelock type connection kit can be purchased to simplify the hose connection. (part
no. KIT 01300 Brass fittings kit or KIT01301 Nylon fittings kit)
Cut and connect a suitable length of ¼” tube to the waste
water connection which is marked
DRAIN. This tube is the waste water
tube and must discharge into the
nearest suitable drain. Cut and
connect a suitable length of ¼”
tube to the joiner from the kit and connect to the white tube
coming from the shut off valve. This must discharge into the
main pure water collection tank. (See Fig 2)
Page 1 of 3
Fit Plug in here
RO Plug
Temporarily remove the small white tube on inlet connection of the RO housing filter housing(See Fig
2), and turn the water supply on, allowing the water to flush through the first three vertical filters for
2-3 minutes, until all visible impurities have disappeared. Turn the water supply off.
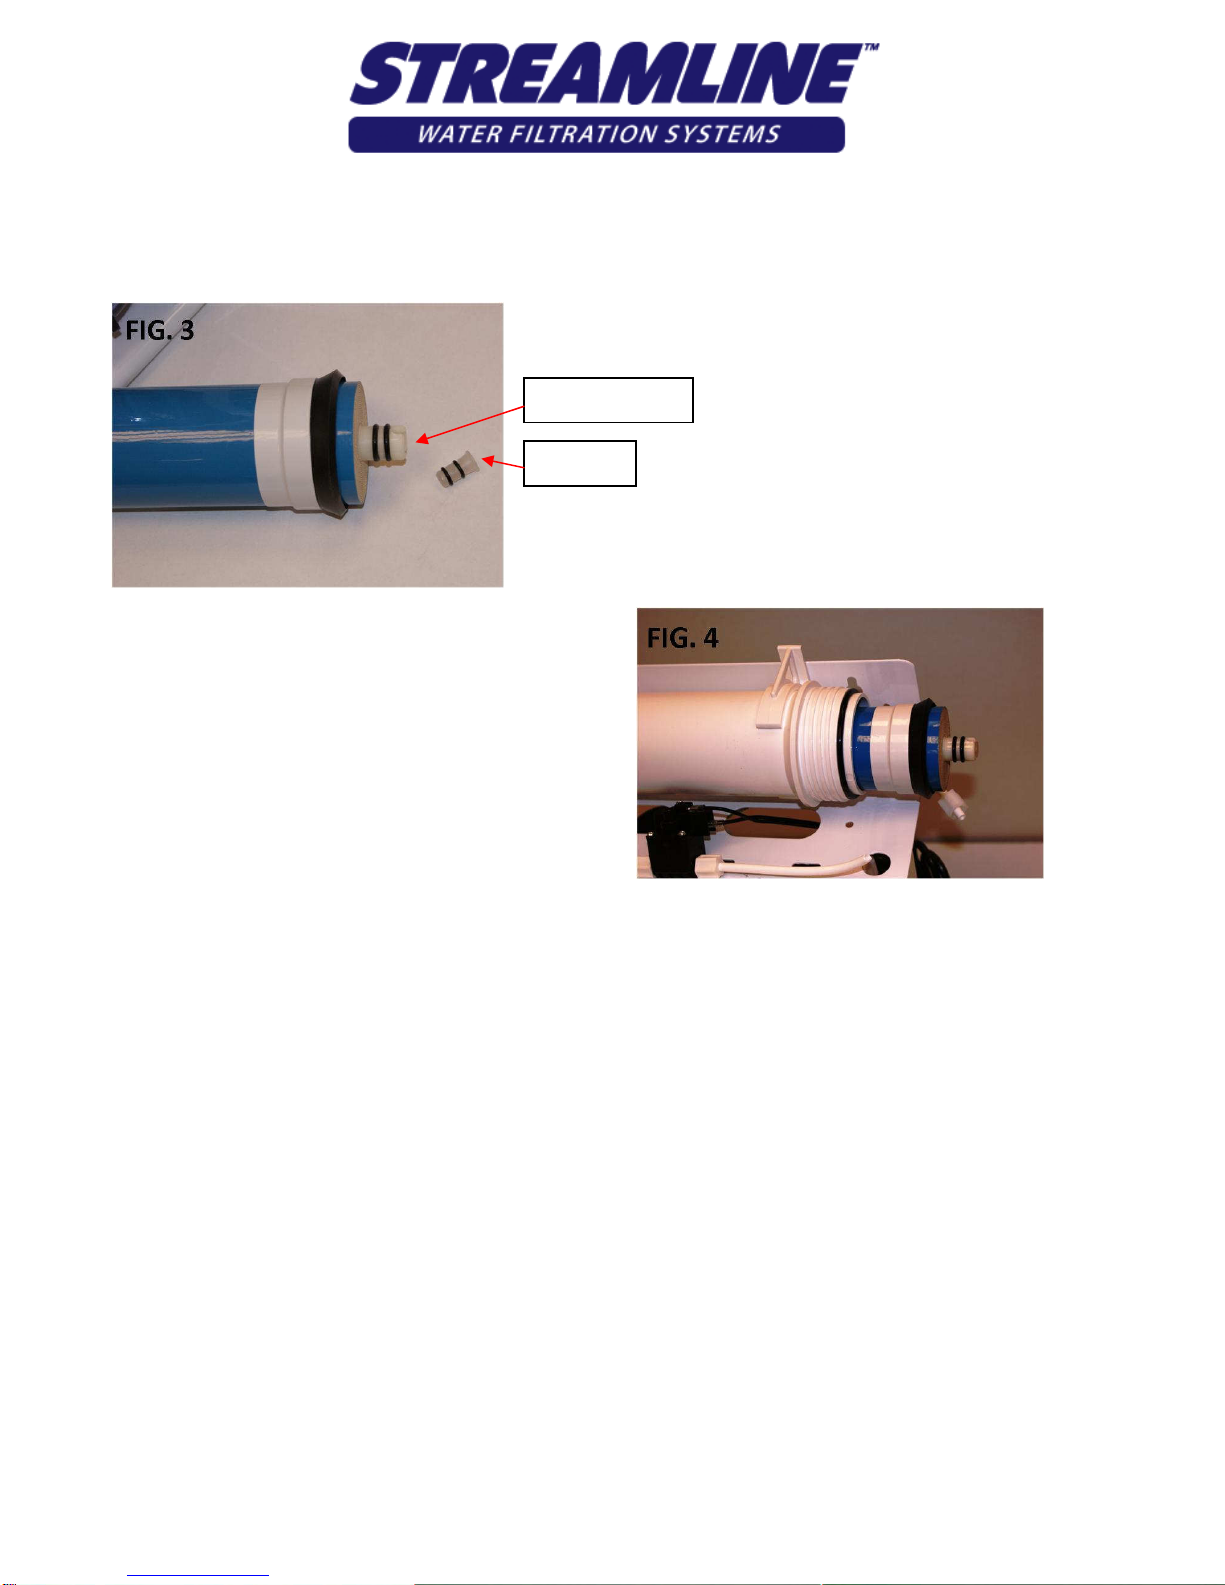
Identify the small RO plug which is packaged in the RO
membrane bag. VERY IMPORTANT - Insert this plug into the
notched side of the centre white tube of
the membrane. (See Fig 3) Remove the
white cap on the right hand side of the
horizontal RO housing and insert the blue RO
membrane with the large black rubber seal towards the
open end of the housing. (Fig 4) Screw the end cap of the
membrane housing in place and refit the inlet tube.
Turn the water supply on, and test the system for
leaks. (Allow the system to run for approx. 15 – 20
minutes for the TDS reading to drop to a realistic
figure.)
MAINTENANCE
Replace the three vertical pre filters every 3 months, or sooner in very hard water areas. (300PPM +)
OPTIONAL EXTRAS
• Pre R.O. Softening Filter, for use in hard water areas to bring TDS readings down and enhance
R.O. Membrane life. (Part No. FH1K plus fittings)
• Male Hozelock type fittings kit. (Part No. KIT01300 brass fittings kit or KIT01301 nylon fittings
kit)
• Post RO resin filter to produce 000ppm from the 300GPD system. (Part No. FH1D plus fittings)
Page 2 of 3
 Loading...