

Page 1
en 3,5 heure environ, en fonction de votre raccordement
électrique USB.
REMARQUE : La durée de chargement d’3,5 heure part
de l’hypothèse d’une puissance de 1000 mA pour un
chargeur CA/USB. (La plupart des ports d’alimentation
USB s’inscrivent entre 100 et 500 mA.)
Notification de temps de marche
La Bandit® Pro possède une notification de fin de temps
de marche de manière à ne pas rester dans l’obscurité
et à savoir qu’il faut charger la pile. Lorsqu’il reste
approximativement 5 minutes de temps de marche, la
lumière clignotera trois fois et restera allumée pendant
30 secondes, puis clignotera encore trois fois et restera
allumée pendant 30 secondes. Cette séquence continuera
jusqu’à ce que la lumière s’éteigne.
Fixation de sangle frontale
Maintenez la lumière avec le dos dirigé vers vous.
Faites glisser la sangle dans l’ouverture de fente étroite
sur un côté de la lumière et enfilez-la sous les deux
oreilles de retenue. Positionnez la sangle à plat sur le dos
de la lampe frontale et enfilez la sangle dans le deuxième
jeu d’oreilles de retenue.
Pour retirer la sangle frontale, faites glisser la sangle
en remontant derrière une oreille de retenue, et faites
ressortir la sangle à travers l’ouverture en fente.
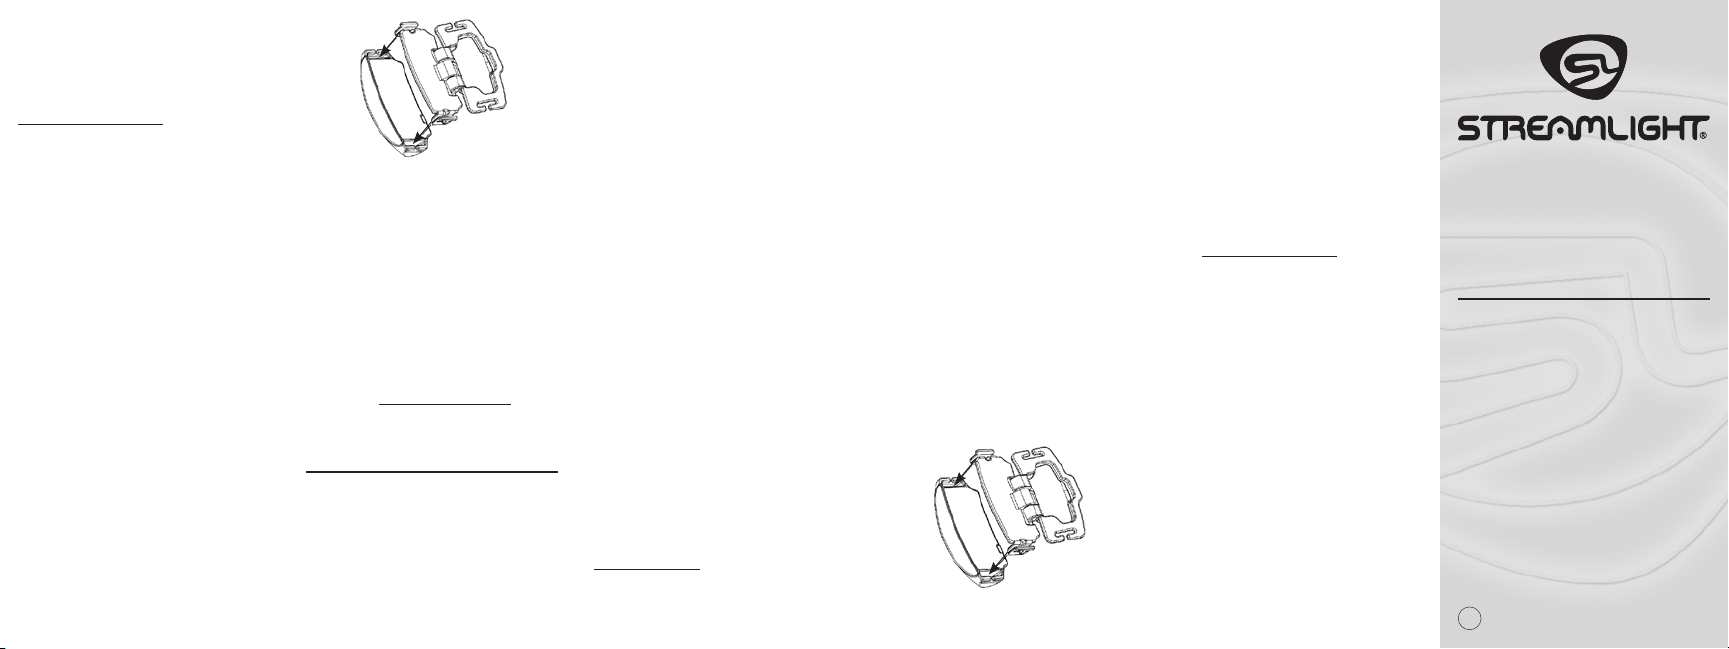
Adaptateur de clip de casque Fixation sur la lampe
Pour fixer le clip de casque sur la lampe frontale, retirez
la sangle frontale. Maintenez le clip de casque de sorte
que la charnière se trouve dans le bas et ouvrez-le
complètement. Positionnez la plaque à enclencher de
sorte que la charnière se trouve dans le bas de lampe
frontale et que les deux clips en U s’alignent avec les
fentes sur le dos de la lampe frontale. Faites glisser
les clips dans les fentes.
Avec les pouces, appuyez sur les deux clips vers
l’intérieur puis versl’extérieur de la lampe frontale
pour verrouiller les loquets en place. Un clic sonore
se fera entendre.
Pour retirer l’adaptateur de clip de casque, détachez
le clip de chaque loquet. À l’aide de votre ongle, tirez
chaque loquet vers le centre de la lampe. Faites glisser
le loquet hors de sa douille.
Garantie Streamlight
Streamlight garantit que sa pile lithium-polymère
non-remplaçable 950 ma Bandit® Pro (valeur nominale
300-400 déchargements) sera dépourvue de défauts
de fabrication dans le cadre d’une utilisation normale
pendant 24 mois suivant achat. Au cours de la période
de garantie, à sa seule discrétion, Streamlight réparera
ou remplacera toute pièce ou produit défectueux. LES
PRÉSENTES SONT LA SEULE GARANTIE, EXPRESSE
OU IMPLICITE, Y COMPRIS TOUTE GARANTIE DE
QUALITÉ COMMERCIALE OU D’ADAPTATION À UN
USAGE PARTICULIER. TOUS DOMMAGES INDIRECTS,
IMMATÉRIELS OU SPÉCIAUX FONT L’OBJET D’UNE
EXONÉRATION DE RESPONSABILITÉ EXPRESSE, SAUF
EN CAS DE LIMITATION INTERDITE PAR LA LOI.
D’autres droits spécifiques peuvent s’avérer applicables
en fonction de la juridiction.
Consultez le site www.streamlight.com/support pour
obtenir un exemplaire complet de la garantie, ainsi que
des informations sur l’enregistrement du produit et les
adresses des centres de services techniques agréés.
Pensez à vous munir de votre justificatif d’achat.
DEUTSCH
ALLGEMEINE BEDIENUNG
Wichtig!
a. Sie müssen die Batterie vor Gebrauch der Bandit
aufladen, um den im verpackten Zustand aktiven
„Probieren Sie mich aus“-Modus zu deaktivieren.
b. Nachdem die Taschenlampe aufgeladen
wurde, funktioniert sie wie unten unter
„Lichtfunktionen“ beschrieben.
Lichtfunktionen
Die Bandit® Pro hat einen Ein-/Ausschalter und zwei
Helligkeitsstufen, nämlich Abgeblendet/Hell und Aus.
Jeder Knopfdruck innerhalb von 1,5 Sekunden schaltet
zur nächsten Stufe oder aus. Wenn Sie zwischen dem
Drücken länger als zwei Sekunden warten, schaltet das
nächste Drücken das Licht aus.
Drücken Sie den Ein-/Ausknopf drei (3) Sekunden lang,
um in den Blitzmodus zu schalten. Drücken Sie den
Knopf noch einmal drei Sekunden lang, um wieder in den
Normalbetrieb mit Abgeblendet/Hell/Aus zu schalten.
Laden der Lithium-Polymer-Batterie von Streamlight
Zum Laden der Lithium-Polymer-Batterie schieben Sie
Ihren Fingernagel unter die USB-Abdeckung aus Gummi an
der Unterseite der Taschenlampe. Hebeln Sie sie ab, um die
Mikro-USB-Buchse freizulegen.
Stecken Sie das mitgelieferte Zuleitungskabel in die
Mikro-USB-Buchse an der Taschenlampe ein. Achten
Sie darauf, den Stecker richtig herum in die Buchse zu
stecken. Schließen Sie dann den Standard-USB-Stecker am
USB-Anschluss Ihres Computers oder an einem anderen
USB-fähigen Anschluss an.
HINWEIS: Das Taschenlampengehäuse ist ultraschallgeschweißt und die Batterie ist nicht auswechselbar.
LED-Ladeanzeige
Die Taschenlampe verfügt über Ladeanzeige-LEDs am Knopf:
- LED rot: Ladevorgang läuft
- LED grün: Ladevorgang abgeschlossen
Ladedauer
Die Taschenlampe hat einen digitalen Regler, der ein Überladen verhindert. Um voll aufgeladen zu sein braucht die
Batterie je nach USB-Stromversorgung etwa 3,5 Stunden.
HINWEIS: Die Ladedauer von 3,5 Stunden basiert auf
einem Ladestrom eines typischen Netzstrom-/USB-Ladegeräts von 1000 mA. (Die meisten USB-Stromanschlüsse
an Computern liefern 100 bis 500 mA.)
Betriebsdauermitteilung
Die Bandit® Pro informiert Sie, wenn die Betriebsdauer
zu Ende geht, damit Sie nicht plötzlich im Dunkeln stehen
und wissen, dass Sie die Batterie laden müssen. Wenn die
restliche Betriebsdauer auf etwa 5 Minuten abgesunken
ist, blinkt das Licht drei Mal und bleibt dann 30 Sekunden
lang an, wonach es erneut drei Mal blinkt und 30 Sekunden
lang an bleibt. Diese Abfolge wird fortgesetzt, bis das
Licht ausgeht.
Anbringen eines Stirnbefestigungsbands
Halten Sie die Taschenlampe so, dass die Rückseite zu
Ihnen zeigt. Schieben Sie das Stirnbefestigungsband in
den schmalen Schlitz auf einer Seite der Taschenlampe
und führen Sie es unter beiden Haltelaschen durch. Legen
Sie das Band flach über die Rückseite der Stirnlampe und
führen Sie das Band in den zweiten Haltelaschensatz ein.
Zum Entfernen des Stirnbefestigungsbands schieben Sie
das Band hinter einer Haltelasche nach oben und ziehen es
durch den Schlitz heraus.
Befestigen des Helmclipadapters an der Taschenlampe
Zum Befestigen des Helmclips an der Stirnlampe
entfernen Sie zunächst das Stirnbefestigungsband.
Halten Sie den Helmclip so, dass sich das Scharnier unten
befindet, und öffnen Sie es ganz. Positionieren sie die
Einschnappplatte so, dass sich das Scharnier an der Unterseite der Stirnlampe befindet und sich die zwei U-Clips
über den Aussparungen an der Rückseite der Stirnlampe
befinden. Schieben Sie die Clips in die Aussparungen.
Drücken Sie die zwei Clips mit Ihren Daumen hinein und
dann zur Außenseite der Stirnlampe hin, bis die Verriegelungen einrasten. Sie hören ein Klickgeräusch.
Zum Abnehmen des Helmclipadapters lösen Sie beide
Verriegelungen. Ziehen Sie sie dazu mit Ihrem Fingernagel
zur Mitte der Taschenlampe. Schieben Sie die Verriegelung aus ihrer Fassung.
Streamlights Garantie
Streamlight garantiert, dass die „nicht austauschbare
950mA-Lithium-Polymer-Batterie für 300 - 400
Entladevorgänge“ seiner Bandit® Pro bei normalem
Gebrauch nach dem Kauf 24 Monate lang frei von Verarbeitungsmängeln ist. Während des Garantiezeitraums
repariert oder ersetzt Streamlight alle mangelhaften Teile
oder Produkte nach alleinigem Ermessen. DIES IST DIE
EINZIGE AUSDRÜCKLICHE ODER IMPLIZITE GARANTIE
EINSCHLIESSLICH EINER ETWAIGEN GARANTIE DER
MARKTÜBLICHKEIT ODER EIGNUNG FÜR EINEN BESTIMMTEN ZWECK. ERSATZ FÜR BEILÄUFIGE SCHÄDEN
ODER FOLGESCHÄDEN UND BESONDERER SCHADENSERSATZ WERDEN AUSDRÜCKLICH AUSGESCHLOSSEN,
AUSSER IN LÄNDERN, IN DENEN EINE DERARTIGE
EINSCHRÄNKUNG GESETZLICH VERBOTEN IST. Je
nach Land könnten Sie andere bestimmte gesetzliche
Rechte haben.
Alle Garantieunterlagen sowie Informationen zur
Produktregistrierung und Vertragswerkstätten finden
Sie auf www.streamlight.com/support. Bewahren Sie
Ihren Einkaufsbeleg als Kaufnachweis auf.
997775 Rev. B 9/18
BC
BANDIT
®
PRO
Operating Instructions
Instrucciones de funcionamiento
Instructions d’utilisation
Bedienungsanleitung
Caution: LED Radiation (RG-2) -
Do not stare into beam.
May be harmful to eyes.
Precaución: Radiación de LED (RG-2) -
No mire directamente al haz.
Podría dañar su vista.
Attention : Rayonnement DEL (RG-2) -
Ne pas regarder dans le faisceau.
Susceptible d’endommager les yeux.
Achtung: LED-Strahlung (RG-2) -
Nicht direkt in den Lichtstrahl schauen.
Augenschädigung möglich.
Page 2
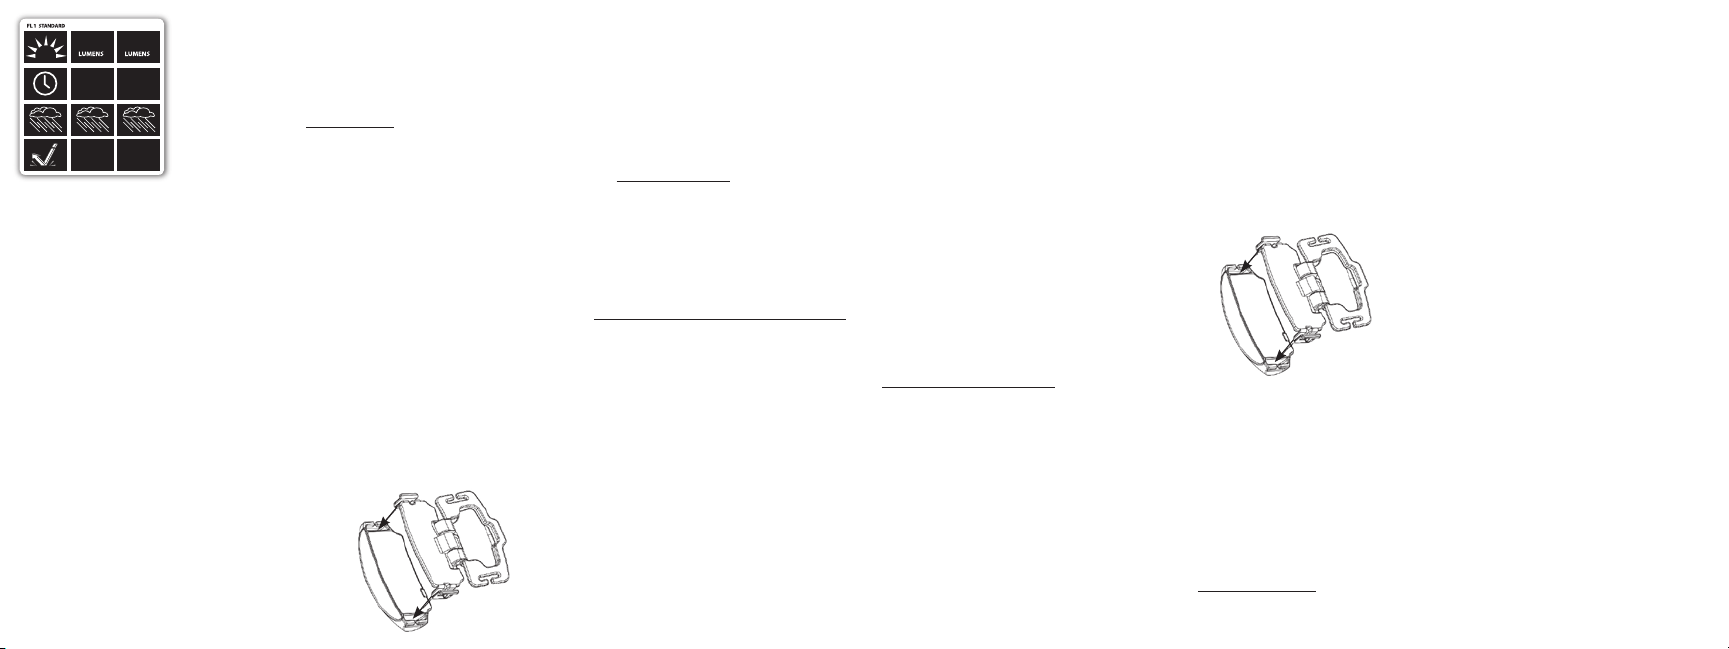
LOWHIGH
180 35
21h
4h 30min
2m 2m
ENGLISH
GENERAL OPERATION
Important!
a. You must charge the battery before using the Bandit
to disable the Packaged “Try Me Mode” functionality.
b. Once the light is charged, the light will function
as described below in Light Function.
Light Function
The Bandit® Pro features an on/off switch and two brightness
levels, Low/High and Off. Each press of the button within 1.5
seconds will step to the next level or off. Wait more than two
seconds between button presses and the next press will turn
the light off.
Press and hold the on/off button down for three (3) seconds to
access flash mode. Press and hold the button again for three
seconds to go back to normal low/high/off operation.
Charging the Streamlight Lithium Polymer Battery
To charge the lithium polymer battery slide your fingernail
under the rubber USB cover on the bottom of the light.
Peel it back to expose the Micro USB connector.
Using the supplied cord, plug the Micro USB connector into
the mating socket on the light. Be sure to align the connector
in the correct orientation to the socket. Then, plug the standard
USB connector into a USB port on your computer or other USB
accessible port.
NOTE: The lights case is ultrasonically sealed closed
and the battery is not replaceable.
Charge Indication LED
Light features charge indicator LEDs in the button:
- LED Red: Charging
- LED Green: Fully Charged
Charge Time
The light has a digital control circuit that prevents overcharge.
The battery fully recharges in approximately 3.5 hours,
depending on your USB power connection.
NOTE: The 3.5 hour charge time assumes 1000 mA output of
a typical AC/USB charger. (Most computer USB power ports
range from 100 to 500 mA.)
Run Time Notification
The Bandit® Pro has an end of run time notification, so you are
not left in the dark and know you need to charge the battery.
When there is approximately 5 minutes of run time remaining,
the light will blink three times and then stay on for 30 seconds,
then blink again three times and stay on for 30 seconds. It will
continue this sequence until the light turns off.
Head Strap Attachment
Hold the light with the back facing you. Slide the strap into
the narrow slot opening on one side of the light, and feed it
under both retaining ears. Position the strap flat across the
back of the headlamp, and feed the strap into the second set
of retaining ears.
To remove the head strap, slide the strap up behind one
retaining ear, and slip the strap out through the slot opening.
Hat Clip Adapter Attachment to the Light
To attach the hat clip to the headlamp, remove the head strap.
Hold the hat clip so the hinge is at the bottom, and open it fully.
Position the snap-in plate so the hinge is at the bottom of the
headlamp and the two U clips line up with the slots on the back
side of the headlamp. Slide the clips into the slots.
Using your thumbs, press the two clips in and then toward the
outside of the headlamp to lock the latches in place. You will
hear an audible click.
To remove the hat clip adapter, unclip each latch. Using your
fingernail, pull each latch in toward the center of the light.
Slide the latch out of its socket.
Streamlight’s Warranty
Streamlight warrants its Bandit® Pro “Non-replaceable 950ma
lithium polymer battery rated at 300-400 discharges” will be
free from manufacturing defects under normal use for 24
months after purchase. During the warranty period, at its sole
discretion, Streamlight will repair or replace any defective part
or product. THIS IS THE ONLY WARRANTY, EXPRESSED OR
IMPLIED, INCLUDING ANY WARRANTY OF MERCHANTABILITY OR FITNESS FOR A PARTICULAR PURPOSE. INCIDENTAL,
CONSEQUENTIAL OR SPECIAL DAMAGES ARE EXPRESSLY
DISCLAIMED EXCEPT WHERE SUCH LIMITATION IS PROHIBITED BY LAW. You may have other specific legal rights which
vary by jurisdiction.
Go to www.streamlight.com/support for a complete copy of
the warranty, and information on product registration and the
location of authorized service centers. Retain your receipt for
proof of purchase.
Customer Service
STREAMLIGHT, INC.
30 Eagleville Road, Suite 100
Eagleville, PA U.S.A. 19403-3996
Phone: (800) 523-7488 Toll-Free
Fax: (800) 220-7007
www.streamlight.com
ESPAÑOL
FUNCIONAMIENTO GENERAL
¡Importante!
a. Tiene que cargar la pila antes de usar la Bandit para
inhabilitar la función “de modo de prueba” incluida.
b. Una vez que la linterna se haya cargado,funcionará
del modo descrito a continuación en la función de
iluminación.
Funcionamiento de la linterna
La Bandit® Pro dispone de un interruptor de encendido y apagado y dos niveles de intensidad, Bajo/Alto y Apagado. Con cada
pulsación del botón en un intervalo de 1,5 segundos avanzará
al siguiente nivel o apagará la linterna. Si se espera más de dos
segundos entre las pulsaciones del botón, al pulsarlo de nuevo
se apagará la linterna.
Pulse y mantenga pulsado el botón de encendido/apagado
durante tres (3) segundos para acceder al modo flash. Pulse de
nuevo y mantenga pulsado el botón durante tres segundos para
regresar al funcionamiento normal Bajo/Alto/Apagado.
Carga de la pila de polímero de litio de Streamlight
Para cargar la pila de polímero de litio, deslice la uña del
dedo bajo la tapa USB de caucho en la base de la linterna.
Despéguela para dejar a la vista el micro conector USB.
Enchufe, con el cable que se proporciona, el micro conector
USB a la toma correspondiente situada en la linterna. Asegúrese
de alinear el conector en la orientación correcta con la toma.
A continuación, enchufe el conector USB estándar en un puerto
USB de su equipo o cualquier otro puerto con USB.
NOTA: La funda de la linterna está sellada mediante
ultrasonidos y la pila no puede sustituirse.
LED indicador de carga
La linterna cuenta con indicadores de carga LED en el botón:
- LED rojo: Cargando
- LED verde: Completamente cargado
Tiempo de carga
La linterna tiene un circuito de control digital que evita
que se sobrecargue. La pila se recarga por complete en
aproximadamente 3,5 horas, dependiente de la conexión de la
alimentación USB.
NOTA: El tiempo de carga de 3,5 horas asume la presencia
de un cargador típico de CA/USB con una potencia de 1,000
mAh. (La mayoría de los puertos de alimentación USB de los
ordenadores tienen una potencia que oscila entre 100
y 500 mAh.)
Notificación de tiempo de funcionamiento
®
La Bandit
Pro tiene una función de notificación de finalización
de tiempo de funcionamiento, para que no se quede a oscuras
y sepa cuándo tiene que cargar la pila. Cuando queden
aproximadamente 5 minutos de tiempo de funcionamiento,
la luz parpadeará tres veces y, a continuación, permanecerá
encendida durante 30 segundos, luego volverá a parpadear
tres veces y permanecerá encendida durante 30 segundos.
Seguirá esta secuencia hasta que la luz se apague.
Fijación de la cinta para la cabeza
Sostenga la linterna con la parte posterior orientada hacia
usted. Deslice la cinta en la abertura en forma de ranura
estrecha en un lateral de la linterna eintrodúzcala bajo las
espigas de retención. Coloque la cinta plana a lo largo de la
parte posterior del faro e introduzca la cinta en el segundo
conjunto de espigas de retención.
Para quitar la cinta de la cabeza, deslice la cinta hacia arriba
por detrás de un espiga de retención y extraiga la cinta a
través de la ranura.
Fijación de adaptador del broche de la gorra a la linterna
Para fijar el broche de la gorra al faro, retire la cinta de
la cabeza. Sostenga el broche de la gorra de manera que
la bisagra quede en la parte inferior y abra por completo.
Coloque la placa a presión de manera que la bisagra quede en
la parte inferior del faro y los dos clips en forma de U queden
alineados con las ranuras en la parte posterior del faro.
Deslice los clips por las ranuras.
Presione con los pulgares los dos clips hacia adentro y luego
hacia el exterior del faro para bloquear los cierres en su sitio.
Oirá un chasquido.
Para retirar el adaptador del broche de la gorra, abra cada uno
de los cierres. Tire de cada cierre con la uña hacia el centro de
la linterna. Deslice el cierre para extraerlo de su alojamiento.
Garantía de Streamlight
Streamlight garantiza que la “pila de polímero de litio de 950
mAh no reemplazable con una calificación de 300 a 400 descargas” del Bandit® Pro estará libre de defectos de manufacturación
bajo condiciones normales de uso durante 24 meses después de
la compra. Durante el periodo de garantía, a su sola discreción,
Streamlight reparará o sustituirá cualquier pieza o producto defectuoso. ESTA ES LA ÚNICA GARANTÍA, EXPRESA O IMPLÍCI-
TA, INCLUIDA CUALQUIER GARANTÍA DE COMERCIABILIDAD
E IDONEIDAD PARA UN FIN EN PARTICULAR. SE RECHAZAN
EXPRESAMENTE LOS DAÑOS FORTUITOS, CONSECUENTES O
ESPECIALES SALVO EN AQUELLOS LUGARES DONDE DICHA
LIMITACIÓN ESTÉ PROHIBIDA POR LA LEY. Podría tener otros
derechos legales específicos que varían según la jurisdicción.
Vaya a www.streamlight.com/support para obtener una copia
completa de la garantía e información sobre el registro del
producto y la ubicación de centros de servicio autorizados.
Conserve su recibo como prueba de compra.
FRANÇAIS
FONCTIONNEMENT GÉNÉRAL
Important !
a. Avant toute utilisation du Bandit, il est impératif de
charger la batterie afin de désactiver le mode essai
(« Try Me Mode »).
b. Une fois le chargement effectué, l’éclairage va
fonctionner comme indiqué plus bas dans le
paragraphe Fonction éclairage.
Fonction éclairage
Le Bandit® Pro présente un interrupteur de marche / arrêt
[on/off] et deux niveaux d’éclairage, Bas / Haut [Low/High]
et Arrêt [Off]. Chaque pression exercée sur ce bouton à
intervalles de 1,5 secondes fait passer au niveau suivant ou
basculer sur arrêt [off]. Attendez plus de deux secondes entre
deux pressions et l’éclairage s’éteint à la pression suivante.
Appuyez et maintenez le bouton marche / arrêt [on/off]
enfoncé pendant (3) secondes pour accéder au mode Flash.
Appuyez et maintenez de nouveau le bouton enfoncé pendant
trois secondes pour revenir à un fonctionnement normal
bas / haut / arrêt.
Chargement de la batterie lithium polymère Streamlight
Pour procéder au chargement de la batterie lithum-polymère,
faites glisser votre ongle sous le cache du port USB en caoutchouc au bas de l’éclairage. Retirez-le pour faire apparaître
la prise Micro USB.
À l’aide du cordon fourni, branchez le connecteur Micro
USB sur la prise correspondante de l’éclairage. Veillez à
aligner le connecteur dans le bon sens sur la prise. Branchez
ensuite le connecteur USB standard sur le port USB de votre
ordinateur ou d’un autre port USB disponible.
REMARQUE : Le boîtier de l’éclairage est fermé
ultrasoniquement et la batterie n’est pas remplaçable.
Voyant indicateur de charge
DEL couleurs indication de charge sur le bouton :
- DEL rouge : charge en cours
- DEL vert : entièrement rechargé
Durée de charge
L’éclairage est doté d’un circuit de commande numérique
qui évite les surcharges. La batterie se recharge entièrement
 Loading...