

Page 1
MANUAL
NUUK D-LINE LED BAR 20" KOMPLETT
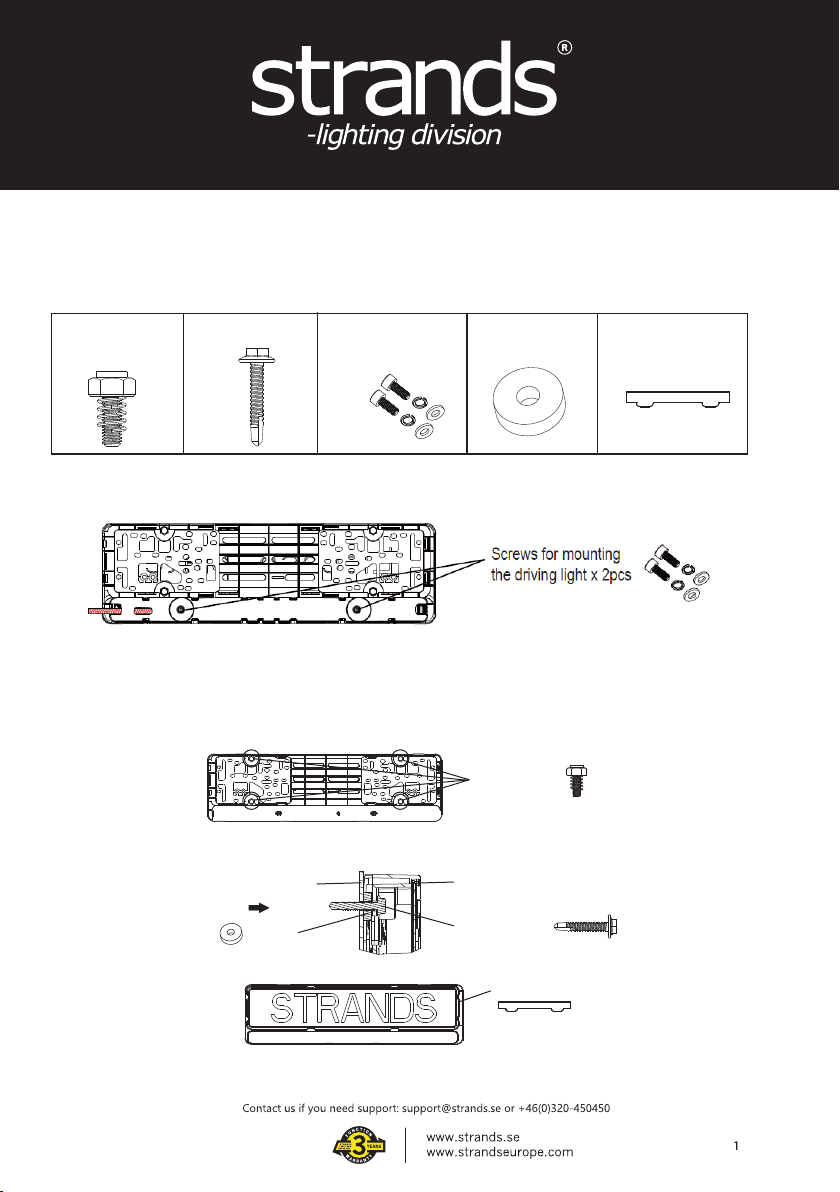
The preparation of installation:.Please check if the accessories contain all the following part
Screws for angle
adjustment X 4pcs
• First, install the LED bar part number 809452 in number plate holder using the 2 screws included in the package. Then,
follow the remaining steps for installing and mounting the holder on the vehicle. Check connection information on page 2.
Steps for license plate holder installation:
1.Take off the cardboard from the license plate.
2.Lock the adjustable screw with spring (x 4pcs) into the screw hole positions on the back of the license plate holder, and adjust
the screw depth according to the installation position. Please ensure that the mounting bracket is securely attached in a manner
that ensures it is parallel to the road surface and check LED light fixture perfectly straight with the direction of thevehicle. This
alignment will enhance optimal illumination. Make sure the positioning before moving to step 3.
3.Position the license plate securely, place silicone spacers with the appropriate height between the installation
surface and the license plate holder, and then lock it in place using the mounting screws.
Mounting screws
X 8pcs
Car(Installation surface)
Mounting screws
for led bar X 2pcs
Spacers X 8pcs
Adjustable screw
with spring X 4pcs
License plate holder
License plate
buckle X 2pcs
Spacers
4.lnsert the license plate into the license plate holder, and then firmly press the number plate buckle into place within the
holder.
5.When working with electrical wiring and cabling, it is important to take all necessary safety precautions. Make sure that all
electrical connections and cable handling are done in a secure way to avoid the risk of fire or electric shock.
Mounting screws
Number plate buckle X 1pcs
Page 2
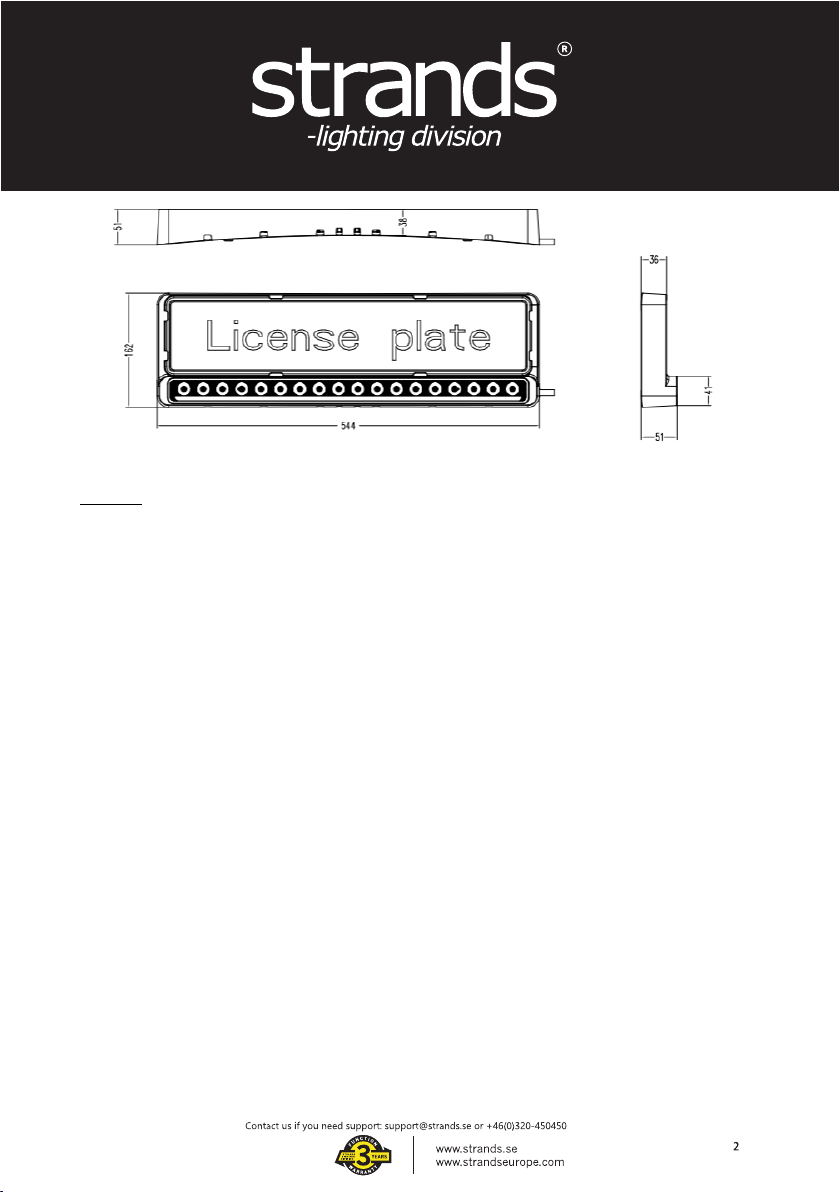
809452
RED = +VDC (HIGH-BEAM)
BLACK = - TO CHASSIS GROUND
WHITE= + WHITE POSITION LIGHT
YELLOW= + AMBER POSITION LIGHT
GREEN= + SIGNAL WIRE (CONNECT TOGETHER WITH +VDC)
Default Setting: Xperience Mode
Always start from the "off" state, meaning the light must have been turned off for at least five seconds
to discharge any internal power.
To Change ”next” mode: (Please check all three steps before you change the mode)
Step 1:Turn the light on and keep it on for 3 seconds (parameter range: 2-3 seconds), then turn it off.
Step 2:Quickly turn the light on and off 3 times (flash high beam 3 times) within 5 seconds, Then
follow
the next step immediately.
Step 3:Turn the light on for the fourth time, and keep the switch held down (or in the "on" position).
After about three seconds, the light will automatically switch to the next mode.
(To change from E-mode to Xperience mode, follow the same steps.)
To Reset : (Default mode)
Regardless of the actual mode, if you flashes light rapidly 10 times within 20 seconds, it will
immediately reset to Xperience mode. This occurs even if the normal mode change sequence isn't
complete. This feature is designed for situations where multiple lights have inconsistent power settings
and need to be quickly unified to same setting.
Page 3
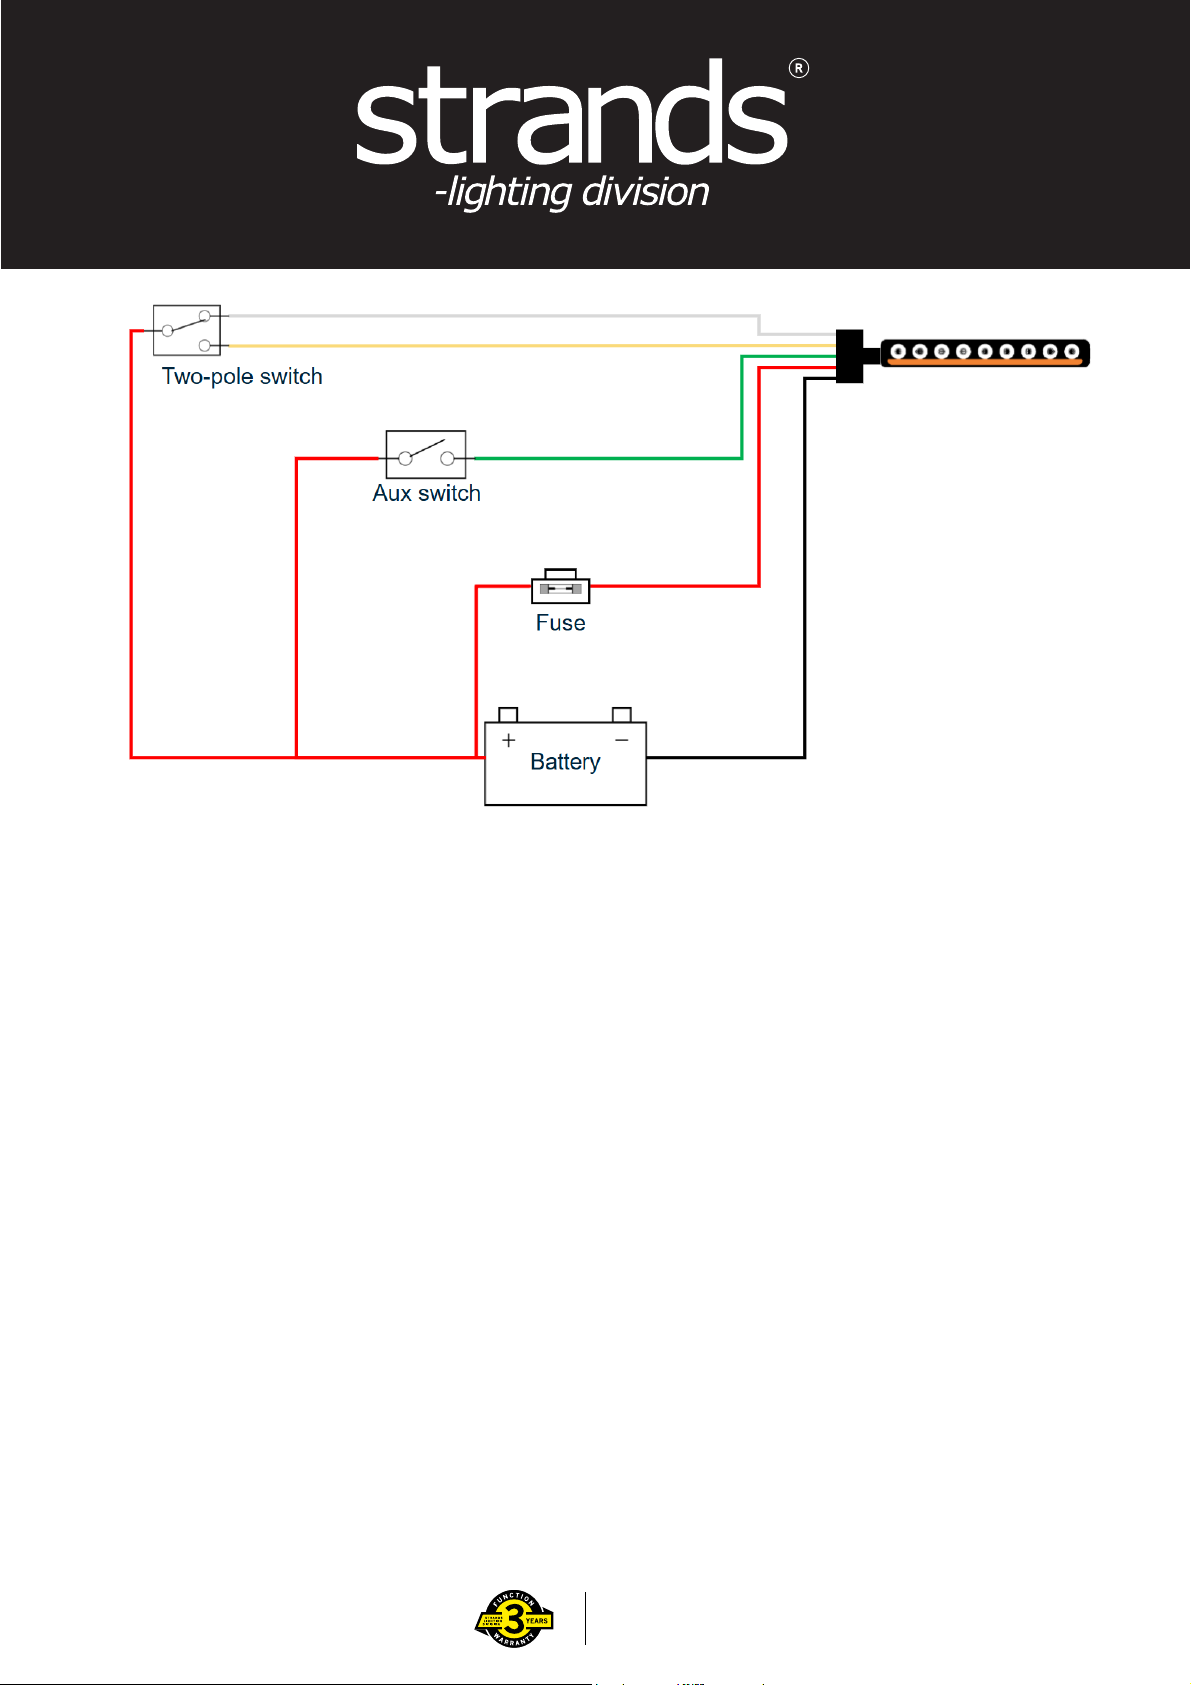
Note: The connection diagram shown is an example only. only for article nr 809452,809453,809454
READ THIS BEFORE INSTALLATION
READ ALL INSTRUCTIONS AND STUDY DIAGRAMS BEFORE INSTALLING YOUR NEW LIGHTS!
LEGAL MOUNTING
Check with state or local authorities for laws governing usage and proper mounting of your new lights.
LED bar with in-built relay
TAKE CARE OF YOUR PRODUCT
Keep the product clean. Dirt on the lens and heat-sink may shorten the products lifetime.
We recommend using lukewarm water and alkaline degreasing.
Follow the degreasing instructions carefully and rinse off gently with cold or lukewarm water on low pressure.
WARNING!
Strong chemicals should not be used on the product. If you accidently get strong chemicals on the product, rinse off immediately, use plenty of water so
that no chemicals remain in any joint. If the product is damaged or has inappropriate paint on the housing due to user actions, the warranty is void.
Some chemicals have a small amount of solvent in them, this can dissolve sealing adhesives and compromise the product's waterproofness.
Some chemicals pull out liquid from plastic and rubber-based components, which makes the plastic or rubber brittle and bursts more easily.
Be careful not to use high water pressure close up on the product.
If you use high water pressure at short distances, most products find it difficult to close out the water.
INSTALLATION
If there is a contact/connector on the product, it should not be cutted. If the connector is cut, the warranty is not valid.
If the product has loose cable and no connector. If the cable is shorter than 50 cm, the cable must not be cutted. If the cable is cut, the warranty is not
valid.
If the cable is longer than 50 cm, it is ok to shorten the cable, but not shorter than 50 cm.
If the cable is cut shorter than 50 cm, the warranty is not valid.
Tighten screws and bolts so that they do not loosen or chafe.
Do not tighten screws so hard that the protective bearings on the product breaks.
WARNING!
Do not use higher volts than the product description states.
This light becomes hot under continuous use. Don´t remove or touch the casing for at least 30 minutes after turning the lamp off.
Part no. 809455
Contact us if you need support: [email protected] or +46(0)320-450450
3
www.strands.se
www.strandseurope.com
 Loading...