

Page 1
MANUAL
SIBERA XP SR/SRC LED BAR
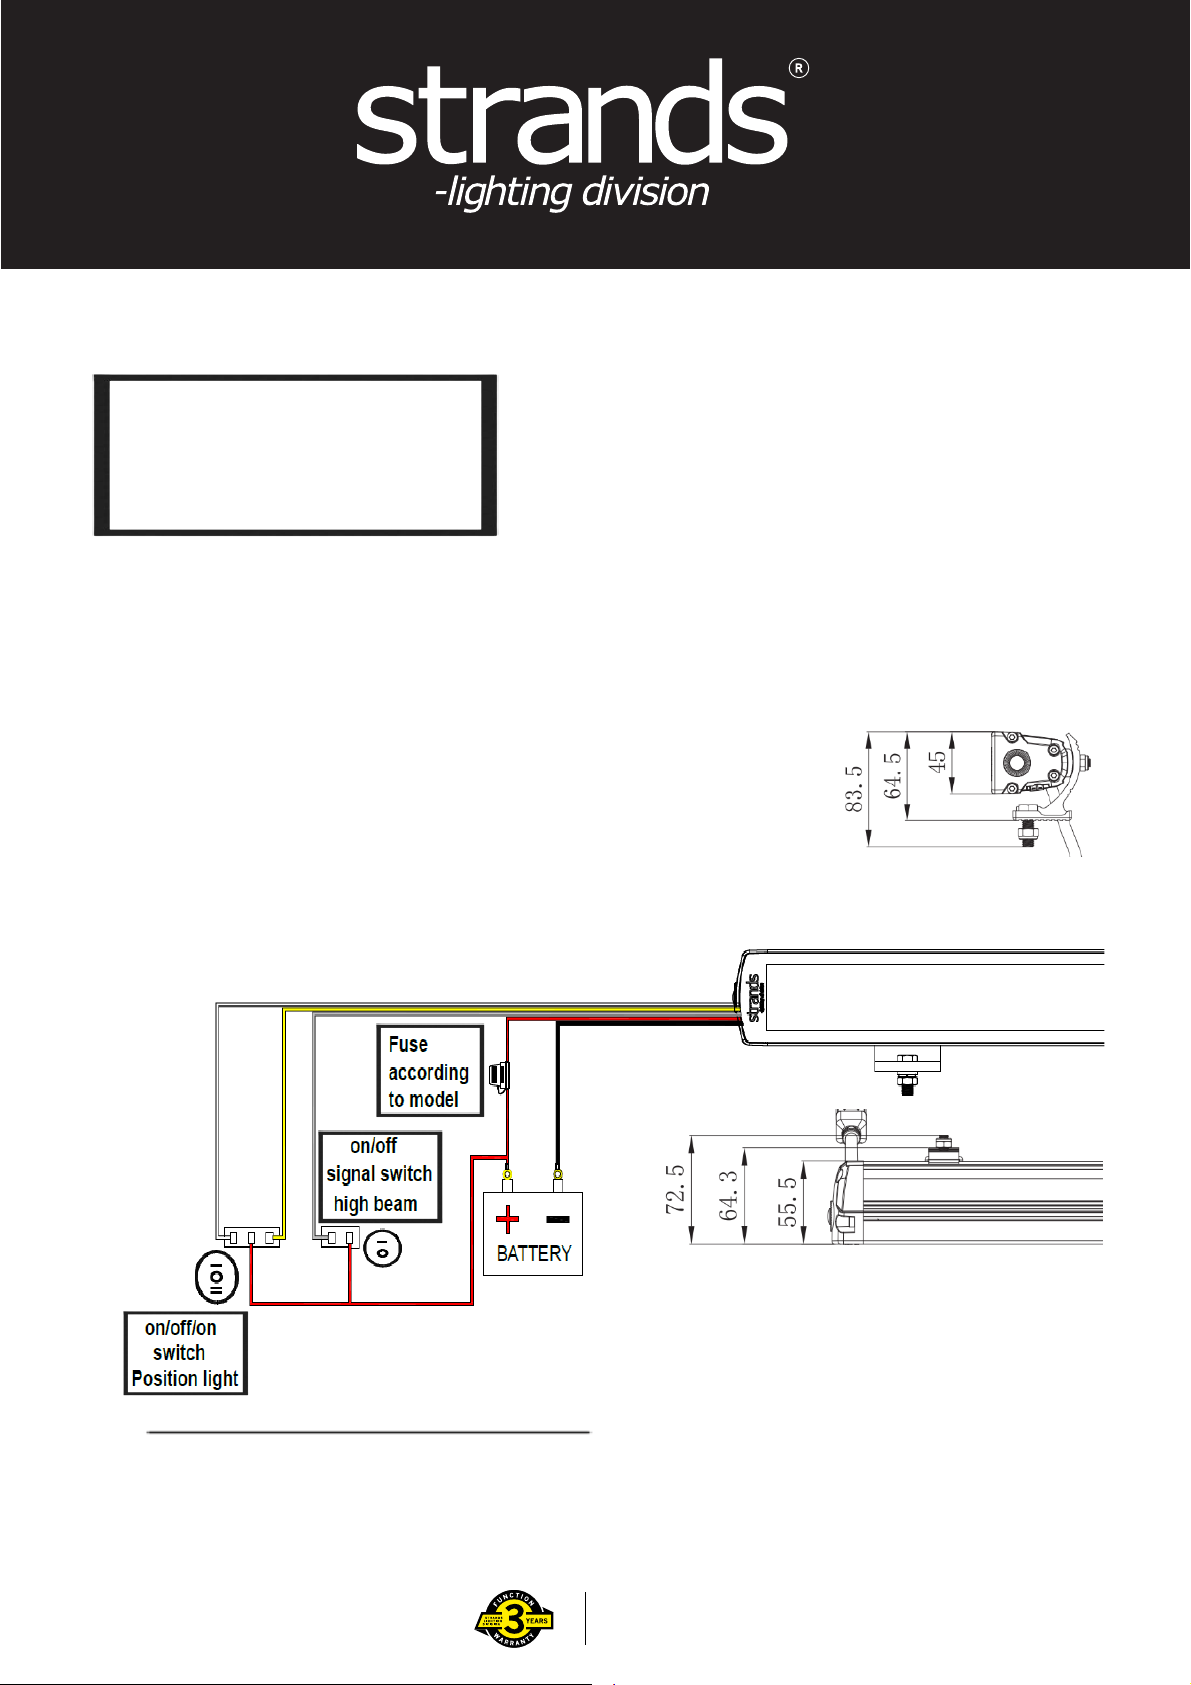
RED: + High beam
BLACK: (-) Negative
GREY: Signal wire connect to +(VDC)
WHITE:
YELLOW: +Yellow position light
Hello Function:This function is activated by flashing the high beams twice
within 2 seconds. To use this mode, ensure a position light wire is connected.
When you start the LED bar for the first time, it is set to Xperience mode.
-To switch back to E-mode, turn off the high beam for 5 seconds, let the high
beam run for 2 seconds, then flash the high beam 3times within 5 seconds.
-To switch to Xperience mode, turn on the high beam for 2 seconds, then flash
the high beam 3 times within 5 seconds.
+White position light
(Can be connect with aux switch,
canbus solution or wirelss controller)
Alternative for signal connection :
It can be connected with an AUX switch, CANBUS
solution with signal wire, By connecting signal wire
with original cable with car main high beam, or a
wireless controller with 12-24v system.
(Length for SR/SRC version
304.7mm-1273.7mm)12"-50"
(Part No.809412,809413,809414,809415,809416,809417,809418,809419)
*25A fuse for above articles , 2.5m cable, Hello function
Contact us if you need support: [email protected] or +46(0)320-450450
www.strands.se
www.strandseurope.com
1 of 2
Page 2
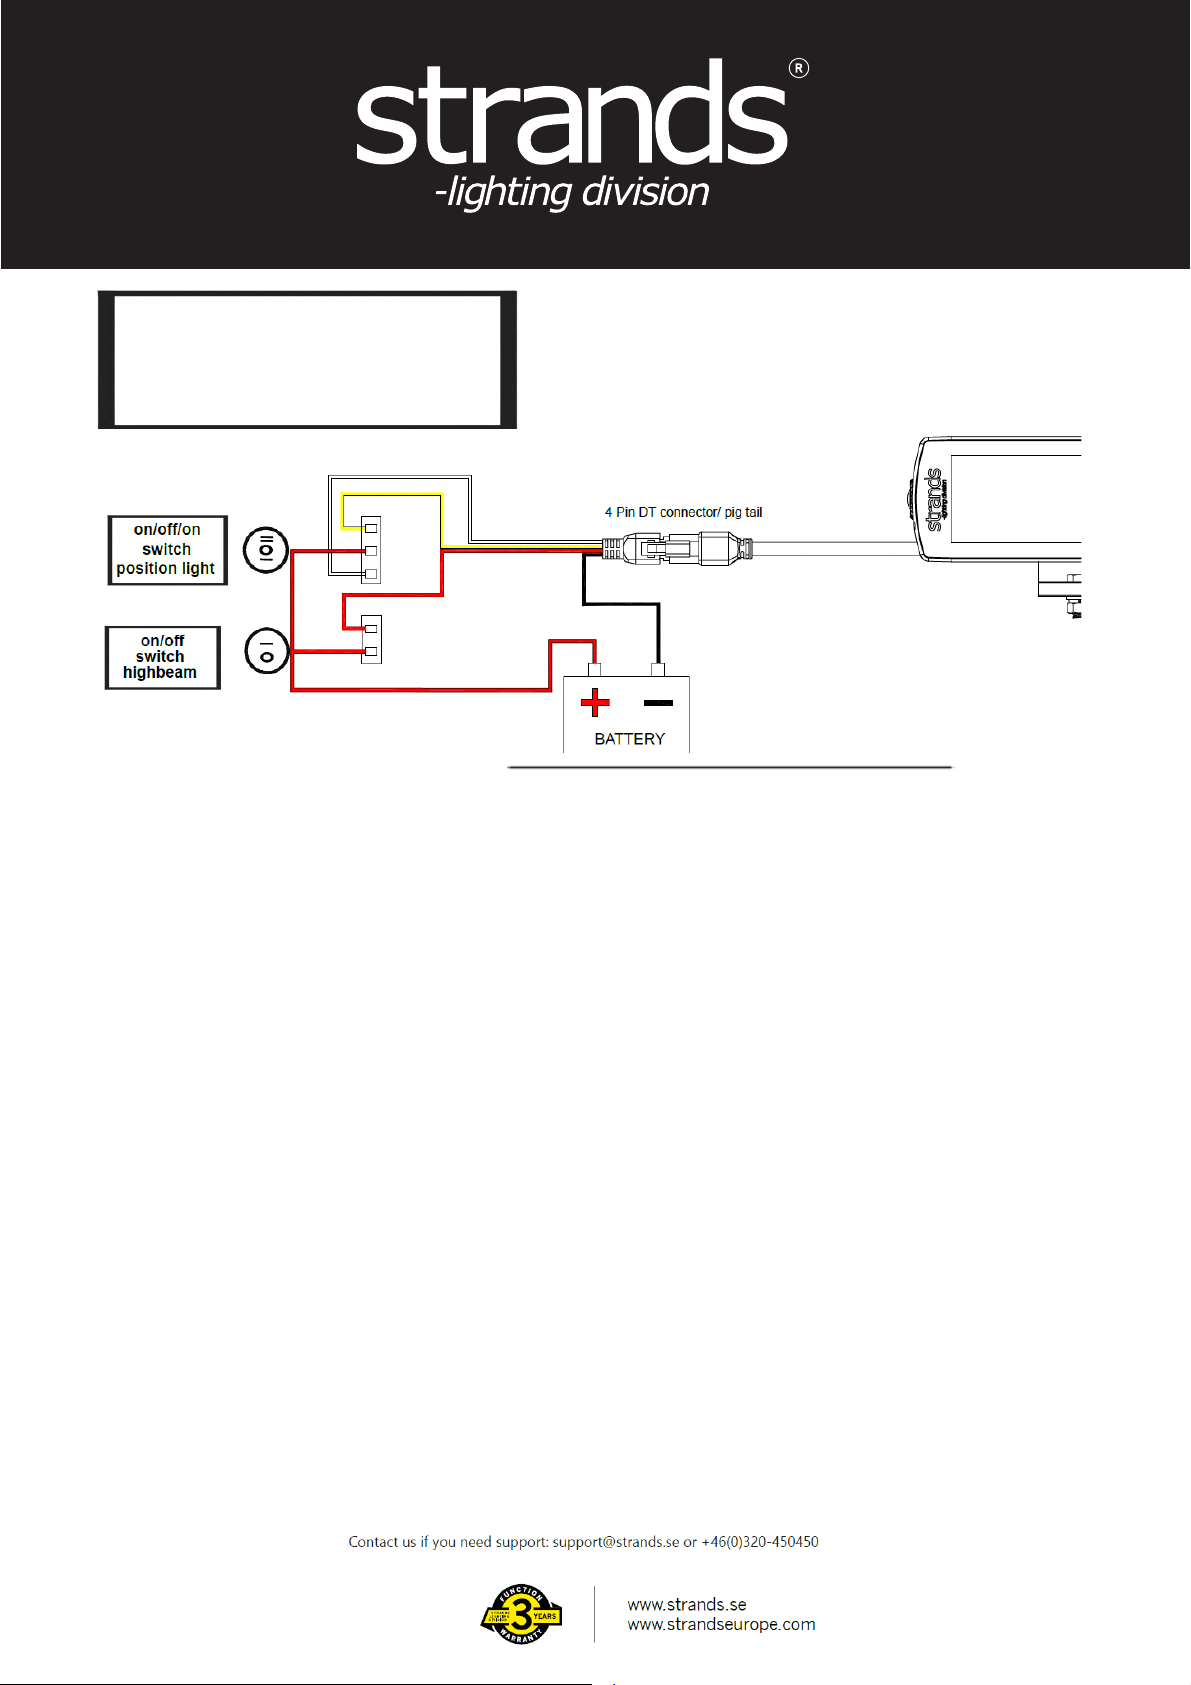
(PIN1)RED: + High beam
(PIN2)BLACK: (-) Negative
(PIN3)WHITE: +White position light
(PIN4)YELLOW: +Yellow position light
(It can be connected with an AUX switch, CANBUS
solution with signal wire, By connecting signal wire
with original cable with car main high beam by using
strands cable kit like 270477 or a similar type.
a wireless controller with 12-24v system)
Note: The connection diagrams shown are examples only. This guide focuses on connecting an external switch
for a single light bar fixture.
*Side brackets are not included in the package. If needed, you can get them separately using our part number 270361.
(Part no.809411)
*No fuse, 15cm cable with DT4 and pig tail, No hello function
READ THIS BEFORE INSTALLATION
READ ALL INSTRUCTIONS AND STUDY DIAGRAMS BEFORE INSTALLING YOUR NEW LIGHTS!
LEGAL MOUNTING
Check with state or local authorities for laws governing usage and proper mounting of your new lights.
TAKE CARE OF YOUR PRODUCT
Keep the product clean. Dirt on the lens and heat-sink may shorten the products lifetime. Top cover of the roof bar can clean with
normal water and cloth, Do not use any sharp material to rub on it.
Follow the degreasing instructions carefully and rinse off gently with cold or lukewarm water on low pressure.
WARNING!
Strong chemicals should not be used on the product. If you accidently get strong chemicals on the product, rinse off immediately, use
plenty of water so that no chemicals remain in any joint.
Some chemicals have a small amount of solvent in them, this can dissolve sealing adhesives and compromise the product's
waterproofness.
Some chemicals pull out liquid from plastic and rubber-based components, which makes the plastic or rubber brittle and bursts more
easily.
Be careful not to use high water pressure close up on the product.
If you use high water pressure at short distances, most products find it difficult to close out the water.
INSTALLATION
If there is a contact/connector on the product, it should not be cutted. If the connector is cut, the warranty is not valid.
If the product has loose cable and no connector. If the cable is shorter than 50 cm, the cable must not be cutted. If the cable is cut,
the warranty is not valid.
If the cable is longer than 50 cm, it is ok to shorten the cable, but not shorter than 50 cm.
If the cable is cut shorter than 50 cm, the warranty is not valid.
Tighten screws and bolts so that they do not loosen or chafe.
Do not tighten screws so hard that the protective bearings on the product breaks.
WARNING!
Do not use higher voltage than the product description states. This light becomes hot under continuous use. Don´t remove or touch
the casing for at least 30 minutes after turning the lamp off.
2 of 2
 Loading...