

Strand Lighting Light Palette Classic, Light Palette Live, Palette OS v10, Light Palette VL User Manual
Page 1
Page 2

Palette OS v10
Concepts and Overview
6
Feature Overview
6
About Palette
10
System Capacities
12
Universal Attribute Control Model
14
Definition
15
Conclusion
38
Tracking
39
A Note on Redundant Data
41
Timing
43
Multiple Cue List Concept
48
Fade Resolution
50
HTP vs LTP
51
Priorities
53
Tips and Tricks
54
Screen Layout
60
Toolbars
60
Channel Grid
63
Channel's different states
65
Attribute Grid
68
File Menu
70
Display Menu
72
Help Menu
74
Softkeys
77
Status Window
80
Look Pages
83
Macro Buttons
86
View Properties
88
Remote Video
89
Screen Layout
91
Console Buttons
93
Display Keys
94
Live Button
94
Blind Button
95
Patch Button
96
Playback Keys
97
DBO Button
97
Go Button
98
Goto Cue Button
99
Select Button
100
Halt Back Button
101
Step Cue Buttons
102
Release Playback Button
103
Recording Keys
104
Record Button
104
Update Button
105
Cue Button
106
Table of Contents
Strand Lighting
p1
Page 3

Palette OS v10
Group Button
107
Look Button
108
Action Keys
109
Arrow Buttons
109
Delete Button
110
Edit Button
111
Load Button
112
Move / Copy Button
113
Tools Button
114
View Button
115
Main Keys
116
Additional 10-Key buttons
116
Next Button
117
Number Buttons
118
Release Button
119
Rem-Dim Button
120
Shift Button
121
Soft Keys
122
Up Button
123
Programming and Viewing Fixtures
124
Fixture Colors and Symbols
124
Command Line Syntax
128
Fixture Title
135
Captured Attributes
136
Selecting and Setting Channels
137
Using the Mouse to Select Channels and Set Levels
140
Controlling Moving Lights
142
Controlling Colour
149
Independent Timing
151
Effects
157
Release
164
Select Softkeys
166
Recording and Editing Cues
169
Recording Cues
169
Record Options
174
Updating Cues
179
Load
183
Blind
187
Edits Track Forward
190
Track Sheets
191
Move In Black
193
Cue Lists
196
Cue List Directory
196
Cue List
198
Cue List Properties
201
Cue List Pointer
204
Autoscroll Cue List
205
Blue Box
206
Profiles
211
Releasing & Asserting Cue Lists
217
Strand Lighting
p2
Page 4

Palette OS v10
Step Forward and Back
218
Cue Numbering Scheme
219
Renumber Cues
220
Blocking and Unblocking of cues
222
Cue Properties
225
Deleting Cues
228
Goto Cue
230
Follow Cues
232
Linking Cues
234
Playback Loops
236
Action on GO within Cue Loop
238
Part Cues
240
SMPTE Timecode on Cue Lists
243
Recording and Using Looks and Groups
247
Looks
247
Sub Master Types
250
Recording Looks
252
Busking
256
Recording and Using Groups
258
Apply Levels/Palettes
259
Patching
261
Patch
261
Patch By Channel/Fixture
263
Patch By Output
267
Patch Routing
269
Capturing Outputs
272
Scrollers
273
Individual Attributes
275
Tools
277
Tools
277
SMPTE Learn Mode
279
Flip
280
Fanning
281
Highlight/Lowlight
284
Rem Dim
285
Colour Picker
286
Channel Check
288
Flash Fixture or Output
290
General Information
291
General Show Options
291
Default Cue List Options
293
Venue Setup/Location
296
Show Save Options
298
Move/Copy
301
ShowNet
307
Pathport
310
One to One Patch
312
Power Patch
313
Printing
315
Hardware Setup
317
Strand Lighting
p3
Page 5

Palette OS v10
Hardware Setup Dialog Box
317
Priorities
318
A/B C/D
319
Grand Master and Black Out Button
323
Button Array
326
Button Array Described
328
Triggers
332
Trigger Wiring
333
Console
334
MIDI / SMPTE Interface
337
Remote Focus Unit
338
Macros & Show Control
340
Macro Editor & Commands
340
Macro Editor & Scripts
343
User Interface Macros
349
Variables, Button Stations & MIDI Notes
351
Vision Net
354
Time Events
358
Browser Control
363
Media Player Control
367
PowerPoint Automation
368
Serial Out Macros
371
Telnet and Serial Communications
373
MIDI Show Control
374
Palette Control Panel
376
Palette Control Panel
376
Upgrading Palette Software
378
Console Group
379
Launch Palette Button
379
Hardware Test
380
Release Notes
382
System Group
384
Date Time & Input Language
384
Screen Resolution
389
ELO Touch Screens
397
On-Screen Keyboard
399
Mouse
400
Keyboard
403
Accessibility
404
Network
405
MonitorPower
410
Network Printers
412
Shutdown
414
Applications Group
415
Explorer
415
MediaPlayer
417
Internet Explorer
420
Outlook Express
421
Notepad
422
Paint
423
Strand Lighting
p4
Page 6

Palette OS v10
Additional Applications
424
System Up Time
425
Backup, Support and Contact Information
426
Tracking Backup
426
Recovery & Enable Outputs
428
Recalibrating, Striking and Dousing Fixtures
430
Software Revision History
431
Console Connections
433
Palette
433
Light Palette
436
Rack Palette
439
Appendix
442
License
442
Offices and Service Centres
444
Keyboard Shortcuts
445
Strand Lighting
p5
Page 7
Palette OS v10
Date:
August 2008
Engine
Version:
v10.4.1
User Interface
Version:
v10.4.1
Concepts and Overview
Welcome Page
Congratulations on the purchase of your Strand Lighting Palette Lighting Control Console.
For general help, use the Contents, Index or Search tab on the left.
Check out the Software Revision History
Palette is a powerful, yet easy to program and operate theatrical control system that truly does
marry dimming and automated control like no other desk. The key is in the software design,
using a Graphical User Interface, together with a control surface that gives you all the direct
access that you have come to expect from a professional lighting console. The core fade engine
works on the Last-Action philosophy, meaning levels and attributes stay put until another control
moves them, freeing you from recording all channels in all cues. This lends itself nicely to the
multiple cue list environment that Palette also boasts. Below are links to full-fledged help topics
that describe some of the keys features that make Palette a very powerful desk:
Universal Attribute Control Model
o
thinking about controlling moving lights. It frees the designer from the crazy world of
DMX charts and lets you think of the lights in your rig as tools to aid you in your
design.
Adding Effects with Palette is as easy and convenient as making a gobo rotate
o
clockwise. Effects can be added to any attribute or attribute family and from that point
onward in the show, the param eters of the effect track, just like any other attribute
value.
Busking - With Palette's unique approach to storing entire looks, rather than just
o
levels, the slider panels become incredibly flexible tools to busk shows live. The setup
and operation is far faster than other desks and core fade engine allows you to build
up extremely complex looks and then tear them back down to their primitives in any
order.
Move In Black - Never again worry about manually marking your m oving lights so you
o
don't see unwanted live moves on stage as cues come up without being limited to
global parameter tim ing. Each cue possess its own MIB timing as well as MIB
Suppression.
Timing parameters are extremely flexible, from individual attribute family's wait, fade
o
.
- Horizon Control's UAC is a whole new way of
Strand Lighting
p6
Page 8
Palette OS v10
and profile settings for every cue, to traditional cue part architecture and extending
into the very powerful Independent Timing of every attribute in every cue.
Updating Cues - It couldn't be made easier: Just press [UPDT] and Palette presents
o
you with a list of possible items to update given your most recent changes, including
the current cue, palettes used in the current cue, track-back cues or Looks that are
being controlled by slider panels.
Track Sheets - Examining what is going on in your show during editing sessions can
o
sometimes be very tedious. Palette's Track Sheets give you a clear idea of what is
moving when (intensities or attributes) and even tells you when it moved last.
Safety Net Features - Tracking Backup, Mirrored Saves, Checkpoint Files and Recovery
o
allow you to program and operate your show in a worry free environment.
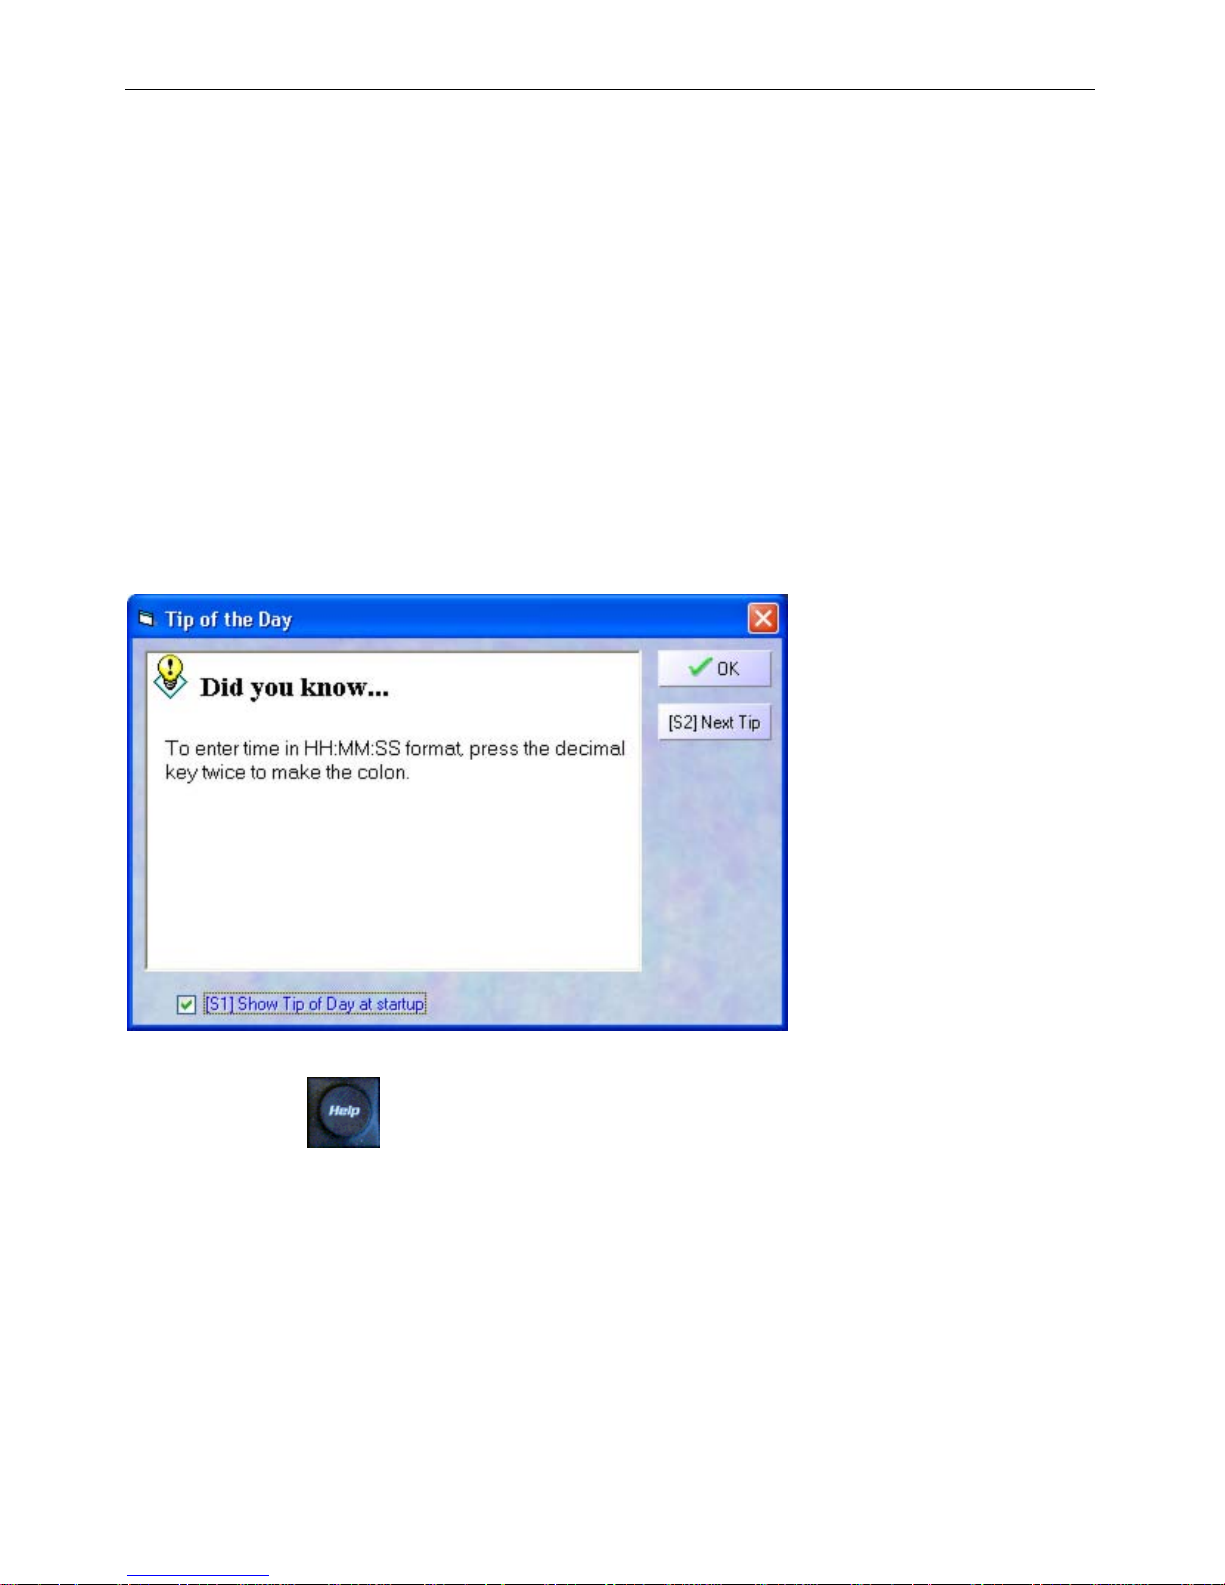
Tip of the Day
By default, the Tip Of The Day is turned on when you start up Palette. You can scroll through tips
by pressing the [S2] key on the desk and close the tip by either pressing [ENTER] or [UNDO]. It
is tempting to turn it off, but keep in mind that these brief tips were written to point out some of
the more subtle features Palette has to offer. You would have to do a lot of reading of the on-line
help or printed manual to get these hints.
You can read tips anytime by selecting Tip of the Day from the main Help menu.
On-Line Help
Why read the manual when it is all on-line. Every dialog box has context sensitive help by just
pressing the [HELP] button. Press [HELP] then any other button to get a description of its uses.
Press [HELP] twice to get the full help contents. The on-line help has advantage over the printed
manual as the hyperlinks allow you to jump around very quickly from topic to topic.
Strand Lighting
p7
Page 9
Palette OS v10
The full and up-to-date m anual is also available on-line at www.strandlighting.com
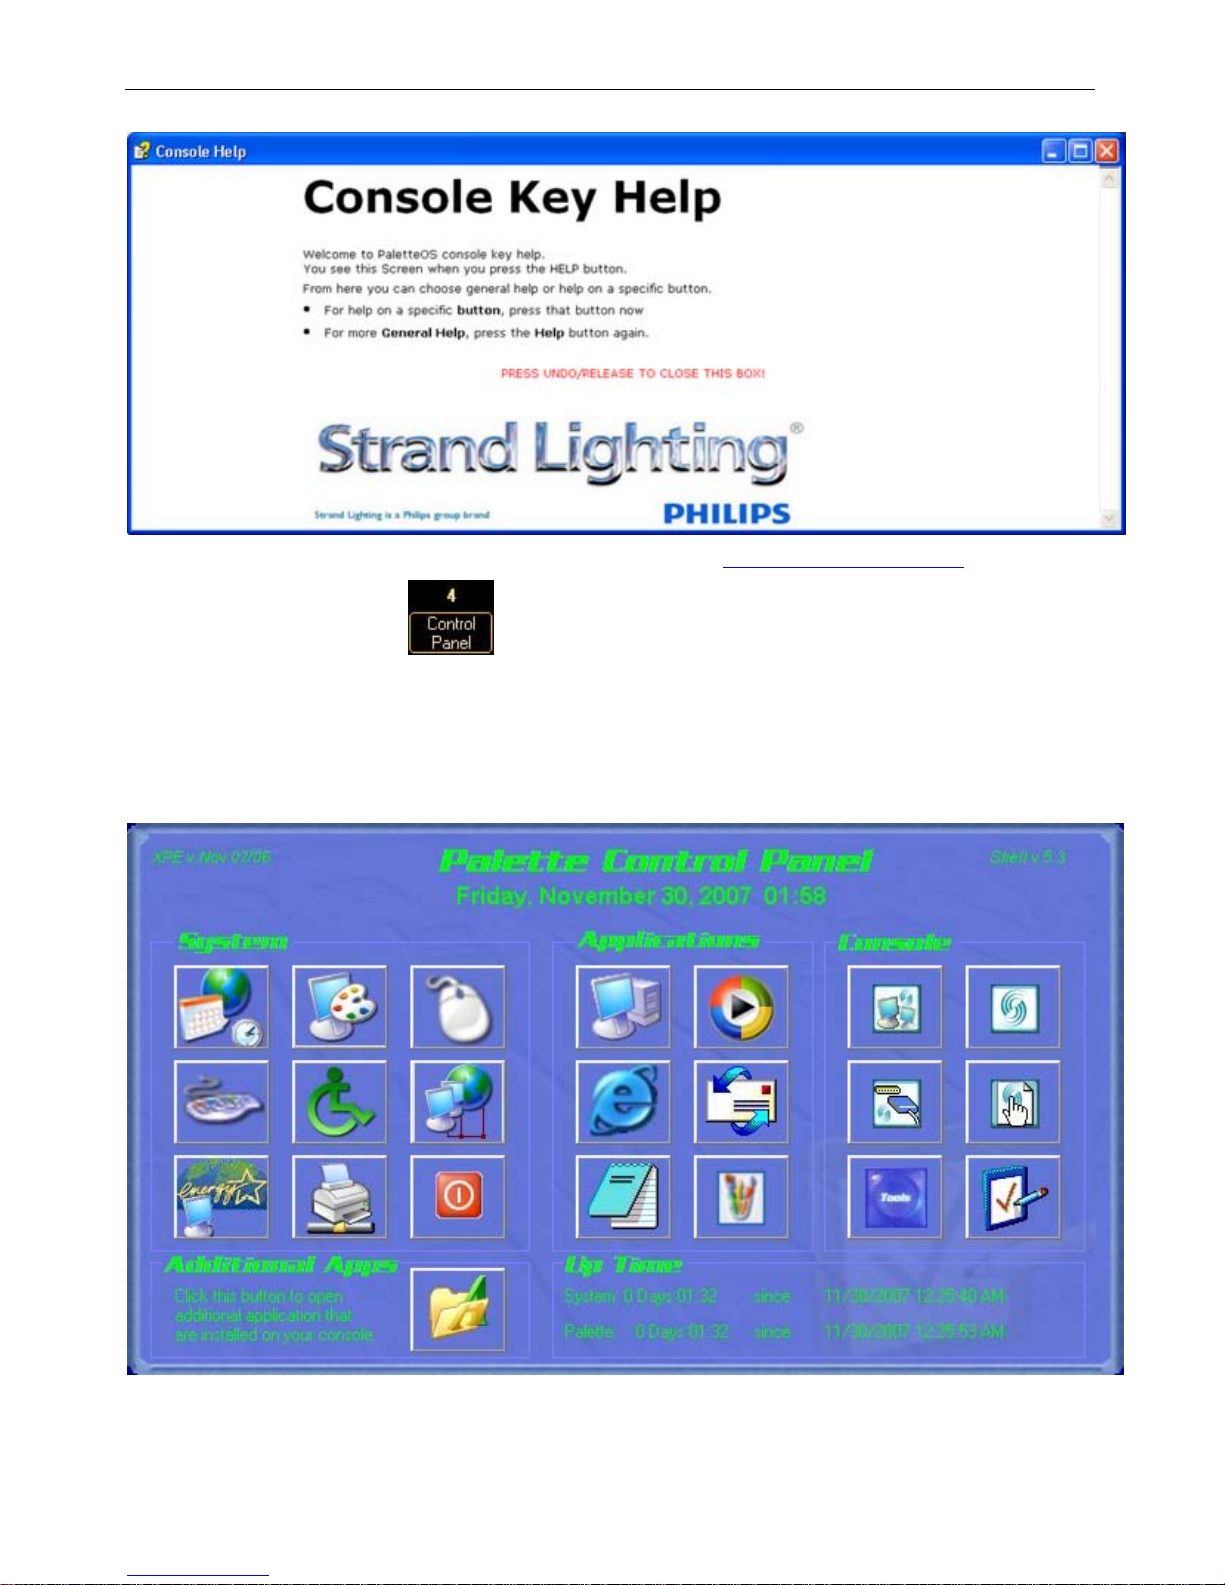
Palette Control Panel
When you are running the main software and no moving lights are selected, you can press [S4]
to reach the processor’s Control Panel. The Control Panel gives you access to general functions
like changing the date and time, adjusting how the trackpad works and setting up your network
connections. Palette comes loaded with useful software like Notepad, Internet Explorer and MS
Media Player. Listen to MP3s or CD while you work. You can also launch a hardware test to make
sure all your buttons, LEDs and sliders are working properly from the Control Panel.
Getting Technical Support
Strand Lighting
p8
Page 10

Palette OS v10
For technical support, please refer to the Strand Lighting Offices and Service Centres
Strand Lighting
p9
Page 11

Palette OS v10
About Palette
Two basic styles of lighting consoles have evolved since computerized consoles were
introduced in the early 1970s. These two styles can best be described as “tracking
“preset”.
Preset consoles record cues the way manual preset consoles do. On a manual preset console,
the user sets up a look on an active set of faders, then sets up the next look on an inactive
set of faders, and then uses cross-faders to fade from one look to the next. In a computerized
preset console, these looks are saved as cues, but each channel needs to be told what to do
in each cue, and cue execution can only crossfade from one cue to another.
With a tracking console, when a cue brings a channel to a level, that channel stays at that
level until it receives a specific instruction to change levels. This level then tracks through all
subsequent cues until the level is increased or decreased by another cue. Tracking consoles
are capable of much more sophisticated and complicated effects than Preset consoles because
of their ability to have more than one fade executing at the same time.
” and
Where does Palette fit in?
Palette is a tracking console.
o
Palette offers the techniques of tracking consoles in an easy-to-learn environment.
o
The Timing options in Palette are extremely flexible and easy to use. The interface for
o
changing simple tim es is as easy to use as a spreadsheet
individual attribute family's wait, fade and profile settings
has a traditional cue part
keystrokes necessary to maintain these typically com plex cues. In very demanding
programming environments, Palette extends timing options with the very powerful
Independent Timing
Palette deals with moving lights using Horizon Control's Universal Attribute Control
o
Model. This means that regardless of who manufactured the moving light and what
protocol it is using, it is presented to the user the same way. Cues are stored using
descriptions like "Blue", "3 RPM" and "11 Hz". This means that not only can you copy
attributes from one type of fixture in your rig to another with predictable results, you
can also swap your entire rig out for another and not have to re-program your cues.
Palette uses a “Graphical User Interface” and replaces the hidden command structure
o
of the DOS-based tracking consoles with modern computer interfaces like menus and
dialog boxes. It can easily be understood and programmed by any computer-literate
operator. Since each dialog box control has a softkey
tied to the mouse. Pure keystroke syntax is not only possible, but quite often quicker
than competing consoles. On the flip side, there is no need to mem orize a strict syntax
as the softkeys are always narrowing your choices to less than a dozen option. You can
read the dialog box from top to bottom like a book and quickly find the options you are
looking for, even resorting to the mouse if that suites you. Palette will never beep at
you and expect you to fix the command line.
Because Palette's design leverages on consumer based technology (such as readily
o
available operating systems, USB interfaces and Pentium® Processors) it allows lower
budget theatres with operators who are not full time employees to have the
implem entation that greatly reduces the number of
of every attribute in every cue.
and allows adjustment on
for every cue. Palette also
accelerator, your hands are not
Strand Lighting
p10
Page 12

Palette OS v10
sophistication that has previously been reserved for only the biggest of professional
theatres using specialized and dedicated equipment.
Since a standard operating system is used and the hardware interfaces with USB, you
o
already have your backup desk. In fact, you probably have over a dozen of them in
your facility.
The software is designed, written and owned by Horizon Control Inc.
See Also:
Universal Attribute Control
Tracking
Edits Track Forward
Blocking and Unblocking of cues
License
Strand Lighting
p11
Page 13

Palette OS v10
Output Devices
32,768 (1024 on physical console without
external output devices)
Control Channels
No reasonable limit - determined by
amount purchased
Cues
Unlimited
Cue Lists
Unlimited
Looks
Unlimited
Looks per page
Unlimited
Look Pages
Unlimited
Simultaneous Fades
Unlimited
Priorities
100 different priorities available for every
Cue List and Sub Master
Macro Buttons
12 pageable virtual
Remote Video
Five connections via XP machine on LAN
running PalettePC software
Portable Remote Focus Unit
Optional
Tracking Backup
Yes
Crash Recovery
Yes
ILS Architectural Button Stations
Optional with ILS Interface card
Browser Control
On local or networked Internet browsers
Show Control Programming
Full programming language using Macro
Scripts and the Lua language
SMPTE/MIDI Interface
Optional
Serial Out
Macros available to output RS232
comm ands
External Trigger Events
2 triggers on Palette hardware or ILS
buttons stations or contact closures
Telnet and Serial session
16 Com ports and multiple telnet session
available
System Capacities
The Palette system capacities outlined below represent the upper range of capacities the
program can support.
Strand Lighting
p12
Page 14

Palette OS v10
Astronomical & Time Event Clock
Yes
"No reasonable limit" means that the limit is determined the processor and RAM on the
system.
See Also:
About Palette
-o-
Strand Lighting
p13
Page 15

Palette OS v10
The Universal Attribute
Control Model by
Horizon Control Inc.
"Simplicity, clarity, singleness: These are the attributes that give our lives power and
vividness and joy as they are also the marks of great art." - Richard Holloway
Communication and the expression of ideas is central to the art of lighting. Creating great
lighting is a team effort lead by the designer. The language a designer uses to communicate
with the team, and specifically the console programmer, is crucial to the process of creating
the art. The programmer, in turn, must then train the console in order to orchestrate the
lights to ultimately relay the intent of the designer to the audience. There is ample
opportunity in this process for misinterpretations to muddy the waters of communication.
More recently, and at a furious pace, moving lights have entered the theatre and the
multitude of options they provide has only complicated this process amplifying the
opportunity for 'miscue' of intent.
Not surprisingly, there has been an increasing necessity to simplify the process of moving
light control. Unlike the hard and fast rules that have existed for decades, a uniform language
for designers and programmers to use for describing moving light behaviors has been
non-existent. Moreover, the method used to communicate to lights has never been
standardized. The pioneering manufacturers of automated lighting equipment each
implem ented different philosophies of control. More recently, generic moving light console
manufacturers have had issues with just covering the bases. It has been a challenge for some
to turn the lights on and make them move about. In all respects, these consoles were merely
outputting numbers, sometim es m asqueraded by words to get the job done. Now that
automated lighting is no longer in its infancy, it is time for a fresh new approach on intelligent
lighting control. Horizon Control has risen to that challenge and this document will explain
how we have achieved that goal with our Universal Attribute Control Model.
See Also:
Controlling Moving Lights
Strand Lighting
p14
Page 16

Palette OS v10
Definition
The heart of this technology is our Universal Attribute Control Model or UAC for short. It is our
method of standardizing the language of communication with respect to intelligent lighting
control.
Elevating the means of control to an higher layer allows designers to once again think of their
lighting fixtures as merely tools available to get the job done. As the theatre embraced
moving light fixtures, it reluctantly accepted all of the idiosyncratic methods needed to control
them. The designers found themselves constantly adapting to the language imposed on them
by the manufacturer. Gone were the days of simply asking for lights and photons would land
on the stage.
Lets go back to the advent of computer controlled lighting to examine the issues that plagued
communication in the theatre. Before computers entered the theatre, the most popular
dimmer controllers were known as road-boards. These large devices had individual handles
for each dimmer and designers would ask operators to move a handle to a position to set the
light level. These 'move' instructions were written down as cues and with each one executed
in succession you had a show. The advantage of this system (which was only realized fully
after the obsolescence of road-boards) was that each move could be controlled at different
rates and multiple moves could be executed simultaneously by different operators.
Computer control first appeared on Broadway in 1975 when Tharon Musser used the
Electronics Diversified LS-8 console on A Chorus Line. This new technology allowed for
unprecedented repeatability and a huge number of cues executed in record time. As
processing power was very limited, decisions had to be made on how to execute these fades.
The technology and code development tools of the day dictated that each channel would be
recorded in each cue. This greatly simplified the process of playing back a show, or more
specifically, jumping from scene to scene during rehearsals. Remem ber, in the old days of
road-boards, getting to any place at random in the show almost always meant starting from
the beginning and executing each cue to ensure accuracy. LS-8 and others could do this with
ease. Kliegl quickly followed with the Performance and Strand with Multi-Q and Broadway
converted to computer control seemingly overnight. People were blown away with the
apparent new flexibility that these computers offered.
These early computer control systems did not emulate road-boards, but rather manual preset
boards. What designers eventually figured out, given a bit of experience on these consoles,
was that they could not achieve the complex cue timing that two or three road-board
operators did in the past. As these preset consoles recorded every channel in every cue, they
only moved from state to state. This resulted in robotic or non-organic fades. It was only
when Strand introduced the Light Palette that the technological problem that plagued these
fundamental concepts was realized on a computer (in North America at least).
People everywhere (and since) have praised Light Palette for marrying designer's desires and
computer control by using a common language. Almost every controller that has been
accepted on Broadway since has used core concepts introduced by Light Palette. With the
advent of intelligent lighting, so many more param eters have entered the equation that the
language conventions that have evolved are discordant and technologically inadequate. The
language must be overhauled. Conventional lighting control just worked in 2-space; Intensity
and Time. That is not so with moving light control. There are many many more parameters.
Moving light control has long suffered from the lack of this common language that designers
and programmers and manufacturers could use. To date, intelligent lighting control has only
stumbled along, managing to keep up with an evolving technology and never experienced the
Strand Lighting
p15
Page 17

Palette OS v10
sort of watershed event that occurred in the industry with the introduction of Light Palette.
The problem was compounded by that fact that industry leaders were extremely protective of
their intellectual property. There was no sharing of control protocols between lights and
controllers. Each manufacturer vigorously protected the methods they used to control their
fixtures and automated systems were sole-source. Only recently has the industry evolved to
the point where most believe that inter-operability is a good thing.
Horizon Control Inc. (HCI) is at the very leading edge of this new paradigm of lighting control.
For years now HCI has had members sitting on ESTA's Control Protocols Working Group and
we are actively involved in the development of new protocols such as ACN (ANSI E1.17).
Horizon Control pulls from over a decade of experience writing lighting control software and
members of the development team were pivotal in the evolution of computer visualization
software. People on our staff have worked on some of the largest shows ever mounted with
virtually every make and model of popular lighting control systems. Our desire to simplify and
revolutionize the fundamental methods that are used to control lighting is deep rooted in our
collective years of experience.
The result is one of the most highly effective developments of a technology that we call
'Universal Attribute Control'. The descriptions and examples in this document are taken from
the implementation of our ' Universal Attribute Control' as used by the Palette Lighting
Console.
Background
The earliest forms of computer control, though digital at their core, output an analog signal
between 0 and 10v. This in turn controlled the lights from no output to full intensity. Inside
the console, these numbers were generally stored using 8-bit bytes, giving 256 steps of
resolution. With the advent of moving light systems, the resolution was doubled to 16-bit,
providing 65536 steps of resolution. Computers then calculated fades that produced a
one-to-one relationship between the 65,000 steps directly to motors that moved the light
from, say, pan-stop to pan-stop. This concept persisted for years and, given a specific
controller tied to a specific lighting system, pre-programmed shows were reproduced faithfully
night after night.
The downfall of this method of control is that these numbers ([0-10], [0-255] or [0-65535])
mean very little in the real world. They are actually only significant when used with very
specific equipment. When applied to other equipment, these numbers mean very little at all,
and in fact are often meaningless. UAC's objective is to provide an intuitive programming
experience and a versatile control system that when played back can actually provide the
operator information about the system it is controlling.
UAC does this by porting the control to an 'abstract' layer. This has a number of benefits:
The 'handles' you use to control moving lights are more inline with what you would do
1.
to manipulate conventional lighting.
The numbers and 'words' you use to build cues will actually mean something. You will
2.
have an idea of what you can do with the lights and what is on stage by reading the
screen.
If you have mixed equipm ent, the methodology you use to communicate with your
3.
entire rig is identical, regardless of the protocols defined by the equipment
manufacturers.
Building a set of looks with one group of lights in your rig can be copied to another
4.
group, regardless of what type of lights they are.
The cues you have in your show file can be played back with any equipment.
One of the key things in Point #2 above that bears repeating is that UAC uses numbers and
Strand Lighting
p16
Page 18
Palette OS v10
'words' to control lighting. You may claim that has been done for years with the use of
'named' palettes. For example, m oving lights desks can use labelled position palettes to build
cues and the cue displays use these 'words' to make it easier to read. Don't lose sight of the
fact that palettes, like "Down Stage Center", are just place holders for a combination of
values between 0 and 65535. The words themselves do not mean anything to the desk (nor
do the numbers). They are just displayed on the screen for convenience. In contrast, with
UAC, the words do mean very specific things within the cue structure.
Some of the words used include:
15 degrees of pan
o
rotate counter clockwise at 6 RPM
o
strobe at 9 hertz
o
thrust the shutter into the aperture of the fixture half way
o
reset the fixture's motor control system
o
At show-time, these 'words' need to be converted into 'values' that the specified lighting
fixtures can use. The trick with UAC is that this conversion is figured out each and every time
GO is pressed (and not before). That means that the protocol, the mode, the model or the
manufacturer can be changed at any time. Moreover, each and every light, regardless of who
makes it, appears similar to the user, giving a more consistent experience when programming
a show.
Apart from the benefits described above, this method of controlling lights is not restricted to
traditional linear channels mapped to attributes on the fixture. Looking at a few examples in
Palette's implementation of this model will demonstrate the intuitive nature of describing
fixtures' attributes as opposed to traditional convoluted methods that sometimes group
completely unrelated behaviours on the same channel.
Pan and Tilt Example
The Home position for pan and tilt on most DMX Moving Lights is 50:50 (or 32767:32767).
This positions the light such that you will have maximum movement in each direction before
encountering a stop (pan-stop or tilt-stop). For a light that has a total pan range of 360
degrees, with the control channel set to half, you are sitting at 180 degrees. Taking the
control channel to full will move the light 180 off axis towards a stop. So, to summarize, a
value of 50% means Hom e, and a value of 100% means go to the pan-stop 180 degrees from
Home. Figuring out that 90 degrees is half way in between those two values is easy. That
would be 75%. And a 45 degree pan from Hom e is, again, half way between those two values
or 62.5%. That gets a little too complex for the programmer to calculate quickly.
To add to the com plication, imagine you have another light in the rig that has a total pan
range of 540 degrees. Now the numbers you just figured out for the first fixture mean nothing
to this one. Worse yet, if you grab both of the fixtures and pan them in tandem , you would
get completely differing results:
Strand Lighting
p17
Page 19
Palette OS v10
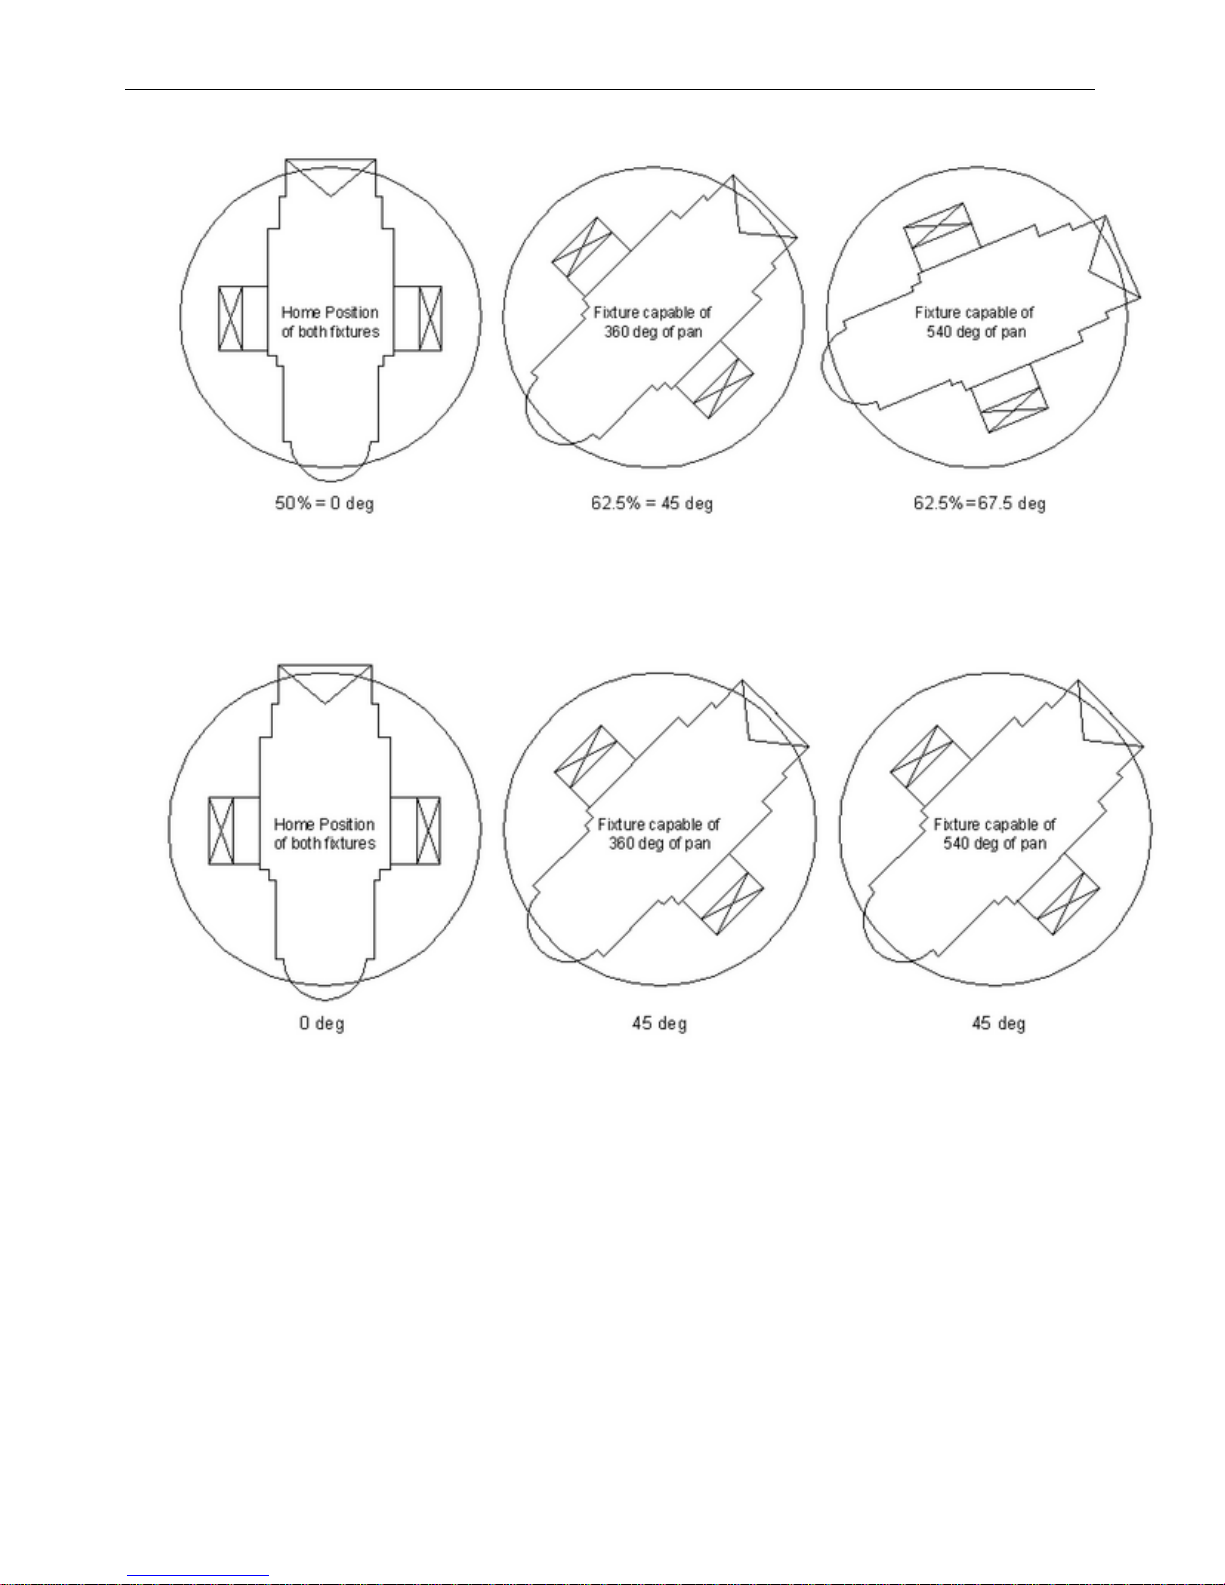
Using the same values (62.5%), the angles of pan are completely different. The beams of
light are not even close to parallel. You can see how this can be very frustrating if you have a
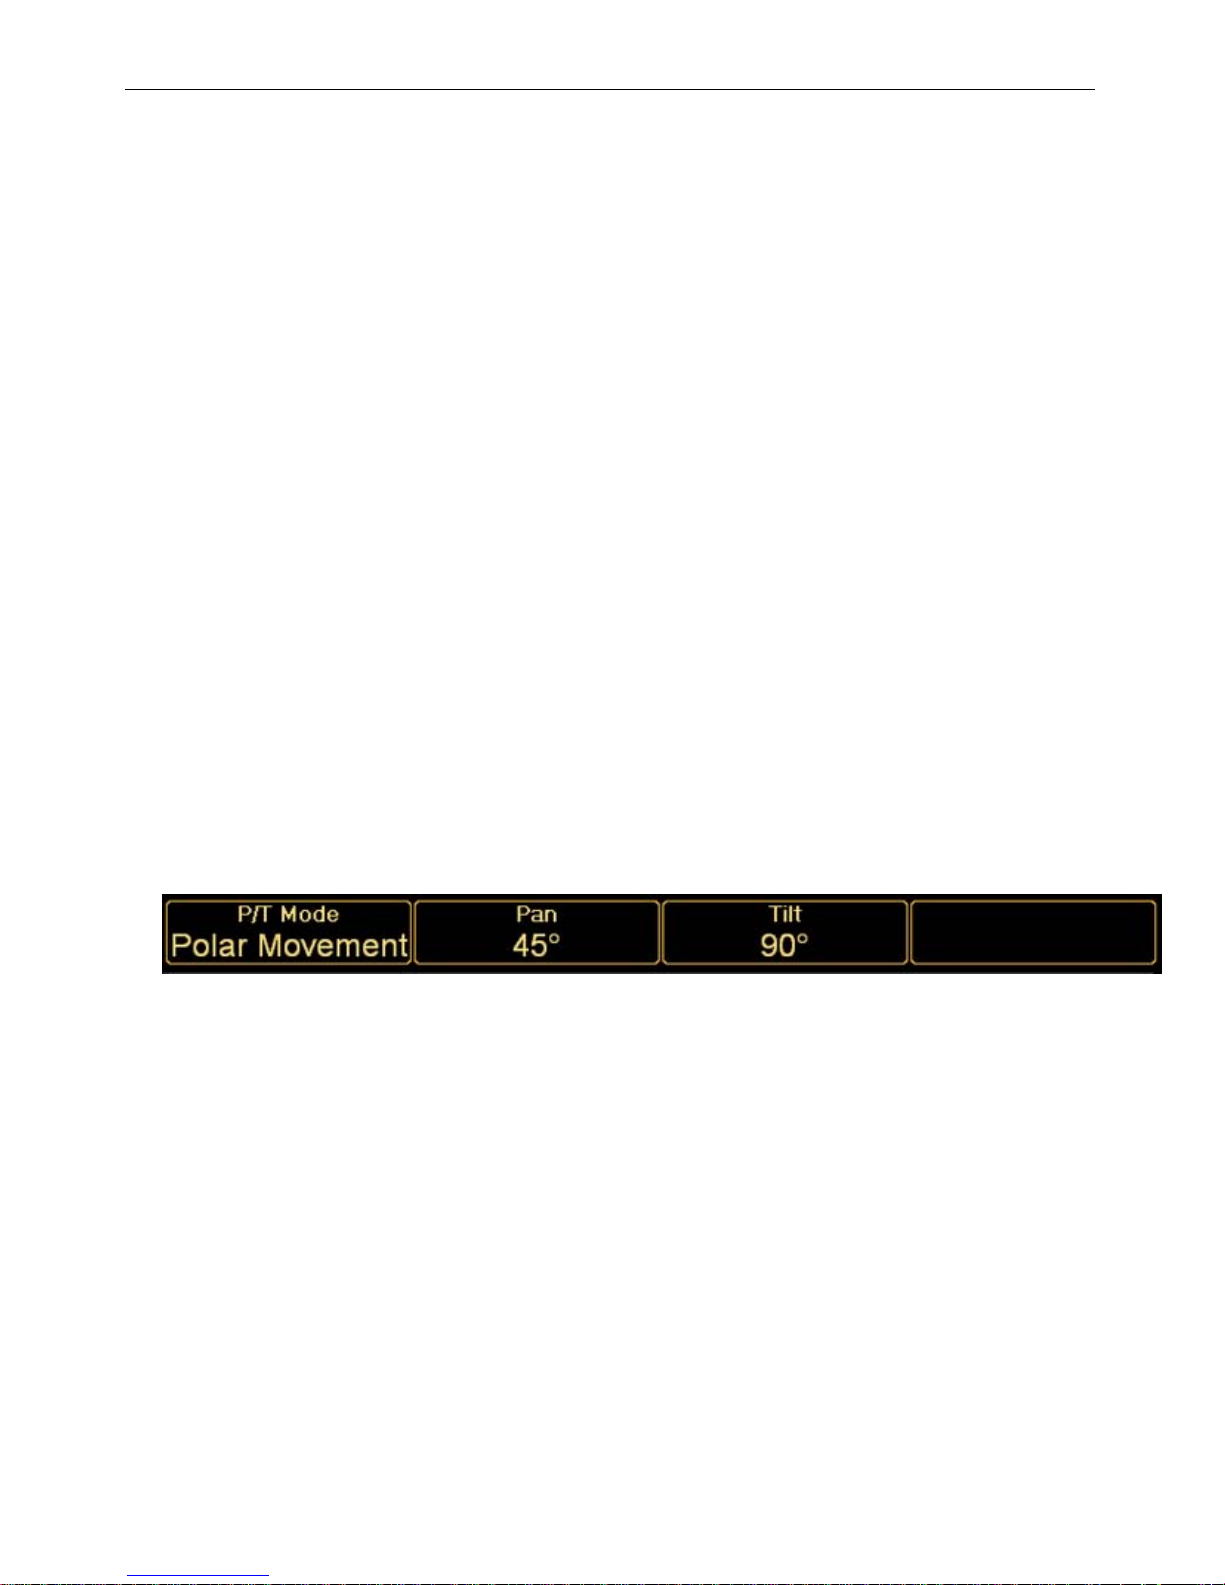
mixed rig. With UAC, the Pan attribute is represented in real-world units of degrees.
Therefore, when you talk to the light, you tell it to pan so many degrees:
Apart from having parallel beams of light from multiple fixtures, notice that there is no need
for the "=" sign. Forty-five degrees is forty-five degrees. This makes controlling a rig that is
made up of different types of fixtures easy to communicate with and easy to understand.
If you program the show using one type of fixture, then swap it for another, it is important to
remem ber that it is these real-world values (in this case, degrees) that are used when fading
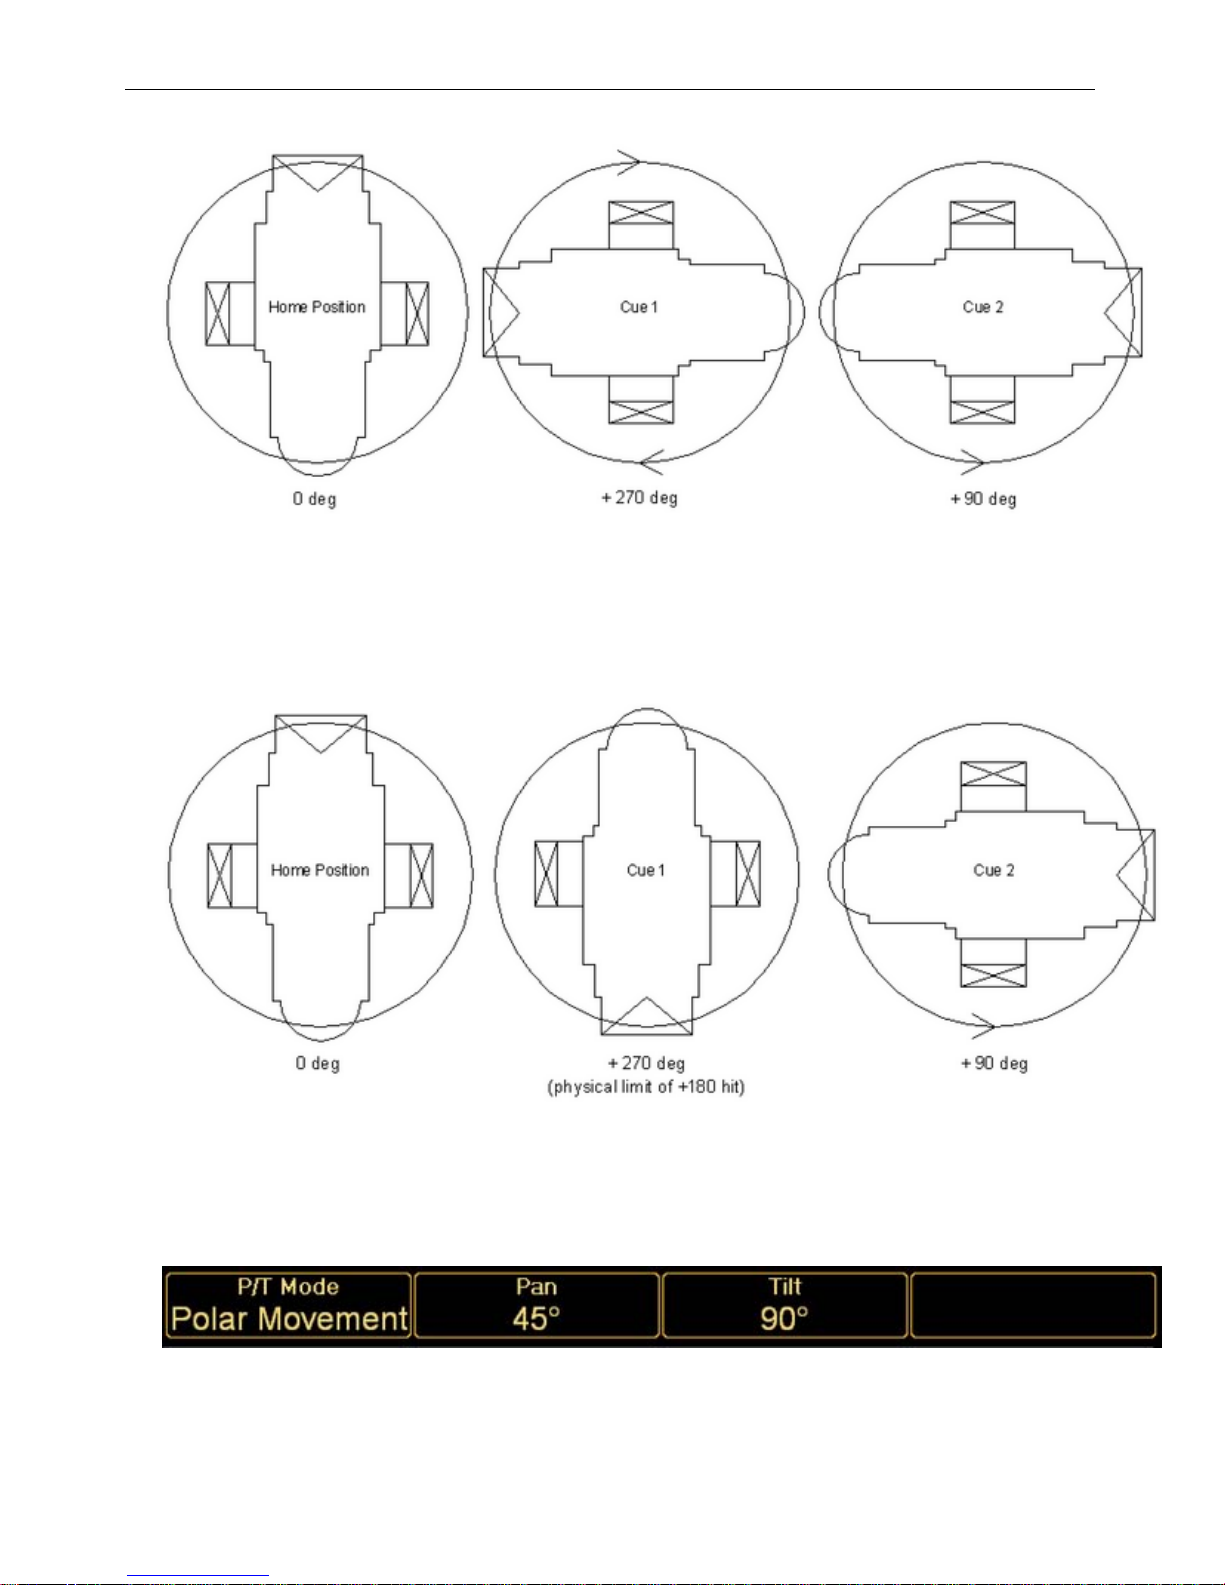
cues, not the DMX values. The example below will demonstrate this with two cues. Cue 1 and
Cue 2 are programmed with a fixture that is capable of panning 540 degrees (-270 to +270).
Cue 1 takes the fixture to its pan-stop at +270 degrees. Cue 2 has it move (in 10 seconds) to
a position of pan +90 degrees.
Strand Lighting
p18
Page 20
Palette OS v10
If we were to substitute this fixture out for a fixture that only has a total pan capability of 360
degrees and run the cue, a surprising, but predictable thing happens. When Cue 1 is active,
the fixture can't reach +270 degrees, so it stops at its pan-stop (+180 degrees). Then Cue 2
is executed, which is a 10 second fade to +90 degrees. For the first 5 seconds of Cue 2, the
fixture doesn't move. But, when the Live display on the screen reads +180 degrees, which is
half way through the cue, the fixture will start to move. When Cue 2 is complete, the fixture
will be resting at +90 degrees:
Since the Universal Attribute Control Model doesn't figure out DMX values until the very last
second, it can also alter the way in which the conversion is done at run-time, producing new
and exciting methods of transition during the fade from cue to cue. Various attributes, such
as position and color lend themselves very nicely to working in different ways. Color Space is
described in detail below, but let's examine how we can move from one place to another on
stage given two stored end places.
In this example, we are going to once again consider a moving head fixture as opposed to a
moving mirror. Moving head lamps achieve movement by physically moving the source and
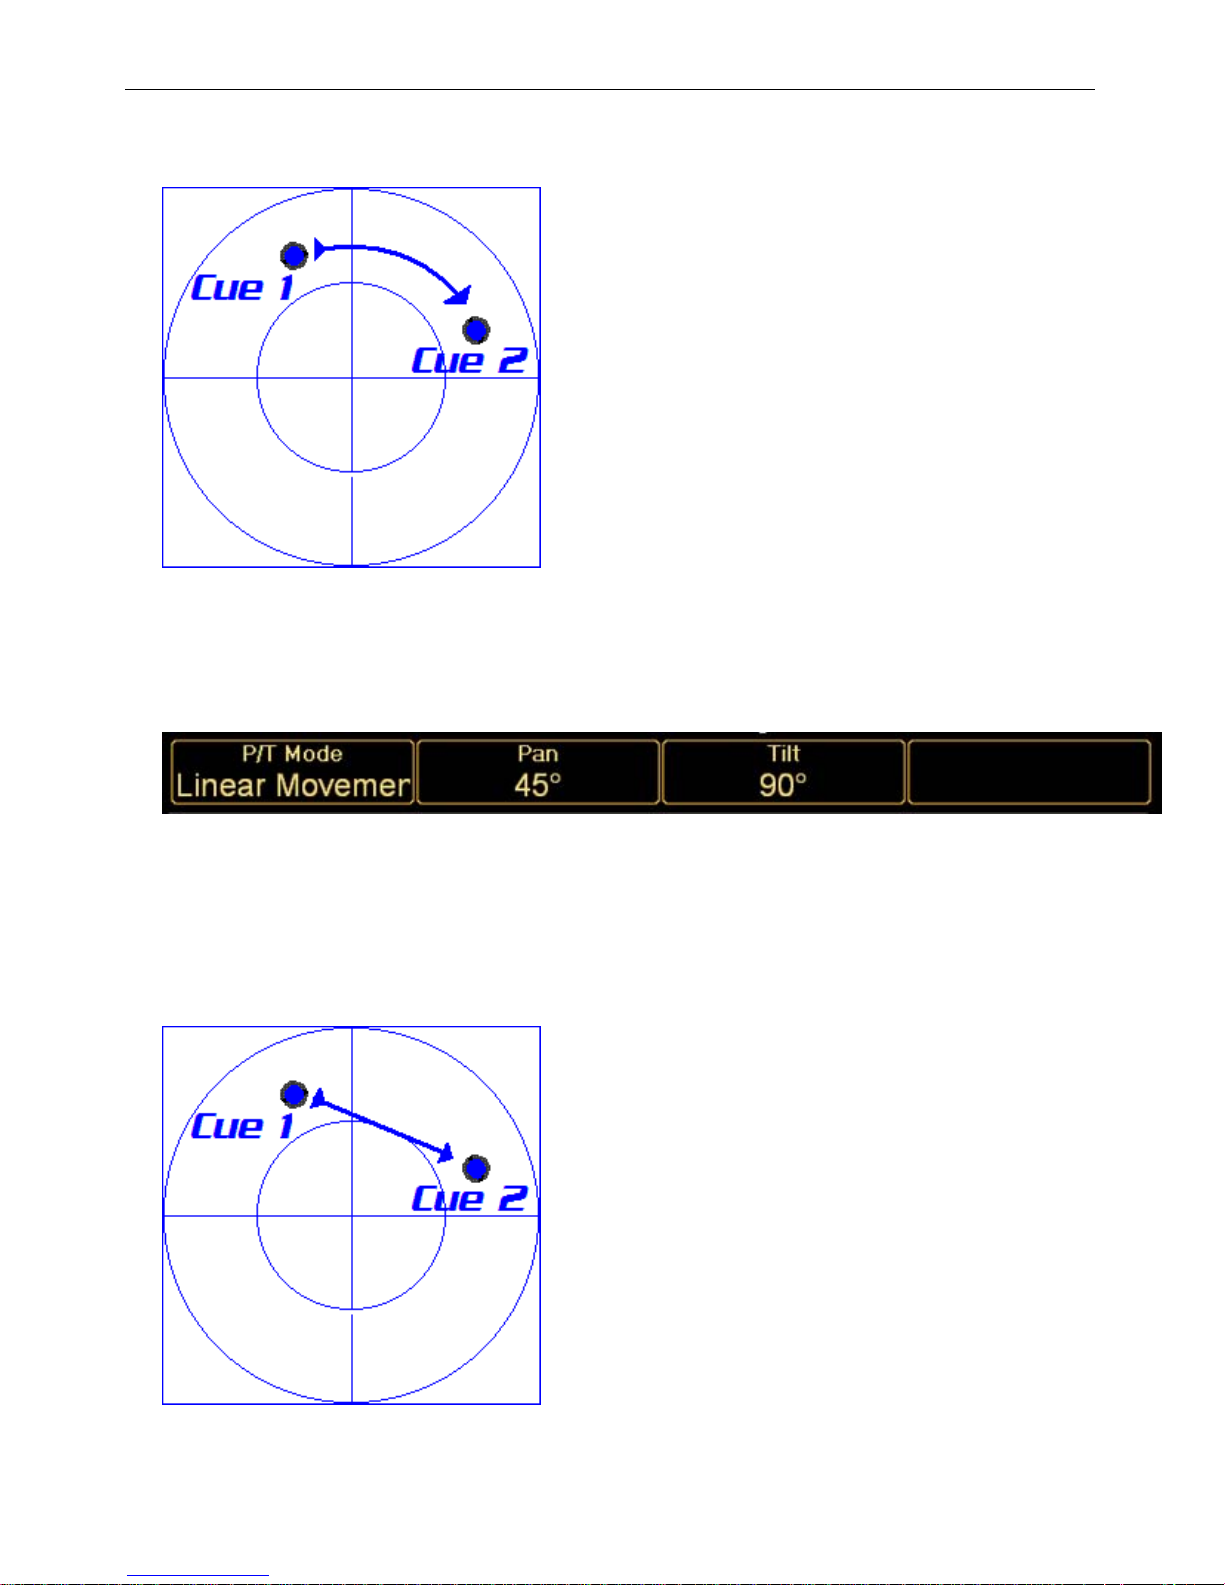
lens train with two motors within a yoke. This Pan/Tilt relationship equates to a polar
coordinate system using azimuth and elevation. When you move in this coordinate system, if
Strand Lighting
p19
Page 21
Palette OS v10
you pan more than you tilt, as the beam of light intersects the plane of your stage, it will
move in an arc:
We have become used to this characteristic movement of moving heads. Very good m oving
lights that move extremely smoothly are sometim es described as moving in an organic
manner or looking like they are operated by a follow-spot operator. People are quick to
forgive the fact that they are always moving in this arc pattern. UAC gives you the option of
how the light will move. It doesn't have to move in an arc. When a follow-spot operator
moves a light from point A to point B, the light normally travels in a straight line.
There is a Movement attribute that alters the way fades are calculated when you press GO. If
you record a cue using specific Pan and Tilt values and specify the Movement to be Linear, the
end points of the cue do not change, but the method the intervening Pan and Tilt values get
from Cue 1 to Cue 2 does. It is not a linear crossfade mapped to a polar system, but rather a
transition that forces the Pan/Tilt mechanism to travel the beam of light in a straight line. Not
only in a straight line, but also at a constant velocity on the stage deck, regardless of how far
Cue 2's end point is in relation to the hanging position of the fixture. The result is that moving
light cues will look even more organic when programmed this way.
Strand Lighting
p20
Page 22
Palette OS v10
Zoom Example
The 540 versus 360 degree examples above demonstrated that you can swap one fixture for
another and get predictable results. Far more useful is the fact that the same values are used
to control different types of lights in a similar fashion. Looking at the zoom attribute
demonstrates this again.
It is quite common to have two or more different types of lights in today's lighting rigs.
Matching beam sizes is a process of grabbing one type of light, setting its zoom, then
selecting the other and tweaking it to match. You cannot grab both and crank the wheel and
hope to get matching results. UAC eliminates the need to remember who made what light
when you're programming. Everything in the air is considered a tool to get the job done; why
should you be expected to address each light in a different language?
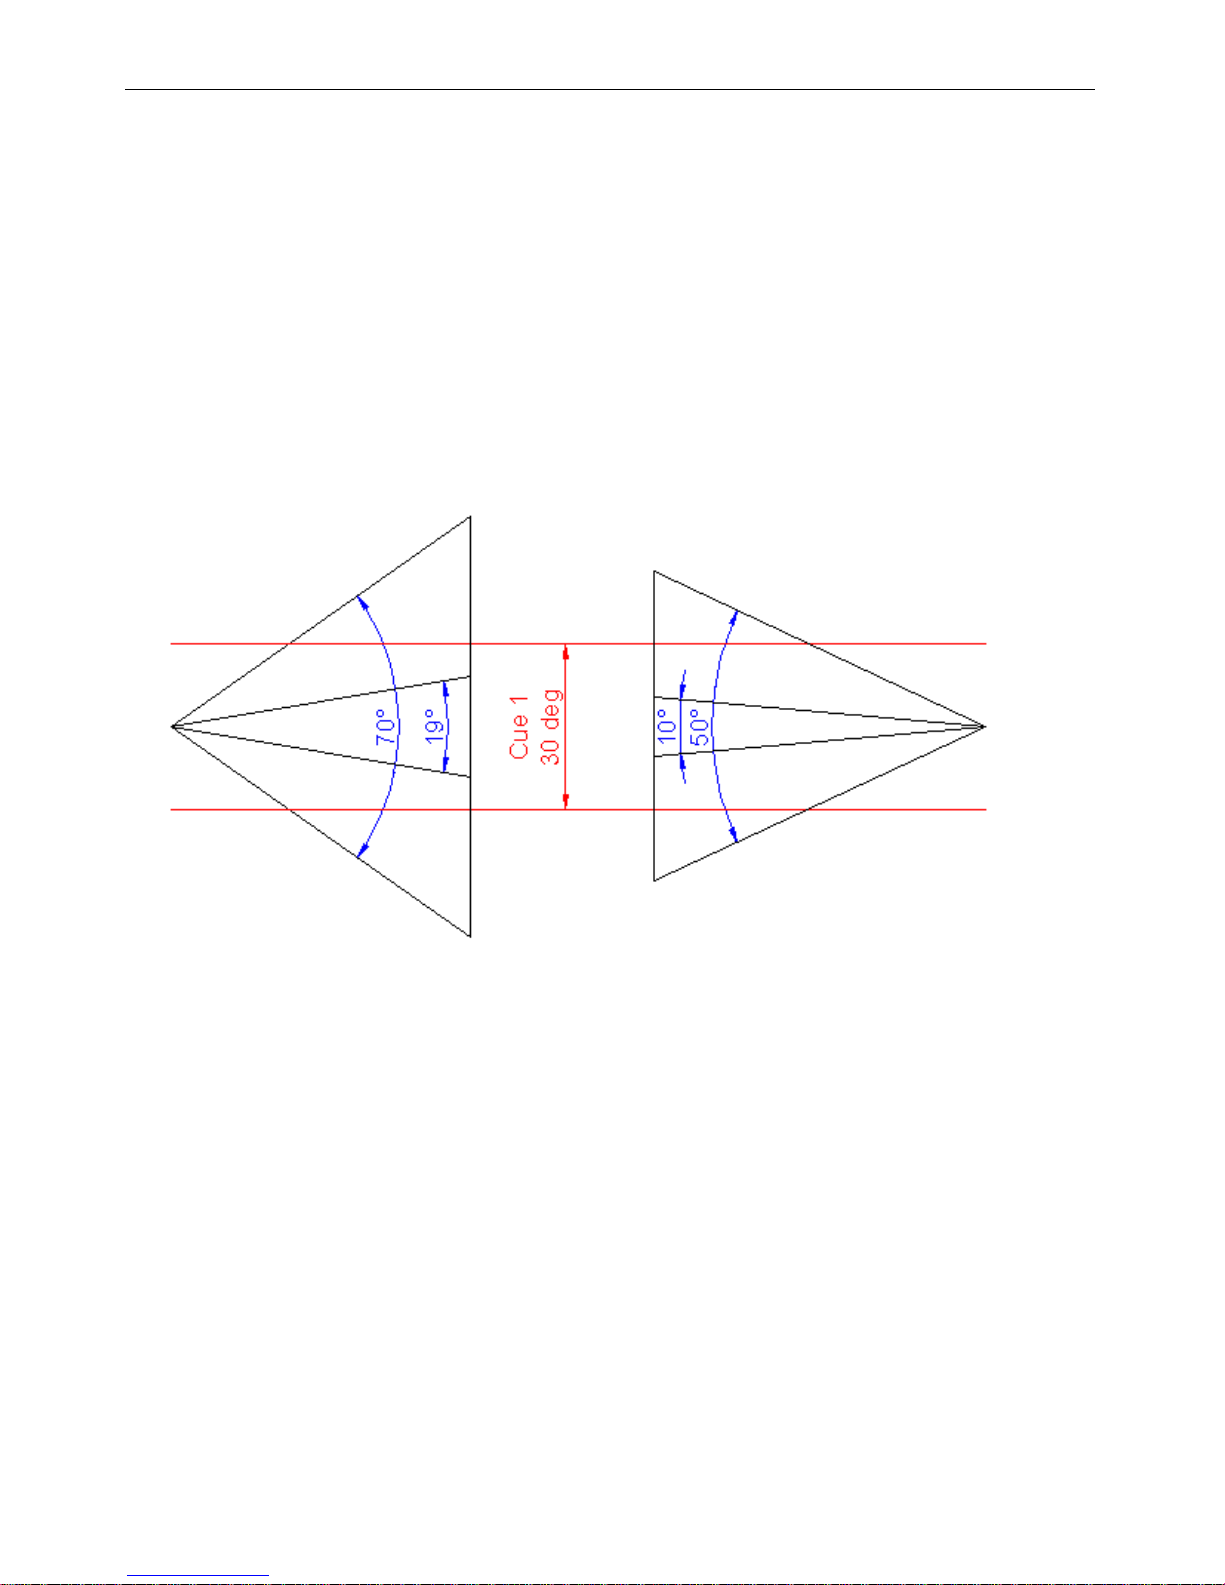
Here are two lights; one that has a zoom range of 19° to 70°, the other from 10° to 50°. Cue
1 is written to put both at 30°:
It is just that simple! Cue 1 stores a value of 30° and both lights achieve it. You rig looks
consistent and symmetrical with no undesirable surprises and no need for manual
re-translation.
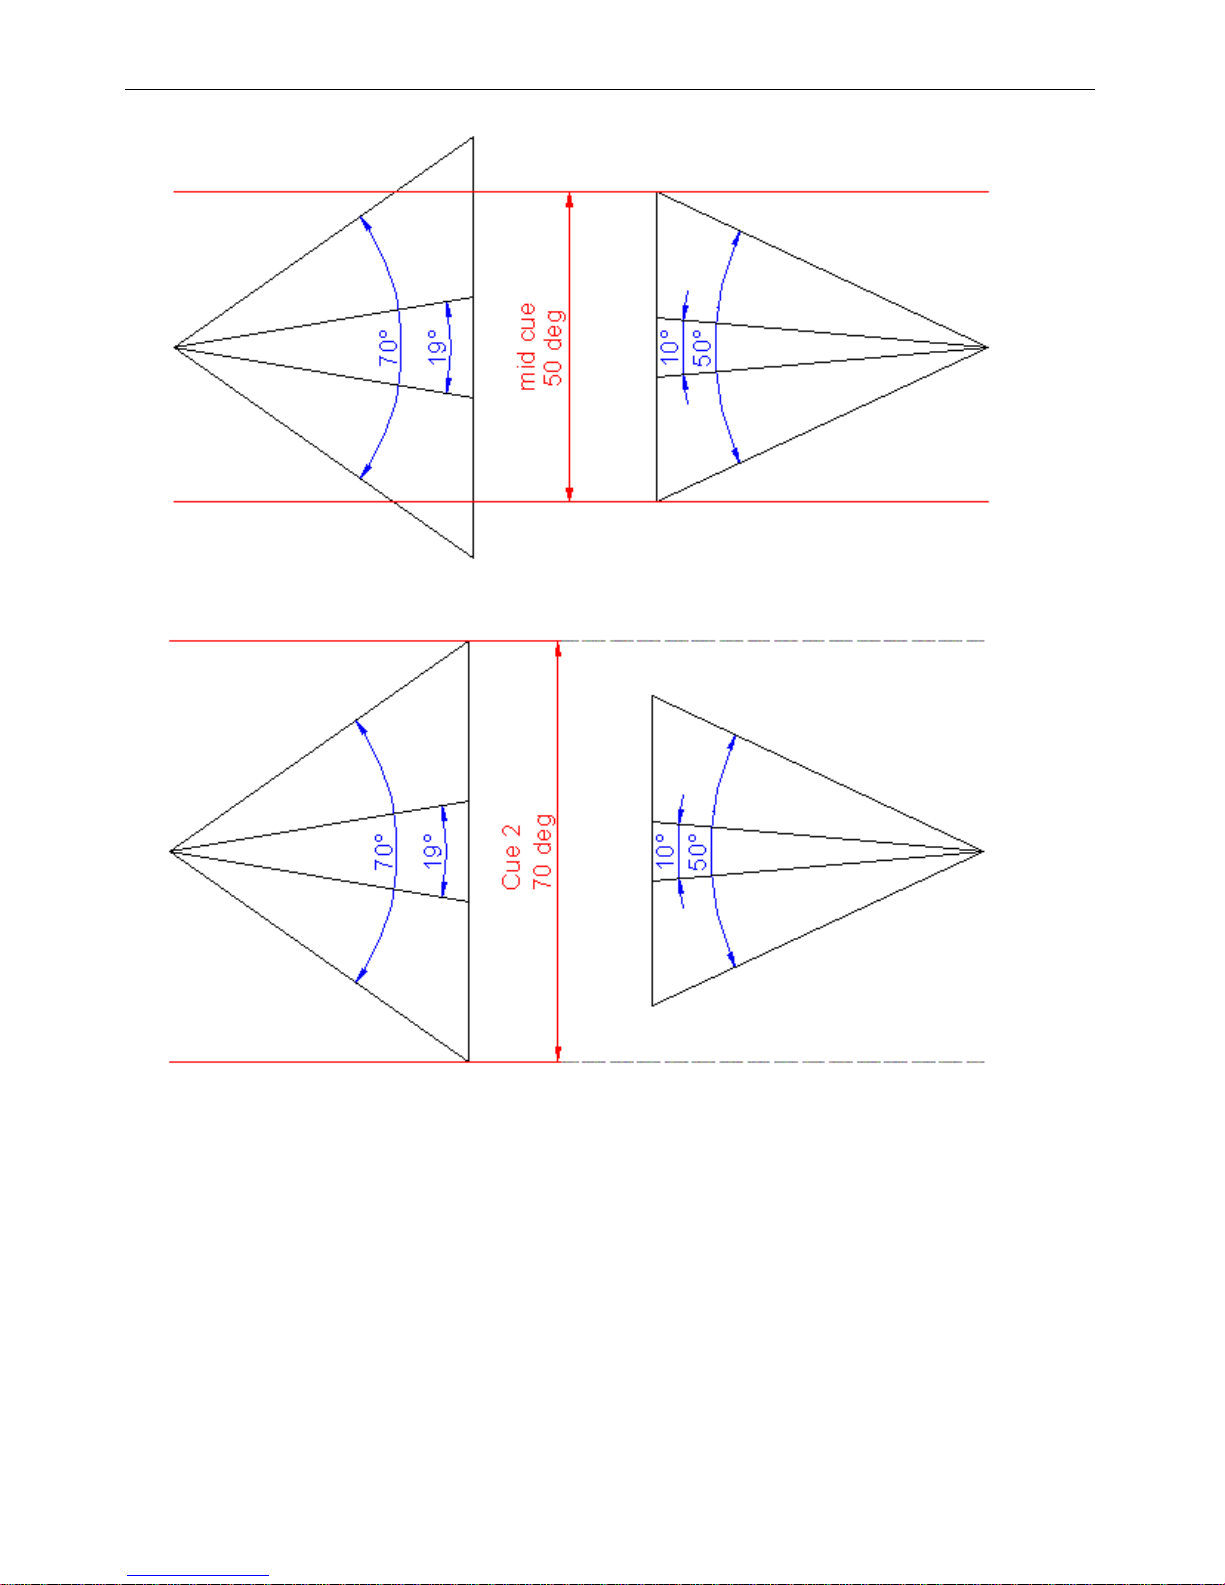
If Cue 2 was written such that both lights go to 70°, as you ran it, the fixture on the right
would have to give up mid-way:
Strand Lighting
p21
Page 23
Palette OS v10
It wouldn't stop the cue from running though. The fixture on the left would go all the way to
70°:
To be fair, Cue 2 could not have been written using the fixture on the right. This cue must
have been recorded using a fixture that can achieve 70°. Even though in this example it was
played back using a 50° fixture, it does not change the cue. If you later swapped it back to a
70° fixture, it would go to 70°. It is only when writing cues that you are limited to the
physical constraints of the light currently patched.
Shutter Control Example
One the most time consuming endeavours when programming moving lights is shutter
control. To achieve desirable effects, the shutter mechanisms need a lot of motors, and
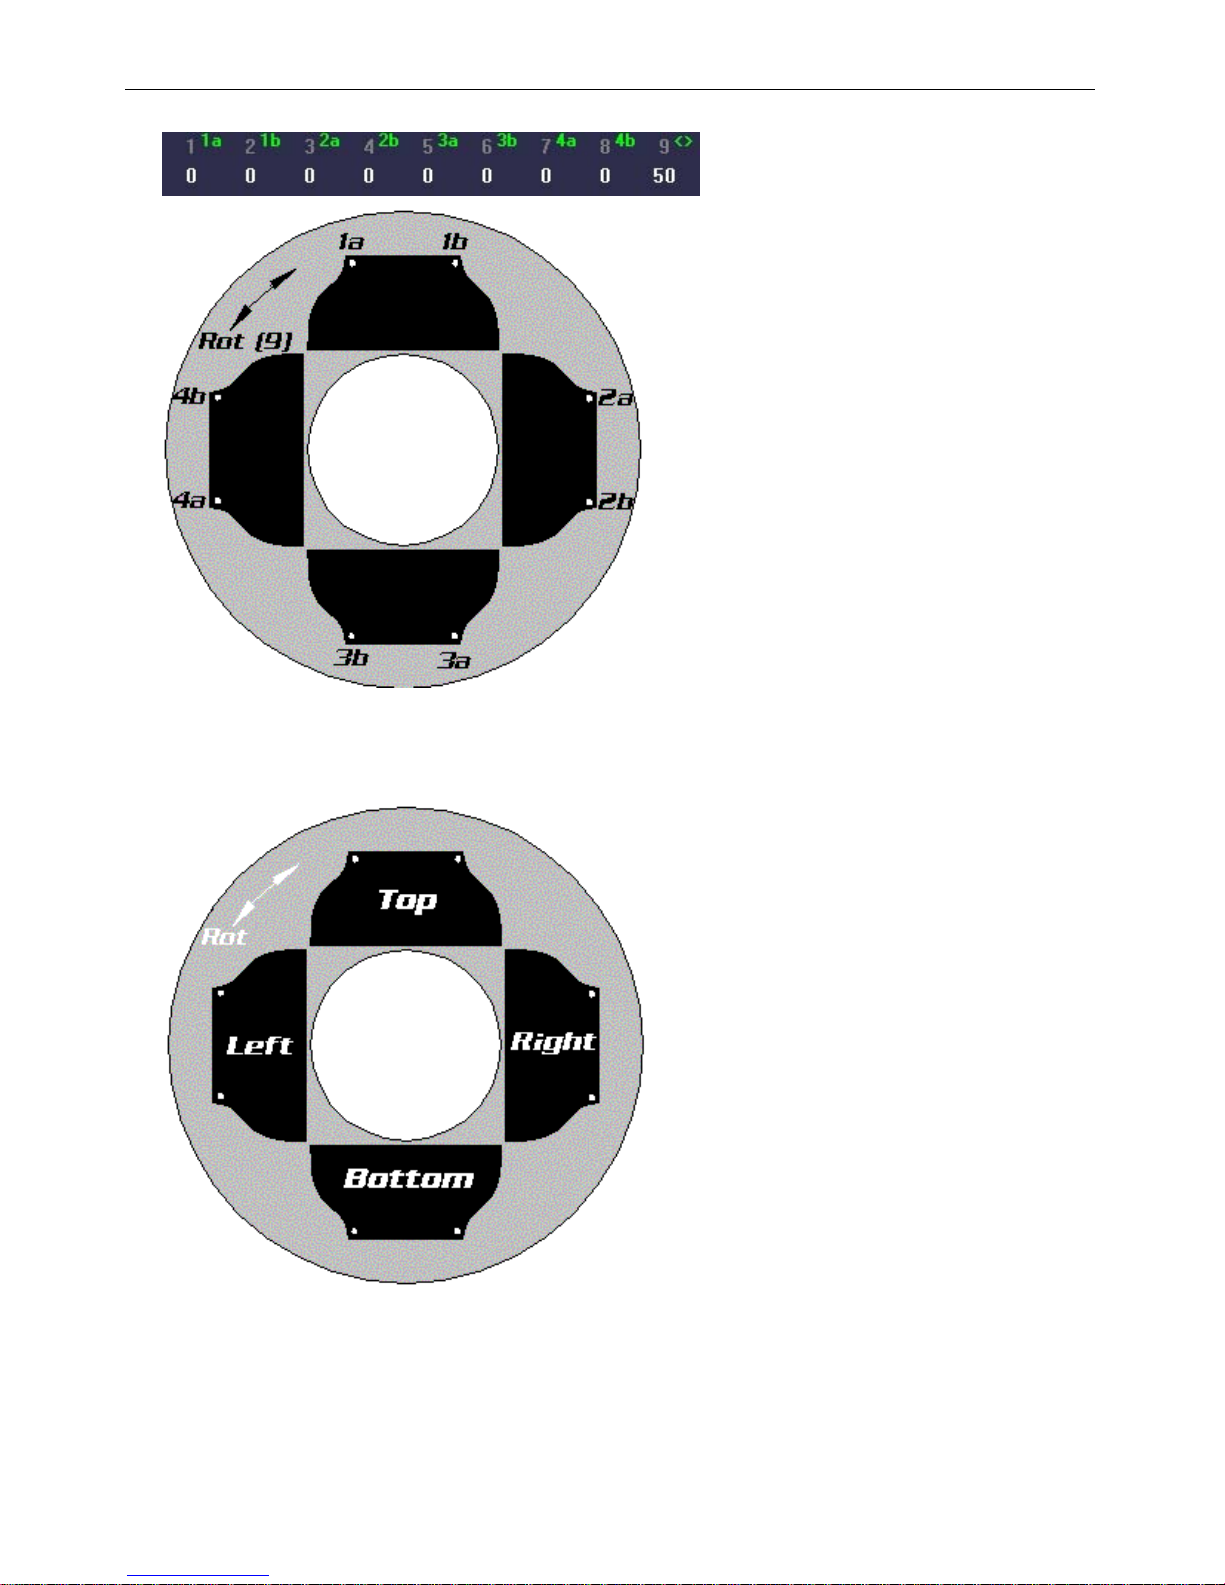
hence, a lot of control channels. Typically, most shutter assemblies have nine motors. There
are four shutters, each using two motors to control its position within the aperture of the
fixture and a ninth to rotate the entire assembly clockwise or counterclockwise. Many times
these channels are labelled like this:
Strand Lighting
p22
Page 24
Palette OS v10
You can imagine that trying to make some light cuts can be a tim e consuming effort of
hunting and pecking for the right channel or more likely, pair of channels. That is why UAC
groups related pairs together onto encoders to reduce the search process by half. UAC labels
the shutters like this.
To get to the shutter control, the encoder banks group opposite shutters together. So the first
encoder bank deals with the Top and Bottom Shutters. Moreover, motors 1a and 1b are
grouped together on the first encoder to thrust the encoder into the aperture of the fixture.
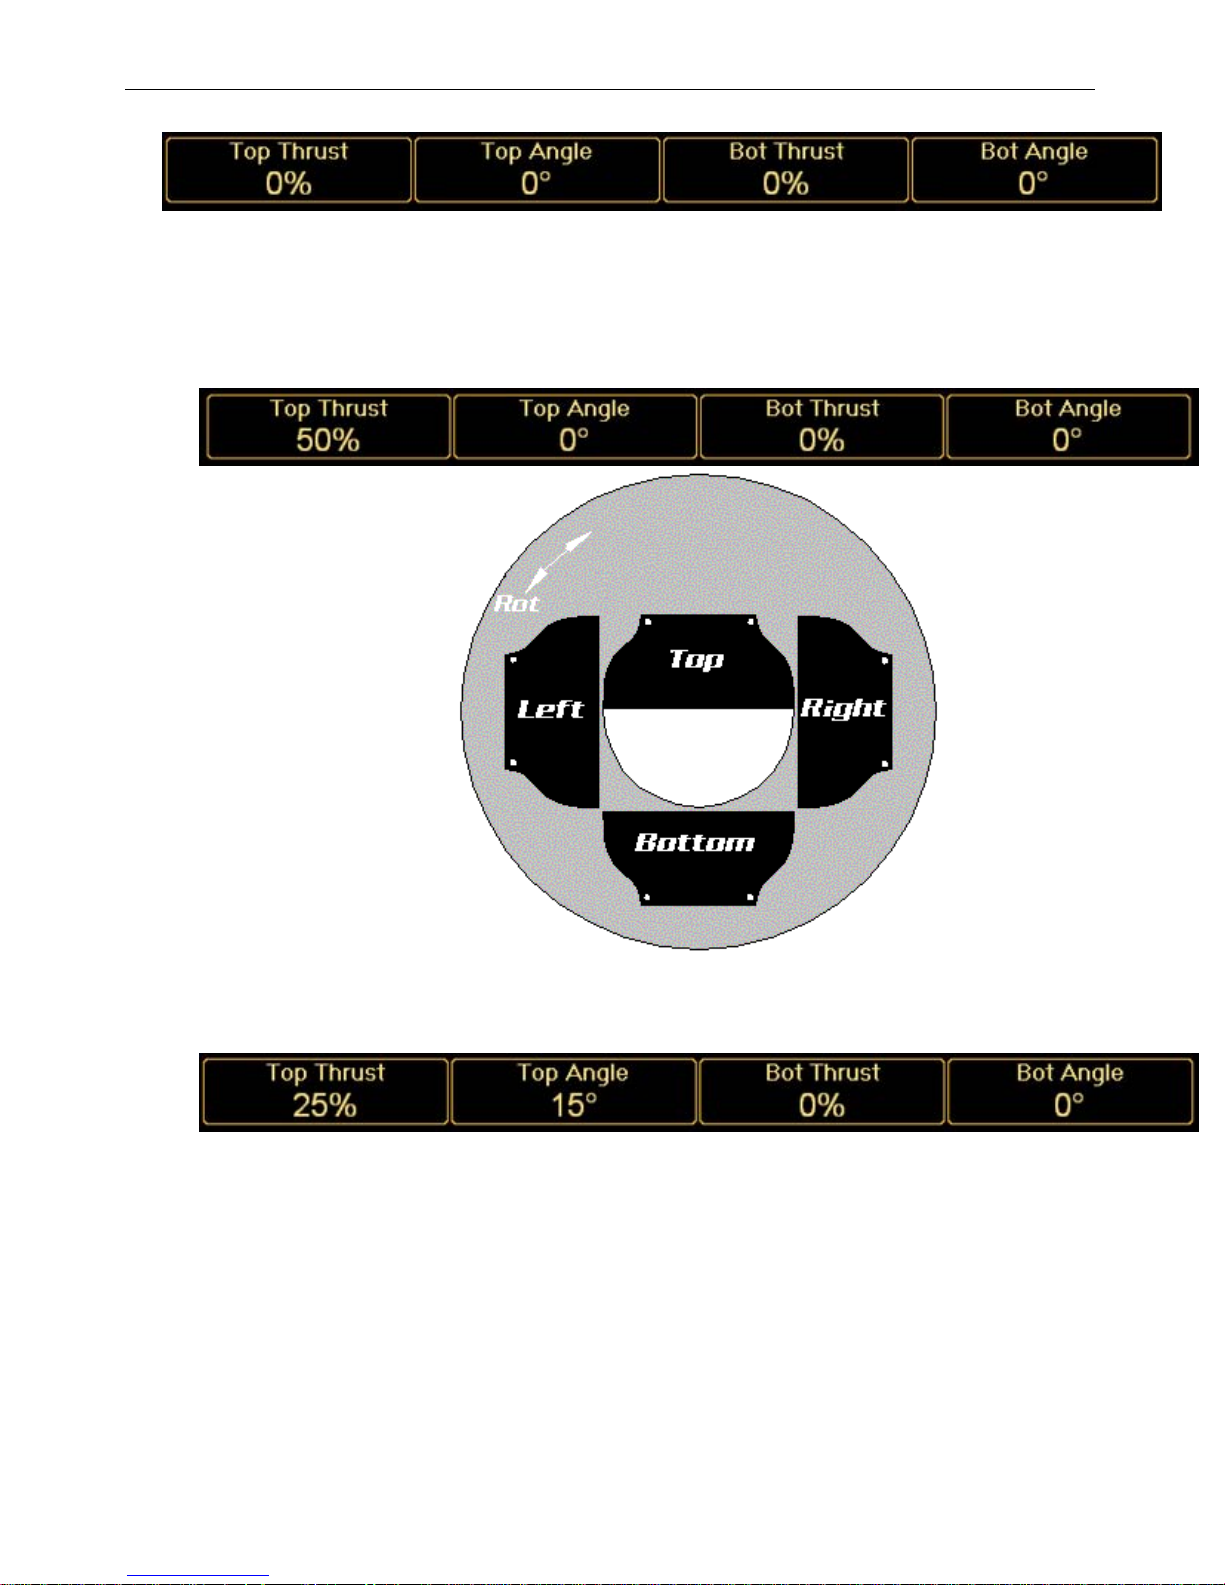
The next encoder controls the relationship between those two motors, giving you one handle
for controlling the angle of that shutter:
Strand Lighting
p23
Page 25
Palette OS v10
In this example, note the value of Top Thrust. It is set to 50% and the top shutter is cutting the
beam in half. If you cranked the first encoder all the way to the right, it is unlikely that it will reach
100%. Most moving lights only allow you to put the shutter in part way into the field of light. That
exact amount is represented here in percent.
If you adjusted the second encoder to adjust the angle of the Top Shutter, note how it affects the
beam of light. In this example, the shutter is about a quarter the way across the beam and cut to a
15 degree angle.
The following examples show how UAC greatly simplifies the process of getting ideal shutter
cuts.
Strand Lighting
p24
Page 26
Palette OS v10
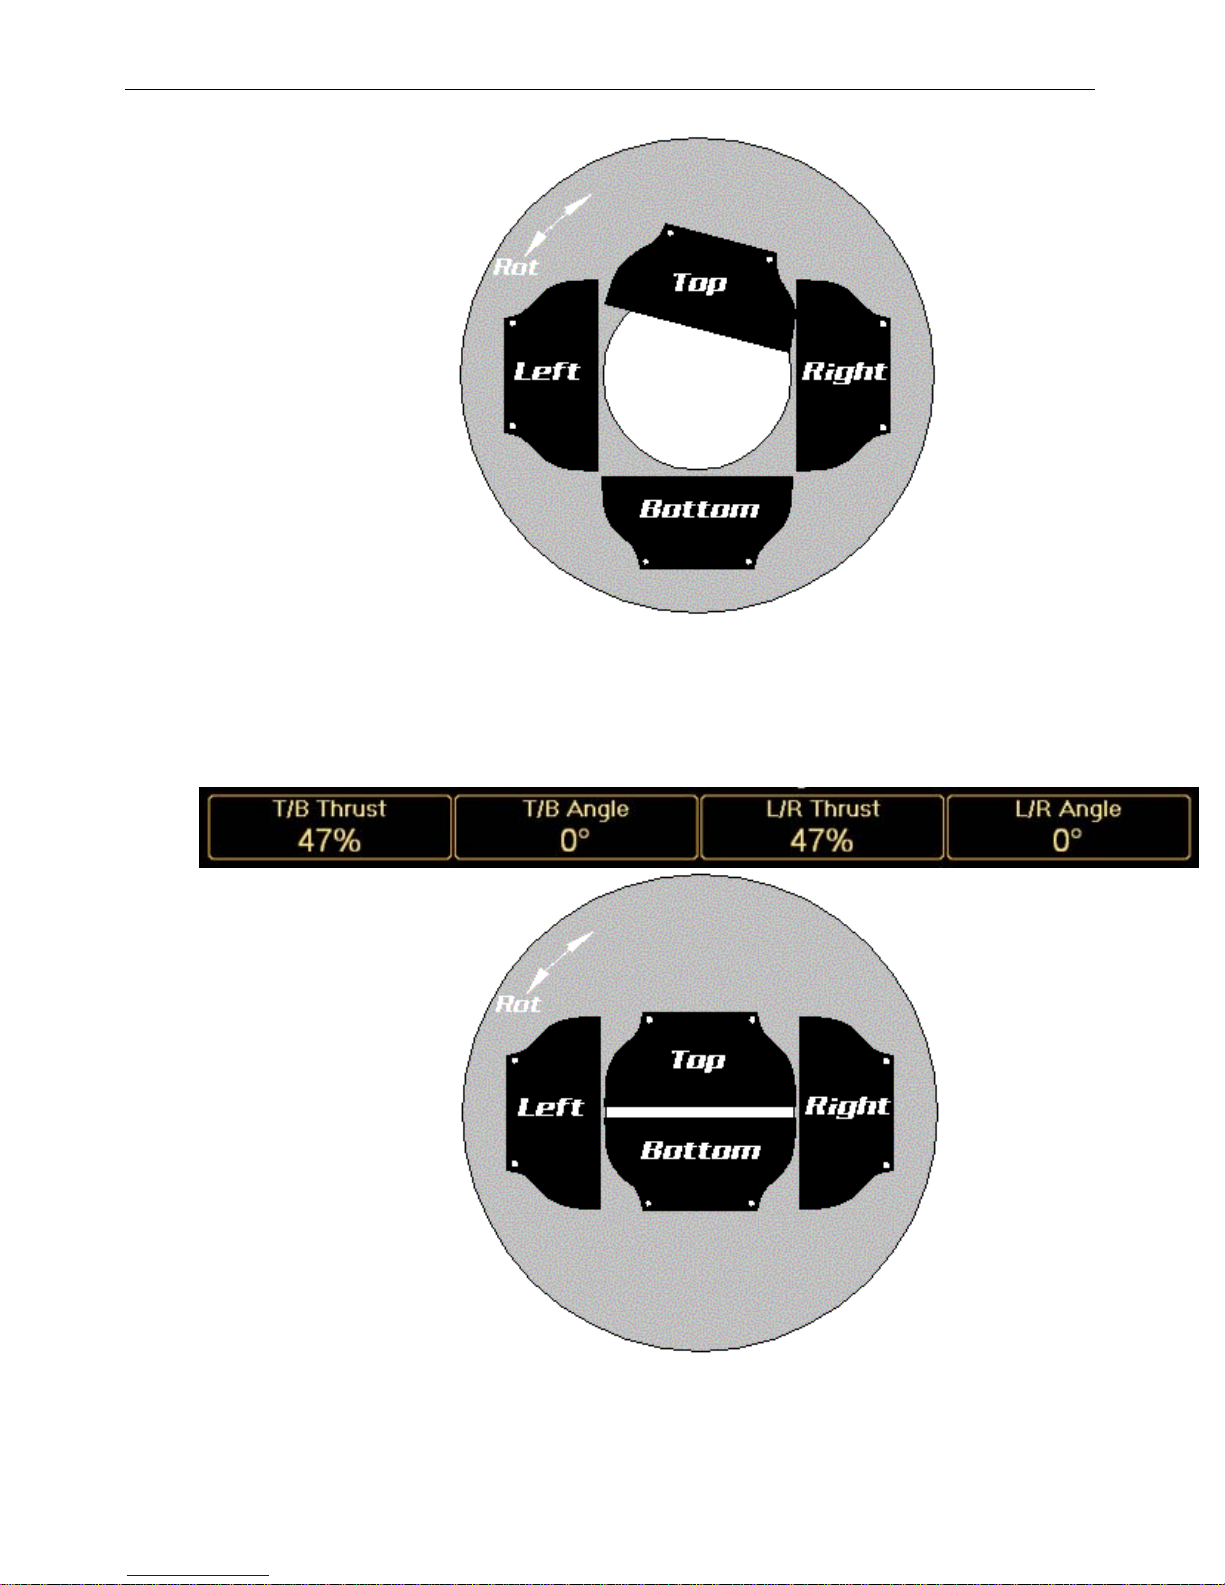
Banking the Lens family one past the group that controls Left and Right Shutters exposes a group of
four encoders that groups Top and Bottom on one wheel and Left and Right on another. That way
you can adjust two opposite groups of motors with one encoder. Here the Thrust of the Top and
Bottom are grouped together and set to a level of 48% resulting in a thin bar of light passing
through the center of the beam. If both attributes were put to 50%, the fixture would not output
any light whatsoever as the two shutters would be either touching or just overlapping.
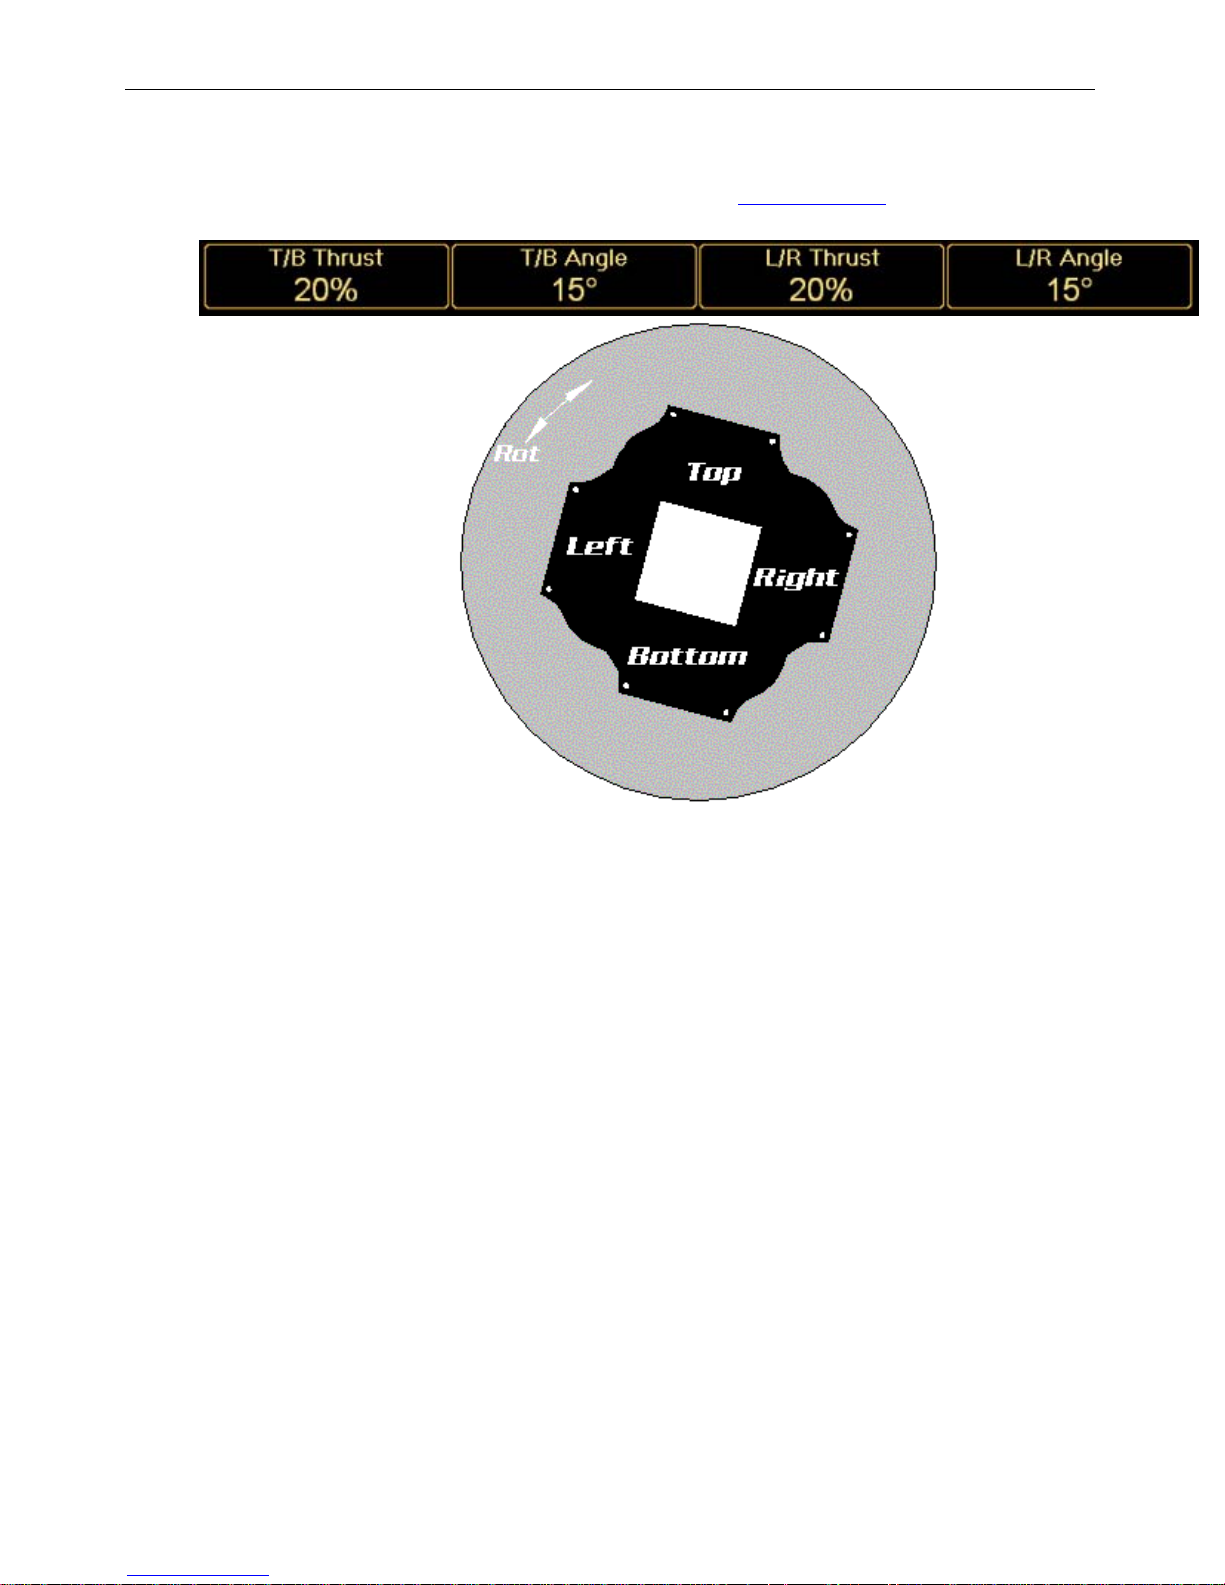
Using this third bank of shutter controls you could create a box of light by just adjusting one
encoder. Do this by using your left hand to press and hold both the T/B Thrust and L/R Thrust
softkeys and your right hand to roll the black wheel. Then grouping encoder 2 and 4, you could
Strand Lighting
p25
Page 27
Palette OS v10
adjust the angle of that box in space. In all of these examples, we never used the ninth motor
labeled 'Rot'. That attribute is generally available on a fourth Lens bank and is marked Shutter <>
and also uses the units degrees. Also check out direct Command Line
entry of values rather than
having to roll the encoders.
Gobo Control
Individual m oving light manufacturers' implementation of gobo control has notoriously been
annoyingly inconsistent. There are so many things these modern machines allow us to do
with imagining, but there has never been a consistent method of describing what they do.
UAC attempts to pull in the reins and consolidate on a common language of control.
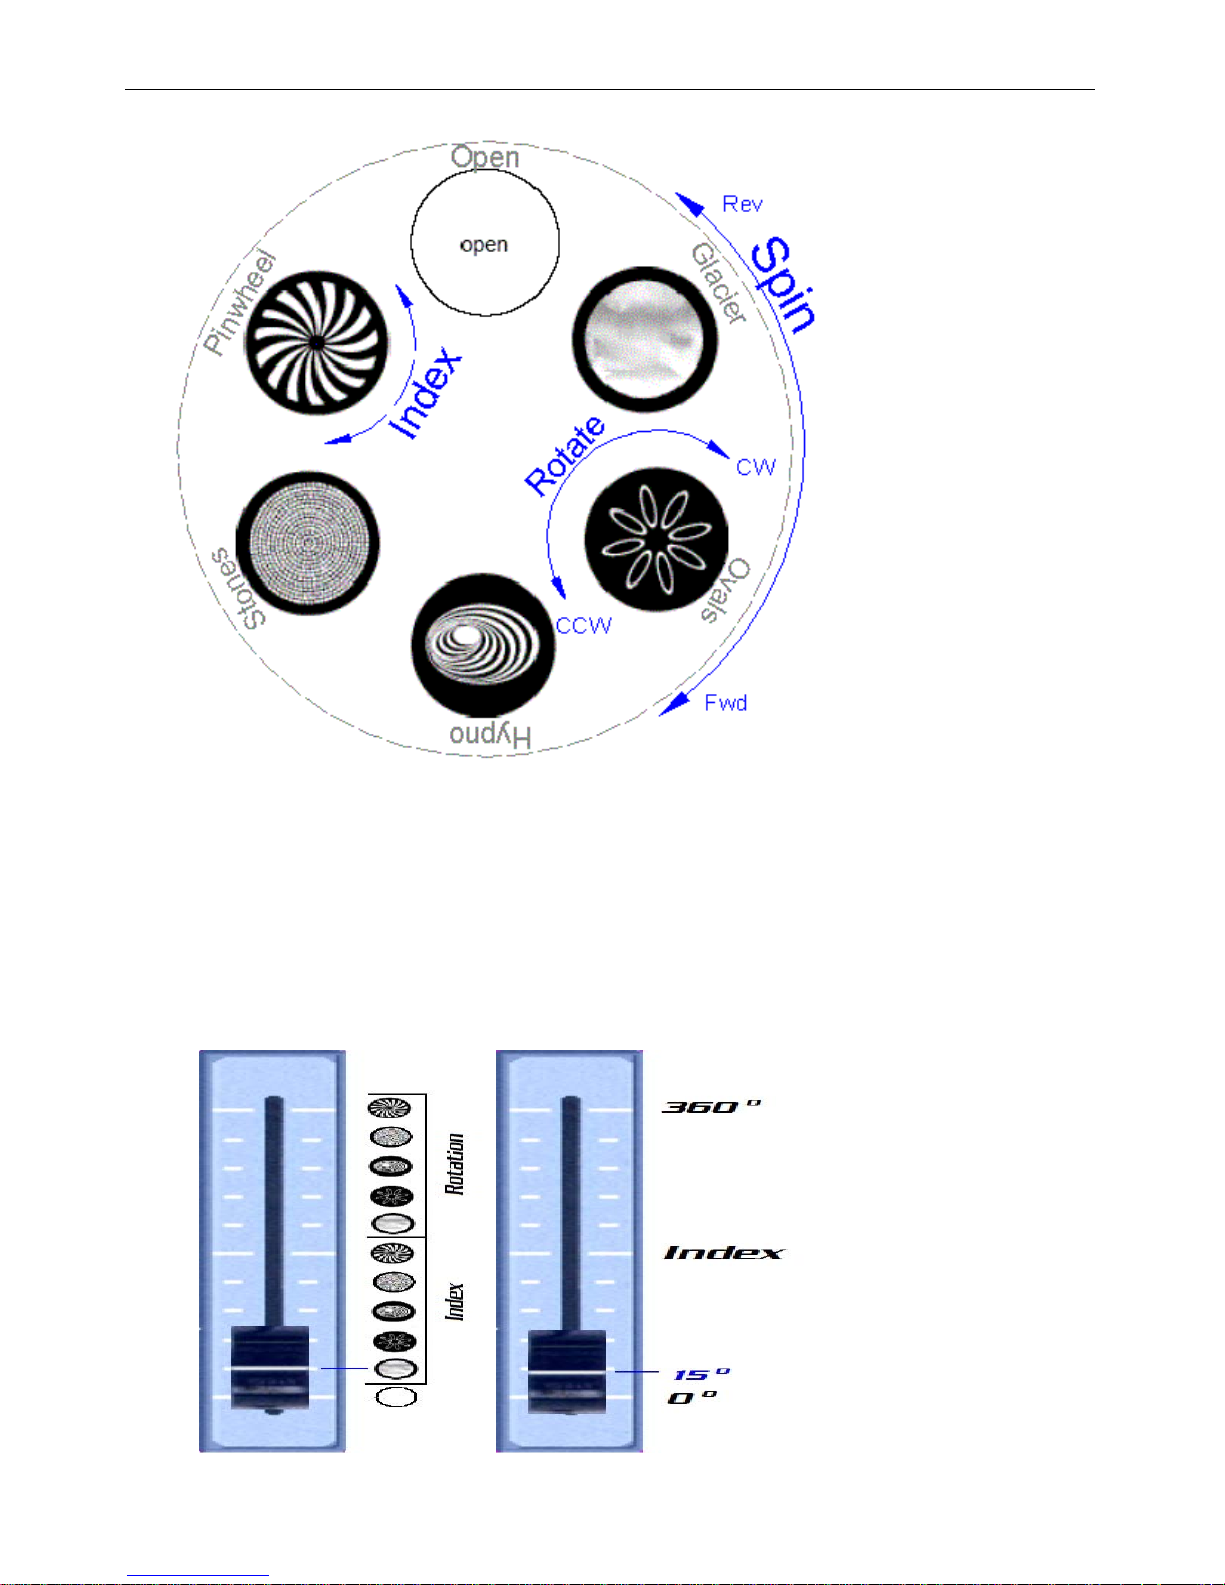
The assembly that holds the entire gobo selection is called the Wheel. Wheels can Spin
Forward or Reverse and can Select gobos. The individual choices are called Gobos. Gobos can
be Indexed in Degrees like hands on a compass or Rotated continuously Clockwise or
Counterclockwise.
Strand Lighting
p26
Page 28
Palette OS v10
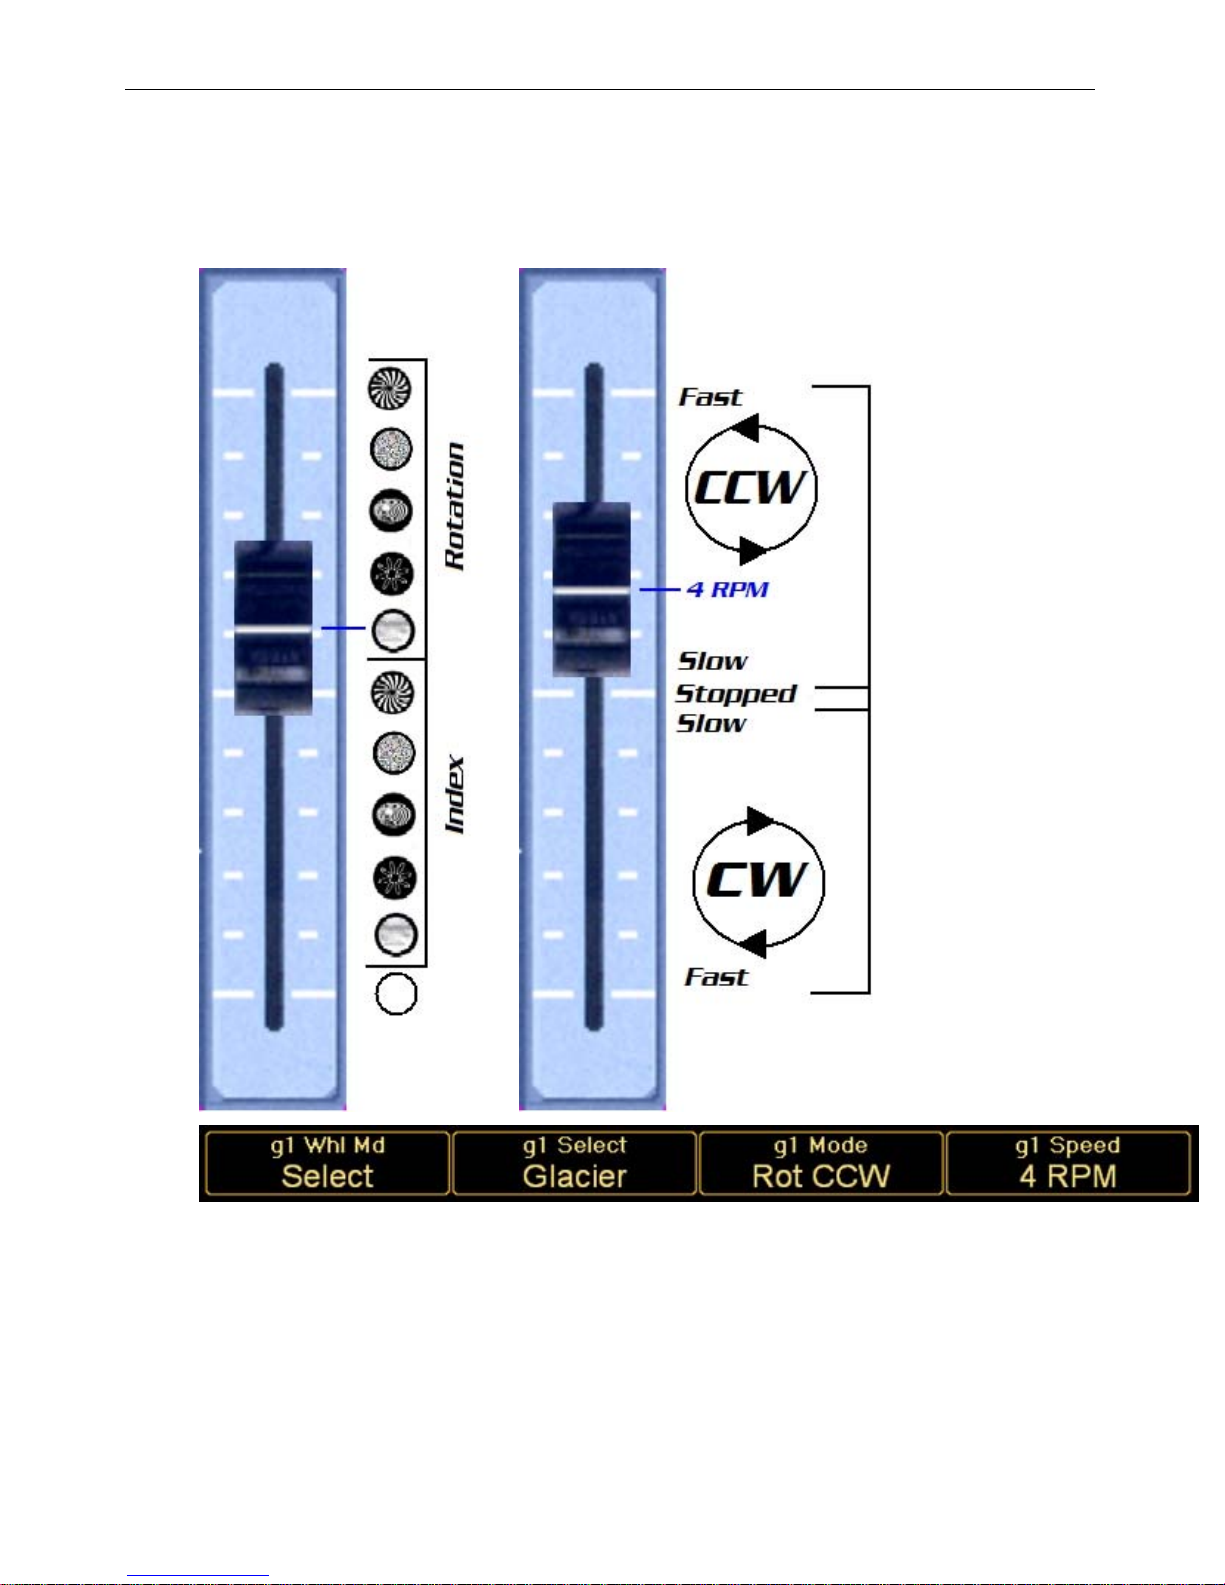
The first of the pair of these two linear channels is used to position the wheel and select a specific
gobo and do one of two things with it; either Index it or Rotate it. The second channel changes
modes based on the position of the first. Here the first channel is set to about 10% and Selects the
Glacier gobo for Indexing. The second channel is set to about 10% which indexes the gobo 15
degrees. Palette's blue attribute bubbles show how this would be achieved using UAC.
Different manufacturers use a variety of control handles to achieve all of these possible
behaviors. Some use lots of handles which surprisingly makes the control of the gobo wheel
easier, and other insist on bunching up behaviours on only a couple of channels. The
examples below are generic and are only used to show how it could be done using linear DMX
channels and how it is handled using UAC.
Strand Lighting
p27
Page 29
Palette OS v10
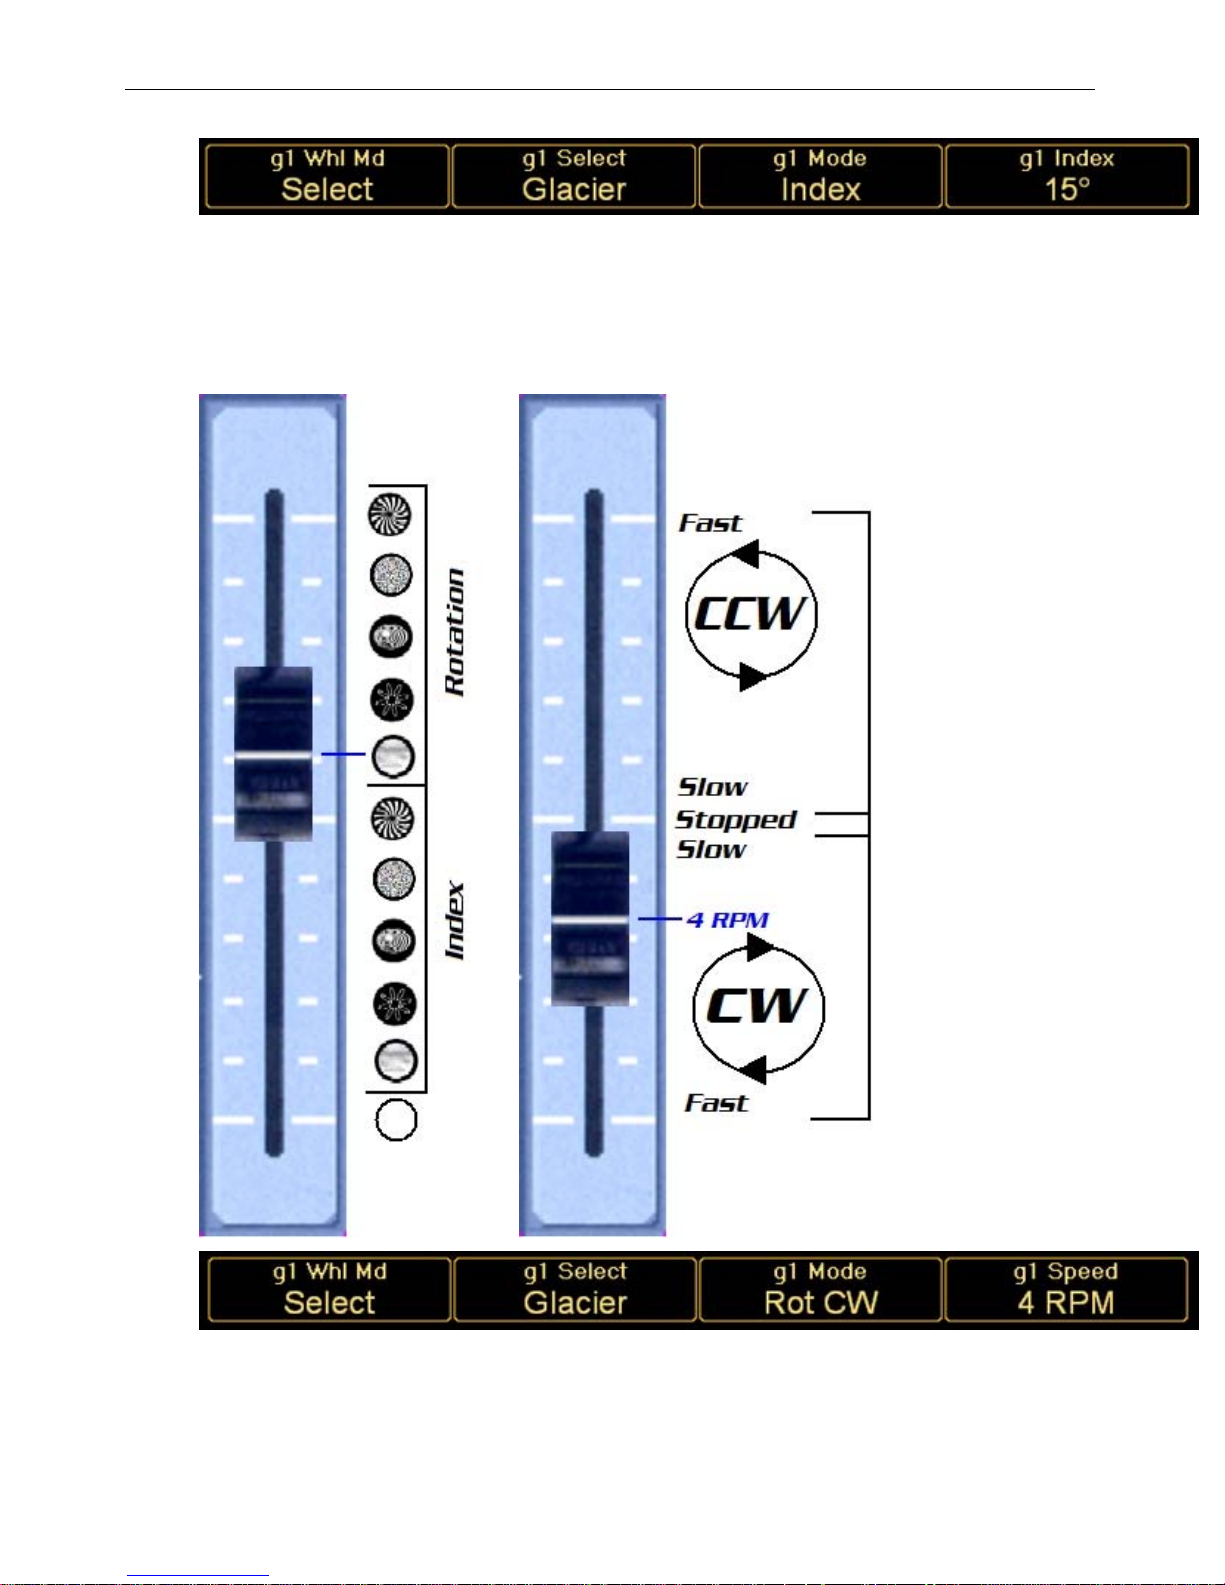
To rotate the glacier gobo continuously in the clockwise direction, the first handle must be placed at
60%. That changes the mode of the second handle and the 10% position is now meaningless. To
see a rotation of 4 RPM clockwise, the channel must be set to 42%. (Where that value comes from is
undetermined. Truthfully, you would never get a concise answer even if you to visit the factory that
built the fixture and asked the firmware engineers!) To achieve the same results in Palette, see the
blue bubbles below.
Changing the direction of the rotation on a DMX based system m eans you must travel the second
handle through a bunch of values that are not of interest to you. The gobo would slow down, then
stop, then change direction and speed up again as you adjust the control channel. This can be very
Strand Lighting
p28
Page 30
Palette OS v10
disconcerting for a designer who is watching the stage. None of those behaviours were asked for,
but were necessary to achieve the desired effect. With UAC, you just nudge the second encoder one
tick to change the value from CW to CCW. The fourth encoder, which controls the speed, is not
changed. The DMX values would jump from the value needed for clockwise rotation at 4 RPM directly
to the counterclockwise 4 RPM value (whatever that is).
Attribute Substitutions
Copying and swapping attributes among fixtures that share scalar properties like Position
and Zoom is only the tip of the iceberg when using UAC. The real power of UAC can be seen
when you start using similar, but not identical attributes and how UAC can work with them.
Color is a great example. There are three primary autom ated color systems in use today;
Strand Lighting
p29
Page 31
Palette OS v10
Subtractive Color Systems like CMY, Additive Color Systems like RGB and Fixed Color
Systems that use gel (like scrollers) or dichroic glass (like color wheels). UAC can work with
any combination of these three and make intelligent substitutions between them if required.
One of the most common modes of color control in automated lighting today is CMY color
mixing. Various mechanisms are used to place pure colors in the path of white light to
subtract different wavelengths out. By introducing varying amounts of interference, a huge
variety of colors can be produced. One of the desirable effects these sorts of mechanisms
allow is smooth transition from one color to the next. If your rig consists of various color
mixing fixtures, the attributes are dealt with in a scalar fashion, similar to Zoom.
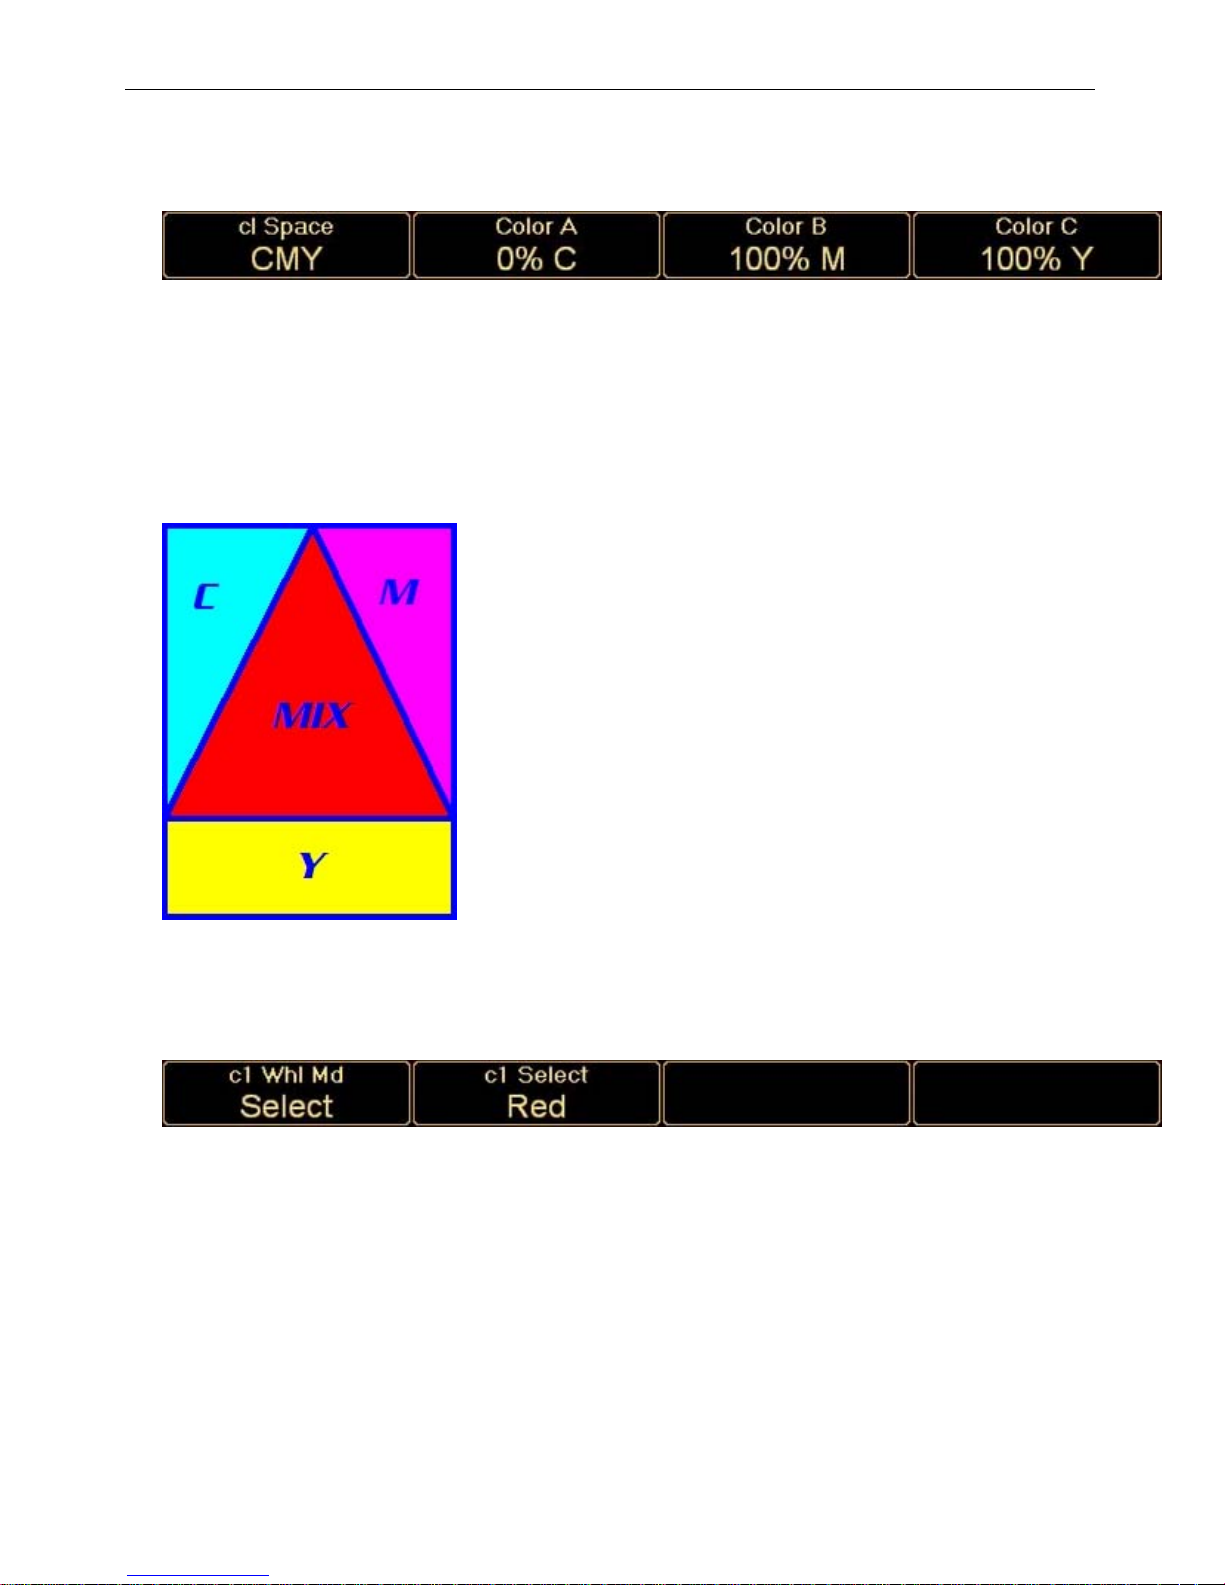
Let's look at an example of mixing a color on one type of light and then ask it to be
reproduced on another that doesn't possess color mix abilities. You can use varying amounts
of Cyan, Magenta and Yellow to produce a hue of Red:
If you copied those attributes to a fixture that did not have color mixing, but did have a
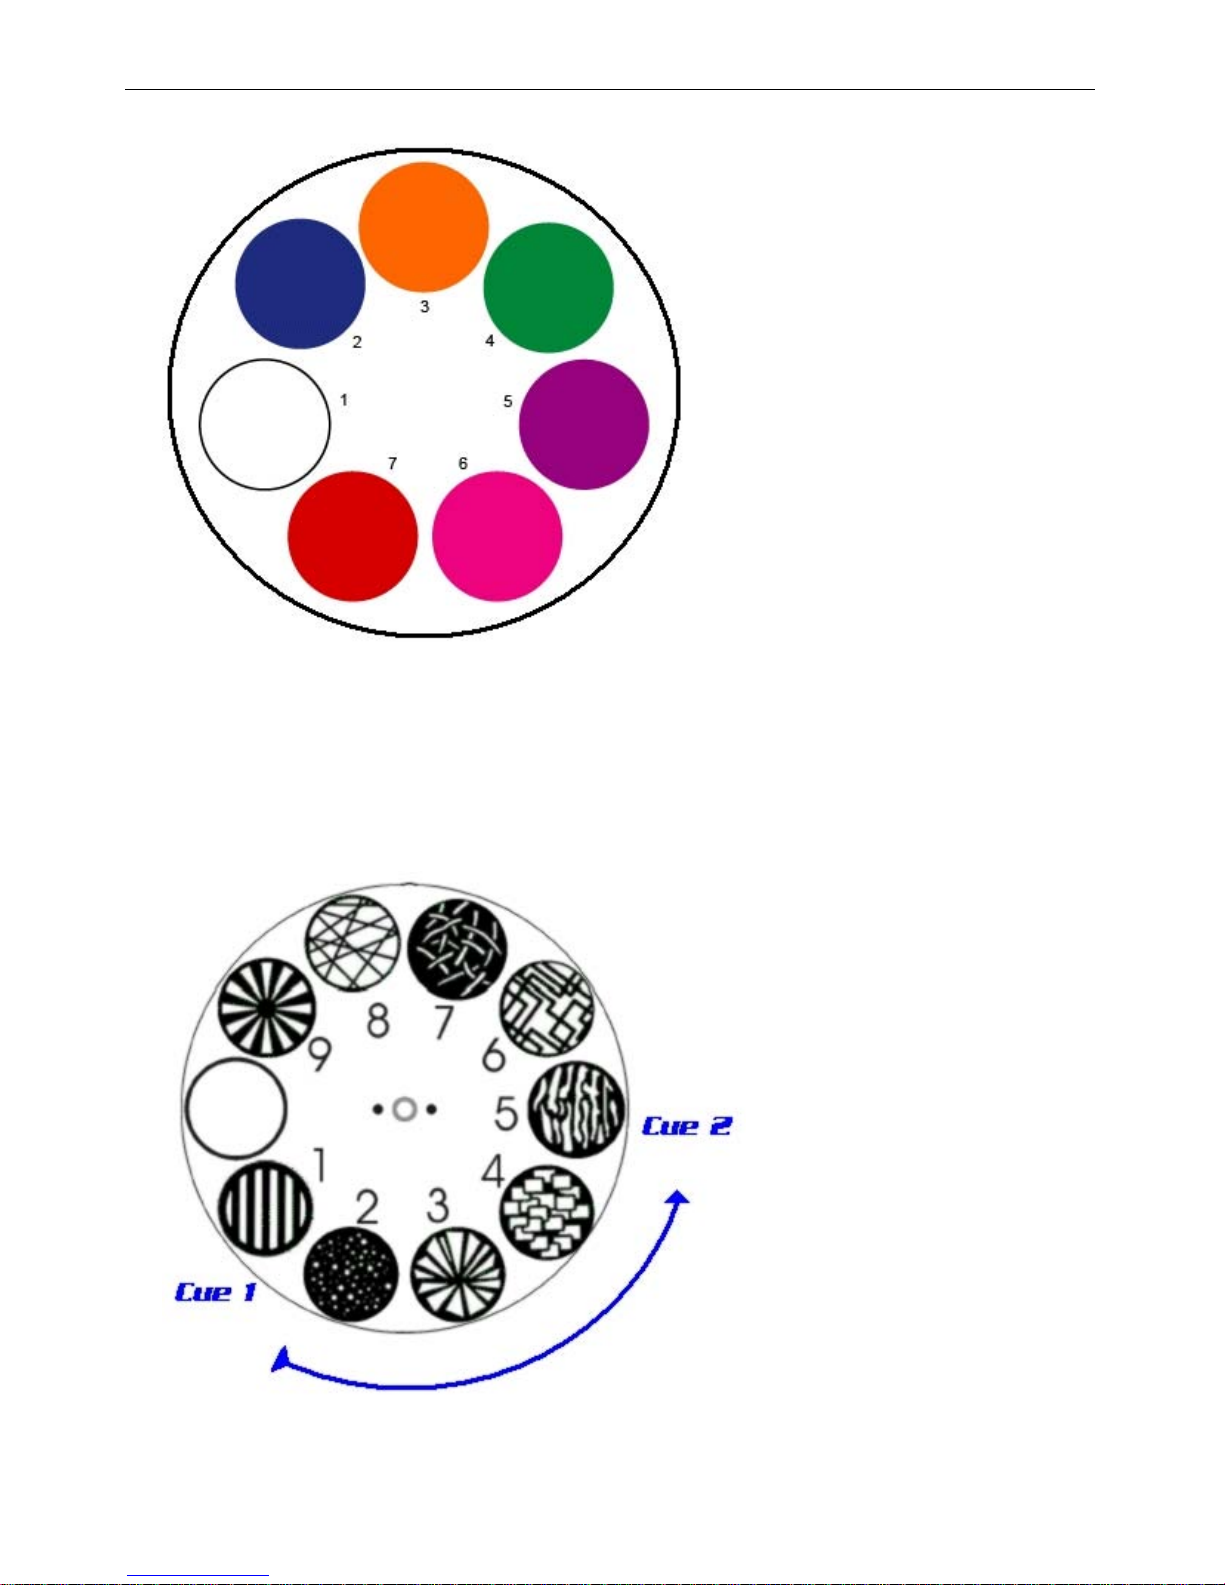
color wheel, a suitable substitution needs to be made. Since the UAC Fixture Library stores a
lot more data than just the name of a color, mathematical matching can be done. In a case
where the destination fixture has a color wheel that looks like the one below, Slot 7 would be
chosen. (By the way, it would not be stored as Slot 7, it is stored as "Light Red"):
Strand Lighting
p30
Page 32
Palette OS v10
Working in the reverse direction (from wheel to mix) is of course trivial when using UAC. The
library has a definition of what wavelengths make Light Red and can easily use the color
mixing system to recreate it.
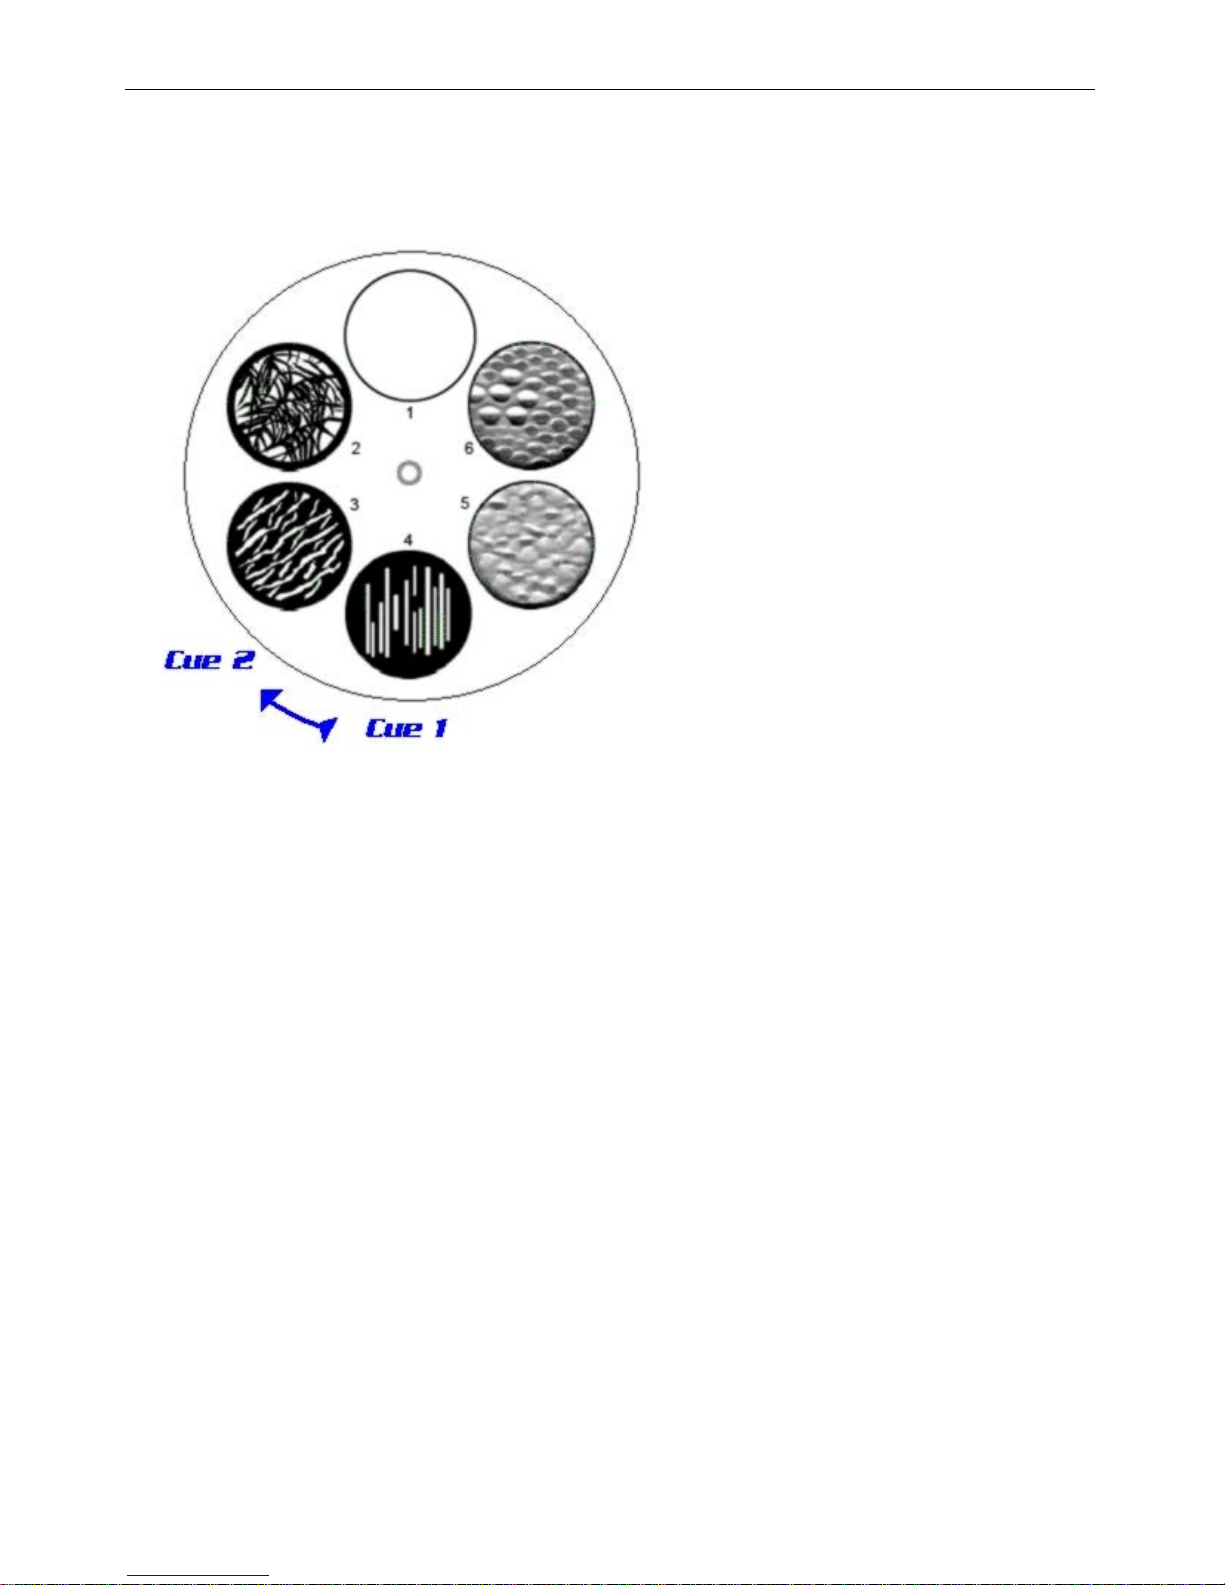
Gobos are also problematic when using stock fixtures. Different fixtures use different numbers
and types of gobos. Imagine that part of your rig has a Linear Breakup gobo that you use in
Cue 1. Cue 2 then switches to a Medium Wavy Breakup. The cues were written using a fixture
that has a gobo wheel with nine gobos (plus open) and the image below shows how Cue 1
positions the wheel to Slot 1, and Cue 2 positions it to Slot 5.
If you wanted to copy this effect to a separate part of your rig, you may not be so lucky to
Strand Lighting
p31
Page 33
Palette OS v10
find the same type of fixtures available for those cues. If you use another model of fixture,
sensible substitutions (and compromises) must be made. UAC can find similar gobos in the
destination fixtures and use them when running the cues. In this case, Cue 1 would select
Slot 4, and Cue 2 Slot 3.
Conditional Abstract Attributes
Automated lights are riddled with control parameters. In earlier days, many fixture
manufacturers combined DMX channels to achieve separate effects in an attempt to prevent
the fixture from consuming an outrageous num ber of channels. A common practice is to use
one channel as a mode channel to modify the behaviour of another. This makes life difficult
for the lighting programmer as he never knows what a handle will do when he uses it without
first checking the state of the mode channels.
UAC eliminates this level of confusion by not presenting you with controls that are ineffective
on one channel because of the state of another. It goes further by labelling each control
appropriately as to what it is doing at present.
To get to the plethora of controls on today's moving lights, all attributes are assigned into one
of five families:
Position
o
Color
o
Gobo
o
Lens
o
Special
o
Dedicated buttons or softkeys then 'bank' those attributes onto four encoders and their
present purpose is displayed in the blue bubbles:
Strand Lighting
p32
Page 34
Palette OS v10
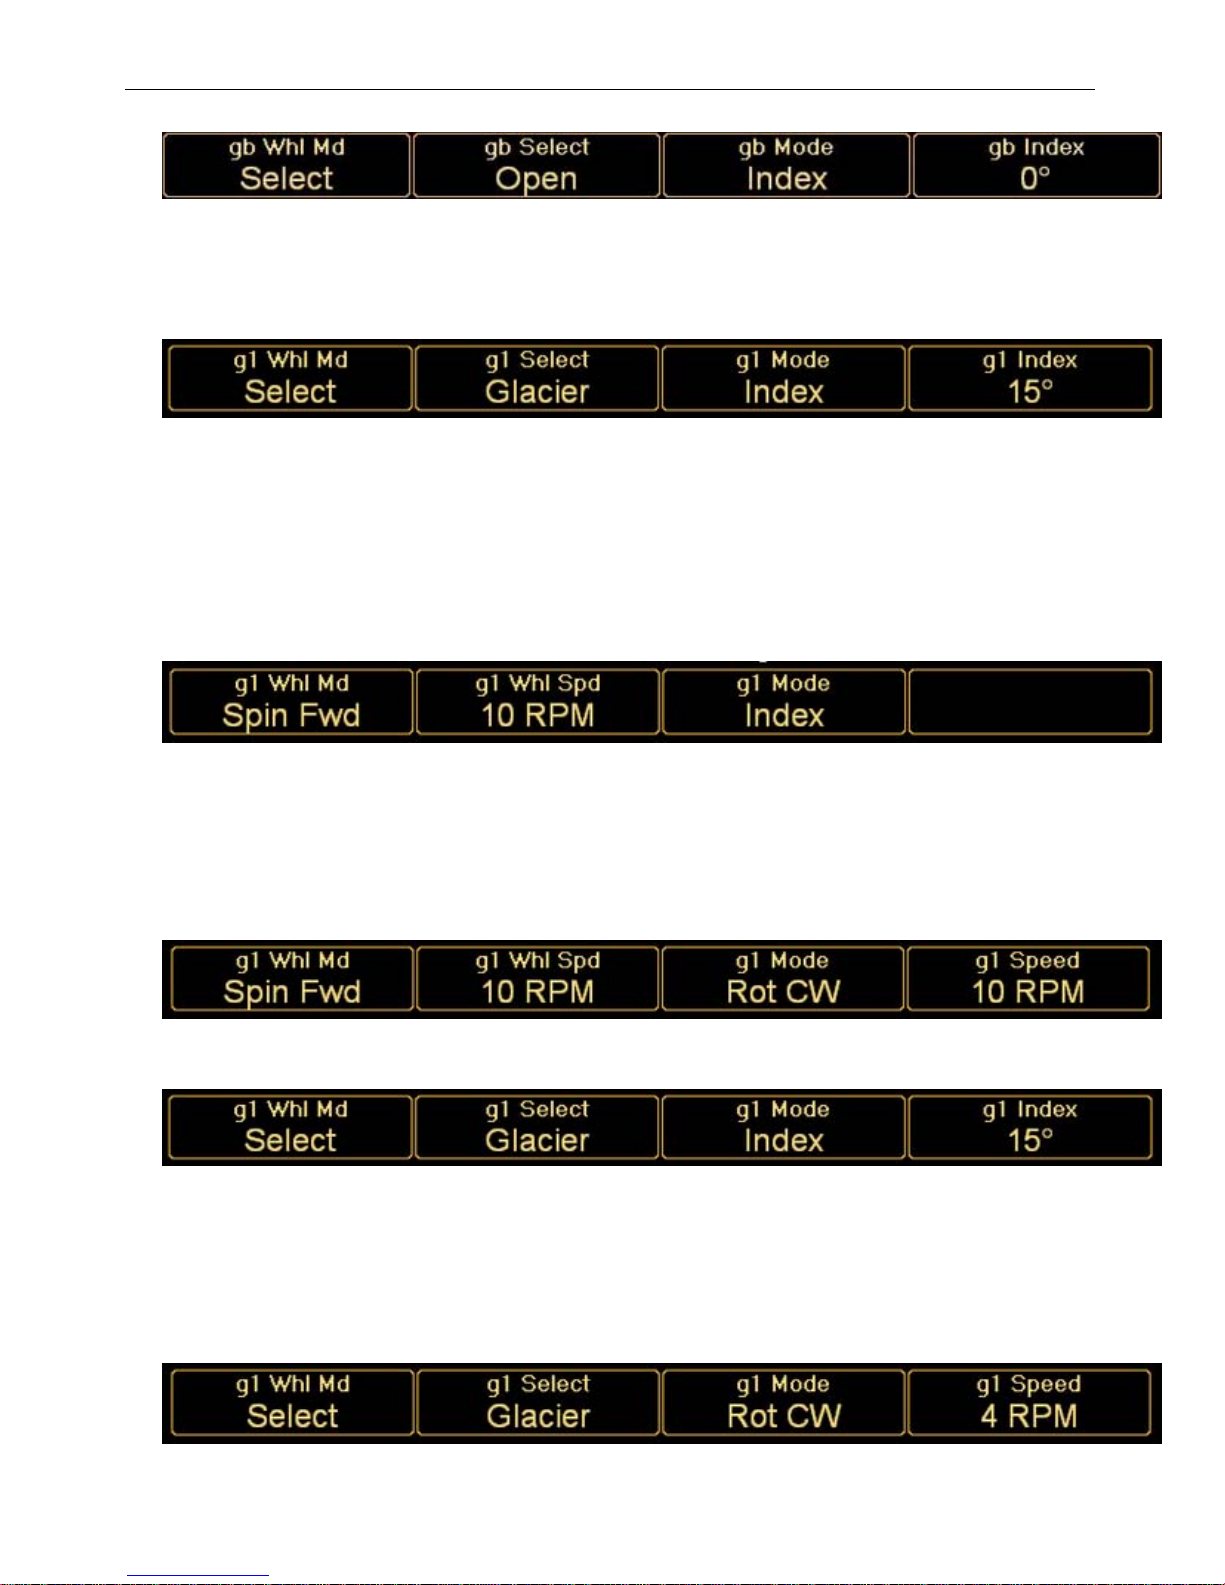
In this case, a moving light with multiple gobo wheels has been selected and the user has
used the Gobo button to bank the encoders to Gobo Wheel 1's controls. More blue bubbles
below the encoder labels show the present value of those controls. Here the Gobo 1 Wheel
Mode is dialed to Select, the current Selection is Glacier, the Gobo Mode is set to Index which
has been Indexed to 15°:
It reads somewhat like a book from left to right. The key thing here is that the DMX ordering
has nothing to do with how the controls are laid out to the user. In fact, as you will see below
in the Gobo examples, the number of DMX channels used to achieve all the effects of the
attribute do not enter in the equation either.
If the user were to nudge the first encoder, (the one labelled Wheel Mode) the entire wheel
would Spin Forward. If so, showing you the control that allows you to choose the gobo
Selection would be pointless. The entire wheel is spinning through the light path, so you will
see them all, not one at a time. The controls exposed to the user change to reflect this new
altered state:
The Wheel Mode encoder now shows that the entire gobo wheel is Spinning Forward. The
second encoder now allows you to set the speed at which the wheel spins, in Revolutions per
Minute. The third encoder shows that the indexing motor is held steady, but it is pointless to
say at what angle it is holding it as all gobos are rotating in a planetary system through the
light path. The four encoder is not used in this case.
If you then adjust the third encoder (G1 Mode) from Index to Rot CW, the fourth encoder
becomes available to adjust the speed of the rotation:
If the first encoder is changed back to Select, the second through fourth encoders will return
to their previous function:
This is where the Universal Attribute Control Model meets the Tracking benefits of this console
as the Index value of 15 degrees was not destroyed as it would have been on a pure DMX
desk (because typically they shared the same DMX control channel). The 15 degrees has just
not been visible when it was not applicable.
Nudging the second encoder from Index to Rotate Clockwise changes the purpose of the
fourth from Index to Speed and the units change from degrees to RPM. Note that the actual
gobo (Glacier) does not change.
Strand Lighting
p33
Page 35

Palette OS v10
While this looks straight forward and concise to the user, behind the scenes UAC is mapping
all of these controls to the appropriate DMX channels, regardless of how convoluted the
protocol is. An added benefit of this method of masking and unmasking attributes is that
controls like Speed that use RPM is not overwritten when the encoder changes to Index and
uses Degrees. When you come back to Speed, the RPM value you left it at will persist. UAC
essentially gives you more handles than the fixture manufacturer allotted.
Phantom Abstract Attributes
As seen above, exposing additional controls that the fixture manufacturer didn't allot for
makes controlling some types of lights more convenient. An ideal example of this is RGB LED
fixtures. Traditionally, the only controls the user can adjust are Red, Green and Blue.
Distinctly absent is an Intensity attribute. The undesirable side effect of this is that if you pull
down the Grand Master, the LEDs intensities remain unchanged. To blackout the fixtures, you
have to adjust three parameters rather than one. This becomes inconvenient when you just
want to lower LED based fixtures' level or take them out in one cue to only restore them in
the next. You must look up the RGB values from the preceding cue to restore them.
Horizon Control's UAC adds a phantom attribute to RGB lights. This intensity attribute does
not appear any different from that of any other fixtures', but it does control the overall
brightness of the LED without affecting its Hue. Another benefit of having this attribute used
in cues is that if you ever do replace an RGB fixture with another, more traditional type of
fixture, the Up/Down dynamics of the light are already in the cues. Color Space is a related
but unique extension of this methodology and is discussed further below.
Color Spaces
Complim entary Color Spaces are basically different methods used to desc ribe the individual
components that make up what the eye perceives as color. None of them are right or wrong.
They are individual and each one has its purpose. The selection of one over the other is
primarily a matter of choice. Most consoles only allow you to work in the color space native to
the fixtures you are controlling. That is, if you have a white-sourced light that has Cyan,
Magenta and Yellow dichroics place before it, you would be working in the subtractive CMY
space. If you have Red, Green and Blue LED lights, you would be working in the additive RGB
space. Some consoles have neat color-pickers that allow you to quickly grab desired colors,
but at the end of the day, they will be fading from one triplet of CMY (or RGB) to another
when they run cues.
When working with color mixing capable lights, UAC allows you to choose and crossfade in six
different color spaces. These are CMY, RGB, HSL (Hue Saturation Luminance), HSL' (Hue
Saturation Luminance Prim e) and, depicted in lower case so as not to confuse it with HSL, hsv
(Hue Saturation Value) and hsv' (Hue Saturation Value Prime). The difference between the
two Hue based color spaces and what the Prime means is explained below.
Lighting designers think of light as having three distinct properties; color, intensity of color,
and brightness. (This is not a discussion on shape and movement.) In the additive RGB color
space, to change the color, you need to change the ratio between the Red, Green and Blue
components. If you wanted to change the intensity of the light, you would have to project the
vector of the new RGB value toward the largest valued primary color (red, green or blue).
With respect to color, the same could be done with CMY, but to simplify the exam ple, we
don't want to get into the effects of a dimmer in the equation. If you want to make a color
brighter in RGB color space you need to keep the ratios between the Red, Green and Blue the
same but increase them. Changing any of these properties on the fly would take some clever
mathematics on behalf of the programmer. Horizon Control's UAC uses functions that
manipulate the native color channels for you. This math transforms the data at run-time
allowing you to program and fade in any one of the six color spaces mentioned above.
Strand Lighting
p34
Page 36
Palette OS v10
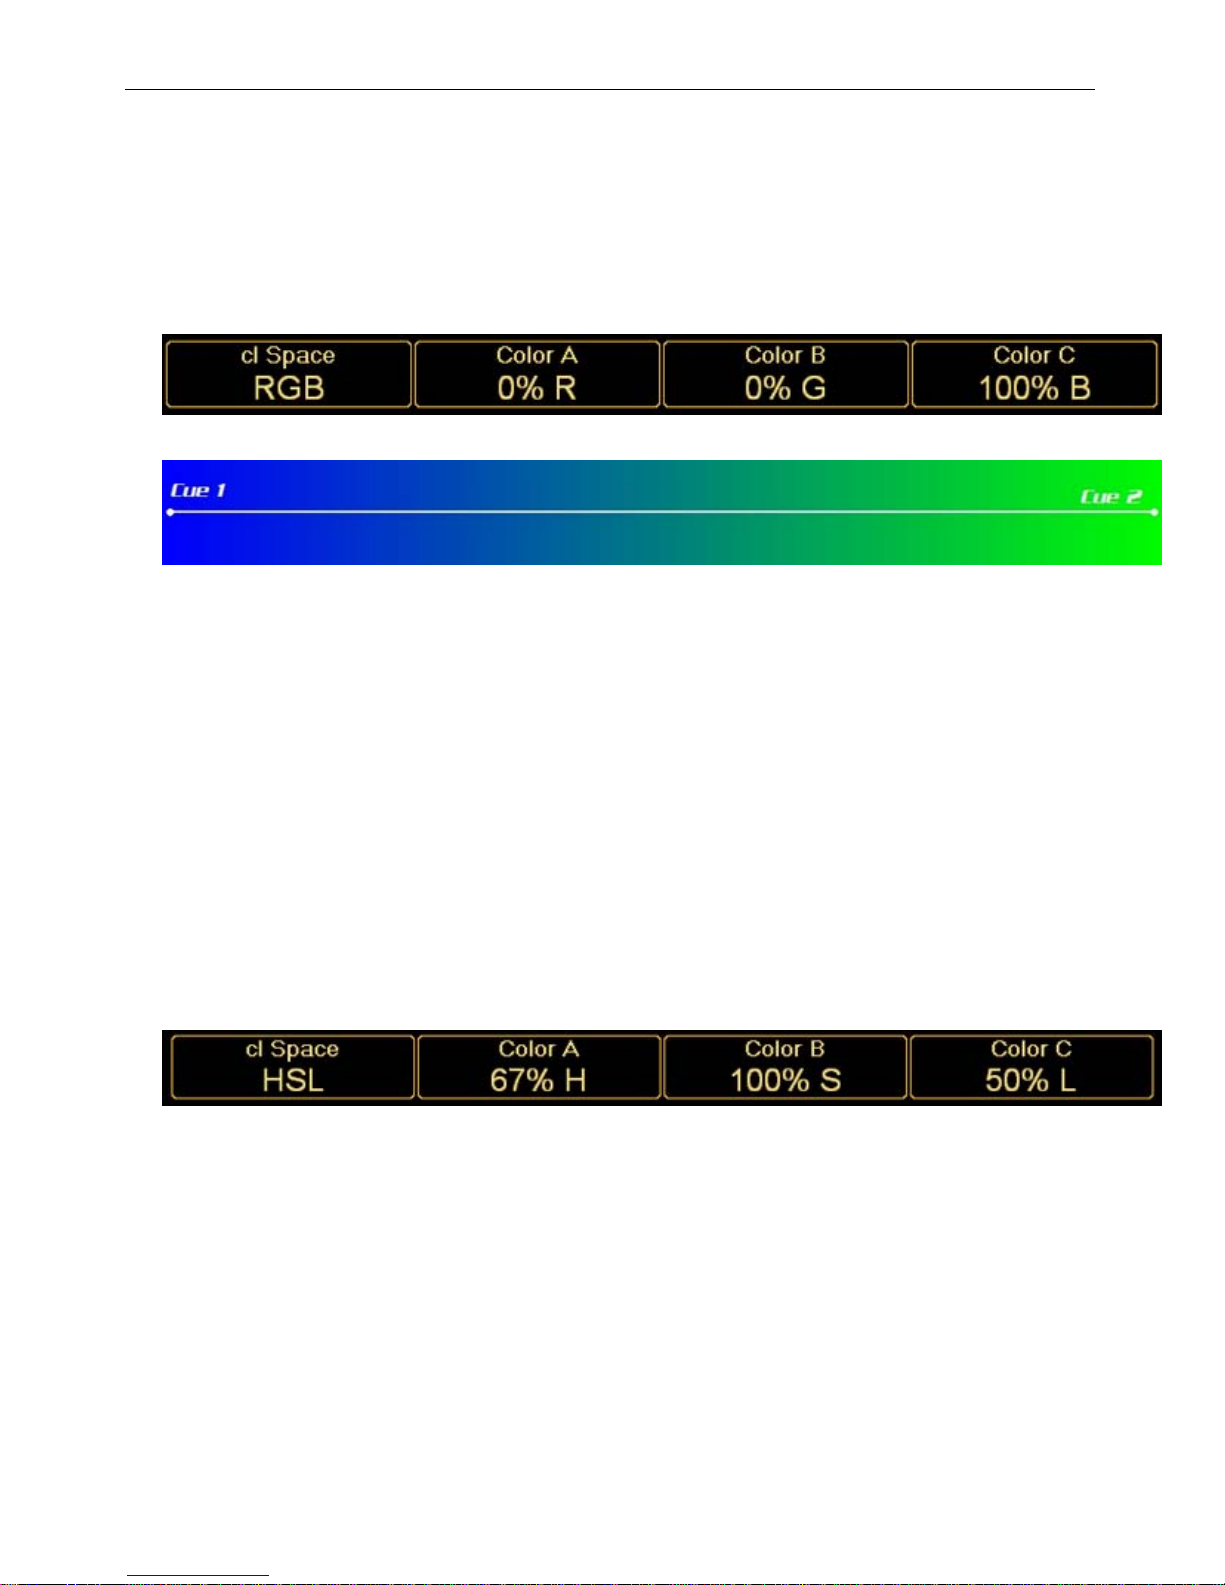
Regardless of which of the six methods you use to choose your color, you also have the option
of how the actual crossfade will execute. In the following three examples, Cue 1 is Blue and
Cue 2 is Green, but in each case, we're going to crossfade in a different color space. Apart
from the Color Space attribute changing in Cue 2 in each example, all other color attributes
remain the same.
RGB Crossfade
The fixture used here could be either a CMY subtractive color light, or it could be an RGB
additive color light. If it fades from Blue to Green in either the CMY or RGB color spaces,
effectively a linear transition occurs on all three control channels. This is typical of what
traditional lighting console do.
Subtractive:
Cue 1 CMY (100%, 100%, 0%) fades to Cue 2 CMY (100%, 0%, 100%). The first channel
does not move and the other two move from opposite ends. The result can either be a
not-so-subtle off-white or a somewhat dingy color in the middle of the fade when Magenta
and Yellow are both at half and Cyan is at full. This is not surprising as there is a lot of
colored glass between you and the light.
Additive:
Cue 1 RGB (0%, 0%, 100%) fades to Cue 2 RGB (0%, 100%, 0%). Half way through the
fade, we have two LEDs producing equal amounts of energy at half their potential and the
third doing nothing. The result can be a color closer to white than desired.
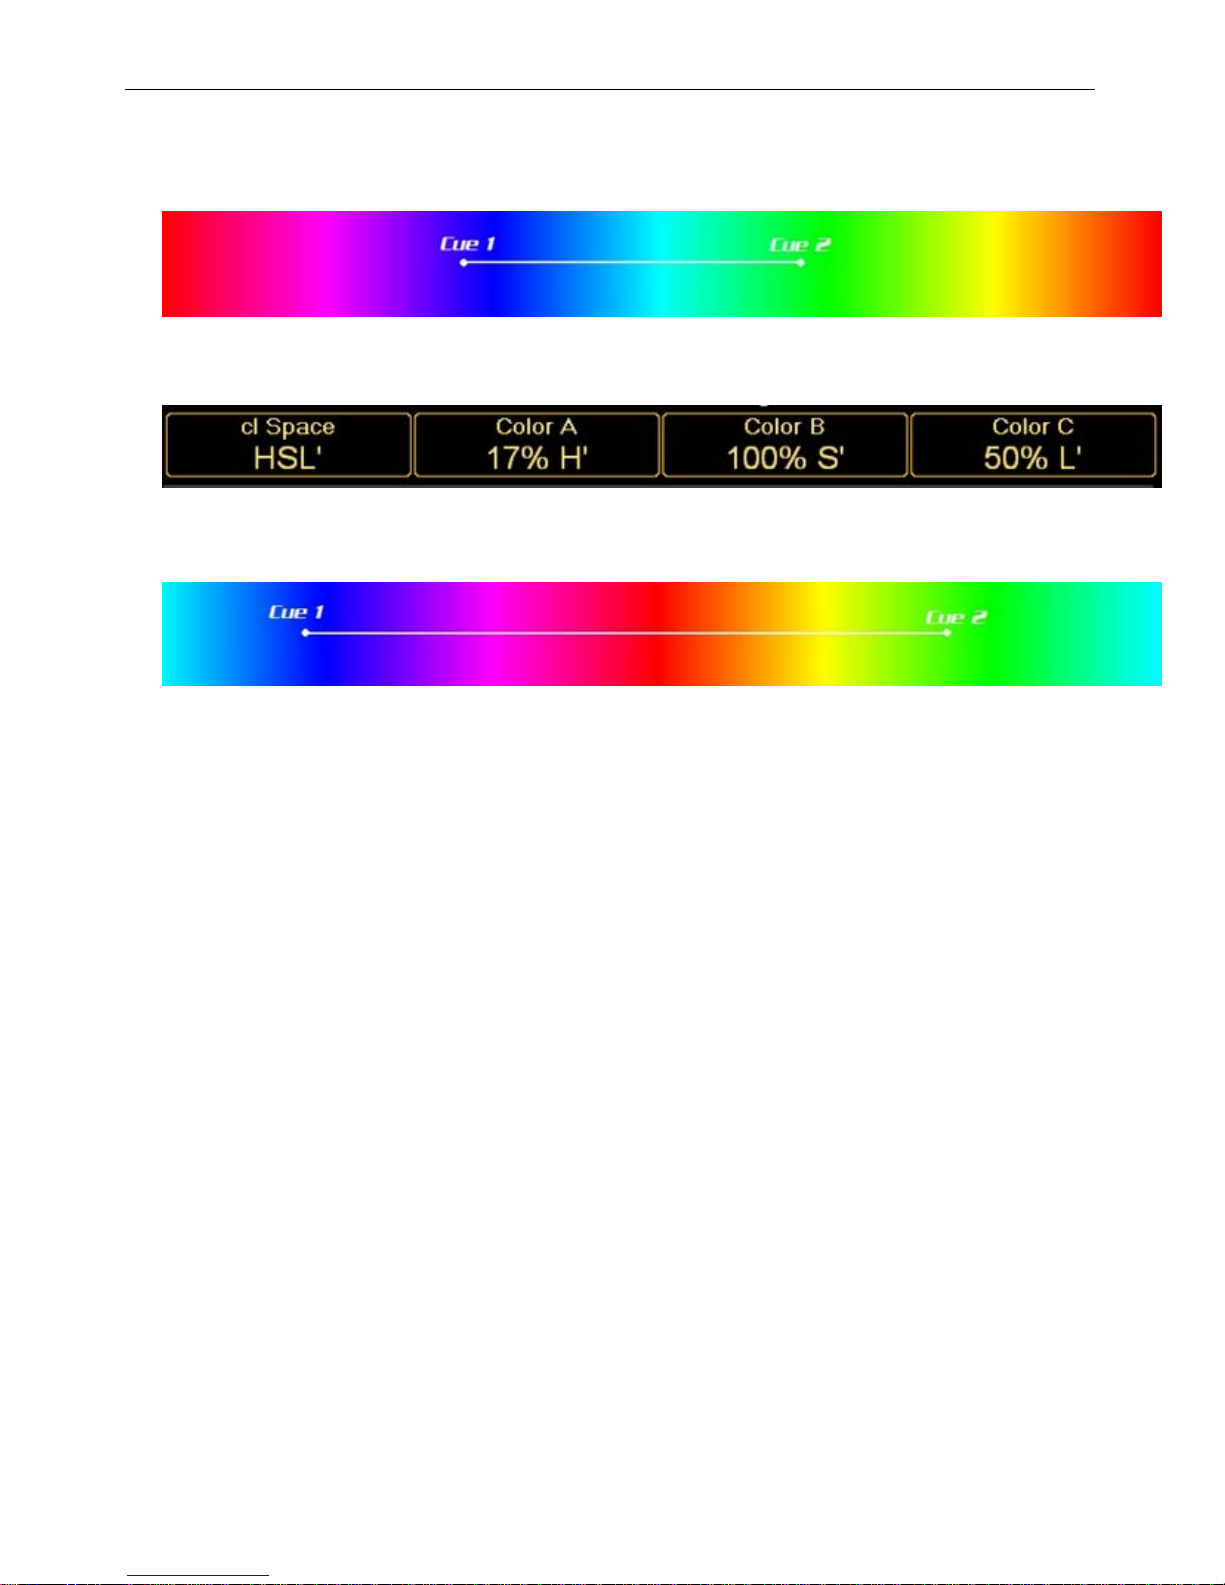
HSL Crossfade
Regardless of whether you're using Additive or Subtractive lights, at the end of the day you
need to provide three control channels (see RGB Crossfade above). You don't have a choice
because that is what the light needs to operate. What you can do though is move through a
different color space, which does not produce the typical linear transition of the channels as
described above. Instead, you will visit altogether different colors when fading from one to
another, hopefully avoiding the undesirable bit in the middle.
The picture below shows the entire color spectrum as it is laid out in the 'Natural' color space.
Hue is the ratio between the three primary colors and is what we think of as color. Saturation
is how intense the color is, or mathematically how far apart each primary is from the others
or how far away from gray you are (Gray is when all three are equal in value. Note, the image
below only shows fully saturated colors.) Luminance is the overall brightness of the selected
color, or mathematically defined as the cumulative total of the three primary colors. Too
much brightness results in white. Cue 1 shows where Blue is and Cue 2 shows Green. When
Strand Lighting
p35
Page 37
Palette OS v10
you press GO on Cue 2, the CMY color flags (or LEDs) will change in such a way that you visit
Cyan along the way. In some circumstances, this will be a more desirable transition than that
shown above.
HSL' Crossfade
The Hue Primed version of the well defined HSL color space just shifts the spectrum such that
each end does not include Red. It could be shifted any amount, but Horizon Control shifted it
180 degrees, such that Cyan now appears at each end:
In the [Cue 1/Cue 2] example, going from Blue to Green in the HSL' color space now
produces a virtual rainbow of colors along the way. This can be a very powerful effect, but the
transition will be different for every combination of colors recorded and it will be up to the
designer to choose. If Cue 1 was Purple and Cue 2 was Yellow, going through Red might not
seem like such a bad idea. To do that you would have to use this color space. If you use the
more common HSL, you go through Blue, Cyan and Green to get there. Again, maybe that is
desirable.
hsv
The Hue Saturation Value color space is also known as the 'Deep' color space. HSL works well
for emissive fixtures like LEDs, but not so good for fixtures that are hitting your set. As you
increase the brightness on you set, you don't want the hue to change. UAC offers the hsv
color space to solve this problem where Luminance is substituted by value. As the value
attribute increases, hues become more saturated. With hsv, hues never progress through the
pastels to white. This is equivalent to you pouring more light on your painted set. As you
bathe the set in more blue, it doesn't approach white (unless you're working in TV - then all
bets are off).
The choice of how to get from color A to color B is up to you. The method of attack is to write
the two cues first, picking the colors using whatever method you choose. Then try running the
cue. If you like the transition, you're all done. If you don't, go to Cue 2, change the color
space and Update the Cue and run it again. Even though UAC literally fades in all six color
spaces, you only have to change between three of them to see all the effects. Choose one of:
CMY or RGB
o
HSL or hsv
o
HSL' or hsv'
o
Strand Lighting
p36
Page 38

Palette OS v10
Strand Lighting
p37
Page 39

Palette OS v10
Conclusion
For years, designers' hands were tied when they were controlling automated lighting. The
language and control structure used had been imposed upon them by the equipment
manufacturers. This was not conducive to an enjoyable experience for anyone involved in the
process. Horizon Control's Universal Attribute Control Model defines a common language that
designers and program mers can share and the complex processes of translating this language
into DMX or any other control protocol is taken care of for you.
This new language has not been defined arbitrarily or in a vacuum. We use colloquial terms
that have been used in the theatre for years and present them to the programmer with sense
and order. Confusing mode channels that change the purpose of other channels have been
eliminated and new and uniquely useful control handles have been added, such as an
intensity control for LED based fixtures. UAC allows the designer to look at the lighting rig as
a unified tool to aid in the design process. The designer will no longer need to conform to the
language of the manufacturers and this allows them to diversify the lighting rig without the
worry of adding complexity to the programming process. Every fixture now speaks the same
language and increased communication and understanding will only lead to better lighting.
Strand Lighting
p38
Page 40
Palette OS v10
Tracking
Palette is by nature a Tracking console. With Tracking, when a cue brings a channel to a level,
the channel stays at that level until it receives a specific instruction to change levels. This level
tracks through all subsequent cues in the cue list until the level is increased or decreased in
another cue.
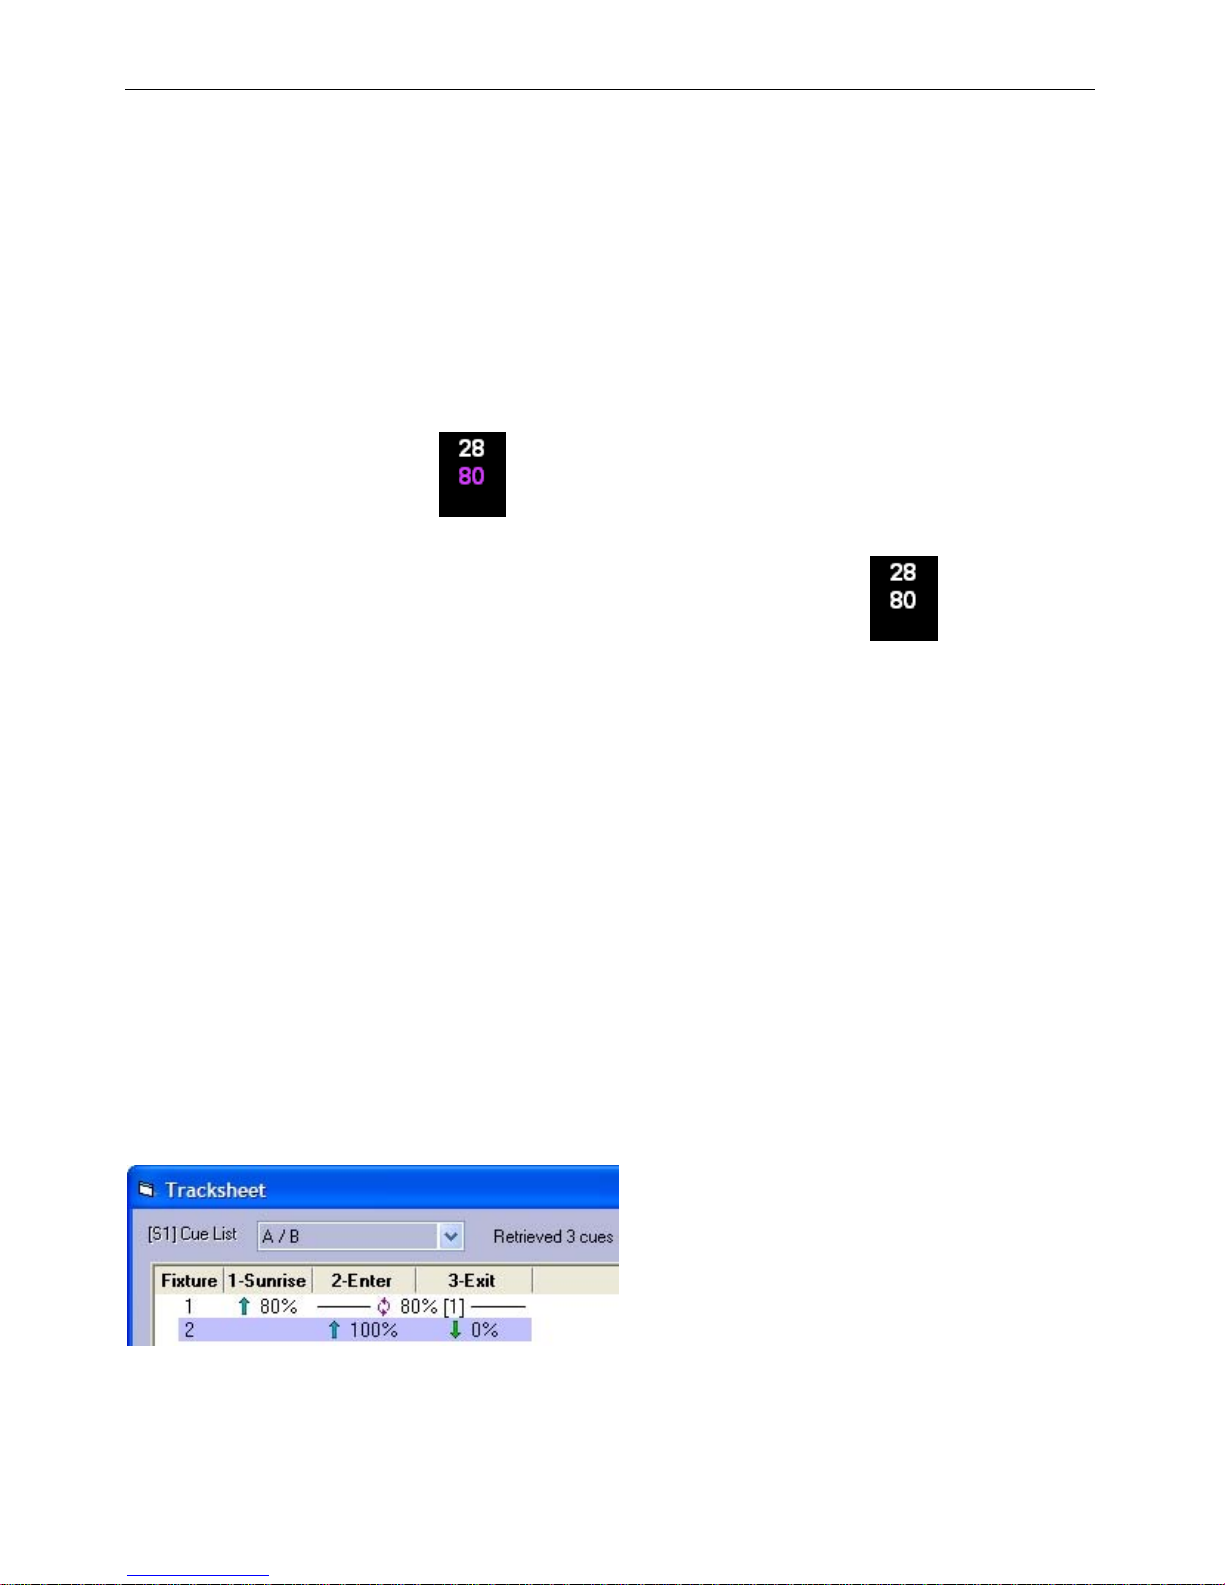
Levels which have tracked in a cue are displayed on the channel grid in magenta with a circular
arrow symbol beside the level:
If you record a hard level in Cue 2 that is exactly the same level that is in Cue 1, you will get a
magenta level with a white block showing there is a redundant command:
A good way to understand tracking is to think of how you use lights every day:
When you enter a room, you turn on a room light.
o
Then you may turn on your desk light. You do not need to turn on the room light
o
again.
The room light and the desk light will remain on until you purposefully turn one or
o
both off.
With Palette, you record channel 1 at 80%. If nothing else sends a command to that channel it
will stay at 80%, no matter what other channels might be added or changed. Channel 1 will
continue at 80% through all subsequent cues until it is told to change its level by a later cue.
One of the advantages of tracking desks is that you can have multiple cues fading simultaneously
because each cue only 'talks' to the channels it has information about. That means that if a long
fade is happening on, say, Channel 1, but Cue 2 runs and moves Channel 2 to different level in
short time, that will not affect Channel 1's fade.
Example:
Cue 1 is a 45 second fade up on the cyc to show a slow sunrise
o
Cue 2 is a 2 second fade up on an actor's front light
o
Cue 3 is a 5 second fade down on the actor's front light
o
When running the show, you're never sure when the actor is going to decide to enter, so
inherently, Cue 2 must be a called cue. Chances are that the actor will enter at some point during
the sunrise. Pressing [GO] on Cue 2 should not affect the subtlety of the 45 second fade on Cue
1. To really drive the point home, the actor may exit before the sunrise has even completed.
Strand Lighting
p39
Page 41

Palette OS v10
There is nothing in Cue 3 that address the cyc channels so pressing [GO] on Cue 3 still does not
affect the progression of the sunrise.
It is important to remember that Preset style desks cannot offer you this flexibility. In Preset
desks, each and every channel is recorded at its stage level in every cue. That would mean that
in Cue 2, the cyc would be at its full sunrise level. So, when you press [GO] on Cue 2 midway
through the subtle sunrise because the actor stepped on stage, your sunrise will complete in a
not-so-subtle 2 seconds flat!
If you really want to, you can operate Palette as a Preset desk. Just set the Record combo box to
All Levels [Block Cue] in the record
level in every cue. This is highly undesirable because you loose the functionality as described
above, but worse yet, you completely deflate the power of having multiple cue lists. If you have
every channel recorded in every cue, each time you press [GO] on any cue list, the entire rig will
go to the recorded levels of that cue - stealing everything away from the other cue list. (If this
appeals to you, you may want to check out how to Block the Entire Cue List
Note:
If you are updating a cue and don't want the edits to track forward, turn OFF Edits
o
Track Forward in the Record dialog box. The cue after the cue you are updating will be
automagically updated to reverse the effects of what you just recorded.
You cannot select Edits Track Forward OFF if you are updating or recording the last cue
o
in a cue list.
You can change the system default state of Edit Track Forward for the Record dialog
o
box in [S2]Show Options|General
See Also:
A Note on Redundant Data
Edits Track Forward
Track Sheets
Blocking and Un-Blocking of cues
Recording a Cue
Multiple Cue List Concept
dialog box. That way, every channel will have a recorded
)
Strand Lighting
p40
Page 42
Palette OS v10
A Note on Redundant
Data
Redundant and/or Blocked data in cues is displayed like this:
or
Sometimes this is properly Blocked data. At other times it is just plain redundant. Having
redundant data in a cue is not desirable. Understanding when and why you may want these
symbols appearing in your Channel Grid
Before you move on, if you're not fully familiar with the philosophy of tracking, you may want to
read the topic called Tracking
first.
or Attribute Grid will make your life a lot easier.
DESIRABLE
When you write a Block cue at the top of Scene 2 so future editing session on cues in
o
Scene 1 won't track through into Scene 2.
When you record a cue using the State option to collect the cumulative set of data
o
used to reproduce a cue state. You may do this at the beginning of a scene in a linear
cue list, or when you are Copying or Moving cues
another cue list.
When you have one attribute that doesn't necessarily change, but other attributes in
o
the cue rely on it to be in a certain state. For example, in a CMY colour mix system, if
you are fading from pure Cyan (100%, 0%, 0%) to pure Green (100%,0%,100%) the
Cyan value does not change in the second cue. When running the second cue, you
would see the Block Symbol. This is definitely not redundant date because having
Cyan at 100% is a necessary condition to making Green. If it were not there with a
Block Symbol, it would still produce Green, but the important thing to consider is what
if we change the first cue such that is does not have Cyan at 100%. Then our second
cue would not be Green. Palette automatically marks co-dependant attributes with
deltas when you are editing so you don't have to worry too much about this. Just don't
get fussed if you do see block symbols in your attribute grid, even if you have just
perform an Un-Blocked
UNDESIRABLE
within a cue list or to the middle of
cue operation.
When you are running a show from top to bottom and attributes are marked with
o
block symbols, it means that those attributes will get unnecessary and som etimes
harmful fades initiated on them for no good reason. For example, in the Tracking
topic, there is a detailed example of a long Sunrise cue followed by an actor's entrance
cue. If the cyc channels that were involved in the sunrise were blocked in the second
cue, the long sunrise would be quickly collapsed by the actor's entrance cue when it is
Strand Lighting
p41
Page 43

Palette OS v10
executed.
When you are copying multiple cues from one section of a cue list to another and you
o
use the Copy State
the entire cumulative state of the cue list is recorded into each and every copied cue.
This means if you copy the sunrise/entrance cues from the example above, you will
destroy the sunrise. If you are copying entire sections of the show within a cue list, it
is best to copy the first cue in the range using the STATE option, then all the
subsequent cues without that option. Alternatively, you can Unblock
you copy it.
Putting redundant data in a cue "Because you want to make sure that if you jump to
o
the cue it will all be there" is not necessary. Palette always maintains the state of the
cue list during Goto's. (i.e., if you jump around in the cue list, it will make sure that
what is on stage looks just like it would if you went to the first cue and pressed [GO]
repeatedly until you got there). Some other tracking consoles are pure "Move-Fade"
boards, meaning that if you jump cues, only the new fade information for the channels
that are in the cue you are jumping to will be implemented. Palette does not do this.
If you have redundant data in the cues, it makes it difficult to maintain the cues when
o
you're editing them at a later date. It is much nicer knowing that the data you are
examining is all 'useful' data and is necessary to get the looks on stage. If there is a
lot of extra garbage in there, it makes it a lot tougher.
Note:
At times you may see the Block symbol in your cue list when you didn't expect to. This may
happen because you just did a Goto Cue
last state. To 'clean up' the display in this case, Assert
note that there is a Cue List Option
directly after a record operation.
See Also:
Blocking and Unblocking of cues
Move/Copy using State
Recording Cues
About Palette
option. This will result in many block symbols appearing because
the section after
and the values just 'happened not' to change from their
the cue list by pressing [SHIFT] [GO]. Also
to Goto cues after they are recorded, so it may happen
Strand Lighting
-o-
p42
Page 44

Palette OS v10
Timing
One of Palette's very powerful features is its ability to fade every attribute of every Channel in
every cue across multiple cue lists and Sub Masters independently, simultaneously and
effortlessly. Many consoles using the preset emulation philosophy are just not capable of this
flexibility because they record every channel in every cue and can only fade from one cue,
singularly, to another cue whereas Palette can handle any number of fades at once. The key to
power is unleashed with a simple user interface that even the most novice of programmers can
take advantage of immediately.
This topic briefly describes different methods of controlling attribute timing but there are specific
topics available that explain them more fully.
See Also:
Cue List Time Cells and the Blue Box
Part Cues
Independent Timing
Command Line Syntax
Hardware Setup - A/B C/D
Cue List Time Cells and the Blue
Box
Most shows will be satisfied with the flexibility offered by editing times in the Cue List. There are
multiple timing columns editable here; the main one is labeled Cue Time:
Visible here is also the Down Time column, but not seen are Position Time, Color Time, Gobo
Time, Lens Time and Special Time which will only be available if you have moving lights patched
in your show. Follow these steps to change the timing of your cue:
1.
Using the [ARROW KEYS] move the Blue Box to the time column you want to change.
1.
2.
Press the [EDIT] button to put the Blue Box into edit mode.
2.
Note:
The QWERTY equivalent of [EDIT] is [INSERT]
3.
Either type in a new value to completely replace the text highlighted in blue or use the
3.
Wheel to roll the values up or down. (Note: Each detent on the wheel will change the
value, up or down, by one second. Holding down [SHIFT] will change the value by 0.1 of a
second.)
4.
If you want the attributes to hold their level for a piece of time after you press the GO
4.
Strand Lighting
p43
Page 45
Palette OS v10
button, enter the time using the Wait/Fade syntax:
5.
When you are finished, press [ENTER] to close the edit box.
5.
Note:
All attributes of all the Channels recorded in the cue will fade in Cue Time unless a time is
entered in the appropriate column. If you want to remove individual attribute timings, edit the
cell and press [DEL] [ENTER].
Part cues
Complex shows need more advanced timing options. If you split a cue into different Parts, you
can have different timing for different groups of Channels without writing additional cues. When
working on a show, you build a cue, which is a singular look on stage and later you decide how
you are going to get from one cue to another.
1.
Goto the cue in which you want to alter the timing param eters
1.
2.
Select the Channels that need to be assigned to a different part
2.
3.
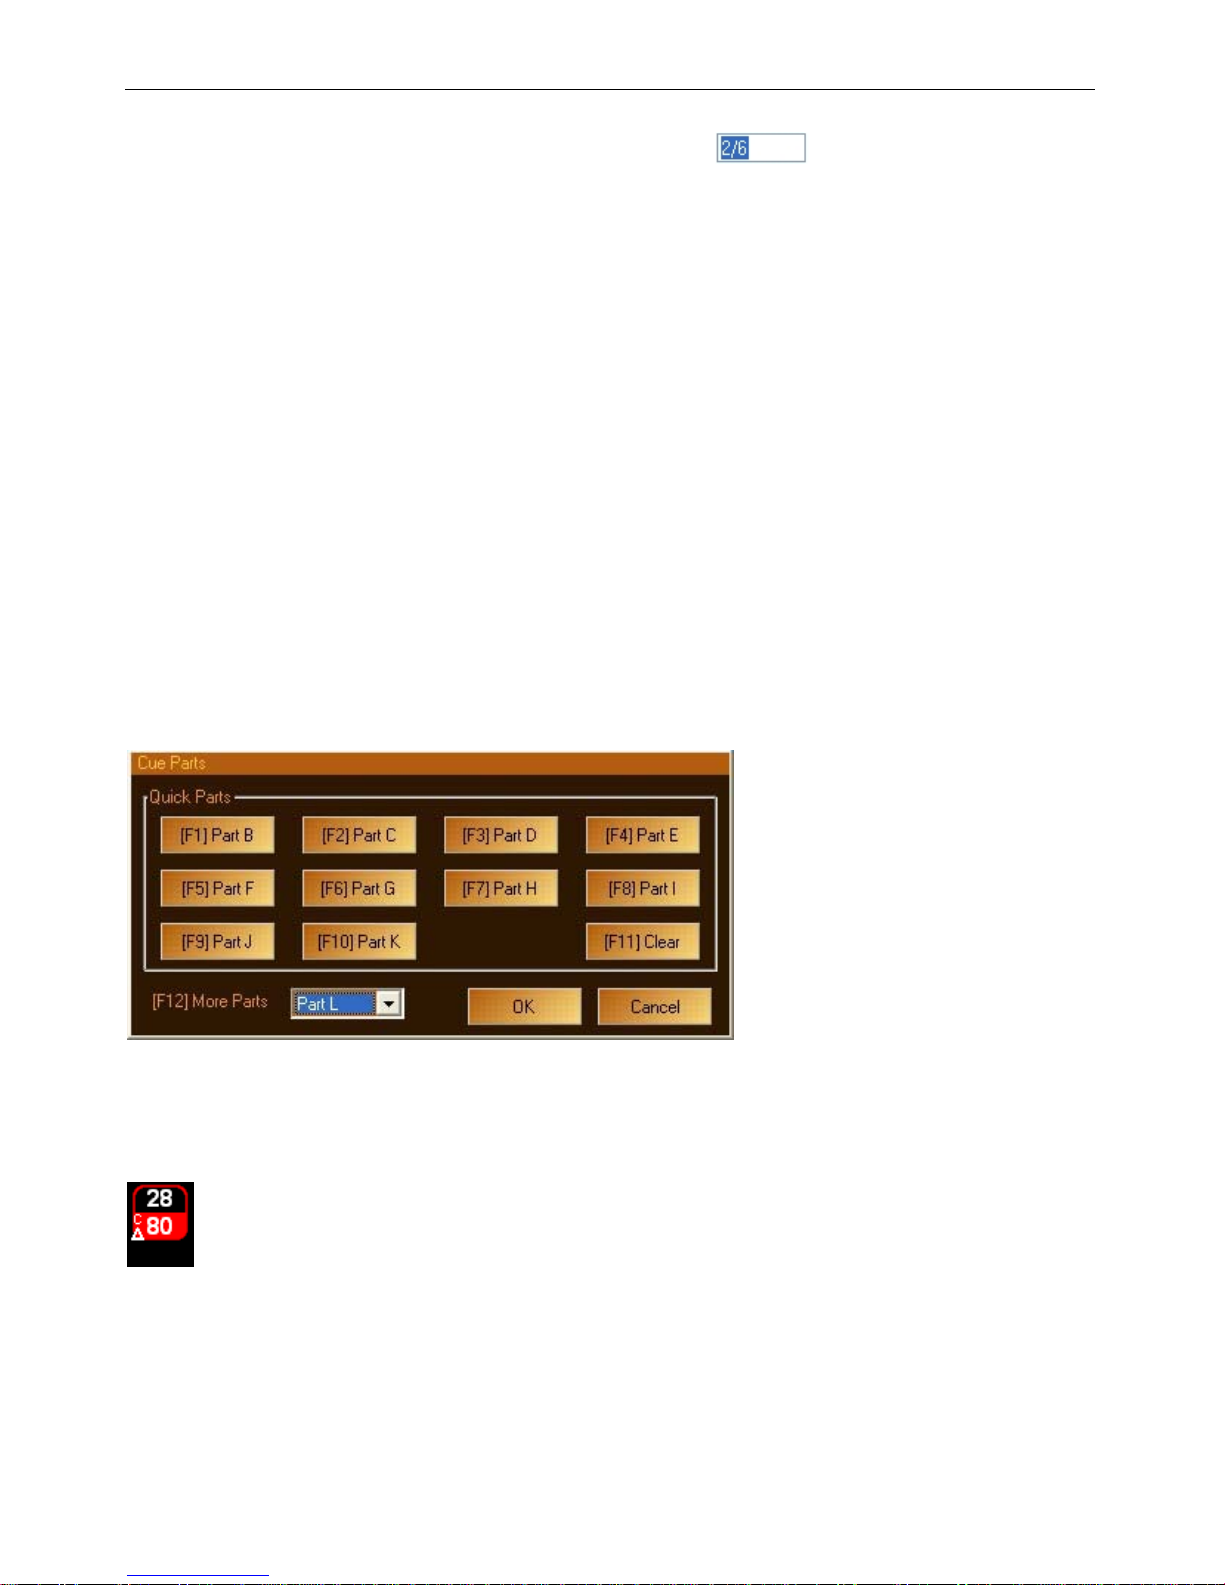
Press the [S11]Cue Parts button to open the cue part dialog box
3.
4.
Select the button for the desired part
4.
5.
The Channels will show a superscript letter showing the part:
5.
6.
Continue with Steps 2 through 5 until you have assigned all Channels to their correct part
6.
7.
Press [UPDT] [ENTER]
7.
8.
Strand Lighting
p44
Page 46
Palette OS v10
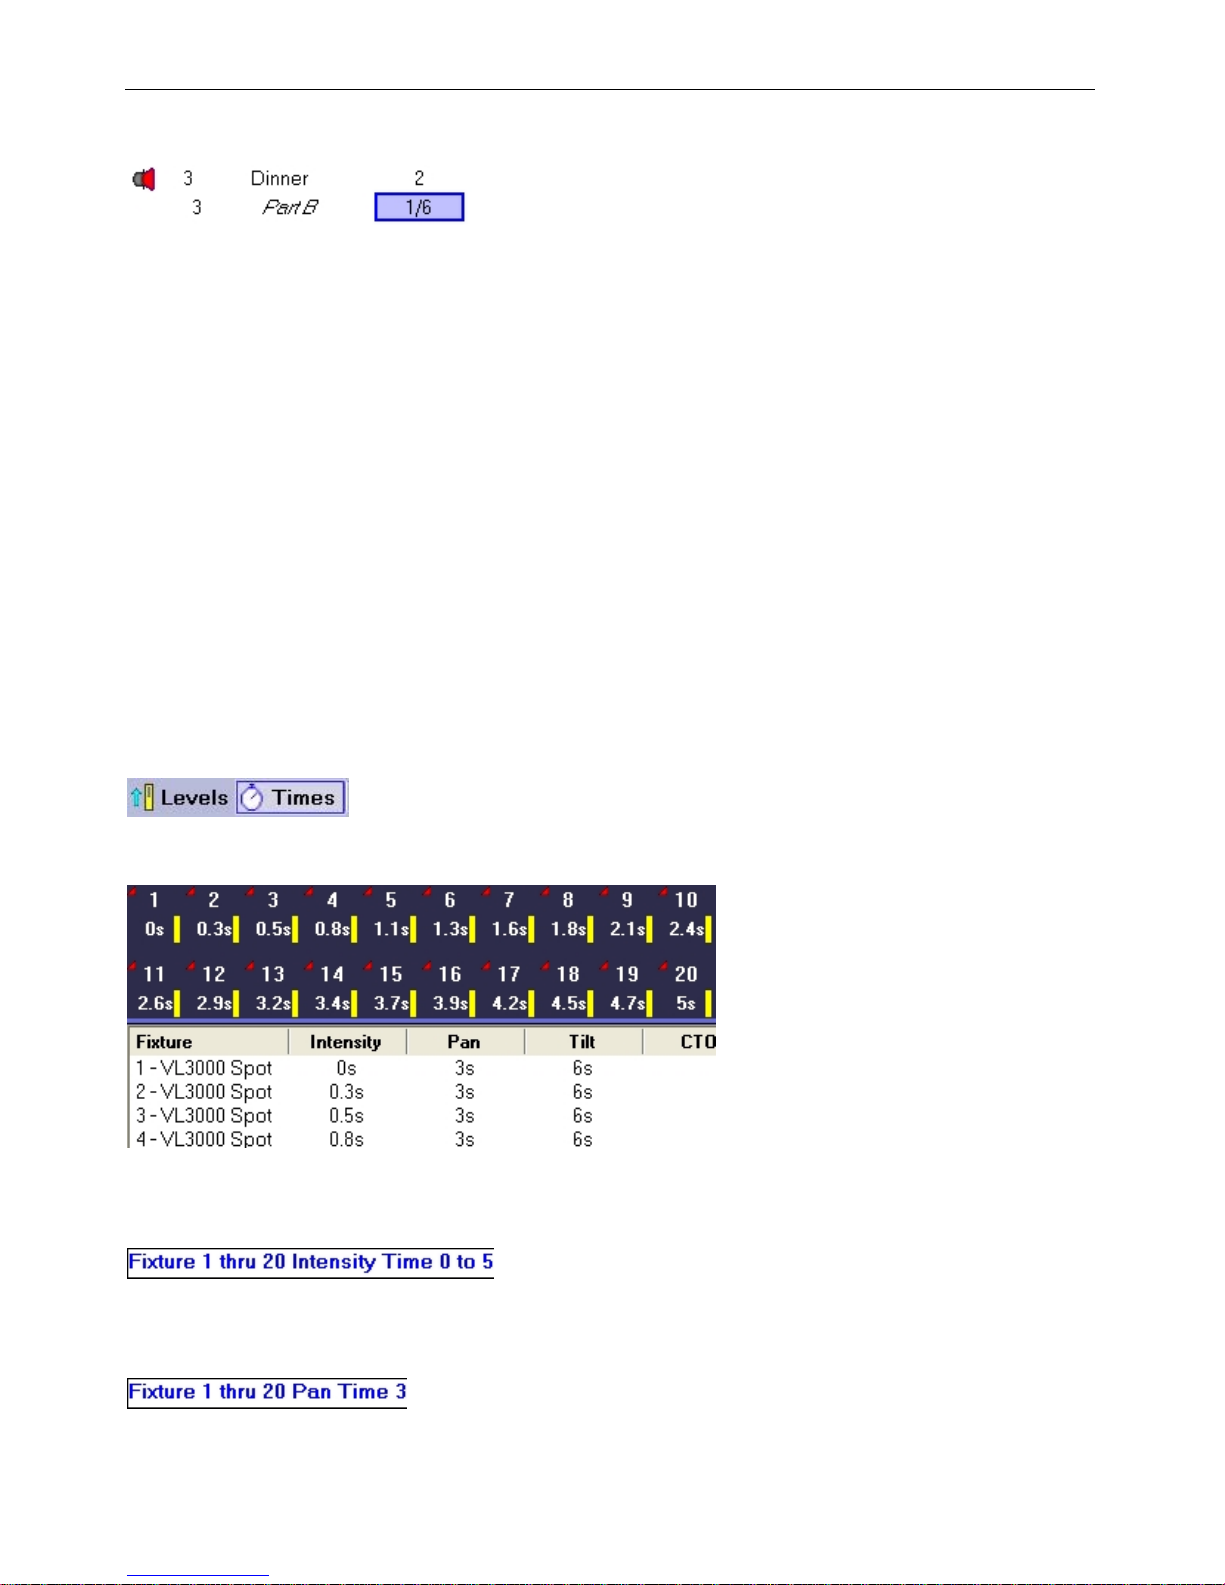
Use the Blue Box to alter timing on the main part or any additional parts:
8.
Note:
o
The main cue part is always Part A (in this case labeled 'Dinner')
o
o
Cues need not be made up of parts in specific order. You can have a cue that has just
o
Part A and Part G
o
Palette supports 26 parts. Press [S12] and roll the wheel to select parts greater than
o
Part K then press [ENTER] to close the dialog box.
Independent Timing
The limitations of the above two methods are that all the Channels in each cue part must use
the same attribute family timing and further still, individual attributes within a family are forces
to use the same time. Independent Timing frees you of these limitations.
1.
Access the Independent Timing display by pressing [SHIFT][EDIT]. Alternately, you can
1.
use the mouse to press the Times button:
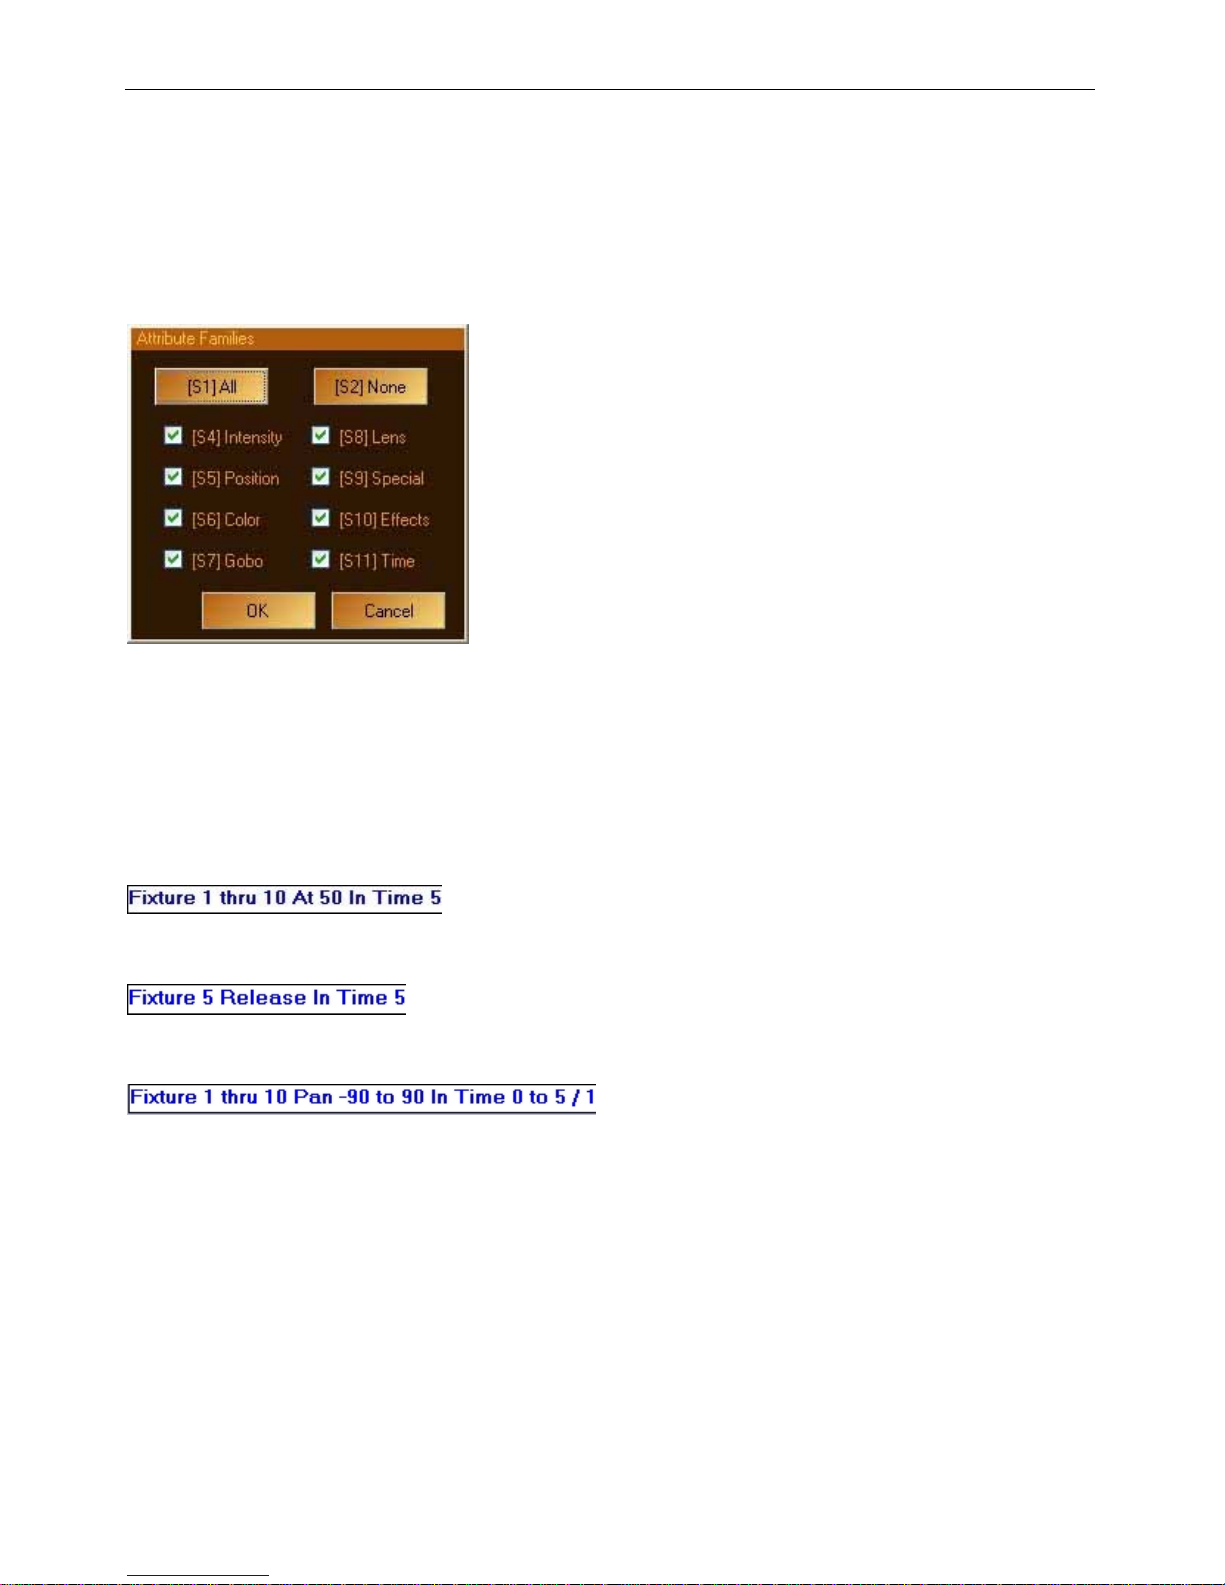
The Channel Grid and Attribute Grid look very similar, except that the numbers that appear are in
seconds rather than degrees or hertz or RPMs:
2.
To achieve the offset intensity times as shown above, type in the command line [1]
2.
[THRU] [20] [@] [0] [-] [5] [ENTER]. It will appear like this:
3.
To set the Pan timing to 3 seconds, type [1] [THRU] [20] [S2-Pan] [3] [ENTER] which
3.
would appear as:
Note:
Strand Lighting
p45
Page 47
Palette OS v10
All the moving light softkeys will stuff text onto the com mand line. That is, if you press [S
5-Position], the text Position Time will appear, which will set both the Pan and Tilt times. If the
individual attributes are currently not visible on [S1] through [S4], just continue pressing [ S5]
through [S9] until you see the attributes you want control over.
4.
When you have finished setting attributes and times, record the new cue or update an
4.
existing cue. Be sure to include the [S11] Time filter in the Attributes masking:
Time on the Command Line
As you directly enter attribute values on the Command Line, you can specify times as well. Not
only will these times be placed in the Independent Time grid as described above, but Palette will
also use the time to fade the attribute from its current value to its new value. For exam ple, you
could type [1] [THRU] [10] [@] [50] [@] [5] [ENTER], and the command line would look like
this:
If you want to Release a Channel (and all of its attributes) in time, or sneak it back to cue level,
use the syntax [1] [SHIFT+REL] [5] [ENTER]. This appears on the command line like this:
A more complex example of using time on the command line is [1] [THRU] [10] [S2] [-] [90] [-]
[90] [@] [0] [-] [5] [/] [1] which would look like this:
This is crazy, but looks very cool. What it does it takes Channels 1 through 10 and fans them out
to make a perfect half circle, but it does it over 5 seconds, starting by moving Channel 1 in one
second and ends after six seconds with Channel 10.
Using the A/B or C/D faders to
specify time
There is an option in the Hardware Setup - A/B C/D that allows either of the split fader pairs to
control the live fade time. If you are running a show live, it is handy to have handles to control
how long attributes get to their new level and how long they should take to return to their old
Strand Lighting
p46
Page 48

Palette OS v10
levels once released. This option sets up the left hand fader to control the IN TIME of any
attribute you set using the comm and line or button array. The scale is from zero to ten seconds
(top to bottom). The right hand fader controls how long releases should take or what is the sneak
time.
Attributes set using times specified by the A/B or C/D faders are not transferred to the TIMES
display (i.e., you can't use these times to write cues with).
-o-
Strand Lighting
p47
Page 49
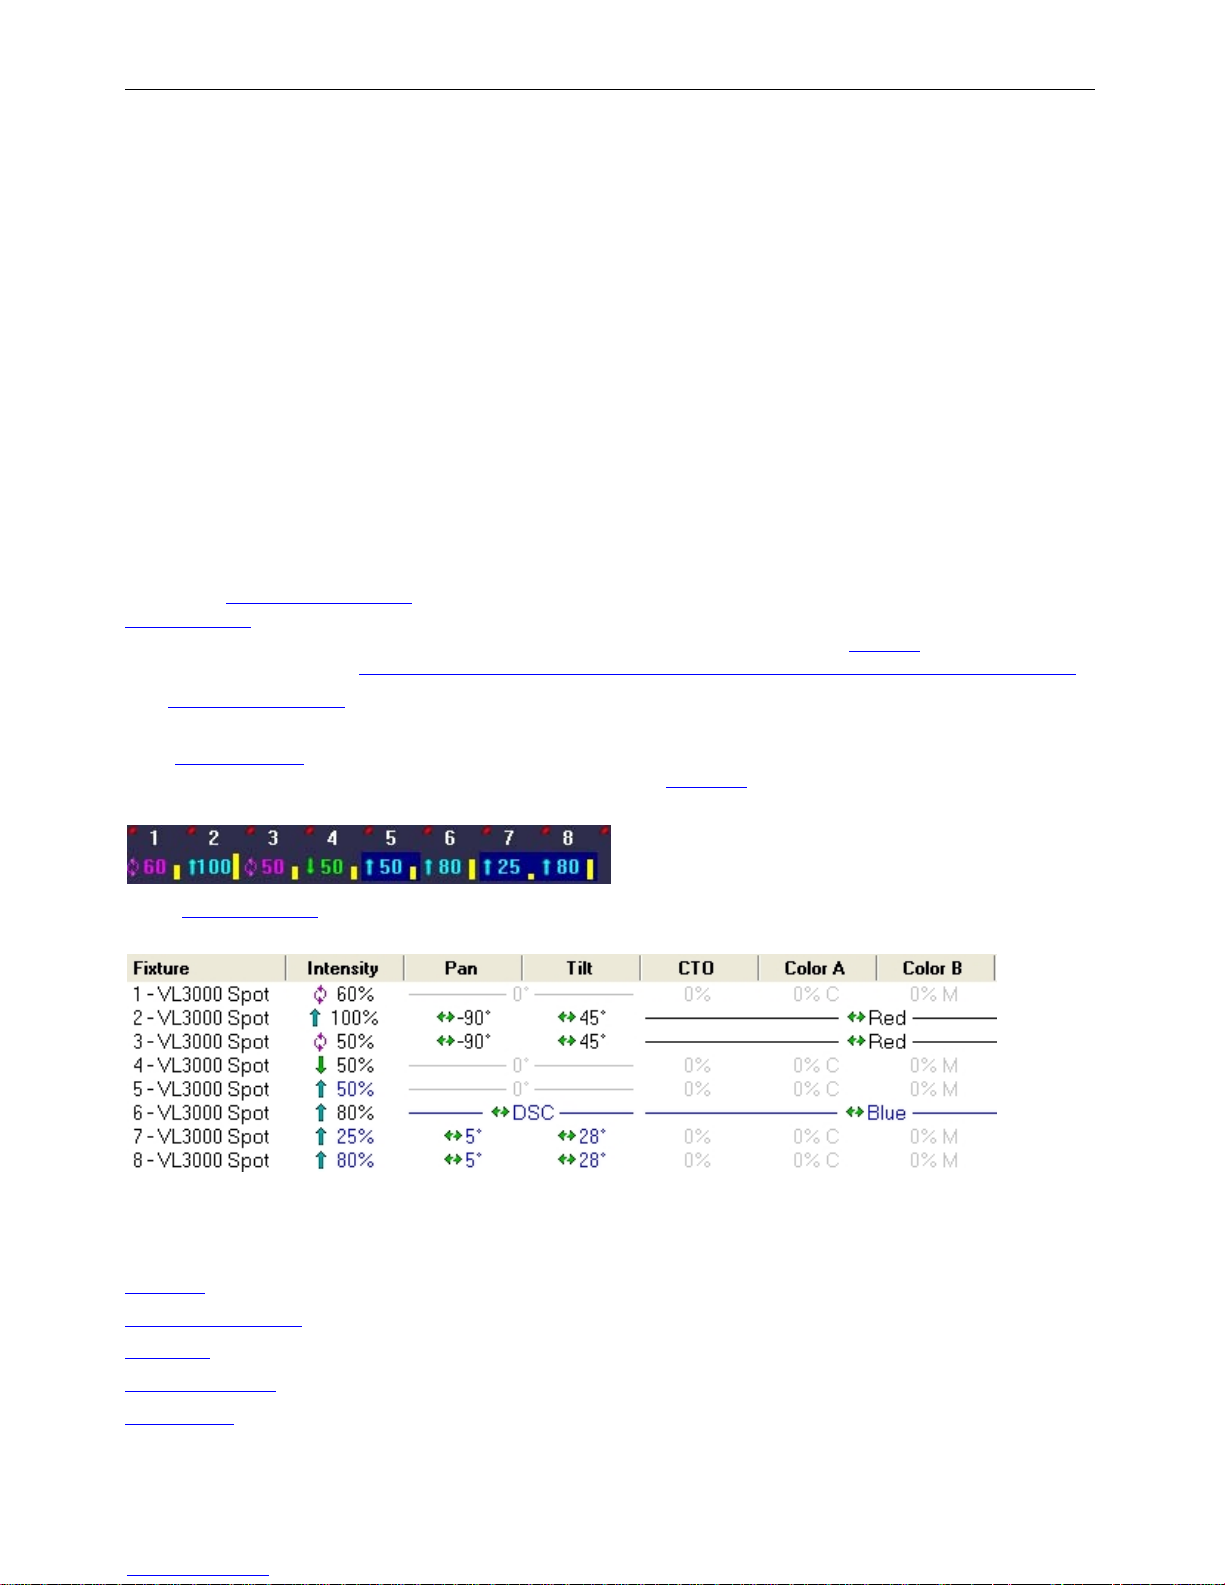
Palette OS v10
Multiple Cue List
Concept
Multiple Cue Lists allow the console to operate completely separate and asynchronous cue lists
simultaneously. This is useful if you want to have an effect running on one cue list to keep it
separate from the cues in the main cue list, or if the console was controlling the lighting in a
main theater as well as a space in the theater lobby, an individual cue list for each space could
be developed and operated at the same time to run completely different cues.
Note:
Palette supports an unlimited number of Cue Lists.
Using the Cue List Properties
backgrounds
prevent unauthorized modifications to cues. Cue Lists can be assigned a Priority
resolved either using a Highest Takes Precedence method or a Latest Takes Precedence method
The Cue List Directory
show.
The Channel Grid
controlled by another cue list (i.e., the one that is not selected
a dark blue background:
to help visually differentiate one from another. Individual cue lists can be locked to
appears above the Cue List Display and shows all the cue lists in your
display normally has a black background color. When Channels are being
, Cue Lists can be given different names as well as different colored
and can be
), the levels will be displayed with
.
The Attribute Grid always has light background. Attributes being controlled by other cue lists
appear with blue text:
Note how one Channel with multiple attributes can be controlled by more than one cue list at a
time. Attributes that are at their default levels are shown in grey text.
See Also:
Cue List
Cue List Directory
Tracking
Record Options
HTP vs LTP
Strand Lighting
p48
Page 50

Palette OS v10
Channel Colors and Symbols
-o-
Strand Lighting
p49
Page 51

Palette OS v10
Fade Resolution
The pecking order that the fade engine uses to resolve output channels, in order of precedence,
is as follows:
Parked
1.
Intensities controlled by the Flash
2.
Captured
3.
Inhibitive
4.
Additive Look levels (intensities and attributes) in order of Priority and Cue List levels
5.
(Latest Takes Precedence or Highest Takes Precedence
Note:
The affect of the Grand Master and Black Out Button can occur before or after
o
Captured intensity attributes based on how it is setup.
Palette's Latest Takes Precedence cue lists do not get automatically released when
o
other cues take full control of all the attributes used in them. Their values are still
valid and if the domineering 'more recent' cue list gets released, the values from the
original cue list will get a chance to write to the stage again. Som e may refer to this
domineering behaviour as Stomping and the behaviour of re-writing to the stage after
the release as Persist on Override.
It's interesting to note that intensities recorded in Looks (often thought of as
o
traditional submasters) do not always win over cue lists at the same priority. By
default, the attributes are resolved on an LTP bases unless the Look has specifically
been marked HTP. This ensures that the recorded 'look' will appear on stage when the
look handle reaches the top of its travel, even if it must reduce the level of some
Channels.
See Also:
Channel's different states
Channel Colors and Symbols
Priorities
HTP vs LTP
Cue List Properties
Sub Master Types
Busking
Output levels
, Highlight or Lowlight Tools
Channel attributes (on the keypad, with red levels)
Look levels (intensities only) in order of Priority
) in order of Priority
Strand Lighting
-o-
p50
Page 52

Palette OS v10
HTP (Highest Takes
Precedent) vs. LTP
(Latest Takes
Precedent)
Intensities are resolved either as HTP (Highest Takes Precedent) or LTP (Latest Takes
Precedent).
LTP
If multiple controls (Sub Masters or Cue Lists) are attempting to control the same attribute,
the last one to move it will win. For example, if one cue sets a level to 75%, then another one
is executed and it sets it to a level of 50%, the attribute will go to 50%.
Note:
Channel Masters are always HTP.
o
Cue Lists and Sub Masters can be either HTP or LTP as determined by their properties.
o
Palette's Latest Takes Precedence cue lists do not get automatically released when
o
other cues take full control of all the attributes used in them. Their values are still
valid and if the domineering 'more recent' cue list gets released, the values from the
original cue list will get a chance to write to the stage again. Som e may refer to this
domineering behaviour as Stomping and the behaviour of re-writing to the stage after
the release as Persist on Override.
For a LTP Cue List or Sub Master to gain control , the losing control must also be LTP
o
(i.e., not marked HTP).
HTP
If multiple controls (Sub Masters or Channel Masters or Cue Lists) are writing to an intensity
attribute, the one with the greatest value will win. The exception to this rule is if a control
with a higher priority
See Also:
Tracking
Releasing & Asserting Cue Lists
Priorities
Fade Resolution
is wanting it to go to a lower level, it will win.
Strand Lighting
p51
Page 53

Palette OS v10
-o-
Strand Lighting
p52
Page 54

Palette OS v10
Priorities
Palette allows for 100 different priorities for use when you are playing back recorded items to the
stage. Priorities apply to Cue Lists
number field where you can enter the desired priority. Regardless of the HTP vs LTP
Higher Priority items (lower number) will win.
The default priority of new Cue Lists is 10 and new for Looks it is 9. In complex show files, it is
good practice to bump higher priority items up to numbers like 7 or 8, rather than straight to
number 1. This will give you 'room to grow' as you add more important things, like fire-safety
cues, at a later date. In architectural situations, you may want to build a 'base' look that is
priority 90 or so, such that if all other playback items get released, this base look will take over.
Note:
Only one item can win. If there are two items writing to the stage and one is 9 and the other is
10, changing the #9 to a #1 will not make it win any better or faster!
See Also:
Cue List Properties
Looks
Sub Master Pages
Fade Resolution
HTP vs LTP
and Looks. The Properties box for each of these items has a
settings,
-o-
Strand Lighting
p53
Page 55

Palette OS v10
Tips and Tricks
Reading these tips may be the fastest way to avoid reading the entire manual. These are the Tip
of the Day tips.
In the Patch Routing screen the first four routes are set to send DMX out by default, however
only the first route is enabled. If you wish to use more than the first universe, then enable
routes 2 through 4 and set them to "Live Data"
Use the HELP button to get help on any specific button or in any dialog box. To get help on
buttons, press HELP then the desired button.
If your hardware is such that the A/B faders crossfade you between cues (see S3 HARDWARE SETUP), holding down SHIFT while moving the faders moves you backwards
through the cue list.
If you double press the softkeys accelerator for a pull-down list in a dialog box, a large popup
will appear, allowing you to use the wheel to select a value.
You can add profiles to any timed fade (intensity, position, color, etc.). As you use the Blue
Box to enter times, the softkeys change giving you access to profiles such as slow start,
damped and zigzag.
Last Action Editing (or the British Release Option) is available in Hardware Setup. This option
does not release attributes to their default level, but rather leaves them static and ready to be
re-asserted by advancing cues.
The Universal Attribute Control Model allows you to move your moving lights in straight lines
rather than arcs.
Palette can read the SMPTE time off your MP3 files and you can synchronize cue lists to
music.
In the Hardware Setup under the Console tab, there is a check box that allows you to mute
QWERTY keyboard events for controlling Cue Lists.
Attribute masking can used when Moving, Copying, Recording, Loading or Updating cues and
looks. Rather than opening the [S9] Attribute dialog box, hold down SHIFT and use the
softkeys. Double pressing any attribute family will solo it.
Palette's Move In Black will automatically set up your moving lights ready for the next cue
their used in. MIB features can be customized on a pre-cue basis using the cue Action dialog
box.
Palette's ability to 'busk' moving lights is very powerful. You can change the attribute
behaviour of your moving lights by VIEWing the properties of a Sub Master.
The Show Options has a field where you can set the level for the FULL button. Double
pressing the FULL button will always give you 100%.
Palette supports 100 Priority levels for Looks and Cue Lists. The highest priority is #1 and the
default priority for Cue Lists is #10.
Press Edit in the Action column of any cue to add a Macro to a cue. Macros can trigger other
cues or even control your Media Player or console work lights.
Strand Lighting
p54
Page 56

Palette OS v10
To enter times in the HH:MM:SS format, use two dots (i.e., “ .. ”) to make the colon. This
format extends from days (DD) to fractions of a second or frames (FF) in SMPTE time (i.e.,
DD:HH:MM:SS.FF). Note that frames or the 100th of a second appear after a single decimal
point.
Moving Head fixtures can hit the same place on stage using two different sets of pan and tilt.
Use the FLIP TOOL to try cues out using either.
[S10] is the Select softkey. Pressing it gives you twelve methods of selecting channels in your
rig, including Evens, Odds, Previous, Levels Going Up, Channels Using Palettes etc. You can
even store your own selection set similar to Memory Store and Memory Recall on a calculator.
Using the command line, you can alter intensity levels relative to their current position using
the [1] [THRU] [10] [@] [+] [15] [ENTER] syntax. The command line will read “Up” when
you press [+]. Similarly you can press [-] for “Down”. If you’re controlling moving light
attributes, the [+] puts the word “Relative” in the command line.
Opening the Hardware Setup allows you to assign Macros to the back panel triggers. Just
short out Pins 1 & 2 or 1 & 3 to fire the macros.
The Universal Attribute Control Model gives you six different Color Spaces to select and fade
your color mixing Channels.
The Fan tool allows you to evenly spread out attribute values using one of the following
functions: Center, Right, Left, Ends, Random, Random Positive, Sine and Tangent. You can
also repeat the fan throughout your selection set.
If you have the Light Palette VL with the Button Array Wing Panel, you can make the buttons
first select the channels, then apply their recorded levels with a second press.
When controlling moving lights, double hit the softkey for an attribute to display a large
pop-up with fixed attribute values. The softkeys 1 through 12 map to these values for very
quick access.
The command line supports relative movement of moving light attributes. For example, you
can type [1] [THRU] [10] [PAN] [+] [90] [ENTER].
If you want one group of channels to move at a different rate than others in the same cue,
you can either move those channels to a different part or use the Independent Timing where
each and every attribute of every channel can have its own wait and fade time. This is handy
if you want staggered times and are not concerned about managing parts in the cue list. To
access Independent Timing, press [SHIFT] [EDIT].
The four round buttons below the encoders on the Light Palette open large popup lists for the
attribute values currently assigned to those encoders. Spinning the encoder will highlight
different values and pressing the button again will put those values live to stage.
If you enter a range of cues in the Record Cue dialog box, you have the option to record
values in all cues in the range, or to just record in the first cue and track through the rest.
Time Events can trigger on specific days of the week or month and have hourly or daily repeat
frequencies.
Cues can steal away from active Sub Masters if both are at the same priority, but by default,
Sub Masters are recorded with Priority 9 whereas Cues are Priority 10.
Use SHIFT with the arrow keys to select multiple cells with the blue box in the Cue List. This
is handy for changing many cues' times all at once. This is also how you select m ultiple cues
to delete, move or copy (before touching the DEL, MOVE or COPY keys). Loops are easily
created by highlighting multiple Action cells and pressing EDIT to add follows and links.
Strand Lighting
p55
Page 57

Palette OS v10
The A/B and C/D faders can be configured with S3 - HARDWARE SETUP to either manually
fade the Up and Down times, crossfade the cues, work as cue list masters or be manual
two-scene masters.
You can write a BLOCK cue by selecting the ALL Levels (Block Cue) Record option in the
record dialog box, or just by right clicking on a cue and selecting Block Cue. A horizontal line
above the cue will show you that no attributes will track into this cue.
You can rearrange the columns in the Cue List by clicking and dragging the column headers.
Use the Tools button to open Virtual 5X5 Button Arrays for Groups and Positions, Color and
Gobo palette access.
The command line supports range entry of when setting levels. For example you can type [1]
[THRU] [10] [@] [10] [TO] [1] [ENTER]. To get [TO] on the command line press the [-] key.
When you record groups, the selection order is preserved for fanning and staggered
independent timing purposes.
Configure the way the DBO (Dead Black Out) button works in S3 - HARDWARE SETUP. It can
be a momentary button, a toggled or disabled.
Palette's Track Sheet can show you every parameter of the moving lights in your rig. You can
expand and collapse this detail level on a per channel basis. Open the Track Sheets using [S5
- Display].
The release button has multiple functions. It will close any open dialog box or it will release
selected channels if no dialog box is open. Press SHIFT + REL to bring back what you just
cleared.
DON'T USE THE TRACKPAD or MOUSE - you don't have to. Almost every function can be
achieved using dedicated keys, the Softkeys (S1 - S12), the NEXT/PREV button, the wheel or
the arrow buttons.
If you put the forward slash character {/} at the beginning of a cue label, the text will appear
italicized. If you use an exclamation point {!} it will be bold.
You can drag columns around in the Cue List to suite your needs. Double clicking on column
separators will automatically size the column for you.
You can move any selected channels in a cue to a separate part by pressing the PART softkey
and then update the cue. Move the Blue Box in the cue list to change cue part timing. Palette
supports 26 different parts plus individual independent timing for every attribute if you need
that flexibility.
The Grand Master can either include or exclude captured channels. Choose your option in S3 HARDWARE SETUP.
The NEXT/PREV button moves you through dialog boxes. Use it with SHIFT to move
backwards through a dialog box.
You can delete cue parts by highlighting any cell part's line with the blue box and press the
DEL key. The channels in that part can either be moved to the main cue or rem oved from the
cue altogether.
While you are in a dialog box, the SOFTKEYS will take you to the individual controls. The
control that currently has the focus of the WHEEL, ARROWS or NUMBER KEYS will flash the
amber LED on that SOFTKEY.
Releasing channels works in three stages: First time you press REL, it release the last
attribute you touched. The second Release releases any currently selected (red background)
channels. The third press clears all captured channels. Use it with SHIFT to make it an Oops
Strand Lighting
p56
Page 58

Palette OS v10
key (also a three-stage process).
The first time you press the TOOL key, you must hold it down and use the SOFTKEYS to select
the desired tool. Next time, you can just touch the tools key quickly to toggle the tool on and
off.
Did you know that any cue with zero time will appear bold in the Next Cue column in the cue
list directory?
To quickly copy a Sub Master, touch COPY then the Sub Master's BUMP button, then touch the
desired new BUMP button.
While in BLIND, m oving the Blue Box loads cues.
To alter the selected channels by 1% instead of 10%, press and hold SHIFT while using the
UP and DOWN buttons.
Time Events can trigger based on astronomical events such as sunrise and sunset. Palette has
longitude and latitude values for nearly two thousand cities around the world.
Palette uses Horizon Control's Universal Attribute Control Model. This very powerful
technology allows you to do things like control color mixing lights in six different color spaces.
Flash Fixture (a TOOL) works whether or not you have channels selected before you initialize
the tool. If you type channel # TOOLS|FLASH, that channel will start flashing. You can then
type another channel number and press enter to jump to it. Use the wheel to scroll through
channel quickly. Once you close the tool, the last channel will be selected and ready for you
to set its level.
To make the channels wait a specific am ount of time after the GO button has been pressed
enter a WAIT time. Do this by editing the Cue Time box using the WAIT / FADE syntax.
You can remove any redundant data in your cue list by right clicking in the cue list and select
Unblock Entire Cue List. Alternately, you can do it on a single cue or range of cues by
selecting them with the Blue Box first before right clicking and selecting Unblock Cues.
When editing wait/fade times using the blue box, use [FULL] to highlight the Wait time (start
of line) and [OUT] to edit the Fade time (end of line).
To enter time in HH:MM:SS format, press the decimal key twice to make the colon. This is
used for VERY long fade times or when entering SMTPE times.
Holding down SHIFT while rolling the WHEEL on any numeric field will change the value by
0.1.
If you build a look that you like on one moving light, you can use the COPY button to copy its
attributes to any other light, regardless of make and model. This is on of the very powerful
features of the Universal Attribute Control Model.
The GOTO CUE button has two functions. Un-shifted, it is the CUE button, used when in the
Record dialog box or in the command line. Shifted it opens the GOTO CUE dialog box where
you can select any cue and Goto it in either recorded time or a time you enter in the dialog
box.
If another cue lists steals away attributes from your cue list, press SHIFT + GO to 'Assert'
your cue list. The current cue will not advance.
If you hold down [SHIFT] while you press [HALT/BACK] the cue list will go back to the
previous cue in cue time, rather than the Halt/Back time.
Busking Looks is a very powerful feature of Palette. Sub Master can be configured to give true
Last Action control to moving light attributes.
Strand Lighting
p57
Page 59

Palette OS v10
If you want to remove information in a cue, LOAD the cue, select the channels, release them,
then press the UPDT key to update the cue.
To quickly record a Sub Master, set the desired levels then press [REC] then a [BUMP] button.
You can later edit the name of the Look by pressing VIEW then BUMP to get the Look's
properties. If you press [REC] [SHIFT]+[BUMP] the record dialog box will remain open to
allow you to label the look.
If you are editing a numeric column (like time), after pressing EDIT you can use the WHEEL to
change the values. If multiple cells are selected, the values will change relative to each other.
Use Load to load cues or looks. You can load multiple items on top of each other to combine
ideas.
To quickly move a Sub Master, press MOVE then the Sub Master's BUMP button, then touch
the desired location's BUMP button.
Press S4 - CONTROL PANEL to change the way your track pad works. You can turn on or off
features such as the tap-clicks.
To release all the Playbacks, press SHIFT+REL PB.
Use the File Open File Types combo to open Checkpoint files if you've made a mistake. Scroll
up the Uber Status to see when the last Checkpoint file was recorded.
To go to the top of a Cue List, press and hold SHIFT while pressing the STEP UP button. To
get to the last cue in a Cue List, press SHIFT+STEP DOWN.
To scroll the channel grid, hold down the SHIFT key while rolling the wheel. This only works
when there are no channels currently selected. To deselect all channels without affecting their
set level, press the BACKSPACE key until the command line is clear.
To go to a cue without using the GOTO CUE dialog box, use the AR ROW KEYS to move the
blue box to the first column in the cue list on the desired cue and press EDIT. This is
equivalent to double clicking on that cell with the mouse.
Using S2 - SHOW OPTONS, you can give each Cue List their own default Step times, Back
times and Release times.
Light Palette's console worklights can have separate levels. Choose the desired levels in S3 HARDWARE SETUP.
You can right click to Clear or Copy the contents of the Uber Status to the system clipboard.
You can then paste this text into Notepad to save it if need be.
Typing VIEW [FIXTURE NUMBER] ENTER allows you to change the labels of a channel to make
your Channel Grid a little easier to understand. Alternately, you can select them and
right-click with the mouse and choose Channel Label.
Right click on the divider to the left of the Channel Grid to set 20 vs. 25 across.
The Status Window will tell you what tool you will get if you touch the TOOLS button. To
change the tool, press SHIFT and TOOLS and select a new tool using the SOFTKEYS.
If you want to get back to the stage display while in the patch, just press a SELECT key.
Instead of using the command line to patch channels, try using the Blue Box. Select the first
cell, press EDIT, type in the desired number then just keep pressing the DOWN ARROW rather
than ENTER.
Press S4 - CONTROL PANEL to get to applications other than the Palette, such as MS PAINT,
Internet Explorer and Media Player.
Strand Lighting
p58
Page 60

Palette OS v10
Running your finger along the very right-hand side of the track pad allows you to adjust the
levels of the selected channels.
Why print to paper? Just e-mail your PDF output right from your desk.
There is a text editor built into Palette that allows you to take notes. Get to it using S4 CONTROL PANEL.
Use the WHEEL in dialog boxes to scroll through lists, number boxes and combo boxes.
Holding down SHIFT while rolling the WHEEL will change numeric fields by 0.1.
Press S4 - CONTROL PANEL to change your Screen Saver. Changing the Settings of "My
Pictures Slideshow" allows you to point to your own directory of images that you place on the
hard drive.
Create a chase easily by selecting a range of cues' ACTIONs with the Blue Box, touch EDIT
and select Follow After Fade. Then select the NEXT CUE to be linked to the first.
When controlling moving lights, group multiple attributes together and control them
simultaneously by holding down combinations of S1-S4 and rolling the wheel.
Palettes can be nested. If you build Position A from raw values, then build Position B using
Position A, updating Position A will affect Position B.
You can Flip moving head channels easily by using the FLIP Tool. Do this and update the cue
when the light 'took the long way 'round' when running cues.
Strand Lighting
p59
Page 61
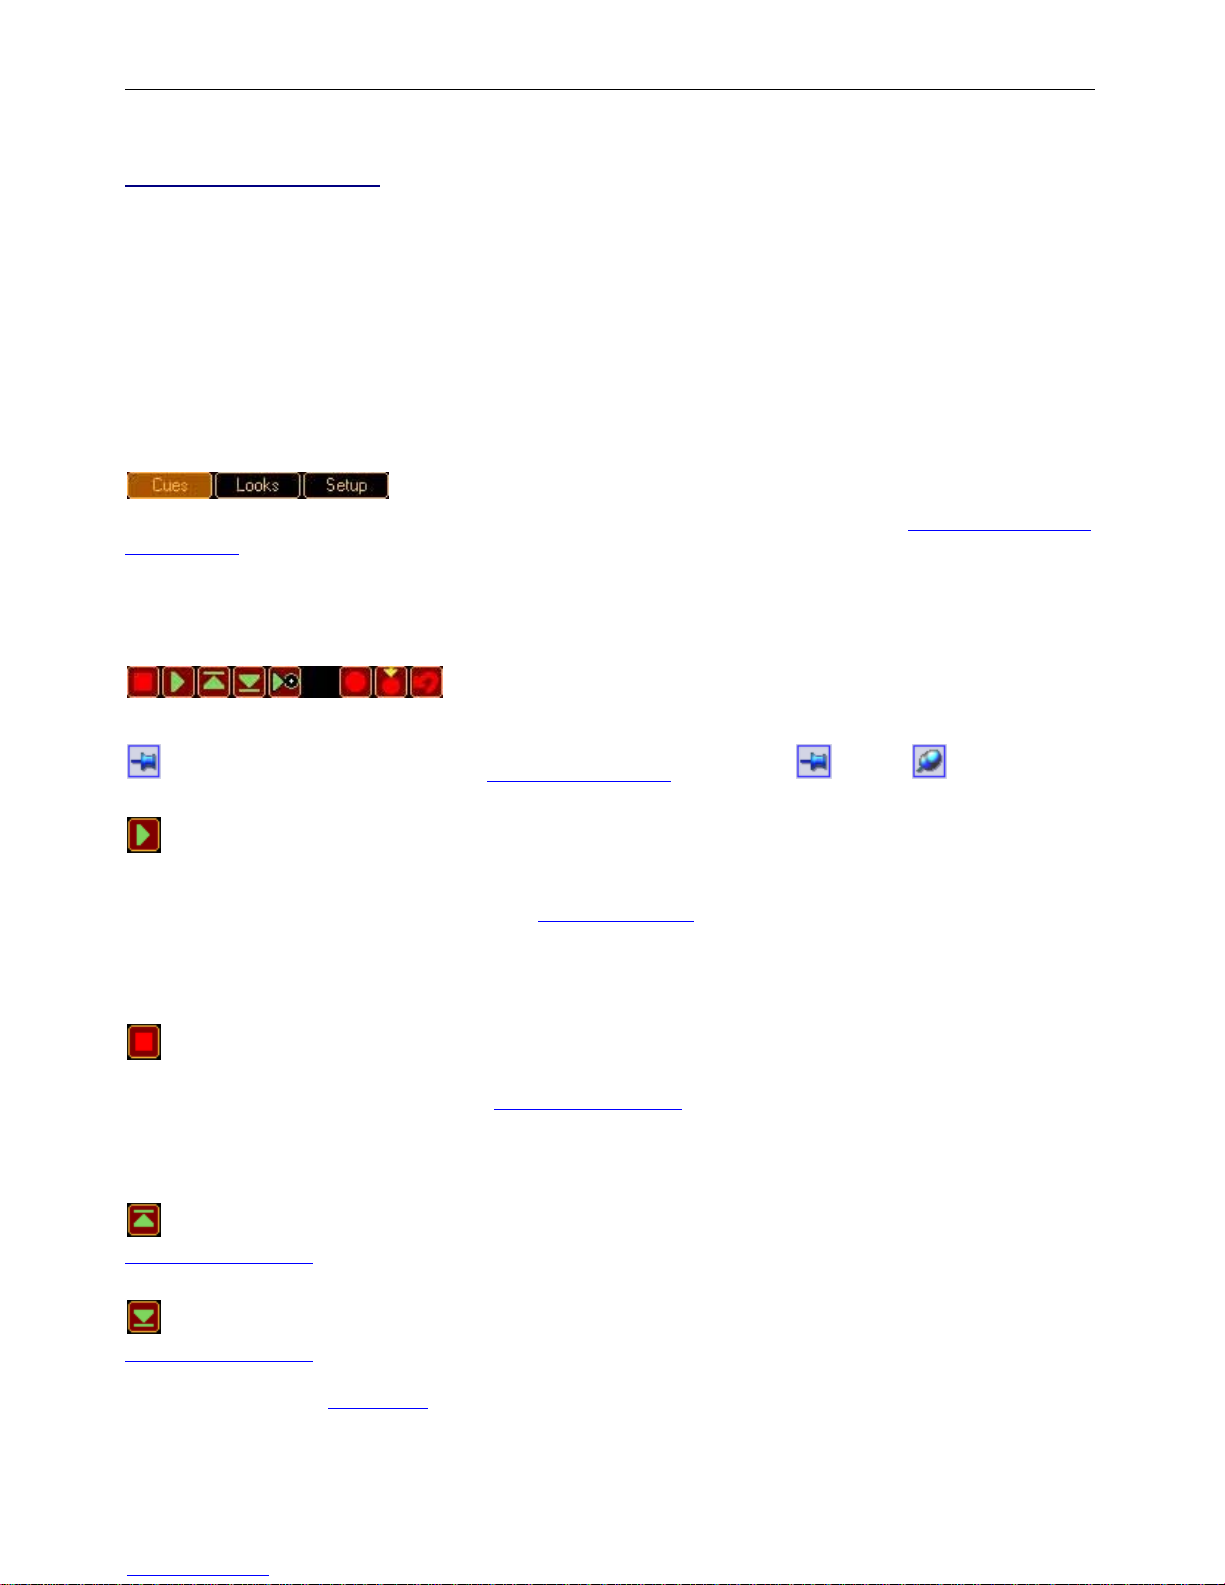
Palette OS v10
Screen Layout
Toolbars
Palette has three different toolbars. If you are not sure about any tool’s function, position the
mouse pointer on a toolbar button (without clicking). The tool is highlighted, and the Tool Tip
display indicates the function:
The functions of the Toolbars are detailed below. Most of these functions have QWERTY keyboard
equivalents.
Cue List Toolbar
The Cue List Toolbar is located directly above the Cue List on the left side of the display.
The Autoscroll button turns the Autoscroll Cue List function on and off . [S11] also
toggles the pin.
The GO button (Console Equivalent: [GO], QWERTY Equivalent: [SPACE]):
activates the cue indicated by the Cue List Pointer
advances to the next cue in the recorded time (activating any Cue Actions and executing
any Follow Cues)
The HALT button stops any cue that are playing back on this cue list from running. Once the
cue list has been stopped, hitting the Halt button again will backup to the previous cue in the
default Cue List Back fade time (See [S2] Show Options
QWERTY Equivalent: [Z])
The Go Back button is equivalent to doing a Goto on the previous cue in its own cue time. (
Console Equivalent: [SHIFT] [HALT/BACK] QWERTY Equivalent: [SHIFT] [Z])
The Step Back button replays the cue before the active cue in the default Step Time (See
[S2] Show Options
to go to the top of a cue list.
). (Console Equivalent: [STEP UP] QWERTY Equivalent: "[") Use with [SHIFT]
in the cue's recorded time
). (Console Equivalent: [HALT/BACK]
The Step Forward button goes to the cue after the active cue on the default Step Time (See
[S2] Show Options
to go to the bottom of a cue list. If a long fading cue is running, pressing this button will
complete the cue in Step Time
Strand Lighting
). (Console Equivalent: [STEP DN], QWERTY Equivalent: "]") Use with [SHIFT]
.
p60
Page 62
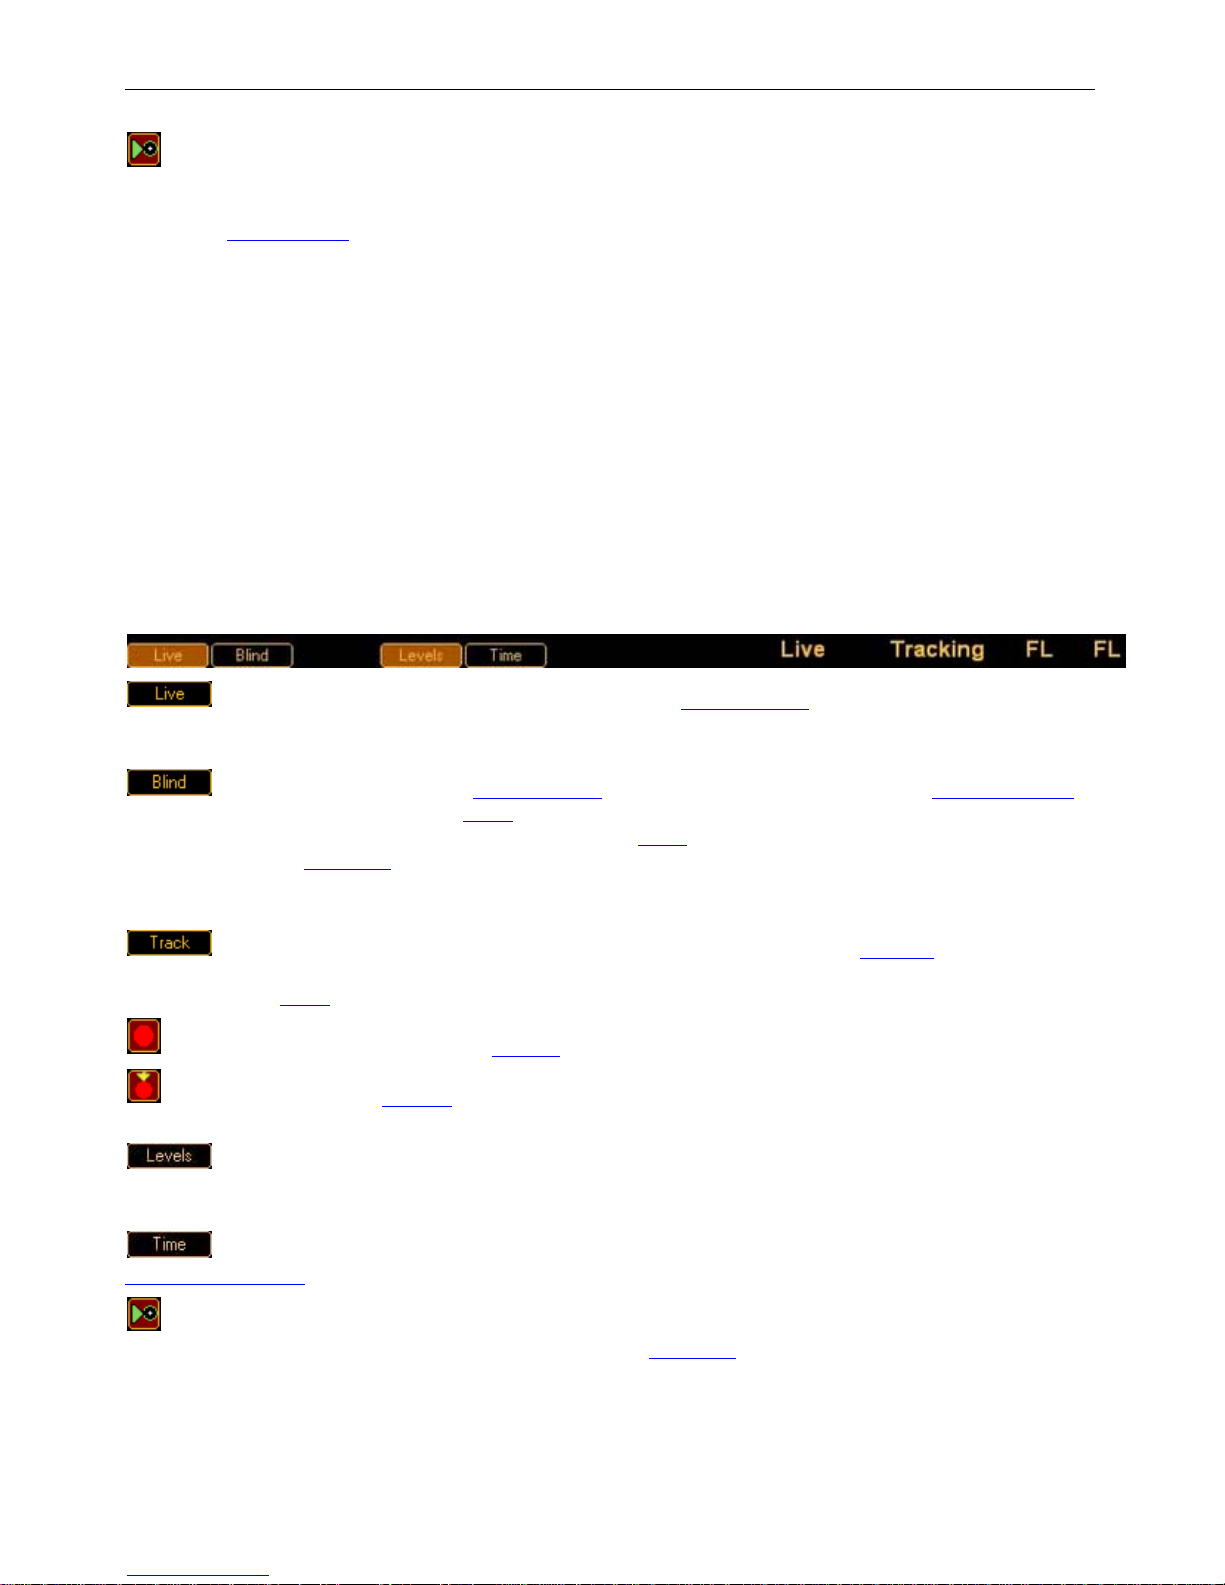
Palette OS v10
The Release Cue List button halts all cues on that Cue List and releases all channels
controlled by that Cue List. (The channels will either return to their default levels, or to the levels
set by any other Cue List or Sub Master that has control of them. They will fade out using the
Cue List's release time
[SHIFT] to release all cue lists.
The Goto Cue button activates the highlighted cue on the Cue List in the default time. (Console
Equivalent: [SHIFT] [GOTO CUE], QWERTY Equivalent: [SHIFT] [Q] [#] [ENTER] - (Un-Check
[S6]) Goto and Do Not Execute Follows)
The Goto and Run button fades to the highlighted cue in the recorded time. (Console Equivalent:
[SHIFT] [GOTO CUE], QWERTY Equivalent: [SHIFT] [Q] - (Check [S6]) Goto and Execute Follows)
Cue Properties are accessed via the Cue Properties dialog box. [VIEW] [CUE] [#] [ENTER]
QWERTY Equivalent: [V] [F10] [#] [ENTER])
). (Console Equivalent: [REL-PB] QWERTY Equivalent: [\]) Use with
Channel Grid Toolbar
When in Live mode, the levels you see in the Channel Grid show what is being output
to the stage. Any levels with a blue background are not controlled by the Selected Cue List. Get
in and out of Live mode by pressing [SHIFT] [BLIND] or on the QWERTY keyboard with [B].
When in Blind mode, the Channel Grid has a grey background. See the status window
to see what is currently loaded in Blind. Get in and out of Blind mode by pressing [SHIFT]
[BLIND] or on the QWERTY keyboard with [B]. See Blind
keys to move the Blue Box
[LOAD] or [SHIFT] [B], the Load dialog box will be automatically stuffed with the highlighted cue
number.
When the Tracking button is down in Blind, the levels that have tracked into the Loaded
cue are shown even though those levels are not recorded in the loaded cue. This button is only
shown when in Blind
The Record button accesses the Record dialog box.
Update will open the Update dialog box presenting a list of possible playback items to
update.
Changes the Channel and Attribute Grid displays to show Intensity Levels and Attribute
Values. The Moving Light Attribute Grid (see below) must be displayed to see Attribute values
such as Pan/Tilt and Color.
Changes the Channel and Attribute Grid displays to show Wait/Fade Times. The
keyboard shortcut
.
to toggle between Levels and Times is [SHIFT] [EDIT].
, the highlighted cue will automatically be loaded. When you press
. While in Blind, if you use the arrow
The first click of the Release button release the last altered attribute. The second click
releases selected channels and the third releases all captured
Strand Lighting
channels
p61
Page 63

Palette OS v10
Cue List Directory Toolbar
Use the Cue List Directory toolbar to switch between displaying Cue Lists, Patch and Time Events
.
See Also:
Keyboard Shortcuts
Softkeys Described
Strand Lighting
p62
Page 64
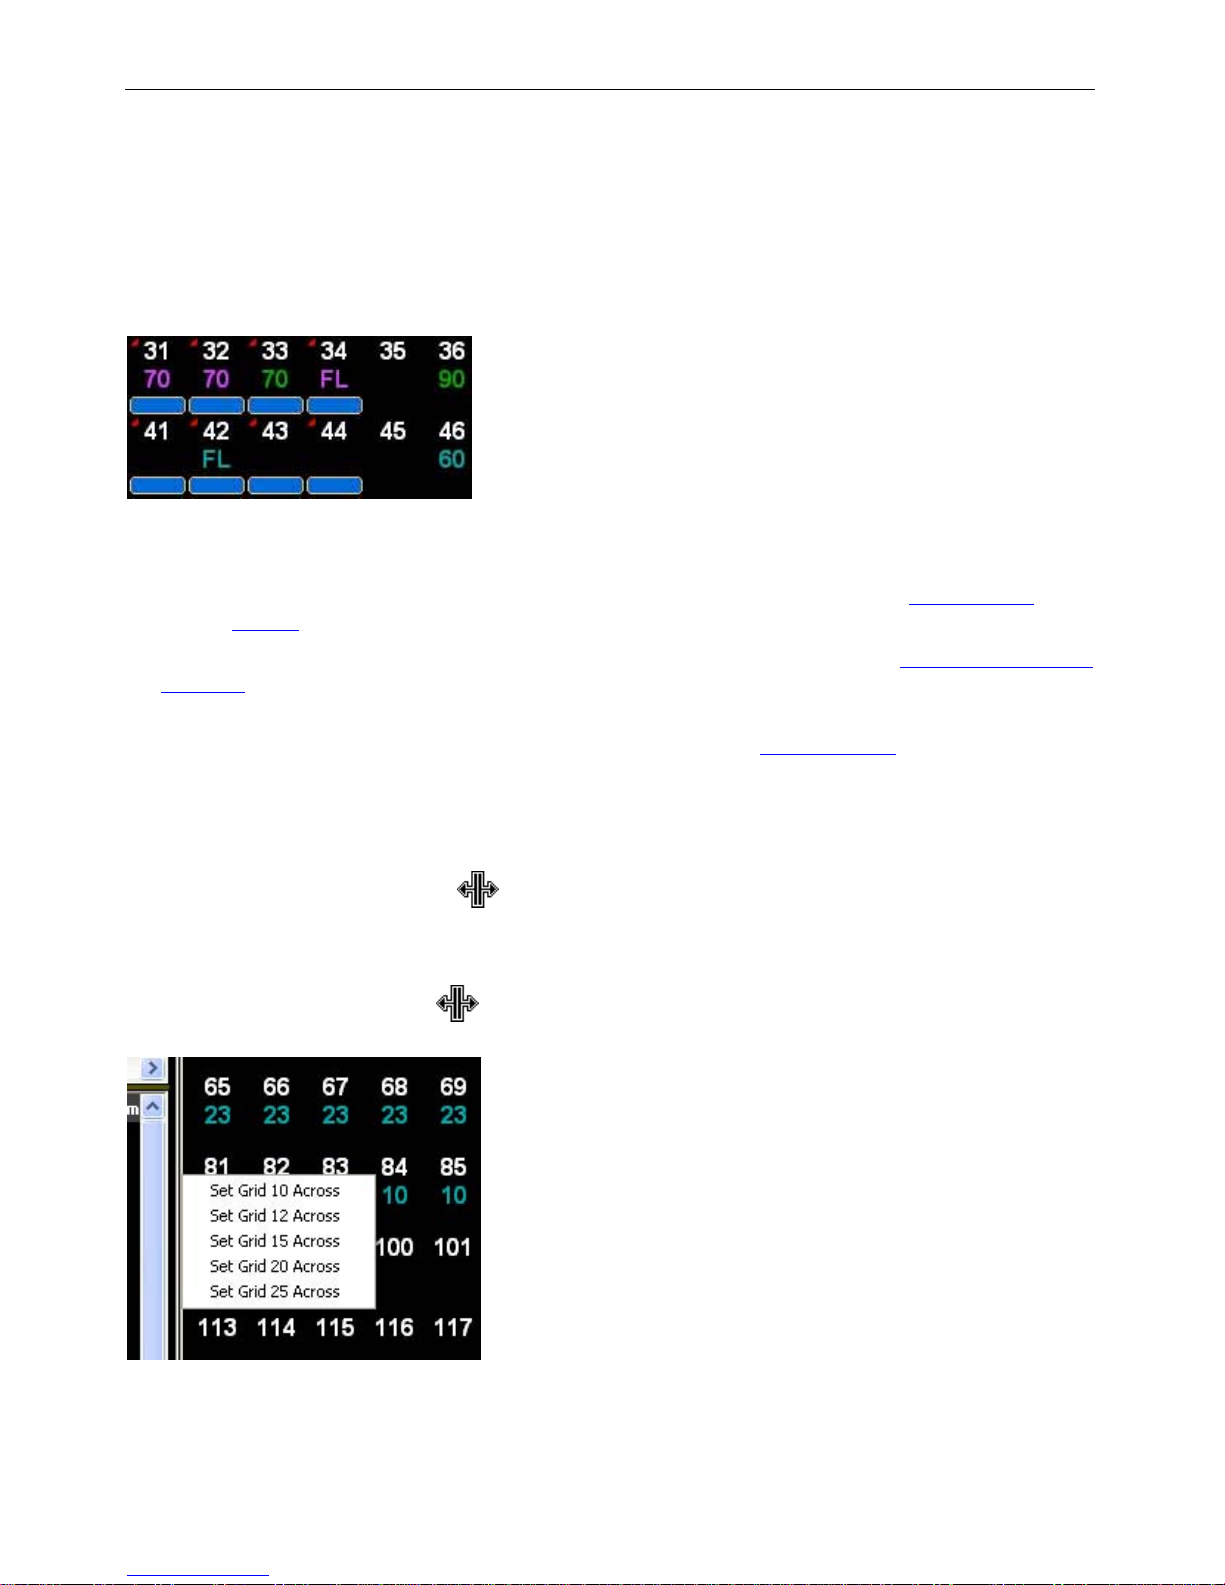
Palette OS v10
Channel Grid
The Channel Grid is the field of numbers located in the top right pane of the display:
Each Channel in the system is represented in the Channel grid in two lines.
The top line represents Channel numbers
o
The second line can either show levels or fade and wait times. (See Independent
o
Timing)
Channel levels are color-coded to indicate the status of the Channel. (See Channel Colors and
Symbols)
Channels with a small red triangle by their number are Channels that have more attributes
than just intensity. The other attributes can be found in the Attribute Grid
.
Adjusting the Size of the Channel Grid Display
Move the mouse over the line separating the Channel Grid from the Cue List until it
1.
turns into this symbol
Click on the vertical line and hold down the mouse button to adjust the width of the
2.
Channel Grid display.
OR
Right-click once the
3.
right-click menu.
.
symbol appears, and select a set Channel Grid size from the
Moving around the Channel Grid using the
Strand Lighting
p63
Page 65
Palette OS v10
Inside the Scroll Bar is the Thumb, which
indicates the section displayed. (If it is
near the top of the scroll bar, you are
near the top of the display.
Click above (or below) the thumb to
move the Channelgrid will move up (or
down) a page.
To move up (or down) line by line, click
on the arrow at the top or bottom of the
scroll bar. Each click will move the
display one line. If you hold down the
mouse button while the mouse pointer is
over the arrow, the screen will continue
moving line by line.
To move in big steps, put the mouse
pointer on the thumb, hold down the
mouse button and the drag the thumb up
or down in the scroll bar.
Wheel
While no Channels are selected, you can hold down [SHIFT] and roll the Wheel to scroll the
Channel grid. If you have channels selected and you don't want to release them, use the [BKSP]
key to clear the command line.
Moving around the Channel Grid Display with
the trackpad
The Scroll Bar is located along the right edge of the cue list display as well as the Channel display
and it identifies whether the display is near the top, middle or bottom.
See Also:
Attribute Grid
Screen Resolution
Toolbars
Channels Colors and Symbols
Strand Lighting
-o-
p64
Page 66
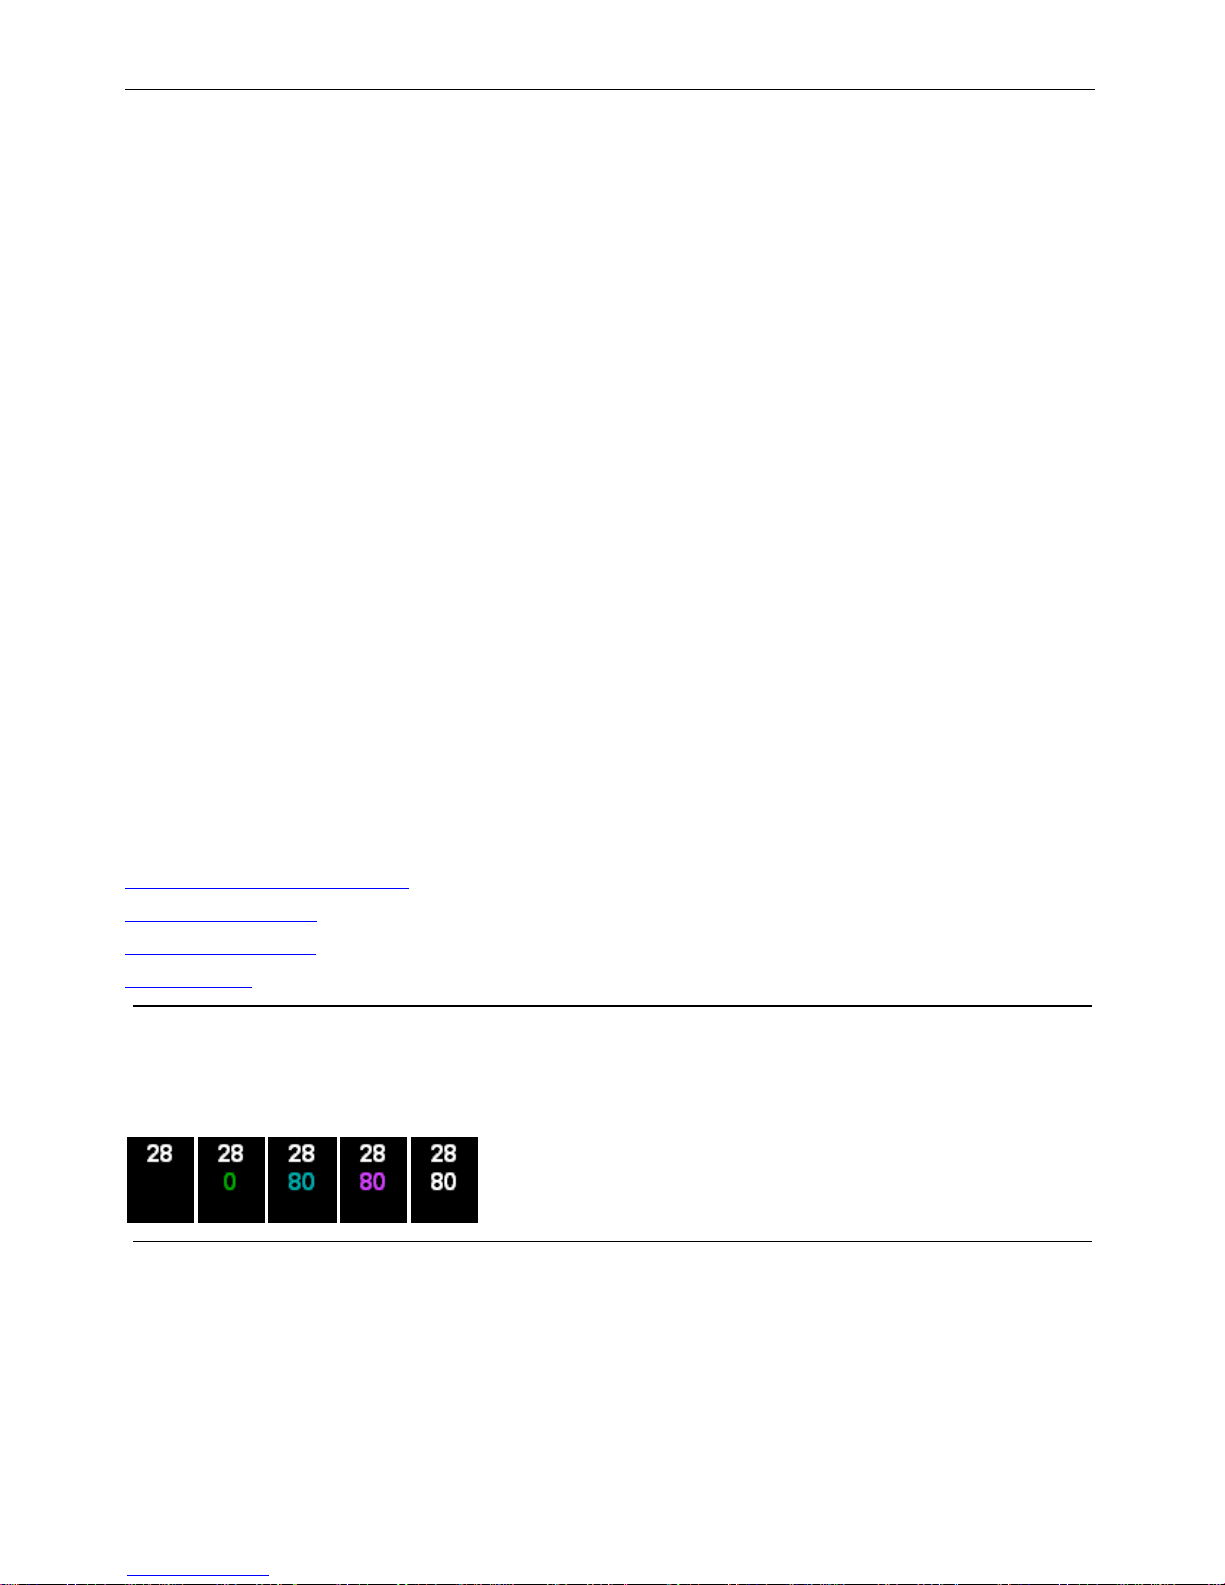
Palette OS v10
Description of the
different states of
channels
When you are programming your show, the channels you select and work with can be described
as existing in different states. Understand the definitions of what changes these states helps
explain why Palette may treat them differently at different times.
Channels can be:
Released
o
Selected
o
Changed
o
Captured
o
Under Playback control
o
Under Sub Master control
o
Under Flash/Highlight/Lowlight control
o
See Also:
Channel Colors and Symbols
Channels to Record
Channel Resolution
Show Option
Released channels are channels that are not captured for use in a pending record operation.
These channels may be at their default level (i.e. not controlled by anything) or they may be set
to a level by a currently active Cue List or Sub Master.
Examples of Released channels:
Selected channels are channels that have been addressed and are pending immediate
hands-on control. Selected channels that have not Changed and are not Captured can still be
controlled by active Playbacks or Sub Masters.
Selected channel Only:
Strand Lighting
p65
Page 67
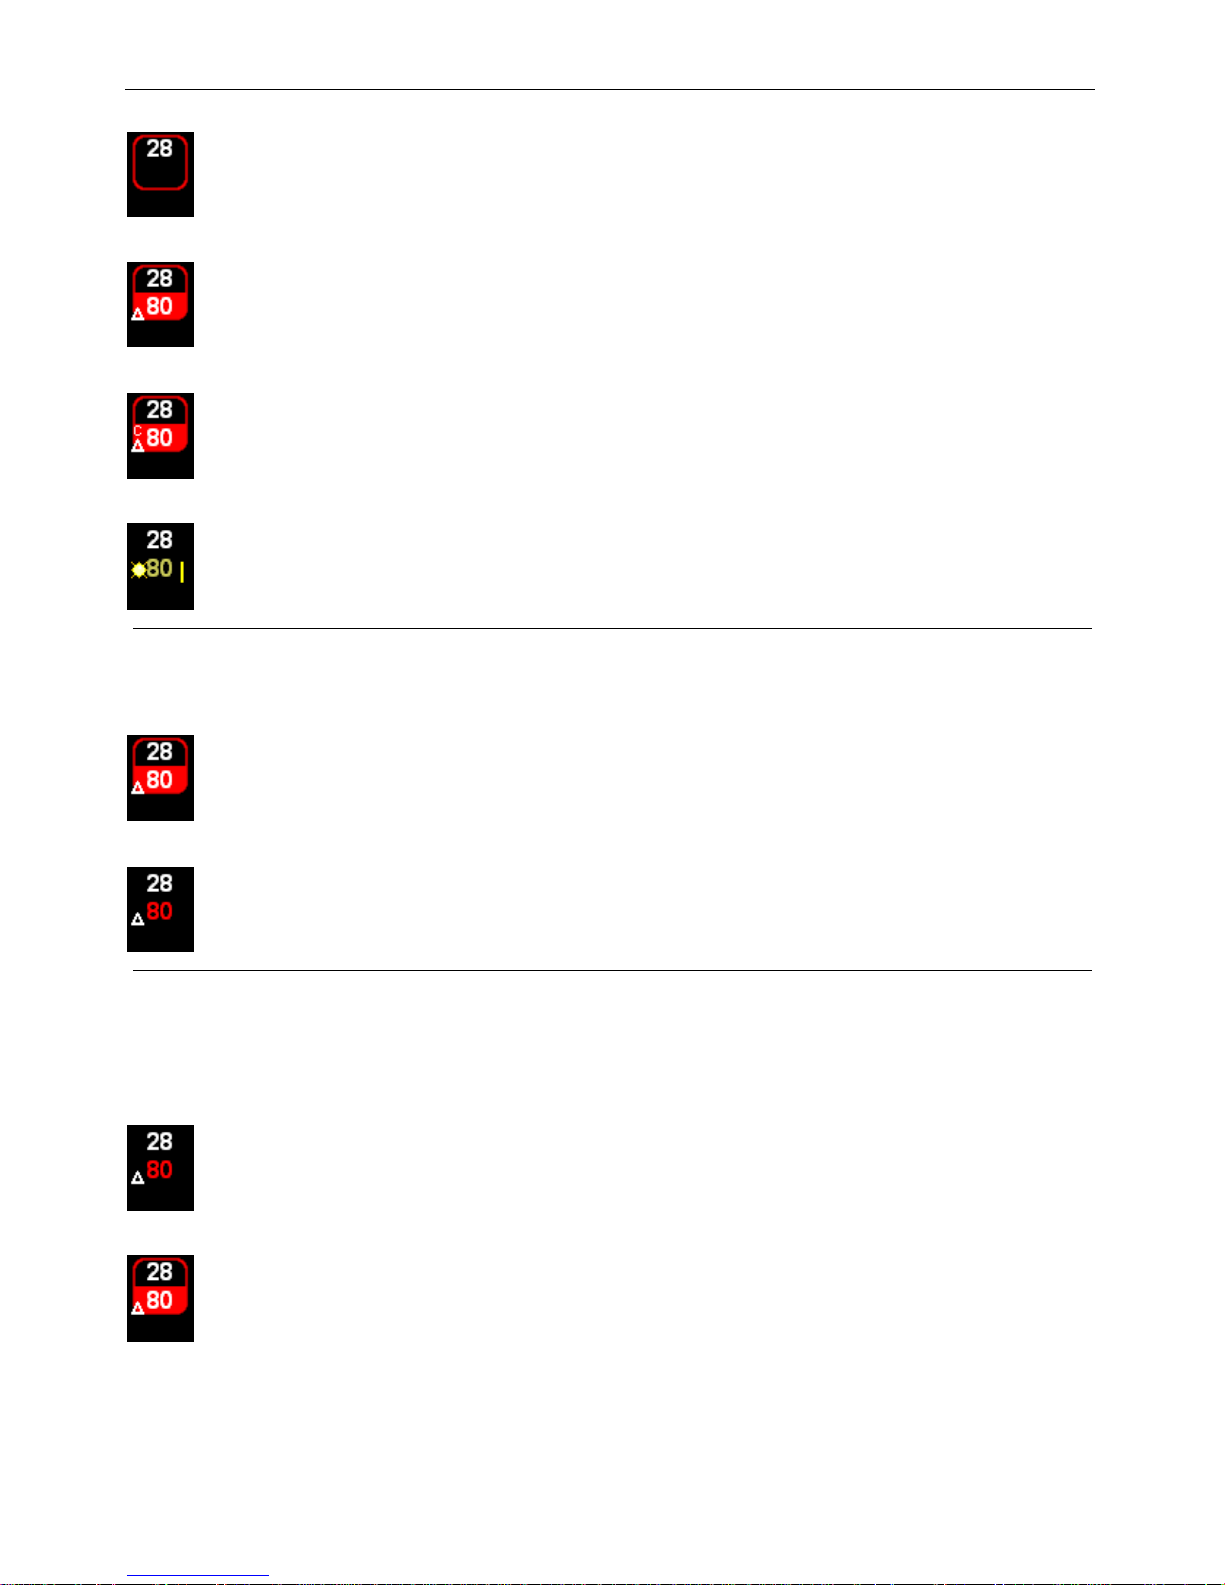
Palette OS v10
Selected and Changed:
Selected, Changed and assigned new part:
Under control of either Flash, Highlight or Lowlight tool:
Changed channels are currently or recently under control after being selected, but not yet
recorded. These channels are necessarily Captured.
Changed, Selected and Captured
Changed and Captured
Captured channels have likely have changed and are pending a record. If you are in the LIVE
display, these channels will not be controlled by Cue Lists or Sub Masters. If you do a record, the
Changed delta symbol is removed, but the channels are still Captured, meaning that Cue Lists
and Sub Masters will not control their level until they are released.
Captured channel (not Selected but Changed):
Captured channel (Selected and Changed)
Captured Not Changed (not Selected, probably just Recorded, but not released)
Strand Lighting
p66
Page 68
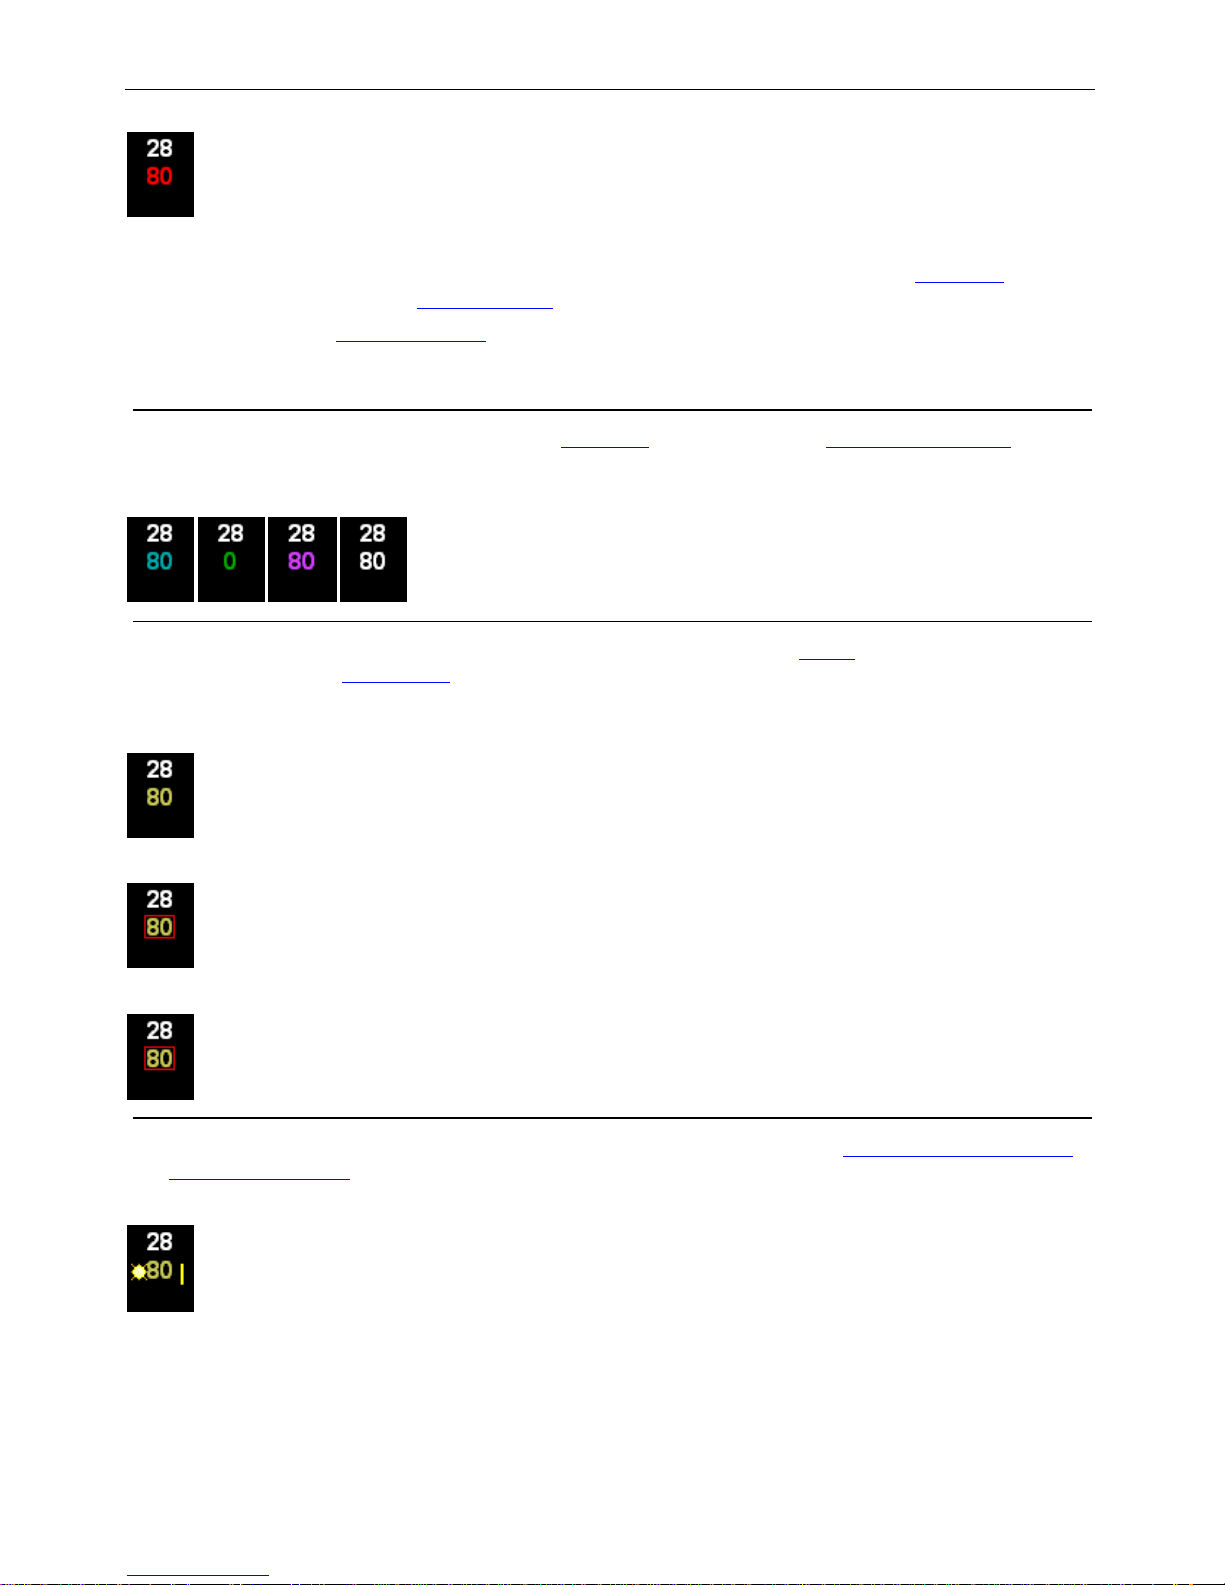
Palette OS v10
Note:
You can control whether or not Captured channels are automatically Released after
o
recording a cue in Show Options
There is a Console Option in Hardware Setup that allows you to use Last Action
o
Editing. If you choose Last Action Editing, channels will remain captured until a cue
takes control of them.
Channels under Playback Control must be Released. If you are using Last Action Editing,
attributes will automatically be Released when a Cue Lists needs to take control of them.
Under Playback Control:
Channel under Sub Master Control must be Released. Additive Looks can affect levels sim ilar
to Cues, either under HTP or LTP
intensity that is currently either under Cue List Control or Additive Sub Master Control.
Under Additive Sub Master Control:
control. Inhibitive Looks negatively affecting a channel's
.
Channel under Cue List Control being inhibited by Inhibitive Sub Master
Channel under Cue List Control being inhibited by Cue List Master or Grand Master
Flashing channels are Selected. It may or may not be Captured. (See: Flash Fixture or Output
and Highlight/Lowlight)
Flashing or Highlighted channel:
-o-
Strand Lighting
p67
Page 69
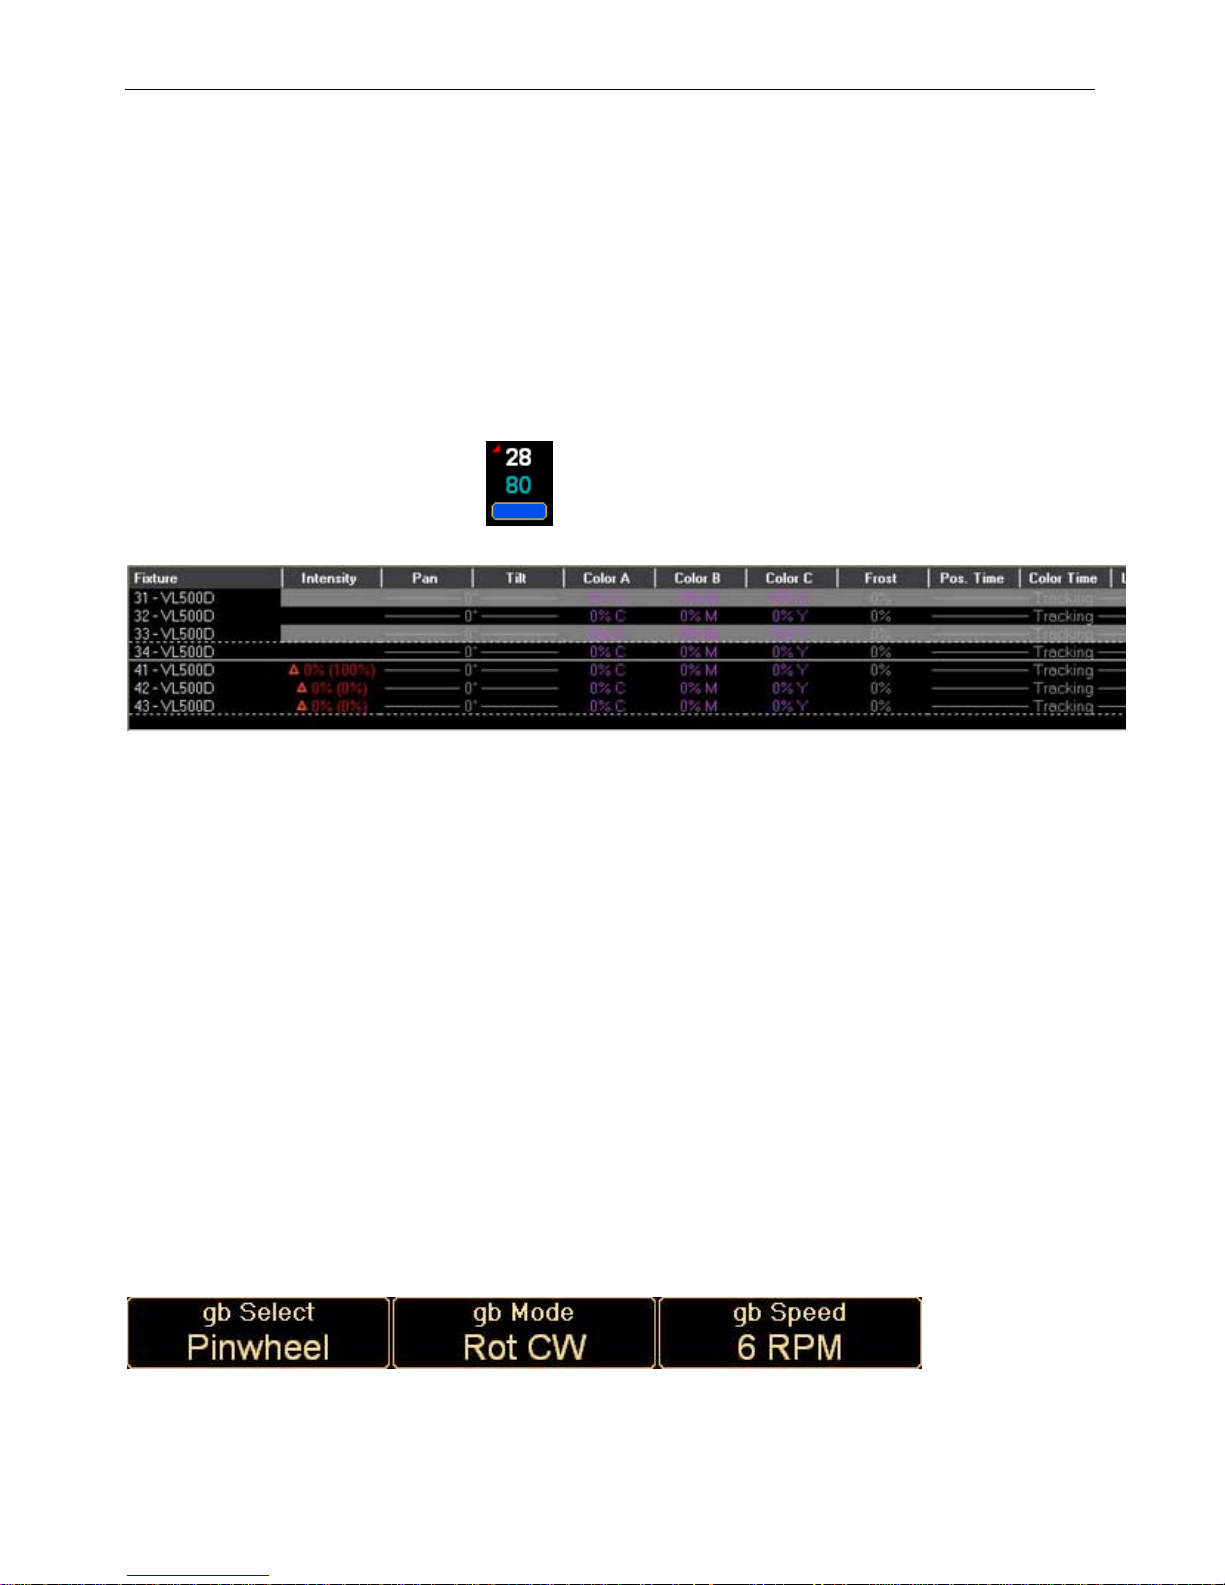
Palette OS v10
Attribute Grid
If you have patched moving lights in your show, the Attribute Grid will appear below the Channel
Grid. You can turn on or off the Attribute Grid display by using the Display menu, [S5].
You can also dock a Second Window with just the Attribute Grid in it by selecting Second Window
from the Display menu or selecting it from the [S5] popup.
The Channel Grid shows that a channel has more attributes than just intensity by displaying a
red triangle in its upper left corner:
Grid:
The channels are listed in rows and the attributes are show in columns. The first two columns
are fixed, such that when you scroll the pane horizontally, you can always see which channel is
on which row and you can see its current intensity. The other columns will shift left an right if
you move the horizontal scroll bar or automatically when you address individual attributes such
that the one you are working with is visible. The column order cannot be switched, but you can
size the columns by placing the cursor between two column headings, clicking and dragging. The
column width will be persistent between show files as it is not saved in with the show.
When you select a moving light, the row in which it appears will be highlighted with a grey
background.
Note:
Just by selecting a moving light, you do not Capture the individual attributes. They are still being
controlled by cues and looks until you actually adjust their values. Check out the topic called
Channel Colors and Symbols to see what the different sym bols mean.
The grey highlighted background shows you which attributes are available for that channel. In
the image above, you can clearly see that the VL1000 does not have a Color Wheel and the
VL2000 Wash does not have a Gobo Wheel.
The attribute control windows at the bottom of the screen show you individual control of the
various aspects of the selected attributes. Sometimes two or more of these controls are string
concatenated into a full description of what the attribute is doing within a single column. The
Gobo wheel on the VL1000 shown above is a great example. When you selected Gobo after
selecting the VL1000, there at three controls that affect how the Gobo Wheel is going to behave:
The additional attributes can be seen in the Attribute
The first bubble Selects the specific gobo from the gobo wheel (in this case Pinwheel). Adjusting
the Gobo Mode determines how the individual gobos will behave (in this case, the gobo will
rotate Clockwise), and the third bubble shows specifically how the behaviour is configured (in this
Strand Lighting
p68
Page 70
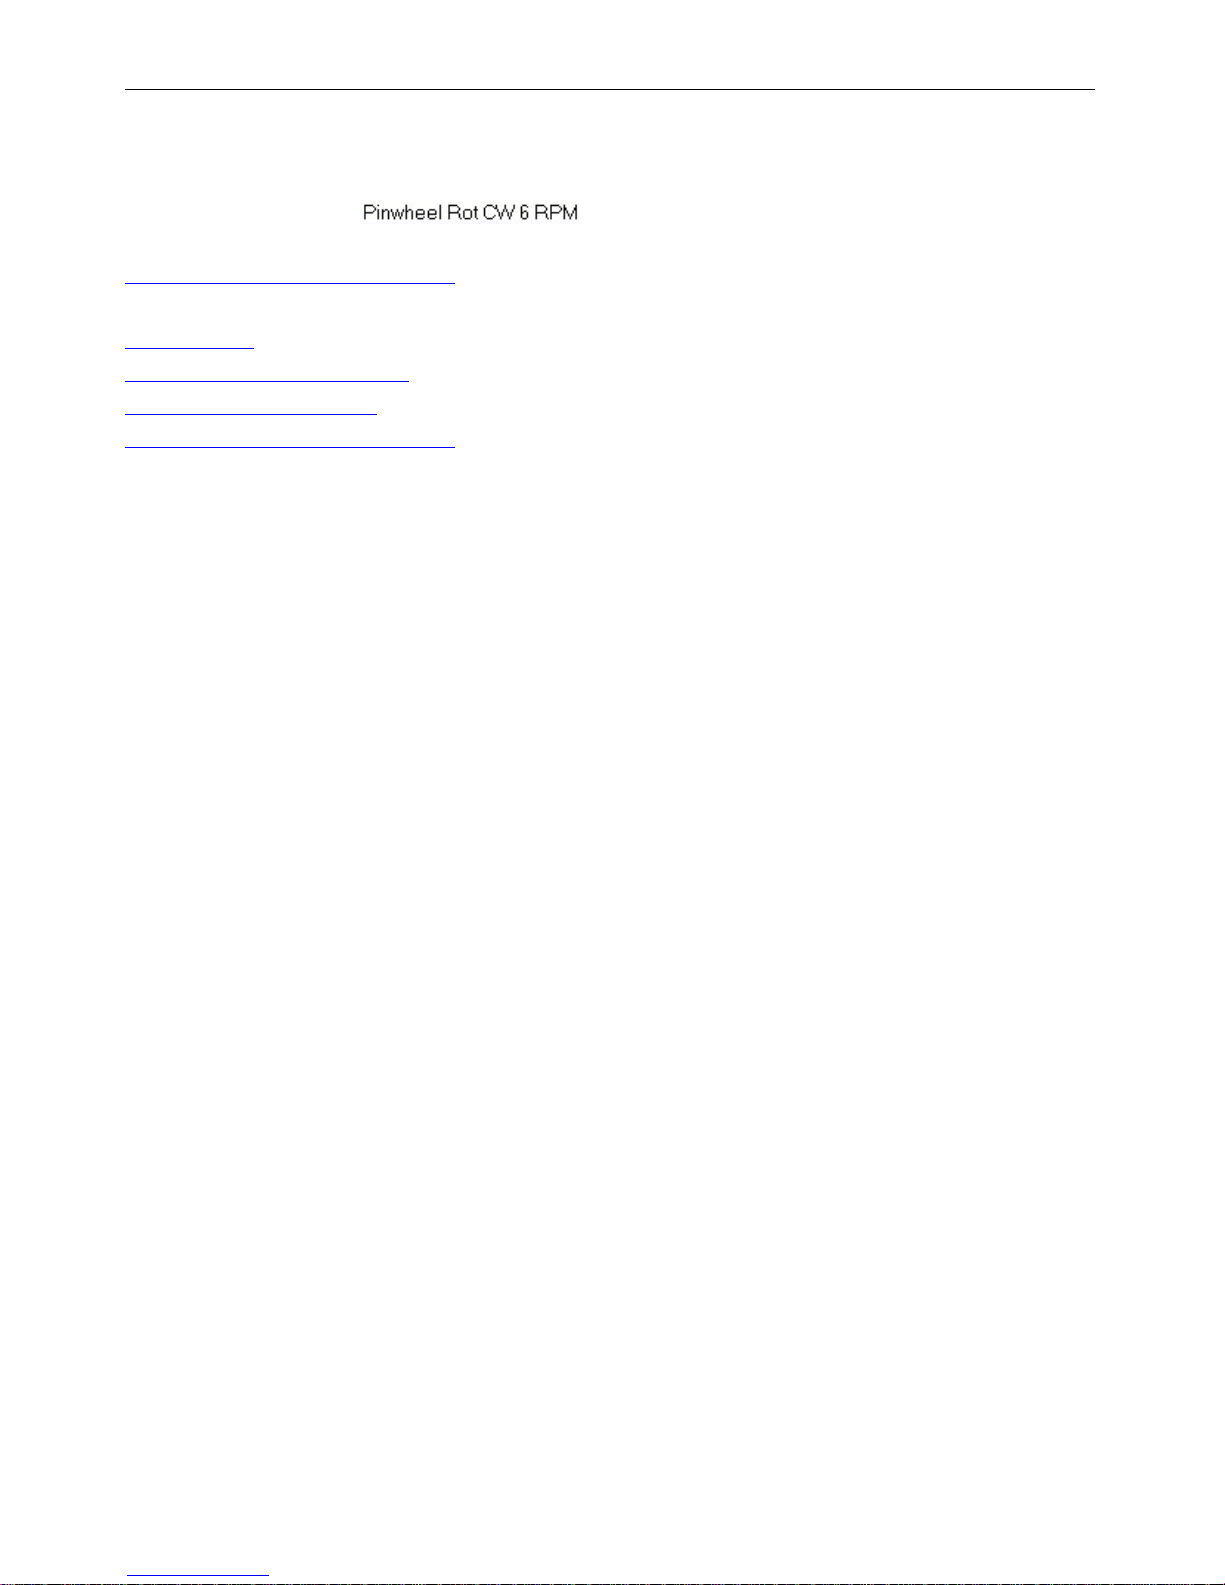
Palette OS v10
case, it shows Revolutions Per Minute, but if the behaviour was to index the gobo, it would show
the angle in degrees from the home position). You can read these bubbles from left to right like
this: "The Pinwheel gobo will Rotate Clockwise at 6 RPM". In the attribute grid, it appears
concatenated like this:
For more inform ation on the relationship of control handles and attributes, check out the topic
Universal Attribute Control Model
.
See Also:
Channel Grid
Channel Colors and Symbols
Controlling Moving Lights
Universal Attribute Control Model
Strand Lighting
p69
Page 71
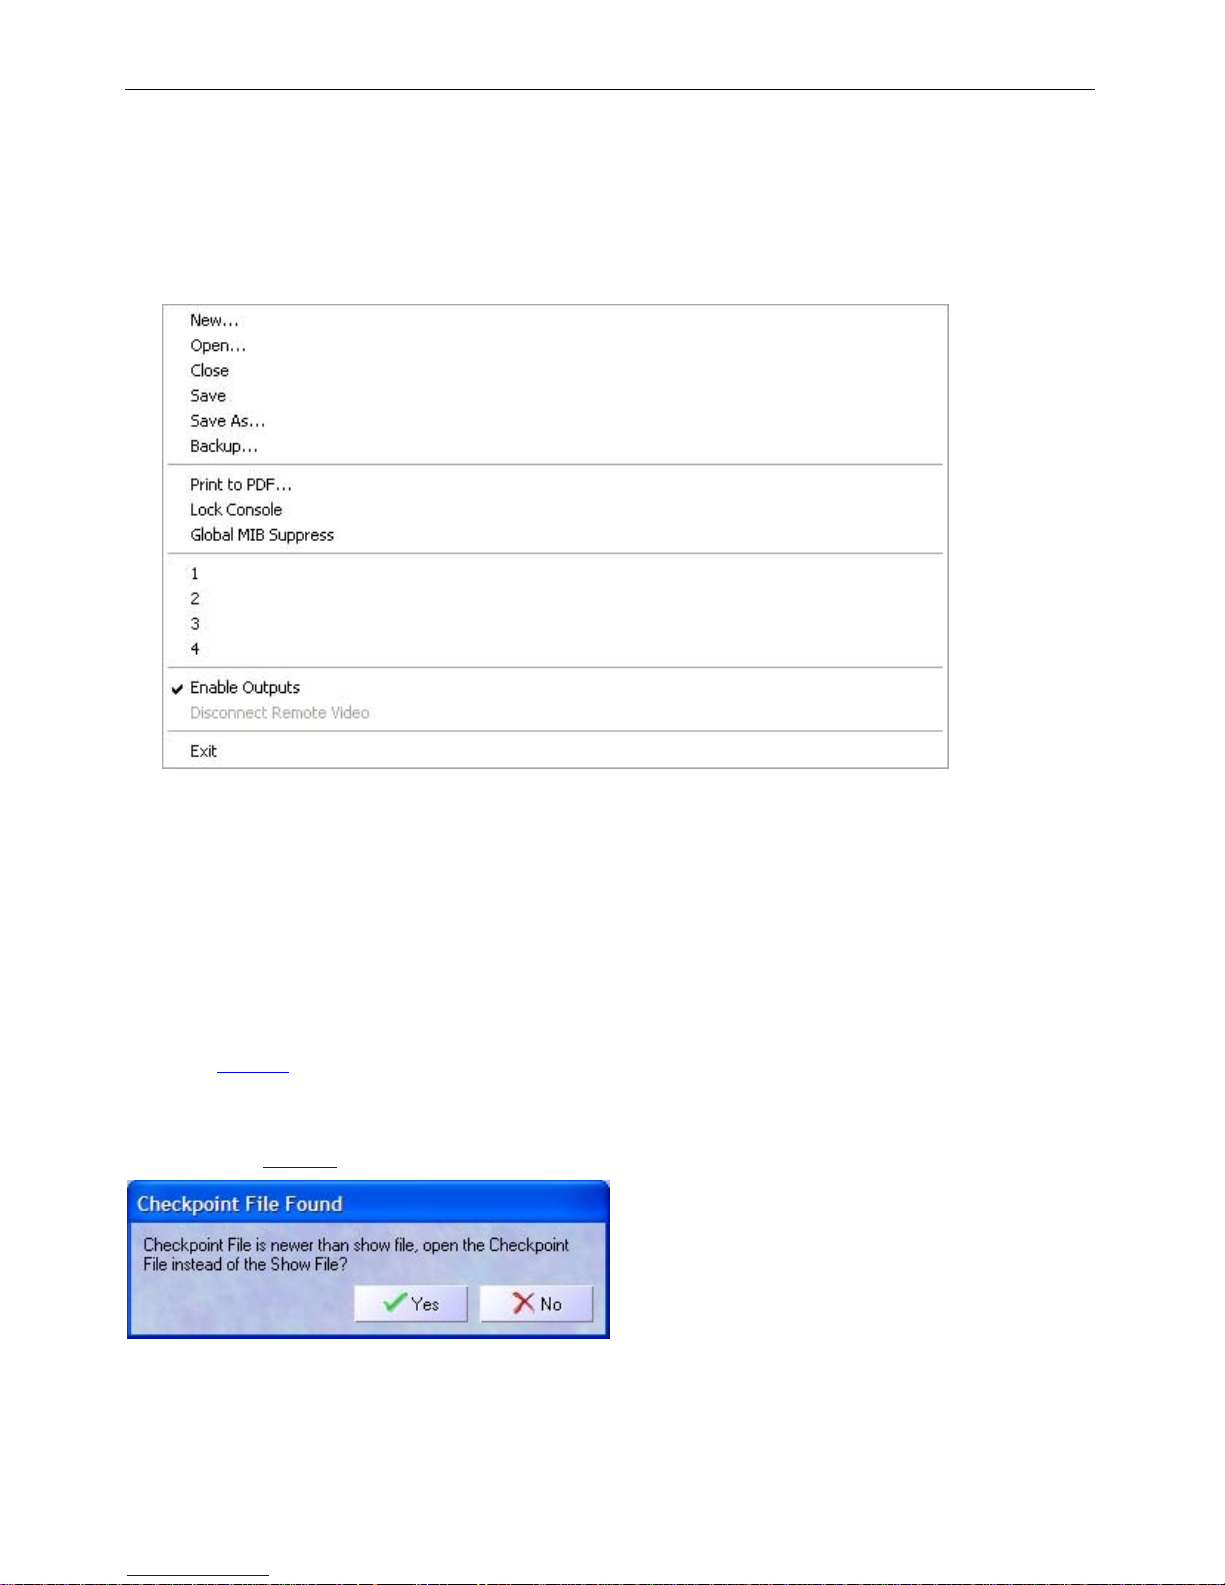
Palette OS v10
File Menu
The File pull down menu on the Menu Bar provides access to the following functions.
New - Use to create a new show. You will have to Save it to give it a name.
Open – Useto access an existing show for playback or editing. The File Open dialog box allows
you to open Palette Show files, Checkpoint files and Backup files. By default, the combo is set
to open Palette Show files (*.spf). You can also open 500 Series Show files (*.ssf). The
conventional patch and cue lists will be opened.
Close – Use to exit the show that is currently in use. If the show file has been changed, it will
ask you to save first.
Save – Use to record the contents of the current show to disk. You can also press [S8] on the
main softkey
YourShowFile.spb. The *.spb extension is used for backup files. The current show file is
automatically backed up at regular intervals to a Checkpoint file. Checkpoint file use the same
name as the show file, but has the extension *.spc. If your system crashes or you lose power,
when you recover
You will need to verify you want to continue working with the Checkpoint file or the real show
file. If you choose Yes to open the Checkpoint file, you will do a SaveAs the first time you choose
Save. You can manually Open checkpoint files by changing the "Files of Type" combo in the
File|Open dialog box to "Palette Checkpoint". Set the time interval of how often checkpoint files
toolbar. Once you save the show, the old file on disk will be renamed
the Checkpoint file will be opened rather than the show file:
Strand Lighting
p70
Page 72
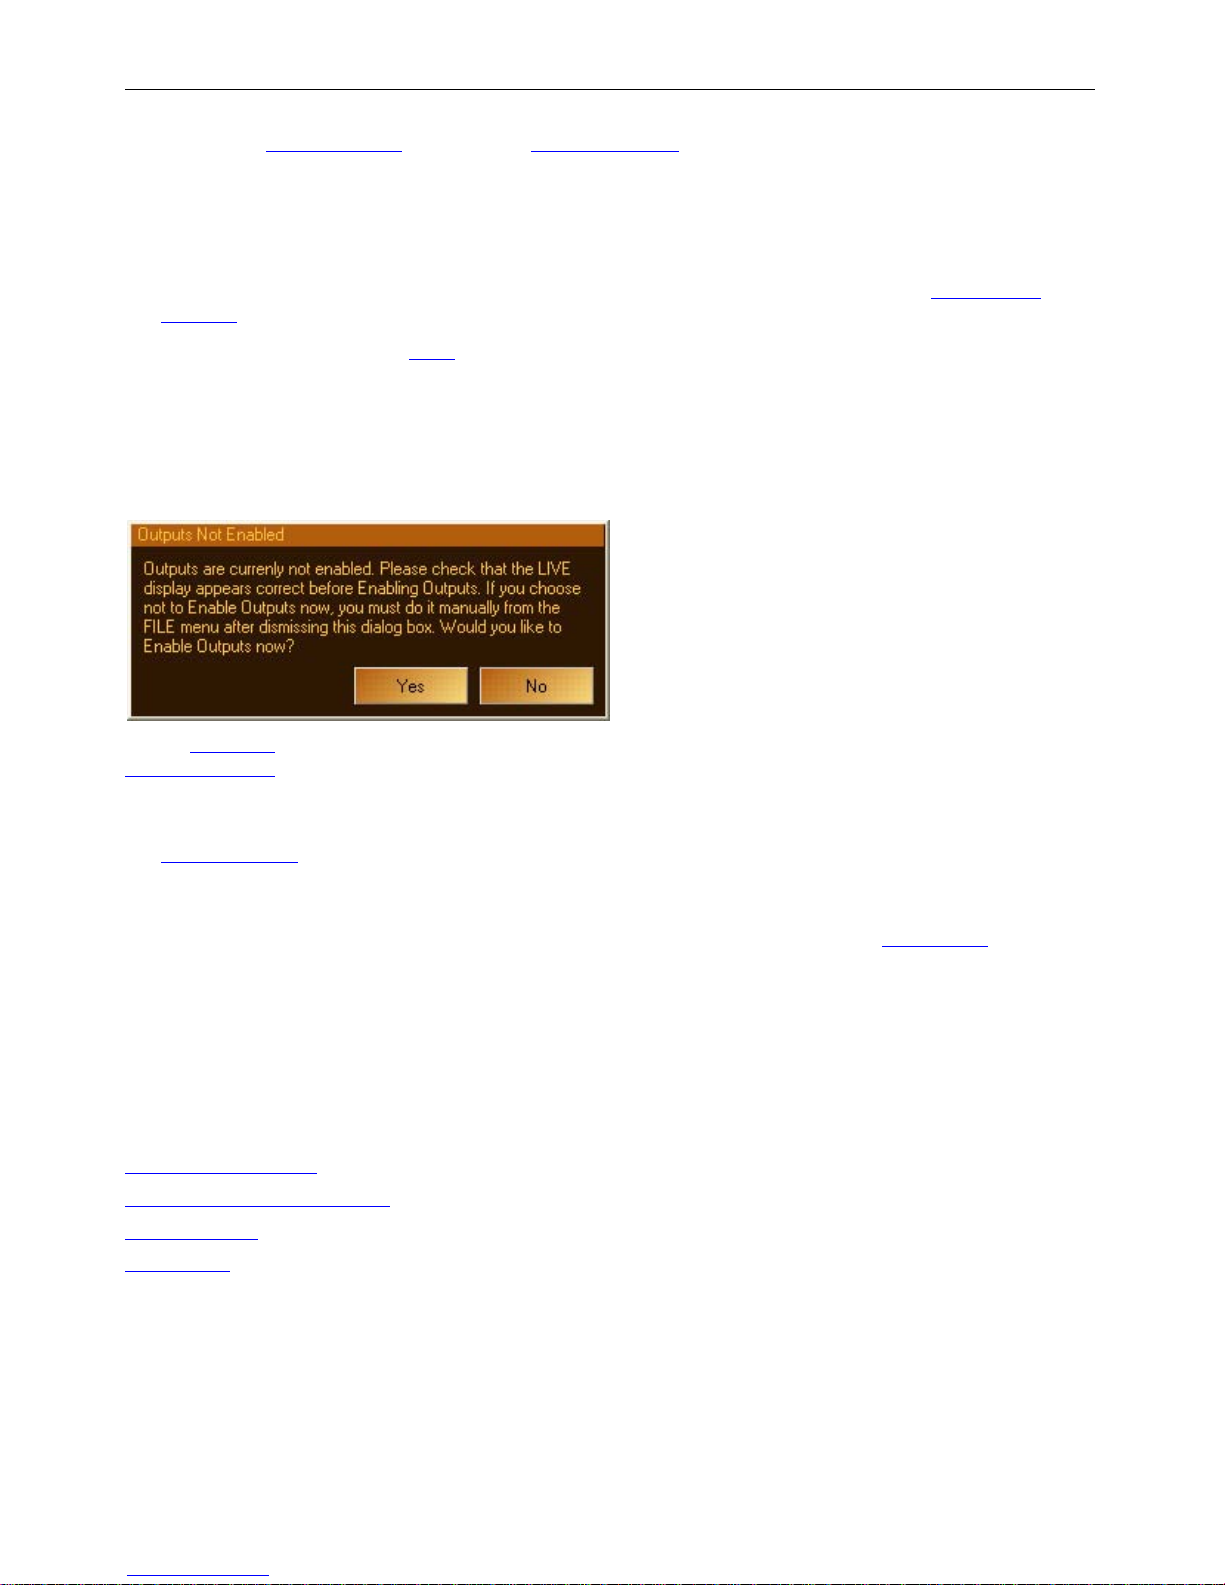
Palette OS v10
are written in Show Options
files are automatically deleted if you exit Palette manually.
Save As – Use to record the current show under another name and continue working under
that name.
Backup - Use to make a backup copy (*.spb) of the current show to another location and
continue working under the original name. Set your backup configurations in Show Save
Options.
Print to PDF - Opens the Print dialog box to allow you to customize what sort of document you
want to create using the current show.
Recent files will be listed by number. Using the QWERTY keyboard, press that number to load
it.
Enable Outputs - This option is a indicated by a check mark. If you disable the outputs, the
console's DMX ports and Ethernet outputs will remain static until you re-enable them:
. (Check out Mirrored Saves also found in Show Options) Checkpoint
Upon recovery from an improper shut down, you can choose to enable or disable outputs. If the
Console Option
desirable in architectural situations.
Disconnect Remote Video - If you are monitoring a console using your PC or laptop as a
Remote Video
Imm ediately, you will be presented with the Connect dialog box to re-connect to the sam e or
other recently used consoles.
Exit – Use to close down the lighting control software. Upon exiting, the checkpoint file for the
current show will be deleted to prevent you from opening a stale show file.
Note:
Any time you see a word with an underlined letter on the menu bar or in a pull-down menu, this
means you can access it from the QWERTY keyboard using the ALT key and the underlined letter.
For example, ALT, F, O will access the File drop down menu from the Menu Bar, and then the
Open file dialog box will appear.
See Also:
Show Save Options
Recovery - Enable Outputs
Display Menu
Help Menu
Force Outputs upon Recovery is checked, they will always be enabled, which is
terminal, you can disconnect from the main console using this options.
-o-
Strand Lighting
p71
Page 73
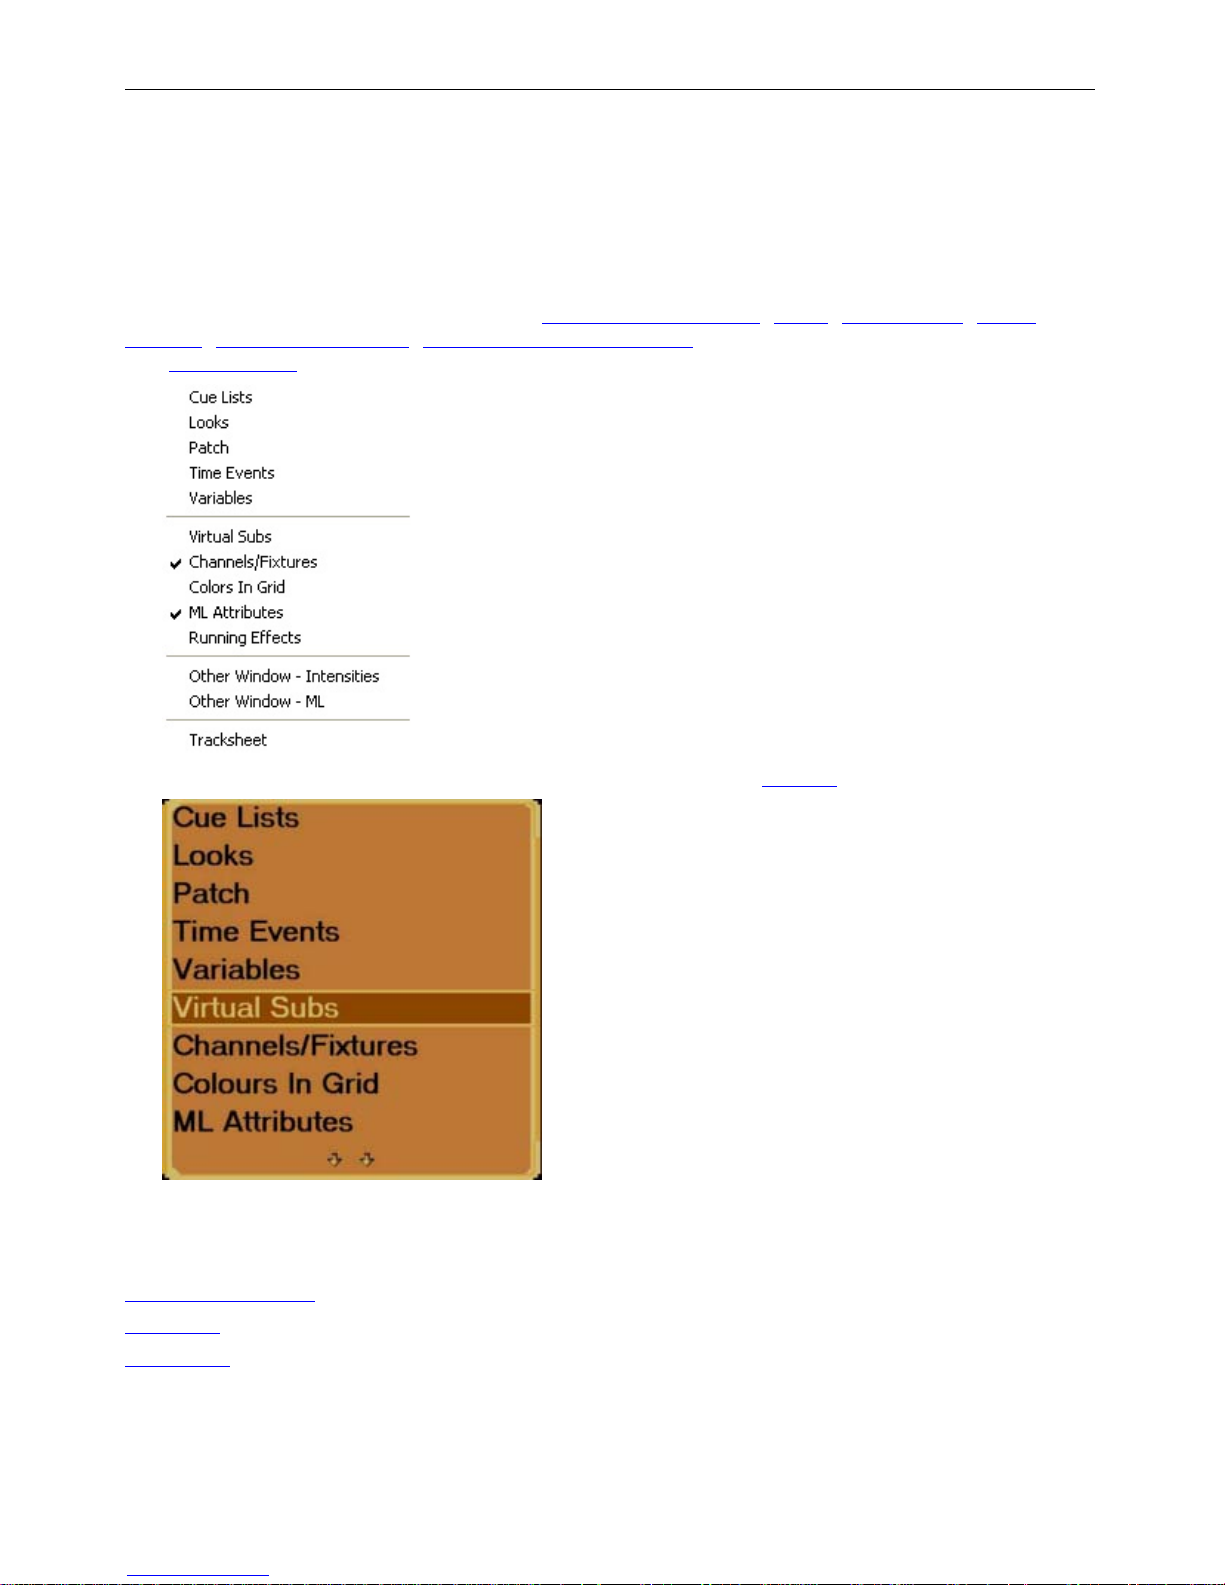
Palette OS v10
Display Menu
Used to turn on and off the display of the Cue Lists/Live Display, Patch, Time Events, Macro
Buttons, Virtual Sub Masters, Moving Light Attribute Grid, Running Effects Grid, Second Window
and Track Sheets
.
A large popup display is available by pressing [S5] on the main Softkey menu:
Use the wheel to select a display, then press [ENTER] to close the popup and select the new
display.
See Also:
Softkeys Described
File Menu
Help Menu
Strand Lighting
-o-
p72
Page 74

Palette OS v10
Strand Lighting
p73
Page 75
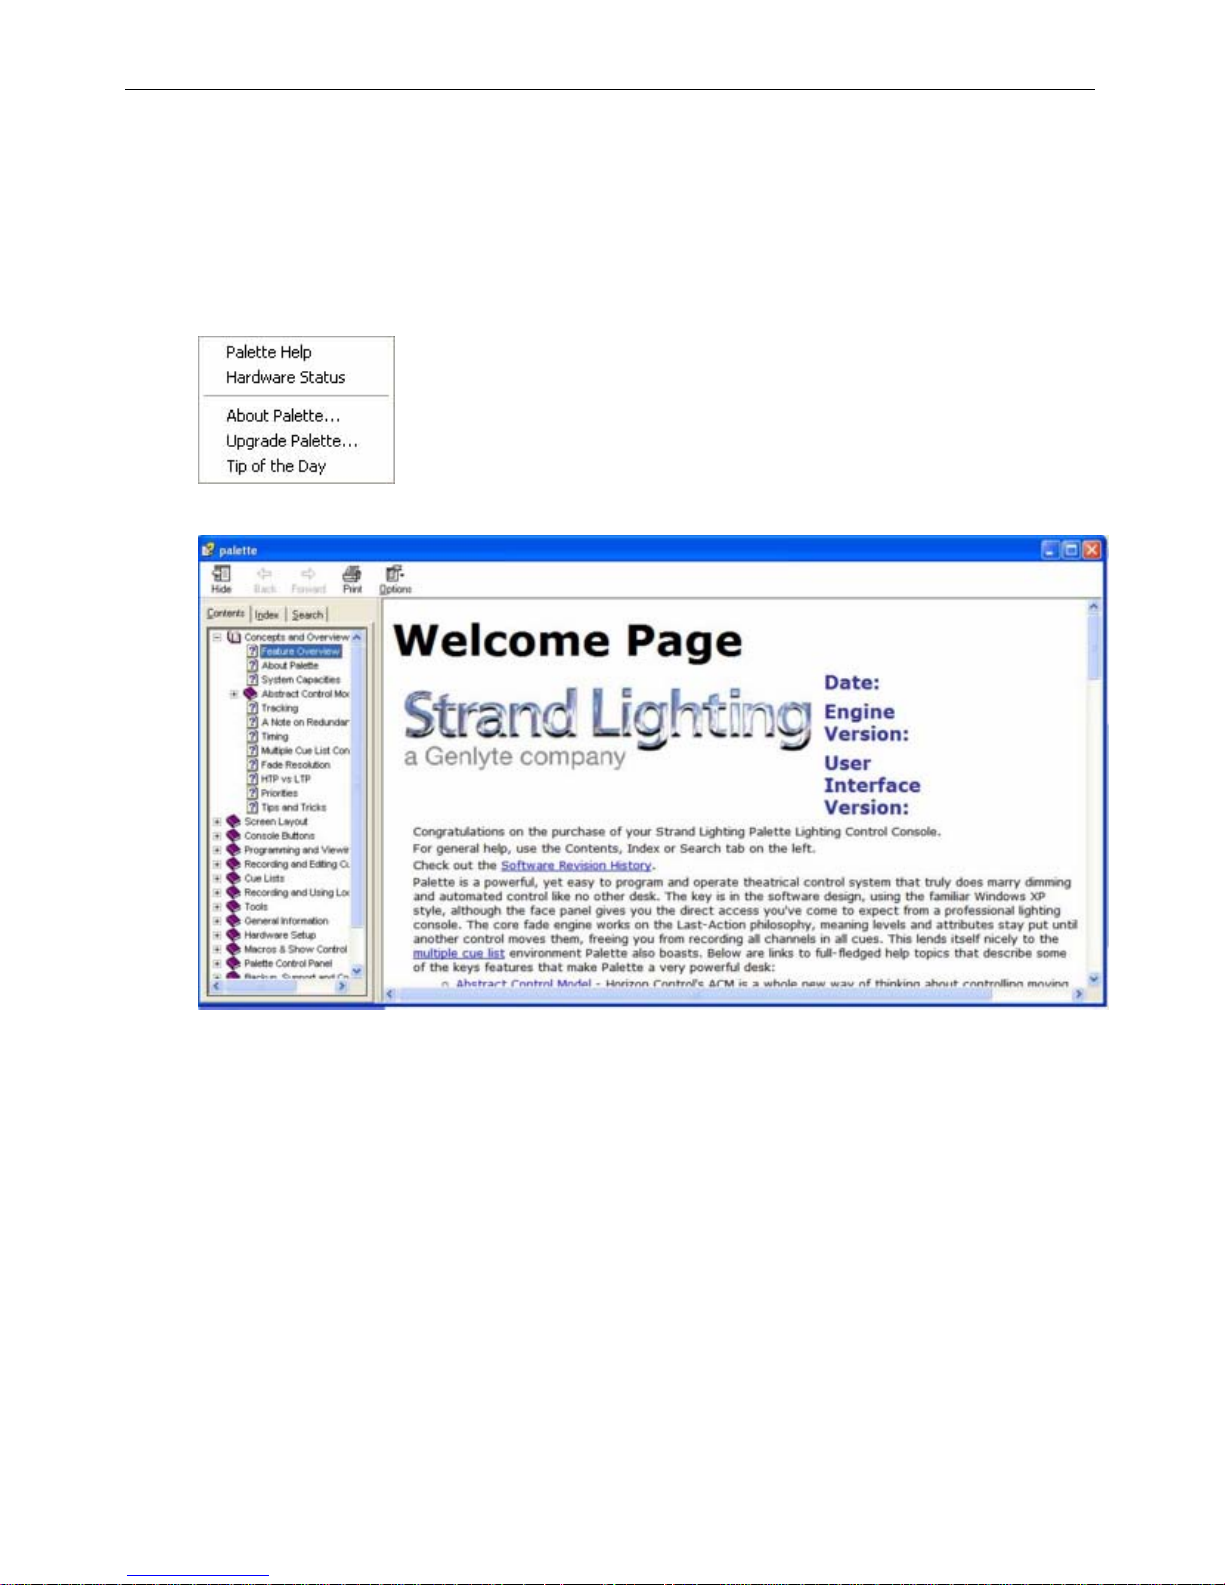
Palette OS v10
Help Menu
The Help pull down menu on the Menu Bar provides access to the following functions.
Palette Help - Opens the on-line Help files.
About Palette... – Displays copyright and version information for Palette, including the User
Interface, Fade Engine and Show File version numbers.
Strand Lighting
p74
Page 76
Palette OS v10
Upgrade Palette... - Allows you to either use Dealer Codes or go On-Line to order more
control channels for your Palette
Tip of the Day – Use to access the Tip of The Day display, which can provide tips and notes on
Palette operation. The Tip of The Day dialog box has a check box to determine if the Tips
should be shown at startup.
Strand Lighting
p75
Page 77
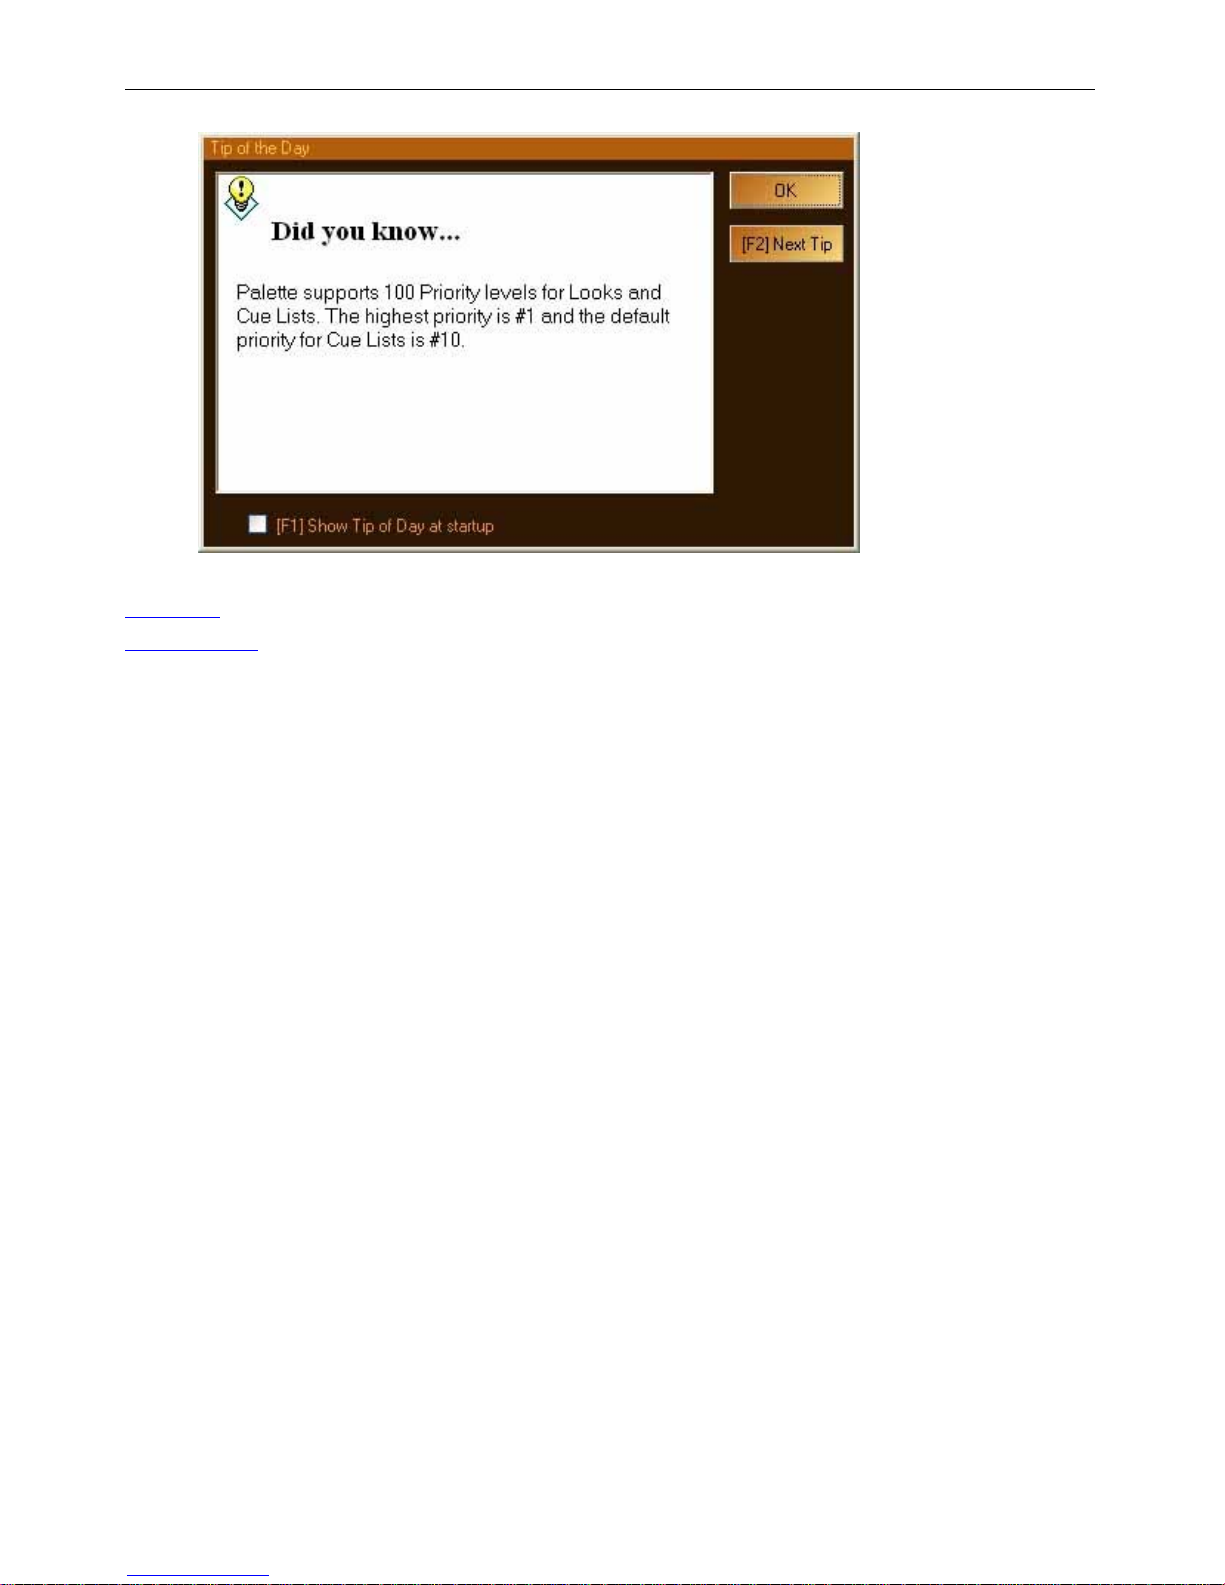
Palette OS v10
See also:
File Menu
Display Menu
-o-
Strand Lighting
p76
Page 78
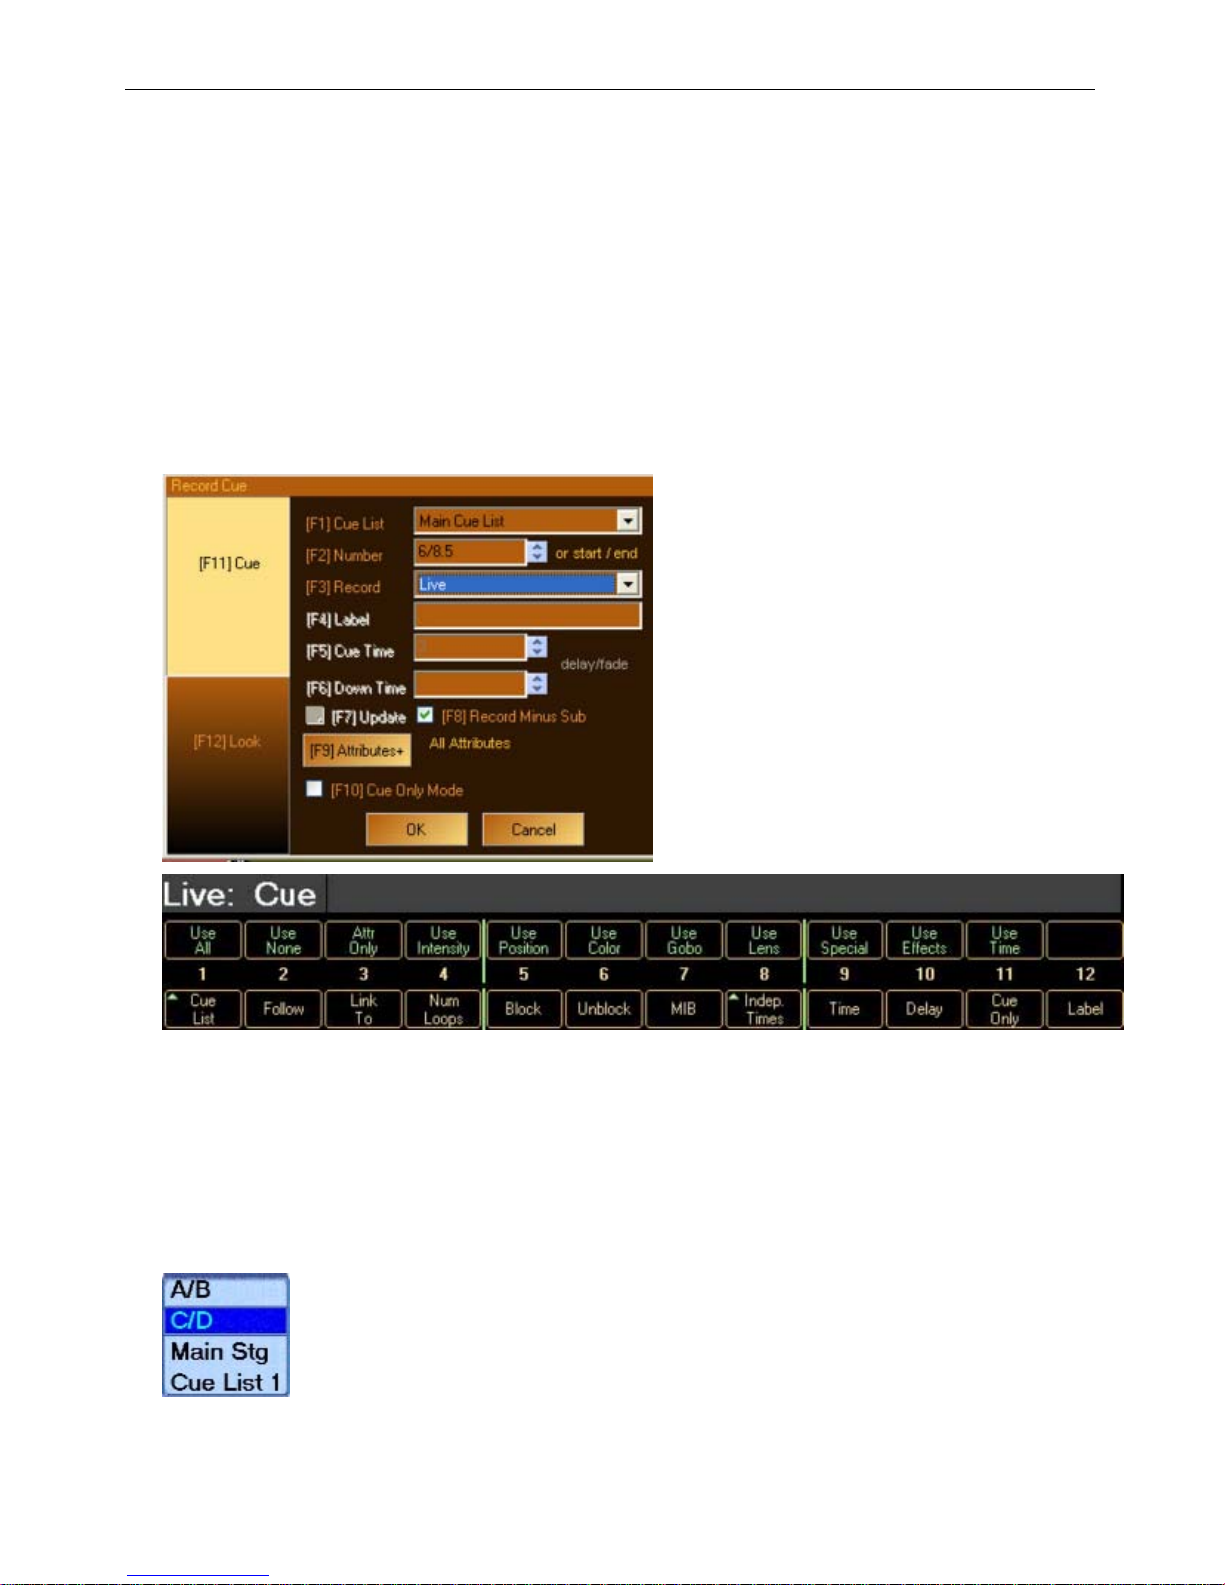
Palette OS v10
Softkeys
The two rows of twelve buttons at the bottom of the screen are context sensitive to what you
are doing, such that at any stage of operation, you are presented with a dozen or less
choices.
The softkeys are Marked as S1 - S12 for the lower set of keys and M1 - M12 for the upper set
of keys.
For instance, if the Record Cue dialog box was open, the softkeys would be as follows:
Note:
The sofkeys 1 through 12 on the console are mapped to F1 through F12 on the QWERTY
keyboard. The upper softkeys in Green are mapped to ALT-F1 throught ALT-F12.
Popups
If you are selecting from a combo list (similar to [S1] above), you can either repeatedly press
the softkey to change the selection or you can double press [S1] to get a pop up list:
When you get this list, [S1] through [S4] become:
Strand Lighting
p77
Page 79
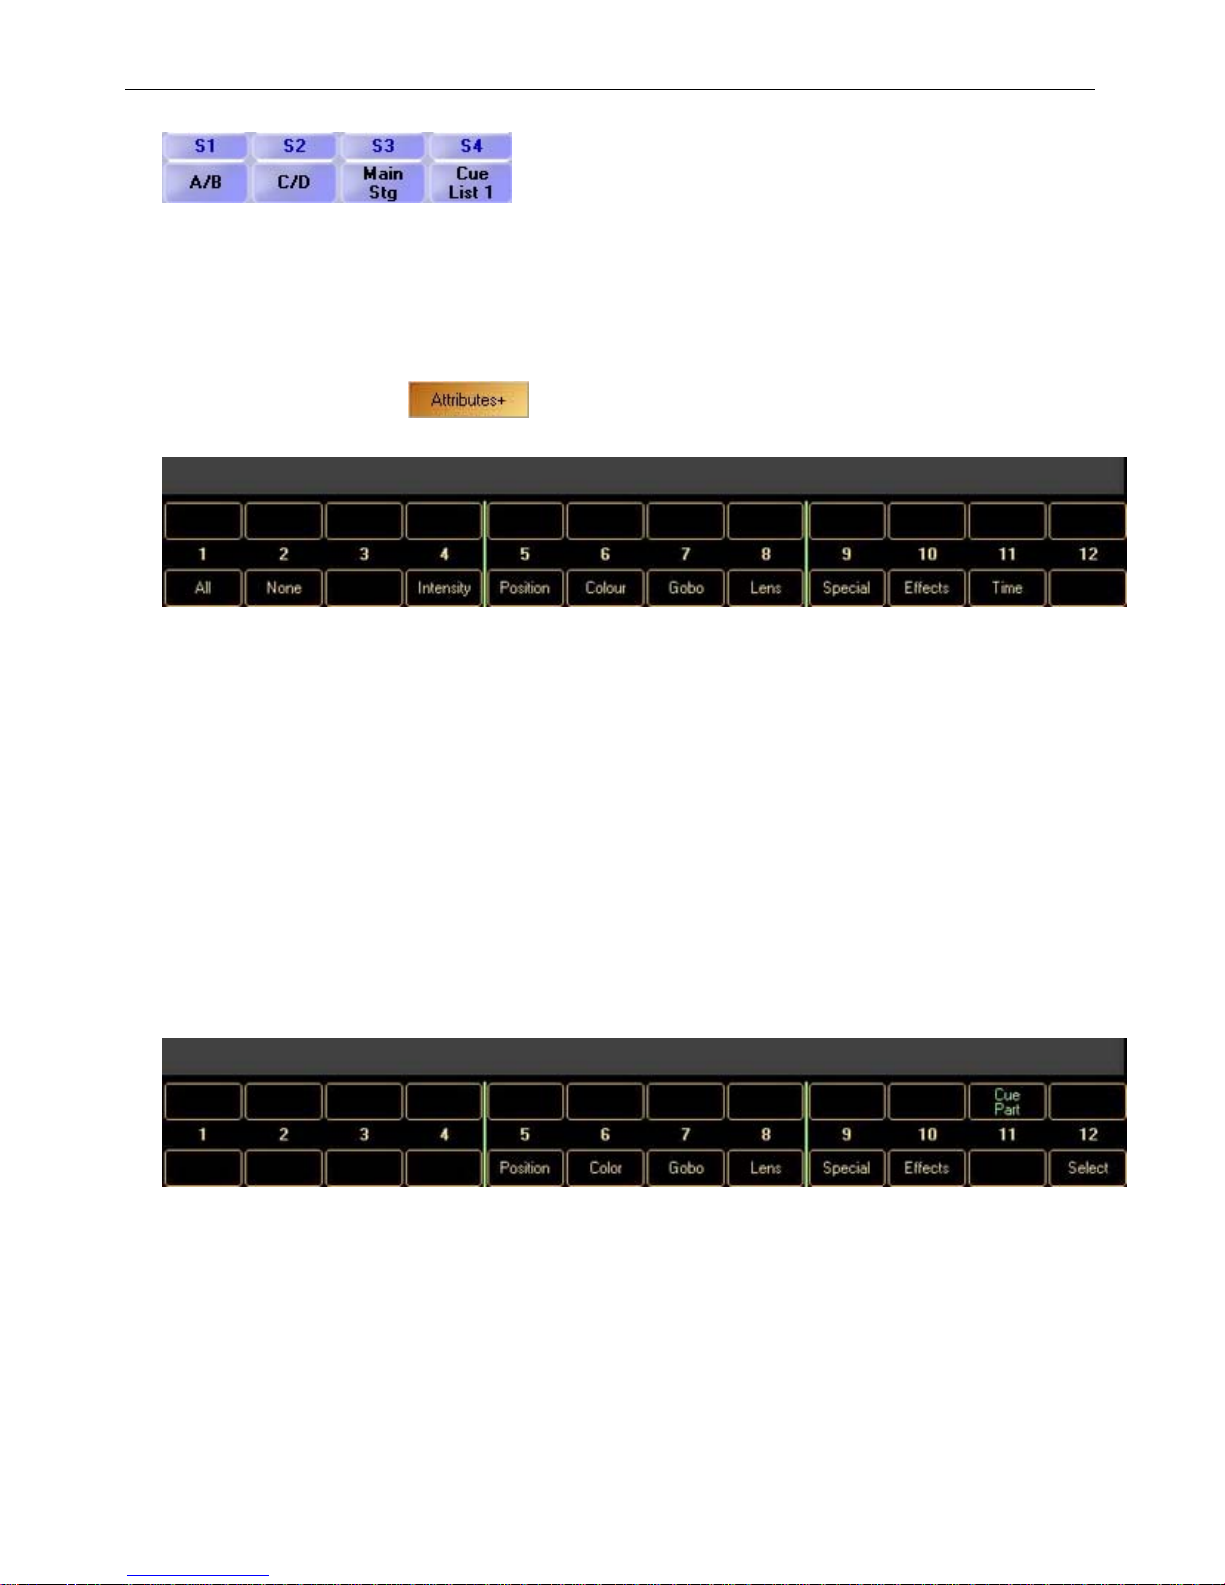
Palette OS v10
You can also use the Softkeys, Arrow Keys or the Wheel to select the desired choice. Once
you have highlighted the right one, press [ENTER].
Additional Softkeys [+]
Some dialog boxes, such as the Record dialog box, have buttons that have the [+] sym bol
after the text, like this:
additional softkeys, such as the following:
In this case, pressing any of these softkeys changes the attribute masking without the need
to open the Attribute dialog box.
Note:
While holding down [SHIFT], the other softkey accelerators in the dialog box will
o
disappear (i.e., [S2] Cue List just becomes Cue List). Although it may look odd when
entering labels that include capital letters, it does not prevent you from utilizing other
shifted functions such as holding down SHIFT and rolling the wheel to change
numerical fields by 0.1 rather than whole numbers.
If you double press any of [S4] through[S11] you can solo that attribute family. This is
o
quicker than pressing [S2] then reselecting the single desired one.
. Pressing and holding the [SHIFT] key gives you
Moving Light Softkeys
If your show has moving lights patched, as you select channels, the softkeys will change to
give you direct access to the moving light attributes:
For more inform ation on manipulating moving light attributes, chec k out the topic Controlling
Moving Lights.
Default Softkeys
When no dialog boxes are open and you have no moving lights selected, you can use your
mouse to press the softkey buttons. The default softkeys give additional functionality that is
not available with the hard buttons on the console:
Strand Lighting
p78
Page 80
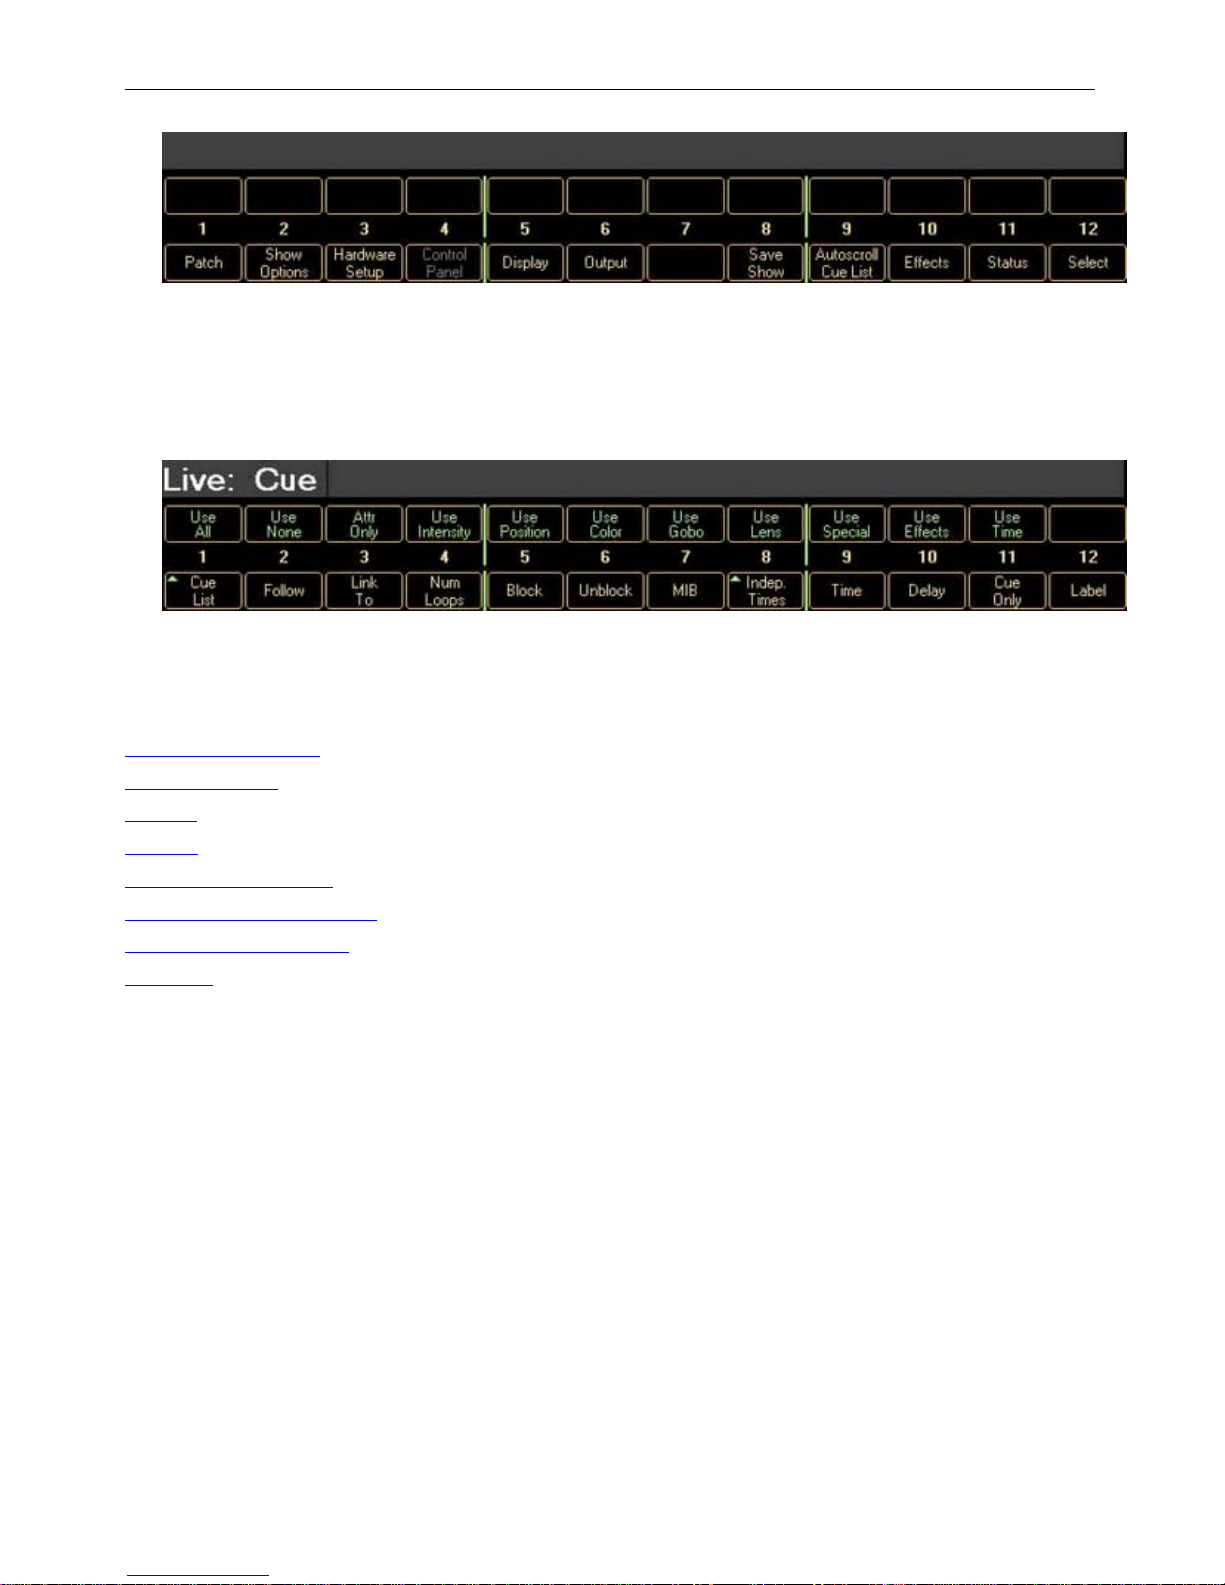
Palette OS v10
If you want to access the Default Softkeys while m oving lights are selected, rather than
releasing the channels, just press backspace. The attributes will remain captured, but the
selection will clear and you can then see the Default Softkeys.
Cue Softkeys
If the Command Line starts with [CUE], the softkeys change to:
This allows you more traditional manipulation of existing cues (if you terminate the command
line with [ENTER]) or allows you to specify some attributes of the cue before you record them
(terminating the command line with [REC]).
See Also:
Keyboard Shortcuts
Select Softkeys
Profiles
Display
Palette Control Panel
Controlling Moving Lights
Command Line Syntax
Blue Box
Strand Lighting
-o-
p79
Page 81
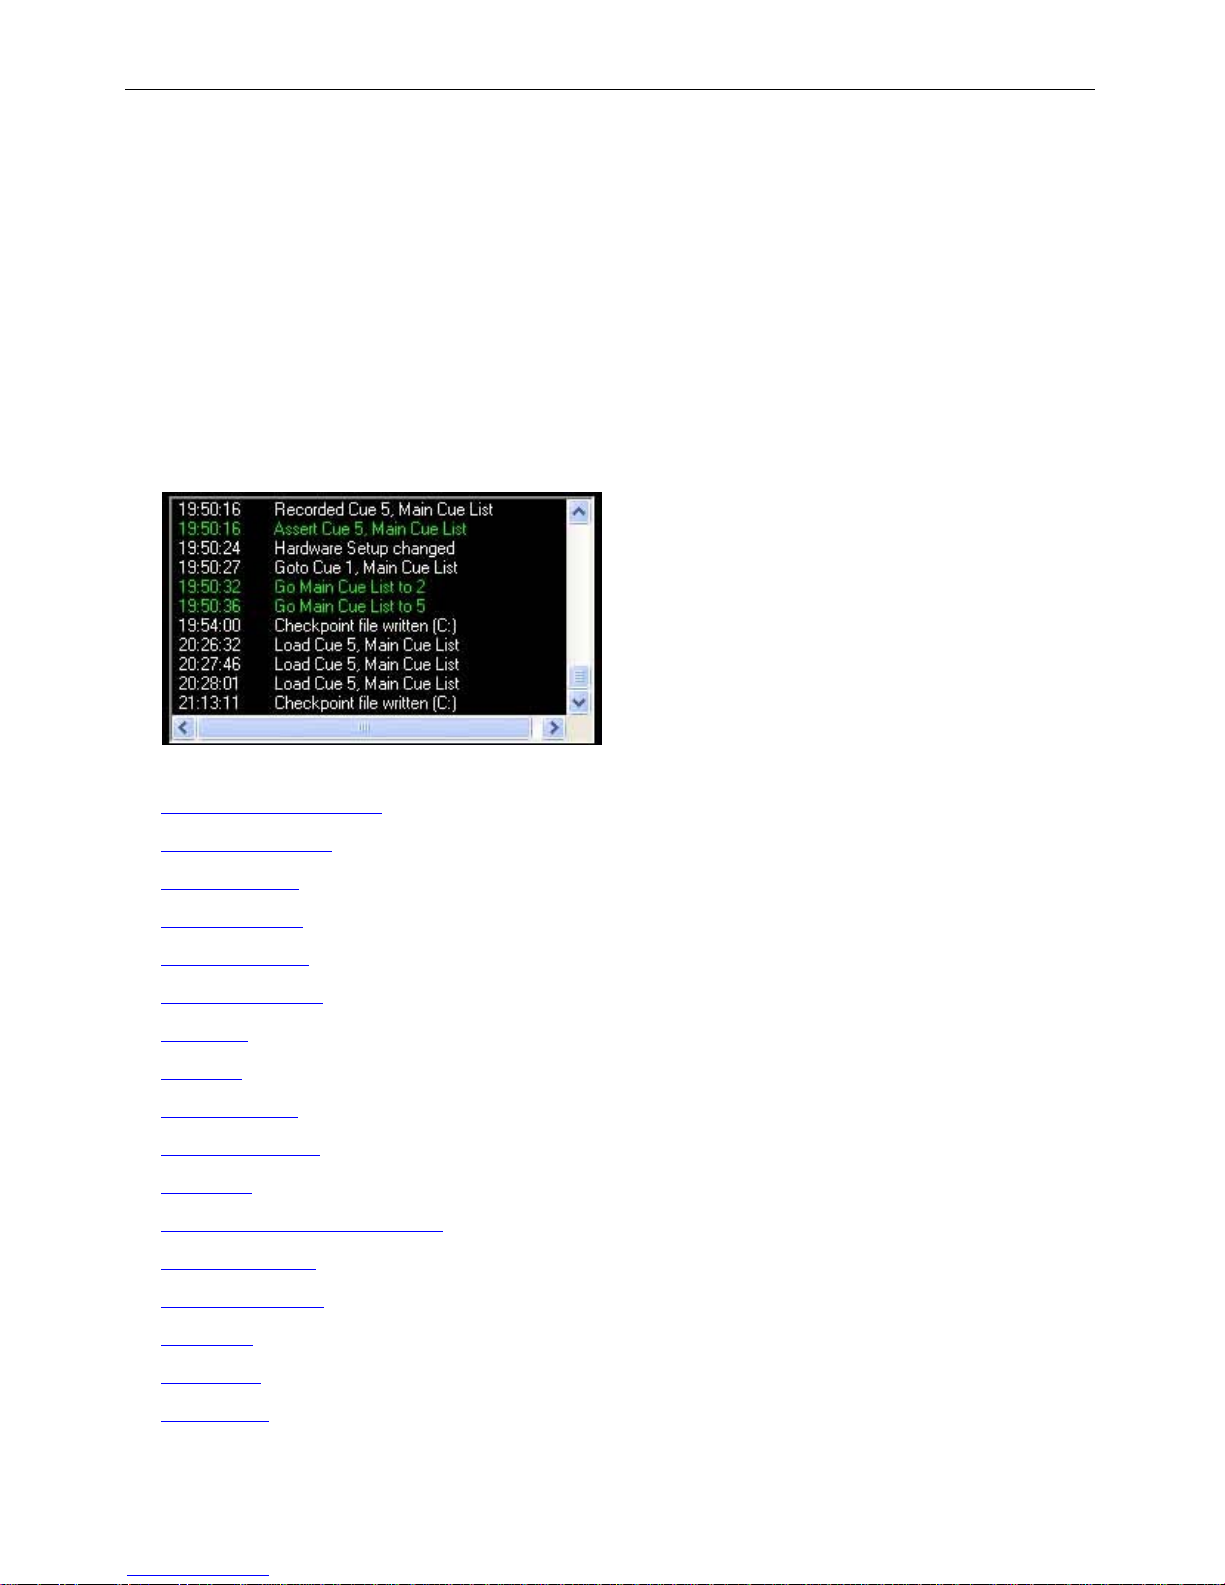
Palette OS v10
Status Window
This box in the lower right hand corner of the display shows you various pieices of information.
What is displayed in this window area is configured with the Status Softkey [S10]
History
In the History window a record is kept of the actions you perform ed when operating your console.
The time of the operation is marked and the last two hundred events are shown in the list. You
can right click to clear the list or copy it to the system clipboard.
Some of the actions that are reported in the Status Window include:
Show Open/New/Save (delineated with horizontal line placed above)
Show Checkpoint
Mirrored Save success or failure
Go, Halt, Back (shown in green text)
Assert Cue List
Release Cue List
Blue Box edits
Triggers
Show Options
Hardware Setup
Goto Cue
Goto Top/Bottom of Cue List
Move/Copy Cue
Move/Copy Look
Load Cue
Load Look
Delete Cue
Strand Lighting
p80
Page 82
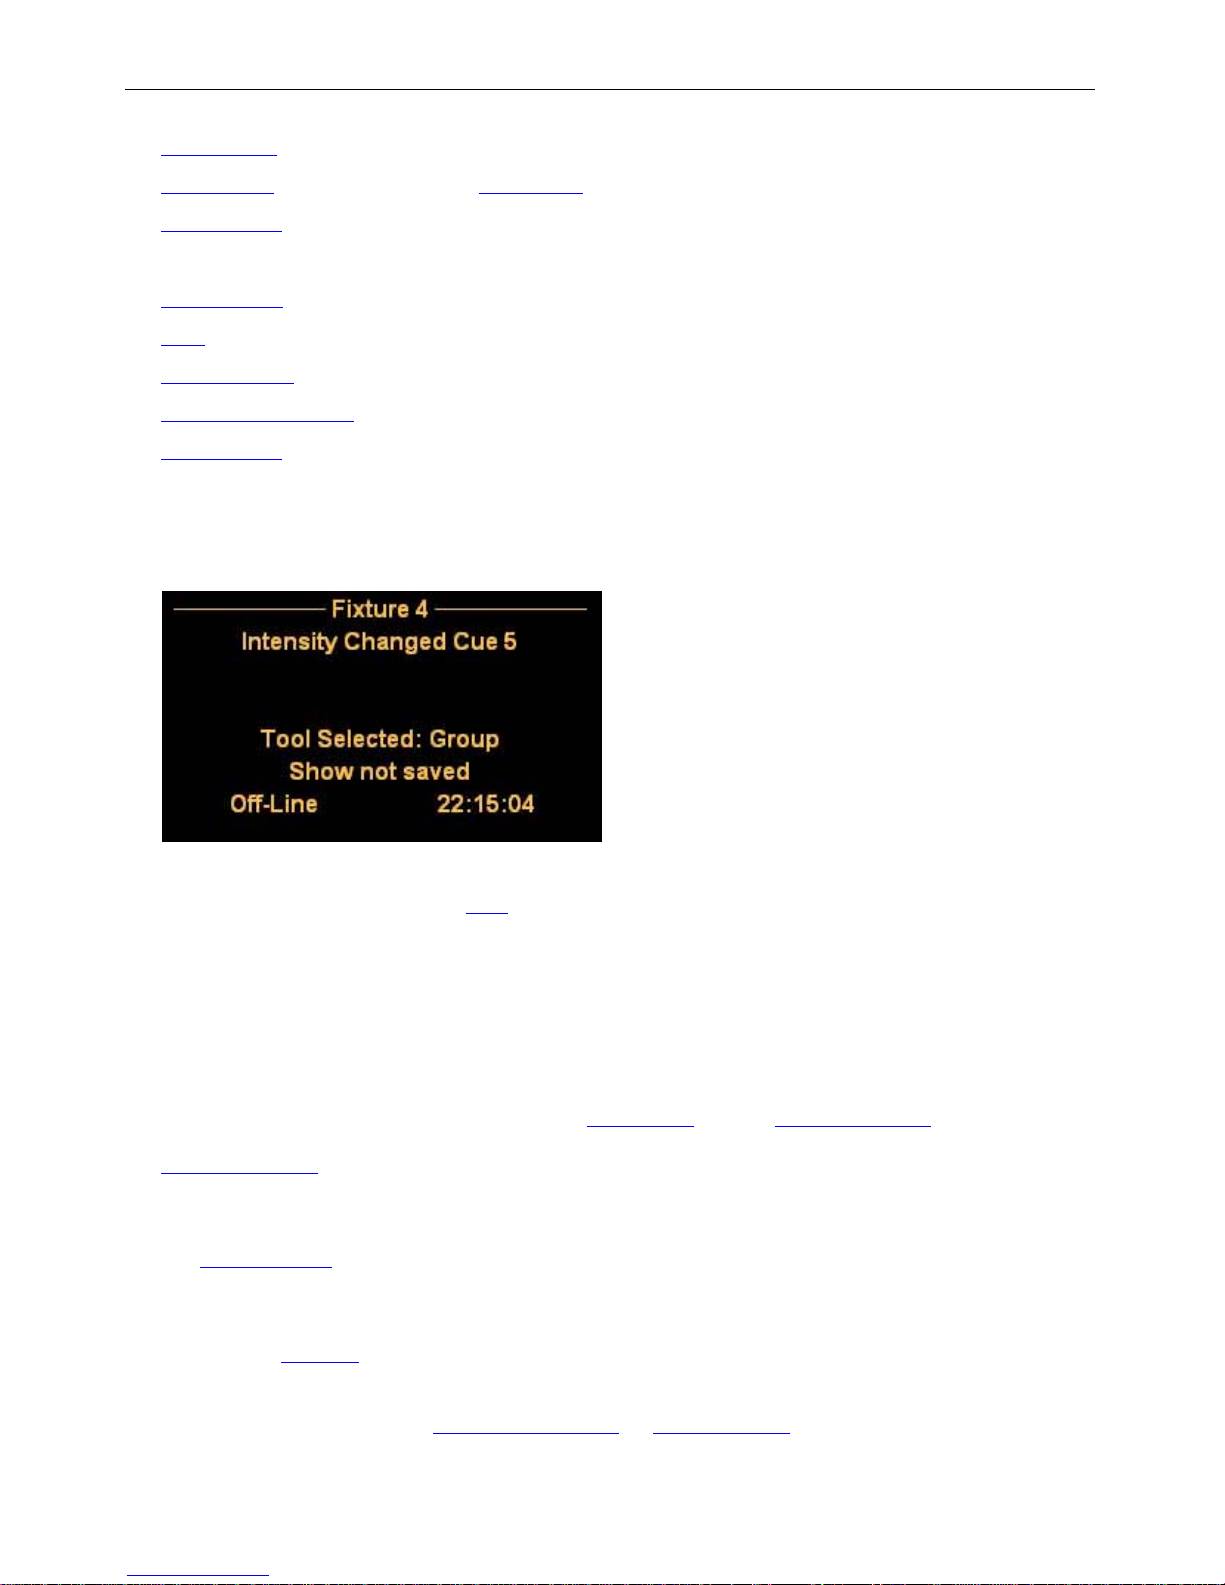
Palette OS v10
Delete Look
Record Cue (red if recording an empty cue)
Record Look
Bump Buttons
Sub Masters Moves
DBO (shown in red text)
Grand Master (shown in red text)
USB On-Line status
Time Events
Status
In the status Window, information about the last selected channel is displayed.
Tool
The Tool Selected shows what Tool is currently active or which tool will be active if you press
the [TOOLS] button (QWERTY equivalent [T] button). When you first start your session, this
will display [---] because no Tool has been selected yet. Press [SHIFT] and the [TOOLS]
button and select the tool using the softkeys. When a tool is active, the LED on the Tools
button on the console will illuminate.
Saved
After you save the current show, this marks the time at which you did that. A timer also
shows you how long it has been since you last saved. The Hostory Windows marks a
horizontal line where the save occurred. If checkpoint
success or failure is also noted in the Uber Status box. [S8] Save Show is available when the
default softkeys
are displayed.
files or mirrored saving is enabled, their
Time
The Time of Day and date is displayed. You can set the date and time of your console through
the Control Panel
.
HW Status
This will tell you if your Palette hardware is either On-Line or Off-Line or whether or not the
outputs are enabled
your Hardware type, serial number, and what type of processor and what amount of memory
your system has. The total number of channels your system is authorized for and other
additional options, such as Remote Focus Unit
. Use the Help drop down to view the Hardware Status dialog box to view
or Remote Video authorization, is also shown
Strand Lighting
p81
Page 83
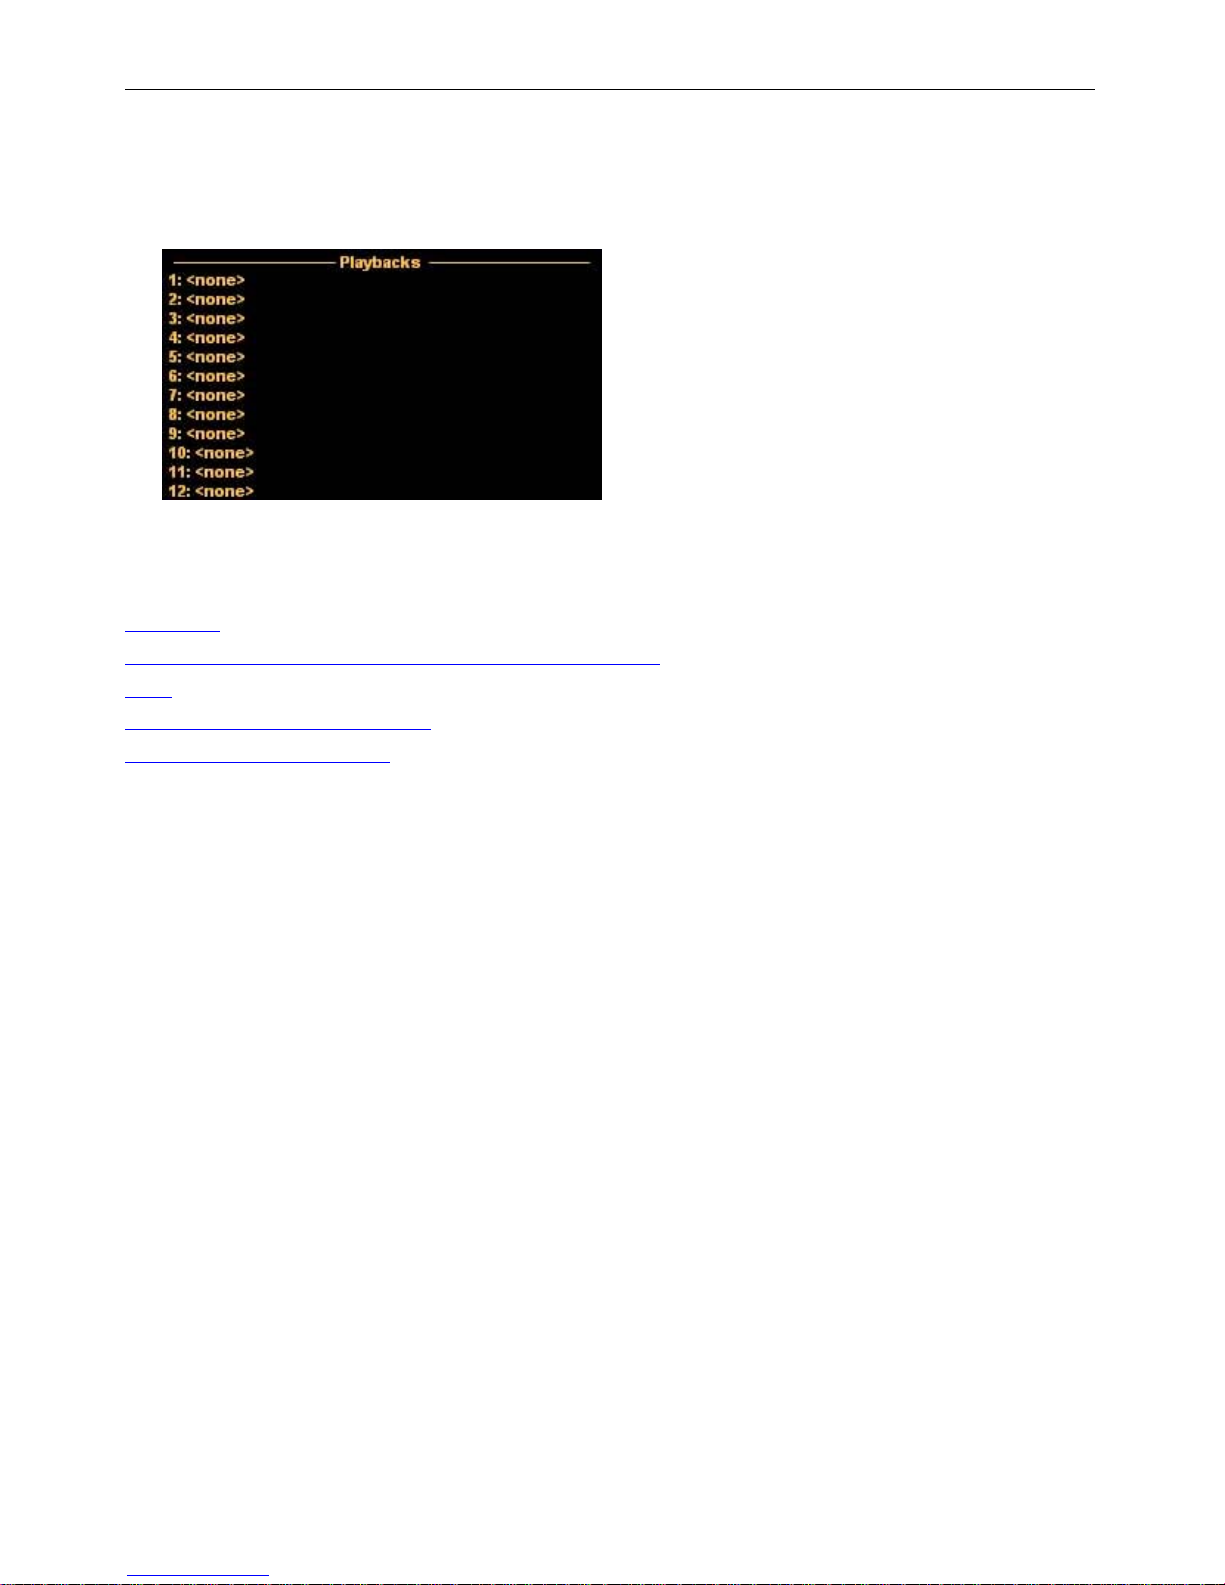
Palette OS v10
here.
Playbacks
A display of playbacks real or virtual is displayed.
See Also:
File Menu
Hardware Setup - Grand Master and Black Out Button
Load
SMPTE Time Code on Cue Lists
Enable Outputs - Recovery
(checkpoint files and mirrored saving)
-o-
Strand Lighting
p82
Page 84
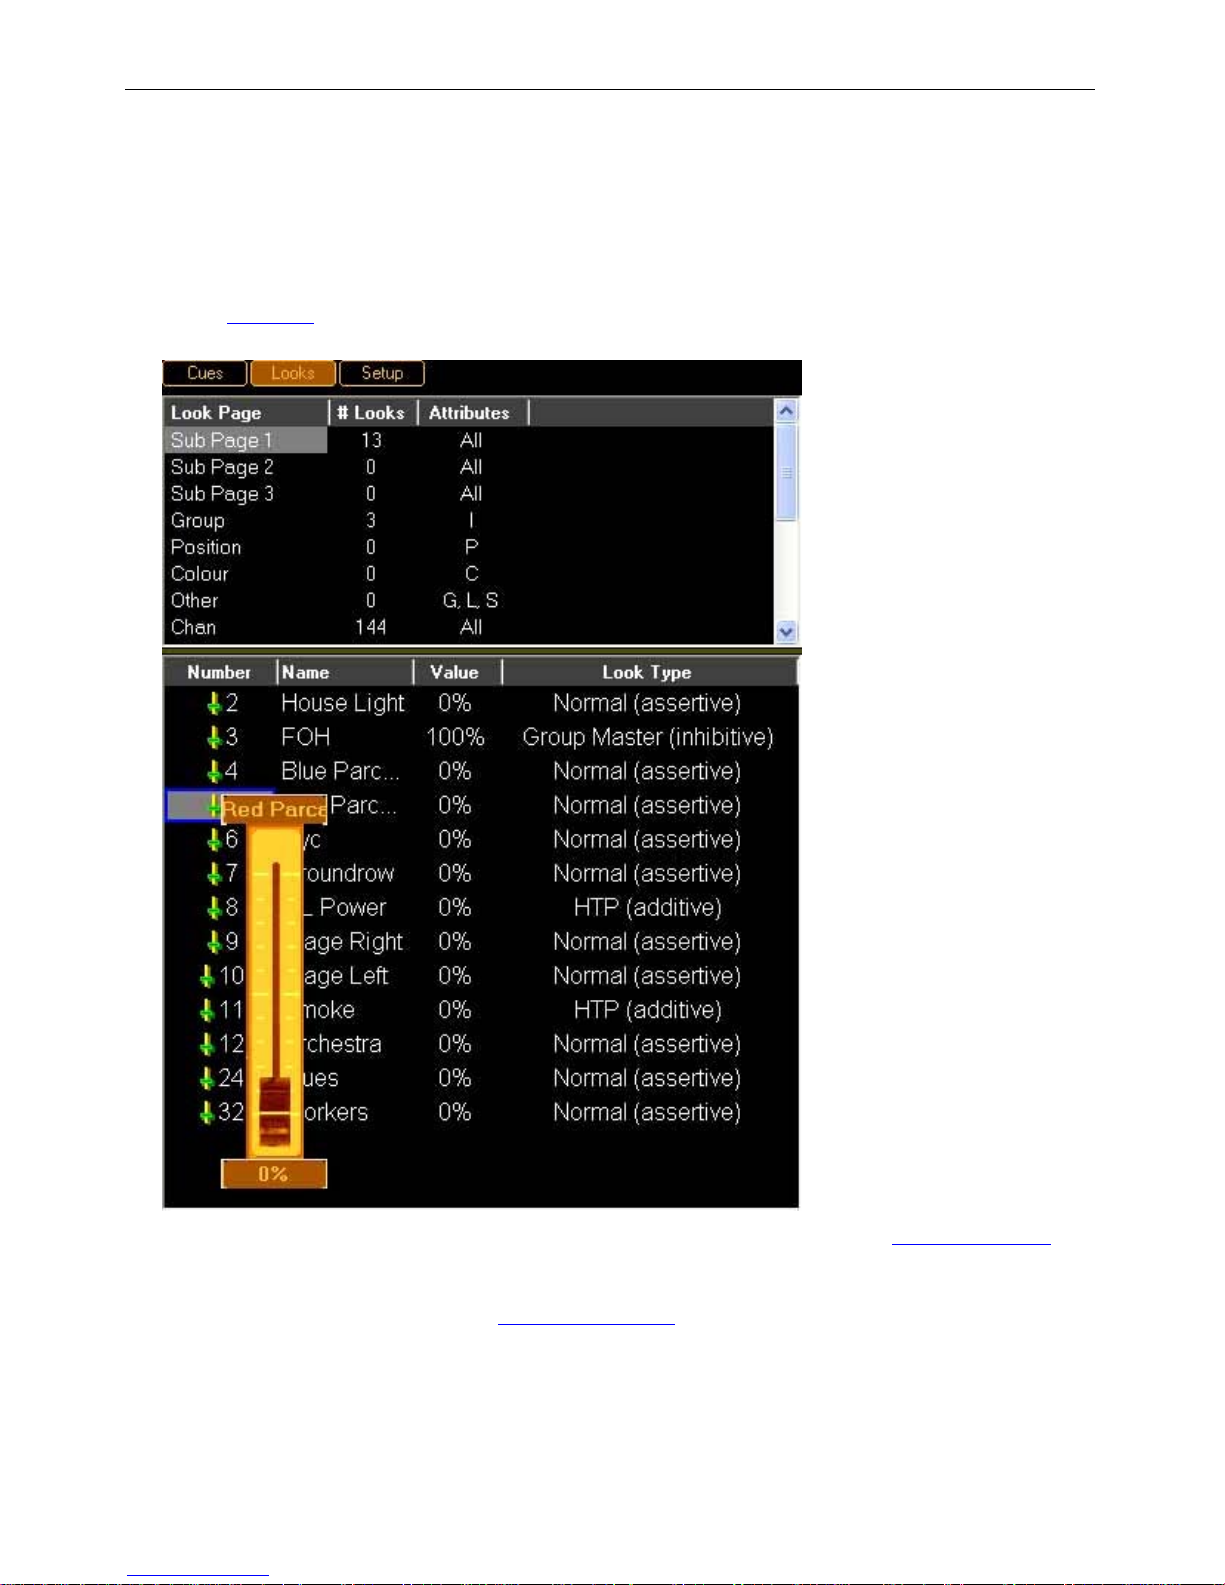
Palette OS v10
Look Pages
Looks are recorded and arranged on Pages. You can see the Look pages by selecting the Looks
Display Display|Looks or pressing the [S5] Display softkey and select Looks from the pop-up list.
Additionally, these pages may be laid out on your hardware's sliders (via Hardware Setup) so
that you can quickly playback Looks live via Sub Masters.
New show files have five Look Pages (Sub Page, Group, Position, Color and Other). You can
add pages by right clicking in the Cue List Directory
If you want to change the name or other properties of the Look Page, press [VIEW] [S11]
then press [S1] to select the Look Page. You can repeatedly press [S1] to change the
highlight in the list, or use the Wheel to scroll the list. Once you have highlighted the desired
page, press [ENTER].
Strand Lighting
and selecting the Add Look Page.
p83
Page 85
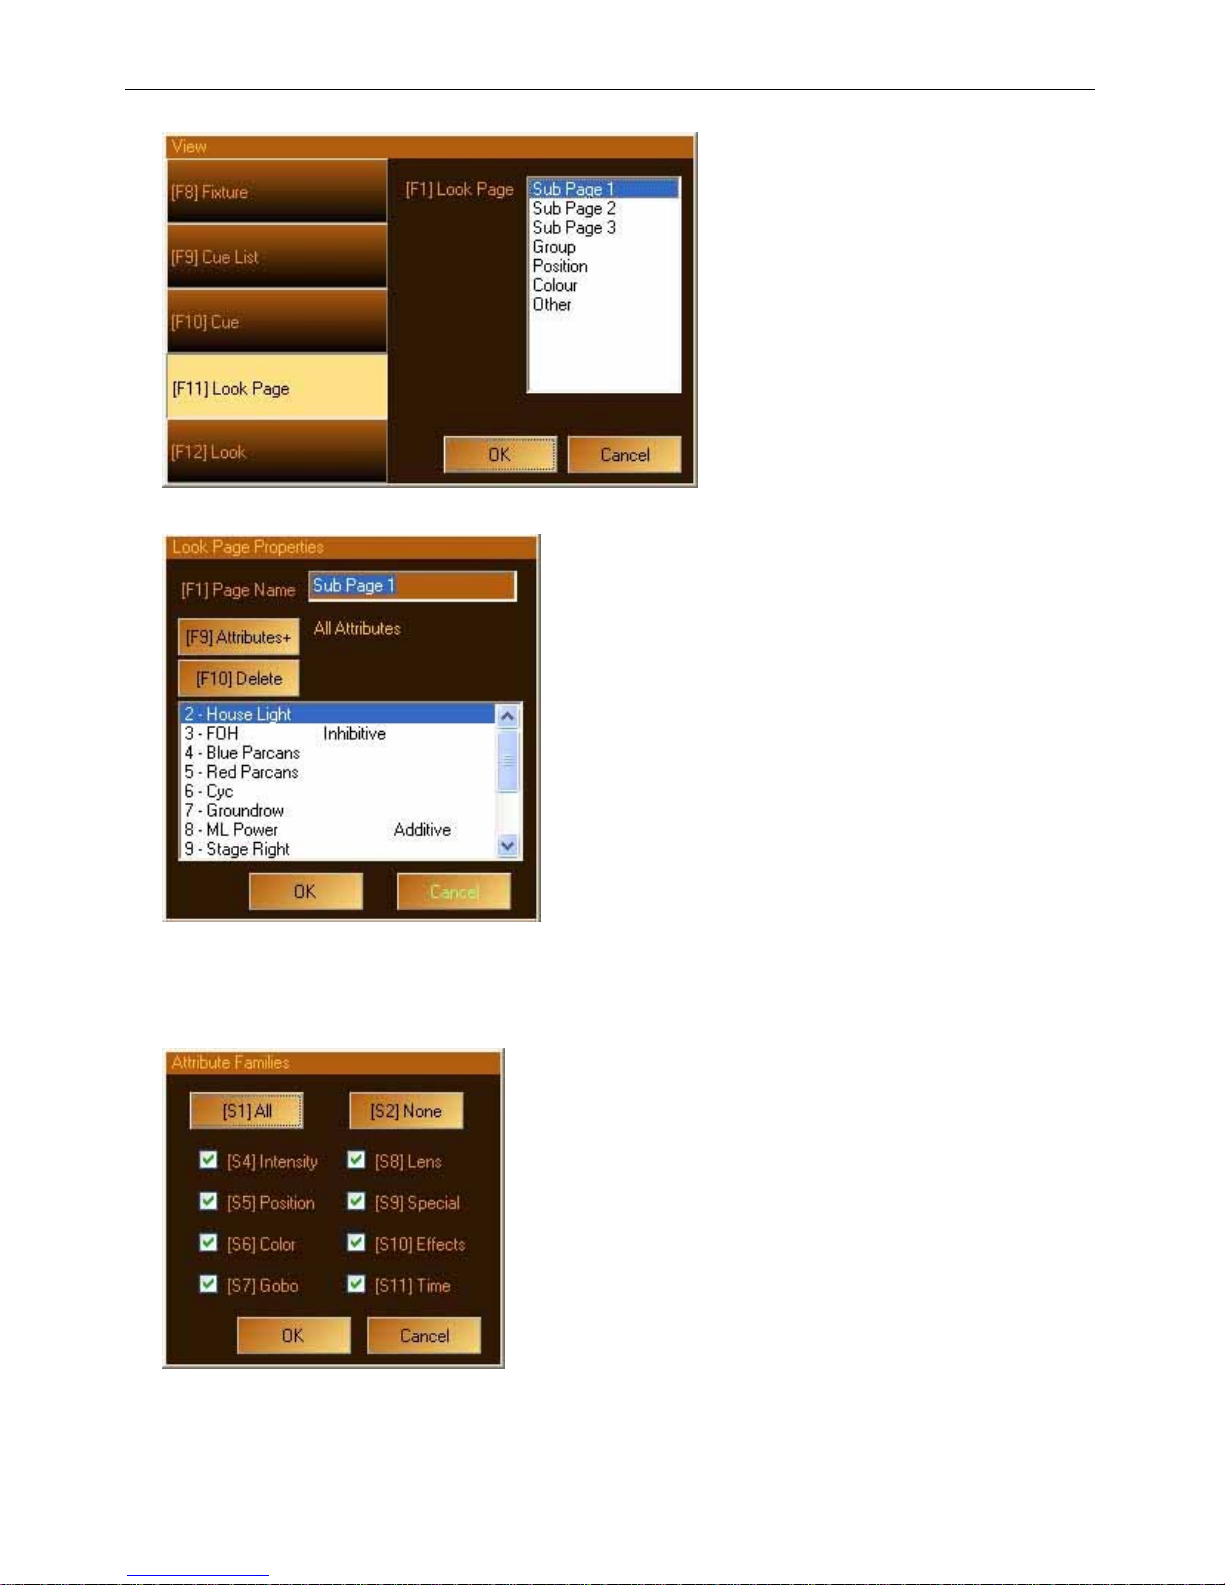
Palette OS v10
You will then be presented with the Look Page Properties box:
In this dialog box you can change the name of the page. The scroll list at the bottom of the
window tells you what Looks are recorded on this page (double clicking on them does
nothing).
The Attributes button will open the Attribute Family Masking dialog box:
By de-selecting different attribute families, these will not be recorded (by default) when you
records Looks to this page. Therefore, if you wanted a whole bunch of Looks that only had
Pan/Tilt information in them, you would de-select all but Position. Then each time you went to
Strand Lighting
p84
Page 86
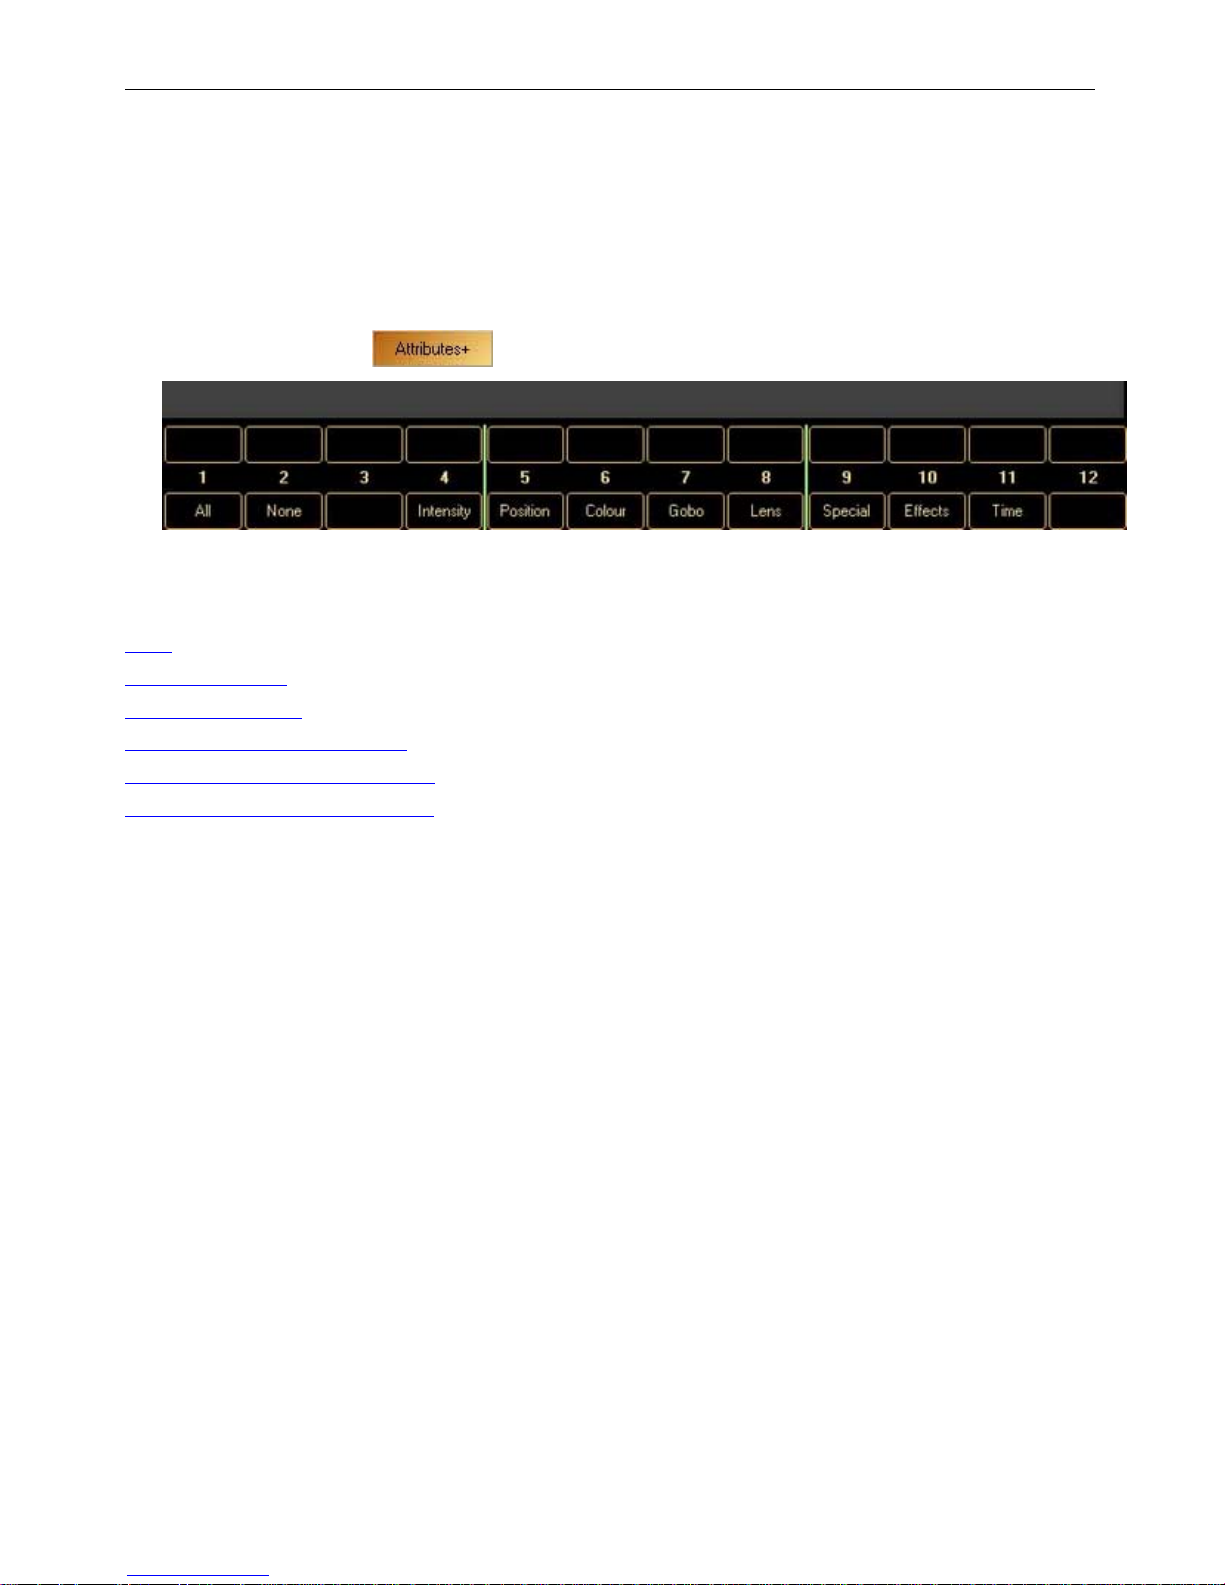
Palette OS v10
record a Look on this page, the Record dialog box would already be masking out (not
recording) any attributes except Position attributes. This can be overridden in the Record
dialog box at will.
Note:
If you double tap [S5] (or any other softkey), it will 'solo' Position. That is, all other
o
check marks will clear and Position will remain checked.
While in the main Properties dialog box, if you press [SHIFT], the Attribute button will
o
look like this
Pressing any of these changes the attribute masking without the need to open the Attribute
dialog box. You can also press [SHIFT] and double tap any attribute family to solo it.
See Also:
Look
Recording Looks
Sub Master Types
Recording and Using Groups
Hardware Setup - Slider Panels
Hardware Setup - Button Array
and the softkeys will change to the following:
-o-
Strand Lighting
p85
Page 87
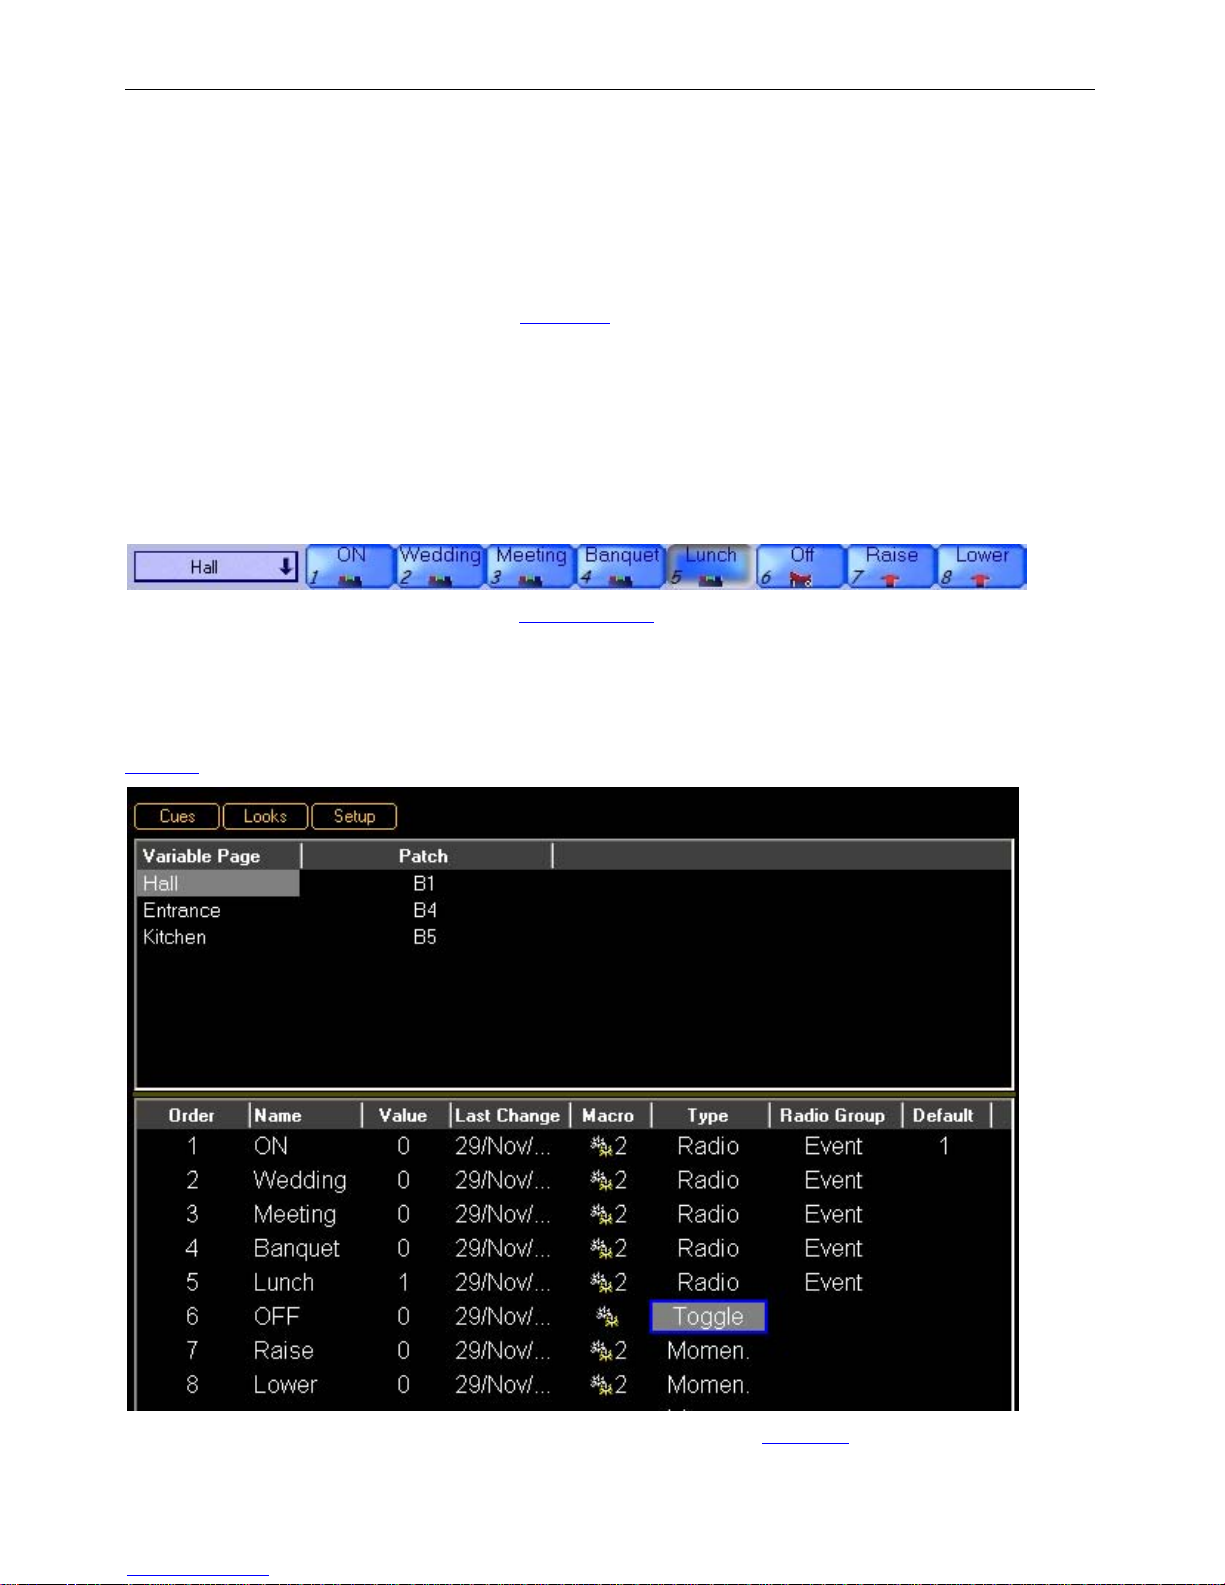
Palette OS v10
Macro Buttons
Macro buttons are a method of setting Variables which, in turn, can either run macros or change
variable values to either true or false.
Variables can be thought of as a meeting place for different pieces of hardware and virtual
console elements. Variable Pages can be 'hard patched' to Look Pages, Cue Lists or physical
Button Stations in the show file. The Macro buttons are just one method of tying user buttons to
Variable Pages for the purpose of seeing the variables' current values and to provide a method to
change them.
You can show virtual Macro Buttons by selecting Macro Buttons in the Display menu or by
pressing [S5] from the main softkey menu and selecting from the pop up list.
The combo box to the left shows which Variable Page the macros buttons are assigned to. If you
have multiple Variable pages, use the mouse to choose which one you want to see. To operate a
Macro Button, left click on it with the mouse or using the QWERTY keyboard, hold down ALT while
pressing [F1] through [F12].
To change the function of the macro buttons you must change the Variables it is tied to. Do this
by accessing Variables in the Display menu or press the traffic light icon in the Cue List Directory
Toolbar
or press [S5] from the main softkey menu and select Variables from the pop up list:
Select the desired Variable Page using the mouse, then use the Blue Box and [EDIT] to change
Strand Lighting
p86
Page 88
Palette OS v10
any of the parameters of the variables. The name and the value of the variable (true or false or
zero or none zero show as normal or pushed in) can be seen if the Variable Page is selected.
Icons also show if a button is a radio, toggle or momentary button.
Momentary Buttons
If a variable's type is Momentary, the corresponding Macro Button will have a red 'mushroom'
button icon. These buttons are only down as long as you have your finger on them. When it goes
down, Button Down, Off Zero or Value Change actions will occur and the variable's value will
change from zero to 1 or 100 (depending on what is patched to it). When you release your finger,
the variable's value will return to zero and any Up Action or On Zero or Value Change actions will
be executed.
Toggle Buttons
Toggle variables, denoted by a rocker switch, make the down action of a button stick. Pressing
the button again, pops the button back up. Again, macros are fired on Button Down, Button Up
and Value Change events where applicable.
Radio Buttons
Similar to an old car radio, only one radio button (or station) can be down (or tuned in) at a
time. Pressing another button down, pops the current button up. The Variable display has a
column called Radio Group. The text in these fields can be anything; as long as they match the
variables are in the same group. You may have as many radio groups per Variable page as need
be and buttons in each group will not affect buttons in other groups. Leaving the Radio Group
field blank is also valid (i.e., any Radio Variable who has no text in this column will be part of the
same radio group).
To learn more about Macros and Variables, check out the topics below.
See Also:
Macro Editor
Variables
-o-
Strand Lighting
p87
Page 89
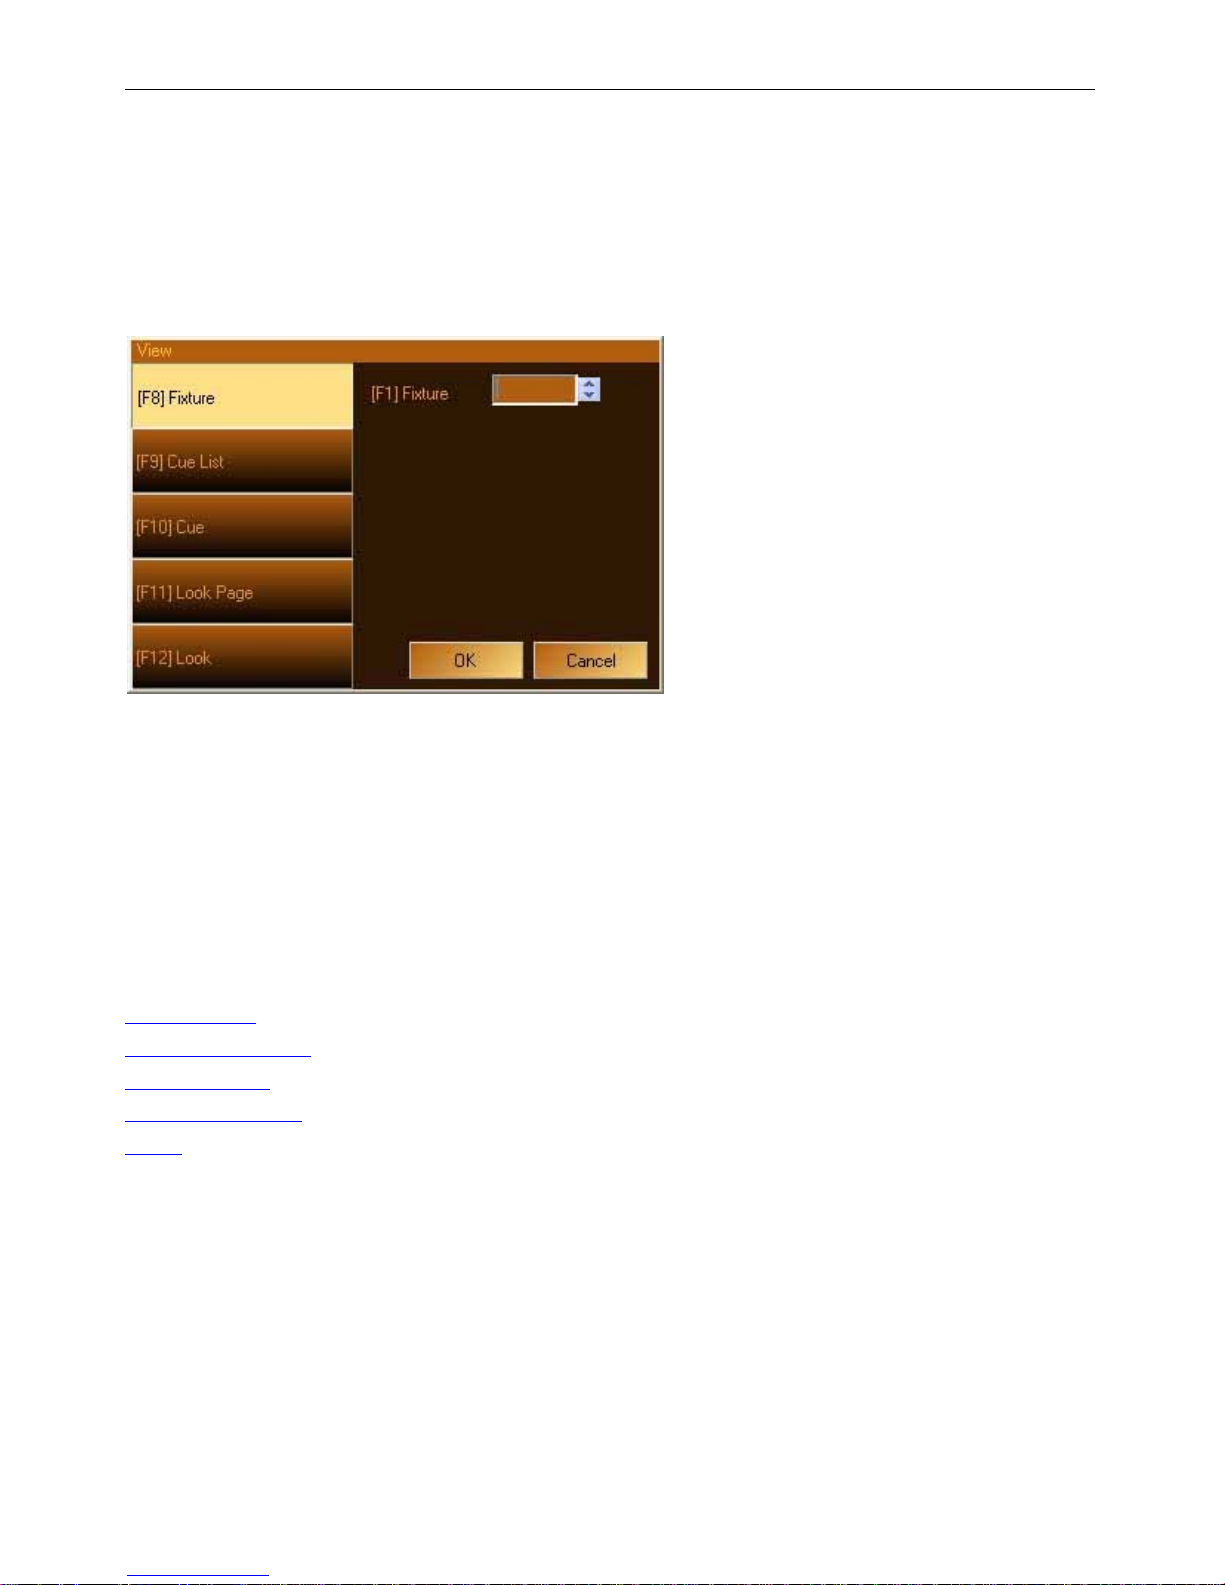
Palette OS v10
View Properties
Pressing [VIEW] button or [V] displays the View dialog box.
When the dialog box opens, the Fixture tab is active allowing you to use the syntax [VIEW] [#]
[ENTER] to see the properties of a specific channel.
This is the method in which you get to View and Edit the Properties of almost anything on the
console. You can navigate this box using the Softkeys and the display on the right hand side will
change to allow you to further narrow your selection.
When on the console, there are two very handy accelerators that speed you through this box. You
can press [VIEW] [BUMP] or [VIEW] [SELECT] to directly open the Properties box for either a
Look or a Cue List. You can also press [VIEW] [CUE] [#] [ENTER] rather than [VIEW] [S10] [#]
[ENTER] to quickly see the properties of a specific cue. Similarly, [VIEW] [LOOK] [#] [ENTER]
shows you the properties of the specified Look.
see also:
Channel Title
Cue List Properties
Cue Properties
Sub Master Pages
Looks
-o-
Strand Lighting
p88
Page 90
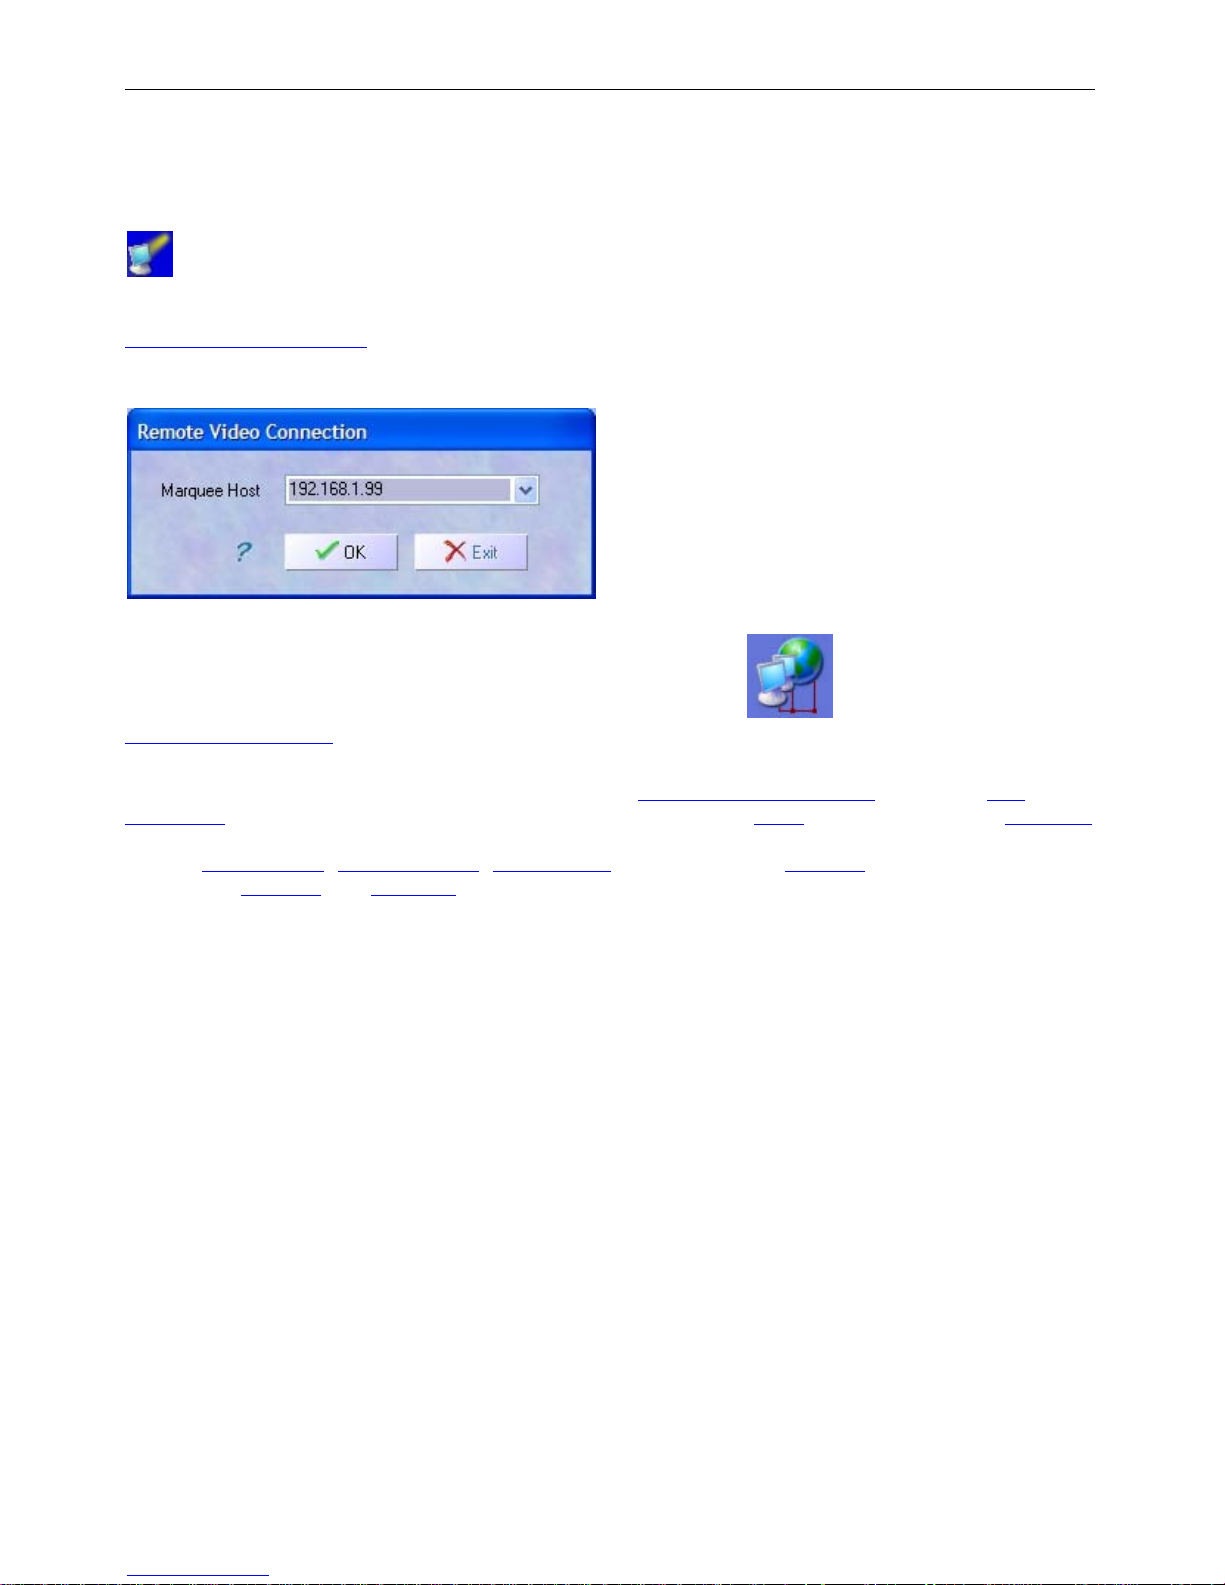
Palette OS v10
Remote Video
If you install the Palette PC software on your personal computer (available from
www.strandlighting.com
Network) to a console to monitor your show. Once you launch the application using this shortcut,
you will be presented with the Remote Video Connection dialog box:
A list of recent IP addresses can be found by clicking on the down arrow in the combo box. If you
), one of the START Menu options is to connect (using the Local Area
don't the know the IP address of your console, hover over the
Palette Control Panel
allows five remote connections.
The remote video connection does not allow you to Select or alter Channels
Properties, but it does allow you to independently view cues in Blind just by moving the Blue Box
and you can display any cue list you wish to see which cues are active. The remote can chose to
display Sub Masters
want. Most toolbars
. The tooltip will show you the current IP address. By default, your Palette
, Macro Buttons, Tracksheets and position the splitters in any locations they
and Softkeys are disabled:
Network button in the
or change Cue
Strand Lighting
p89
Page 91
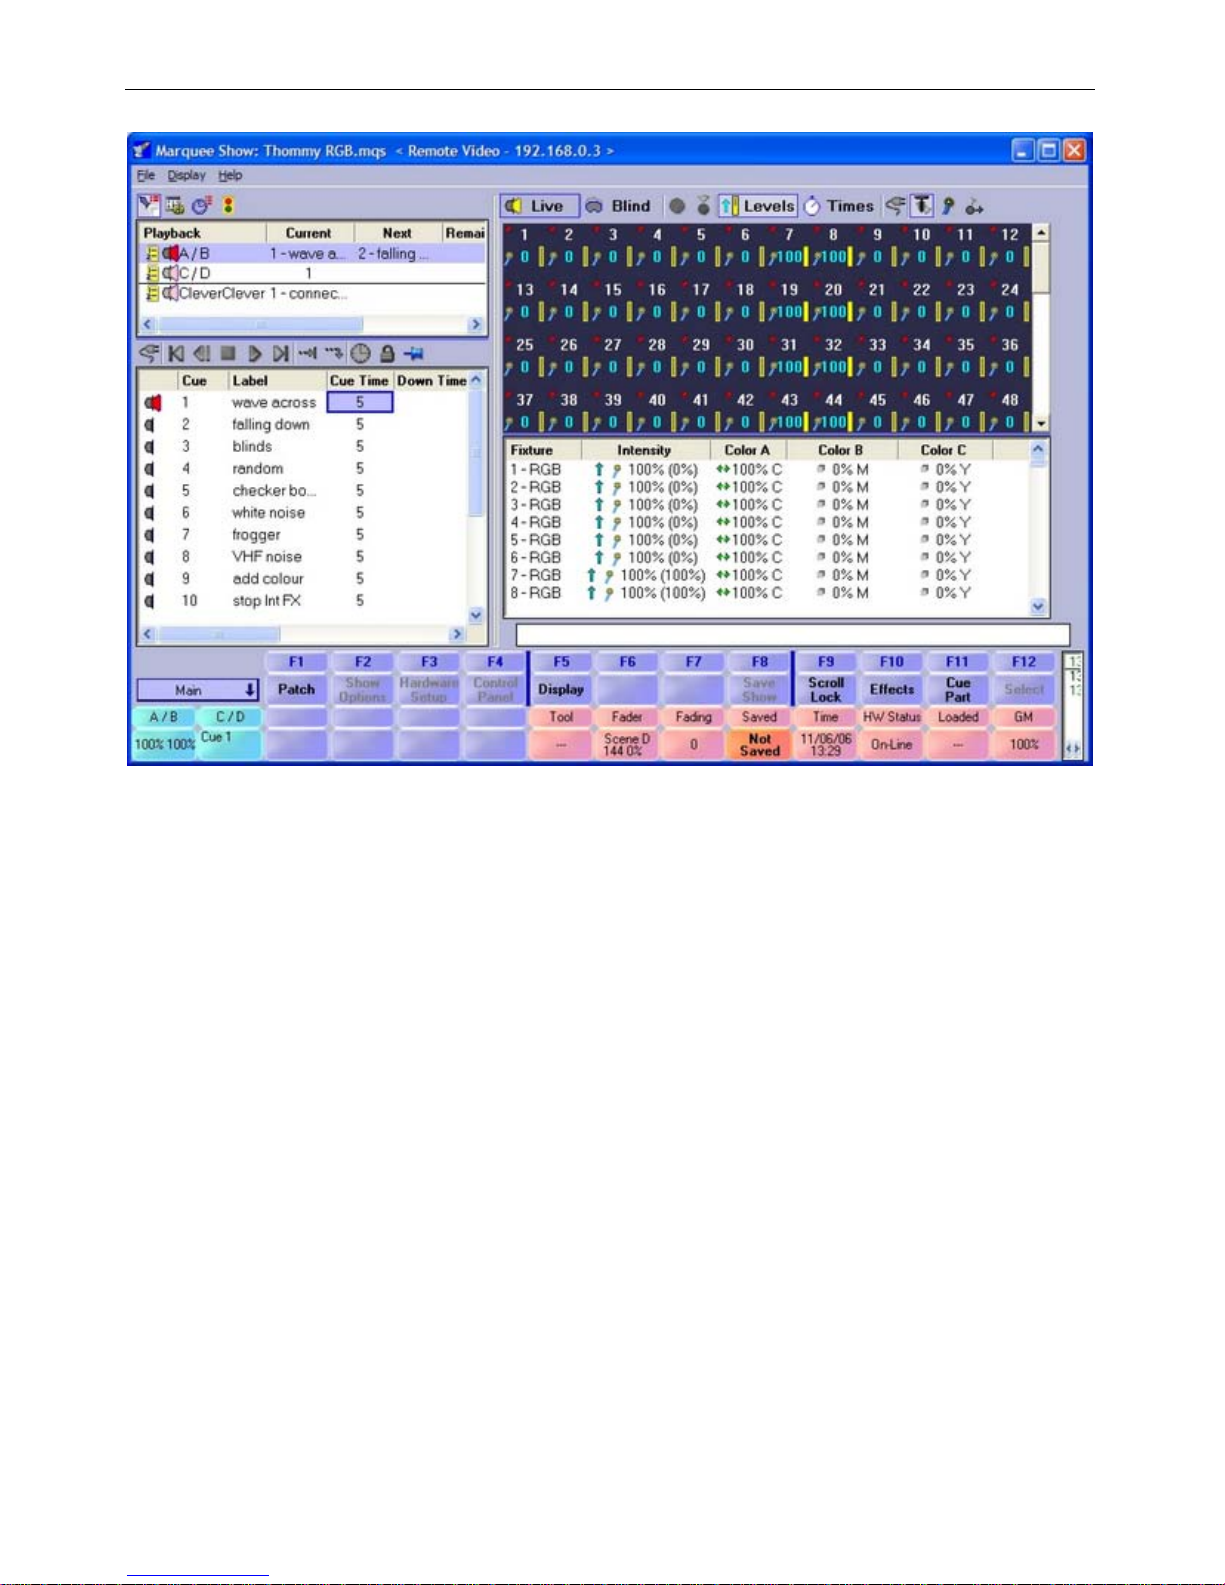
Palette OS v10
If the main system exits or re-loads a show file, the remote machine will be presented with a
dialog box explaining that you must close and re-connect to the main system. You can also
disconnect using the File|Disconnect Remote Video option to disconnect any time and/or connect
to another system on your network.
-o-
Strand Lighting
p90
Page 92
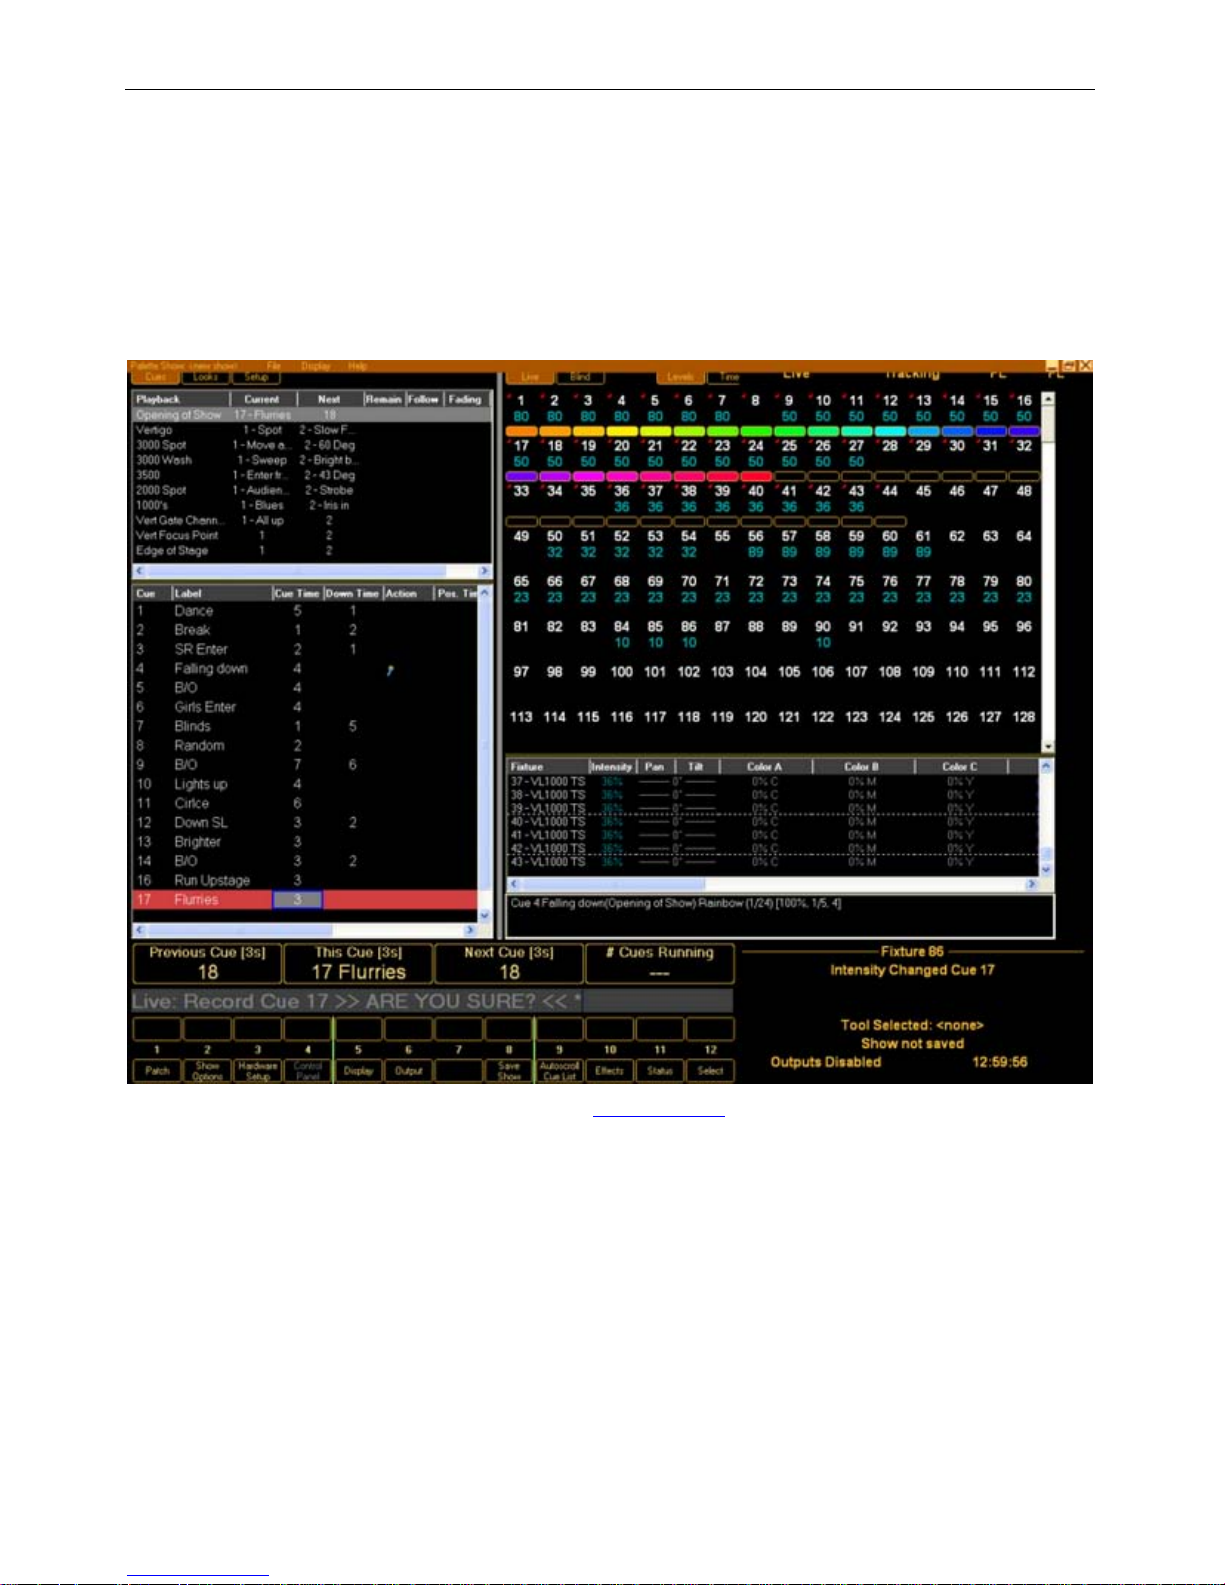
Palette OS v10
Screen Layout
The layout of the Palette screen is flexible and allows you to look at the information you need
when you need it. When Palette starts, the screen is not a busy as this:
To add or remove screen components, use the Display Menu or press [S5] to show the display
popup list:
Strand Lighting
p91
Page 93
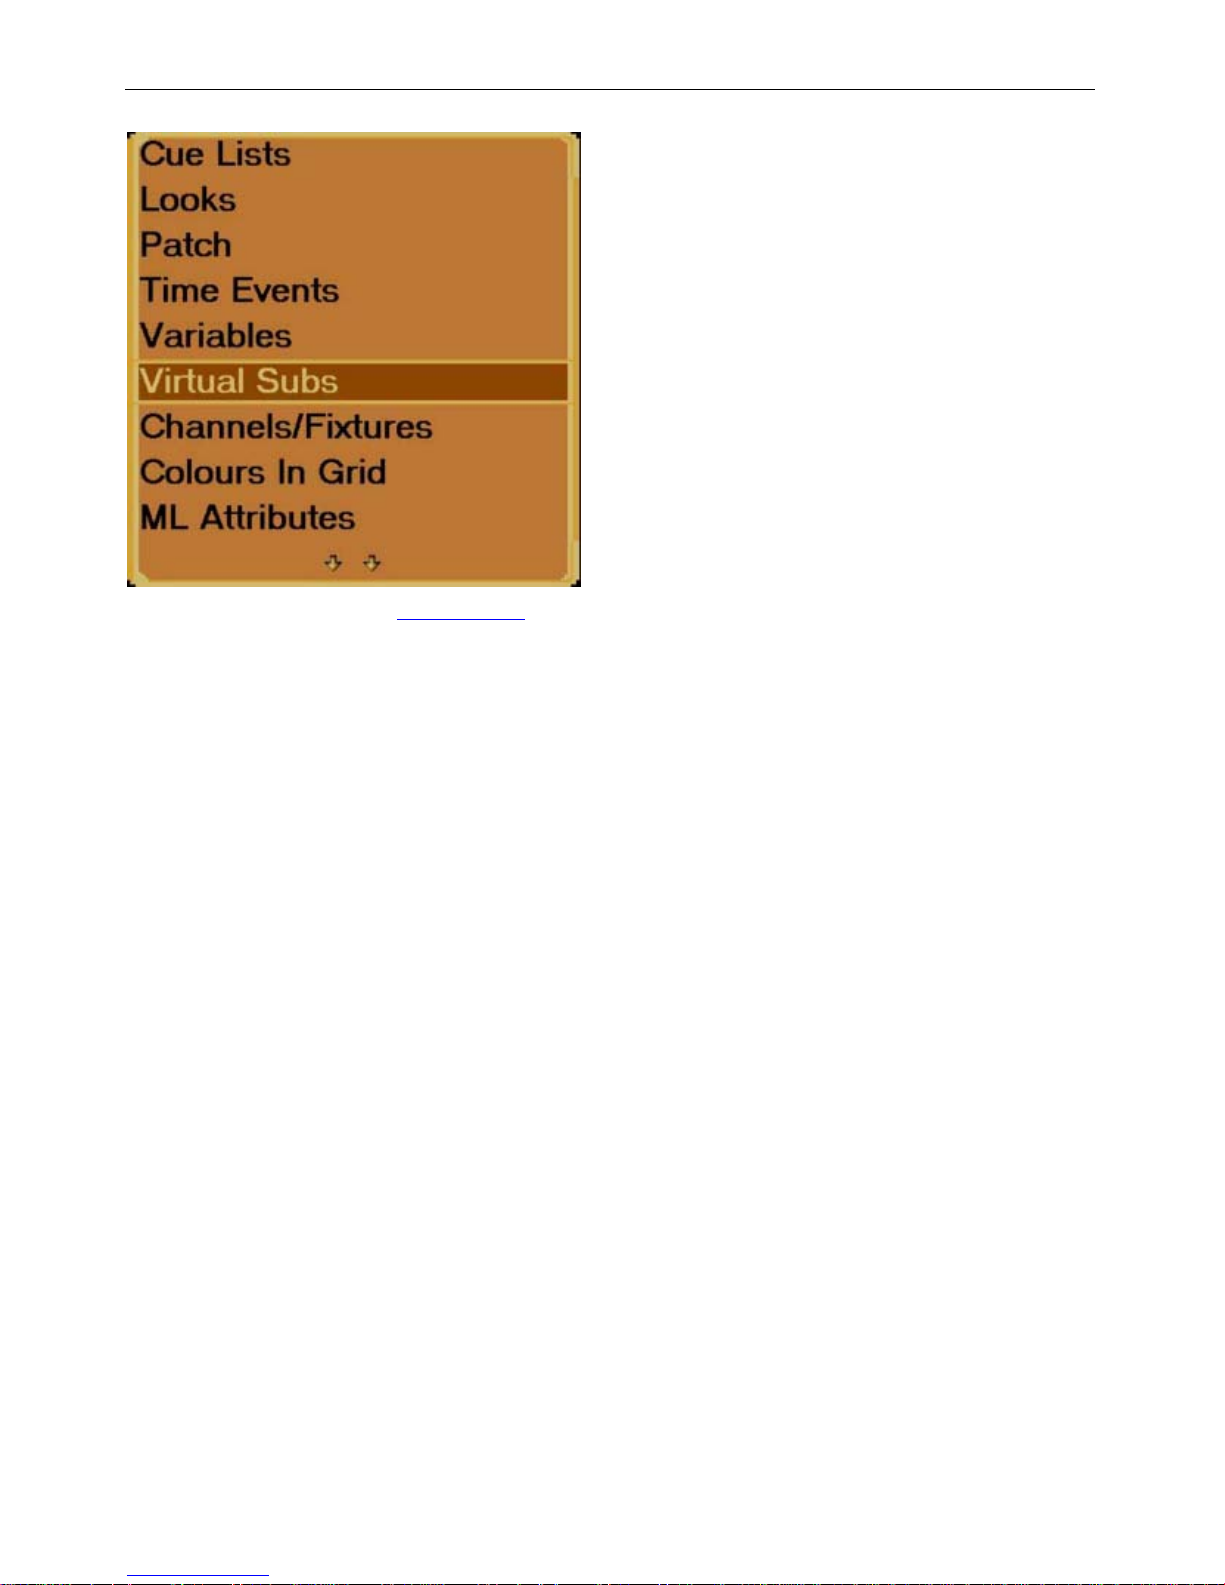
Palette OS v10
As well, you can resize the Channel Grid by clicking or right clicking on the splitters.
For more inform ation on what areas of the screen do what, hover and/or click on the image
above.
-o-
Strand Lighting
p92
Page 94

Palette OS v10
Console Buttons
Strand Lighting
p93
Page 95

Palette OS v10
LIVE
Press [LIVE] to enter and exit the Live display.
While in Live, the channel grid has a Black background.
Display Keys
Live Button
PRESS Release TO CLOSE THIS BOX!
-o-
Strand Lighting
p94
Page 96

Palette OS v10
BLIND
Press [BLIND] to enter and exit the Blind display.
While in Blind, the channel grid has a Grey background and the
Green LED You can also see the Blind button in the Channel Grid
toolbar.
While in Blind, moving the Blue Box
will Load cues automatically for
you.
Blind Button
PRESS Release TO CLOSE THIS BOX!
-o-
Strand Lighting
p95
Page 97

Palette OS v10
PATCH
Press [PATCH] to enter the Patch display.
Pacth Button
PRESS Release TO CLOSE THIS BOX!
-o-
Strand Lighting
p96
Page 98

Palette OS v10
DBO-A
DBO-B
Use this button to black out the stage.
This button can be configured
to work as a momentary button, a
toggle button or be disabled. Choose your preference using [S3]
Hardware Setup
The LED flashes when the GM slider is not at 100%. It flashes rapidly
when the slider is at 0%.
The current level of the Grand Master can be seen in the Status
Bubbles
Playback Keys
Dead Black Out Button
PRESS Release TO CLOSE THIS BOX!
-o-
Strand Lighting
p97
Page 99

Palette OS v10
GO
This button will do a GO on its cue list. (Note: The Select
button
does not have to be active (amber LED flashing))
If a cue is running, the Green LED will be flashing.
If you are sitting in a cue, the LED will be solid Green.
Use with [SHIFT] to assert
the current cue, grabbing full control of
all its attributes without advancing the cue list.
If the cue list is Releasing
, both the GO and the HALT/BACK LEDs
will be flashing. The release time can be set in the Cue List's
Properties
.
Go Button
PRESS Release TO CLOSE THIS BOX!
-o-
Strand Lighting
p98
Page 100

Palette OS v10
GOTO
Press [GOTO CUE] # ENTER to take the selected cue list to the
desired cue.
The Cue Number edit box will be pre-stuffed with the cue number of
the blue highlighted cue.
If desired, you can set a desired tim e for the cue to execute. The
recorded time is the default time.
If you move the Blue Box to the first column and press [EDIT], this is
equivalent to doing a GOTO on that cue.
Goto Button
PRESS Release TO CLOSE THIS BOX!
-o-
Strand Lighting
p99
 Loading...