

Page 1
Quickstart guide SRT326
SRT3260110A13_QG_EN_STD
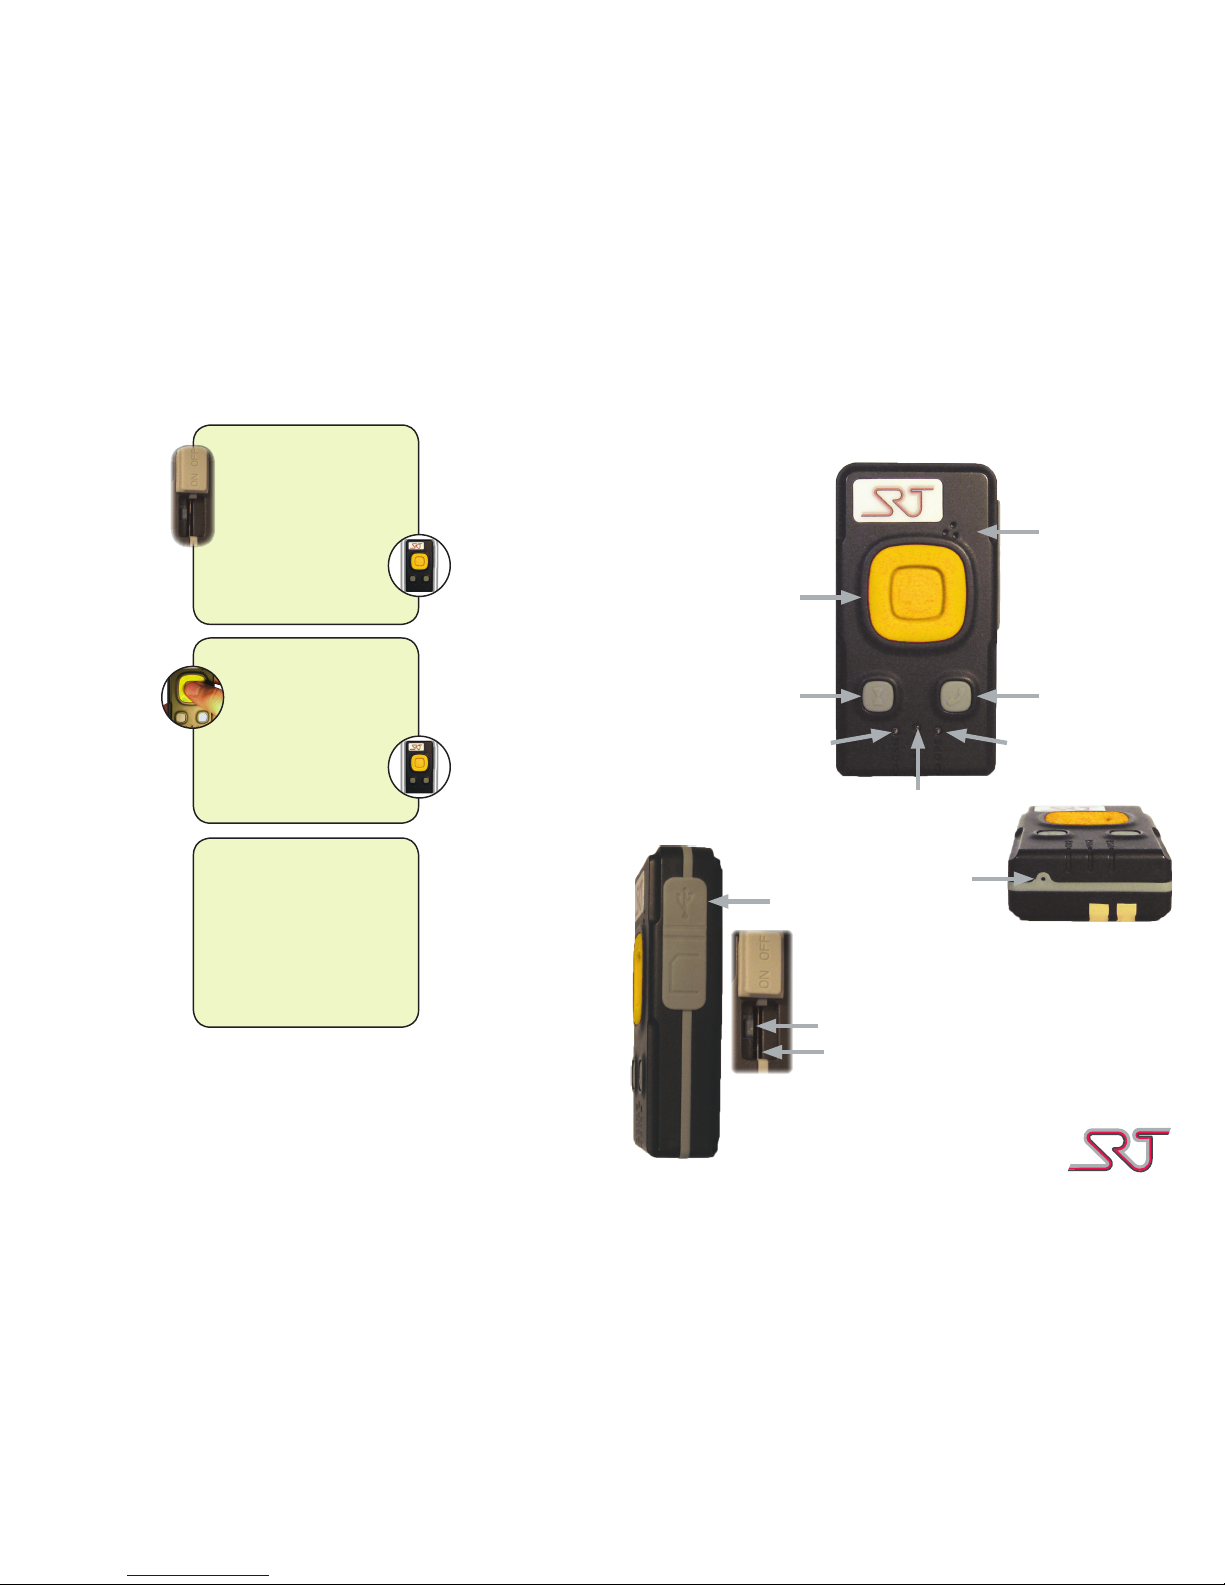
Speaker
Call buttonTimer button
Alarm button
GSM status
Charge indicator
Timer/Man down
status
Charge socket
SIM card slot
On/off switch
Microphone
Sending an alarm
Press the alarm
button until the device
vibrates.
The personal alarm
vibrates as soon as
the alarm is registered.
Turn on/off
Move switch into on or
off position
The personal alarm
vibrates shortly and
thereafter turns on/off.
Acoustic warning
If the SIM card is out of
place the device will emit
an audible signal. Shut the
device off, extract and
reinsert the SIM card and
turn the device on again.
Page 2
Status LEDs
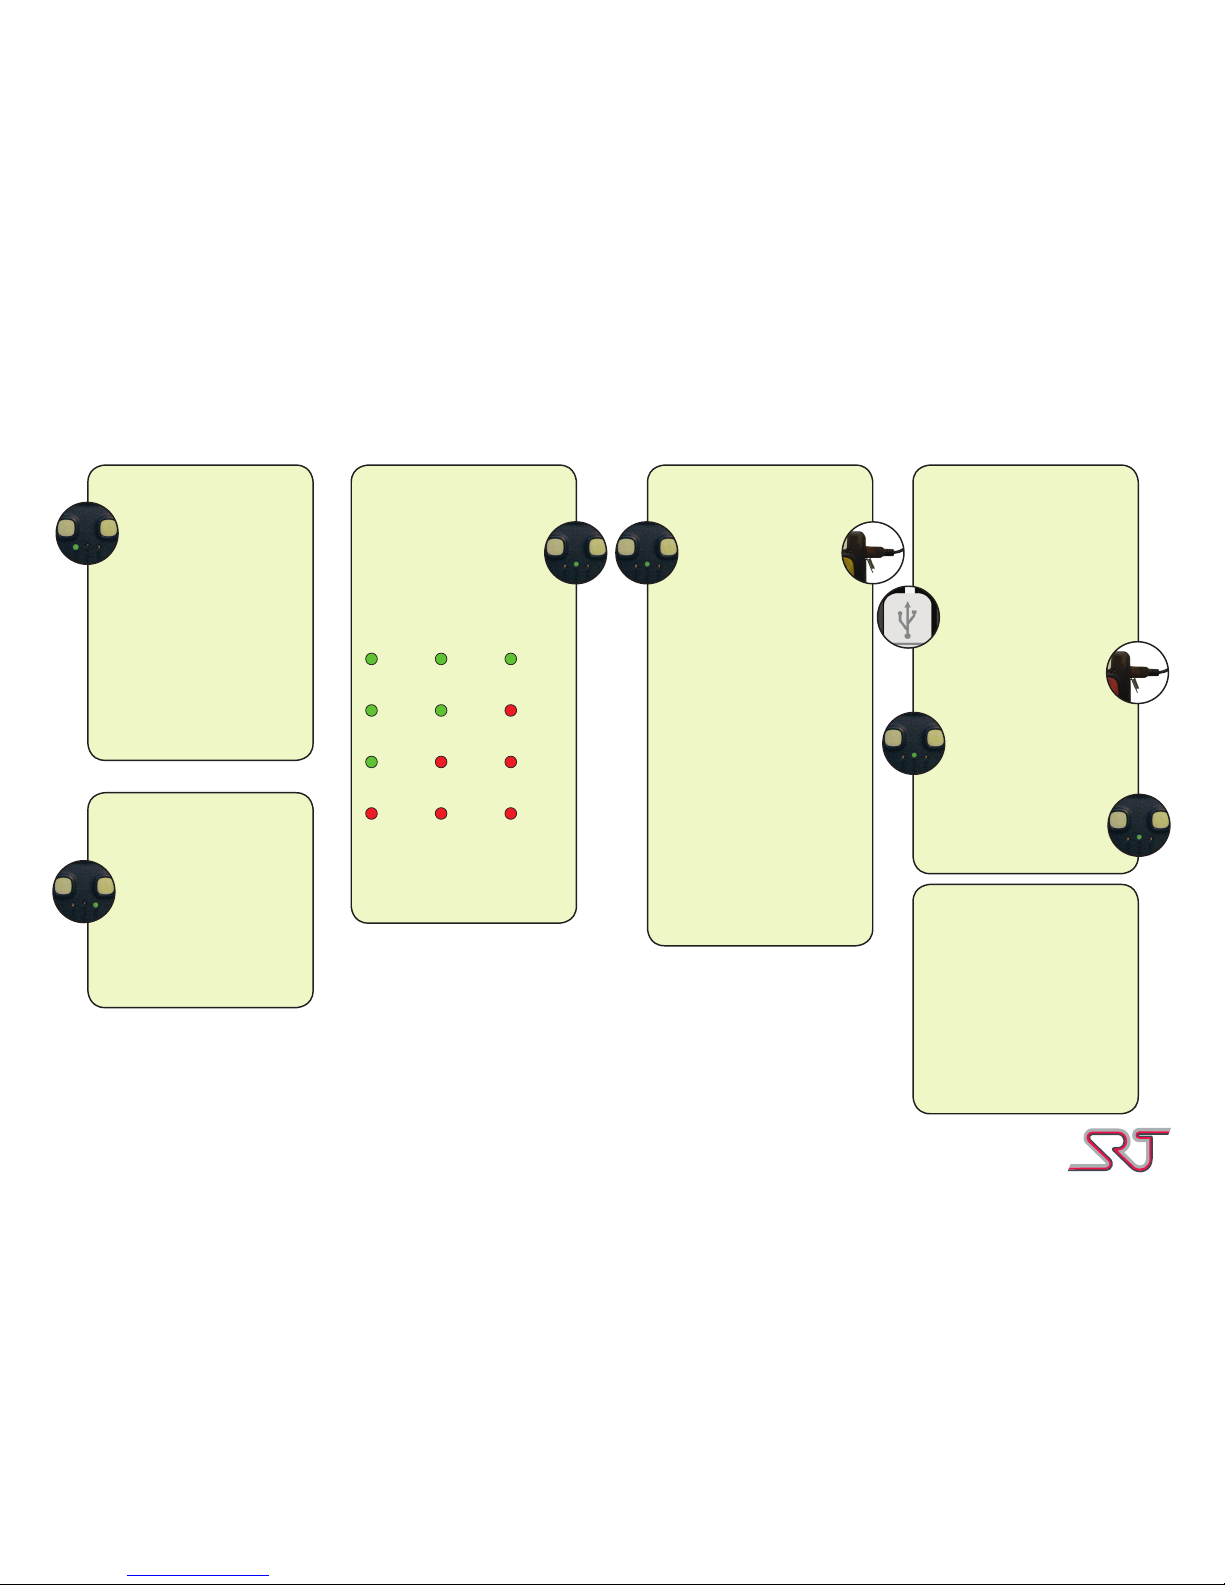
Timer/Man down
status LED
Charge indicator LED
(charger connected)
Charge indicator LED
(no charger connected)
GSM status LED
Solid
Searching for a GSM
network
Slow blinking
Connected to a GSM
network
Rapid blinking
Voice call in progress
Turned off
The device is either turned
off or in sleep mode
No light
Timer alarm/Man down
not active.
Blinking three times
every 15 seconds
The device is on and
shows the battery status
with three blinks
Blinking green
every other second
The device is on and
charging
Blinking red every other
second
The device is off and
charging
Solid green
The device is on and fully
charged
Solid red
The device is off and fully
charged
green green green
Very good
greengreen
red
Good
green
redred
Low
redredred
Critical
Alternating between
solid red and green
The device is shutting
down
Alternating between
solid red and green
The device is shutting
down
Blinking (red)
Timer alarm/Man down
is enabled.
Insert the charger
cable into the mini
USB connector.
The charge indicator
LED will blink red or
green when charging
The charge indicator
LED will turn into a solid
red or green when the
device is fully charged
Charging times
Before using your alarm
device the rst time it
should be charged for 4
hours. Whenever the
battery is fully discharged
it should be charged for at
least 4 hours.
The device should be
charged every day.
Charging
(Desktop charger)
Charging (USB)
Lift the rubber ap on the
side of the device
Place the unit in the desktop charger
 Loading...