

Page 1

S7 - G900C
S7 - G1100C
Handbook
Page 2

Contents
If you smell gas:
Do not
try to light any appliance. Do not touch any electrical switch.
Call the Gas Emergency Helpline at TRANSCO on: 0800 111999
. . . . . . . . . . . . . . . . . . . . . . . . . . . . . . . . . . . . . . . . . . . . . . . . . . . . . . . . . . . . . . . . .
. . . . . . . . . . . . . . . . . . . . . . . . . . . . . . . . . . . . . . . . . . . . . . . . . . . . . . . . . . . . . . . . .
. . . . . . . . . . . . . . . . . . . . . . . . . . . . . . . . . . . . . . . . . . . . . . . . . . . . . . . . . . . . . . . . .
. . . . . . . . . . . . . . . . . . . . . . . . . . . . . . . . . . . . . . . . . . . . . . . . . . . . . . . . . . . . . . . . .
. . . . . . . . . . . . . . . . . . . . . . . . . . . . . . . . . . . . . . . . . . . . . . . . . . . . . . . . . . . . . . . . .
. . . . . . . . . . . . . . . . . . . . . . . . . . . . . . . . . . . . . . . . . . . . . . . . . . . . . . . . . . . . . . . . .
. . . . . . . . . . . . . . . . . . . . . . . . . . . . . . . . . . . . . . . . . . . . . . . . . . . . . . . . . . . . . . . . .
. . . . . . . . . . . . . . . . . . . . . . . . . . . . . . . . . . . . . . . . . . . . . . . . . . . . . . . . . . . . . . . . .
. . . . . . . . . . . . . . . . . . . . . . . . . . . . . . . . . . . . . . . . . . . . . . . . . . . . . . . . . . . . . . . . .
. . . . . . . . . . . . . . . . . . . . . . . . . . . . . . . . . . . . . . . . . . . . . . . . . . . . . . . . . . . . . . . . .
. . . . . . . . . . . . . . . . . . . . . . . . . . . . . . . . . . . . . . . . . . . . . . . . . . . . . . . . . . . . . . . . .
. . . . . . . . . . . . . . . . . . . . . . . . . . . . . . . . . . . . . . . . . . . . . . . . . . . . . . . . . . . . . . . . .
. . . . . . . . . . . . . . . . . . . . . . . . . . . . . . . . . . . . . . . . . . . . . . . . . . . . . . . . . . . . . . . . .
. . . . . . . . . . . . . . . . . . . . . . . . . . . . . . . . . . . . . . . . . . . . . . . . . . . . . . . . . . . . . . . . .
. . . . . . . . . . . . . . . . . . . . . . . . . . . . . . . . . . . . . . . . . . . . . . . . . . . . . . . . . . . . . . . . .
. . . . . . . . . . . . . . . . . . . . . . . . . . . . . . . . . . . . . . . . . . . . . . . . . . . . . . . . . . . . . . . . .
. . . . . . . . . . . . . . . . . . . . . . . . . . . . . . . . . . . . . . . . . . . . . . . . . . . . . . . . . . . . . . . . .
. . . . . . . . . . . . . . . . . . . . . . . . . . . . . . . . . . . . . . . . . . . . . . . . . . . . . . . . . . . . . . . . .
COD. 04059ST - 17.10.2007
Page 3
Before Using Your Hob
Thank you for purchasing a new Stoves Gas Hob.
Its stylish and practical design will enhance your
kitchen and make cooking a pleasure. Even if you
have used a gas hob before, it is important that you
read these instructions thoroughly before starting to
cook, paying particular attention to the installation and
safety instructions.
If you have any problems with any aspect of your
Stoves hob, please check through these instructions
thoroughly to make sure that you have not missed
anything. If you still need help, then please contact us
susing the customer care centre number at the back
of this book.
Before using this appliance please make sure that
you have removed all packaging and wrapping.
Some of the furniture inside this
appliance may have additional wrapping.
Although every care has been taken to ensure this
appliance has no burrs, or sharp edges, we
recommend that you wear protective gloves when
installing and moving this appliance.
This will prevent any injury.
Our policy is one of constant development and
improvement. Strict accuracy of illustrations and
specifications cannot be guaranteed. Modification to
design and material may be necessary
subsequent to publication.
Always use a registered installer for this appliance.
WARNING! For your own safety, make sure that
these instructions on installation, use and
maintenance are followed.
Environmental protection:
Glen Dimplex Home Appliance brands are
committed to protecting the environment and operates and Environmental Management System which
complies with BS EN ISO 14001.
All packaging with this appliance is recyclable and
environmentally friendly.
Please recycle whenever possible - contact your
local authority for your nearest recycling centre.
This appliance is for
use in a domestic
kitchen only, it is not
designed, or intended, for commercial
use.
Please keep these
instructions in a safe
place.
Should you sell or
pass on the appliance, please give the
new owner this
handbook.
Page 4
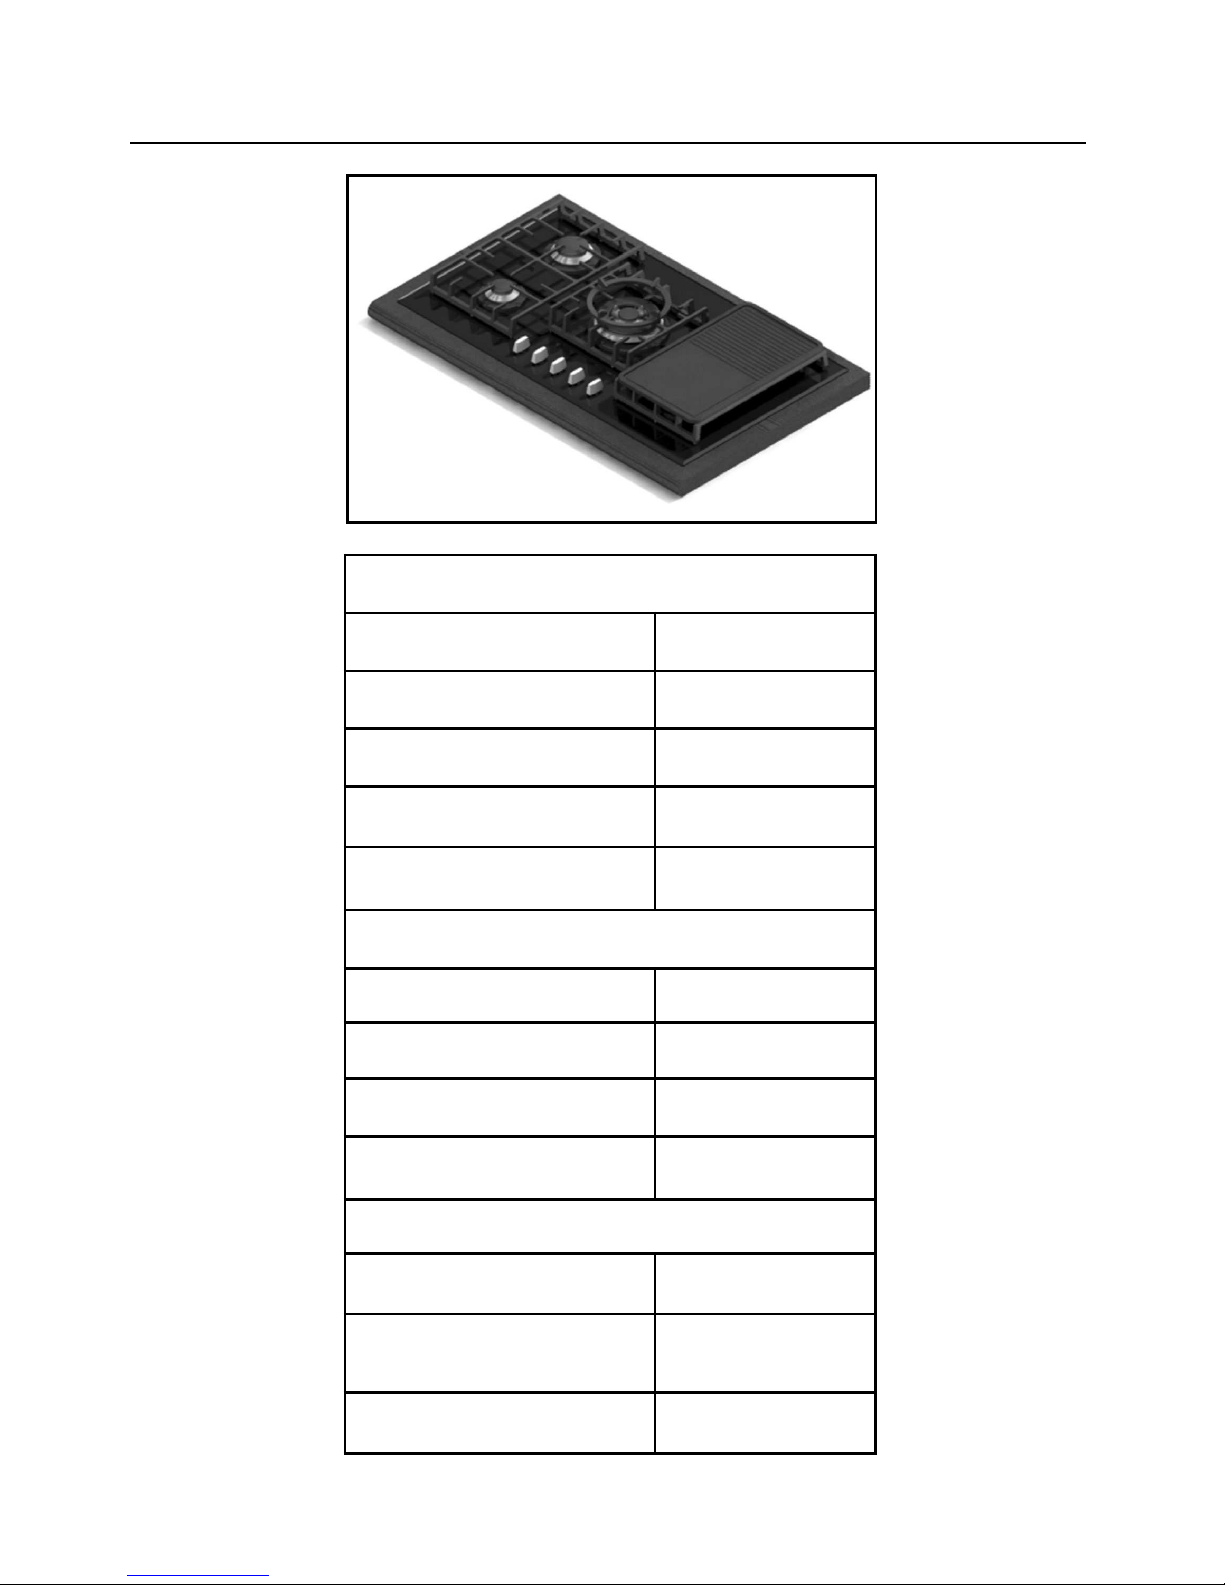
About The S7 - G900C
Hob Details
Burner Type Rating (kW)
Wok 3.35 ÷ 3.5
Rapid (large) 2.5
Semi-Rapid (medium) 1.75
Auxiliary (small) 1.0
Hob Dimensions
Width 860mm
Depth 500mm
Height (to top of pansupports) 60mm
Cut out required (WxD) 833mm x 473mm
Hob Aesthetics
5 burners Automatic ignition
Cast Iron pansupports, griddle
& wok stand
LPG conversion kit
included
Stainless or Black finish
Page 5
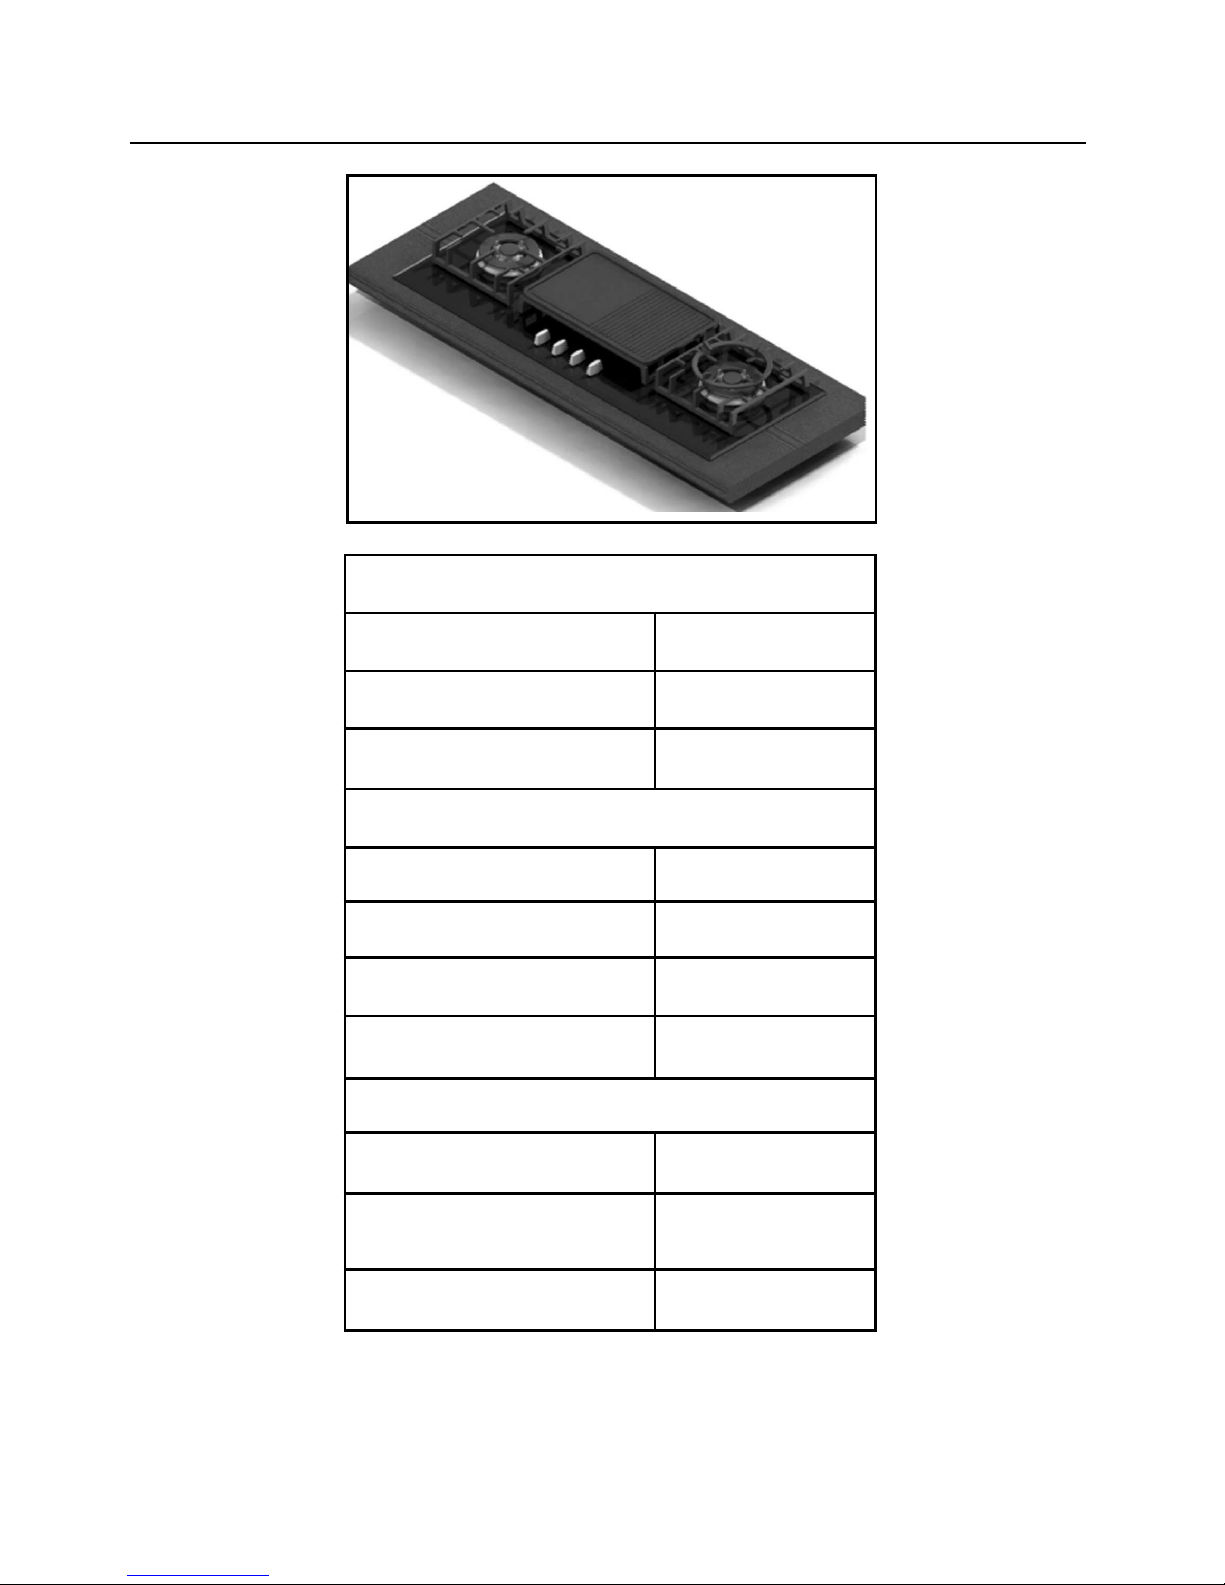
About The S7 - G1100C
Hob Details
Burner Type Rating (kW)
Wok 3.35 ÷ 3.5
Semi-Rapid (medium) 1.4 ÷ 1.75
Hob Dimensions
Width 1100mm
Depth 370mm
Height (to top of pansupports) 80mm
Cut out required (WxD) 1060mm x 345mm
Hob Aesthetics
4 burners Automatic ignition
Cast Iron pansupports, griddle
& wok stands
LPG conversion kit
included
Stainless or Black finish
Page 6

Safety Instructions
Ensure that thes e notes and that the whol e of this
instruction book are thoroughly read and understood before
installation or operation of the hob.
The instructions are provided in the interest of your safety.
G
AS SAFETY (INSTALLATION & USE) REGULATIONS
1. It is the law that all gas appliances are installed by
competent persons in accordance with the current edition
of the above regulations. It is in your interest and that of
safety to ensure compliance with the law.
2. Repairs or servicing of this product must only be carried
out by an authorised Stoves service agent using only
approved parts.
3. No attempt must be made to modify this appliance.
4. Cooking appliances become very hot in use, therefore
ensure children and pets are kept away. The use of oven
gloves is recommended when during use.
5. Do not allow children to operate or play with any part of
the appliance.
6. Do not use unstable pans and position handle away from
the edge of the hob. The use of a suitable hob guard is
recommended.
7. In the interests of safety and hygiene, ensure the hob is
kept clean as a build up of grease could cause fire.
8. This appliance is designed for domestic cooking only,
commercial catering may invalidate the warranty.
9. Do not cover the hob or place combustible materials on or
near the surface even when the hob is not in use.
10. Do not fill deep fat frying pans more than one third full of
oil. Do not leave unattended.
11. Before cleaning the hob, switch off at the mains.
12. When finished cooking, switch all controls off and allow to
cool.
13. If you sell or transfer ownership of this product, please
pass on these instructions to the new owner.
14. If uncertain of any points, please call the Stoves Customer
Care Centre on: 0871 22 22 502
Page 7
Using Your Hob
L
IGHTING THE BURNERS
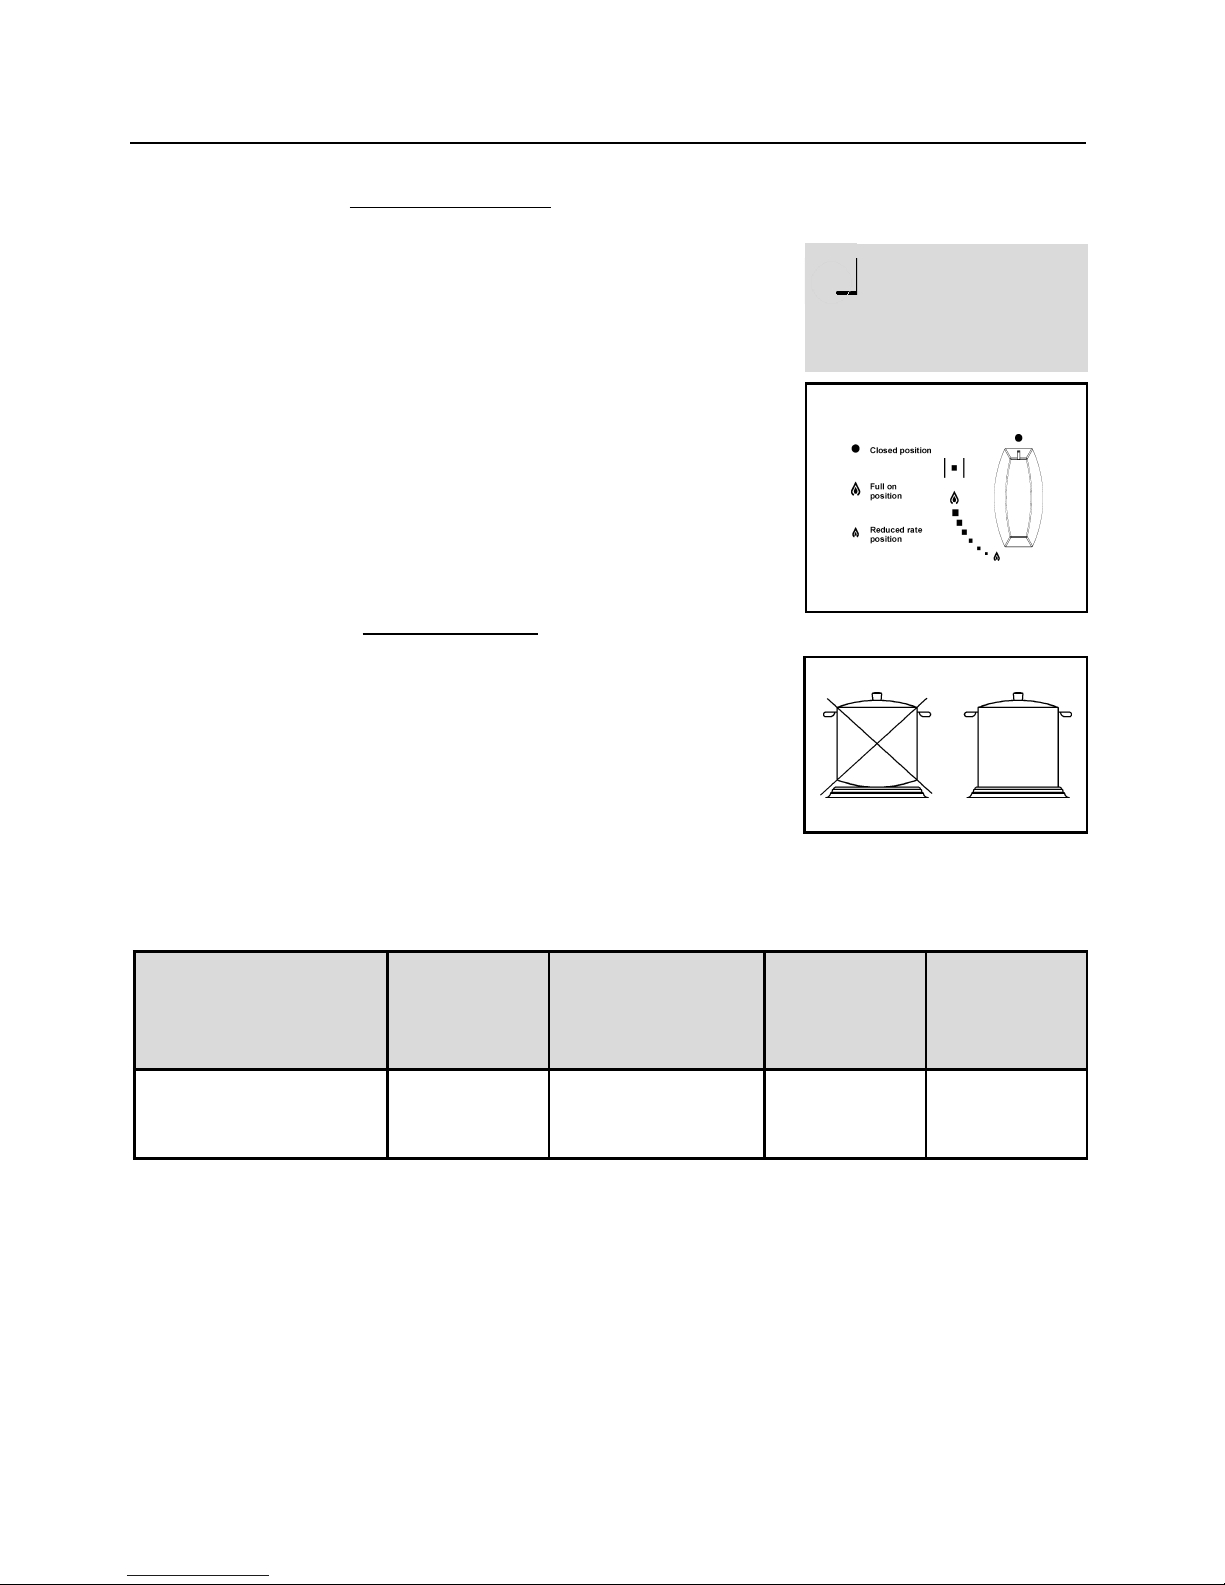
1. To light the hotplate push in the appropriate control knob
and turn anti-clockwise to the large flame symbol (fig. 9).
2. Keep the knob depressed until the burner lights.
3. Turn the tap to the required setting.
4. Return control knob to the OFF position following use.
Use an appropriately sized pan and with flat bottom for each
burner (see the table below and fig. 10).
When the contents of the pan start to boil, turn the knob
down to reduced rate position.
Always put a lid on the pan.
U
SING THE GRIDDLE
When using the griddle make sure that it is placed over the
burners as shown in the illustration at the front of this
handbook. Do not place the griddle over other burners. The
griddle is split into two sections (one flat, one ridged) can be
used for cooking such foods as burgers, sausages, steaks,
bacon, and gammon steaks. The flat side can be used for
pancakes, eggs and drop scones
Should there be a
power cut, you can
also use matches to
light the burners.
BURNERS
(SIZE & KW)
RAPID
(LARGE)
2.5KW
SEMI RAPID
(MEDIUM)
1.4 ÷ 1.75KW
AUXILIARY
(SMALL)
1.0KW
WOK
3.35 ÷ 3.5KW
Ø pans in cm 20 ÷ 22 16 ÷ 18 10 ÷ 14 24 ÷ 26
FIG. 10
FIG. 9
Page 8

Care & Cleaning
VITREOUS ENAMEL
Burner caps.
Cloth wrung out in hot soapy water. Stubborn stains can be
removed with a cream paste approved by the Vitreous
Enamel Development Council, liquid cleaner or by rubbing
with fine steel wool soap pads.
ALUMINIUM
Trim, Hotplate burner bodies.
It is advisable to clean the decorative trims regularly to
prevent any build up of soiling which may detract from the
appearance of the appliance. The recommended method of
cleaning is to wipe over the trims with a soft cloth wrung out
in warm water, or mild non-abrasive cleaner. (If in doubt try
the cleaner on a small area of trim which is not noticeable in
normal use), then after wiping with a cloth wrung out in clear
water, dry with a soft clean cloth.
Use a nylon brush to remove any cleaning materials, water or
dirt from the hotplate burner bodies. After cleaning, wipe dry
and refit to the hob ensuring they are correctly seated.
Check parts are reassembled correctly by lighting the burners
and allowing to dry out.
PLASTIC
Control knobs.
Wipe with a cloth wrung out in hot soapy water.
GLASS
Hob top.
Wipe with a cloth wrung out in hot soapy water. Then dry
with a clean dry cloth. You may use a glass cleaner, but
always follow the instructions carefully.
CAST IRON
Griddle, pansupports
Wipe with a cloth wrung out in hot soapy water. Dry with a
clean cloth. Do not wash in a dishwasher.
Always: Turn off the
electricity supply
before cleaning.
Page 9
Installation
Some parts on the appliance are protected by a plastic
film. This protective film must be removed before the
appliance is used.
We recommend carefully slitting the plastic film along
the edges with a sharp knife or pin.
The packaging materials should carefully discarded
and not left within easy reach of children as they are
a potential safety hazard.
I
NSTALLATING AND FIXING THE HOB
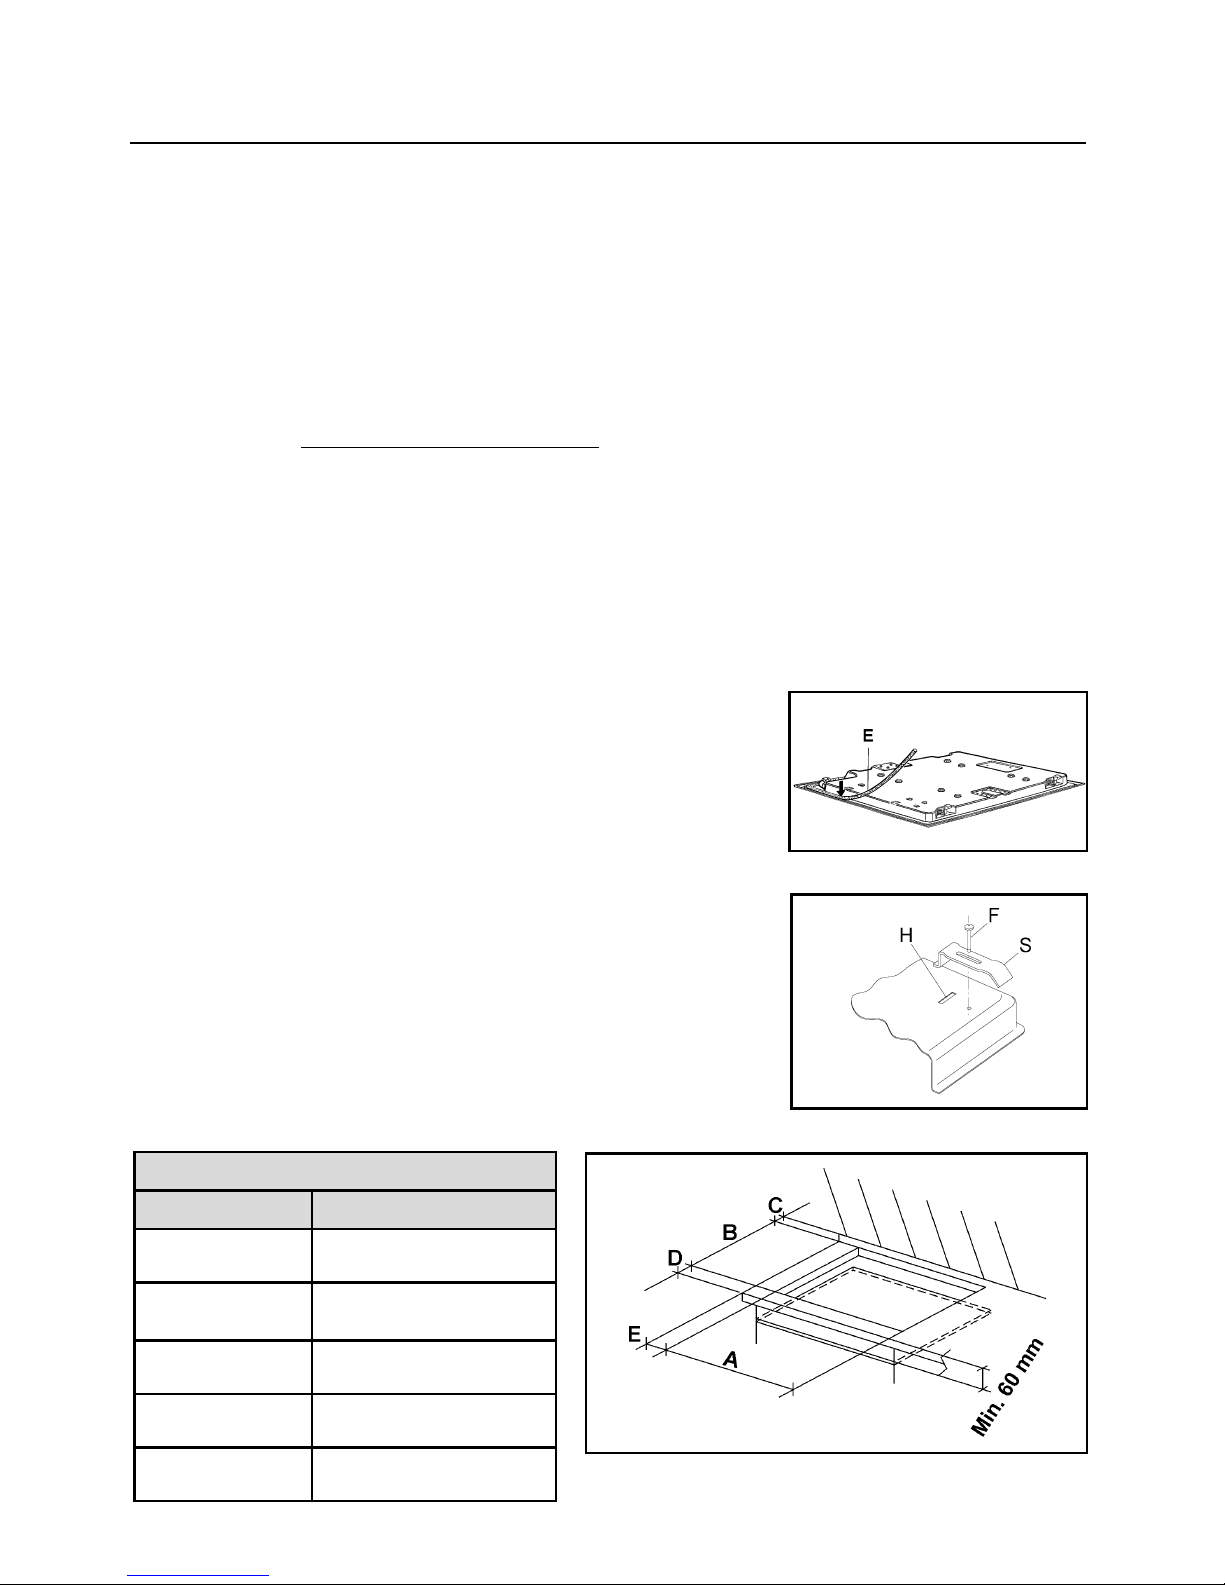
Your hob can be fitted to any worktop with a thickness of 30
to 40 mm.
No overhanging surface or cooker hood should be closer to
the hotplate than 750 mm (29 1/2"). Fix in position in
accordance with fig. 4.
If fitting a 600 mm bridging unit above the hob unit, the sides
of adjacent cabinets may be lower than 750 mm, down to
336 mm depending on the cabinets fitted, provided that they
are resistant to heat and steam.
The hob has a special seal which prevents liquid from
entering the cabinet. Follow these instructions in order to
correctly apply this seal:
- detach the seals from their backing, checking that the
transparent protection still adheres to the seal itself.
- Turn over the hob and correctly position seal “E” (fig. 5)
under the edge of the hob itself, so that the outer part of
the seal itself perfectly matches the outer edge of the hob.
The ends of the strips must fit together without overlapping.
- Evenly and securely fix the seal to the hob, pressing it firmly
in place.
- Remove the strip of protective paper from the seal. Insert
the hooks “S” into their relative housings “H” on the hob
and place into the prepared hole in the cabinet. Lock in
place with the relative fixing screws “F” (see fig. 6).
Dimensions
FIG. 5
FIG. 6
Dimensions
Letter Measurement (mm)
A (G900C)
A (G1100C)
833
1060
B (G900C)
B (G1100C)
473
345
C (G900C)
C (G1100C)
73.5
80
D (G900C)
D (G1100C)
63.5
127.5
E (G900C)
E (G1100C)
155 min
70 min
FIG. 4
Page 10
Installation
T
ECHNICAL INFORMATION
The installation, the adjustments, conversions and
maintenance listed in this part must only be carried out by
qualified persons.
The safety and automatic adjustment devices of the
appliance may only be modified by an authorised Belling
service agent.
The installation of this gas hob must comply with the
standards in force.
This appliance is not connected to a flue for discharge of
the combustion products; therefore, it must be connected
in compliance with the above mentioned installation rules.
Particular attention must be paid to the instructions given
below for ventilation and aeration.
L
OCATION
The cooker may be located in a kitchen, kitchen/diner or a
bed-sitting room, but not in a room containing a bath or
shower. The hob must not be installed in a bed-sitting room
of less than 20 m3.
LPG models shall not be installed in a room or internal space
below ground level, e.g. in a basement.
P
ROVISION FOR VENTILATION
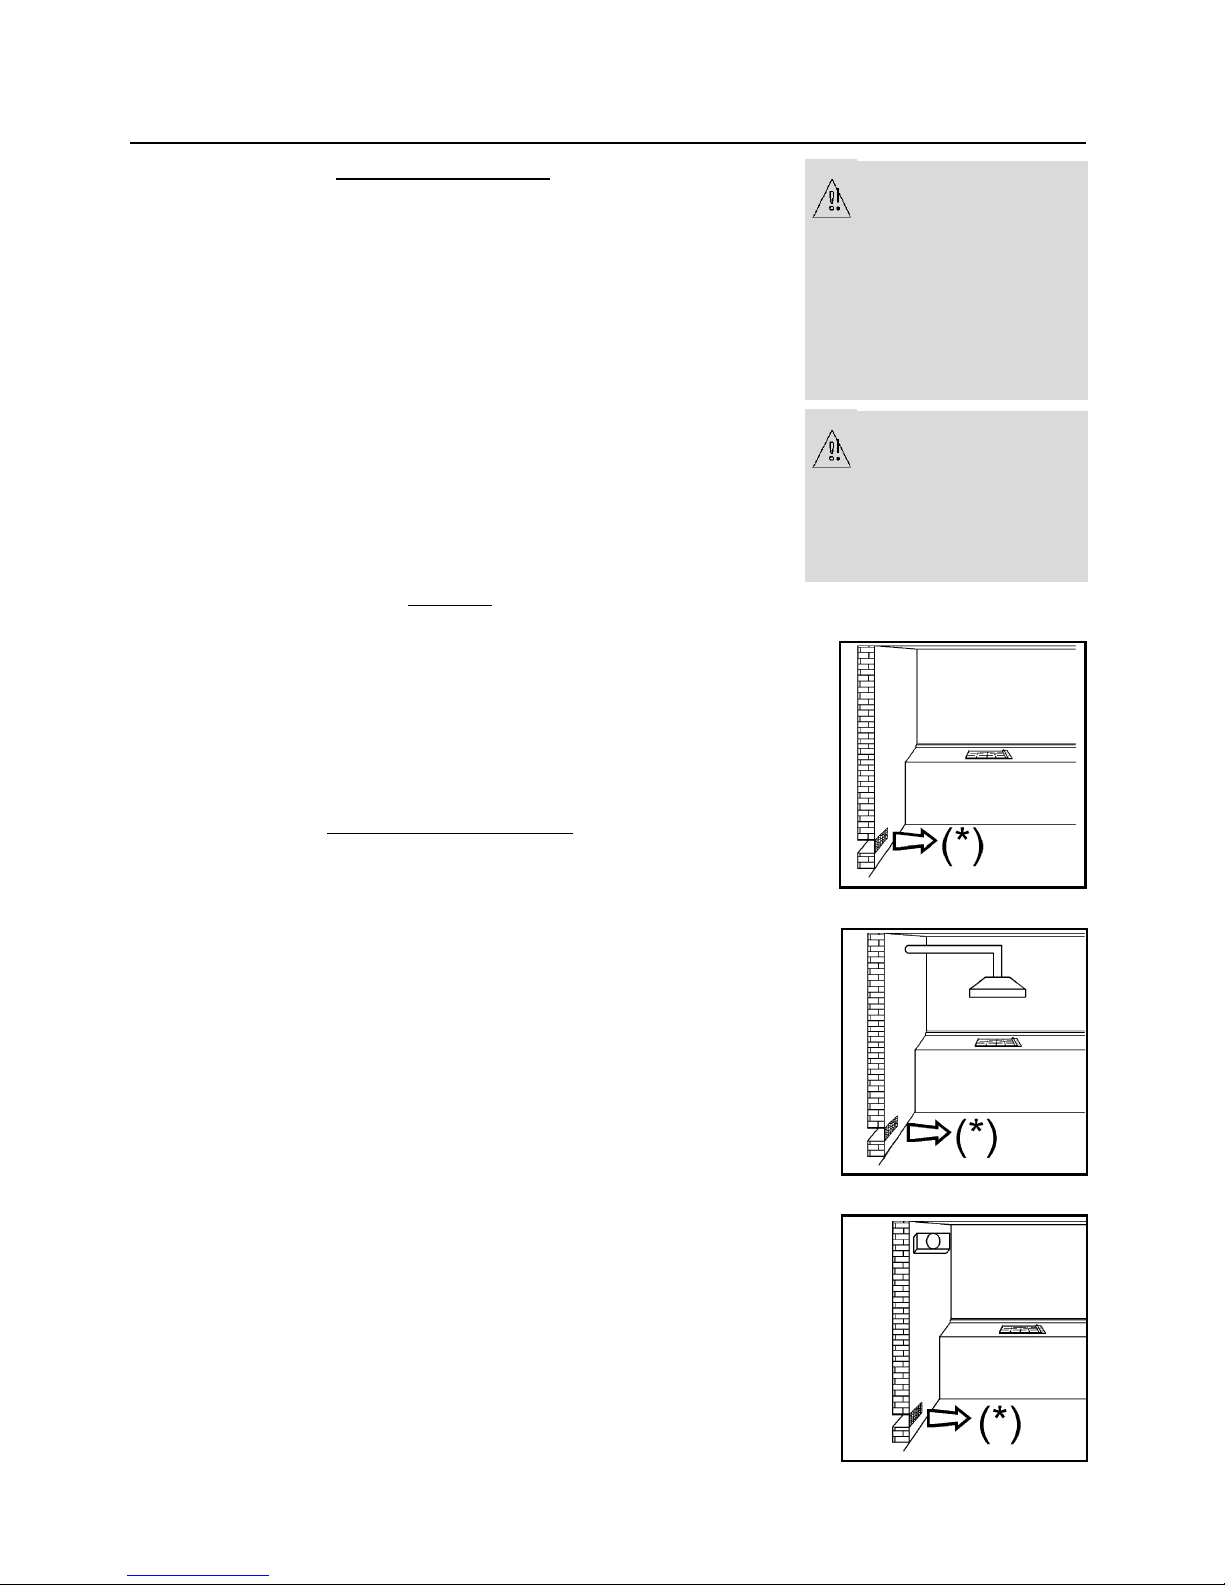
The room containing the cooker should have an air supply in
accordance with BS 5440: Part 2.
The room must have an opening window or equivalent; some
rooms may also require a permanent vent. If the room has a
volume between 5 and 10 m3, it will require an air vent of 50
cm2effective area unless it has a door which opens directly to
outside. If the room has a volume of less than 5 m3, it will
require an air vent of 100 cm2effective area (fig. 1). If there
are other fuel burning appliances in the same room, BS 5440:
Part 2 should be consul ted to determine ai r ven t
requirements.
NOTE: the use of a gas cooking appliance results in the
production of heat and moisture in the room in which it is
installed. Always ensure that the kitchen is well ventilated;
keep natural ventilation holes open or install a mechanical
ventilation device (fig. 2).
In particular, when using the grill or more than one hotplate
burner, open a window if a mechanical ventilation device is
not operating (fig. 3).
(*) Air inlet - minimum section: 100 cm
2
Make sure that you
have removed al the
packaging information before you begin
installation. Any protective films / plastics should be
removed before the
appliance is used.
FIG. 1
FIG. 2
FIG. 3
Packaging materials
are hazardous to
small children.
Please dispose of it
carefully.
Page 11

Installation Instructions
G
AS CONNECTION
The appliance’s gas inlet fitting is a 1/2” male threaded
cylindrical gas type in accordance with the ISO 7-1 standards.
Make the connection using rigid pipe.
ELECTRICAL CONNECTION
This appliance must be connected by a competent person,
using fixed wiring via a double pole switched fused spur
outlet, with a contact separation of at least 3mm in all poles.
We recommend that the appliance is connected by a qualified
electrician who will comply with I.E.E. regulations.
The wires in the mains lead are coloured in accordance with
the following code:
Green & Yellow = Earth,
Blue = Neutral,
Brown = Live.
Page 12
Installation Instructions
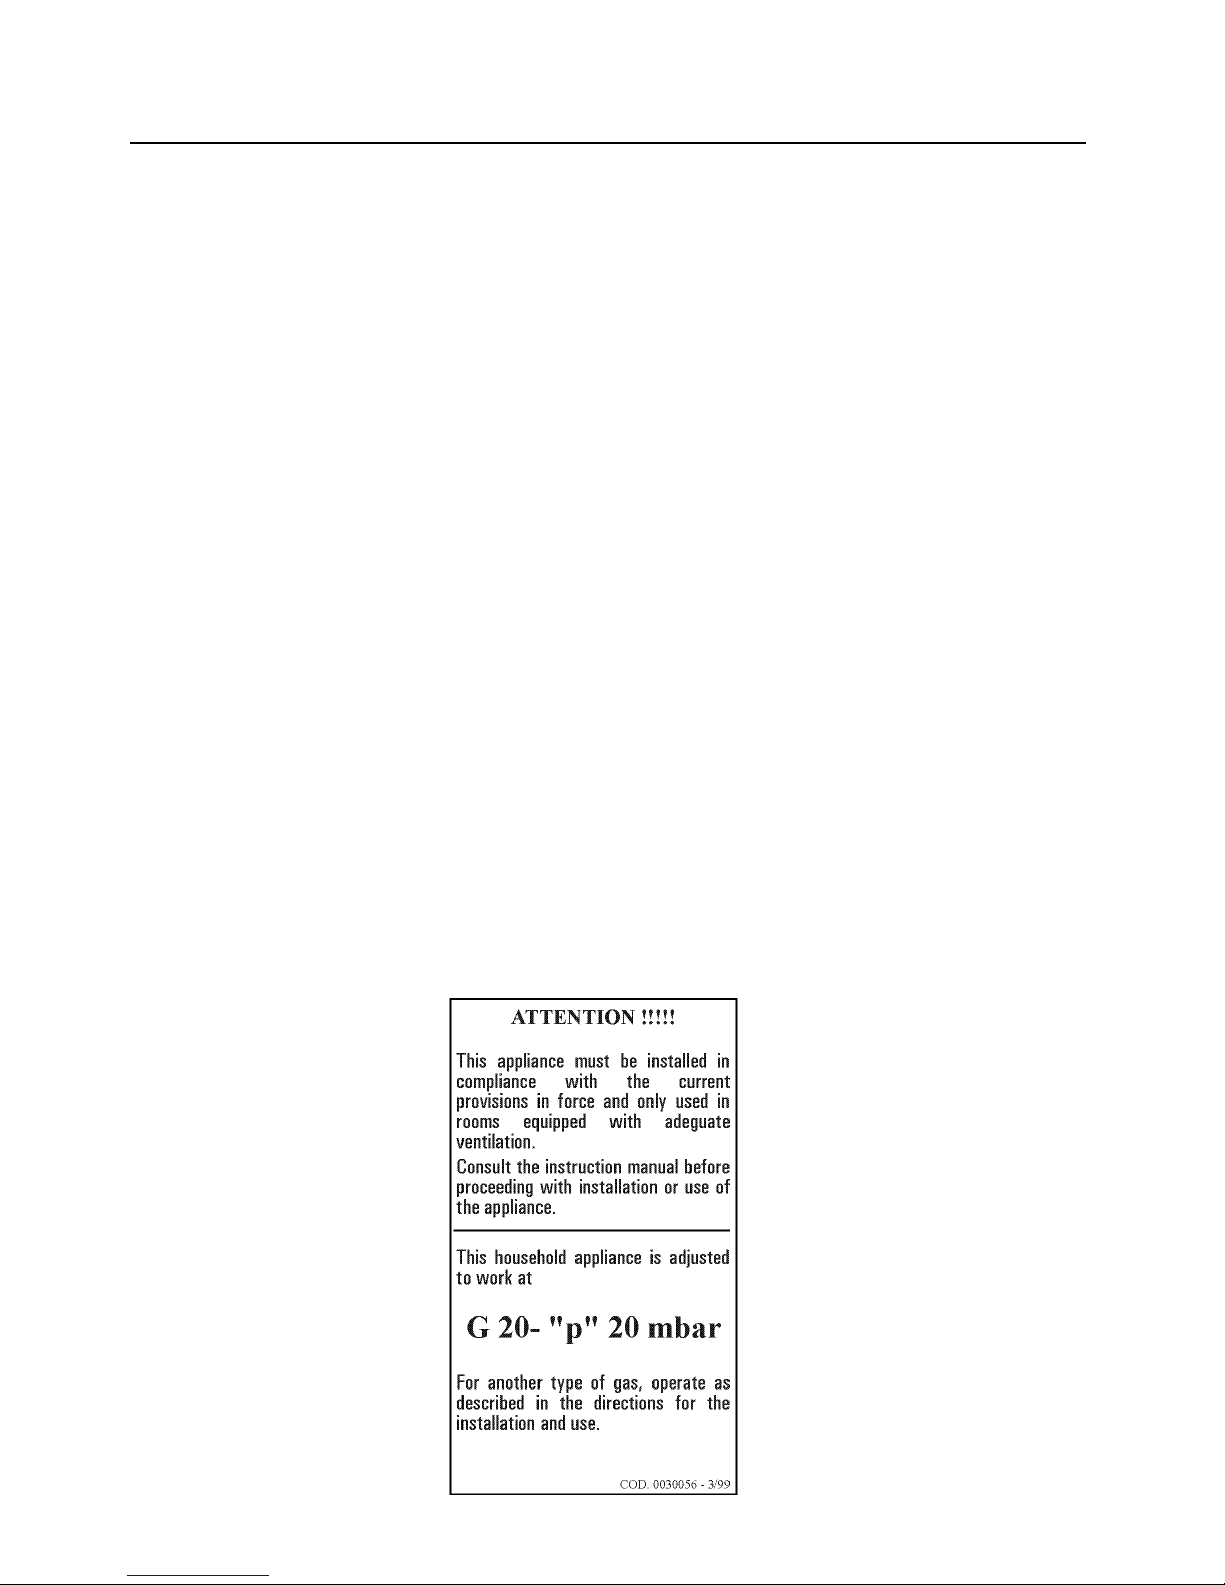
This appliance is adjusted for NATURAL GAS at 20mbar
ONLY.
The hob is suitable for conversion to Liquid Petroleum Gas
(BUTANE (G30) at 28-30 mbar and PROPANE (G31) at
37 mbar by the following procedure using the kit supplied.
If you require a replacement kit, please contact our spares
department on 0870 458 9695 and give the model number
from the databadge on your appliance.
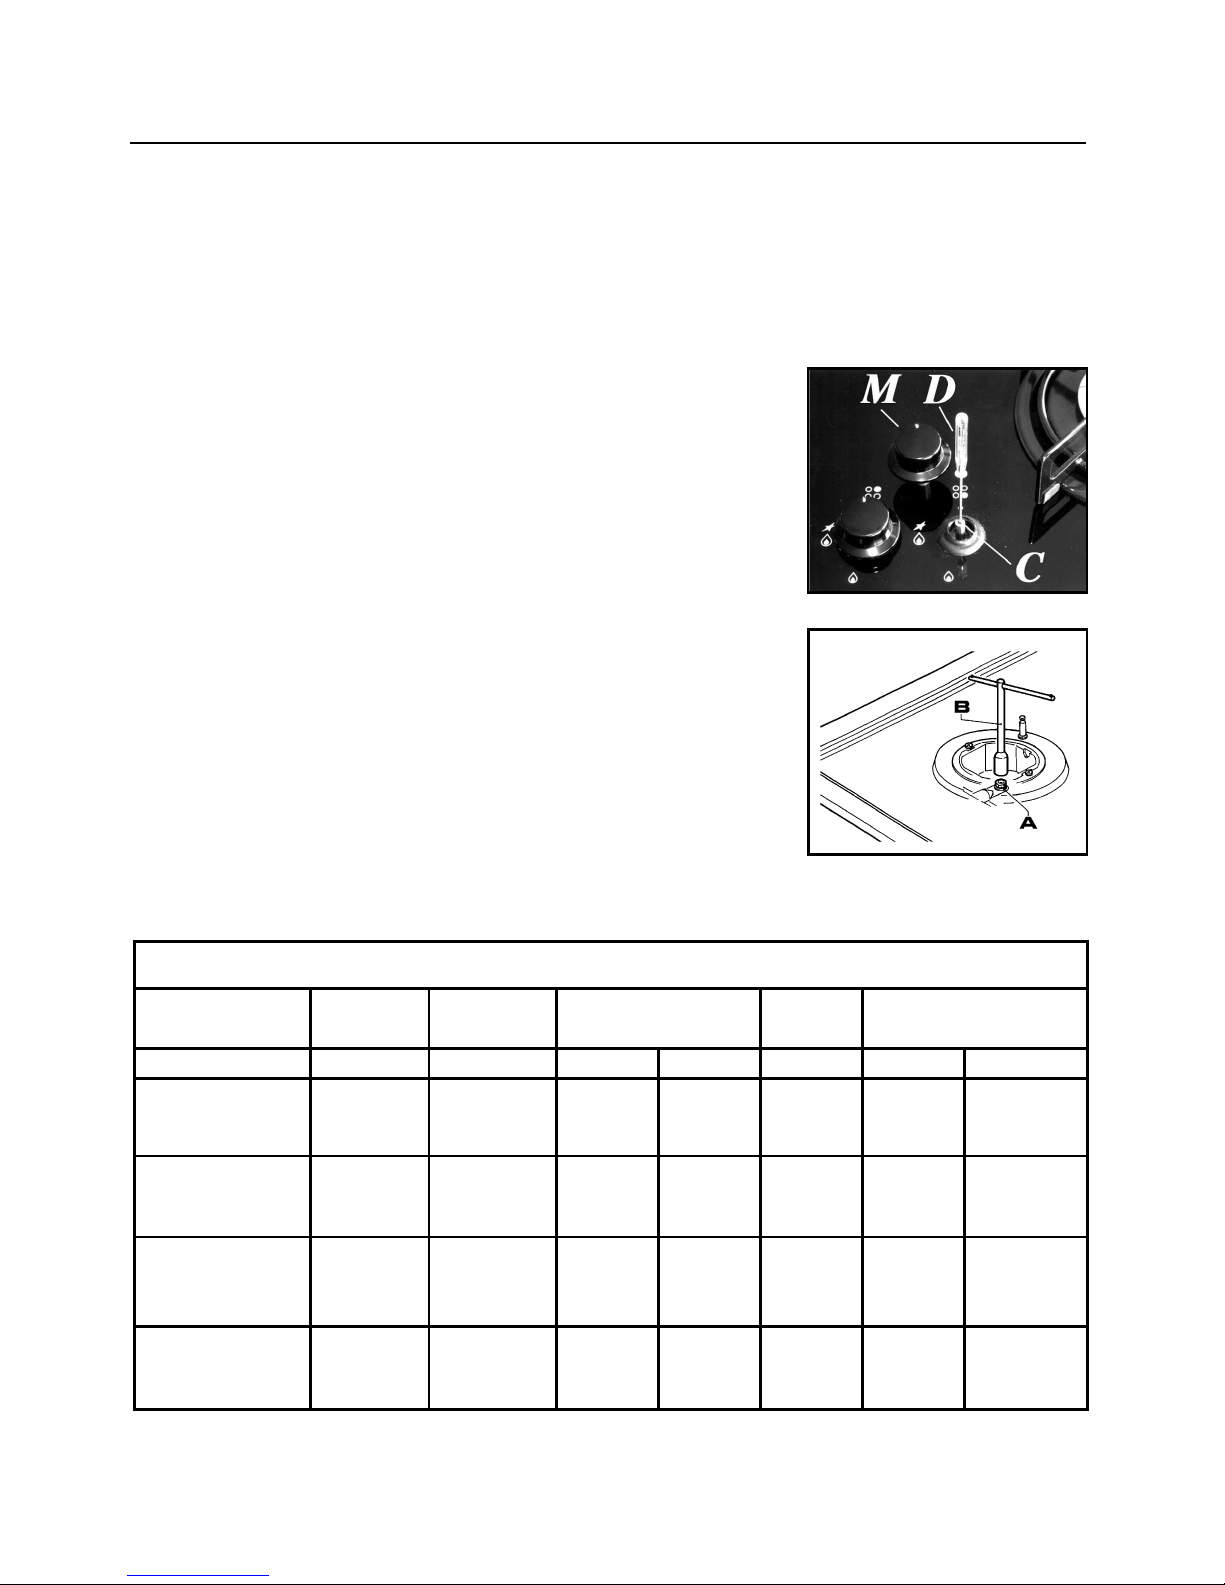
Replace the injectors with the corresponding injector from
the table on page below.
First remove the burner caps and rings and with a socket
spanner “B”, unscrew injector “A” (see fig. 7).
The adjustment of the reduced rate position is as follows
(fig. 8):
light the burner and turn the knob fully anti-clockwise to
reduced rate position.
Remove the knob “M” which is simply inserted onto tap
stem.
Insert a small screwdriver “D” into the top shaft “C” and
turn the bypass screw left or right until flame of the
burner is correctly regulated at the low position.
Make sure that when turning quickly from “Full on”
position to reduced rate position that the burner does not
extinguish.
FIG. 8
FIG. 7
Injector Replacement Table
BURNER
DESCRIPTION
GAS TYPE
NORMAL
PRESSURE
NORMAL RATE
INJECTOR
DIAMETER
NOMINAL HEAT INPUT
(W)
mbar g/h l/h 1/100mm min max
Wok
Butane
Propane
Nat Gas
28 - 30
37
20
244
239
333
91zE
91zE
145zE
1450
1450
1450
3350
3350
3500
Rapid
(large)
Butane
Propane
Nat Gas
28 - 30
37
20
182
179
238
78zE
78zE
120zA
800
800
800
2500
2500
2500
Semi Rapid
(medium)
Butane
Propane
Nat Gas
28 - 30
37
20
127
125
167
68zE
(2)
68zE
(2)
98zA
(3)
500
500
500
1750
(1)
1750
(1)
1750
(1)
Auxiliary
(small)
Butane
Propane
Nat Gas
28 - 30
37
20
73
71
95
50zE
50zE
78zA
400
400
400
1000
1000
1000
(1)
1400 W for models with Griddle plate
(2)
60zE for the models with Griddle plate
(3)
85zA for the models with Griddle plate
Page 13
Troubleshooting
Check the guide below if there is a problem with your hob.
U
NEVEN OR YELLOW FLAME RATHER THEN BLUE
Switch off and check the following points:
1. Are the burners fitted correctly?
2. Are the holes in the burner clear?
3. Check that no dust has fallen into the flame turning
it yellow.
BURNER FAILING TO IGNITE?
Check that the power is turned on or that the fuse has not
blown.
Make sure that the ignitor isn’t coated with food spillage.
S
PARK BUT NO GAS?
Make sure the gas is turned on.
Check that the burner holes are not blocked.
S
MELL GAS?
Check to see if any gas tap has been left on.
If they are off, switch off gas at mains and call a service
agent.
DO NOT search with a naked flame, strike any matches or
press ignitor.
S
TILL NOT WORKING?
Call the service agent.
Page 14
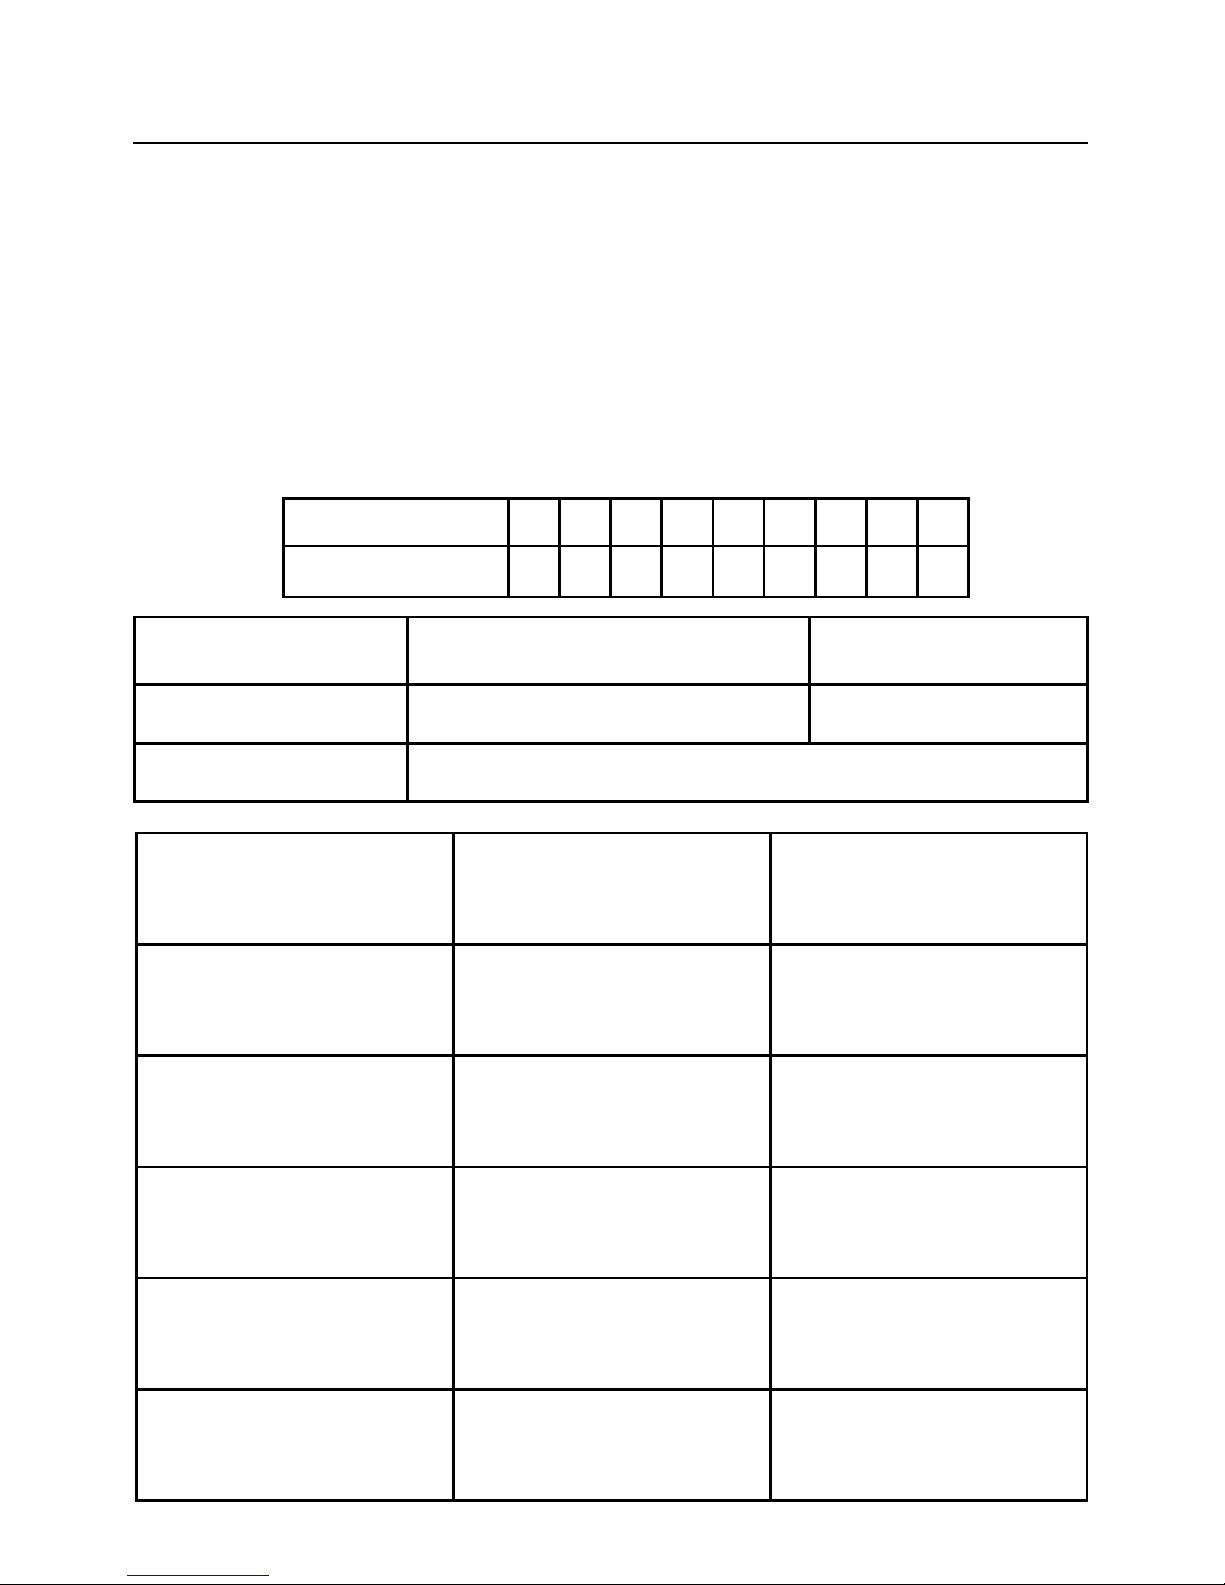
Service Record
Date of purchase Installer stamp / Printed name Date of installation
Place of purchase:
Date Part(s) replaced Engineers Stamp/
Printed Name
Model Number
Serial Number
Please record your model number and serial number in the space below.
Where are my model and serial numbers?
Freestanding HL appliances: base of storage drawer
Freestanding appliances: front frame near oven cavity
Built in oven: front frame near oven cavity
Hobs: base plate of the hob
Having these numbers to hand will help us to help you, quickly and more efficiently.
When contacting us, please use the Customer Care number on the back cover of this
handbook.
Page 15

Page 16

www.stoves.co.uk
Stoney Lane, Prescot, Merseyside L35 2XW
Tel: Customer Care 0871 222 2502
Trade Support 0871 222 2625
Customer Support Line 0871 222 2635
Fax: 0871 222 2645
Stoves is a member of Glen Dimplex Home Appliances
8 26292 00 / 10.2007
GAS HOB
 Loading...