

Page 1

S7 - E450BCMAUTO
450mm Automatic Built In Coffee Maker
Handbook
Page 2

THIS APPLIANCE IS MARKED ACCORDING TO THE EUROPEAN DIRECTIVE 2002/96/EC ON WASTE
ELECTRICAL AND ELECTRONIC EQUIPMENT (WEEE).
By ensuring this product is disposed of correctly, you will help prevent potential negative consequences for
the environment and human health, which could otherwise be caused by inappropriate waste handling of
this product.
The symbol on the product, or on the documents accompanying the product, indicates that this appliance may not be treated as household waste. Instead it shall be handed over to the applicable collection
point for the recycling of electrical and electronic equipment.
Disposal must be carried out in accordance with local environmental regulations for waste disposal.
For more detailed information about treatment, recovery and recycling of this product, please contact your
local city office, your household waste disposal service or the shop where you purchased the product.
Page 3

Contents
ABOUT YOUR COFFEE MAKER
1 Description . . . . . . . . . . . . . . . . . . . . . . . . . . . . . . . . . . . . . . . . . . . . . . . . .4
2 Safety warnings . . . . . . . . . . . . . . . . . . . . . . . . . . . . . . . . . . . . . . . . . . . . .6
USING YOUR COFFEE MAKER
3 Before first use . . . . . . . . . . . . . . . . . . . . . . . . . . . . . . . . . . . . . . . . . . . . . .7
4 Using for the first time . . . . . . . . . . . . . . . . . . . . . . . . . . . . . . . . . . . . . . . .8
5 Preparing coffee (using coffee beans) . . . . . . . . . . . . . . . . . . . . . . . . . . . . . .9
Automatic cup tray lighting . . . . . . . . . . . . . . . . . . . . . . . . . . . . . . . . . . . . . .9
6 Changing the quantity of coffee in the cup . . . . . . . . . . . . . . . . . . . . . . . . . .11
7 Regulating the coffee mill . . . . . . . . . . . . . . . . . . . . . . . . . . . . . . . . . . . . . .11
8 Preparing Espresso coffee
(using ground coffee instead of beans) . . . . . . . . . . . . . . . . . . . . . . . . . . . .12
9 Hot water delivery . . . . . . . . . . . . . . . . . . . . . . . . . . . . . . . . . . . . . . . . . . .12
10 Preparing cappucinos (using steam) . . . . . . . . . . . . . . . . . . . . . . . . . . . . . .13
CARE AND CLEANING
11 Cleaning and maintenance . . . . . . . . . . . . . . . . . . . . . . . . . . . . . . . . . . . . .14
11.1 Cleaning the coffee maker . . . . . . . . . . . . . . . . . . . . . . . . . . . . . . . . .14
11.2 Cleaning the infuser . . . . . . . . . . . . . . . . . . . . . . . . . . . . . . . . . . . . .14
PERSONALISING YOUR COFFEE MAKER
12 Changing and setting the menu parameters . . . . . . . . . . . . . . . . . . . . . . . .16
12.1 Setting the clock . . . . . . . . . . . . . . . . . . . . . . . . . . . . . . . . . . . . . . . .16
12.2 Setting the auto-start time . . . . . . . . . . . . . . . . . . . . . . . . . . . . . . . . .16
12.3 Descaling . . . . . . . . . . . . . . . . . . . . . . . . . . . . . . . . . . . . . . . . . . . . .17
12.4 Changing the coffee temperature . . . . . . . . . . . . . . . . . . . . . . . . . . .18
12.5 Changing the length of time the appliance remains on . . . . . . . . . . . . .18
12.6 Setting water hardness . . . . . . . . . . . . . . . . . . . . . . . . . . . . . . . . . . . .18
12.7 Resetting factory default settings . . . . . . . . . . . . . . . . . . . . . . . . . . . . .18
TROUBLESHOOTING
13 Changing the language . . . . . . . . . . . . . . . . . . . . . . . . . . . . . . . . . . . . . . . .19
14 Troubleshooting - error messages . . . . . . . . . . . . . . . . . . . . . . . . . . . . . . . .19
15 Further troubleshooting advice . . . . . . . . . . . . . . . . . . . . . . . . . . . . . . . . .19
Table 14 . . . . . . . . . . . . . . . . . . . . . . . . . . . . . . . . . . . . . . . . . . . . . . . . . .20
Table 15 . . . . . . . . . . . . . . . . . . . . . . . . . . . . . . . . . . . . . . . . . . . . . . . . . .21
INSTALLATION
16 Building in . . . . . . . . . . . . . . . . . . . . . . . . . . . . . . . . . . . . . . . . . . . . . . . . .22
17 Connecting to the electricity supply . . . . . . . . . . . . . . . . . . . . . . . . . . . . . . .24
Customer Care . . . . . . . . . . . . . . . . . . . . . . . . . . . . . . . . . . . . . . . . . . . . . . . .25
Figures . . . . . . . . . . . . . . . . . . . . . . . . . . . . . . . . . . . . . . . . . . . . . . . . . . . . . .26
3
Page 4

About Your Coffee Maker
Appliance - next page
A. Main ON/OFF switch
B. Lights
C. Steam spout
D. Water tank (removable)
E. Cup tray
F. Drip tray (removable)
G. Service door
H. Coffee spout (adjustable in height)
I. Control panel
J. Bean container lid
K. Central ground coffee lid
L. Infuser
M. Power cable
N. Cappucino maker (removable)
O. Cappucino maker nozzle (removable)
P. Measure for pre-ground coffee
Q. Coffee grounds container (removable)
R. Grinding coarseness regulator
S. Coffee beans container
T. Compartment for measure - measure
supplied
U. Ground coffee funnel
V. Mobile drawer
W. Accessories holder
Control Panel
1. Display;
2. Appliance ON/OFF button;
3. Coffee taste selection button;
4. One or two cups short coffee button;
5. One or two cups standard coffee
button;
6. One or two cups long coffee button;
7. Button to select ground coffee or, if the
MENU light is on, to display the next
parameter on the menu;
8. Button to select hot water or OK to
confirm
9. Button to rinse the appliance or, if the
MENU light is on, to change the menu
parameters.
10. Button to activate or deactivate menu
parameter setting mode (MENU);
11. MENU light;
12. Hot water delivery knob
4
10
11
12
3 4
5
6
7 9
8
1
2
1 DESCRIPTION
Page 5

About Your Coffee Maker
5
O
N
I
BC
D
V
LQ
E
G
F H
P
R
S
J
T
K
U
W
C
A
Page 6

Safety
2 SAFETY WARNINGS
READ THESE INSTRUCTIONS CAREFULLY AND KEEP FOR FUTURE CONSULTATION!
• This appliance is designed to "make espresso coffee" and "heat drinks". Use with care
to avoid scalds from the water and steam jets.
• This appliance is intended for domestic use only. Any other use is considered improper
and thus dangerous.
• Do not drag down on, or hang on to the appliance when it is out of the cabinet.
• When sliding the appliance out of the cabinetry make sure that you:
• Hold the appliance firmly with both hands.
• Pull towards you evenly, and carefully, ensuring that the appliance does not come
out at an angle.
The same advice applies when sliding the appliance into the cabinetry. Failure to follow
this advice may damage the appliance.
• The manufacturer is not liable for damage caused by improper, incorrect or unreasonable use of the appliance.
• Never touch the appliance with damp hands or feet, and never use with bare feet.
• When using the appliance, do not touch the hot surfaces. Use the knobs or handles.
• The appliance is not intended for use by persons (including children) with reduced physical, sensory or mental capabilities, or lack of experience and knowledge, unless they
have been given supervision or instruction concerning use of the appliance by a person
responsible for their safety. Children should be supervised to ensure that they do not play
with the appliance.
• In the event of failure or malfunction, unplug the appliance from the mains and do not
attempt repairs - unless advised to do so within this handbook. If it requires repair, contact Customer Care, and arrange a service engineers visit. Failure to respect the above
could reduce the safety of the appliance, and invalidate any warranty.
• This appliance may be installed above a conventional built oven provided it is fitted with
a cooling blower on the top side. The nominal power of the oven shall not be more than
3Kw.
• Do not store containers of liquid on the appliance.
• Do not store flammable or corrosive items on the appliance.
• Do not store heavy or large items on the appliance.
• This appliance is only designed to store the accessories which are supplied with it.
• Do not expose the appliance to atmospheric agents.
• The parts which could come into contact with coffee or milk conform to the provisions
of the EEC directive 1935/2004 relating to materials suitable for contact with foodstuffs.
• The coffee maker complies with European Directive 2004/108/EC on electromagnetic
compatibility (EMC).
6
Page 7

Using Your Coffee Maker
3 BEFORE FIRST USE
• After unpacking, make sure the appliance is complete and undamaged. If in doubt, do
not use. Contact the your retailer, or the Customer Care Centre.
• Installation must be performed by a qualified professional in compliance with local legis-
lation in force in the country of installation.
• Packaging (plastic bags, polystyrene etc) must not be left within reach of children as they
may represent a suffocation or choking hazard.
• Never install the appliance in environments where the temperature may reach 0°C or
lower (the appliance may be damaged if the water freezes).
• Make sure the mains voltage corresponds to the voltage indicated on the appliance data
badge.
• Connect the appliance to an earthed socket. The manufacturer may not be considered
liable for possible incidents caused by the failure to adequately earth the mains.
• Observance of safety directives requires that a multi pole switch with a minimum contact
gap of 3 mm be used for the installation.
• Do not use multiple plug adopters or extension leads.
• The power cable on this appliance must not be replaced by the user as this operation
requires the use of special tools. If the cable is damaged or requires replacing, contact
an authorised service centre only to avoid all risks. For the electrical connection use a
HO5 VV-F type cable as indicated in the table below:
• You should personalise water hardness as soon as possible following the instructions in
section 12.6.
• The pull-out runners for securing the coffee maker to the housing are screwed to the bot-
tom of the coffee maker with four screws.
• The appliance's data badge is positioned on the side of the coffee maker so that it
remains visible after installation when the machine is removed from its housing.
• To learn how to operate the appliance correctly, when you use it for the first time, follow
the step-by-step instructions given in the following paragraphs.
When using the appliance for the first time, 4-5 cups of coffee need to be made before the
appliance starts to give satisfying results.
In the event of any problems using this appliance please refer to the Troubleshooting Guide
within this handbook. The problem can almost always be resolved by using tables 14 and
15. Should you require further assistance, please contact the Customer Care Centre on 0871
22 22 502.
Figures (i.e. Fig 1) are at the back of the handbook for reference.
7
Conductors Amount x size
230 V~ + ~ 3 x 1.0 mm
2
Page 8

4 USING FOR THE FIRST TIME
The first time you switch on the appliance and every time that it is plugged in, when you
press the main ON/OFF switch (A), the appliance makes a SELF-DIAGNOSIS and then
switches off; to turn it on, press the button (2) on the control panel.
1. The first time you use the appliance, select the language.
Press the main ON/OFF switch on the rear side of the appliance; the lights on the front
side and the display go on; wait for the appliance to display:
Press the button for at least 3 seconds until the appliance displays:
The appliance then displays the setting message in English.
2. After a few seconds, the appliance displays:
To fill, remove the tank (fig. 1), rinse and fill with fresh water. Never exceed the MAX line.
(When removing the tank, the Cappucino maker must always be positioned towards the
right hand side of the appliance, otherwise the tank cannot be removed).
Put the tank back and push as far as it will go.
Move the Cappucino maker centrally (fig. 2) and place a cup underneath it.
3. The appliance now displays:
Follow this instruction. After a few seconds, a little water runs out of the Cappucino
maker. When the cup contains about 30ml of water, turn the steam knob clockwise as far
as it will go to stop the water running out.
4. The appliance now displays:
and it goes off.
5. Extract the appliance by pulling it outwards taking care to use the special handles, and
ensuring that it comes out evenly then open the lid and fill the bean container with coffee beans (fig. 3). Close the lid and push the appliance evenly back into the cabinetry.
IMPORTANT: to prevent malfunction, never fill the bean container with ground coffee,
freeze dried coffee, caramelised beans or anything else which could damage the appliance.
6. Press the (fig. 4), The appliance displays:
to indicate that preheating is underway.
7. When preheating is complete, the appliance displays:
and performs an automatic rinse cycle (a little hot water runs out of the spouts and is
collected in the drip tray beneath).
Tip: if you want to make a short coffee (40ml), to make it hotter, fill the cup with hot
water first. Leave it for a few seconds then empty it to preheat the cup.
8. The appliance now displays the ready message:
Using Your Coffee Maker
PRESS OK TO INSTALL ENGLISH
ENGLISH INSTALLED
READY STANDARD TASTE
HEATING UP PLEASE WAIT…...
RINSING COMPLETE PLEASE WAIT…...
TURNING OFF PLEASE WAIT…..….
TURN THE STEAM KNOB
FILL TANK
8
Page 9

Using Your Coffee Maker
5 PREPARING COFFEE (USING COFFEE BEANS)
1. The appliance is factory set to “Standard”. You can also choose coffee with an extra-mild,
mild, strong or extra-strong taste. To choose the required taste, press the button (fig.
5): the selected coffee taste will be displayed.
2. Place 1 cup under the spouts to make 1 coffee (fig. 6) or 2 cups for 2 coffees (fig. 7). For
a creamier coffee, lower the spouts to bring them as close to the cups as possible (fig.
8).
3. Press the button to make a short coffee, the button for a standard coffee and
the button for a long coffee (fig. 9).
To make 2 coffees, press the button twice (within 2 seconds).
To change the quantity of coffee delivered automatically into the cup, follow the instructions in section 6.
(The appliance now grinds the beans and starts pouring coffee into the cup(s).
Once the desired quantity has been reached, the appliance automatically stops delivering the coffee and ejects the grounds into the special container).
4. After a few seconds, the ready message is displayed again and you can make another
coffee.
5. To turn the appliance off, press the button.
Before going off, the appliance performs an automatic rinse cycle (a little hot water runs
out from the spouts and is collected in the drip tray beneath). Take care to avoid scalds.
PLEASE NOTE: Figures (i.e. Fig 1) are at the back of the handbook for reference.
VOLUME TABLE
AUTOMATIC CUP TRAY LIGHTING
The appliance automatically lights the spout and drip tray while delivering coffee, steam and
hot water. After delivery, the lights remain on and the cooling fan comes into operation to
prevent condensate from forming inside the cabinet. After a few minutes, both the lights
and the fan go off automaticall.
The appliance completes this cycle even if turned off by pressing the button.
9
Symbol Volume (in cup / mug) Name
40ml Short Coffee
80ml Standard Coffee
120ml Long Coffee
These measurements are factory set - to adjust them see section 6.
Page 10
Using Your Coffee Maker - Notes
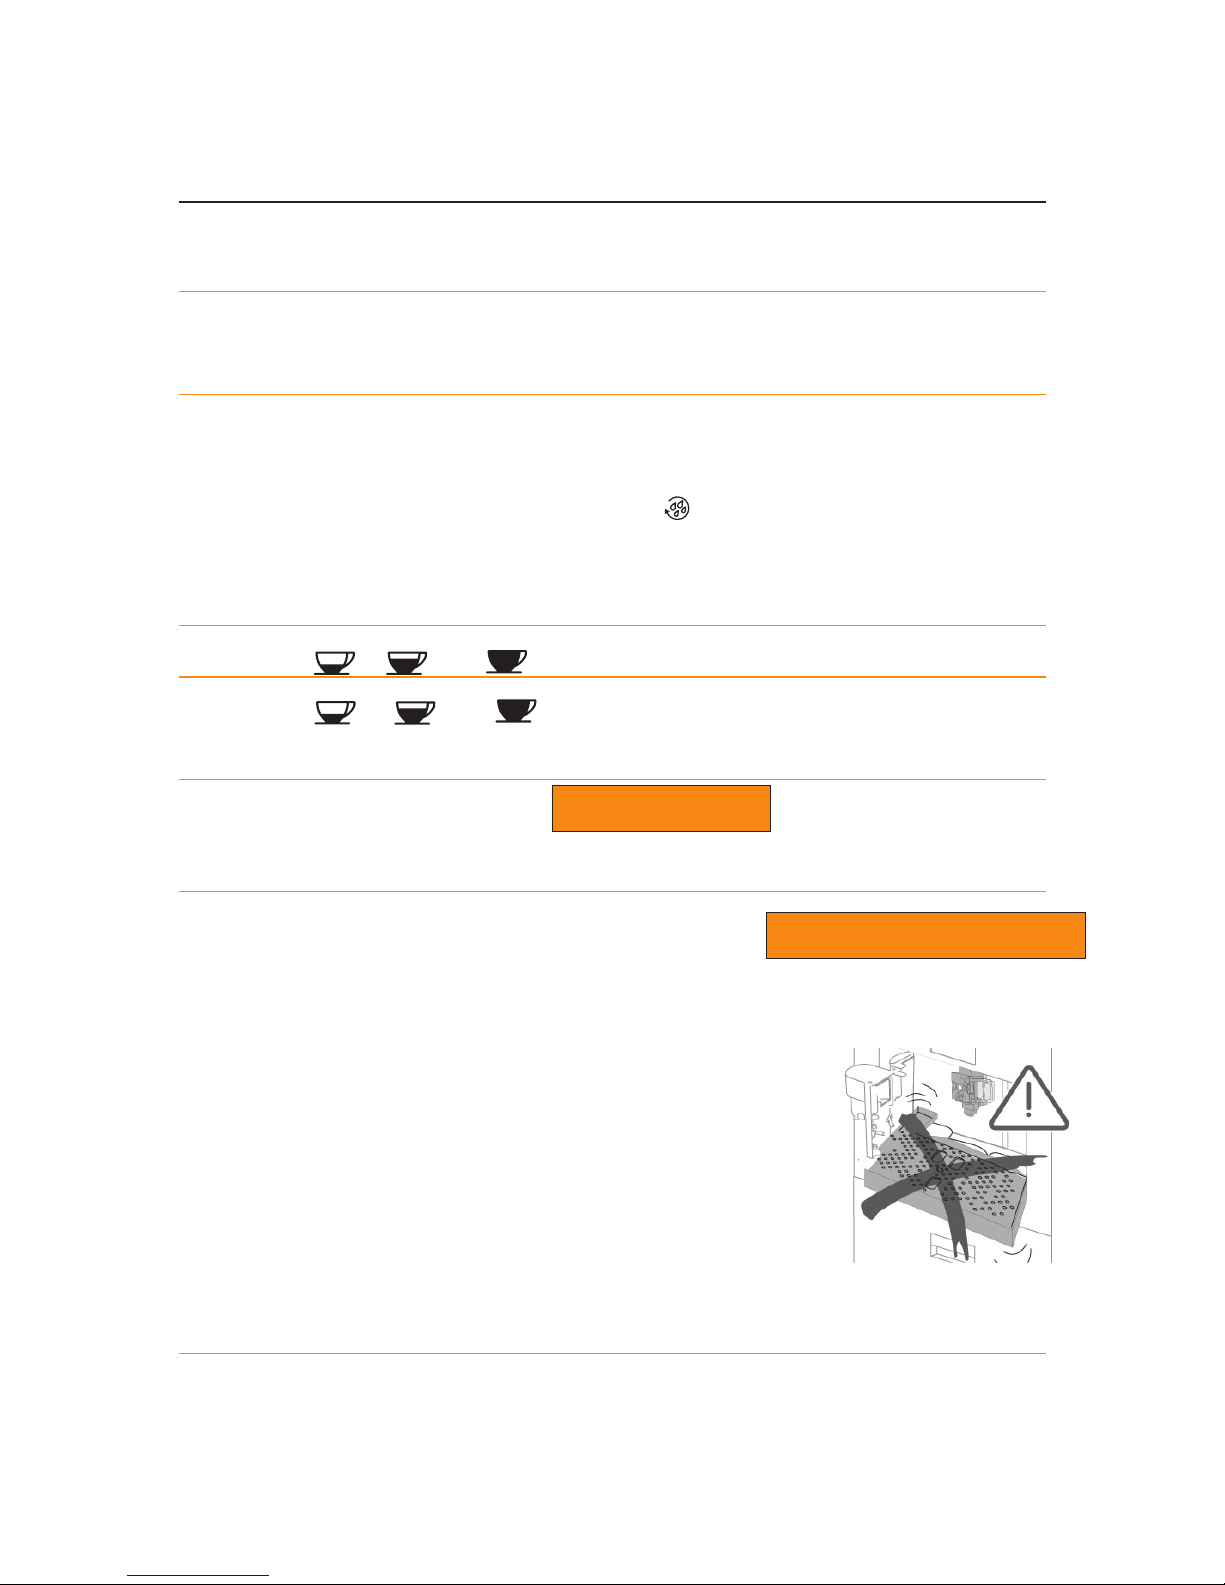
NOTE 1: If the coffee is delivered a drop at a time or not at all, turn the grinding coarseness regulator (fig. 15) one click clockwise (see section 7).
Turn one click at a time until the coffee is delivered to your satisfaction.
NOTE 2: If the coffee is delivered too fast and is not creamy enough, turn the grinding
coarseness regulator (fig. 10) one click anticlockwise (see section 7).
Avoid turning the grinding coarseness regulator excessively otherwise when you select 2
cups, the coffee may drip out slowly.
NOTE 3: Tips to make hotter coffee:
• When you turn the appliance on, if you want to make a short coffee (less than 40ml),
use the hot water delivery to preheat the cups.
• If 2/3 minutes have passed, since you last made coffee, before making coffee again
you must preheat the infuser by pressing the button (fig. 11).
Run off the water into the underlying drip tray or alternatively use this water to fill (and
then empty) the cup to be used for the coffee, so as to preheat it.
• Unless preheated, do not use cups that are too thick, as they will absorb too much heat.
• Use cups that have been preheated by rinsing them with hot water .
NOTE 4: while the appliance is making the coffee, delivery can be stopped at any time by
pressing the , or button as previously selected.
NOTE 5: as soon as delivery is complete, to increase the quantity of coffee, simply press
and hold the , or button as previously selected, until the desired quantity is reached (this operation must be performed within 3 seconds from when coffee delivery from the spouts stops).
NOTE 6: when the appliance displays:
the water tank must be refilled or the appliance will not make coffee.
(It is normal for there to be a little water left in the tank when the message is displayed).
NOTE 7: the appliance counts the number of coffees made.
Every 14 single coffees (or 7 doubles) the appliance displays:
indicating that the grounds container is full and must be emptied and cleaned. Until the
grounds container has been cleaned, the appliance continues to display the message and
cannot make coffee.
To clean:
Open the service door at the front by pulling the coffee spout (fig.
12), remove the drip tray (fig. 13), empty and clean.
When proceeding,
always completely remove the drip tray,
to
avoid dropping it when removing the grounds container.
Empty the grounds container and clean thoroughly, making sure all
residues are removed.
IMPORTANT: It is good practice, when removing the drip tray, to empty the grounds container,
even if it is not completely full
. This prevents a build up of grounds which may exceed
the Max Level and cause blockages.
NOTE 8: while the appliance is running off coffee, never remove the water tank. If it is
removed, the appliance will not be able to make the coffee.
10
FILL TANK
EMPTY GROUNDS CONTAINER
Page 11

Using Your Coffee Maker
6 CHANGING THE QUANTITY OF COFFEE IN THE CUP
The appliance is factory preset to automatically deliver the following quantities of coffee:
- short (when the button is pressed);
- standard (when the button is pressed);
- long (when the button is pressed);
To change these quantities, proceed as follows:
- press the button corresponding to the quantity you want to change ( , or
or ) for at least 8 seconds until the message "PROGRAM QUANTITY" is displayed;
- when the coffee in the cup reaches the required level, press the same button again to
record the new amount.
7 REGULATING THE COFFEE MILL
However, after making the first coffees, if you find that coffee delivery is either too fast or
too slow (in drips), the grinding coarseness regulator can be adjusted (fig. 10).
Turning it 1 click (1 number) clockwise speeds up coffee delivery (without drips).
Turning it 1 click anticlockwise slows down delivery giving a creamier appearance to the coffee.
These adjustments will only be evident after at least 2 cups of coffee have been made.
The grinding coarseness regulator must only be turned when the coffee mill is on.
Turn anticlockwise to obtain finer ground coffee, slower delivery and a creamier appearance.
Turn clockwise for coarser ground coffee and faster delivery
(not a drop at a time).
Please note:
Coffee has been used to factory test the appliance and it is therefore completely normal for
there to be traces of coffee in the mill. This appliance is however guaranteed to be new.
Figures (i.e. Fig 1) are at the back of the handbook for reference.
11
Page 12

Using Your Coffee Maker
8 PREPARING ESPRESSO COFFEE USING GROUND COFFEE (INSTEAD OF
BEANS)
• Press the (fig. 14) button to select the ground coffee function. This disables the
coffee mill function. The appliance displays:
• Extract the appliance by pulling it towards you using the special handles
(fig. 3).
• Lift the central lid, place one level measure of ground coffee in the funnel
(see fig. 15). Close the lid, push the appliance back into place and then
proceed as described in paragraph 5. Note: You can make just one coffee
at a time by pressing the , or button once only.
NOTE 1: Never add the ground coffee when the appliance is off to avoid it being dispersed
inside the appliance.
NOTE 2: Never add more than one level measured scoop, otherwise either the appliance
will not make the coffee, the ground coffee will be lost inside the appliance, dirtying it, or
the coffee will pour in drips and the message "GROUND TOO FINE ADJUST GRINDER AND
PRESS OK" will be displayed. A little water comes out from the steam spout.
NOTE 3: When dosing the quantity of coffee to be added, use the measuring scoop supplied only. Should you need to replace the measuring scoop, please contact the Customer
Care Centre to order one.
NOTE 4: Use ground coffee for espresso coffee makers only. Do not use coffee beans,
freeze-dried coffee or other drink varieties which could damage the appliance.
NOTE 5: If the funnel blocks due to moisture inside the appliance or if more than one measuring scoop of pre-ground coffee has been used, use a suitable implement to push the coffee down (Fig. 16), then remove and clean the infuser and appliance as described in paragraph 11.2 "Cleaning the infuser".
Once the coffee has been delivered, to go back to making coffee using beans, deactivate
the ground coffee function by pressing the button again (the light goes off and the
coffee mill is enabled for operation again).
9 HOT WATER DELIVERY
• Always make sure the appliance is switched on and ready for use.
• Turn the Cappucino maker towards the outside of the appliance and place a container
under it (fig. 2).
• Press the button (fig. 17). The appliance displays:
• Turn on the steam/hot water delivery knob by turning it counterclockwise.
• Hot water is delivered through the Cappucino maker and starts to fill the container under-
neath. You should not run the hot water delivery for more than 2 minutes at a time.
• To stop the hot water delivery, turn the steam/hot water delivery knob clockwise (fig. 4)
and place the Cappucino maker in the original position near the centre of the appliance.
• If you want to stop using this function, press the button again.
12
READY PRE-GROUND
READY HOT WATER
Page 13

Using Your Coffee Maker
10 PREPARING CAPPUCINOS (USING STEAM)
• Move the Cappucino maker outwards (fig. 2).
• Place an empty container under the Cappucino maker. Start the steam/hot water delivery
by turning the control knob counterclockwise to the ‘On’ position.
The appliance displays:
• Allow the steam mixed with water to run for a few seconds until there is only steam.
• To stop using steam, the steam/hot water delivery knob should be turned clockwise (fig.
18).
• Empty the container (there will be water inside) then re-fill it with about 100 grams of
milk for each Cappucino to be prepared. When choosing the size of the container, bear
in mind that the milk doubles or triples in volume. We recommend you use semi-skimmed
milk straight from the refrigerator
• Dip the Cappucino maker into the milk (fig. 2), taking care not to immerse the raised line
on the Cappucino maker (indicated by the arrow in fig. 19). Turn the steam/hot water
delivery knob to the ‘On’ position. Steam is discharged from the Cappucino maker, giving
the milk a creamy frothy appearance. To obtain a creamier froth, dip the Cappucino maker
into the milk and rotate the container with slow movements from the bottom upwards.
Note: You should not discharge steam for more than two minutes at a time.
• Once the milk is frothed to your taste, stop the steam delivery by turning the knob clock-
wise (fig. 8).
• Prepare the coffee as described in section 8, using large enough cups, then top with the
frothed milk prepared previously. The Cappucino is ready. Sweeten to taste and then
sprinkle the froth with a little cocoa powder if desired,
IMPORTANT: always clean the Cappucino maker immediately after use. Proceed as follows:
• Discharge a little steam for a few seconds by turning the control knob. This clears any
milk left in or on the steam spout.
IMPORTANT: to guarantee hygiene, you are recommended to follow this procedure
each time you make Cappucino to avoid stale milk in the milk circuit.
• Wait a couple of minutes for the Cappucino maker to cool down then with one hand hold
the Cappucino spout handle firm and with the other unscrew the Cappucino maker itself
by rotating clockwise and pulling downwards (fig. 20).
• Remove the nozzle from the steam spout by pulling it downwards (fig. 21).
• Carefully wash the Cappucino maker and steam nozzle in warm water.
• Make sure the two holes shown in fig. 22 are not blocked. If necessary, clear with a pin.
• Replace the steam nozzle by inserting it and vigorously turning it upwards into the steam
spout.
• Replace the Cappucino maker by pushing it upwards and turning it anticlockwise.
13
STEAM
Page 14

Care and Cleaning
11 CLEANING AND MAINTENANCE
Before cleaning, leave the appliance to cool down, switch off the main ‘On / Off’ switch and
unplug from the mains supply socket.
Never immerse the coffee maker in water. It is an electrical appliance.
Do not use solvents or abrasive cleaning products to clean the appliance. A soft damp cloth
will suffice.
If you are going on holiday, or do not intend to use the appliance for a prolonged period of
time, please follow the instructions below:
• Empty the containers of any coffee (both beans and ground), and empty any water from
the tank.
• Clean the appliance thoroughly following the cleaning instructions.
• Ensure there is no water or milk residue in or on the appliance which may cause bacte-
ria to build up, or odours to develop.
NEVER wash ANY of the components of the appliance in a dishwasher.
11.1 Cleaning the coffee maker
Clean the grounds container (as described in section 5, note 7) whenever it requires emptying.
The water tank should also be cleaned regularly.
The drip tray is fitted with a level indicator (red) showing the level of water it contains.
When the indicator starts to become visible (a few millimetres under the drip tray), the drip
tray must be emptied and cleaned.
Check that the holes in the coffee spout are not blocked. To unblock them, scrape the dry
coffee residues away with a needle (fig. 23).
11.2 Cleaning the infuser
The infuser must be cleaned regularly to avoid the build-up of coffee encrustations which
could cause malfunction. Proceed as follows:
• Turn the appliance off by pressing the button (fig. 4) (do not switch off the main
‘On / Off’ switch or unplug) and wait for the display to go off;
• Open the service door (fig. 12);
• Remove the drip tray and the grounds container (fig. 13) and clean;
• Press the two red release buttons on the infuser sideways and towards the centre (fig.
24) and pull it out;
• IMPORTANT:
THE INFUSER CAN ONLY BE REMOVED WHEN THE APPLIANCE IS TURNED OFF.
ATTEMPTING TO REMOVE THE INFUSER WITH THE APPLIANCE ON MAY CAUSE
SERIOUS DAMAGE.
• Wash the infuser under running water, without using detergents. Never wash the infuser
in the dishwasher;
• Clean the inside of the appliance thoroughly. To remove coffee encrustations from the
inside of the appliance, scrape with a plastic or wooden fork (fig. 25) then vacuum up the
residues with a vacuum cleaner (fig. 26);
• Replace the infuser by sliding it onto the supports and pin at the bottom, then push the
PUSH symbol fully in until it clicks into place.
14
Page 15

Cleaning the Infuser
NOTE 1: If the infuser is not inserted correctly until it clicks into place and the two red buttons have not snapped out, the service door cannot be closed.
NOTE 2: If it is hard to insert the infuser, before inserting it squeeze it to the right size by
pressing it forcefully from the top and bottom simultaneously, as shown in figure 27.
NOTE 3: If it is still hard to insert the infuser, leave it out of the appliance, close the service door, unplug from the mains then plug in again.
Wait for all the lights to go off, then open the door and replace the infuser.
• replace the drip tray, complete with the grounds container;
• close the service door.
15
Check that the two red buttons have snapped out, otherwise the door cannot be closed.
CORRECT
INCORRECT
The two red buttons
have snapped out
CORRECTLY
The two red buttons
have not snapped out
Support
Pin
Infuser
Push the PUSH symbol fully in
until it clicks into place.
After having heard the click,
check that the red buttons
have snapped out.
Bottom pipe on the infuser.
The pin must be inserted into the bottom pipe on the infuser.
Page 16
Personalising Your Coffee Maker
12 CHANGING AND SETTING THE MENU PARAMETERS
The following menu parameters and functions can be changed by the user:
• Clock
• Auto-start time
• Descaling process
• Coffee temperature
• Length of time the appliance remains on
• Water hardness
• Factory default values
12.1 Setting the clock
Set the clock as follows:
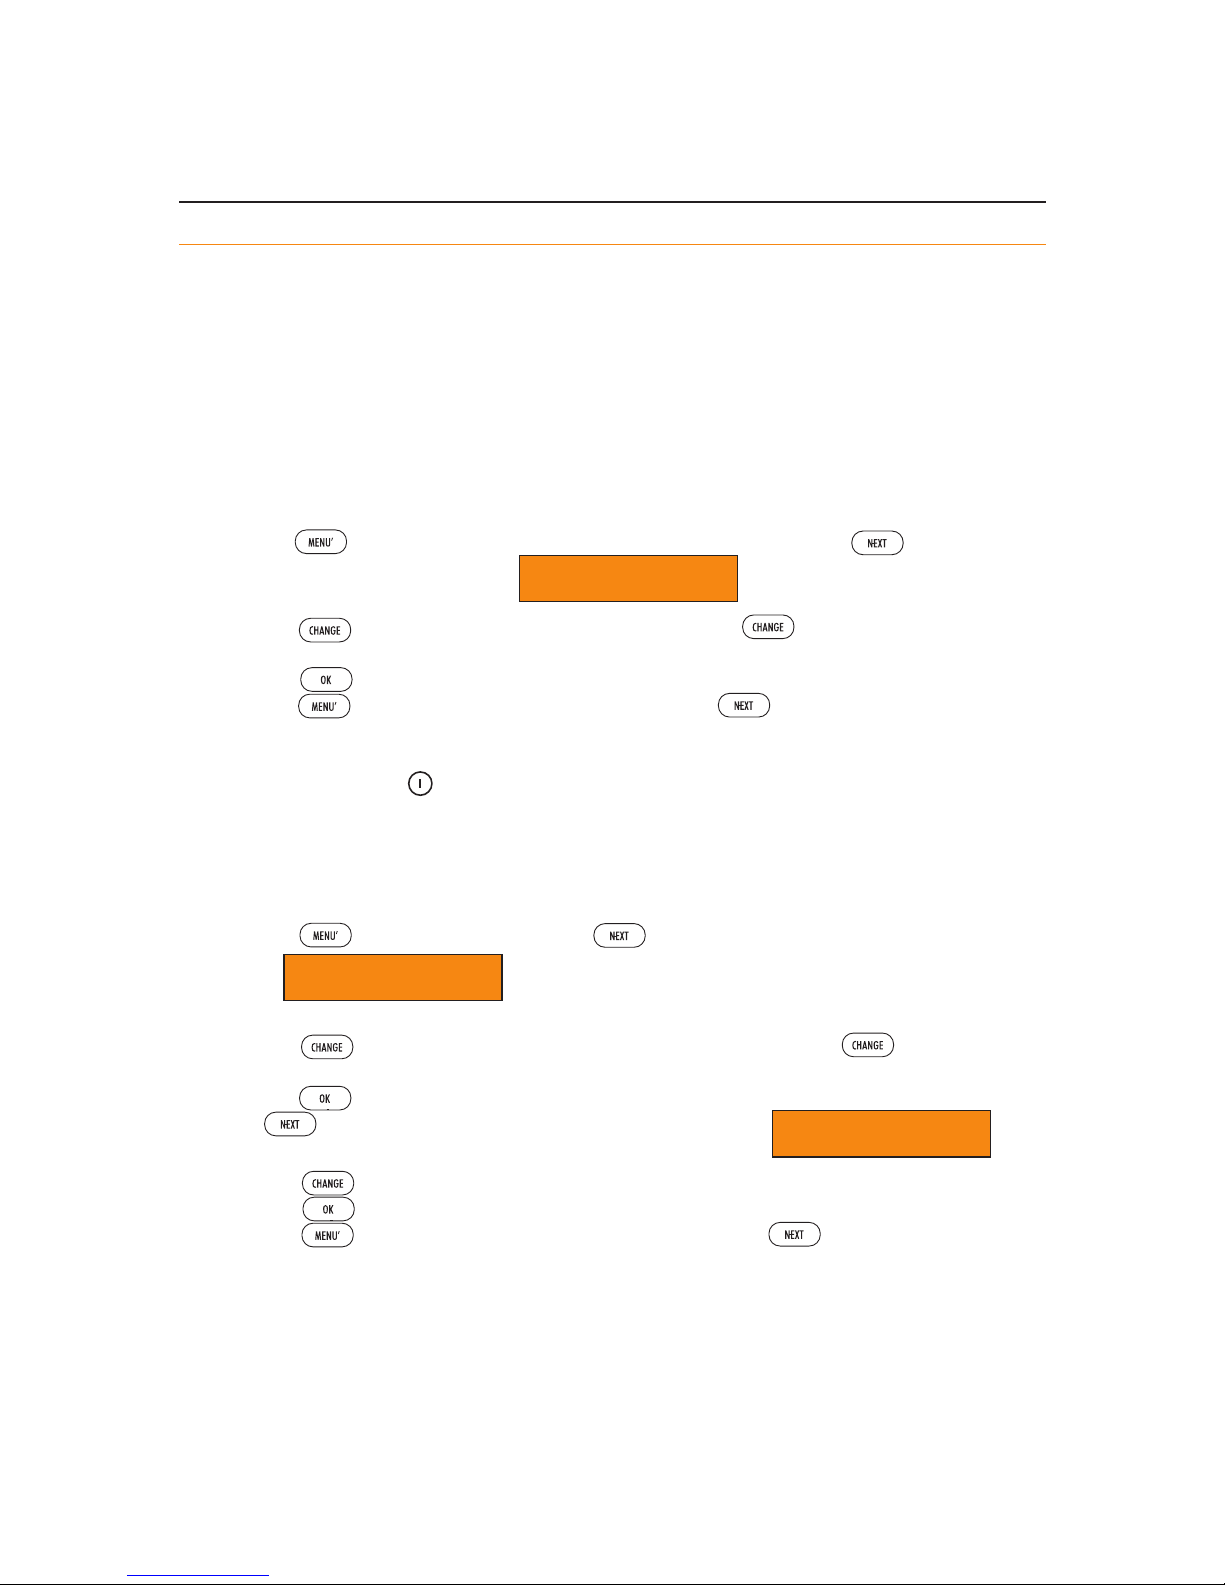
• Press the (the light over the button comes on) then press the button repeat-
edly until the appliance displays:
• Press the button to set the clock. (If you hold the , button down, the time is
changed rapidly).
• Press the button to confirm the value;
• Press the button to exit programming mode or to change other parameters.
When the appliance is in stand-by, you can see the time by pressing any of the
buttons (except the button).
12.2 Setting auto-start time
You can set a time for the appliance to switch on automatically, by following the instructions
below:
• Make sure the clock on the appliance is set as described above.
• Press the button then press the button repeatedly until the appliance dis-
plays:
• Press the button to set the auto-start time. (If you hold the , button down,
the time is changed rapidly).
• Press the button to confirm the value,
• Press once and the appliance displays the message:
• Press the button to modify the function (the appliance displays AUTO-START YES");
• Press the button to activate auto-start;
• Press the button to exit programming mode or the button to change other
parameters.
This appliance will then switch on automatically switch on at the auto-start time, until the
auto-start is disengaged.
16
AUTO-START NO
START TIME 00:00
CLOCK 00:00
Page 17
Personalising Your Coffee Maker
12.3 Descaling
Over time, the continuous heating up of the water used to make the coffee leads to lime
scale building up in the inner circuits of the appliance.
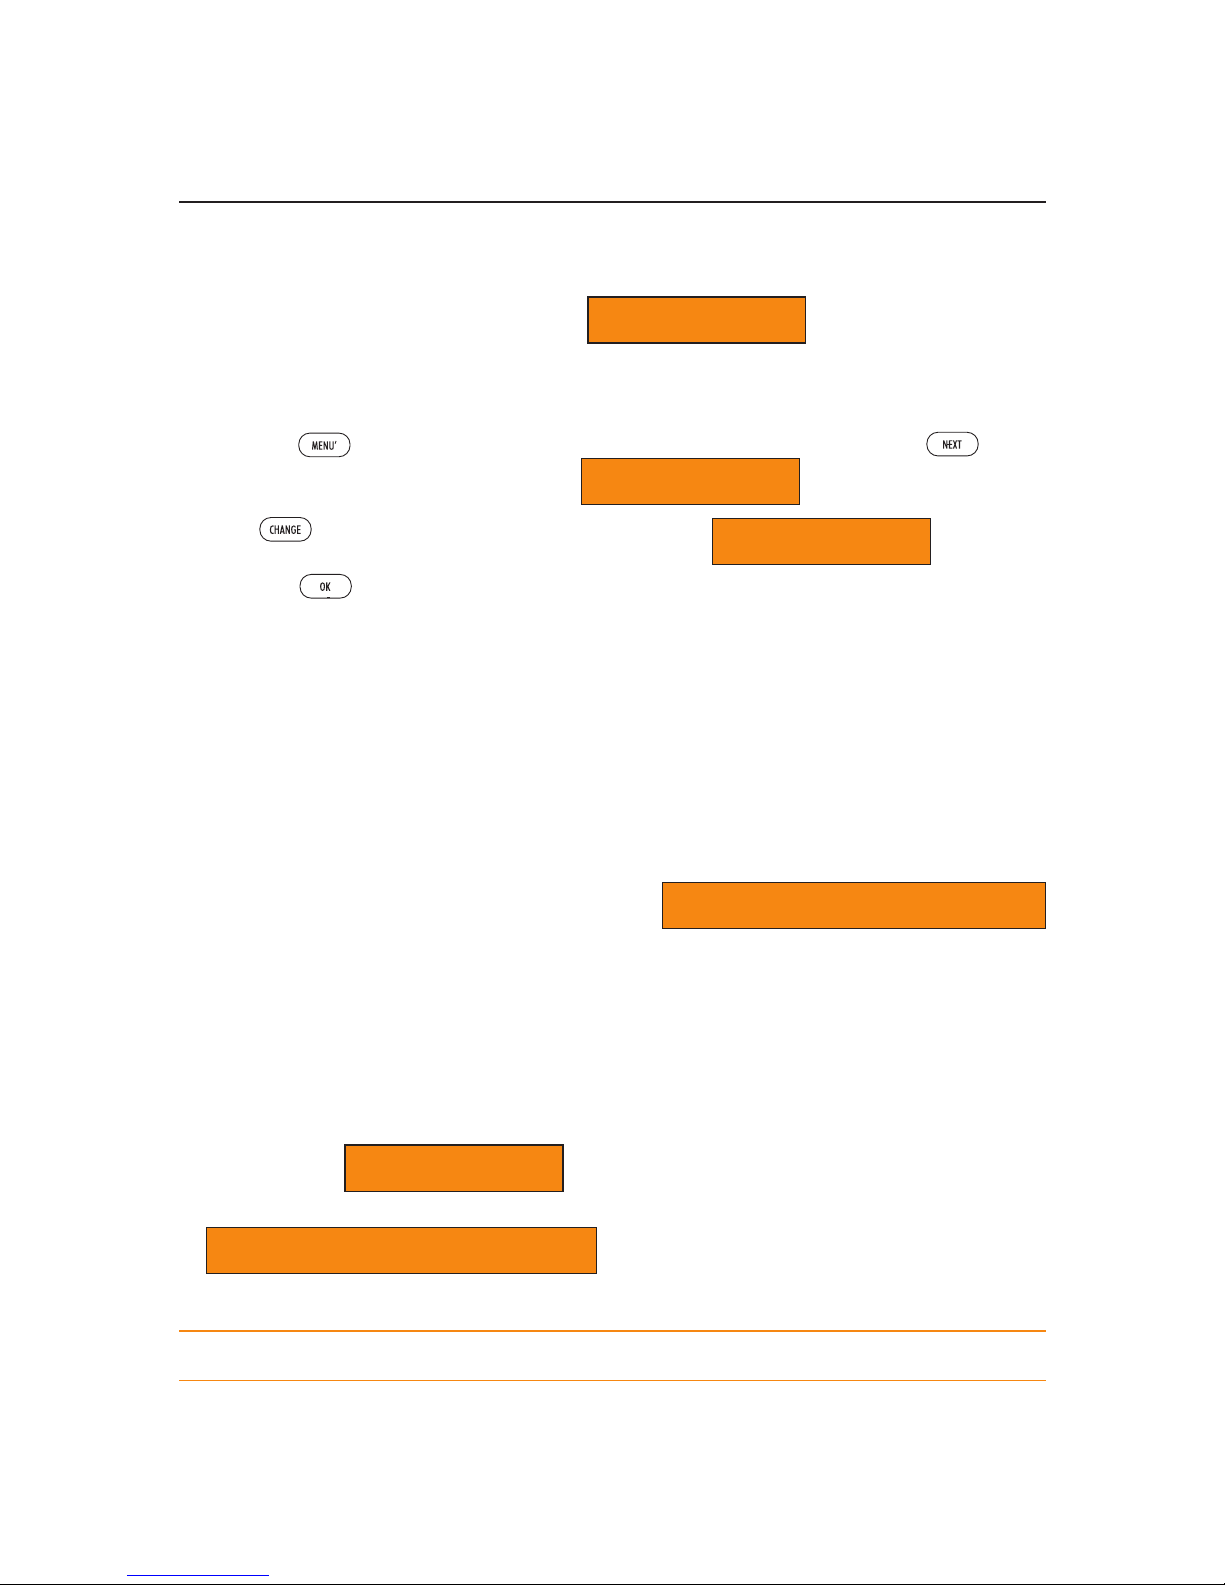
When the appliance displays the message:
you should perform the descale cycle.
Proceed as follows:
• Make sure the appliance is switched on and ready.
• Press the button (the light over the button comes on) then press the button
repeatedly until the appliance displays:
• Press and the appliance displays the message:
• Press the button to start the descale programme.
• Empty the water tank, pour the contents of the descaler bottle into the tank respecting
the instructions given on the descaler pack, then add water up to the MAX level marked
on the water tank.
NB: Make sure splashes of descaler do not fall onto surfaces sensitive to acid such as
marble, limestone and glaze.
• Place a container with a minimum capacity of 1.5 litres under the Cappucino maker (fig. 2);
• Turn the steam knob anticlockwise. The descaling solution will run out of the Cappucino
maker and start to fill the container underneath. The appliance displays "APPLIANCE IN
DESCALE";
• The descale programme automatically performs a series of runs and pauses to remove
lime scale deposits from inside the coffee maker.
• After about 30 minutes, the appliance displays:
Turn the steam knob clockwise.
The appliance must now be rinsed through to eliminate residues of descaling solution from
inside the appliance. Proceed as follows:
• Remove the water tank, rinse and fill with clean water.
• Reposition the tank: the appliance display rinsing press OK.
• Empty the collection container (under the Cappucino maker) of liquid and then put it back
under the Cappucino maker.
• Turn the steam knob anticlockwise (fig. 18).
Hot water is run off from the Cappucino maker into the container below and the appli-
ance displays:
• When the water tank is empty, the appliance displays the message:
• Turn knob clockwise and refill the water tank with clean water.
The descale programme is now terminated and the appliance is ready to make coffee again.
NOTE: if the descaling cycle is interrupted before completion, the appliance continues to
display the descale message and the programme must be started again from the beginning.
IMPORTANT: FAILURE TO DESCALE THE APPLIANCE REGULARLY INVALIDATES THE WARRANTY.
17
RINSE COMPLETE PRESS OK BUTTON
RINSING
DESCAL. COMPLETE TURN KNOB
DESCALE YES
DESCALE NO
DESCALE
Page 18

Personalising Your Coffee Maker
12.4 Changing coffee temperature
To change the temperature of the coffee, proceed as follows:
• Press the button (the light over the button comes on) then press the but-
ton repeatedly until the appliance displays:
• Press the button until the appliance displays the required coffee temperature
• Press the button to confirm the temperature selected;
• Press the button to exit programming mode or to change other parameters.
12.5 Changing the length of time the appliance remains on
The appliance is factory preset to go off automatically one hour after the last coffee has
been made.
The number of hours the appliance remains on can be increased as follows:
• Press the button (the light over the button comes on) then press the button
repeatedly until the appliance displays:
• Press the button to change the number of hours the appliance remains on
• Press the button to confirm the value;
• Press the button to exit programming mode or to change other parameters.
12.6 Setting water hardness
The descale message is displayed after the appliance has been operated for a factory set
period of time calculated on the basis of the maximum quantity of lime scale which may be
contained in the water used. If necessary, this period of operation can be extended, making descaling less frequent, by programming the appliance based on the actual lime content
in the water used. Proceed as follows:
• Remove the "Total Hardness Test" strip (attached to this book) from its packaging then
dip it fully in the water for a few seconds, Remove it and wait around 30 seconds (until
it changes colour and a number of red dots are formed);
• Turn the appliance on by pressing the button (fig. 4).
• Press the button then press the button repeatedly until the appliance displays:
• Press the button repeatedly until the number coincides with the number of red
squares on the test strip (for example, if there are 3 red squares on the test strip, press
the button until WATER HARDNESS 3 is displayed).
• Press the button to confirm the value. The coffee maker is now programmed to
provide the descaling warning when necessary, based on the actual hardness of the
water.
12.7 Resetting factory default settings
Should you wish to fully re-set the appliance, the factory settings can be restored by following the instructions below:
• Press the , button then press the button repeatedly until the appliance dis-
plays:
• Press the button and the appliance displays “RESET TO DEFAULT YES”;
• Press the button to reset the factory default values;
• Press the button to exit programming mode or to change other parameters.
18
RESET TO DEFAULT NO
WATER HARDNESS 4
OFF AFTER 1 HOUR
TEMPERATURE MEDIUM
Page 19

Troubleshooting
19
15 FURTHER TROUBLESHOOTING ADVICE
If the appliance is not working, the causes of the malfunction can be identified and
resolved by referring to section 14. If, on the other hand, no error message is displayed,
use table 15 for further advice.
13 CHANGING THE LANGUAGE
To change the language, proceed as follows:
• Press the button for at least 5 seconds until the appliance displays:
and press the button for at least 3 seconds to confirm. The appliance then displays
the setting message in English.
PRESS OK TO INSTALL ENGLISH
14 TROUBLESHOOTING - ERROR MESSAGES
Table 14 explains the messages which may be displayed should there be a problem with
the appliance. Please use this before calling the Customer Care Centre.
Page 20

Troubleshooting - Table
20
MESSAGE MEANING WHAT TO DO
FILL TANK
• The water tank is empty or is
positioned incorrectly.
• The tank is dirty or encrusted
with lime scale.
• Fill the water tank as described in
section 5, note 6 and insert it
fully.
• Rinse or descale the tank.
GROUND TOO FINE ADJUST MILL
AND
• The coffee runs off too slowly. • Turn the grinding regulator (fig.
10) one click clockwise (see section 7).
Press the OK button • The appliance cannot make cof-
fee
• Press the OK button (fig. 17).
EMPTY GROUND CONTAINER • The grounds container is full • Empty the grounds container and
clean as described in section 5,
note 7, then replace.
INSERT GROUNDS
CONTAINER
• After cleaning, the grounds
container has not been replaced.
• Open the service door and insert
the grounds container
ADD PRE-GROUND COFFEE • With the ground coffee function
selected, ground coffee has not
been poured into the funnel
• Add the ground coffee as
described in section 8.
FILL BEAN CONTAINER • The coffee beans have run out.
• If the coffee grinder is very noisy,
this means a small stone in the
coffee beans has blocked the
mill.
• Fill bean container
• Contact an authorised service
centre.
DESCALE • This indicates the presence of
lime scale in the appliance.
• The descaling procedure,
described in section 12.3, needs
to be performed as soon as possible.
PRESS NEXT + CHANGE • This indicates the presence of
lime scale in the appliance.
• Leave the service door closed
and the infuser out of the appliance, then follow the instructions
displayed.
CLOSE DOOR • The service door is open. • If the service door cannot be
closed, check that the infuser is
inserted correctly (section 11.2 note 1)
INSERT INFUSER ASSEMBLY • After cleaning, the infuser has
probably been left out of the coffee maker.
• Insert the infuser, see section
11.2
GENERIC ALARM • The inside of the appliance is
very dirty.
• Thoroughly clean the inside of
the appliance, as described in
section 11.2. If the message is
still displayed after cleaning, contact a service centre.
14
Page 21

Troubleshooting - Table
21
PROBLEM CAUSE SOLUTION
The coffee is not hot • The cups have not been
pre-heated.
• The infuser is too cold
• Heat the cups by rinsing them in hot water
• Heat the infuser by pressing the
button before making the coffee
The coffee is not creamy
enough
• The coffee is ground too
coarsely
• Wrong type of coffee
• Turn the grinding regulator one click anticlockwise.
• Use a type of coffee for espresso coffee makers
The coffee runs out too
slowly
• The coffee is ground too finely • Turn the grinding regulator one click anticlockwise.
The coffee runs out too
quickly
• The coffee is ground too
coarsely
• Turn the grinding regulator one click anticlockwise.
The coffee does not come
out of one of the spouts
• The spout holes are blocked • Scrape off coffee residue with a needle (fig
23)
When the steam knob is
opened, no steam comes
out of the cappucino maker
• The holes in the cappucino
maker and steam nozzle are
clogged
• Clean the holes in the cappucino maker and
the steam nozzle.
When the ,
or buttons are press, the
appliance does not deliver
coffee only water
• The ground coffee may be
blocked in the funnel
• Remove the ground coffee inside the funnel
using a knife (section 8 - note 5). Then clean
the infuser and the inside of the appliance
(section 11.2)
When the button is
press, the appliance does
not switch on.
• The appliance is not switched on
at the rear side, or at the mains.
• The appliance is not plugged in.
• Check that the power cable is plugged into
the mains socket and the main switch is in the
ON position.
The infuser cannot be
removed for cleaning
• The appliance is switched on.
The infuser can only be removed
if the appliance is switched off.
• Turn the appliance off and remove the infuser
(see section 11.2). IMPORTANT: the infuser
can only be removed if the appliance is off.
Attempting to remove the infuser when the
appliance is on may cause serious damage.
Ground coffee is being used
(not beans) and the appli-
ance does not deliver the
coffee.
• Too much coffee has been
added.
• The button has not been
pressed and the appliances has
used both the ground coffee and
the coffee ground by the mill.
• Ground coffee has been added
while the appliance was switched
off.
• Remove the infuser and thoroughly clean the
inside of the appliance, as described in section
11.2. Repeat the operation using a maximum of
1 measure of ground coffee.
• Thoroughly clean the inside of the appliance, as
described in section 11.2. Repeat the operation,
first pressing the button as described in
section 8.
• Remove the infuser and thoroughly clean the
inside of the appliance, as described in section 11.2. Repeat the operation, but switch
the appliance on first
The coffee does not run out
from the spouts, but from
around the service door.
• The holes in the spouts are
blocked.
• The mobile container inside the
service door is blocked and cannot swing
• Scrape the holes with a needle (see section
11.1, Fig. 23).
• Thoroughly clean the mobile container, particularly near the hinges to ensure they are free
to swing smoothly.
15
Page 22

Installation
16 BUILDING-IN
22
368
361
527
455
595
20
Please check the dimensions of your cabinetry
aperture against the dimensions required (see
diagram below) to ensure you have enough
space to install the appliance.
The coffee maker must be installed into a column unit and the column unit must be firmly
fixed to the wall.
IMPORTANT:
• All installation or maintenance operations
must be undertaken with the appliance disconnected from the mains electricity supply.
• Kitchen furniture in direct contact with the
appliance must be heat resistant (65°C
min).
• To guarantee correct ventilation, leave an
opening at the bottom of the cabinet (see
diagram above).
50
50
50
50
450
850
500
550
Min.
560
200
cmq
200 cmq
50
50
50
50
Page 23

Installation
23
Place the appliance onto the runners
and fasten it to the projections securely
with the screws supplied (see diagram 2
above).
Fix the power lead with the special clip,
to avoid the lead becoming tangled
when the appliance is pulled out of the
cabinetry. The power lead must be long
enough to allow the appliance to be
extracted far enough from the cabinetry
to fill the coffee bean container.
16
Offer the runner to the interior sides
of the cabinet.
The plastic spacers provided (see diagram 4 below) may be used between
the runner side plates and the cabinetry to adjust any difference between
the runner, and the cabinetry.
Fix the runners with the screws provided; then completely extract the two
runners.
If the coffee maker is installed above
a "warming drawer", use the top of
the latter as a reference for the coffee
maker runners. In this case, there will
be no support surface.
approx. 350mm
1
The appliance must be earthed in
compliance with current legislation.
Electrical connections must be performed
by a qualified electrician who will comply
with the manufacturer's instructions, I.E.E.
regulations and local regulations.
Once installed, the electrical socket must
be accessible.
4
3
2
1
Page 24

Connecting to the Electricity Supply
17 CONNECTING TO THE ELECTRIC SUPPLY
WARNING - THIS APPLIANCE MUST BE EARTHED
The flexible mains lead is supplied connected to a BS 1363 fused plug, having a fuse of
13 amp capacity.
The wires in the mains lead are coloured in
accordance with the following code:
Green and yellow = Earth,
Blue = Neutral,
Brown = Live.
The plug and socket must be accessible after installation.
Should the mains lead of the appliance ever require replacing, we recommend that this is
carried out by a qualified electrician who will replace it with a lead of the same size and
temperature rating.
Important: - ensure that you route all mains and electrical cables and flexible tubing well
clear of any adjacent heat source.
24
Technical Data
Model Name: S7 - E450BCMAUTO Built In Coffee Maker
Maximum Load: 1350W @ 230v
Working Pressure: 15 bar
Capacity: 1.8 Litres
Coffee Bean Capacity: 200
Use a 13 amp fuse
in an 13 amp plug
Page 25

Should you need to contact us, please call our Customer Care Centre on:
0871 22 22 502.
Calls will be answered in strict rotation, as soon as possible.
Please record your model and serial number in the spaces above.
Having these numbers to hand will help us to help you quickly and more efficiently
should you need to call us for any reason.
Customer Care
25
Date of purchase Installer stamp / Printed name Date of installation
Place of purchase:
Date Part(s) replaced Engineers Stamp/
Printed Name
Model Number
Serial Number
Page 26

Figures
26
234
5678
91011
12
14 15 16
13
1
Page 27

Figures
27
17 18 19 20
21 22 23 24
25 26
27
OPEN
CLOSE
Page 28

Stoney Lane, Prescot, Merseyside L35 2XW
Tel: Customer Care 0871 222 2502
Trade Support 0871 222 2625
Customer Support Line 0871 222 2635
Fax: 0871 222 2645
Stoves is a member of Glen Dimplex Home Appliances
www.stoves.co.uk
S7 - E450BCMAUTO /
01.2008 / 08 26305 00 /
Built in coffee maker
5713210311/01.08
 Loading...