

Page 1
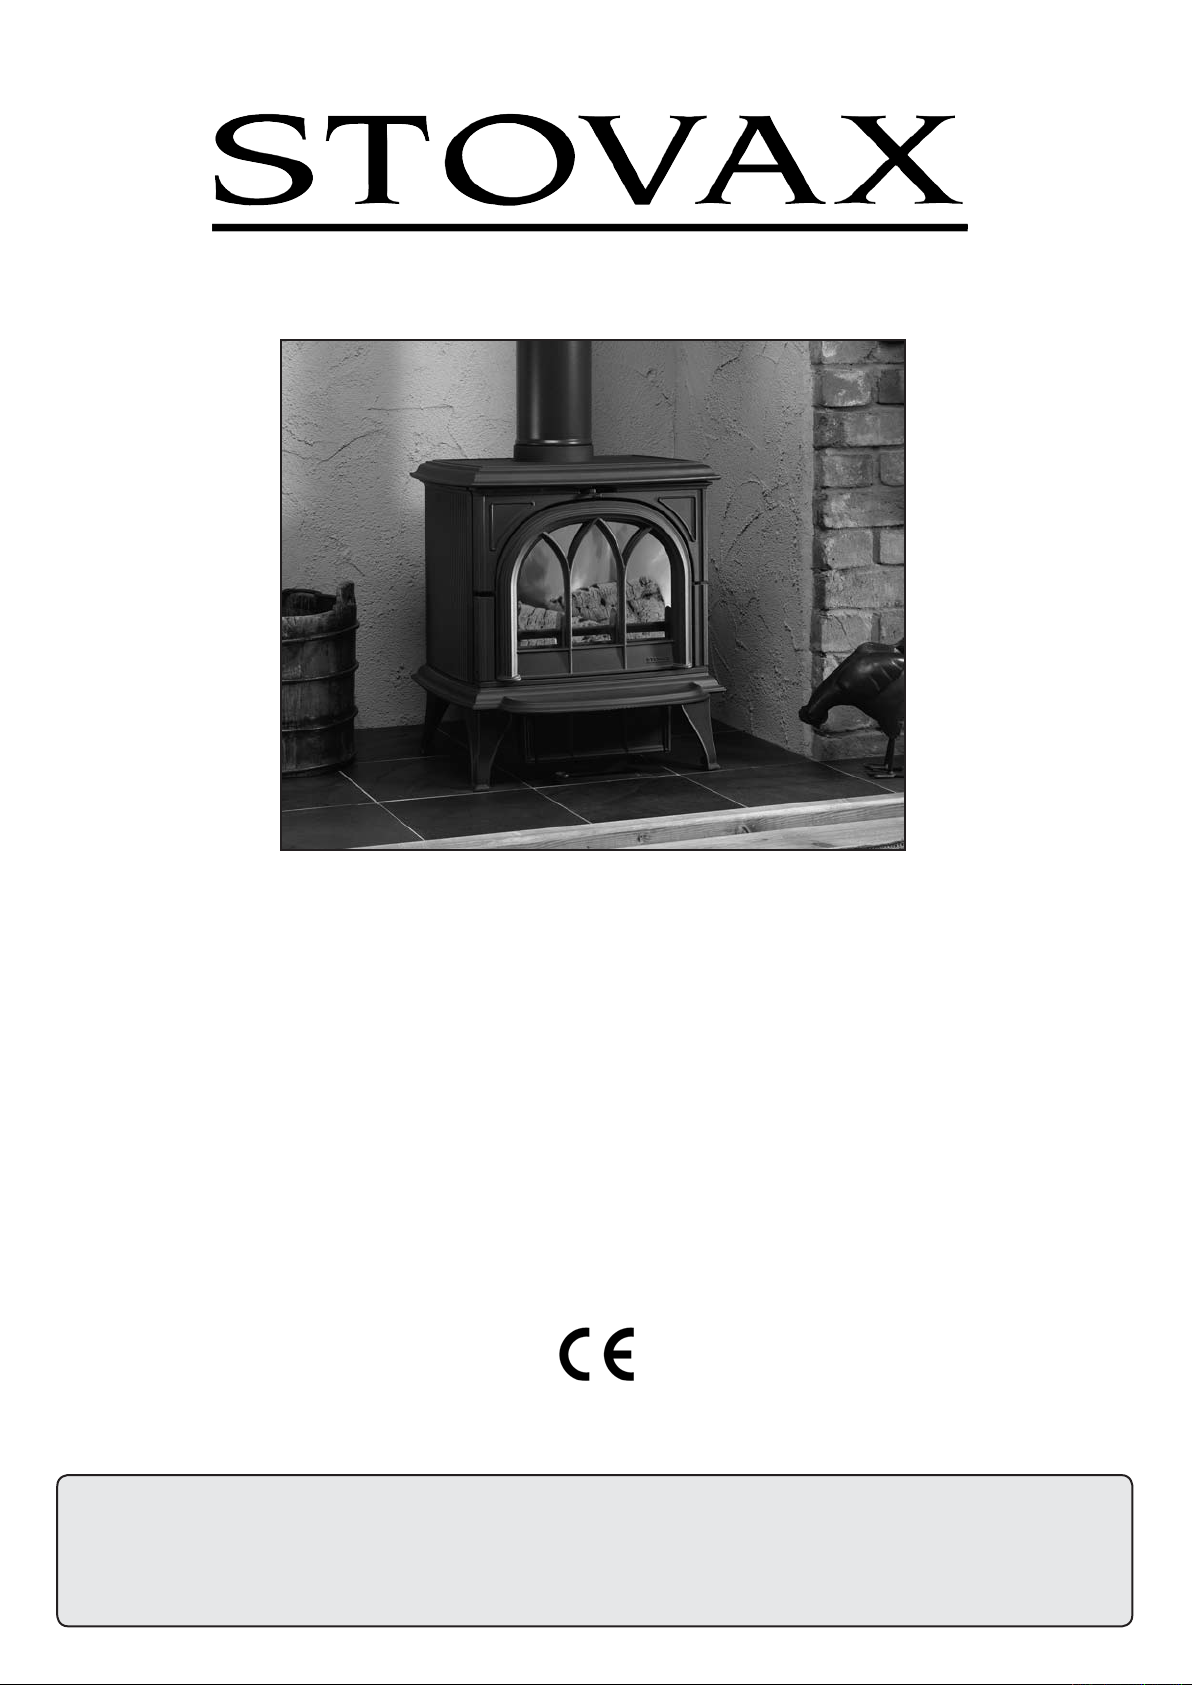
Huntingdon 25-28-30-35-40
Free Standing Stove
MODELS: 7057/7058/7058BL/7058LG/7064/7065/7065BL/7065LG/7054/7055/7055BL/
7055LG/7060/7061/7061BL/7061LG/7063/7069/7074/7075/7075BL/7075LG
User Instructions
For Use in Great Britain and Eire
This product is suitable for use in the stated countries. To install the product in other countries it is essential to obtain translated instructions
and in some cases the product may require modification. Contact Stovax to obtain further information.
IMPORTANT
Please read these instructions carefully before using the appliance.
Keep them safe for future reference and when servicing the appliance.
PM195 - Issue 2 (March 2007)
Page 2
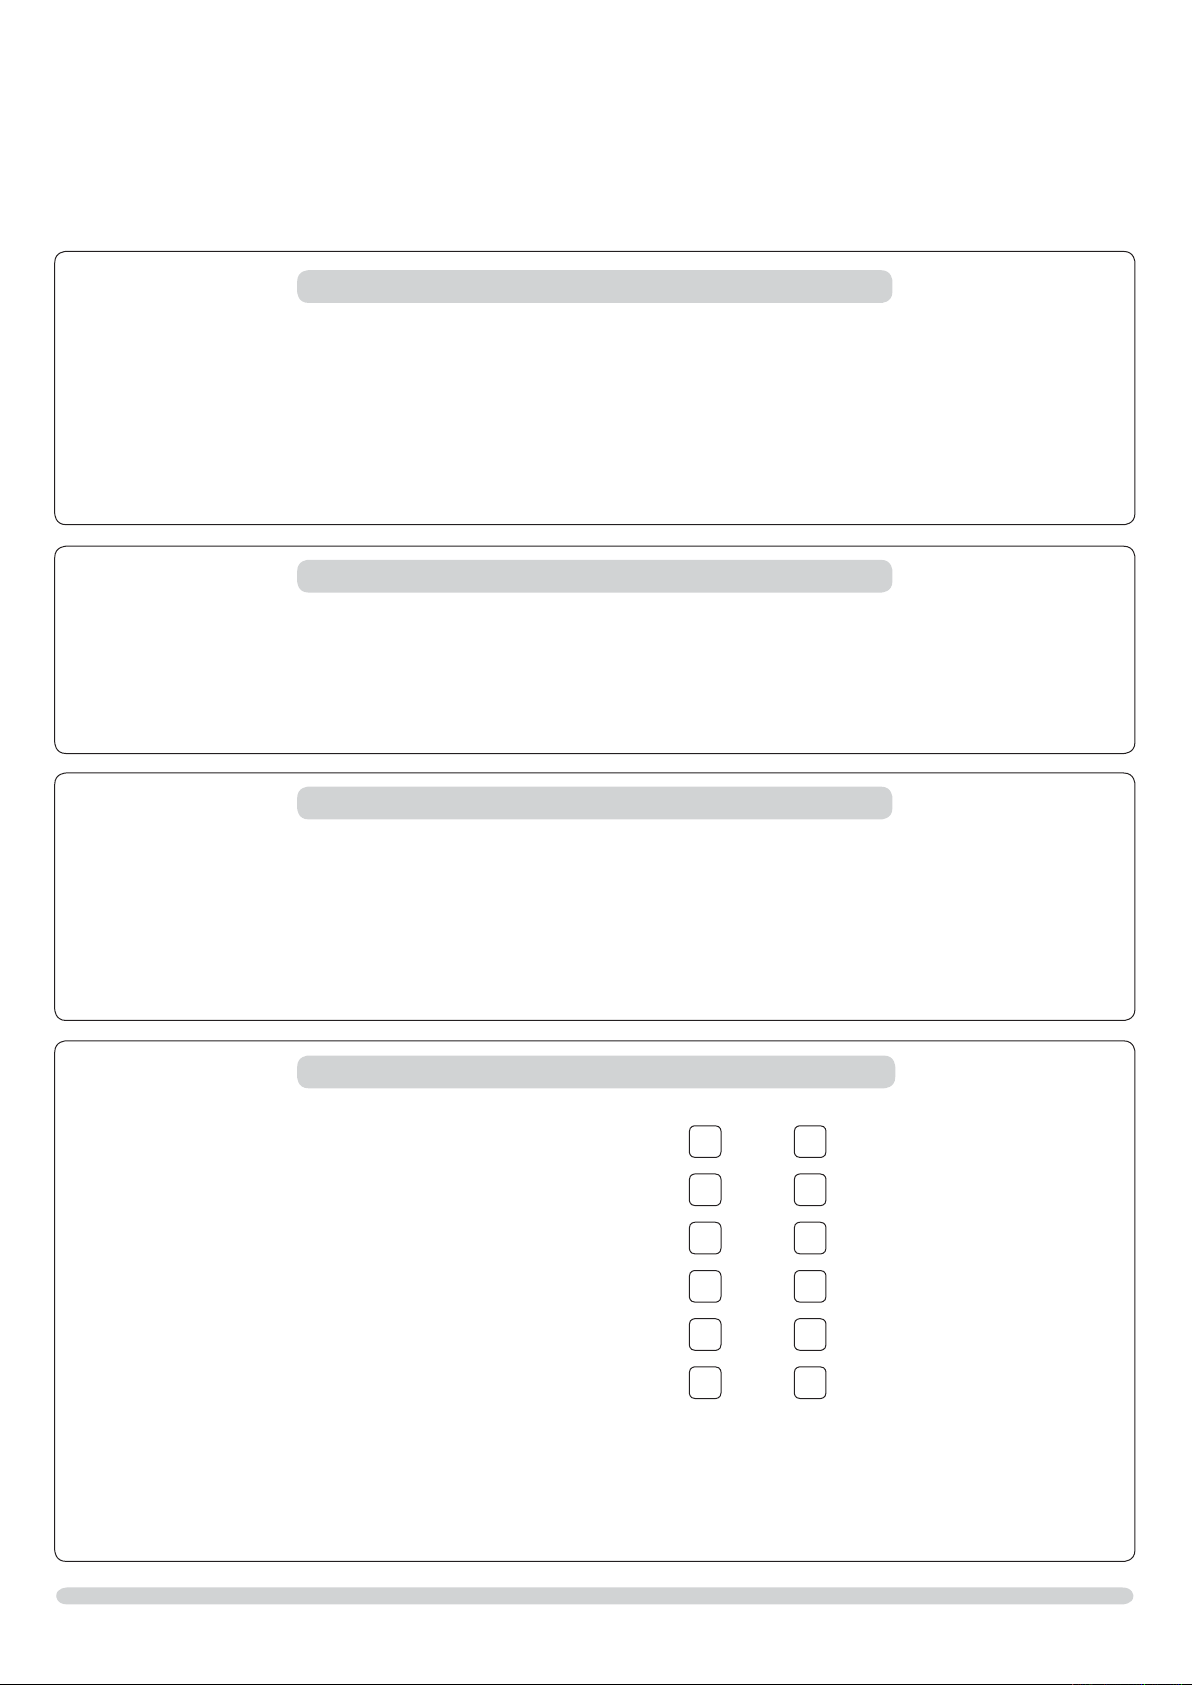
FOR YOUR RECORDS
To assist us in any Guarantee claim please complete the following information:-
Stovax dealer appliance was purchased from
Name: .................................................................................................................................................................
Address: ...............................................................................................................................................................
............................................................................................................................................................................
Telephone number: .............................................................................................................................................
Essential Information - MUST be completed
Date installed: .....................................................................................................................................................
Model Description: ..............................................................................................................................................
Serial number: .....................................................................................................................................................
Installation Engineer
Company name: .....................................................................................................................................................................
Address: .................................................................................................................................................................................
...............................................................................................................................................................................................
Telephone number: ................................................................................................................................................................
Commissioning Checks (to be completed and signed)
Is flue system correct for the appliance YES
Flue swept and soundness test complete YES
Smoke test completed on installed appliance YES
Spillage test completed YES NO
Use of appliance and operation of controls explained YES NO
NO
NO
NO
Instruction books handed to customer YES NO
Signature: ....................................................................................... Print name: ...............................................................
2
Page 3

SERVICE RECORDS
1ST SERVICE
Date of Service:...........................................................................
Next Service Due:.......................................................................
Signed:........................................................................................
Dealer's Stamp/HETAS Registration Number
3RD SERVICE
Date of Service:...........................................................................
Next ServiceDue:........................................................................
Signed:........................................................................................
Dealer's Stamp/HETAS Registration Number
5TH SERVICE
Date of Service:...........................................................................
Next Service Due:.......................................................................
Signed:........................................................................................
Dealer's Stamp/HETAS Registration Number
2ND SERVICE
Date of Service:...........................................................................
Next Service Due:.......................................................................
Signed:........................................................................................
Dealer's Stamp/HETAS Registration Number
4TH SERVICE
Date of Service:...........................................................................
Next Service Due:.......................................................................
Signed:........................................................................................
Dealer's Stamp/HETAS Registration Number
6TH SERVICE
Date ofService:............................................................................
Next Service Due:.......................................................................
Signed:........................................................................................
Dealer's Stamp/HETAS Registration Number
7TH SERVICE
Date of Service:...........................................................................
Next Service Due:.......................................................................
Signed:........................................................................................
Dealer's Stamp/HETAS Registration Number
9TH SERVICE
Date of Service:...........................................................................
Next Due:........................................................................
Signed:........................................................................................
Dealer's Stamp/HETAS Registration Number
8TH SERVICE
Date of Service:...........................................................................
Next Due:........................................................................
Signed:........................................................................................
Dealer's Stamp/HETAS Registration Number
10TH SERVICE
Date of Service:...........................................................................
Next Service Due:.......................................................................
Signed:........................................................................................
Dealer's Stamp/HETAS Registration Number
3
Page 4

OPERATING INSTRUCTIONS
Before using this appliance, please read these instructions carefully.
1. GENERAL
1.1 This stove is designed for domestic heating and should
only be used for this purpose, and in accordance with the
manufacturers operating instructions.
1.2
It should be installed by a competent installer, in
accordance with all local regulations, including those
referring to national and European standards.
1.3 The stove should only be used to burn approved fuels
and should not be used with liquid fuels or used as an
incinerator.
1.4 As with all heating stoves the surfaces will become very
hot when in use, therefore due care should be taken
when near the stove. If it is to be used in the presence
of young children, elderly or infirm persons, a suitable
fireguard should be used. Care should also be taken with
the placement of combustible items near the stove as
conducted and radiated heat could cause a fire hazard.
1.5 Stovax offer a wide range of firescreens and sparkguards,
along with a hearthgate system designed to offer full
protection for a range of stoves and fireplaces. Your Stovax
dealer can advise you on these products.
1.6 Due to the high temperature of the convected air above
the stove we recommend that no valuable photographs,
paintings, porcelain or other items are placed in this area.
Such artefacts may be damaged by long term exposure to
fluctuating temperatures.
1.7 The additional ventilation required for the safe use of this
stove should be kept free of any obstructions, both inside
and outside the building, at all times.
1.8 Have your Stovax product serviced annually by a competent
service engineer, and if repairs are required use only Stovax
approved spare parts.
1.9 Do not make unauthorised modifications or changes to
the stove. No other appliance should be connected to or
share, the same flue or chimney system.
SERIAL NUMBER
This number will be required when ordering spare parts or
making warranty claims.
Huntingdon 25
It is found on the stove data plate, which is on the back of
the stove.
Huntingdon 28/30/35/40
It is found on the stove data plate, which is under the front
of the stove ashlip.
4
Page 5
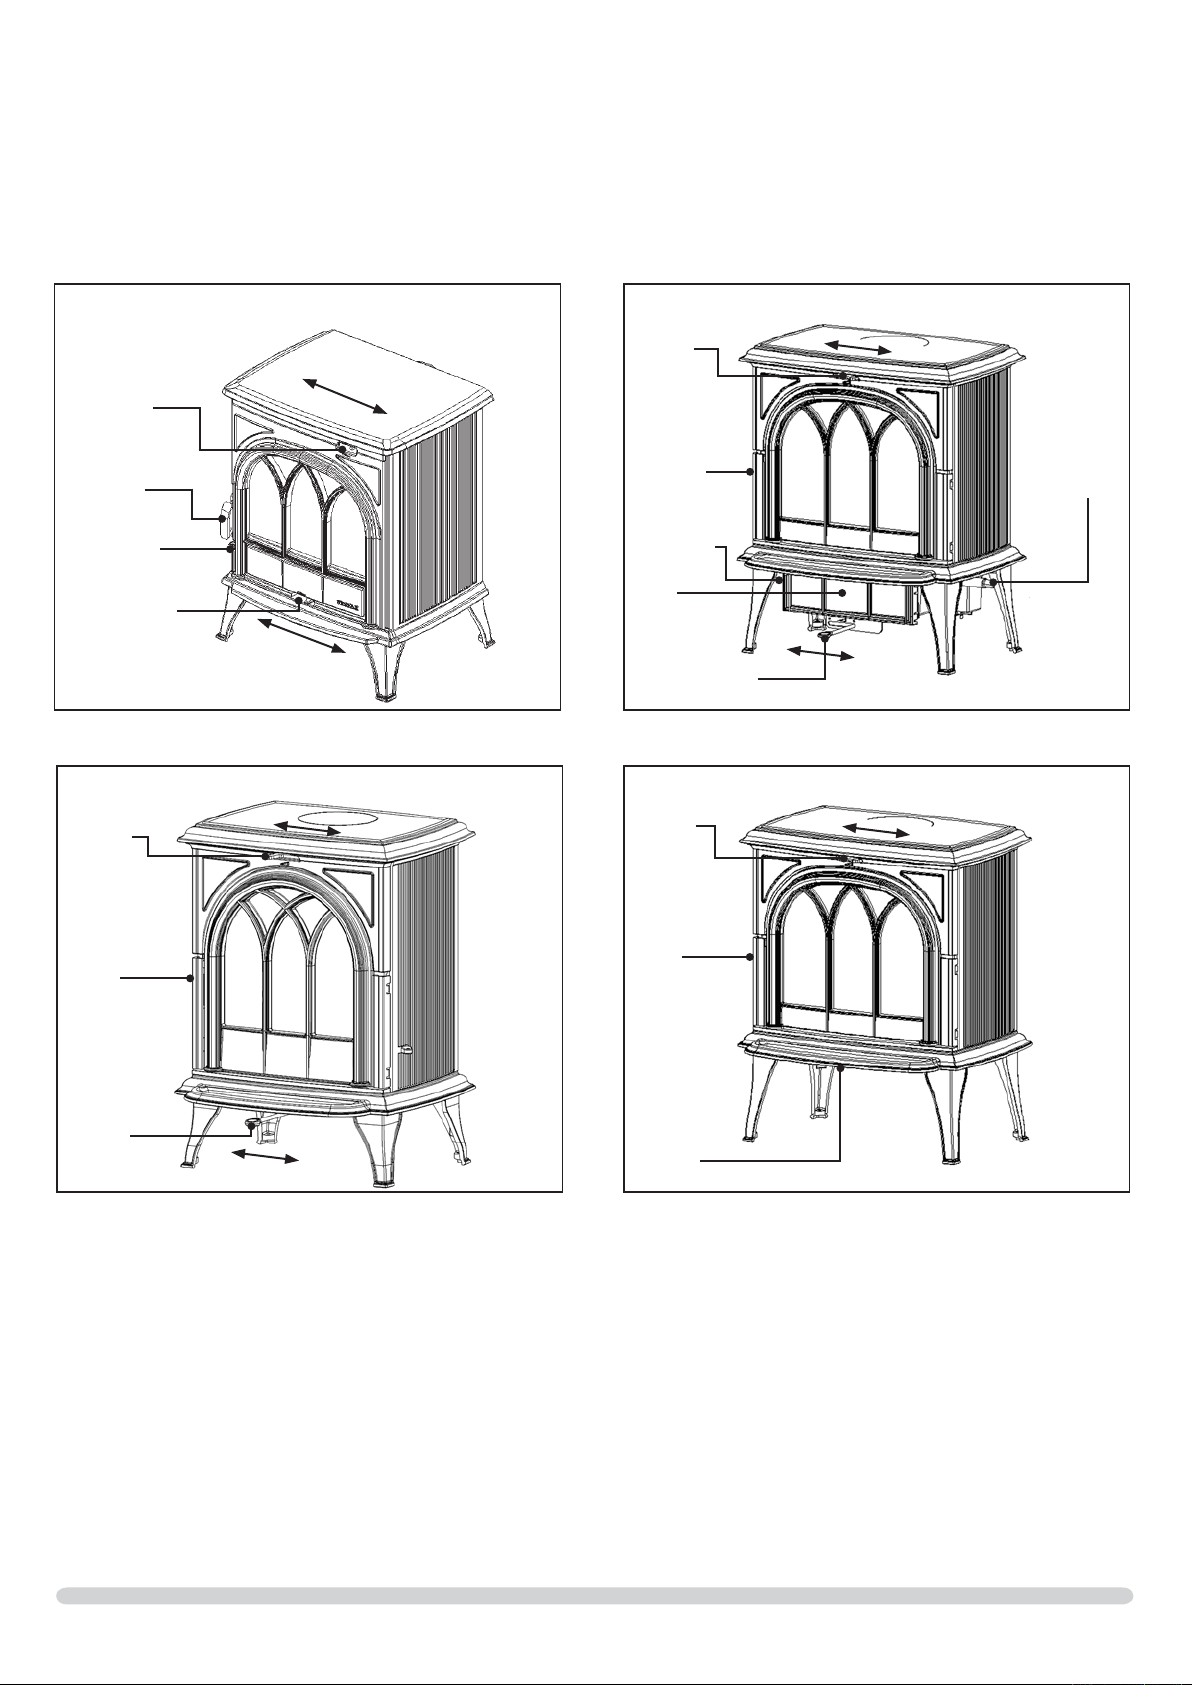
AIR CONTROLS
OPERATING INSTRUCTIONS
Multi-fuel version Huntingdon 25 only
Open
Airwash
Airwash
control
Main door
catch
Riddling
Grate
Primary
Control
Open
Closed
Multi-fuel version Huntingdon 28 only
Airwash
control
Closed
Open
Closed
PR7533
Multi-fuel version Huntingdon 30/35/40 only
Closed
Closed
Open
Open
Airwash
control
Main door
catch
Ashpan
door catch
Ashpan
door
Primary Control
Wood-burning version Huntingdon 35/40 only
Airwash
control
Closed
Open
Riddling
control
PR7223
Main door
catch
Primary
Control
Closed
Open
PR7224
Main door
catch
Ashlip
PR7222
5
Page 6

OPERATING INSTRUCTIONS
2. USING THE STOVE FOR THE FIRST TIME
2.1 When new, it is best to burn the fire at a low output for
the first few days of use. This will allow the construction to
settle and all fixing glues and paint to fully cure.
2.2
Avoid touching the paint during the first period of use.
2.3 During this time the stove may give off some unpleasant
odours, and we recommend that you keep the room well
ventilated during this period to avoid a build-up of fumes.
3. BURNING WOOD
(Wood and multi-fuel stoves)
3.1 Open the
control, (multifuel versions only) to approximately 25% open.
3.2 Place some pieces of firelighter or dry crumpled paper on
the grate and cover with some small pieces of dry kindling
wood. Light the paper or firelighters.
3.3 To avoid the build-up of condensation on the door glass
it is advisable to leave the door slightly open as the fire
establishes, and the glass warms.
3.4 As the fire becomes established add a few larger pieces
of wood and fully close the door. Do not initially add too
many logs as this may smother the fire. Do not leave the
stove with the door open as this could over-fire the stove
and cause permanent damage.
3.5 As the fire becomes established close the
control (multifuel versions only) and control the burn rate
using the Airwash control only.
3.6 To burn wood efficiently it is best to allow a bed of ash to
build-up on the grate, or the base of the stove, and control
the combustion using the Airwash control only.
Airwash control fully and open the Primary air
Primary air
effectiveness of the glass cleaning effect of the airwash and
will cause a large build-up of tars and creosotes in the stove
and flue system.
3.11 We would recommend that the stove be burnt at high
output for at least 30 minutes each day when it is in use.
This will help reduce the build-up of tars and creosotes
within the stove and flue system.
3.12 Do not burn construction timber, painted, impregnated /
treated wood or manufactured board products.
4. BURNING SOLID FUEL
(Multi-fuel stoves only)
4.1 Open the
Primary air control fully.
4.2 Place some pieces of firelighter or dry crumpled paper on
the grate and cover with some small pieces of dry kindling
wood. Light the paper or firelighters.
4.3 To avoid the build-up of condensation on the door glass
it is advisable to leave the door slightly open as the fire
establishes, and the glass warms.
4.4 As the fire becomes established add pieces of solid fuel and
fully close the door. Do not initially add too much fuel as
this may smother the fire. Do not leave the stove with the
door open as this could over-fire the stove and cause
permanent damage.
4.5 As the fire becomes established reduce the
control to approximately 25% and control the burn rate
using the Primary air control only.
4.6 To burn solid fuel efficiently it is best to control the
combustion using the Primary air control only.
4.7 Before re-fuelling the stove it is advisable to de-ash the
firebed, using the riddling grate system. This is completed as
follows:-
Airwash control to approximately 50% and
Airwash air
3.7 Before re-fuelling the stove it is advisable to first rake the
embers evenly over the firebed then open the Airwash
control fully for a few minutes, to establish a glowing bed
before adding new logs.
3.8 Allow the new logs to burn at high output for a few minutes
before adjusting the burn rate with the Airwash control,
to the desired setting. It is best to refuel little and often to
maintain clean and efficient burning.
3.9 The ideal control settings to suit the particular installation
and personal preferences will be established by experience
in using the stove.
3.10 Do not load fuel higher than the log guard at the front of
the stove and the secondary combustion air inlet holes at
the back of the firebox. It is not recommended to load large
amounts of logs and burn with the Airwash control on
low settings for long periods of time. This will reduce the
Huntingdon 25 / 28
Using the tool provided pull and push the riddling control.
This will cause the centre grate section to rotate and ash to
fall into the ashpan below.
Huntingdon 30/35 multifuel /40 multifuel
Place the tool provided onto the square end of the riddling
control rod. Then, by pushing and pulling the handle de-ash
the firebed. Moving the handle will cause the grate bars to
move back and forth, with the ash falling into the ashpan
below. Do not use bare hands to operate the riddling
system.
4.8 Open the
establish a glowing bed before adding new fuel. Allow the
new fuel to burn at high output for a few minutes before
adjusting the burn rate with the Primary air control to the
desired setting. It is best to refuel little and often to maintain
clean and efficient burning.
Primary air control fully for a few minutes, to
6
Page 7

OPERATING INSTRUCTIONS
4.9 The ideal control settings to suit the particular installation
and personal preferences will be established by experience
in using the stove. It is not recommmended to load large
amounts of fuel and burn with the Primary Air Control on
low settings for long periods of time as this will reduce the
effectiveness off the glass cleaning effect of the airwash.
Also this will help reduce the build-up of tar and creosotes
within the stove and flue system.
4.10 We would recommend that the stove be burnt at high
output for at least 30 minutes each day when it is in use.
This will help reduce the build-up of tars and creosotes
within the stove and flue system.
Burn only manufactured smokeless fuels, suitable for use
4.11
in closed appliances.
4.12 Do not burn bituminous coal, ‘petro-coke’ or other
petroleum based fuels, as this will invalidate the product
guarantee.
5. OVER-FIRING
5.1 Do not use the appliance at maximum output for prolonged
periods of time, or over-fill the firebox with fuel, as this
could result in over-firing. If the connecting fluepipe,
appliance flue collar or top plate glow red with heat the
appliance is being over-fired and the air controls should be
closed to reduce the output.
6.2 The air controls should be set in the 50% open position to
keep the appliance ventilated, and stop the build-up of any
moisture inside.
6.3 Before re-lighting the stove remove the baffles, clear any
debris that may have accumulated, and check the flue is
clear of any blockages.
7. ASH REMOVAL (Multi-fuel stoves)
7.1 The burning of any fuel will produce ash, which will have
to be removed after a period of use. This time will depend
on the fuel used. Before removing the ash from the stove it
is advisable to let the fire burn down to a low level, or even
go out completely. The ashpan can then be removed using
gloved hands, after opening the ashdoor (Huntingdon 30,
35, 40 multifuel stoves / main firedoor Huntingdon 25/28).
7.2 As heat can remain in the ash for a long period after use
care must be taken when removing and carrying the full
ashpan. We suggest that the ashpan be carried using gloved
hands, or the ash is placed directly in to a Stovax Ash
Caddy (Stovax Part No. 4227).
7.3 Do not place ash in a bin made from plastic or any other
combustible material.
5.2 Over-firing of enamel stoves will cause permanent damage
to the finish and will appear as small cracks or flaking
enamel.
5.3 Do not load fuel higher than the log guard at the front of
the stove and the secondary combustion air inlet holes at
the back of the firebox.
5.4 If a chimney fire occurs shut all air controls immediately to
close the appliance down, and evacuate all persons from
the building before calling the fire brigade. Do not re-enter
the building until it is confirmed safe to do so.
5.5 Following a chimney fire do not use the appliance until it is
inspected, by a HETAS (GB only)/INFO (Eire only) registered
installer, to confirm that the appliance is safe to use, or
make any repairs required before re-use. Only genuine
Stovax replacement parts are to be used to keep your
appliance in safe and efficient working order.
5.6 After any chimney fire it is recommended that the chimney
system be inspected and swept by a NACS registered
(UK only) chimney sweep, to confirm that the system is
structurally sound and free from any obstructions before
re-use.
6. SEASONAL USE
6.1 If the stove is not to be used during the warmer periods of
the year it is recommended to clean and service the stove,
as detailed in the Maintenance and Servicing section on
page 10.
8. ASH REMOVAL (Wood-burning stoves)
8.1 When burning wood the amount of ash will be smaller and
may only need removal once every week. To do this, allow
the fire to burn out and cool. Open the main door, then
after removing the log retainer scoop out the ash with a
suitable shovel. It is best to leave a layer of ash in the stove
to form a bed for the new fire.
8.2 Do not place ash in a bin made from plastic or any other
combustible material.
9. RECOMMENDED FUELS
9.1 Wood: Burn only seasoned timber, with a moisture content
of less than 20% with a recommended cut length of
300mm. In most cases, this would require drying cut wood
for 12 to 18 months before use. Poor quality timber could
cause low combustion efficiency, produce large amounts of
harmful condensation, which could reduce the effectiveness
of the airwash system, and ultimately the life of the stove.
Do not burn construction timber, painted, impregnated
/ treated wood, manufactured board products or pallet
wood.
The symptoms of poor performance related to poor quality
wood include: -
• Difficulty getting a fire going and keeping it burning well,
• Smoky fires with little flame,
7
Page 8

OPERATING INSTRUCTIONS
• Dirty glass,
• Rapid creosote build-up in the chimney,
• Low heat output,
• Short burn times, excessive fuel consumption and
blue/grey smoke from the chimney.
To help avoid large build-ups of tars and creosote within
the stove and the flue system, it is recommended to burn
at high output for at least 30 minutes each day. The use of
Stovax Protector chimney cleaner will also help to reduce
this problem (Stovax Part No. 7002).
9.2 Solid fuel: Burn only manufactured briquetted smokeless
fuels, listed as suitable for use with closed heating stoves.
Do not burn bituminous coal, ‘petro-coke’ or other
petroleum based fuels, as this will invalidate the product
guarantee.
9.3
Fuel consumption at nominal heat output.
As tested at nominal heat output to the requirements of EN
13240: 2001 for intermittent operation.
Fuel Consumption
Description
7057
7058
7058BL
7058LG
Kg/hour
Wood
Huntingdon 25 1.45
Kg/hour
Briquetted
Smokeless fuel
0.69
10. BURNING PERFORMANCE
A number of factors can affect the performance of the
Huntingdon stove. Some of these are listed.
10.1
Fuel Quality (Wood)
Use only seasoned wood with a moisture content of
less than 20%. Well seasoned logs should have the bark
beginning to lift and peel away, along with deep cracks
radiating from the centre of the log. Logs should feel lighter
than fresh cut wood of a similar size and sound hollow
when struck against each other. Logs should not feel damp
to the touch, have any visible moisture oozing from them or
moss and fungal growths on them.
Symptoms of poor performance related to wet woods
include:
• Difficulty getting a fire going and keeping it burning well,
• Smoky fires with little flame,
• Dirty glass,
• Dirty firebricks,
• Rapid creosote build-up in the chimney,
• Low heat output,
• Short burn times, excessive fuel consumption and
blue/grey smoke from the chimney.
To help avoid large build-ups of tars and creosote within
the stove and the flue system, it is recommended to burn
at high output for at least 30 minutes each day. The use of
Stovax Protector chimney cleaner will also help to reduce
this problem.
7064
7065
7065BL
7065LG
7054
7055
7055BL
7055LG
7063
7060
7061
7061BL
7061LG
7069
7074
7075
7075BL
7075LG
9.4 If you require advice on suitable solid fuels contact your
Huntingdon 28
Huntingdon 30
Huntingdon 35
(wood)
Huntingdon 35
(multi-fuel)
Huntingdon 40
(wood)
Huntingdon 40
(multi-fuel)
local Approved Coal Merchant. Details can be obtained by
ringing the Solid Fuel Association advice line on Freephone
0800 600 000. Or their web site at www.solidfuel.co.uk
1.90 0.92
1.90 0.92
2.05
2.05
2.66
2.66 1.26
n/a
0.95
n/a
Fuel Quality (Solid Fuel)
10.2
Use only recommended solid fuels, which are approved for
use with closed appliances. Symptoms of poor performance
related to unsuitable fuels include:
• Difficulty getting a fire going and keeping it burning well,
• Smoky fires with little flame,
• Dirty glass,
• Dirty firebricks,
• Short life span for grate, baffles and internal firebricks,
• Permanent staining of glass.
Backpuffing
10.3
This is caused by a lack of combustion air entering the
firebox causing combustion gases to build up in the firebox
and periodically ignite as small explosions, causing smoke to
puff out of the appliance air inlets and other openings. The
problem will often occur if the air controls are shut soon
after adding new fuel to a very hot fire. To stop backpuffing
occurring open the air controls to increase the combustion
air and increase the burning rate.
10.4 Flue Draught
The chimney has two main functions, which are, to safely
remove the smoke, gases and fumes from the house, and
to provide a sufficient amount of draught (suction) in the
Huntingdon stove to ensure that the fire is kept burning.
Draught is caused by the rising hot air in the chimney when
the Huntingdon stove is lit.
8
Page 9

OPERATING INSTRUCTIONS
Symptoms of poor performance related to flue draught
include:
• Excessive fuel consumption (high flue draught)
• Poor burning control, overheating (high flue draught)
• Wind noise from air controls (high flue draught)
• Difficulty getting a fire going and keeping it burning well
(low flue draught)
• Low heat output (low flue draught)
• Smoke entering room when doors opened (low flue
draught)
The construction, position, size and height of the chimney
are all factors that affect the performance of the flue
draught.
Other factors that can effect the flue draught include:
• Trees or other buildings nearby causing turbulence
• High and gusty winds
• Outside temperature
• Outside weather conditions
• Incorrect additional ventilation to building
• Blocked flue / chimney
For advice on the correction of persistent flue problems
consult a qualified solid fuel heating engineer before
continuing to use the Huntingdon stove.
10.5
Weather conditions
The weather conditions outside the building could have an
effect on the burning performance of the Huntingdon stove.
These could include:
Windy days - Smoking from the appliance. This could
be caused by turbulent airflow around chimney terminal,
possibly caused by the position of other buildings or
obstacles nearby. This problem is, also, sometimes
associated with oversize chimneys, which may even have
downdraught problems on calm days. If smoking is a
common problem on windy days make a note of the wind
strength and direction before consulting your appliance
installer, who will advise you on possible solutions to the
problem, after visiting the installation.
Damp / Rainy days – These sometimes result in problems
when lighting and maintaining the fire, due to the lower
flue temperatures and smaller difference between indoor
and outdoor temperatures reducing the flue draught. Also,
rain water running down the inside of the chimney reducing
the flue temperatures. To help with this problem care must
be taken to use good quality kindling wood, when starting
the fire, and running the stove at a higher heat setting than
normal for a period after start-up to fully heat the chimney.
It could be possible to fit a rain cowl to the chimney to
reduce this problem. Your appliance installer should advise
you on possible solutions.
If the Huntingdon stove emits smoke into the room
continuously close the air controls and allow the stove to go
out, and ventilate the room to clear the fumes.
Troubleshooting
10.6
STOVE GLASS BLACKENING:
This occurs as a result of four possible causes:
Burning unseasoned wood – See page 8 (section 10.1)
1.
for more information on how to identify when your wood
is ready for burning. Properly seasoned logs will have been
kept for a minimum of a year but are best burnt at 2 years.
The stove being burned at too low a temperature - A
2.
good working temperature is 300-500° F (120 – 250° C).
A stove pipe thermometer will help identify this problem.
(Stovax part no 3046). Burning the stove with the airwash
control fully open for a period of around 20 minutes ought
to cure this. This might be caused by damping your stove
down overnight.
Problems with your flue – in particular insufficient air
3.
pull. If your flue is not doing its job efficiently this can
cause blackening of the glass. A flue which is too short,
experiences a downdraft, needs lining or has too many
bends can promote blackening. If you suspect your flue may
be contributing to the blackening of your stove glass you
should contact the installer or a flue specialist.
RIDDLING MECHANISM JAMMING:
This occurs when fine ash builds up under the riddling bars
preventing their movement. To prevent this we recommend
that you follow a regular cleaning routine for the inside
of your stove, taking care to lift out the riddling bars and
remove all ash. Replace riddling bars when cleaning is
complete.
STOVE GLASS CRACKING:
Please ensure when replacing the glass in your stove that
you do not over tighten the screws on the glass clips as this
will cause stress in the glass and with the intense heating
and cooling of burning your stove it may well cause the
glass to crack.
STOVE IS PRODUCING TAR:
You can recognise this from the following traits:
Very strong pungent smell shortly after the stove is lit and
as the stove heats up, glass blackening and, possibly, can be
seen as a thick, brown and sticky material oozing from your
stove pipe joints.
This is caused by burning damp wood and burning your
stove at too low a temperature. To resolve this only use well
seasoned wood and ensure your stove is operating in the
ideal temperature range. Tar is a major cause of chimney
fires - if you experience problems with tar build up, please
consult a chimney sweep before continued use of your
stove.
Ideal working temperature range is 130°C and 240°C
(270°F – 465°F). If you fail to close down your primary air
control once the stove has heated up to this range you may
cause your stove to overfire and the temperature to exceed
the ideal range. Overfiring can cause permanent damage to
your stove and will invalidate your warranty.
Do not re-light the appliance until the cause of the
problem is identified and rectified.
9
Page 10

MAINTENANCE and SERVICING
See chart on page 11 for common spare parts refered to in this section.
For a complete list of spare parts and accessories contact your Stovax dealer for the
Stovax Fireplace, Stove & Hearth Accessories brochure or call 01392 474011
1. GENERAL CLEANING
Before any cleaning is carried out, allow stove to cool
thoroughly to avoid risk of burns.
1.1 We would recommend that your Huntingdon stove be
cleaned fully on a regular basis, according to the level of
use. Attention should be given to cleaning the baffle system,
flueways and removing ash. Regular cleaning and preventive
maintenance will help give many years of safe use.
1.2 The external paintwork may be cleaned using warm soapy
water and a soft clean cloth. Wipe dry with a soft clean
cloth before re-lighting. Do not leave unit without drying, as
this may cause rust. To refresh painted finishes it is possible
to re-paint using Stovax Thermolac stove paint.
1.3 Enamel finishes may be cleaned using warm soapy water
and a soft clean cloth. Wipe dry with a soft clean cloth
before re-lighting. Do not leave unit without drying, as this
may cause rust. Do not use abrasive cleaner or cleaning
pads to clean enamel finishes.
2. CLEANING GLASS
2.1 While the correct use of the Airwash system, and good quality
fuel, will generally keep the glass clean when the appliance is
used you may sometimes need to clean the glass.
2.2 This can be done as follows. Allow the Huntingdon stove
to cool fully, never attempt to clean hot glass. Any deposits
can be removed using a soft cloth and Stovax Glass Cleaner.
2.3 Before re-lighting the appliance, dry the glass fully.
2.4 Do not use abrasive cleaner or cleaning pads
.
stove). See sections 5 and 6 for the instructions on how
to remove the baffles and firebricks. Care should be taken
when handling firebricks, as they can become fragile after a
period of use.
4.2 Vacuum clean any remaining ash and debris from the inside
of the stove. Stovax offer a filter/collection attachment for
your vaccuum cleaner to protect it from fire ash. Ash Clean
(Stovax Part No. 2091).
4.3 Clean the internal surfaces of the stove using a wire brush
and scraper as required. Vacuum and brush the resulting
debris from the stove.
4.4 Clean the grate parts with a wire brush, and check the parts
for any damage. Replace any damaged parts.
4.5 Check and clean the firebricks with a soft brush. Replace
any broken bricks. It is normal for some surface damage to
occur during use and the life will depend on the type of
fuels burnt and the level of use. Damaged bricks should be
replaced as soon as possible.
4.6 Re-fit cleaned internal parts.
4.7 Remove the glass from the door, see section 7, and discard
all old rope seals.
4.8 Remove the door rope seal from the outer edge of the door
and clean the old glue from the door sealing rope groove.
4.9 Clean the door glass using Stovax Stove Glass cleaner and
a soft cloth. Do not use abrasive cleaners to remove tar or
soot deposits from the glass.
4.10 Replace the glass edge seal with new and re-fit the glass into
place in the door.
3. CHIMNEY SWEEPING
3.1 We would recommend that to maintain the safe and
efficient use of the appliance the flue / chimney is inspected
and swept at least once a year, by a NACS registered (UK
only)/INFO registered (Eire only) chimney sweep, who will
issue you with a certificate.
4. ANNUAL SERVICE
At the end of the heating season it is recommended to strip,
inspect and clean the stove as detailed:
4.1 Carefully remove all of the following internal parts; baffle,
firebricks, *complete grate, and *ashpan (*If multifuel
4.11 Fit new door rope seal, gluing it in place with Stovax
Thermic Seal rope adhesive. Press the new door sealing
rope into the locating groove, placing the joint in the
middle of the lower edge of the door. When fitting new
door seals we recommend closing the stove door and
leaving for at least 12 hours before using. This allows the
adhesive to fully bond to the seal before use.
4.12 Lightly oil the door catch mechanism and hinge pins. Avoid
getting oil onto the door seals and glass.
4.13 To refresh painted finishes it is possible to re-paint using
Stovax Thermolac stove paint.
4.14 We recommend that only genuine Stovax replacement
parts are used to keep your appliance in safe and efficient
working order. Your local Stovax dealer will be able to
provide you with the genuine parts you require.
10
Page 11

MAINTENANCE and SERVICING
This is a list of the maintenance products you may need to use
Task Product name
Stove glass cleaner 500ml
Glass cleaning
Preventing buildup of creosote in
flue
Sealing flue pipe
joints
Re-painting
Cleaning matt
black stoves
Protecting your
hands
Door sealing rope
Glass sealing tape
Thermic seal glue
(wipe on)
Stove glass cleaner
(spray on)
Protector (15 sachets) 7002
Protector (1kg tub) 7025
Fire Cement (500g tub) 2020
Fire Cement (600g cartridge) 2021
Thermolac Black
(400ml aerosol)
Thermolac Black
(200ml brush-on)
Colloidal black (85ml) 7000
Heat resistant leather gloves 4008
14mm Black rope seal
(handy pack)
14mm Black rope seal
(25m reel)
3mm Black rope seal
(handy pack)
3mm Black rope seal
(25m reel)
(50ml bottle) 5037
Stovax Code
Number
4111
4103
2019
2057
5000
4670
4975
4974
5. REMOVAL OF THE LOG GUARD
5.1 Remove the log guard by lifting clear of the supporting
brackets and rotating to clear the sides of the door opening.
The stove should not be used without the log guard in
position.
6. FITTING & REMOVAL OF FIREBRICKS
(2 SIDES - 1REAR)
6.1 As part of the routine maintenance of the stove you may
have to remove the firebricks from the stove. This can be
carried out without the use of tools.
6.2 Allow the stove to cool fully before removing firebricks.
6.3 Care should be taken when handling bricks, as they can
become fragile after a period of use. This is normal and the
life will depend on the type of fuels burnt and the level of
use.
6.4 Damaged bricks should be replaced as soon as possible.
HUNTINGDON 25
6.5 To remove the firebricks first remove the side bricks and
then slide the rear bricks forward and then remove these.
HUNTINGDON 28, 30 & 35
6.6 To remove the bricks lift the LH baffle brick, slide the RH
baffle under the LH baffle to allow you to remove, then
remove the LH baffle brick. Remove the LH and RH side
bricks then the back brick. Fitting is the reverse of this
procedure.
HUNTINGDON 40
Soft rope
Ash Clean
These products, all available from your local Stovax dealer,
along with regular maintenance and use of the correct
fuels, will help you to keep your stove in the best possible
condition.
4.15 If you require more information about Stovax group
products visit our web site www.stovax.com
4.16 When using the stove for the first time again it is best to
burn the fire at a low output for the first day of use. This
will allow the new seals to settle and all new fixing glues
and paint to fully cure.
4.17 During this time, the stove may give off some unpleasant
odours, and we recommend that you keep the room well
ventilated during this period to avoid a build-up of fumes.
4.18 If you require help, your local Stovax dealer will be able to
carry out all of your service and maintenance requirements
for a reasonable cost.
10mm diameter 4965
Vaccuum Cleaner Attachment 2091
6.7 Remove side bricks by pulling base of brick towards centre
of stove and repeat for opposite side. Remove rear brick.
Fitting is reverse of the procedure.
7. FITTING AND REMOVAL OF BAFFLE
(2 PARTS)
7.1 To maintain safe and efficient combustion the stove is fitted
with a baffle in the top of the firebox.
7.2 Allow the stove to cool fully before removing baffle system.
7.3 To remove the baffle, remove the log guard from the stove
to give access to the firebox.
7.4 Care should be taken when handling bricks, as they can
become fragile after a period of use. This is normal and the
life will depend on the type of fuels burnt and the level of
use.
11
Page 12

MAINTENANCE and SERVICING
7.5 It is important to remove and clean the baffle system to
ensure the flue ways are clear of soot and debris and to
ensure the safe and efficient operation of the stove. The
frequency of cleaning will depend on the stove operating
conditions.
7.6 Replace any damaged baffles immediately.
7.7 Do not modify the baffle system.
HUNTINGDON 25
7.8 To remove the baffle, lift the baffle plate, rotate it and then
slide it out through the front.
HUNTINGDON 28, 30 & 35
7.9 To remove the bricks lift the LH baffle brick, slide the RH
baffle under the LH baffle to allow you to remove, then
remove the LH baffle brick. Remove the LH and RH side
bricks then the back brick. Fitting is the reverse of this
procedure.
HUNTINGDON 40
7.10 Side bricks must be removed first.
Remove side bricks by pulling base of brick towards centre
of stove and repeat for opposite side. Remove rear brick.
Fitting is reverse of the procedure.
glass. Do not over tighten the clips as this could break the
glass.
8.6 Fit only original Stovax ceramic glass, which is suitable to
use in high temperature applications.
8.7 Using the stove with a damaged door glass could cause
dangerous fumes to enter the room, or the stove to overfire,
resulting in damage.
9. FITTING A NEW DOOR SEAL
ALL MODELS
9.1 To maintain the safe use of your stove you may need to
replace a damaged or worn door sealing rope. To complete
this operation, use this method.
9.2 Remove the door from the stove, by opening, removing
the hinge pins and lifting the door free of the hinge blocks.
Then lie the door face down on a soft flat surface, to protect
the paintwork and glass.
9.3 Remove the old rope and scrape old glue from the locating
groove. Clean the locating groove with a clean dry cloth to
remove all old dust and debris.
7.11 Lift LH baffle brick as high and as far forward as possible,
slide RH baffle brick under LH baffle brick and lower
into stove. Repeat for LH brick. Fitting is reverse of the
procedure.
8. FITTING A NEW DOOR GLASS
ALL MODELS
8.1 To maintain the safe use of your stove you may need to
replace a damaged door glass. To complete this operation,
use this method.
8.2 Remove the door, by opening, removing the hinge pins and
lifting the door free of the hinge blocks. Then lie the door
face down on a soft flat surface, to protect the paintwork
and glass.
8.3 Using a screwdriver remove the glass clip fixing screws. The
old glass can then be lifted clear of the door. (Note how
the 3mm sealing rope is placed between the glass and the
door.) Remember to dispose of the old glass safely.
8.4 Clean and re-paint the rear of the door if required. Clean
the screws with light oil and coat with high temperature
anti-seize grease, this will aid future removal.
8.5 Fit a new sealing rope between the new glass and the door,
and place the glass into position in the door. Place the glass
fixing clips in to position and re-fix with the clean fixing
screws, tighten the screws evenly until the clips hold the
9.4 Squeeze a generous bead of fresh Stovax Thermic Seal glue
into the rope locating groove. Press the new Stovax rope
into the locating groove, placing the joint in the middle of
the lower edge of the door.
9.5 Refit the door and close the door to apply pressure to the
new rope. Leave the stove closed for at least 12 hours
before lighting the stove and using at a low output for
approximately one day.
9.6 Using the stove with a damaged door seal could cause
dangerous fumes to enter the room, or the stove to overfire,
resulting in damage.
10. ADJUSTING DOOR HINGES
28/30/35/40 ONLY
10.1 To maintain the safe use of your Huntingdon stove, you
may need to adjust the door hinges to ensure safe correct
closing of the door. This is completed by loosening the
hinge fixing screws and moving the hinge position, then
tightening the fixing screws.
If you require help, your local Stovax dealer will be able to
carry out all of your service and maintenace requirements
for a reasonable cost.
12
Page 13
13
Page 14
14
Page 15
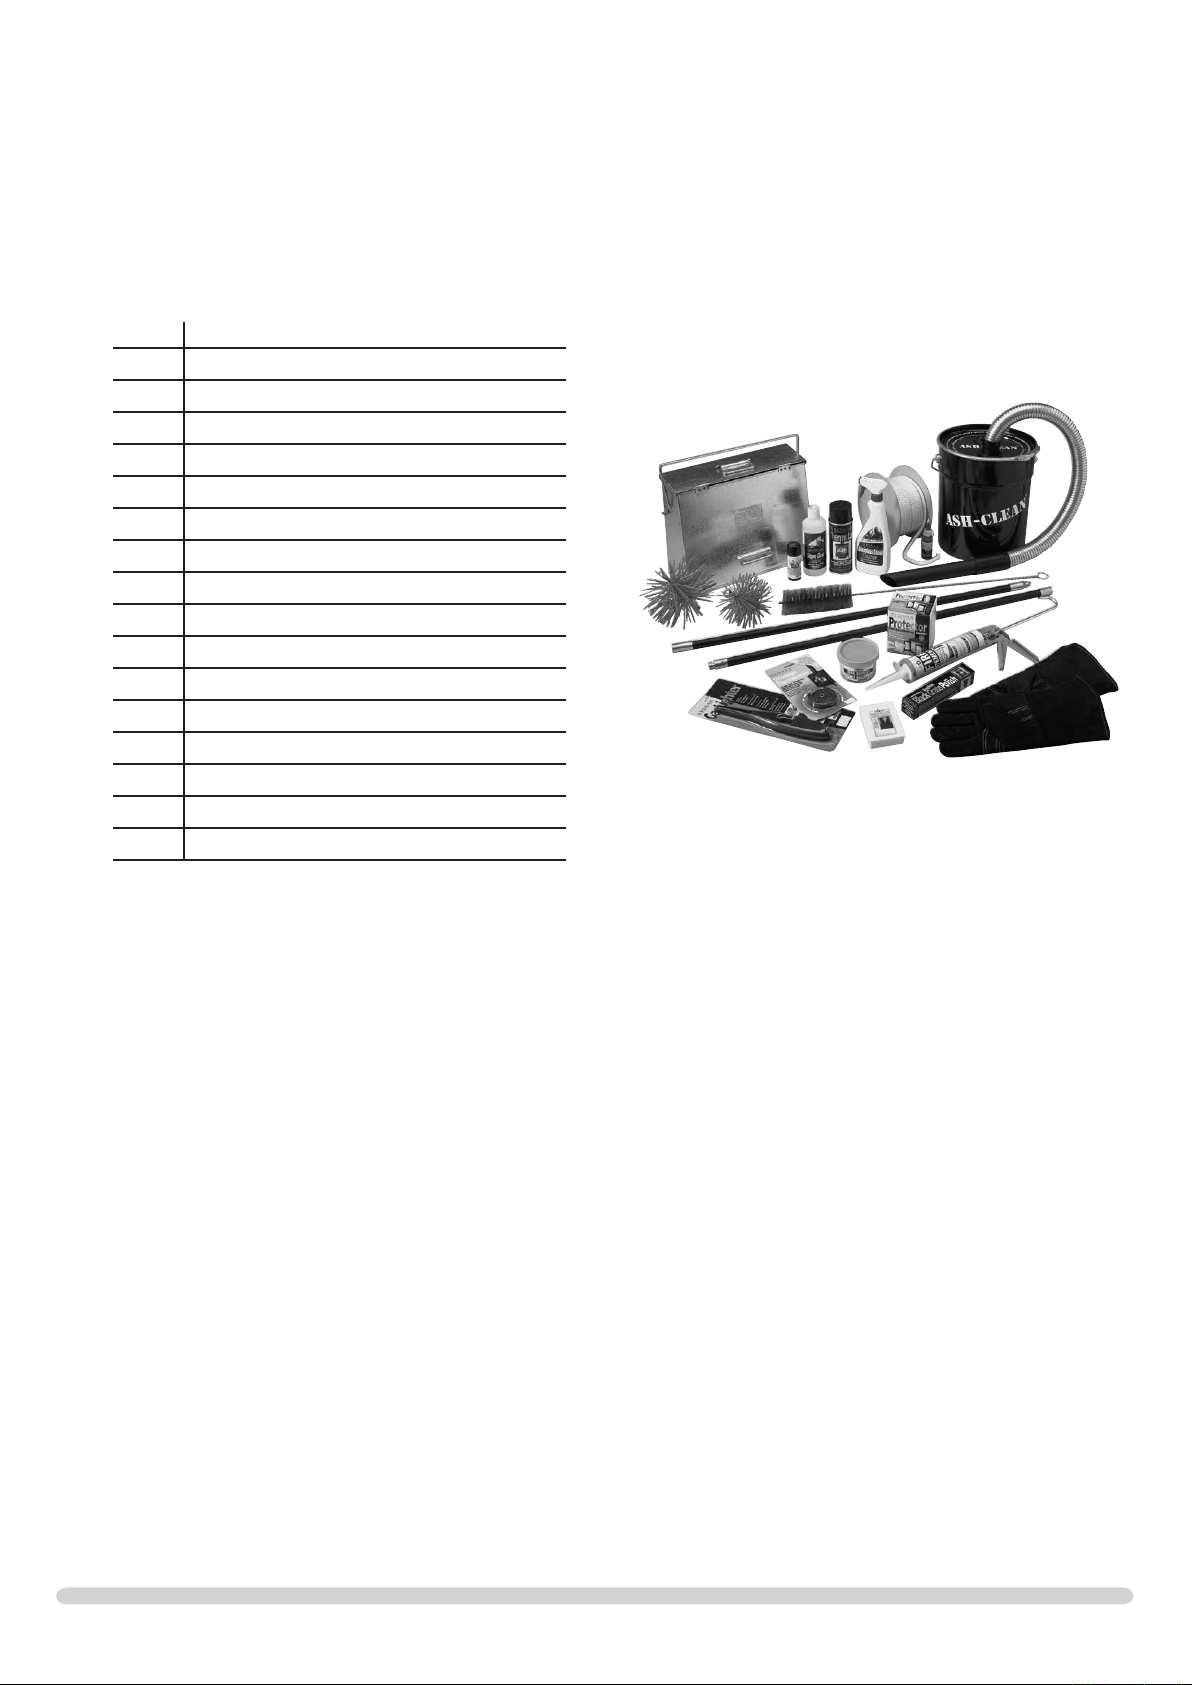
CARE OF YOUR HUNTINGDON
To help you get the best performance from your Huntingdon and keep it in good condition, inside and out, Stovax offers a wide range of
cleaning and maintenance products as well as a host of accessories to help you enjoy the maximum pleasure from your stove. Your Stovax
retailer will be able to provide full details but here is a brief list of items that may be of interest:
Product Description
Code
4293 Fire lighters
5039 Gas lighter
4052 Log basket
3048 Wood sling - for easy carrying of logs
3016 Log tongs
4027 Extra long protective gloves
3046 Stove pipe thermometer
5038 Hearthgate - 5 section (for areas 1780x610mm)
5044 Hearthgate - 7 section (for areas 1780x405mm)
4227 Ash caddy - 382x102x306mm
4228 Ash caddy - 446x102x306mm
4229 Ash caddy - 382x102x459mm
4230 Ash caddy - 637x127x408mm
4231 Ash caddy - 306x178x459mm
2091 Ashclean vacuum cleaner attachment
4232 Steel brush
3047 Extra long matches
Your retailer will also be able to provide genuine spare parts such as replacement glass, door sealing rope and re bricks, as and when
required. Remember, an annual service is recommended to keep your appliance in best possible condition.
15
Page 16

Stovax Ltd, Falcon Road, Sowton Industrial Estate, Exeter, Devon, England EX2 7LF
Tel: (01392) 474011 Fax: (01392) 219932 E-mail: [email protected] www.stovax.com
 Loading...