

Page 1
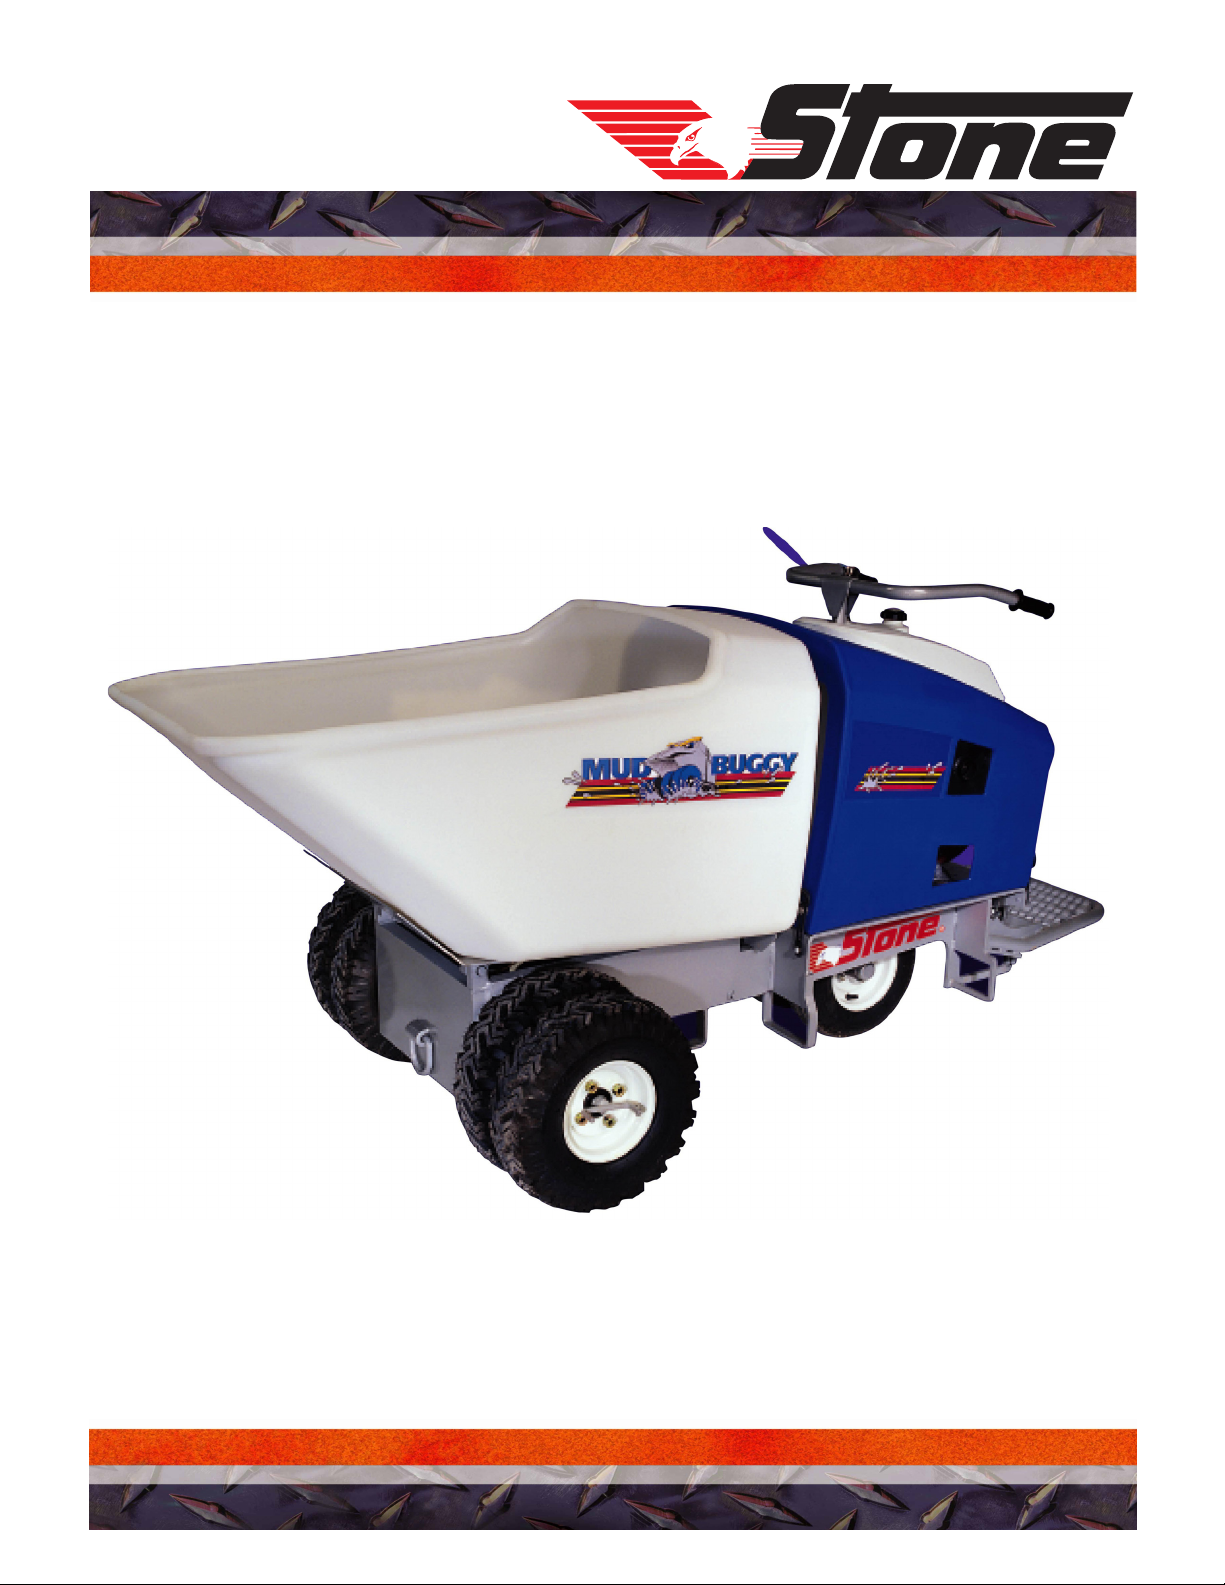
OPERATOR MANUAL
MODELS: SB1600, FB1000
®
Mud Buggy
A 100% employee-owned American manufacturer
REVISION: H 6/2005 PN 56486
Page 2

Page 3

Table of Contents
FOREWORD ...................................................................................................................... 4
LIMITED WARRANTY .................................................................................................... 5
TECHNICAL DATA .......................................................................................................... 6 - 10
Machine Specifications................................................................................................... 6
Engine Specifications ..................................................................................................... 7
Lubrication Specifications .............................................................................................. 7
Machine Sound Level Specifications ............................................................................. 8
Engine Controls .............................................................................................................. 9
Machine Operation Controls .......................................................................................... 10
HEALTH & SAFETY ........................................................................................................ 11 - 16
Mud Buggy
OPERATION ...................................................................................................................... 17-23
Engine ............................................................................................................................. 17
Pre-Start Checklist .......................................................................................................... 17
Engine Starting/Stopping Instructions ............................................................................ 17
Machine Operation ......................................................................................................... 18
Quick Release Dual Wheels ........................................................................................... 19
Lifting Points/Transporting/Storage ............................................................................... 20
Hydraulic Oil/Fuel/Hardware ......................................................................................... 21
Cleaning/Storage............................................................................................................. 22
Warning Decals............................................................................................................... 23
Lubrication...................................................................................................................... 24
CALIFORNIA PROPOSITION 65 WARNING .............................................................. IBC
- 3 -
Page 4

User Information
These instructions include:
Foreword
Safety regulations
Operating instructions
Maintenance instructions
These instructions have been prepared for
operation on the construction site and for the
maintenance engineer.
These instructions are intended to simplify
operation of the machine and to avoid
malfunctions through improper operation.
Observing the maintenance instructions will
increase the reliability and service life of the
machine when used on the construction site
and reduce repair costs and downtimes.
Always keep these instructions at the place
of use of the machine.
Only operate the machine as instructed and
follow these instructions.
Observe the safety regulations as well as the
guidelines of the civil engineering trade
association. Observe the safety rules for
operation and the pertinent regulations for
the prevention of accidents.
1. Machine Type: ______________________________
Machine S/N: _______________________________
2. Engine Type: _______________________________
Engine S/N: ________________________________
3. VIN: ______________________________________
4. Purchase Date: ______________________________
5. Dealer/Distributor Information:
Name: _____________________________________
Address: ___________________________________
__________________________________________
Phone #: ___________________________________
Fax #: _____________________________________
6. Battery
Manufacturer: ______________________________
Battery Type: _______________________________
Battery S/N: ________________________________
Stone Construction Equipment, Inc. is not
liable for the function of the machine when
used in an improper manner or for other
than the intended purpose.
Operating errors, improper maintenance
and the use of incorrect operating materials
are not covered by the warranty.
The above information does not extend the
warranty and liability conditions of business
of Stone Construction Equipment, Inc.
Stone Construction Equipment, Inc.
P.O. Box 150, Honeoye, New York 14471
Phone: (800) 888-9926
Fax: (585) 229-2363
Location of above information:
1. Information on S/N tag.
2. Information on engine tag.
3. Information on S/N tag - if applicable.
4. Date you purchased machine.
5. Dealer machine was purchased from.
6. Information on battery and battery warranty
card--if applicable.
- 4 -
Page 5

L i m i t e d W a r r a n t y
The Manufacturer warrants that products manufactured shall be free from defects in material and
workmanship that develop under normal use for a period of 90 days for concrete vibrators and electric
pumps, one year for Rhino®, Bulldog®, WolfPac Rollers, trowels, Stompers®, saws, forward plates, engine
powered pumps, Lift Jockey, Mortar Buggy and 6 months for all other products from the date of
shipment. The foregoing shall be the exclusive remedy of the buyer and the exclusive liability of the
Manufacturer. Our warranty excludes normal replaceable wear items, i.e. gaskets, wear plates, seals, Orings, V-belts, drive chains, clutches, etc. Any equipment, part or product which is furnished by the
Manufacturer but manufactured by another, bears only the warranty given by such other manufacturer.
(The Manufacturer extends the warranty period to “Lifetime” for the drum bearings and seals for the mortar
mixers, and agrees to furnish, free of charge, the bearings and seals only upon receipt of the defective
parts. The warranty is two years for eccentric bearings on the forward plate compactors, mortar and plaster
mixer drums, trowel gearboxes, three years on the Bulldog trench roller microprocessor (ECIB) and five
years on the Bulldog trench roller eccentric bearings.) A Warranty Evaluation Form must accompany all
defective parts. Warranty is voided by product abuse, alterations, and use of equipment in applications for
which it was not intended, use of non-manufacturer parts, or failure to follow documented service instructions.
The foregoing warranty is exclusive of all other warranties whether written or oral, expressed or implied.
No warranty of merchantability or fitness for a particular purpose shall apply. The agents, dealer and
employees of Manufacturer are not authorized to make modification to this warranty, or additional warranties
binding on Manufacturer. Therefore, additional statements, whether oral or written, do not constitute warranty
and should not be relied upon.
The Manufacturer’s sole responsibility for any breach of the foregoing provision of this contract, with respect
to any product or part not conforming to the Warranty or the description herein contained, is at its option (a)
to repair, replace or refund such product or parts upon the prepaid return thereof to location designated
specifically by the Manufacturer. Product returns not shipped prepaid or on an economical transportation
basis will be refused (b) as an alternative to the foregoing modes of settlement - the Manufacturer’s dealer
to repair defective units with reimbursement for expenses, except labor, and be reviewed with the
Manufacturer prior to repair. A Warranty Evaluation Form must accompany all warranty claims.
Except as set forth hereinabove and without limitation of the above, there are no warranties or other
affirmations which extends beyond the description of the products and the fact hereof, or as to operational
efficiency, product reliability or maintainability or compatibility with products furnished by others. In no
event whether as a result of breach of contract or warranty or alleged negligence, shall the Manufacturer
be liable for special or consequential damages including but not limited to: Loss of profits or revenues, loss
of use of the product or any associated product, cost of capital, cost of substitute products, facilities or
services or claims of customers.
No claim will be allowed for products lost or damaged in transit. Such claims should be filed with the carrier
within fifteen days.
Effective January 2004.
Stone Construction Equipment, Inc. • 8662 Main Street, P. O. Box 150 • Honeoye, NY 14471-0150
Phone: 1-800-888-9926 • 1-585-229-5141 Fax: 1-585-229-2363
www.stone-equip.com • e-mail: [email protected]
- 5 -
P/N 51018 F-7080 7/2002
Page 6
Technical Data
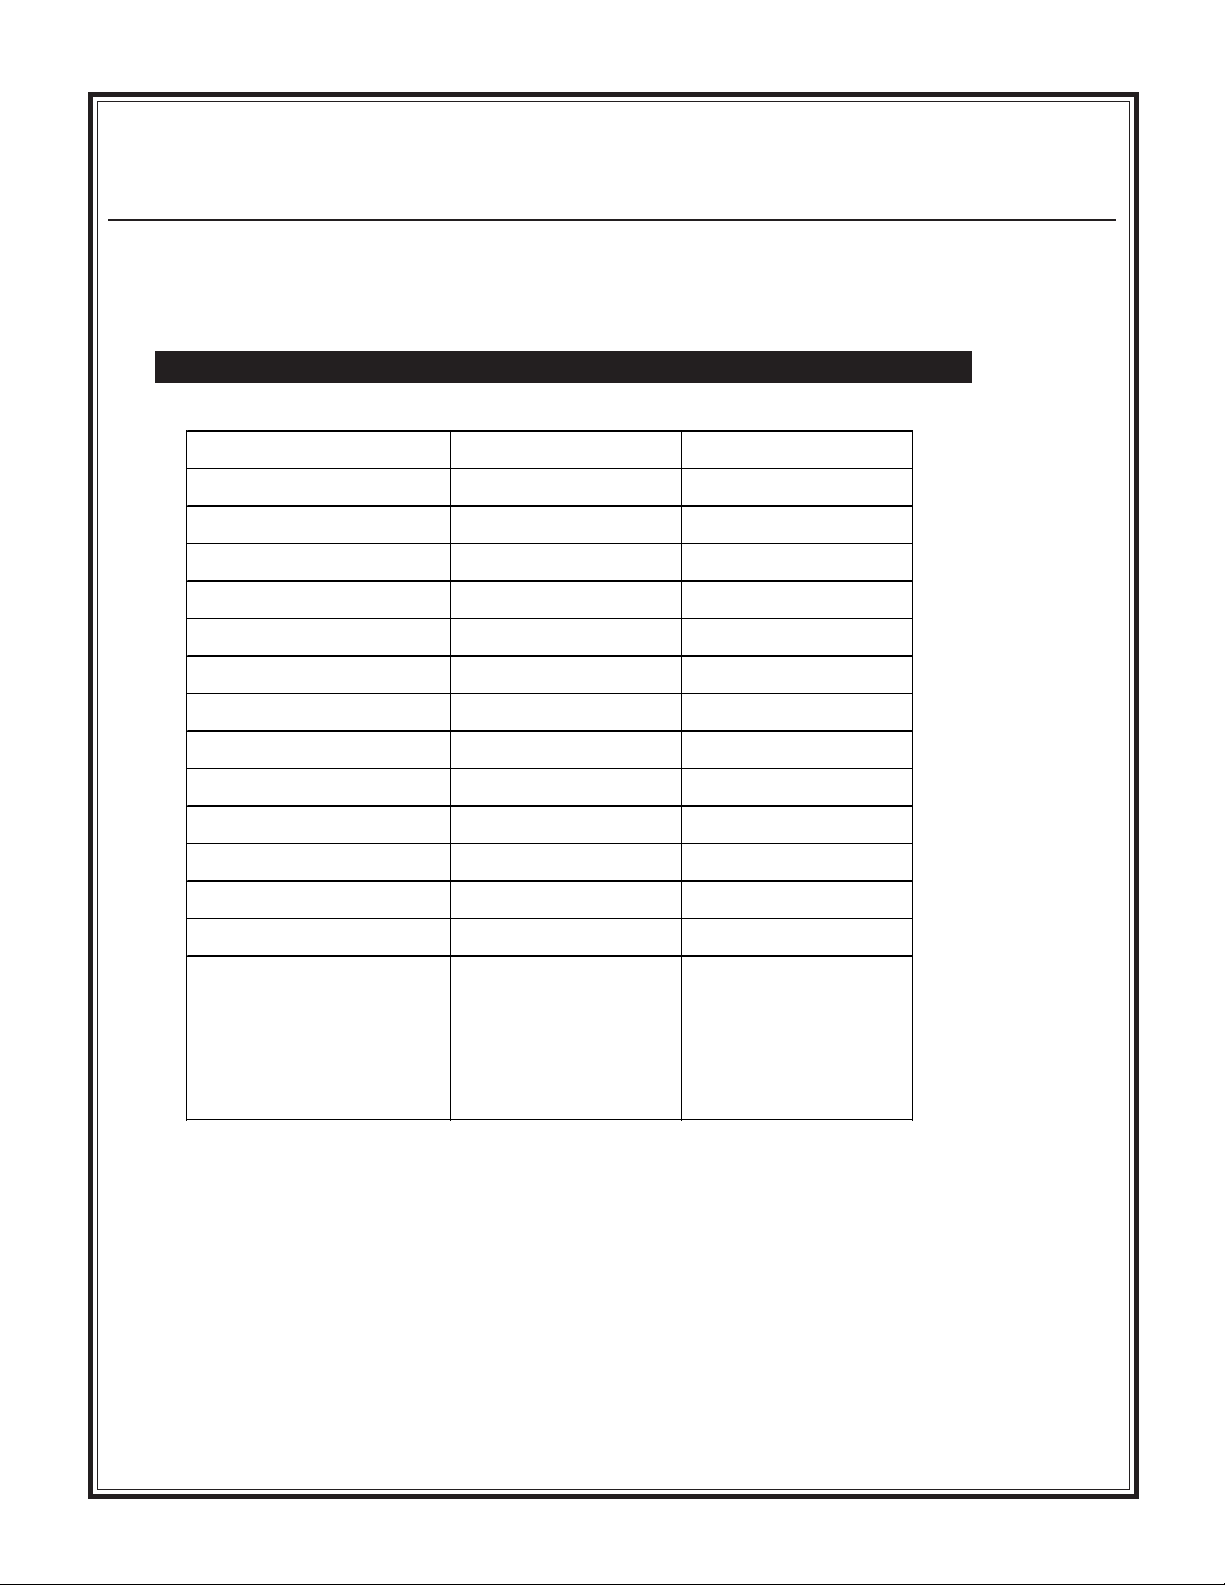
Mud Buggy – Specifications
Model SB1600 FB1000
Capacity (m3) 16 Cu. Ft. (.45) 10 Cu. Ft. (.28)
Weight (kg) 1370 lbs. (621) 1520 lbs. (689)
Length (cm) 105.5 in. (268) 105.5 in. (268)
Width (single wheel) (cm) 33.75 in. (86) 33.75 in. (86)
Width (Double wheel) (cm) 46 in. (117) 46 in. (117)
Height (cm) 45 in. (114,3) 45 in. (114,3)
Wheelbase (cm) 42 in. (107) 42 in. (107)
Max. Load (kg) 2500 lbs. (1136) 2500 lbs. (1136)
Specifications
Tub Polyethylene Stake Bed
Engine (kW) 13 hp. Honda (9,7) 13 hp. Honda (9,7)
Speed (km/h) 7.0 mph (11,3) 7.0 mph (11,3)
Fuel Tank (l) 7 gal. (26,5) 7 gal (26,5)
Discharge Height (cm) 6.5 in (16,5) 6.5 in (16,5)
Options
Q uick- Rele as e
Removable Tires
Fo a m- filled Tires
Steel Drum
Electric Start
Quick-Release
Removable Tires
Foam-filled Tires
Electric Start
- 6 -
Page 7
Technical Data
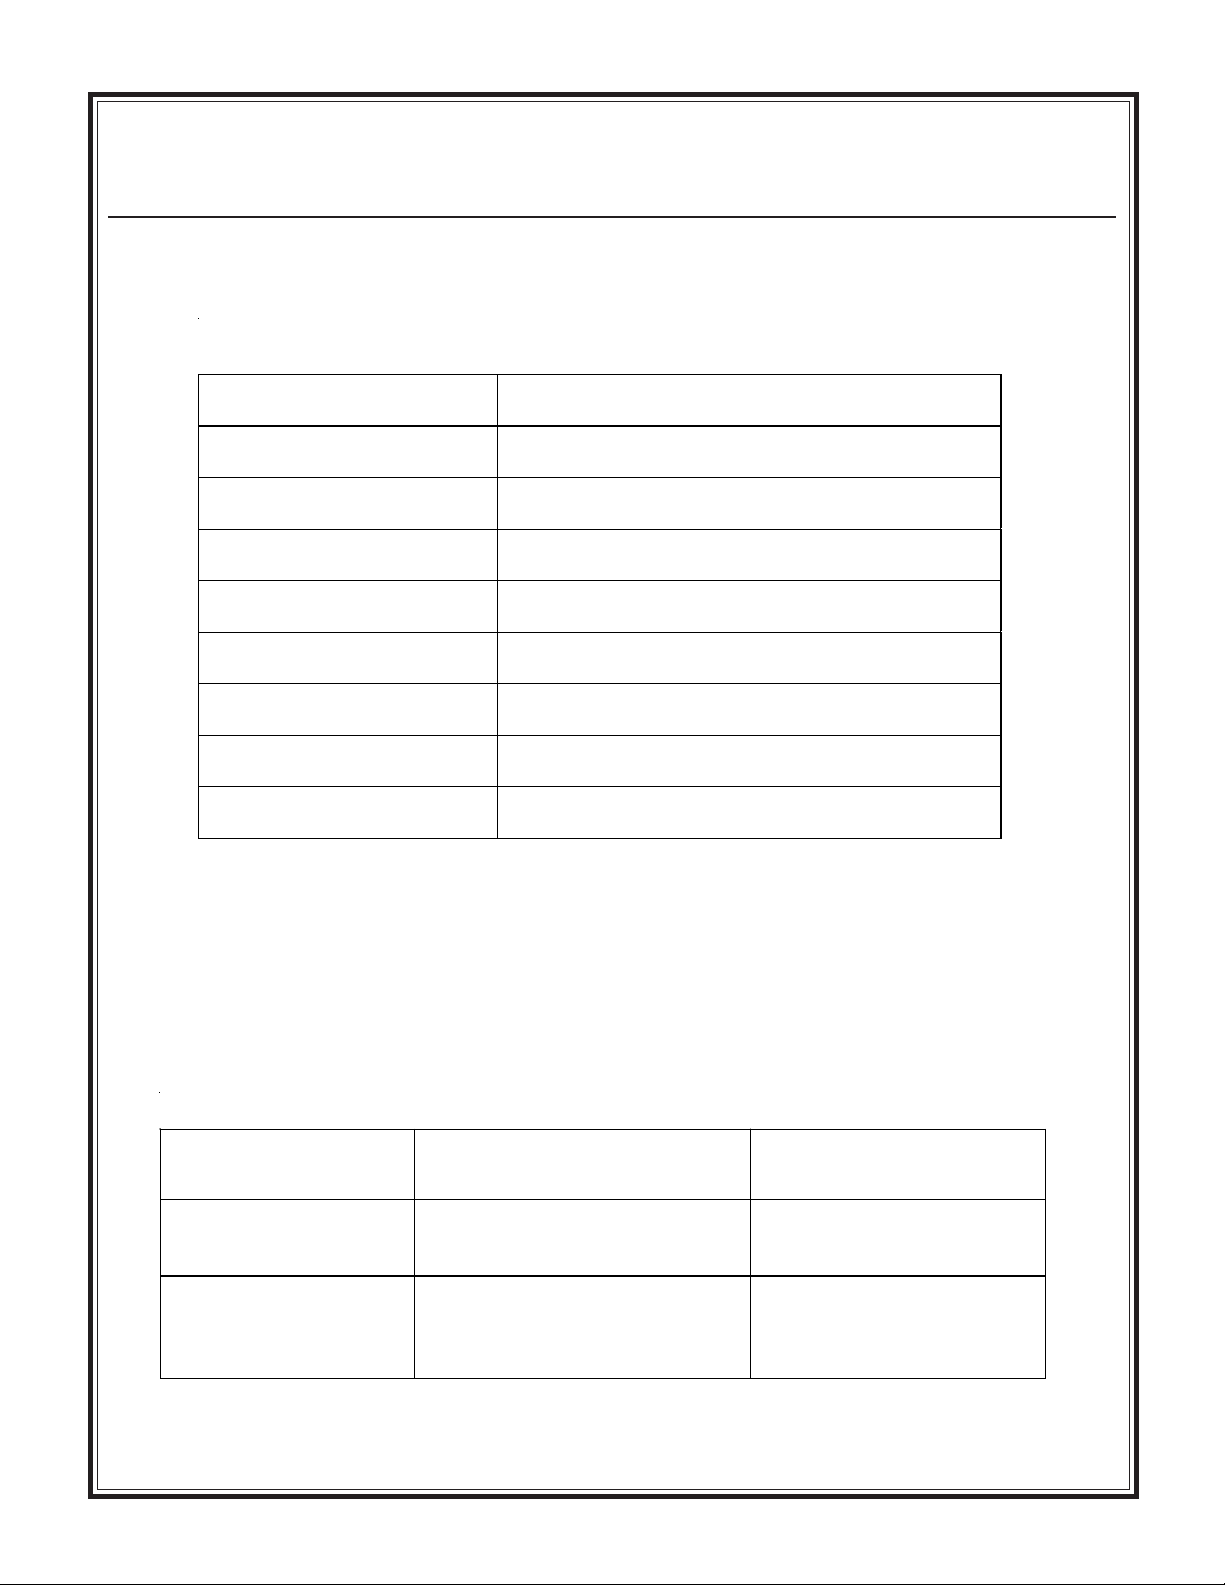
ENGINE SPECIFICATIONS
Engine Type 13hp 4-cycle Overhead Valve
Engine Make Honda
Engine Model GX390
Power @ 2500 RPM 19.5 ft.lb. (26.5 Nm)
Operating RPM 3900
Battery 165 amp
Fuel Type Unleaded Gas
Fuel Tank Capacity 7 gal (26.5 liter)
Engine & Lubrication Specs
Fuel Consumption 1.14 gph (4.2 liter)
LUBRICATION SPECIFICATIONS
Type Quantity
Engine Crankcase See Engine Manual 1.6 quarts/1.1 liter
Hydraulic System
Mobilfluid 424 Hydraulic Oil(VI-
152) SUS255 55CST ISO VG55
30 quarts/28.39 liter
- 7 -
Page 8
Machine Sound Level
Technical Data
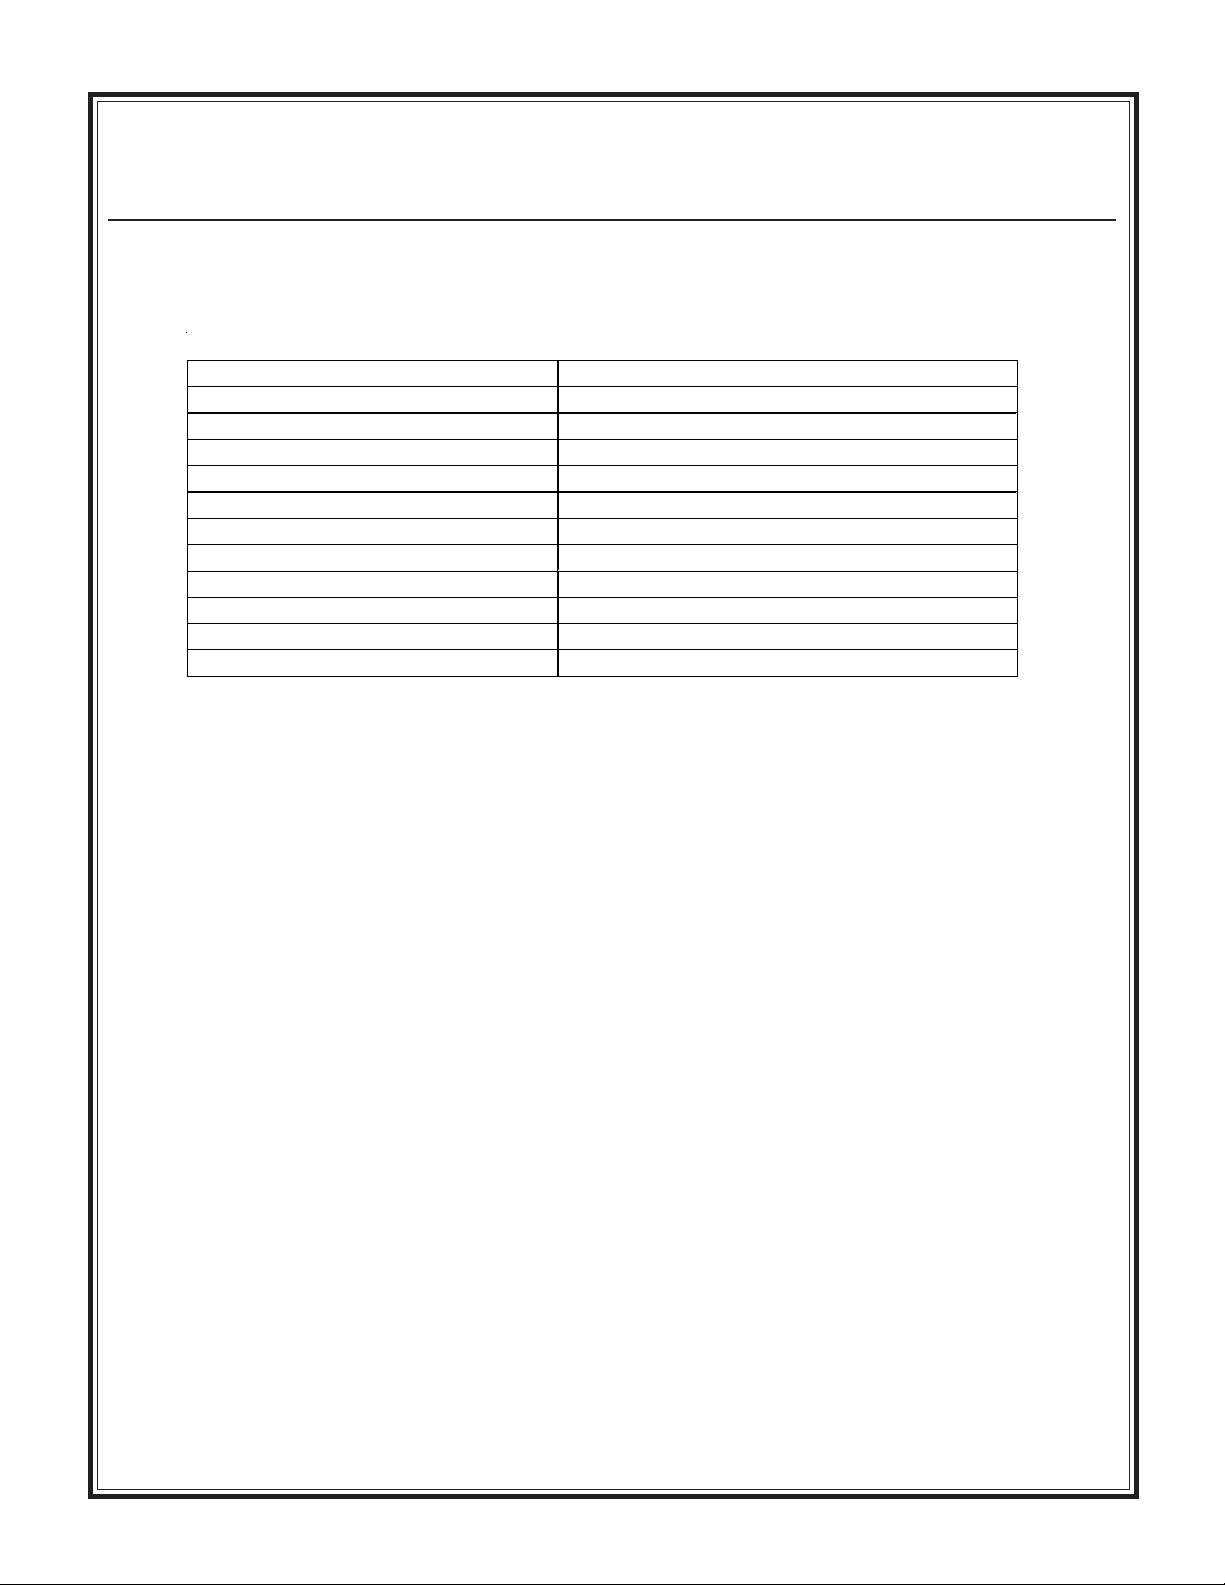
Machine Type: Mud Buggy Material Handler
Sound Level Meter Calibration Date: February 15, 2000
Meter Type: Simpson Model 886-2 Type 2
Test Date: September 20, 2001
Test Conditions
Temperature: 31 degrees Fahrenheit / 1 degree Celsius
Ambient Sound: dba fast mode
Moisture Limit: Approximately equal to 50%
Engine speed: 3600 rpm / 60 Hz
Sound Level at Operator Position: 73 dba
Specifications
Test Site; Honeoye, New York USA
- 8 -
Page 9
Technical Data
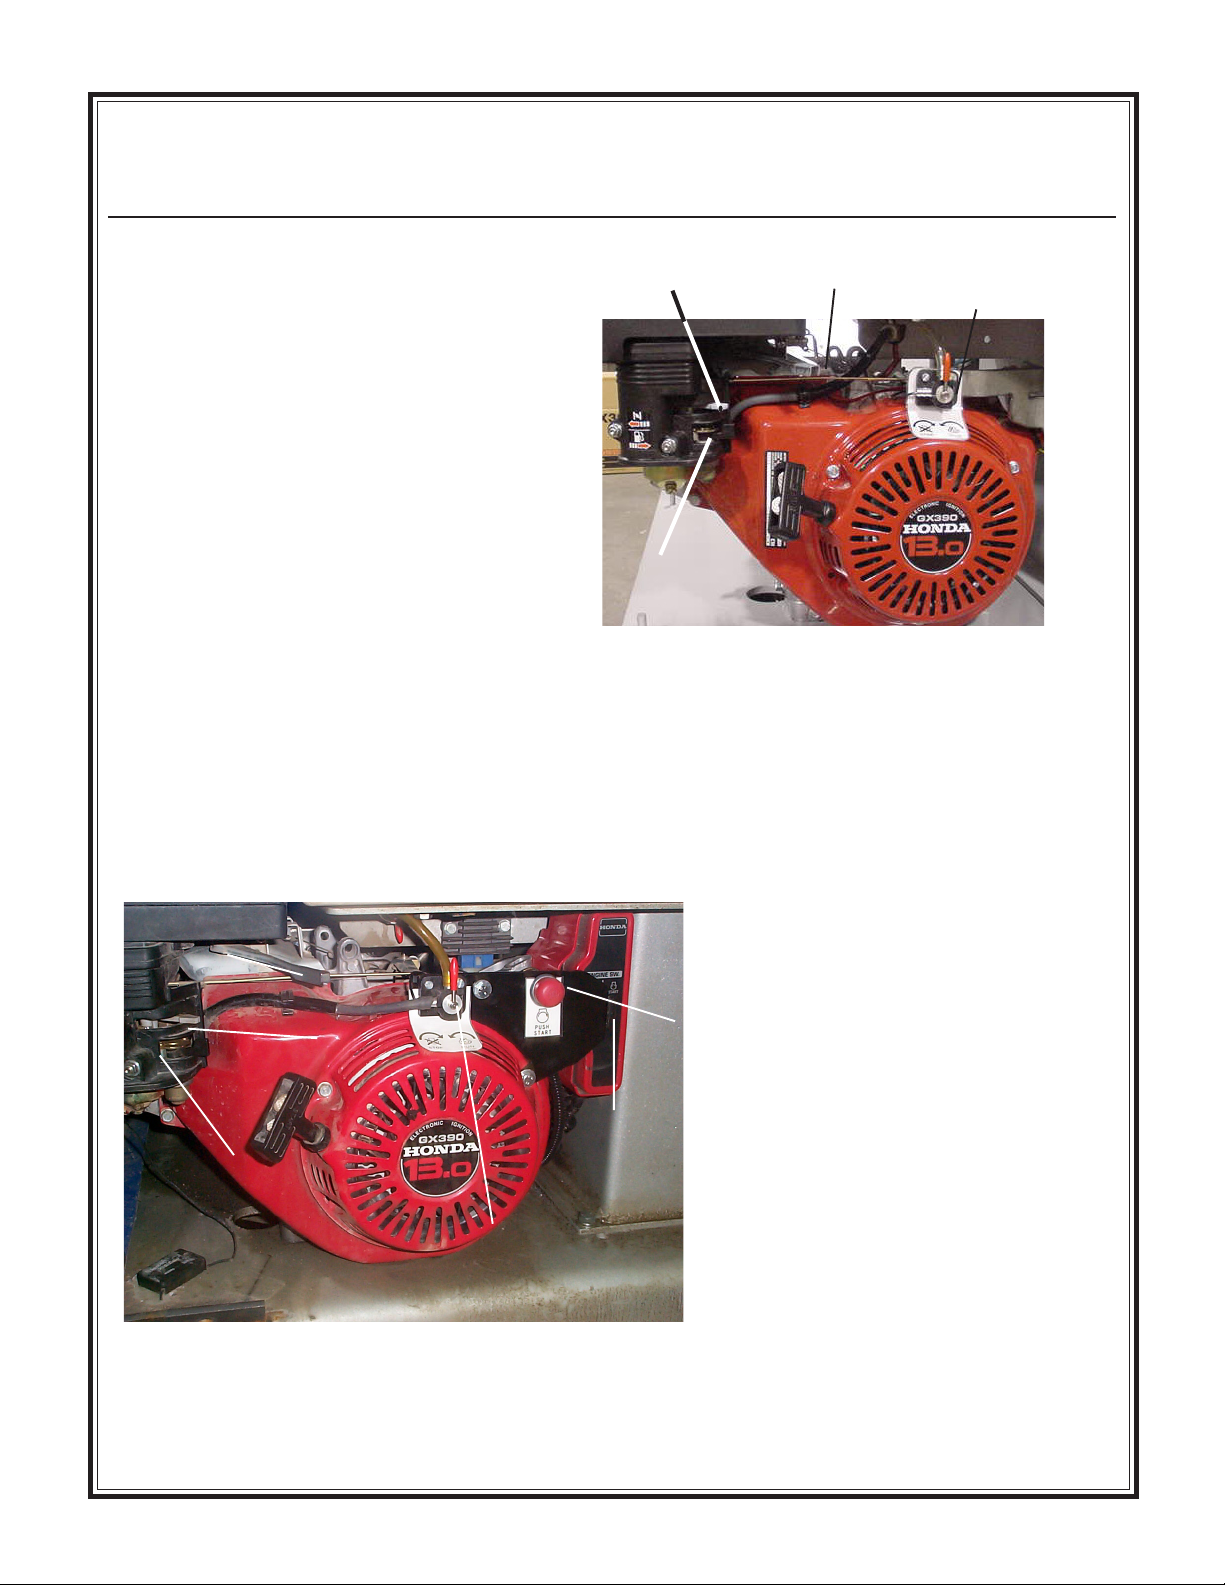
Engine Controls
Manual Recoil Start
Engine Choke
Gas
Valve
Throttle
Engine Fuel
Stop Switch
Throttle
Gas Valve
(carburetor)
Electric Option
Choke
Engine Start
Button
Key Switch
on
Engine Controls
Engine Fuel
Stop Switch
- 9 -
Page 10
Technical Data
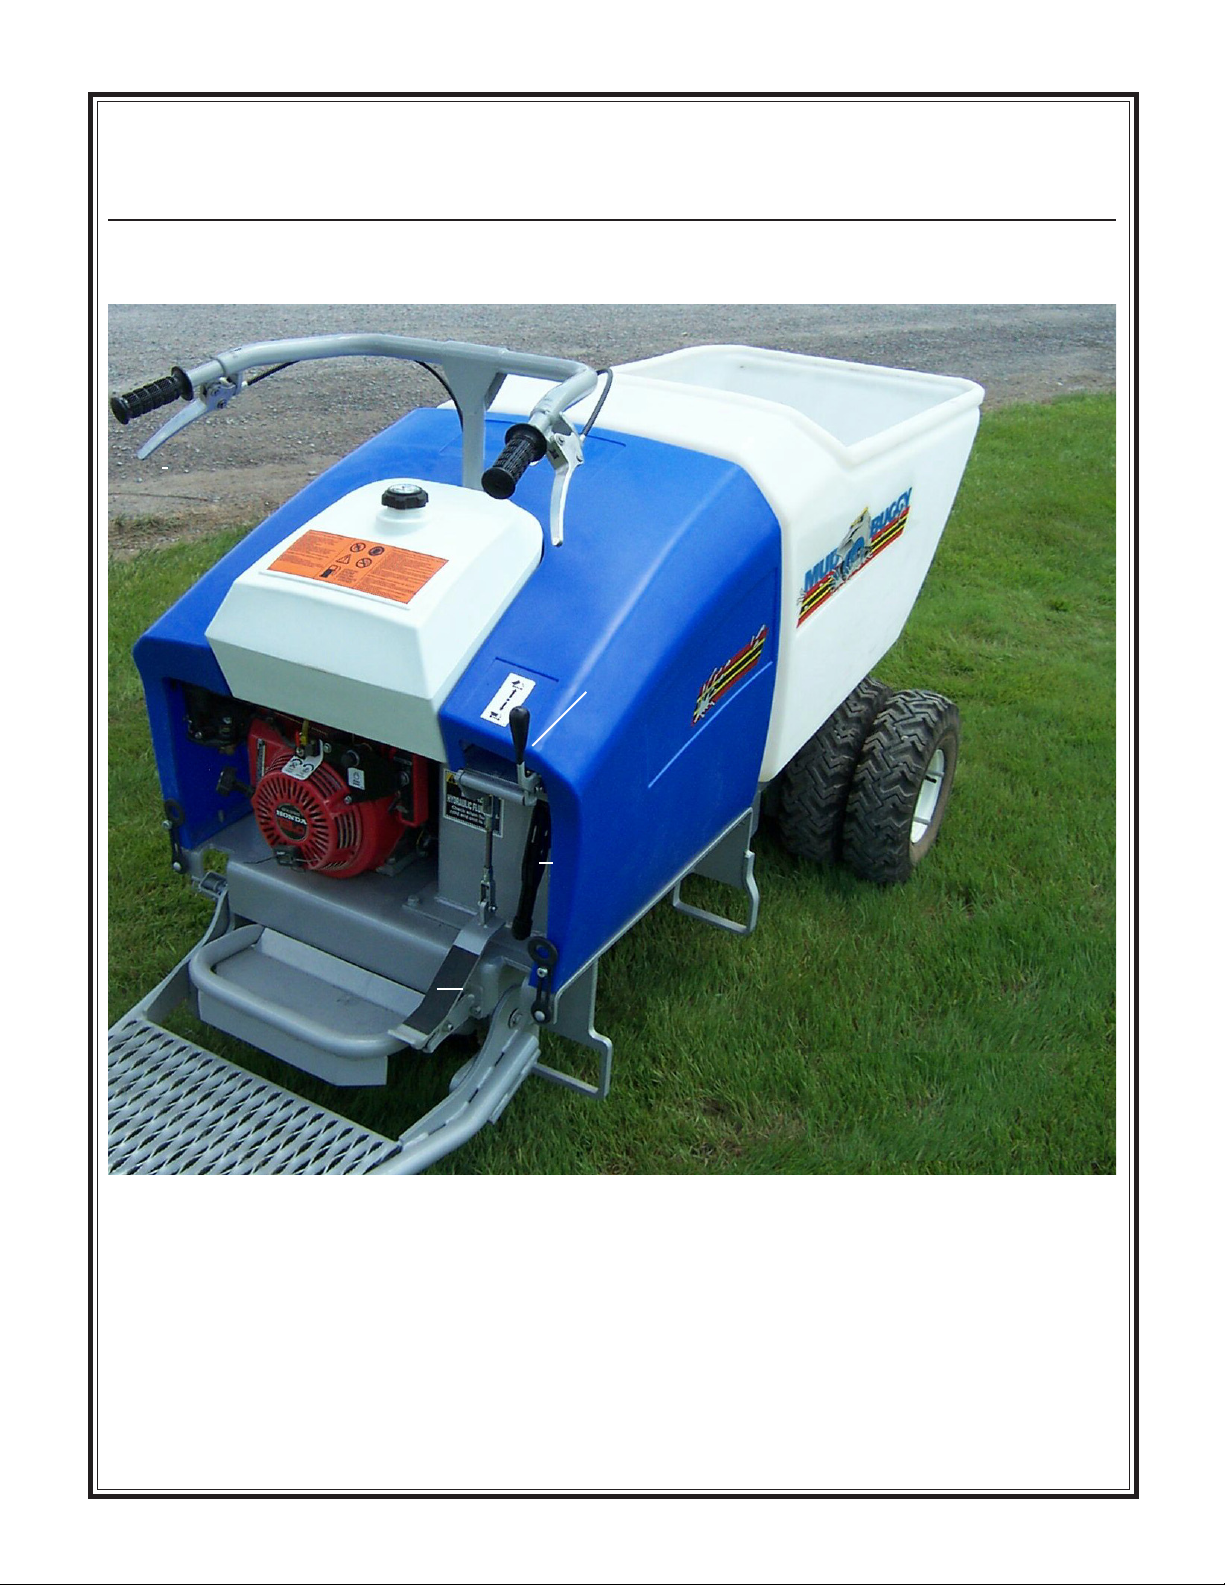
Reverse
Speed
Control
Handle
Machine Operation Controls
Forward Speed
Control Handle
Dump Handle
Brake Pedal
Parking Brake
Dump Pedal
- 10 -
Page 11
Health & Safety
Safety Precautions
Before using this equipment, study this entire manual to
become familiar with its operation. Do not allow
untrained or unauthorized personnel, especially children,
to operate this equipment. Use only factory authorized
parts for service.
FOLLOW SAFETY INSTRUCTIONS
Carefully read all safety messages and decals in this manual and on
your machine safety signs. Keep decals in good condition. Replace
missing or damaged decals. Be sure new equipment components and
repair parts include the current safety signs. Replacement safety
signs and decals are available through your dealer.
Learn how to operate the machine and how to use controls properly.
Do not let anyone operate without instruction.
Keep your machine in proper working condition. Unauthorized
modifications to the machine may impair the function and/or safety
and affect machine life.
If you do not understand any part of this manual and need assistance,
contact your dealer.
When warning decals are destroyed or missing, contact
the Manufacturer immediately at 1-800-888-9926 for
replacement. For the safety of yourself and others, it is
imperative that the following rules are observed. Failure
to do so may result in serious injury or death.
This notation appears before warnings in the text. It means that the
step which follows must be carried out to avoid the possibility of
personal injury or death. These warnings are intended to help the
technician avoid any potential hazards encountered in the normal
service procedures. We strongly recommend that the reader takes
advantage of the information provided to prevent personal injury or
injury to others.
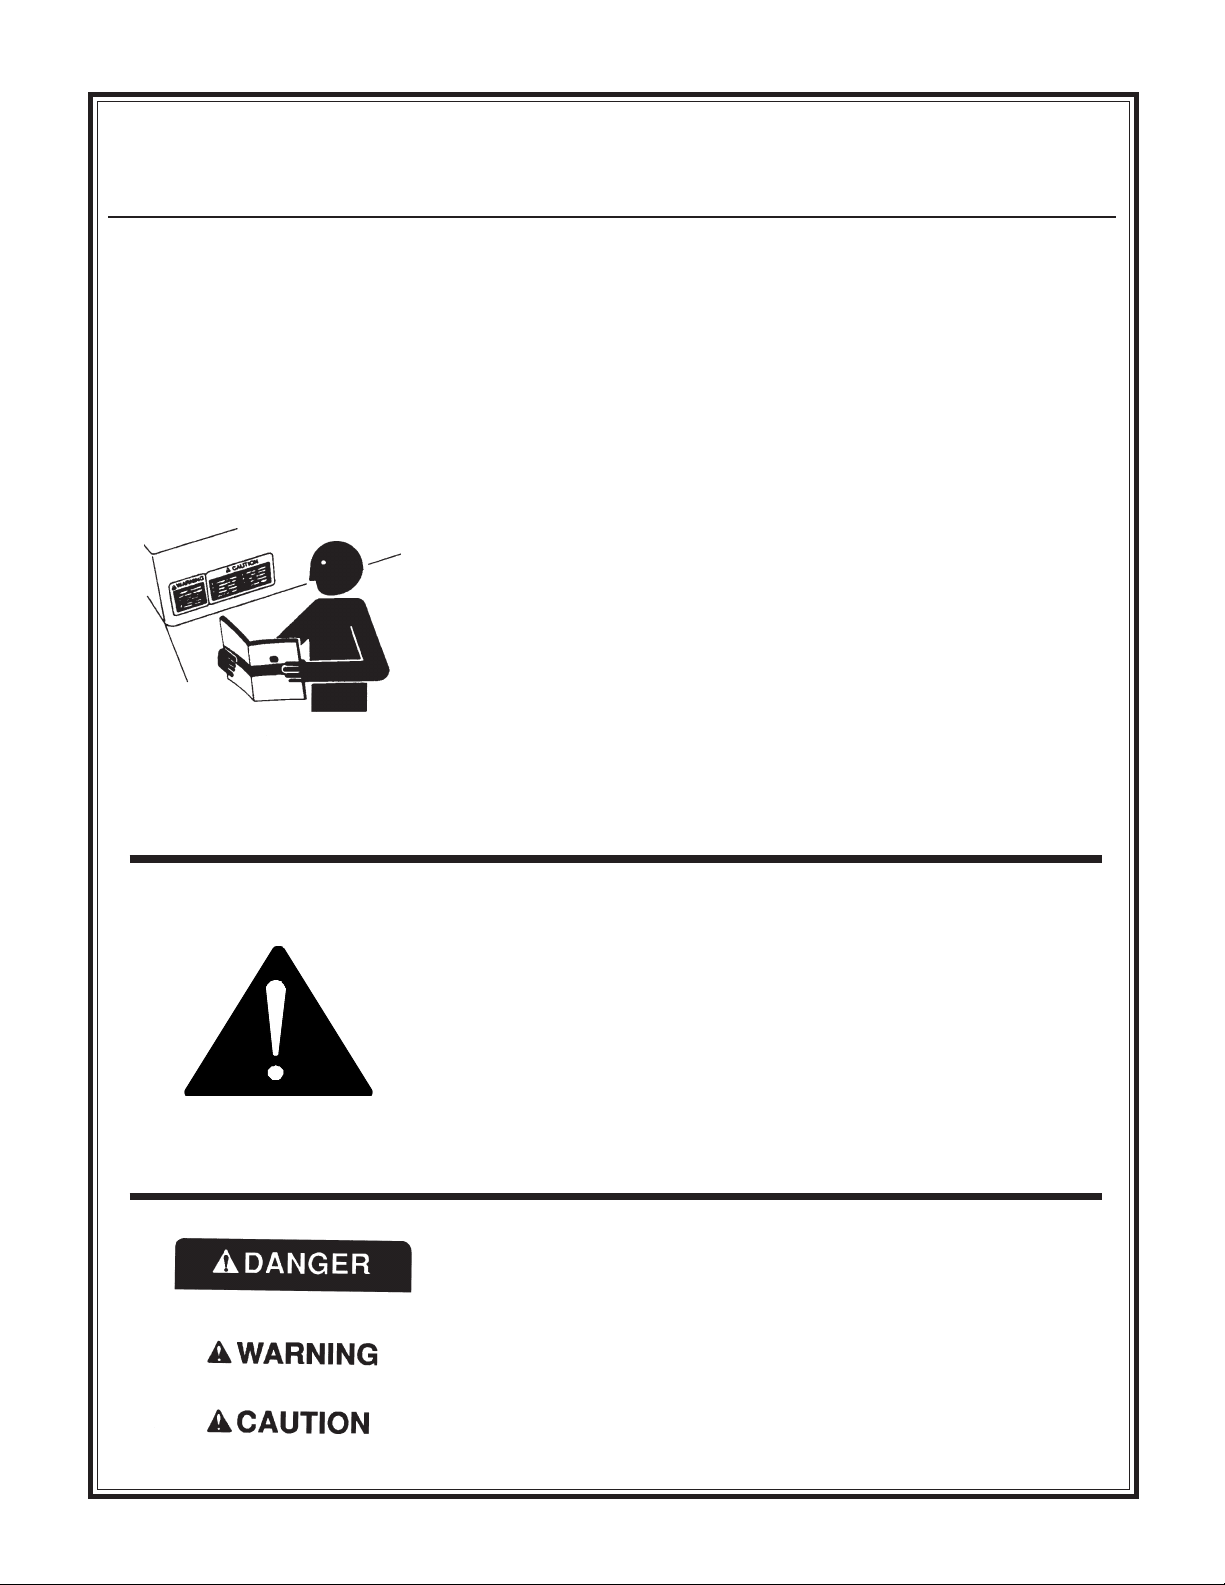
UNDERSTAND SIGNAL WORDS
A signal word DANGER, WARNING, or CAUTION is used with
the safety-alert symbol. DANGER identifies the most serious hazards.
DANGER or WARNING safety signs are located near specific
hazards. General precautions are listed on CAUTION safety signs.
CAUTION also calls attention to safety messages in this manual.
- 11 -
Page 12
Health & Safety
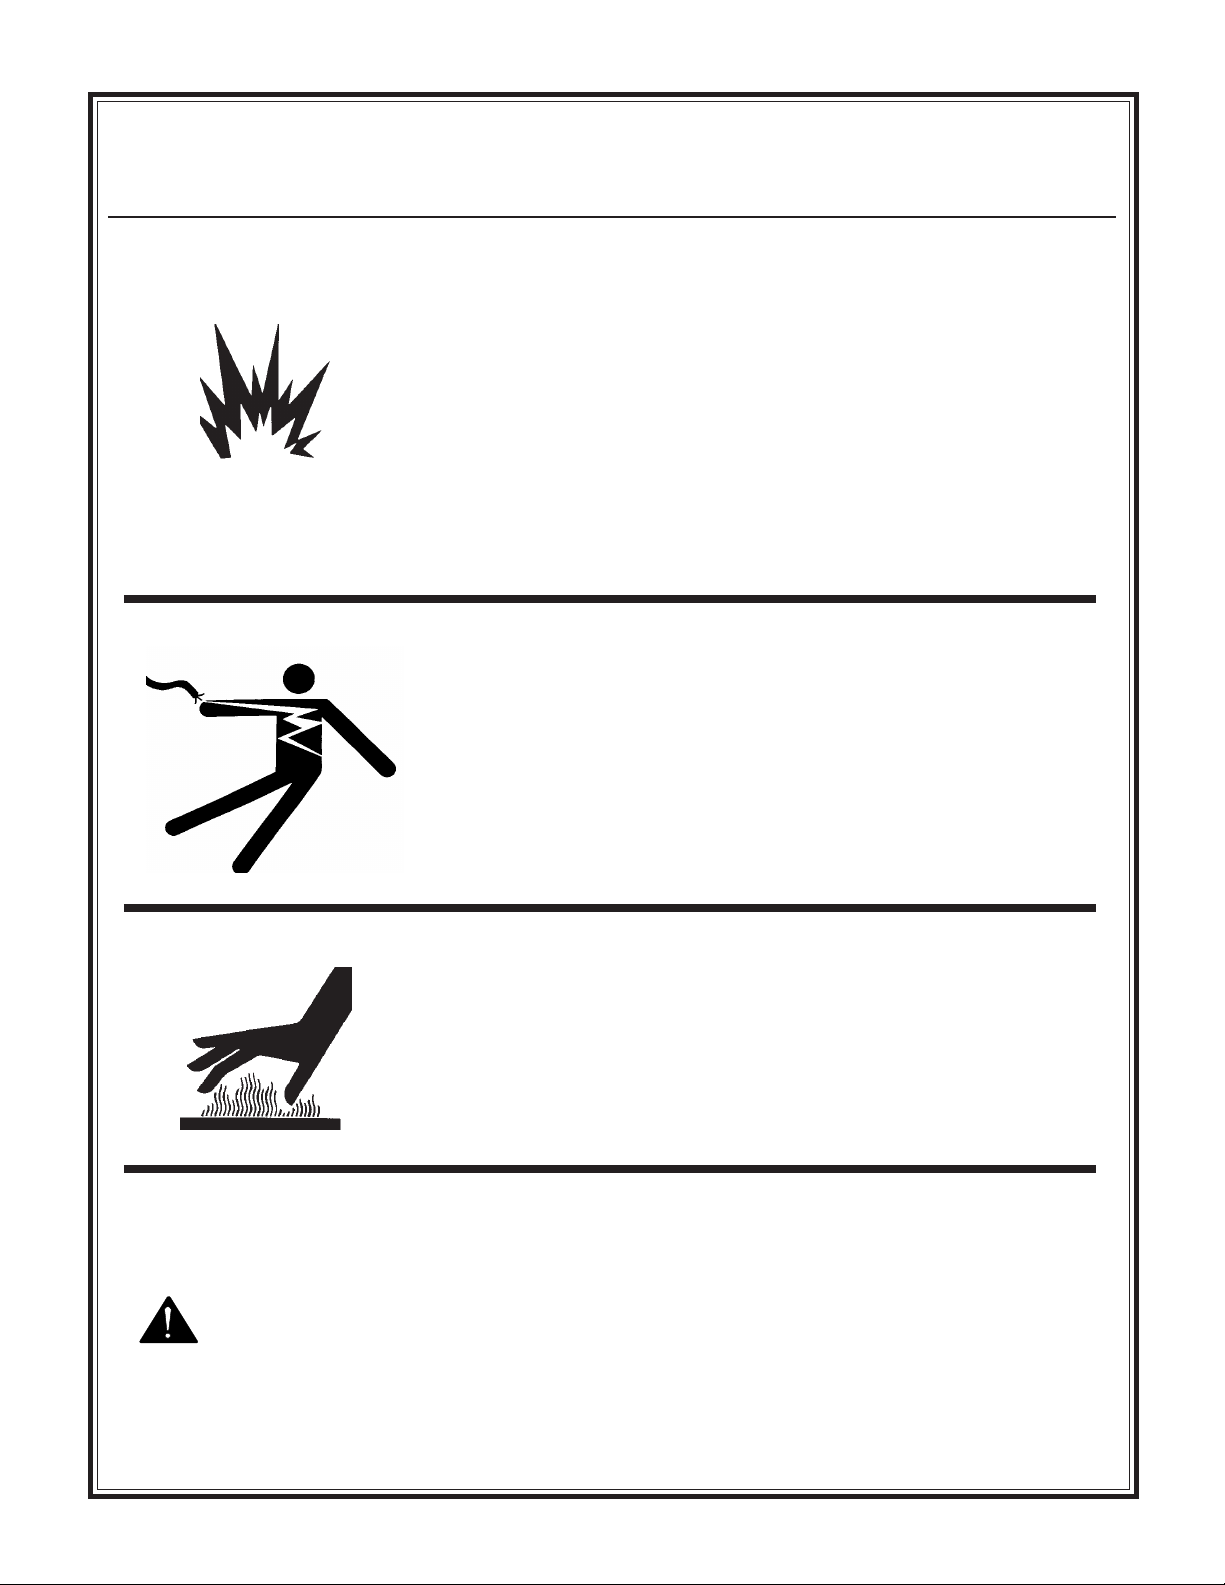
USE COMMON SENSE WHEN HANDLING FUELS
Transport and handle fuel only when contained in approved safety
container.
Do not smoke when refueling or during any other fuel handling
operation.
Do not refuel while the engine is running or while it is still hot.
If fuel is spilled during refueling, wipe it off from the engine
immediately and discard the rag in a safe place.
Do not operate the equipment if fuel or oil leaks exist - repair
immediately.
Never operate this equipment in an explosive atmosphere.
Always use the proper size grounded extension cord, conforming to
the National Electric Code and Local Ordinances.
Inspect all extensions and electrical cords for cuts, frayed wire and
broken connectors before use. Do not use cords if not in good
condition.
Do not route extension cords through standing water.
Do not operate the equipment in standing water.
When cleaning the equipment, never spray water on the electric
motor.
Safety Precautions
WARNING
HOT SURFACES
Avoid contact with hot exhaust systems and engines.
Allow all components in the engine compartment to cool before
performing any service work.
Never leave equipment unattended while running.
Be certain you can control both speed and direction before moving.
This is a one-person buggy. Never permit riders.
Avoid sharp turns at high speed.
- 12 -
Page 13
Health & Safety
Never perform any work on the equipment while it is running.
Before working on the equipment, stop the engine and disconnect
the spark plug wire(s) to prevent accidental starting. On electric
models, disconnect the electric cord at the equipment.
Keep cowl closed and latched during the operation, close and latch
cowl immediately after starting.
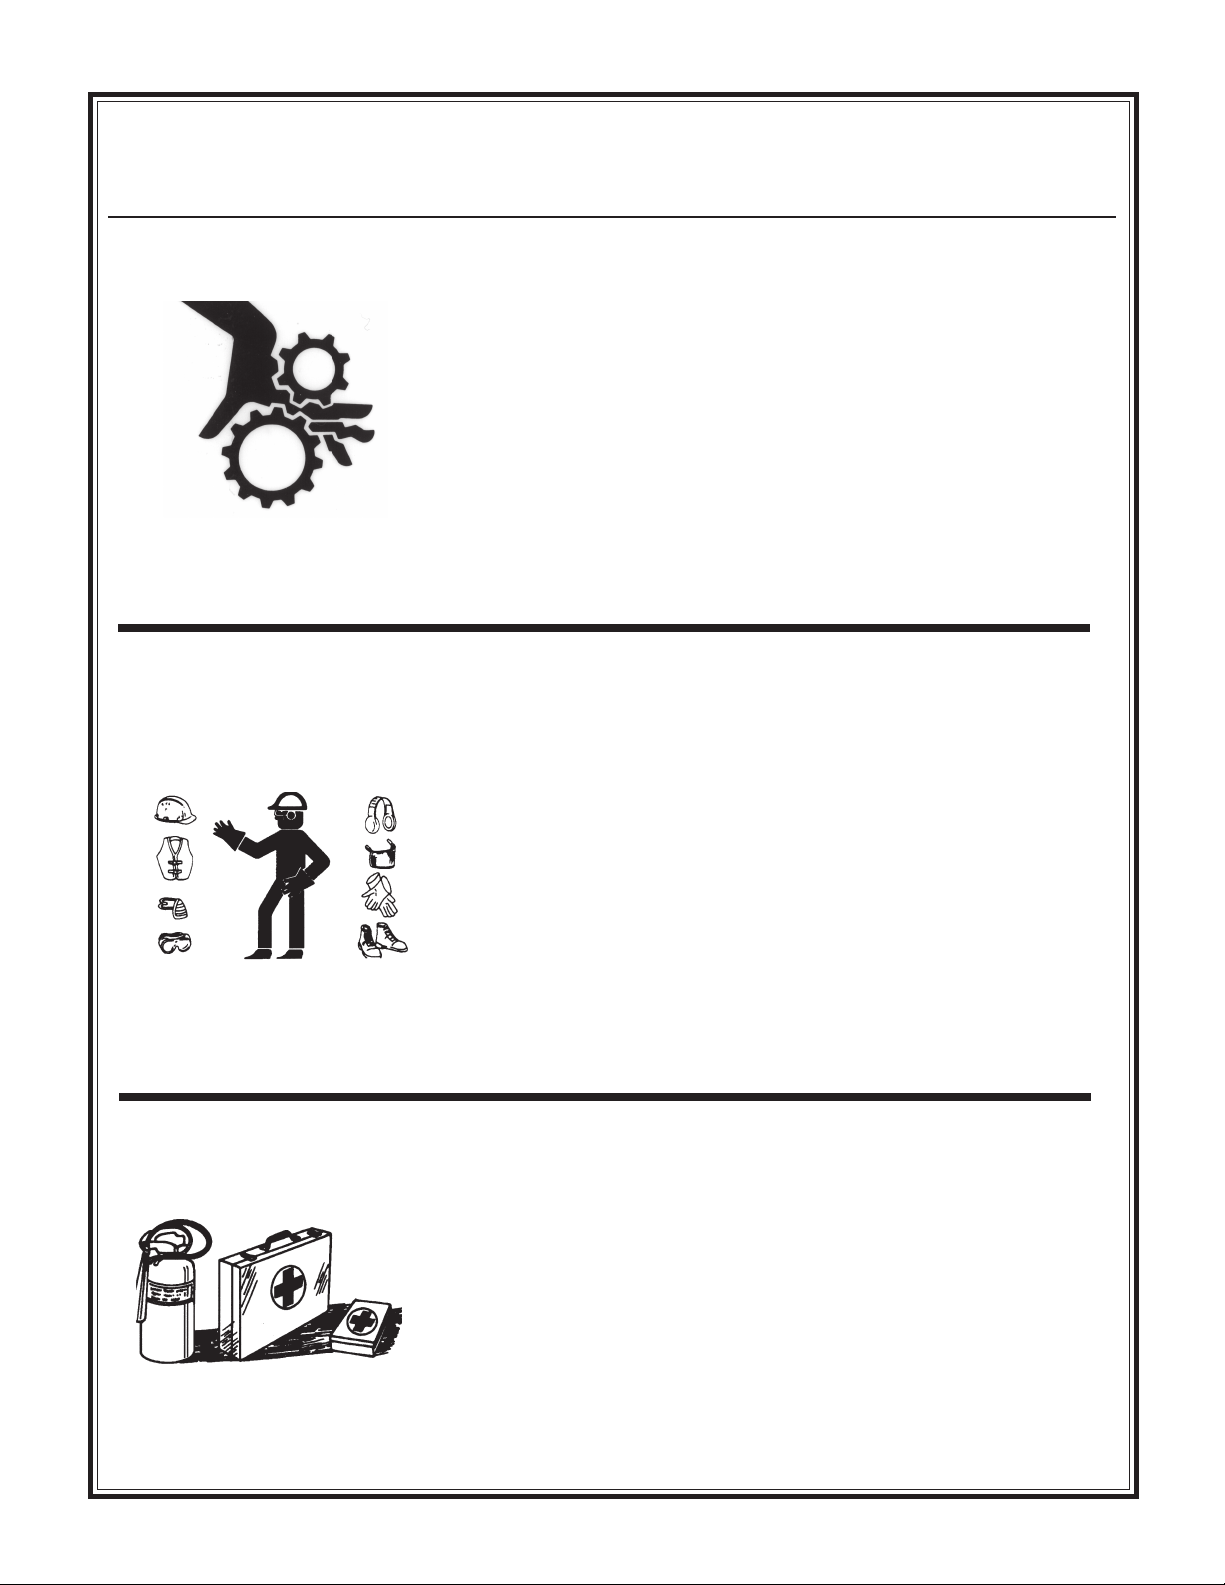
Keep hands, clothing and jewelry away from all moving parts.
Keep all guards in place.
WEAR PROTECTIVE CLOTHING
Wear close fitting clothing and safety equipment appropriate to the
job.
Safety Precautions
Prolonged exposure to loud noise can cause impairment or loss of
hearing.
Wear a suitable hearing protective device such as earmuffs or
earplugs to protect against objectionable or uncomfortable loud
noises.
Operating equipment safely requires the full attention of the
operator. Do not wear radio or music headphones while operating
machine.
PREPARE FOR EMERGENCIES
Be prepared if a fire starts.
Keep a first aid kit and fire extinguisher handy.
Keep emergency numbers for doctors, ambulance service, hospital,
and fire department near your telephone.
- 13 -
Page 14
Health & Safety
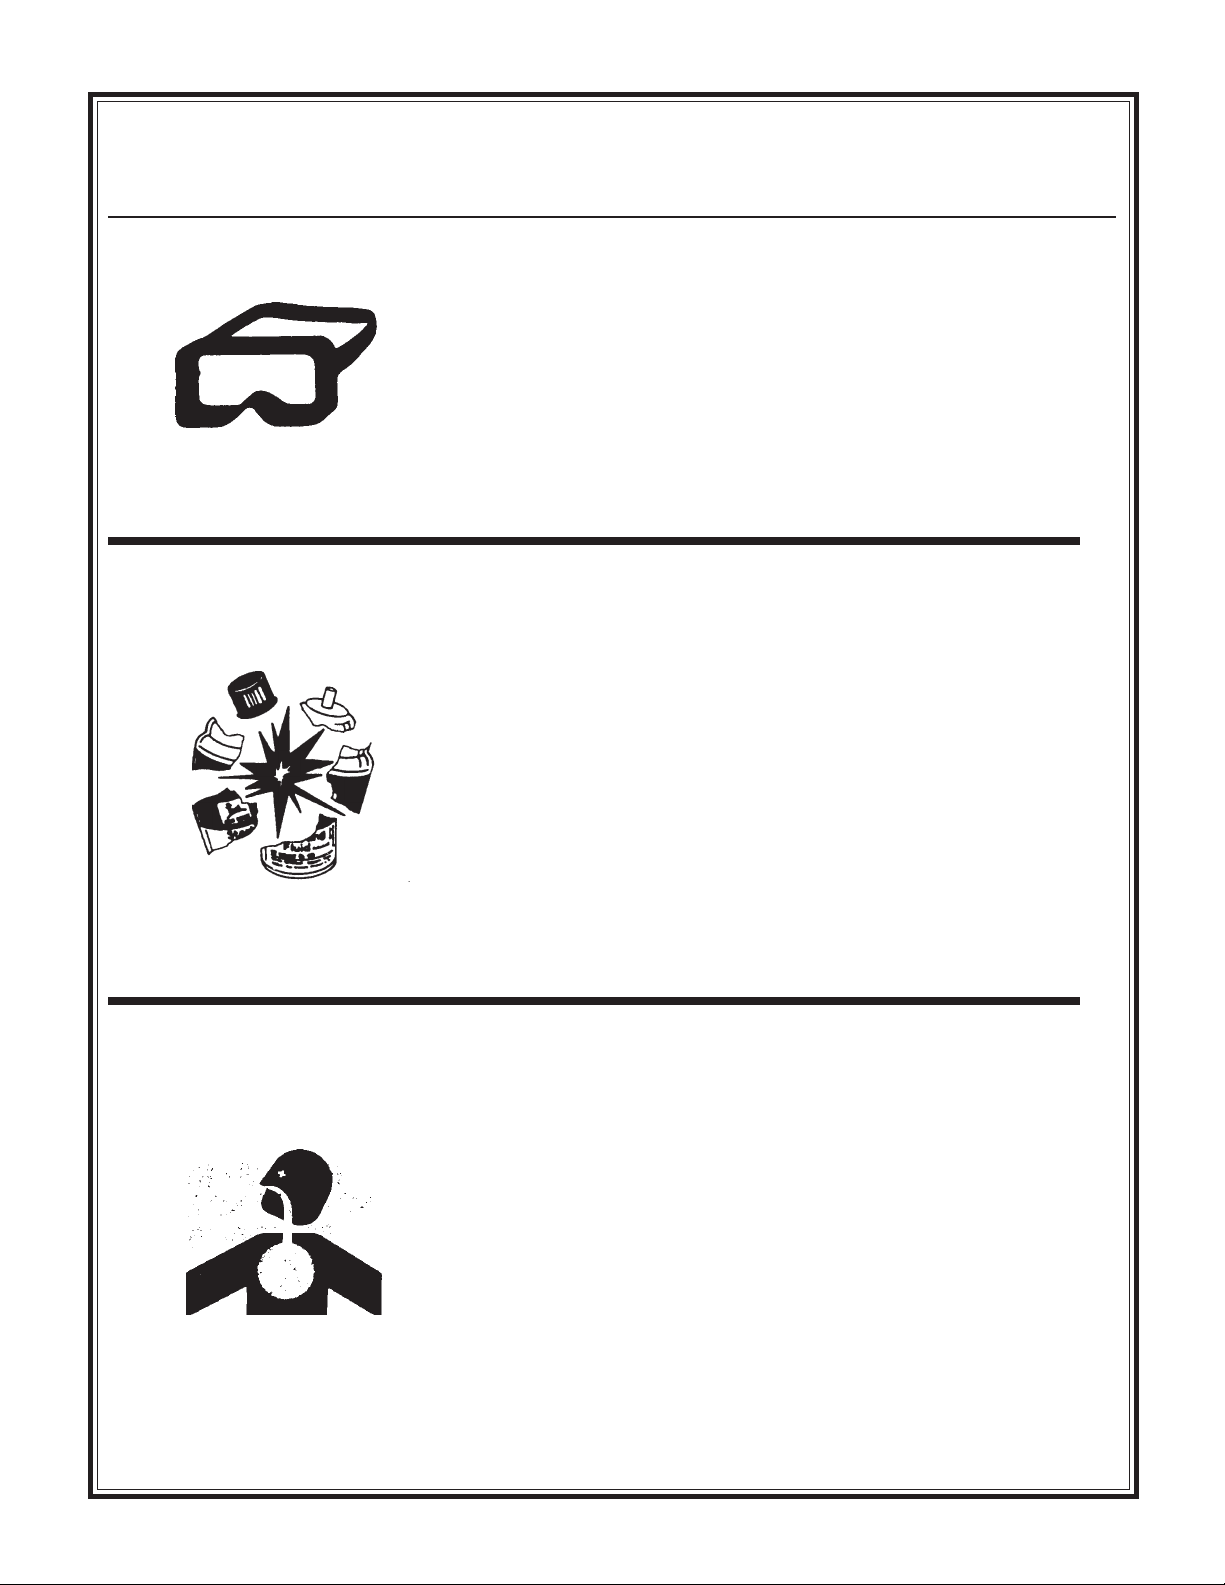
Warning-Eye Protection
• Always wear splash goggles when operating equipment.
Starting fluid (ether) is highly flammable, do not use or an
explosion or fire may result.
Safety Precautions
Never operate unit in a poorly ventilated or enclosed area.
Avoid prolonged breathing of exhaust gases.
Engine exhaust fumes can cause sickness or death.
- 14 -
Page 15
Health & Safety
PRACTICE SAFE MAINTENANCE
Understand service procedure before doing work. Keep area clean
and dry.
Never lubricate, service or adjust machine while it is moving. Keep
hands, feet, and clothing from power-driven parts. Disengage all
power and operate controls to relieve pressure. Lower equipment to
the ground. Stop the engine. Remove the key. Allow machine to
cool.
Securely support any machine elements that must be raised for
service work.
Keep all parts in good condition and properly installed. Repair
damage immediately. Replace worn or broken parts. Remove any
buildup of grease, oil, or debris.
Disconnect battery ground cable (-) before making adjustments on
electrical systems or welding on machine.
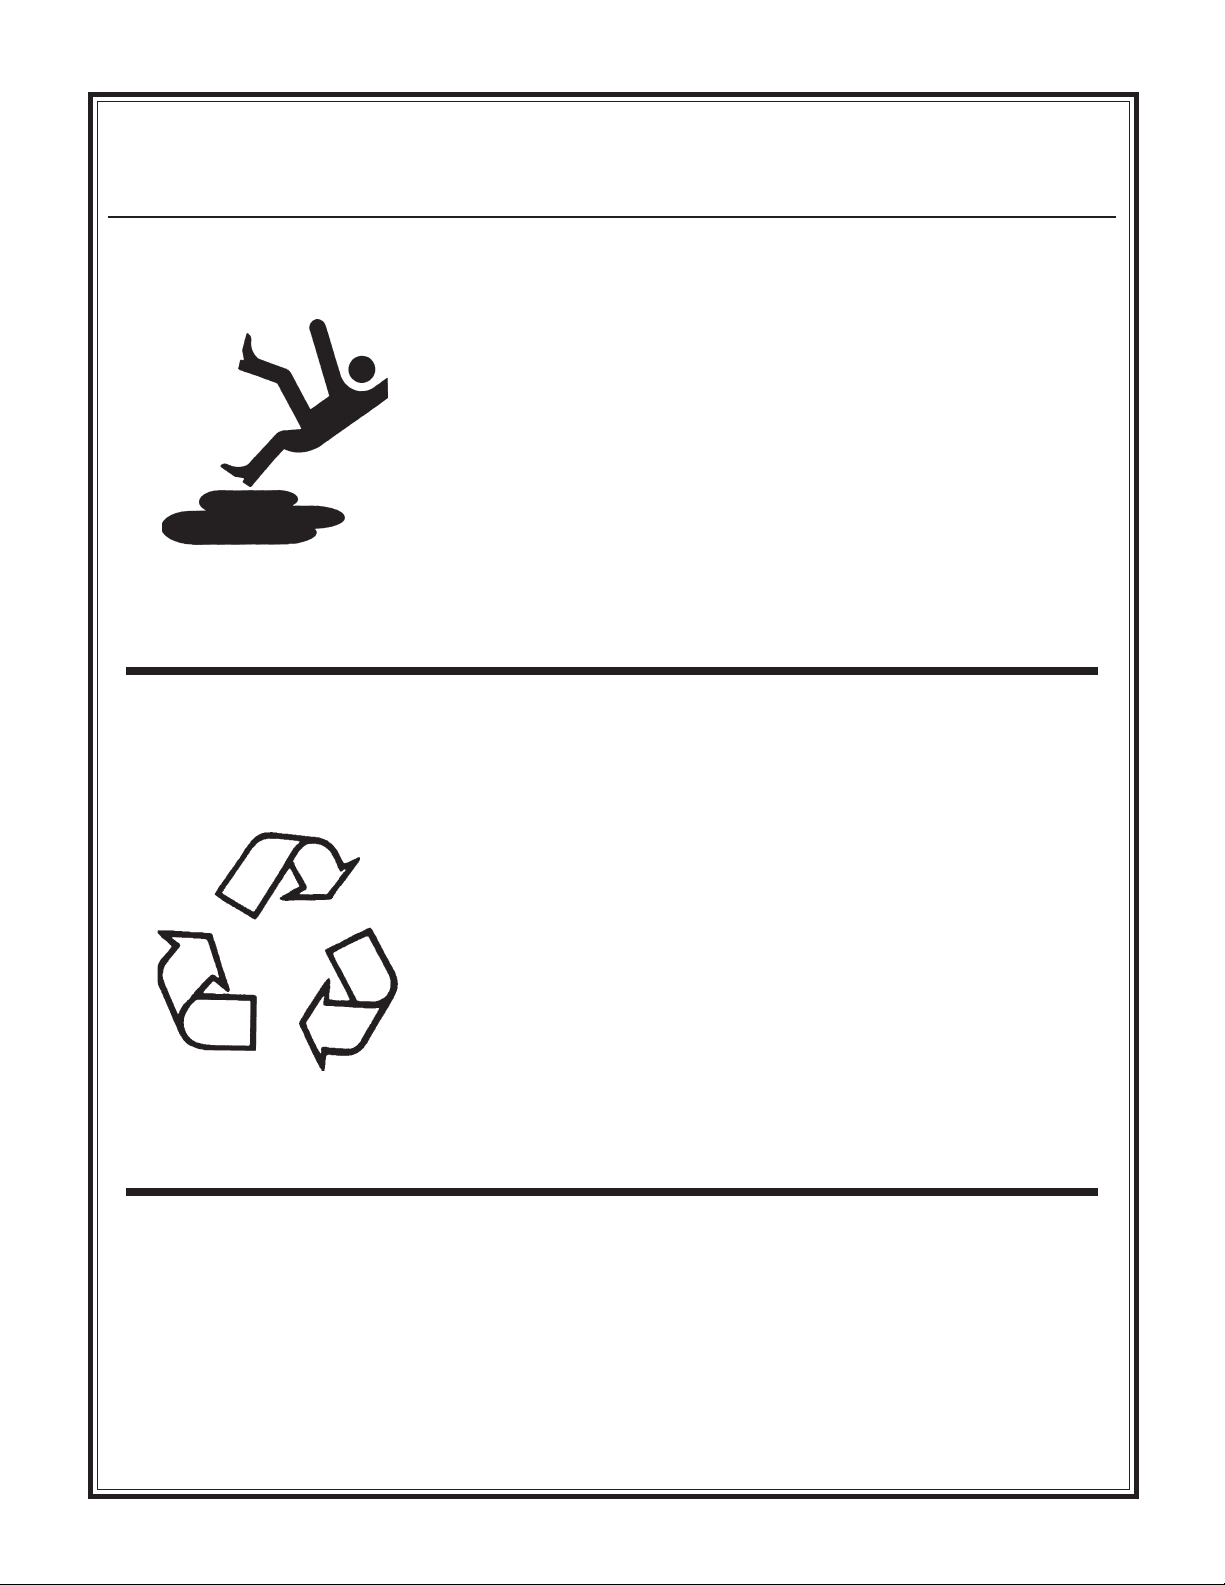
DISPOSE OF WASTE PROPERLY
Safety Precautions
Improperly disposing of waste can threaten the environment and
ecology. Potentially harmful waste used with equipment include
such items as oil, fuel, coolant, brake fluid, filters, and batteries.
Use leakproof containers when draining fluids. Do not use food or
beverage containers that may mislead someone into drinking from
them.
Do not pour waste onto the ground, down a drain, or into any water
source.
Air conditioning refrigerants escaping into the air can damage the
Earths atmosphere. Government regulations may require a certified
air conditioning service center to recover and recycle used air
conditioning refrigerants.
Inquire on the proper way to recycle or dispose of waste from your
local environmental or recycling center.
DECALS - FOR THE SAFETY OF YOURSELF AND OTHERS REPLACE ANY DAMAGED
OR MISSING SAFETY DECALS. SEE DECAL IDENTIFICATION SECTION.
- 15 -
Page 16
Health & Safety
BABA
TTERTTER
BA
TTER
BABA
TTERTTER
§ Read and understand the Maintenance Section of this manual before attempting
to charge the battery.
§ Before using a charger, read all the manufacturers instructions for, and caution
markings on (1) charger and (2) battery.
§ Wear personal protective equipment including gloves and complete eye
protection that protects eyes from all angles.
§ Never work alone with electrical equipment. Make sure that someone is nearby
to give assistance if you need help.
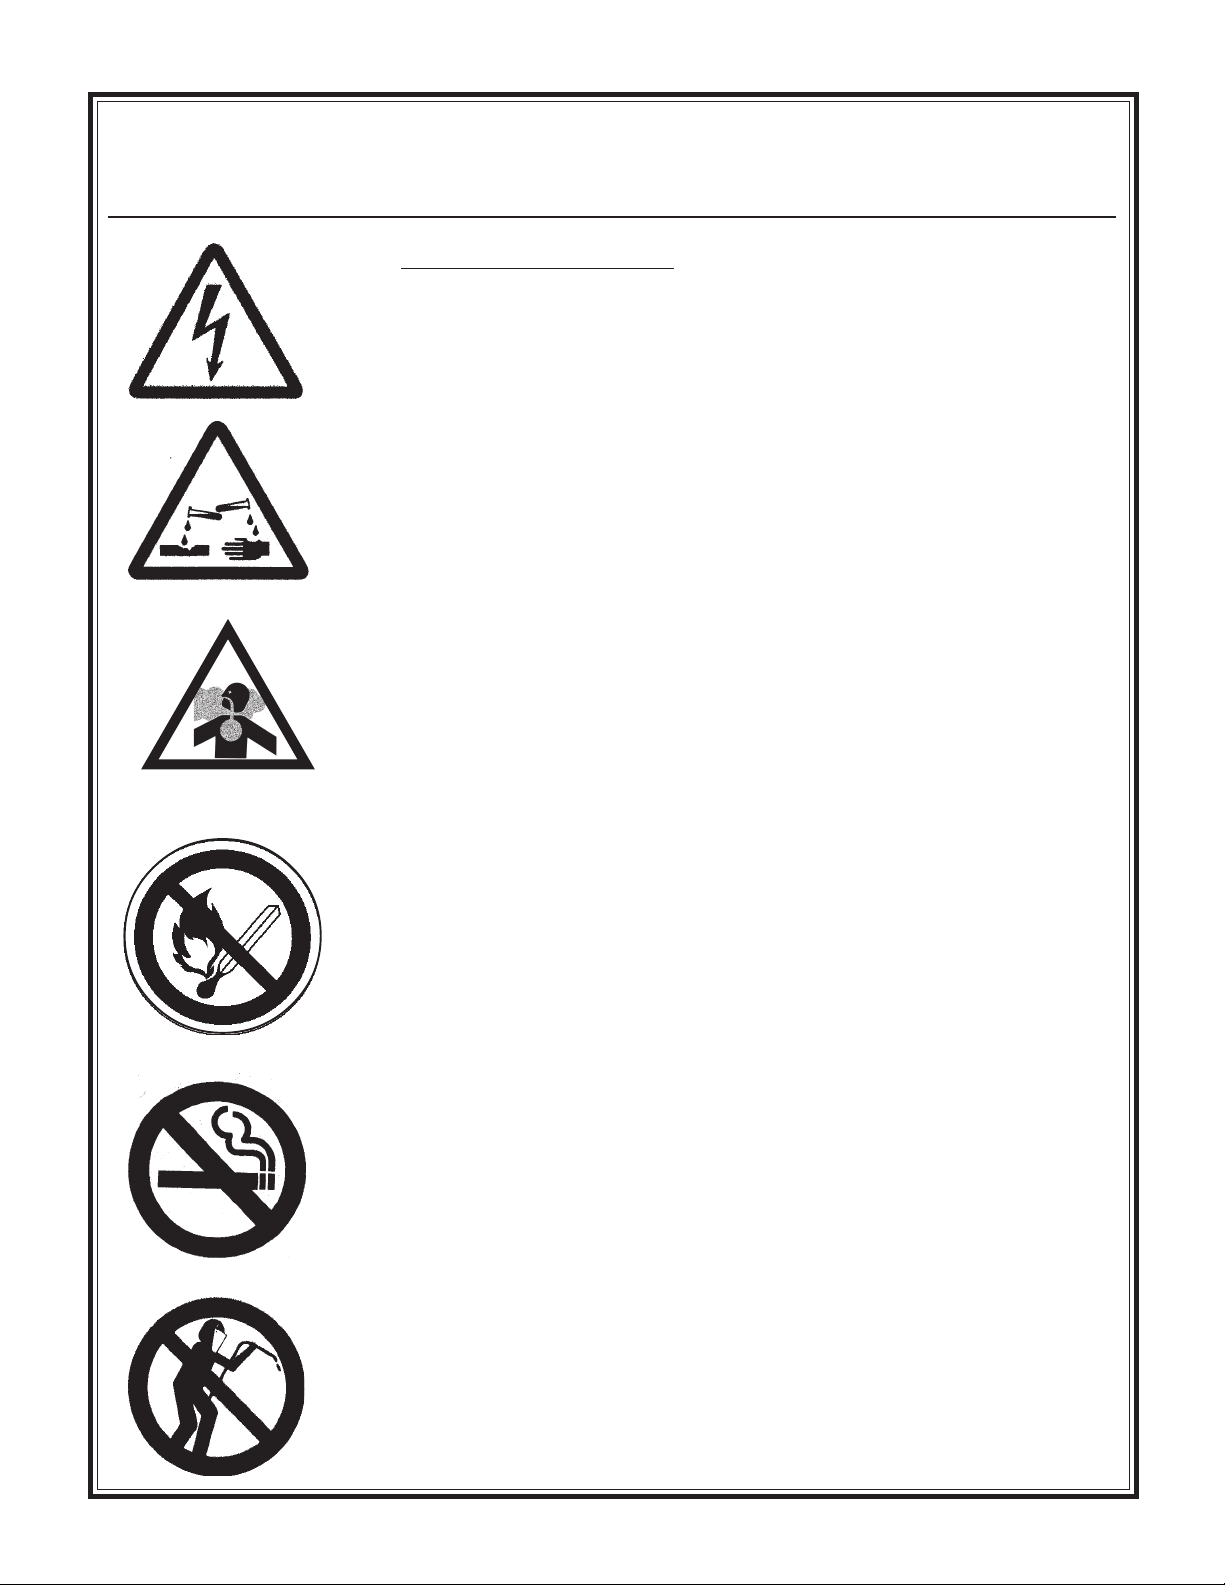
§ Reduce explosive gas (hydrogen). Batteries give off explosive gases when
charging and serious injuries can occur. Be sure the area around the battery is
clean and well ventilated before and during the charging process.
§ Avoid flames and sparks near the battery. Do not smoke or weld near the
battery. Keep flames, matches, lighters, cigarettes or other ignition sources away
from the battery.
§ Use only cables and clamps that are well insulated and in good condition to
make connections between battery and charger.
Y CHARY CHAR
Y CHAR
Y CHARY CHAR
GINGGING
GING
GINGGING
Safety Precautions
§ Exercise caution in using metal tools on or near the battery to reduce the risk of
short circuits that may cause battery explosions. Do not place tools on top of the
battery.
§ Avoid overcharging batteries. Some chargers can overcharge a battery if left
connected for an extended period of time resulting in loss of water and creation
of hydrogen gas. Rising battery temperature and vigorous gassing are clear
indications of excessive charging which may reduce battery life.
§ So called FAST (also known as High Rate or Boost) chargers should be used
with caution. Do not use a fast charger for more than 30 minutes on any battery.
§ In very cold weather, a discharged battery may freeze. Never charge a frozen
battery. Gases may form which can crack the case and release battery acid.
§ Avoid contact with corrosion due to battery acid. Battery posts may have acid
corrosion that may be harmful to eyes and skin.
§ If the battery is to be removed and/or replaced, always use a battery carrier.
Carrying the battery by hand may put pressure on its ends, causing battery acid
to be forced out the vent caps. Avoid tipping the battery, which may cause the
release of battery acid through the vent caps. Avoid dropping the battery.
Batteries can be heavy and may cause injuries if dropped. Dropping the battery
can crack the case and release battery acid.
§ Be sure to wash your hands with soap and water after servicing or handling the
battery. This will help neutralize any acid you may have contacted. Always have
plenty of fresh water and soap nearby in case battery acid contacts the eyes, skin
or clothing. If battery acid contacts the skin or clothing, wash immediately with
soap and water. If battery acid enters the eye, immediately flood eye with cold
running water for at least fifteen (15) minutes and get medical help immediately.
- 16 -
Page 17
Operation
Starting and Stopping the Engine
ENGINE
Refer to engine manual for specific engine information.
Pre-Start Checklist
Read Operator Manual and check that operator
and engine controls function properly before
starting.
Check the oil level before starting the engine.
Warranty is VOID if run without oil. Consult
the Engine Manual supplied with this unit for
specific instructions and oil recommendations.
Check engine air filter.
Check engine fuel level.
Check hydraulic fluid level.
ENGINE STARTING INSTRUCTIONS
Read Operator Manual before operating machine.
figure 1
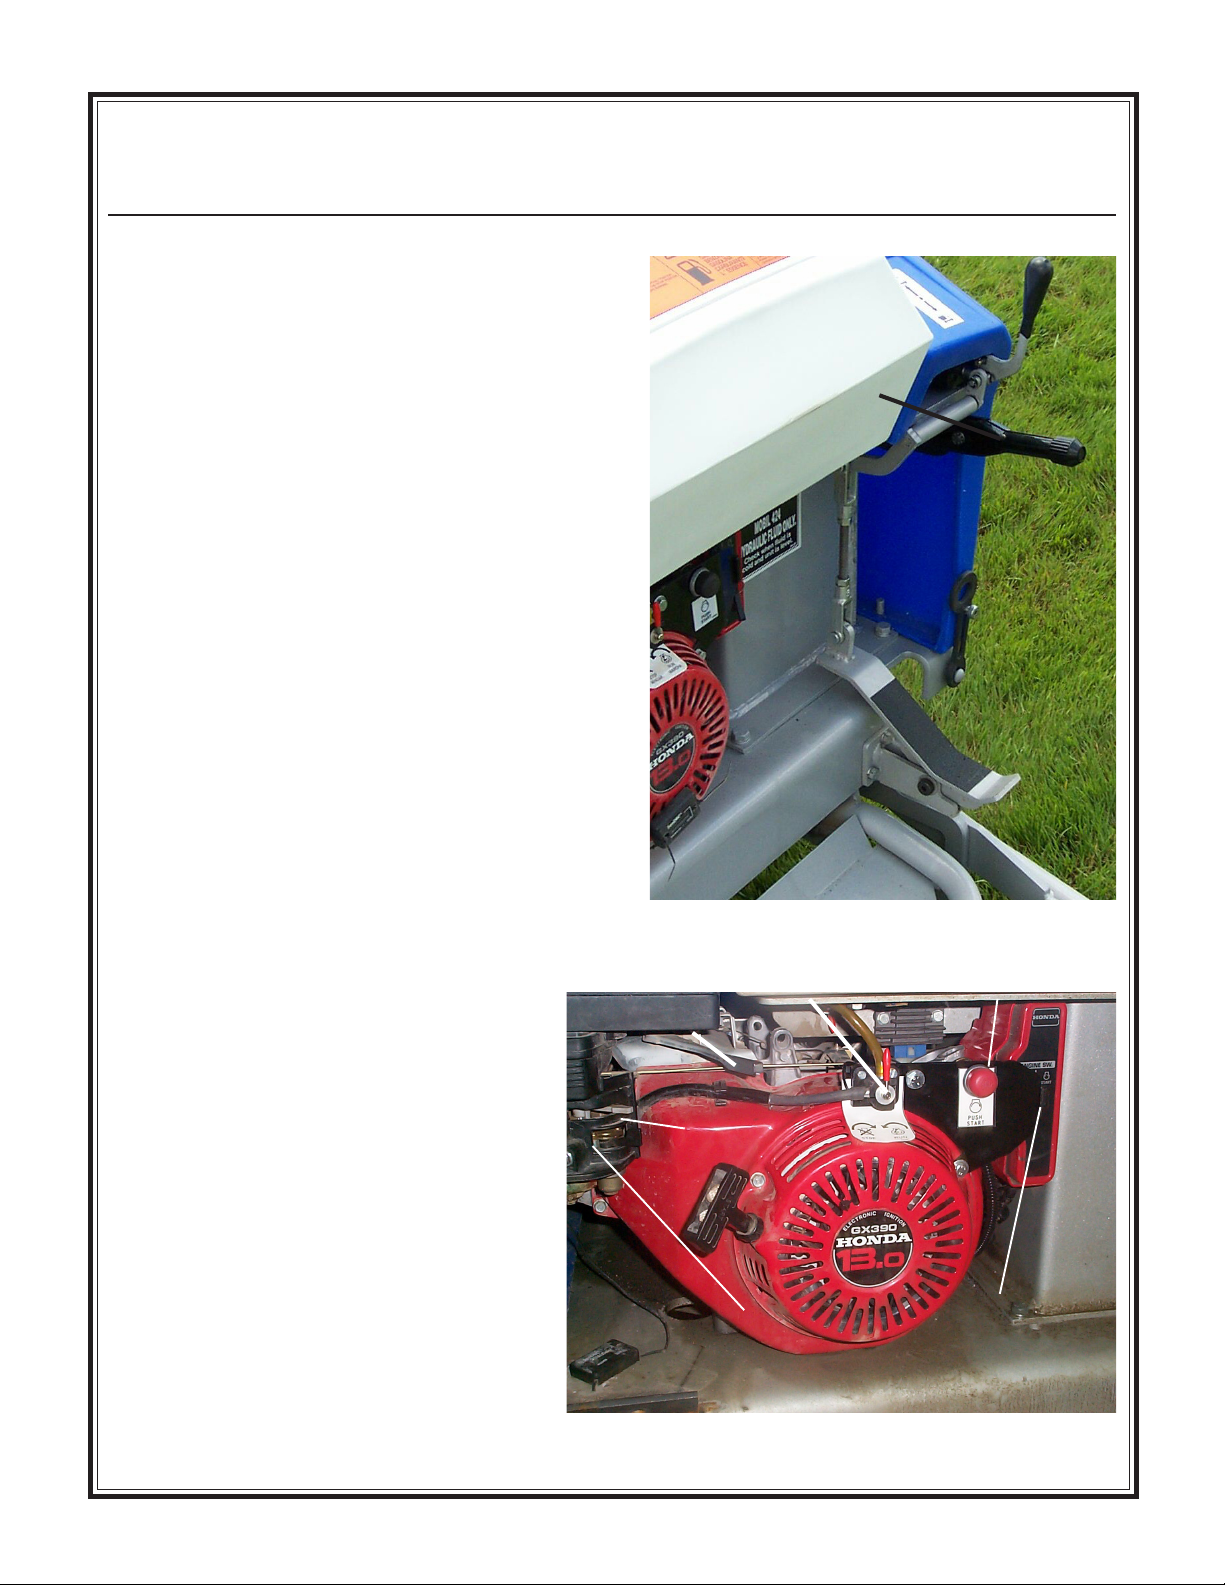
Parking Brake On
1. Set parking brake to on position (figure 1)
2. Set forward/reverse handle to neutral position
before attempting to start (figure 2)
3. Turn engine choke to full on position
4. Turn gas to open position (figure 2)
5. Turn engine fuel stop switch to run position
(figure 2)
For electric start version push and hold button
in until engine starts then release
For manual start version use pull cord
6. Adjust throttle speed (figure 2)
7. Turn choke to full open when engine is warm
(figure 2)
ENGINE STOPPING INSTRUCTIONS
1. Reduce throttle
2. Set parking brake to on position (figure 1)
3. Set forward/reverse handle to neutral position
4. Turn engine fuel stop switch to the stop
position (figure 2)
5. Turn gas off when engine stops running
(figure 2)
Throttle
Choke
figure 2
Engine Fuel Stop
Switch
Gas Valve
(carburetor)
Engine Start
Button
Key Switch
On
Engine Controls
Electric Option
- 17 -
Page 18
Operation
Machine Operation
MACHINE OPERATION
1. Start engine as described under section Starting
and Stopping the Engine.
2. Turn throttle lever to desired RPM (figure 2).
3. Release parking brake lever to off position
(figure 4).
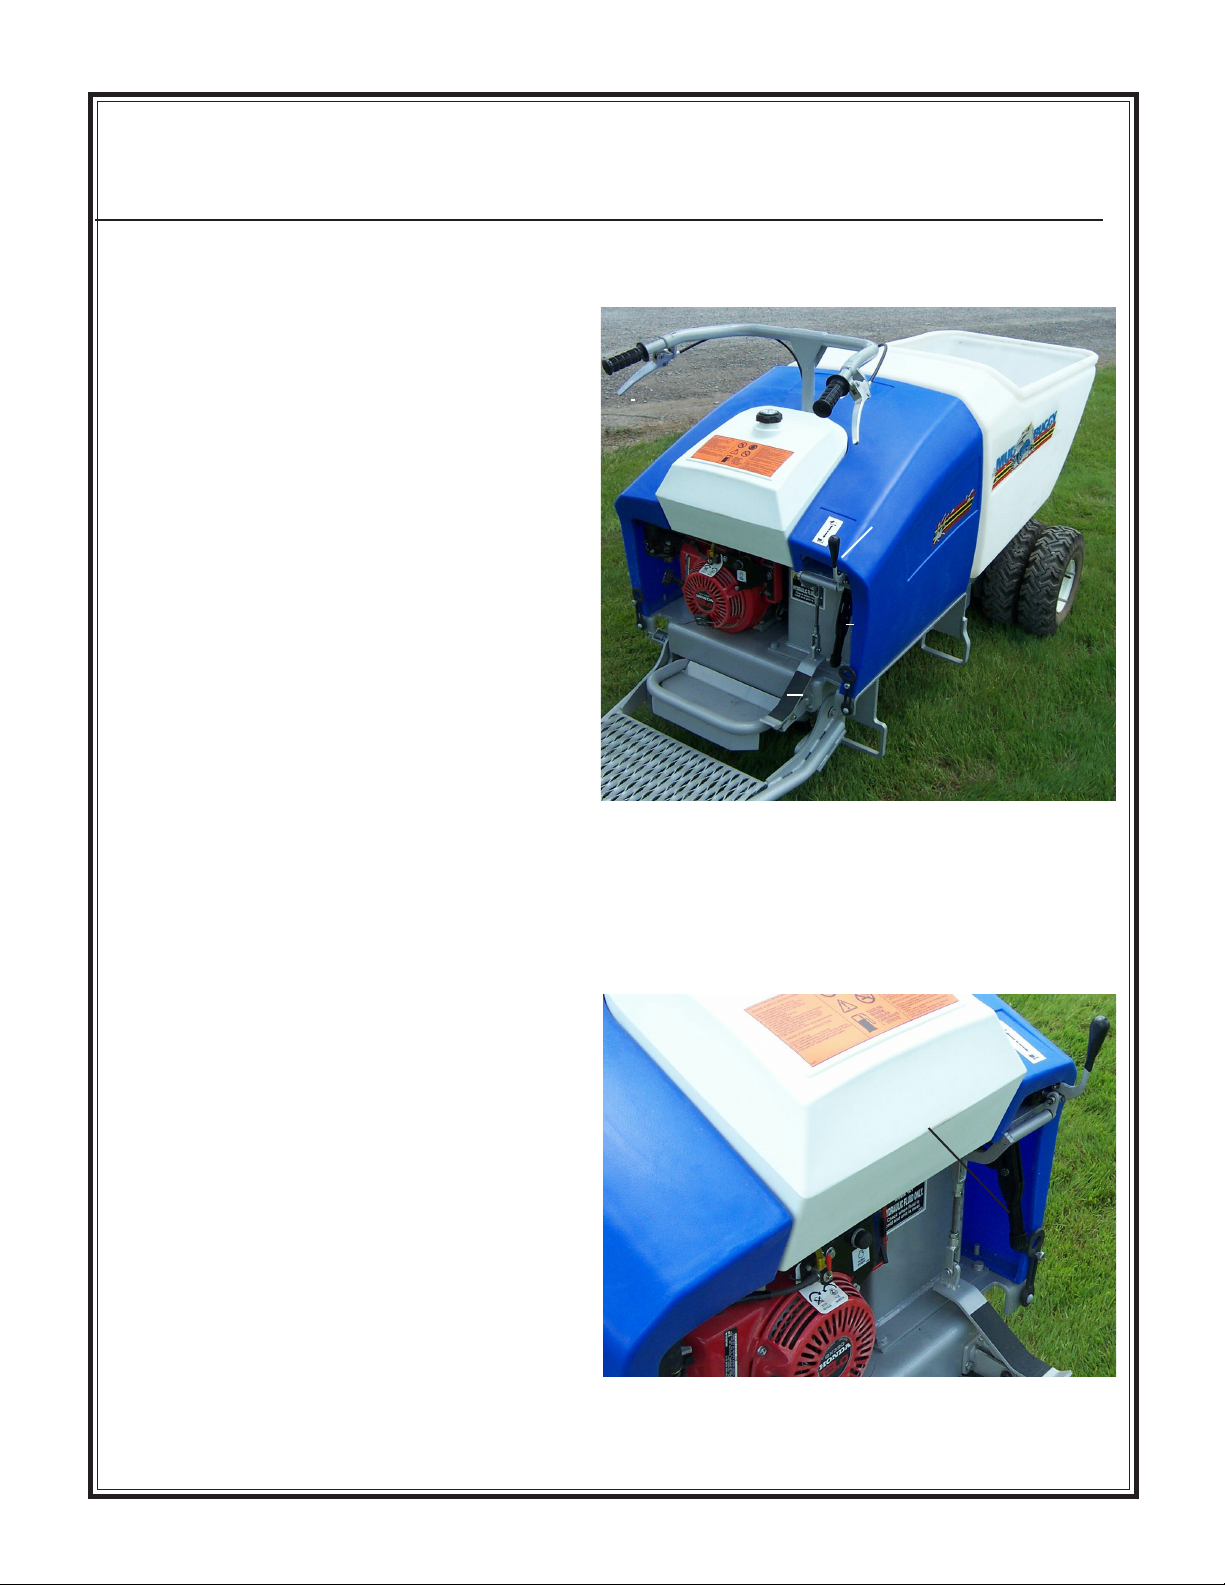
4. Two controls are located on the handle bar (see
figure 3). The control on the operators left-hand
side is for reverse and the control on the righthand side is for forward motion. Select the
control for the corresponding motion you want to
go.
5. Squeeze speed control handle (figure 3) on
handle bar to move the machine. Note: The more
you squeeze the handle the faster the machine
will travel.
figure 3
Reverse
Speed
Control
Handle
Brake
Forward
Dump
Parking
Dump Pedal
6. When you release the speed control handle the
machine will stop (if machine does not stop when
speed control is released, have machine inspected
by Certified Repair Person).
7. Service Brake Pedal (see figure 6). Brakes are
adjusted at factory and will need to be adjusted as
brake shoes wear. Check operation daily. Adjust
at 25 hours then as needed. Refer to Service
Manual.
DUMPING OPERATION
Capacity--Know the load capacities of your buggy
and never exceed them. Buggies normally operate on
uneven, unpaved, bumpy and/or inclined surfaces-adjust load accordingly.
1. Position the machine where you intend to dump
load.
2. Push handle forward to dump (figure 3).
figure 4
Parking
Brake
OFF
3. Pull handle back to lower bucket
- 18 -
Page 19
Operation
CHANGING DUAL WHEEL TO SINGLE
WHEEL
Standard Machine
1. Jack machine up. Apply parking brake.
2. Remove five (5) lug bolts.
3. Remove outer wheel.
4. Remove five (5) lug nuts from inner dual wheel
adapter then remove adapter.
Quick Release Dual Wheels
5. Replace five (5) lug nuts on inner wheel and
torque to 32 ft. lbs.
6. Repeat above steps on opposite side of machine.
Note: Maximum payload reduced by 25% when
operating machine without dual wheels.
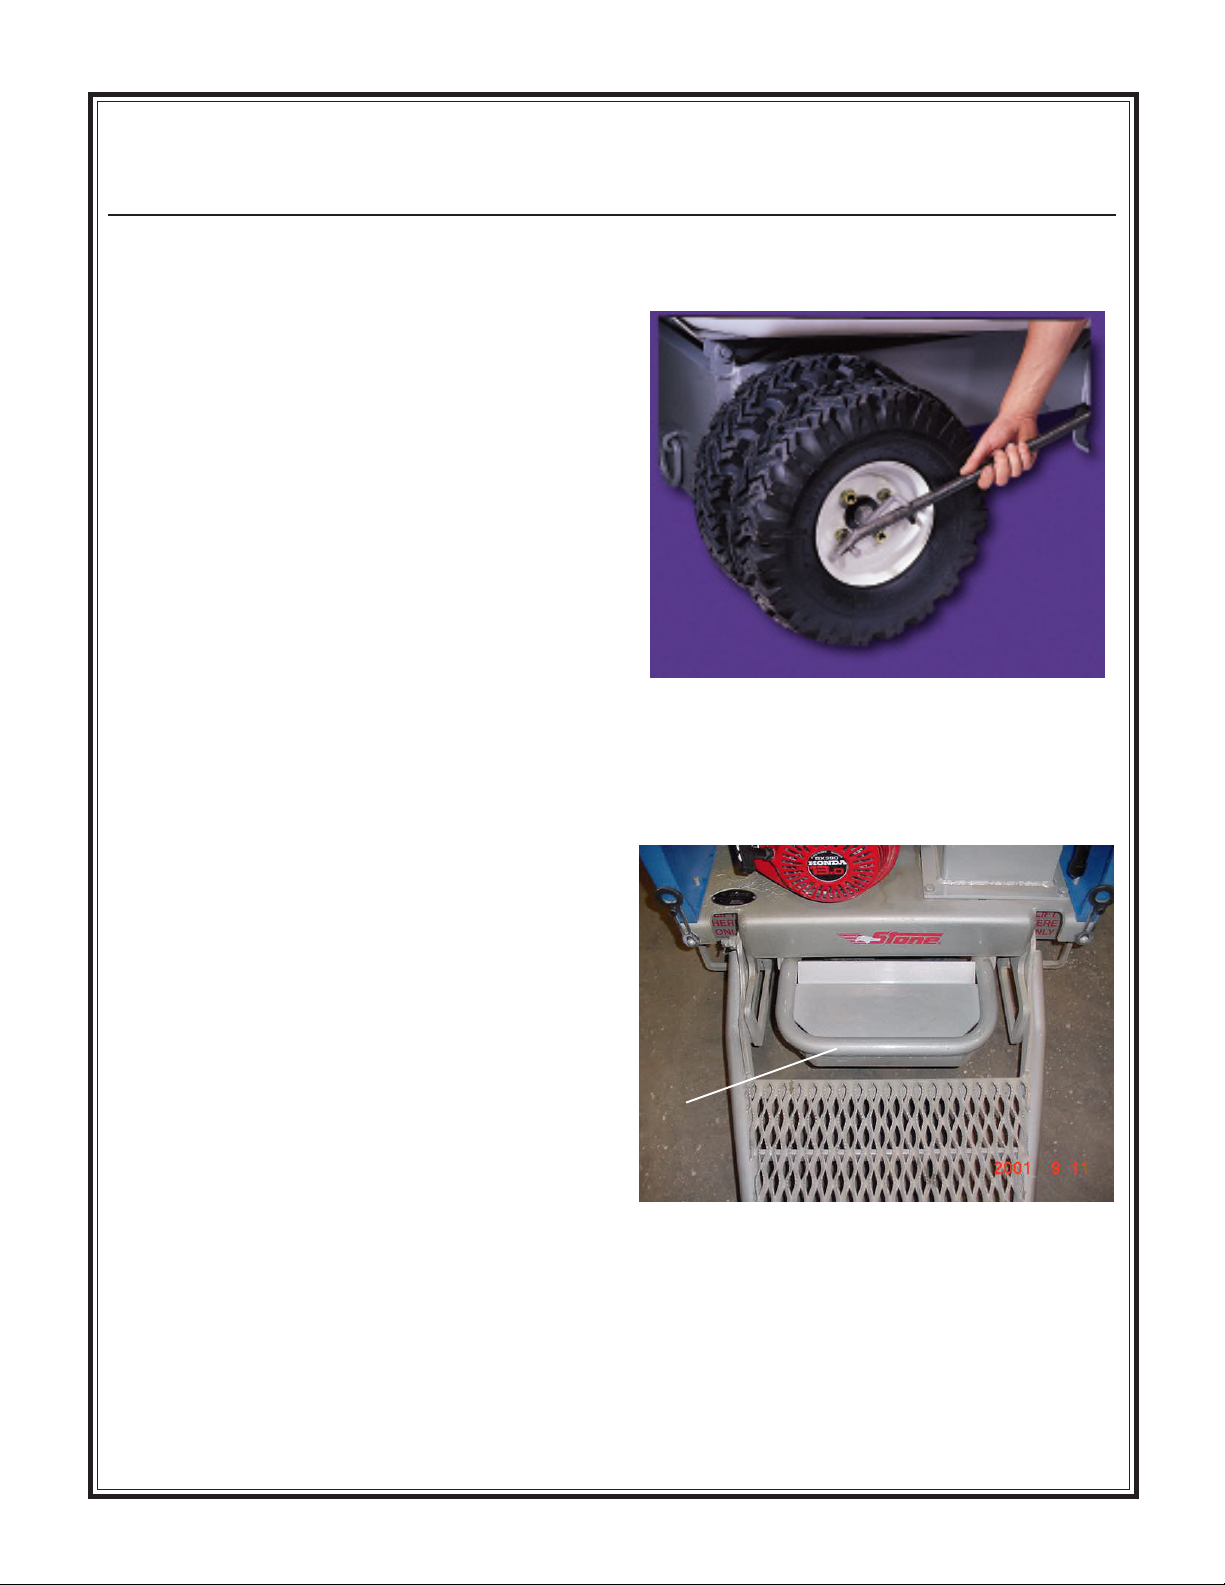
Quick Release Wheel Option
1. Position machine inner wheel over 2x4 and apply
parking brake.
2. Remove large tee bolt in center of wheel with
crow bar (figure 5).
3. Remove outside wheel with quick-change hub
attached.
4. Repeat above steps on opposite side of machine.
figure 5
figure 6
Brake
Pedal
- 19 -
Page 20
Operation
Cold Weather Starting
Hard starting may occur in temperatures below 35
degrees Fahrenheit. Using a lighter grade of oil in
both the engine and hydraulic tank is recommended.
Return oil to the proper grade when temperatures are
above 35 degrees Fahrenheit.
Hoses, Fittings and Leakage
Check weekly for loose hose fittings, damage, and
leakage--it is important to check entire machine
periodically.
Cleaning Machine
Lifting Points/Transporting/Storage
middle position. The transmission is also provided
with a bypass valve.
Transporting Machine--When transporting unit,
observe overall height for proper clearance of
obstacles overhead. Make sure bucket is lowered
and latched down. Secure unit with the proper
devices and in the proper locations.
Wash daily with warm, soapy water. Rinse off mud
and dirt. Use pressurized air (30 PSI max) to blow
debris. Dirt and mud build up will decrease machine
performance and/or cause failures. Avoid spraying
water directly on electrical components or electrical
damage may occur.
Parking Buggy
Parking on a Grade--Parking the unit on a grade
should be avoided if possible. If unit must be parked
on a grade, park it at right angles to the slope and
apply the parking brake and block the wheels if
necessary.
Long Term Parking--When unit is not in use for
long period of time, tilt tub up so water, snow, and
debris will not collect inside. Apply parking brake
and park unit out of main traffic areas.
If buggy will be exposed to wet freezing weather for
any length of time, place tub in the dump position to
prevent any possibility of freezing water damaging
the tub.
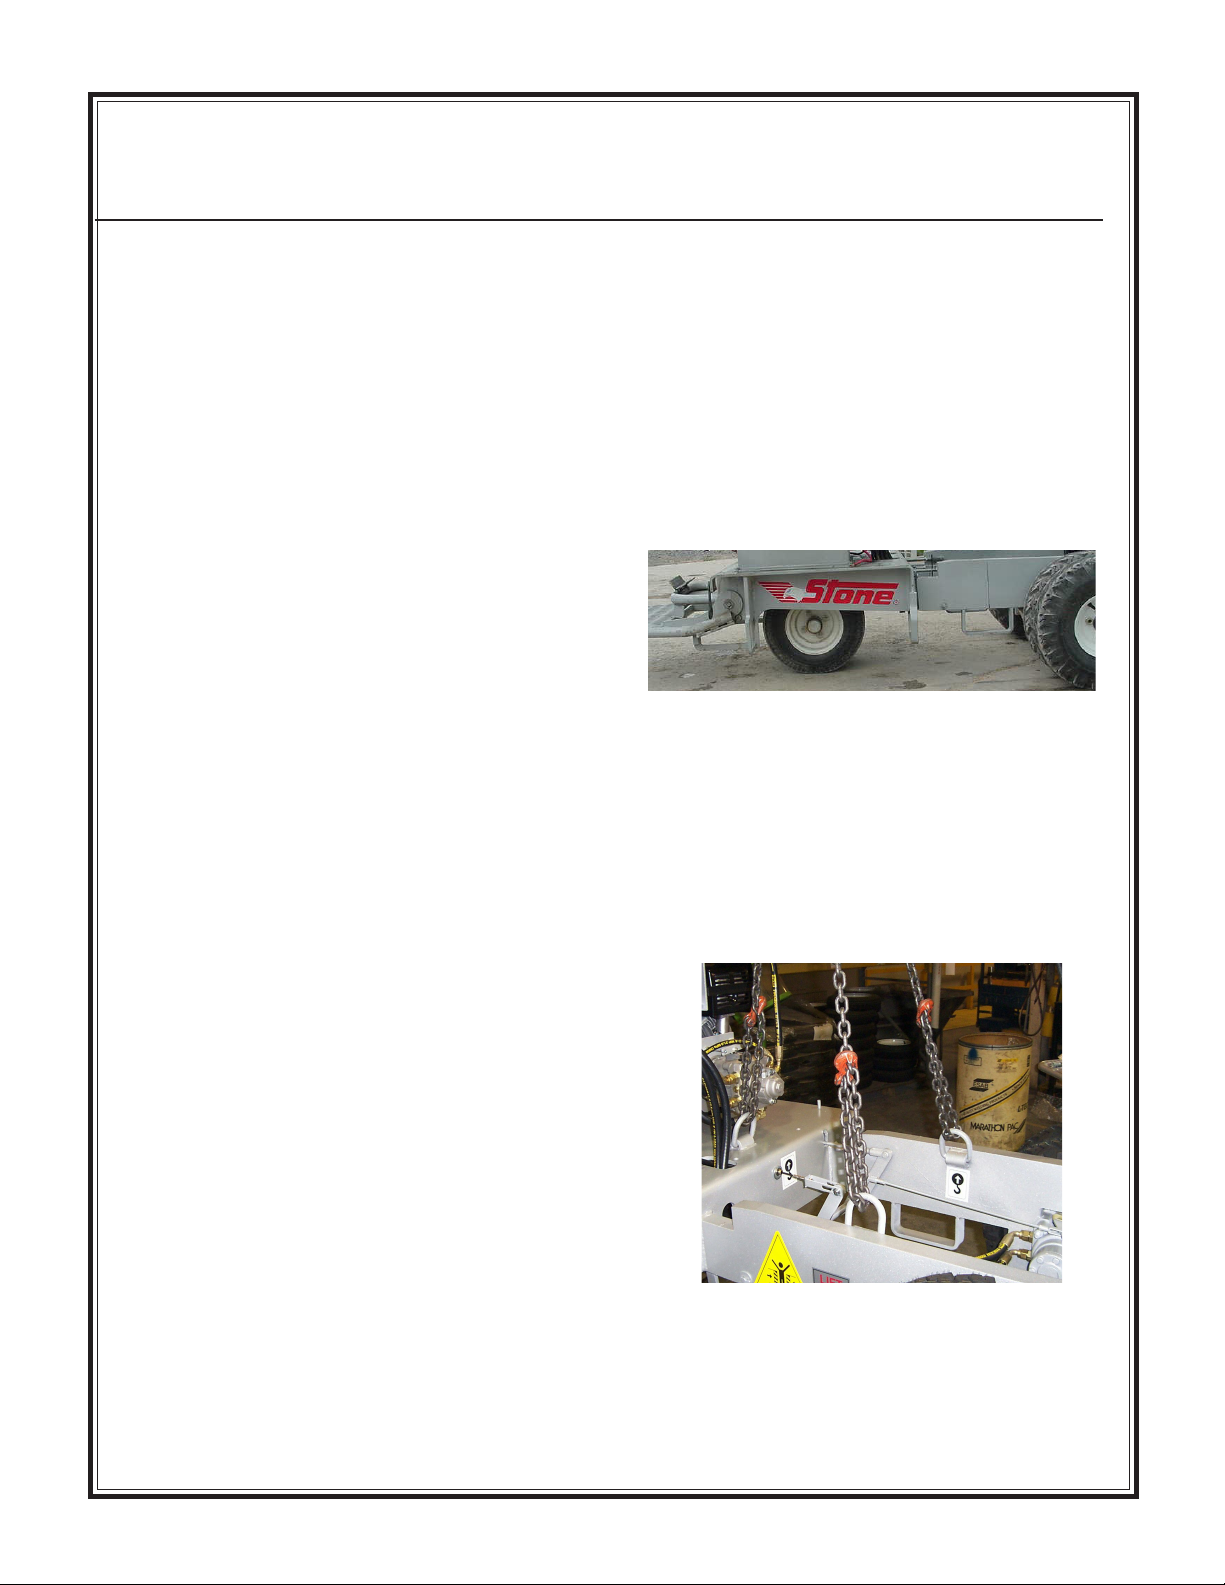
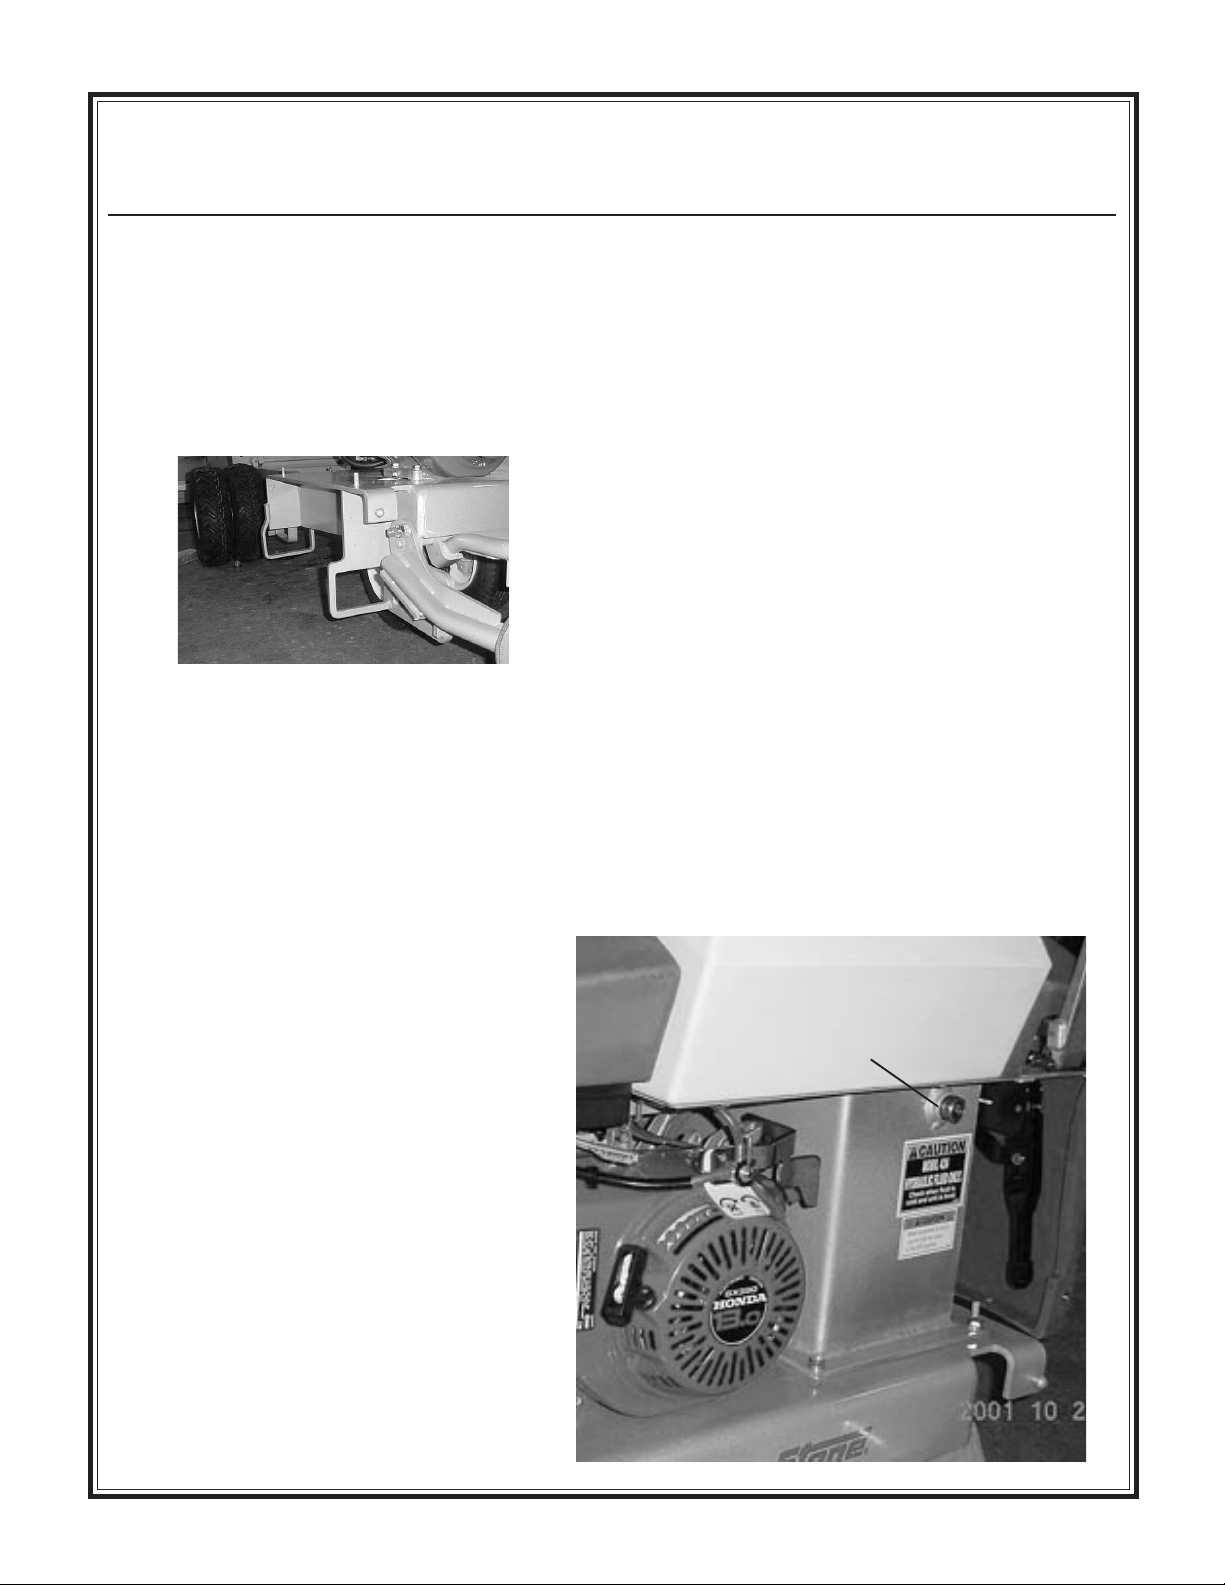
Mud Buggy Lifting Points--The unit can be hoisted
with three (3) lift points under the hopper. Tilt the
hopper forward to locate the three lift loops and attach chain or straps at each of the loops as shown below. Take up slack in chain or straps to properly balance the unit.
.
Moving Machine Without Engine Power--The
unit can be moved, if the engine wont run, short
distances by moving the f/r control lever to the
- 20 -
Page 21
Operation
Hydraulic Oil/Fuel/Hardware
Proper Lifting Points--There are two ways of
lifting the unit, from the side or from the front.
Lifting the standing platform will allow access to the
lifting tubes. Accessing the side lifting tubes is
straightforward.
Proper Tie Down Practices--Tie unit down with
proper devices. Make sure all blocking is secure.
Proper Transportation Practices--Always know
overall height to allow proper clearance for overhead obstructions such as power lines, overhangs,
and doorways when transporting unit on a high
vehicle
Hydraulic Oil - Check oil sight gauge (see figure
7) located on the side of the hydraulic oil tank in
the engine compartment. Keep oil level in
middle of sight glass. Consult Service Manual
supplied with this unit for specific instructions
and oil recommendations.
Fuel - Fill the gas tank with clean gasoline from a
safety can. Consult the Engine Manual supplied
with this unit for the proper type of gasoline required.
DO NOT mix oil with gasoline.
Hardware - Check all hardware on equipment
before starting. Consult the Torque Chart section in
the Service/Parts manual and tighten any loose
hardware accordingly.
Follow the guidelines found in the SAFETY
PRECAUTION section of this manual whenever
handling gasoline.
- 21 -
figure 7
Hydraulic Oil
Sight Gauge
Page 22
Operation
CLEANINGCLEANING
CLEANING
CLEANINGCLEANING
WARNING
NEVER POUR OR SPRAY WATER
OVER THE ENGINE.
Cleaning the Equipment - For consistent performance, long life and continued high quality use of
this mud buggy, thoroughly clean the bucket inside
and out at the end of each days operation. To
prevent lumps of dried plaster from forming and
contaminating further batches of plaster or mortar,
do not allow build up materials to form on bucket
side walls.
Before cleaning, shut the engine off and disconnect
the spark plug wire to prevent accidental starting.
Spray the bucket with water before the mix dries to
remove any accumulations. Dried mix should be
scraped out as necessary. DO NOT beat on the
bucket with a shovel, hammer or other device to
break up accumulations of dried mix, as this will
dent and damage the bucket and void the warranty.
Cleaning/Storage
Storage Always store the equipment with the
hydraulic cylinder contracted. This will prevent
corrosion of the cylinder shaft.
Prior to storage, perform any required repairs and
maintenance. See Parts/Service Manual.
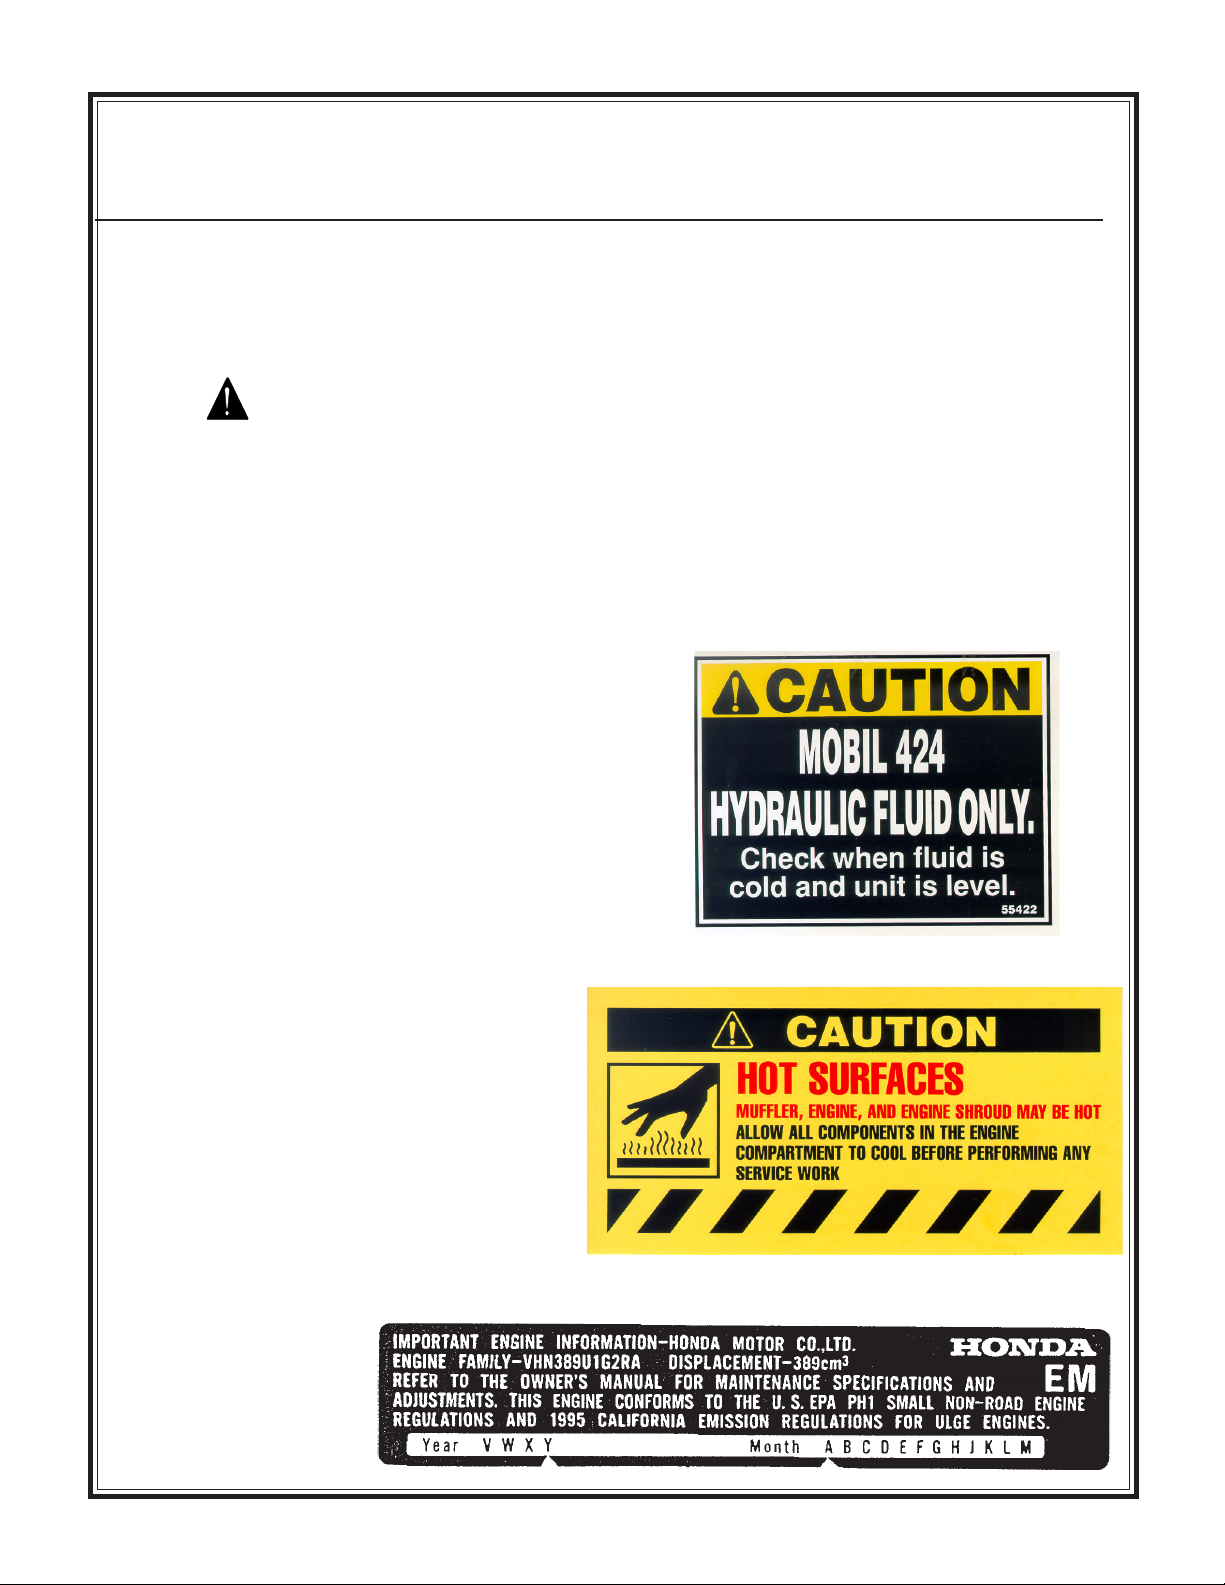
55398
55485
- 22 -
Page 23
Operation
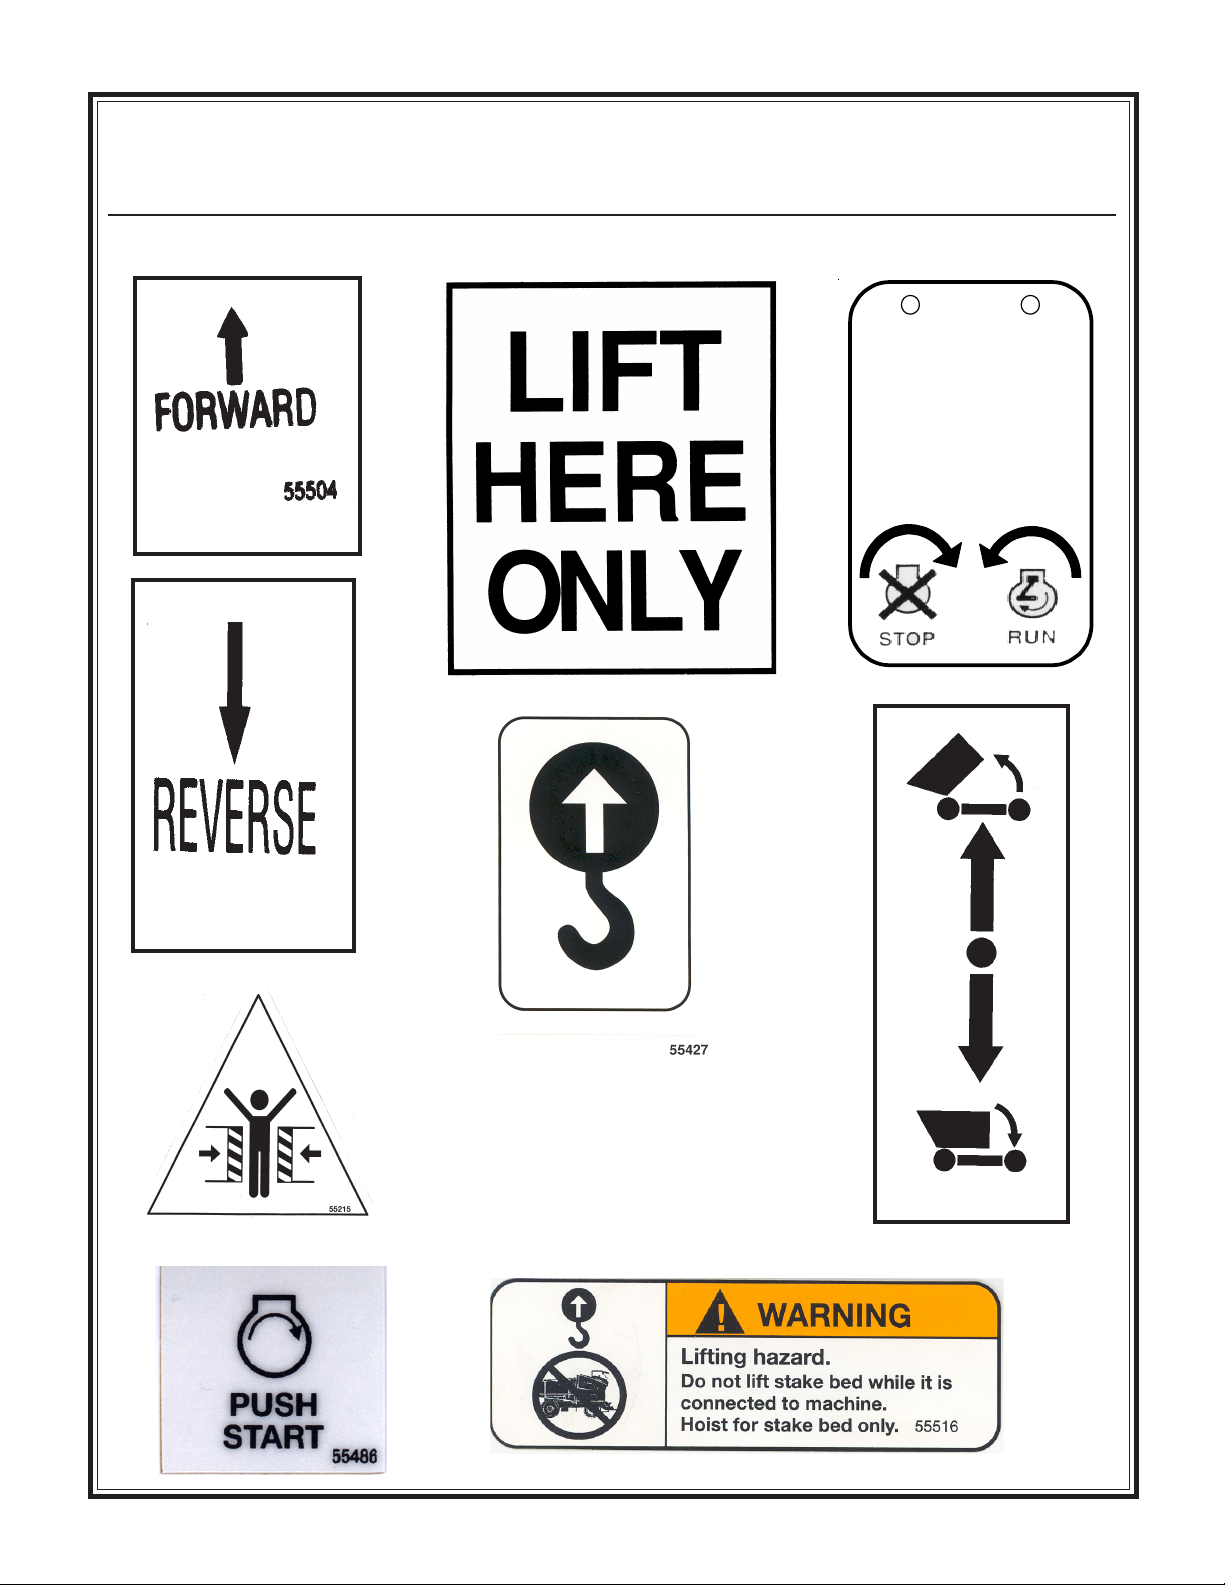
Warning Decals
55592
55200
55485
55593
- 23 -
Page 24

Lubrication
Daily
1. Check the oil levels in the engine. If required,
add a good grade of 10W30 oil. The engine
warranty is VOID if run without oil.
2. Check oil level in hydraulic tank. Oil should
be visible in the sight gauge. If required, add
Mobil 424
Weekly
1. Grease
a. cylinder pivot pins (2)
b. hopper pivot shaft pin (4)
c. steering bearing (1)
Lubricating the Mud Buggy
- 24 -
Page 25

Page 26

Lubrication
- 26 -
Page 27

CALIFORNIA PROPOSITION 65 WARNING:
Operation of this equipment and/or engine exhaust
from this product contains chemicals known to the
State of California to cause cancer, birth defects,
or other reproductive harm.
Page 28
Stone Construction Equipment, Inc.
P.O. Box 150, Honeoye, New York 14471
Phone: (800) 888-9926
Fax: 585-229-2363
e-mail: [email protected]
www: stone-equip.com
A 100% employee-owned American manufacturer
© 1995 Stone Construction Equipment, Inc.
Printed in U.S.A.
SPR
 Loading...