

Page 1
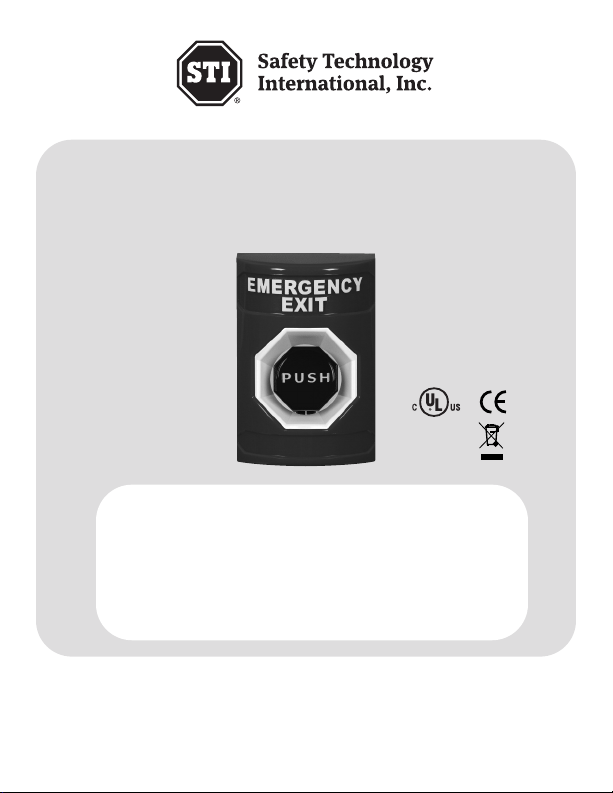
Stopper®Station Series SS-2008
ADA
for operation
Push Button Pneumatic Timer Button
Pneumatic Timer Models
SS-2008 Red
SS-2108 Green
SS-2208 Yellow
SS-2308 White
SS-2408 Blue
We protect the things that protect you.
ALL MODELS COME WITH A
COLOR MATCHED SURFACE
MOUNT BACKBOX
Page 2

This push button has been tested according to UL38 and UL2017. Manual fire
alarm stations are listed in UL category UNIU and non-fire alarm initiating devices
are listed in UL category UEHX. It is important to read, understand and follow all
instructions provided with this product. It is the installer’s responsibility to
comply with NFPA72 and 101, NEC, mounting specifications according to ADA
and other applicable fire and electrical codes. After installation and testing are
complete, provide a copy of this manual to all personnel responsible for testing
and maintenance of this product. To avoid electrical shock , DO NOT attempt to
install this product when power is on.
* For access control installations, power for the SS-2008 must be supplied by a
power source Listed to UL294. When used for access control, this device shall be
used as a part of an access controlled egress door system. It is up to the local
AHJ to allow use of this device in place of an automatic sensor. For higher
security installations, lower time limits should be used.
- 1 -
Page 3

ns
uctio
Service Ins
nd
n a
tio
lla
ta
Ins
®
TATION SE
S
R
E
P
TOP
S
NE
TON P
UT
USH B
P
INS
O
T
TICE
O
N
FETY
SA
L
I. GENER
UL File #UL57255 Operating Temperature of button 15°-120°F (-9°to +49°C
II.
A
t
uc
d
ro
P
t
c
nta
Co
ONTENTS LIST
C
ns
io
ns
ime
D
ting O
a
R
QTY. D
1 Pu
1 1
1 1
4
2 1
1 1
4 190
4 19
1 7
19
ESC
90
9
9
9
1
sh
0
06
0
0
0
10
Se
Ra
Reco
1,
01
1
60
21
3
1
pa
e
ne
ed a
t
0
0
RIPTION
Bu
Allen
A
5
8 #
Screw #
Gro
#6
9
Pla
8
A Su
0
tr
S SS-2008
IE
R
UMATIC TIM
nd o
a
MP @ 2
A
0
1
po
m
d co
e
s
e
cycl
0
sing Assembly
ch 3
ren
. hi-
in
/8
x 1
6-32
in. S
4
1/
ck
A
box
LLERS
TA
ge 3
NO
et
s
t
gniz
0
0
0,
Hou
n
tto
Head Screw #
llen W
6 x 5
nd Screw
u
x 1
stic Screw Anchor
ace Ba
rf
N
ne
ne
3
/
low
in.
S SMS
E
D
et
s
4
t
n
8
2 in.
screw
R
0
l
-32
U
NC
VAC
SERS
ing is
st
i
x 3
/8 in.
III. INSTRUCTIONS
Product Dimensions
Front Housing Removal .......
Backbox Preparation
Switch Contact Diagram
Switch Data.....
Installation .....
Warranty ...
...........
...........
...........
...........
...........
..
...........
...........
...........
.......
...........
...........
...........
...........
...........
...........
...........
...........
............
............
............
............
............
............
...........
- 2 -
...........
...........
...........
...........
...........
...........
...........
...........
...........
...........
...........
...........
...........
............
...........
...........
...........
...........
...........
...........
.........
..... Page 3
..... Page 3
..... Page 4
..... Page 5
..... Page 5
..... Page 6
Page 7
Page 4

19011 SCREW ALLEN HEAD
#8 - 32 x 3/8 (1) PROVIDED
BUTTON AND SWITCH ASSEMBLY
19015 WRENCH
(1) PROVIDED
10271 SWITCH HOUSING
RED, GREEN, YELLOW,
WHITE AND BLUE
1
.62 in.
(
41mm)
3
.25 in. (82mm)
1.58 in.
(40mm)
1.375 in.
(35mm)
PUSH
4.87 in.
(124mm)
PRODUCT DIMENSIONS
VIEW SHOWING FRONT HOUSING REMOVAL
- 3 -
Page 5

J
J
J
J
H
SWITCH BACKPLATE
MOUNTING HOLES
BOX MUST BE INSTALLED WITH
ARROWS POINTING UPWARD
THESE HOLES MUST BE
DRILLED OUT USING A
5/32 in. DRILL BIT
H
J
OUNTING HOLESM
T
CKPLA
ACH BWITS
H
J
ALLED WITHTT BE INSUSX MOB
TE
ALLED WITH
J
J
WS POINTING UPWOARR
ALLED WITHTT BE INSUSX MOB
5/32 in. DRILL BIT
DRILLED OUT USING A
T BEUSTHESE HOLES M
H
ARDWS POINTING UPW
ALLED WITH
5/32 in. DRILL BIT
DRILLED OUT USING A
T BE
DRILL POINT LOCATIONS PROVIDED
TOP AND BOTTOM FOR 1/2 in.
CONDUIT FITTING S.
DRILL AS NEEDED
S NEEDEDDRILL A
ONDUIT FITC
OP AND BT
DRILL POINT L
S NEEDED
.TINGSONDUIT FIT
OR 1/2 in.M FOTTOOP AND B
VIDEDOTIONS PROCADRILL POINT L
BACKBOX PREPARATION
(NOT INCLUDED WITH FLUSH MOUNT COVERS)
- 4 -
FIELD DRILLING FOR CONDUIT ENTRY IS
REQUIRED. LOCATIONS SHOWN ALSO
APPLY TO OPPOSITE, PARALLEL SIDES.
Page 6

CONTACT DIAGRAM
(BLACK) NC
(RED) NO
NC (GREEN)
NO (WHITE)
NC
NO
NC
NO
COUNTERCLOCKWISE
CLOCKWISE
TIMER RANGE ADJUSTMENT SCREW
ADJUSTMENT RANGE - 2 TO 60 SECONDS
TIMER FACTORY SET TO MINIMUM TIME
SETTING. TO INCREASE TIME, TURN
SCREW CLOCKWISE IN 1/4 TURN
INCREMENTS. WHEN CLOSE TO DESIRED
TIME, TURN SCREW IN VERY FINE
INCREMENTS TO DESIRED SETTING.
CAUTION: OVER-TIGHTENING MAY
CAUSE DAMAGE TO TIMER.
INSTALLATION NOTE:
ADA mounting compliance requires the
operable part of the initiating device
LEAD WIRE COLORS
IN PARENTHESIS.
CONTACTS
One set NO and one set NC
SWITCH INFORMATION
shall not be less than 1.1m
(3 1/2 ft.) or greater than 1.37m
(4 1/2 ft.) above finished floor service.
- 5 -
Page 7

TYPICAL FLUSH MOUNT
GANG BOX
19021 GROUND LUG
(2) PROVIDED
19060 SCREW
#6-32 X 1
(2) PROVIDED
BUTTON AND
SWITCH ASSEMBLY
CAN BE INSTALLED
ON ANY EXISTING
SINGLE GANG BOX
19021 GROUND SCREW
BUTTON AND SWITCH ASSEMBLY
19060 SCREW #6-32 x 1 in.
(2) PROVIDED
19039 SCREW #6 x 1-1/4 in.
(4) PROVIDED
71100A-COLOR SURFACE BOX
19018 ANCHOR
(4) PROVIDED
DRILL (4) 3/16 in.
DIA HOLES
(4) PR
19018 ANCHOR
DIA HOLES
DRILL (4) 3/16 in.
VIDEDO(4) PR
19018 ANCHOR
XOCE BAOR SURFOLC-71100A
VIDEDO(4) PR
1/4 in.-19039 SCREW #6 x 1
SEMBLSCH AWITON AND STBUT
OUND SCREW19021 GR
Y
VIDEDO(2) PR
19060 SCREW #6
VIDED
32 x 1 in.-19060 SCREW #6
INSTALLATION
WITH PROVIDED
SURFACE
BACKBOX
WITHOUT PROVIDED
SURFACE BACKBOX
- 6 -
Page 8

Warranty
Three year guarantee against breakage of polycarbonate in normal use (one
year on electro mechanical and electronic components).
Electronic warranty form at www.sti-usa.com/wc14.
2306 Airport Rd • Waterford, MI 48327
Phone: 248-673-9898 • Fax: 248-673-1246
800-888-4STI (4784) •
Safety Technology International (Europe) Ltd.
Unit 49G Pipers Road • Park Farm Industrial Estate • Redditch
Worcestershire • B98 0HU • England • Tel: 44 (0) 1527 520 999
Fax: 44 (0) 1527 501 999 • Freephone: 0800 085 1678 (UK only)
E-mail: info@sti-europe.com • Web: www.sti-europe.com
www.sti-usa.com
2008 A-IS
02/04
 Loading...