

Page 1

Instructions for Use
Elite2 Plus, Elite2 XS,
Elite2 RS
MOBILITY SCOOTER
ELTP010100
Page 2

2
Sterling Elite2 XS-RS-Plus
If you are visually impaired, this document can be viewed in PDF
format at:
www.Sunrise Medical.com
For further information on the full specification and options and
accessories, please refer to the order form.
All information is subject to change without notification.
Please consult Sunrise Medical with any queries you may have.
DANGER!
IF YOU REQUIRE LARGE TEXT, SUNRISE
MEDICAL STRONGLY RECCOMMEND THAT
YOU SEEK A CLINICAL EYESIGHT
ASSESMENT BEFORE USING THIS PRODUCT.
www.SunriseMedical.com
Your scooter may sometimes display badges showing a different name to that referred to in this owner’s manual.
This is due to an agreement between the retailer and sunrise Medical, allowing the retailer to rename the scooter to suit
their product branding.
This does not affect your guarantee in any way.
For the purposes of official communication, this product can be positively identified by referring to the serial number label
located on the seat post of the scooter, and also on a duplicate serial number label attached to this owner’s manual.
Page 3

3
Sterling Elite2 XS-RS-Plus
Dear Customer,
We are very happy that you have decided in favour of a
high-quality SUNRISE MEDICAL product.
This user’s manual will provide numerous tips and ideas
so that your new scooter can become a trustworthy and
reliable partner in your life.
We want you to be satisfied with our products and
service. Sunrise Medical has been consistently working
at continuously developing its products, for this reason,
changes can occur in our palette of products with regard
to form, technology and equipment. Consequently, no
claims can be construed from the data or pictures
contained in this user’s manual.
The management system of SUNRISE MEDICAL is
certified to ISO 9001, ISO 13485 and ISO 14001.
As the manufacturer, SUNRISE MEDICAL,
declares that the scooters conform to the
93/42/EEC, amended by 2008/47/EC
guideline.
In addition, they fulfil the performance requirements
for the "Crash Test" to ISO 7176-19
Please contact your local, authorised SUNRISE
MEDICAL dealer if you have any questions regarding the
use, maintenance or safety of your scooter.
In case there is no authorised dealer in your area or you
have any questions, contact Sunrise Medical either in
writing or by telephone (contact addresses can also be
found on the back page).
Sunrise Medical
Thorns Road
Brierley Hill
West Midlands
DY5 2LD
Phone: 0845 605 66 88
Fax: 0845 605 66 89
www.SunriseMedical.com
Foreword
Symbol legend
Use
Intended Use of Scooter’s
Class C Scooter’s are usually large in size, not
necessarily intended for indoor use but capable of
travelling longer distances and negotiating outdoor
obstacles.
They are intended for use in public places and similar
locations where there are pavements, pedestrian paths or
floors that have hard and firm surfaces. The safe limit for
slopes and obstacles shall be observed.
They may be used on the roads in compliance with local
country traffic law. They are intended for a user who has
difficulty in walking or limited mobility and is for their own
personal use.
The maximum user weight limit, includes both the user
and any weight of accessories fitted to the scooter), is
marked on the serial number label, which is affixed to the
seat post or rear frame.
Warranty can only be taken on if the product is used
under the specified conditions and for the intended
purposes. No unauthorised modifications should be made
to the Scooter. Only approved parts and accessories
shall be fitted.
The intended lifetime of the scooter is 5 years. Please
DO NOT use or fit any 3rd party components to the
scooter unless they are officially approved by Sunrise
Medical.
Area of application
The electrical power, simple steering and automatic
braking make the Scooter suitable for people who have
limited mobility due to, for example:
Joint pain and/or stiffness due for example to Arthritis •
or Rheumatism
Difficulty breathing due to Respiratory or Heart •
Conditions Amputees
Difficulty walking due to Stroke •
Certain cases of Obesity •
The following should be taken into consideration in
relations to the provision of the scooter and any specific
options available:
The users body size, weight including the distribution •
of body weight.
The mass of any carry on or stowed items should be •
added to the users body mass and together should
not exceed the maximum load of the scooter.
The user’s physical and psychological constitution. •
The age of the user, their living conditions and the •
environment in which the scooter is going to be used,
eg home surroundings and the intended area of use.
If in doubt, please consult a health care professional to
ensure the user is not exposed to unacceptable risks. A
risk assessment may be required in certain
circumstances.
Sunrise Medical is ISO 9001 certified, which ensures
quality at all stages of the development and production of
this scooter.
DANGER!
Warning messages regarding possible risks of serious
accident or death.
WARNING!
Warning messages regarding possible risks of injury.
CAUTION!
Warning messages regarding possible technical damage.
NOTE:
Information for operating the product.
Reference to Additional Documentation.
IMPORTANT:
DO NOT USE YOUR SCOOTER UNTIL THIS
MANUAL HAS BEEN READ AND
UNDERSTOOD.
Page 4

4
Sterling Elite2 XS-RS-Plus
Features of Sterling Elite2 - XS - RS
Due to its modular design, simplicity and wide range of adjustments, the Sterling Elite2 XS, RS is a perfect
choice for easy service, refurbishment and recycle requirements.
As a part of our ongoing product improvement initiative, Sunrise Medical reserves the right to change
specifications and design without notice. Further, not all features and options offered are compatible with
all configurations of the scooter.
All dimensions are approximate and may be subject to change.
TILLER ADJUSTER
CONTROL FASCIA
PARKING BRAKE LEVER SEATING
ON-OFF KEY
SWITCH
CHARGING
SOCKET
WIG-WAG THROTTLE
LEVERS
FLIP-UP ARM
RESTS
FREEWHEEL
LEVER
SERIAL NUMBER
LABEL
(ON SEAT POST
RECIEVER)
TYRES
BATTERY COVER
(BATTERIES)
FOOT BOARD
BUMPER
FRONT SUSPENSION
LED LIGHTS
FRONT
BASKET
(MAX. 5KG)
SEAT SWIVEL
LEVER
Page 5

5
Sterling Elite2 XS-RS-Plus
Features of Sterling Elite2 Plus
Due to its modular design, simplicity and wide range of adjustments, the Sterling Elite2 PLUS is a perfect
choice for easy service, refurbishment and recycle requirements.
As a part of our ongoing product improvement initiative, Sunrise Medical reserves the right to change
specifications and design without notice. Further, not all features and options offered are compatible with
all configurations of the scooter.
All dimensions are approximate and may be subject to change.
TILLER ADJUSTER
CONTROL FASCIA
PARKING BRAKE LEVER
SEATING
ON-OFF KEY
SWITCH
CHARGING
SOCKET
CONTROL LEVERS
FLIP-UP ARM
RESTS
FREEWHEEL
LEVER
TYRES
BATTERY COVER
(BATTERIES)
FOOT BOARD
BUMPER
FRONT SUSPENSION
LED LIGHTS
FRONT
BASKET
(MAX. 5KG)
SEAT SWIVEL
LEVER
SERIAL NUMBER
LABEL
(ON SEAT POST
RECIEVER)
Page 6

6
Sterling Elite2 XS-RS-Plus
Contents
1.0 Your Scooter
1.1 PRODUCT INFORMATION:
We at Sunrise Medical want you to get the best out of
your Sterling Elite2 RS, XS, PLUS scooter. This Owner’s
Manual will familiarise you with the scooter and its
features. It contains hints on everyday usage and general
care in addition to information on the high quality
standards which we adhere to and details about the
guarantee.
Your scooter should be delivered fully configured for your
use; there are a wide range of components and
adjustments available on the Sterling Elite2. For further
information about these you should contact your Sunrise
Medical authorised dealer.
Your scooter will reach you in excellent condition having
been personally inspected before leaving our factory.
Following the guidelines for maintenance and cleaning
your scooter will maintain its first class condition and give
you complete satisfaction.
This Scooter is designed for comfort, safety and durability
and has been exhaustively researched and tested by our
experts. The Elite2 XS, RS and PLUS model scooter is
classified as a category C vehicle under the European
scooter standard EN 12184.
It is intended for the use of people of all ages who may
have difficulty walking distances or for periods of time. It
is ideal for indoor and outdoor use and suitable for users
up to 175kg in weight. Variation in load weight can affect
performance. Maximum user weight tested using 175kg
test dummy. The scooter is designed to be driven on
paved or tarmac footpaths and roads but should not be
driven through mud, water or snow which is deeper than
50mm. If you are in any doubt as to the suitability of the
power scooter, contact your local Sunrise Medical
approved supplier for clarification, prior to commencing
use.
It is very important to read the relevant section
of the owner’s manual when making any minor
adjustments. Consult the Technical Manual or
your local Sunrise Medical authorised dealer for
more complex adjustments.
If you have any queries about the use, maintenance or
safety of your scooter, please contact your local approved
Sunrise Medical service agent. If you do not know of an
approved dealer in your area or have any other questions
please write or telephone:
Sunrise Medical Limited
High Street Wollaston
West Midlands DY8 4PS
England
Tel.: +44 (0) 1384446688
www.sunrisemedical.com
DEALER ADDRESS/STAMP
FOREWORD 3
SYMBOL LEGEND 3
USE 3
AREA OF APPLICATION 3
FEATURES OF STERLING ELITE
2
- XS - RS 4
FEATURES OF STERLING ELITE2 PLUS 5
CONTENTS 6
1.0 YOUR SCOOTER 6
2.0 HOW TO USE THIS MANUAL 7
3.0 LABEL EXPLANATION/DEFINITIONS 7
4.0 SAFETY INFORMATION 8
5.0 ASSEMBLY & OPTIONS 16
6.0 USING THE SCOOTER 24
7.0 SCOOTER CONTROL SYSTEM 28
8.0 TROUBLESHOOTING USING THE LCD 37
9.0 BATTERIES AND CHARGING 39
10.0 ADJUSTMENTS 41
11.0 CLEANING 42
12.0 SHIPPING AND STORAGE 43
13.0 DISPOSAL 43
14.0 TORQUE SETTINGS 43
15.0 SPECIFICATION SHEETS 44
16.0 GUARANTEE 46
17.0 SERVICE ADVICE/HISTORY 46
18.0 SERVICE AND MAINTENANCE 47
19.0 NAME PLATE 51
Please keep a note of your local service agent’s address
and telephone number in the space below.
In the event of a breakdown, contact them and try to give
all relevant details so they can help you quickly.
Page 7

7
Sterling Elite2 XS-RS-Plus
2.0 How to Use This Manual
2.1 INTRODUCTION:
Please keep a note of your local service agent’s address
and telephone number in the space below.
In the event of a breakdown, contact them and try to give
all relevant details so they can help you quickly.
The scooters shown and described in this manual may
not be exactly the same in every detail as your own
model. However, all instructions are still entirely relevant,
irrespective of detail differences.
NOTE : The manufacturer reserves the right to alter
without notice any weights, measurements or other
technical data shown in this manual. All figures,
measurements and capacities shown in this manual are
approximate and do not constitute specifications.
2.2 GUARANTEE:
The guarantee form is included in the Sunrise Pack.
Please fill in the relevant details and return to us to
register your entitlement. THIS IN NO WAY AFFECTS
YOUR STATUTORY RIGHTS.
2.3 WARRANTY-REPAIR-SERVICE CONDITIONS:
1) The repair or replacement will be carried out by an
authorised Sunrise Medical dealer/service agent.
2) To apply the warranty conditions, should your scooter
require attention under these arrangements, notify the
designated Sunrise Medical service agent immediately
giving full information about the nature of the difficulty.
Should you be operating the scooter away from the
locality of the designated Sunrise Medical service agent,
work under the “Warranty Conditions” will be carried out
by any other service agent designated by the
manufacturer.
3) Should any part of the scooter require repair or
replacement, as a result of a specific manufacturing or
material defect, within twenty four months from the date
on which the possession of the scooter was transferred to
the original purchaser, and subject to it remaining within
that ownership, the part or parts will be repaired or
replaced completely free of charge if returned to the
authorised service agent. If you are unsure who your
local servicing agent is:
Please contact Sunrise Medical using the contact details
on the previous page.
4) Any repaired or replaced part will benefit from these
arrangements for the balance of the warranty period
applicable to the scooter.
5) Parts replaced after the original warranty has expired
are covered for a further twelve months.
6) Items of a consumable nature will not generally be
covered during the normal warranty period, unless such
items have clearly suffered undue wear as a direct result
of an original manufacturing defect. These items include
amongst others; upholstery, tyres, inner tubes, batteries,
motor brushes etc.
7) The above warranty conditions apply to all scooter
parts for models purchased at full retail price.
8) Under normal circumstances, no responsibility will be
accepted where the scooter has required repair or
replacement as a direct result of:
a) The scooter or part not having been maintained or
serviced in accordance with the manufacturer’s
recommendations, as stated in the Owner’s Manual and/
or Service Manual. Or failing to use only the specified
original equipment parts.
b) The scooter or part having been damaged by neglect,
accident or improper use.
c) The scooter or part having been altered from the
manufacturer’s specifications, or repairs having been
attempted prior to the service agent being notified.
3.0 Label Explanation/Definitions
LABEL MEANING
This label shows the
position of tie down
location points for scooter
transport.
This label shows the
model number, serial
number, max weight and
manufacturer details.
This label shows the
position of the freewheel
lever..
DRIVE
FREEWHEEL
This label shows the
location of the power ON
and OFF for the scooter
and ‘read the user manual’
warning.
This label warns about the
possibility of finger
entrapment or pinching.
Page 8

8
Sterling Elite2 XS-RS-Plus
4.0 Safety Information
If you follow the instructions given in this manual, you will
enjoy many trouble-free years of use.
4.1 GENERAL WARNINGS:
WARNING!
This scooter can be used on the road, ensure all local •
traffic regulations and health requirements, (such as
eye sight), are understood and adhered to.
Load data always refers to one single person as •
operator.
The scooter is authorised for use by one person.•
Do not operate your Scooter whilst under detrimental •
influence of alcohol, drugs or bouts of severe/acute
illness .
Please observe all relevant rules and regulations •
pertaining to pedestrians and road users, at all times.
Always ensure that your scooter is switched off •
before attempting to mount or dismount.
Always ensure that you are able to operate all •
controls from a comfortable position. Paying attention
to your posture is essential to ensure your continued
comfort and well being.
Always make sure that you can be seen clearly, •
especially if you intend using your scooter in poor
light.
Switch on the scooter lights to make yourself visible •
when there are low levels of light , day or night.
The scooter has been built to match the needs of the •
majority of users. If a personal risk assessment
highlights specific needs, the scooter may need to be
adjusted and/or reprogrammed.
Do not let children or others use your scooter.•
Do not lift or hoist the scooter by any detachable •
parts such as leg rests, arm rests etc.
CAUTION!
4.2 FEATURES AND OPTIONS:
Some of the options shown in this manual may not be
available in your country and may also restrict the overall
physical limits of the standard product (e.g. max. speed,
user weight limit, range, etc.).
Any limitations are marked on the order form, in
the technical manual and in this owner’s manual.
For further information please consult your Sunrise
Medical authorised dealer.
DANGER!
4.3 PRELIMINARY CHECKS:
Always check that Drive is selected before setting the •
scooter in motion.
The scooter emits an audible warning when •
Freewheel is selected and will not allow the scooter
to drive.
You should not try to manoeuvre at full speed.•
If you have to make a sudden turn, slow down first by •
releasing the control lever or the speed control
feature, this is very important if you are going down a
hill.
Failure to slow down during a manoeuvre may result •
in your overturning the scooter.
Always check that the scooter is switched off before •
trying to get on or off.
Always check that you can be seen clearly, especially •
if you are using the scooter in conditions of low
visibility.
4.4 EMERGENCY BRAKING:
WARNING!
If power is cut by means of the ON/OFF key switch,
braking will be immediate and total. This method of
stopping is not recommended except for emergencies,
since the stop will be extremely sudden.
CAUTION!
Routine use of emergency braking will cause damage to
your Scooter.
4.5 KERBS, (FIG 4.1):
DANGER!
Be aware of other vehicles and pedestrians when •
kerb climbing.
Do not attempt to mount kerbs in excess of 100mm •
(4“).
Always mount and dismount kerbs with caution and •
directly facing the kerb.
Do not attempt to mount or dismount kerbs in •
reverse.
Do not attempt to descend from, a kerb of more than •
100 mm. height.
Do not attempt to ascend high kerbs, steep slopes or •
cambers due to the risk of falling out of the scooter or
tipping over.
Do not attempt to ascend any kerb in the vicinity of a •
drain cover, uneven surfaces, or gravel covering.
Do not attempt to climb or descend any kerb at an •
oblique angle. Approach only at an angle of 90° with
at least 500mm run-up.
Fig.4.1
Page 9

9
Sterling Elite2 XS-RS-Plus
4.6 TYRES:
The tyres of a scooter suffer wear depending on how
much the scooter is used. Check them regularly,
especially for inflation pressure, according to the service
instructions in this manual.
Each tyre pressure should be:
Elite2 XS & RS = 1.8-2.0 bar (25-28 P.S.I.)
Elite2 Plus = 2.4-2.5 bar (33-35 P.S.I.).
See section 5.26 for solid tyre information.
DANGER!
Never inflate the tyres with a service station air pump. It
is recommended that you use a manual pump or a
pressure regulator (manometer)
4.7 FREEWHEEL DEVICE, (FIG.4.2):
The scooter has two modes of movement:
Drive or Freewheel.
DRIVE = All movement, including braking, is •
exclusively controled by operation of the electronic
control system.
FREEWHEEL = Movement is by manual means. •
Movement can also occure due to gravity, (pot holes,
kerbs, hills or inclines etc).
Push the lever up for drive and down for freewheel.
DANGER!
Only use the freewheel function to push the scooter •
manually from one spot to another.
Keep in mind that while the freewheel system is in •
operation, the scooter is without a braking system.
Selecting freewheel causes a loud audible warning •
beeping tone from the scooter horn.
For safety reasons the scooter can no longer be •
moved using the control levers.
Do not operate the freewheel device whilst seated in •
the scooter
The freewheel device should only be operated by a •
person who has the strength and agility to be able to
fully manoeuvre the scooter safely, during freewheel.
Always put the scooter back in drive.•
Always check that drive is engaged before using the •
scooter.
Do not disengage the freewheel on or near a slope.•
Do not allow yourself to be pushed by others whilst •
the scooter is in freewheel.
4.8 TRANSPORTATION IN VEHICLES:
This scooter is suitable to use as a seat in vehicles as per
certificate ISO / NP 7176-19: 2008, and using the
restraint system Unwin (4 point WWR / ATF / K / R) or
any other 4 point tie down system that complies to the
same standards.
DANGER!
A scooter secured in a vehicle will not provide the
equivalent level of safety and security of a vehicle seating
system. It is always recommended that the user transfers
to the vehicle seating. It is recognised that this is not
always practical for the user to be transferred and in
these circumstances where the user must be transported
whilst in the scooter the following advice should be
followed:
WARNING!
Confirm that the vehicle is suitably equipped to •
transport a passenger in a scooter, and ensure the
method of access/egress is suitable for your scooter
type.
The vehicle should have the floor strength to take the •
combined weight of the user, the scooter and
accessories.
Sufficient space should be available around the •
scooter to enable clear access to attach, tighten and
release the scooter and occupant tie down restraints
and safety belts.
The occupied scooter must be located in a forward •
facing position and secured by the scooter tie down
and occupant restraint straps (WTORS tie downs)
meeting the requirements of ISO 10542 or SAE
J2249, in accordance with the WTORS
manufacturers’ instructions, (Fig. 4.3).
The scooter’s use in other positions within a vehicle •
has not been tested e.g. transportation in a side
facing position must not be carried out under any
circumstances. (Fig. 4.3).
The scooter should be secured by a Tie Down •
Restraint system, conforming to ISO 10542 or SAE
J2249 with non-adjustable front straps and adjustable
rear straps, which typically use Karabiner clips/S
hooks and tongue and buckle fittings. These
restraints generally comprise of 4 individual straps
that are attached to each corner of the scooter.
Fig.4.3
Fig.4.2
DRIVE
FREEWHEEL
Page 10

10
Sterling Elite2 XS-RS-Plus
WARNING!
The tie-down restraints should be fitted to the main •
frame of the scooter as indicated by the diagrams in
the section, Transportability Positioning of Tie down
Restraints on the scooter and not to any attachments
or accessories, e.g. not around the wheels or brakes
The tie–down restraints should be attached as close •
as possible at an angle of 45 degrees and tightened
securely in accordance with the manufacturer’s
instructions.
Alterations or substitutions must not be made to the •
scooter tie down points or to structural and frame or
components without consulting the manufacturer.
Failure to do so will invalidate the ability of a Sunrise
Medical scooter to be transported within a vehicle.
Both pelvic and upper torso restraint belts must be •
used to restrain the occupant to reduce the possibility
of head and chest impacts with the vehicle
components and serious risk of injury to the user and
other vehicle occupants. (Fig.4.4) The upper torso
restraint belt should be mounted to the vehicle “B”
pillar – failure to do so will increase the risk of serious
abdominal injuries to the user.
Fig.4.4
DANGER!
If the user may be compromised during •
transportation; by the removal of some options
intended for their comfort, wellbeing and support, for
both head and body, then a risk assessment maybe
required.e.g. Elevating leg rests, specialists seating
systems or other prescribed adaptations
Postural supports (lap straps, lap belts) should not •
be used or relied on for occupant restraint in a
moving vehicle unless they are labelled as meeting
the requirements specified in ISO / NP 7176-19:
2008 or SAE J2249
The safety of the user during transportation depends •
upon the diligence of the person securing the tiedown restraints and they should have received
appropriate instructions and/or training in their use.
Wherever possible remove and stow safely away •
from the scooter all auxiliary equipment, for example:
Crutches, basket etc.
Articulating/elevating leg rest should not be used in •
the elevated position when the scooter and user are
being transported and the scooter is restrained using
Scooter Transport and Occupant Restraints.
Seating backrests should be returned to an upright •
position.
The manual brakes must be applied, and locked into •
position using the locking feature on the brake lever.
4.9 OCCUPANT RESTRAINT INSTRUCTION:
DANGER!
The pelvic restraint belt must be worn low across the •
front of the pelvis so that the angle of the pelvic belt is
within the preferred zone of 30 to 75 degrees to the
horizontal.
A steeper (greater) angle within the preferred zone is •
desirable i.e.closer to, but never exceeding
75degrees. (Fig.4.5).
Fig.4.5
The upper torso restraint belt must fit over the shoulder
and across the chest as illustrated Fig 4.6.
DANGER!
Restraint belts must be adjusted as tightly as possible •
consistent with user comfort.
Restraint belt webbing must not be twisted when in •
use.
Restraints should be mounted to the vehicle “B” pillar •
and should not be held away from the body by
scooter components such as armrests, fenders etc.
(Fig.4.7)
Page 11

11
Sterling Elite2 XS-RS-Plus
Fig.4.7
Fig.4.6
Fig.4.10
4.10 TRANSPORTABILITY - POSITIONING OF TIE
DOWN RESTRAINTS ON THE SCOOTER:
The tie down symbol (Fig.4.8) on the scooter frame
indicates the position of the scooter restraint straps.
The front straps are fitted first to anchor the scooter, then
the rear straps are fitted and tensioned to secure the
scooter, (Fig.4.9).
The attachment points to the scooter are the brackets on
the front of the main frame under the front wheel arch,
(Fig.4.10) and the brackets on the rear of the frame under
the seat, (Fig.4.11).
The straps are attached to the brackets as shown in
Fig.4.12 for front and Fig.4.13 for rear.
Fig.4.9
Fig.4.11
Fig.4.12
Fig.4.13
Fig.4.8
Page 12

12
Sterling Elite2 XS-RS-Plus
WARNING!
4.11 EMC - RADIO TRANSMITTING DEVICES:
When operating two-way radio, walkie-talkies, C.B.,
amateur radio, public mobile radio and other powerful
transmitting devices the scooter should be brought to a
halt and turned off. The operation of cordless, mobile
telephones and cell phones including hands-free devices
is permitted but if abnormal operation of the scooter is
encountered then the scooter must be brought
immediately to a halt and turned off.
NOTE: the electrical systems of the scooter may disturb
the performance of alarm systems in retail shops.
DANGER!
4.12 SHARP TURNS:
Full speed turns should not be attempted. If you need to
turn sharply you must reduce your speed with the control
panel speed setting. This is particularly important when
travelling across or down a slope. Disregarding this
advice could lead to your scooter tipping over.
DANGER!
4.13 WEIGHT LIMIT:
The user, plus options and accessories, plus items •
carried should never exceed a total weight of
175 kg.
Never sit in the scooter whilst weight training if the •
total weight (user plus additional weights) exceed a
total weight of 175 kg.
Exceeding the weight limit is likely to damage the •
seat, frame or fasteners and may cause severe injury
to you or others from scooter failure
Exceeding the weight limit will void the warranty •
Scooter motors:
Do not hang shopping bags from the handlebars as •
they could swing and cause loss of steering control.
4.14 HOT/COLD SURFACES:
WARNING!
After prolonged use, the drive unit motors will produce
heat, which is radiated through the motors’ outer casing.
Do not remove the rear drive unit cover after using •
the scooter.
Do not touch the motors’ outer casing for at least 30 •
minutes after using the scooter, to allow it to cool.
Not only motors can become hot during the operation •
of the scooter, the seat upholstery material and
armrests may heat up when standing in the sun.
Be aware that in extremely cold weather, exposed •
metal parts can present a freeze burn hazard,
particularly if the hands are wet.
4.15 ROAD CAUTION:
Please show the utmost consideration for pedestrians
and other road users.
DANGER!
Remember that the last thing a car or lorry driver •
expects to see is a scooter driving off the kerb into
the road.
If in any doubt, do not risk crossing the road until you •
are certain that it is safe.
When crossing roads, do so as quickly as possible; •
there may be other traffic.
Be seen! Always wear something bright such as light •
coloured clothing, a reflective tabard or day glow vest.
At night, in dull conditions or in poor visibility, always •
use the lights, particularly when driving on the road.
Obey all of the rules for pedestrians and traffic.•
Remember, on the road you are traffic, on the •
footpath and when crossing the road you are a
pedestrian.
Whilst driving on the road do not drive up one-way •
streets the wrong way, use the footpath with the
speed control set at the appropriate speed, (less than
4mph-6kph).
Do not hang bags off the handle bars or tiller •
adjustment lever.
4.16 ADVERSE CONDITIONS:
DANGER!
Be aware that when driving your scooter in adverse •
conditions, e.g. on wet grass, mud, ice, snow or other
slippery surfaces, you may experience a reduction in
the grip and traction of your scooter. We recommend
you take extra precautions in these conditions,
particularly on hills and slopes; your scooter could
become unstable or skid causing possible injury.
DANGER!
When you are using a Powered Scooter or Wheelchair,
take extra care with loose or long items of clothing.
Moving parts, such as wheels, can be potentially
dangerous or even fatal if clothing becomes entangled.
NOTE: Extreme variances in temperature may trigger the
self protect mechanism in the control system. If this
occurs the control system will temporarily shut down to
prevent damage to the electronics or the scooter.
Page 13

13
Sterling Elite2 XS-RS-Plus
4.18 TRANSFER TO AND FROM THE SCOOTER
Mounting your Elite2 scooter
1. Ensure that the key is turned to the off position.
2. Stand at the side of the scooter and lift the nearest arm
rest, (Fig.4.14).
3. Push the seat rotate lever forwards and rotate the seat
until it faces you, (Fig. 4.15 - 4.16)).
4. Make sure that the seat is locked securely into position.
5. Position yourself comfortably in the seat (Fig.4.17).
6. Push the seat rotate lever forwards and rotate the seat
until facing forward (Fig.4.18).
7. Make sure that the seat is locked securely into position
and the arm rest is down, (Fig.4.18).
8. Ensure that your feet are placed firmly on the foot board
of the scooter and that you can reach all the controls
comfortably, (Fig.4.19).
4.3.2 Dismounting your Elite2 scooter
1. Bring your Elite2 scooter to a complete stop.
2. Make sure that the key is turned to the off position.
3. Push the seat rotate lever forwards and rotate the seat
until you are facing the side of the scooter, (Fig.4.17).
4. Make sure that the seat is locked securely into position
and that both feet are on the ground.
5. Carefully get out of the seat and stand by the side of
your scooter, (Fig.4.16).
6. You may leave the seat in this position or return it to
facing forward.
Fig.4.14
Fig.4.15
Fig.4.16
Fig.4.17
Fig.4.18
Fig.4.19
4.17 RAMPS FOR TRANSPORTING SCOOTER:
DANGER!
When using a ramp, please ensure that it is capable •
of taking the combined weight of the scooter and
yourself.
If a ramp is being used to load a scooter into a •
vehicle, please ensure the ramp is properly secured
to the vehicle.
Always approach the ramp head-on and exercise •
caution.
Please ensure the ramp is suitable for the product •
you are transporting.
Maximum ramp angle = 10• ° (18%)
Follow all the user instructions supplied with the •
ramp.
Be aware that accessories attached to the scooter, •
may affect the overall stability.
Page 14

14
Sterling Elite2 XS-RS-Plus
4.19 ANTI TIPS:
WARNING!
Ensure the anti tips are fitted before using the •
scooter.
Ensure that anti tips are not damaged or worn before •
using your scooter.
Attendants must be aware of the location of the anti •
tips to prevent feet being trapped underneath causing
injury.
Do not allow adults or children to stand on the anti •
tips, or any other part of the scooter as this could
cause the scooter to become unstable.
4.20 USE ON A SLOPE:
Your scooter has been designed and tested to allow its
use on slopes or gradients of up to 10° (18%).
To improve stability lean forward when driving uphill. Set
the seat to it’s lowest height in the furthest forward
position and set the back upright.
When travelling downhill sit in an upright position or
recline the back rest slightly to compensate.
WARNING!
Do not exceed the maximum slope of 10• °.
Stop and return the back rest to an upright position •
before attempting to climb a slope. Failure to do this
may cause the scooter to become unstable.
If you are in any doubt about the capabilities of your •
scooter on a slope then do not attempt to drive up or
down the slope/kerb; try to find an alternative route.
Wherever possible always travel up or down the •
slope directly facing the slope, (Fig.4.20).
Never attempt a non-stop “U” turn when going up or •
down steep slopes, (Fig.4.20).
Be aware that accessories attached to the scooter, •
may affect the overall stability.
Fig.4.20
4.21 GRADIENTS: ASCENTS:
When going uphill, keep the scooter moving if it is safe
and clear to do so.
Manoeuvre by using gentle tiller and throttle movements.
The seat should be set to it’s lowest height in it’s furthest
forward position and the back should be upright.
WARNING!
If you have stopped on a hill, you should start off •
again slowly.
Avoid sudden acceleration or hard braking.•
Avoid hard turns•
4.22 GRADIENTS: DESCENTS:
WARNING!
On descents, it is important not to let the scooter •
accelerate beyond its normal level of ground speed.
It is safer to proceed slowly down steep descents •
(below the speed of 3mph, 5kph) and stop, if any
anxiety arises regarding the descent.
If the scooter picks up speed, release the control lever •
to stop all forward movement, then restart slowly and
do not allow the speed to increase beyond a
comfortable level.
4.23 LAP BELT (OPTIONAL ACCESSORY)
Before using your scooter ensure the Lap belt is worn and
correctly adjusted before use.
The lap belt is fitted to the scooter as shown in the fitting
photographs, (Fig.4.24 - 4.26). It is important that the belt
is fitted correctly and is not twisted.
The belt is adjusted automatically to the correct tension by
the interia reel system.
To lock the belt:
Pull the buckle over your lap and push firmly into the slot
in the receiver, (1).
The belt will adjust to the correct tension. Ensure that
there is no excess belt material, and the belt is tensioned
correctly. (Fig 4.23)
To release the belt:
Push the red button marked ‘PRESS’ to release the belt,
(2), (Fig 4.21).
Fig.4.21
1
2
Page 15

15
Sterling Elite2 XS-RS-Plus
DANGER!
The lap belt is an order form option, factory installed •
by Sunrise Medical.
For your comfort, the Lap Belt must be correctly fitted •
to the scooter. If you are unsure about the fitting or
operation of this option, please contact your
approved Sunrise Medical dealer.
Generally the Lap Belt should be fixed so that the •
straps sit at an angle of approximately 45°, and when
correctly adjusted should not allow the upper body to
slip down in the seat, (Fig.4.22)
The lap belt is not suitable for use when the scooter •
and occupant are transported in a vehicle. Always
use the separate occupant lap and diagonal
restraints provided in the vehicle, (Fig 4.4 - 4.6).
The lap belt must be checked on a daily basis to •
ensure it is adjusted correctly and it is free from any
obstruction or adverse wear.
Failure to make sure that the lap belt is secure and •
adjusted prior to use could cause serious injury to the
user. E.g. too loose a strap may allow the user to slip
down in the seat and risk suffocation.
Maintenance:
Check lap belt, and securing components; at regular •
intervals for any sign of fraying or damage.
Replace if necessary.•
Clean the lap belt with warm soapy water and allow •
to dry.
The lap belt should easily allow a hands width of •
space between the body and the belt, (Fig.4.23).
Sunrise Medical also recommend that the fit of the •
belt is checked on a daily basis to reduce the risk of
the end user inadvertently re-adjusting the belt to an
excessive length.
If in doubt about the use and operation of the seat •
belt then ask your healthcare professional, dealer, or
carer for assistance.
For your comfort, the Lap Belt must be correctly fitted to
the scooter. If you are unsure about the fitting or operation of this option, please contact your approved Sunrise
Medical dealer.
Fig.4.23
Fig.4.24
Fig.4.25
Fig.4.26
Fig.4.22
45°
Page 16

16
Sterling Elite2 XS-RS-Plus
4.24 SAFETY CHECKS
WARNING!
The scooter rider plus items should never exceed a •
total weight of 175 kg.
Before you use the scooter, check that it is not in •
freewheel and that all of the controls are functioning
correctly.
If you discover any scooter malfunction, take it to be •
repaired or reset. Your dealer can help you to find the
fault and correct it.
Make sure batteries are charged. Do not use the •
scooter when battery is low. The scooter may come
to a sudden, unexpected stop.
Be aware that there is a point during every transfer •
when the scooter seat is not below you.
Use extra care when you drive your scooter in •
reverse. If one of the wheels hits an obstacle, you
could lose control of the scooter or fall out.
Never use your scooter on a slope unless you are •
sure you can do so without losing traction.
When travelling along, always ensure the backrest is •
upright and the seat faces forwards.
Lift the scooter only by non-detachable parts of the •
main frame.
Never short-circuit electrical connections as you •
could cause an explosion.
Do not use the scooter if any of the tyres are •
damaged or under/over-inflated.
When using mobile phones you should switch the •
scooter off.
Do not smoke whilst on-board the scooter.•
If you take a break from driving, but remain seated in •
the scooter for more than just a moment, switch the
scooter off at the ignition key.
5.0 Assembly & Options
5.1 SEAT ADJUSTMENTS
WARNING!
Observe correct lifting techniques at all times when
lifting components over 10kg.
Flip Up Armrests (Fig 5.1): By pulling up on the end of
either armrest, the armrest will flip back for easy transfer
on and off of your Elite2.
Seat Rotate Lever (Fig 5.2): This is found under the left
side of the seat. Push it forwards to allow the seat to
rotate 360 degree and release to lock in any 45 degree
position desired.
Seat Height Adjustment: (Fig 5.3) The seat post is
height adjustable, providing 4 height positions. Carefully
unscrew the 2 bolts and nuts, and insert into desirable
position and tighten nut.
Sliding Mechanism (Fig. 5.4): This allows forward and
backward movement of the seat. Pull up lever found
under the front of the seat and use legs and body to
move to the required position and release lever.
Fig.5.1
Fig.5.2
Fig.5.4
Fig.5.3
Page 17
17
Sterling Elite2 XS-RS-Plus
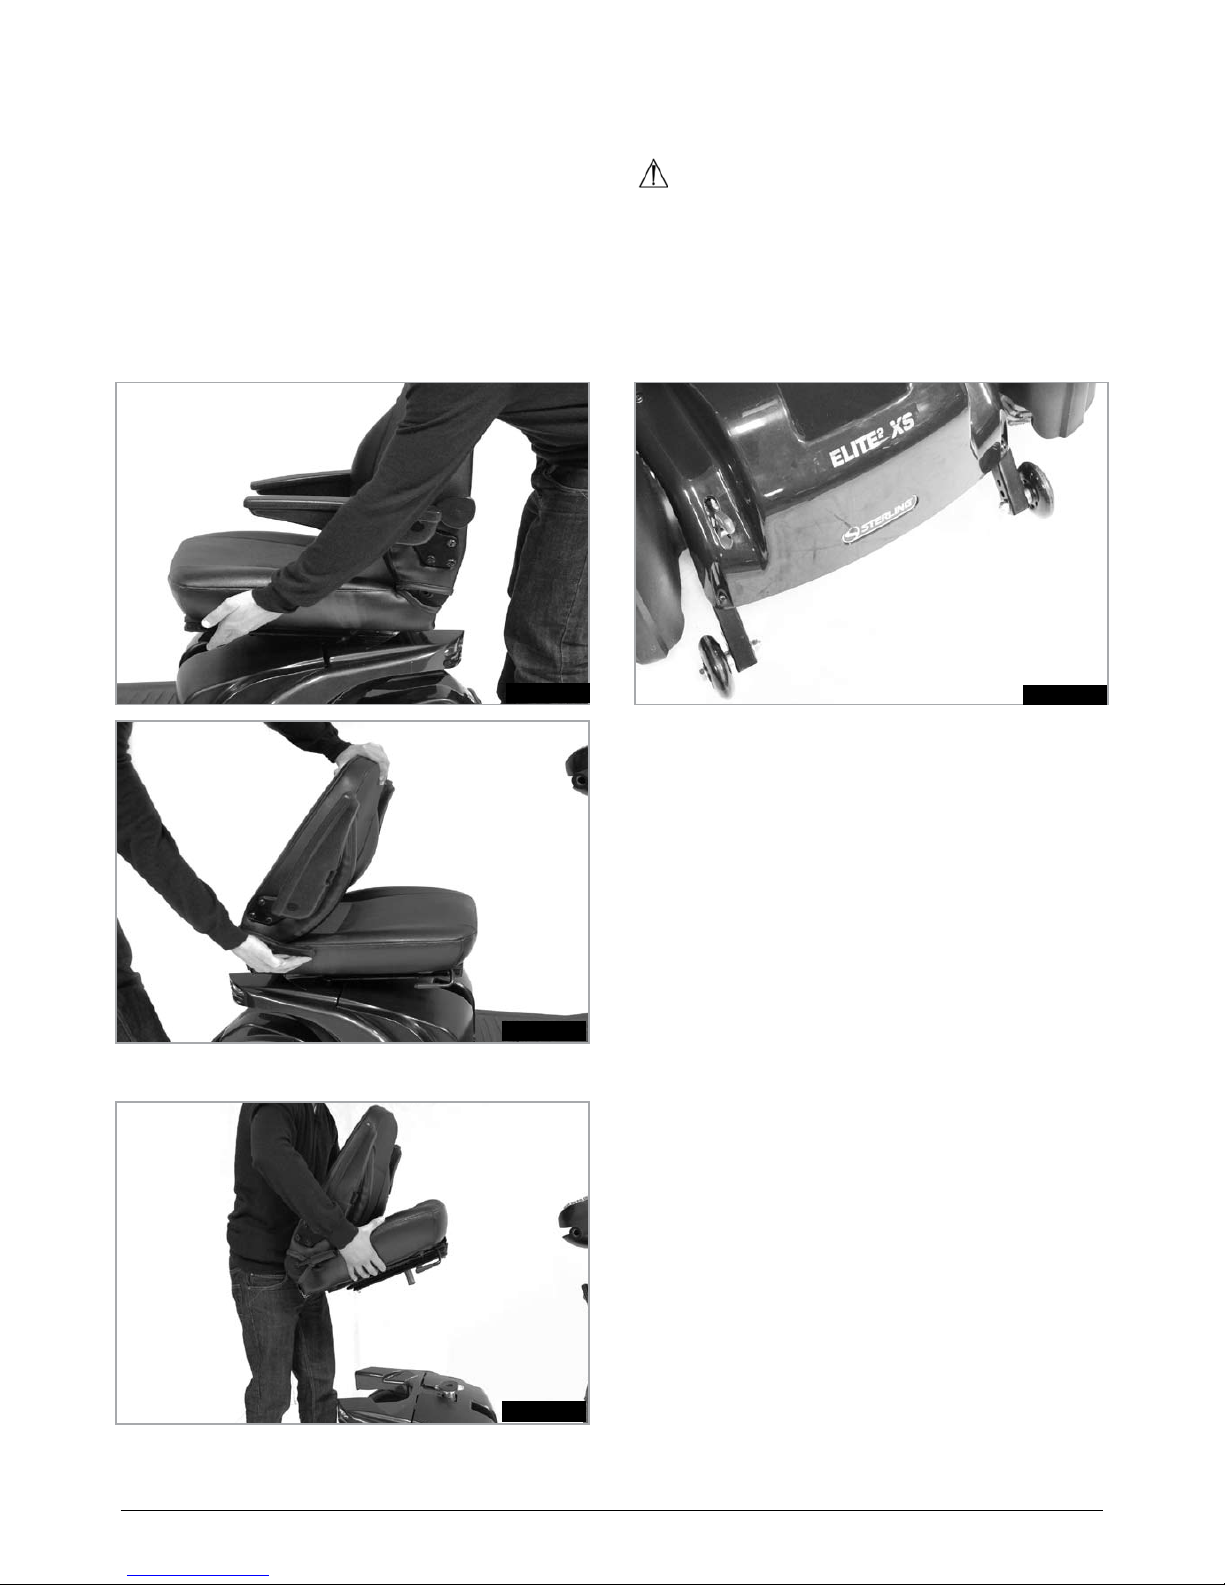
Seat Removal (Fig 5.5 - 5.8)
1. Push the seat rotate lever forwards and turn seat to
face the front.
2. Stand behind the seat, flip up the arm rests and fold
the backrest forward by lifting up the backrest
adjustment lever.
4. Place hands on either side of seat base, push the seat
rotate lever forwards and lift the seat vertically keeping
back posture upright. Bend the knees if required.
Fig.5.5
Fig.5.6
Fig.5.7
5.2. ANTI-TIP WHEELS:
These are factory fitted and should not be removed. The
anti-tip assembly is bolted to the rear frame of the
scooter, (Fig 5.8).
WARNING!
Never use the scooter without the anti-tip wheels fitted.
Fig.5.8
Page 18
18
Sterling Elite2 XS-RS-Plus
5.3 BATTERIES:
Read section 9.0 of this manual for additional
battery and charging information.
DANGER!
Do not smoke near, or expose the batteries to direct •
heat (i.e. naked flame, gas fire).
Do not attempt to change the fuses yourself.•
Do not attempt to by-pass the fuse as this would be •
very dangerous and could cause a fire.
If you suspect a fault, contact your Sunrise Medical •
authorised dealer as soon as possible.
Do not short circuit the battery terminals. Remember •
tools, jewellery etc can conduct and if dropped
across the battery terminals may cause severe burns
and/or explosion!
Ensure the rubber battery terminal covers are fitted.•
Batteries are heavy. Use correct lifting techniques •
when removing them from the scooter.
Always use the handles provided to lift the batteries.•
Always refit the retaining bar after refitting or •
replacing the batteries.
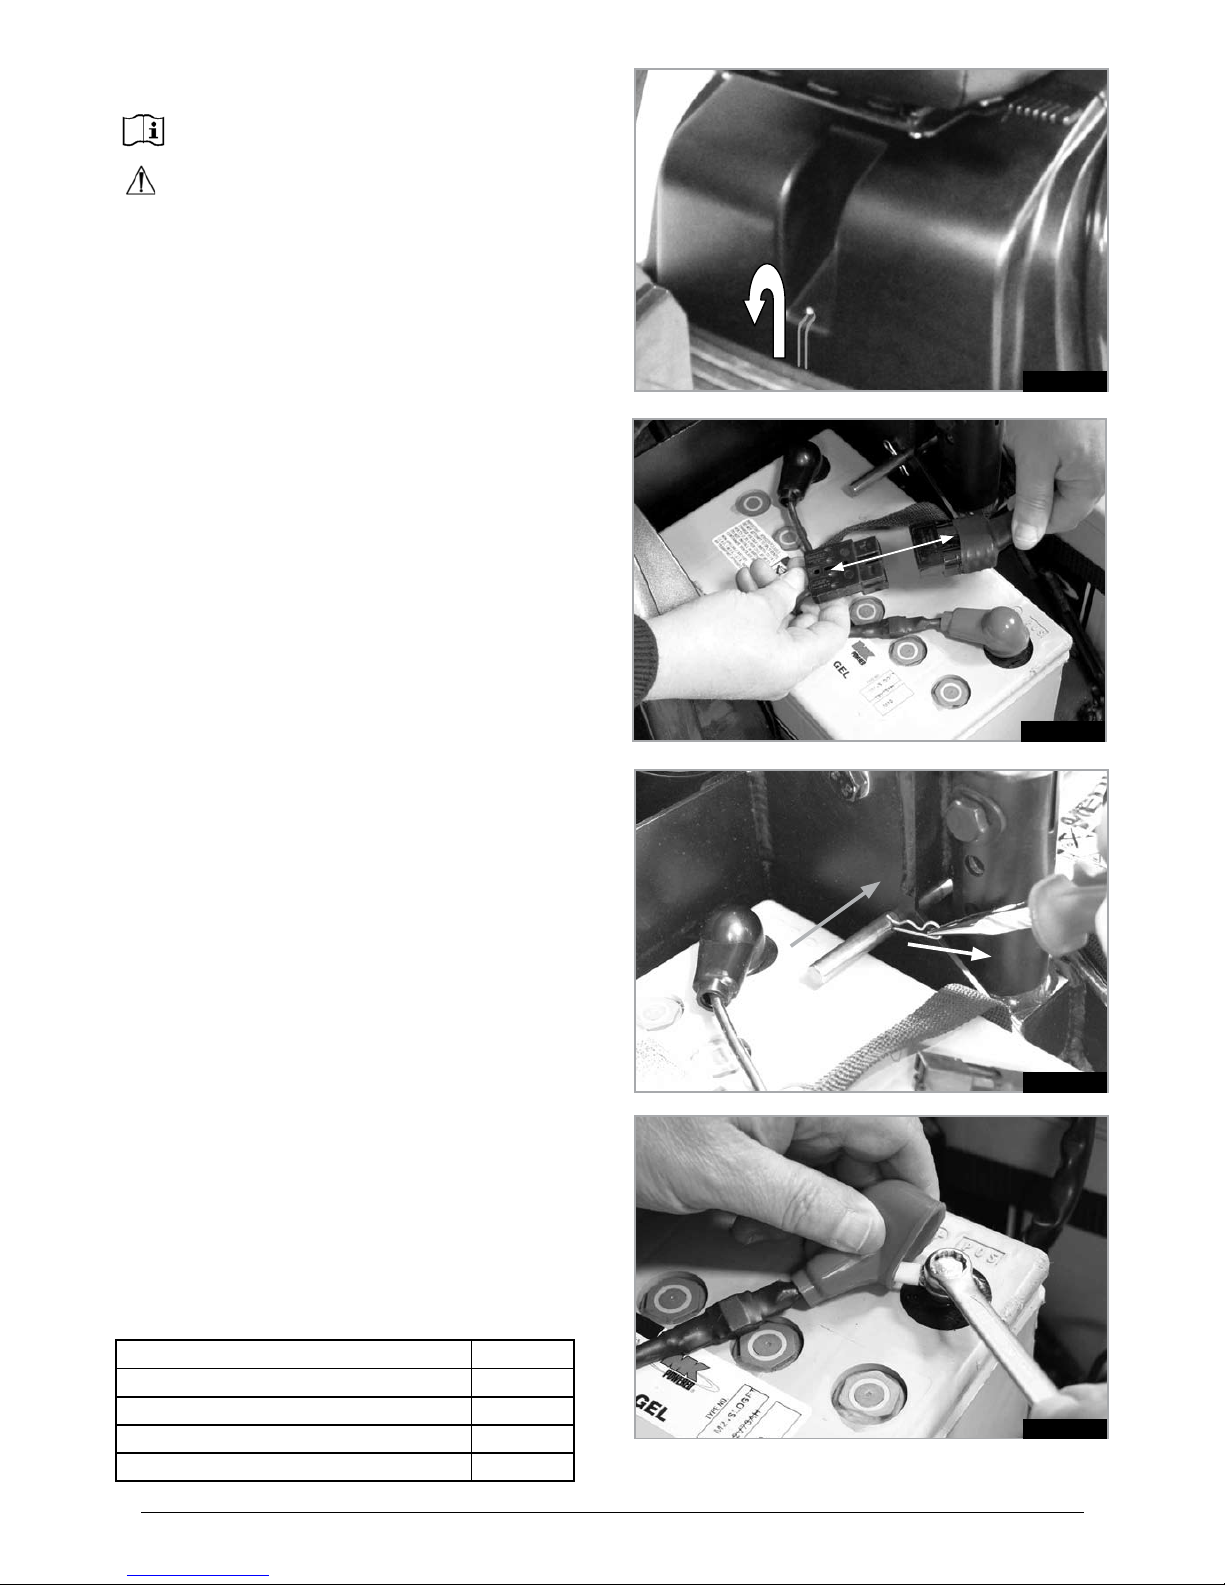
Battery Removal:
Remove the seat (Fig 5.5 - 5.8)1.
Remove the Battery cover by lifting the small elastic 2.
strap off the holding peg and lifting it off (Fig 5.9)
Pull the two halves of the plastic battery connector 3.
plugs apart, (Fig 5.10).
Remove the battery retaining bar by pulling out one 4.
clip and sliding the bar through the hole (Fig 5.11).
NOTE: There are two holes used for this bar, so note
which position is being used and refit the bar
accordingly.
If replacing the batteries or battery looms, pull back 5.
the rubber terminal cover and disconnect battery
terminals, using a 11.0mm spanner (Fig 5.12).
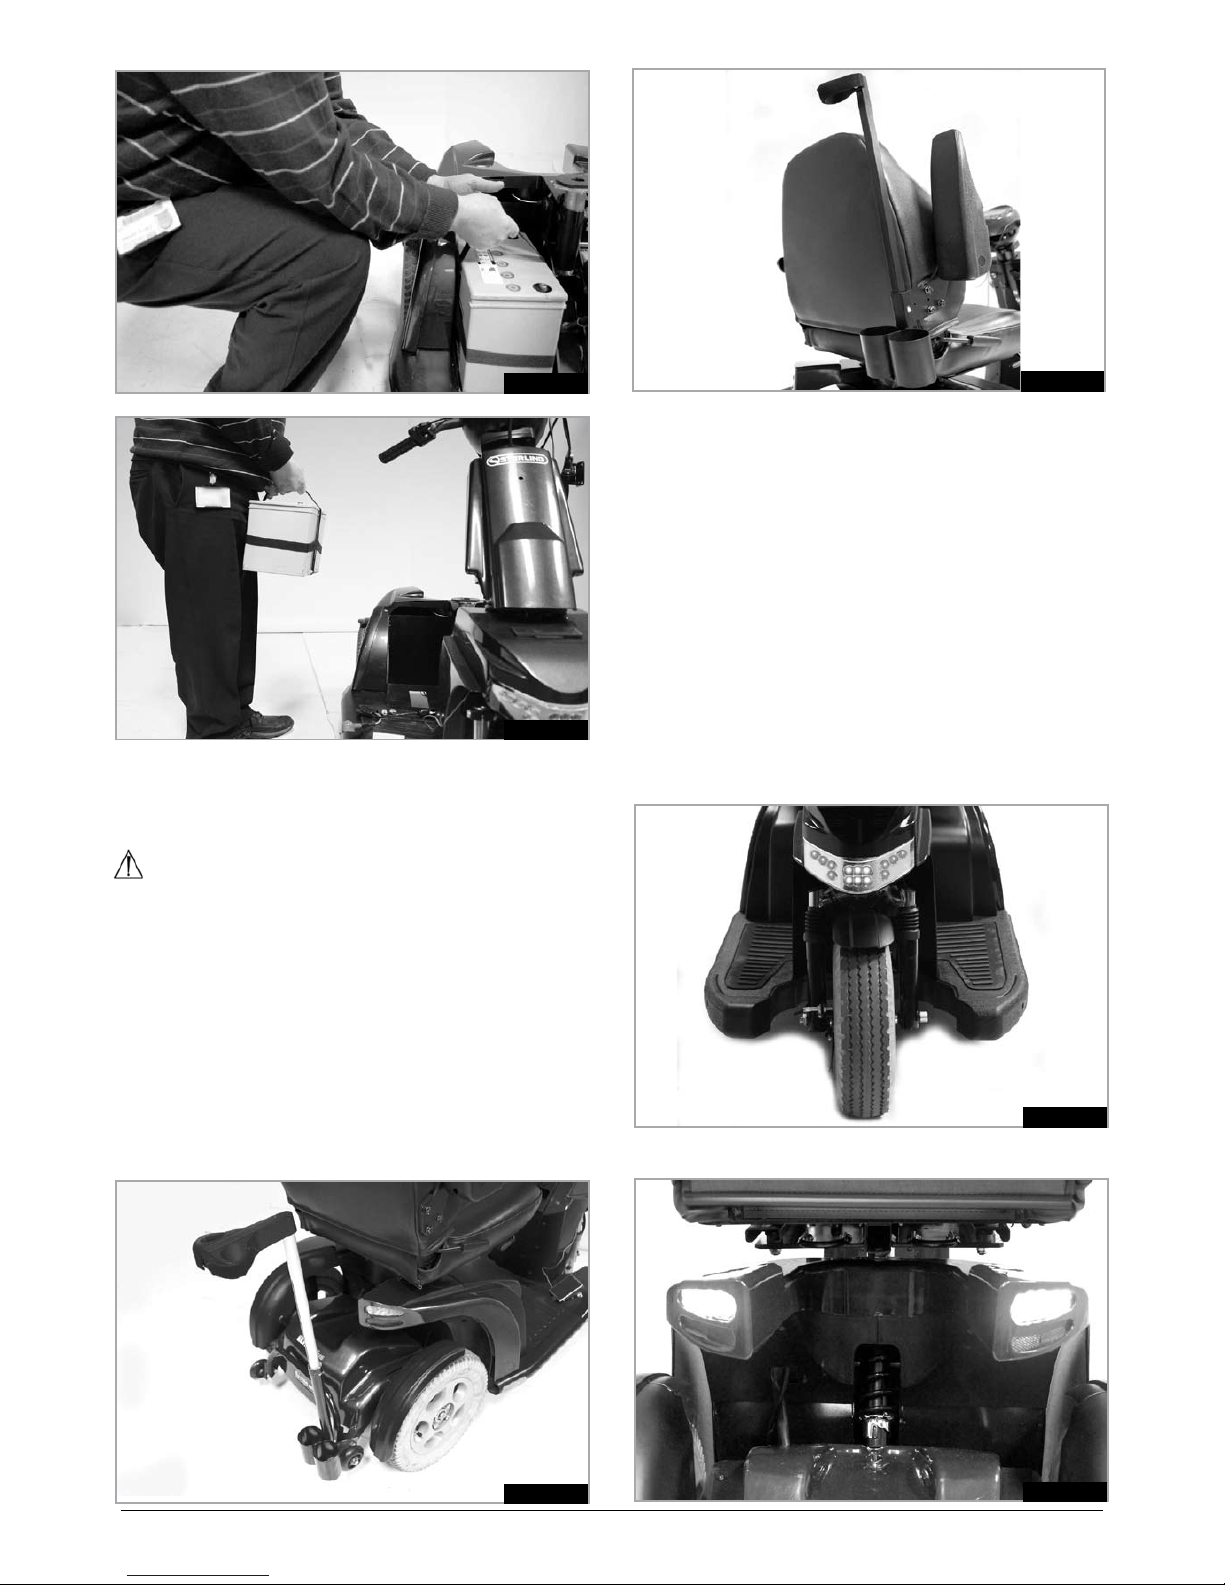
Bend knees with battery positioned centrally in front 6.
of you, rest your forearms on your knees for support
(Fig 5.13).
Grab battery handle with both hands (Fig 5.13). 7.
Lift vertically by straightening legs, keeping back 8.
posture upright (Fig 5.14).
Move the battery to a safe place, keeping back 9.
posture upright and bending knees when setting it
down.
NOTE: If changing the batteries for a different size
replacement, it may be necessary to adjust the height of
the battery retaining bar to suit the new batteries. it may
also be necessary to fit the sticky backed foam battery
box packer strip to prevent any sideways play. Simply cut
the strip to the desired length. If greater depth is
required, stick one strip on top of the other.
Fig.5.9
Fig.5.12
Fig.5.11
Fig.5.10
Battery Type Weight kg
MK 60 amp (at 20Hr) 19.3
MK 73.6 amp (at 20Hr) 24.3
EXIDE-GNB 60 amp (at 20Hr) 19.8
EXIDE-GNB 70 amp (at 20Hr) 23.0
Battery Weights:
Page 19
19
Sterling Elite2 XS-RS-Plus
Fig.5.13
Fig.5.14
5.4 CRUTCH HOLDER
Rear Frame mount Fig 5.15
Rear Seat mount Fig 5.16
WARNING!
Ensure that the crutch is securely fastened to the •
crutch holder.
Ensure that the crutch is not interfering with the •
mechanisms of the scooter.
Ensure that the crutch does not protrude from the •
scooter.
Do not attempt to remove the crutch whilst the •
scooter is in motion.
Always come to a complete stop and turn off the •
power to the controls before attempting to remove
the crutch. This will avoid accidentally operating the
scooter.
Fig.5.15
Fig.5.16
5.5 L IGHTS AND INDICATORS,
Front Fig.5.17
Rear Fig 5.18
Ensure that the lights and indicators are functioning
correctly and lenses are clean before going outdoors at
night or in poor visibility.
NOTE : The light clusters fitted to the scooter comprise of
LED lights. They are very efficient and reliable, which
means that there is no “bulb” to change. Should a light
cluster become damaged, please contact your local
Sunrise medical approved servicing agent for any
warranty, service or repair work required.
Fig.5.17
Fig.5.18
Page 20
20
Sterling Elite2 XS-RS-Plus
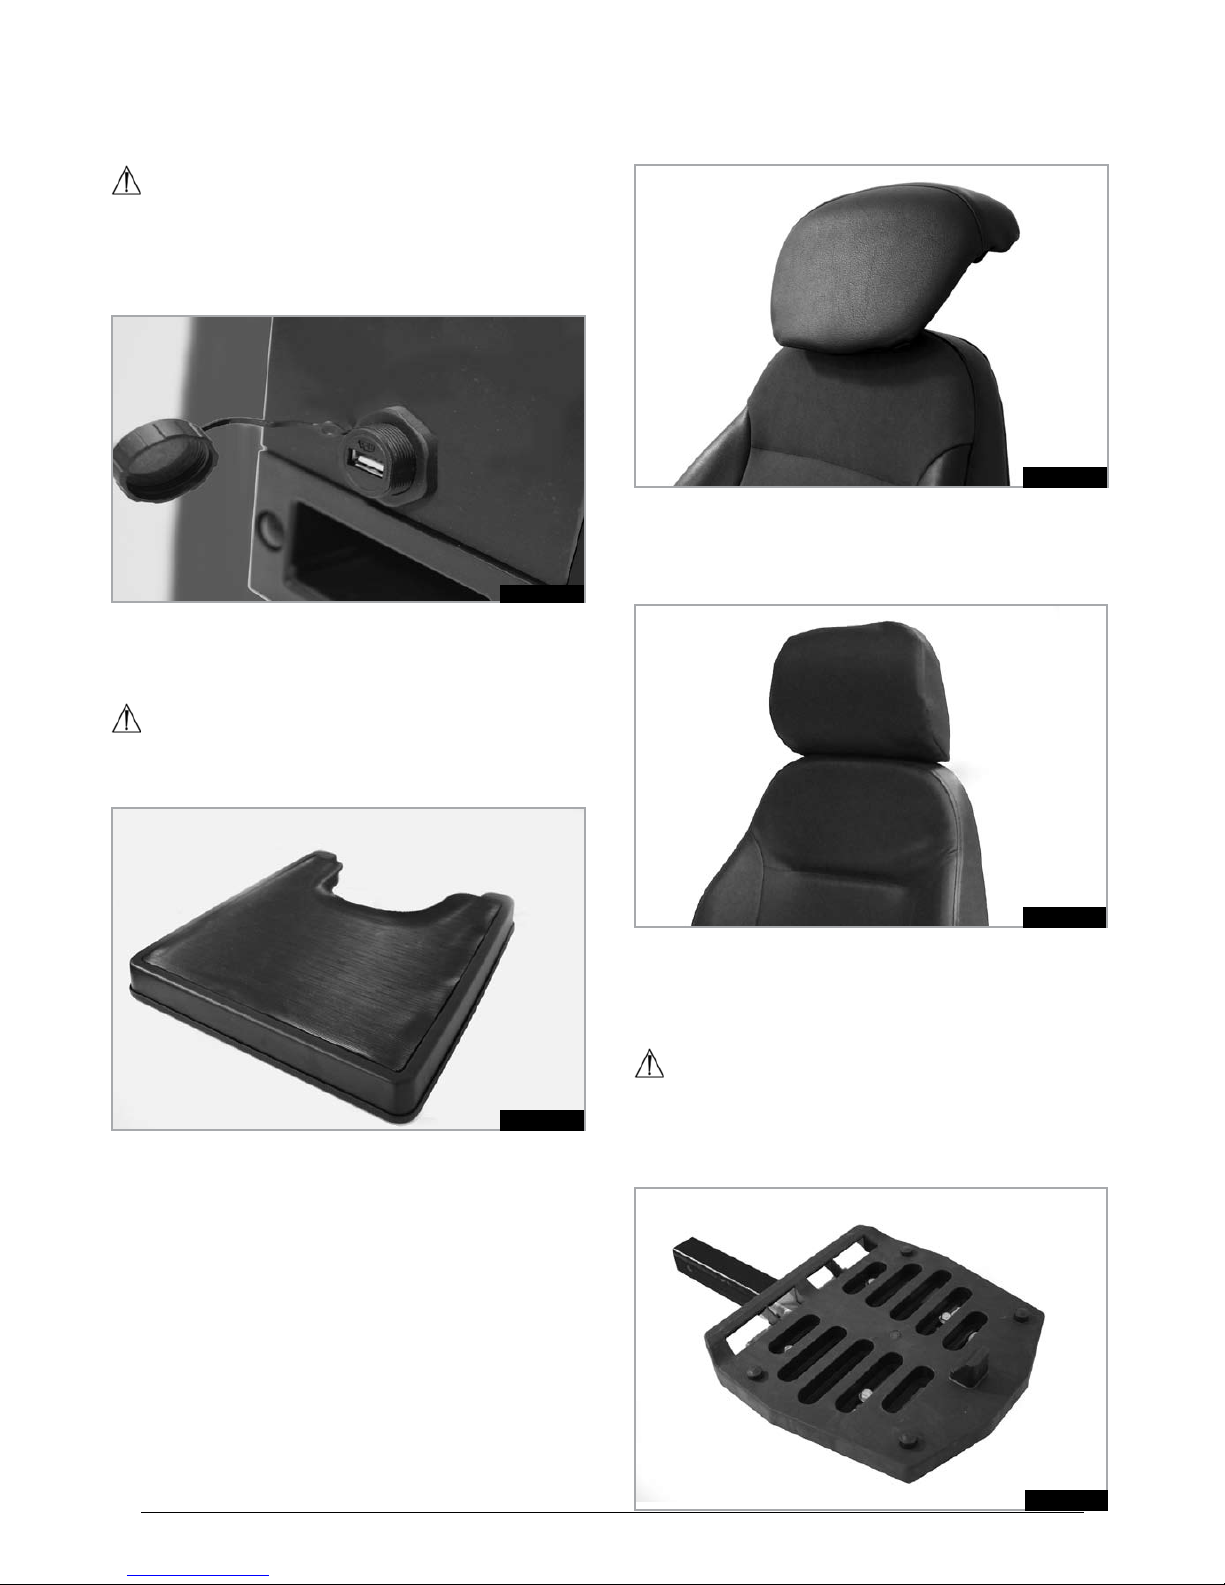
5.8 EXTENDED BACK REST
This option offers extra support and comfort to the upper
back and shoulders. It is particularly suited to taller users,
(Fig 5.21).
5.9 HEAD REST
The crash tested head rest offers additional support and
comfort to the back of the head, neck and shoulders,
(Fig.5.22).
5.10 REAR UNIVERSAL MOUNT
This mount is used for the rear storage box, but it can
also be used as a base to strap small items of luggage to,
(Fig.5.23).
WARNING!
Maximum Carrying Load = 10kg.•
The weight of the driver plus any luggage, should not •
exceed the maximum user weight of the scooter.
5.6 POWER USB OUTLET 5V- D.C.
This socket provides a convenient d.c. 5V - 1.2A power
supply to run low-current external accessories such as
phone chargers etc. (Fig.5.19).
WARNING!
Do not connect appliances that exceed the current rating
of the power outlet socket. The power will be cut if 1.2A
is exceeded, but will automatically be restored when the
abnormal current load is removed.
5.7 RAISED FOOT PLATFORM
This is to facilitate the correct knee / leg angle to obtain
maximum comfort for users with shorter lower leg
lengths, (Fig.5.20).
WARNING!
Be aware of the extra height from the ground and take
care when getting on and off the scooter.
Fig.5.19
Fig.5.20
Fig.5.21
Fig.5.22
Fig.5.23
Page 21
21
Sterling Elite2 XS-RS-Plus
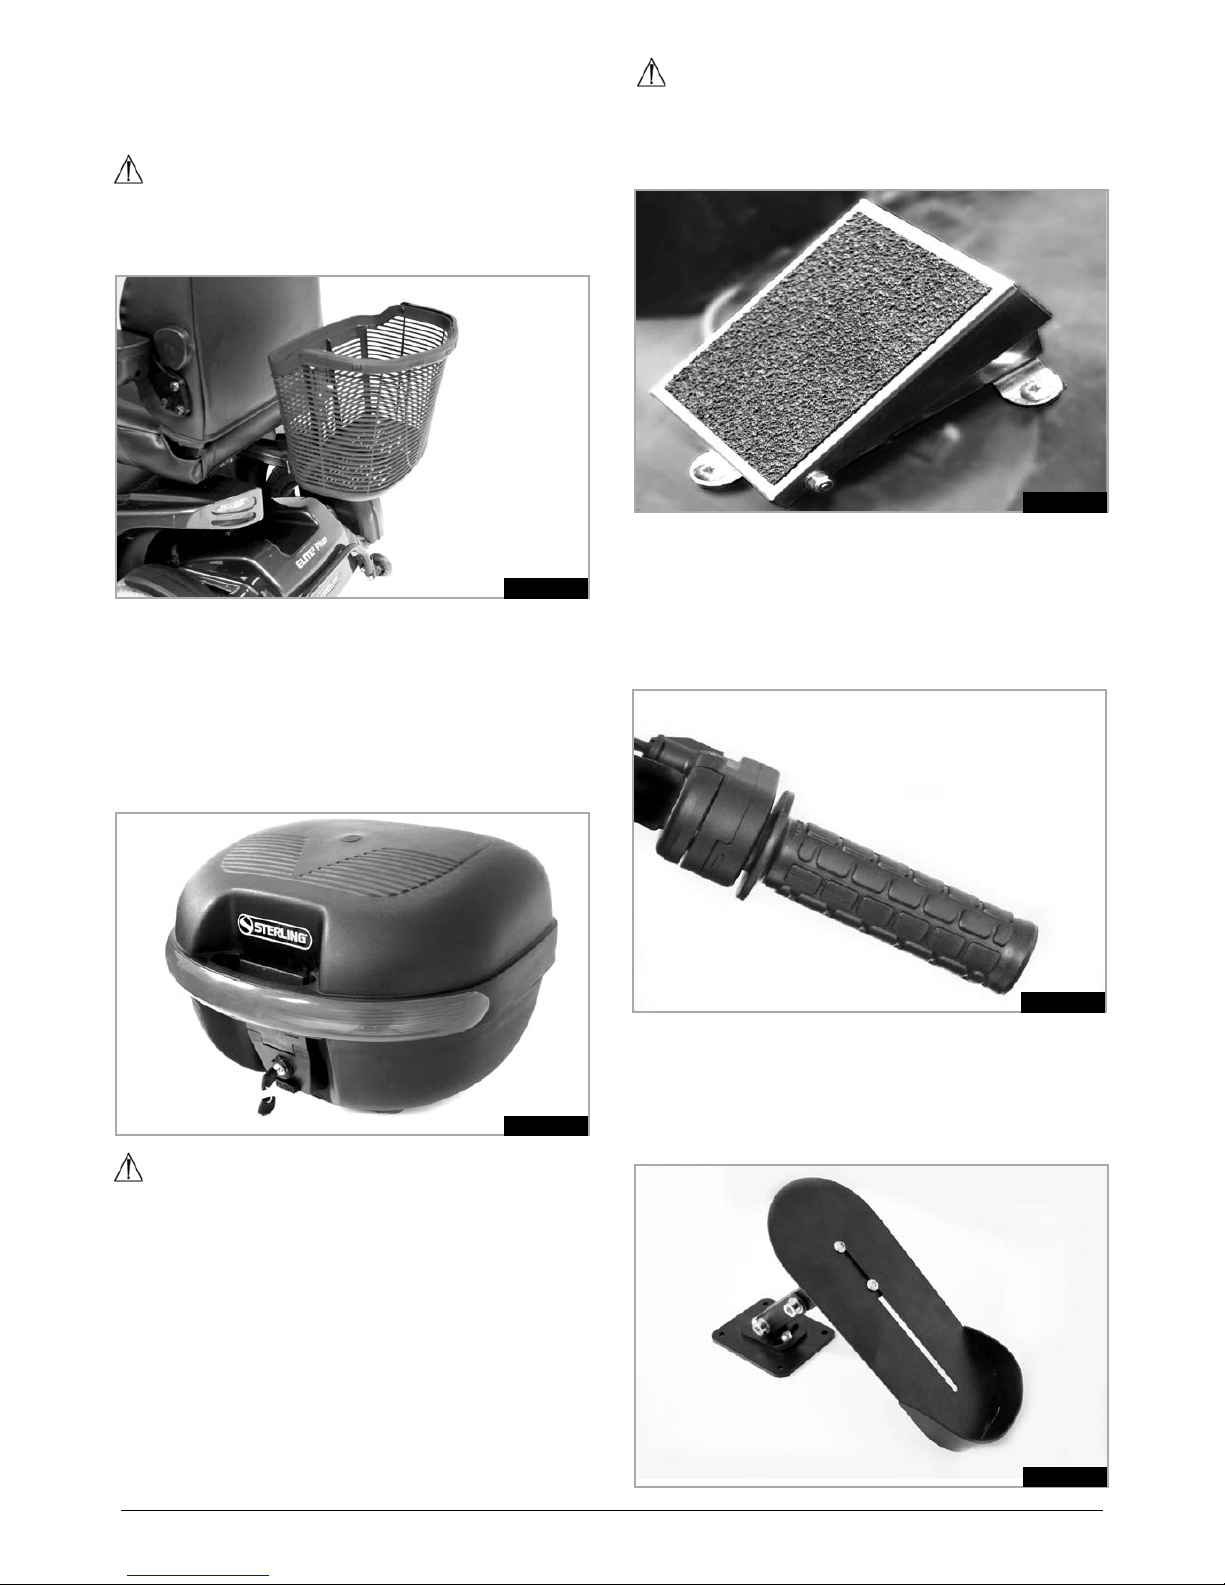
5.11 REAR BASKET WITH HANDLE
This option extends the luggage/shopping carrying
capacity of the scooter. It is detachable and has a handy
carrying handle, (Fig.5.24).
WARNING!
Maximum Storage load = 5kg.•
The weight of the driver plus any luggage, should not •
exceed the maximum user weight of the scooter.
5.12 REAR STORAGE BOX
This option offers a greater degree of weather protection
and security for items such as wet weather clothing,
shopping, personal items etc.
When locked the storage box cannot be opened and it
cannot be removed from the scooter. When unlocked the
storage box can be accessed and if required removed
from the scooter with the press of a button, (Fig.5.25).
WARNING!
Maximum Storage load = 10kg.•
The weight of the driver plus any luggage, should not •
exceed the maximum user weight of the scooter.
5.13 FOOT CONTROL
This can be mounted anywhere on the floor of the
scooter or on the raised foot platform. It is used in
conjunction with either a twist grip or a side lever control.
Two switches are also used, one to switch between
forwards and reverse and one to switch between the foot
control and the twist grip or side lever control, (Fig.5.26).
Also see section 7.12 and 7.13.
Fig.5.24
Fig.5.25
Fig.5.26
5.14 TWIST GRIP THROTTLE
The twist grip control may be used on its own or in
conjunction with the foot control. If it is used on its own, it
it has a forward/reverse switch supplied. If the twist grip is
used in conjunction with the foot control, two switches are
used, forwards/reverse and an additional switch to select
each control, (Fig.5.27). Also see section 7.12 and 7.13
Fig.5.27
5.15 ANGLE ADJUSTABLE FOOT SUPPORT
The foot support helps to provide extra support for the
foot, ankle and leg, helping to prevent cramp and
reducing joint pain. It can be mounted anywhere on the
floor of the scooter or on the raised foot platform,
(Fig.5.28).
Fig.5.28
WARNING!
Accidental depression of the pedal while the scooter is
switched on, will cause the scooter to move.
Exercise caution and always turn the scooter off when
not driving.
Page 22
22
Sterling Elite2 XS-RS-Plus
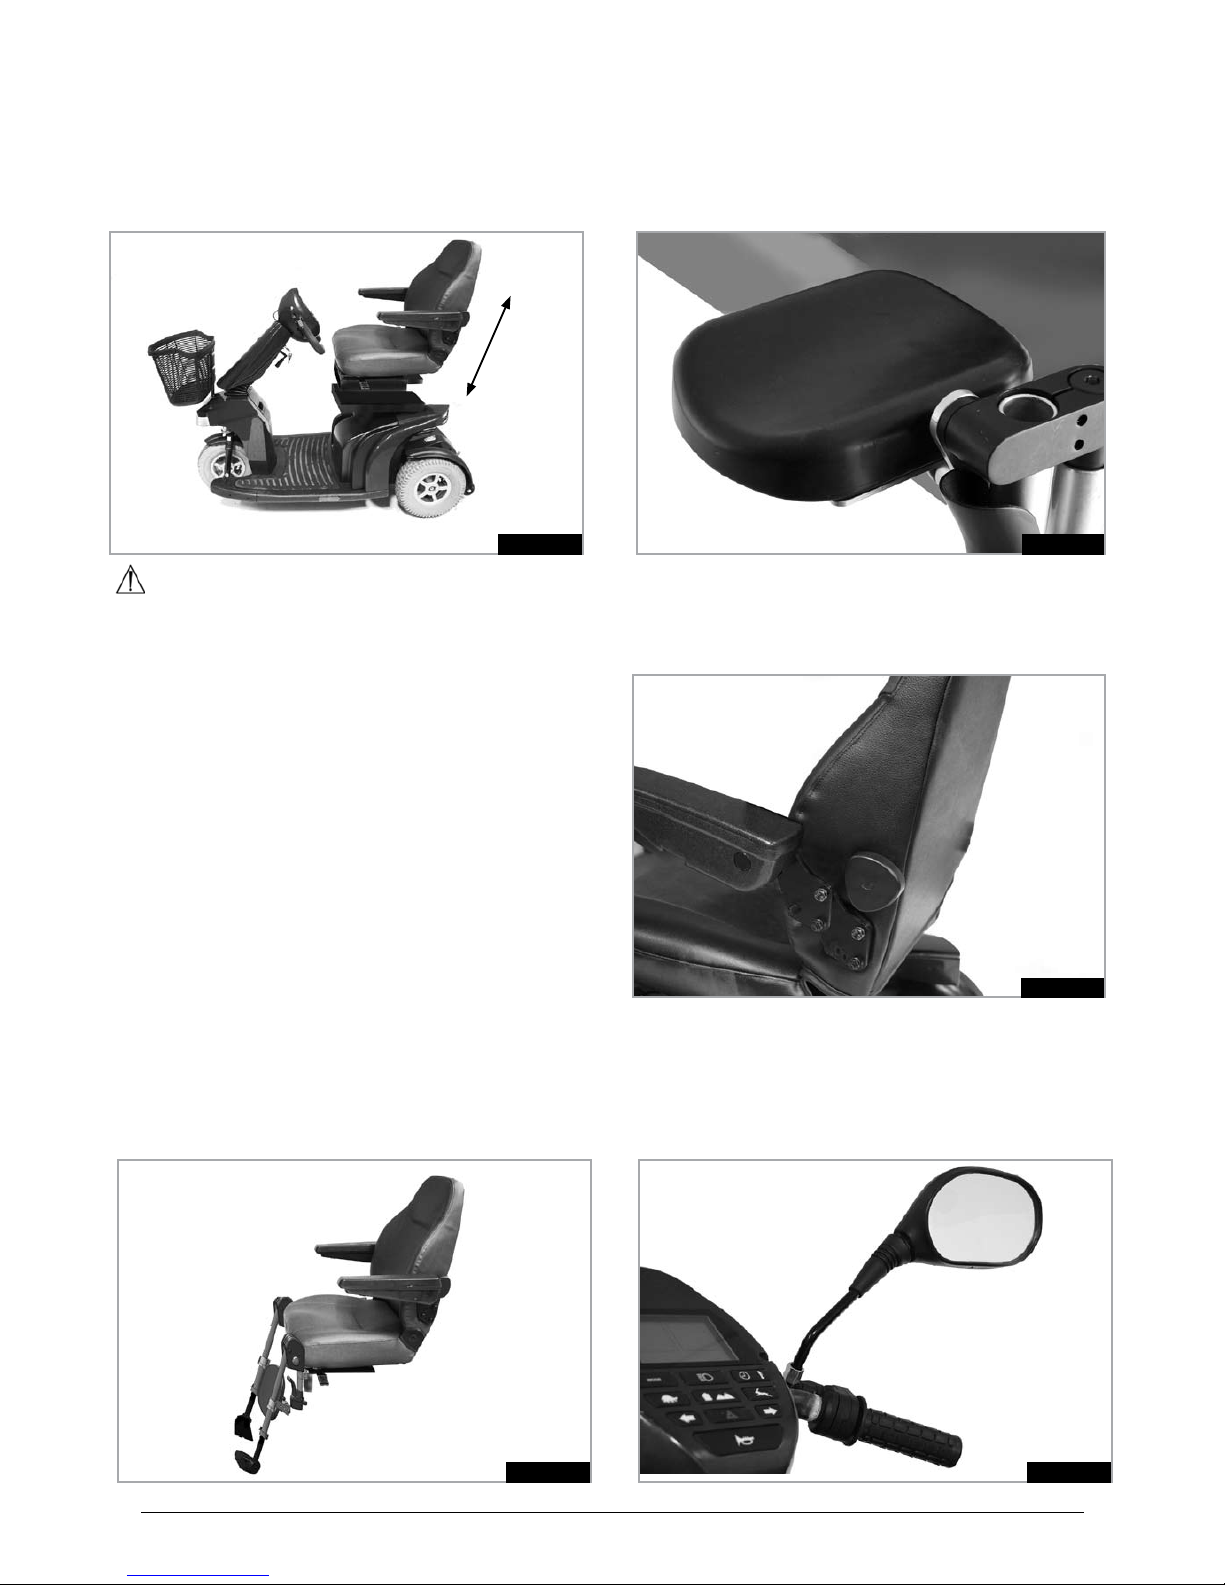
5.16 POWERED SEAT LIFT
This device is an aid to lifestyle. It can assist the user to
reach for objects without the need for standing, when
shopping for example or approaching a counter such as
an airport check in.
It is controlled from a switch mounted beneath the seat,
(Fig.5.29).
WARNING!
When the seat lift is raised the stability of the scooter •
is affected.
Do not over-reach from the scooter seat.•
Do not operate the seat lift on significant inclines.•
Do not operate the freewheel device.•
Watch out for overhanging obstacles, (such as •
kitchen cupboards), when operating the seat lift.
Be vigilant. Watch out for small children and pets etc. •
when operating the seat lift.
To prevent falls it is recommended that the arm rests •
are in the down position when using the seat lift.
For your safety when the seat lift is in operation, all •
powered movement is stopped. Returning the seat to
the normal position will reinstate full drive.
As with all moving parts, be aware of the possibility of •
finger entrapment.
Fig.5.29
5.17 MANUAL ARTICULATING LEG REST (ALR)
This accessory offers extended seating and positioning
possibilities. It is designed for users who need more
flexible control and support for legs and feet, (Fig.5.30).
Fig.5.30
5.18 AMPUTEE SUPPORT
This provides extra support for amputees, in the form of a
comfortable and stable platform. It is fully adjustable to
allow accurate positioning to suit users on an individual
basis, (Fig.5.31).
Fig.5.31
Fig.5.32
5.19 ARMREST HEIGHT ADJUSTABLE BRACKET
An additional bracket to provide a height adjustment
option to the angle adjustable arm rests, (Fig.5.32).
5.20 REAR VIEW MIRROR
The mirror is fully adjustable and mounted on the
handlebars. There are two types, left hand mount and
right hand mount, (Fig 5.33).
Fig.5.33
Page 23
23
Sterling Elite2 XS-RS-Plus
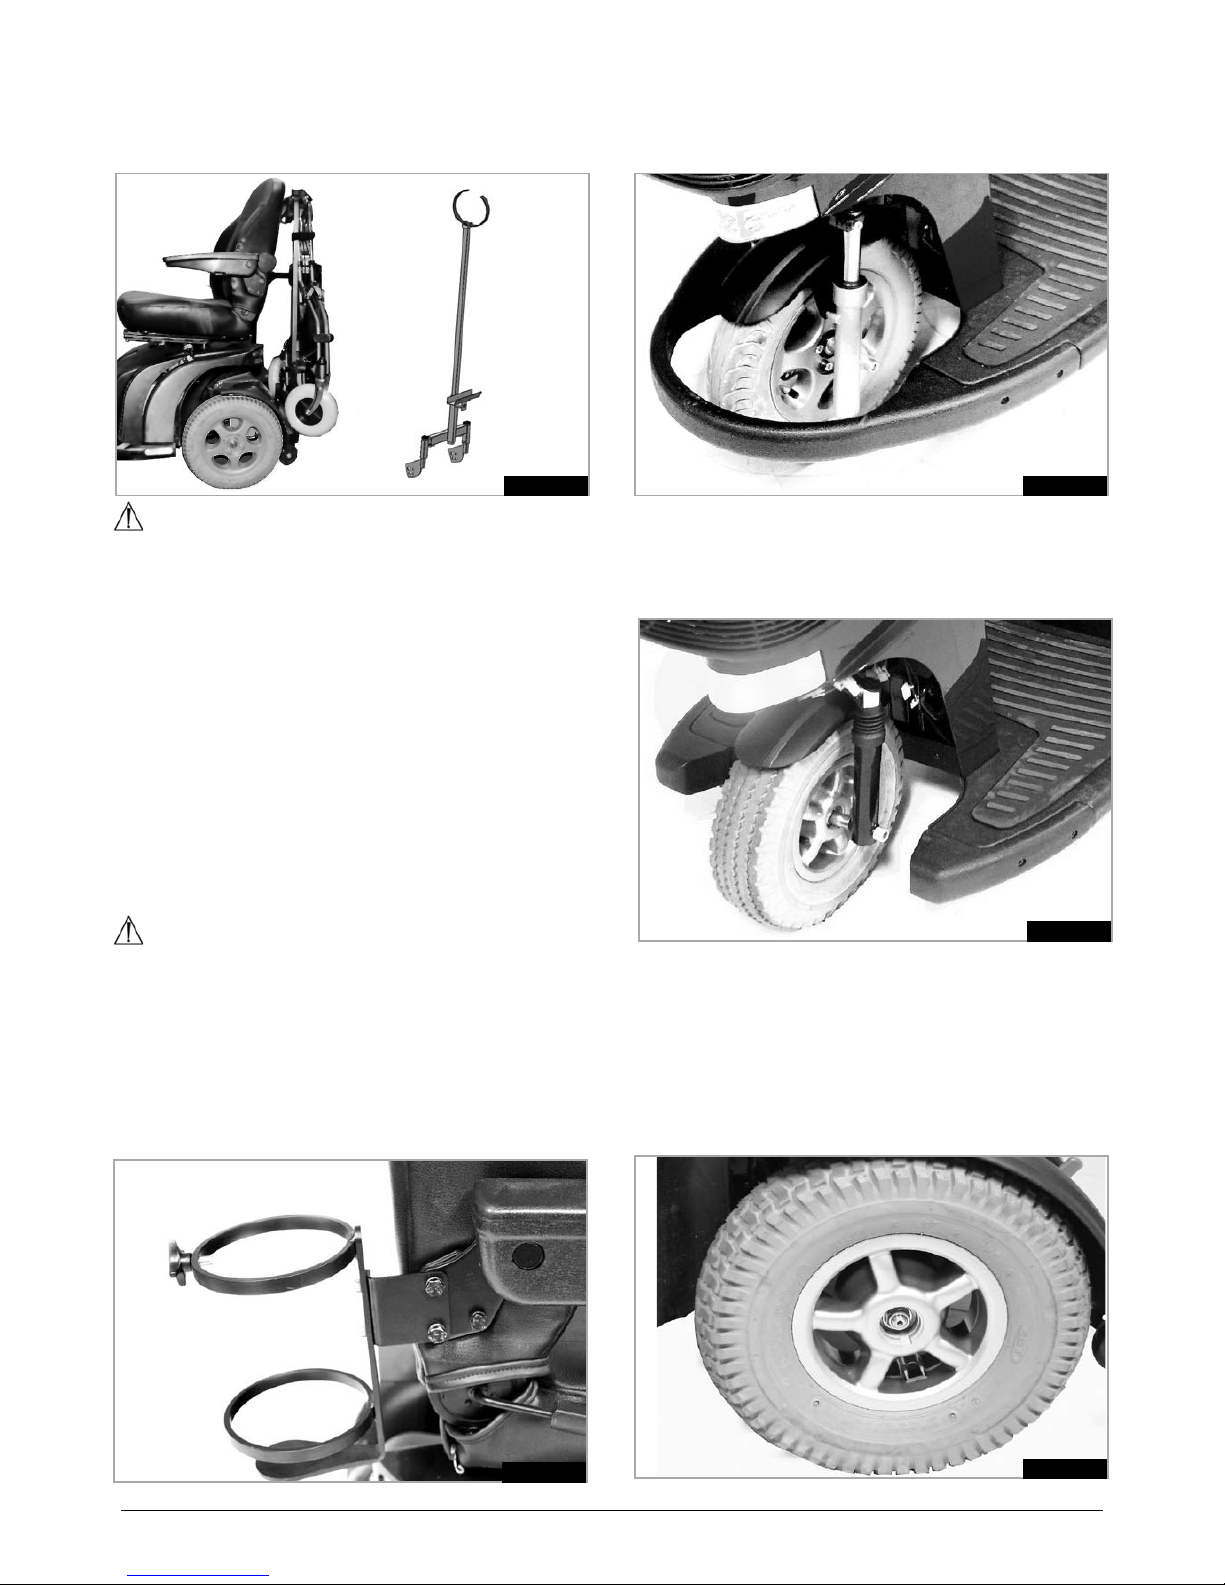
5.21 WALKER - ROLLATOR MOUNT
This rear mounted frame allows the carriage of Sunrise
Medical walkers and rollators on board the scooter,
(Fig.5.34).
WARNING!
Be aware that attached accessories increase the •
effective footprint of the scooter.
Take extra care when manoeuvring if you have a •
rollator or walker on board.
Ensure that the load is secured properly before •
moving off.
Be aware that the load you are carrying may obscure •
the rear lights on the scooter. If this is the case,
please use the foot path whilst carrying the load,
particularly at night.
Fig.5.34
5.22 OXYGEN BOTTLE HOLDER
There are two diameters, 100 and 120mm.
Both fit to the seat via the arm rest bracket bolts.
Both can be positioned on the left or right hand side of
the seat. The holder is designed to accept a 3.9 kg bottle,
(Fig.5.35).
WARNING!
While you are taking Oxygen, observe all safety
regulations pertaining to the use of Oxygen.
Do not enter an area where naked flames may be •
used.
Do not smoke.•
Do not use transmitting devises such as mobile •
phones etc.
Fig.5.35
Fig.5.36
5.23 FULL FRONT BUMPER
This fully enclosed front bumper is available as an option,
(Fig.5.36).
5.24 FRONT CORNER BUMPERS
The corner bumpers are fitted as standard, (Fig.5.37).
Fig.5.37
5.25 SOLID TYRES
Solid tyres are available as an option.
The solid tyres offer greater security for the user because
they cannot be punctured.
NOTE: Solid tyres have the effect of producing a firmer
ride, (Fig.5.38).
Fig.5.38
Page 24
24
Sterling Elite2 XS-RS-Plus
6.0 Using The Scooter
WARNING!
Parts of the scooter are heavy. Please use correct •
lifting techniques.
If you are unsure about lifting or removing any •
assemblies, or performing any other task requiring
physical effort, get someone to help you who can
manage the task or call your local Sunrise Medical
dealer.
6.1 PREPARING FOR STOWED TRANSPORTATION:
Remove the batteries as described in section 5.3.
To lift the batteries please use the handles on the
webbing cradle surrounding the batteries.
Ensure that the seat is removed, (section 5.0) or folded
and the tiller is folded in it’s lowest position.
6.2 TO USE THE SCOOTER AGAIN:
Reverse the above procedure
Refit the batteries.
WARNING!
Never lift the scooter by the armrests, seat or tiller, •
harm could be done to the user or to the scooter.
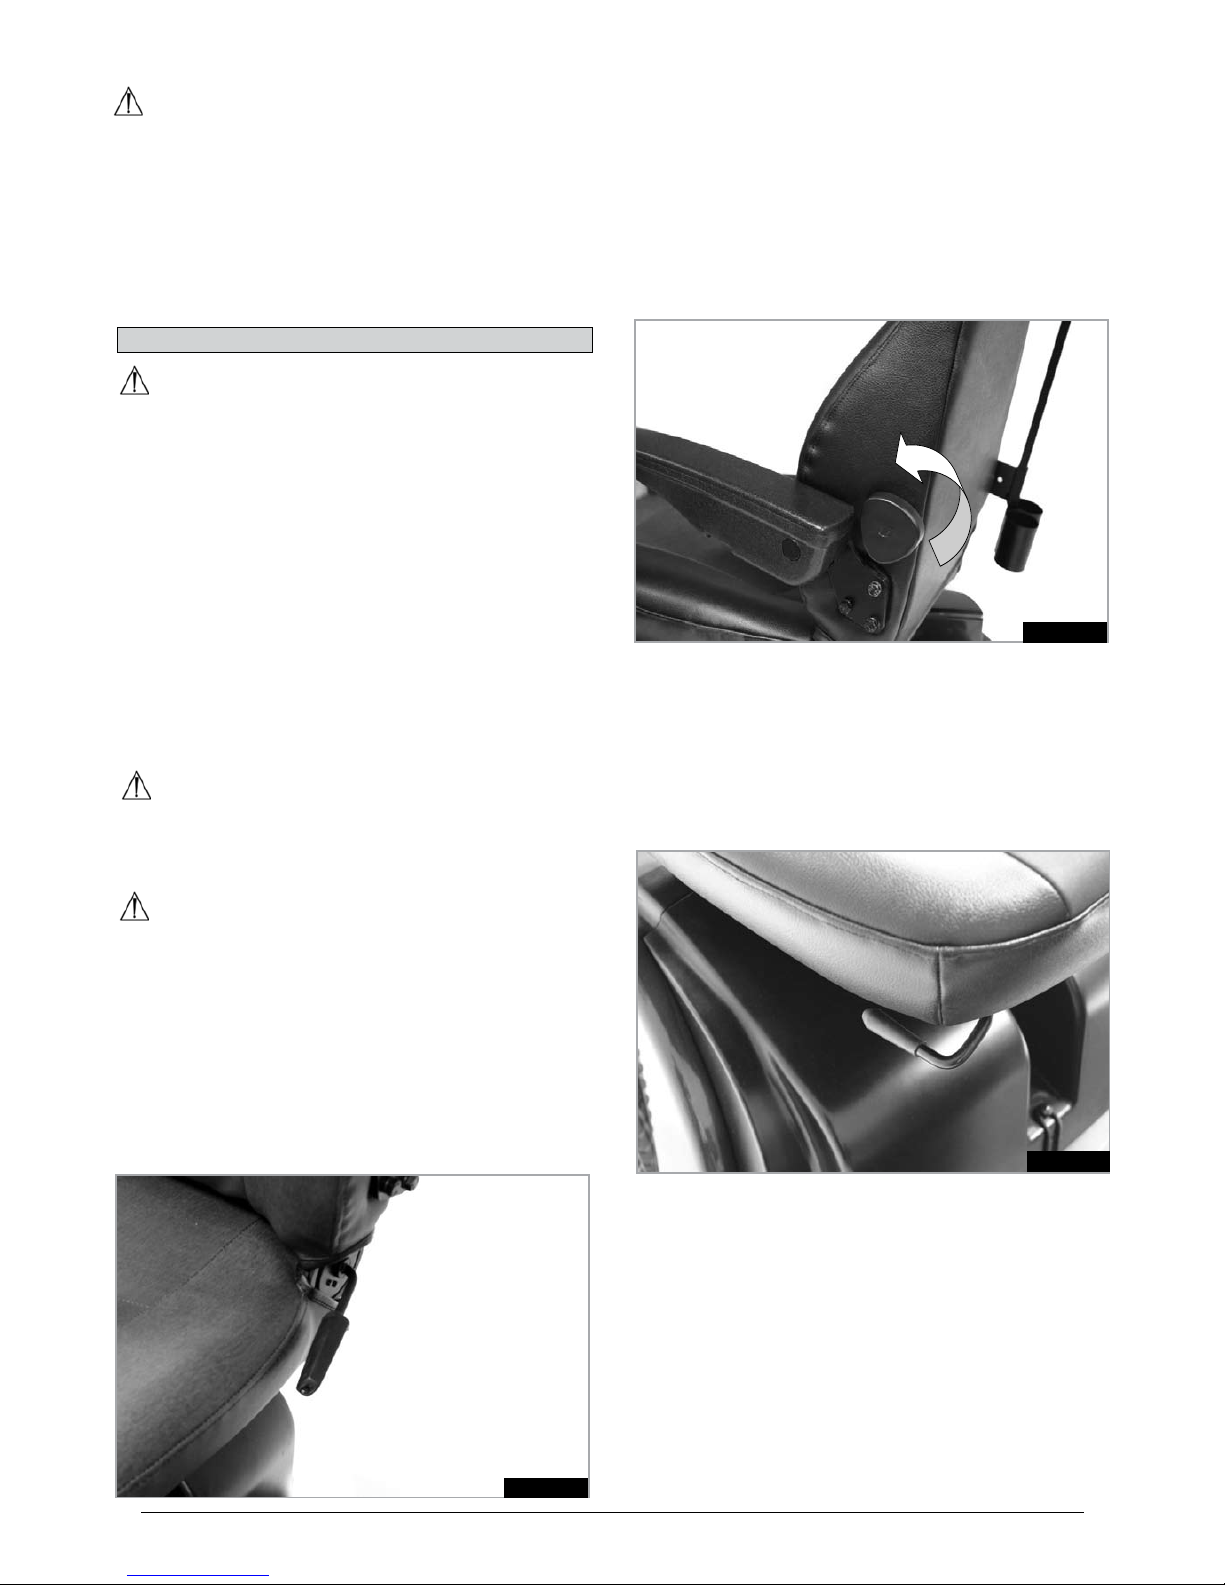
6.3 SEAT BACKREST RECLINE
WARNING!
Take care when adjusting the seat backrest recline •
angle as it could be possible to fall backwards and
harm the user or the scooter.
When adjusting the back angle, be careful not to get •
your fingers caught.
The seat backrest recline angle is adjusted by the lever
shown in Fig 6.1
Fig.6.1
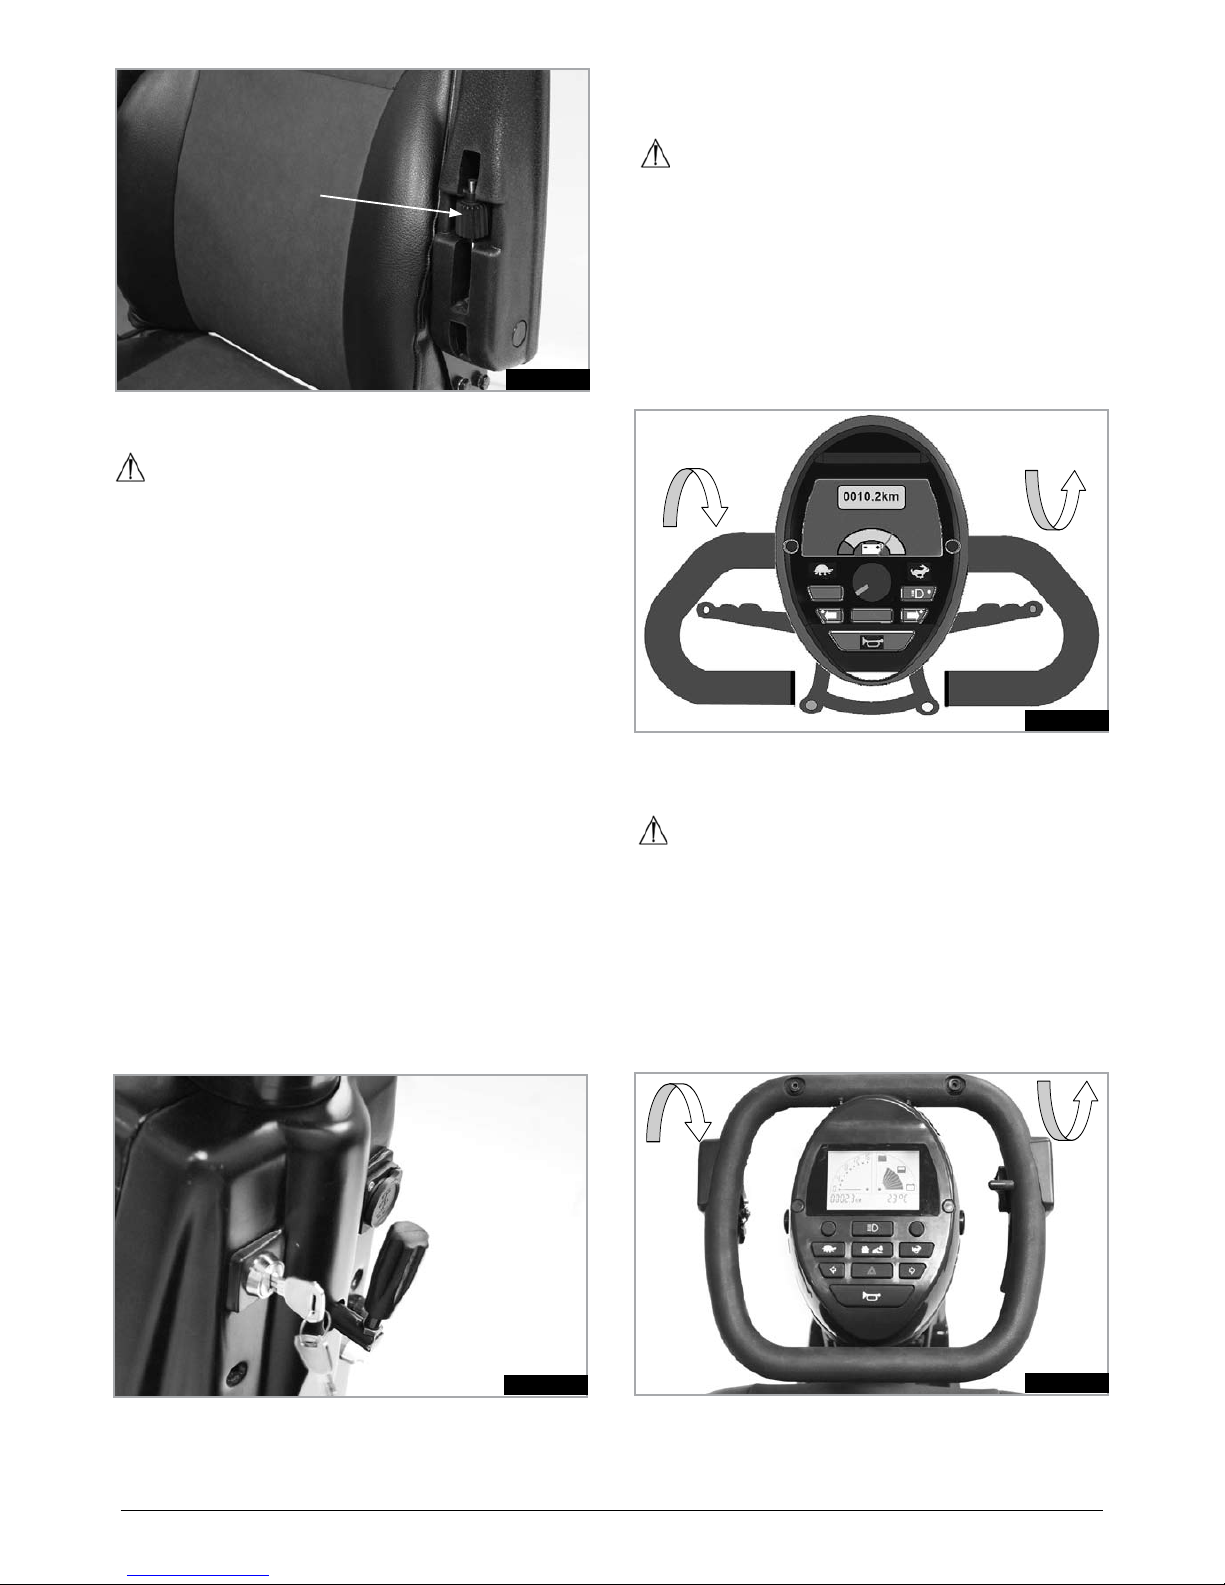
6.4 SEAT BACKREST LUMBAR
If fitted your scooter may have an optional backrest
lumbar adjustment. (Fig 6.2)
This is adjusted by rotating the knob located behind the
armrest on the left hand side of the scooter. Rotate the
knob in the direction shown on the arrow to increase the
lumbar support. The lumbar support increases, and then
decreases as the knob is rotated in the direction show.
6.5 SEAT POSITION
The scooter seat can be adjusted in a forward or
backwards postion. The adjustment lever is found on the
right hand side under the front of the seat.
Pull the lever
upwards and use legs and body to move to the required
position and release lever.
Fig.6.2
Fig.6.3
6.6 ARMREST ANGLE
The scooter armrests are angle adjustable for user
comfort. The adjustment knob (1) is found under the
armrest body. The knob is rotated either way to increase
or decrease the angle of the armrest, (Fig.6.4).
5.26 WINDSHIELD (NO PHOTO).
WARNING!
Do not bend the windshield.•
Do not expose the windshield to heavy impacts.•
Keep the windshield clean using warm soapy water, •
so that your view is not impeded.
If the rubber surround strip is damaged or missing, •
replace it as soon as possible.
Page 25
25
Sterling Elite2 XS-RS-Plus
Fig.6.4
1
6.7 TILLER ADJUSTMENT FIG 6.5
DANGER!
Do not adjust the tiller while the scooter is being •
driven as serious injury could happen if you lose
control.
Do not use the tiller adjustment handle to hold or •
carry items such as bags etc.
Ensure fingers or other items are not around the area •
of the lower tiller when making adjustments. Serious
injury could happen due to entrapment.
The angle of the tiller can be adjusted for getting on and
off the scooter and for achieving a comfortable driving
position.
Rotate the lever clockwise. 1.
Hold the handlebar and push or pull the tiller to the 2.
required position.
The tiller contains a gas strut to aid in the adjustment of
the tiller position
Fig.6.5
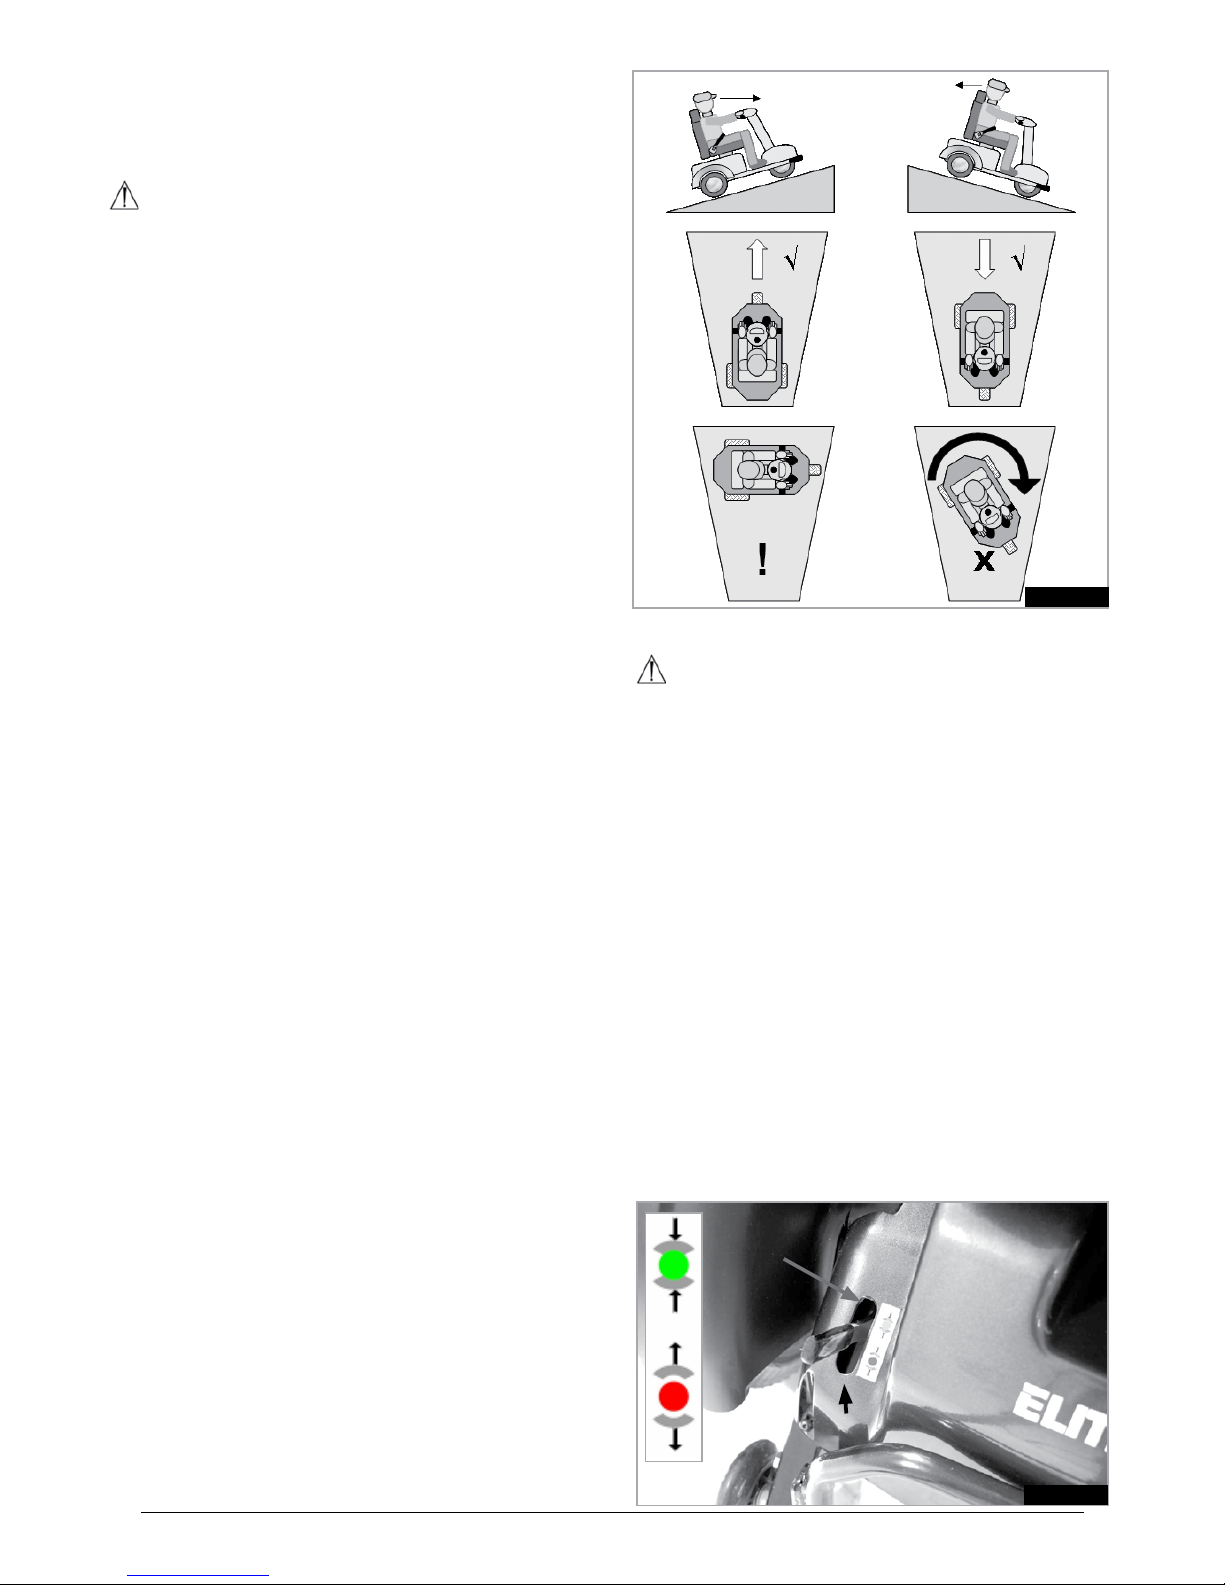
6.8 ELITE2 XS, RS DELTA HANDLEBAR
ADJUSTMENT
CAUTION!
The Elite
2
delta handlebar angle can be adjusted to suit
the users needs, (Fig 6.6). The handlebar is clamped
within the control system.
Your dealer or supplier can adjust the angle of the
handlebar if needed. Do not attempt adjustment of this
yourself. Damage to the control system of the scooter
could happen if unauthorized adjustment is carried out.
Fig.6.6
6.9 ELITE2 PLUS HANDLEBAR ADJUSTMENT
CAUTION!
The Elite•
2
PLUS handlebar angle can be adjusted to
suit the users needs, (Fig 6.7). The handlebar is
clamped within the control system
Your dealer or supplier can adjust the angle of the •
handlebar if needed. Do not attempt adjustment of
this yourself. Damage to the control system of the
scooter could happen if unauthorized adjustment is
carried out.
Fig.6.7
Page 26
26
Sterling Elite2 XS-RS-Plus
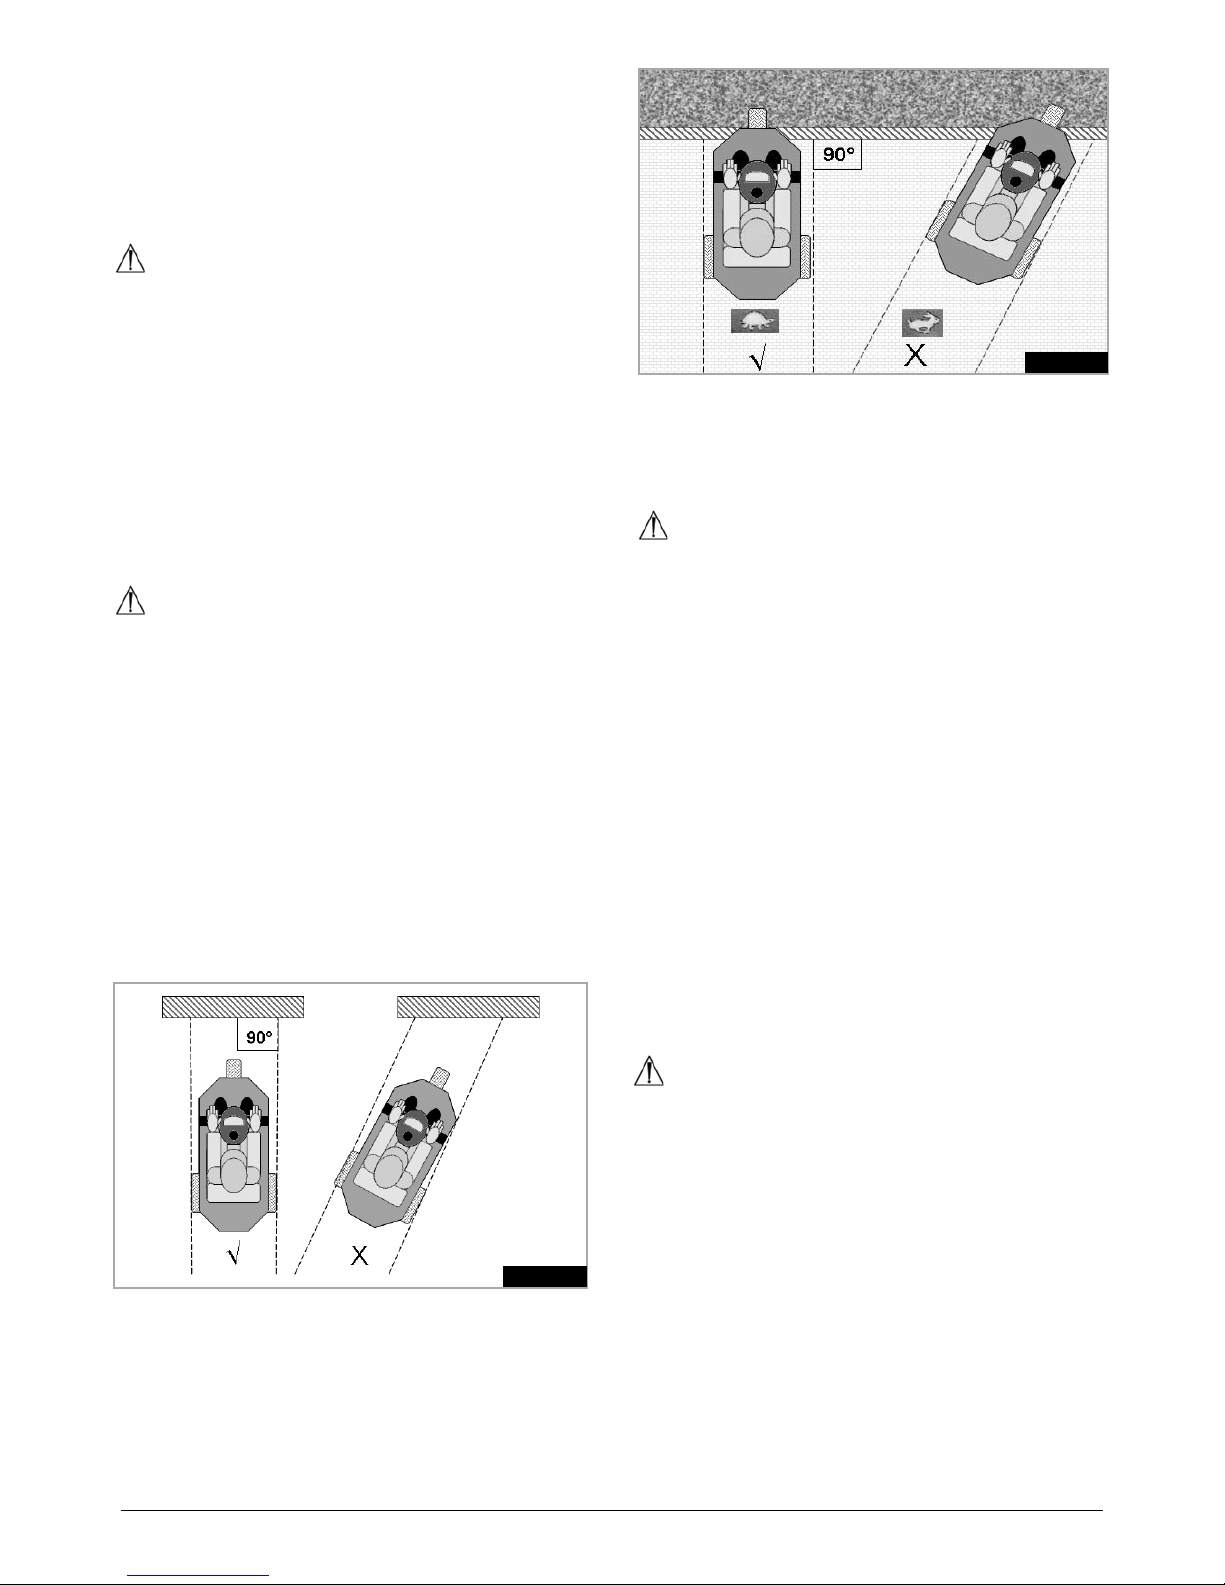
6.10 SLOPES
Please also refer to section 4.20.
The following instructions explain how to manoeuvre
correctly on steep ramps and slopes, especially in the
course of descent, (Fig 6.8).
DANGER!
Low speed settings are recommended when •
traveling on slopes, particularly in reverse.
We strongly recommend that you bring the seating •
backrest into an upright position during manoeuvres
on slopes.
If you stop on an incline, start off slowly and, if •
necessary, lean forward to counteract the tendency
of the front wheel to rise.
On descents it is important not to allow the scooter to •
exceed normal speed. Indeed, the safest course is to
go down steep hills slowly and to stop immediately if
you have any doubts about the steering.
If the scooter gathers speed, release the control •
lever to slow down, or stop completely.
Start off again slowly and do not allow speed to •
increase.
Make sure the scooter is in drive mode as this •
ensures that the automatic braking system is active.
Climbing or descending a slope with the automatic •
brakes disengaged is very dangerous and is not
recommended.
Always reduce your speed when turning corners, •
particularly when travelling down slopes.
Disregarding this advice could lead to your Scooter •
tipping over.
Do not traverse across the face of a slope in excess •
of 10° (1 in 6).
Disregarding this advice could result in your Scooter •
tipping.
6.11 SLOPE CLIMBING
(Fig 6.8).
Where possible always travel up slopes or ramps •
directly facing the slope of the hill.
When driving up or down a very long hill, it is a good •
idea to rest for a moment to break the journey up.
This will aid performance and allow the scooter motor
to cool down.
Do not traverse across the face of a slope, in excess •
of 10° (1 in 6).
Always reduce your speed to the minimum setting •
when reversing down hills.
Do not attempt to drive along with the wheels at •
different levels, e.g. along the footpath and road
simultaneously.
6.12 FREEWHEEL DEVICE
DANGER!
Please also refer to section 4.7
Do not sit on the scooter when freewheel mode is •
activated.
Do not attempt to drive the scooter when freewheel •
mode is active.
Never allow the scooter to be pushed in freewheel •
mode by other persons when you are still on board.
Do not activate freewheel mode when the scooter is •
stopped or parked on a significant slope.
Never attempt to activate freewheel mode whilst you •
are still on board the scooter.
Pull the lever down so that it is in the freewheel position.
The drive wheels will turn freely. If you wish to push the
scooter with the motors off, you should follow this
procedure. When the levers are pushed upwards, the
drive wheels will automatically connect with the
propulsion mechanism, (Fig.6.9).
Fig.6.9
DRIVE
FREEWHEEL
Fig.6.8
Page 27
27
Sterling Elite2 XS-RS-Plus
6.13. TYRE PRESSURE:
It is important to check inflation pressure regularly, along
with the state of wear of the tyres. The maximum
pressure recommended for the wheels should be up to :
Elite2 XS & RS = 1.8-2.0 bar (25-28 P.S.I.)
Elite2 Plus = 2.4-2.5 bar (33-35 P.S.I.)
For further information on tyres please refer to section
18.2 and 18.3.
DANGER!
Never inflate the tyres with a service station air pump. It
is recommended that you use a manual pump or a
pressure regulator (manometer).
6.14 MOUNTING A KERB OR STEP
The Scooter is capable of mounting and dismounting
kerbs and obstacles up to 100mm (4”).
Remember when climbing kerbs to drive forwards and
face the kerb at 90°, (Fig.6.10).
Approach the kerb or step from a minimum of 500mm,
select a medium to high speed setting and drive up
without stopping.
Leaning forwards will also help maximize your stability.
NOTE: Heavier users will require higher speed settings
WARNING!
The approach speed and process can vary •
depending on your scooter performance and wheel
type.
Drastically under inflated tyres can cause loss of •
control when mounting kerbs and damage the
scooter.
6.15 DISMOUNTING A KERB OR STEP
To dismount a kerb, face the kerb at 90°, but select a low
speed setting.
Move forward and slowly allow your Scooter to drop
gently, front wheel(s) first from the kerb.
The rear stabilising wheels may make contact with the
kerb when dismounting this is normal, (Fig.6.11).
Fig.6.10
Fig.6.11
6.16 USING NEAR WATER
Take extra care when using your scooter near open
water. Canal tow paths, beaches, quay sides and river
banks can be hazardous.
DANGER!
Do not travel along a sloping surface leading to an •
open waters edge.
Keep a distance of at least one scooter length from •
an open waters edge whenever possible.
Beware of hidden obstacles such as tree roots drain •
covers and mooring rings as these may cause loss of
control if you hit them unexpectedly.
Use a low speed setting.•
Never reverse towards open water.•
Do not drive up or down steep slopes located near an •
open waters edge.
Give way to pedestrians on canal tow paths and •
footpaths.
Sound the horn to let other people know you are •
there.
Never try to manoeuvre around pedestrians if it takes •
you too close to the waters edge.
Avoid deep sand, gravel, mud and wet grassy slopes.•
Take extra care on windy days as loose clothing such •
as capes or blankets can suddenly fly up and may
foul the controls or temporarily block you view.
Do not get close to open water during a storm.•
When stationary, switch the scooter OFF at the key.•
Observe all local by laws, rules and regulations.•
CAUTION!
Always clean your scooter thoroughly if it has been •
exposed to mud, sand, salt or other contaminates.
Do not use a high pressure washer, (see section 11).•
Page 28
28
Sterling Elite2 XS-RS-Plus
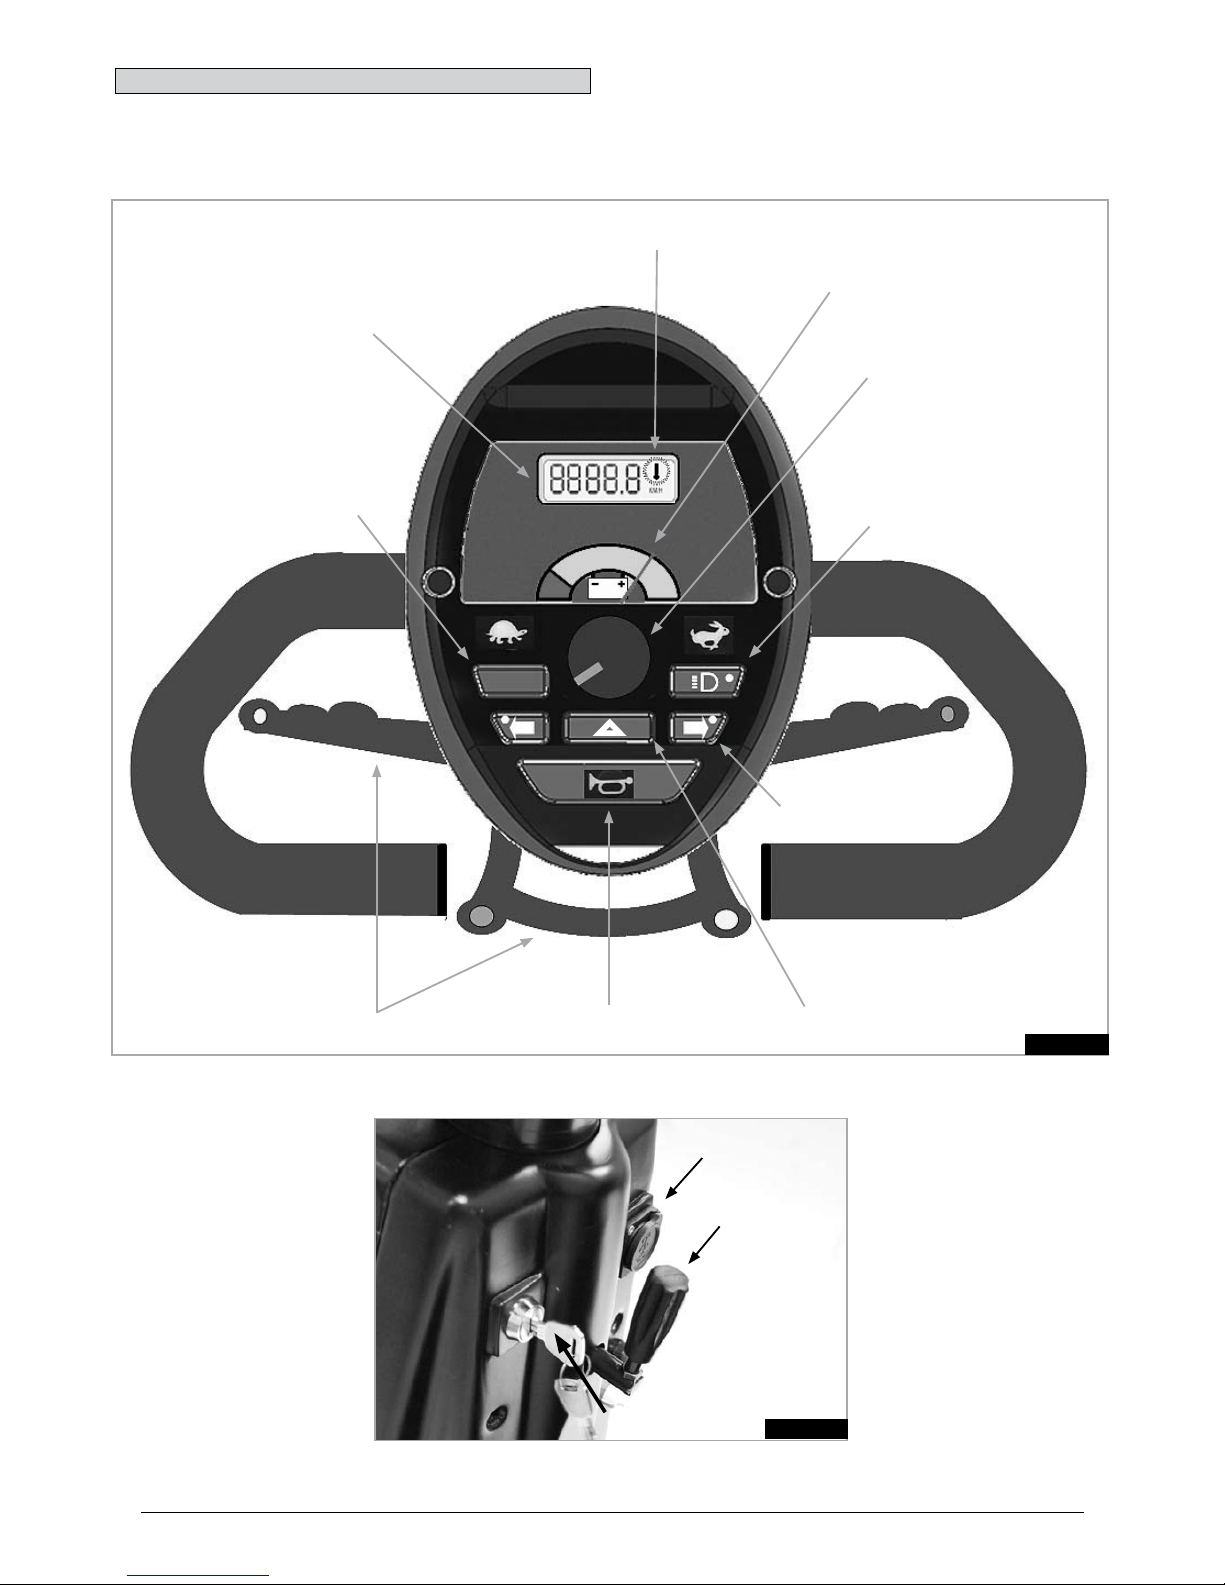
7.0 Scooter Control System
7.1 ELITE2 XS, RS CONTROL SYSTEM
Fig.7.1
7.1.2 CONTROL LEVER
7.1.7 MODE BUTTON
7.1.6 LIGHTS
7.1.5 INDICATORS
7.1.4 HAZARD LIGHTS
7.1.3 HORN
7.1.9 BATTERY LEVEL GAUGE
7.1.10 LCD DISPLAY
7.1.8 SPEED CONTROL
Fig.7.1.1
7.1.1 KEY SWITCH
CHARGER SOCKET
TILLER
ADJUSTER
7.1.10A DIRECTIONAL ARROW
Page 29

29
Sterling Elite2 XS-RS-Plus
7.1.1 ON/OFF KEY SWITCH
The On/Off key switch applies power to the control
system electronics, which in turn supply power to the
scooter motors.
To turn ON Insert the key vertically and turn 90 •
degree clockwise.
To turn OFF scooter, turn key back to vertical position •
and remove, (Fig.7.1.1).
WARNING!
Do not use the on/off key switch to stop the scooter •
unless there is an emergency. (If you do you may
shorten the life of the scooter drive components).
To avoid unexpected or unintentional movement of •
the scooter and to conserve battery power, it is
recommended that the keyswitch is switched Off
when stationary or not being used.
7.1.2 CONTROL LEVER (WIG WAG)
Located by handle bar grips. Your speed as well as
forward and reverse motion is controlled via the control
lever or wig wag.
Gently pull with the right hand or push with the left thumb
to move the scooter in a forward motion. The amount of
movement applied to the lever or wigwag also
proportionally controls the speed of the scooter.
The left hand or right thumb moves the Elite2 in a
reverse motion and also controls the speed of the
scooter in reverse.
The lever will return by itself when released, and you will
stop gently.
Braking is engaged when the Wig-Wag is released.
WARNING!
The factory default setting is described above. Be aware
that it is possible the throttle operation could be reversed
through programming, particularly if you are a second
user.
When stopping the high visibility rear LED braking lights
will illuminate. These also function when the scooter
lights are turned on.
When reversing an audible alarm can be programmed to
come on to warn other vehicles or pedestrians that the
scooter is reversing.
NOTE: The audible reversing alarm is turned off by
default but it can be activated by your Sunrise Medical
dealer or supplier. It is not recommended to deactivate
this feature if it is a statuary requirement of your country/
state.
NOTE: Forward and reverse functions can be swapped
over from right hand operation to left hand operation, via
programming. Please consult your authorised Sunrise
dealer.
NOTE: The handle bar angle can be adjusted to the most
comfortable position by your local authorised Sunrise
dealer.
WARNING!
It is important that you stop the scooter before you
change direction from forward to reverse.
Always turn the scooter control system off via the
keyswitch before you transfer in or out of the scooter.
7.1.3 HORN
The horn will sound while this button is depressed.
7.1.4 HAZARD LIGHTS
With the scooter ON the front and rear LED indicators will
flash simultaneously when this button is pressed.
The visual indicators on the direction buttons on the
keypads will also illuminate.
Press the button again to switch the hazard lights off.
7.1.5 INDICATORS
Pressing the button will illuminate the front and rear LED
indicators in a flashing pattern indicating you are turning
the scooter. On the keypad the visual indicator light will
also flash, and the scooter will emit a beeping tone.
To turn off the indicators press the button again.
Alternatively the direction indicators will automatically turn
off after a distance of approximately 30 meters.
7.1.6 LIGHTS
Pressing the button will turn on the front LED headlight,
and the rear LED lights
NOTE: If the lights are inadvertently left on after use,
removing the ON/OFF key will extinguish the lights
automatically.
WARNING!
Ensure that the lights and indicators are functioning
correctly and all of the lenses are clean, before using the
scooter at night or during poor visibility.
7.1.7 MODE BUTTON
Pressing the Mode button will change the information
shown in the LCD display 7.1.10
Pressing and HOLDING the Mode button will reset •
the trip distance displayed.
Press once to show total distance travelled.•
Press twice to show total trip distance travelled ( LCD •
will display a “t”).
Press a third time to show total hours of use.•
Press fourth time to return to speed display.•
7.1.8 SPEED CONTROL
This allows you to preset your desired scooter speed.
Turn the dial anti-clockwise to slow for very gentle
operation. Turn it clockwise to increase your speed to
maximum
Remember that only with practice will you become a
competent driver. Find a safe, hazard free environment to
practice controlling the scooter and familiarise yourself
with the controls and functions.
WARNING!
For the safety of the operator and other pedestrians,
Sunrise Medical recommends that whilst driving on
footpaths and other pedestrian walk ways, the scooter
preset speed should be set to less than 4 mph/6kph.
Page 30
30
Sterling Elite2 XS-RS-Plus
7.1.9 BATTERY LEVEL
This indicates the average amount of charge you have in
the batteries. Green indicates fully charged batteries with
reducing charge to the red indicator. Red indicates
warning and less than half-charged batteries,
(Label.7.1.9). Please be aware that the meter reading will
fluctuate when accelerating from start or travelling uphill,
this is normal. The reading is more accurate when the
scooter is operating on flat level ground.
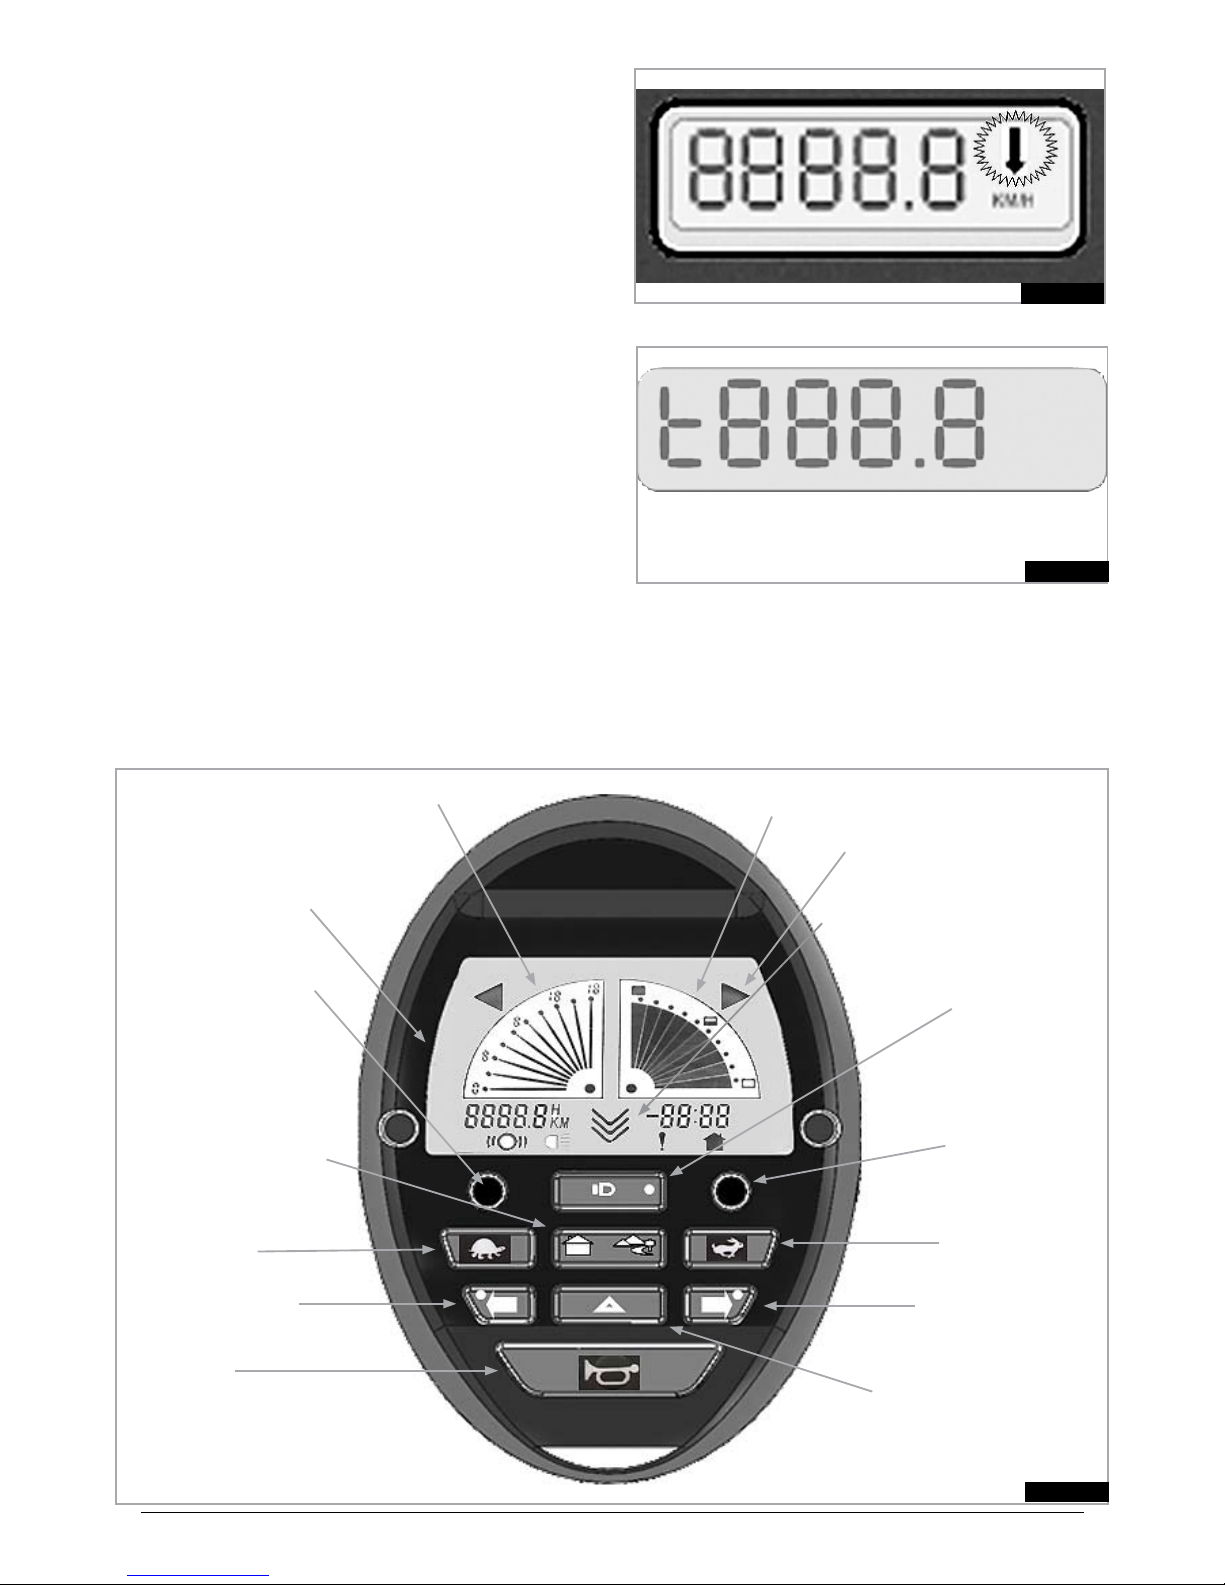
7.1.10 LCD DISPLAY (7.1.10)
The backlit LCD display can display:
Speed in Kilometres per hour (km/h) or Miles per •
hour (m/h).
Total distance in Kilometres (km) or Miles (m), •
Trip distance – reset by holding down MODE button, •
7.1.7, (Fig.7.1).
Total Hours the scooter has been used (h).•
Fault display – see troubleshooting section.•
When used with an optional foot or twist grip handcontrol
the flashing arrow indicates travel in reverse direction,
(Fig 7.1-Label 7.1.10A), (also see section 7.13).
TOTAL DISTANCE MODE
Fig.7.1.2
TRIP MODE
Fig.7.1.3
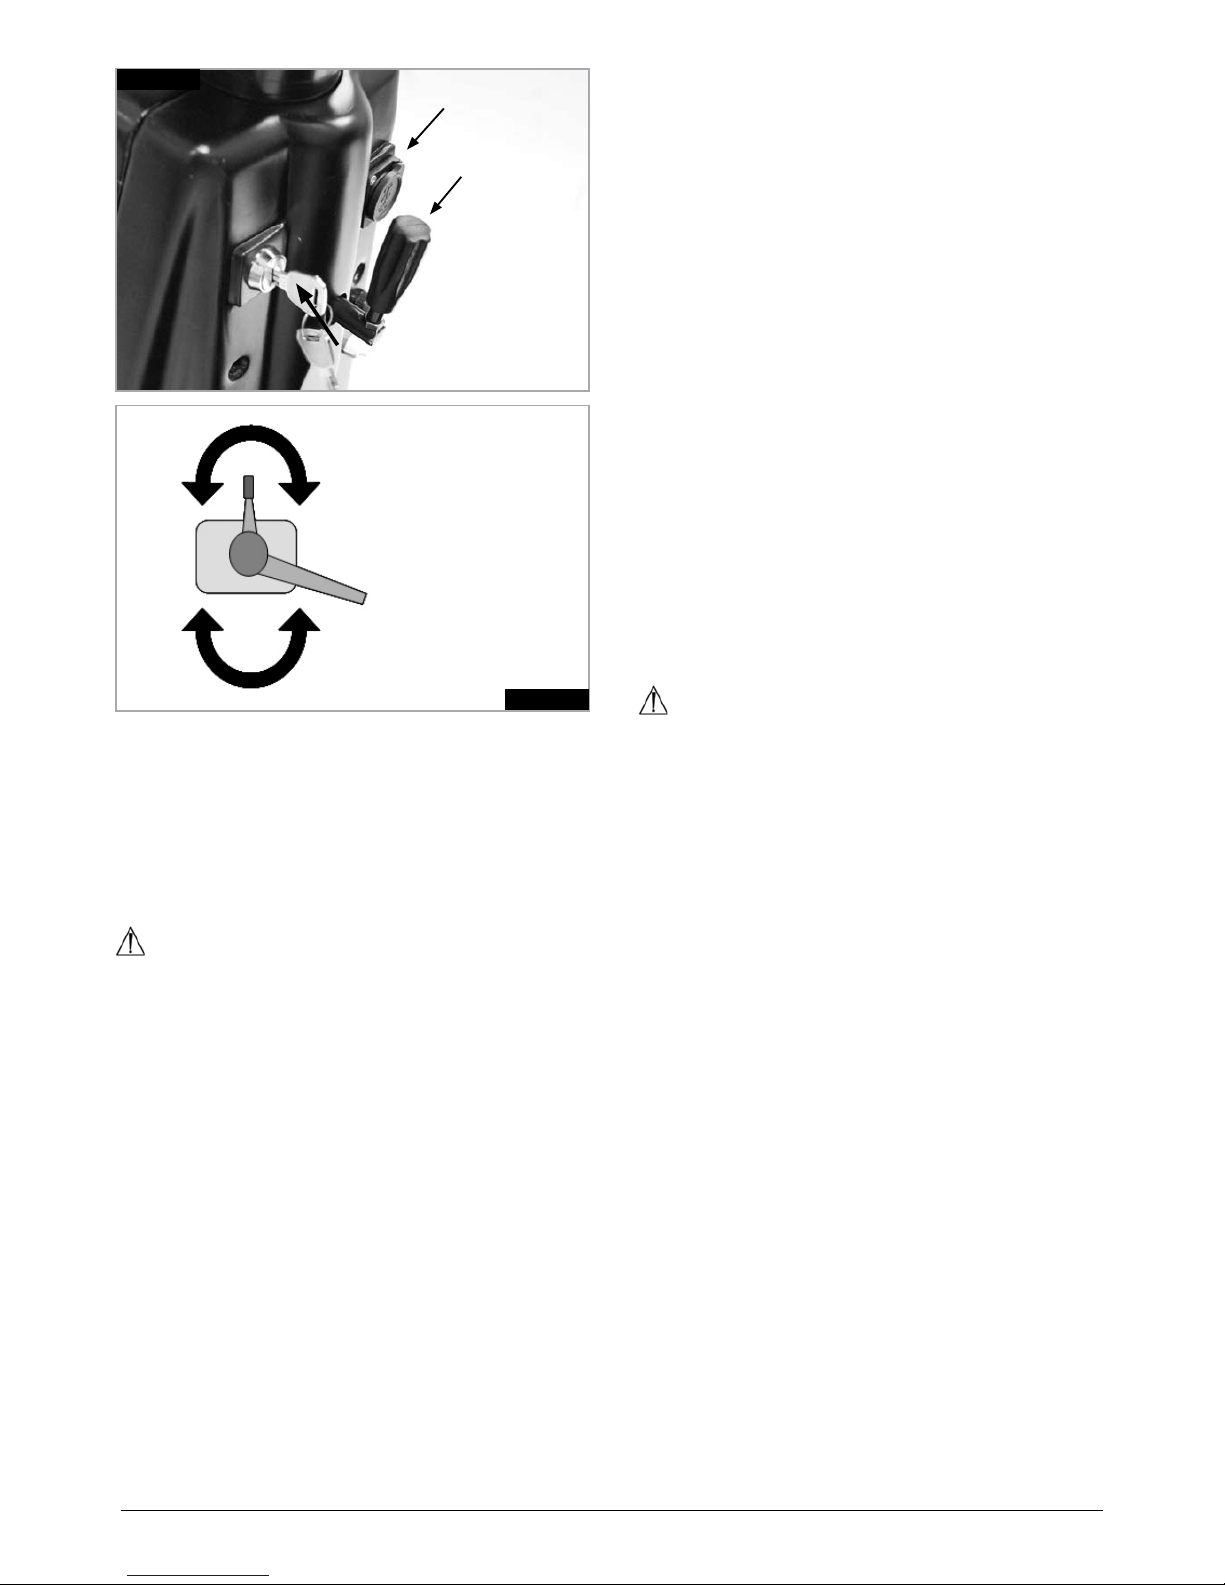
7.2 ELITE2 PLUS CONTROL SYSTEM – FIG 7.2
Fig.7.2
7.2.7 MODE BUTTON
7.2.6 LIGHTS
7.2.5 INDICATORS
7.2.4 HAZARD LIGHTS
7.2.3 HORN
7.2.11 BATTERY LEVEL INDICATOR
7.2.14 LCD DISPLAY
7.2.8 SPEED CONTROL
FAST
7.2.10 TIME/TEMP
BUTTON
7.2.9 PROFILE BUTTON
INDOOR/OUTDOOR
7.2.8 SPEED CONTROL
SLOW
7.2.12 CURRENT SPEED INDICATOR (LINE)
PRESET SPEED INDICATOR (DOT)
7.2.5 INDICATORS
7.2.13 INDICATOR ICONS
7.2.15 DIRECTIONAL ARROWS
Page 31
31
Sterling Elite2 XS-RS-Plus
Fig.7.2.2
7.2.2 CONTROL SIDE
LEVER
Fig.7.2.1
7.2.1 ON/OFF KEY SWITCH
CHARGER SOCKET
TILLER
ADJUSTER
7.2.1 ON/OFF KEY SWITCH
The On/Off key switch applies power to the control
system electronics, which in turn supply power to the
scooter motors.
To turn ON Insert the key vertically and turn 90 degree
clockwise.
To turn OFF scooter, turn key back to vertical position
and remove, (Fig.7.2.1).
WARNING!
Do not use the on/off key switch to stop the scooter •
unless there is an emergency. (If you do you may
shorten the life of the scooter drive components).
To avoid unexpected or unintentional movement of •
the scooter and to conserve battery power, it is
recommended that the key switch is switched Off
when stationary or not being used.
7.2.2 CONTROL LEVER (SIDE THROTTLE)
Located by handle bar grips. Your speed as well as
forward and reverse motion is controlled via the control
lever or side throttle.
Gently pull up on the lever to move the scooter in a
forward motion. The amount of movement applied to the
lever also proportionally controls the speed of the
scooter.
Pushing down on the knob at the top of the lever will
move the scooter in reverse and also proportionally
controls the speed of the scooter in reverse.
Alternatively pushing down on the lever will also move
the scooter backwards. Again the rate of speed is
controlled by the amount of the movement of the lever.
The lever will return by itself when released, and you will
stop gently. Braking is engaged when the lever is
released
When stopping the high visibility rear LED braking lights
will illuminate. These also function when the scooter
lights are turned on.
A programmable audible reversing alarm is available to
warn other vehicles or pedestrians when you are
reversing.
NOTE: The audible reversing alarm is turned off by
default but it can be activated by your Sunrise Medical
dealer or supplier. It is not recommended to deactivate
this feature if it is a statuary requirement of your country/
state.
NOTE: The control lever can be mounted on either side
of the handle bars.
WARNING!
It is important that you stop the scooter before you
change direction from forward to reverse.
Always turn the scooter control system off via the
keyswitch before you transfer in or out of the scooter.
7.2.3 HORN
The horn will sound while this button is depressed.
7.2.4 HAZARD LIGHTS
With the scooter ON the front and rear LED indicators will
flash simultaneously when this button is pressed.
The corresponding indicator icons on the LCD will also
illuminate, (7.2.13).
Press the button again to switch the hazard lights off.
7.2.5 INDICATORS
Pressing the button will illuminate the front and rear LED
indicators in a flashing pattern indicating you are turning
the scooter. The corresponding indicator icons on the
LCD will also illuminate, (7.2.13), and the scooter will
emit a beeping tone.
To turn off the indicators press the button again.
Alternatively the direction indicators will automatically turn
off after a distance of approximately 30 meters.
Page 32
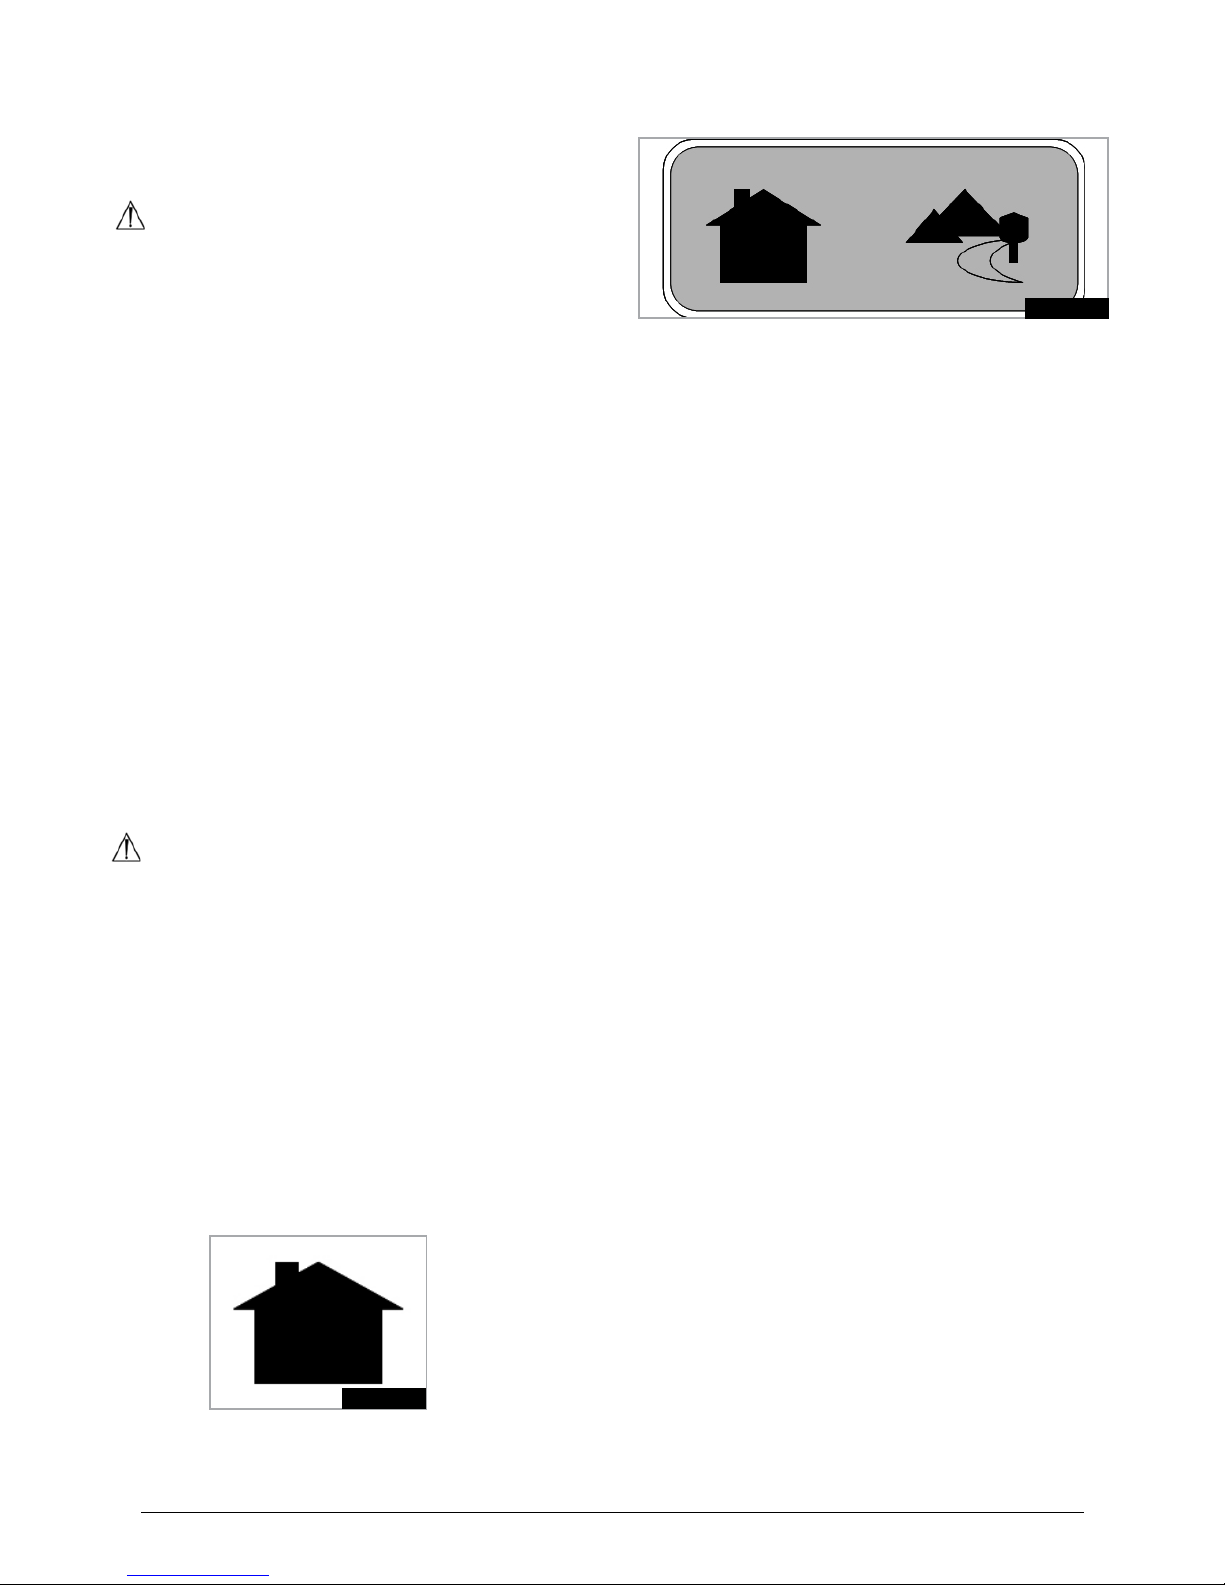
32
Sterling Elite2 XS-RS-Plus
7.2.6 LIGHTS
Pressing the button will turn on the front LED headlight,
and the rear LED lights
NOTE: If the lights are inadvertently left on after use,
removing the ON/OFF key will extinguish the lights
automatically.
WARNING!
Ensure that the lights and indicators are functioning
correctly and all of the lenses are clean, before using the
scooter at night or during poor visibility.
7.2.7 MODE BUTTON
Pressing the Mode button will change the information
shown in the LCD display 7.2.14
Pressing and HOLDING the Mode button will reset •
the trip distance displayed.
Press once to show total distance travelled.•
Press twice to show total trip distance travelled ( LCD •
will display a t).
Press third time to show total hours of use.•
Press fourth time to return to normal display.•
7.2.8 SPEED CONTROL
This allows you to preset your desired scooter speed.
Pressing the button marked with a Rabbit increases
preset speed, this is shown by the increasing dots in the
left hand part of the display , (7.2.12).
Pressing the button marked with a Turtle decreases
speed, this is shown by the reducing dots in the left hand
part of the display, (7.2.12).
NOTE: Remember that only with practice will you
become a competent driver. Find a safe, hazard free
environment to practice controlling the scooter and
familiarise yourself with the controls and functions.
WARNING!
For the safety of the operator and other pedestrians,
Sunrise Medical recommends that whilst driving on
footpaths and other pedestrian walk ways, the scooter
preset speed should be set to less than 4 mph/6kph.
7.2.9 USER PROFILE – INDOOR / OUTDOOR BUTTON
The user profile button, (indoor/outdoor mode), changes
the speed of the scooter to a preset 50% of maximum
speed and reduces the acceleration and deceleration.
This is ideal when travelling indoor or within confined
spaces.
When the indoor mode is activated:The LCD display will show the graphic in Fig 7.2.3
To return to normal driving, (outdoor mode), press the
button again, (Fig.7.2.4).
When the indoor mode is active, the scooter speed can
also be reduced further by using the Turtle button as
normal. The scooter will remember this speed when
changing from indoor/outdoor mode until the scooter is
turned off. After this the setting will revert to the standard
50% setting.
NOTE: Further adjustment of the standard indoor setting
is possible.
Contact your Sunrise Medical dealer or supplier to do
this.
7.2.10 TIME / TEMPERATURE
Each press of this button will change the display to show
either the time or the current ambient temperature.
NOTE: The ambient temperature display is an indication
only of current ambient temperature. Due to the
numerous factors that affect temperature sensing, the
displayed temperature should only be taken as a guide.
7.2.11 BATTERY GAUGE
This indicates the average amount of charge you have in
the batteries. 10 bars indicates fully charged batteries this
is shown by the full battery symbol. 50% charge is
approximately 5 bars. The battery gauge will flash when
the batteries are in a very low state of charge. It is
recommend that, if possible, you charge the scooter when
the gauge displays 2 bars, (see section 9).
Please be aware that the meter reading may fluctuate
when the scooter is in use, this is normal.
7.2.12 SPEED DISPLAY ICON
The straight line indicates the current running speed and
will rise and fall accordingly.
The small dots represent the preset speed setting,
(please see 7.2.8 and Fig. 7.2).
7.2.13 INDICATOR DISPLAY ICONS
The triangular shaped icon will pulse in time with the
indicators and hazard lights, (please see 7.2.4, 7.2.5 and
Fig 7.2).
Fig.7.2.3
Fig.7.2.4
Page 33
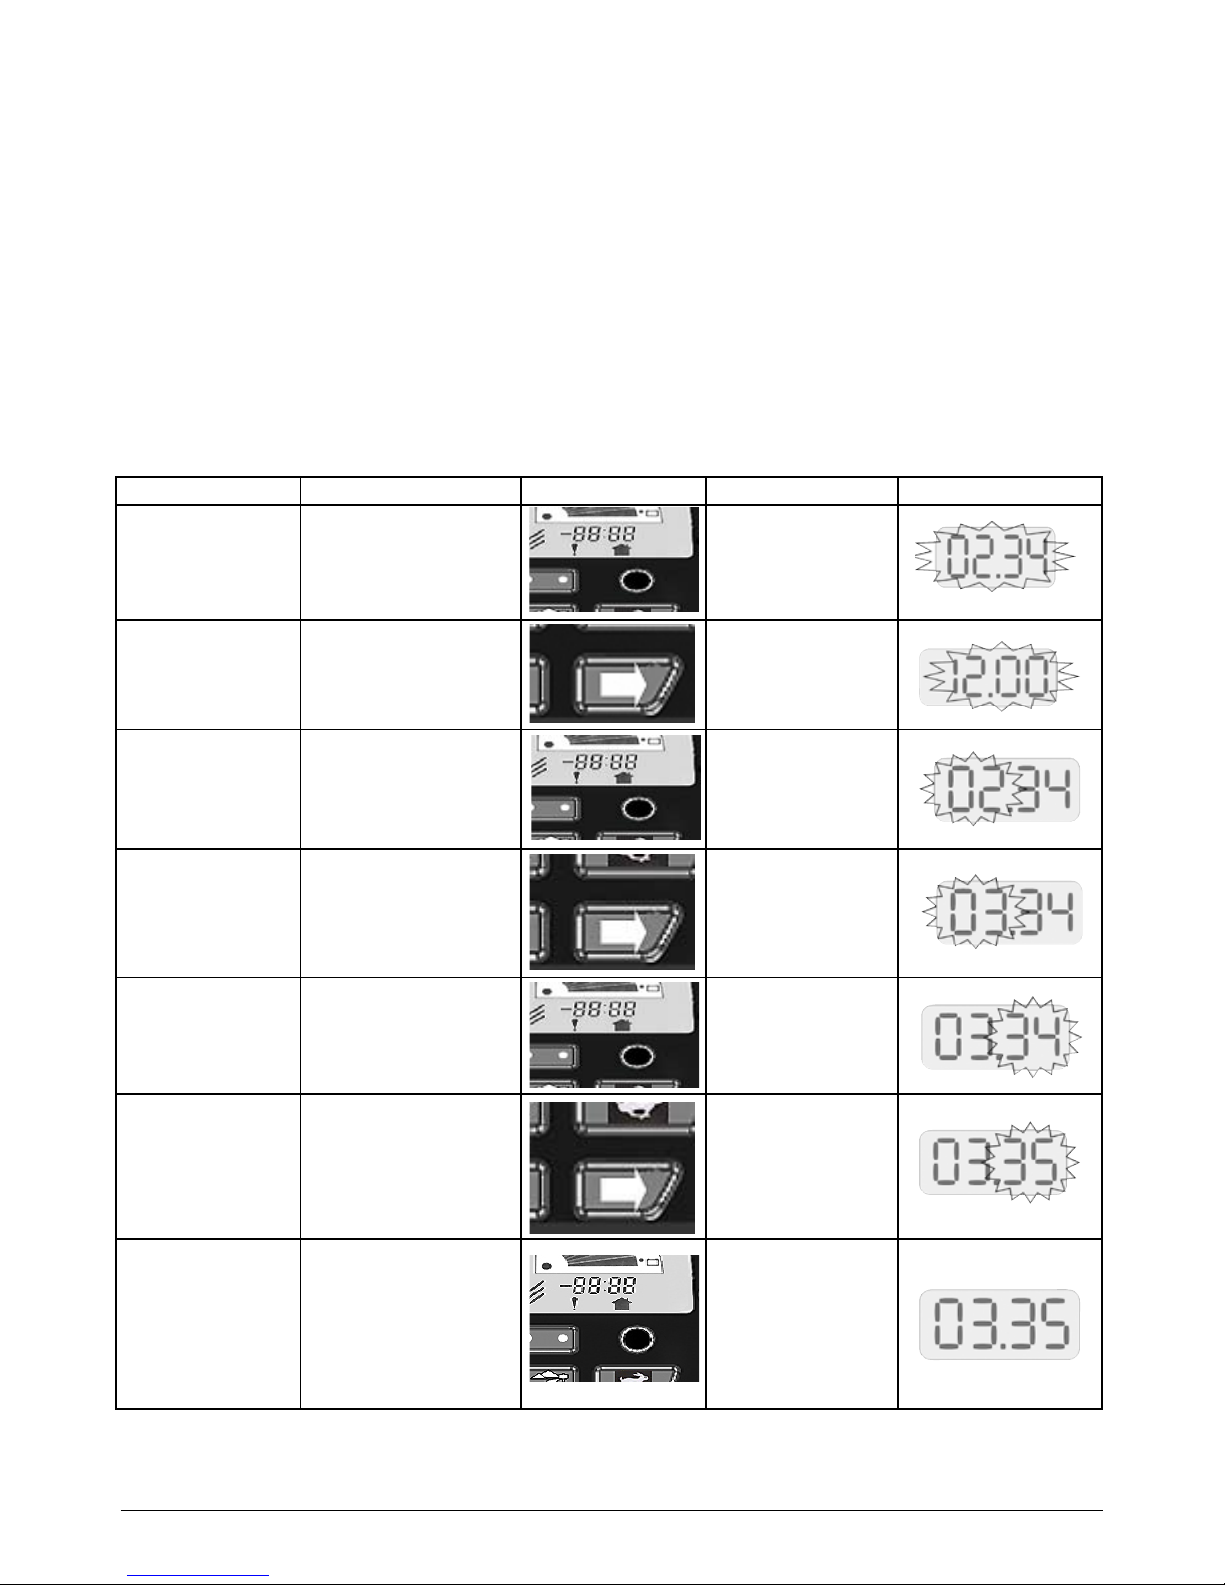
33
Sterling Elite2 XS-RS-Plus
7.2.14 LCD DISPLAY
(Fig.7.2)
The backlit LCD display can display the following
functions:
Battery gauge.•
Time and ambient temperateure.•
Speed in Kilometres per hour (km/h) or Miles per •
hour (m/h),
Total distance in Kilometres (km) or Miles (m),•
Trip distance. This can be reset by holding down the •
MODE button.
Total Hours the scooter has been in use (h).•
Directional Arrows. When used with an optional foot •
or twist grip hand control the arrow indicates travel in
reverse direction, (see section 7.13).
Fault display, (see troubleshooting section).•
7.3 CLOCK SETTING
To set the clock please follow the instructions below:
MODE OPERATION DISPLAY
To enter Clock Set
Mode
Press and hold the round
button below the clock
display for more than 10
seconds
The current time
display flashes
Choosing the 12 or
24 Hour Clock Mode
Press and release the
right-hand indicator
button to switch between
12 or 24 hour clock
display
12:hr Flashes
or
24:hr Flashes
Press and release the
round button to confirm
your selection and move
to the next step
The hours part of the
time display flashes
Setting the Hours Press and release the
right-hand indicator
button once to move up
One Hour at a time
The Hour display is
changed by 1 hour
per press and
release
Press and release the
round button to confirm
the hours setting and
move to the next step
The minutes part of
the time display
flashes
Setting the Minutes Press and release the
right-hand indicator
button once to move up
One Minute at a time
The Minutes display
is changed by 1
minute per press and
release
To Finish Press and release the
round button to confirm
the minutes setting. This
will automatically save
your settings and exit the
Clock Set Mode
The clock shows your
new time setting.
Page 34
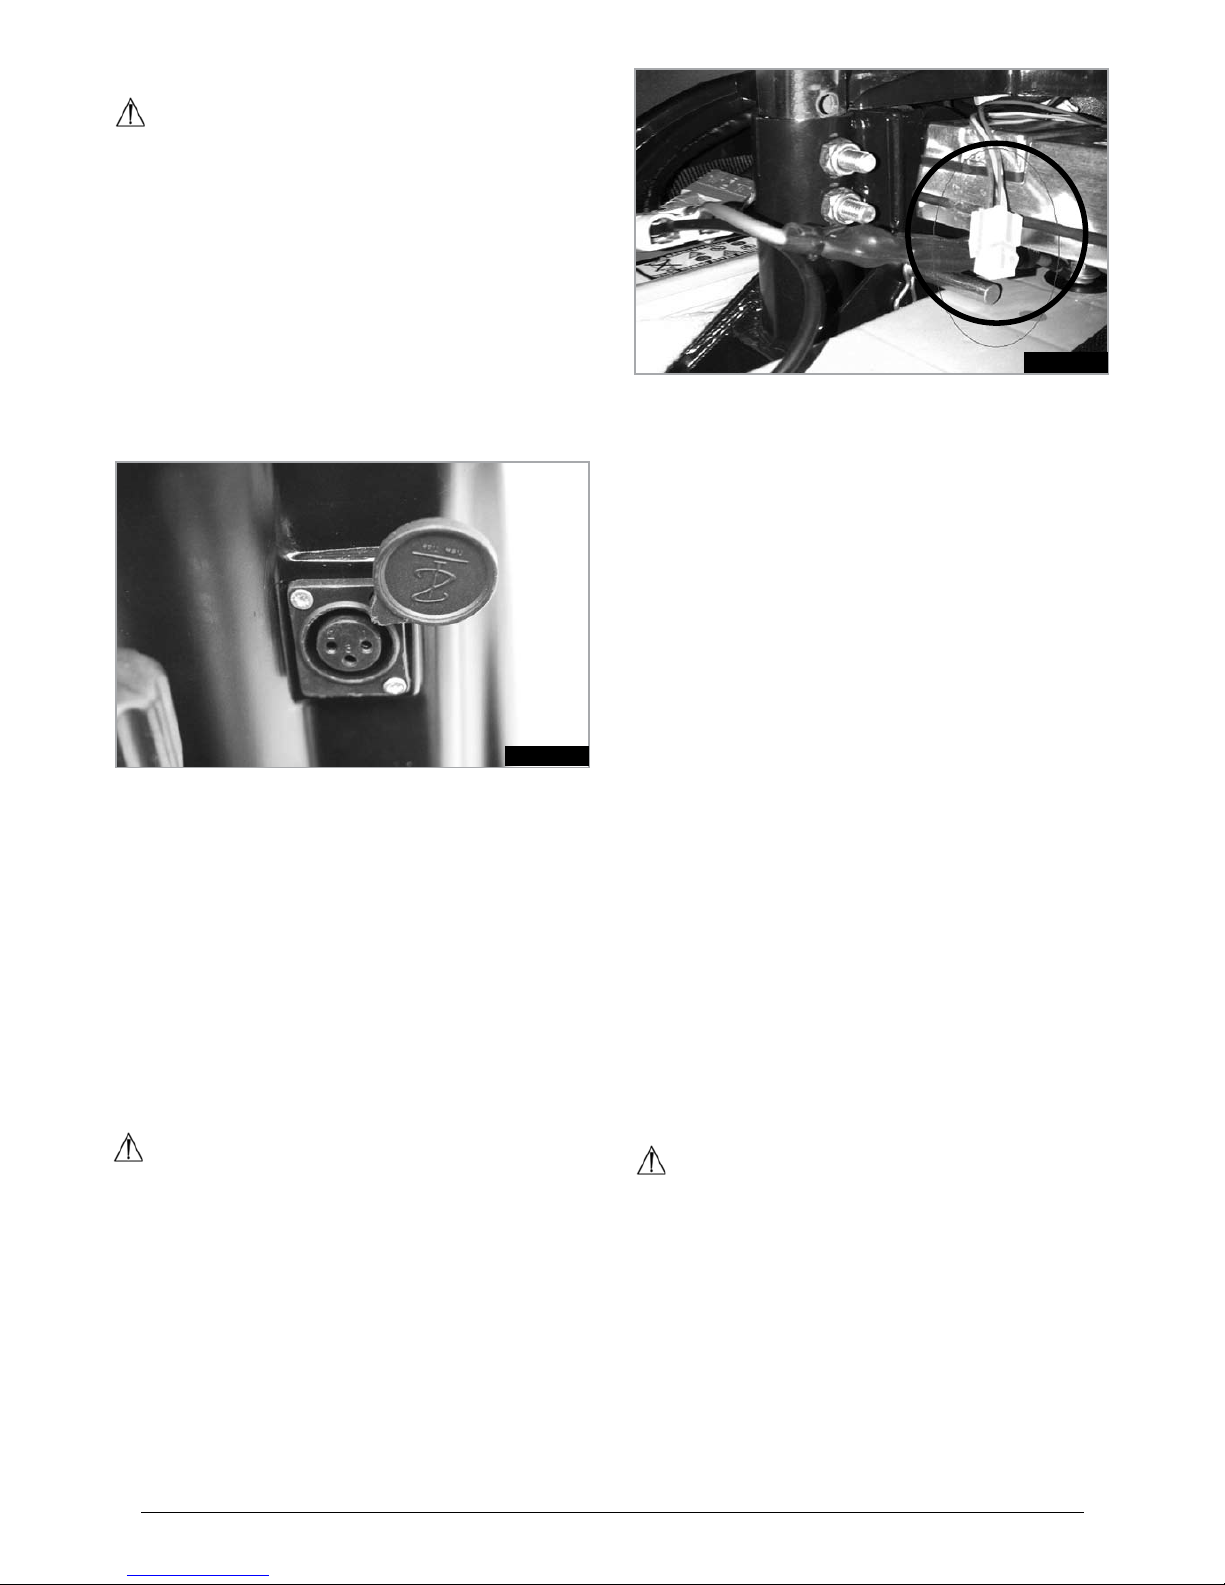
34
Sterling Elite2 XS-RS-Plus
7.4 CHARGING SOCKET:
WARNING!
The charging socket should only be used for •
connecting the scooter battery charger plug to the
scooter.
The charging socket should not be used to supply •
power for any other device.
Connection of unapproved electrical devices may •
damage the control system or compromise the EMC
performance of the scooter.
Always put the socket cover back over the charging •
socket when the battery charger plug has
been removed.
(Fig. 7.4.1)
Please see section 9.0 for more details about charging.
7.5 PROGRAMMING SOCKET
When the scooter leaves the factory, the parameters of
the controller are set to accommodate most driving styles
and preferences. However the scooter control system is
very versatile and will allow certain functions to be
reprogrammed.
If required, the programming socket. (Fig. 7.5.1), will
enable an approved Sunrise Medical authorised dealer to
reprogramme your scooter.
Your approved Sunrise Medical authorised dealer can
also gain useful service information via the programming
socket, from the scooter’s on board diagnostics facility.
To programme the controller a special programming
device is required, (handheld or PC software), which is
available to your Sunrise Medical authorised dealer.
DANGER!
Programming the scooter is only allowed via •
authorised personnel trained by Sunrise Medical.
Incorrect controller settings could cause driving •
outside the safe limits and could result in damage or
injury.
Fig.7.5.1
NOTE: Sunrise Medical does not accept responsibility for
damages / injuries which result from unexpected
movement or stopping of the scooter due to inappropriate
programming or unauthorised use of the scooter.
7.6 OPERATING THE CONTROLS
If you are new to driving a scooter, it is a good idea to
practice in a clear, safe space on a sound level surface.
Put the key in its slot, but do not turn the scooter on.
Board the scooter by following the instructions in section
4.18.
7.7 BASIC DRIVING ELITE
2 -
XS, RS AND PLUS
Make sure you are properly seated and can comfortably
reach all the controls on the scooter.
Set the speed control to its lowest speed.1.
Turn the key clockwise (90 degrees) to turn the 2.
scooter on.
On the tiller, gently operate the Control lever or Wig-3.
Wag as described earlier, (7.1.2 for the wigwag and
7.2.2 for the side control lever). You will gently
accelerate. Release and you will gently stop. Practice
these two basic functions until you get used to them.
Steering the scooter is easy and logical. Just be sure 4.
to remember to get wide clearance when turning so
that the rear wheels clear any obstacle.
Short-cutting a pavement corner can cause the back 5.
wheel to go off the pavement, causing problems, if the
corner is very rough. Avoid this at all times by steering
an exaggerated curve around the obstacle.
When steering in a tight spot, such as entering a 6.
doorway or when turning around, stop the scooter
and then turn the handlebar to where you want to go,
then apply power gently. This will make the Elite turn
tightly. It is also recommended that the pre-set speed
is set to a slower setting to aid control in tight spots.
DANGER!
Reversing requires extra attention as the field of vision is
restricted.
Elite 2 RS, XS
Using the right thumb or left fingers to operate the WigWag will reverse the scooter.
Fig.7.4.1
Page 35
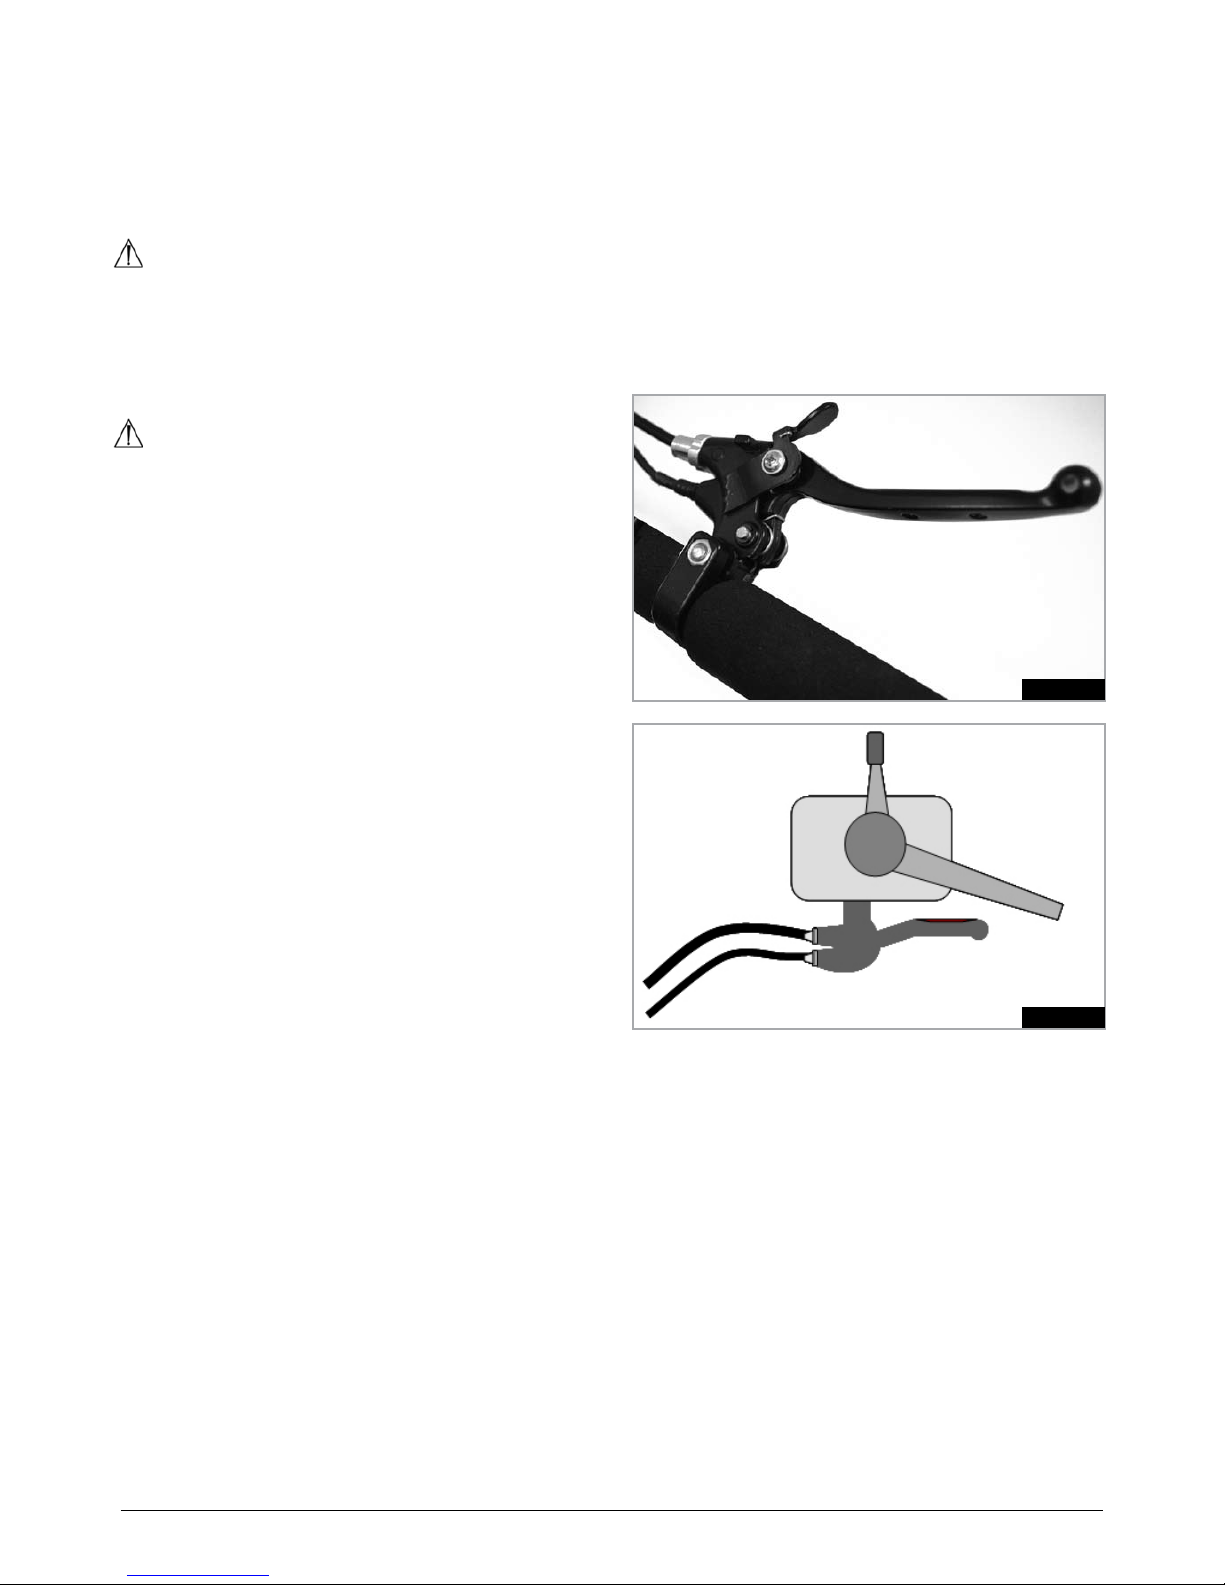
35
Sterling Elite2 XS-RS-Plus
Elite 2 PLUS
Pushing down on the control lever or pulling back on the
upper knob will reverse the scooter.
Remember, the more you push the Wig-Wag, lever or
side control lever the faster you will go.
Reverse speed is programmed to 50% slower than
forward speed.
DANGER!
It is advisable that during the first few sessions of
operating your scooter that the area around you is clear
of obstacles and pedestrians.
Before operating your Scooter, ensure the seat height
has been adjusted to your satisfaction, and the tiller angle
has been set for optimum safety and comfort.
DANGER!
When using your Scooter on public walk ways and •
footpaths, always be aware of pedestrians and
situations which might require extra care.
Be especially vigilant around young children and •
pets.
Remember, when driving in public places drive with •
caution and regard for others at all times.
When manoeuvring in confined areas, including •
shops, ensure the minimum speed is selected.
If you leave your Scooter unattended, ensure that it •
does not obstruct pedestrians or other road users.
Remember to keep the key with you at all times for •
your safety and security.
For the safety of the operator and other pedestrians, •
Sunrise Medical recommends that whilst driving on
footpaths and other pedestrian walk ways, the
scooter preset speed should be set to less than 4
mph/6kph.
7.8 BRAKING
To stop the Scooter simply release the Wig-Wag or side
control lever, whilst keeping your hands on the handlebar.
Two types of braking will automatically operate in
sequence:
Automatic regenerative braking, which slows the •
Scooter to a standstill.
Automatic parking brake which will operate as the •
scooter comes to a stop. The automatic parking
break holds the Scooter in position, even if you are
on a hill.
NOTE: This is a two stage process and is not
instantaneous. First the scooter slows down and stops,
then the parking brake comes on. When starting off again
the parking brake will release automatically. If the throttle
is momentarily engaged and released, the parking break
will release and then engage again in approximately 1/2 a
wheel turn.
7.9 EMERGENCY BRAKING USING THE HAND BRAKE
In the unlikely event of an unwanted movement of the
Scooter, use the Parking Braking System (PBS) hand
brake. The Parking Braking System (PBS) is operated by
pulling the hand brake lever on the tiller, this will slow the
scooter to a controlled stop.
Handlebar mount, (Fig.7.9.1), side lever mount, (Fig.7.9.2)
.
The hand brake automatically stops the drive unit by way
of an electrical connection. Releasing the hand brake lever
will allow the drive unit to function again.
NOTE: The scooter will not drive with the handbrake
applied.
7.10 EMERGENCY BRAKING USING THE KEYSWITCH
In the unlikely event of an unwanted movement of the
Scooter, turning the keyswitch OFF will cause the Scooter
to a come to an immediate stop. Though very effective,
emergency braking is extremely abrupt and must never be
used in normal use.
7.11 SWITCHING OFF
The Scooter must always be switched off at the On/Off key
switch.
NOTE: The scooter can remain safely on charge for a
couple of weeks. When the Scooter is not to be use for a
long period of time, first charge the batteries fully and then
disconnect them from the scooter. Store as close to room
temperature as is possible.
Fig.7.9.1
Fig.7.9.2
Page 36
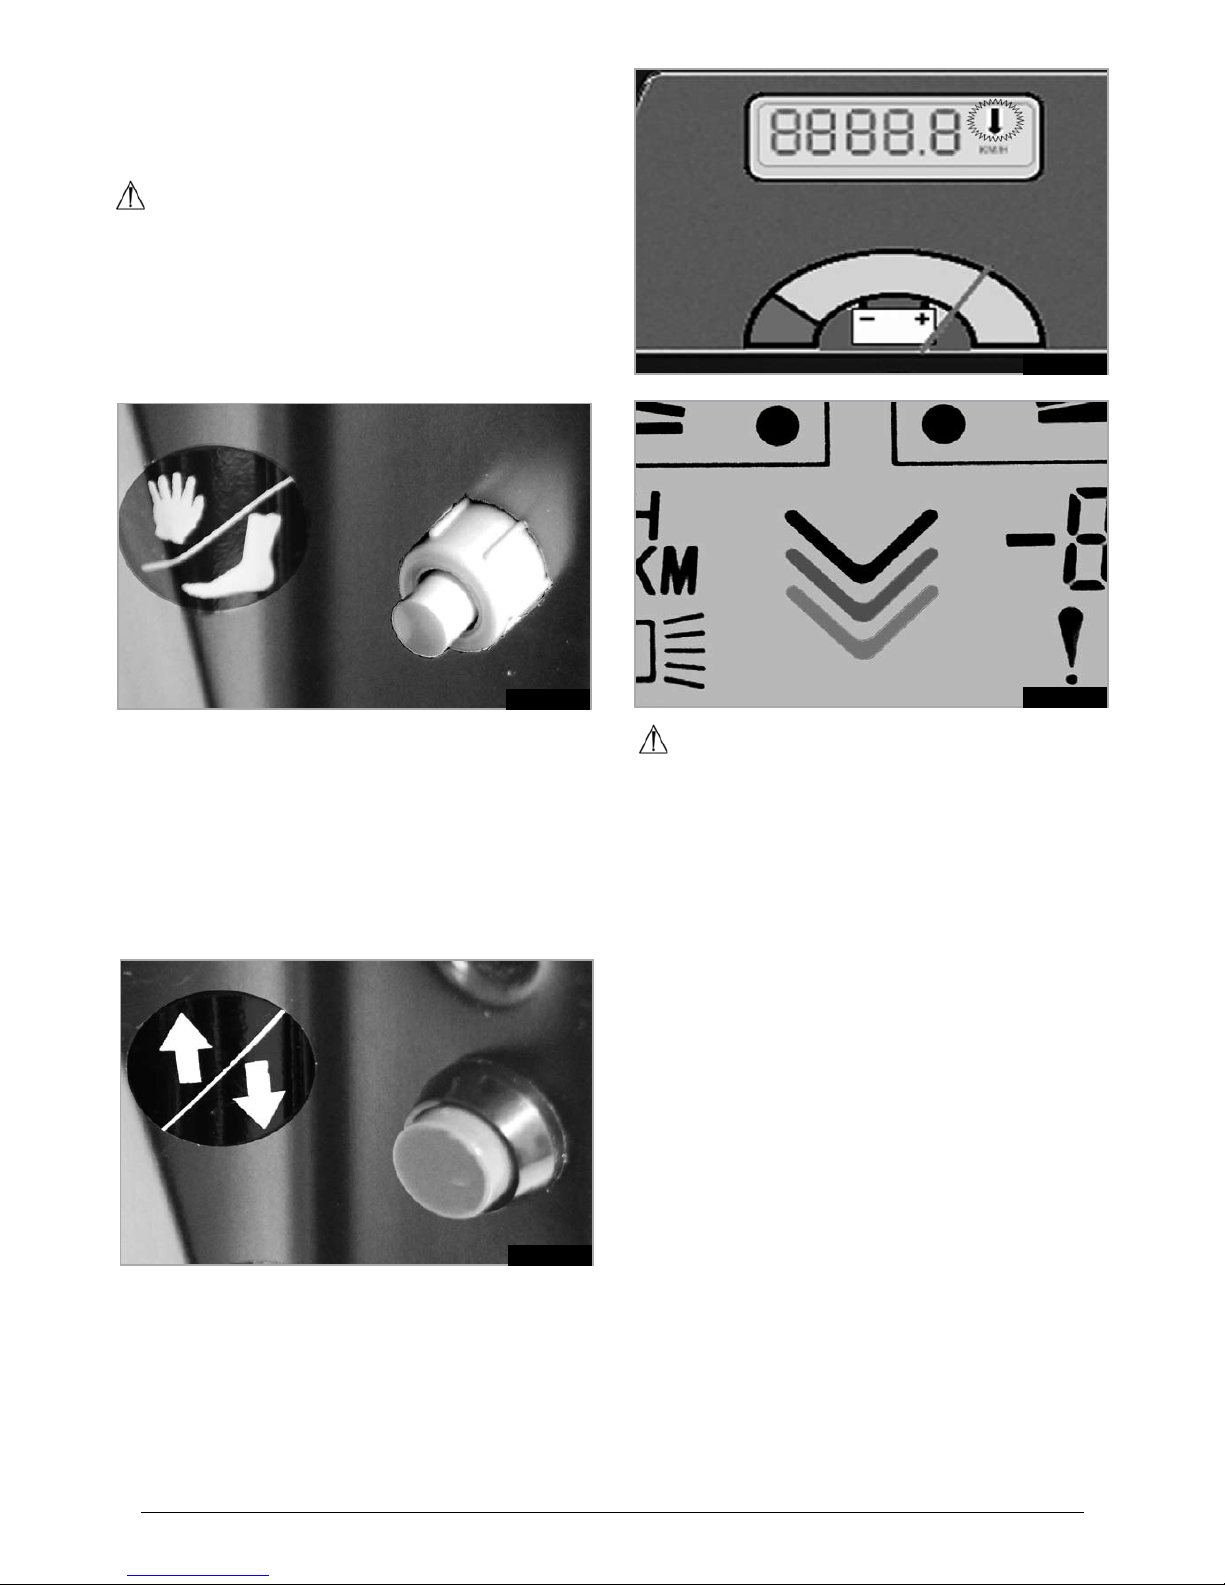
36
Sterling Elite2 XS-RS-Plus
7.12 THROTTLE SELECT SWITCH
This switch is used to select between the foot control and
any handlebar control.
NOTE: A latching, (push On-push Off), type switch is
used for this function, (Fig.7.12.1).
WARNING!
When the scooter is turned off, the control that was •
selected at the time of switching off will still be
selected when the scooter is turned back on again.
Use caution when first starting off after a break in •
driving.
Keep any luggage/bags, clear of fouling the foot •
control at all times.
Fig.7.12.1
7.13 DIRECTIONAL SWITCH
This switch is used to select between the forward or
reverse direction of travel, (Fig.7.13.1).
The directional switch is always used with any nonwigwag throttle, ie. foot control and twist grip throttle.
When reverse is selected a warning flashing arrow
appears on the LCD display of the Elite2 XS -RS,
(Fig.7.13.2), or scrolling arrows appear on the LCD
display of the Elite2 Plus, (Fig.7.13.3).
Fig.7.13.1
Fig.7.13.2
Fig.7.13.3
WARNING!
When the scooter is turned off, the direction that was •
selected at the time of switching off will still be
selected when the scooter is turned back on again.
Use caution when first starting off after a break in •
driving.
Use caution when reversing.•
Always stop the scooter before switching between •
forwards and reverse.
Do not reverse downhill on an uneven surface.•
Do not reverse and turn on any uneven surface.•
Never reverse around a blind corner.•
Always give way to people on foot.•
If your head/neck movement is restricted when reversing:
Use your mirrors.•
Select the lowest usable speed setting.•
Do not make any sudden manoeuvres.•
Listen out for any audible clues, (children shouting, •
running etc).
Be prepared to stop immediately.•
Page 37
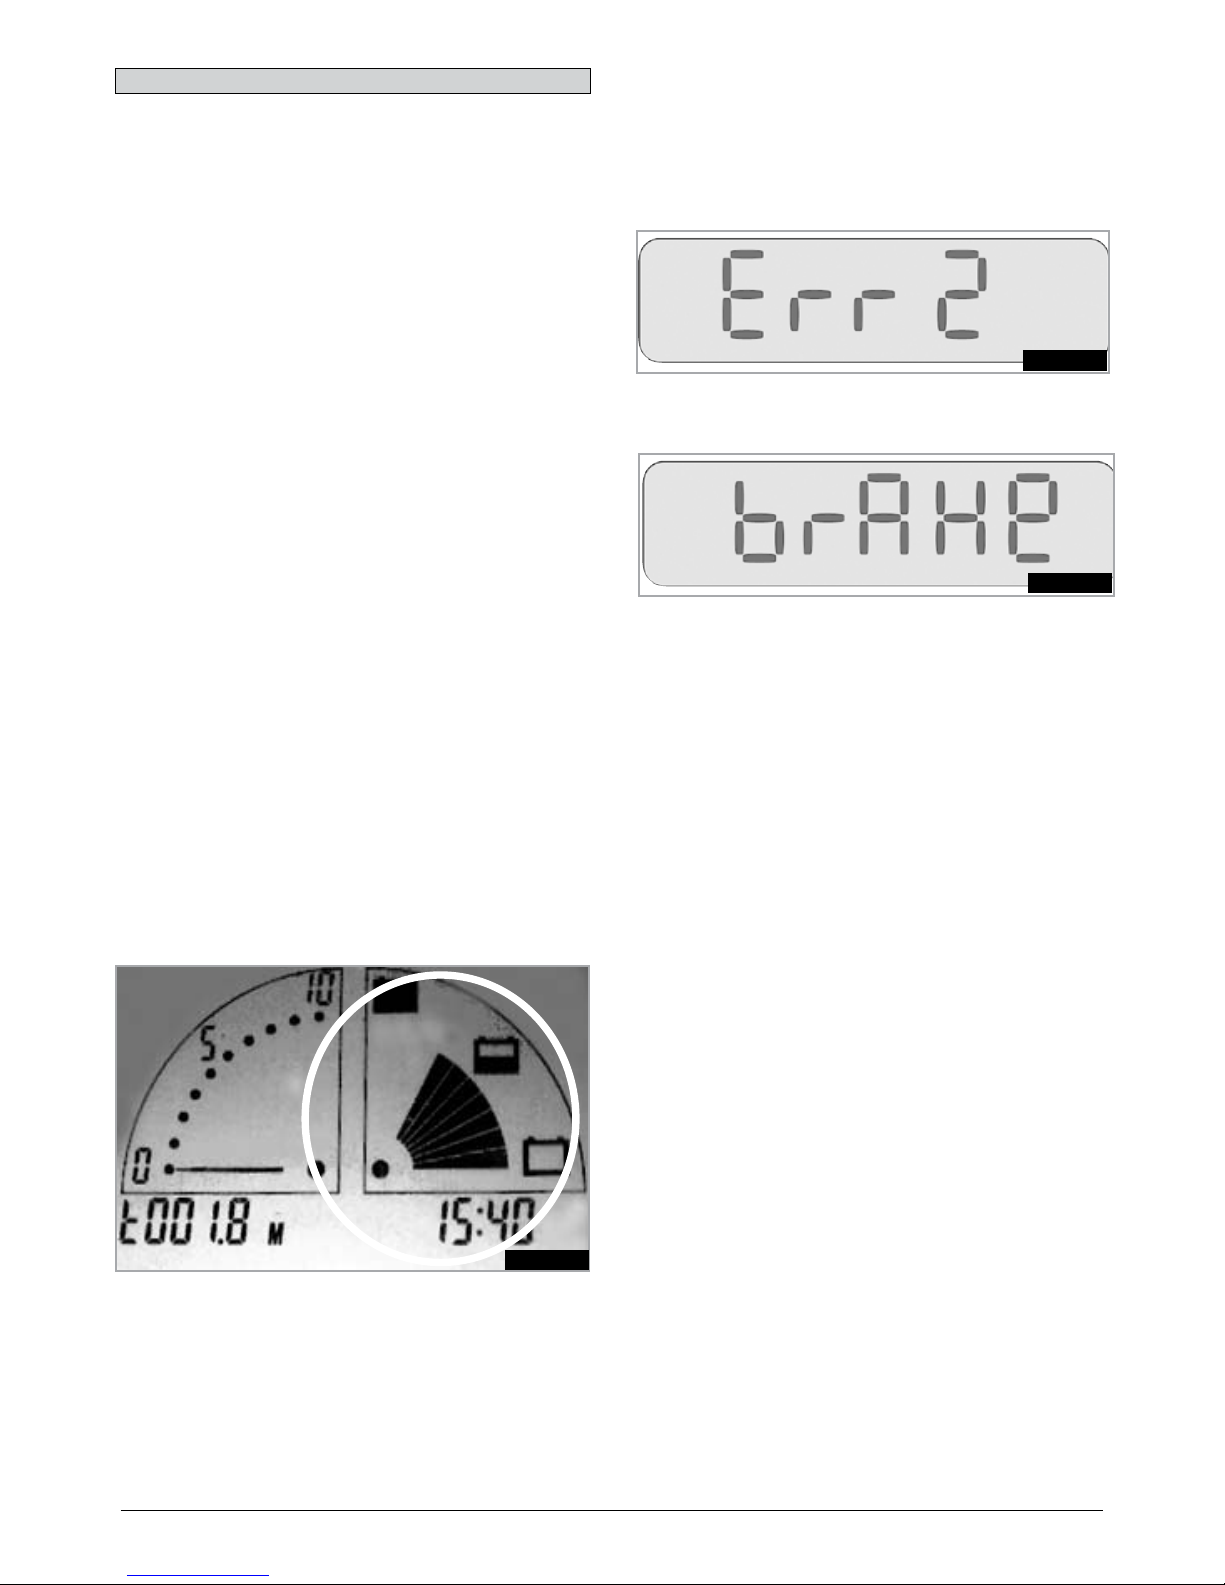
37
Sterling Elite2 XS-RS-Plus
8.1 ELITE2 PLUS DISPLAY
(Fig.8.1.0).
Always consult your Sunrise Medical authorised dealer
when a diagnostic fault has appeared on your scooter
display.
Elite2 PLUS Fault- The battery gauge shows the status of
the control system, and the fault graphic ! on the display.
Battery Gauge is steady
This indicates that everything is OK.
Battery Gauge flashes slowly
The control system is functioning correctly but the
batteries need charging as soon as possible.
Battery Gauge steps up
The scooter batteries are being charged. You will not be
able to drive the scooter until the charger is disconnected
and you have switched the control system off and on
again.
Battery Gauge flashes rapidly
The control system safety circuits have operated and the
control system has been prevented from moving the
scooter.
This indicates a system trip. i.e. the power module has
detected a problem somewhere in the scooters electrical
system.
Switch the scooter off.
Check that none of the plugs and sockets have become
loose or disconnected.
Check the condition of the battery.
If you can’t find the problem, try the self help guide on the
next page.
Switch the scooter on again and try to drive the scooter.
If the safety circuits operate again, switch off and do not
try to use the scooter.
Contact your Sunrise Medical authorised dealer.
8.0 Troubleshooting Using the LCD
Fig.8.1.0
8.2 ELITE2 XS, RS DISPLAY
Always consult your Sunrise Medical authorised dealer
when a diagnostic fault has appeared on your scooter
display
Elite2 XS,RS Fault- The LCD displays the fault bar
number, (Fig.8.2.0).
Incase of a brake fault (4 bar) the display will show,
“brake” and the horn will sound, (Fig.8.2.1).
The displays above indicate the control system safety
circuits have operated and the control system has been
prevented from moving the scooter.
This indicates a system trip. i.e. the power module has
detected a problem somewhere in the scooters electrical
system.
Switch the scooter off.
Check that none of the plugs and sockets have become
loose or disconnected.
Check the condition of the battery.
If you can’t find the problem, try the self help guide on the
next page.
Switch the scooter on again and try to drive the scooter.
If the safety circuits operate again, switch off and do not
try to use the scooter.
Contact your Sunrise Medical authorised dealer.
NOTE: Taking the scooter from a warm indoor
environment to very cold outside surroundings may cause
the display to mist for a short time. This is harmless and
will clear quickly.
Fig.8.2.0
Fig.8.2.1
Page 38
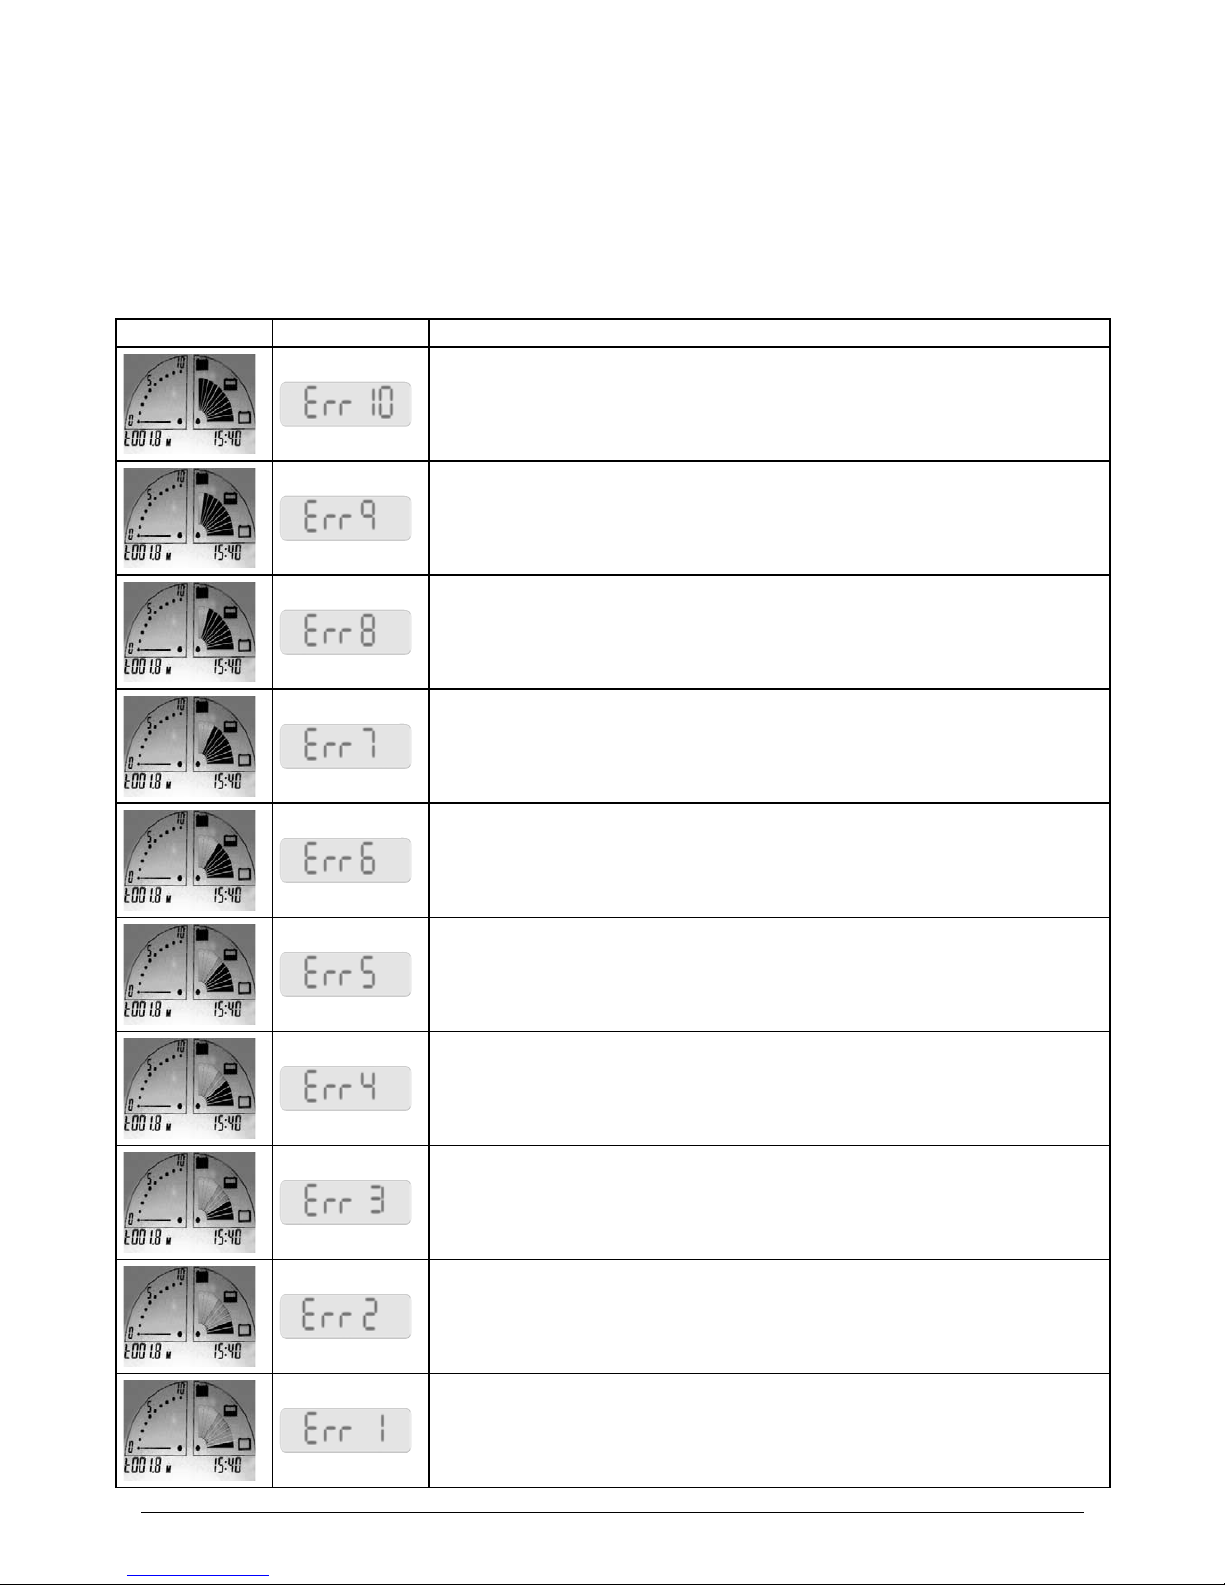
38
Sterling Elite2 XS-RS-Plus
8.3 SELF HELP GUIDE
If a system trip occurs you can find out what has
happened by checking the scooter display.
Elite2 PLUS - counting the number of bars on the battery
gauge that are flashing.
Go to the number on the list which matches the number
of flashing bars and follow the instructions.
FAULT CODES AND POSSIBLE CAUSES.
ELITE2 PLUS ELITE2 XS - RS
An excessive voltage has been applied to the Power Module.
Check the battery connections.
Check the correct battery charger is being used and that it is functioning properly.
The parking brake has a bad connection.
Check all connections between Motor, Brake and Power Module.
A general control system fault has been detected.
Check that all plugs and sockets are connected.
If the scooter has been driven in extreme weather, gone through a deep puddle or
has been jet washed, place it in a dry warm environment to dry out.
A throttle fault has been detected.
Ensure that the throttle levers are at the neutral or rest position.
The scooter is being prevented from driving by the control system because
of an inhibit signal..
Check that the charger plug is disconnected from the charge socket.
This is not used.
The freewheel lever/switch is activated.
Switch the scooter off, put the scooter back into “DRIVE” mode and switch the
scooter back on again.
The Motor has a short circuit to a battery connection.
Contact your servicing agent.
There is a bad connection to the Motor.
Check all connections to the Motor and Power Module.
Check Motor brushes.
The battery needs charging or there is a bad connection to the battery.
Charge the batteries.
Check the connections to the batteries are tight.
Check the battery charger is switched on and working.
Batteries need changing.
Elite
2
XS, RS – check the error code displayed on the
LCD screen.
Go to the number on the list which matches code and
follow the instructions.
Slow or sluggish movement - If the scooter does not
travel at full speed or does not respond quickly enough
and the battery condition is good, check the maximum
speed setting. If adjusting the speed setting does not
remedy the problem then there may be a non hazardous
fault. Consult your Sunrise Medical authorised dealer.
Page 39
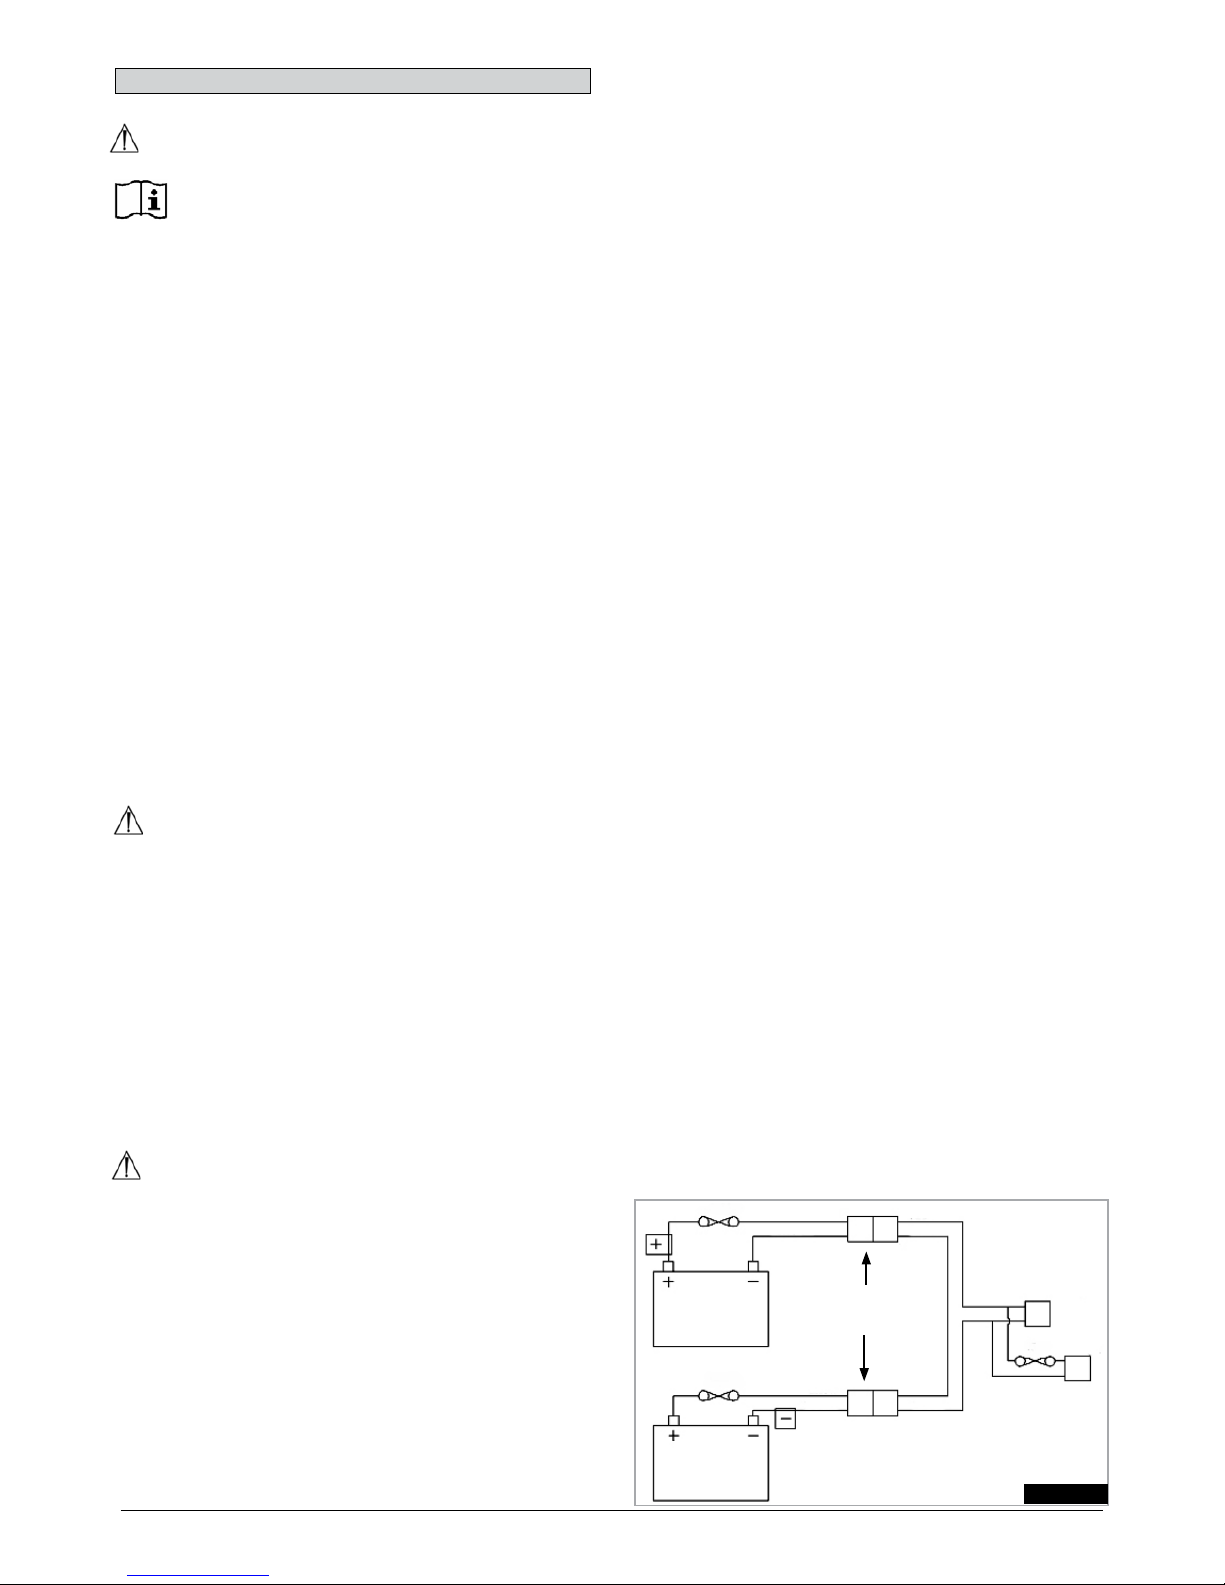
39
Sterling Elite2 XS-RS-Plus
WARNING!
Please read the owner’s manual supplied with the
charger carefully. The general procedures and
effects for the interference with the scooter and
the batteries remain valid.
Do not smoke near batteries. •
Do not expose any part of the battery to direct heat •
(i.e. naked flame, gas fire).
When charging always place your charger on a hard •
surface in a room with good ventilation.
You should not charge your batteries in outdoor •
conditions.
9.1. BATTERY & CHARGER SPECIFICATION:
Batteries:
24 V (2x12 V) / 60 Ah., Gel Type-maintenance-free
Dimensions:
Please see Technical Specifications.
NOTE: Optional batteries with different capacities are
available.
Dimensions:
Please see Technical Specifications.
Charger:
Connector: 3 pin “Nuetrik” type
Charger: 24V d.c. 8 A Cyclic.
NOTE: Other cyclic chargers designed for GEL batteries
may be used, up to a maximum power output of 10A.
WARNING!
It is the responsibility of the person electing to use an
alternative battery charger to ensure that the chosen
battery charger is fully compatible with the scooter.
9.2 ELECTRICAL FUSES:
To prevent the scooter from becoming overloaded, fuses
been built into the battery looms. The fuses
automatically isolate the battery from the scooter wiring
and control systems in the event of an electrical short
circuit.
If you suspect that the fuses have blown, contact your
Sunrise Medical authorised dealer as soon as possible,
who will carry out a full diagnostic to determine the cause
of the original fault.
WARNING!
Do not attempt to change the fuses yourself.•
Do not attempt to by-pass the fuse as this would be •
very dangerous. If you suspect a fault, contact your
Sunrise Medical authorised dealer as soon as
possible.
9.0 Batteries and Charging
Fig.9.1.0
150A
150A
15A
POWER
MODULE
CHARGER
BATTERY
CONNECTORS
RED
RED
BLACK
BLACK
YELLOW
YELLOW
YELLOW
9.3 BATTERIES
For all warnings and the detailed removal process please
refer to section “5.3 Batteries”, on pages 18 and 19.
9.4 GENERAL BATTERY INFORMATION
Batteries are the power source for almost all of the
modern mobility products available today.
The design of batteries used in mobility products is
significantly different to the batteries used to start a car for
example.
Car batteries are designed to release a large amount of
power over a short period of time, whilst mobility batteries
(commonly called deep cycle batteries) release their
power evenly, over a long period of time. Therefore, due
to the lower production volumes and increased
technological requirements, mobility batteries are typically
more expensive.
Commonly two 12 volt batteries are used together in a
mobility product, giving a total voltage of 24 volts.
The size of the battery (e.g. its available power) is
expressed in amps per hour e.g. 70 A/hr. The higher the
number, the bigger the battery size, weight and,
potentially, the greater the distance you can travel.
Sunrise Medical only fit as standard maintenance-free
mobility batteries into these types of scooters.
9.5 MAINTENANCE-FREE BATTERIES:
This type of battery uses a method of carrying the
electrolyte commonly referred to as ‘gel’, that is held
within the battery case. As the name implies, no
maintenance is required other than regular charging. You
can safely transport this type of battery without fear of
acid spilling. Furthermore, they are approved for
transportation on aircraft, trains and ships.
9.6 BATTERY CARE:
Over the years, battery technology has moved forward
but, unfortunately, some of the advice given on battery
care has not.
This has resulted in a number of confused and at times
contradictory instructions on the ‘best’ way to care for your
batteries.
This section will help to dispel some of these myths and
legends.
Below is set out a battery care plan for maintenance-free
batteries. This has been agreed between Sunrise Medical
and the battery manufacturers, to enable you to get the
best out of your batteries. If a different care plan is
followed, this may result in lower than expected
performance from your mobility vehicle.
Page 40

40
Sterling Elite2 XS-RS-Plus
9.7 MAINTENANCE-FREE BATTERY CARE PLAN:
Only use an approved Sunrise Medical charger
compatible with the vehicle to be charged.
Charge your batteries every night, regardless of the •
amount of use your mobility device has had during
the day.
Do not interrupt the charging cycle.•
If your mobility device is not required for use, it •
should remain connected to the charger until
required. This will not damage your batteries, as long
as the mains socket/plug is left switched on. Turning
the mains socket/plug off, but leaving the mains cable
plugged in will eventually deplete your battery
charge.
If you leave your vehicle for an extended period •
(more than 1 week), charge the batteries fully and
then disconnect the main battery lead. When the
scooter is to be used again, charge the batteries for a
further 24 hours before use.
Failure to allow for recharge will damage the batteries •
and can lead to shortened distances and premature
failure.
Do not top up the charge of your batteries during the •
day. Wait until the evening for a full overnight charge.
As a general rule, maintenance-free batteries take •
longer to fully charge than wet lead acid batteries.
The battery terminals need to be checked regularly •
for signs of corrosion. If any corrosion is apparent,
then clean the terminals completely (a wire brush is
ideal) and re-grease the terminal using Vaseline
petroleum jelly, not ordinary grease. Ensure that the
terminal nut and bolt, cable clip and exposed cable
are completely covered with jelly.
Following all the points above should result in a •
healthier battery, greater range for the vehicle user
and a longer life for your batteries.
Return the batteries back to Sunrise Medical or •
directly to the battery manufacturer for recycling,
when they no longer hold charge.
9.8 GENERAL CHARGER INFORMATION:
The external charger has been designed to charge two
12 V Gel type batteries connected in series (= 24 V).
9.9 CHARGER SPECIFICATION:
WARNING!
Only use cyclic chargers designed for mobility batteries,
Gel-Type, with a maximum output not exceeding
24V/10A.
For more information about the charger
operation, consult the instructions provided with
the charger.
NOTE: If the charger is not connected to the scooter, it
does not output charge voltage.
WARNING!
It is possible that the charger’s metallic box may slightly
raise in temperature due to use.
9.10 CHARGER SAFETY FEATURES:
The charger has features that prevent hazards or
accidents occurring as a result of connecting batteries the
wrong way round, overheating caused by fault conditions
or attempting to charge wrong voltage batteries.
The majority of chargers are electrically double insulated
and no earth connection is required. Some larger sizes
may be electrically earthed and this will be clearly stated
on the label.
The 3 pin UK mains input plug contains a replaceable
fuse. The rating of this fuse is shown on the charger
label.
WARNING!
Always replace fuses with the same type and size of •
fuse as specified.
Fitting of different fuses can result in damage to the •
charger or failure of the charger to operate properly.
If your charger has been specified for use in •
Continental Europe it will contain a European two pin
plug which does not have a fuse. In this case the
fuse is located inside the case or on the fascia panel
of the charger.
9.11 PROCEDURE FOR CONNECTING THE CHARGER
AND CHARGING:
The scooter can be charged via the charger socket on
the rear of the tiller panel. Fig 9.11.1
Ensure the scooter is switched off.•
First, connect the charger to the scooter.•
Then, connect the charger to the mains supply by •
means of the mains plug and switch on.
The GREEN LED will illuminate to show that the •
power is ON, (Fig.9.11.2).
The YELLOW LED will illuminate to show the •
batteries are charging, (Fig.9.11.2).
The YELLOW LED will switch off when the charge •
cycle is complete, (Fig.9.11.2).
CAUTION!
Do not leave the charger connected to the battery •
with the mains disconnected or switched off. This
could result in damage to your battery being caused
by deep discharge over a period of time.
Always switch off at the mains before disconnecting •
the charger from the scooter.
WARNING!
If an alternative charger has been chosen,
please read the user instruction manual
supplied with that charger as they may differ
from the instructions show above.
Fig.9.11.1
GREEN
LED
YELLOW
LED
Fig.9.11.2
Page 41
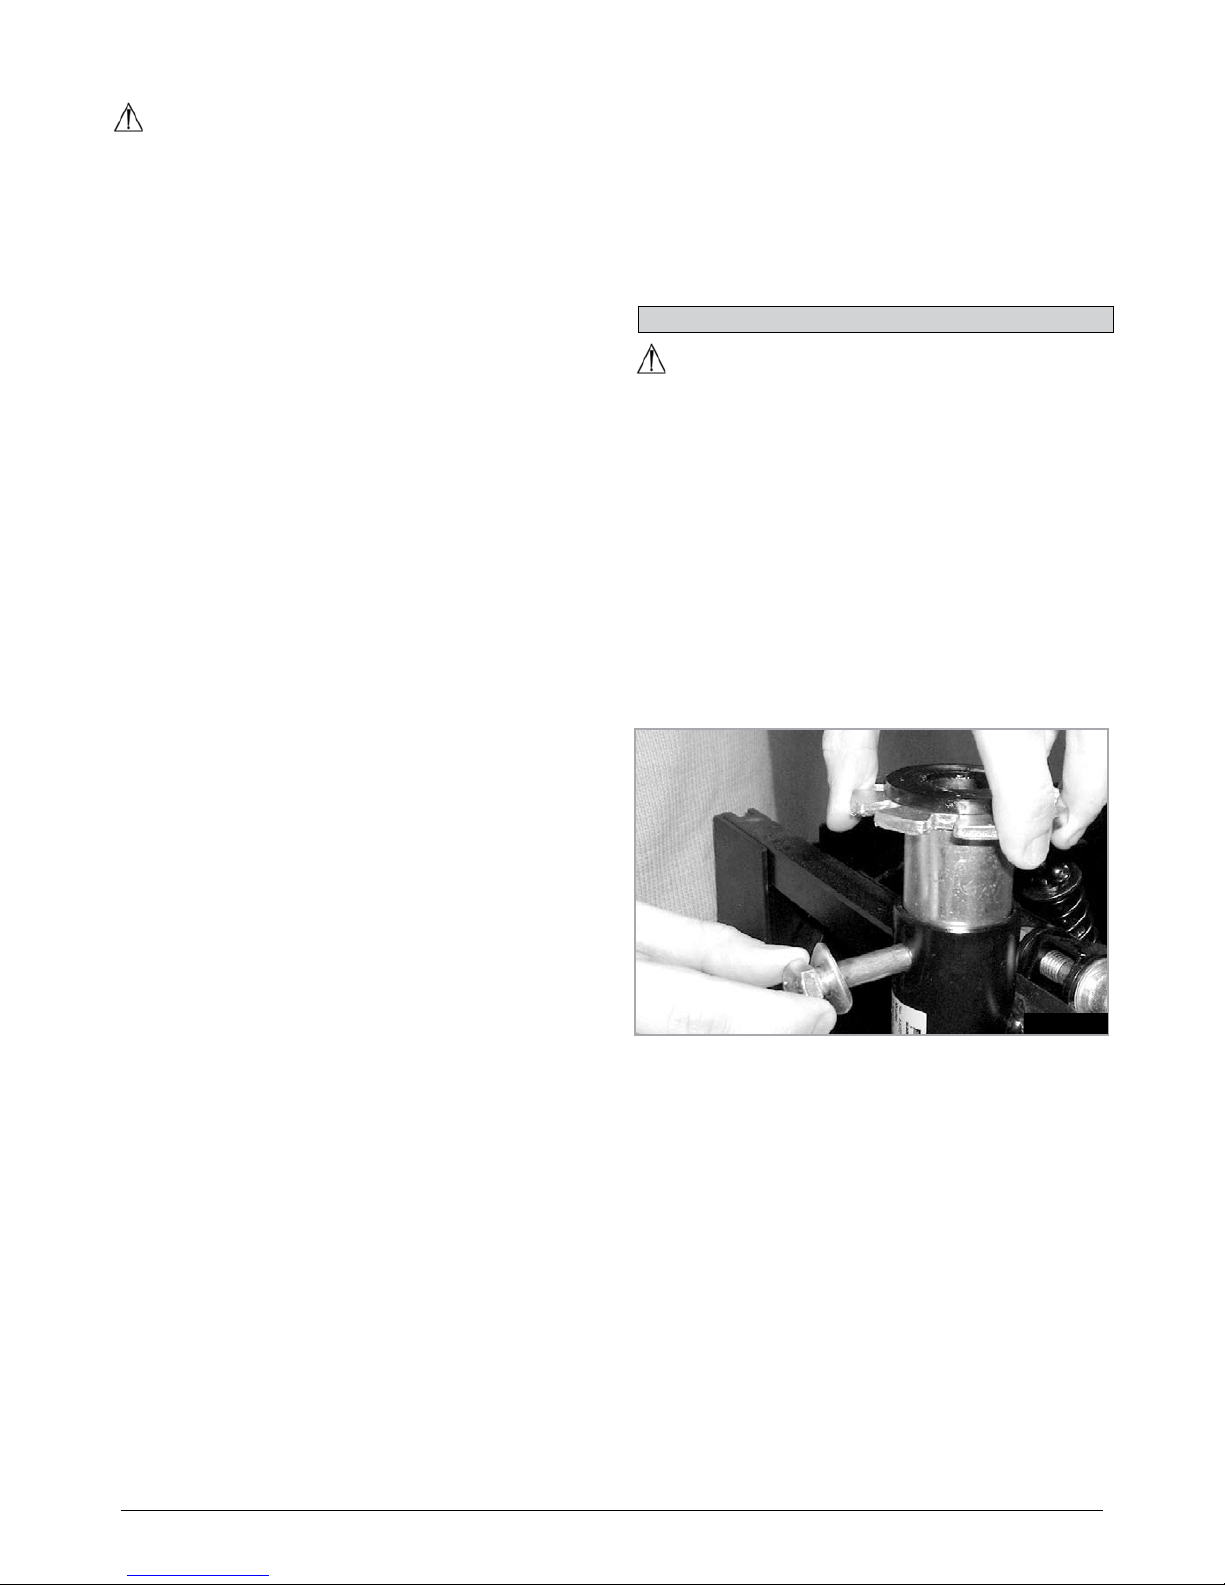
41
Sterling Elite2 XS-RS-Plus
9.12 CHARGER SAFETY AND CAUTION NOTES:
WARNING!
The charger is designed for indoor use. Do not use •
outdoors or expose to rain, snow, spray or moisture.
When buying replacement batteries or charger •
always consult your Sunrise Medical service agent.
The charger may be used with other brands of Gel •
type batteries, subject to written confirmation from
the Technical Department of Sunrise Medical.
To reduce the risk of damage to electric plug and •
cord, pull by the plug rather than the cord when
disconnecting the charger.
Make sure the cord is located so that it will not be •
stepped on, tripped over or otherwise subjected to
damage or stress or cause a trip hazard.
A mains extension cord should not be used unless •
absolutely necessary.
Use of an improper extension cord could result in a •
risk of fire and electric shock.
If any extension cord must be used, make sure the •
pins on the plug of the extension cord are the same
number, size and shape as those of the plug on the
charger and that the extension cord is properly wired
and in good electrical condition.
9.13 THE RANGE OF YOUR VEHICLE:
The batteries give the scooter a range of approximately
44 kilometres.
Most manufacturers of mobility products state the range
of their vehicles either in the sales literature or within the
Owner’s Manual. The range stated sometimes differs
from manufacturer to manufacturer even though the
battery size is the same. Sunrise Medical measure the
range of their vehicles in a consistent and uniform
manner, but variances still occur due to motor efficiencies
and overall product load weight.
The range figures are calculated to I.S.O. Standard 7176.
Part 4: Wheelchair Energy Consumption Theoretical
Range.
This test is carried out in controlled conditions with new,
fully charged batteries, on a level test surface and a user
weight of 100 kg. The range figures stated should be
seen as a theoretical maximum and will be reduced if any
single, or combination, of the following circumstances
occur:
User weight heavier than 100 kg.•
Batteries whose age and condition are less than •
perfect.
The terrain is difficult e.g. very hilly, sloping, muddy •
ground, gravel, grass, snow and ice.
The vehicle climbs kerbs regularly.•
The ambient temperature is very hot or very cold.•
Incorrect tyre pressures in one or more tyres.•
Lots of start/stop driving.•
Also thick pile carpets within the home can affect •
range.
Use of additional power consumption options (e.g. •
lights, actuators, etc.).
The battery sizes available on each Sunrise Medical
product should give sufficient range to cope with the
majority of customer’s requirements. However, everyone
is different. There are different sizes of batteries available
as spares. Don’t forget the scooter can also be
programmed to suit your specific needs.
Please contact your approved Sunrise Medical dealership
for further information.
10.0 Adjustments
WARNING!
Only undertake adjustments on your scooter if you •
are qualified to do so.
Serious injury or damage can occur if adjustments are •
not carried out correctly.
If you are unsure please contact your Sunrise Medical •
dealer for assistance.
10.1 SEAT HEIGHT ADJUSTMENT
Remove the battery cover to access the seat height •
adjustment bolts.
Remove the two seat stem fixing bolts (Fig 10.1)•
The seat height can be adjusted to a range of •
100mm.
Replace the two bolts in the upper and lowest hole of •
the seat stem
10.2 ELITE2 PLUS TILLER HEIGHT ADJUSTMENT
The Elite2 PLUS tiller has a standard height adjustment of
0mm – 50mm
Access to the height adjustment bolt is via the hole in the
rear of the tiller panel. (Fig 10.2 overleaf).
Place a 6.0mm allen key through the hole and into the •
head of the bolt.
Once the bolt is loosened, the tiller height can be •
adjusted.
Carefully pull the tiller up using the tiller steering •
handle.
Once at the preferred height, tighten the bolt to fix the •
steering column.
Fig.10.1
Page 42
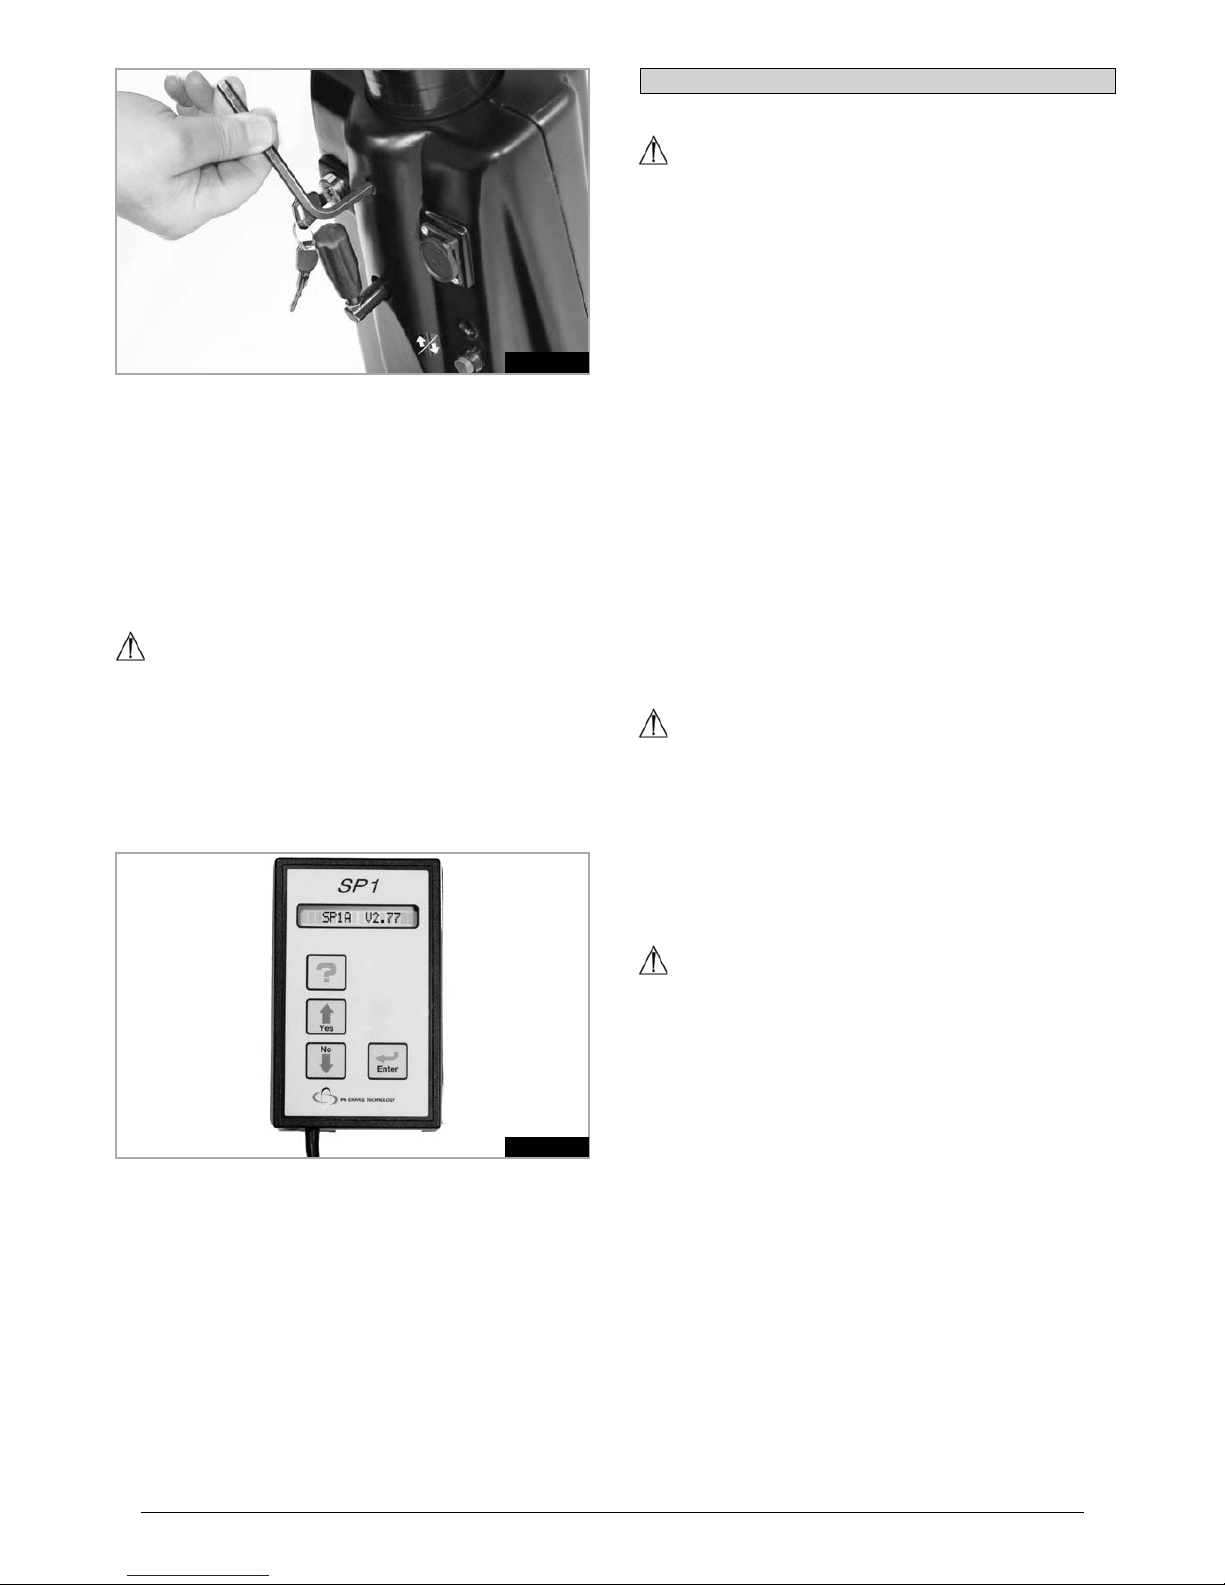
42
Sterling Elite2 XS-RS-Plus
10.3 PROGRAMMING:
When the scooter leaves the factory, it is programmed to
best suit the general needs of our customers. This is a
generic or default programme. However, if any alterations
are required, then you should contact your dealer, where
a specialist can reprogramme the scooter to fine tune it to
your needs.
NOTE: A programmer or a PC-based software program
with the appropriate connecting lead are required to
program the wheelchair, (Fig.10.3).
WARNING!
Never attempt to programme the scooter yourself.•
Programming the controller of the scooter is only •
allowed through authorised personnel trained by
Sunrise Medical.
Incorrect controller settings could cause a driving •
profile outside the safe limits and could result in
damage or injury.
Fig.10.2
Fig.10.3
11.1 CLEANING GENERAL:
WARNING!
Ensure the controller is switched off before cleaning.
The scooter should be wiped over once per week •
with a slightly damp, (not wet), cloth and any fluff or
dust that has accumulated around the motors should
be blown or dusted away.
Make sure that you dry all parts of your scooter if it •
becomes wet or damp after cleaning or if it is used in
a wet or damp atmosphere.
It is important that should the scooter be used by •
more than one person it is cleaned thoroughly to
ensure there is no cross infection.
You should use a proprietary disinfectant for this task. •
Please pay attention to the manufacturer`s
instructions of the disinfectant you are using.
Inspect the upholstery/seating for tears, dents, •
wearing or slackening of upholstery particularly near
to metal as this could result in poor posture or lower
levels of comfort and pressure relief.
11.2 CLEANING SEATING:
All parts/accessories such as crutch holders should be
cleaned with a damp cloth.
All lateral supports, headrest, armrests, lap belts should
be cleaned with a damp cloth.
CAUTION!
Do not use a hose or a pressure or steam washer to
clean your scooter.
11.3 CLEANING CONTROL SYSTEM:
Clean the control system and the keypad with a cloth
dampened with diluted detergent. Be careful not to use
excessive water or force when cleaning the control
keypad.
CAUTION
Never use abrasive or spirit based inflammable cleaners.
11.0 Cleaning
Page 43
43
Sterling Elite2 XS-RS-Plus
12.1 STORAGE TEMPERATURE & HUMIDITY:
Storage Temperature: Min: -40ºC Max: 65ºC
Relative Humidity ( non-condensing): Min:5% Max: 95%
12.2 SPECIAL SHIPPING REQUIREMENTS:
The scooter may be transported by road, rail, sea or air
and the batteries conform to IATA regulations.
CAUTION!
Before you travel, please contact the appropriate carrier.
The travel operator will be able to supply details of any
special requirements/instructions.
Ensure that any detachable parts are secured with •
your scooter or separately packed and labelled so
they do not get lost during loading and unloading.
Take this Owner’s Manual with you.•
The carrier will need to refer to the following sections.•
How to remove the seat, (Section 5.1, Page 17).•
How to disconnect the batteries, (Section 5.3, Page •
18).
How to disconnect the drive, (Section 4.7, Page 9).•
12.3 MEDIUM TO LONG TERM STORAGE:
When storing your scooter for long periods of time (in
excess of one week), follow these simple instructions:
Fully charge the wheelchair for at least 24 hours.
Disconnect the batteries
CAUTION!
Never store your scooter for medium to long periods of
time:
Outside.•
In direct sunlight, (plastic parts may discolour).•
Near a source of direct heat.•
In a damp environment.•
In a cold environment.•
With the batteries connected, (even if the controller is •
switched off).
Avoiding all of the above will minimise battery deep cycle
discharge and extend battery lifetime.
When returning the scooter to use, please reconnect the
batteries/battery boxes and charge the scooter for at
least 24 hours before using again.
12.4 WEIGHT OF DETACHABLE PARTS
PAR T WEIGHT kg
SE AT 22.8
FRONT BASKET 0.9
TOP BOX 1.9
LEG REST 1.9
AMPUTEE PAD 0.8
BATTERY BOX LID 1.1
RAISED FOOT PLATFORM 3.2
SEAT BACK EXTENSION 1.0
HEAD REST 0.7
12.0 Shipping and Storage 13.0 Disposal
The symbols below, mean that in accordance with local
laws and regulations your product should be disposed of
separately from household waste.
When this product reaches the end of its life, take it to
the local collection point designated by local authorities.
The separate collection and recycling of your product at
the time of disposal will help conserve natural resources
and ensure that it is recycled in a manner that protects
the environment.
NOTE: Ensure you are the legal owner of the product
prior to arranging for the product disposal in accordance
with the above.
14.0 Torque Settings
WARNING!
Do not attempt to dismantle and/or reassemble the •
scooter on an engineering level, or fit any
replacement parts or accessories if you are not
qualified/authorised to do so.
Always consult your approved Sunrise Medical •
servicing agent.
The torque information supplied below will enable normal
routine maintenance tasks to be performed, (please also
see section 18).
GENERAL TORQUE SETTINGS
DESCRIPTION TORQUE VALUE
M3 POZI PAN 2-3 Nm
M4 POZI PAN 3-4 Nm
M5 SKT HD CAP 4-5 Nm
M5 POZI PAN 4-5 Nm
M6 HEX HD 9-10 Nm
M6 BUTT HD 9-10 Nm
M6 SKT HD CAP 9-10 Nm
M8 HEX HD 15-20 Nm
M8 SKT HD CAP 15-20 Nm
M8 SKT BUTT HD 15-20 Nm
M10 HEX HD 20-25 Nm
M10 SKT BTT HD 20-25 Nm
SPECIFIC TORQUE SETTINGS
Front Wheel Axle Bolt 32-Nm
Rear Wheel Hub Studs 25Nm
Seat Stem Height Bolts 20 Nm
Page 44
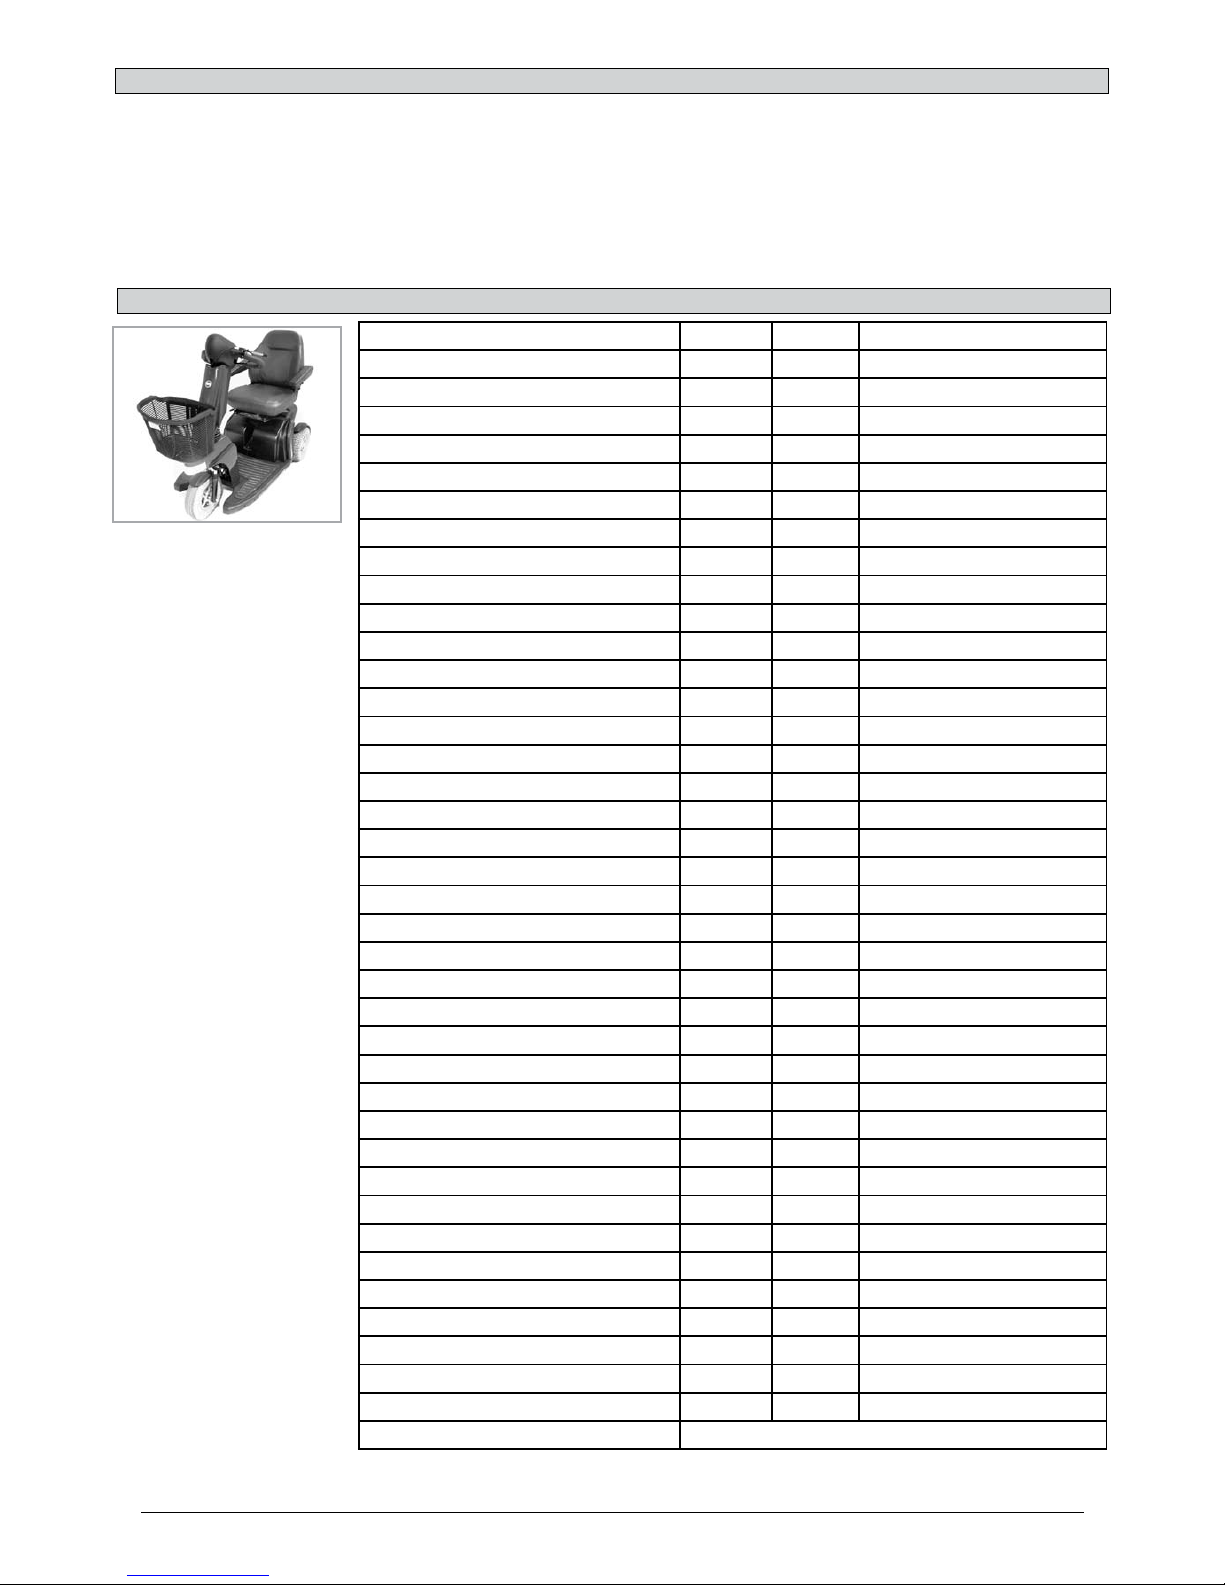
44
Sterling Elite2 XS-RS-Plus
15.0 Specification Sheets (EN 12184 & ISO 7176-15)
Sunrise Medical Logistics BV Operating temp: -25degC to 50DegC
Groningenhaven 18-20, 3433 Storage temp: -40degC to 65degC
PE ,Nieuwegein, Netherlands Moisture resistance: IPX4
T: +31 (0)30 - 60 82 182 Customer Service No restrictions on humidity and air pressure
F: +31 (0)30 - 60 55 880
www.sunrisemedical.com
MODEL: STERLING ELITE2 XS, RS
Maximum occupant
mass: 175 kg
The Sterling Elite2 XS, RS
conforms to the following
standards:
a) requirements and test
methods for static, impact
and fatigue strengths (ISO
7176-8)
b) power and control
systems for electric
wheelchairs requirements
and test methods (ISO
7176-14)
c) climatic test in accordance with ISO 7176-9
d) requirements for resistance to ignition in accordance with ISO 7176-16
e) the product is specified
as a Class C power product
f) all materials used on this
product conform to EN1021
parts 1 and 2
NOTE: Measurments of
upholstered parts are
approximate. All other
measurments may be
subject to change
ISO 7176-15 MIN. MAX. COMMENTS
Overall length 1390mm 1390mm standard configuration
Overall width 670mm 670mm standard configuration
Total mass (with batteries) 132kg 132kg standard configuration
Mass of the heaviest part - 23kg 72 Ah Battery
Static stability downhill - 15° 175kg User
Static stability uphill - 15° 175kg User
Static stability sideways - 15° 175kg User
Energy consumption (max. range) - 44km To ISO 7176-15
Dynamic stability uphill - 10°-18% 175kg User
Obstacle climbing - 100mm standard configuration
Ramp transition 8° 8° without high centring
Max. speed forward 15kph standard configuration
Min. brake distance from max. speed - 4.5m with standard programming
Max. speed reverse - 50% % of forwards speed
Effective seat depth 460mm standard configuration
Effective seat width 475mm standard configuration
Seat surface height 440mm 540mm to scooter floor
Back rest angle -45° +45° from vertical
Back rest height 510mm standard configuration
Fore / aft seat adjustment -80mm +80mm from centre position
Seat weight with slide 22kg standard configuration
Top of arm rest to seat 80mm arm rest set at 90°
Min. turning radius 1400mm standard configuration
Min. turn between walls 1850mm standard configuration
Nominal battery voltage 24V 24V two 12V batteries
Reversing width 1600mm -----------
Controller cut-off voltage 16V drive stops
Battery capacity 60Ah 72Ah see options
Battery fusible links - 150A In-line fuse on each battery
Battery charger loom fusible link - 15A
Battery charger 8A 10A automatic cyclic
Max. kerb height 100mm
Ground clearance 110mm
Rear suspension travel 50mm Unladen
Front suspension travel 25mm Unladen
Rear wheel drive - - 3 wheel scooter
Scooter push force 100N in freewheel
Crash tested YES Test to 7176-19
Tyre Pressure 1.8-2.0 bar, (25-28 P.S.I.)
Page 45
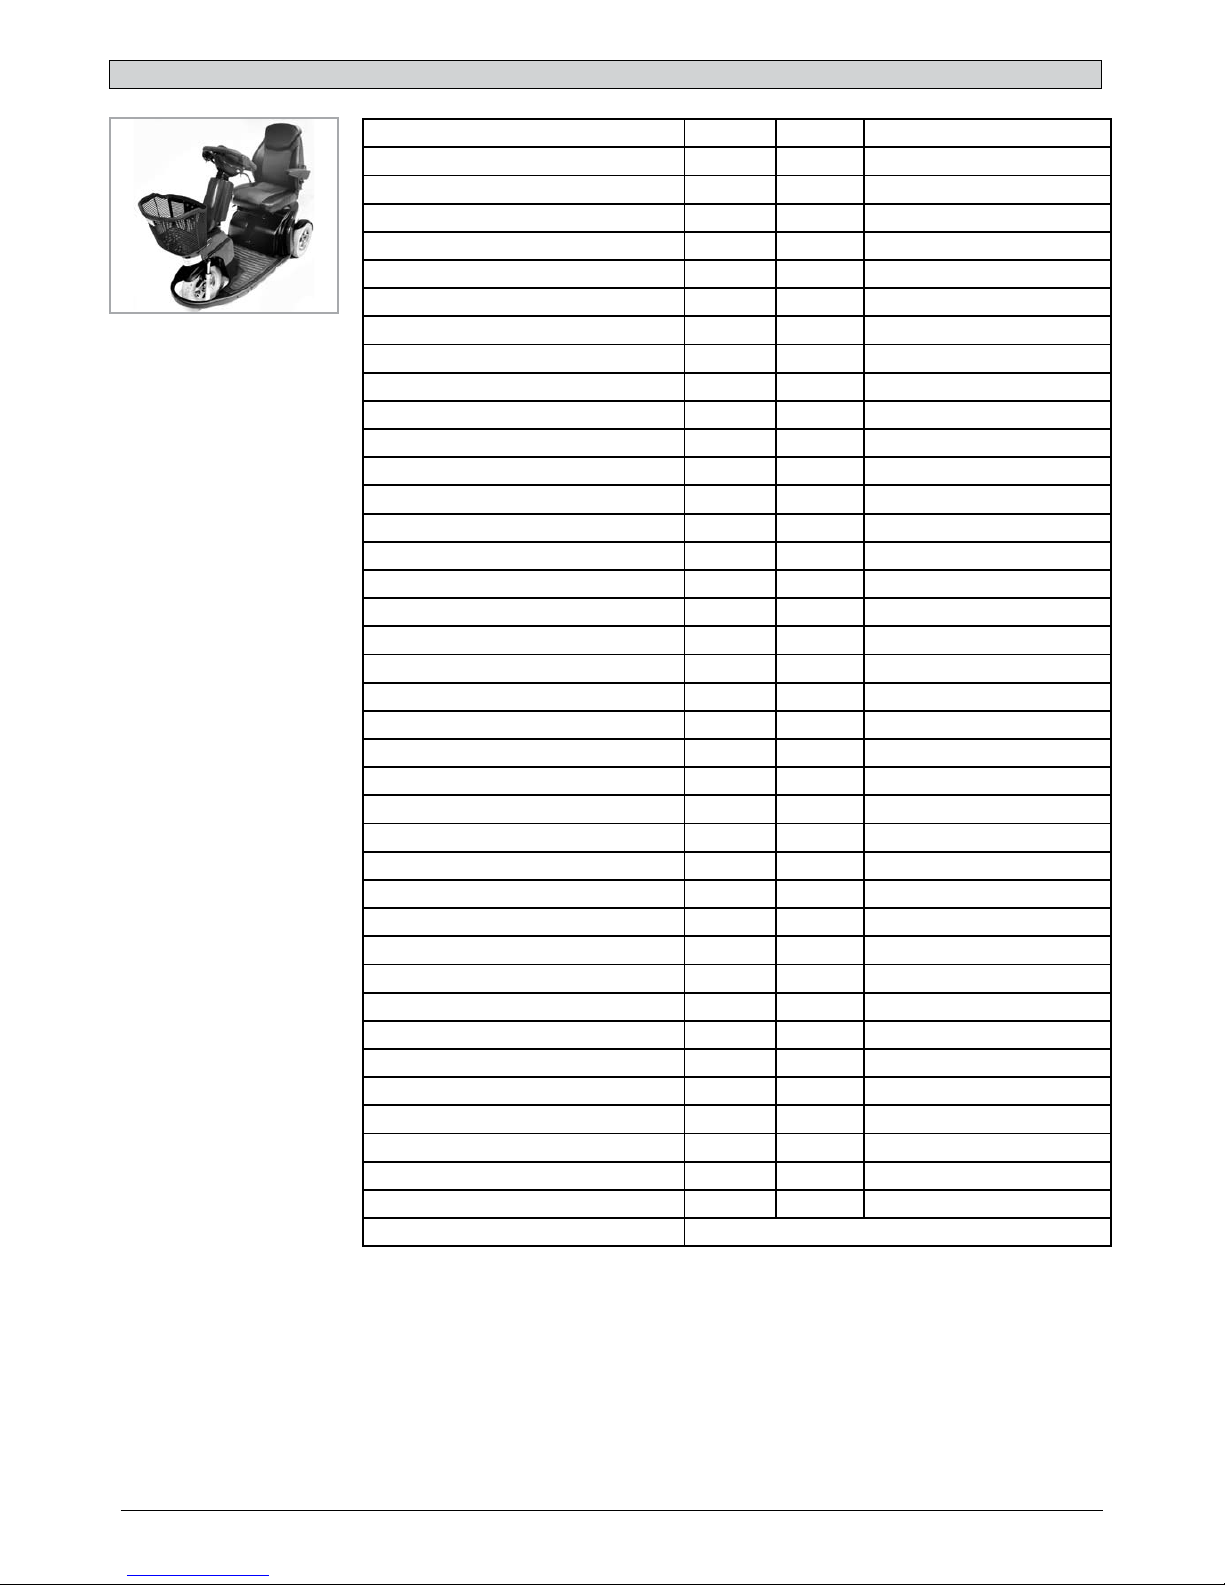
45
Sterling Elite2 XS-RS-Plus
MODEL: STERLING ELITE2 PLUS
Maximum occupant
mass: 175 kg
The Sterling Elite2 PLUS
conforms to the following
standards:
a) requirements and test
methods for static, impact
and fatigue strengths (ISO
7176-8)
b) power and control
systems for electric
wheelchairs requirements
and test methods (ISO
7176-14)
c) climatic test in accordance with ISO 7176-9
d) requirements for resistance to ignition in accordance with ISO 7176-16
e) the product is specified
as a Class C power product
f) all materials used on this
product conform to EN1021
parts 1 and 2.
NOTE: Measurments of
upholstered parts are
approximate. All other
measurments may be
subject to change
ISO 7176-15 MIN. MAX. COMMENTS
Overall length 1390mm 1390mm standard configuration
Overall width 650mm 650mm standard configuration
Total mass (with batteries) 140kg 140kg standard configuration
Mass of the heaviest part - 23kg 72 Ah Battery
Static stability downhill - 15° 175kg User
Static stability uphill - 15° 175kg User
Static stability sideways - 15° 175kg User
Energy consumption (max. range) - 44km To ISO 7176-15
Dynamic stability uphill - 10°-18% 175kg User
Obstacle climbing - 100mm standard configuration
Ramp transition 8° 8° without high centring
Max. speed forward 15kph standard configuration
Min. brake distance from max. speed - 4.5m with standard programming
Max. speed reverse - 50% % of forwards speed
Effective seat depth 460mm standard configuration
Effective seat width 475mm standard configuration
Seat surface height 440mm 540mm to scooter floor
Back rest angle -45° +45° from vertical
Back rest height 510mm standard configuration
Fore / aft seat adjustment -80mm +80mm from centre position
Seat weight with slide 22kg standard configuration
Top of arm rest to seat 80mm arm rest set at 90°
Min. turning radius 1400mm standard configuration
Min. turn between walls 1850mm standard configuration
Reversing width 1600mm -----------
Nominal battery voltage 24V 24V two 12V batteries
Controller cut-off voltage 16V drive stops
Battery capacity 60Ah 72Ah see options
Battery fusible links - 150A In-line fuse on each battery
Battery charger loom fusible link - 15A
Battery charger 8A 10A automatic cyclic
Max. kerb height 100mm
Ground clearance 135mm
Rear suspension travel 85mm Unladen
Front suspension travel 50mm Unladen
Rear wheel drive - - 3 wheel scooter
Scooter push force 100N in freewheel
Crash tested YES Test to 7176-19
Tyre Pressure 2.4-2.5 bar (33-35 P.S.I.)
Page 46

46
Sterling Elite2 XS-RS-Plus
SUNRISE MEDICAL guarantees this product for two
years as from the date indicated on the invoice, receipt or
delivery note. For products containing batteries, the
battery warranty is 6 months. This warranty covers parts
in need of replacement, labour and transport.
In warranty claims the user must submit the product and
the purchase invoice as proof of delivery date.
This warranty does not cover:
NORMAL WEAR AND TEAR, e.g. on upholstery, tyres,
inner tubes, rims, wheels, fabric, etc.
ACCIDENTS, e.g. bent structures, scratches, flat tyres,
etc.
IMPROPER USE and damage caused by users who
weigh more than the weight limit indicated in the user’s
manual.
LACK OF MAINTENANCE and failure to follow the
conservation instructions in the user’s manual.
MODIFICATIONS or REPAIRS carried out by persons not
authorised by Sunrise Medical.
PRODUCTS WITH NO INVOICE OR SERIAL NUMBER
(when appropriate).
Life Expectancy
We estimate a life expectancy of 5 years for this product,
provided that:
It is used in strict accordance with the intended use as
set out in this document.
All service and maintenance requirements are met.
The estimated life expectancy can be exceeded if the
product is carefully used and properly maintained.
The life expectancy can also be considerably reduced by
extreme or incorrect usage.
The fact that we estimate a life expectancy for this
product does not constitute an additional warranty.
Servicing Agents Only:
Any parts required should be obtained from Sunrise
Medical approved servicing agent only, either through our
web site or by direct contact with our Customer Service
or Service department.
Do not used unauthorized parts or carry out unauthorised
modifications.
This section is designed to assist you in keeping a record
of any service and repairs to your scooter. The service
Agent will complete this section and return the manual to
you.
NOTE: Please contact your local Sunrise medical
approved servicing agent for any warranty, service or
repair work required.
Model
Serial Number
Year
1 2 3 4
Service dates
Controller
On/Off switch
Output plug
Operation
Dynamic braking
Programmable conguration
Batteries
Physical Damage
Connections
Discharge tests
Wheels/Tyres
Wear
Pressure
Bearings
Whel nuts
Motors
Wiring
Noises
Connections
Brakes
Brushes
Freewheel Device
Chassis
Condition
Steering
Upholstery
Seat
Back
Armrests
Electric's
Condition of loom
Connections
Lights & Indicators
Test run
Forward
Reverse
Emergency stop
Left run
Right run
Up/Down slope
Over obstacle
Parking brake
DEALER STAMP
16.0 Guarantee 17.0 Service Advice/History
Page 47
47
Sterling Elite2 XS-RS-Plus
After performing any maintenance or repairs on the
scooter you must make sure that it is functioning correctly
before it is used.
Visually inspect the scooter to make sure its parts are •
correctly positioned and attached to the scooter and
all fasteners are sufficiently tightened.
Make sure that the seat is correctly fitted and •
adjusted.
Switch on the scooter – Does the battery gauge flash •
with the ! symbol or error show on the LCD? This
signifies that there is a fault in the electronic system.
Refer to section 8.0 for basic troubleshooting.•
Perform the parking brake check.•
Operate all of the electric options, including lights and •
indicators to make sure that they work correctly.
Drive the scooter to make sure the scooter performs •
as it did before.
WARNING!
If you are in any doubt about the performance •
requirements of your scooter contact your Sunrise
Medical authorised dealer.
Only carry out the maintenance tasks listed below •
together with any general cleaning.
Do not attempt any task you are not sure of.•
18.1 RE-USE
Due to its construction, high level of flexibility and the
modular construction system make the Elite2 ideal for
re-use. Individual accessories and options can be fitted
and removed very quickly and are a range of possibilities
so that individual adjustments can be made to suit the
end user.
Maintenance and Inspection Schedule
Daily
Weekly
Quarterly
Six month
Annually
Check battery level indicator and charge if necessary.
¯
Check the control levers on the tiller are not bent or damaged.
¯
Ensure all removable parts are securely fastened.
¯
Check lap strap for wear and make sure the buckle is operational.
¯
Check the Parking brake clicks on and off.
¯
Check tyres and inflate if required.
¯
Ensure any visible nuts and bolts are tight.
¯
Ensure all cables and connectors are sound and are tidy and out of the way.
¯
Clean the scooter and upholstery regularly.
¯
Battery terminal inspection – Remove any corrosion and apply Vaseline.
¯
Check upholstery, seating, headrests, arm pads for wear.
¯
Complete inspection, safety check and service should be made by a Sunrise
Medical authorised dealer.
¯
18.0 Service and Maintenance
Page 48
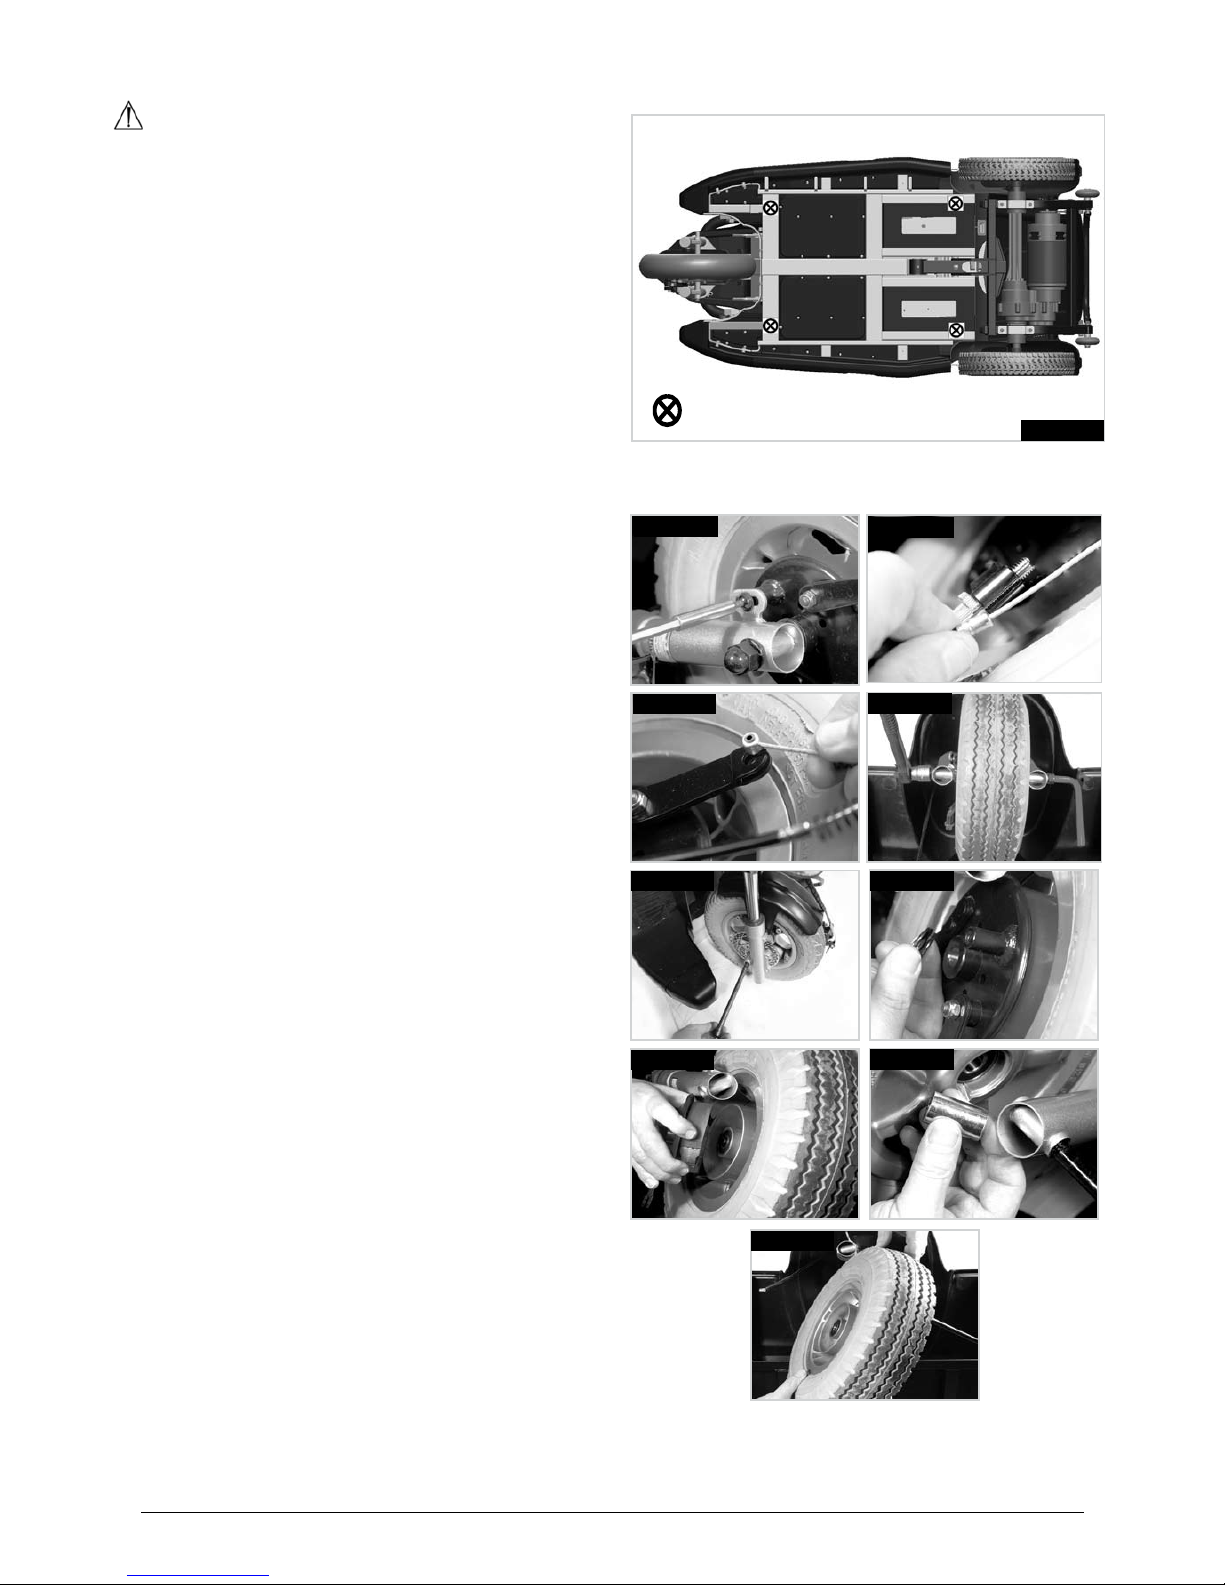
48
Sterling Elite2 XS-RS-Plus
18.2 WHEEL REMOVAL
WARNING!
It is not usually practical to try to repair a puncture in •
situ at the site of the occurrence. Sunrise Medical
suggest that you call for help to remove the scooter
either directly to an approved service agent, or to a
safe place for collection by the approved agent at a
later time.
If you are in any doubt about the servicing •
requirements of your scooter contact your Sunrise
Medical authorised dealer.
Do not attempt any task you are not sure of.•
Do not attempt a puncture repair if the scooter has •
stopped in an unsafe area. Move the scooter to a
safe area away from traffic and other hazards.
Do not attempt a puncture repair in busy pedestrian •
areas.
Do not attempt a puncture repair if the scooter is •
causing an obstruction.
If you are using a jack or other equipment, always •
follow the user instructions given in the related
Owners’ Manual or User Instructions.
Be aware that the scooter may fall off the jack at any •
time.
Keep hands and feet clear of the scooter when it is •
on the jack.
Do not stand the jack on uneven surfaces.•
Always use a support block or stand in conjunction •
with the jack.
The scooter must be in drive mode with the power •
switched OFF and the keys removed, before jacking
any wheel off the ground.
Do not raise more than one wheel of the ground at •
any one time.
NOTE: Reverse the following procedures to refit the
wheels unless otherwise stated.
18.2.1 ELITE2 XS RS 3-Wheel Front Wheel Removal
Elevate the front wheel by placing a jack under the •
relevant jack points, (Fig.18.1).
When elevated back up the jack with solid blocks to •
increase stability, (Fig18.11).
Use a 4.0mm Allen Key to remove the brake anchor •
stud, (Fig.18.2).
Remove the brake cable from the outer sleeve by •
turning the knurled wheel until the slots align,
(Fig.18.3).
Lift the brake nipple out of the brake actuator arm, •
(Fig.18.4).
Use a 19.0mm Socket and 10.0mm Allen key to undo •
the nut, (Fig.18.5).
Start to withdraw the axle stud slowly, (Fig.18.6).•
First the washers will drop out, (Fig.18.7).•
Next lift the Brake assembly away from the hub, •
(Fig.18.8).
The spacer falls away, (Fig.18.9).•
Remove the front wheel assembly, (Fig.18.10).•
= JACK POINTS
Fig.18.1
Fig.18.2
Fig.18.3
Fig.18.4
Fig.18.5
Fig.18.6
Fig.18.7
Fig.18.8
Fig.18.9
Fig.18.10
Page 49
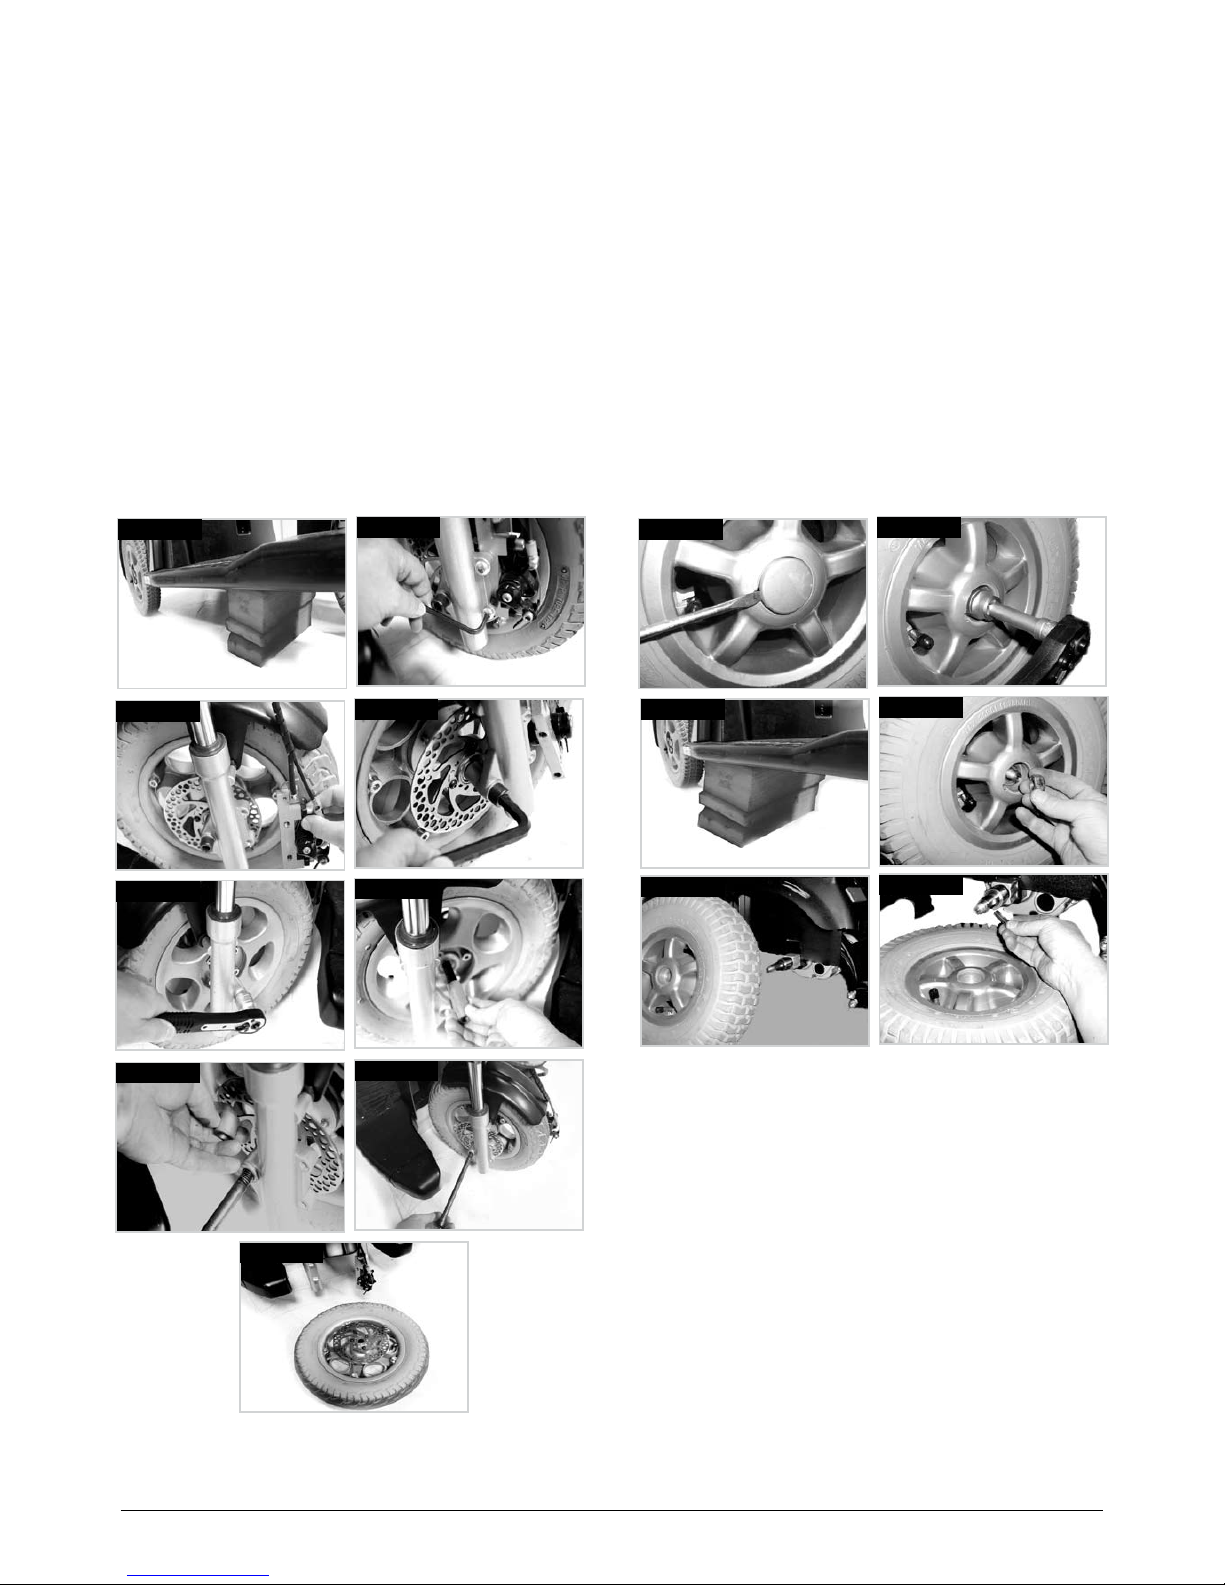
49
Sterling Elite2 XS-RS-Plus
18.2.2 Elite2 Plus 3-Wheel Front Wheel Removal
Elevate the front wheel by placing a jack under the •
relevant jack points, (Fig.18.1).
When elevated back up the jack with solid blocks to •
increase stability, (Fig18.11).
Use a 5.0mm Allen Key to remove the two disc brake •
anchor studs, (Fig.18.12).
Gently lift the the disk brake calliper off, (Fig.18.13).•
Use a 10.0mm Allen key, (Fig18.14), and a 19.0mm •
socket, (Fig18.15), to remove the axle nut.
Slowly pull the axle stud back through the front forks, •
NOTE: you may have to gently tap the axle stud to
free it.
Remove the large spacer, (Fig.18.16).•
Remove the small spacer, (Fig.18.17).•
Withdraw the axle stud, (Fig.18.18).•
Gently lift the front wheel out, (Fig.18.19).•
Fig.18.12
Fig.18.11
Fig.18.14
Fig.18.13
Fig.18.16
Fig.18.15
Fig.18.18
Fig.18.17
Fig.18.19
Fig.18.21
Fig.18.20
Fig.18.23
Fig.18.22
Fig.18.25
Fig.18.24
18.2.3 Elite2 XS RS Rear Wheel Removal
Use a flat bladed screw driver to carefully lever off •
the hub cover, (Fig.18.20).
With the wheel still on the ground: use a 19.0mm •
socket to loosen the hub nut, but do not release the
nut more than two turns, (Fig.18.21).
Elevate the rear wheel by placing a jack under the •
relevant jack points, then secure with
blocks,(Fig.18.22).
Use the socket wrench to finish releasing the nut.•
Remove the nut and washer, (fig.18.23).•
Carefully remove the wheel, (Fig.18.24).•
Remove the drive key from the drive shaft and keep it •
in a safe place, (Fig.18.25).
Page 50
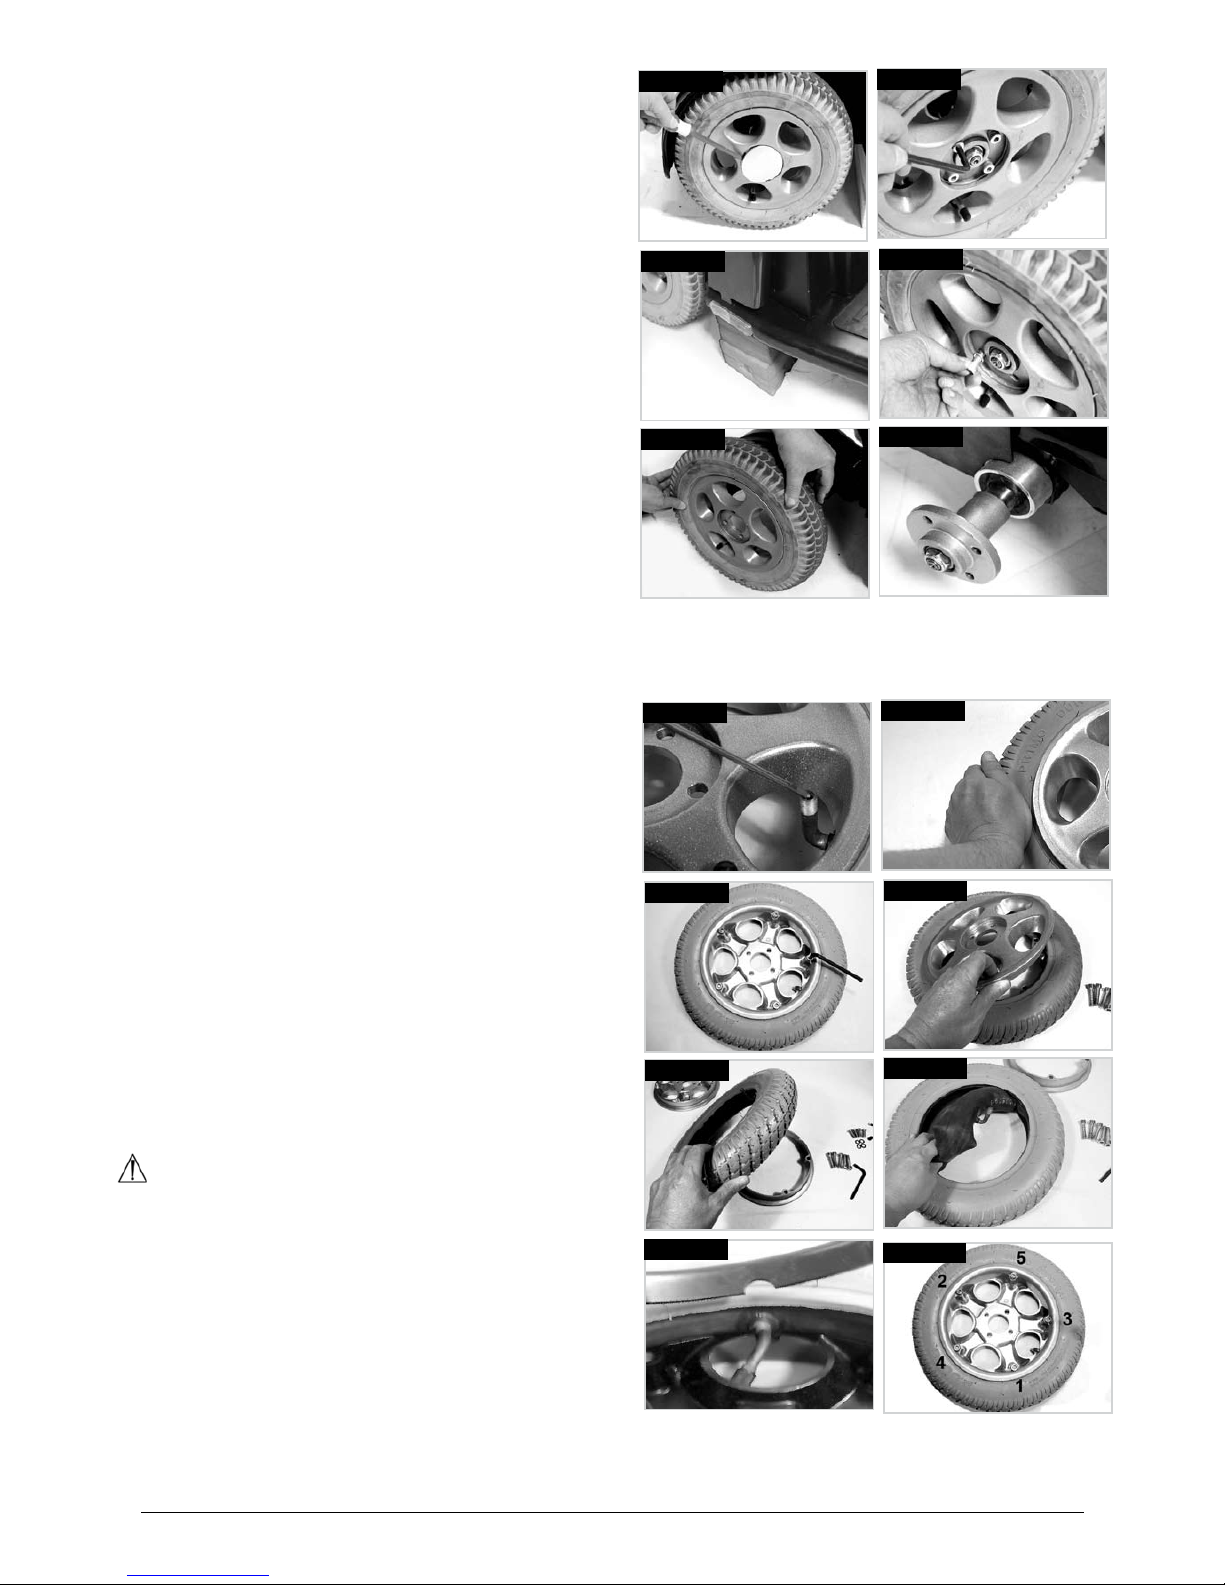
50
Sterling Elite2 XS-RS-Plus
18.2.3 Elite2 Plus Rear Wheel Removal
Use a flat bladed screw driver to carefully lever off •
the hub cover, (Fig.18.26).
With the wheel still on the ground: use a 6.0mm Allen •
key to loosen the 4 rim studs, but do not release the
studs more than two turns, (Fig.18.27).
Elevate the rear wheel by placing a jack under the •
relevant jack points, then secure with
blocks,(Fig.18.28).
Use the Allen key to finish releasing the studs.•
Remove the studs and washers, (Fig.18.29).•
Carefully remove the wheel, (Fig.18.30).•
Do not remove the drive hub from the drive shaft, •
(Fig.18.31).
Fig.18.27
Fig.18.26
Fig.18.29
Fig.18.28
Fig.18.31
Fig.18.30
Fig.18.33
Fig.18.32
Fig.18.35
Fig.18.34
Fig.18.37
Fig.18.36
Fig.18.38
Fig.18.39
18.3 CHANGING THE INNER TUBE (ALL)
Ensure any remaining air is expelled by pressing the•
valve with a small screwdriver and squeezing the
tyre, (Fig.18.32 - 18.33).
Use a 6.0mm Allen key to undo the FIVE rim studs,•
(Fig18.34).
Lift the outer rim off, (Fig.18.35).•
Lift the tyre of the inner rim, (Fig.18.36).•
Gently get hold of the inner tube just behind the •
valve.
Carefully feed the tube out of the tyre, (Fig.18.37).•
NOTE: Solid tyres are chemically bonded to the wheel
rims. These must be changed as a complete assembly.
To refit:
Place the tube inside the tyre and rest it on the outer •
rim.
Align the valve stem with the cut out on the rim, •
(Fig.18.38).
Face the valve stem outward, (Fig.18.38).•
Place the inner rim over the tyre, tube and outer rim.•
Align the cut out to fit over the valve stem and match •
it up to the cut out in the outer rim, (Fig.18.38).
Make sure the stud mounts are in line on both rims.•
Tighten the studs evenly in the sequence shown, •
going around once to close the rims and then again
to tighten fully taking, care not to pinch the tube,
(Fig.18.39).
Slowly inflate to the appropriate pressure. •
WARNING!
Do not use high pressure air delivery systems such •
as those found on garage forecourts, to inflate the
scooter tyres.
Always use a new inner tube.•
Page 51
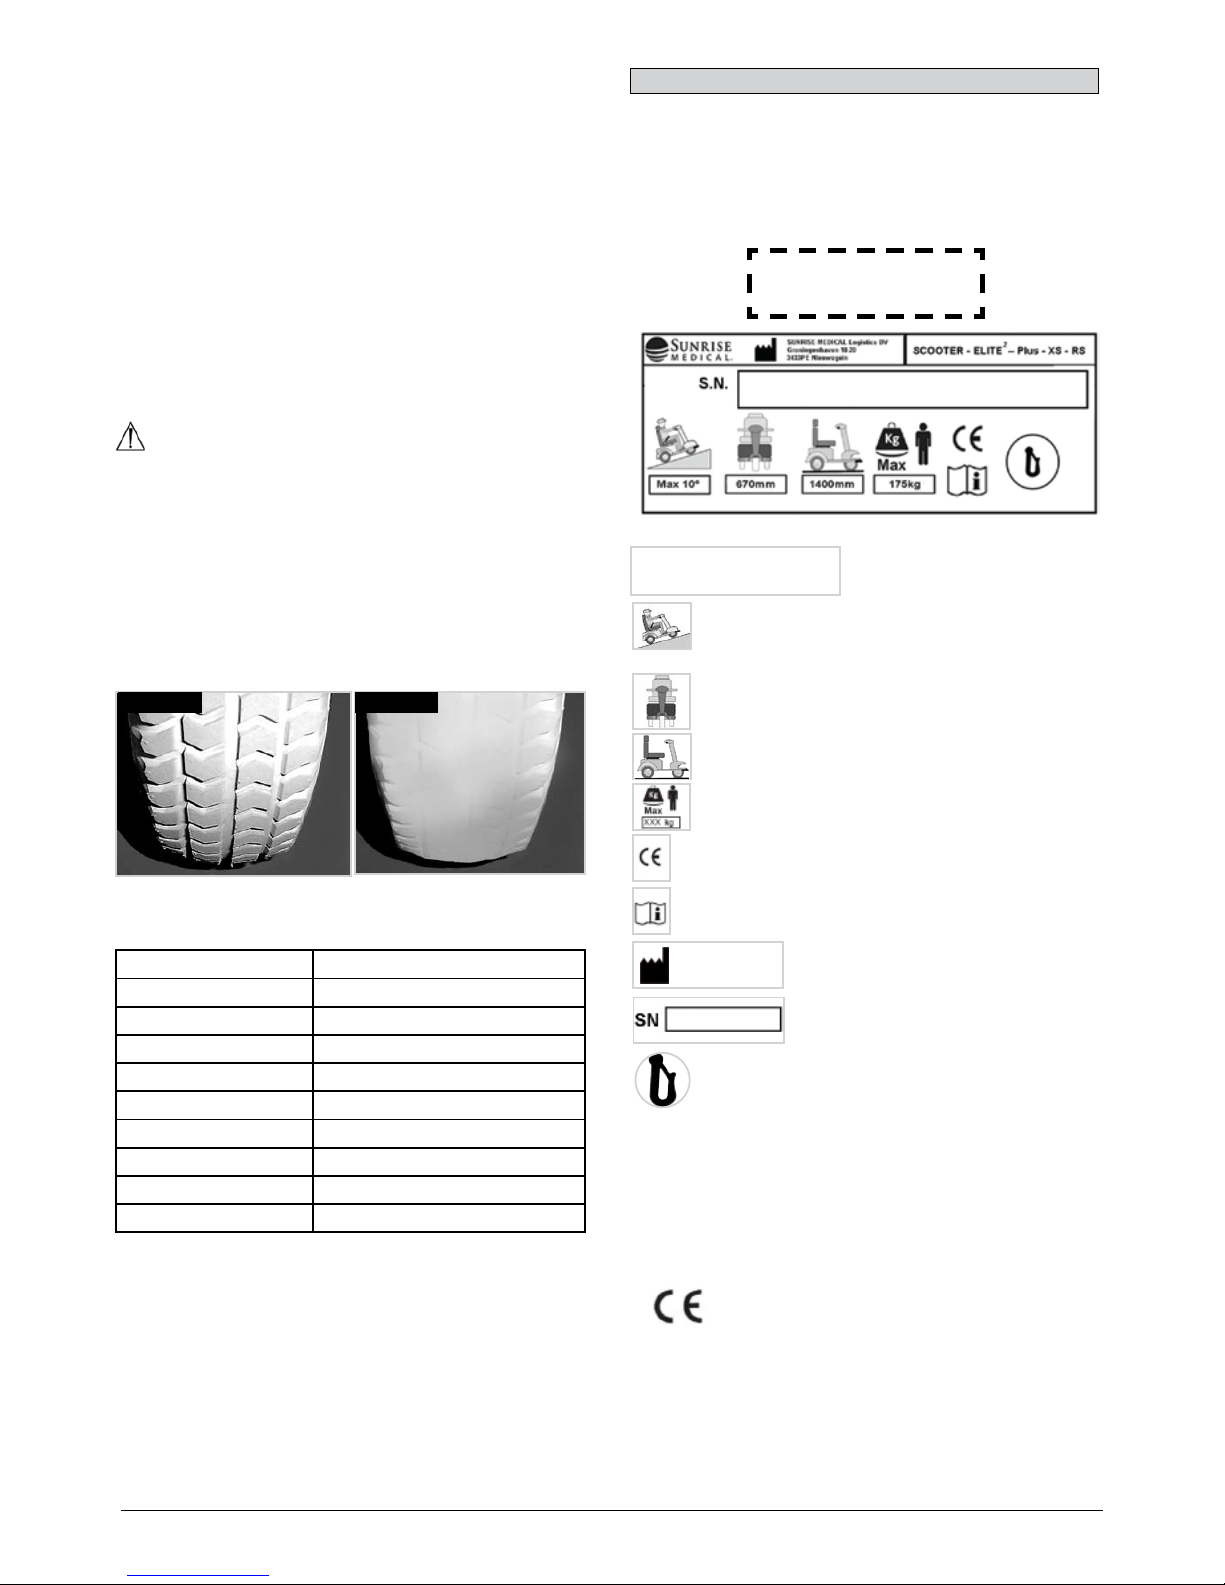
51
Sterling Elite2 XS-RS-Plus
19.0 Name Plate
The nameplate is located on the seat post of the scooter,
as well as on a label in the owner’s manual. The
nameplate indicates the exact model designation and
other technical specifications. Please provide the
following pieces of information whenever you have to
order replacement parts or to file a claim:
Due to our policy of continuous improvement in the
design of our wheelchairs, product specifications may
vary slightly from the examples illustrated. All weight/
dimensions and performance data are approximate and
provided solely for guidance.
Sunrise Medical complies with the EU Medical Devices
Directive 93/42/EEC
All wheelchairs must be used in accordance with the
manufacturer’s guidelines.
Sunrise Medical B.V.
Groningenhaven 18-20
3433 PE NIEUWEGEIN
The Netherlands
T: +32 (0)800 – 24 800
F: +32 (0)3 – 844 68 03
E: [email protected]
www.SunriseMedical.be
Product Name.
Maximum safe slope with anti-tips fitted,
Depends on scooter seat setting and options
fitted to the scooter.
Scooter width.
Scooter Length
Load Maximum.
CE Mark
User's Guide.
Manufacturer Address.
Serial number.
Crash Tested
SAMPLE
SCOOTER - ELITE
2
18.4 CHECKING THE TYRES
Check the tyres at least once a week for signs of wear
and damage.
Check for:
Excessive wear on the tyre tread.•
Uneven wear over the surface of the tyre.•
Cuts or holes in the tyre tread.•
Cuts or holes in the tyre walls.•
Sharp objects stuck in the tyre. •
Tyre pressures.•
Tyre studs/nuts are tight.•
Damage to wheel rims.•
Foreign materials/contaminants.•
(Fig.18.40-18.41)
WARNING!
Put the scooter in drive, switch the scooter off and •
remove the key before carrying out the checks.
Never use the scooter if the tyres are found to be •
defective after carrying out the above checks.
Wear protective gloves if you have to physically touch •
the tyres or undercarriage and afterwards wash you
hands thoroughly.
Fig.18.40 Fig.18.41
18.5 WHEEL SIZES
ELITE2 PLUS
356mm (14”) Front V Groove Grey Pnuematic
356mm (14”) Rear Knobby Grey Pnuematic
356mm (14”) Front V Groove Grey Solid
356mm (14”) Rear Knobby Grey Solid
ELITE
2
XS-RS
310mm (12”) Front Flat profile Pneumatic
310mm (12”) Rear Knobby Grey Pneumatic
310mm (12”) Front Flat profile Solid
310mm (12”) Rear Knobby Grey Solid
Page 52

Ref: P19093
OM_Elite2_RS-SX-Plus_EU_EN_
Rev.2.0_15_01_2013
Sunrise Medical GmbH & Co.KG
Kahlbachring 2-4
69254 Malsch/Heidelberg
Germany
Tel.: +49 (0) 7253/980-400
Fax: +49 (0) 7253/980-111
www.SunriseMedical.de
Sunrise Medical
Thorns Road
Brierley Hill
West Midlands
DY5 2LD
Phone: 0845 605 66 88
Fax: 0845 605 66 89
www.SunriseMedical.com
Sunrise Medical S.L.
Polígono Bakiola, 41
48498 Arrankudiaga – Vizcaya
España
Tel.: +34 (0) 902142434
Fax: +34 (0) 946481575
www.SunriseMedical.es
ZAC de la Vrillonnerie
17 Rue Michael Faraday
37170 Chambray-Lès-Tours
France
Tel : 02 47 55 44 00
Fax : 02 47 55 44 03
www.SunriseMedical.fr
Sunrise Medical Srl
Via Riva 20, Montale
29100 Piacenza (PC)
Italy
Tel.: +39 0523-573111
Fax: +39 0523-570060
www.SunriseMedical.com
Sunrise Medical A.G.
Lückhalde 14
3074 Muri bei Bern
Switzerland
Tel.: +41 (0) 31-958-3838
Fax: +41 (0) 31-958-3848
www.SunriseMedical.ch
Sunrise Medical AS
Dynamitveien 14B
1400 SKI
Norway
Tel.: +47 (0) 66963800
Fax: +47 (0) 66963838
www.SunriseMedical.no
Sunrise Medical AB
Box 9232
400 95 Göteborg
Sweden
Tel: +46 (0)31 748 37 00
Fax: +46 (0)31 748 37 37
www.SunriseMedical.sv
Sunrise Medical B.V.
Groningenhaven 18-20
3433 PE NIEUWEGEIN
The Netherlands
T: +31 (0)30 – 60 82 100
F: +31 (0)30 – 60 55 880
E: [email protected]
www.SunriseMedical.nl
G2 A/S
Graham Bells Vej 21-23 A
8200 Arhus N
Denmark
Tel.: +45 87 41 31 00
Fax: +45 87 41 31 31
www.G2.dk
Sunrise Medical Pty. Ltd.
6 Healey Circuit, Huntingwood,
NSW 2148,
Australia
Phone: 9678 6600,
Orders Fax: 9678 6655,
Admin Fax: 9831 2244.
Australia
www.SunriseMedical.com
 Loading...