

Stentofon IP Master Series, IP Flush Master, IP OR Master, IP Desktop Master, IP Dual Display Getting Started
Page 1
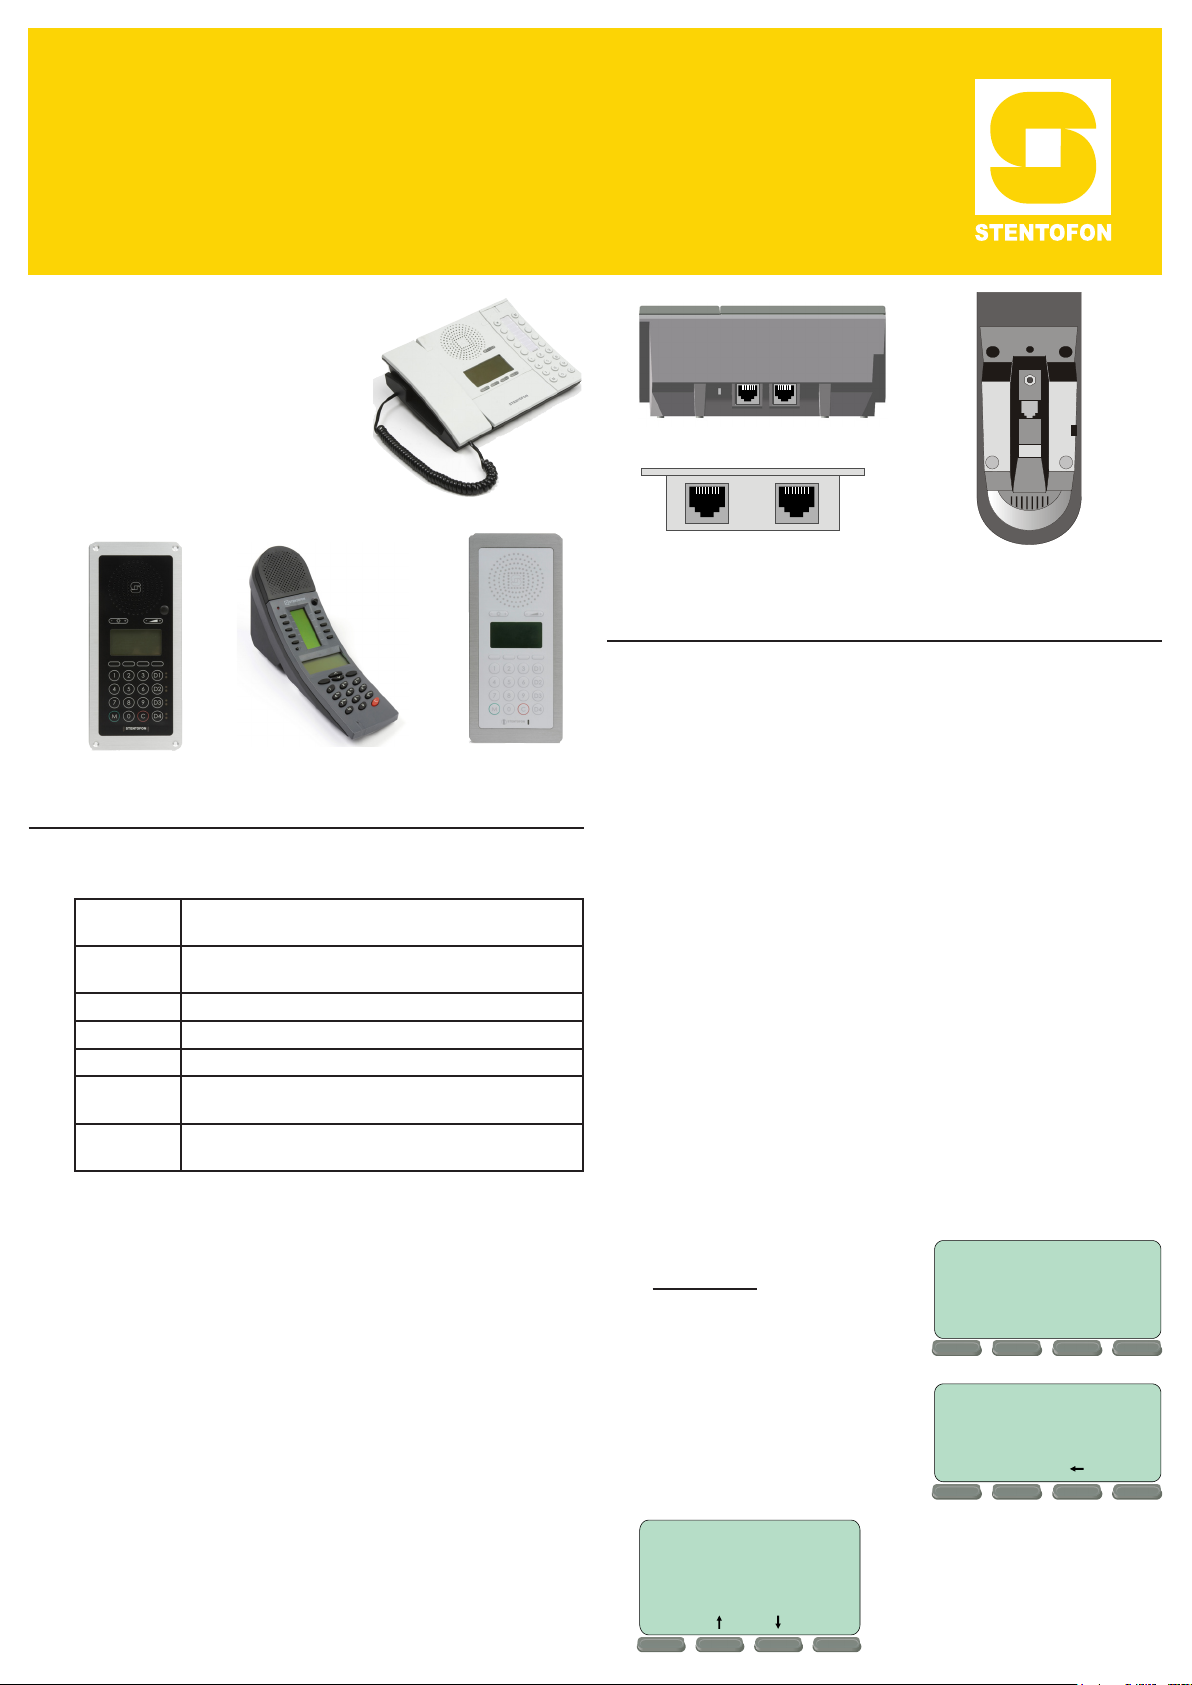
IP Master Stations
RJ45
- Main menu Station info --
>
IP settings --
>
AlphaCom Settings --
>
Load defaults --
>
Restart --
>
Sel
Back
Getting Started
The information in this document
pertains to the following
STENTOFON IP Master
Stations:
- IP Desktop Master Station
- IP Flush Master Station
- IP OR Master Station
- IP Dual Display Station
AUX
LAN
RJ45 Ports on Desktop Master
1 Installation
The table below is an overview of the main connectors
involved when installing the IP Master Stations.
LAN 10/100 Mbps RJ45 port for LAN (uplink) connection. Supports
AUX 10/100 Mbps RJ45 ports for auxiliary equipment such as PC and
Handset Port RJ11 (only for IP Flush Master Station and IP Master Kit)
Headset Port RJ11 (only for IP Flush Master Station and IP Master Kit)
Input/Output Pluggable screw terminal (all stations except IP Desktop Station)
Extension Unit
(IP DAK-48)
Local Power Pluggable screw terminal, 17-27 VDC Idle 4W, max. 8W (all
1.1 Power Supply
The IP Master Station supports Power over Ethernet
(PoE, IEEE 802.3 a-f) where power can be drawn from
either the spare line or signal line. If PoE is not available,
the IP Master Station (except for IP Desktop) can be
connected to a local power. A 24 VDC power supply
should be used.
1.2 Network Connection
There are two RJ45 ports on the IP Master stations:
● LAN port is for connecting to the network and the
AlphaCom server/exchange.
● AUX port is for connecting to auxiliary equipment
such as a PC.
There is one RJ45 port located at the bottom of the IP
Dual Display station that is used as the LAN port.
PoE (802.3af). Draws power from either spare line or signal line.
IP camera.
RJ45 (only for IP Flush Master Station and IP Master Kit)
stations except IP Desktop Station)
LAN
RJ45 Ports on Flush/OR Master RJ45 Port on Dual Display
AUX
2 Conguration
There are two ways of conguring the IP Master Station:
● Using the station keypad
● Using a web browser
For station conguration, there are essentially three
parameters to set:
● AlphaCom IP address
● Station directory number
● Station IP address
2.1 Conguration Via Station Keypad
When the IP Master Station is not connected to the
AlphaCom server/exchange, an ofine menu is displayed.
The ofine menu can be used to congure the station
and is navigated with the 4 buttons below the display.
The button on the left is used as a Select or Ok button
as shown in the display, while the button on the right is
used as a Back button. The two buttons in the middle
are used to navigate up or down according to the arrows.
When conguring IP settings, the M-key is used to insert
a “.” (dot) and the right-middle button is used to delete
a character.
State:
Main menu
To enter the setup menu:
1. Press the Setup button
on the left
2. Enter the password 1851
3. Press the Ok button
A menu with ve options will
be displayed. Use the two
arrow buttons in the middle
to navigate through the menu
options. Press the Sel button
No AlphaCom conn.
Setup
- Enter password
1851
Ok
Esc
Page 2
on the left to select the menu option and the Ok button to
Back
Back
Sel
conrm data entered. When entering data, the left-arrow
is used for deleting characters.
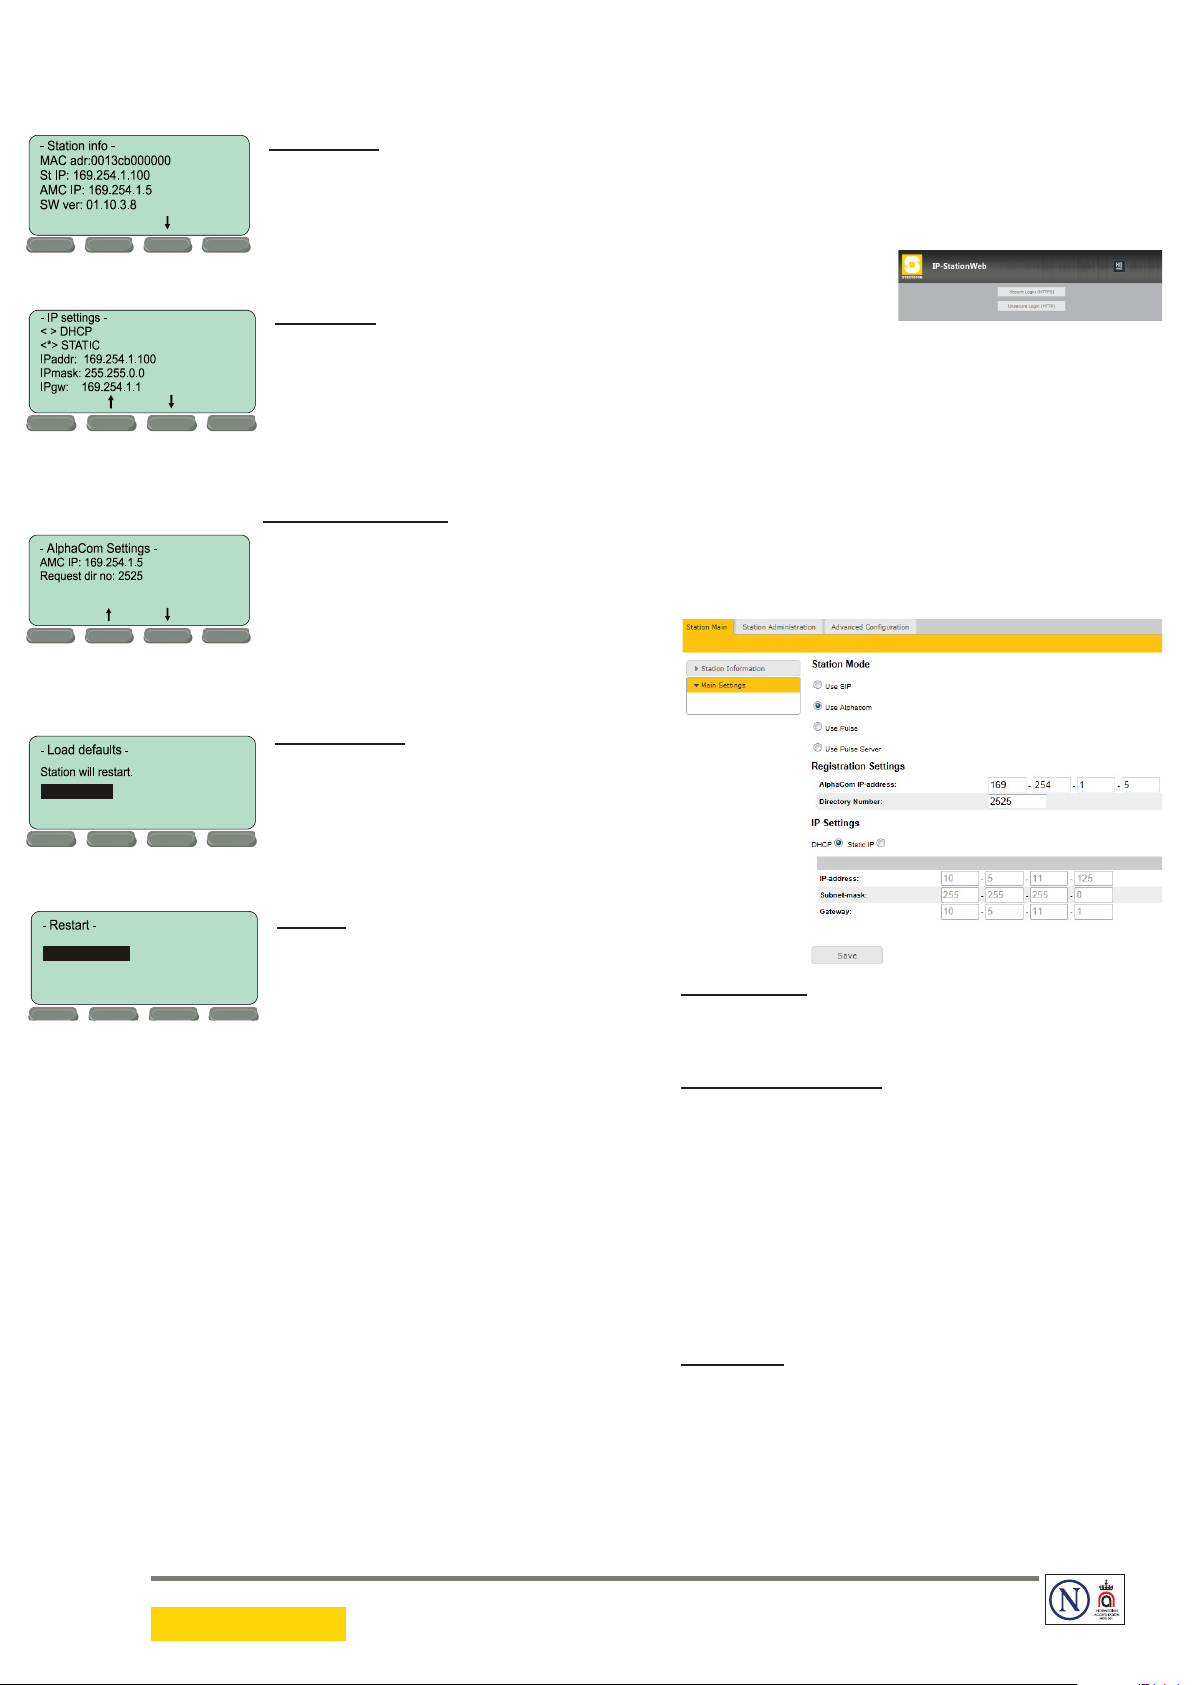
Station info
This shows the station MAC and
IP addresses, the congured
AlphaCom IP address and software
version.
After the IP properties have been changed, access the
station by logging into the web interface using a standard
web browser:
1. Open a web browser
2. In the browser’s address bar, type the default IP
address 169.254.1.100 and press the ENTER key
- The station login page will be displayed.
To log into the station:
Sel
Press to set.
Sel
IP settings
Choose between DHCP and
STATIC IP address. If STATIC is
chosen, it is possible to congure
Back
the IP address, mask and
gateway.
AlphaCom Settings
Set the IP address of AlphaCom
that the station shall connect to,
and the directory number of the
station. If a directory number is not
entered, the station will register
with its MAC address.
Load defaults
This will load the factory default
settings.
Back
Press the Sel button to load the
default settings.
1. Click Login
2. Enter the default User name: admin
3. Enter the default password: alphaadmin
The Station Information page will now be displayed,
showing the IP station conguration.
2.2.2 Station Main Settings
● Click Station Main > Main Settings to access
the page for conguring station mode and IP
parameters.
Restart
Press to restart
Sel
Back
This will restart the station.
Press the Sel button to restart
the station. Restart the station to
apply the new settings.
2.2 Conguration Via Web Browser
2.2.1 IP Master Station Web Interface
The IP Master Station features an embedded web server,
which allows users to log in via a standard web browser.
At commissioning, the IP station needs to be congured
to enable it to subscribe to an AlphaCom server/
exchange. To do this, your PC and the IP station have to
be connected together via a PoE switch using network
cables:
● Connect the PC to the PoE switch
● Connect the LAN port on the IP station to the PoE
switch
The factory default IP address of the station is
169.254.1.100. In order for your PC to communicate
with the station it is necessary to change its Internet
Protocol Properties to use an IP address that is in the
same range as 169.254.1.100, e.g. 169.254.1.1 with
subnet mask 255.255.255.0.
Station Mode
● Select the Use Alphacom radio-button
Registration Settings
● Enter the IP address of the AlphaCom server/
exchange in which the IP station is to be a
subscriber in the AlphaCom IP-address eld.
● Enter the directory number of the station in the
Directory Number eld.
- If a directory number is not entered, the station will
register with its MAC address. The MAC address is
found on the Station Information page and needs to be
entered into the AlphaPro programming tool.
IP Settings
● DHCP – Use this option if the IP station shall receive
IP Settings from a DHCP server.
● Static IP – Use this option if the IP station shall use
a static IP address. Enter values for IP-address,
Subnet-mask, Gateway.
● Click Save followed by Apply to apply the new
conguration settings.
DOC NO.
A100K10935
STENTOFON and VINGTOR products are developed and marketed by Zenitel Norway AS. The company’s Quality Assurance System is certified to meet the requirements in NS-EN ISO 9001:2008. Zenitel Norway AS
reserves the right to modify designs and alter specifications without prior notice, in pursuance of a policy of continuous improvement. © 2010 Zenitel Norway AS.
14.12.2011
 Loading...