

Page 1
Virtual Bassist
Operation Manual
by Wolfram Knelangen
Page 2

The information in this documentation is subject to change without notice and
does not represent a commitment on the part of Steinberg Media Technologies
GmbH.
The software described by this document is subject to a License Agreement
and may not be copied to other media.
No part of this publication may be copied, reproduced, or otherwise transmitted or recorded, for any purpose, without prior written permission by Steinberg
Media Technologies GmbH. All product and company names are ™ or ®
trademarks of their respective owners.
© Wizoo Sound Design GmbH & Steinberg Media Technologies GmbH, 2005.
All rights reserved.
Virtual Bassist
2
Page 3

Table of contents
4 On bass…
5 Congratulations!
6 What is Virtual Bassist?
7 How does Virtual Bassist work?
8 What you can and can’t do with Virtual Bassist
8 Register your software!
9 The Steinberg Key
11 System requirements (PC version)
11 Installing Virtual Bassist (PC version)
12 System requirements (Mac version)
12 Installing Virtual Bassist (Mac version)
13 Activating the Steinberg Key
14 Setting up Virtual Bassist as a VST Instrument in your host application
15 Setting up Virtual Bassist as a DXi2 instrument
16 Using Virtual Bassist in an AU compatible application
16 Virtual Bassist stand-alone and ReWire
17 Latency
17 Using a single button mouse (Mac)
18 The first test
19 Playing Virtual Bassist
19 Using a MIDI keyboard
21 Virtual Bassist terminology
23 The Play page
24 Loading and saving Styles
25 Auditioning styles
26 Play page controls
32 Guitar controls
34 Chord recognition
36 The Groove Match page
37 The Macro Groove display
40 Micro timing settings
42 The Part Browser
44 The Amp & FX page
45 The Amp section
47 FX section…
49 The effects
56 Effect routing
57 The output section
60 Effect management
62 Bonus feature: Creating your own phrasings
63 Plug-in version of the effect board
64 MIDI Controller assignments
65 Assigning MIDI controllers in Virtual Bassist
66 The Settings page
70 Credits
Virtual Bassist
3
ENGLISH
Page 4

On bass…
The Virtual Guitarist product line has changed the way many people
produce their music – or talk to guitarists. Because of the success
and positive recognition of Virtual Guitarist from hobby to high-profile
users, Virtual Bassist has been an obvious item on the to-do list for a
long time. In the end, it took three years for it to finally hit the shelves.
As a Virtual Guitarist user, you will notice that the long wait brought improvements as well. The engine we now use as a foundation is much
more flexible and intelligent. That said, the heart of Virtual Bassist is deliberately not rocket science or artificial intelligence – it’s real recordings. Whatever you create with it is based on real performances by a
real musician, with real feel, real skills and real meaning. We’ve just
added flexibility, control and intelligence to allow you to tell the bassist
what to play and how to sound. To some of you, that may be the most
important innovation.
To cut a long story short: We love the sound of Virtual Bassist, we love
how easy it is to work with. We are very proud of the innovative Groove
Match feature that allows possibilities we haven’t even thought of. We
love the great amp and the FX and we know that Virtual Bassist always
does for you what we trained it to do.
Yours sincerely,
Peter Gorges
Executive Producer
Virtual Bassist
4
Page 5
Congratulations!
ENGLISH
Virtual Bassist is your own personal bass player, allowing you to
choose between 30 fulfilling styles with perfect sound, perfect timing,
and the ability to flexibly adapt the playing to suit most musical needs.
Virtual Bassist will easily add professional-sounding bass guitar tracks
to your projects, without the need for a real bass player, and you get a
perfect take every time. Even if you use real bassists in your music as
well, Virtual Bassist has the big advantage of enabling you to experiment with and alter your bass parts at any time, in any place, without the
need for special recording equipment. You can even lay down tracks on
your laptop computer while sitting in the park or use the Virtual Bassist
effects to process your own bass recordings.
Virtual Bassist
5
Page 6

What is Virtual Bassist?
Technically speaking, Virtual Bassist is a software instrument that can
be used stand-alone or in any VST, DXi, AU or ReWire compatible
host application under Windows or Mac OS X. Virtual Bassist comes
with a variety of electric bass guitar Styles, each fitting a certain musical style and is ready-to-go with the correct sound and phrases as
well as a selection of Fills and controls.
Musically speaking, Virtual Bassist plays itself, all you have to do is select the chords or root notes via a MIDI keyboard. You can control the
phrasing and many other play parameters in real time, using either the
mouse or a MIDI controller.You can adapt licks to your projects seamlessly via the Groove Match function and customize the sound using
the comprehensive selection of bass effects.
Virtual Bassist
6
Page 7

How does Virtual Bassist work?
Virtual Bassist doesn’t use single-note samples or synthesis to imitate
reality. The result would be extremely artificial, if you’ve ever tried to
simulate bass playing on a MIDI keyboard you’ll know exactly what
we’re talking about.
Perhaps surprisingly, the Virtual Bassist concept is much simpler. It is
based on a huge library of audio tracks recorded by real living bass
players. This means the results are genuine bass recordings—and not
some MIDI trickery.
Virtual Bassist’s approach makes it possible to choose from these recordings in real-time when you change a chord or any other parameter. Tempo changes are no problem as the bass recordings have been
processed in such a way that enables them to be played at any tempo.
In addition, you can manually manipulate Parts to create your own or
adapt them to fit your music using the Groove Match function. The 13
Parts and 6 Fills available in each Style are all examples of what’s possible, we’ll take a closer look later.
Just like in real life, Virtual Bassist has its own amplifier and FX pedals
to beef up your sound and at the end of the signal chain is a selection
of speaker cabinets in all popular configurations. The state-of-the-art
Virtual Bassist technology even allows you to select the type and the
position of the microphone in front of your cabinet.
ENGLISH
Virtual Bassist
7
Page 8

What you can and can’t do with Virtual Bassist
Virtual Bassist has many advantages when compared with a real
player:
• Virtual Bassist is convenient and available at any time.
• Virtual Bassist is cheap and easy and you won’t need a studio to record in.
• You can save time because there’s no setup, tuning, preparation, microphone
positioning, or audio recording.
• Virtual Bassist doesn’t play wrong notes and there aren’t any timing problems.
• You can work with several bass players simultaneously.
• You can control the sound and phrasing of the bass.
• Virtual Bassist supports your creativity, allowing you to experiment as much as
you want, and gives you the possibility to create tracks that couldn’t be played
on a real bass guitar.
• It’s possible to make alterations at any stage, even after recording or during
the mixing process. You can change the instrument, phrasing and sound without having to recreate a recording from scratch.
Despite all of these advantages, it’s important to remember that Virtual
Bassist is a computer program and will inevitably have some disadvantages when compared to a real player. It would be impossible for Virtual Bassist to provide everything a real musician might theoretically be
able to offer, although the included Styles cover a broad range and will
be capable of suiting most needs.
Register your software!
Before getting carried away with the software, which we’re sure you
will do, please take a moment to complete and return the registration
card enclosed with Virtual Bassist. This will entitle you to technical
support, and we’ll also keep you up to date with the latest news and
updates.
Virtual Bassist
8
Page 9
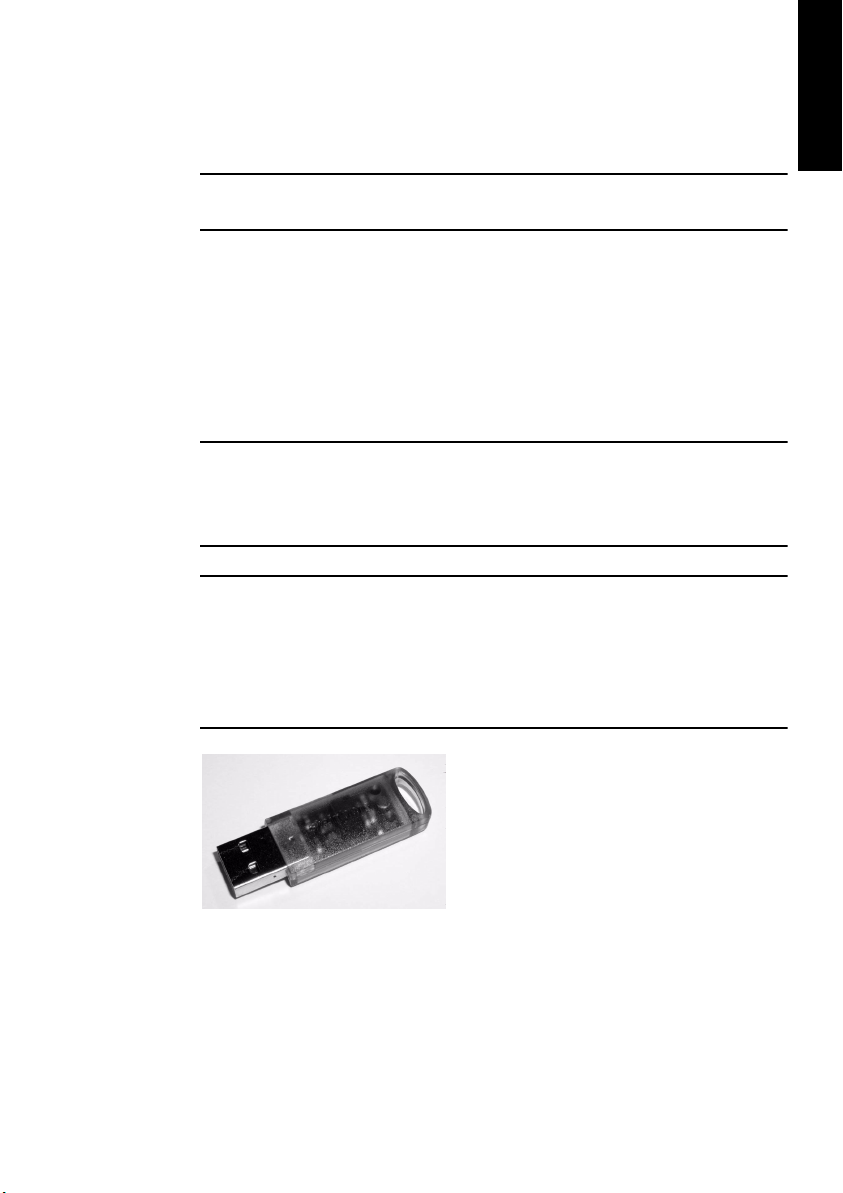
The Steinberg Key
Please read the following section before installing the Virtual Bassist
software.
Included with the Virtual Bassist package, you will find an activation
code for the Steinberg Key (sometimes referred to as a “dongle”), a
hardware copy protection device that is part of the Virtual Bassist copy
protection scheme. Virtual Bassist will not run if there is no Steinberg
Key present or if this key has not been properly activated. You can either separately purchase a new Steinberg Key for use with Virtual Bassist, or use a key previously bought for use with a Steinberg application.
If you have a Windows PC and have never used a dongle on your computer before, the installation routine may initiate a restart of Windows after
installation of the key drivers. After the restart, the key must be plugged
into the USB port for the installation routine to continue.
If you already own software that requires a Steinberg Key, it should be
plugged into the computer’s USB port after installing Virtual Bassist and
restarting the computer! When the key is plugged into the USB port, Windows will automatically recognize it as a new hardware device and will
attempt to find drivers for it – these necessary drivers won’t be present
until Virtual Bassist has been installed and the computer restarted.
ENGLISH
The Steinberg Key
The Steinberg Key is, in fact, a little computer on which your Steinberg
software licenses are stored. All hardware-protected Steinberg products use the same type of key and you can store more than one license
on a key. Licenses can also (within certain limits) be transferred between keys – which is helpful, e.g. if you want to sell a piece of software.
Virtual Bassist
9
Page 10

If you already own a Steinberg Key (e.g. for Cubase or Nuendo), you can
load your Virtual Bassist license onto that, using the activation code
supplied with Virtual Bassist. This way you need only one USB key for
both your host and Virtual Bassist (see below).
The Steinberg Key must not be plugged in before or during the installation of Virtual Bassist if this is the first time you use such a key. In this
case Windows will register it as new USB hardware and try to find drivers that won’t be present before Virtual Bassist installation.
Virtual Bassist
10
Page 11

System requirements (PC version)
To run Virtual Bassist you’ll need:
•A PC with an 800 MHz Pentium or Athlon processor (1.4 GHz or faster
recommended).
• 256 MB of RAM (512 MB recommended).
• 500 MB of hard disk space.
• Windows® XP Home or Professional.
• Windows MME compatible audio hardware (an ASIO compatible audio card
is recommended).
• If you want to use Virtual Bassist as a plug-in, you’ll need Cubase or Nuendo
(version 1.5 or higher) or another VST 2.0, DXi 2 or ReWire compatible host
application. Please note that some features may not be supported in other
host applications.
•A Steinberg Key and an available USB port.
• Monitor and graphics card supporting 1024 x 768 resolution.
Please also observe the system requirements of your host application.
ENGLISH
Installing Virtual Bassist (PC version)
To install Virtual Bassist on your PC:
1.
Switch on your computer and wait for Windows to start.
2.
Insert the Virtual Bassist CD ROM into your CD ROM drive.
3.
Open the Windows Explorer, or the “My Computer” window, and
double-click on the CD ROM drive icon.
4.
Double-click on the Virtual Bassist Installer icon to run the installation
program, and follow the on-screen instructions.
Virtual Bassist
11
Page 12

System requirements (Mac version)
To run Virtual Bassist you’ll need:
•A Power Mac G4 867 MHz computer (Power Mac G4 Dual and 1.25 GHz or
faster recommended).
• 256 MB of RAM (512 MB recommended).
• 500 MB of hard disk space.
• Mac OS X version 10.3 or higher.
• CoreAudio compatible audio hardware.
• If you want to use Virtual Bassist as a plug-in, you’ll need Cubase or Nuendo
(version 1.5 or higher) or another VST 2.0, AU or ReWire compatible host
application.
Please note that some features may not be supported in other host
applications.
•A Steinberg Key and an available USB port.
• Monitor and graphics card supporting 1024 x 768 resolution.
Please also observe the system requirements of your host application.
Installing Virtual Bassist (Mac version)
To install Virtual Bassist on your Mac:
1.
Switch on your computer and insert the Virtual Bassist CD ROM.
2.
If the CD window doesn’t open automatically, double-click on the
Virtual Bassist CD icon on your desktop.
3.
Double-click the Syncrosoft LCC.mpkg file to run the copy protection
installation program and follow the on-screen instructions.
4.
Depending on the format you want to install, open the folder “Virtual
Bassist VST”, “Virtual Bassist AU” or “Virtual Bassist ReWire”. Please
read the corresponding *.rtf file in there. Double-click the *.pkg file to
run the Virtual Bassist installation program and follow the on-screen
instructions.
Virtual Bassist
12
Page 13

5.
After installing the plug-in copy the folder “Virtual Bassist Content” to
your system hard drive in the folder “Library/Application Support/
Steinberg/”.
If you copy the content to another directory on your hard drive you will
have to run the “Set VB Content Location” application in the “Virtual Bassist Content” folder on your hard drive, otherwise VB will not find its data!
Activating the Steinberg Key
Whether you purchased a new key with Virtual Bassist, or if you want to
use one you bought with a different Steinberg product: your Steinberg
Key does not yet contain a valid license for Virtual Bassist. You must
download a license to it before you can launch Virtual Bassist! Use the
activation code supplied with the program in order to download a valid
Virtual Bassist license to your Steinberg Key. This process is the same
for existing and new keys. Proceed as follows:
1.
After installation and restarting the computer, plug the Steinberg Key
into the USB port.
If you are unsure of which port this is, consult the computer’s documentation.
ENGLISH
2.
If this is the first time a copy protection device is plugged in, it will be
registered as a new hardware device, and a dialog will appear asking
you whether you would like to find drivers for the device manually or
automatically.
Choose to find drivers automatically. The dialog closes and you may have to reboot
your computer.
3.
Make sure that your computer has a working internet connection.
License download is made “online”. If your Virtual Bassist computer isn’t connected to
the internet, it’s possible to use another computer for the online connection – proceed
with the steps below and see the help for the License Control Center application.
4.
Launch the “License Control Center” application (found in the Windows
Start menu under “Syncrosoft” or in the Macintosh Applications folder).
This application allows you to view your Steinberg Keys and load or transfer licenses.
Virtual Bassist
13
Page 14

5.
Use the License Control Center “Wizard” function along with the activation code supplied with Virtual Bassist to download the license to
your Key.
Simply follow the on-screen instructions. If you are uncertain about how to proceed
consult the help for LCC.
When the activation process is completed you are ready to launch
Virtual Bassist!
Setting up Virtual Bassist as a VST Instrument in your host application
This section describes how to set up Virtual Bassist with Cubase SX
as your host application. However, the same procedure applies to
most VST host applications, you should consult your host’s documentation if you need further help.
Make sure the host program has been correctly installed and set up to
work with your MIDI and audio hardware (e.g. MIDI keyboard and an
audio card).
To set up Virtual Bassist:
1.
Open the VST Instruments window.
2.
Click the “No Instruments” label and select Virtual Bassist from the
pop-up menu.
3.
Wait for a few seconds while Virtual Bassist loads its default Style.
The Virtual Bassist window will open automatically.
4.
In the VST host application, select Virtual Bassist as the output for a
MIDI track.
Virtual Bassist
14
Page 15

Setting up Virtual Bassist as a DXi2 instrument
The information in this section refers to using Virtual Bassist within Cakewalk SONAR. We assume that you have correctly set up both SONAR and
your available MIDI and audio hardware. Should you wish to use Virtual
Bassist within another DXi2 compatible host application, please refer to
its documentation.
Proceed as follows to activate Virtual Bassist:
1.
Make sure that SONAR is receiving MIDI data generated by your external MIDI master keyboard. You can check this visually with the
“MIDI In/Out Activity” tray icon.
2.
In SONAR, open the “Synth Rack” window from the View menu.
3.
Click the Insert button (or select the Insert option on the main menu).
4.
Open the DXi Synth submenu and select “Virtual Bassist” from the
pop-up menu.
5.
By default the “Insert DXi Options” dialog appears. To create one MIDI
track and connect an audio track to Virtual Bassist’s 1+2 outputs, activate the options “Midi Source Track” and “First Synth Output”.
Refer to your host application’s documentation for further details.
ENGLISH
6.
Clicking the “Connection State” button in the Synth Rack will activate/
deactivate Virtual Bassist. By default this is automatically activated
when DXi SoftSynths are loaded.
7.
Double-click on the “Virtual Bassist” entry or click the “Synth Properties” button in the tool bar of the Synth Rack to open the Virtual Bassist
window.
8.
In SONAR, select the previously created MIDI track “Virtual Bassist”.
Virtual Bassist will now receive MIDI data from the selected track.
Make sure that the MIDI channel of the currently selected SONAR track is set to the
channel on which Virtual Bassist is to receive MIDI data.
Virtual Bassist
15
Page 16

Using Virtual Bassist in an AU compatible application
You can use Virtual Bassist in any AU host application (e.g. Logic).
The Virtual Bassist AU version is installed in the folder “Library/Audio/
Plug-ins/Components” and lets Virtual Bassist work in an AU environment – without any performance loss or incompatibilities.
For Logic Pro 7 proceed as follows:
1.
Open the Track Mixer and choose the desired Instrument channel.
2.
[Command]-click the I/O field and, in the pop-up menu that appears,
choose Stereo.
3.
In the sub-menu that appears, select AU Instrument, then Steinberg
and then Virtual Bassist.
Virtual Bassist is now loaded as an AU instrument and ready to be
played!
Virtual Bassist stand-alone and ReWire
Virtual Bassist can be used as a stand-alone application, independently of any host application. This makes it possible to use Virtual
Bassist in sequencer applications that do not support one of the provided plug-in formats of Virtual Bassist (i.e. VST, DXi, AU), but allow
for data exchange using ReWire.
ReWire2 is a special protocol for streaming audio and MIDI data between two computer applications. When using ReWire, the order in
which you launch and quit the two programs is very important, as the
first audio application launched will capture the sound card resources.
Proceed as follows:
1.
First, launch the sequencer application you wish to use (e.g. Ableton
Live, ProTools). If your sequencer supports ReWire, it will provide a
way to assign audio and MIDI channels for the exchange of data. See
the documentation of your host application for details.
Virtual Bassist
16
Page 17

Now, launch Virtual Bassist as a stand-alone application. You can launch the program
just like any other application on your computer through the Start menu or desktop icon
(Windows) or by double-clicking the application symbol in the Applications folder (Mac).
You can also double-click the Virtual Bassist program file in the installation folder.
2.
Now when playing a Style with Virtual Bassist, the sound is streamed via
ReWire to the assigned mixer channels in your host. Note that you are
now running two completely separate applications. When you save your
sequencer project, this will include the overall channel and bus configuration, but none of the settings in Virtual Bassist! To retain your Virtual
Bassist settings, choose the Save Bank command from the Virtual
Bassist File menu. You may want to choose a file name that indicates
that the file contains settings created for a particular sequencer project.
Similarly, when you re-open a project in your sequencer application and
have launched Virtual Bassist, use the Load Bank command in Virtual
Bassist to reload any settings pertaining to this particular project.
Latency
Although Virtual Bassist is practically latency-free, high latency times
(the delay between pressing keys on your MIDI keyboard and hearing
a sound) can occur when you play Virtual Bassist via your MIDI keyboard in real time.
ENGLISH
This is often caused by the audio card or the MIDI interface, although
it won’t be an issue when playing back a project with a Virtual Bassist
MIDI track. To get rid of annoying real time latency, we recommend
you to replace your current audio card with a professional audio card
for which an ASIO driver is available. Most soundcards built into offthe-shelf computers don’t use an ASIO driver and usually produce
large latencies of up to several hundred milliseconds.
Using a single button mouse (Mac)
Throughout the Virtual Bassist manual, references will be made to
right clicking (i.e. on a mouse with more than one button, clicking with
the button on the right). If you have a mouse with only a single button,
you get the same result as when right-clicking by holding down the
[Ctrl] key on your keyboard and clicking.
Virtual Bassist
17
Page 18

The first test
At this point, you’re probably itching to get your hands on Virtual
Bassist, so let’s get started:
1.
Activate Virtual Bassist (as described in the previous section). Virtual
Bassist automatically loads a showcase Style. The “Latch” button on
the Play page will be activated.
2.
Press the D1 key on your MIDI keyboard (to select a Part) and play a
chord or note in the two octaves between C3 and B4 (the Pitch
Range). Virtual Bassist will play a basic groove. Because the “Latch”
button is activated, playback will continue when you release the key(s).
3.
Pressing white keys between D1 and B2 (the Remote Range) on your
MIDI keyboard will select Parts, increasing in complexity from left to
right.
4.
Pressing black keys (F#, G#, Bb) in the Remote Range will trigger
Fills.
After playing a Fill Virtual Bassist will return to playing the last Part chosen.
5.
To stop Virtual Bassist immediately press C#1 or press D#1 to end
playback with a sustained note, lasting one bar.
The MIDI LED in the Virtual Bassist window lights up when Virtual Bassist receives MIDI information.
Virtual Bassist
18
Page 19
Playing Virtual Bassist
There are several ways to play Virtual Bassist:
• You can play chords and notes and vary the expression using keyboard velocity, MIDI controllers and sustain pedal.
• If you don’t have a MIDI keyboard you can enter notes and other MIDI events
using a MIDI editor provided by your host application.
• Virtual Bassist can be used to replace tracks of existing projects and MIDI
files to improve the way they sound.
• You can use several instances of Virtual Bassist. You can use as many Virtual
Bassists simultaneously as your host application and computer allow. There’s
nothing wrong with using one Virtual Bassist to play the basic groove and at
the same time use another to add additional licks or Fills.
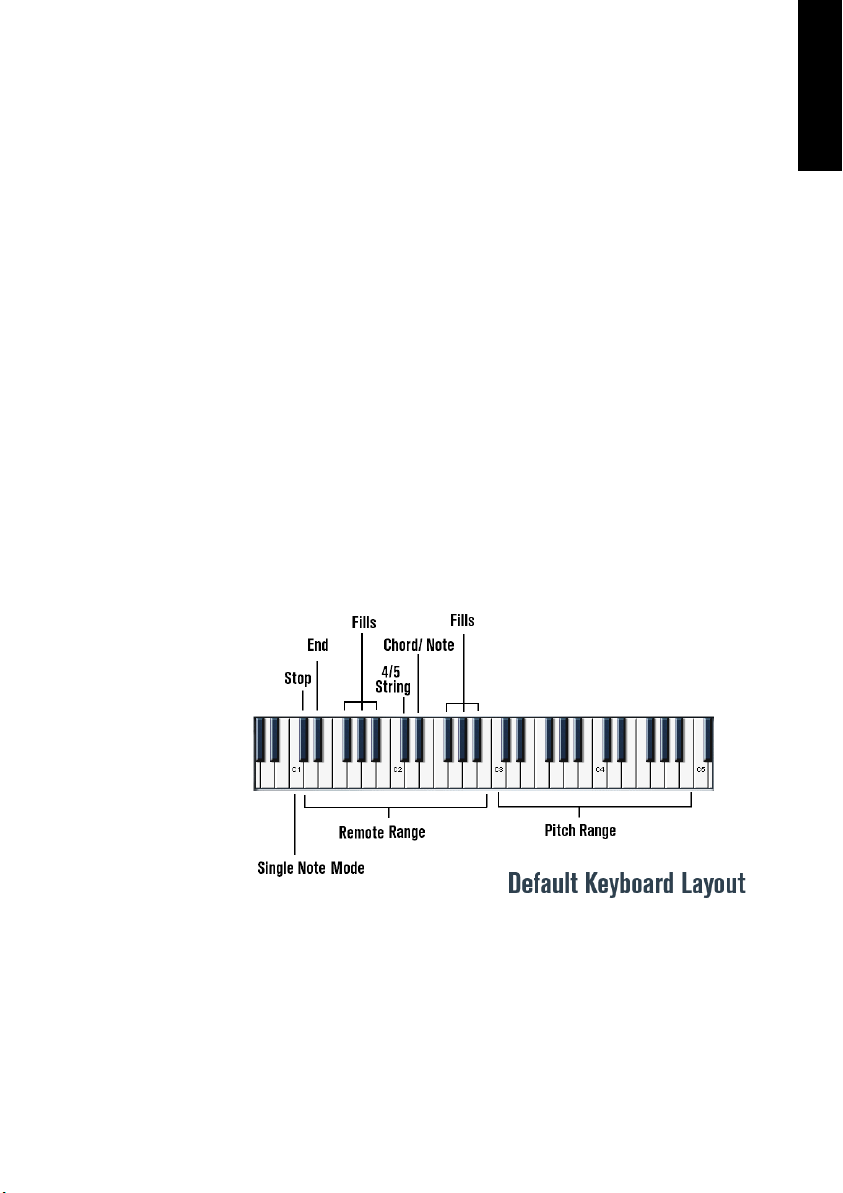
Using a MIDI keyboard
When using a MIDI keyboard to play Virtual Bassist there are two
ranges (or zones) used for different purposes.
ENGLISH
Virtual Bassist
19
Page 20

The Pitch Range
The keyrange between C3 to B4 on your MIDI keyboard is called the
Pitch Range and controls the pitch of the played Parts, Fills or Single
Notes. In this range you can play notes or chords and Virtual Bassist
will intelligently follow your playing. Playing any note in the Pitch Range
with a high velocity (>125) produces an eighth or a quarter bass note,
depending on the Style. This Accent is handy for varying your
basslines in real-time.
The Remote Range
The keyrange between C1 and B2 is called the Remote Range and
triggers Parts, Fills, Single Note mode, Stop and End as well as a few
other useful features. The functions of each key can be freely assigned in the Parts Browser which is explained below. By default the
Remote range is assigned as follows:
Key Function Description
C1 Single Note Mode When active, any MIDI notes or chords played in the
Pitch Range will produce a single sustained bass note.
C#1 Stop Virtual Bassist immediately stops playing.
F#, G#, Bb Fill Triggers a Fill.
D#1 Short End (1bar) Plays an ending note with a length of one bar.
D#1 Held End Holding the D#3 key will allow you to control the
length of the final End note. When you releasse the
key the End note stops playing.
C#2 4 or 5 strings Toggles between bass guitars with either four or five
strings.
D#2 Chord/Note Determines whether a Part will play melodic bass
lines or whether it will play the rhythmic pattern of the
Part using only the root keys of the note or chord chosen in the Pitch Range. Sometimes octave notes are
also played when appropriate for the Style.
Note that you can swap the order of the Pitch and the Remote Range in
the Keyboard Layout section of the Settings page (see page 68).
Virtual Bassist
20
Page 21

Virtual Bassist terminology
Styles
A Style is a set of grooves and phrases (called Parts and Fills) and includes bass selection, FX and Groove Match settings suitable for a
particular musical genre. Each Style consists of 13 Parts triggered by
the white keys between D1 and B2 and 6 Fills triggered by the black
keys F#, G#, Bb in the same key range.You can load a Style by double-clicking it in the Style Browser. Virtual Bassist loads a showcase
Style when started.
Parts
A Part is a bass groove or phrase varying in rhythmic and melodic
structure triggered by the white keys (D1 to B2) in the Remote Range
of your MIDI keyboard. The Parts from D1 to B1, named Basic 1 to
Basic 6, tend to be simpler in their rhythmic and melodic nature. The
Parts from C2 to B2, called Complex 1 to Complex 7, are more complex and more Style specific. When playing Parts, Virtual Bassist will
quantize the changes to the nearest 16th note by default. You can
change this quantize setting on Virtual Bassist’s Settings page.
ENGLISH
Fills
A Fill is a special kind of Part that plays for a predefined time (for example 1 bar). After that, Virtual Bassist will return to playing the Part
that was playing prior to the Fill. Fill Parts are found on the F#, G#, Bb
keys of the Remote Range (D1 to B2).
If you want Virtual Bassist to play a different Part after it has completed a Fill just hit the appropriate white key for that Part after the Fill
key has been played.
A Fill will repeat as many times as the Fill key has been played. So if
you want a Fill to play three times, hit the Fill key three times.
If a Fill key is the first key played after Virtual Bassist has been stopped,
the Fill will play repeatedly until another Fill or Part is played.
Virtual Bassist
21
Page 22

Fills play at a predefined bar position and for a predefined length. If
you want Fills to switch in the same way as normal Parts, select Key
Change Quantize on the Settings page. In this mode Fills will change
according to the quantize setting in the same way as normal Parts.
Remote Keys
Remote Keys are special functions assigned in the Remote Range
that influence the performance of Virtual Bassist. These keys include:
Single Note Mode (C1), Stop (C#1), End (D#1), 4/5 String Mode
(C#2) and Chord/Note Mode (D#2).
Single Note Mode
Single Note Mode is activated by pressing C1 on your MIDI keyboard.
Once Single Note Mode is activated all MIDI keys played in the Pitch
Range will trigger single bass notes allowing you to play your own
bass lines with Virtual Bassist.
Accents
Playing a MIDI note in the Pitch Range with a high velocity (125 and
above) will start the Part with (depending on the Style) either an
eighth or a quarter bass note called Accent. This Accent is handy for
varying your basslines in real time.
Aftertouch Vibrato
Applying aftertouch will automatically produce vibrato in Virtual Bassist.
To set the Vibrato rate click the Steinberg logo on the top right hand
side of the instrument and adjust the Rate knob on the Settings page.
Virtual Bassist
22
Page 23
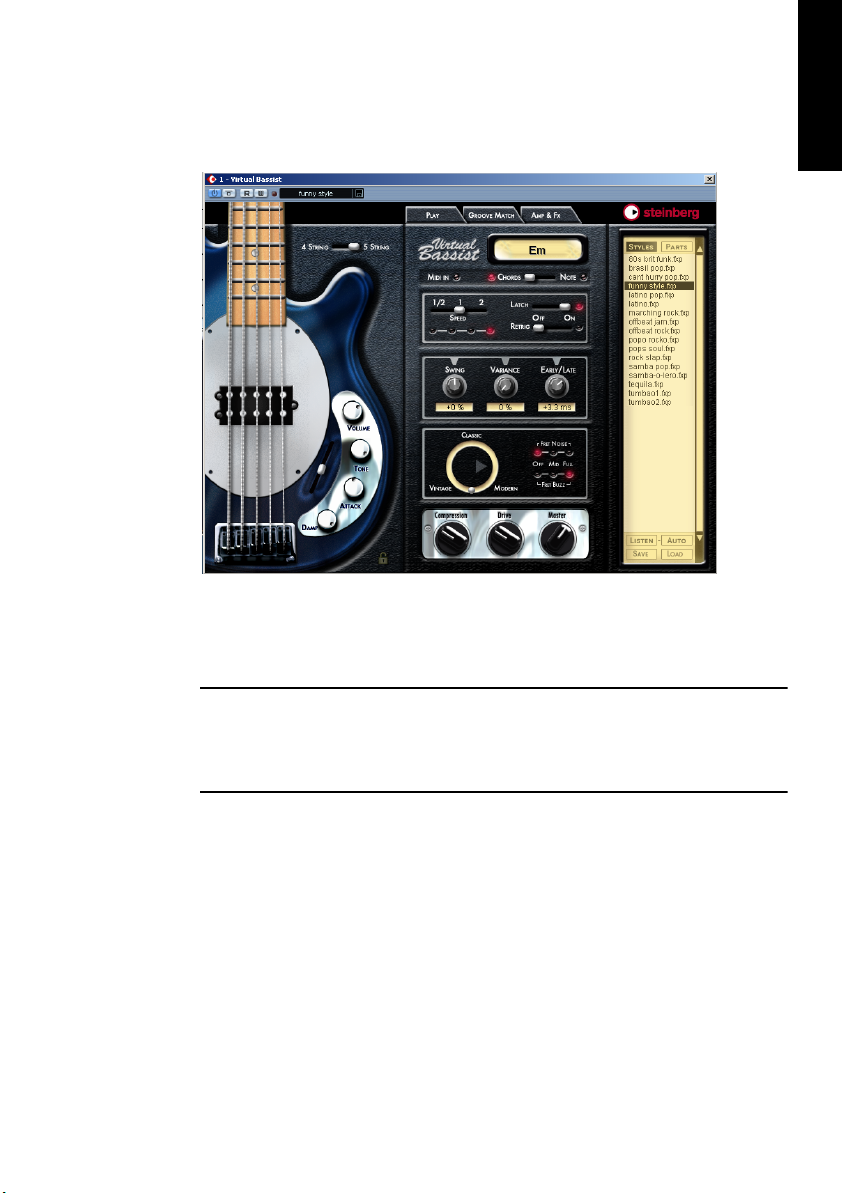
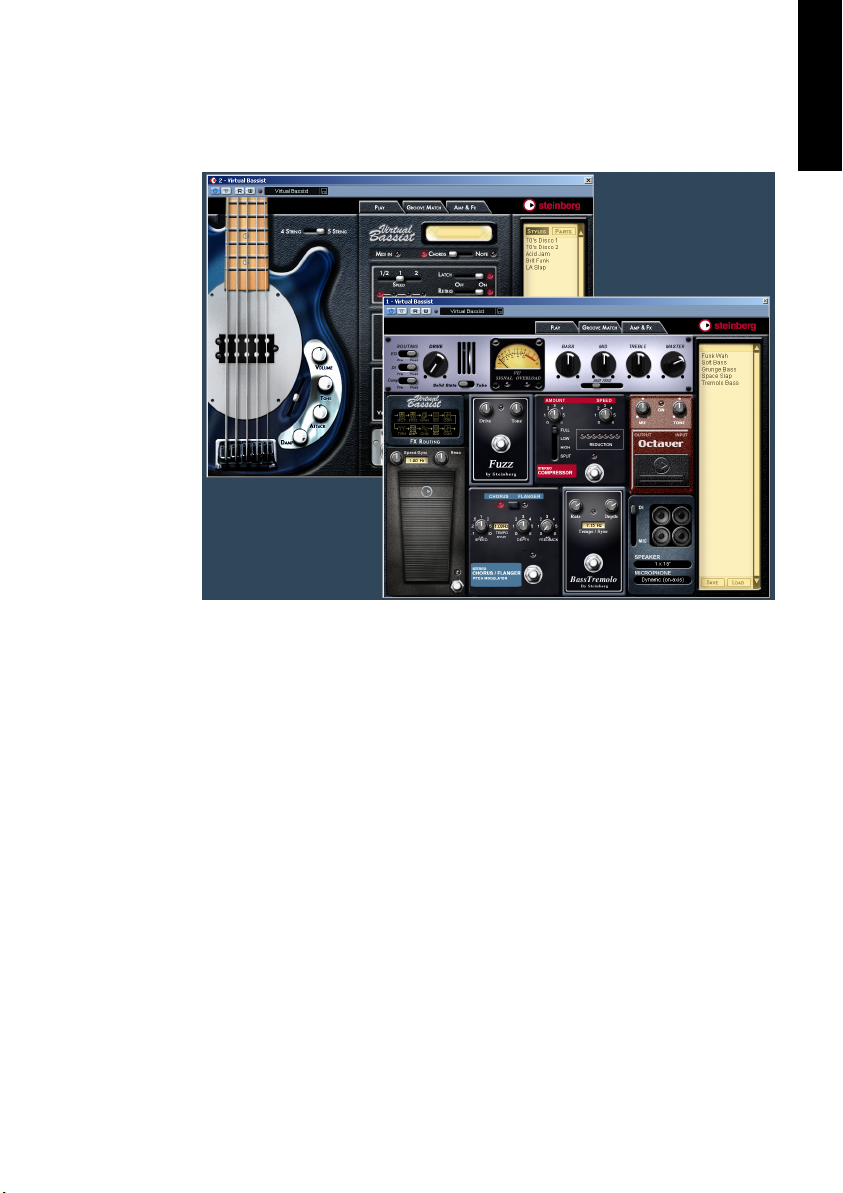
The Play page
This is Virtual Bassist’s main page, here you can set all of the general
playing parameters of the instrument, load and save Styles and Parts
and choose and modify your bass and its overall sound.
ENGLISH
If you haven’t got a MIDI keyboard connected to your host application or
if you just want a quick impression, you can make Virtual Bassist play by
clicking on the frets of the bass on the Play page. The Chord Display will
show you the pitch chosen.
Virtual Bassist
23
Page 24
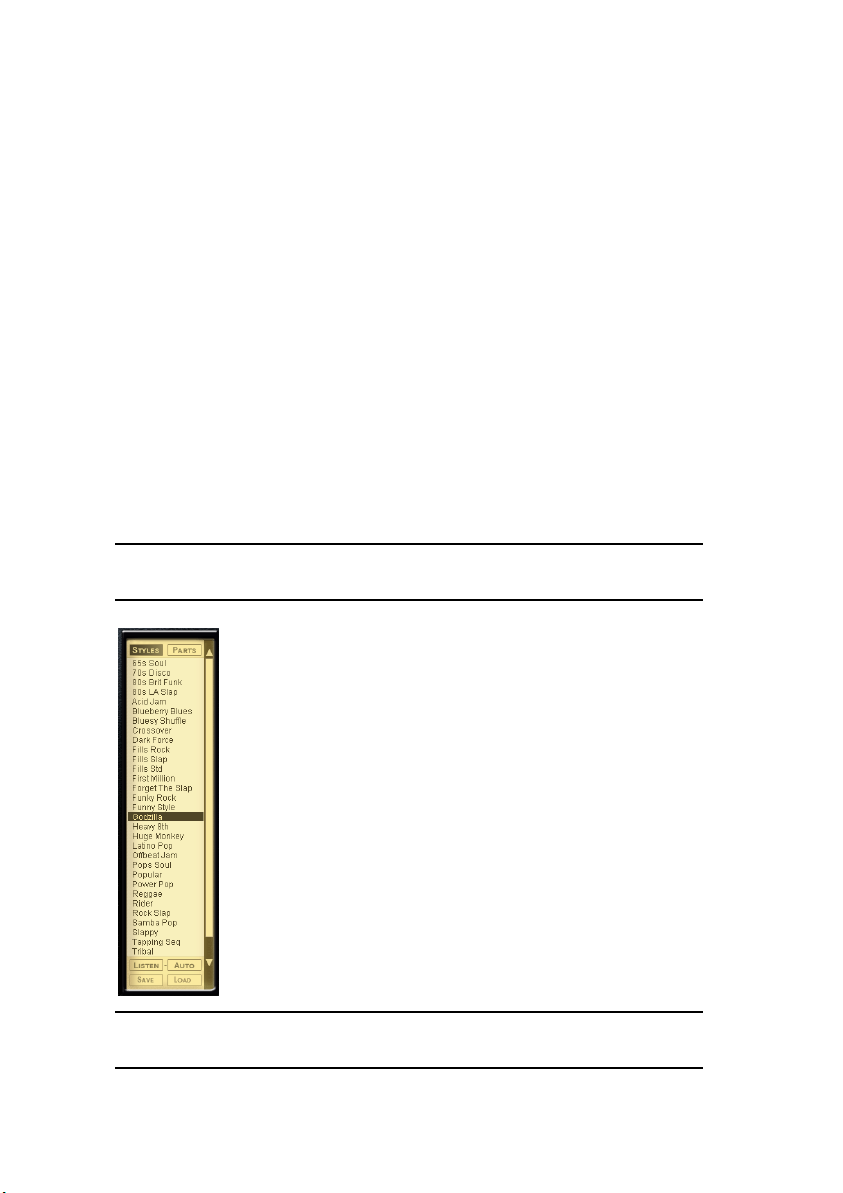
Loading and saving Styles
On the right hand side of the Virtual Bassist’s Play page is a Browser
listing the available Styles.
Load
To load a Style you can either:
• Double-click its name in the list or …
• Click the Load button on the bottom right of the Browser and use the
standard load dialog to locate and open the Style.
Save
To save a Style click Save (the left button at the bottom of the
Browser section) and use the standard Save dialog to enter a name
and location for the saved Style.
If the Styles listing is not displayed, click the Styles button at the top of
the Browser.
Depending on the speed of your computer a Style may take a few seconds to Load. The chord display will show a message saying “Loading”.
Virtual Bassist
24
Page 25
Auditioning styles
Each Factory Style comes with an audio preview. The previews were
made using Virtual Bassist with Steinberg’s Virtual Guitarist and
Groove Agent to give you an example of how the Style might sound
with guitar and drums.
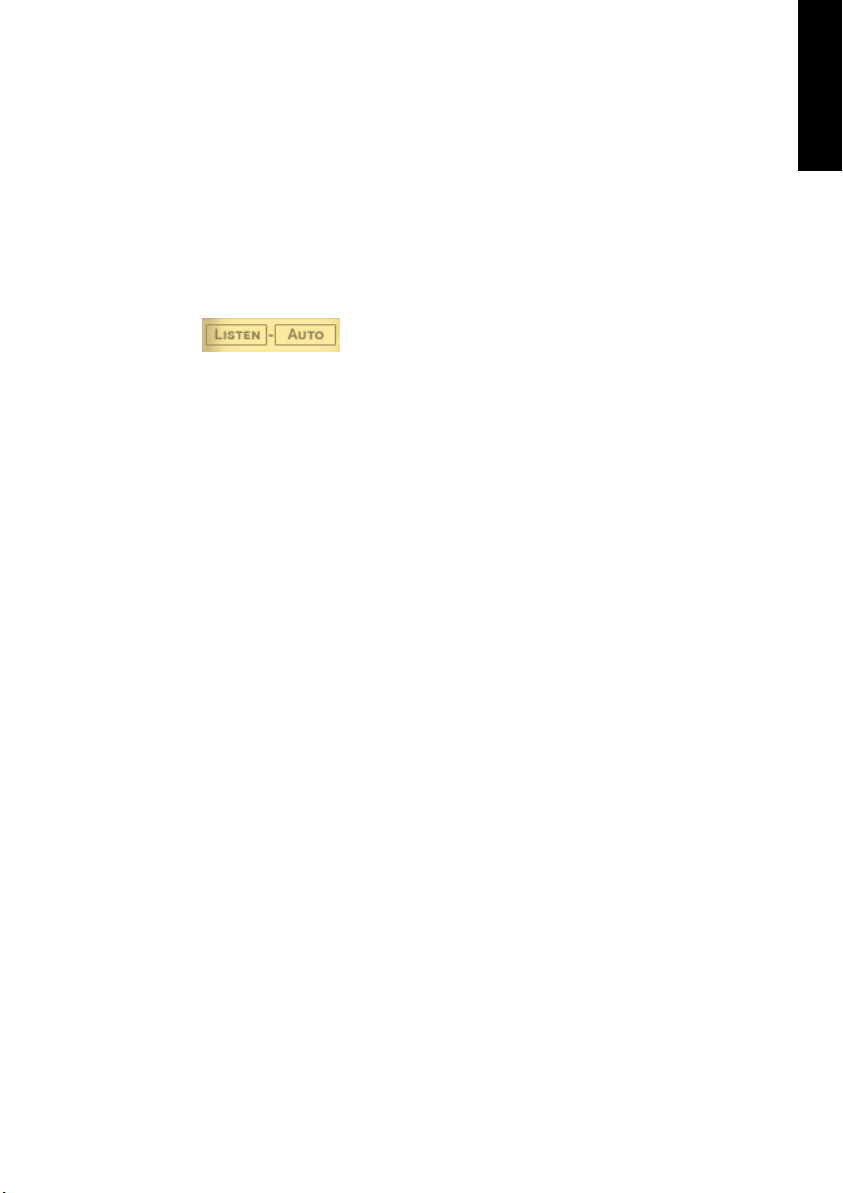
There are two ways of previewing:
Listen
In the Style Browser, click on a style (it becomes highlighted). Click
Listen and Virtual Bassist will play a preview for as long as you hold
the mouse button.
Auto
Clicking Auto activates the automatic preview mode. With Auto active
a Style preview will play any time you click a Style in the Browser. The
preview will play for as long as you hold the mouse button.
ENGLISH
The Parts Browser on the Play page
Clicking on a Part in the Play page Browser displays the key assignments of all of the Parts, Fills and Remote Keys used in the selected
Style. All features in the Remote Range can be renamed and their key
assignments changed. When a Part, Fill or Remote Key is played it will
become highlighted in the Parts Browser.
The Parts Browser on the Play page is identical to that featured on the
Groove Match page, see page 42.
Virtual Bassist
25
Page 26
Play page controls
Most of the controls you need to play and alter the performance of
Virtual Bassist can be found on the Play page.
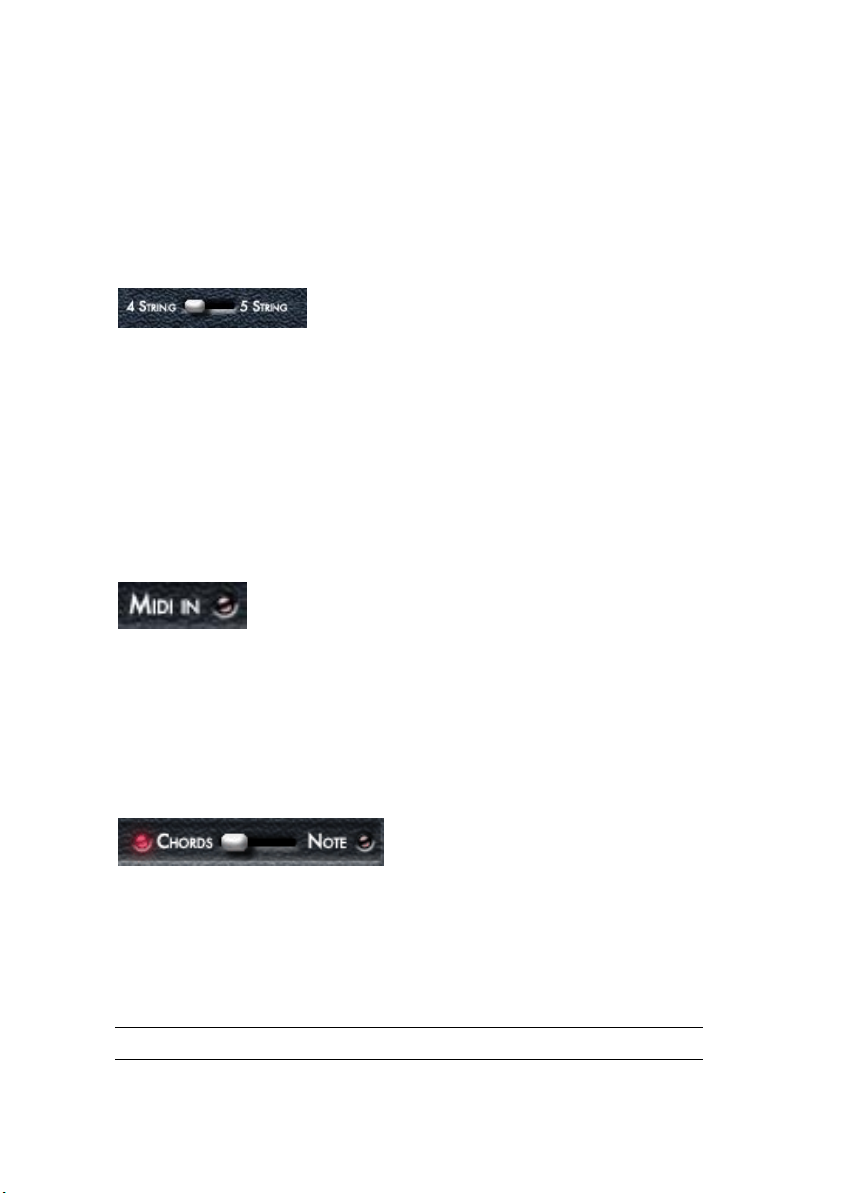
Four or five string
Use this switch to choose between a standard four string or five string
bass (which has an additional low B string). In 5 string mode Virtual
Bassist will play licks including notes on the low B string, whenever
possible.
• You can switch between 4-string or 5-string mode using the MIDI
remote key C#2.
MIDI In
The MIDI In LED lights up red to indicate that Virtual Bassist receives
MIDI data from your host application or MIDI keyboard. When you play
notes on your keyboard but the LED does not light up, this means
Virtual Bassist is not receiving any MIDI data.
Chords/Note
You can switch between Chords or Note mode during a performance
by playing MIDI note D#2 on your MIDI keyboard or host application.
The Chords/Note mode selector determines whether a Part will play
melodic bass lines or the rhythmic pattern of the Part using only the
root keys and octaves of the note or chord chosen in the Pitch Range.
Changing this setting will not affect every Part of a Style.
Virtual Bassist
26
Page 27
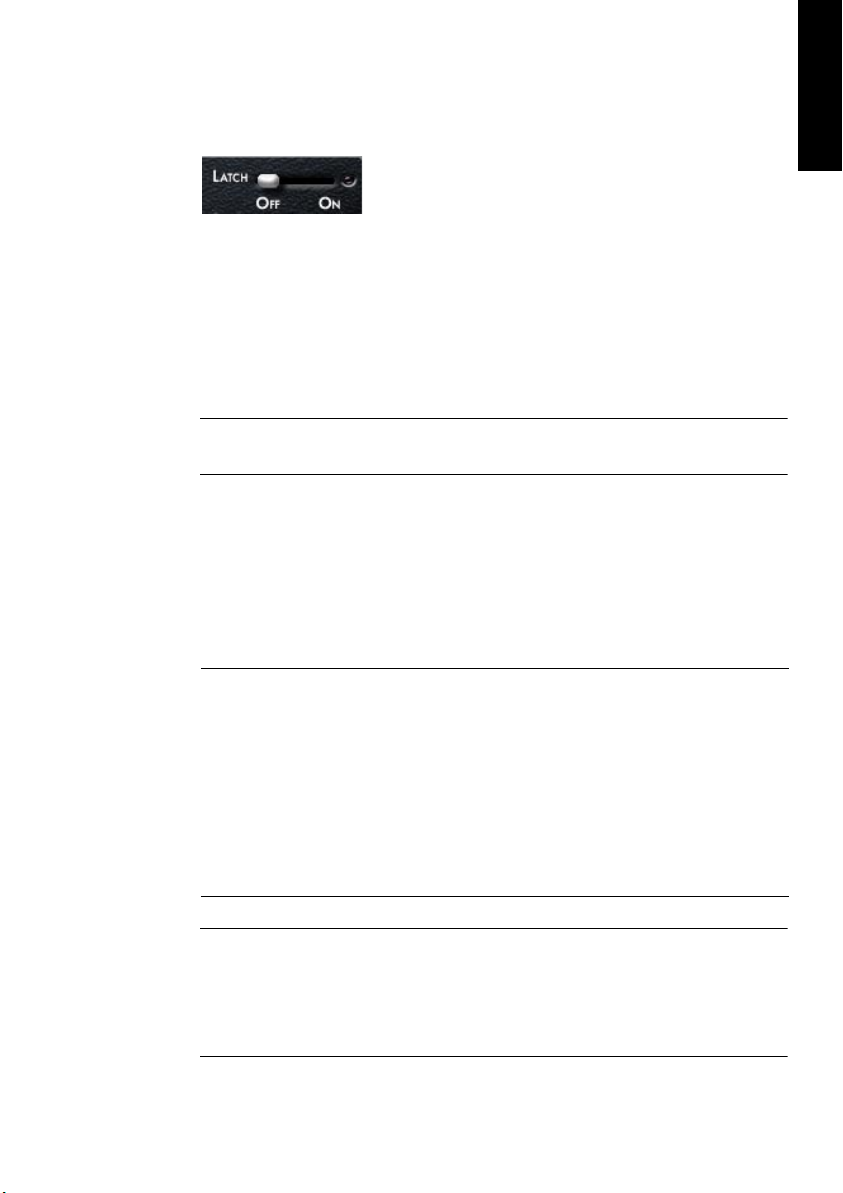
Latch mode
With latch mode On, Virtual Bassist will play Parts continuously from
the moment you play the first key until you press the stop button of
your sequencer or play the C#1 Stop or D#1 End remote keys.
If you only want to play a lick here and there, set latch mode to Off and
Virtual Bassist will only play while the keys on your MIDI keyboard are
held.
Latch mode is turned On or Off for the duration that your sustain pedal
is pressed.
Using the sustain pedal in Latch mode
Using a combination of Latch settings and sustain pedal with Virtual
Bassist will give you a lot of flexibility when arranging and performing.
ENGLISH
Try experimenting with the possibilities described below to get an
understanding of how useful the sustain pedal can be.
Latch Mode On Sustain pedal
pressed
Latch Mode Off Sustain pedal
pressed
Latch mode is disabled for as long as you press
the sustain pedal. While the sustain pedal is
held any notes played in the Pitch Range will
produce single notes. Virtual Bassist will return
to playing normal Parts when the sustain pedal
is released.
Latch mode is enabled for as long as you press
the sustain pedal. Any Parts played while the
pedal is held will play until you release the sustain pedal.
If you don’t have a sustain pedal you can assign Latch to a different MIDI
controller. To do this right-click on the Latch parameter and assign a
MIDI controller from the drop-down list or use right-click and choose
MIDI Learn, move the MIDI controller of your choice and this controller
will be detected and used by Virtual Bassist.
Virtual Bassist
27
Page 28
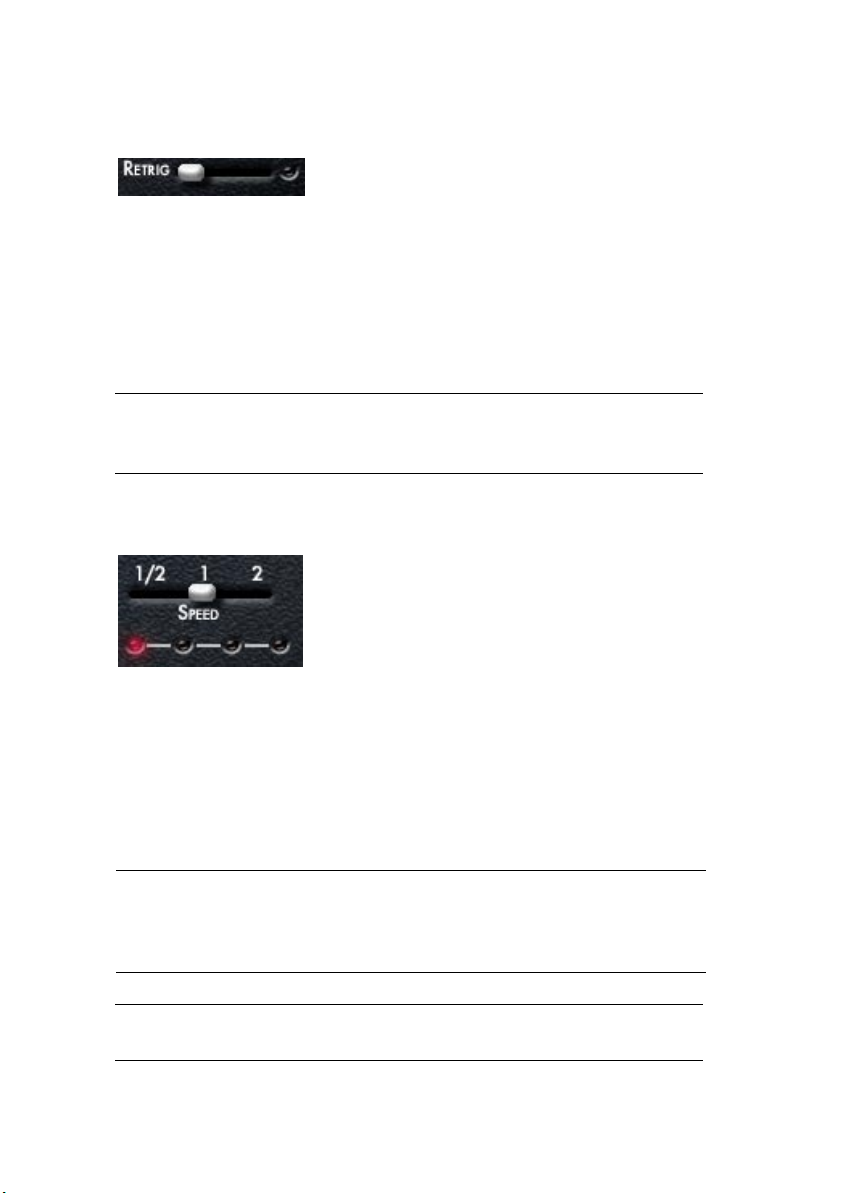
Retrigger mode
With Retrigger mode activated, every time a Part key is played the
Part will begin to play again from the beginning, regardless of the current bar position.
When Retrigger Mode is Off, Part changes will be performed playing
the appropriate melodic and rhythmic phrasing of the Part for the current position in the bar.
Activating Retrigger mode does only make sense for showcases or a
quick overview of the Parts of a Style. When performing or arranging with
Virtual Bassist, it is strongly recommended to turn Retrigger mode off.
Speed
Virtual Bassist automatically follows the tempo of your project, including all tempo changes. The Speed parameter in Virtual Bassist allows
you to change the playback speed to half, normal or double the speed
of your project tempo. This can be useful for example if you happen to
be working on a track that is 80 BPM but are running your host application at 160BPM. It might also be quite interesting creatively to have
your bass playing at double or half speed.
Half = 1/2 Virtual Bassist plays at half the tempo of your project.
Normal = 1 Virtual Bassist plays at the same tempo as your project.
Double = 2 Virtual Bassist plays at double the tempo of your project.
The red LEDs under the Speed control indicate the current position in
the bar.
Virtual Bassist
28
Page 29
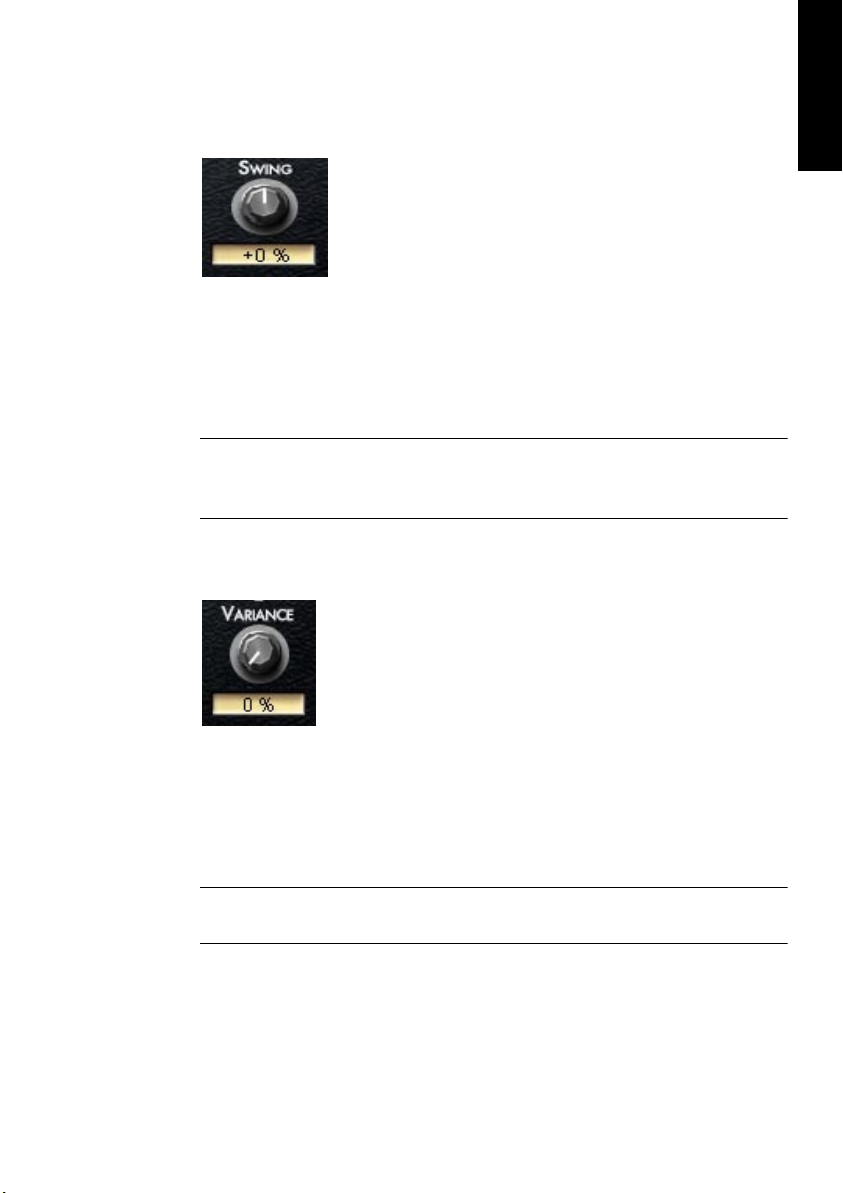
Swing
Swing allows you to adjust the feel of Virtual Bassist’s performance.
Technically speaking, Swing allows you to move the offbeats of a bar
to an earlier or later position. Turning Swing to the left moves the offbeats back, turning it to the right moves them forward. Virtual Bassist
will play exact triplets when setting Swing to -100% or +100%.
The Swing controls on the Play page and the Groove Match page are actually the same. Swing controls the depth of the Micro Groove parameters found on the Groove Match page, see page 40.
Variance
ENGLISH
Virtual Bassist’s timing and feel are always perfect and reliable. However, given that these two words are rarely used to describe the timing
of a musician, Virtual Bassist also allows you to adjust how accurately
the player will play. Variance adds timing and sound variations so
every note sounds slightly different.
A setting of 0% produces a very accurate performance, while at a value
of 100% the performance is loose and uneven.
Virtual Bassist
29
Page 30
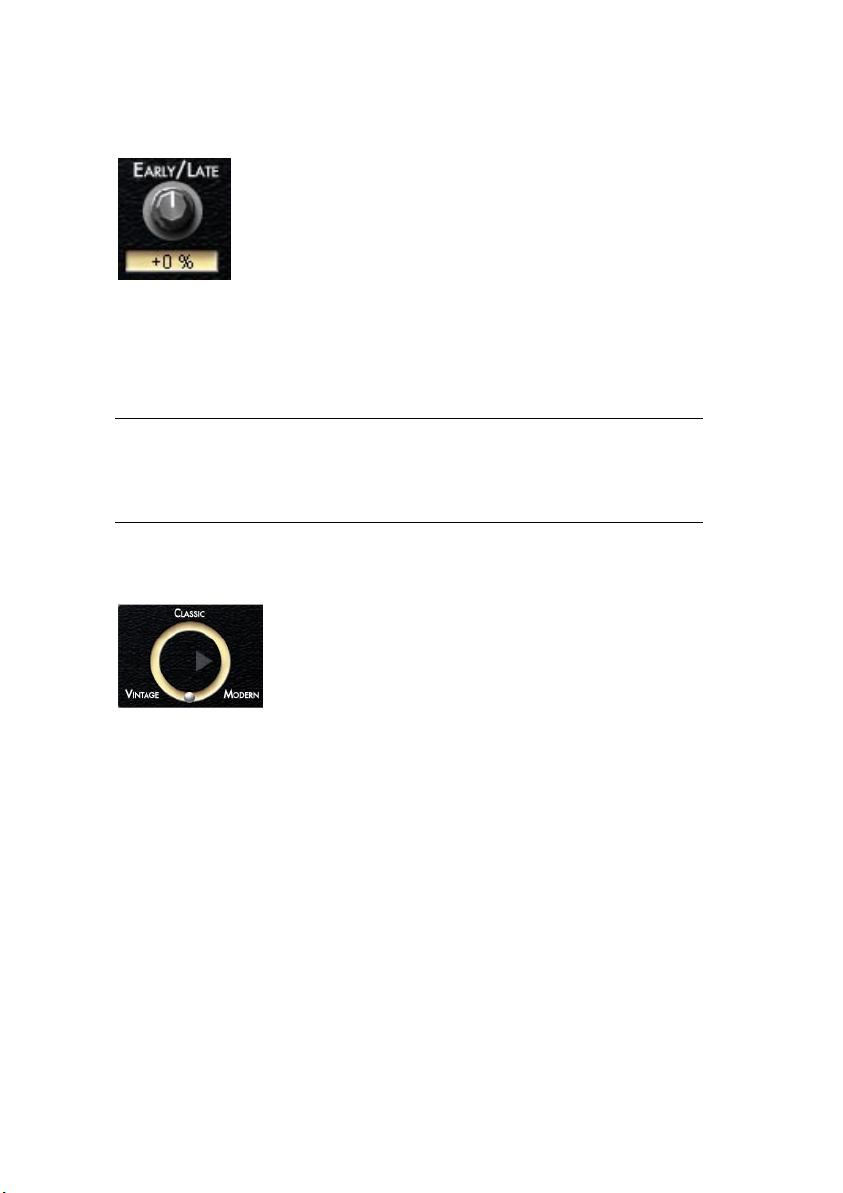
Early/Late
This control is used to adjust the overall timing of the Virtual Bassist in
relation to the rest of the instruments in your project. Turning to the left
(Early) will give you an aggressive groove, playing slightly ahead of the
beat, turning to the right (Late) produces a more laid back groove.
The maximum timing deviation is very modest and will hardly be audible
if only Virtual Bassist is playing. However, in conjunction with other
tracks, especially those that have been quantized it will become clearly
noticeable.
Bass Selector
This seamless selector allows you to change the basic sound of the
bass guitar being played. You can choose between the sound of a
modern bass guitar with active pickups, a classic model as used in
70’s rock and pop or a vintage bass with flatwound strings for that
legendary Motown sound. Just move the silver sphere on the circle to
the sound of your choice, or experiment with in-between positions.
Virtual Bassist
30
Page 31

Fret Buzz
Depending on the setup of the bass and the playing style, the strings
might touch the frets causing a buzzing or rattling sound. In Virtual
Bassist you can adjust the amount of buzz in your bass. The right dose
of Buzz will enhance the natural feel of your bass tracks.
Fret Noise
When a bassist moves from one hand position to another the hand
slides over the strings and frets creating a squeaking sound. This fret
noise is an important part of a natural bass sound – a fact often ignored in bass emulations. Virtual Bassist gives you control over the
amount of fret noise in your bass track. Select Mid for a little, Full for a
lot or Off to completely remove fret noises from the track.
ENGLISH
Compression, Drive, Master
These three knobs can also be found on the Amp & FX page. Since
these three controls are very useful for changing the sound of your
bass, for your convenience they are also available on the Play page.
The Compression control varies the Amount control on the effect
board’s compressor. Drive raises the gain of the preamp and Master
the master volume of the amplifier’s output.
Learn more about Compression, Drive and Master on page 44.
Virtual Bassist
31
Page 32

The bass sound lock
Activating the bass sound lock (by clicking on the lock symbol at the
bottom right of the bass) will lock all settings that influence your bass
sound, e.g. the knobs on the bass guitar and the bass selector. It will
keep these settings even when you change the Style.
Guitar controls
You will notice that the bass guitar graphic on the left of the Play page
has four knobs and a slider for varying your bass sound.
Volume
The Volume knob controls the output level of the Bass to the amp, just
like the volume knob on a real bass guitar. Turning this up will help to
overdrive your sound.
Tone
The Tone knob is also just like the tone control on a bass guitar. Turning the Tone knob to the left will cut high frequencies and soften the
sound.
Virtual Bassist
32
Page 33

Attack
Bass players can change the sound of their playing by choosing to
play with their fingers or a pick. Playing with the fingers produces a
softer sound while playing with a pick produces more of an attacking
sound. The Attack knob in Virtual Bassist adjusts the strength of the
attack allowing you to seamlessly produce the kind of attack sound
you want, from fingered to picked or in between.
Damp
Bass players can subtly vary their sound by damping the strings with
their hands, to make the sound duller and decay faster. The Damp
knob emulates this behavior, turning it to the left makes the sound
softer and more percussive.
ENGLISH
At the maximum left position Virtual Bassist will play deadnotes.
To emulate the sound of old bass strings try a setting between 10 and 2
o’clock.
Virtual Bassist
33
Page 34

Pickup position
The sound spectrum a bass guitar produces depends on the position
of the pick-up. A cool thing about Virtual Bassist is that it allows you
to adjust the position of the pick-up. Moving the slider downwards
from the neutral mid position increases the bite, while moving it up
produces a warmer sound with more bass.
Chord recognition
Virtual Bassist contains an intelligent chord recognition system, it always plays the correct bassline for the chords it receives from the MIDI
input of your sequencer or keyboard, although for some chord types
the bassline may not significantly change. The MIDI input can consist
of a complete chord or simple one-finger notes—you don’t need to
make any special settings because Virtual Bassist will always know
what to do.
Playing chords
If you play a complete chord in the Pitch Range (for example, the
notes C, F, and G for a Csus chord), Virtual Bassist will automatically
recognize it.
For the best possible chord recognition, all the notes of a chord must
be played. Playing three notes is sufficient for major, minor or sus4
chords, but for other chord types (maj7, 7, 6, dim, mmaj7, m7, m6,
m7-5, sus2 and 7sus4) you need to play all four notes.
Virtual Bassist
34
Page 35

Chord inversions
In most cases, it doesn’t matter what inversion of a chord you play.
However, there are some exceptions where the bass note has to be
the root or tonic note:
• m7: For example, in Am7 the A must be the bass note because Virtual Bassist
would otherwise interpret the chord as a sixth (C6, in this case)—although the
chord uses the same notes on the keyboard, it should have a different root
note when played on a bass guitar.
• dim chords (for example, Adim uses the same notes as Cdim, Eb-dim and
Gb-dim).
• +5 chords (A+5 uses the same notes as C#+5 and F+5).
• m6 chords (Am6 uses the same notes as F#m7-5).
One-finger chords
For the chord types major, 7, minor, and m7, you don’t actually need
to play all the notes in the chord. Although playing a single note always indicates a major chord, you can indicate a different chord type
by playing an additional key.
ENGLISH
Additional key Chord
None major
Next left white key 7
Next left black key minor
Next left white and black keys minor7
Chord display
The chord display at the top of Virtual Bassist’s Play page shows the
currently playing chord. Virtual Bassist will always play a fitting bass
line to any chord although for some chord types the bass line may not
significantly change.
Virtual Bassist
35
Page 36

The Groove Match page
On this page you can adapt existing grooves and rhythms, edit Parts
and Fills in the Macro Groove Display and set the overall timing with
the Micro Groove settings.
In the Part Browser you can edit the keyboard layout in the Remote
Range.
To switch to the Groove Match page, click the Groove Match tab at the
top of Virtual Bassist.
Virtual Bassist
36
Page 37

The Macro Groove display
The Macro Groove Display shows a timeline of the currently selected
Part or Fill. Parts can be up to four bars in length. Just like the Piano
Roll editor in your host application, the red rectangles show the pitch,
position and length of each note in the Part or Fill.
Attention! The vertical pitch information does not necessarily represent
the true pitch of the note, it’s presented this way for easier navigation.
Key Follow
ENGLISH
When the Key Follow button is active any Part or Fill played via MIDI
will automatically be selected in the Parts Browser and its rhythmic
structure will be shown in the Macro Groove Display.
Changing the timing of individual notes
The timing of all individual notes in a Part or Fill can be moved backwards or forwards (by up to an 8th note) by dragging them left or right.
When you move a note and it overlaps with another, Virtual Bassist automatically removes or shortens the previous note to maintain a realistic
monophonic bassline.
Muting notes
To mute a note simply right-click it and it becomes grey.
In Virtual Bassist 1.0 the pitch of a note cannot be edited.
Virtual Bassist
37
Page 38

Modifiers
The Modifiers section on the Groove Match page allows you to create
variations of Parts and Fills quickly and easily. A Modifier is simply a
preset which shifts or mutes notes in a selected Part or Fill to change
its rhythmic structure.
Each Modifier produces two versions (A & B).
The table below explains how each Modifier will change the selected
Part or Fill.
The Macro Groove Display is updated when a Part or Fill is modified.
Modifier preset Variation A Variation B
Simplify Keeps 8th notes. Keeps 4th notes.
Downbeats Plays only beats 1 and 3
of the bar.
Backbeat Plays only beats 2 and 4. Plays beats 2 and 4 plus the last
Offbeats Plays only 8th note offbeats.
For a triplet groove every 3rd
triplet note is played.
Plays beats 1 and 3 of the bar
plus the 8th note before beats 1
and 3. For a triplet groove beats
1 and 3 play plus the last triplet
before each.
8th note before beats 2 and 4.
For a 16th triplet groove, beats 2
and 4 play plus the last triplet for
each.
Plays 8th note offbeats plus the
next16th note after each. For a
16th triplet groove every 2nd
triplet note is played.
Virtual Bassist
38
Page 39

Modifier preset Variation A Variation B
Other This is a complex variation which
plays notes on the following
16ths of the bar: 1, 4, 7, 9, 12
and 15. For a 16th triplet groove
every 1st and 3rd triplet is played.
Root Notes Plays only the root notes in the
Part or Fill.
Randomize Produces a random variation. Produces an alternative random
Plays only beats 1 and the 8th
note before beat 4. For a 16th
Triplet groove the following triplets are played:1, 3, 5, 7, 9, 11.
Mutes the root notes of the Part
or Fill.
variation.
Compare
This button allows you to quickly compare your newly edited Part or
Fill with the original version.
Reset
Reset restores the Part or Fill to its original rhythmic structure.
ENGLISH
Virtual Bassist
39
Page 40

Micro timing settings
The Micro Timing Section of the Groove Match page allows you to
adjust the timing or feel of Virtual Bassist. The intensity of the timing
changes is controlled by the Swing knobs. The Swing knob on the
Groove Match page is connected to the Swing knob found on the
Virtual Bassist Play page.
Swing
Technically speaking Swing is the process of moving the timing of offbeats of a bar backward or forward in time, this will change the way
Virtual Bassist feels when it plays and may also help you adapt the
Virtual Bassist performance to an existing recording.
The three Swing buttons (1/16 Swing, 1/8 Swing and 1/4 Swing) under the Micro display allow you to select whether sixteenth, eighth or
quarter note offbeats will be moved and the Swing knob allows you to
adjust how far they will be moved and whether they are moved forward or backward in time.
Virtual Bassist will play triplets when the swing knob is set to ±100%.
Bar Stretch
Selecting Bar Stretch moves all notes except the first beat of the bar
in a Part or Fill forward or backward in time, to accentuate the downbeat.
Virtual Bassist
40
Page 41

From MIDI
When From MIDI is activated, Virtual Bassist will analyze its MIDI input
and adapt the Micro Timing to the incoming MIDI information. Any offset will be shown in the Micro Timing section.
Click From MIDI again to stop analyzing the MIDI input when you are
happy with the result.
When From MIDI is activated, Virtual Bassist will not respond to MIDI
controller messages.
Reset
Clicking Reset will reset the Micro Timing settings and Virtual Bassist
will play with its usual timing unaffected.
ENGLISH
Virtual Bassist
41
Page 42

The Part Browser
The Part Browser displays all of the Parts, Fills and Remote Keys used
in the Remote Range and their MIDI key assignments. A selected Part,
Fill or Remote Key becomes highlighted in the Part Browser. You can
trigger Parts by clicking the note description keys on the left.
What can you do in the Part Browser?
Assign keys
You can assign any Part, Fill or Remote key to any MIDI key inside the
Remote Range.
To do this:
1. Play the relevant key (Key Follow switched on) or click the Part in the
Browser to select it. The part will become highlighted. If a key is assigned to a Part or Fill its rhythmic structure will appear in the Macro
Groove Display.
2. Right-click the Key in the Browser and select a Part, Fill or Remote
Key from the context menu.
You can assign the same Part to several keys! This allows you to have
variations of the same groove on multiple keys.
Virtual Bassist
42
Page 43

Copy and paste parts
Virtual Bassist allows you to edit Parts and Fills with Groove Match
and to assign any Part or Fill to any Key in the Remote Range. It is also
possible to edit a Part or Fill and copy it to another key.
To copy an edited Part to another key:
1. Edit a Part with Groove Match (e. g. Complex 4 on F2).
2. Right click the key in the Part Browser and select Copy from the con-
text menu.
3. Right-click the destination key (e. g. G2) and select Paste from the
context menu.
Rename keys
For convenience, all keys in the Remote Range can be renamed in the
Part Browser. To do this double-click a key in the Browser, type in its
name and press [Enter] on your computer keyboard.
ENGLISH
Virtual Bassist
43
Page 44
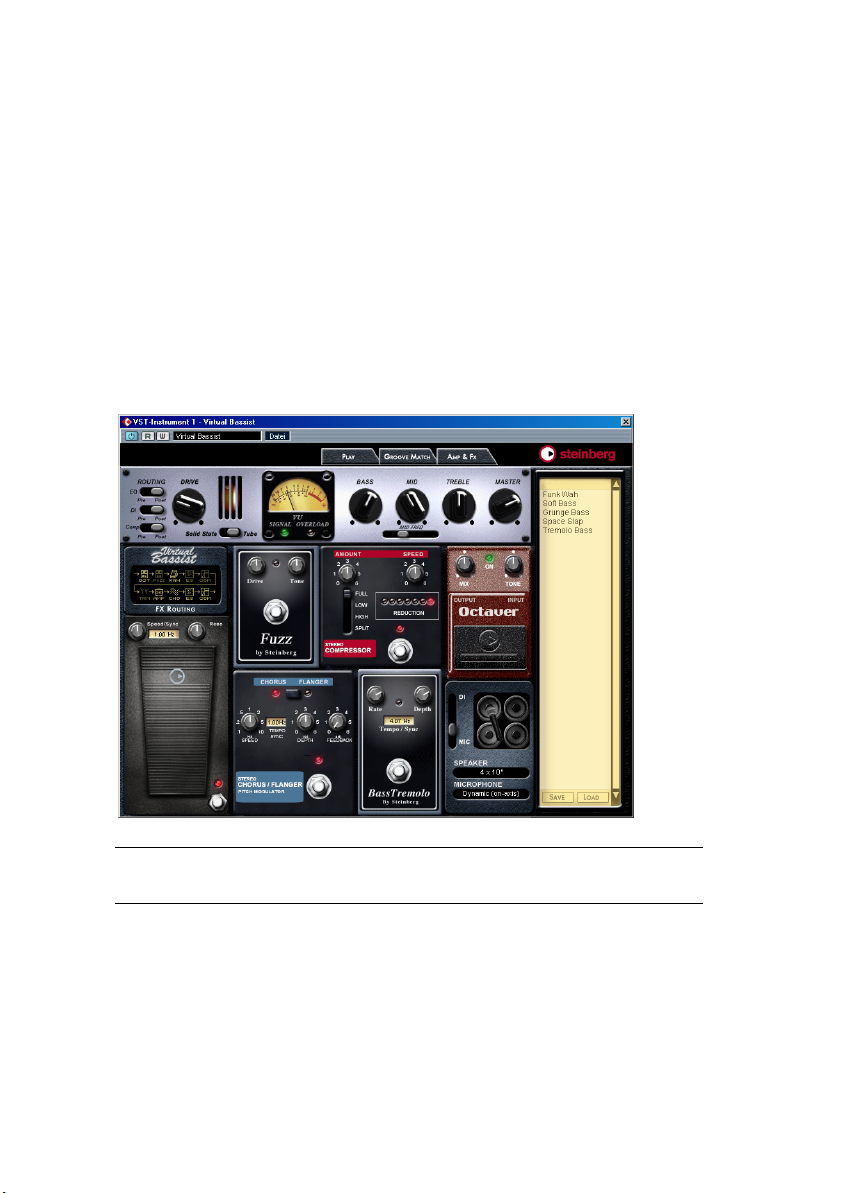
The Amp & FX page
The Amp & FX page is the icing on the Virtual Bassist cake. The amp
has authentic Solid State or Tube modes and the stomp box collection includes everything a bassist needs on stage or in the studio.
We’ve focussed on getting the best possible sound and feel.
Since the amp sound and effects are an important part of an electric
bass sound, the multi-effect board in Virtual Bassist is seamlessly integrated into the instrument. The same multi-effect board can also be
used as an effect plug-in in your host application on any instrument or
track you choose, see page 63.
To switch to the Amp & FX page, click the Amp & FX tab at the top of
Virtual Bassist.
Virtual Bassist
44
Page 45
The Amp section
At the top of the Amp & FX page you will see the silver Virtual Bassist
amplifier.
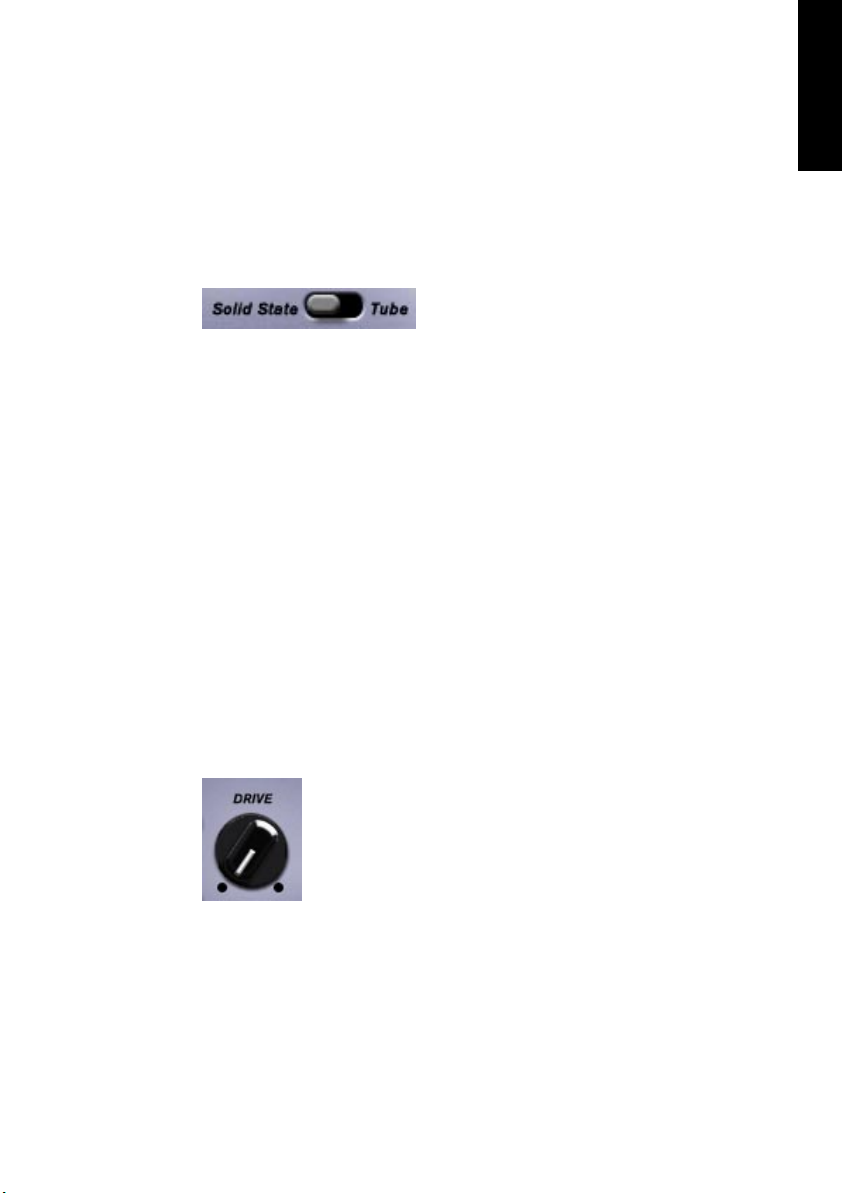
Solid State Or Tube amplifier?
Solid State
The transistors in a solid state amp deliver high volume with a fast
transition from clean to distorted (turning up the Drive), adding odd
harmonics to the bass signal. If you are looking for high power and a
pure, bright sound, switching to Solid State will probably serve your
needs perfectly.
Tube
Tube amps are famous for their warm and refined amplification. Turn
up the Drive and the amount of distortion rises gradually. If you want a
warm and smooth crunched sound, switching to Tube is your choice.
ENGLISH
Musicians have argued forever about which is the better amplifier –
some people like coffee and others prefer tea.
Drive
The Drive knob controls the gain of the preamp. Turning it to the right
means your signal will get louder but will also start to distort. As mentioned above the Drive knob’s behavior depends on which amp model
you use - Tube or Solid State.
Virtual Bassist
45
Page 46
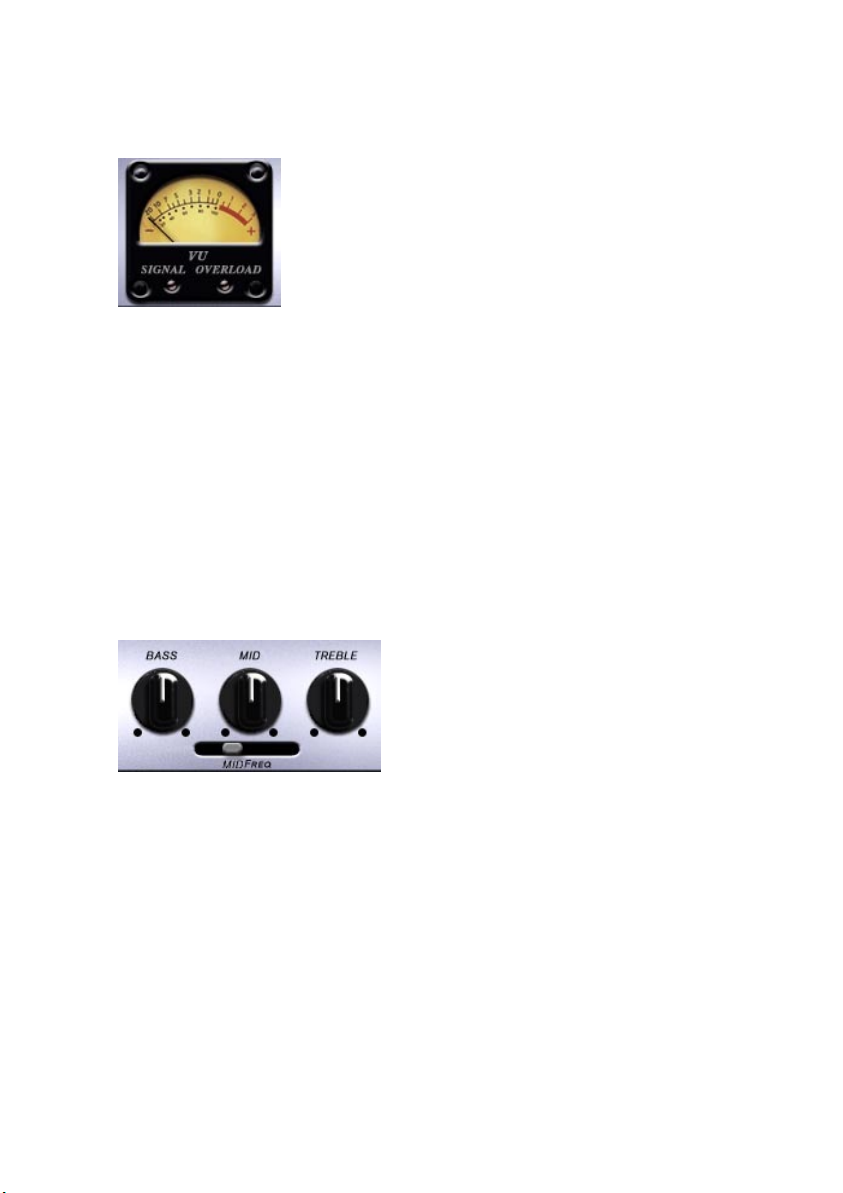
VU meter
The VU meter is used to give an accurate visual indication of the output
of the amplifier. It closely corresponds to the level sensing mechanism
of the human ear and therefore provides a useful indication of the subjective loudness of a signal. The VU meter is a standard requirement in
recording studios and professional amplifiers as it aids the recording
engineer or the musician to control the headroom of the entire system
and to avoid clipping. Virtual Bassist’s VU meter indicates the output of
the preamp. The perfect recording level is slightly below 0dB, occasionally moving into the red. A meter reading of +3dB indicates a distortion of 10%.
EQ
This high quality three band equalizer gives you powerful frequency
control and features a parametric mid band. It was specially designed
for Virtual Bassist to give you exactly the tools you need to tweak your
bass sound.
MID FREQ
Use this slider to adjust the frequency of the mid band.
Virtual Bassist
46
Page 47

Master
The Master Level knob controls the main output volume of Virtual
Bassist.
For convenience this knob is linked to the control with the same name
on the Play page.
FX section…
The following section will give you an introduction to the effects features of Virtual Bassist. Although we’ll try to explain them theoretically
it’s always a good idea for you to just play around with them to get an
impression of what they can do.
ENGLISH
Switching effects on or off
Every effect device has its own on/off switch. All switches are classic
metal switches with a indicator LED except the Octaver which has a
black rubber switch on the bottom half of the pedal.
Effects are active when the LED is lit.
Virtual Bassist
47
Page 48

Tempo-syncing effects
Wah, Chorus/Flanger and Tremolo can all be tempo synchronized to
your project tempo so that they modulate at exactly the right speed for
your project. To synchronize an effect unit to the project tempo simply
click the yellow Tempo/Sync field on the pedal and choose a speed
from the drop-down menu. T is for triplets, * for dotted.
To set the pedal back to an unsynced speed just move the rate or speed
knob on the pedal.
Virtual Bassist
48
Page 49

The effects
Wah pedal
The Wah effect was named after its sound and is a special lowpass
filter with a resonance control that amplifies the frequency band
around the cutoff frequency. The pedal controls the cutoff frequency
opening and closing the filter. Just like in real life the Virtual Bassist’s
Wah pedal is inserted between the bass and the amp.
ENGLISH
Resonance
The Resonance knob in the top right corner of the pedal controls the
intensity of the Wah effect. Turning this knob up amplifies the frequency band around the cutoff frequency. Higher Resonance values
make the Wah effect more intense. From “wa” to “uuaah”.
Wah control
When the Wah speed is set to zero you can manually control the
pedal with your mouse or the modulation wheel of your MIDI keyboard. Of course this movement can be recorded or written as automation information in your project.
The wah pedal can be controlled by any MIDI CC#, see page 64.
Virtual Bassist
49
Page 50

Speed (tempo synchronized wah)
Turning up the speed control in the top left corner activates the Auto
Wah, a Wah that automatically modulates at the speed you set. The
foot pedal now controls the center frequency of the Wah.
Setting the Auto Wah rate is a simple matter of moving the Speed
knob, the Wah speed is displayed in the yellow field in Hertz or “Wahs
per second”. The following table gives some examples of how long
one filter movement or Wah will take at different speed settings:
Speed (Hz) Seconds per “Wah”
0.1 10
0.5 2
10 0,1
Of course you can synchronize the speed of the Wah to your host’s
tempo. Select a note resolution from the Speed/Sync drop-down menu
next to the speed knob. T stands for triplets, * for dotted.
Auto
When you set the Speed knob to maximum, the Wah pedal will be
controlled via envelope analysis (also called envelope follower). This
means that the filter cutoff frequency will be controlled by the input
(bass) signal. In this mode the Speed knob’s display will say “Auto”.
Virtual Bassist
50
Page 51

Fuzzbox
The Fuzz box got its name from the fuzzy sounds it generates. The genuine sound comes from a distorted transistor amplification that cuts the
waveform’s peaks and changes them towards a square wave. If you’re
not after the natural drive of your solid state amp give this one a try. The
fuzz box is standard issue for modern Heavy and Industrial music.
Setting up the Fuzzbox:
1. Use the Drive knob to adjust the amount of distortion, turning it to the
right increases distortion.
ENGLISH
2. Turning the Tone knob towards the left produces a softer sound while
turning it to the right produces a brighter, thinner sound.
Virtual Bassist
51
Page 52

Compressor
A compressor is a tool to control the dynamic range of an audio signal.
Technically speaking, it consists of an envelope detector controlling a
voltage controlled amplifier. Practically it limits volume peaks and allows you to boost the volume of the quieter parts of the signal. Use it
to accentuate attacks or increase the sustain of your bass notes.
Setting up the Compressor:
1. Select which frequency band of the bass sound you want to compress:
FULL Compresses the whole frequency range, perfect for accentuating attacks.
LOW Compresses the lower frequency band, increasing the amount of bass.
HIGH Compresses the higher frequency band, also increasing fret noise (see
page 31) and fret buzz (see page 31).
SPLIT Compresses the high and the low frequency bands independently, resulting
in a soft, dense overall compression. Also increases sustain.
2. Use the Amount knob to set the level of compression from 1 (gentle)
to 6 (hard).
3. The Speed knob determines how fast the compressor reacts to a signal from 1 (quickly) to 6 (slowly).
• To accentuate the bass attacks try setting the Compressor to FULL,
Amount to 2 and Speed to 3.
• To lift the sustain of single bass notes try setting the Compressor to
SPLIT, Amount to 4 and Speed to 1.
Virtual Bassist
52
Page 53

Octaver
The Octaver adds a second pitched bass signal. This is a very common effect to make the bass sound fatter or growly. A whiff of a fifth, a
third or an octave softly added to Virtual Bassist’s signal will make it
sound much more dense.
Try turning the Mix knob to maximum and the Tone to very low, add
some chorus and you will end up with a quite synthetic bass sound.
Setting up the Octaver:
1. Turning the Mix knob to the right increases the level of the second
harmony bass generated by the Octaver.
ENGLISH
2. The Tone knob sets the pitch of the harmony bass generated by the
Octaver. Fully to the left produces a signal one octave lower than the
original, fully to the right one octave up.
Please note that the Octaver will work properly only with higher bass
notes, lower bass notes are too low for the Octaver to track.
Virtual Bassist
53
Page 54

Chorus/Flanger
This is a two in one stomp box. Click the button at the top of the effect
to switch between Chorus and Flanger.
Flanger
A Flanger adds a whirling, glassy character to the sound. It is created by
slightly delaying the effect signal, modulating the delay time and feeding
a portion of the effect back into the input to sharpen the effect.
Setting the Flanger:
1. Click the button at the top of the effect to choose Flanger.
2. Use the Speed control to adjust the modulation speed. Higher set-
tings make the Flanger sound like a vibrato.
3. Using the Depth knob adjusts the delay time and therefore the pitch
range of the Flanger effect.
4. Now turn up the Feedback control until the effect has the desired
contour (from subtle to glassy to sharp swirling).
Virtual Bassist
54
Page 55
Chorus
As the name suggests, a chorus seemingly multiplies the signal, livening up the sound, making it wider and thicker. The principle of the
Chorus is similar to the Flanger except for the fact that the modulation
is unsynced for the left and right channels and the pre-delay time is
longer making the Chorus fatter and less glassy.
Setting the Chorus Effect:
1. Click the button at the top of the effect to choose Chorus.
2. By matching Speed and Depth to each other, you can create a wealth
of effects. As a rule of thumb: The higher you set Speed, the lower you
need to set Depth and vice versa, otherwise the detuning becomes
too strong. A high Speed setting creates vibrato-like effects.
3. Now carefully turn the Feedback knob up to accentuate the detuning
effect of the Chorus.
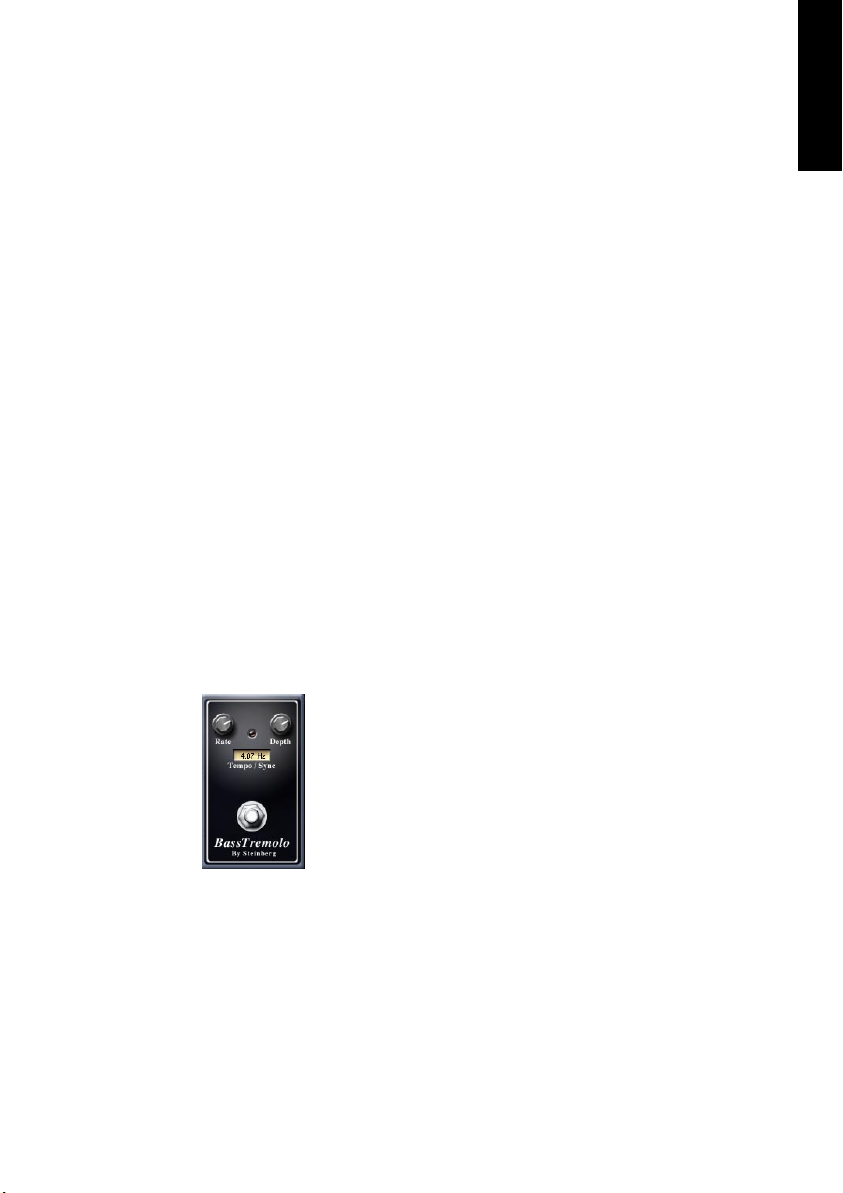
Tremolo
Tremolo (also called amplitude vibrato) is commonly used to liven up
clean or slightly overdriven bass sounds. It was most popular before
Chorus became an alternative and it’s typical for many classic bass
tracks.
ENGLISH
Programming the tremolo is pretty straightforward: You can only control Rate and Depth. Unlike traditional hardware tremolo effects this
one can be synchronized to the project tempo. This allows you to use
it as a “Chopper” effect e.g. for Nu Metal styles.
Virtual Bassist
55
Page 56

Effect routing
Routing display
The effect routing is set up in the most efficient way. All effects are
connected in series in the following order:
Activated effects are highlighted in the routing display.
Routing switch
If you take a closer look at the FX Routing you will notice that EQ and
Compressor are available at two positions in the chain. Depending on
the sound you’re aiming for, you might want to have the EQ and the
Compressor in front of the other effects or after them.
To manage the signal flow of the effect board and the position of the
DI (Direct Injection) box – pre or post Drive – the amp section has
three routing switches.
For example you want...
1. …the Chorus to affect the compressed signal (Compressor pre).
2. …to compress an already chorused signal (Compressor post).
3. …to mix a clean DI signal with the overdriven signal from a mic’d
cabinet (DI pre).
Virtual Bassist
56
Page 57

The output section
The output section of Virtual Bassist allows you to choose between
several recording setups to polish the sound of your bass track. Our
ultra realistic algorithms put you in the chair of the producer, creating
recording conditions just like in a real studio situation.
DI/Microphone
ENGLISH
Set the slider on the left to DI to record Virtual Bassist through a DI box.
DIs are used in professional studios to connect the bass guitar directly
to the mixing console. The DI sound is usually a very distinctive and
clean sound although as mentioned in the FX Routing section, the DI
can be placed before or after the Drive in the Virtual Bassist amp.
Setting the slider to MIC sends Virtual Bassist through its own mic’d
speaker cabinet. Virtual Bassist’s speaker cabinet has a number of
configurations and microphone types, explained below.
The DI/MIC slider in Virtual Bassist allows you to set any mix of DI and
speaker.
Virtual Bassist
57
Page 58

Speaker cabinets
Virtual Bassist has six types of speaker cabinets available which cover
most speaker configurations used by bass players and offers many
possibilities to shape your bass sound.
1 x 15” A bass amp combo with a single 15 inch speaker.
1 x 18” A bass amp combo with a single 18 inch speaker.
2 x 15” Two 15 inch speakers in a cabinet.
4 x 10” Four 10 inch speakers in a quad box.
4 x 10” Alum Four 10 inch aluminium speakers in a quad box.
8 x 10” Two quad boxes, each with four 10 inch speakers.
Virtual Bassist
58
Page 59

Microphone type
The Virtual Bassist speaker cabinet is recorded using either a dynamic
or condenser microphone. The microphone can be placed on axis,
meaning directly in front of the speaker cone, or off axis meaning that
it points more towards the speaker’s edge than the cone.
ENGLISH
Dynamic
(on-axis)
Dynamic
(off-axis)
Condenser
(on-axis)
Condenser
(off-axis)
Dynamic microphone pointed
directly towards the speaker cone
of the cabinet.
Dynamic microphone pointed
towards the speaker edge.
Condenser microphone pointed
directly towards the speaker cone
of the cabinet.
Condenser microphone pointed
towards the speaker edge.
Produces a more cutting bass
sound with an accentuated mid
range.
Produces a slightly warmer sound
than the above setting.
Produces a clearer less colored
sound than the dynamic microphones.
Produces a slightly less bright
sound than the above setup.
Because the speaker combination selected also affects the sound of
Virtual Bassist, the above microphone descriptions should be only
treated as a general overview. The many combinations of microphone
and speaker types will give you a broad choice of tones for every Virtual
Bassist Style.
Virtual Bassist
59
Page 60

Effect management
Effect programs
When you load a Style in Virtual Bassist all effects settings for the
Style are automatically loaded. In addition Virtual Bassist can independently save and load Effect Programs which include only the settings for the Amp & FX page.
Virtual Bassist comes with 32 factory effect programs plus an effect
program for each Style (displayed in the Amp & FX page Browser on
the right hand side of the Amp & FX page). In addition a virtually unlimited number of user effect programs can also be saved and loaded.
Loading effect programs
There are two ways to load effect programs:
1. Double-click the effect program name in the Browser on the right
hand side of the Amp & FX page.
2. Click the Load button at the bottom of the Browser on the right hand
side of the Amp & FX page and locate and load the effect program via
the standard load dialog that appears.
Virtual Bassist
60
Page 61

Loading the effect settings used in a Style
The Amp & FX page settings used by any Style can be loaded into any
other Style. To do this:
• In the Amp & FX page browser, double-click an effect program with
the name of the Style you want.
or…
• Use the Load button at the bottom of the Browser.
Saving effect programs
Since a Style loads and saves its effect settings automatically it is not
necessary to save effect programs for the Styles you create. Virtual
Bassist however allows you to load and save effect programs that you
find particularly useful.
1. Edit the Amp & FX page settings to your liking.
2. Click the Save button at the bottom of the Browser on the right hand
side of the Amp & FX page.
ENGLISH
3. Set a name and location for the effect program using the standard
Save dialog.
Be careful to use different names for your Effect Programs as files with
the same names will be overwritten.
Virtual Bassist
61
Page 62

Bonus feature: Creating your own phrasings
Although you can control Virtual Bassist via any MIDI channel, the most
common channel to use will be MIDI channel 1. However, if you send
Virtual Bassist MIDI data via MIDI channel 16, it will behave in a totally
different way. When playing on MIDI channel 16, all the components
making up a Part can be accessed individually, which allows you to
create and record your own Parts. Handling this is not very easy, but
your patience will be rewarded if you invest a little research time.
Playing individual hits
On MIDI channel 16, the keyboard is split into two halves. The keys of
the Pitch Range are used to select the Pitch, as usual, while the Remote Range’s keys trigger the individual, single components of the
currently selected Part. You cannot select the Part on MIDI channel
16 but it’s no problem to trigger single components via channel 16
and select which Part via channel 1.
Example:
1. Select a Style (e. g. 80’s Brit Funk) and set the Virtual Bassist track to
MIDI channel 16.
2. Select a Part by clicking on it in the Part browser or by playing it via
MIDI channel 1.
3. Hold down a note in the keyboard’s Pitch Range and play single keys
in the Remote Range. You can play single individual components of
the Part on each key in the Remote Range.
The notes you play on channel 16 can also be recorded on a MIDI track
or entered into an editor which allows you to create your own part variations by defining the progression and timing of individual beats. You can
then save these part variations as MIDI sequences and include them in
your projects.
Virtual Bassist
62
Page 63

Plug-in version of the effect board
The Amp & FX section of Virtual Bassist is also available as a separate
effect plug-in for the following formats: VST (for both Windows and
Mac OSX), DirectX, Audio Units.
You can use this plug-in on any mixer channel in your host application,
for example for your keyboards, vocals or drums tracks. The plug-in
version offers all of the functionality of the integrated effect board.
All knobs and switches can be set to any MIDI controller by right clicking and choosing a MIDI controller from the drop-down list or using
MIDI Learn, see page 65.
ENGLISH
You may have to assign a MIDI input to the plug-in in your host application.
Effect presets created and saved in the Virtual Bassist instrument can be
loaded into the effect plug-in (and vice versa) via the effect programs
Browser.
Virtual Bassist
63
Page 64

MIDI Controller assignments
To help you get the most out of Virtual Bassist in a recording or performance situation we have made many parameters available for use
with MIDI controllers. The following table shows the factory default
assignment of Virtual Bassist parameters to MIDI controller numbers.
CC# Name Virtual Bassist parameter
1 Mod Wheel Wah Pedal
7 Volume Master Volume
11 Expression Bass Volume
64 Sustain Pedal Latch On/Off
71 Resonance Damp
73 Attack Attack
74 Cutoff Tone
76 Vibrato Rate Vibrato Rate
77 Vibrato Rate Vibrato Rate
78 Vibrato Rate Vibrato Rate
91 FX Send 1 Drive
Depending on the capabilities of your VST host application, you can also
automate many of the knobs and switches in Virtual Bassist using your
sequencer’s automation features. This type of automation is available in
all Steinberg host applications: Cubase SX/SL and Nuendo for example.
Virtual Bassist
64
Page 65

Assigning MIDI controllers in Virtual Bassist
As well as the preassigned MIDI Controllers listed above, you can assign many of Virtual Bassist’s features to MIDI controllers for automation or real-time control, e.g. via the knobs of your MIDI keyboard.
There are two ways to assign a Virtual Bassist knob or parameter to a
MIDI controller:
1. Right-click the parameter and choose a controller number from the
drop-down list.
2. Right-click the parameter, click Learn and move the desired knob or
controller on your MIDI keyboard or sequencer host. Virtual Bassist
will set this MIDI controller to the parameter you have chosen.
ENGLISH
Virtual Bassist
65
Page 66

The Settings page
The Virtual Bassist Settings page provides access to all global parameters that affect how the instrument will play.
When you save a Virtual Bassist Style, all information on the Settings
page is also saved. This means that if you exchange your project files
with someone who also has Virtual Bassist, it will perform in exactly the
same way on their computer as it did on your system. When your friend
later uses Virtual Bassist on their own project, their usual Settings will
be automatically active.
To select the Settings page click the Steinberg logo in the top right corner of the Virtual Bassist window.
Virtual Bassist
66
Page 67

Vibrato
All Virtual Bassists Styles have their own special vibrato settings
found at the top of the Settings page. These vibrato parameters are
preassigned to MIDI controllers:
CC#76 Vibrato Rate
CC#77 Vibrato Depth
CC#78 Vibrato Delay
The Vibrato Rate on the Settings page also controls the Aftertouch
Vibrato rate.
The default Vibrato CC# assignments can be easily changed by rightclicking any knob and choosing a new controller from the list or using
MIDI Learn, see page 65.
ENGLISH
Key Change Quantize
The Key Change Quantize parameter determines at which position of
the bar Virtual Bassist will make a Part change. For example, if you set
this parameter to sixteenth notes (1/16), the Part will change at the
next sixteenth note in the bar after the Part note is played.
This makes real time MIDI triggering much easier and prevents unwanted Part changes.
Sustained notes are not affected by this function.
Virtual Bassist
67
Page 68

Fill Triggering
In Auto mode Fills will play at a predefined bar position and for a predefined length. If you want Fills to switch in the same way as normal
Parts (for example at the next 16th note in the bar), select Key Change
Quantize. In this mode Fills change according to the Key Change
Quantize setting in the same way as normal Parts.
Keyboard Layout
The Keyboard Layout field allows you to swap the keyboard areas
used for the Pitch Range and the Remote Range.
When Keyboard Layout is set to Pitch Range Right (default setting)
the Pitch Range extends from MIDI keys C3 to B4 and the Remote
Range from C1 to B2.
When Keyboard Layout is set to Pitch Range Left the Pitch Range extends from MIDI keys C1 to B2 and the Remote Range from C3 to B4.
Bar Sync
By default, Virtual Bassist is set to Bar Sync Off. This means that Virtual
Bassist synchronizes to the host tempo but not to the bar position. This
is generally the best setting when you are working with Virtual Bassist.
When Bar Sync is set to On, Virtual Bassist synchronizes to the host
tempo and to the host bar position.
Virtual Bassist
68
Page 69

Master Fine Tune
This parameter allows you to adjust the tuning of Virtual Bassist by up
to ± 50 cents.
Save Defaults
Pressing the Save button saves your current MIDI Controller assignments plus all settings on the Settings page, except Vibrato and Master Fine Tune. The settings for the Latch and Retrigger parameters on
the Play page are also saved. These settings are loaded as the default
set anytime you use Virtual Bassist in the future.
ENGLISH
Exit
Click the Exit button to close the Settings page and return to the previously opened page.
All your settings are saved and take effect the moment they are changed.
Virtual Bassist
69
Page 70

Credits
Bass Performance and Engineering: Detlef Blanke (www.D-Tone.de)
(info@D-Tone.de)
Programming: Paul Kellett, Mario Reinsch, Benjamin Wendelstein
Audio Editing: Sascha Haske, Edi Hettinger, Malte Bieler, Jan Schmidt
Proofreading: Mark Ovenden
Graphics: Frank Simmerlein
QA: Götz Kretschmann, Wolfram Knelangen
Project Management: Helge Vogt, Lars Slowak
Executive Producer: Peter Gorges
Virtual Bassist
70
Page 71

Virtual Bassist
Handbuch
von Wolfram Knelangen
Page 72

Die in diesem Dokument enthaltenen Informationen können ohne Vorankündigung geändert werden und stellen keine Verpflichtung seitens der Steinberg
Media Technologies GmbH dar.
Die Software, die in diesem Dokument beschrieben ist, wird unter einer
Lizenzvereinbarung zur Verfügung gestellt und darf ausschließlich nach Maßgabe der Bedingungen der Vereinbarung (Sicherheitskopie) kopiert werden.
Ohne ausdrückliche schriftliche Erlaubnis durch die Steinberg Media Technologies GmbH darf kein Teil dieses Handbuchs für irgendwelche Zwecke oder
in irgendeiner Form mit irgendwelchen Mitteln reproduziert oder übertragen
werden.
Alle Produkt- und Firmennamen sind ™ oder ® Warenzeichen oder Kennzeichnungen der entsprechenden Firmen.
© Wizoo Sound Design GmbH & Steinberg Media Technologies GmbH, 2005.
Alle Rechte vorbehalten.
Virtual Bassist
72
Page 73

Inhaltsverzeichnis
74 Und am Bass…
75 Herzlichen Glückwunsch!
76 Was ist Virtual Bassist?
77 Wie funktioniert Virtual Bassist?
78 Was kann Virtual Bassist, was kann er nicht?
78 Lassen Sie Ihre Software registrieren!
79 Der Steinberg Key
81 Systemanforderungen (PC-Version)
81 Installation (PC-Version)
82 Systemanforderungen (Mac-Version)
82 Installation (Mac-Version)
83 Aktivieren des Steinberg Key
84 Einrichten von Virtual Bassist als VST- Instrument in Ihrer
Host-Anwendung
85 Einrichten von Virtual Bassist als DXi2-Instrument
86 Verwenden von Virtual Bassist in einer AU-kompatiblen Anwendung
86 Virtual Bassist als Standalone-Anwendung und ReWire
88 Latenz
88 Verwenden einer Eintastenmaus (Mac)
88 Erster Test
89 Wie spielt man Virtual Bassist?
90 Verwenden eines MIDI-Keyboards
92 Terminologie
94 Die Play-Seite
95 Laden und Speichern von Styles
96 Anhören von Styles
97 Bedienelemente auf der Play-Seite
104 Regler auf der Bassgitarre
107 Akkorderkennung
109 Die Seite »Groove Match«
110 Die Macro-Anzeige
113 Einstellungen im Micro-Bereich
115 Der Parts-Browser
117 Die Seite »Amp & FX«
118 Der Amp-Bereich
121 Der FX-Bereich
123 Die Effekte
130 Effekt-Routing
131 Der Ausgangsbereich
134 Verwalten von Effekten
136 Bonus: Erstellen eigener Phrasen
137 Die PlugIn-Version der Effekt-Seite
138 MIDI-Controller in Virtual Bassist
139 Zuweisen von MIDI-Controllern in Virtual Bassist
140 Die Settings-Seite
145 Credits
DEUTSCH
Virtual Bassist
73
Page 74

Und am Bass…
Unser Virtual Guitarist war für viele Anwender eine Offenbarung für ihre
Musik und ihr Verhältnis zu Gitarristen. Der Erfolg und die Anerkennung,
die Virtual Guitarist von Hobbymusikern wie Profis gleichermaßen erhielt, waren daher Ansporn genug, als nächstes Virtual Bassist in Angriff zu nehmen. Und hier ist, nach drei langen Jahren, das Ergebnis.
Wenn Sie bereits mit Virtual Guitarist gearbeitet haben, werden Sie bemerken, dass sich das lange Warten gelohnt hat. Die dem Programm
zugrunde liegende Engine ist flexibler und intelligenter geworden, aber
das Herzstück von Virtual Bassist sind nach wie vor Aufnahmen von
echten Bässen. Mit Virtual Bassist verwendet Ihre Musik weiterhin von
Menschen mit Feeling und Musikalität eingespielte Aufnahmen. Das
Programm sorgt lediglich für die nötige Flexibilität, Steuerbarkeit und
Intelligenz, damit Sie Ihrem Bassisten mitteilen können, was er spielen
und wie er dabei klingen soll. Und für viele Anwender wird das schon
die wichtigste Innovation sein.
Kurz gesagt: Wir sind stolz auf den Klang von Virtual Bassist und wie
leicht man damit arbeiten kann. Wir sind stolz auf Groove Match, eine
neue Funktion, die Ihnen völlig neue Einsatzmöglichkeiten bescheren
wird. Und dank dem hervorragenden Amp und den Effekten sind wir
sicher, dass Virtual Bassist alle Erwartungen erfüllen kann, die Sie an
ihn stellen.
Viel Spaß wünscht
Peter Gorges
Executive Producer
Virtual Bassist
74
Page 75
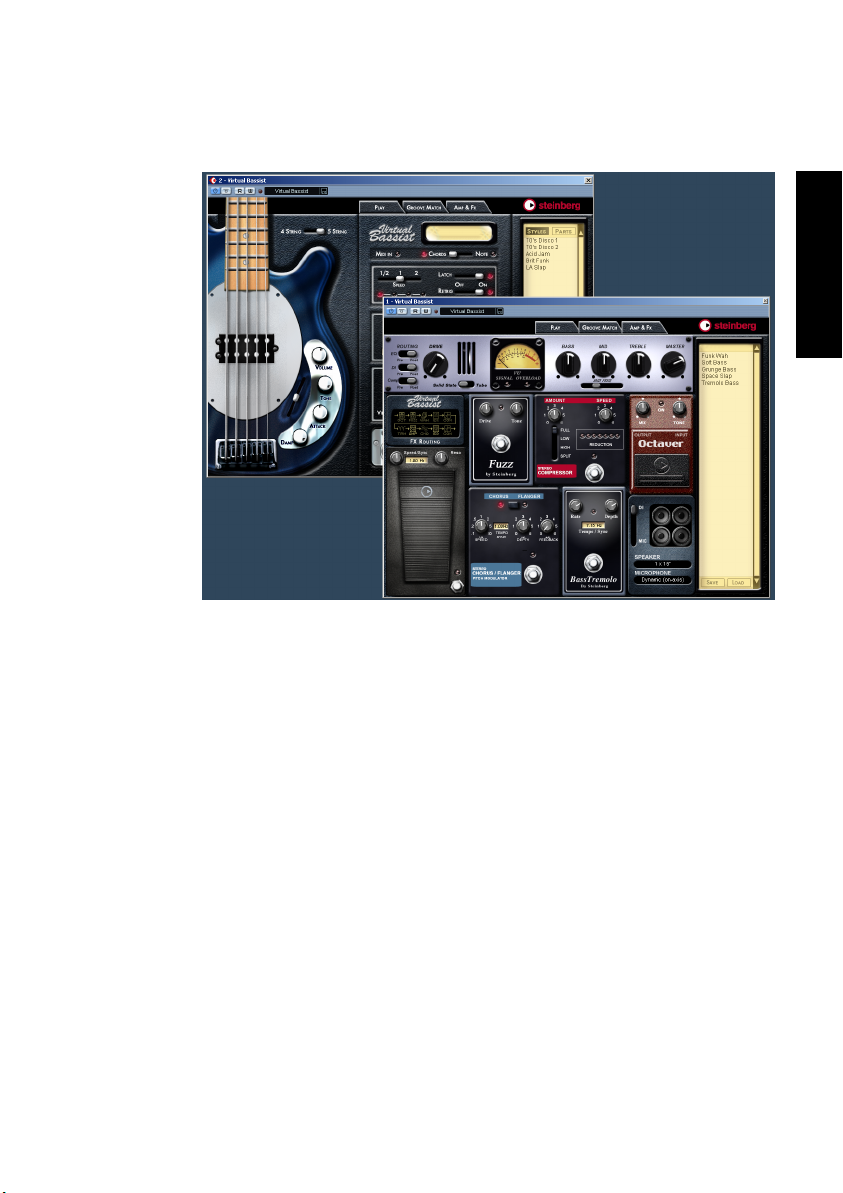
Herzlichen Glückwunsch!
Virtual Bassist ist Ihr neuer Mann am Bass. Er beherrscht 30 verschiedene Styles, spielt mit perfektem Sound und perfektem Timing und
kann sich an praktisch jeden Musikgeschmack anpassen.
DEUTSCH
Mit Virtual Bassist können Sie professionell eingespielt klingende
Bass-Parts in Ihre Projekte einbauen, ohne einen Bassisten zu bemühen und ohne lange auf eine gute Aufnahme warten zu müssen. Und
selbst wenn Sie zusätzlich mit einem »echten« Bassisten arbeiten,
bietet Virtual Bassist einen sehr großen Vorteil: Sie können jederzeit
und überall mit Ihren Bass-Parts experimentieren, ohne zusätzliches
Aufnahme-Equipment. Sie können neue Parts erstellen oder die Effekte von Virtual Bassist zur Bearbeitung Ihrer eigenen Bassaufnahmen verwenden. Sogar auf einem Laptop, während Sie im Park sitzen.
Virtual Bassist
75
Page 76

Was ist Virtual Bassist?
Technisch betrachtet ist Virtual Bassist ein Software-Instrument. Sie
können Virtual Bassist entweder als eigenständige Anwendung
(»Standalone«) oder in einer Host-Anwendung unter Windows oder
Mac OS X einsetzen. Die Host-Anwendung muss dabei mit den Standards VST, DXi, AU oder ReWire kompatibel sein. Virtual Bassist bietet eine Reihe verschiedener so genannter Styles, von denen jeder zu
einem bestimmten Musikstil passt. Jeder Style hat seinen eigenen
Klang und eigene Phrasierung und bietet mehrere zusätzliche Fills
und Einstellmöglichkeiten.
Virtual Bassist spielt den Bass, Sie müssen lediglich über ein MIDIKeyboard die Akkorde oder Grundtöne festlegen. Phrasierung und
eine Vielzahl weiterer Spielparameter können Sie in Echtzeit steuern,
entweder mit der Maus oder über MIDI-Controller. Verwenden Sie
»Groove Match«, um Licks an Ihre Projekte anzupassen und die vielen
verfügbaren Effekte, um den richtigen Sound einzustellen.
Virtual Bassist
76
Page 77

Wie funktioniert Virtual Bassist?
Virtual Bassist arbeitet nicht mit Samples einzelner Noten oder mit
Klangsynthese. Dies würde künstlich klingen. Wenn Sie schon einmal
versucht haben, auf einem MIDI-Keyboard einen Bass-Part nachzuspielen, wissen Sie genau, was wir meinen.
Es mag Sie überraschen, aber das Virtual Bassist zugrunde liegende
Konzept ist viel einfacher. Das Programm greift auf eine riesige Sammlung von Audioaufnahmen zurück, die von lebenden Bassisten eingespielt wurden. Das Ergebnis sind echte Bassaufnahmen, keine MIDISynthese.
Virtual Bassist wählt in Echtzeit die richtigen Aufnahmen aus der
Sammlung aus, sobald Sie einen Akkord oder einen beliebigen anderen Parameter verändern. Tempowechsel stellen kein Problem dar, da
die Bassaufnahmen so bearbeitet wurden, dass man sie bei jedem
Tempo abspielen kann. Sie können die verschiedenen Parts bearbeiten und so eigene Parts erzeugen oder sie mit Groove Match an Ihre
Musik anpassen. Die 13 Parts und 6 Fills jedes Styles sind Beispiele
für die Möglichkeiten, die das Programm bietet. Weiter unten werden
wir näher darauf eingehen.
Virtual Bassist verfügt natürlich über einen eigenen Verstärker und eigene Effekte zur Klangverbesserung und am Ende der Signalkette finden Sie noch verschiedene Lautsprecherkonfigurationen. Virtual
Bassist gestattet es sogar, die Position des Mikrofons vor der Lautsprecherbox einzustellen.
DEUTSCH
Virtual Bassist
77
Page 78

Was kann Virtual Bassist, was kann er nicht?
Virtual Bassist bietet im Vergleich zu einem Bassisten eine Reihe von
Vorteilen:
• Virtual Bassist ist komfortabel, da er jederzeit verfügbar ist .
• Sie sparen Geld und Aufwand, da Sie kein Studio für die Bassaufnahme benötigen.
• Sie sparen Zeit, da das Aufbauen, Stimmen, Warmspielen, Mikrofonieren und
Aufnehmen entfallen.
• Virtual Bassist verspielt sich nicht und hat perfektes Timing.
• Sie können mit mehreren Bassisten gleichzeitig arbeiten.
• Sie steuern Klang und Phrasierung des Instruments.
• Sie werden kreativer, da Sie beliebig experimentieren und sogar Bass-Parts
erstellen können, die auf einer echten Bassgitarre nicht spielbar wären.
• Sie können jederzeit, auch nach der Aufnahme oder während des Mischens,
Änderungen vornehmen (z.B. das Instrument, die Phrasierung oder den Klang
ändern). Eine neue Aufnahme ist nicht notwendig.
Trotz all dieser Vorteile sollten Sie immer daran denken, dass Virtual
Bassist ein Computer-Programm ist und verglichen mit einem echten
Bassisten auch Nachteile hat. Virtual Bassist kann natürlich nicht alles, was ein echter Bassist theoretisch zu bieten hat. Aber die mitgelieferten Styles decken ein breites musikalisches Spektrum ab, so
dass die meisten Wünsche erfüllt werden können.
Lassen Sie Ihre Software registrieren!
Bitte füllen Sie die beiliegende Registrierungskarte aus und senden
Sie sie ein, da wir technische Unterstützung und Informationen über
Updates und neue Produkte nur registrierten Anwendern gewähren
können.
Virtual Bassist
78
Page 79

Der Steinberg Key
Bitte lesen Sie den folgenden Abschnitt, bevor Sie die Software für
Virtual Bassist installieren.
Im Lieferumfang von Virtual Bassist ist der so genannte »Activation
Code« für den Steinberg Key enthalten. Der Steinberg Key ist ein Kopierschutzstecker (auch »Dongle« genannt), durch den unerlaubtes
Vervielfältigen der Software verhindert wird. Der Virtual Bassist kann nur
zusammen mit einem richtig aktivierten Steinberg Key gestartet werden.
Dieser ist nicht im Lieferumfang enthalten. Wenn Sie nicht bereits über
einen Steinberg Key verfügen, müssen Sie diesen separat kaufen.
Wenn Sie bereits über einen Steinberg Key (für ein anderes SteinbergProdukt) verfügen, können Sie diesen für Virtual Bassist aktivieren.
Wenn Sie mit einem PC unter Windows arbeiten und zuvor noch keinen
Key verwendet haben, startet der Installationsprozess evtl. nach der Installation der Key-Treiber Ihr Windows-System neu. Stecken Sie den
Key nach dem Neustart des Computers in den USB-Anschluss, damit
der Installationsprozess fortgeführt werden kann.
Wenn Sie bereits einen Steinberg Key besitzen, müssen Sie den Key
nach der Installation von Virtual Bassist und nach dem anschließenden
Neustart des Computers an den USB-Anschluss anschließen. Wenn der
Key in den USB-Anschluss gesteckt wird, erkennt Windows ihn automatisch als neue Hardware und versucht, Treiber für ihn zu finden – diese
notwendigen Treiber sind vor der Installation von Virtual Bassist und einem anschließenden Neustart Ihres Computers nicht verfügbar.
DEUTSCH
Der Steinberg Key
Virtual Bassist
79
Page 80

Der Steinberg Key ist eigentlich ein kleiner Computer, auf dem Ihre
Steinberg-Software-Lizenzen gespeichert sind. Alle Steinberg-Produkte, die mit Steinberg Keys geschützt sind, verwenden denselben
Dongle und es ist möglich, mehr als eine Lizenz auf einem Key zu
speichern. Außerdem können Lizenzen (innerhalb bestimmter Grenzen) zwischen Keys übertragen werden. Dies ist sinnvoll, wenn Sie
z.B. eine bestimmte Software verkaufen möchten.
Wenn Sie bereits einen Steinberg Key besitzen (z.B. für Cubase oder
Nuendo), können Sie Ihre Lizenz für Virtual Bassist mit Hilfe des mitgelieferten Aktivierungskodes auf diesen Key laden. So benötigen Sie nur
einen Key für Ihren Host und für Virtual Bassist (siehe unten).
Wenn Sie zum ersten Mal einen Steinberg Key verwenden, schließen Sie
diesen nicht vor oder während des Installationsvorgangs von Virtual
Bassist an. Andernfalls registriert Windows ihn als neue USB-Hardware
und versucht Treiber zu finden, die erst nach der Installation von Virtual
Bassist bereitstehen.
Virtual Bassist
80
Page 81

Systemanforderungen (PC-Version)
Für Virtual Bassist benötigen Sie mindestens:
• Pentium oder AMD Athlon 800MHz (1.4 GHz oder schneller empfohlen).
• 256MB RAM (512MB empfohlen).
• 500MB freier Speicherplatz auf der Festplatte.
• Windows® XP Home oder Professional.
• Eine mit Windows MME kompatible Audio-Hardware (ASIO-kompatible
Soundkarte empfohlen).
• Wenn Sie Virtual Bassist als PlugIn verwenden möchten, benötigen Sie
Cubase oder Nuendo (Version 1.5 oder höher) oder eine andere mit VST 2.0,
DXi 2 oder ReWire kompatible Host-Anwendung. Beachten Sie, dass einige
andere Host-Anwendungen nicht alle Programmfunktionen unterstützen.
• Steinberg Key und Anschluss für USB-Komponenten.
• Darstellungsauflösung von 1024 x 768 Pixel.
Beachten Sie auch die Systemanforderungen Ihrer Host-Anwendung!
Installation (PC-Version)
Gehen Sie zum Installieren von Virtual Bassist folgendermaßen vor:
1. Schalten Sie Ihren Computer ein und starten Sie Windows.
DEUTSCH
2. Legen Sie die CD von Virtual Bassist in Ihrem CD-Laufwerk ein.
3. Öffnen Sie den Windows Explorer oder das Arbeitsplatz-Fenster und
doppelklicken Sie auf das Symbol des CD-Laufwerks, das die CD
enthält.
4. Doppelklicken Sie zum Starten des Installationsprogramms auf das Installer-Symbol und befolgen Sie die Anweisungen auf dem Bildschirm.
Virtual Bassist
81
Page 82

Systemanforderungen (Mac-Version)
Für Virtual Bassist benötigen Sie mindestens:
• Power Mac G4 867MHz (G4 Dual 1,25GHz oder schneller empfohlen).
• 256MB RAM (512MB empfohlen).
• 500MB freier Speicherplatz auf der Festplatte.
• Mac OS X 10.3 oder höher.
• CoreAudio-kompatible Audio-Hardware.
• Wenn Sie Virtual Bassist als PlugIn verwenden möchten, benötigen Sie
Cubase oder Nuendo (Version 1.5 oder höher) oder eine andere mit VST 2.0,
AU oder ReWire kompatible Host-Anwendung. Beachten Sie, dass einige
andere Host-Anwendungen nicht alle Programmfunktionen unterstützen.
• Steinberg Key und Anschluss für USB-Komponenten.
• Darstellungsauflösung von 1024 x 768 Pixel.
Beachten Sie auch die Systemanforderungen Ihrer Host-Anwendung!
Installation (Mac-Version)
Gehen Sie folgendermaßen vor, um Virtual Bassist zu installieren:
1. Schalten Sie Ihren Computer ein und legen Sie die CD von Virtual
Bassist in das CD-Laufwerk ein.
2. Wenn der Inhalt der CD nicht automatisch angezeigt wird, doppelklicken Sie im Finder auf das Symbol von Virtual Bassist.
3. Doppelklicken Sie auf die Syncrosoft LCC.mpkg Datei, um die Kopierschutz-Installation zu starten und befolgen Sie die Anweisungen auf
dem Bildschirm.
4. Öffnen Sie – je nachdem welches Format Sie installieren möchten –
den Ordner »Virtual Bassist VST«, »Virtual Bassist AU« oder »Virtual
Bassist ReWire«. Bitte lesen Sie die in dem jeweiligen Ordner enthaltene *.rtf-Datei. Doppelklicken Sie auf die *.pkg-Datei, um das Installationsprogramm von Virtual Bassist zu starten und befolgen Sie die
Anweisungen auf dem Bildschirm.
Virtual Bassist
82
Page 83

5. Wenn das PlugIn installiert ist, kopieren Sie den Ordner »Virtual Bassist
Content« in den Ordner »Library/Application Support/ Steinberg/« auf
Ihrer Systemfestplatte.
Wenn Sie den Content in ein anderes Verzeichnis auf Ihrer Festplatte kopieren, müssen Sie das Programm »Set VB Content Location« im Ordner
»Virtual Bassist Content« auf Ihrer Festplatte ausführen. Andernfalls wird
Virtual Bassist seine Daten nicht finden!
Aktivieren des Steinberg Key
Ihr Steinberg Key enthält bisher noch keine gültige Lizenz für Virtual
Bassist (egal, ob Sie einen neuen Key zusammen mit dem Programm
erworben haben oder ob Sie einen bereits vorhandenen Key nutzen
möchten). Sie müssen daher eine Lizenz auf diesen Key herunterladen,
bevor Sie Virtual Bassist verwenden können! Mit dem Aktivierungskode, der im Lieferumfang von Virtual Bassist enthalten ist, können Sie
eine Lizenz für das Programm auf Ihren Steinberg Key herunterladen.
Der Vorgang ist dabei sowohl für neue als auch für bereits vorhandene
Steinberg Keys derselbe. Gehen Sie folgendermaßen vor:
1. Nachdem die Installation abgeschlossen und der Computer neu gestartet ist, schließen Sie den Steinberg Key am USB-Anschluss an.
Wenn Sie sich nicht sicher sind, welchen Anschluss Sie verwenden müssen, lesen Sie
dies in der Dokumentation zu Ihrem Computer nach.
2. Beim ersten Anschließen wird der Dongle als neue Hardware erkannt
und ein Dialog wird angezeigt, indem Sie gefragt werden, ob Sie die
Treiber für die Hardware manuell oder automatisch suchen möchten.
Verwenden Sie die automatische Suche. Der Dialog wird geschlossen und eventuell
müssen Sie Ihren Computer neu starten.
DEUTSCH
3. Stellen Sie eine Verbindung mit dem Internet her.
Das Herunterladen der Lizenz erfolgt »online«. Wenn Sie mit dem Computer, auf dem
Sie Virtual Bassist verwenden, nicht auf das Internet zugreifen können, ist es auch
möglich, einen anderen Rechner zu verwenden. Fahren Sie einfach mit den unten beschriebenen Schritten fort und lesen Sie die Hilfe im »Lizenz Kontroll Center«.
Virtual Bassist
83
Page 84

4. Starten Sie die Anwendung »Lizenz Kontroll Center« (im WindowsStart-Menü unter »Syncrosoft« bzw. im Anwendungen-Ordner unter
Mac OS X).
Über diese Anwendung können Sie die auf dem Steinberg Key vorhandenen Lizenzen
überprüfen und weitere Lizenzen darauf übertragen.
5. Verwenden Sie die Funktionen des Assistenten-Menüs und den Aktivierungskode, den Sie mit Virtual Bassist erhalten haben, um eine Lizenz auf Ihren Key herunterzuladen. Folgen Sie dabei einfach den
Anweisungen auf dem Bildschirm.
Alle weiteren Schritte werden in der Hilfe der Anwendung beschrieben.
Nach der Aktivierung können Sie Virtual Bassist starten!
Einrichten von Virtual Bassist als VSTInstrument in Ihrer Host-Anwendung
In diesem Abschnitt wird beschrieben, wie Sie Virtual Bassist in
Cubase SX als Host-Anwendung einrichten. Der Vorgang ist für die
meisten VST-Host-Anwendungen identisch. Falls Sie weitere Informationen benötigen, lesen Sie im Handbuch Ihrer Anwendung nach.
Die Host-Anwendung muss richtig installiert und für die Arbeit mit Ihrer
MIDI- und Audio-Hardware (d.h. MIDI-Keyboard und Audiokarte) eingerichtet sein.
Gehen Sie folgendermaßen vor, um Virtual Bassist einzurichten:
1. Öffnen Sie das Fenster »VST-Instrumente«.
2. Klicken Sie auf eine leere Schnittstelle und wählen Sie im Einblend-
menü die Option »Virtual Bassist«.
3. Warten Sie einen Moment, bis Virtual Bassist den Standard-Style geladen hat.
4. Wählen Sie in der VST-Host-Anwendung »Virtual Bassist« als Ausgang
einer MIDI-Spur.
Virtual Bassist
84
Page 85

Einrichten von Virtual Bassist als DXi2Instrument
Dieser Abschnitt bezieht sich auf die Verwendung von Virtual Bassist in
Cakewalk SONAR. Vergewissern Sie sich, dass Sie sowohl SONAR als
auch Ihre MIDI- und Audio-Hardware richtig installiert haben.
Wenn Sie Virtual Bassist in einer anderen DXi2-kompatiblen Host-Anwendung verwenden möchten, lesen Sie die entsprechende Dokumentation.
Gehen Sie folgendermaßen vor, um Virtual Bassist einzurichten:
1. Stellen Sie sicher, dass SONAR MIDI-Daten empfängt, die Sie mit
Ihrem externen MIDI-Master-Keyboard erzeugen. Überprüfen Sie
dazu die Anzeige »Midi In/Out Activity«.
2. Öffnen Sie in SONAR über das View-Menü das Fenster »Synth Rack«.
3. Klicken Sie den Insert-Schalter (oder wählen Sie im Hauptmenü die
Insert-Option).
4. Öffnen Sie das Untermenü »DXi Synth« und wählen Sie »Virtual
Bassist«.
5. Standardmäßig wird der Dialog »Insert DXi Options« geöffnet. Wenn
Sie eine MIDI-Spur erzeugen und eine Audiospur an die Ausgänge 1
und 2 von Virtual Bassist leiten möchten, schalten Sie die Optionen
»MIDI Source Track« und »First Synth Output (Audio)« ein.
Weitere Informationen entnehmen Sie bitte der Dokumentation Ihrer Host-Anwendung.
6. Mit dem Schalter »Connection State« im Dialog »Synth Rack« können
Sie Virtual Bassist ein- bzw. ausschalten. Standardmäßig sind neu
geladene DXi-SoftSynths eingeschaltet.
DEUTSCH
7. Doppelklicken Sie auf den Eintrag »Virtual Bassist« oder klicken Sie in
der Werkzeugzeile des Dialogs »Synth Rack« auf den Schalter »Synth
Properties«, um das Bedienfeld von Virtual Bassist zu öffnen.
8. Wählen Sie in SONAR die neu erstellte MIDI-Spur »Virtual Bassist«
aus. Virtual Bassist empfängt jetzt MIDI-Daten über diese Spur.
Achten Sie darauf, dass der Eingang der MIDI-Spur auf »Alle« oder auf die MIDI-Spur,
an die Ihr MIDI-Keyboard angeschlossen ist, eingestellt ist.
Virtual Bassist
85
Page 86

Verwenden von Virtual Bassist in einer AUkompatiblen Anwendung
Sie können Virtual Bassist in einer AU-kompatiblen Host-Anwendung
verwenden (z.B. Logic).
Die AU-Version von Virtual Bassist wird im Ordner »Library/Audio/
Plug-ins/Components« abgelegt und ermöglicht das Verwenden von
Virtual Bassist in einer AU-Umgebung ohne Leistungseinbußen oder
Kompatibilitätsprobleme.
Gehen Sie in Logic Pro 7 folgendermaßen vor:
1. Öffnen Sie den Track Mixer und wählen Sie den gewünschten Instrument-Kanal aus.
2. Klicken Sie mit gedrückter [Befehlstaste] in das I/O-Feld und wählen
Sie im angezeigten Einblendmenü »Stereo« aus.
3. Wählen Sie im angezeigten Einblendmenü die Option »AU Instrument«,
dann »Steinberg« und dann »Virtual Bassist«.
Virtual Bassist ist jetzt als AU-Instrument geladen.
Virtual Bassist als Standalone-Anwendung und ReWire
Virtual Bassist kann auch als eigenständige Anwendung (»Standalone«) verwendet werden, unabhängig von einer Host-Anwendung.
Wenn ein Sequenzer keines der angebotenen PlugIn-Formate von
Virtual Bassist (d.h. VST, DXi, AU) unterstützt, dafür aber den Datenaustausch über das ReWire-Protokoll ermöglicht, können Sie Virtual
Bassist auch mit diesem Sequenzer zusammen verwenden.
ReWire2 ist ein Protokoll, mit dem Audio- und MIDI-Daten zwischen
verschiedenen Computer-Anwendungen ausgetauscht werden können. Beim Arbeiten mit ReWire ist die Reihenfolge, in der die zwei
Programme gestartet werden, von größter Wichtigkeit, da die zuerst
gestartete Anwendung die Ressourcen der Soundkarte belegt.
Virtual Bassist
86
Page 87

Gehen Sie folgendermaßen vor:
1. Starten Sie zunächst die gewünschte Sequenzeranwendung (z. B.
Ableton Live, ProTools).
ReWire-kompatible Anwendungen ermöglichen das Zuweisen von Audio- und MIDIKanälen für den Datenaustausch. Nähere Informationen dazu entnehmen Sie bitte der
Dokumentation Ihrer Sequenzeranwendung.
2. Starten Sie anschließend Virtual Bassist als Standalone-Anwendung.
Sie können das Programm wie jede andere Anwendung auf Ihrem Computer über das
Start-Menü oder das entsprechende Desktop-Symbol (Windows) bzw. über das Anwendungssymbol im Anwendungen-Ordner (Mac) starten. Alternativerweise können
Sie auch auf die Programmdatei im Installationsordner doppelklicken.
Wenn Sie jetzt mit Virtual Bassist einen Style anspielen, werden die
entsprechenden Signale über ReWire an die zugewiesenen Mixerkanäle des Sequenzers übertragen.
Beachten Sie, dass jetzt zwei voneinander unabhängige Anwendungen auf Ihrem Computer laufen. Wenn Sie das Sequenzerprojekt
speichern, werden die Kanal- und Buskonfigurationen gespeichert, jedoch keine der Einstellungen in Virtual Bassist! Um die Einstellungen
von Virtual Bassist zu speichern, wählen Sie den Befehl »Save Bank«
(in Virtual Bassist im File-Menü). Achten Sie beim Eingeben des Dateinamens darauf, einen Namen zu wählen, der darauf hinweist, dass
diese Datei Einstellungen enthält, die sich auf ein bestimmtes Sequenzerprojekt beziehen.
DEUTSCH
Wenn Sie ein bereits vorhandenes Sequenzerprojekt öffnen und auch
Virtual Bassist gestartet haben, müssen Sie die zu diesem Projekt gehörenden Einstellungen für Virtual Bassist über den Befehl »Load Bank«
laden.
Virtual Bassist
87
Page 88

Latenz
Virtual Bassist selbst arbeitet praktisch ohne Latenz. Lange Latenzzeiten (die Zeitspanne vom Drücken einer Taste auf Ihrem MIDI-Keyboard
bis zu dem Moment, an dem man etwas hören kann) können jedoch
auftreten, wenn Sie Virtual Bassist in Echtzeit über Ihr MIDI-Keyboard
spielen.
Dies liegt meist an der Audiokarte oder der verwendeten MIDISchnittstelle, wirkt sich aber nicht aus, wenn Sie ein Projekt mit einer
MIDI-Spur wiedergeben, die Virtual Bassist als Instrument verwendet.
Um Echtzeitlatenzen zu vermeiden, sollten Sie Ihre Audiokarte durch
eine professionelle Audiokarte ersetzen, für die es einen ASIO-Treiber
gibt. Herkömmliche Soundkarten in gewöhnlichen Computern verwenden in der Regel keine ASIO-Treiber, was zu Latenzzeiten von
mehreren hundert Millisekunden führen kann.
Verwenden einer Eintastenmaus (Mac)
In diesem Handbuch wird oft vom »Klicken mit der rechten Maustaste«
(d.h., wenn Sie eine Maus mit mehr als einer Taste benutzen, klicken
Sie mit der Taste auf der rechten Seite) gesprochen. Wenn Sie jedoch
eine Maus mit nur einer Taste verwenden, können Sie denselben Effekt
erzielen, indem Sie beim Klicken die [Ctrl]-Taste gedrückt halten.
Erster Test
An dieser Stelle sollten Sie Virtual Bassist einfach mal ausprobieren:
1. Aktivieren Sie Virtual Bassist (wie oben beschrieben). Virtual Bassist
lädt automatisch einen Standard-Style. Auf der Play-Seite ist der
Latch-Schalter eingeschaltet.
2. Drücken Sie auf Ihrem MIDI-Keyboard die D1-Taste (um einen Part
auszuwählen) und spielen Sie einen Akkord oder eine Note im Tastenbereich zwischen C3 und H4 (dem Pitch-Bereich). Virtual Bassist
spielt einen einfachen Groove. Da der Latch-Schalter eingeschaltet ist,
wird die Wiedergabe auch dann fortgesetzt, wenn Sie die Tasten loslassen.
Virtual Bassist
88
Page 89

3. Wenn Sie auf Ihrem MIDI-Keyboard weiße Tasten zwischen D1 und
H2 (dem Remote-Bereich) drücken, werden verschiedene Parts angespielt, deren Komplexität von links nach rechts zunimmt.
4. Wenn Sie im Remote-Bereich schwarze Tasten (F#, G#, B) drücken,
werden Fills angespielt.
Wenn ein Fill beendet ist, spielt Virtual Bassist den zuletzt gespielten
Part weiter.
5. Wenn Virtual Bassist die Wiedergabe sofort beenden soll, drücken
Sie die C#1-Taste. Wenn Sie D#1 drücken, endet die Wiedergabe
nach dem Spielen einer für einen Takt gehaltenen Note.
Die MIDI-LED im Fenster von Virtual Bassist leuchtet auf, sobald Virtual
Bassist MIDI-Daten empfängt.
Wie spielt man Virtual Bassist?
Sie haben mehrere Möglichkeiten, Virtual Bassist zu spielen:
• Sie können Akkorde und Noten spielen und die Artikulation variieren, indem
Sie beim Spielen unterschiedliche Anschlagstärken, MIDI-Controller und das
Sustain-Pedal verwenden.
• Wenn Sie kein MIDI-Keyboard besitzen, können Sie Noten und weitere MIDIEvents über einen der MIDI-Editoren Ihrer Host-Anwendung eingeben.
• Sie können Virtual Bassist dazu verwenden, Spuren existierender Projekte
und MIDI-Dateien mit einem anderen Sound wiederzugeben.
• Sie können mehrere Instanzen von Virtual Bassist starten, wobei Sie nur
durch die Leistungsfähigkeit Ihres Computers und/oder Ihrer Host-Anwendung eingeschränkt sind. Beispielsweise kann ein Virtual Bassist einen einfachen Groove spielen, ein anderer alle zusätzlichen Licks oder Fills.
DEUTSCH
Virtual Bassist
89
Page 90

Verwenden eines MIDI-Keyboards
Sie können ein MIDI-Keyboard verwenden, um Virtual Bassist zu spielen. Das Keyboard ist dabei in mehrere Bereiche unterteilt, deren Tasten für bestimmte Zwecke reserviert sind.
Die Standardbelegung des MIDI-Keyboards
Der Pitch-Bereich
Der Tastenbereich von C3 bis H4 auf Ihrem MIDI-Keyboard wird hier als
Pitch-Bereich bezeichnet und steuert die Tonhöhe der gespielten Parts,
Fills oder Einzelnoten. Wenn Sie Tasten in diesem Bereich spielen, folgt
Virtual Bassist diesen Noten oder Akkorden. Wenn Sie die Tasten im
Pitch-Bereich mit einer hohen Anschlagstärke (über 125) spielen, wird
ein Akzent (je nach Style eine Achtel- oder Viertelnote) wiedergegeben,
so dass Sie Ihre Basslinien in Echtzeit variieren können.
Virtual Bassist
90
Page 91

Der Remote-Bereich
Der Tastenbereich zwischen C1 und H2 wird Remote-Bereich genannt. Mit diesen Tasten werden Parts, Fills, der Einzelnotenmodus,
Stop und Ende sowie weitere nützliche Funktionen angespielt. Welche
Funktion eine Taste hat, kann über den Parts-Browser frei eingestellt
werden (siehe unten). Die Standardbelegung im Remote-Bereich wird
in der folgenden Tabelle aufgestellt:
Taste Funktion Beschreibung
C1 Einzelnotenmodus In diesem Modus werden im Pitch-Bereich gespielte
MIDI-Noten oder Akkorde als einzelne Bassnoten
wiedergegeben.
C#1 Stopp Die Wiedergabe wird sofort beendet.
F#, G#, B Fill Ein Fill wird gespielt.
D#1 (kurz) Ende
(über 1 Takt)
D#1
(gehalten)
C#2 4 oder 5 Saiten Mit dieser Taste können Sie zwischen Bassgitarren
D#2 Akkord/Note Durch Drücken dieser Taste bestimmen Sie, ob ein
Ende Die D#3-Taste steuert die Wiedergabe der Endnote.
Die Wiedergabe endet nach dem Spielen einer Note
über einen Takt.
Solange Sie die Taste gedrückt halten, wird die Note
gespielt.
mit vier oder fünf Saiten umschalten.
Part melodische Basslinien oder nur die Grundtöne
der im Pitch-Bereich angeschlagenen Note oder des
Akkords im Rhythmus des Parts wiedergibt. In einigen
Styles werden auch oktavierte Noten gespielt.
DEUTSCH
Auf der Settings-Seite (die geöffnet wird, wenn Sie rechts oben im
Fenster von Virtual Bassist auf das Steinberg-Logo klicken) können Sie
im Bereich »Keyboard Layout« festlegen, welcher der Bereiche (Pitchoder Remote-Bereich) links angeordnet sein soll (siehe Seite 142).
Virtual Bassist
91
Page 92

Terminologie
Styles
Unter einem Style versteht man eine einem bestimmten Genre zugeordnete Zusammenstellung von Grooves und Phrasen (auch als Parts
und Fills bezeichnet) unter Verwendung eines bestimmten Basses und
bestimmter Effekt- und Groove-Match-Einstellungen. Ein Style umfasst
immer 13 Parts, die über die weißen Tasten zwischen D1 und H2 angesteuert werden, und 6 Fills, die durch die schwarzen Tasten F#, G#
und B in demselben Tastenbereich angesteuert werden. Ein Style wird
geladen, indem Sie ihn im Style-Browser doppelklicken. Wenn Sie Virtual Bassist starten, wird immer ein Standard-Style geladen.
Parts
Ein Part ist ein Bass-Groove oder eine Phrase mit variierender rhythmischer und melodischer Struktur. Er wird über die weißen Tasten
(D1 bis H2) im Remote-Bereich Ihres MIDI-Keyboards angesteuert.
Die Parts von D1 bis H1 heißen »Basic 1« bis »Basic 6« und sind
rhythmisch und melodisch etwas einfacher aufgebaut. Die Parts von
C2 bis H2 heißen »Complex 1« bis »Complex 7« und sind entsprechend komplexer und Style-spezifischer. Bei der Wiedergabe eines
Parts quantisiert Virtual Bassist alle Wechsel standardmäßig auf die
nächste Sechzehntelnote. Sie können die Quantisierungseinstellung
auf der Settings-Seite (die geöffnet wird, wenn Sie rechts oben im
Fenster von Virtual Bassist auf das Steinberg-Logo klicken) ändern.
Fills
Ein Fill ist ein besonderer Part, der nur über eine bestimmte Zeit gespielt wird (z.B. für einen Takt). Anschließend kehrt Virtual Bassist zur
Wiedergabe des zuvor gespielten Parts zurück. Fills werden mit den
Tasten F#, G# und B des Remote-Bereichs (D1 bis H2) angesteuert.
Wenn Sie möchten, dass Virtual Bassist nach Abschluss eines Fills
einen anderen Part spielt als vorher, drücken Sie einfach nach dem Fill
die entsprechende weiße Taste.
Fills werden sooft wiederholt wie Sie die Fill-Taste gedrückt haben.
Wenn ein Fill also drei Mal wiederholt werden soll, drücken Sie drei
Mal auf die Fill-Taste.
Virtual Bassist
92
Page 93

Wenn nach dem Stoppen von Virtual Bassist zuerst eine Fill-Taste gedrückt wird, wird dieser Fill solange wiederholt, bis eine andere Filloder Part-Taste gedrückt wird.
Fills werden immer ab einer bestimmten Taktposition gespielt und haben eine bestimmte Länge. Wenn Fills genau wie normale Parts einsetzen und enden sollen, wählen Sie auf der Settings-Seite im Bereich
»Fill Triggering« den Modus »Key Change Quantize«. Fills richten sich
dann wie normale Parts nach der Quantisierungseinstellung.
Remote-Tasten
Einigen Tasten im Remote-Bereich sind besondere Funktionen zugewiesen, die die Wiedergabe von Virtual Bassist verändern. Dazu gehören: Einzelnotenmodus ein/aus (C1), Stopp (C#1), Ende (D#1),
Umschalten zwischen Bass mit 4 oder 5 Saiten (C#2) und Umschalten zwischen Akkord- und Notenmodus (D#2).
Einzelnotenmodus
Der Einzelnotenmodus wird ein- bzw. ausgeschaltet, wenn Sie auf Ihrem MIDI-Keyboard auf die C1-Taste drücken. Wenn der Einzelnotenmodus eingeschaltet ist, werden mit den Tasten im Pitch-Bereich
immer einzelne Bassnoten angesteuert, so dass Sie eigene Basslinien
mit Virtual Bassist spielen können.
DEUTSCH
Akzente
Wenn Sie im Pitch-Bereich eine Taste mit hoher Anschlagstärke (125
oder höher) anschlagen, wird eine Achtel- oder Viertelnote (namens
Akzent) gespielt. Die Länge des Akzents richtet sich nach dem aktuellen Style. Akzente ermöglichen Echtzeitvariationen Ihrer Basslinien.
Aftertouch Vibrato
Wenn Sie Aftertouch spielen, wird in Virtual Bassist automatisch
Vibrato erzeugt. Die Vibratogeschwindigkeit richtet sich dabei nach
der Einstellung des Rate-Reglers auf der Settings-Seite (die geöffnet
wird, wenn Sie rechts oben im Fenster von Virtual Bassist auf das
Steinberg-Logo klicken).
Virtual Bassist
93
Page 94

Die Play-Seite
Auf dieser Seite werden die wichtigsten Einstellungen für Virtual Bassist vorgenommen: die Spielparameter des Instruments, das Laden
und Speichern von Styles und Parts und das Einstellen des Basses
und seines Klangs.
Wenn kein MIDI-Keyboard angeschlossen ist oder Sie lediglich einen
Klangtest machen möchten, können Sie Virtual Bassist spielen, indem Sie
auf der Play-Seite auf die Bünde des dort abgebildeten Basses klicken. In
der Akkordanzeige wird die Tonhöhe des gespielten Klangs angezeigt.
Virtual Bassist
94
Page 95

Laden und Speichern von Styles
Auf der Play-Seite von Virtual Bassist finden Sie rechts den Browser,
in dem alle vorhandenen Styles aufgelistet werden.
Laden
Styles werden geladen, wenn Sie
• auf den Namen in der Liste doppelklicken oder …
• unten rechts im Browser auf den Load-Schalter klicken und den ge-
wünschten Style über den angezeigten Dateiauswahldialog auswählen.
Speichern
Wenn Sie einen Style speichern möchten, klicken Sie unten links im
Browser auf den Save-Schalter und geben Sie im angezeigten Dialog
einen Namen und den Pfad für die neue Style-Datei ein.
Wenn im Browser keine Liste der Styles angezeigt wird, klicken Sie oben
im Browser auf den Styles-Schalter.
DEUTSCH
Es kann u.U. einen Moment dauern, bis Ihr Computer einen Style geladen
hat. In der Akkordanzeige wird dann »Loading« angezeigt.
Virtual Bassist
95
Page 96

Anhören von Styles
Sie können sich für jeden der mitgelieferten Styles ein Klangbeispiel anhören. Diese Beispiele wurden mit Virtual Bassist und den SteinbergProgrammen Virtual Guitarist und Groove Agent erstellt, um Ihnen einen Eindruck davon zu geben, wie sich ein Style zusammen mit Gitarre
und Schlagzeug anhört.
Sie haben zwei Möglichkeiten für das Anhören:
Listen
Klicken Sie im Style-Browser auf einen Style, um ihn auszuwählen.
Wenn Sie jetzt auf den Listen-Schalter klicken, wird die zum Style gehörende Beispieldatei wiedergegeben, solange Sie die Maustaste gedrückt halten.
Auto
Wenn der Auto-Schalter eingeschaltet ist, wird die Style-Beispieldatei jedesmal gestartet, wenn Sie im Browser auf einen Style klicken.
Die Beispieldatei wird wiedergegeben, solange Sie die Maustaste gedrückt halten.
Der Parts-Browser auf der Play-Seite
Wenn Sie im Browser auf der Play-Seite auf einen Part klicken, werden die Tastenzuweisungen aller Parts, Fills und Remote-Tasten angezeigt, die im ausgewählten Style verwendet werden. Die Funktionen im
Remote-Bereich können umbenannt und die entsprechenden Tastenzuweisungen geändert werden. Ein angespielter Part, Fill oder eine angeschlagene Remote-Taste werden im Parts-Browser hervorgehoben.
Der Parts-Browser auf der Play-Seite ist identisch mit dem PartsBrowser auf der Seite »Groove Match«, siehe Seite 115.
Virtual Bassist
96
Page 97

Bedienelemente auf der Play-Seite
Die meisten für Wiedergabe und Klang von Virtual Bassist benötigten
Bedienelemente finden Sie auf der Play-Seite.
»4 String« vs. »5 String«
Mit diesem Schalter können Sie zwischen einem Bass mit vier und einem Bass mit fünf Saiten (verfügt über eine zusätzliche tiefe H-Saite)
umschalten. Wenn Sie den Bass mit fünf Saiten verwenden, werden in
den Parts und Fills, in denen es möglich ist, auch auf der tiefen H-Saite
gespielte Noten verwendet.
• Sie können auch die C#2-Taste im Remote-Bereich drücken, um
zwischen dem 4- und dem 5-Saitenmodus umzuschalten.
MIDI In
Die LED »MIDI In« leuchtet auf, sobald Virtual Bassist MIDI-Daten der
Host-Anwendung oder vom MIDI-Keyboard empfängt. Wenn Sie Noten auf Ihrem MIDI-Keyboard spielen und diese LED nicht aufleuchtet,
ist die Verbindung zu Virtual Bassist unterbrochen.
DEUTSCH
Chords/Note
Wenn Sie die D#2-Taste auf Ihrem MIDI-Keyboard drücken, schaltet
Virtual Bassist zwischen dem Akkord- und dem Notenmodus um.
Durch Drücken dieser Taste bestimmen Sie, ob ein Part melodische
Basslinien oder nur die Grundtöne der im Pitch-Bereich angeschlagenen Note oder des Akkords im Rhythmus des Parts wiedergibt.
Eine Änderung dieser Einstellung wirkt sich nicht auf alle Parts eines
Styles aus.
Virtual Bassist
97
Page 98

Latch-Modus
Wenn der Latch-Modus eingeschaltet (»On«) ist, werden Parts nach
dem Ansteuern solange wiedergegeben, bis Sie den Stop-Schalter
Ihrer Host-Anwendung oder die C#1-Taste (»Stopp«) oder die D#1Taste (»Ende«) im Remote-Bereich Ihres MIDI-Keyboards betätigen.
Wenn Sie nur wenige Variationen benötigen, können Sie den LatchModus auch ausschalten (»Off«), so dass Virtual Bassist nur solange
einen Part oder Fill wiedergibt, wie Sie die entsprechende Taste gedrückt halten.
Solange Sie das Sustain-Pedal betätigen, wird die aktuelle Latch-Einstellung umgeschaltet.
Sustain-Pedal und Latch-Modus
Sie können das Sustain-Pedal verwenden, um den Latch-Modus zeitweise ein- bzw. auszuschalten.
Experimentieren Sie mit den in der Tabelle beschriebenen Einstellungen, um ein Gefühl für die Möglichkeiten zu bekommen, die sich aus
der Verwendung eines Sustain-Pedals ergeben.
Latch-Modus
eingeschaltet
Latch-Modus
ausgeschaltet
Virtual Bassist
98
Sustain-Pedal
gedrückt
Sustain-Pedal
gedrückt
Der Latch-Modus ist ausgeschaltet, solange
Sie das Sustain-Pedal gedrückt halten. Bei gedrücktem Sustain-Pedal erzeugen im Pitch-Bereich gespielte Tasten nur Einzelnoten. Wenn
Sie das Sustain-Pedal loslassen, werden Parts
wie gewohnt wiedergegeben.
Der Latch-Modus ist eingeschaltet, solange Sie
das Sustain-Pedal gedrückt halten. Bei gedrücktem Sustain-Pedal gespielte Parts werden
wiedergegeben, bis Sie das Pedal loslassen.
Page 99

Wenn Sie kein Sustain-Pedal besitzen, können Sie den Latch-Parameter
auch einem anderem MIDI-Controller zuweisen. Klicken Sie dazu mit der
rechten Maustaste auf den Latch-Schalter und wählen Sie aus dem angezeigten Einblendmenü den gewünschten MIDI-Controller aus. Sie können
auch Rechtsklicken und die Option »MIDI Learn« wählen. Bewegen Sie
anschließend das gewünschte Bedienelement Ihres MIDI-Geräts, so dass
Virtual Bassist den entsprechenden MIDI-Controller registrieren kann.
Retrig-Modus
Wenn der Retrig-Modus eingeschaltet ist, beginnt die Wiedergabe
eines Parts jedesmal von vorne, wenn Sie die entsprechende Taste
drücken, unabhängig von der aktuellen Position im Takt. Wenn der
Retrig-Modus ausgeschaltet ist, erfolgt eine Part-Änderung immer in
Abhängigkeit vom aktuellen Part und der aktuellen Taktposition.
Der Retrig-Modus sollte nur zu Demonstrationszwecken eingeschaltet
werden oder wenn Sie sich einen Überblick über die vorhandenen Parts
eines Styles verschaffen möchten. Schalten Sie Retrig in allen anderen
Fällen (vor allem bei Live-Einsätzen oder beim Arrangieren) aus.
DEUTSCH
Speed
Virtual Bassist folgt automatisch dem Tempo Ihres Projekts, inklusive
aller Tempoänderungen. Mit dem Speed-Parameter von Virtual Bassist können Sie die Wiedergabegeschwindigkeit einstellen: halbes
Projekttempo (»1/2«), Projekttempo (»1«) oder doppeltes Projekt-
Virtual Bassist
99
Page 100

tempo (»2«). Diese Funktion bietet sich z.B. an, wenn Sie in einem
Projekt mit 160BPM Aufnahmen verwenden, die mit 80BPM gemacht
wurden. Auch kann es sich interessant anhören, wenn der Bass im
Vergleich zum Projekt mit halbem oder doppeltem Tempo spielt.
1/2 Virtual Bassist spielt nur halb so schnell wie das Projekt.
1 Virtual Bassist spielt mit demselben Tempo wie das Projekt.
2 Virtual Bassist spielt doppelt so schnell wie das Projekt.
Die roten LEDs unter dem Speed-Schalter zeigen die aktuelle Position
im Takt an.
Swing
Mit dem Swing-Regler können Sie das Timing von Virtual Bassist anpassen. Sie können mit diesem Parameter die Offbeats eines Taktes
zeitlich rückwärts (Regler nach links) oder vorwärts (Regler nach
rechts) verschieben. Virtual Bassist spielt Triolen, wenn Sie den
Swing-Regler auf -100% oder +100% einstellen.
Sie finden den Swing-Regler sowohl auf der Play-Seite als auch auf der
Seite »Groove Match«. Der Swing-Regler steuert die Swing-Parameter,
die Sie auf der Seite »Groove Match« finden, siehe Seite 113.
Virtual Bassist
100
 Loading...