

Page 1
Page 2

The information in this document is subject to change without notice and does not represent a commitment on the part of Steinberg Media Te c hnologies GmbH. The software
described by this document is subject to a License Agreement and may not be copied
to other media. No part of this publication may be copied, reproduced or otherwise
transmitted or recorded, for any purpose, without prior written permission by Steinberg
Media Technologies GmbH.
All product and company names are ™ or ® trademarks of their respective owners.
Windows XP is a trademark of Microsoft Corporation. The Mac logo is a trademark used
under license. Macintosh is a registered trademark. Mac OS X is a registered trademark.
© Steinberg Media Technologies GmbH, 2005.
All rights reserved.
Groove Agent
2 English
Page 3

Table of Contents
4Welcome!
6 How do I use Groove Agent?
7What is Groove Agent?
7 Register Groove Agent!
8 The Steinberg Key
10 System requirements (PC version)
10 Installing Groove Agent (PC version)
11 System requirements (Mac version)
11 Installing Groove Agent (Mac version)
12 Activating the Steinberg Key
13 Setting up Groove Agent as a VST instrument in your host application
14 Setting up Groove Agent as a DXi2 instrument
15 Using Groove Agent in an AU compatible application
16 Groove Agent stand-alone and ReWire
17 First test
18 Groove Agent terminology
20 About the sounds in this VST instrument
27 Using Groove Agent
28 The LCD window
29 Range
29 The right-click menu
30 Sliders and buttons
39 Mute, grouping and instrument selection
40 Stop/Run
41 Under the hood
44 The setup lid
48 Creating a drum track in Groove Agent
50 Using Groove Agent’s MIDI output in Cubase SX
51 Using the automation in Cubase SX
52 Composing with Groove Agent’s Memory slots in Cubase SX
53 About the styles
71 Tempo Guide
73 80 or 160 BPM, what’s the correct tempo?
73 Finding a suitable style for your song
73 Jamming with Groove Agent
74 Smooth handling
74 Controlling Groove Agent from a MIDI keyboard
76 Contact, Internet
76 Credits
77 Last but not least…
ENGLISH
English 3
Groove Agent
Page 4

Welcome!
In early 2002, a member of our Swedish VST forum suggested that
someone should create a modern-day drum machine VST instrument.
Just like in the old days, when drum machines offered exotic musical
styles like Rumba and Cha-Cha, this baby would be able to play a huge
number of styles. And with today’s 24 bit audio technology, velocity
layers, real ambience recordings and an easy to use control panel,
what could go wrong?
A year later it was time for Groove Agent, a modern day drum machine.
Now it’s early 2005 and we’re presenting Groove Agent 2 – the next
logical step. We’ve added content in the form of acoustic and electronic drum kits plus 27 new styles and some improved functionality.
But the basic behavior of our drum machine is still the same, so for anyone saying:
- “I can’t program drums”,
- “I don’t have the time to program drums”,
- “Inspire me!”,
Groove Agent 2 offers instant assistance and inspiration for producing
songs, jingles, film scores or any other genre that requires versatility
and speed. We also know that some Groove Agent customers prefer
using our drum machine as a rhythmic source to feed external sound
modules, or to use the built-in sounds for their own drumming. Or any
combination thereof.
I firmly believe that the slogan we used two years ago still holds true
for this updated version of Groove Agent: “Create a professional
drum track in the same 3 minutes it takes to play your song!”.
Groove Agent
4 English
Page 5
So why not skip the boring parts of life and concentrate on the interesting bits! I personally consider song-writing to be the finest craft of
all, and Groove Agent 2 is designed to help anyone who needs drums
in their music; instant drums to keep the creative flow.
Computer tools can’t replace real humans, no more in music programs
than in other software. We’ve done our best in maintaining the human
touch in Groove Agent 2 by asking real musicians to contribute with
their very best grooves. And when they thought the job was done, then
came the hard bits; adding half tempo feel and sidestick versions of all
25 levels of complexity for each style! The results often surprised the
musicians too, and the collected effort of all that musical activity resides somewhere there in those thousands of bars of drumming.
ENGLISH
Please use Groove Agent 2 to create sweet music! Music is good for
your soul, and hopefully this musical tool will assist and inspire you to
reach higher levels.
Sven Bornemark
/Producer
Groove Agent
English 5
Page 6

How do I use Groove Agent?
You can use Groove Agent as stand-alone application or together with
a host application, a sequencer program. If your sequencer supports
VST instruments, then you can use Groove Agent. Here’s how to get
started:
1.
Prepare a track and load Groove Agent.
2.
Select a style or a sub-style using the top slider in Groove Agent (see
page 30). Wait while it loads its sound data.
3.
Click the Run button and Groove Agent starts playing. Move the Complexity slider to hear variations in the style.
4.
Choose another style and hear what it sounds like when you change
the individual drum sounds, click the fill button, mute or un-mute the
percussion instruments, try the half tempo feel or add a syncope (accent). Have you found the ambience knob yet?
Now it’s time to let Groove Agent act as a real drummer in your music!
Groove Agent
6 English
Page 7
What is Groove Agent?
Technically speaking, Groove Agent uses thousands of custom designed MIDI patterns created by Swedish top musicians. These patterns trigger samples especially recorded for this instrument. That’s
basically it!
The Timeline slider allows you to choose a musical style or sub-style
and its associated drum kit. Some of the kits are acoustic, others are
electronic. The Complexity slider provides you with increasing degrees
of advanced play. For each level there’s an associated fill, half tempo
feel pattern and sidestick version. On top of that, there’s an Edit section
where you can tweak the sounds and even change your instruments.
ENGLISH
We’re especially proud of the fine musicianship behind every single
level of the styles available. This piece of software was produced by
musicians for musicians!
Register Groove Agent!
Before getting carried away with Groove Agent, which we’re sure you
will be, please take a moment to complete and return the enclosed
registration card. This will entitle you to technical support, and we’ll
also keep you up to date with the latest news and updates.
English 7
Groove Agent
Page 8
The Steinberg Key
❐
Please read the following section before installing the Groove Agent
software.
Included with the Groove Agent package, you will find an activation
code (not to be confused with the serial number) for the Steinberg
Key (sometimes referred to as a “dongle”), a hardware copy protection device that is part of the Groove Agent copy protection scheme.
Groove Agent will not run if there is no Steinberg Key and if this key
hasn’t been properly activated. You can either separately purchase a
new Steinberg Key for use with Groove Agent, or use a key previously
bought for use with a different Steinberg application.
•
If you have a Windows PC and have never used a dongle on your
computer before, the installation routine may initiate a restart of Windows after installation of the key drivers. After the restart, the key must
be plugged into the USB port for the installation routine to continue.
•
If you already own software that requires a Steinberg Key, it should be
plugged into the computer’s USB port after installing Groove Agent
and restarting the computer!
When the key is plugged into the USB port, Windows will automatically
register it as a new hardware device and will attempt to find drivers for it
– these necessary drivers won’t be present until Groove Agent has
been installed and the computer restarted.
The Steinberg Key
Groove Agent
8 English
Page 9

The Steinberg Key is, in fact, a little computer on which your Steinberg software licenses are stored. All hardware-protected Steinberg
products use the same type of key, and you can store more than one
license on one key. Also, licenses can (within certain limits) be transferred between keys – which is helpful, e.g. if you want to sell a piece
of software.
❐
If you already own a Steinberg Key (e.g. for Cubase or Nuendo), you can
load your Groove Agent license onto that one, using the activation code
supplied with Groove Agent. This way you need only one USB key for
both your host and Groove Agent (see below).
❐
The Steinberg Key must not be plugged in before or during the installation of Groove Agent if this is the first time you use such a key. Otherwise Windows will register it as new USB hardware and try to find drivers
that won’t be present before Groove Agent installation.
ENGLISH
English 9
Groove Agent
Page 10

System requirements (PC version)
To run Groove Agent you’ll need:
•A PC with a 800 MHz Pentium or Athlon processor (1.4 GHz or faster recommended).
• 384 MB of RAM (512 MB recommended).
• 450 MB of hard disk space.
• Windows® XP Home or Professional.
• Windows MME compatible audio hardware (an ASIO compatible audio card
is recommended).
• If you want to use Groove Agent as a plug-in, you’ll need Cubase or Nuendo
(version 1.5 or higher) or another VST 2.0 or DXi 2 compatible host application.
Please note that some features may not be supported in other host applications.
•A Steinberg Key and a free USB port.
• Monitor and graphics card supporting 1024 x 768 resolution (a dual monitor
setup and a display resolution of 1152 x 864 are recommended).
❐
Please also observe the system requirements of your host application.
Installing Groove Agent (PC version)
To install Groove Agent on your PC:
1.
Switch on your computer and wait for Windows to load.
2.
Insert the Groove Agent CD ROM into your CD ROM drive.
3.
Open the Windows Explorer, or the “My Computer” window, and double-click on the CD ROM drive icon.
4.
Double-click on the Groove Agent Installer icon to run the installation
program, and follow the on-screen instructions.
Groove Agent
10 English
Page 11

System requirements (Mac version)
To run Groove Agent you’ll need:
•A Power Mac G4 867 MHz computer (Power Mac G4 Dual and 1.25 GHz or
faster recommended).
• 384 MB of RAM (512 MB recommended).
• 450 MB of hard disk space.
• Mac OS X version 10.3 or higher.
• CoreAudio compatible audio hardware.
• If you want to use Groove Agent as a plug-in, you’ll need Cubase or Nuendo
(version 1.5 or higher) or another VST 2.0 or AU compatible host application.
Please note that some features may not be supported in other host applications.
•A Steinberg Key and a free USB port.
• Monitor and graphics card supporting 1024 x 768 resolution (a dual monitor
setup and a display resolution of 1152 x 864 are recommended).
❐
Please also observe the system requirements of your host application.
Installing Groove Agent (Mac version)
ENGLISH
To install Groove Agent on your Mac:
1.
Switch on your computer and insert the Groove Agent CD ROM.
2.
If the CD window doesn’t open automatically, double-click on the
Groove Agent icon.
3.
Double-click on the Groove Agent Installer icon to run the installation
program, and follow the on-screen instructions.
Groove Agent
English 11
Page 12

Activating the Steinberg Key
❐
Whether you bought a new key when you bought Groove Agent, or if you
want to use one you previously bought with a different Steinberg product:
your Steinberg Key does not yet contain a valid license for Groove Agent.
You must download a license to it before you can launch Groove Agent!
Use the activation code supplied with the program in order to download a valid Groove Agent license to your Steinberg Key. This process
is the same both for existing and new keys. Proceed as follows:
1.
After installation and restarting the computer, plug the Steinberg Key
into the USB port.
If you are unsure of which port this is, consult the computer’s documentation.
2.
If this is the first time a copy protection device is plugged in, it will be
registered as a new hardware device, and a dialog will appear asking
you whether you would like to find drivers for the device manually or
automatically.
Choose to find drivers automatically. The dialog closes, and you may have to reboot
your computer.
3.
Make sure that your computer has a working internet connection.
License download is made “online”. If your Groove Agent computer isn’t connected to
the internet, it’s possible to use another computer for the online connection – proceed
with the steps below and see the help for the License Control Center application.
4.
Launch the “License Control Center” application (found in the Windows Start menu under “Syncrosoft” or in the Macintosh Applications
folder).
This application allows you to view your Steinberg Keys and load or transfer licenses.
5.
Use the License Control Center “Wizard” function and the activation
code supplied with Groove Agent to download the license to your
Key. Simply follow the on-screen instructions.
If you are uncertain about how to proceed, consult the help for LCC.
When the activation process has completed, you are ready to launch
Groove Agent!
Groove Agent
12 English
Page 13

Setting up Groove Agent as a VST instrument in your host application
This section describes how to set up Groove Agent with Cubase SX
as your host application. However, the same procedure applies to
most host applications, and you should consult your host’s documentation if you need further help.
Make sure the host program has been correctly installed and set up to
work with your MIDI and audio hardware (e.g. MIDI keyboard and an
audio card).
To set up Groove Agent:
1.
Open the VST Instruments window.
2.
Click the “No Instruments” label and select Groove Agent from the
pop-up menu.
3.
Wait for a few seconds while Groove Agent loads its default style
samples. The Groove Agent window opens automatically.
4.
In the VST host application, select Groove Agent as the output for a
MIDI track.
ENGLISH
Groove Agent
English 13
Page 14

Setting up Groove Agent as a DXi2 instrument
❐
The information in this section refers to using Groove Agent within Cakewalk SONAR. We assume that you have correctly set up both SONAR
and your available MIDI and audio hardware. Should you wish to use
Groove Agent within another DXi2 compatible host application, please
refer to its documentation.
Proceed as follows to activate Groove Agent:
1.
Make sure that SONAR receives MIDI data that you generate with
your external MIDI master keyboard. You can check this visually with
the “MIDI In/Out Activity” tray icon.
2.
In SONAR, open the “Synth Rack” window from the View menu.
3.
Click the Insert button (or select the Insert option on the main menu).
4.
Open the DXi Synth submenu and select “Groove Agent” from the
pop-up menu.
5.
By default the “Insert DXi Options” dialog appears. To create one MIDI
track and connect an audio track to Groove Agent’s 1+2 outputs, activate the options “Midi Source Track” and “First Synth Output”. To
create all available Groove Agent outputs activate “All Synth Outputs”.
Refer to your host application’s documentation for further details.
6.
Clicking the “Connection State” button in the Synth Rack will activate/deactivate Groove Agent. By default this is automatically activated when DXi SoftSynths are loaded.
7. Double-click on the “Groove Agent” entry or click the “Synth Properties” button in the tool bar of the Synth Rack to open the Groove Agent
window.
8.
In SONAR, select the previously created MIDI track “Groove Agent”.
Groove Agent will now receive MIDI data from the selected track.
Groove Agent receives MIDI data in 16 channel multi-mode. It is therefore not necessary to assign a specific MIDI receive channel in Groove Agent. However, you should
make sure that the MIDI channel of the currently selected SONAR track is set to the
channel on which Groove Agent is to receive MIDI data.
Groove Agent
14 English
Page 15

Using Groove Agent in an AU compatible application
You can use Groove Agent in an AU host application (e.g. Logic).
The Groove Agent AU version is installed in the folder “Library/Audio/
Plug-ins/Components” and lets Groove Agent work in an AU environment – without any performance loss or incompatibilities.
For Logic Pro 7 proceed as follows:
1.
Open the Track Mixer and choose the desired Instrument channel.
2.
[Command]-click the I/O field and, in the pop-up menu that appears,
choose either Multi-Channel or Stereo.
3.
In the sub-menu that appears, select All Instruments and then Groove
Agent.
Groove Agent is now loaded as an AU instrument.
When set, you are ready to load some samples and start using
Groove Agent!
ENGLISH
Groove Agent
English 15
Page 16

Groove Agent stand-alone and ReWire
Groove Agent can be used as a stand-alone application, independently of any host application. This makes it possible to use Groove
Agent in sequencer applications that do not support one of the provided plug-in formats of Groove Agent (i.e. VST, DXi, AU), but allow
for data exchange using ReWire.
ReWire2 is a special protocol for streaming audio and MIDI data between two computer applications. When using ReWire, the order in
which you launch and quit the two programs is very important, as the
first audio application launched will capture the sound card resources.
Proceed as follows:
1.
First, launch the sequencer application you wish to use (e.g. Ableton
Live, ProTools).
If your sequencer supports ReWire, it will provide a way to assign audio and MIDI
channels for the exchange of data. See the documentation of your sequencer application for details.
2.
Now, launch Groove Agent as a stand-alone application.
If you chose to create desktop and Start menu items during installation of Groove
Agent, you can launch the program just like any other application on your computer.
You can also double-click the Groove Agent program file in the installation folder.
When you now play a style with Groove Agent, the sound is streamed
via ReWire to the assigned mixer channels in your host. You can route
the separate instrument outputs to individual mixer channels (up to 8).
Note that you are now running two completely separate applications.
When you save your sequencer project, this will include the overall
channel and bus configuration, but none of the settings in Groove
Agent! To retain your Groove Agent settings, choose the Save Bank
command from the Groove Agent File menu. You may want to choose
a file name that indicates that the file contains settings created for a
particular sequencer project.
Similarly, when you re-open a project in your sequencer application
and have launched Groove Agent, use the Load Bank command in
Groove Agent to reload the Groove Agent settings pertaining to this
particular project.
Groove Agent
16 English
Page 17

First test
Let’s make sure Groove Agent is properly set up and ready to play:
1.
If you load Groove Agent as a VST instrument, make sure Groove
Agent is selected as the output for a MIDI track and that the MIDI
channel chosen is any other than channel 10. If required, make sure
your MIDI controller is routed to this track.
2.
Open the Groove Agent panel. Move the Style slider to a style of your
choice. Be prepared to wait for a second or two while Groove Agent
loads its samples for this style. The green LCD window is helpful here
with its Loading and Ready messages.
3.
Adjust the tempo of your host application to suit each style’s favorite
tempo range as displayed in the “range” field in the green LCD window.
4.
Click Run in the Groove Agent window. Now you should see the red
LCD meters on the Groove Agent interface flash and the beat light indicate 1-2-3-4. You should also hear cool rhythms streaming from
your speakers!
ENGLISH
Groove Agent
English 17
Page 18

Groove Agent terminology
LCD window
going on inside Groove Agent. This is your main source for information.
LCD meters
when Groove Agent is playing. They indicate that sound is being output from Groove Agent, but for more detailed control you should use
the level meters in your host sequencer.
Style
– A certain musical style, normally linked to a unique drum and
percussion kit.
Kit
– A special set of drums and percussion associated with each
style. Style and kit can be chosen separately.
Complexity
the complexity levels go from left (simple) to right (advanced). Music
in general benefits from variations in a song, and in Groove Agent
they’re easy to reach.
Fill – A live drummer usually plays a fill every eight bars or so, emphasizing the song’s structure and movement. A fill may be regarded as
“an improvised exclamation mark”. Going from the verse into the chorus? Time for a fill!
Half tempo feel – Typically, slowing down the kick and snare pattern
to half speed, while keeping the rest of the pattern going in the other
instruments, creates a dramatic effect. This is very typical live drummer
behavior! Real drummers do this all the time, if you don’t stop them.
– The big, green window tells you, at all times, what’s
– These are the cool, red level meters that start flashing
– The level of advancement in a style. In Groove Agent
Accent – Before drum machines became popular, an accent was a
marked hit, typically played on the crash cymbal and kick drum. When
played off beat, like e.g. on the 8th note preceding a bar line, it becomes a syncope.
Shuffle – Sometimes referred to as “swing factor”. These terms indicate the relationship between the 8th notes (sometimes 16th notes),
as these can either be perfect 8ths (“straight 8ths”) or swung (“triplet
8ths”).
Groove Agent
18 English
Page 19

Limiter – This is probably the first device a recording engineer reaches
out for when recording drums. Limiting (or compression, the difference
is not always easily defined) controls the overall output level and can
also be used as an effect.
Ambience – Groove Agent comes with a complete set of ambience
recordings for all drums and percussion instruments. The acoustic
sounds have been recorded with distant microphones and the electronic sounds have been processed through various reverb and effects
units.
Dry/Wet – These are terms that describe the two extremes of a sound.
Either it’s recorded very closely in a damped environment – dry – or
we’re dealing with the sound recorded from a distance or bathed in
reverb – wet.
• New in Groove Agent 2 is the right-click menu. We’ve added some
new features that can be reached by pressing the right mouse button
or by left-clicking in the logo area.
Via this menu you can reach the About screen or go to the Groove Agent and Steinberg websites. You can also reach new functions like changing the number of mixer
outputs, edit MIDI output behavior, change the MIDI mute key mode or instruct Groove
Agent 2 what to do when the host stops.
ENGLISH
Groove Agent
English 19
Page 20
About the sounds in this VST instrument
Before we started producing the musical content for this instrument,
we scanned the market for existing drum libraries we could use. Using
ready made samples would save us oceans of time (Per “Worra” Larsson/SampleTekk is the first person to agree here), but unfortunately
we could not find anything suitable. Either those libraries were incomplete in terms of drum sounds (have you ever seen a sample archive
that includes “hihat gliss” or “spoons”?) or inconsistent in the way
they were recorded.
We wanted (1) a complete selection of kits and sounds and (2) ambient recordings of everything. So we started recording…
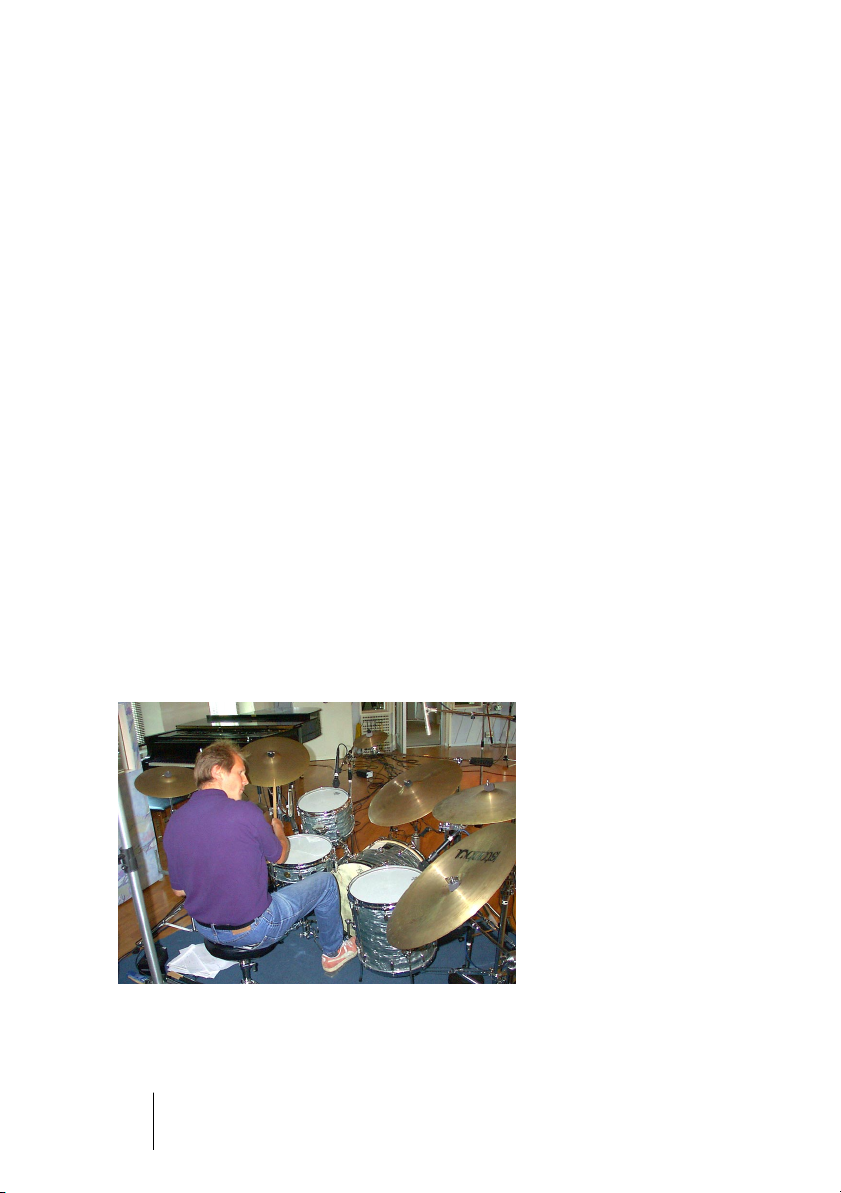
The wonderful Studio Kuling in Örebro, Sweden, has the most dramatic
recording room we’ve ever seen! The room itself is large and mostly
covered with wood panels, and engineer Jens Bogren certainly knows
his way around the equipment. With Mats-Erik Björklund playing all instruments, sound designers Per “Worra” Larsson/SampleTekk and
Sven Bornemark started recording multiple velocity levels of each
sound.
There was an initial agreement that this archive should cover most
grounds – as many musical landscapes as possible. Therefore we
decided upon recording all these instruments:
A 50s jazz kit. Not very
damped, sounds a bit
loose, sloppy.
Groove Agent
20 English
Page 21
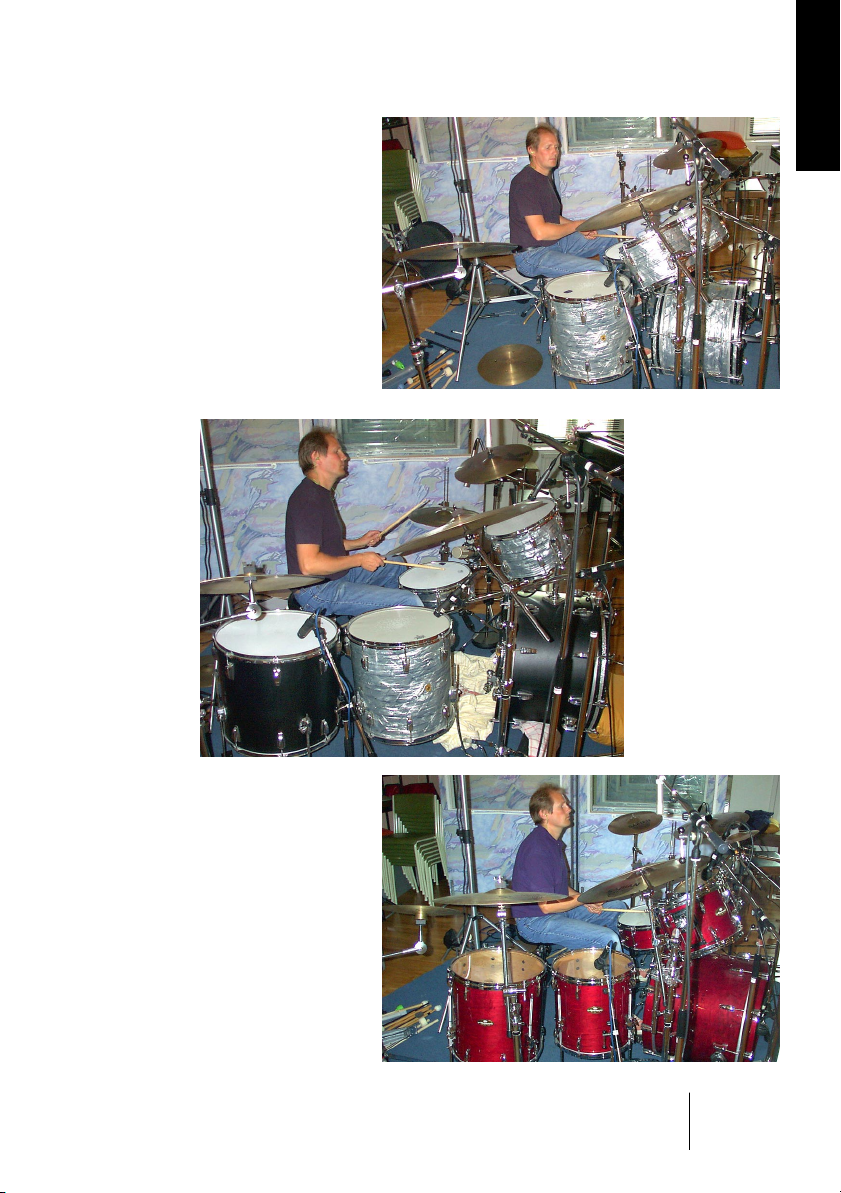
A 60s pop kit. Very
damped drums from
the era when they put
towels on the toms!
ENGLISH
A 70s rock kit. Loud,
deep and ringing.
This kit is big!
An 80s studio kit. Fresh
and modern, like on
most of today’s CDs.
Groove Agent
English 21
Page 22
On top of that, we added stuff that adds color and realism to the different eras and attitudes we wanted to cover. 50s drums played with
brushes and mallets, 80s kit with rods and additional snares like piccolo and deep models.
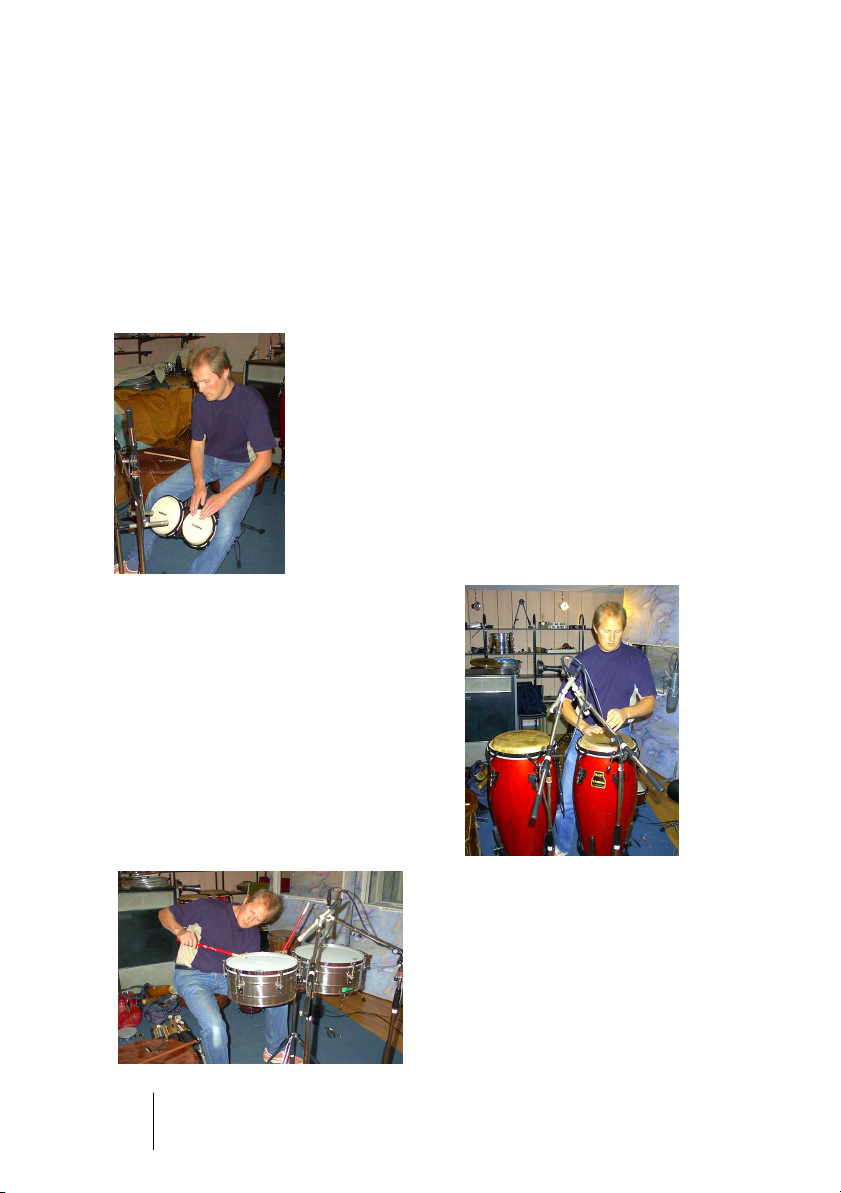
To make the archive complete, we had a long session with only percussion instruments, both those included in the GM protocol plus an
array of other, interesting sounds: African fur drum, rainstick, tambourine, cascabelles, mouthplopp etc.
Recording bongos…
Groove Agent
22 English
…congas…
…and timbales
Page 23

Jens Bogren came up with the suggestion that we’d run everything
through an analogue 24 track tape recorder for “that warm sound”.
Great idea! Coupled with our original intention to produce a very complete archive, this is what we actually recorded:
• Tracks 1-2: closely miked drum.
• Tracks 3-4: overhead microphones.
• Tracks 5-6: ambient mics 2 meters away.
• Tracks 7-8: distant mics 7 meters away.
After the recording sessions, Per Larsson spent several months editing the sounds. Editing in a multitrack environment like this is a task
very different from working with only stereo samples. We carefully
chose the takes that would go together best and went for a mixed
setup, where the 50s and 70s kits use the dry and distant sounds and
the remaining instruments use the dry and ambient recordings.
Mats-Erik Björklund was also the person responsible for bringing all
the carefully chosen instruments to the studio. So even if the 70s hihat
recordings went astray and we totally forgot to record the sound of a
whistle, his help has been invaluable!
So much for acoustic timbres. For the more modern and experimental
electronic sounds we turned to the sample library of Primesounds,
Stockholm. There was the multitude of sounds we needed. On top of
that, many of our musicians spent time on building their own unique
sounds from the ground up.
ENGLISH
❐
Sounds marked with a B, M or R were recorded with Brushes, Mallets
and Rods respectively.
Groove Agent
English 23
Page 24
The new sounds for Groove Agent 2
The Groove Agent 2 sessions sported Mats-Erik behind the drums
and as the main sound designer. Engineer for this second round was
Rickard Bengtsson. Mats-Erik took the opportunity to record some
useful kits to make the sonic palette even more complete:
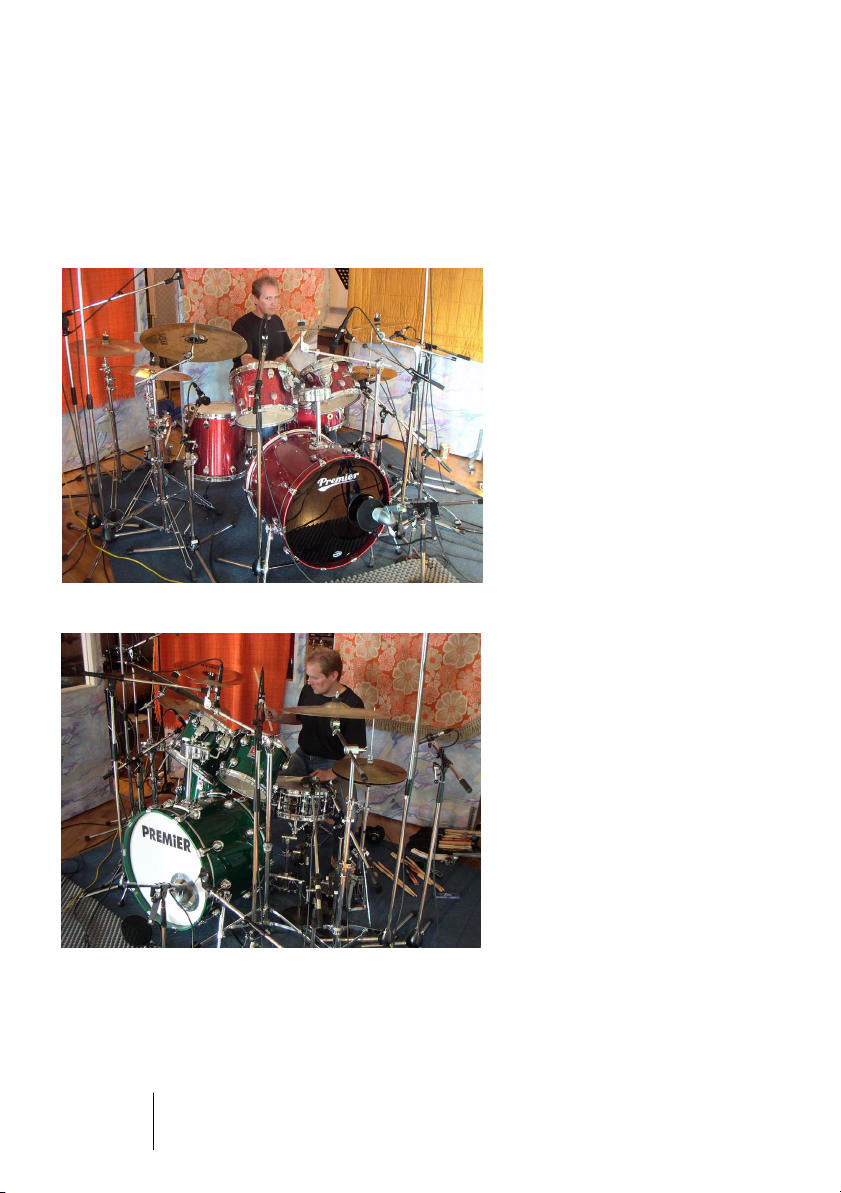
The Studio kit – A top of the
line set with some of the best
drums and cymbals around.
We wanted to achieve a
sound that would fit in a lot of
styles that demand a good,
clean and modern sound. The
three snares are high quality
snares with different depth
and materials and carefully
tuned to bring out the true
characteristic of the instru-
ments
.
The Heavy kit – This drum-set
is intended to fit in many of today’s Metal styles, where busy
bass drumming is a vital ingredient. The dry character of the
ride-cymbal and the great
sound from the crashes will
cut through any wall of guitars.
Groove Agent
24 English
Page 25
The Noisy kit – We wanted to create a modern drum sound using traditional drums. These instruments
are very small but along with the
boom-box effect they sound much
bigger than they really are. We experimented a lot with different digital effects and came up with a
sound that we think will last. The
snares are a thin, high pitched piccolo and a small 10" mini-snare.
Some of the cymbals are rare vintage instruments that are almost
impossible to find anywhere today,
while others are modern, noisy
sounding instruments that have
seen better days...
A red Slingerland “Radio
King” (the world’s most recorded snare drum), a black
handmade snare drum from
Hanus & Hert in Prague and a
Slingerland copper snare
.
ENGLISH
In order to achieve our sonic goals, it was decided that we would not
add acoustic ambience this time. Rickard had just purchased an Eventide Harmonizer “Orville” unit and spent considerable time creating
some very significant environments for the drum sounds. The resulting
sounds are very rich and colorful.
Groove Agent
English 25
Page 26

In addition to the three acoustic kits,
a handful of vintage drum machines
from Sven Bornemark’s private collection were added. Some of these
beauties are over thirty years old, so
sampling them was not without
complications. Old analogue gear
has a tendency to sound a bit different from day to day, and even from
beat to beat, so when comparing
the original, built in rhythms with our
MIDI renditions, there are some differences. However, we think we’ve
managed to capture and re-package the better part of the magic of
these drum machines of yesteryear.
The vintage drum machines got their ambience from a vintage EMT
plate reverb unit located in Malmö’s most well known recording studio,
Tambourine Studios.
Groove Agent
26 English
Page 27
Using Groove Agent
ENGLISH
Here’s the extremely compact version for the impatient amongst you:
Choose what style you want to use with the upper slider. Make sure
the lower slider is somewhere in the middle third of its total range and
that the tempo is inside the tempo range of the chosen style. Start your
sequencer, and when you want the drums to start playing, hit Run in
Groove Agent.
For really easy living, activate Auto Fill. Move the Complexity slider to
the left for easier/gentler playing and to the right for a more advanced/
noisy/wild drummer. Stop Groove Agent with its own Stop button or by
stopping your sequencer. To record the output of Groove Agent as a
MIDI part, click Edit, open the Setup section and put the MIDI Output
switch to the ON position (this only works in Cubase and Nuendo).
Groove Agent
English 27
Page 28

The LCD window
The information given in this window
is mostly self explanatory, but let us
give you the most useful tip of all:
When navigating the Style and Complexity sliders, the big LCD window
always tells you where the sliders are.
We’ve crammed 54 styles into the
top slider, and some users may find
the style names difficult to read. Please, have a look in the LCD window. It makes it much easier for you to place the sliders exactly where
you want them.
You have probably noticed that some of the style names above the top
slider are colored differently. That’s because they house sub-styles,
the new additional 27 styles that have been added in Groove Agent 2.
Here’s the trick:
1. Select a differently colored style with the slider as usual.
2. Right click with your mouse button and select any of the new styles
listed in the pull-down menu.
• As you might have expected, it’s still possible to combine the music of
one style with the drum kit from another style. Just de-activate the Link
button and use separate positions (and sub-menus) for the two halves
of the style selector.
Groove Agent
28 English
Page 29

Range
Each style has its own favorite tempo range. If you play a hectic House
style at 40 BPM, it probably won’t sound very impressive. We won’t try
to stop you from trying any style in any tempo, but we remind you of
each style’s home BPM range in the LCD window.
The recommended tempo range should be regarded as a helpful hint
if realism is what you’re after. If not, break this rule!
❐
For a tempo map overview, see page 71.
The right-click menu
Several new features can be reached by right-clicking in an unused
area of the main interface of by clicking in the logo area:
• About Groove Agent 2 – This page lists the people involved and shows the
version number. You can exit the Credits page by clicking anywhere in it.
• Groove Agent website – Info, sound clips, FAQ and a friendly forum at this
dedicated website.
• Steinberg website – Here’s where you can learn more about other cool and
creative software.
• Audio Outputs – You can decide how many stereo outputs Groove Agent will
occupy in your host’s mixer. Please notice, that due to technical reasons, the
changes made here won’t be seen until Groove Agent has been re-started.
• MIDI Output – Groove Agent 2 can output its drumming to either a MIDI part
(as before) or to a MIDI file! That MIDI file can then be imported to your host
for further tweaking.
• MIDI Mute Key Mode – Remote control of Groove Agent 2 is now easier than
ever! Two new modes in this department. More info in the section “Controlling
Groove Agent from a MIDI keyboard” on page 74.
• When Host Stops – The Pause behavior has been changed in Groove Agent 2.
Please consult the section “Stop/Run” on page 40.
ENGLISH
Groove Agent
English 29
Page 30

Sliders and buttons
The style slider/timeline
The top slider is perhaps the most important gadget in the entire instrument. It is a timeline with various musical styles written above it. When
dragging the slider along this timeline, you select what style to use.
Every style has its own carefully crafted drum kit assigned to it. Many of
the early styles sound a bit old by today’s standards – both musically
and soundwise – and that’s exactly the point!
When first selecting a style, the plug-in will take a few seconds to load
the samples. When you move to another style, there are a few seconds of loading time again. But if you go back to the first style again,
loading time will be much shorter, because the samples are still in your
computer’s cache. This is especially true for the Windows operating
systems. So, if you are brave enough to use several styles within one
song, you may encounter glitches at those style changes, but only the
first time.
Styles stored in memory locations stay loaded, so Groove Agent will
not glitch when switching between them.
The 27 new styles introduced in Groove Agent 2 can be reached by
moving the slider to a differently colored style name and right-clicking
on it. You can then make a selection from the pull down menu.
Groove Agent
30 English
Page 31

The Style Link button
Choosing a style also selects a drum and percussion
kit especially assigned to it. As long as the two halves
of the slider are linked, that is. Clicking the Link button
once un-links the two halves of the slider button, making it possible for you to play the Bossa Nova style with a Techno
drum kit! In this mode, the upper half selects the playing style and the
lower half of the slider the kit.
Click the Link button again, if you want to re-establish the Link between
the style and the corresponding kit.
❐
Please note that selecting a new kit usually calls for new samples to be
loaded. This may take a few seconds.
❐
There are two ways to help you place the lower half of the slider more
accurately. Either (1) look at the LCD window or (2) grab the slider and
move your mouse pointer to the last character of a style name.
ENGLISH
The Complexity slider
This tool is also very important, since it makes the drumming built into
Groove Agent come alive. Getting acquainted with this slider shouldn’t
be too problematic, since its behavior is very predictable.
If you move this slider to the left, you’ll reach the simpler levels of complexity. As a matter of fact, the first levels – named A, B, C, D, and E –
are usually not even complete patterns. Something is missing here, be
it a kick drum or a few beats. The reason we gave you these levels is
because we think you might find them suitable for song intros or when
producing very sparse music. Maybe only the first verse of your song
needs this gentle touch?
By moving the slider to the right, you move into the more busy territory. Here you’ll find variations 1-20 of the chosen style and the further
you move to the right, the busier it gets. Some may even regard the
rightmost levels to be totally unlistenable, but that’s intentional. This
drummer gets a bit wild sometimes!
English 31
Groove Agent
Page 32

For convenience’s and predictability’s sake, level changes occur only
at bar lines. This means that if you want to change from level 8 to 11
and move the slider on the second beat of a bar, you’ll have to wait until the next bar to hear the new level. This behavior gives you time to
trigger fills (and click other buttons if you need to) a bit in advance.
If you really want to change levels instantly, you should get acquainted
with the memory section. There you can jump between ANY combinations of panel settings in a split second.
❐
Complexity levels 1-15 are generally regarded as “normal” or “most useful”.
The Complexity Link button
The 25 levels of complexity each have their own unique
fill. By moving the slider to a certain level and then hitting the Fill button, you’ll hear the fill associated with
that level.
You can however separate the two halves of the slider. When you click
the Link button, the two halves can be dragged individually. In this
mode, it’s perfectly possible to use a very simple rhythm and activate a
rather complex fill. Or vice versa.
You may also find the Link button useful if you’ve decided that “fill number 13” (or whatever) is the only one you want to use at a particular position in your song. Or throughout the song, for that matter.
Clicking the Link button again re-establishes the link between complexity and fill.
Snare/Sidestick
One common practice in traditional drumming is to
make the sound “lighter” by playing with the stick
lying down on the snare drum hitting the metal rim.
This is called sidestick and here’s the button for it.
You may switch between regular snare and sidestick at any level of complexity.
Groove Agent
32 English
Page 33

While we’ve tried our very best to make the sidestick option sound as
natural and musical as possible, there are instances where it felt really
awkward to use the sidestick. Therefore, the sidestick option is available in most but not all the complexity levels in Groove Agent.
❐
The sidestick playing technique generally sounds more natural at lower
complexity levels.
Accent
This button triggers a kick + crash cymbal hit. You may
use it as an accent in your song. When hit at an offbeat, the accent hit becomes a syncope. The current
drum pattern stops for as long as you keep the button
pressed. Holding down the Accent button for approximately one quarter note after you hit it on an off-beat
creates a very realistic syncope.
Fill
This is one of the most rewarding buttons of this in-
strument! A drum machine that played its patterns very
regularly and automatically triggered a fill every 8th bar
would sound right most of the time but certainly not al-
ways.
ENGLISH
In Groove Agent you are the band leader, the conductor! Hit the button when you feel it’s time for a fill, and Groove Agent
will obey. If you hit the button early in a bar, you’ll hear more of the fill
bar than if you hit the button late in a bar. Armed with this knowledge,
you can turn even the wilder fills into more discrete ones.
Please note that in most styles the fills end with a crash cymbal on the
downbeat of the next bar, just like a live drummer. You can turn this effect off by muting the Crash group.
Speaking of arming, you can actually start a pattern with a fill. When
Groove Agent is stopped, hitting the fill button will arm it, so that clicking the Run button makes Groove Agent start playing with a fill.
Groove Agent
English 33
Page 34

There are 25 levels of complexity in each style. This also applies to
fills; the lower numbered fills are generally less busy than the higher
numbered ones.
❐
Some musical styles have a definite 2 or 4-bar pattern feel to them. While
an irregular (like 7 or 9) bar period in your music may cause such a pattern to sound wrong (a bit like “one bar late”), it’s reassuring to know that
after a fill the music always restarts at “bar 1" in such a pattern.
❐
Fills can also be used for endings. Hit the Fill button in the last bar of
your song and then the Stop button on the last beat.
Half Tempo Feel
One trick many live drummers use, is to change their
playing to “half tempo feel”. It usually involves slowing
down the kick and snare pattern to half tempo while
keeping the hihat/ride pattern going. Figge, one of the
musicians involved in this project, suggested that we
include this feature in Groove Agent. After some seri-
ous thought, we decided it would definitely be a big
bonus; no other drum machine (that we know of) has a “Half Tempo
Feel” button. But all drummers do!
In Groove Agent, all the half tempo feel patterns have been especially
programmed to imitate this trick. One very obvious example can be
found in the Fox style. Play it at a moderately brisk tempo and then hit
the Half Tempo Feel button. You will notice how the playing style turns
into something very similar to funk.
In practice, the Half Tempo Feel function doubles the amount of available styles! You can think of the half tempo feel as the basic rhythm of
your song. And then, near the end, perhaps disengage the button for
an uptempo, gospel style ending!
❐
Try activating the Half Tempo Feel button at the bridge section of a song
and then go back to normal play for the end choruses. Or at any other part
where you feel the urge to increase the excitement or coolness with this
function.
Groove Agent
34 English
Page 35

Random
If you want some automatic pattern variation, the Random button is very handy. This function automatically
changes patterns for you. The general idea is to make
the drumming sound less rigid, less predictable. The
LCD window shows you what level is currently playing.
The Random button only moves within a range of ±2 levels from the
slider’s original position.
Auto Fill
Here’s a handy little button. It can automate the way fills are
triggered. When you move from one complexity level to another with Auto Fill activated, Groove Agent automatically
plays a fill before the next level.
❐
If an auto save function is active in your sequencer, it may cause Groove
Agent to trigger a fill. The medicine is to turn Auto Save off.
ENGLISH
Random Fill
This is another little tool to make life easier. If you stay
within one complexity level and trigger a fill every now and
then, this button will make sure that every time there’s a fill,
it’ll be a slightly different one.
As with the Random button, the randomly chosen fill always lies within
±2 steps from the slider’s current location.
Shuffle
Some of the music in this world has a “straight”, or
“even”, subdivision. Eights are even eights, so to
speak. Other genres use some form of triplets,
giving the rhythm a certain “swing”, a smoother,
rolling character.
English 35
Groove Agent
Page 36

Musically, these two types are known as straight and swing based
music. And to make matters more complicated, swung music can be
based on either triplet 8ths (as in the song “New York, New York”) or
triplet 16th notes (as in Stevie Wonder’s “Sir Duke”).
The Shuffle knob affects the sub-timing of the 8ths or 16ths and acts
a bit differently than the other Groove Agent controls. If you play a
straight style and turn the knob to the right (+), you’ll hear the music
change into a more “swingy” style (the even 8ths or 16ths turning into
triplet feel). On the other hand, a swing based style becomes more
straight if you turn the dial to the left (–).
Unfortunately, while we’ve tried our best to provide a logical user interface, the Shuffle knob can be used to mess things up, too. If you
turn in towards 7 o’clock when playing a straight style, or if you turn it
towards 5 o’clock when playing something triplet based, the result will
sound weird, to say the least. Use at your own risk!
The normal position for this knob is 12 o’clock. At this setting, all
styles sound as they were originally composed.
❐
For that cajun, zydeco, or New Orleans kind of swing, try using a straight
style and move the Shuffle knob halfway to its triplet position, to the 5760% region.
Humanize
Groove Agent
36 English
Even though the musical tracks feeding Groove
Agent have been created with great care and musicality, you may want to give your drumming a bit
more natural variation. This knob gradually makes
the instrument play more “inaccurately” in terms of
timing and dynamics.
The normal position for this knob is to the far left.
Page 37

Limiter
The first thing any studio engineer reaches out for
when recording drums is probably a dynamics processor, like a compressor or a limiter. We’ve thrown
in a simple limiting device in Groove Agent to put
that dynamic control within easy reach for you.
If you feel that the drums don’t cut through your
complete musical mix, then this Limiter may help
you obtain a stronger and more consistent sound pressure level.
The knob you see actually controls four stereo limiters simultaneously.
If you assign individual groups to different outputs, the loud kick on
output 1 will still affect the crash cymbal on output 3. This linking
makes the Limiter behave more predictably.
Use with care! There’s nothing worse than an over-squished mix.
The normal position for this knob is its minimum (Off) position.
Ambience
ENGLISH
This knob is one of the highlights of Groove
Agent! All the acoustic drums and percussion
instruments were recorded using a mix of several techniques:
• Every instrument close miked, giving a very dry sound.
• Every instrument recorded through the overhead microphones, giving a rather
dry sound but with a sweet stereo image.
• Every instrument recorded through the ambience microphones, positioned
approximately 2 meters from the source. This gave us a warm, roomy sound
with a controlled amount of “air”.
• Every instrument recorded through a pair of distant mikes, placed over 7 metres away. Now we’re talking room! These recordings give a definite hall atmosphere. Overly roomy? Yes, definitely!
• The new drums that come with Groove Agent 2 have electronic and electromechanical reverb added to them.
Groove Agent
English 37
Page 38

Now, while editing the sound archive for Groove Agent, we carefully
chose the ambience recording that should go with every dry source.
For the 50s kit, we used the close-up microphones for drums and hihat and the overheads for the cymbals. We then added the distant recordings for ambience. This gave us a chance to create old sounding,
overly acoustic kits for that vintage sound.
For other kits we used different combinations, and for the modern,
electronic sounds we added normal studio effects units like reverbs
and delays.
All in all, the very natural sounding ambience is there for you to use!
We’ve preset a lot of different kits to go with the different musical
styles, but if you want to change the preset version, use this dial to
your heart’s content!
This knob also acts as a master control for the 8 individual group Ambience controls.
The normal position for this knob is 12 o’clock. Turning it all the way to
the left produces an all dry sound, while all the way to the right gives
you the ambient (wet) sounds only.
Groove Agent
38 English
Page 39

Mute, grouping and instrument selection
The sounds in Groove Agent are organized in 8 logical groups:
1. Kick (bass) drum
2. Snare drum
3. Toms or effects
4. Hihat
5. Ride and Chinese cymbals
6. Crash and splash cymbals
7. Percussion group 1
(usually “high and quick” instruments)
8. Percussion group 2
(usually “low and slow” instruments)
You can use the corresponding Mute button at any time to kill the
sound output from any of these groups. Mute activated = no sound.
Mute disabled (un-lit) = sound on.
ENGLISH
One welcome addition in Groove Agent 2 is the inclusion of Solo buttons. When you’re listening to a full drum kit and want to tweak one of
the groups only, it’s usually easier to press Solo for that group. Solo
activated = one group only is heard. Solo not active (un-lit) = all groups
are heard.
While listening to the preset styles and their related kits, you may want
to experiment with changing individual instruments or instrument
groups. Click the sound name field to open a pop-up menu from which
you can choose a different instrument. Change that tight 80s studio
kick to a dull 50s jazz kick in one easy go and hear the results instantly!
Groove Agent
English 39
Page 40

Stop/Run
These buttons start and stop Groove Agent. While this instrument can
be used with your host sequencer stopped, it always plays at the BPM
rate (tempo) of your host program. When your sequencer is running,
Groove Agent follows the tempo and synchronizes to the beat position
of the host.
You can make Groove Agent start simultaneously with your sequencer
by using this method:
1. Start your sequencer.
2. Start Groove Agent.
3. Click the sequencer stop button.
Now, the next time you start your sequencer, Groove Agent will start
too! The waiting status of the Run button is indicated by a green light
surrounding the Run button. This is good for those situations where
you want the drums to play from the very start of a song or a section.
New in Groove Agent 2 is the facility to choose your favorite Stop/
Run behavior. You do so by right-clicking somewhere in the Groove
Agent screen or by clicking on the Steinberg logo. Selecting “When
Host Stops -> Pause Playback” puts your drummer in waiting mode
whenever the host is stopped. Selecting “When Host Stops -> Stop
Playback” means that Groove Agent 2 has to be restarted manually.
Different modes for different situations.
Groove Agent
40 English
Page 41

Under the hood
So far we have only described the functions you can reach on the top
surface of Groove Agent. The black area surrounding the large LCD
window is not only holding the level meters, it’s also the lid under which
the Edit department resides. Let’s open the lid by clicking “Edit” in the
lower right corner of the instrument panel.
The sound edit knobs
There are eight rows of controls in
the area close to the middle of the
screen. The functions for all the
eight instrument groups are identical, so we’re using the top row as
an example.
All knobs have their default position
at 12 o’clock.
ENGLISH
Aud – This knob lets you audition the sound chosen in the group win-
dow to the left. This function is handy when auditioning the sounds
themselves and the edits you make to them.
Vel – The Velocity Offset knob alters the response of the drum sounds.
When turned counter-clockwise, the MIDI input velocities are scaled
down to lower values, making more use of the softer samples. Turning
the knob past 12 o’clock increases the input velocities, producing a
harder, louder sound. To compensate for the decrease/increase in overall output, a volume compensating device is connected to each group
output.
This knob may also be regarded as a quick method for making the
acoustic drums sound more loose or tight.
Groove Agent
English 41
Page 42

Tune – You can tune each group up and down by as much as 12
seminotes with this knob. Please note that for ease of use, the knob
has a much finer resolution around its 12 o’clock position than at its
end positions.
Dec – Altering the decay of an instrument can create interesting
changes to the sound, especially if they’re recorded with ambience as
our acoustic drum and percussion sounds. A normal snare can be
turned into an extremely damped drum or to an almost gated reverb
kind of noise.
Amb – Here you can fine tune the amount of ambience for each group
from dry to wet. The main Ambience knob (in the bottom left corner of
the window) always serves as a master control, so if you make sure it’s
in its 12 o’clock position, it’ll be easier for you to do the fine tuning.
Vol – Finally you can adjust the total volume for each instrument group.
Out – Each group can be assigned to any of the 1-8 available stereo
outputs. This is useful when you want to tweak one or more groups
with external EQ or effects.
Memory
When you first open Groove Agent, the
first memory button is lit. This means that
it’s active, it’s listening, it registers every
change you make. You don’t have to activate this memory slot – it’s always live.
The Copy button copies whatever is on Groove Agent’s panel into any
of the 10 memory locations. Click Copy and then a memory button,
and the procedure has been completed.
A dark button means that this location is empty, a green-ish color indicates that something has been saved here and a bright light shows
the currently active memory.
Each of the 10 memory slots can be regarded as a snapshot of all settings in the entire instrument. After some tweaking you may have found
an overall setting that is absolutely right for, say, the verses of your song.
Groove Agent
42 English
Page 43

By clicking the Copy button and then memory slot number 2, all the
current settings are stored in Memory 1 but also moved into the new
memory slot. You are now free to go further and find the right sound
for, say, the chorus. With slot 2 active, you may fiddle around the panel
to your heart’s desire. That perfect verse setting is safely stored at
memory position 1, so you’re free to experiment. (While this description
does not represent the ultimate in flexibility when using Groove Agent,
this is ONE way to use automation.)
Here’s another suggestion. Since the Memory slots store the entire
front panel settings of this instrument, you can jump between complexity levels instantly and even completely different styles and kits in
one go! This may not be the ultimately realistic scenario – how many
drummers do you know that can change an entire kit in a snap – but it
sure gives you more flexibility than anyone could ask for!
❐
If you save your Groove Agent settings as a Bank (.fxb), all the content of
the Memory buttons will be retained.
Master volume
ENGLISH
It’s not very hard to describe a knob marked as Master Volume, is it? You may think that it controls the
overall output from this instrument, and if so, you’re
absolutely right!
When using several outputs, the Master Volume knob
controls all outputs.
New in Groove Agent 2 is that audio activity stops when the Master
Volume control is at its minimum position. If you’re using Groove
Agent 2 as a pure MIDI player, and using none of its internal sounds
(controlling external drum sounds only), you may want to save some
CPU power this way.
Groove Agent
English 43
Page 44

The setup lid
By clicking the rugged button
above the little Setup lid, you
open an area resembling a battery compartment. This is where
the really secret functions are
hidden. You close this lid by clicking the Close button in the lower
right corner. Let’s open it and have a look!
MIDI Output
One fantastic feature of Groove Agent is its ability to write a MIDI part
containing the notes you actually hear! By setting this switch to the
ON position, a whole array of new possibilities appears!
If you arrange your drumming in real-time with your sequencer in record
mode (you should try it – this was our ultimate goal when designing
Groove Agent), a MIDI part will be created as you go. After this stage
you are free to open that newly created part and perform various tasks:
• Delete, add, copy or move individual notes.
• Copy any desired length of this new part into another section of the song or
into another song altogether.
• Use another kind of quantizing or dynamics.
• Copy the entire part, delete the kick drum in the original part and delete all
other instruments in the copy part on another track. Now you can assign the
kick part to another virtual or physical instrument, e.g. your favorite sampler. If
you’re using a Cubase drum map, this whole operation is even simpler.
❐
The MIDI Output feature really belongs to the outskirts of the VST 2.0
protocol. We’re pushing the limits here. We have no idea what MIDI Output may do (or not do) in every available host program. We only guarantee that MIDI Output works correctly in Steinberg’s Cubase and Nuendo.
If you’re using a program that can’t handle MIDI output from a VST instrument like described above, you’ll have to use your host’s automation facilities while creating your arrangements. Please also refer to
the following section describing a brand new function: Live <> File.
Groove Agent
44 English
Page 45

• It’s usually a good idea to turn on the SysEx (System Exclusive) filter in
your sequencer when using Groove Agent. If you don’t filter out SysEx,
the Run and Stop commands are written into the MIDI part, causing
Groove Agent’s engine to start playing along with the incoming MIDI
data. If you filter out SysEx, the Run and Stop commands aren’t written
into the MIDI part and life becomes generally easier.
❐
It is advisable to turn off your sequencer’s auto quantize function when
Groove Agent writes a MIDI track. You can always quantize the drumming
later, if you want to.
When MIDI Output is active, this status is shown by a MIDI
plug symbol in the LCD window.
Live <> File
Here’s another new feature in Groove Agent 2! You may choose to direct its MIDI output to either a MIDI part in your host – as described
above – or to a MIDI file on your desktop!
If you set MIDI Output to ON and the newly added DIP switch
Live <> File to the File position, Groove Agent 2 will record a MIDI file
for you and place it on your desktop. Remember to set the MIDI Output switch to OFF when you’re finished (this action instructs Groove
Agent 2 to write that file). You can then import that MIDI file into your
song for further tweaking. Just use the “Import MIDI File” function of
your host, or common drag and drop import if you prefer, and you’re
there! Please note that every time you start Groove Agent 2 in this
mode, any previous MIDI file will be overwritten.
ENGLISH
Right-clicking on an unused area or clicking in the logo area gives you
these same options in the pull-down menu.
Groove Agent
English 45
Page 46

GM Output
We’ll tell you more about GM Output shortly, but first some background.
For Groove Agent we used the following keyboard mapping. You’ll
see it if you use the MIDI Output function and look at the MIDI part that
Groove Agent creates. It starts off like an ordinary GM map with kick
drum on C1, sidestick on C#1 etc. But after tom 1 you’ll notice differences. There are two groups of percussion instruments and, finally, a
series of ride and crash cymbals above C3.
This is the map we’ve used, but we honestly don’t think you’ll have to get
too involved in it. When editing a Groove Agent generated MIDI part,
Groove Agent
46 English
Page 47

you’ll probably want to have the speaker icon (or similar) activated, so
that you can hear the drum sounds while you scroll through the notes.
When you set the GM Output to its ON position, Groove Agent will
redirect output notes so that it follows the General MIDI protocol.
When GM Output is active, this status is shown by a GM
symbol in the LCD window.
Ambience Split
You can make Groove Agent output the ambient or reverberated
sounds to a separate mixer channel output. This is handy if you want to
process that part of the sound separately. With this button activated,
the wet signal will only be heard on the highest numbered mixer output.
So what can you do with the ambience on a separate output? Well, EQ
or dynamics processing can create interesting effects. Or if you export
Groove Agent’s drumming to an audio file, you can experiment with the
isolated ambience file. What does it sound like with the ambient sound
a bit late – or a bit early? Or with the dry sound from a techno snare
combined with the ambience from a piccolo snare…? Experiment!
ENGLISH
When Ambience Split is active, this status is shown by a split
sound chain in the LCD window.
Vintage mode
We’ve exaggerated the effect of a timeline that houses authentic styles
and sounds by adding some clever filtering and narrowing the stereo
width. We believed that you would appreciate the old fashioned sound
of an old style playing an old kit. But there may be times when you want
to turn this effect off, so we’ve added a button here for you to do so.
With Vintage Mode deactivated, all vintage emulation gets deactivated.
The Vintage Mode effect can only be heard on styles between 1950
and 1975 and it is most prominent on the earlier genres.
When Vintage Mode is active, this status is shown by a
gramophone symbol in the LCD window.
English 47
Groove Agent
Page 48

Reset All
The Reset All button is handy if you want to start building your own kit
from scratch. This could be the case if you’re using Groove Agent as
a pure sound module. Clicking the Reset All button empties all the
group slots and sets all the edit knobs to their default position.
If you’ve lost yourself completely when editing the kit of a certain style,
you can always get the original kit back by first selecting another style
and then going back to the one you used before.
Creating a drum track in Groove Agent
When you want to add drums to your music, the scenario may be either
one of these two:
1. Your sequencer program is an empty screen but you have very definite musical ideas in your head. You want to start with the drums.
2. A couple of instruments and/or vocals have already been recorded,
and now you want to add a drum arrangement.
Groove Agent offers at least three different ways of creating a drum
track:
• Method 1: Play along with your song in real-time, using your se-
quencer’s automation to capture every move you make. Those moves
can include “non-musical” events like real-time tweaking of sound parameters (edit knobs etc.).
Advantage: After recording, you can edit your moves in great detail. Your own knob
tweaking gets recorded as editable MIDI events. For sequencers that don’t accept
MIDI output from a VST instrument, this is one of a few workarounds.
Disadvantage: You cannot edit individual hits in Groove Agent’s drumming this way, although you can always add individual hits by playing them live on your MIDI keyboard.
Groove Agent
48 English
Page 49

• Method 2: Play along with your song in real-time, using the Groove
Agent panel controls to create a living and breathing drum track. Your
sequencer records the MIDI notes output by Groove Agent in a MIDI
part. The MIDI Output switch must be activated for this to work. We
believe this is the most intuitive and creative way to create a drum track.
Advantage: “What-you-hear-is-what-you-get”. The drum part will sound identical to
your performance. Also, it’s easy to delete, add, copy or move individual notes in the
newly created drum part. You can re-direct certain notes to trigger drum sounds in another instrument, like e.g. a sampler.
Disadvantage: If you want to use a lot of dynamic controls, like the Limiter knob fading
in and out or switching snare drums during a song, these events are not captured, only
the MIDI notes streaming out of Groove Agent.
❐
Of course, you can mix these two methods of working, by automating
Groove Agent to map out the song and then recording its output to a
MIDI track for fine tuning. You can think of this as rendering Groove
Agent’s output to a MIDI track, like you can render the audio output of
plug-ins to an audio track. Of course, you can render Groove Agent’s output to an audio track, too!
• Method 3: First create a series of settings using the Memory function.
One setting may be perfect for the verse, the next one for the chorus
and so on. Then, when you are happy with the individual memory setups, you can map out the song by switching between memories while
it plays.
Advantage: Since the Memories capture EVERYTHING currently on screen, this is the
only way to switch instantly between different complexity levels or even between different styles and kits! This is the method to use if it’s really drastic changes you’re after.
Disadvantage: Switching between pre-set scenarios may seem a bit static, since fills
and real-time variations will need to be recorded or programmed in separately.
ENGLISH
❐
The creative musician may combine any of these methods to obtain the
ultimate drum track, one that includes an editable MIDI part with moving
knobs and instant switching between levels, styles and kits!
Here’s a slightly different angle: Set up a suitable controller – like a
five octave MIDI keyboard the way you like it. Then record a MIDI performance of pattern start, stop, select, fill, parameter adjustments and
individual drum hits. This method can be used with Groove Agent’s
MIDI output active or not.
Groove Agent
English 49
Page 50

Using Groove Agent’s MIDI output in Cubase SX
While we’re not sure what every available host will do with MIDI notes
being sent from a VST instrument (as far as we know, Groove Agent is
the first virtual instrument with this feature), Cubase SX users can certainly use this method. Follow these steps.
1. Open Groove Agent in your VST instruments rack. Select Groove
Agent as your input (and de-select it as an output to avoid double triggering) on the desired MIDI track. Open the Edit and Setup lids in
Groove Agent and make sure that MIDI Output is set to ON. For most
situations, the auto quantize function in your sequencer should be
turned OFF. You’re now ready to start recording your drum track.
2. Start recording in Cubase SX. Record your drums. In this mode, the
settings for Limiter, Ambience and drum sounds won’t be recorded,
only the drum notes. When the song or section of the song is over, hit
Groove Agent’s Stop button and then the Stop button in Cubase.
3. In order to hear what you just recorded, make sure that the MIDI track
you’re using has its output set to Groove Agent. If not, it may output
notes to another VSTi or external module, and you won’t hear Groove
Agent play back the rhythm.
Groove Agent
50 English
Page 51

Using the automation in Cubase SX
This and the following section give step by step instructions describing how you create a drum track in Cubase SX. However, similar procedures apply to most host applications, and you should consult your
host’s documentation if you need further help.
Working with automation is perhaps the most straightforward method.
If you’re not used to this approach, here’s a helpful guide to get the
job done in Cubase SX.
1. Open Groove Agent in your VST instruments rack. From Groove
Agent’s panel, activate the Write button (W). Look in the Cubase SX
project window, and you’ll notice that a new track called VST Instruments, plus another track below it, have been created. For most situations, the auto quantize function in your sequencer should be turned
OFF. You’re now ready to start recording your drum track.
2. Start Cubase SX. When it’s time for the drums to start playing, hit the
Run button (with or without a fill being armed, remember?). Drag the
sliders, push the buttons and turn the knobs until your drum track
sounds right. When the song or section of the song is over, hit Groove
Agent’s Stop button and then Cubase’s Stop button.
ENGLISH
3. After recording, right-click the VST Instrument Automation track and
select “Show used automation for all tracks”. All the automation classes
(Run/Stop, Fill, Pattern Select etc.) will have a separate track.
4. Click the Read button (R) in Groove Agent or in one of the newly created automation sub-tracks. Now you’ll see the actual data in all the
tracks. This data can be freely edited.
5. To prevent unintentional over-writing of data, make sure the Write button is only lit when you deliberately want to over-write the automation
data.
Groove Agent
English 51
Page 52

Composing with Groove Agent’s Memory slots in Cubase SX
For more drastic changes, i.e. if you want to change style, kit and sound
in one go, the Memory buttons come into play. Proceed as follows.
1. Open Groove Agent in your VST instruments rack. Prepare settings
for the various parts of your song in Groove Agent and save those
“snapshots” in different memory locations. You may want to use one
snapshot for the first verse and another snapshot for the chorus etc.
2. From Groove Agent’s panel, activate the Write button (W). Look in
the Cubase project window, and you’ll notice that a new track called
VST Instruments, plus another track below it, have been created. For
most situations, the auto quantize function in your sequencer should
be turned OFF. You’re now ready to start recording your drum track.
3. Start Cubase SX. Record your drum track by hitting Run and selecting
different Memory slots when you reach various sections of your song.
When the song or section of the song is over, hit Groove Agent’s Stop
button and then Cubase’s Stop button.
4. After recording, right click on the VST Instrument Automation track
and select “Show used automation for all tracks”. All the automation
classes (Run/Stop, Fill, Pattern Select etc.) will be on a separate track.
5. Click the Read button (R) in Groove Agent or in one of the newly created automation sub-tracks. Now you’ll see the actual data in all the
tracks. This data can be freely edited.
6. To prevent unintentional over-writing of data, make sure the Write button is only lit when you deliberately want to over-write the automation
data.
❐
You may prefer sending Program Change commands from your MIDI keyboard to select memory locations. If so, use normal MIDI recording, since
automation will not be involved. If you play live drums on your keyboard
while recording, those notes will also be recorded.
❐
In Cubase SX, the MIDI SysEx filter must be turned OFF for parameter
automation to work.
Groove Agent
52 English
Page 53

About the styles
Here’s a short description of each style, as expressed by the musicians
themselves. Those styles that are new to Groove Agent 2 are marked
with an asterisk (*). Please note that while the original 54 Groove Agent
styles were closely related to years and the timeline, the new styles are
not related to any years in particular. Example: “Vintage FR-3” is a sub
style to “1981 Elektro”, not because it has a particular 1981 flavour,
but because those old analogue machines are electronic devices.
1950 Swing
Here’s a style used for jazz and big band playing. It’s hard to cover all
the possibilities in a field as complex as swing/big band drumming, so I
chose a straight, forward view for this one. The style was programmed
around 144 BPM. It’s divided into two sections: the first half in “2”, the
second in “four on the floor” in order to match the different bass patterns often used in this type of drumming. RB
1951 Samba
ENGLISH
This Samba style is a mixture between the authentic Samba (when
played on the drum kit) and the Samba style that many jazz and fusion
drummers use in their playing. MEB
1952 Jazz Trio
The lost art of brushes! Not many people these days know how to use
brushes “the right way”! It’s one thing to own a pair, another to be able
to play them. A third issue is to make a VST instrument handle them
convincingly.
We’ve implemented the “brush stroke” in Groove Agent and combined
it with my own inspiration from brush greats such as Buddy Rich, Louie
Bellson, Jo Jones and all the lessons taken from brush legend Ed Thigpen (known from the Oscar Peterson Trio among others). You should
know that I don’t agree 100% with Sven about what happens when we
push the sidestick button! It’s a “hire one drummer – get two” effect
and that’s not so bad, after all! RB
English 53
Groove Agent
Page 54

*Bop
This busy jazzy style could easily be used in a small jazz combo, like piano, bass, drums and a solo instrument. A good choice when you
want to make your version of one of the many jazz standards out there.
So open up Real Book, hit the Run-button and play. MEB
1953 Paint
Sometimes there’s no need for regular, rhythmic drum playing. If you
tell a drummer to “do something”, he or she will probably get into
some sort of creative mood and start producing wonderful noises.
This is a style that emulates such a situation. SB
* Ominous
This style is a non-rhythmic sound-fx journey through different moods
and places, preferably unpleasant ones… Heartbeats, scary noises,
chimes and many more noises merge into a melting pot of suggestive
impressions. It ranges from the simple to the complex but in a non-linear fashion, beyond the boundaries of standard pattern playing. Still
the Fill, Sidestick and Half tempo functions will vary the contents. Also
try using the Random-function a lot. So, imagine where you will be,
and it will be so… NE
* Machinery
Factory hall? No it’s not a reverberation algorithm this time. It’s the
static rhythm of machines working together. Some are small and fast,
others are big and slow or vice versa, and they’re added one by one
and speeding from a small scale industry into the final cacophony of
hammers and wheels. Move carefully and put your helmet on! NE
1954 Cha-Cha
Cha-Cha style is a sidestick based style that sounds best with the
sidestick button enabled. MEB
Groove Agent
54 English
Page 55

1955 3/4
Here are a number of different styles that have the 3/4 signature in
common. The complexity doesn’t go from easy to wild in this one. It’s
more like a journey through different attitudes and emotions, all in
“three quarter time”. For best results, set your sequencer’s time signature to 3/4. SB
* 6/8
One silly omission in the original edition of Groove Agent was that the
6/8 style was missing. There are many lovely songs that need this kind
of rhythm, songs like “If you don’t know me by now” and “When I need
you”. Please note that you must set the time signature of your host to
6/8 to play this style properly. SB
1956 Rumba
This is the Afro-Cuban version of the Rumba, not to be confused with
the Rhumba (with an “h”) that can often be heard in older drum machines. MEB
ENGLISH
1957 Shuffle
An uncomplicated style which can give you, as a drummer, a lot of
possibilities if you are creative. Instead of just playing backbeats on
the snare drum, you can play the whole pattern along with the hihat or
ride cymbal, which will give you a “fat” sound in what you’re producing. It’s harder for your left hand (if you play an ordinary drum set) but
a lot more fun! RB
1958 Fox
This is one style that has been around for longer than anyone cares to
remember. Call it foxtrot, slowfox of whatever; some people would still
refer to it as “music”. A merry and light uptempo style. SB
English 55
Groove Agent
Page 56

1959 Tom-Toms
This style is used in many different situations. With it’s origin in the
1920’s, when Duke Ellington played “jungle music” in Harlem and then
made totally unforgettable by Gene Krupa with the Benny Goodman
Orchestra at Carnegie Hall playing “Sing, Sing, Sing” in 1938, this
type of drumming is heard in almost every movie made reflecting the
30’s and 40’s. RB
1960 Bossa Nova
The traditional Bossa Nova style is played with the sidestick on the
snare drum. Activate the sidestick button for that authentic feel. MEB
1961 Twist
The inspiration here was of course Chubby Checker’s classic “Let’s
Twist Again”. On the record, the song is played really straight and simple, but as you crank up the complexity slider here in Groove Agent,
you’ll get more variations and additions of bass drum patterns and ride
cymbals. RB
1962 12/8
This style is a hybrid. The original idea was to create a slow 12/8 feel,
similar to what you can hear in many love songs from the fifties. While
composing the patterns, I raised the tempo just for fun and noticed
that with faster BPM rates there’s a whole new feeling, a funky and
pretty modern touch. Use it in a ballad or turn it up for that groovy
beat. PS
* Slow Blues
If I were forced to choose one style and one tempo for an all-night jam
session, I’d say “Slow blues at 60 BPM” without hesitation. It’s a mood
and tempo that could last an entire evening. There are so many cool
standards that fit here: “Summertime”, “Red House”, “Sweet Sixteen”
and numerous other classics. Or any relaxed improvisation. Slow Blues
in Groove Agent is rather dynamic; see how it increases in volume and
intensity as the complexity levels get higher. Also, it re-starts a couple
of times (at level 7, 12 and 18) from it’s basic closed hihat groove. SB
Groove Agent
56 English
Page 57

1963 Train Beat
This is a style where the drummer has to work hard with the snare
drum. It works well in country and rock’n’roll songs and will give your
music a “busy” feeling. PS
1964 Tamla
For this style I was inspired by the rock classic “Pretty Woman”. This
rhythm was also frequently used by artists on the legendary Tamla
Motown label. There can’t be a better way to start an up-tempo song,
than with a snare drum pounding the beat! PS
1965 Soul
This style is influenced by some of the groovy drummers behind
James Brown. MEB
1966 Pop
High energy pop drumming at your service! Fave tempo is 146 BPM.
These rhythms were created to inspire all the other boys in the band.
Pop drumming is the motor to a popcycle, with fill-ins from corny to
rocket fuel. Can you find the two-bar fill going from A to Z and back
again? Happy ride! dB
ENGLISH
* Steady Beat
Here’s a very basic style that suits almost any tempo. It’s perfect when
you need a steady drummer who doesn’t do any unexpected exercises,
someone who never flips out, someone who’s not into impressing anyone – but just plays. Plays a steady beat. This style can also be used if
you want something with a triplet feeling. Just turn the Shuffle-knob to
the right and you will have a steady Shuffle-beat. MEB
1967 Backbeat
This is the perfect up-tempo style. The drumming is pretty intense and
it doesn’t stop to catch its breath, and maybe that is why it’s very easy
to create a dance friendly song based on this groove. PS
English 57
Groove Agent
Page 58

1968 New Orleans Funk
In the winter of 1968-69, great drummer Joseph “Zigaboo” Modeliste
recorded the classic New Orleans R’n’B style tune “Cissy Strut” with
funk pioneers The Meters. Zigaboo invented the characteristic funk
groove often referred to as “the second line” style, very typical for The
Meters’ groove. The Zigaboo grooves are (together with James Brown’s
“Funky Drummer”) among the most sampled and recycled grooves in
the history of modern Afro-American music. This exact groove is found
at complexity level 8. Enjoy! MK
1969 Songo
Songo was created in the late sixties by drummer Chanquito of the
group Los Van Van. This style has inspired many of today’s jazz and
fusion drummers. Songo is one of the more modern Afro-Cuban styles
and is sometimes a drummer’s first step into the world of Latin music.
MEB
* Mozambique
The Mozambique was invented in the 1960s and is one of the more
modern Latin rhythms. It’s often heard on recordings with funk, jazz
and Latin bands and has been developed by several well known drummers. MEB
1970 Olympic
It’s funny how a drumming style without accentuated backbeats can
make a song really swing. I took the drumming from The Beatles’ Get
Back and scaled it down. The result can be heard at the lower levels.
I also took the style a few steps further, the levels to the right. My
graphics designer suggested that this one could be used for gymnastic exercises, hence the style name. SB
Groove Agent
58 English
Page 59

1971 Cajun
You no longer need to go “Deep down in Louisiana close to New Orleans” to get that spicy cajun feeling. Just tune in to Groove Agent’s
1971 Cajun style, set your VSTi host to preferred 86 degrees, or…
BPM, and get cooking! Add a pinch of accordion and a bouncing
bass to the busy snare, and you’re off. Bon appetite! MK
1972 Bonzo
This style is, as the name suggests, to some extent inspired by the late
great John Bonham of Led Zeppelin, perhaps the most influential hard
rock drummer. I suggest you turn the Ambience dial up to at least 2
o’clock to get that big heavy feel. The patterns A to E are intended to
emulate Mr. Bonham’s habit of playing the drumkit with his bare hands.
To achieve this effect, Percussion 2 should be activated for these patterns. Percussion 1 is supposed to sound like a tambourine attached
to the hihat. The complexity increases from pattern 1-10 with hihat and
then it starts over for Pat 11-20 with ride. The 1/2 Tempo Feel patterns
have small snare triplet things going on that are not found in the regular
patterns.
ENGLISH
Although perhaps not environmentally correct, some songs just call
for being run on leaded fuel. MD
1973 Dark Side
It never ceases to amaze me, how you can sell so many records and
play so few notes. There’s a fair amount of inspiration from Pink Floyd’s
“Dark Side of the Moon” album in this style, well suited for slow songs.
SB
1974 Reggae
This is a triplet based version of reggae usually played with sidestick.
The sound of the drums is very dry. When we recorded these drum
samples for Groove Agent, sound engineer Jens Bogren turned around,
looked at us and asked: “Do you really want it to sound like that?”. We
nodded. MEB
English 59
Groove Agent
Page 60

* Bombay Dance Hall
It’s the third millennium global dance hall beat. Could be London,
could be Bombay, could be Sollentuna. It doesn’t really matter, as
long as everybody is having a good time. Some artists marry this style
to Reggae, others to Hip Hop. It’s all around and it’s up to you. Try
adding or subtracting ambience to the different instruments to vary
the sense of space. NE
* Roots
Roots, rock, reggae. The percussionist – playing big bottles and a
vibra-slap – is free-wheeling through the different complexity levels,
whereas the drummer goes from simple to busy. He’s using rim-shot
already on some mid levels, so selecting the “Sidestick” function will
make him play a deep fur-drum accordingly. Enough of tech-talk, it’s
time to quote the old rasta in Trench-town who once said: “It’s like
football. It’s there. It’s in your knees…”. NE
1975 Funk
This is funk drumming inspired by funk guru George Duke (Party Down)
at one end to the unexpected Frank Zappa (I Don’t wanna Get Drafted)
at the other… As a matter of fact, they did some great music together,
too! Of course, many are the innovators of funk. Earth Wind & Fire’s
Fred White really did some seriously simple but stunningly groovy stuff.
In the 1970’s, funk music was often played quite straight except for
the drums that added a little more swing to it. Add the Slick Triangle
and the Wood Block at any time. Style programmed in 126 BPM. dB
1976 Disco
In the early 1970’s, the disco era began. In April 1976, the famous
New York club Studio 54 took disco-ing to a higher level, but it was the
movie Saturday Night Fever that spread the hustling world wide. The
drums may sound muffled and some of the fills are kind of cheesy, but
that is the charm of this style. When mixed with the rest of the band,
this beat makes a nice and funky dance groove. So bring out your bellbottom pants and your platform shoes, grow some hair on your chest,
put on a satin shirt slashed to the waist and get down on it! FvW
Groove Agent
60 English
Page 61

1977 Hard Rock
I grew up listening to The Beatles in the early seventies. After that I
was a young soul without a home, listening to whatever was on the radio, but I never found “my thing”. Then, when I was sixteen, someone
gave me a black album from a band I’d never heard of, and I was just
blown away by the intro of “Hells bells” starting up their album “Back
in black”.
Yepp, I became a hardrocker!! So here you have some steady and
heavy drums for anyone with Angus-ambitions!! JS
* Grunge
Nirvana, Mudhoney, Melvins… I think this list wouldn’t get an end. The
Music Industry calls them Grunge. So, preheat your amp, strap your
guitar, aim at the F# power-chord and press the “Run”-button for this
style. MS
* Indie Punk
A classic drum figure for a Punk song should be powerful and fast.
But a drum figure for a Modern Punk song must be powerful, fast, individual and creative in order to stress the structure of the song.
These characteristics are implemented in this style. Enjoy and keep on
rocking! MS
ENGLISH
* Unplugged
Music Television made it popular. A big rock song must also be
played in a smooth ambience so the audience can easily listen to the
voice of the singer. This style is full of soft played beats/fills and it is
using the popular and lovely rods. MS
* Ballad
It’s early in the morning, your coffee is still hot and your latest ballad
needs some steady and powerful drums. Try this one! The tambourine
can add extra sparkle to the chorus and maybe straighten out the
overall drum sound as well. (And psst, here’s something I just discovered: try this one at 120 BPM! Pretty energetic, eh?) MS
English 61
Groove Agent
Page 62

1978 TexMex
I once played a song to Sven with a strange, loose kind of drumming
together with bass, piano and slide guitar. It sounded a bit like a notso-very-well-rehearsed-gig in a small restaurant somewhere on the
borderline between Texas and Mexico. “This is very weird and very
cool”, Sven said. “We have to include this in Groove Agent“. “Ok!”. JS
1979 Basic Hip-Hop
This style was inspired by early Hip-Hop and the way it sounded in the
early digital drum machine era. LW
* Live Hip-Hop
In a big discussion about Hip-Hop, a friend told me that a real drummer in a Hip-Hop band only needs a bass drum, a snare, a hihat, a
crash and no toms. He was right. This style will provide you with a full
palette for your live song. Don’t forget to use the percussion in the
chorus! MS
* Sloppy Hip-Hop
The “Sloppy Hip Hop” style is inspired by the works of Beastie Boys
and others, giving you a sense of floating time, where quantizing is
banned… The basic character of the groove is slightly altered from
level 14 and up. Warning: Changing the loose handclap to a more distinct sound may produce some really weird timing effects, as will excessive use of the Humanize-function. Select this style when you’re in
the mood for drifting away, avoiding all the boundaries of a regulated
beat. NE
1980 Boogie
Some bands built their careers on simple three-chord songs where
the drummer had to work a bit harder. This is a classic boogie style
where the feeling is focused on the hihat and ride. PS
Groove Agent
62 English
Page 63

1981 Elektro
My intention here was to create a style that sounds like an analog
drum machine programmed for early synth-pop tunes. It’s not an 808
or a 909 but a totally new “box” with retro and electronic sounds. LW
* Vintage FR-3
Original rhythms from a very old drum machine. Slow Rock x 3 (“home”
tempo: 80 BPM). Samba x 4 (110). Rhumba x 3 (130). Beguine x 4
(130). Mambo x 4 (140). Bossanova x 3 (145). Rock’n Roll x 4 (160).
There were no fills in this machine, so we’ve created some for you.
Same goes for Sidestick and Half Tempo Feel. This baby didn’t even
have a cymbal! The sound differs somewhat from the real thing, in that
the original machine sounds a bit different each time it is played! MS
* Vintage TR-7
A slightly newer analogue box. Slow Rock and Ballad x 2 (“home”
tempo: 80 BPM). Western (90). Samba 1 + 2 (110). Rhumba x 2, Beguine x 2, Cha-Cha x 2, Mambo x 2, Baion x 2, Tango and 6/8 March
(130). Bossa Nova x 3 and Bolero (145). Rock’n Roll 1 x 2 and Rock’n
Roll 2 (155). MS
ENGLISH
*Vintage CR-8
An almost modern drum machine because you could program it, but
still analogue sounding. Habanera (“home” tempo: 70 BPM). S. Rock
(80). Samba 1 + 2 and Merengue (110). Mambo, ChaCha, Tango,
Beguine, Enka and Rock 1-6 (120). Then comes a combination of
Rock 1/Rock 4 (120). Disco and Swing 1 + 2 (120). Rhumba and
Rhumba/ChaCha combination (130). BossaNova and BossaNova/
Mambo combination (145). Foxtrot (160). Combining two rhythms is a
cool trick! MS
English 63
Groove Agent
Page 64

* Meek Ballad
Follow me back to the early 80s. This could be the next great thing…
The slowly evolving groove adds a few more programmed hits on every level, giving you a fair chance to find just the desired complexity.
The style was created by adding each instrument one by one, just as it
was in the childhood of these legendary “rhythm composers”. The
meek shall inherit the earth. NE
* Axis Y
Back in the 80s, people had ugly hair cuts, pink jackets and played on
hexagonal drums. Beware, because some of that might return any
day! This style prepares you for at least the musical revival. Put on
your dancing shoes and get into the groove. NE
1982 Slick
This style is a 16th note based beat, inspired by the sessions recorded in L.A. around 1980, with master drummers like Jeff Porcaro
and John Robinson. Actually, the beat itself isn’t very innovative, but
it’s too representative for this great genre to leave it out. A slow tempo
is a must for this style. Favorite tempo range is 73-88 bpm. FvW
1983 Breakbeat
Wirebird shouted “HEEEELP” from deep down in “the Pixelmine”,
when he created that fabulous front panel. I said “With what?”. “With
breakbeats!”, he shouted from below. “You mean dirty, groovy, kind of
playing-too-much à la Chemical Brothers?”. “Yepp!”. “Yo, I’ll do it!!”, I
replied. And while you’re at it, dear user, why don’t you run the whole
thing through some nice distortion. JS
Groove Agent
64 English
Page 65

1984 Arena
During the glory days of the 80s, the hardrock guys wore tight pants,
sprayed their long hair and stole make-up from their girlfriends. There
is no doubt that they really could play drums though – hard and distinctive. Since the music should be hard and loud, the dynamic has
pretty much just one level – louder!
The fills are very typical for those drummers, intense, distinctive and
almost composed sometimes. PS
* HM Straight
HM Straight and HM Triplets are based on the European style of
Heavy Metal with a lot of double bass pedal work as well as some of
my own chops from the albums/bands I played in, such as the albums
“Beware the heavens” by Sinergy and “Sign Of truth” and “Anima
Mundi” by Dionysus. The triplet rolls were inspired by the one and only
Scott Travis, especially from the time before Judas Priest when he
played with Paul Gilbert in Raxor X. The Raxor X song “Scarified” is a
milestone in metal with its magnificent drum intro groove and I made a
lot of variations of grooves of this type. The more straight and powerful
grooves were made in the style of Jörg Michael, one of today’s most
hired and respected German drummers. RM
ENGLISH
* HM Triplets
A triplet based groove with a lot of 3-stroke rolls in the bass drums.
The rolls in particular were inspired by my friend and Brazilian metal
band Angras drummer Aquiles Priester, who developed it to a new
level in modern metal drumming. While touring with Saxon I got the
chance to pick up a drum fill or two which I throw in here and there.
It’s from another great drummer and friend, the legendary Fritz Randow, one of the most technical drummers in European metal. RM
* Grind
These grooves are kinda busy and made for higher tempos. Notice
how the bass drum uses 8th notes, 8th note triplets and then 16ths in
various modern approaches. These grooves were influenced and
played in the style of The Haunted, Krisiun and Hate Eternal. If you’re
huge a fan of brushes, these grooves are not for you! ;-) RM
English 65
Groove Agent
Page 66

* Progressive
Here’s a rather technical style with a lot of busy fills. “Progressive” is a
mixture of the sound of new progressive styles and some old progressive bands back in the 80s. Certain levels were recorded in various
odd meters and played over a loop of four bars. Don’t get lost! MEB
1985 World Ethno
Take one big, wide pad, one fretless bass and one electric guitar playing 8ths through a delay unit, and you’ll find yourself in a “world/ethno”
kind of ambience, that’ll make you say “Manu”?!? JS
1986 Detroit Techno
As you may have already guessed, the techno roots are in Detroit. In
this style I decided to give you a lot of noise. No energy has been
saved here! They would call it “Hard to the bone” in the old days. DS
* Daft
Keep it fair and square. Simple and stupid. Keep it going. Keep it up.
Perhaps the bottle will distract you. Never mind. It’s just a bottle. Keep
it safe. NE
1987 LA Shuffle
Somewhere around complexity level 15 you will find a sibling to a girl
called Rosanna. All over these grooves you will hear a whole bunch of
her relatives from earlier decades, also known as ghost notes. Tiny
triplets in between, especially from the snare drum, that add a fine
masked web to a sturdy, laidback foundation. A slick style, yeah! Not
to be used in a too high BPM environment! 78 is perfect! dB
1988 House
House music is a quite laidback electronic style that lives on its own
groove. It’s a bouncy style with percussion as one of its main elements.
House was born when DJs added 808 and 909 analog drum machines
to beef up the dance music. DS
Groove Agent
66 English
Page 67

1989 Westcoast
This is the beat many drummers would play if you told them to just
cruise at 98 Bpm. A straight “perfect-day-for-going-to-the-beach”
groove with influences from modern gospel music and contemporary
pop/rock beats. FvW
1990 Mini Works
All the sounds in this style come from the legendary Mini, built by a
very clever guy called Moog. Every sound is note-off dependant. This
means that the important note-off events become tempo-independent.
Mini Works is built up around this rule, which turns the note-offs into
important rhythmical components as well as all the cool little note-ons!
There are 5 different grooves with 5 complexity levels each. Like five
time zones in a synth clock. Every sound has its own effect in ambience mode which makes the note-off function even more extreme.
Fave tempo: 95 BPM. Fave ambience: none! dB
1991 Fusion
ENGLISH
The inspiration for this busy style comes from some of the fusion
records of the early nineties. MEB
1992 Trance
When creating this Trance style, I wanted to make room for catchy
melodies, so the drumming is easy and not supposed to take too
much room in a mix. Now, if you still think the drums occupy too much
sonic space, tweak the knobs until your melodies become the main element again. DS
1993 Modern Soul
Straight and very well suited for slow pop and soul ballads. Modern
Soul contains a hybrid of analog, processed sounds and electronic
sounds. LW
English 67
Groove Agent
Page 68

1994 Trip-Hop
This is a trip to the darker side of Trip-Hop. Picture yourself in a spooky
attic late at night, on your knees looking for an old photo album in a
worn chest. Suddenly the room comes to life, the floor squeaks and
wooden toys start playing in a slow, rhythmic groove. What next? Get
into the groove or run for your life! W
* Bristol Trip
Portishead was one of the bands that popularized Trip Hop. They
loved to play their songs live with an acoustic drum kit and a trickyplaying drummer. Be my guest! MS
1995 Busy Beat
A lot of 16th notes coming at you in this one, especially at the higher
complexity levels. Busy Beat is a kind of modern funk style with plenty
of ghost notes on the snare drum. I’ve been inspired by the groove
from the Spin Doctors’ hit “Two Princes” as well as Candy Dulfer’s
song “Funkyness”. If you listen carefully, the sources of inspiration
should be obvious. Programming was made at 104 Bpm. FvW
1996 Drum’n’Bass
This style combines the use of high speed beats with a natural half
tempo feel, resulting in a playful rhythmic ballet. Thunderdome sub
basses push the speaker limits, while frantic high pitched sounds
keep the flow going. NE
1997 Ambient
Time to chill with some ambient grooves and spacious rhythms. It’s 5
am at the club and the previously crowded dance floor is visited only
by a couple of slow dancers, chillin’ to the beat as the faint early morning light passes through the drapes. My favorite tempo for this style is
somewhere around 90 BPM. Try experimenting with different combinations of dry and wet sounds and alternative pitches. The long reverb tail
on some of the low pitched drums can create a really nice rhythmic
tension to dry high pitched cymbals or percussion sounds. W
Groove Agent
68 English
Page 69

1998 Hip Hop
Groovy, fat and heavy Hip-Hop with a modern sound in contrast to the
Basic Hip-Hop style. It’s been programmed to sound a little “off” in the
beat with a nice swing to it. Closely related to Modern RnB. New, fresh
kick, snare and effects noises were designed especially for this style. LW
1999 2-Step
A very tiny and fast affair with high pitched sounds. There’s a slight
swing factor in this mixture of 2-Step, Garage and early synth-pop. LW
2000 Tribal Techno
This style was programmed to fit the sound of modern techno. It has a
lot of my own personality in it. This is my tribute to the underground
techno culture. You may recognize some of the grooves. The name of
the style says a lot. Listen to those tribal grooves and you will understand the name. DS
2001 Nordic Pop
ENGLISH
A straight and modern pop groove, inspired by the Nordic hit phenomenon during the past ten years or so. Steady, compressed and simple.
New, fresh kick and snare were designed especially for this style. LW
2002 Nu RnB
An effective groove with poly-rhythmic fills for that special feeling.
Modern RnB/Hiphop style with a compressed sound, if you like. Kick
and snare were designed especially for this style. LW
* Kelly
This is a cool, yet energetic modern R&B-style. The basic beat is slow
and heavy while the hihats and other small sounds play in double
tempo, creating a dynamic contrast. Try using a lot of different fills to
vary the formula. No feelings were hurt during the making of this style.
NE
English 69
Groove Agent
Page 70

2003 Mini Club
Again, a Moog-only built up sound bank. And again 5 different grooves
with 5 complexity levels each. This style will hopefully find its way to the
floor of the future dance club. Try the note-off dependant sounds, too!
Every sound slot has to be active to make these rhythms complete.
There are no special percussion add-ons in this one. Original groove
was made in 120 BPM with absolutely no ambience, but personally I
like the full ambience version just as much, especially since every sound
has its own special FX treatment! dB
Groove Agent
70 English
Page 71

Tempo Guide
ENGLISH
Groove Agent
English 71
Page 72

Groove Agent
72 English
Page 73

80 or 160 BPM, what’s the correct tempo?
Normally, we decide a certain style’s tempo by defining where the
downbeats and backbeats are. A rhythm that goes boom-chick-boomchick probably counts 1-2-3-4 at the same rate. In most popular western music the kick (bass drum) plays the downbeats (1 and 3) and the
snare drum plays the backbeats (2 and 4).
As with all living things, this rule has its exceptions. Reggae has a half
tempo feel built in to itself by nature. The reggae style we’ve included
in Groove Agent actually plays the backbeat on the third beat of the
bar. It simply seemed sensible to specify its favorite tempo range to
130-150 BPM rather than half those figures. This is also true for the
cajun style.
On the other hand, styles like Tom-Toms, Backbeat and Train Beat are
sort of double speed by nature. Here, the Train Beat style works best
somewhere in the 100 BPM region. More practical than 200, don’t
you think?
Finding a suitable style for your song
ENGLISH
So, you are working on a song in 104 BPM and now you want to know
what styles have a suitable tempo? Take a look at the tempo map. It
provides a rough guide to suitable tempo ranges for the various styles.
Jamming with Groove Agent
You may feel the urge to play a drum instrument yourself. Perhaps you
have a much better idea for a kick drum pattern than what’s been programmed into Groove Agent or you may want to add a very special
tambourine rhythm. If so, please feel free to do just that!
If you mute, say, the kick drum, Groove Agent won’t play the kick drum
pattern. You can add your own kick drum playing from your MIDI keyboard, and if you’re recording the MIDI output of Groove Agent, your
playing will end up in that newly created MIDI part, too.
English 73
Groove Agent
Page 74

Smooth handling
We are the first to agree that some of the knobs in this instrument are
small, very small. When tweaking the sounds, a knob can suddenly
jump from one position to another. Not very comfortable.
❐
If your sequencer lets you choose what sort of mouse movement controls
knobs, you should try “linear” (up and down) mode. This generally gives a
better and more predictable feel and handling.
Controlling Groove Agent from a MIDI keyboard
There are situations where you want to control Groove Agent via a
remote MIDI device such as a keyboard. We have prepared a scheme,
so that almost everything you can do directly on screen can also be
carried out remotely. Here’s a complete description.
• MIDI notes B0-A3 (35-69) play the internal sounds according to the
keyboard map shown on page 46. These drum sounds are available at
all times.
• If you control Groove Agent on MIDI channel 10, the keyboard becomes compatible with standard General MIDI (GM) mapping.
• MIDI note A#3 (70) doubles as the Accent button. It also kills drumming for as long as it’s held; play a syncope and hold this key for one
quarter note for very realistic behavior. Please note that this key has
better timing than the Accent button on screen.
• MIDI note B3 (71) stops Groove Agent when it’s running.
• Moving the modulation wheel or using CC 66 triggers a fill.
• When controlling Groove Agent on an odd numbered channel MIDI
notes C4-C6 (72-96) serve dual purposes. Pressing any of these keys
starts Groove Agent. C4 selects complexity level A, G5 selects level
15 etc. If you hit a key harder than velocity 90, you will trigger a fill.
• When controlling Groove Agent on an even numbered channel the
white MIDI keys C4-B4 (72-83) are used to mute and un-mute the 8
individual instrument groups. The black keys above C4 (C#4-A#5 or
73-94) select memory locations 1-10 for you.
Groove Agent
74 English
Page 75

• The new right-click menu “MIDI Mute Key Mode” will provide you with
three modes for group handling:
– Toggle: Like before, white keys in the range C4-C5 switch instrument groups 1-8 on
and off.
– Velocity Switch: Notes with high velocity (>64) mute groups, notes with low velocity
un-mute groups.
– While Held: Groups are temporarily muted (or un-muted, depending on their current
status) while notes are held.
If you have an extra modulation wheel or dedicated controller/s on
your keyboard, you can use these CC’s to control Groove Agent:
MIDI CC Destination
CC Destination
2 and 65 Snare/Sidestick selection
3 and 64 Half Tempo Feel
7 Overall volume
76 Host BPM (60 + value) if your host does not support tempo sync
77 Humanize
78 Shuffle
83 Vintage on/off
91 Ambience
Prg chng Memory select 1-10
ENGLISH
Please note that the controllers mentioned here may also be handy
when editing Groove Agent drum parts in your sequencer.
You can get one level deeper in detail when controlling Groove Agent
via MIDI. These commands double as edit controls for each of the 8
output groups on MIDI channel 1-8:
Groove Agent
English 75
Page 76

MIDI CC Destination
CC Destination
69 Mute
70 Vel Offset
71 Tune
72 Ambience
73 Volume
74 Output
75 Decay
Contact, Internet
For more info, latest news, and to get into contact with the Groove
Agent staff, please visit our website: www.bornemark.se.
Credits
Concept and realization: Sven Bornemark
Programming: Paul Kellett / mda
Design and graphics: Wirebird
Acoustic sound design: Per “Worra” Larsson/SampleTekk, Sven
Bornemark and Mats-Erik Björklund
Recording engineer: Jens Bogren and Rickard Bengtsson at Studio
Kuling, Örebro
Session drummer: Mats-Erik Björklund
Electronic sounds from Primesounds and our private collections. Additional samples from the studios of Daniel Sunebring, Lars Westin and
Wirebird. Mini sounds created by Dan Bornemark at Studio McBuddha.
EMT plate reverb recorded at Tambourine Studios, Malmö
Groove Agent
76 English
Page 77

Musicians: Per Almered, Roger Berg, Mats-Erik Björklund, Dan Bornemark, Sven Bornemark, Mats Dagerlind, Nils Erikson, Marshall Karlsson,
Ronny Milianowicz, Per Samuelsson, Michael Spork, Jens Ståhlstierna,
Daniel Sunebring, Figge von Wachenfeldt, Lars Westin and Wirebird
Audio mastering: Uffe Börjesson
Project management: Helge Vogt
Manual: Sven Bornemark and Mats Dagerlind with kind assistance of
the Steinberg Manuals Department
Throughout the production period we have received lots of help from
the Steinberg staff in Hamburg. You guys are too many to mention, so
THANK YOU ALL!
We would like to thank the following companies for their friendly support: MusicMania/Feedback Music (Malmö) and Audiomaster (Örebro).
Last but not least…
Thank you, HeavenlyHansson, for suggesting this instrument.
ENGLISH
And thank you, Per “Worra” Larsson of SampleTekk, for being such a
patient audio editor.
And Mats-Erik, I’m so grateful you had the knowledge, musicianship
and energy to spend on this instrument. Now, finally, you have the fine
sample-sets of your own drums you always wanted!
Groove Agent
English 77
Page 78

Groove Agent
78 English
Page 79

Groove Agent
Handbuch
von Sven Bornemark
Page 80

Die in diesem Dokument enthaltenen Informationen können ohne Vorankündigung geändert werden und stellen keine Verpflichtung seitens der Steinberg Media Technologies GmbH dar. Die in diesem Dokument beschriebene Software wird im Rahmen einer
Lizenzvereinbarung zur Verfügung gestellt und darf nicht kopiert werden. Ohne ausdrückliche schriftliche Erlaubnis durch die Steinberg Media Technologies GmbH darf
kein Teil dieses Handbuchs für irgendwelche Zwecke oder in irgendeiner Form mit irgendwelchen Mitteln reproduziert oder übertragen werden.
Alle Produkt- und Firmennamen sind ™- oder ®-Warenzeichen oder Kennzeichnungen
der entsprechenden Firmen. Windows XP ist ein Warenzeichen der Microsoft Corporation. Das Mac-Logo ist eine Marke, die in Lizenz verwendet wird. Macintosh ist ein eingetragenes Warenzeichen. Mac OS X ist ein eingetragenes Warenzeichen.
© Steinberg Media Technologies GmbH, 2005.
Alle Rechte vorbehalten.
Groove Agent
80 Deutsch
Page 81

Inhaltsverzeichnis
82 Willkommen!
85 Wie verwende ich Groove Agent?
86 Wie funktioniert Groove Agent?
86 Lassen Sie Groove Agent registrieren!
87 Der Steinberg Key
89 Systemvoraussetzungen (PC-Version)
89 Installieren von Groove Agent (PC-Version)
90 Systemvoraussetzungen (Mac-Version)
90 Installieren von Groove Agent (Mac-Version)
91 Aktivieren des Steinberg Key
92 Einrichten von Groove Agent als
VST-Instrument in der Host-Applikation
93 Einrichten von Groove Agent als DXi2-Instrument
94 Verwenden von Groove Agent in einer AU-kompatiblen Anwendung
94 Groove Agent als Standalone-Anwendung und ReWire
96 Der erste Test
97 Groove Agent-Terminologie
99 Die Klänge dieses VST-Instruments
106 Arbeiten mit Groove Agent
107 Das LCD-Fenster
108 Range – Der Tempobereich
108 Das Kontextmenü
110 Regler und Schalter
120 Auswählen der Instrumente, Stummschalten und Gruppieren
121 Stop/Run-Schalter
122 Weitere Funktionen
126 Der Setup-Bereich
132 Erzeugen einer Drum-Spur in Groove Agent
134 Verwenden der MIDI-Ausgabe von Groove Agent in Cubase SX
135 Verwenden der Cubase SX-Automation
136 Das Komponieren in Cubase SX mit Hilfe der
Groove Agent-Speicherplätze
138 Die einzelnen Stilrichtungen
158 Tempoübersicht
160 80 oder 160 BPM, wo liegt das richtige Tempo?
160 Die passende Stilrichtung für Ihren Song
161 Mit Groove Agent jammen
161 Bequeme Anwendung
162 Steuern von Groove Agent per MIDI-Keyboard
165 Kontakt, Internet
165 Credits
166 Last but not least…
DEUTSCH
Groove Agent
Deutsch 81
Page 82

Willkommen!
Anfang des Jahres 2002 schlug ein Mitglied des schwedischen VSTForums vor, einen modernen Drumcomputer als VST-Instrument zu
entwickeln. Dieses Gerät sollte eine Vielzahl verschiedener Stilrichtungen wiedergeben – wie früher, als Rhythmusgeräte noch exotische
musikalische Stilrichtungen wie Rumba und Cha-Cha enthielten. Bei
der heutigen 24-Bit-Technologie, Velocity-Layers, Aufnahmen mit echter Räumlichkeit und einer leicht anzuwendenden Bedienoberfläche
kann schließlich nichts schiefgehen!
Ein Jahr später gab es dann Groove Agent, einen modernen Drumcomputer. Zu Beginn des Jahres 2005 möchten wir Ihnen nun – als
nächsten logischen Schritt – Groove Agent 2 vorstellen. Wir haben
Content in Form von akustischen und elektronischen Dumkits hinzugefügt, ebenso wie 27 neue Stilrichtungen und natürlich weiterführende
Funktionen. Die grundsätzliche Funktionsweise des Drumcomputers
ist jedoch gleich geblieben. Jedem, der also folgende Sätze aussprechen würde…
• »Ich kann keine Drums programmieren.«
• »Ich habe zum Programmieren von Drums keine Zeit.«
• »Inspiriere mich!«.
…bietet Groove Agent 2 sofortige Unterstützung und Inspiration zum
Erstellen von Songs, Jingles, Filmmelodien und jedes andere musikalische Genre, das Vielseitigkeit und Geschwindigkeit erfordert. Wir
wissen auch, dass die Benutzer Groove Agent bevorzugt als Rhythmusquelle für externe Soundmodule einsetzen, um die integrierten
Sounds für ihr eigenes Spiel zu verwenden, oder um die verschiedenen Möglichkeiten zu kombinieren.
Groove Agent
82 Deutsch
Page 83

Ich bin fest davon überzeugt, dass das Motto, das wir vor zwei Jahren
hatten, auch heute noch gilt: »Zum Erzeugen einer professionellen
Drum-Spur benötigen Sie nur noch drei Minuten – die Zeit, die Ihr
Song dauert!«.
Lassen wir also die langweiligen Dinge des Lebens hinter uns und
konzentrieren uns auf das Wesentliche! Für mich persönlich ist das
Songschreiben das schönste Handwerk. Groove Agent 2 wurde für
all jene entwickelt, die sofort verwendbare Drums zum Erzeugen ihrer
Musik benötigen. Der Kreativität sind so keine Grenzen gesetzt.
DEUTSCH
Computerprogramme können Menschen nicht ersetzen. Dies gilt für
Musikprogramme genauso wie für andere Software. Um Groove
Agent 2 so »menschlich« wie möglich zu gestalten, haben wir echte
Musiker gebeten, ihre besten Grooves beizusteuern. Als die Musiker
dachten, sie seien fertig, begann erst der eigentliche Teil der Arbeit:
Groove Agent
Deutsch 83
Page 84

das Erstellen einer 1/2 Tempo- und einer Sidestick-Version für alle 25
Variationen jedes Stils! Die Ergebnisse waren oft für die Musiker
selbst überraschend und die gemeinsamen musikalischen Bemühungen zeigen sich nun in Tausenden Schlagzeugtakten.
Bitte verwenden Sie Groove Agent 2 dazu, gute Musik zu machen!
Musik ist gut für die Seele und dieses musikalische Werkzeug wird
Sie beim Komponieren hoffentlich unterstützen und inspirieren.
Sven Bornemark
/Urheber
Groove Agent
84 Deutsch
Page 85

Wie verwende ich Groove Agent?
Sie können Groove Agent als Standalone-Anwendung benutzen oder
in eine Host-Applikation (Sequenzer) laden. Wenn Ihr Sequenzer also
VST-Instrumente unterstützt, können Sie Groove Agent verwenden.
Und so geht’s:
1. Wählen Sie eine Spur aus und laden Sie Groove Agent.
2. Wählen Sie mit dem obersten Schieberegler in Groove Agent eine
Stilrichtung bzw. eine Unterkategorie aus (siehe Seite 111). Warten
Sie einen Augenblick, bis die entsprechenden Klangdaten geladen
werden.
3. Klicken Sie auf den Run-Schalter und Groove Agent beginnt mit der
Wiedergabe. Verschieben Sie den Complexity-Schieberegler, um
sich die Variationen der Stilrichtung anzuhören.
4. Wählen Sie eine andere Stilrichtung aus und hören Sie sich an, wie es
klingt, wenn Sie einzelne Schlagzeug-Sounds verändern. Klicken Sie
auf den Fill-Schalter, schalten Sie die einzelnen Instrumente stumm und
heben Sie die Stummschaltung wieder auf. Klicken Sie auf den Schalter
»1/2 Tempo Feel« oder fügen Sie durch Klicken auf den Accent-Schalter eine Synkope hinzu. Haben Sie schon den Ambience-Drehregler
ausprobiert?
Nun können Sie Groove Agent in Ihrer Musik als echten Schlagzeuger
einsetzen.
DEUTSCH
Groove Agent
Deutsch 85
Page 86

Wie funktioniert Groove Agent?
Technisch gesehen verwendet Groove Agent tausende von MIDI-Sequenzen, die von schwedischen Topmusikern »maßgeschneidert« eingespielt wurden. Diese Sequenzen steuern eigens für die jeweiligen
Instrumente aufgenommene Samples an. Das war es eigentlich schon!
Mit dem Zeitskala-Schieberegler können Sie eine musikalische Stilrichtung bzw. eine Unterkategorie und das entsprechende Schlagzeug
(Drum-Kit) auswählen. Einige dieser Drum-Kits sind akustisch, die anderen elektronisch. Mit dem Complexity-Schieberegler können Sie den
Grad der Komplexität einstellen. Für jeden Komplexitätsgrad steht ein
entsprechendes Drum-Fill, eine 1/2 Tempo- und eine Sidestick-Version zur Verfügung. Im Edit-Bereich können Sie Klänge bearbeiten und
sogar Instrumente austauschen.
Wir sind besonders stolz auf die hohe Musikalität, die sich hinter jeder
Variation der vorhandenen Stilrichtungen verbirgt. Dieses Programm
wurde von Musikern für Musiker erstellt!
Lassen Sie Groove Agent registrieren!
Bevor Sie Groove Agent verwenden, füllen Sie bitte die beigefügte
Registrierungskarte aus und senden Sie sie ein. Sie erhalten dadurch
das Recht auf technische Unterstützung und wir halten Sie außerdem
über Updates und andere Neuigkeiten auf dem Laufenden.
Groove Agent
86 Deutsch
Page 87

Der Steinberg Key
❐
Bitte lesen Sie den folgenden Abschnitt, bevor Sie die Software für
Groove Agent installieren.
Im Lieferumfang von Groove Agent ist der so genannte »Activation
Code« (nicht zu verwechseln mit der Seriennummer) für den Steinberg
Key enthalten. Der Steinberg Key ist ein Kopierschutzstecker (auch
»Dongle« genannt), durch den unerlaubtes Vervielfältigen der Software
verhindert wird. Der Groove Agent kann nur zusammen mit einem (richtig aktivierten) Steinberg Key gestartet werden. Dieser ist nicht im Lieferumfang enthalten. Wenn Sie nicht bereits über einen Steinberg Key
verfügen, müssen Sie diesen separat kaufen. Wenn Sie bereits über
einen Steinberg Key (für ein anderes Steinberg-Produkt) verfügen,
können Sie diesen für Groove Agent aktivieren.
• Wenn Sie mit einem PC unter Windows arbeiten und zuvor noch keinen Key verwendet haben, startet der Installationsprozess evtl. nach
der Installation der Key-Treiber Ihr Windows-System neu. Stecken Sie
den Key nach dem Neustart des Computers in den USB-Anschluss,
damit der Installationsprozess fortgeführt werden kann.
• Wenn Sie bereits einen Steinberg Key besitzen, müssen Sie den Key
nach der Installation von Groove Agent und nach dem anschließenden Neustart des Computers an den USB-Anschluss anschließen.
DEUTSCH
Wenn der Key in den USB-Anschluss gesteckt wird, erkennt Windows
ihn automatisch als neue Hardware und versucht, Treiber für ihn zu finden – diese notwendigen Treiber sind vor der Installation von Groove
Agent und einem anschließenden Neustart Ihres Computers nicht verfügbar.
Der Steinberg Key
Groove Agent
Deutsch 87
Page 88

Der Steinberg Key ist eigentlich ein kleiner Computer, auf dem Ihre
Steinberg-Software-Lizenzen gespeichert sind. Alle Steinberg-Produkte, die durch Hardware-Keys geschützt sind, verwenden dieselbe
Art Key auf denen auch mehrere Lizenzen gespeichert werden können. Außerdem können Lizenzen (innerhalb bestimmter Grenzen) zwischen Keys übertragen werden. Dies ist sinnvoll, wenn Sie z.B. eine
bestimmte Software verkaufen möchten.
❐
Wenn Sie bereits einen Steinberg Key besitzen (z.B. für Cubase oder
Nuendo), können Sie Ihre Lizenz für Groove Agent mit Hilfe des mitgelieferten Aktivierungskodes auf diesen Key laden. So benötigen Sie nur einen Key für Ihren Host und für Groove Agent (siehe unten).
❐
Wenn Sie zum ersten Mal einen Steinberg Key verwenden, schließen Sie
diesen nicht vor oder während des Installationsvorgangs von Groove
Agent an. Andernfalls registriert Windows ihn als neue USB-Hardware
und versucht Treiber zu finden, die erst nach der Installation von Groove
Agent bereitstehen.
Groove Agent
88 Deutsch
Page 89

Systemvoraussetzungen (PC-Version)
Um mit Groove Agent arbeiten zu können, benötigen Sie:
• Einen PC mit 800 MHz Pentium oder Athlon Prozessor (1,4GHz oder
schneller).
• 384 MB RAM (512 MB empfohlen).
• 450 MB freier Speicherplatz auf der Festplatte.
• Windows® XP Home oder Professional.
• Windows MME-kompatible Audio-Hardware (ASIO-kompatible Audiokarte
empfohlen).
• Wenn Sie Groove Agent als Plug-in verwenden möchten, benötigen Sie Cubase oder Nuendo (Version 1.5 oder höher) oder eine andere VST 2.0-bzw.
DXi 2-kompatible Host-Applikation. Letztere unterstützen möglicherweise nicht
alle Funktionen von Groove Agent.
• Einen Steinberg Key (Dongle) und einen freien USB-Anschluss.
• Einen Monitor und eine Grafikkarte mit einer Auflösung von 1024 x 768
(Dual-Monitor-Setup und Darstellungsauflösung von 1152 x 864 empfohlen).
❐
Bitte beachten Sie die Systemvoraussetzungen Ihrer Host-Applikation!
Installieren von Groove Agent (PC-Version)
Gehen Sie wie folgt vor, um Groove Agent auf Ihrem PC zu installieren:
1. Schalten Sie Ihren Computer ein und starten Sie Windows.
DEUTSCH
2. Legen Sie die Groove Agent-CD in das entsprechende Laufwerk Ihres
Computers.
3. Öffnen Sie den Windows Explorer oder das Arbeitsplatz-Fenster und
doppelklicken Sie auf das Symbol des CD-Laufwerks.
4. Doppelklicken Sie zum Starten des Installationsprogramms auf das
Installer-Symbol und befolgen Sie die Anweisungen auf dem Bildschirm.
Groove Agent
Deutsch 89
Page 90

Systemvoraussetzungen (Mac-Version)
Um mit Groove Agent arbeiten zu können, benötigen Sie:
• Einen PowerMac G4 867 MHz-Computer (PowerMac G4 Dual und 1,25GHz
oder schneller empfohlen).
• 384 MB RAM (512 MB empfohlen).
• 450 MB freier Speicherplatz auf der Festplatte.
• Mac OS X-Version 10.3 oder höher.
• CoreAudio-kompatible Audio-Hardware.
• Wenn Sie Groove Agent als Plug-in verwenden möchten, benötigen Sie Cubase oder Nuendo (Version 1.5 oder höher) oder eine andere VST 2.0- bzw.
AU-kompatible Host-Applikation. Letztere unterstützen möglicherweise nicht
alle Funktionen von Groove Agent.
• Einen Steinberg Key (Dongle) und einen freien USB-Anschluss.
• Einen Monitor und eine Grafikkarte mit einer Auflösung von 1024 x 768
(Dual-Monitor-Setup und Darstellungsauflösung von 1152 x 864 empfohlen).
❐
Bitte beachten Sie die Systemvoraussetzungen Ihrer Host-Applikation!
Installieren von Groove Agent (Mac-Version)
So installieren Sie Groove Agent auf Ihrem Mac:
1. Schalten Sie Ihren Computer ein und legen Sie die Groove Agent-CD
in das Laufwerk.
2. Falls sich das CD-Fenster nicht automatisch öffnet, doppelklicken Sie
auf das Groove Agent-Symbol.
3. Doppelklicken Sie zum Starten des Installationsprogramms auf das Installer-Symbol und befolgen Sie die Anweisungen auf dem Bildschirm.
Groove Agent
90 Deutsch
Page 91

Aktivieren des Steinberg Key
❐
Ihr Steinberg Key enthält bisher noch keine gültige Lizenz für Groove
Agent (egal, ob Sie einen neuen Key zusammen mit dem Programm
erworben haben oder ob Sie einen bereits vorhandenen Key nutzen
möchten). Sie müssen daher eine Lizenz auf diesen Key herunterladen,
bevor Sie Groove Agent verwenden können!
Mit dem Aktivierungskode, der im Lieferumfang von Groove Agent enthalten ist, können Sie eine Lizenz für das Programm auf Ihren Steinberg
Key herunterladen. Der Vorgang ist dabei sowohl für neue als auch für
bereits vorhandene Steinberg Keys derselbe. Gehen Sie wie folgt vor:
1. Nachdem die Installation abgeschlossen und der Computer neu gestartet ist, schließen Sie den Steinberg Key am USB-Anschluss an.
Wenn Sie sich nicht sicher sind, welchen Anschluss Sie verwenden müssen, lesen Sie
dies in der Dokumentation zu Ihrem Computer nach.
2. Beim ersten Anschließen wird der Dongle als neue Hardware erkannt
und ein Dialog wird angezeigt, indem Sie gefragt werden, ob Sie die
Treiber für die Hardware manuell oder automatisch suchen möchten.
Verwenden Sie die automatische Suche. Der Dialog wird geschlossen und eventuell
müssen Sie Ihren Computer neu starten.
3. Stellen Sie eine Verbindung mit dem Internet her.
Das Herunterladen der Lizenz erfolgt »online«. Wenn Sie mit dem Computer, auf dem
Sie Groove Agent verwenden, nicht auf das Internet zugreifen können, ist es auch
möglich, einen anderen Rechner zu verwenden. Fahren Sie einfach mit den unten beschriebenen Schritten fort und lesen Sie die Hilfe im »Lizenz Kontroll Center«.
DEUTSCH
4. Starten Sie die Anwendung »Lizenz Kontroll Center« (im WindowsStart-Menü unter »Syncrosoft« bzw. im Anwendungen-Ordner unter
Mac OS X).
Über diese Anwendung können Sie die auf dem Steinberg Key vorhandenen Lizenzen
überprüfen und weitere Lizenzen darauf übertragen.
5. Verwenden Sie die Funktionen des Assistenten-Menüs und den Aktivierungskode, den Sie mit Groove Agent erhalten haben, um eine Lizenz auf Ihren Key herunterzuladen. Befolgen Sie dabei einfach die
Anweisungen auf dem Bildschirm.
Alle weiteren Schritte werden in der Hilfe der Anwendung beschrieben.
Wenn der Aktivierungsprozess beendet ist, können Sie Groove Agent
starten.
Groove Agent
Deutsch 91
Page 92

Einrichten von Groove Agent als VST-Instrument in der Host-Applikation
In diesem Abschnitt wird beschrieben, wie Sie Groove Agent einrichten müssen, wenn Sie mit Cubase SX als Host-Applikation arbeiten.
Bei den meisten Host-Applikationen verläuft die Einrichtung sehr ähnlich. Weitere Informationen entnehmen Sie bitte dem Handbuch Ihrer
Host-Applikation.
Vergewissern Sie sich, dass die Host-Applikation korrekt installiert
und für den Betrieb mit Ihrer MIDI- und Audio-Hardware (z.B. MIDIKeyboard und Audiokarte) eingerichtet ist.
Gehen Sie zum Einrichten von Groove Agent wie folgt vor:
1. Öffnen Sie das Fenster »VST-Instrumente«.
2. Klicken Sie dort auf eines der Einblendmenüs »Kein Instrument« und
wählen Sie Groove Agent aus.
3. Warten Sie ein paar Sekunden, bis Groove Agent alle Samples für die
in der Grundeinstellung voreingestellte Stilrichtung geladen hat. Das
Groove Agent-Bedienfeld wird automatisch geöffnet.
4. Wählen Sie in der VST Host-Applikation Groove Agent als Ausgang
für eine MIDI-Spur aus.
Groove Agent
92 Deutsch
Page 93

Einrichten von Groove Agent als DXi2-Instrument
❐
Dieser Abschnitt bezieht sich auf die Verwendung von Groove Agent in
Cakewalk SONAR. Vergewissern Sie sich, dass Sie sowohl SONAR als
auch Ihre MIDI- und Audio-Hardware richtig installiert haben.
Wenn Sie Groove Agent in einer anderen DXi2-kompatiblen Host-Anwendung verwenden möchten, lesen Sie die entsprechende Dokumentation.
Gehen Sie folgendermaßen vor, um Groove Agent einzurichten:
1. Stellen Sie sicher, dass SONAR MIDI-Daten empfängt, die Sie mit
Ihrem externen MIDI-Master-Keyboard erzeugen. Überprüfen Sie dazu
die Anzeige »Midi In/Out Activity«.
2. Öffnen Sie in SONAR über das View-Menü das Fenster »Synth Rack«.
3. Klicken Sie den Insert-Schalter (oder wählen Sie im Hauptmenü die
Insert-Option).
4. Öffnen Sie das Untermenü »DXi Synth« und wählen »Groove Agent«.
5. Standardmäßig wird der Dialog »Insert DXi Options« geöffnet. Wenn
Sie eine MIDI-Spur erzeugen und eine Audiospur an die Groove AgentAusgänge 1 und 2 leiten möchten, schalten Sie die Optionen »MIDI
Source Track« und »First Synth Output (Audio)« ein. Wenn Sie Spuren
für alle verfügbaren Ausgänge von Groove Agent erzeugen möchten,
schalten Sie die Option »All Synth Outputs« ein. Weitere Informationen
entnehmen Sie bitte der Dokumentation Ihrer Host-Anwendung.
DEUTSCH
6. Mit dem Schalter »Connection State« im Dialog »Synth Rack« können
Sie Groove Agent ein- bzw. ausschalten. Standardmäßig sind neu geladene DXi-SoftSynths eingeschaltet.
7. Doppelklicken Sie auf den Eintrag »Groove Agent« oder klicken Sie in
der Werkzeugzeile des Dialogs »Synth Rack« auf den Schalter »Synth
Properties«, um das Bedienfeld von Groove Agent zu öffnen.
8. Wählen Sie in SONAR die neu erstellte MIDI-Spur »Groove Agent«
aus. Groove Agent empfängt jetzt MIDI-Daten über diese Spur.
Groove Agent empfängt MIDI-Daten im 16-fachen Multi-Modus. Daher ist es nicht notwendig, einen bestimmten MIDI-Kanal zum Empfangen von MIDI-Daten zuzuweisen.
Stellen Sie jedoch sicher, dass der MIDI-Kanal der ausgewählten Spur in SONAR auf
den Kanal eingestellt ist, auf dem Groove Agent MIDI-Daten empfangen soll.
Groove Agent
Deutsch 93
Page 94

Verwenden von Groove Agent in einer AUkompatiblen Anwendung
Sie können Groove Agent in einer AU-kompatiblen Host-Anwendung
verwenden (z.B. Logic).
Die AU-Version von Groove Agent wird unter »Library/Audio/Plug-ins/
Components« installiert und ermöglicht das Verwenden von Groove
Agent in einer AU-Umgebung ohne Leistungseinbußen oder Kompatibilitätsprobleme.
Gehen Sie in Logic Pro 7 folgendermaßen vor:
1. Öffnen Sie den Track Mixer und wählen Sie den gewünschten Instrument-Kanal aus.
2. Klicken Sie mit gedrückter [Befehlstaste] in das I/O-Feld und wählen
Sie im angezeigten Einblendmenü entweder »Multi-Channel« oder
»Stereo« aus.
3. Wählen Sie im angezeigten Einblendmenü die Option »All Instruments«
und dann »Groove Agent«.
Groove Agent ist jetzt als AU-Instrument geladen.
Wenn Sie diese Einstellungen vorgenommen haben, können Sie
Samples laden und mit Groove Agent arbeiten.
Groove Agent als Standalone-Anwendung und ReWire
Groove Agent kann auch als eigenständige Anwendung (»Standalone«) verwendet werden, unabhängig von einer Host-Anwendung.
Wenn ein Sequenzer keines der angebotenen PlugIn-Formate von
Groove Agent (d.h. VST, DXi, AU) unterstützt, dafür aber den Datenaustausch über das ReWire-Protokoll ermöglicht, können Sie Groove
Agent auch mit diesem Sequenzer zusammen verwenden.
Groove Agent
94 Deutsch
Page 95

ReWire2 ist ein Protokoll, mit dem Audio- und MIDI-Daten zwischen
verschiedenen Computer-Anwendungen ausgetauscht werden können. Beim Arbeiten mit ReWire ist die Reihenfolge, in der die zwei
Programme gestartet werden, von größter Wichtigkeit, da die zuerst
gestartete Anwendung die Ressourcen der Soundkarte belegt. Gehen Sie folgendermaßen vor:
1. Starten Sie zunächst die gewünschte Sequenzeranwendung (z.B.
Ableton Live, ProTools).
ReWire-kompatible Anwendungen ermöglichen das Zuweisen von Audio- und MIDIKanälen für den Datenaustausch. Nähere Informationen dazu entnehmen Sie bitte der
Dokumentation zu Ihrer Sequenzeranwendung.
2. Starten Sie anschließend Groove Agent als Standalone-Anwendung.
Sie können das Programm wie jede andere Anwendung auf Ihrem Computer über das
Start-Menü oder das entsprechende Desktop-Symbol (Windows) bzw. über das Anwendungssymbol im Anwendungen-Ordner (Mac) starten. Alternativerweise können
Sie auch auf die Programmdatei im Installationsordner doppelklicken.
Wenn Sie jetzt mit Groove Agent einen Style spielen, werden die entsprechenden Signale über ReWire an die zugewiesenen Mixerkanäle
des Sequenzers übertragen. Sie können die Ausgänge der einzelnen
Instrumente jeweils an einen eigenen Mixerkanal leiten (bis zu 8).
Beachten Sie, dass jetzt zwei voneinander unabhängige Anwendungen
auf Ihrem Computer laufen. Wenn Sie das Sequenzerprojekt speichern,
werden die Kanal- und Buskonfigurationen gespeichert, jedoch keine
der Einstellungen in Groove Agent! Um die Einstellungen von Groove
Agent zu speichern, wählen Sie im File-Menü von Groove Agent den
Befehl »Save Bank«. Achten Sie beim Eingeben des Dateinamens darauf, einen Namen zu wählen, der darauf hinweist, dass diese Datei Einstellungen enthält, die sich auf ein bestimmtes Sequenzerprojekt
beziehen.
DEUTSCH
Wenn Sie ein bereits vorhandenes Sequenzerprojekt öffnen und auch
Groove Agent gestartet haben, müssen Sie die zu diesem Projekt gehörenden Einstellungen für Groove Agent über den Befehl »Load Bank«
laden.
Groove Agent
Deutsch 95
Page 96

Der erste Test
Stellen Sie sicher, dass Groove Agent richtig eingerichtet und betriebsbereit ist:
1. Wenn Sie Groove Agent als VST-Instrument laden, vergewissern Sie
sich, dass Groove Agent auch als Ausgang für eine MIDI-Spur ausgewählt ist. Die Spur darf mit Ausnahme von Kanal 10 auf jeden MIDI-Kanal eingestellt sein. Stellen Sie gegebenenfalls sicher, dass Ihr MIDIController (MIDI-Keyboard) Daten an diesen Kanal sendet.
2. Öffnen Sie das Groove Agent-Bedienfeld. Stellen Sie mit dem oberen
Schieberegler die gewünschte Stilrichtung ein. Das Laden der entsprechenden Samples kann ein paar Sekunden dauern. Der aktuelle
Status wird im grünen LCD-Fenster durch »Loading…« (laden) und
»Ready!« (Ladevorgang abgeschlossen) angezeigt.
3. Passen Sie ggf. das Tempo Ihrer Host-Applikation dem bevorzugten
Tempobereich der Stilrichtung an. Dies wird im BPM-Feld des LCDFensters angezeigt.
4. Klicken Sie im Groove Agent-Bedienfeld auf den Run-Schalter. Die
roten LCD-Pegelanzeigen auf der Groove Agent-Bedienoberfläche
und die Beat-Anzeigen leuchten nun auf. Außerdem sollten coole
Rhythmen aus Ihren Lautsprechern tönen!
Groove Agent
96 Deutsch
Page 97

Groove Agent-Terminologie
Zeitskala-Regler – Der obere Schieberegler im Bedienfeld von
Groove Agent. Hiermit können Sie die Schlagzeug-Stilrichtungen auswählen. Die verschiedenen Stilrichtungen sind entlang einer Zeitskala
aufgeführt und können durch Positionieren des Reglers aufgerufen
werden.
Complexity-Regler – Schieberegler unter dem Zeitskala-Regler, der
zum Einstellen komplexerer Variationen jeder der Stilrichtungen verwendet werden kann. Verschieben Sie den Regler nach links, um die
einfachen Variationen aufzurufen, und nach rechts, um komplexere Variationen auszuwählen. Im Allgemeinen sind Variationen ein gutes Stilmittel. Groove Agent macht es Ihnen hier ganz leicht.
LCD-Fenster – Im grünen Bereich rechts unten im Groove AgentBedienfeld wird angezeigt, was sich gerade innerhalb von Groove
Agent abspielt. Dieser Bereich ist also Ihre wichtigste Informationsquelle.
Pegelanzeigen – Damit sind die roten Pegelanzeigen gemeint, die
aufleuchten, sobald Groove Agent Sounds wiedergibt. Wenn Sie jedoch genaue Informationen benötigen, sollten Sie die Pegelanzeigen
Ihrer Host-Applikation verwenden.
Stilrichtung – Ein bestimmter musikalischer Stil mit einem dazu passenden Drum- und Percussion-Kit.
Drum-Kit – Eine spezielle Zusammenstellung von Schlagzeug- und
Percussion-Instrumenten, die einer Stilrichtung zugeordnet sind. Stilrichtung und Drum-Kit lassen sich separat auswählen.
DEUTSCH
Fill – Ein lebendiger Schlagzeuger spielt zur Betonung der Song-
Struktur üblicherweise etwa alle acht Takte eine Variation (früher
nannte man so etwas in Deutschland »Wirbel«, heute heißt es »Fill«).
Ein Fill betont einen Wechsel in Ihrer Musik: Sie wechseln von der
Strophe in den Refrain? Dann ist es Zeit für ein Fill!
1/2 Tempo Feel – Wenn die Bass-Drum (auch »Kick-Drum«) und
Snare-Drum halbes Tempo spielen, während der Rest des Pattern unverändert bleibt, erzielen Sie eine Art dramatischen Effekt. Richtige
Schlagzeuger machen das häufig – wenn Sie nicht gestoppt werden.
Groove Agent
Deutsch 97
Page 98

Accent – Bevor es Drumcomputer gab, verstand man unter einem
Accent eine betonte Zählzeit, die normalerweise von Bass-Drum und
Becken gespielt wurde. Auf einer unbetonten Zählzeit (einem sog.
Offbeat), z.B. der letzten Achtelnote vor dem Taktende eines 4/4Taktes, wird so eine Synkope erzeugt.
Shuffle – Hiermit wird das rhythmische Verhältnis von Achtelnoten
(manchmal Sechzehntelnoten) zueinander bezeichnet. Bei Achtelnoten
kann es sich um »gerade« Achtel oder »swingende« Achtel (triolische
Achtel) handeln.
Limiter – Der Limiter ist wahrscheinlich das wichtigste Gerät, das ein
Toningenieur verwendet, wenn er Schlagzeug aufnimmt. Das Begrenzen (bzw. Komprimieren – der Unterschied ist marginal) hilft beim
Steuern des Gesamtausgabepegels, kann aber auch als Effekt verwendet werden.
Ambience – Groove Agent wird mit einem vollständigen Satz von
Schlagzeug- und Percussion-Instrumenten ausgeliefert, die mit eigener Räumlichkeit aufgenommen wurden. Die akustischen Klänge wurden hierzu mit Mikrofonen in geeigneten Räumen aufgenommen und
die elektronischen Klänge wurden mit Hilfe verschiedener Hall- und
Effektgeräte bearbeitet.
Dry/Wet – Gemeint sind hier die beiden Extremzustände eines
Klangs. Dry: Der Klang wurde in gedämpfter Umgebung und aus äußerst geringer Entfernung aufgenommen. Wet: der Klang wurde aus
der Entfernung aufgenommen bzw. mit Hall-Effekten bearbeitet.
• Neu in Groove Agent 2 ist das Kontextmenü. Wir haben einige neue
Funktionen hinzugefügt, die Sie durch Klicken mit der rechten Maustaste bzw. durch Klicken auf das Groove Agent-Logo öffnen können.
Über das Kontextmenü können Sie auch den About-Screen (in dem die an der Entwicklung beteiligten Personen aufgelistet sind) öffnen oder die Groove Agent- bzw. die
Steinberg-Website aufrufen. Hier stehen Ihnen auch neue Funktionen zur Verfügung,
mit denen Sie z.B. die Anzahl der Mixerausgänge ändern, das Verhalten der MIDI-Ausgänge bearbeiten, den »MIDI Mute Key Mode« festlegen bzw. das Verhalten von
Groove Agent 2 beim Stoppen der Host-Applikation bestimmen können.
Groove Agent
98 Deutsch
Page 99

Die Klänge dieses VST-Instruments
Vor der Erstellung der Drum-Sounds für dieses Instrument, haben wir
den Markt nach verwertbaren Drumsound-Bibliotheken abgesucht. Dies
hätte uns viel Zeit und Mühe erspart – Per »Worra« Larsson/Sample
Tekk kann ein Lied davon singen. Leider konnten wir nichts Passendes
finden. Entweder enthielten diese Klangbibliotheken nicht alle notwendigen Klänge – haben Sie jemals eine Sample-Zusammenstellung gesehen, die »HiHat Gliss« oder »Spoons« enthält? – oder sie waren nicht
konsistent aufgenommen.
Wir wollten eine vollständige Auswahl an Drum-Kits und räumliche
Sounds aller Instrumente. Also begannen wir, selbst aufzunehmen…
Das wunderbare Studio Kuling in Örebro in Schweden besitzt das
eindrucksvollste Aufnahmestudio, das wir jemals gesehen haben! Der
Raum selbst ist groß und mit Holz verkleidet. Der Toningenieur Jens
Bogren kennt sich mit seinem Equipment wirklich gut aus. Während
Mats-Erik Björklund alle Instrumente spielte, begannen die Sound-Designer Per »Worra« Larsson/Sample Tekk und Sven Bornemark damit,
verschiedene Anschlagdynamikpegel für jeden Klang aufzunehmen.
Unser Ziel war es, mit unserer Klangbibliothek so viele Bereiche wie
möglich abzudecken. Daher haben wir die folgenden Instrumente aufgenommen:
Ein 50er Jahre Jazz-Kit.
Nicht sehr gedämpft,
klingt relativ offen und
lässig.
DEUTSCH
Groove Agent
Deutsch 99
Page 100

Ein 60er Jahre Pop-Kit.
Sehr stark gedämpfte
Drums aus einer Zeit, in
der man sogar Handtücher auf die Toms legte!
Ein 70er Rock-Kit.
Laut, tief und resonant. Dieses Kit ist
riesig!
Ein 80er Jahre StudioKit. Frisch und modern,
wie auf den meisten
heutigen CDs.
Groove Agent
100 Deutsch
 Loading...