

Page 1
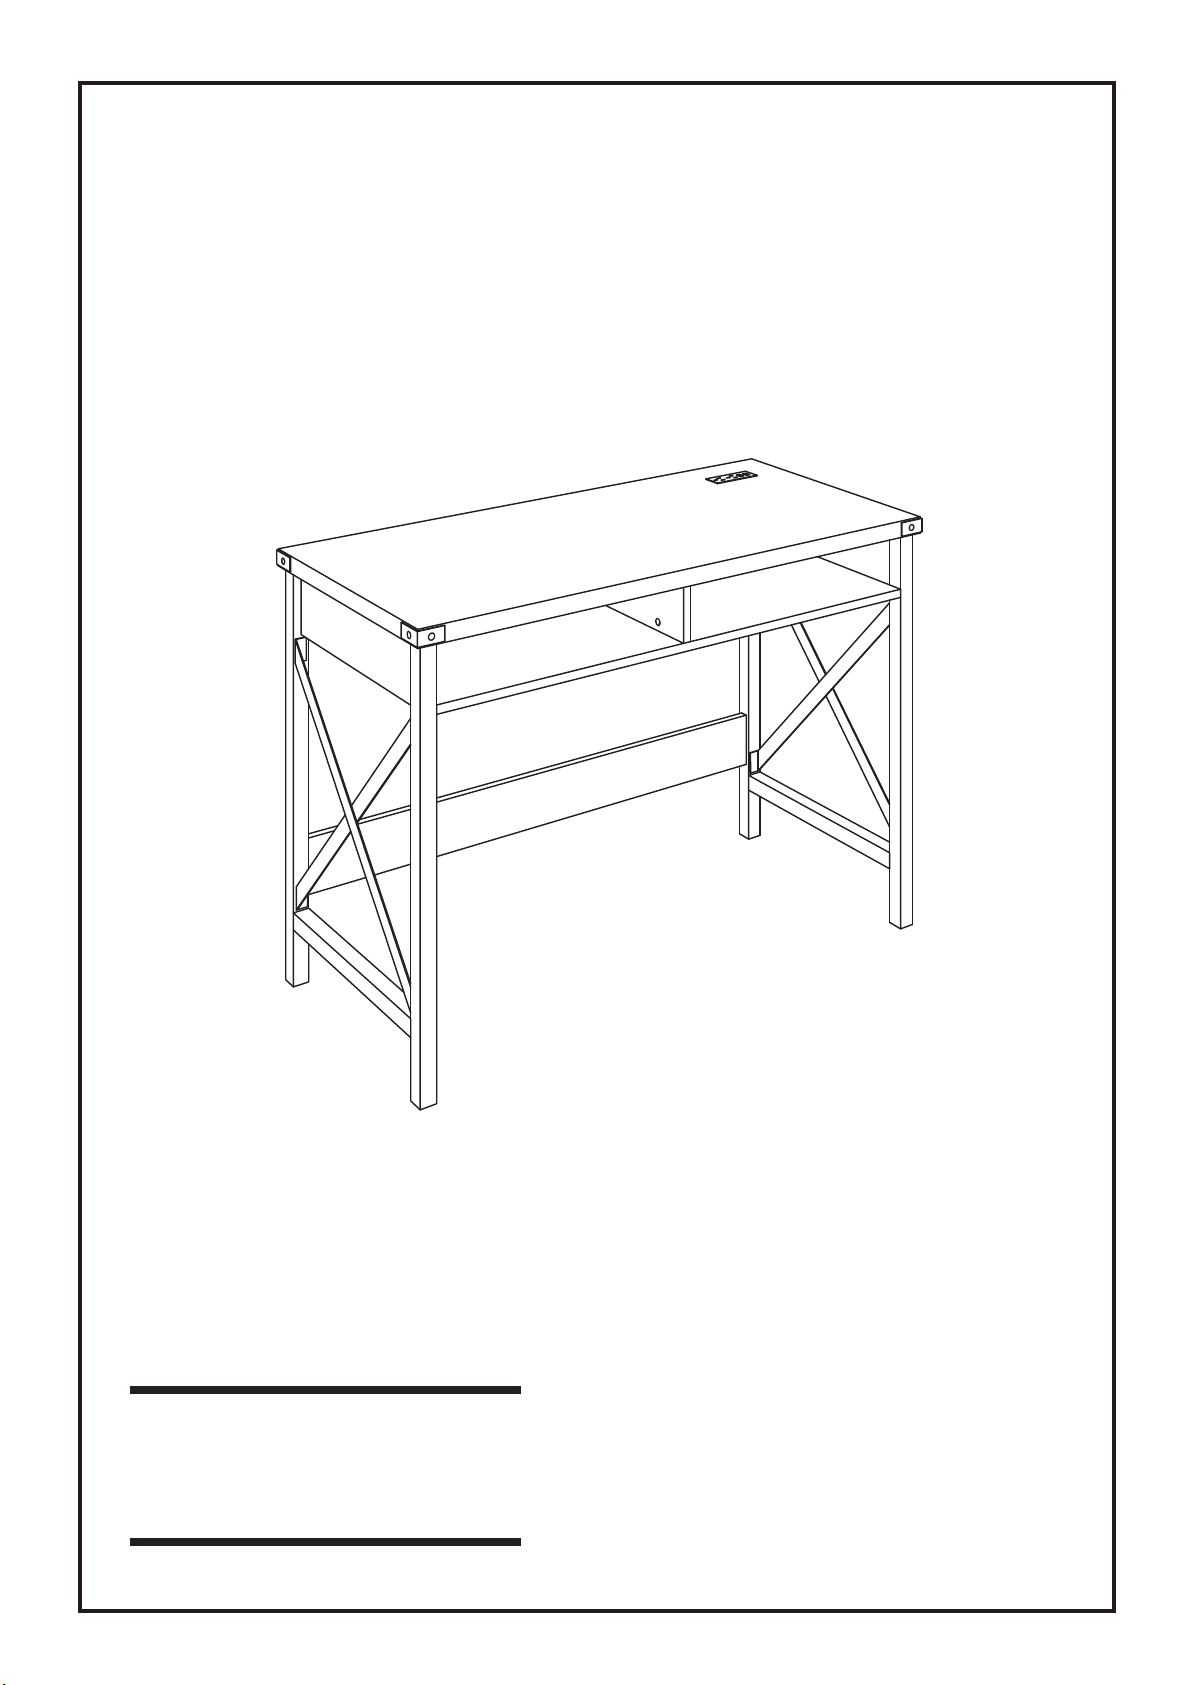
42" DESK W/ CHARGING STATION
ASSEMBLY INSTRUCTIONS
We have designed our furniture with you , the customer in mind . Our clear , easy to follow ,
step by step instructions will guide you through the project from start to finish .
Feel confident that this will be a fun and rewarding project . The final product will be a quality
piece of furniture that will go together smoothly and give years of enjoyment .
Page 2
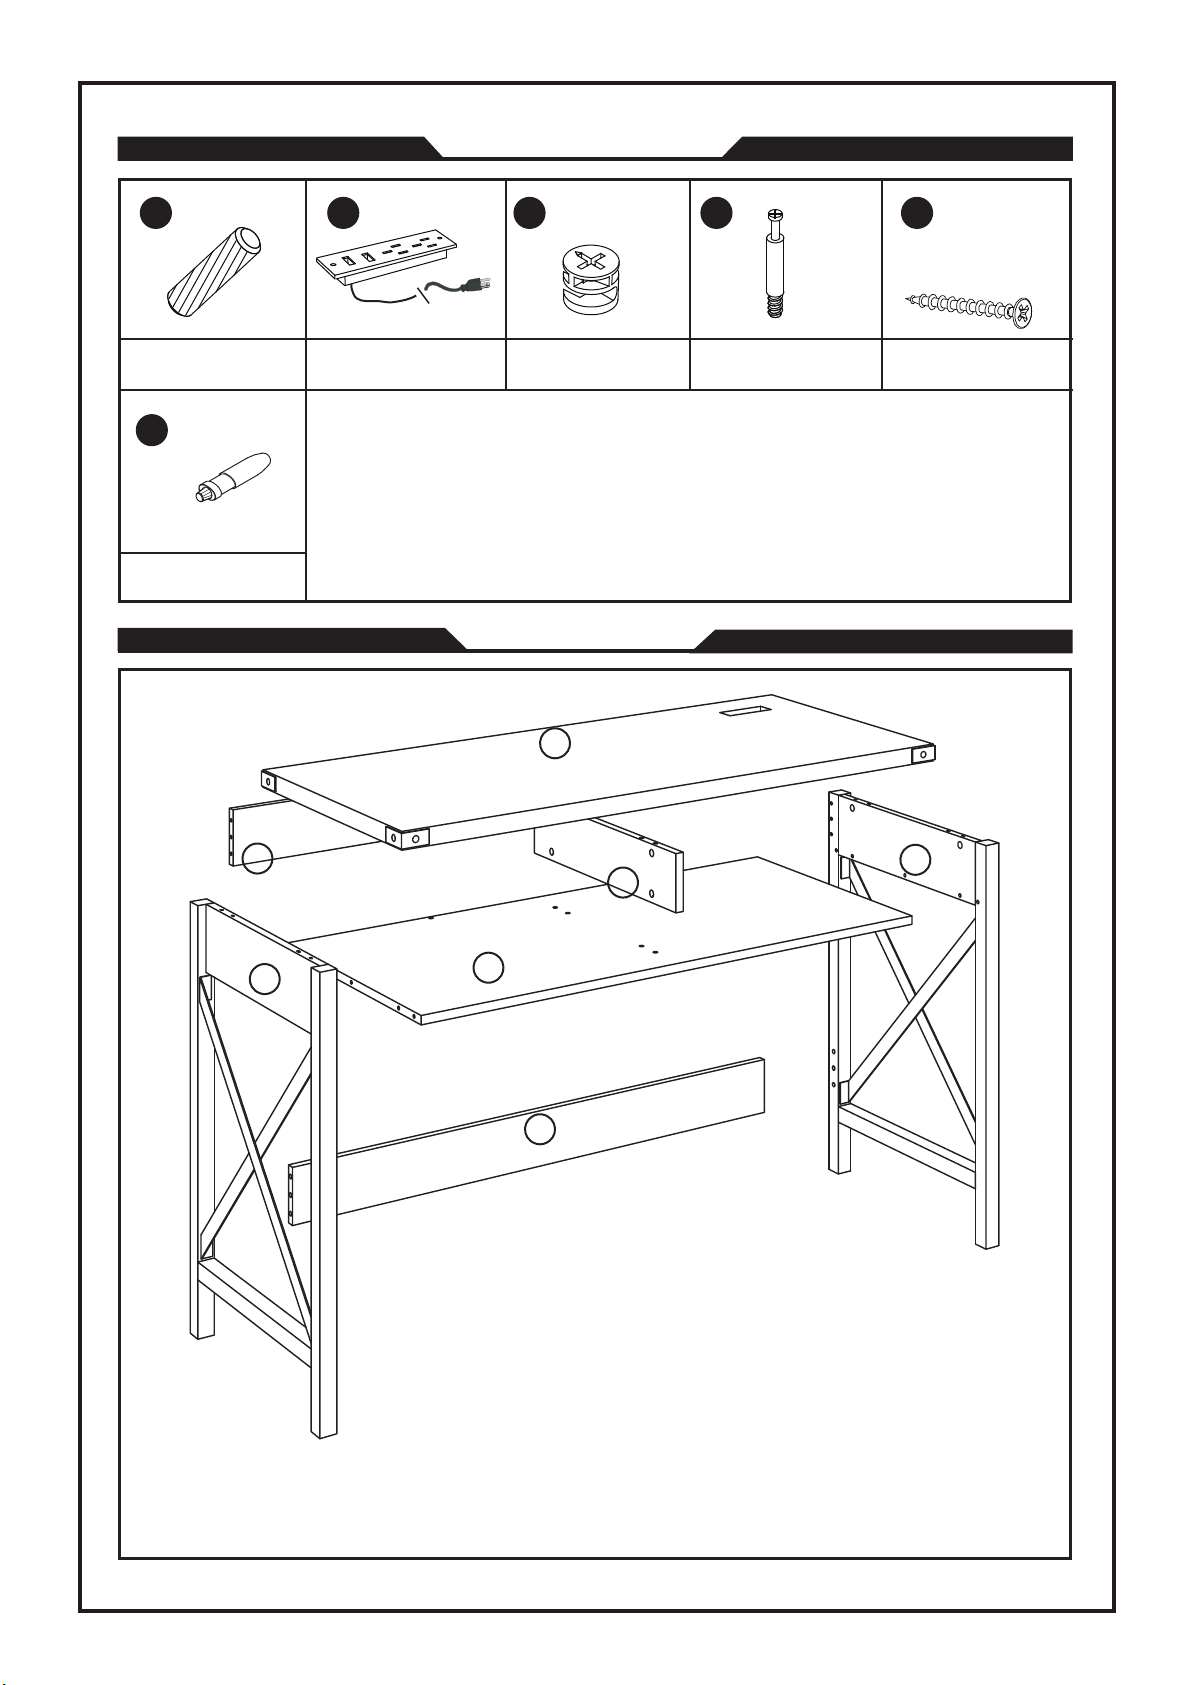
Hardware List
A
Wood Dowel( 18pcs )
F
Glue (1pc)
B C
Socket strip
Glue : For securing please apply to
wood dowel first before inserng
into panel .
(1pc)
Cam Lock
(24pcs)
Panel List
Top Panel
1
D E
Cam Bolt ( 24pcs )
Screw (2pcs)
Top Back Panel
3
Le Panel
5
Support Panel
2
Middle Panel
4
Boom Back Panel
7
Right Panel
6
*Please count and verify all parts before assembly .*
Page 2 of 5
Page 3
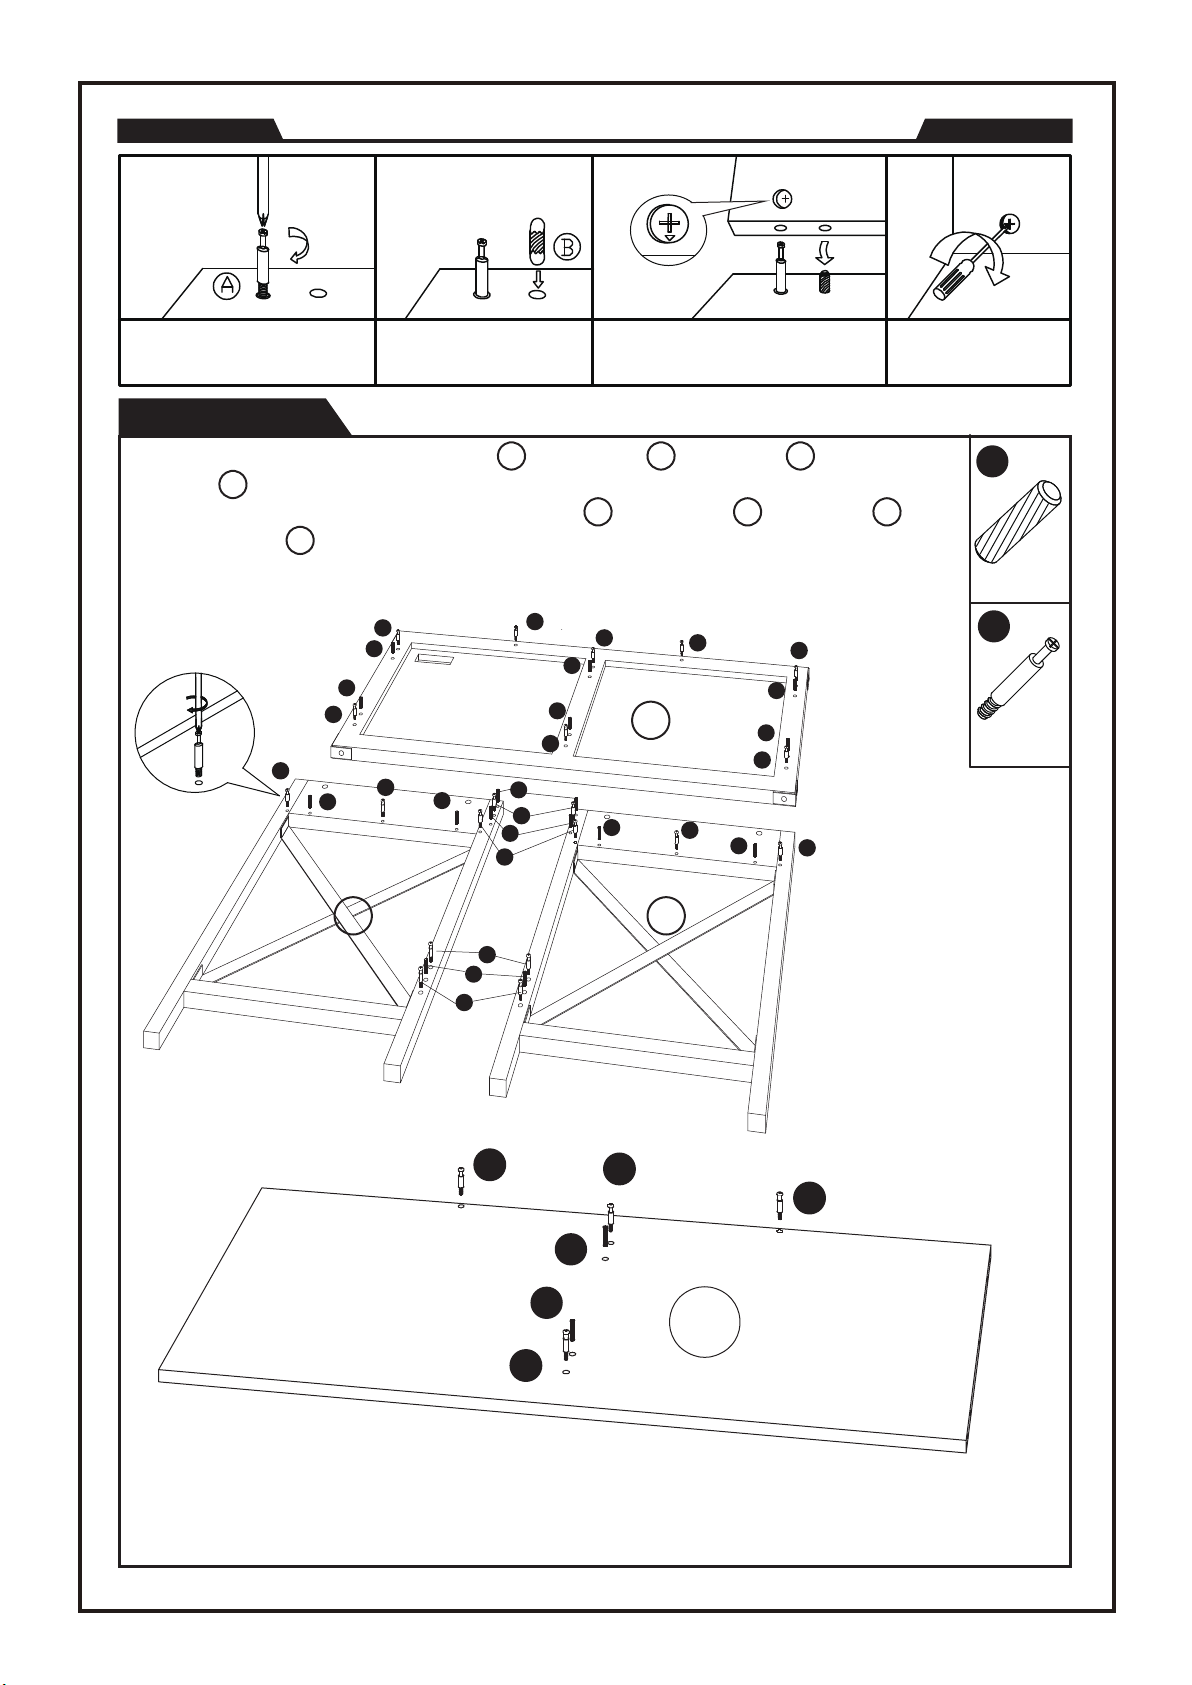
Assembling the unit with camlocks and wood dowels.
Arrow must face hole
Gently screw cambolt
into the threaded anchor.
Lightly glue one end of
the wood dowel and tap
halfway into hole.
Lightly glue wood dowel and
connect to second panel by
inserng dowels into holes.
Screw the camlock
firmly into locked
posion.
Step 1
1.Screw Cambolts (D) into Le Panel ,Right Panel ,Top Panel and Middle
Panel as shown.
4
2.Gently tap Wood Dowels (A) into Le Panel ,Right Panel ,Top Panel and
Middle Panel as shown.
D
4
D
A
A
D
D
D
A
A
5
6 1
5 6 1
D
A
D
A
D
D
A
A
D
A
1
D
D
A
D
A
A
D
D
A
D
X
18
X
24
5
6
D
A
D
D
D
D
A
A
4
D
Page 3 of 5
Page 4
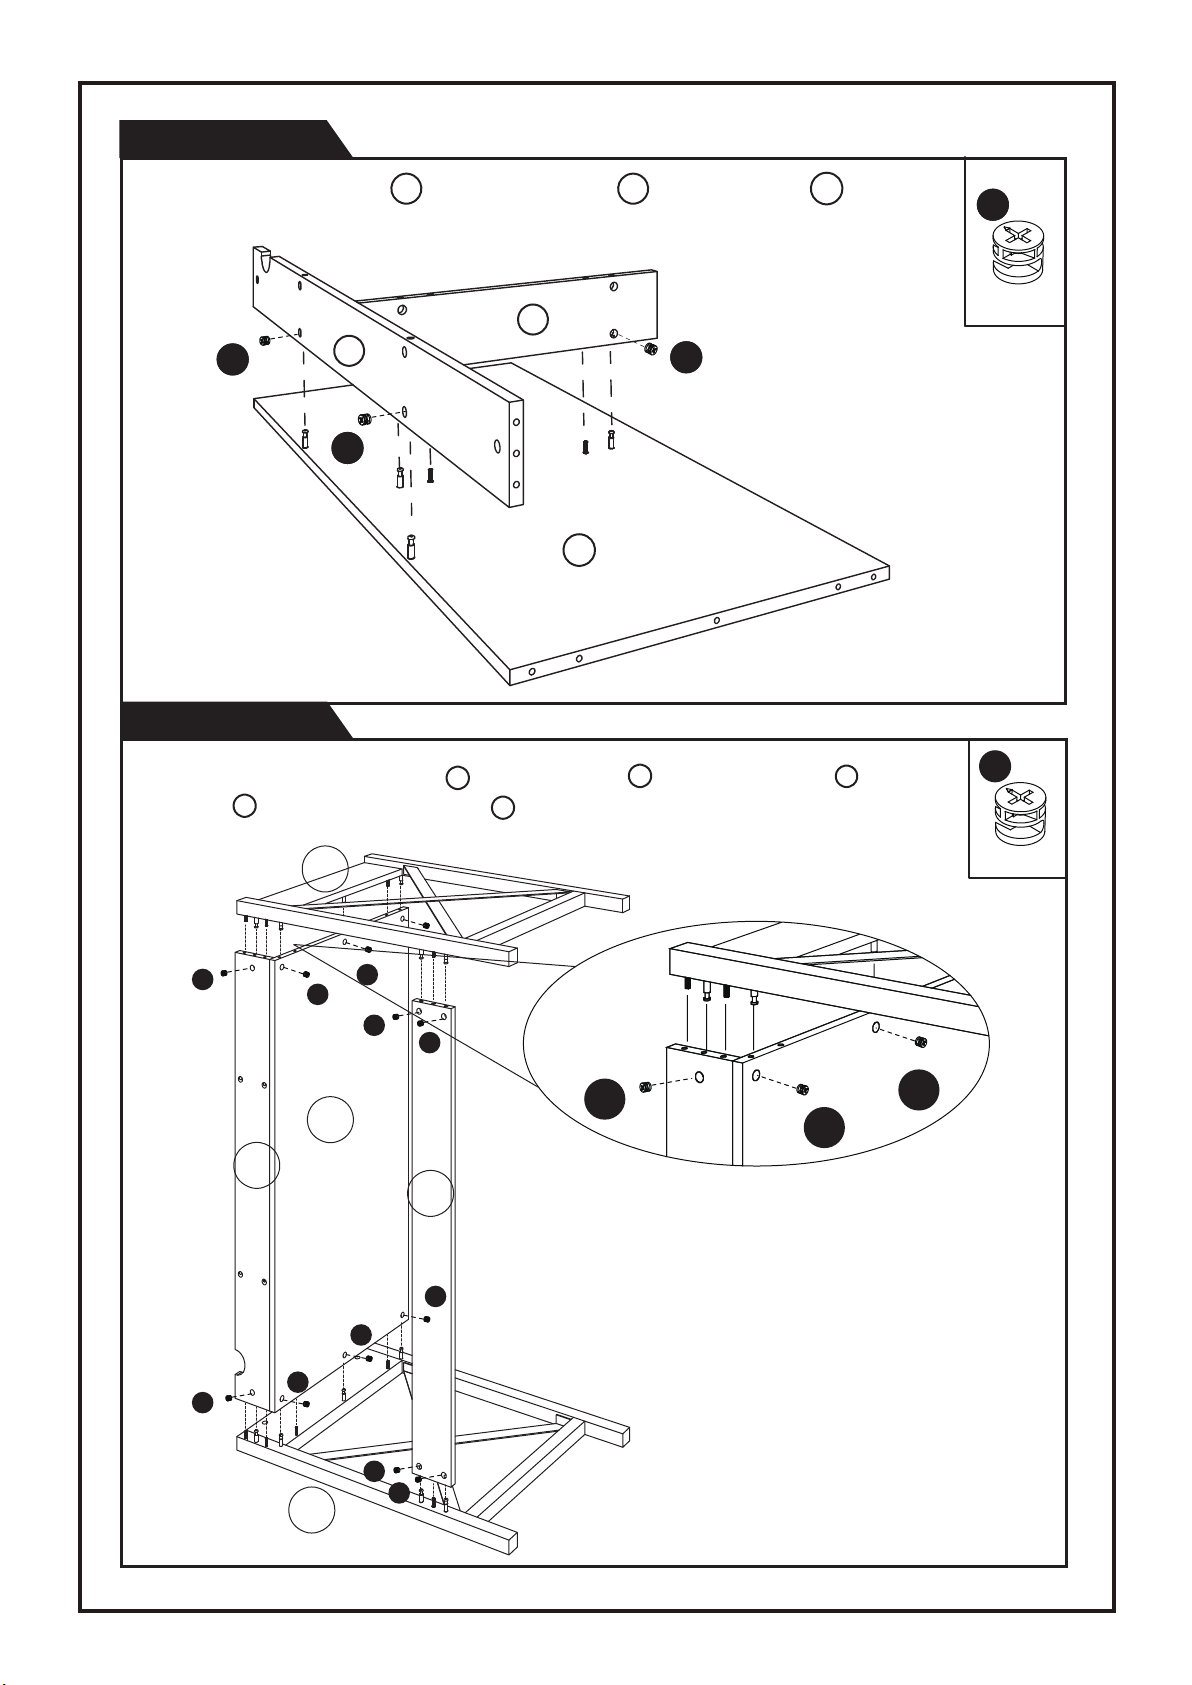
Step 2
*Assemble unit on carpet or other so surface.
1.Aach Support Panel and Top Back Panel to Middle Panel
as shown using Cam Locks (C) gently ghten Cam Locks.
2
3
2
DC
3
DC
DC
4
Step 3
*Assemble unit on carpet or other so surface.
4
D
C
X
4
1.Carefully connect Le Panel and Right Panel to Top Back Panel ,Middle
Panel and Boom Back Panel using Cam Locks (C) gently ghten Cam Locks.
4
5
7
6
3
5
C
C
4
C
C
C
C
C
C
3
7
C
C
C
X
12
C
C
C
C
6
Page 4 of 5
Page 5
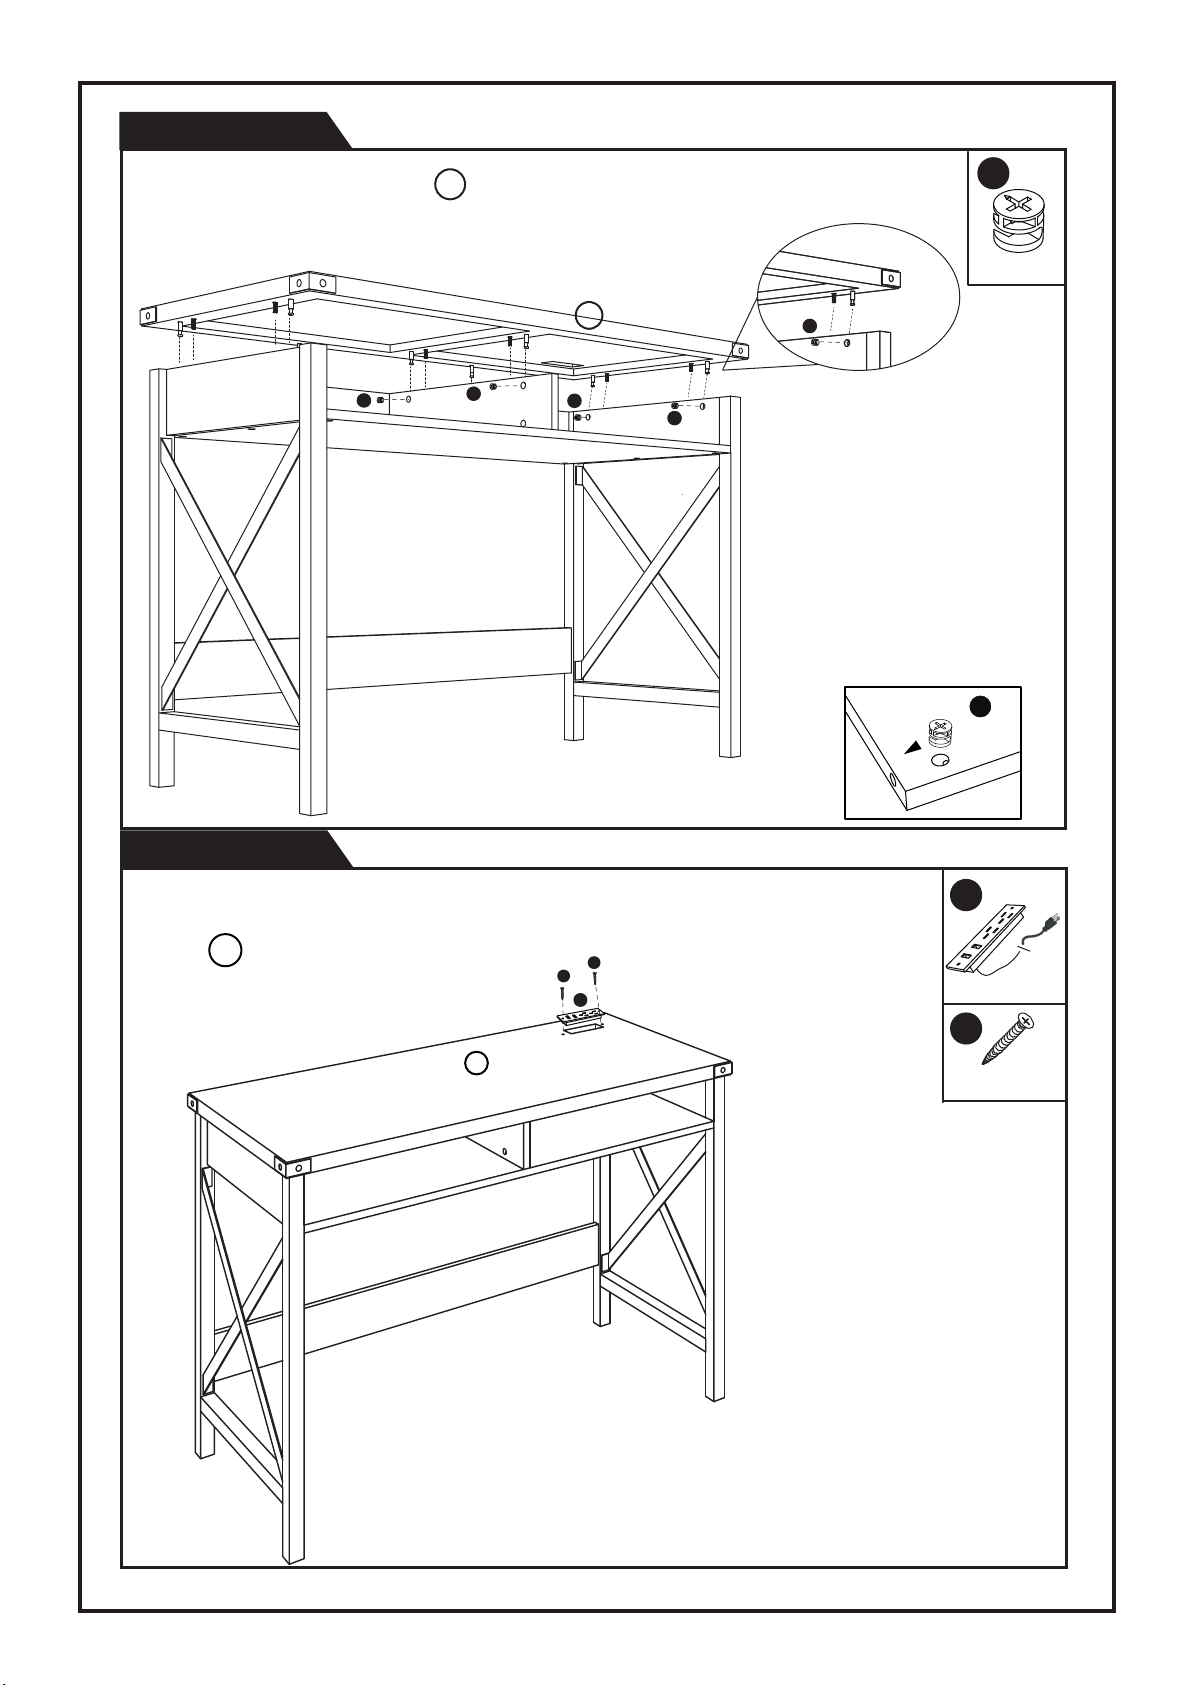
Step 4
*Assemble unit on carpet or other so surface.
1.Carefully connect Top Panel to assembly using Cam Locks (C)
1
gently ghten Cam Locks.
1
C
C
C
C
C
X
8
C
C
Step 5
1.Attach socket strip (B) to Top
Panel using screws (E).
2.Enjoy !
1
B
E
E
B
X 1
E
1
X 2
Page 5 of 5
 Loading...