

Page 1
ASSEMBLY INSTRUCTIONS
VERY IMPORTANT
PLEASE READ THOROUGHLY. MAKE SURE YOU PROPERLY ALIGN POLES BEFORE
SCREWING THEM TOGETHER TO AVOID DAMAGING CONNECTION THREADS.
NOT ADHERING TO THIS PROCEDURE MAY VOID YOUR WARRANTY.
Carefully unpack and place all lamp parts on a flat surface.
1.
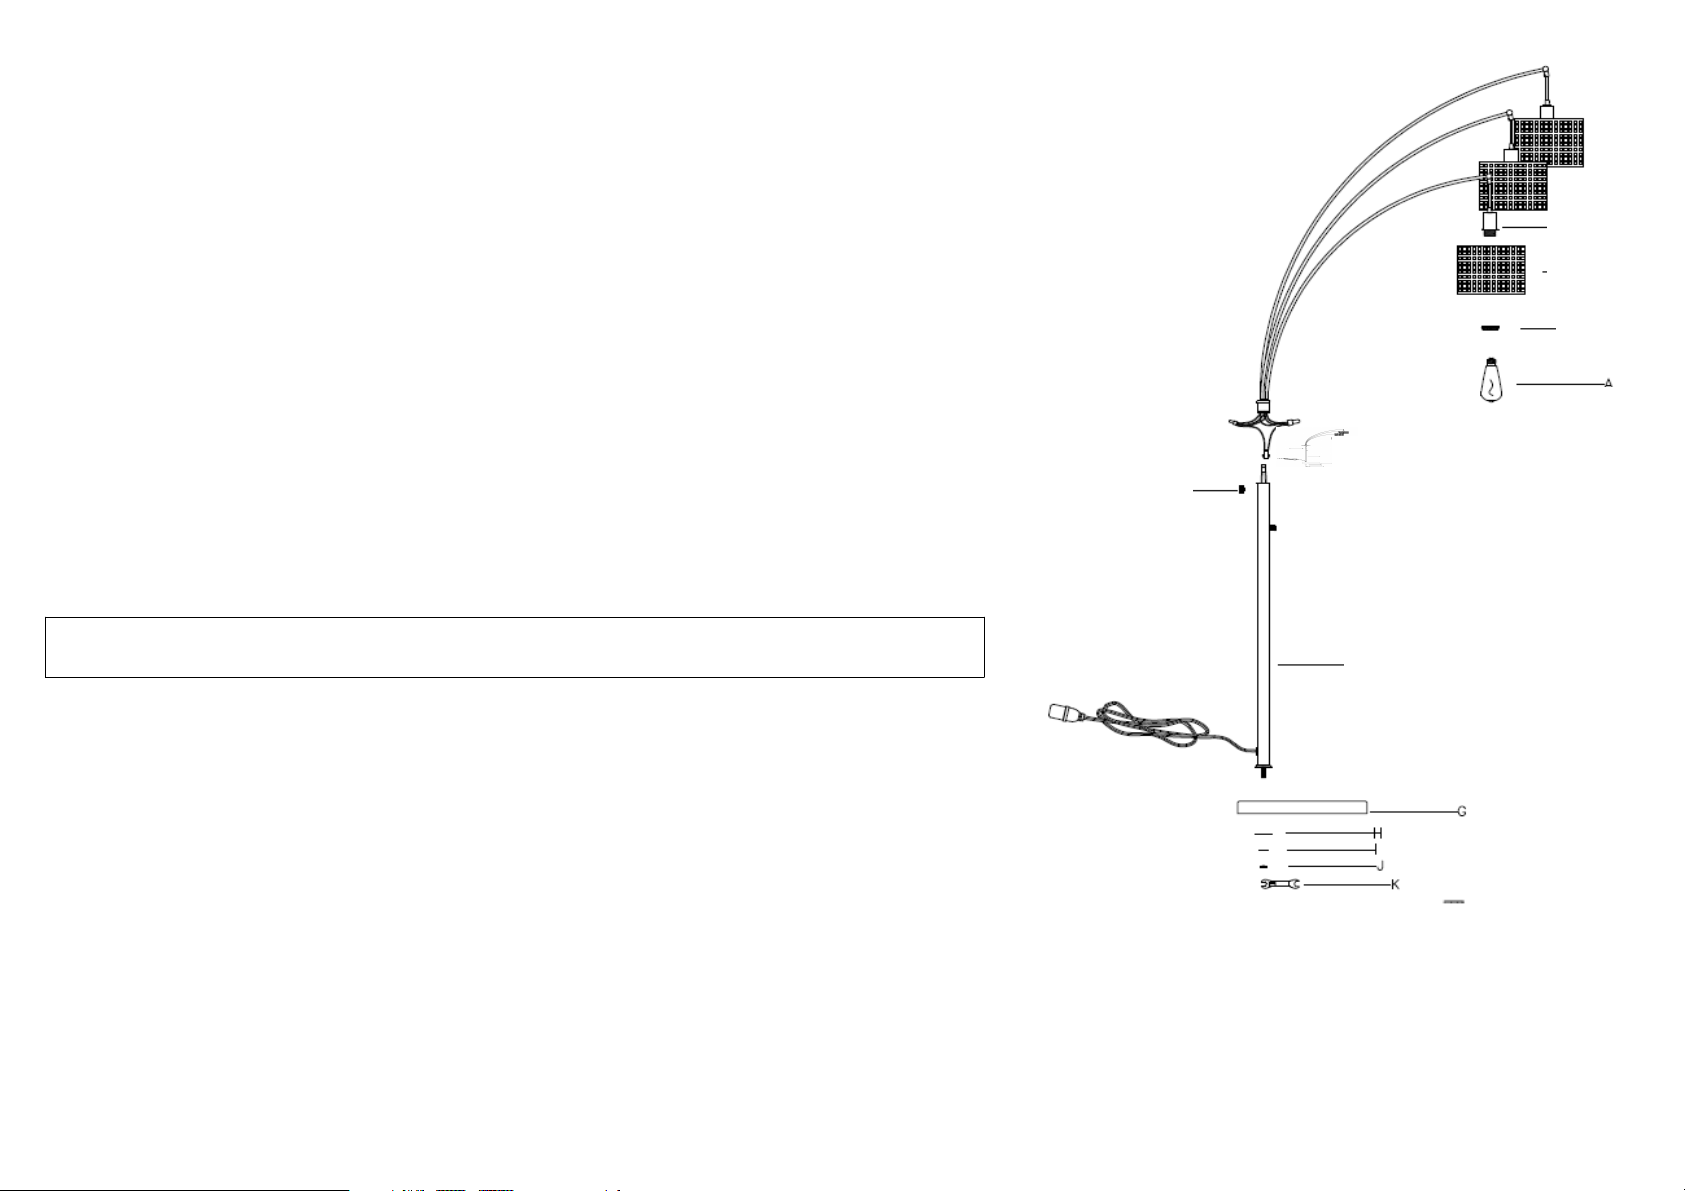
2. Insert tube (F) into the base (G), then use washer (H), (I) and nut (J) to tighten by using spanner (K).
3. Connect the wire section together, then insert body into tube (F) and tighten with handle (E).
Attach the 3pcs metal shades (C) to sockets (D) and secure with socket rings (B).
4.
E
5. Install 3pcs bulbs (A) into sockets.
6. Insert the polarized plug into a wall outlet, then turn on switch and enjoy your lamp.
7. To clean, use a soft dry cloth only. Never use chemical or abrasive cleaners.
Use 3pcs 40W (Maximum) Vintage Edison S19 type bulbs (bulb included)
IMPORTANT SAFETY INSTRUCTIONS:
Handle-
Body
D- Socket
C- Shade
B -Socket
Ring
A- Bulb
Wire Section
F- Tube
This portable lamp has a polarized plug (one blade is wider than the other) as a safety feature to reduce the risk
of electric shock. This plug will fit in a polarized outlet only one way. If the plug does not fit fully in the outlet,
reverse the plug. If it still does not fit, contact a qualified electrician. Never use with an extension cord unless
plug can be fully and easily inserted. Do not alter the plug.
ATTENTION
POUR PRÉVENIR LES CHOCS ÉLECTRIQUES NE PAS UTILISER CETTE FICHE POLARISEE AVEC UN PROLONGATEUR,
UNE PRISE DE COURANT OU UNE AUTRE SORTIE DE COURANT, SAUF SI LES LAMES PEUVENT ÊTRE INSÉRÉES A
FOND SANS EN LAISSER AUCUNE PARTIE À DÉCOUVERT.
PLEASE INFORM YOUR DEALER IMMEDIATELY IN CASE OF ANY PARTS SHORTAGE.
SAVE THESE INSTRUCTIONS FOR FUTURE REFERENCE.
G - Base
H- Washer
I - Washer
J- Nut
K- Spanner
 Loading...