

Page 1
Page 2

1
TABLE OF CONTENTS
TABLE OF CONTENTS
GROUNDING INSTRUCTIONS................................................ 2
SAFETY INSTRUCTIONS.......................................................... 3
INSTALLATION.......................................................................... 6
TREADMILL OVERVIEW............................................................. 8
OPERATING INSTRUCTIONS FOR CT1............................... 10
OPERATION SYNOPSIS OF PROGRAMS FOR CT1............. 21
PROGRAM PROFILE FOR CT1............................................... 23
OPERATING INSTRUCTIONS FOR PT10............................. 28
MAINTENANCE....................................................................... 41
WARRANTY............................................................................. 42
Page 3

GROUNDING INSTRUCTIONS
GROUNDING INSTRUCTIONS
DANGER-Improper connection of the equipment-grounding
conductor can result in a risk of electric shock. Check with a
qualified electrician or serviceman if you are in doubt as to
whether the product is properly grounded. Do not modify the
plug provided with the product- if it will not fit the outlet, have
a proper outlet installed by a qualified electrician.
Make sure that the product is connected to an outlet having the
same configuration as the plug. No adapter should be used with
this product.
The appliance must be positioned so that the plug is accessible.
If the power cord is damaged; it must be replaced by the
manufacturer or its service agent or a similarly qualified person
in order to avoid a safety hazard.
This product must be grounded. If it should malfunction or
breakdown, grounding provides a path of least resistance for
electric current to reduce the risk of electric shock. This product
is equipped with a cord having an equipment-grounding conductor
and grounding plug. The plug must be plugged into an appropriate
outlet that is properly installed and grounded in accordance with
all local codes and ordinances.
2
Page 4

3
SAFETY INSTRUCTIONS
SAFETY INSTRUCTIONS
IMPORTANT SAFETY INSTRUCTIONS
When using an electrical appliance, basic precautions should always
be followed, including the following:
Read all instructions before using the Treadmill.
DANGER - To reduce the risk of electric shock:
Always unplug this appliance from the electrical outlet immediately
after using and before cleaning.
WARNING - To reduce the risk of burns, fire, electric shock,
or injury to persons:
1. An appliance should never be left unattended when plugged in.
Unplug from outlet when not in use, and before putting on or
taking off parts.
2. Close supervision is necessary when this appliance is used by,
on, or near children, invalids, or disabled persons.
3. Use this appliance only for its intended use as described in this
manual. Do not use attachments not recommended by the
manufacture.
4. Never operate this appliance if it has a damaged cord or plug,
if it is not working properly, if it has been dropped or damaged,
or dropped into water. Call service for examination and repair.
5. Keep the cord away from heated surfaces.
6. Never drop or insert any object into any opening.
7. Do not use outdoors.
Page 5

4
SAFETY INSTRUCTIONS
SAFETY INSTRUCTIONS
8. To disconnect, turn all controls to the off position, than remove
plug from outlet.
9. Connect this appliance to a properly grounded outlet only.
See Grounding Instructions.
10. Never Tie off Safety Cord, as this will bypass the SAFE use,
could cause a choking hazard for children, and / or present
other unsafe use of product. Remove and store safety cord
and plug after use. Keep out of reach of children.
11.The appliance is not to be used by children or persons with
reduced physical, sensory or mental capabilities, or lack of
experience and knowledge, unless they have been given
supervision or instruction.
12.Children being supervised not to play with the appliance.
13. WARNING:
REMOVE CONTROL BOX (OR KEY, OR SAFETY PIN) WHEN
NOT IN USE AND STORE OUT OF REACH OF CHILDREN.
AVERTISSEMENT:
RETIRER LA CLÉ DE SÉCURITÉ QUAND L´APPAREIL N´EST
PAS EN SERVICE, ET LA PLACER HORS D´ATTEINTE DES
ENFANTS.
14.CAUTION:
RISK OF INJURY TO PERSONS – TO AVOID INJURY, USE
EXTREME CAUTION WHEN STEPPING ONTO OR OFF OF
A MOVING BELT.
READ INSTRUCTION MANUAL BEFORE USING.
15. For commercial use.
Page 6
5
SAVE THESE INSTRUCTIONS
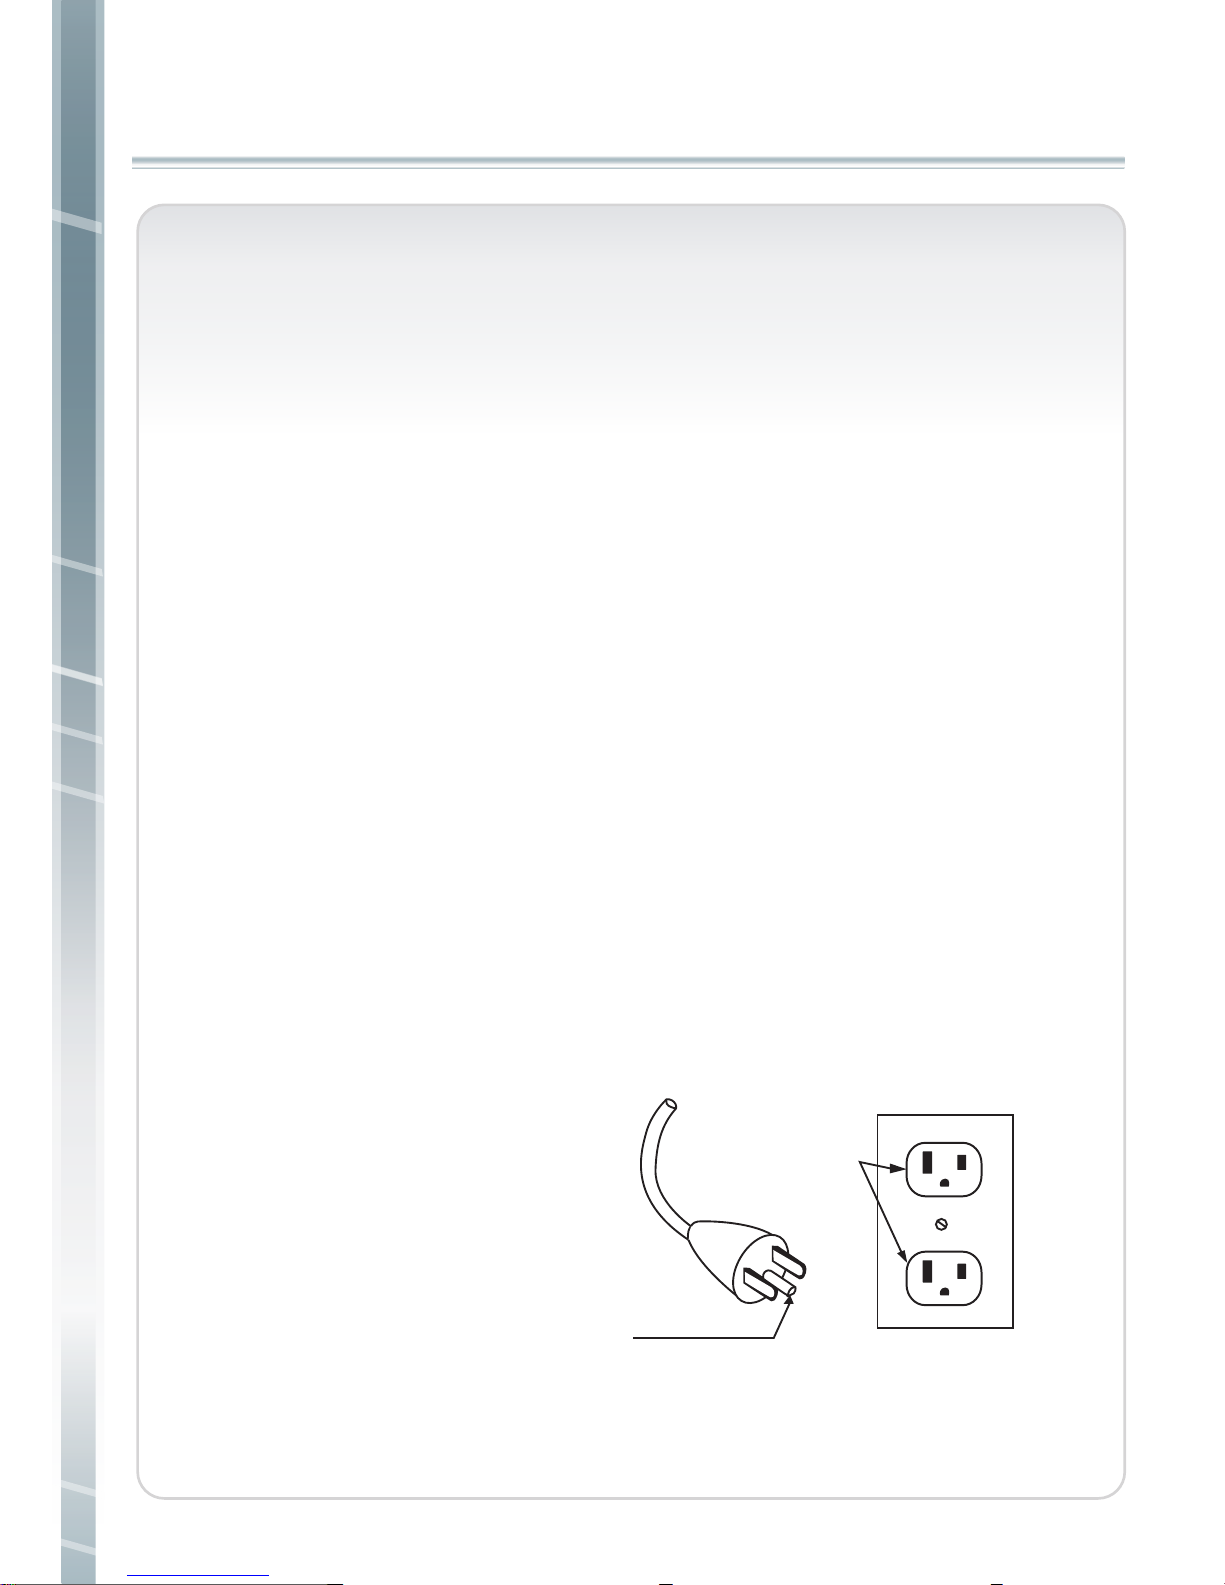
GROUNDING PIN
Figure Grounding methods
GROUNDED
OUTLET
Note:Illustration is for Example purposes only. Your Treadmill plug and required
outlet may look different. DO NOT MODIFY plug that comes with treadmill.
PRUDENCE:
RISQUE DE BLESSURES - POUR ÉVITER LES BLESSURES,
FAIRE PREUVE DE PRUDENCE EXTRÊME LORSQUE
L'INTENSIFICATION DANS OU HORS D'UN TAPIS ROULANT.
LIRE LES INSTRUCTIONS MANUEL AVANT D'UTILISER
15.CAUTION:
To Reduce The Risk Of Injury From Moving Parts - Unplug
Before Servicing.
ATTENTION: Pour réduire les risques de blessures des pièces
en mouvement - Débranchez avant tout entretien.
16.WARNING:
To Reduce the Risk of Electric Shock – Unplug Before Cleaning
or Servicing.
AVERTISSEMENT - Pour réduire le risque de choc électrique le débrancher avant de nettoyer ou de réparer.
SAFETY INSTRUCTIONS
SAFETY INSTRUCTIONS
Page 7
6
INSTALLATION
INSTALLATION
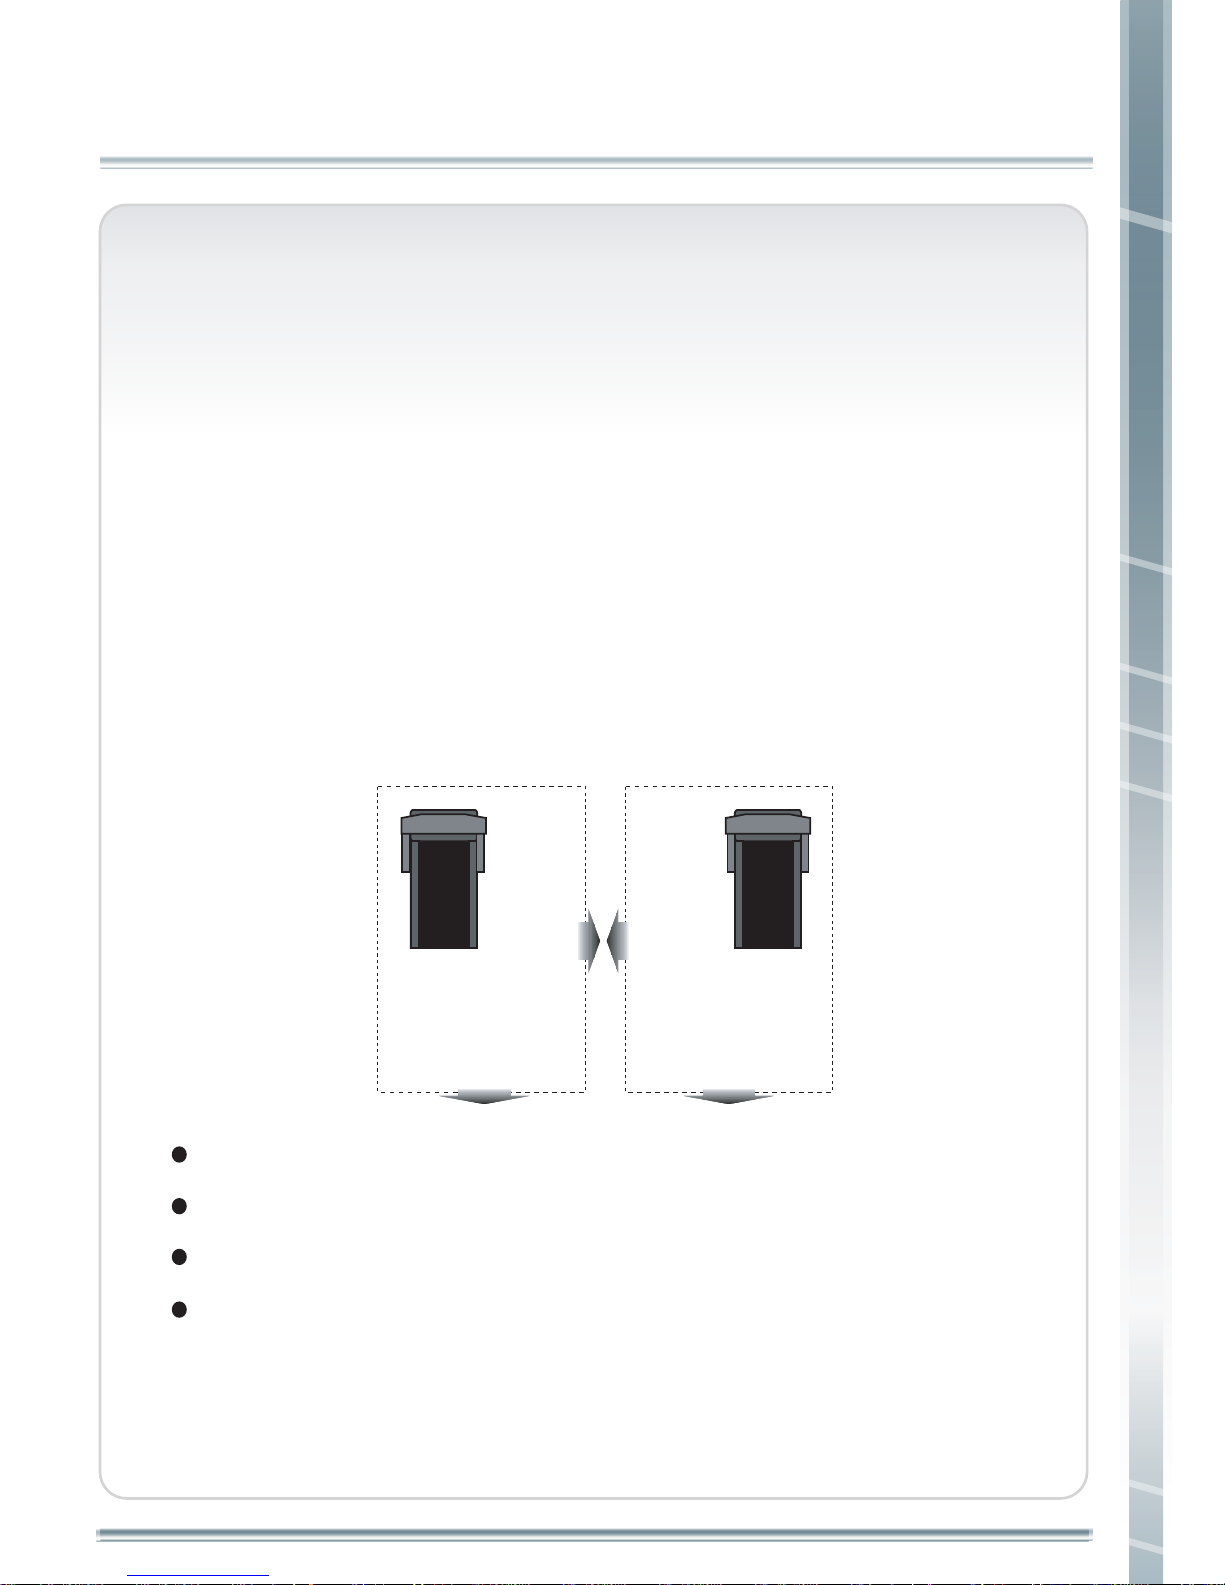
Non-entry side of treadmill - Minimum of 8 inches (20cm)
Entry side of treadmill - Minimum of 36" (90cm)
Front of the treadmill - Minimum of 12 inches (30cm)
Behind treadmill - Minimum of 6 feet (180cm)
These spacing requirements are mandatory for the safe use of
the treadmill. If an accident should occur, you must have sufficient
space to move away from the treadmill.
ELECTRICAL REQUIREMENT
Your STEELFLEX treadmill is intended for use in the country to which
it was shipped. Electrical supplies outside of this country may differ
and may not be compatible with the product. Please consult
Customer Support before using the treadmill in a different country.
LOCATION
When choosing a location for the treadmill, pick a location that is
unobstructed. The treadmill must have the following clearance.
Page 8
7
INSTALLATION
INSTALATION
GROUNDING INSTRUCTIONS
The treadmill must be properly grounded prior to use. Proper
grounding reduces the risk of shock or damage to the treadmill.
The power cord's plug is equipped with a grounding conductor
that must be used with an electrical outlet installed in accordance
to all local codes and ordinances. DO NOT use a temporary
adapter that bypasses this function. This will stop the safety
equipment from functioning properly and may void your warranty.
DO NOT MODIFY the plug provided with this product. If it will not fit
an electrical outlet, have a proper outlet installed by a qualified
electrician.
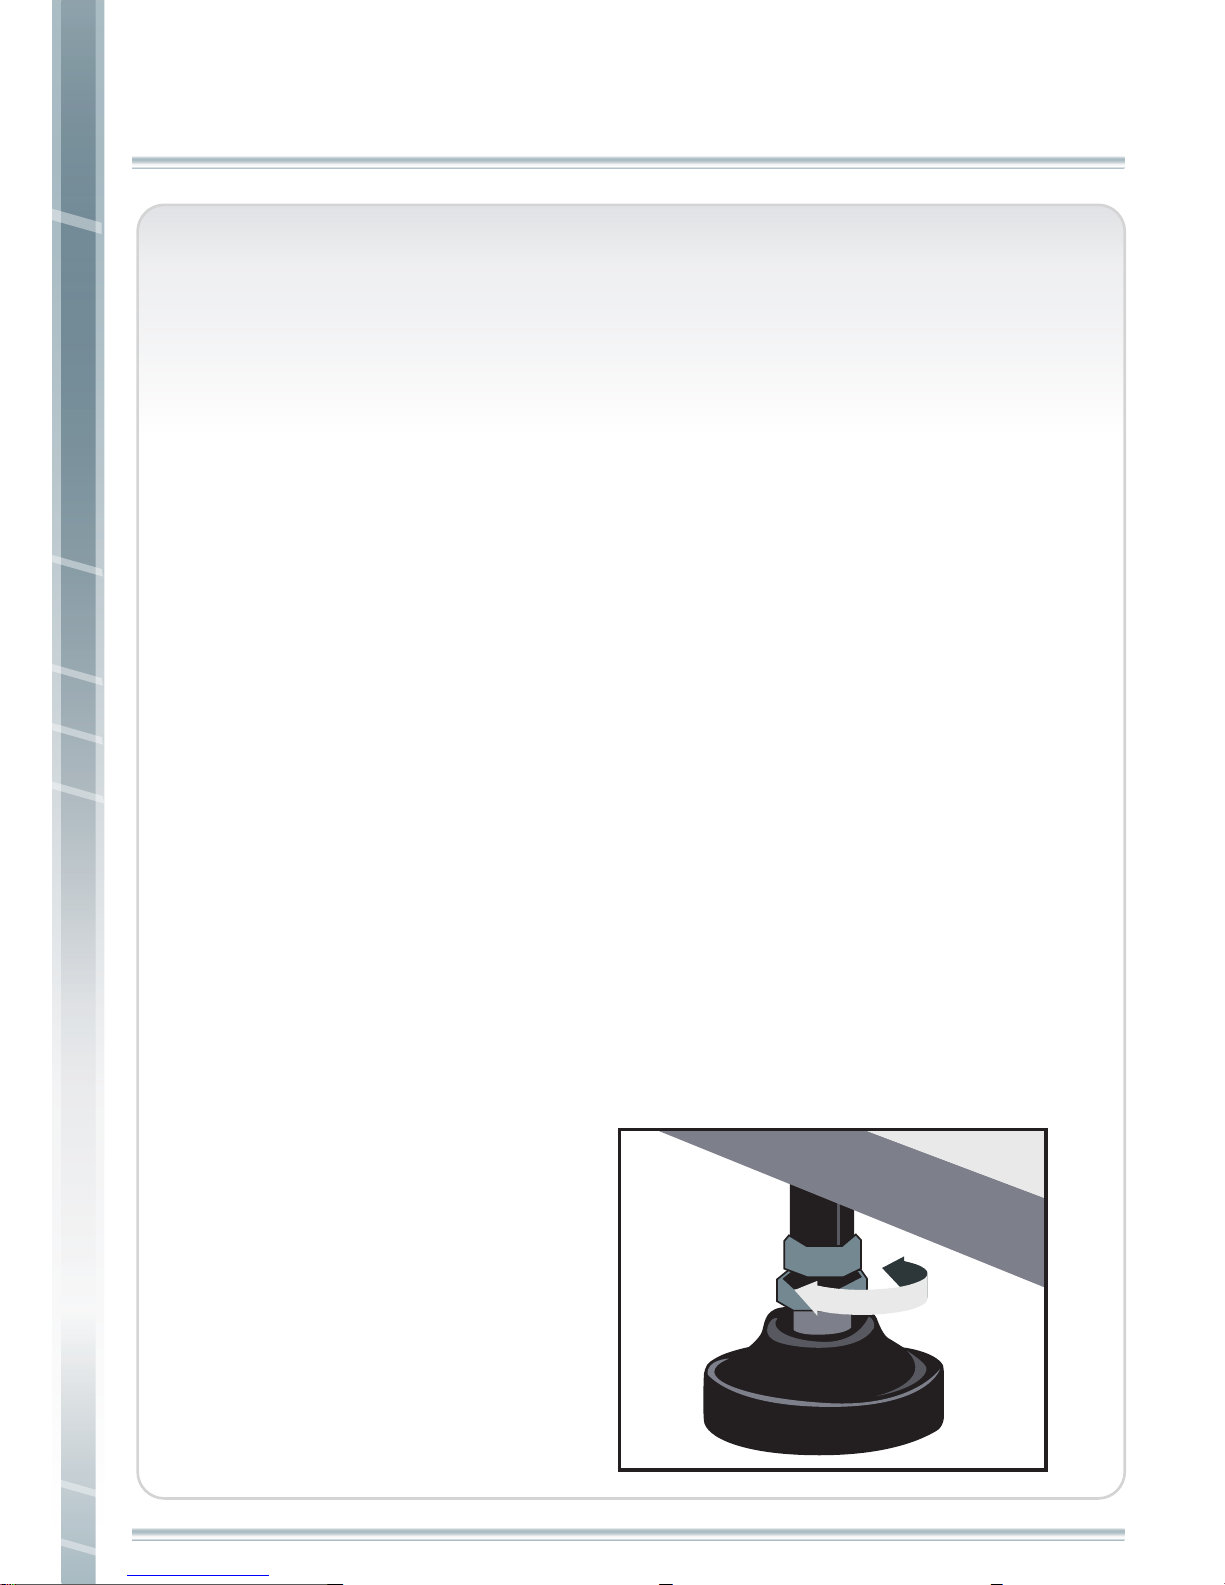
LEVELER LEGS
After finding a location that is suitable for the treadmill, the rear legs
must be adjusted to provide stable support. Located on the side of each
leg is a thumb-wheel that will allow you to lower or raise the leg until it
is
properly
seated on the floor.
DO NOT adjust legs while the
treadmill is on. Turn the power
switch
to the
OFF position
before adjustment.
Page 9
8
TREADMILL OVERVIEW
TREADMILL OVERVIEW
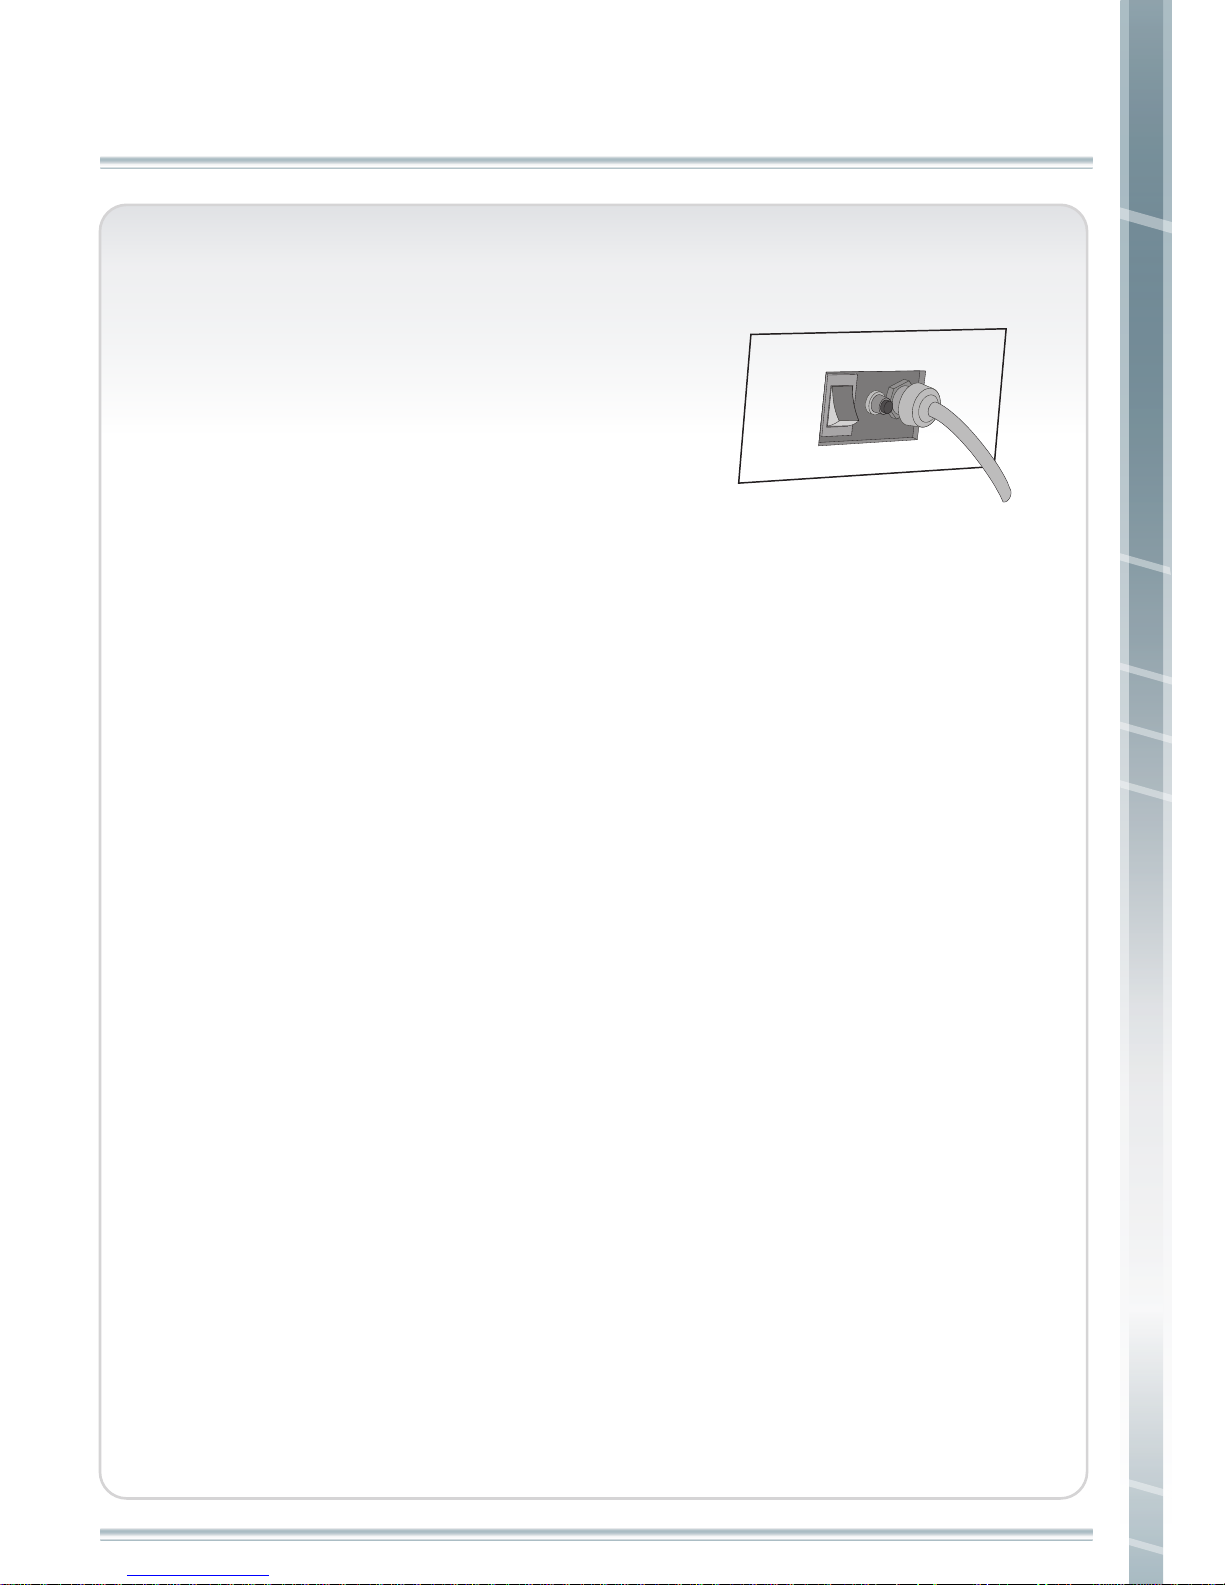
POWER SWITCH
The power switch is located on the side of the
treadmill near the power cord. The power
switch has two positions - ON and OFF.
The display console will beep when the
treadmill is plugged in and the power switch is pressed ON.
CIRCUIT BREAKER RESET
The circuit breaker is located next to the power switch. If there
should be an electrical overload due to a surge in electricity or
other situation, the circuit breaker will disconnect and attempt to
prevent any damage from occurring to the treadmill.
If the treadmill suddenly stops with no lights visible nor beep heard,
the circuit breaker may need to be reset. To reset the circuit breaker
press the button firmly. The display console should restart and a beep
should be heard.
POWER CORD
The power cord of the treadmill must be plugged into a properly
grounded electrical outlet. Locate the power cord so it will not
come in contact with the wheels of the treadmills during operation.
This may cause the power cord to become pinched or damaged .
Damage to the power cord could result in a fire hazard or cause
personal injury through electrical shock.
CAUTION
Feel the power cord with your hands.If the power cord is warm to
the touch a problem may exist with the electrical outlet in which the
treadmill is plugged. It may be necessary to plug the treadmill into a
different outlet.
Page 10
9
OPERATING INSTRUCTIONS FOR CT1
OPERATING INSTRUCTIONS FOR CT1
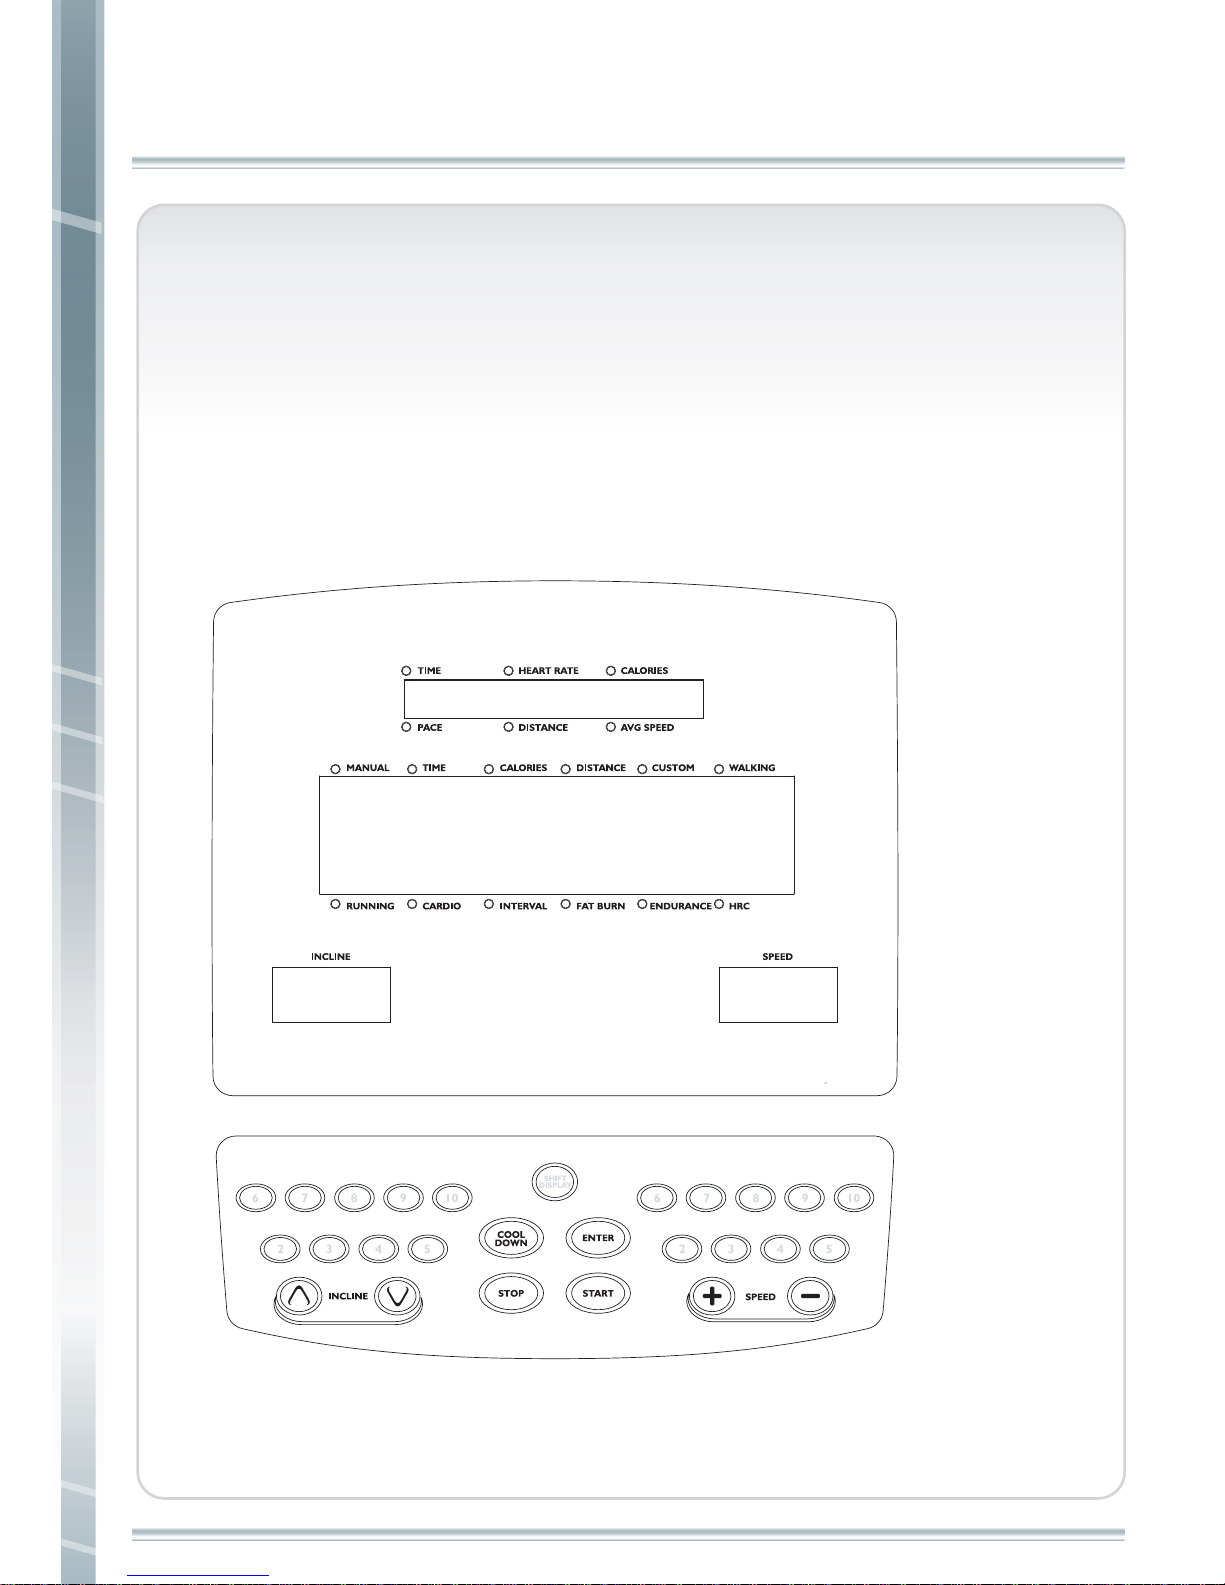
Display instruction
The display of your CT1 is used to operate the unit. It
includes information windows, matrix window and button location.
Information
Window
Matrix Window
Button Location
Information
Window
SHIFT
DISPLAY
6 7 8 9 10
2 3 4 5
6 7 8 9 10
2 3 4 5
Page 11
10
OPERATING INSTRUCTIONS
OPERATING INSTRUCTIONS
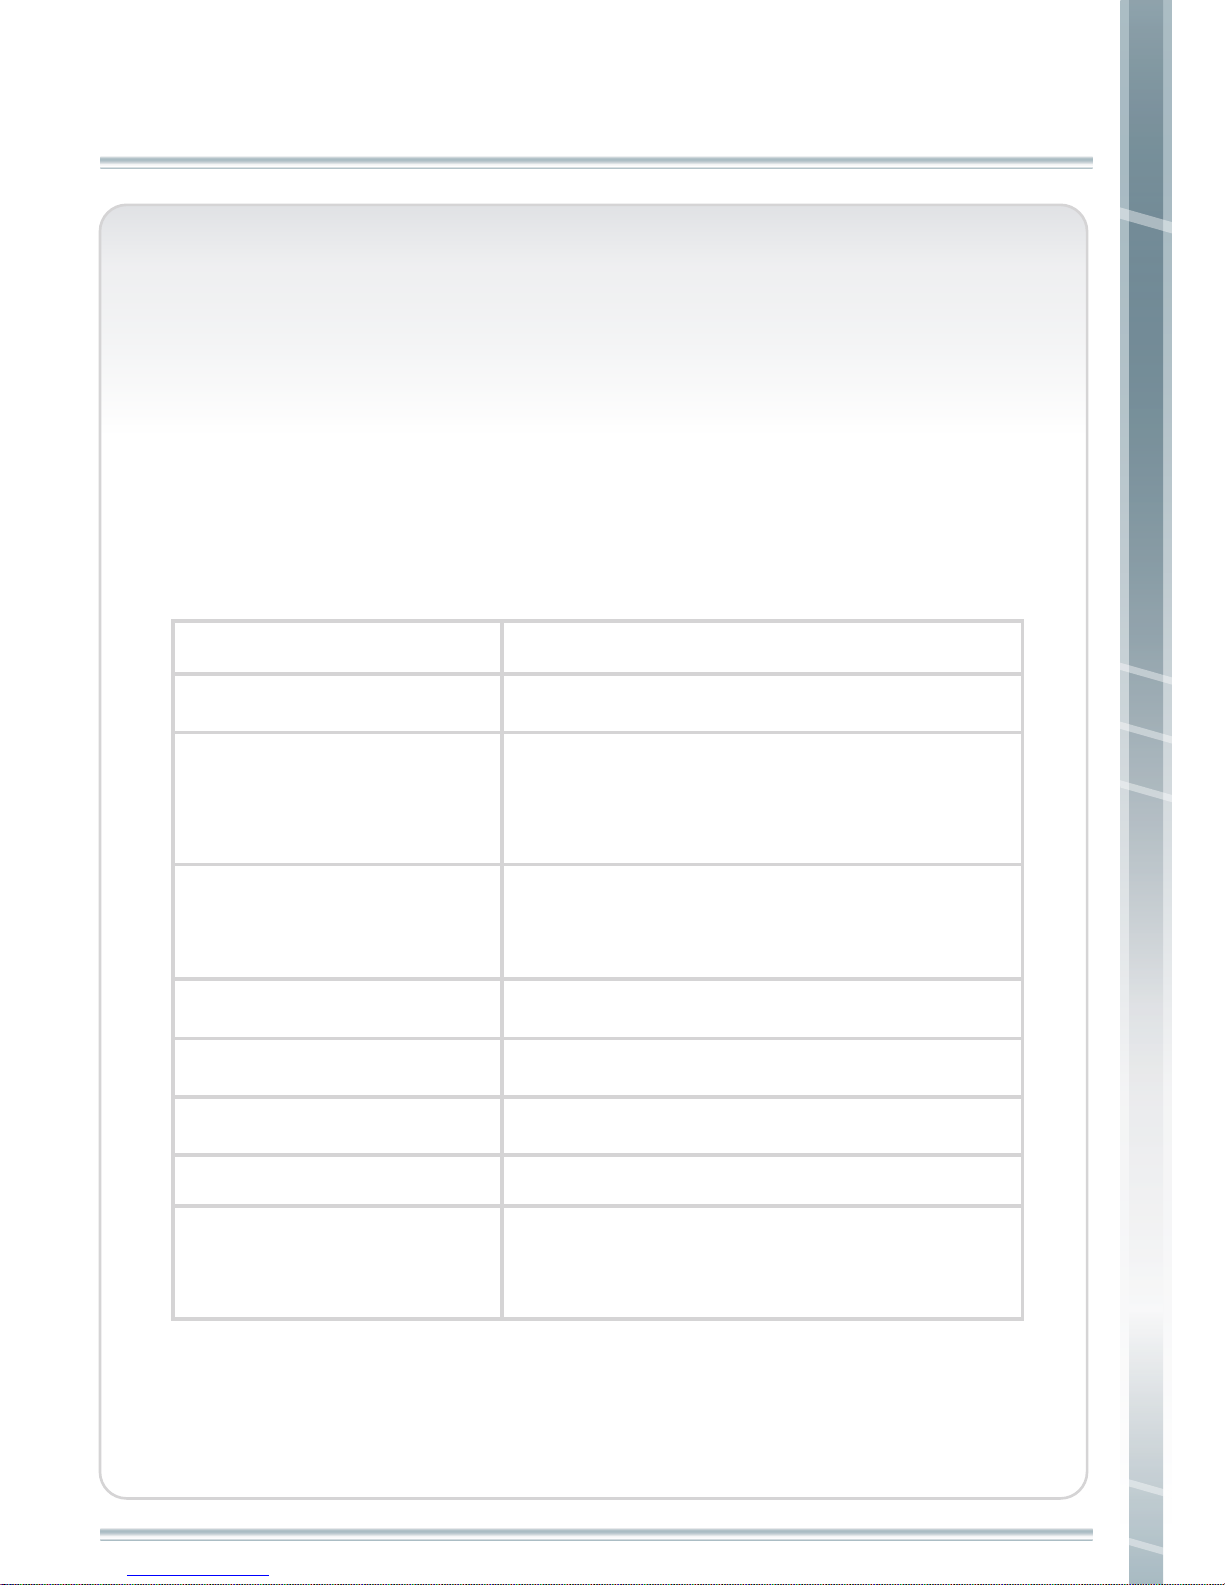
INFORMATION WINDOW
The information windows provide two different types of
information: program directions and user information data.
Program directions will be explained with programs later. User
information data includes:
Indicates speed of your workout.
(Either miles or kilometers.)
User information Data
Description
TIME
HEART RATE
CALORIES
PACE
INCLINE
SPEED
Indicates time in minutes and seconds (mm:ss).
Indicates heart rate , beats per minute during
your workout. (Only displayed if you are
using contact heart rate bar or chest belt.)
Indicates accumulated calories burned during
your workout.
Indicates time required per mile or kilometer.
DISTANCE Indicates exercising distance of your workout.
AVG SPEED Indicates average speed of your workout.
Indicates current incline of your workout.
Page 12
11
OPERATING INSTRUCTIONS
Matrix window
The Matrix Window displays the workout program you select.
Each program displays a different exercise profile. Flashing lamp
bar in the window displays your location on the exercise course.
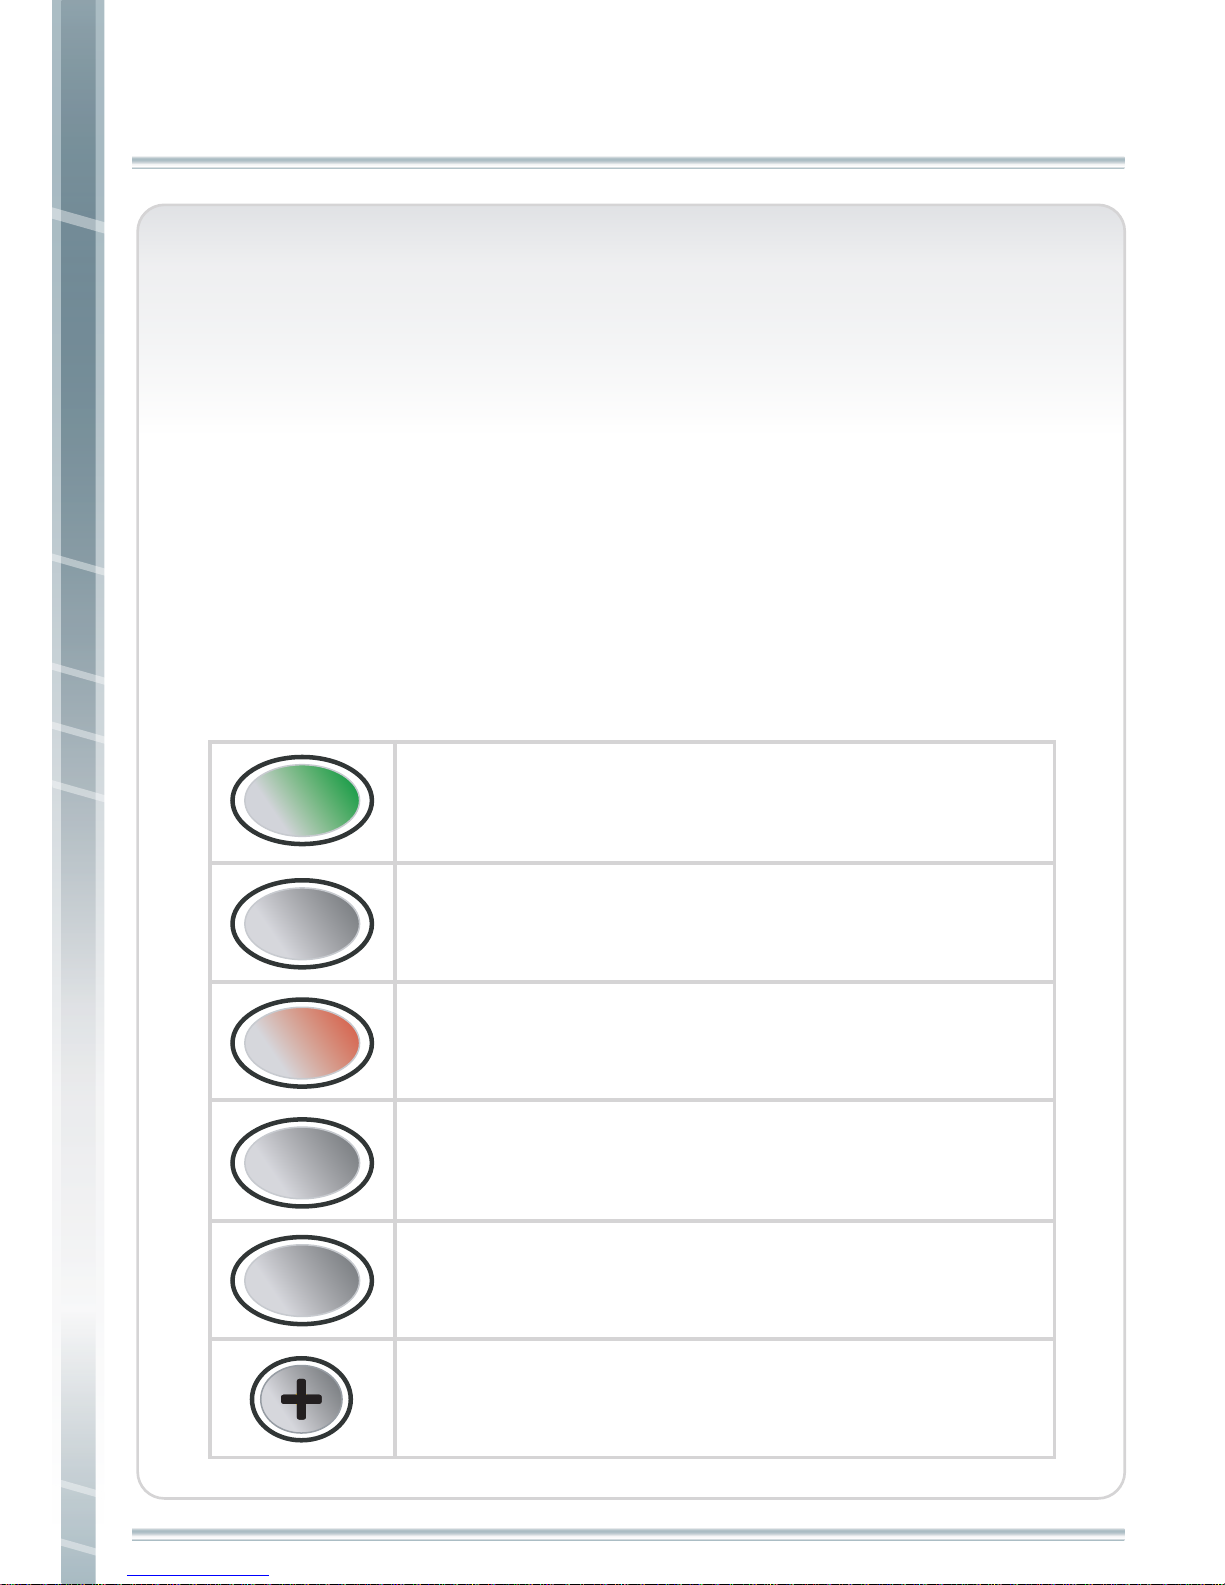
Button Location
There are buttons for operating the machine, adjusting incline
level, and adjusting exercise speed. A description of each button
is listed below.
Start your workout.
STARTSTART
STOPSTOP
ENTERENTER
SHIFT
DISPLAY
SHIFT
DISPLAY
Change ( TIME、HEART RATE、CALORIES ) and
( PACE、DISTANCE、AVG SPEED ) value.
COOL
DOWN
COOL
DOWN
Stop your workout slowly
Enter Data
Stop your workout
Adjust speed. Every press will increase 0.1 mile. Press and
hold this button to increase quickly.
OPERATING INSTRUCTIONS
Page 13
12
OPERATING INSTRUCTIONS
OPERATING INSTRUCTIONS
Numeric key. User can adjust incline and speed using
this quick key.
Numeric key. User can adjust incline and speed using
this quick key.
Numeric key. User can adjust incline and speed using
this quick key.
Numeric key. User can adjust incline and speed using
this quick key.
Numeric key. User can adjust incline and speed using
this quick key.
Numeric key. User can adjust incline and speed using
this quick key.
Adjust incline level. Every press will decrease 1 level.
Press and hold this button to decrease quickly.
Adjust incline level. Every press will increase 1 level.
Press and hold this button to increase quickly.
Adjust speed. Every press will decrease 0.1 mile. Press and
hold this button to decrease quickly.
66
77
22
33
44
55
Page 14
13
OPERATING INSTRUCTIONS
9
10
Programs
There are different exercise programs, includes manual, set time,
set calories, set distance, custom (1 and 2), walking, running,
cardio, interval, fat burn, endurance and HRC. Operations are
explained as follows.
Press “ ”, when asked in the scrolling display to enable
elevation / incline.
Numeric key. User can adjust incline and speed using
this quick key.
Numeric key. User can adjust incline and speed using
this quick key.
NOTE : When using Speed Quick key, to increase speed from the
displayed speed, when user presses a quick key for a speed faster
than indicated, the user must then press “ENTER” to verify
speed selection before change will occur.
Numeric key. User can adjust incline and speed using
this quick key.
8
OPERATING INSTRUCTIONS
Page 15
14
OPERATING INSTRUCTIONS
MANUAL
Manual
Center Display counts down 3 seconds, and then starts belt.
During your workout, you can change speed and incline using
Quick Keys, corresponding arrow or “+” “-“ keys.
When Using Speed Quick keys, for any Increase in speed, user
Must press “ ” after selection before Speed will Increase.
Press “ ”, when asked in the scrolling display to enable
elevation / incline.
step 1
step 2
STARTSTART
Press “ ” .
Turn on the power and press “ ” 、
“ ”、 “ ” or “ ” to set
your weight and press “ ”. The default
value is 176 LBS.
ENTERENTER
ENTER
Page 16
15
OPERATING INSTRUCTIONS
Press “ ” or “ ” to select TIME/
CALORIES/DISTANCE program, then
press“ ”.
SET TIME/SET CALORIES/SET DISTANCE
SET TIME/SET CALORIES/SET DISTANCE
ENTER
ENTER
step 1
step 2
step 3
Center Display counts down 3 seconds, and then starts belt.
During your workout, you can change speed and incline using
Quick Keys, corresponding arrow or “+” “-“ keys.
When Using Speed Quick keys, for any Increase in speed, user
Must press “ ” after selection before Speed will Increase.
Press “ ”, when asked in the scrolling display to enable
elevation / incline.
ENTER
Turn on the power press “ ” 、 “ ”
、 “ ” or “ ” to set your weight
and press“ ”. The default value is 176 LBS.
Use “ ” 、 “ ”、 “ ” or
“ ” to set time/calories/distance then
press “ ”.
START
Page 17
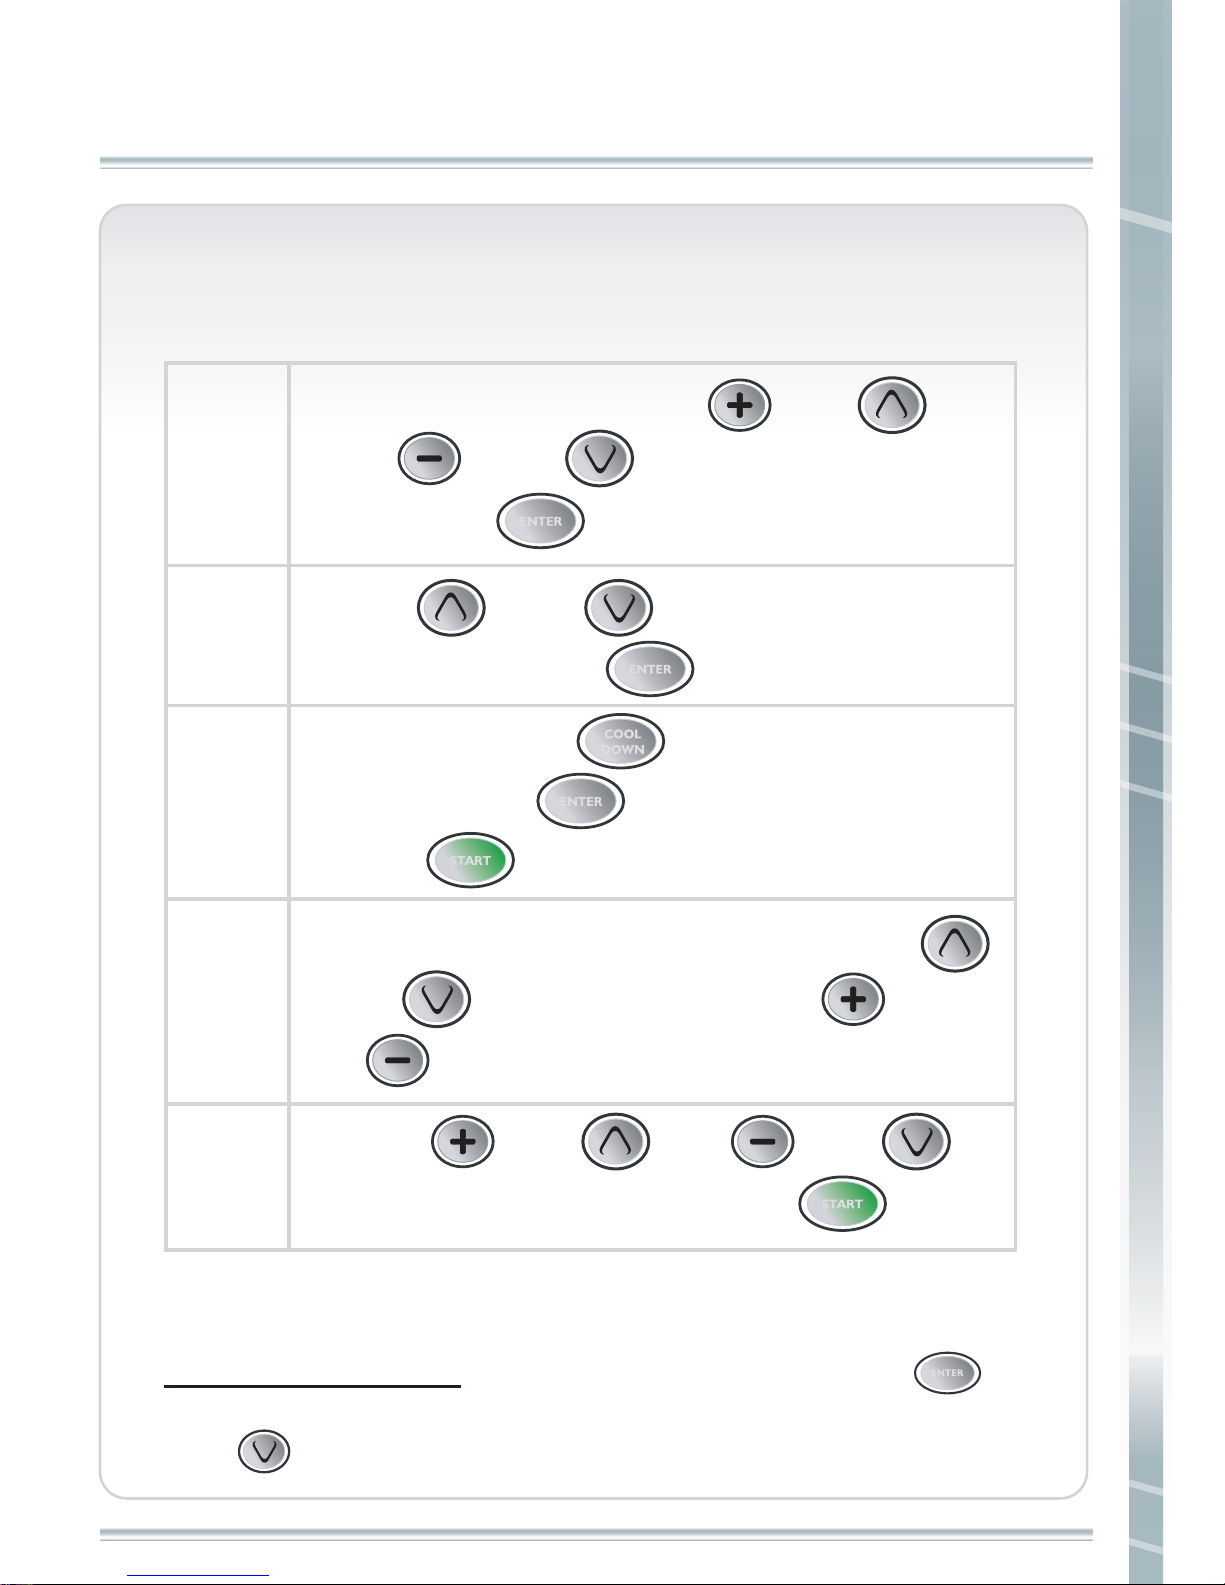
16
OPERATING INSTRUCTIONS
CUSTOM LEARN 1 / CUSTOM LEARN 2
Center Display counts down 3 seconds, and then starts belt. During your workout, you
can change speed and incline using Quick Keys, corresponding arrow or “+” “-“ keys.
When Using Speed Quick keys, for any Increase in speed, user Must press “ ”
after selection before Speed will Increase.
Press “ ”, when asked in the scrolling display to enable elevation / incline.
step 1
Turn on the power and press “ ” 、 “ ”
、 “ ” or “ ” to set your weight,
then press “ ”. The default value is 176 LBS.
ENTER
step 2
Press“ ” or “ ” to select CUSTOM
program, then press “ ”.
ENTER
step 3
To Program, press “ ” after changing profile
segment, press “ ” and repeat. When complete
press “ ”, display will show Time of workout.
ENTER
ENTER
COOL
DOWN
START
step 4
Two custom programs can be memorized. Press “ ”
or “ ” to set incline level. Press “ ” or
“ ” to set speed.
step 5
START
Press “ ” 、 “ ”、 “ ” or “ ”
to set your exercise time, then press “ ”.
CUSTOM LEARN 1/CUTOM LEARN 2
Page 18
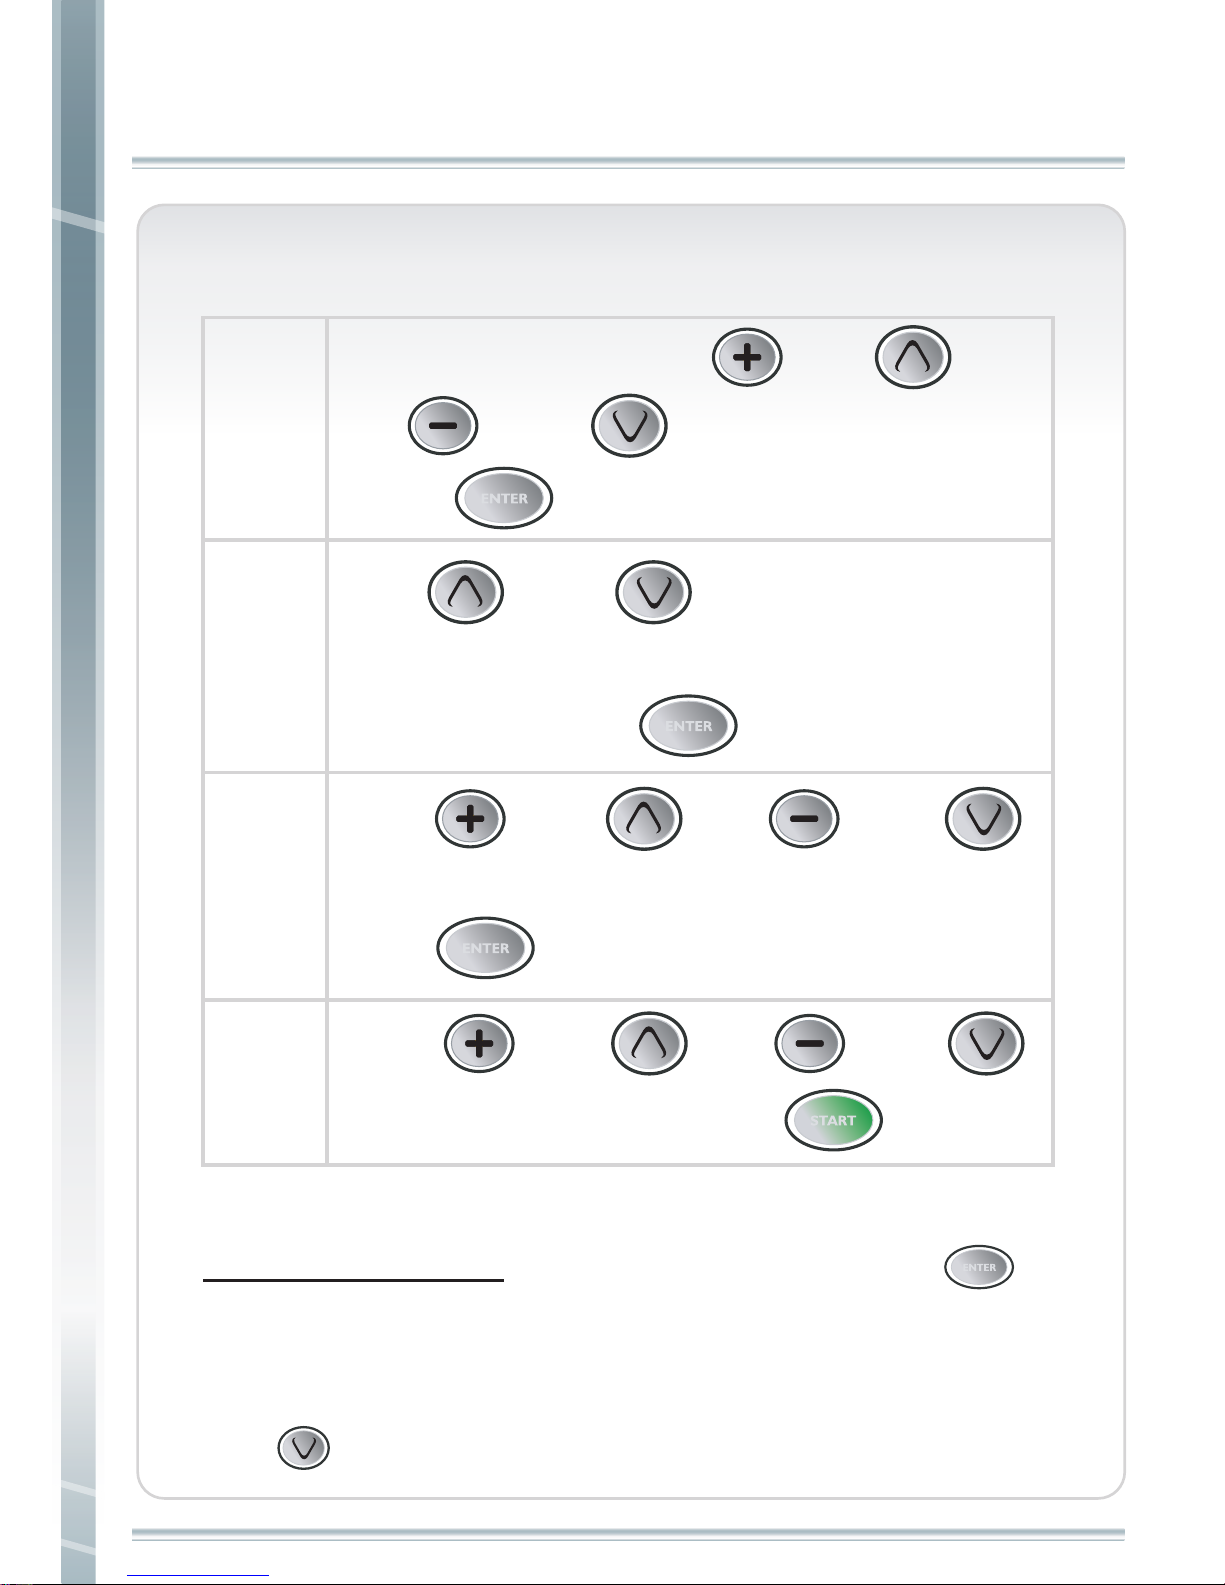
17
OPERATING INSTRUCTIONS
WALKING/RUNNING/CARDIO/INTERVAL/FAT BURN/ENDURANCE
WALKING/RUNNING/CARDIO/INTERVAL/FAT BURN/
ENDURANCE
Center Display counts down 3 seconds, and then starts belt. During your workout, you
can change speed and incline using Quick Keys, corresponding arrow or “+” “-“ keys.
When Using Speed Quick keys, for any Increase in speed, user Must press “ ”
after selection before Speed will Increase.
NOTE: These programs will NOT allow manual changing of Elevation during routine.
Speed can be changed, but Speed profile will now show User change for the rest of the
routine.
Press “ ”, when asked in the scrolling display to enable elevation / incline.
Turn on the power. Press “ ” 、 “ ”
、 “ ” or “ ” to set your weight, then
press “ ”. The default value is 176 LBS.
step 1
ENTER
step 2
Press“ ” or “ ” to select WALKING/
RUNNING/ CARDIO/ INTERVAL /FAT BURN/ ENDURANCE
program, then press “ ”.
ENTER
step 4
START
Press “ ” 、 “ ”、 “ ” or “ ”
to set exercise time, then press “ ”.
step 3
ENTER
ENTER
Press “ ” 、 “ ”、 “ ” or “ ”
to choose from three different exercise levels, then
press “ ”.
Page 19
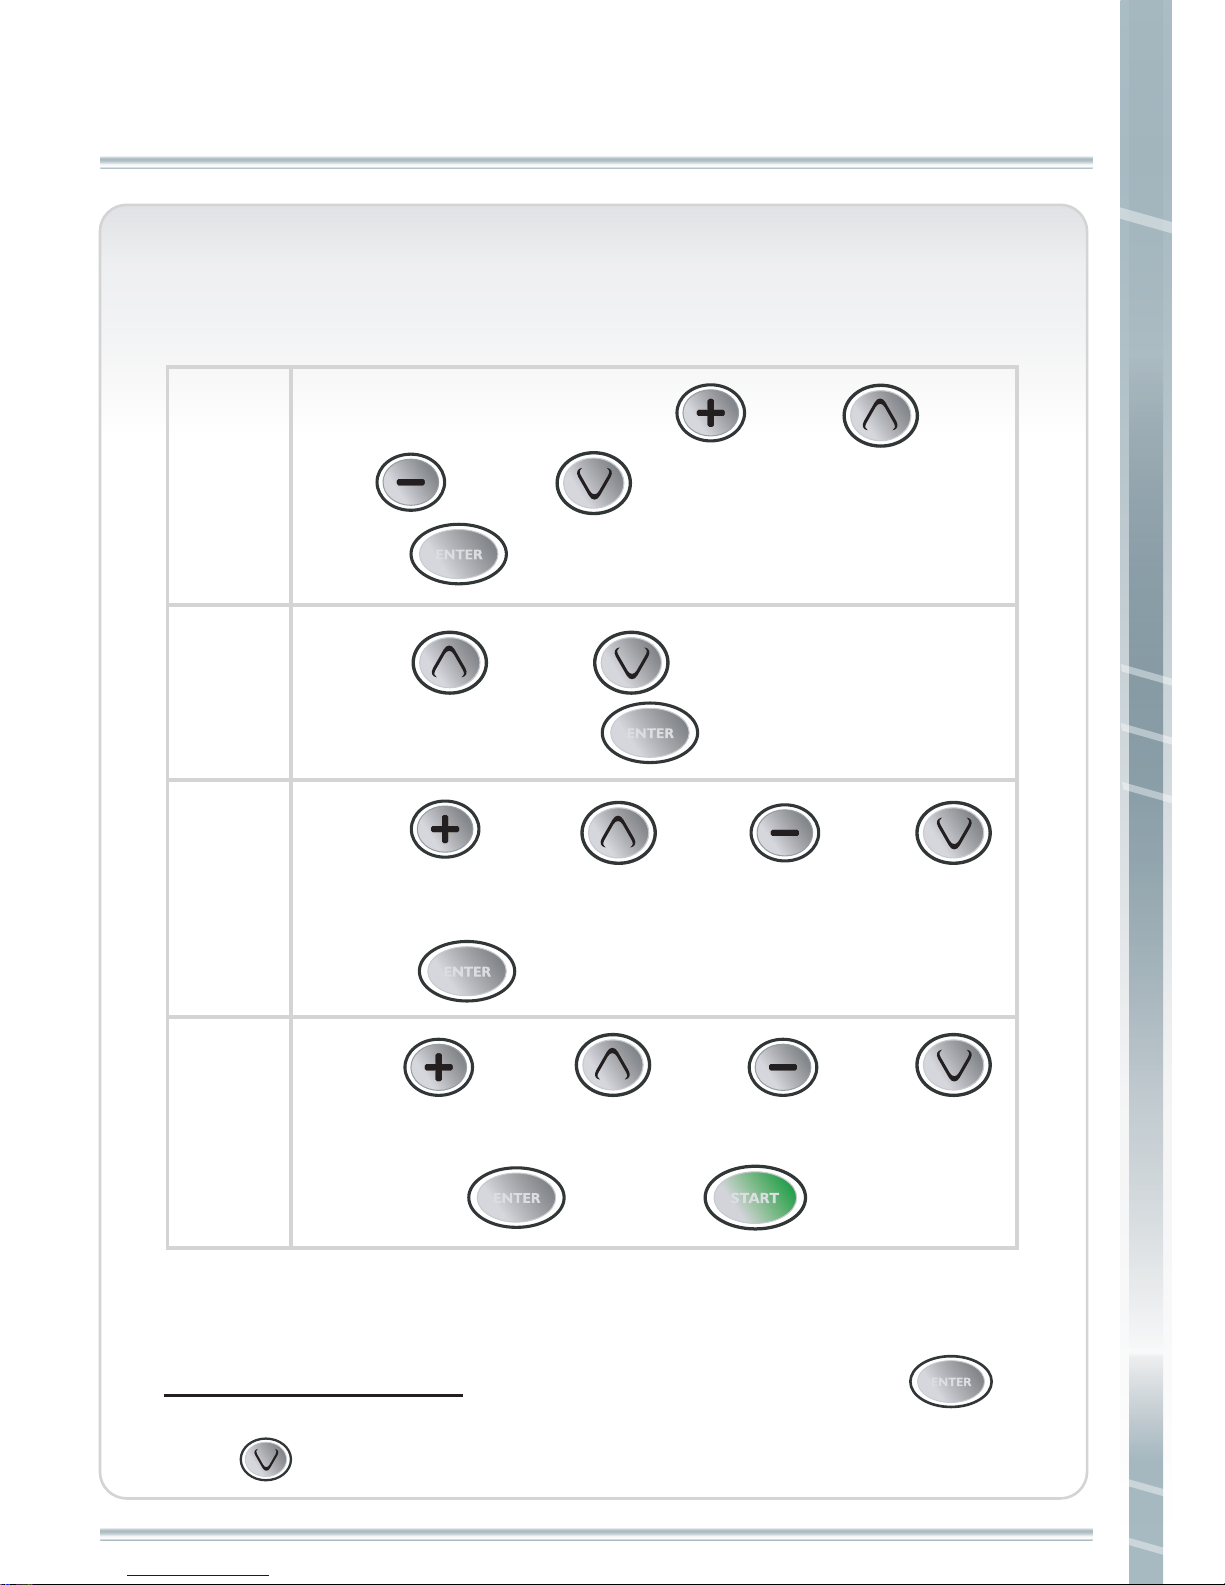
18
OPERATING INSTRUCTIONS
HEART RATE CONTROL
Turn on the power. Press “ ” 、 “ ”
、 “ ” or “ ” to set your weight, then
press “ ”. The default value is 176 LBS.
HEART RATE CONTROL
Center Display counts down 3 seconds, and then starts belt. During your workout, you
can change speed and incline using Quick Keys, corresponding arrow or “+” “-“ keys.
When Using Speed Quick keys, for any Increase in speed, user Must press “ ”
after selection before Speed will Increase.
Press “ ”, when asked in the scrolling display to enable elevation / incline.
step 1
step 2
step 3
step 4
Press “ ”
or “ ” to select HRC
program, then press “ ”.
Press “ ” 、 “ ” 、 “ ” or “ ”
to set age. The default value is 25. Then
press “ ” .
Press “ ” 、 “ ” 、 “ ” or “ ”
to set max heart rate %. The default value is 60%,
then press“ ” . Press“ ” to begin.
ENTER
ENTER
ENTER
ENTER
ENTER
START
Page 20

19
OPERATING INSTRUCTIONS
HEART RATE CONTROL
Heart rate checks are made every 15 seconds-
A. If heart rate is less that 50 bpm, (regardless of target), elevation
will move to 0%, after 0%, speed will reduce by 0.1 mph every
15 seconds, when minimum speed is reached, end exercise will
occur.
B. If heart rate is less than 3 bpm below target, there will be no
change.
C. If heart rate is between 3 and 5 bpm below target, elevation will
increase by 0.5% every 30 seconds.
D. If heart rate is between 6 and 10 bpm below target, elevation
will increase by 1% every 30 seconds.
E. If heart rate is between 11 and 20 bpm below target, elevation
will increase by 1% every 15 seconds.
F. If heart rate is more than 20 bpm below target, no change will
occur, as system assumes that there may be an error in the heart
rate signal. User must ensure that Chest Strap is working properly.
G. If heart rate is less than 3 bpm Above target, there is no change.
H. If heart rate is more than 3 bpm Above target, elevation will
decrease by 1% every 15 seconds. When elevation reaches 0%,
then speed will begin lowering 0.1 mph every 15 seconds, until
minimum is reached or heart rate is on target range.
USER CAN AND SHOULD STOP HEART RATE CONTROL
PROGRAM AT ANY TIME FOR ANY OVERWORK OR OUT OF
RANGE CONDITION, JUST BY PRESSING ANY STOP BUTTON,
OR REMOVING THE SAFETY KEY.
Press “ ”, when asked in the scrolling display to enable
elevation / incline.
Page 21
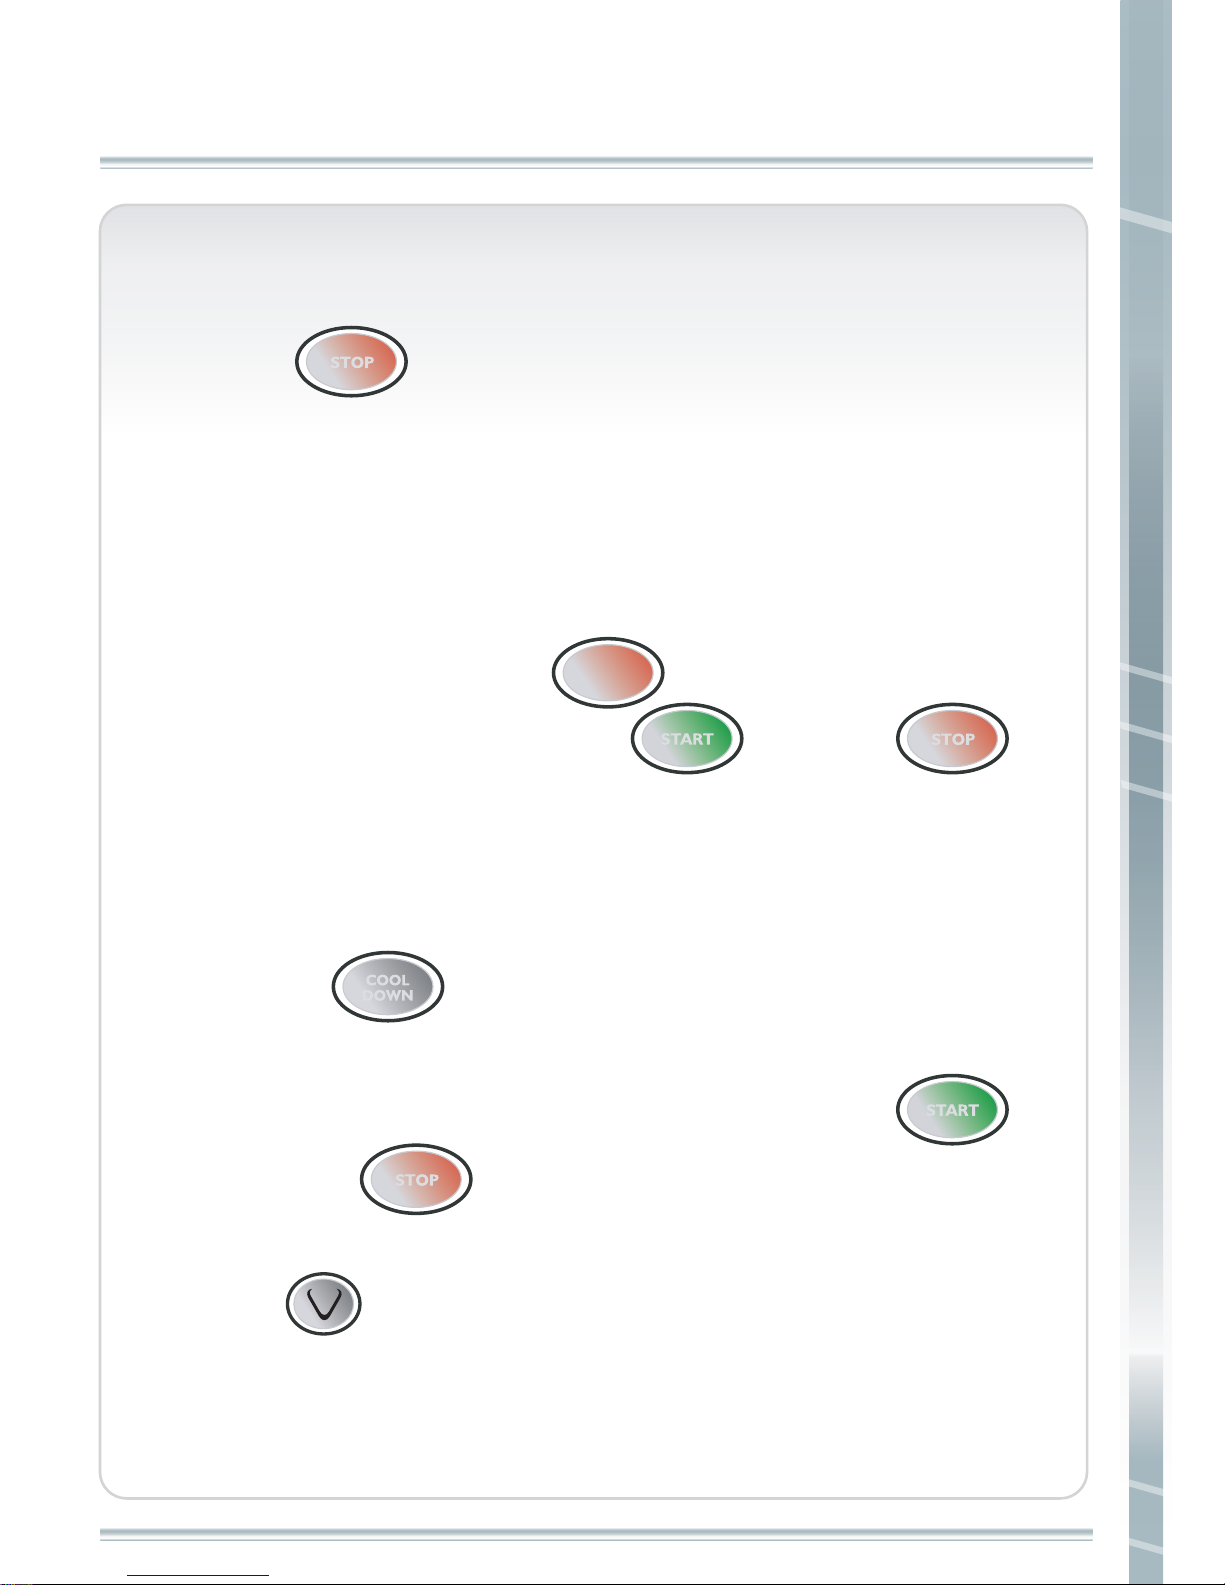
20
OPERATING INSTRUCTIONS
NOTE:
1.Press “ ” during exercise, speed will decrease to “0”,
but elevation will not change. After treadmill belt has stopped,
the information window for ( TIME, HEART RATE, CALORIES,
then PACE, DISTANCE, AVG SPEED) will rotate between values
every 5 seconds, a large STOP will show in the dot matrix. This
is telling you to press the “ ” to reset treadmill last user
information. If the user presses “ ” before “ ”,
routine will begin at minimum speed, and routine will “Add” to
the exercise values displayed.
2.Pressing “ ” during a routine will begin slowly decreasing
speed and elevation until minimums are reached, and then belt
stops. After belt stops, user and restart by pressing “ ”
or press “ ” to reset.
3.Press “ ”, when asked in the scrolling display to enable
elevation / incline.
STOPSTOP
STOP
STOP
START
START
STOP
COOL
DOWN
HEART RATE CONTROL
Page 22

21
OPERATION SYNOPSIS OF PROGRAMS
OPERATION SYNOPSIS OF PROGRAMS
MANUAL PROGRAM
1.The user has the option to input their weight or just press Start.
2.The user makes all speed and elevation changes manually.
3.When the belt starts, a Dot Matrix Track Shows ¼ mile track. A
Blinking L.E.D. indicates present location simulated on the track. In
the center of the track will be a “0”. L.E.D.’s turn off when “Passed”.
When all L.E.D.’s turn off the user has completed ¼ of a mile, then
a “1” will be displayed in the center of the track, and all L.E.D.’s will
be on indicating the beginning of the user’s 2nd ¼ mile run. This will
continue for as long as the runner is on the treadmill. The final
number displayed in the center of the track will indicate how many
¼ miles have been completed.
TIME PROGRAM
1.After selecting the Time Program, the user inputs the time desired
for the exercise and then presses “Start” to begin. Time will then
count down and end routine when time runs out.
2.The user makes all speed and elevation changes manually.
3.When the belt starts, a Dot Matrix Track Shows ¼ mile track. A
Blinking L.E.D. indicates present location simulated on the track. In
the center of the track will be a “0”. L.E.D.’s turn off when
“Passed”. When all L.E.D.’s turn off the user has completed ¼ of a
mile, then a “1” will be displayed in the center of the track, and all
L.E.D.’s will be on indicating the beginning of the user’s 2nd ¼ mile
run. This will continue for as long as the runner is on the treadmill.
The final number displayed in the center of the track will indicate
how many ¼ miles have been completed.
Page 23

22
OPERATION SYNOPSIS OF PROGRAMS
CALORIES PROGRAM
1.After selecting the Calories Program, the user inputs the Calories
desired to‘burn’, then presses “Start” to begin. Calories will count
down and end routine when Calories reaches “0”.
2.The user makes all speed and elevation changes manually.
3.When the belt starts, a Dot Matrix Track Shows ¼ mile track. A
Blinking L.E.D. indicates present location simulated on the track.
In the center of the track will be a “0”. L.E.D.’s turn off when
“Passed”. When all L.E.D.’s turn off the user has completed ¼ of a
mile, then a “1” will be displayed in the center of the track, and all
L.E.D.’s will be on indicating the beginning of the user’s 2nd ¼ mile
run. This will continue for as long as the runner is on the treadmill.
The final number displayed in the center of the track will indicate
how many ¼ miles have been completed.
DISTANCE PROGRAM
1.After selecting the Distance Program, the user inputs the Distance
desired for routine, then presses “Start” to begin. Distance will count
down and end routine when Distance reaches “0”.
2. The user makes all speed and elevation changes manually.
3. When the belt starts, a Dot Matrix Track Shows ¼ mile track. A
Blinking L.E.D. indicates present location simulated on the track.
In the center of the track will be a “0”. L.E.D.’s turn off when
“Passed”. When all L.E.D.’s turn off the user has completed ¼ of a
mile, then a “1” will be displayed in the center of the track, and all
L.E.D.’s will be on indicating the beginning of the user’s 2nd ¼ mile
run. This will continue for as long as the runner is on the treadmill.
The final number displayed in the center of the track will indicate
how many ¼ miles have been completed.
OPERATION SYNOPSIS OF PROGRAMS
Page 24
23
PROGRAM PROFILE
PROGRAM PROFILE
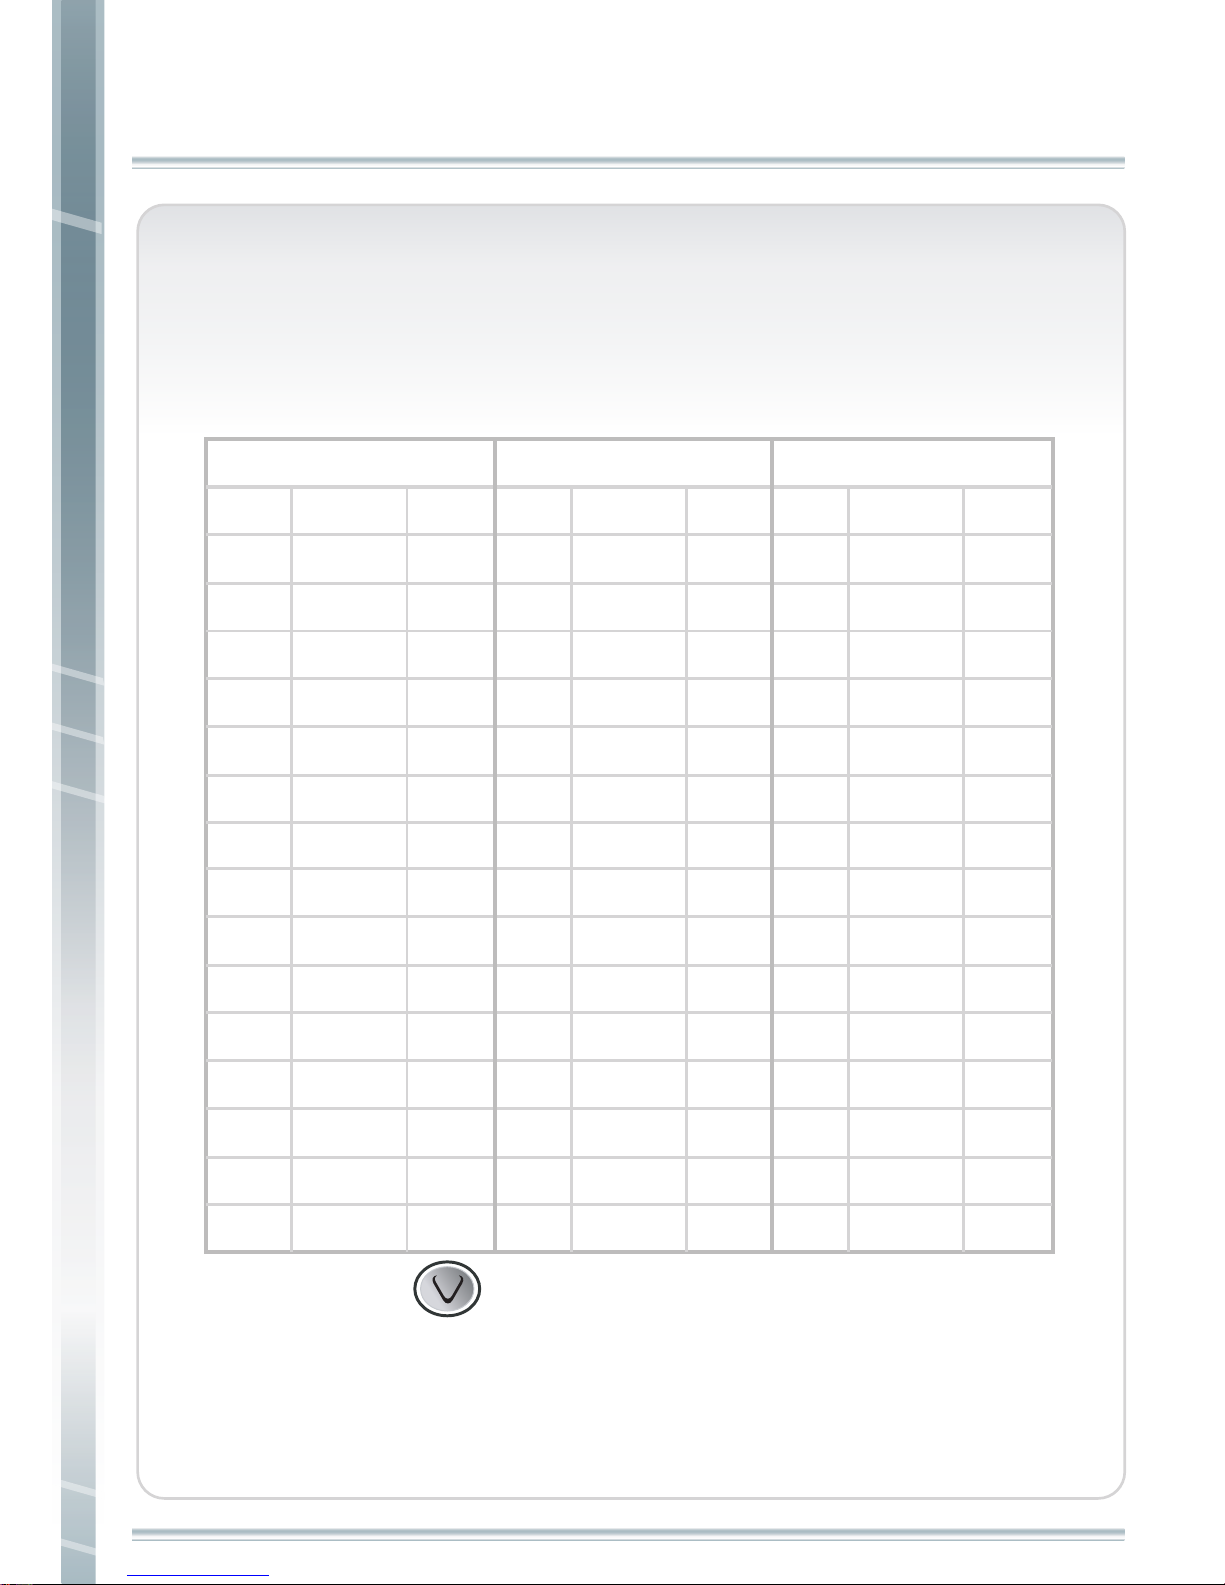
WALKING PROGRAM PROFILES
Speed starts at 0.5, max. allowable speed is 3.3 mph
User input is required to adjust desired speed above 0.5mph.
NOTE 1-
Press “ ”, when asked in the scrolling display to enable elevation /
incline.
NOTE 2 - Elevation cannot be changed. Speed can be manually changed but all
remaining speed segments will follow manual input and not program.
NOTE 3 - Last 1:45 minutes, speed begins decreasing approximately every 10-12
seconds.
Level 1 Level 2 Level 3
Stage Elevation Speed Stage Elevation Speed Stage Elevation Speed
1
2
3
4
5
6
7
8
9
10
11
12
13
14
15
1
2
3
4
5
6
7
8
9
10
11
12
13
14
15
0
3
7
1
5
9
3
0
5
9
0
3
7
1
5
0.5
0.5
0.5
0.5
0.5
0.5
0.5
0.5
0.5
0.5
0.5
0.5
0.5
0.5
0.5
0.5
0.5
0.5
0.5
0.5
0.5
0.5
0.5
0.5
0.5
0.5
0.5
0.5
0.5
0.5
1
2
3
4
5
6
7
8
9
10
11
12
13
14
15
0.5
0.5
0.5
0.5
0.5
0.5
0.5
0.5
0.5
0.5
0.5
0.5
0.5
0.5
0.5
2
8
11
1
8
13
4
0
8
13
2
6
11
4
10
0
4
9
1
7
11
3
0
7
11
0
6
10
1
7
Page 25
PROGRAM PROFILE
PROGRAM PROFILE
24
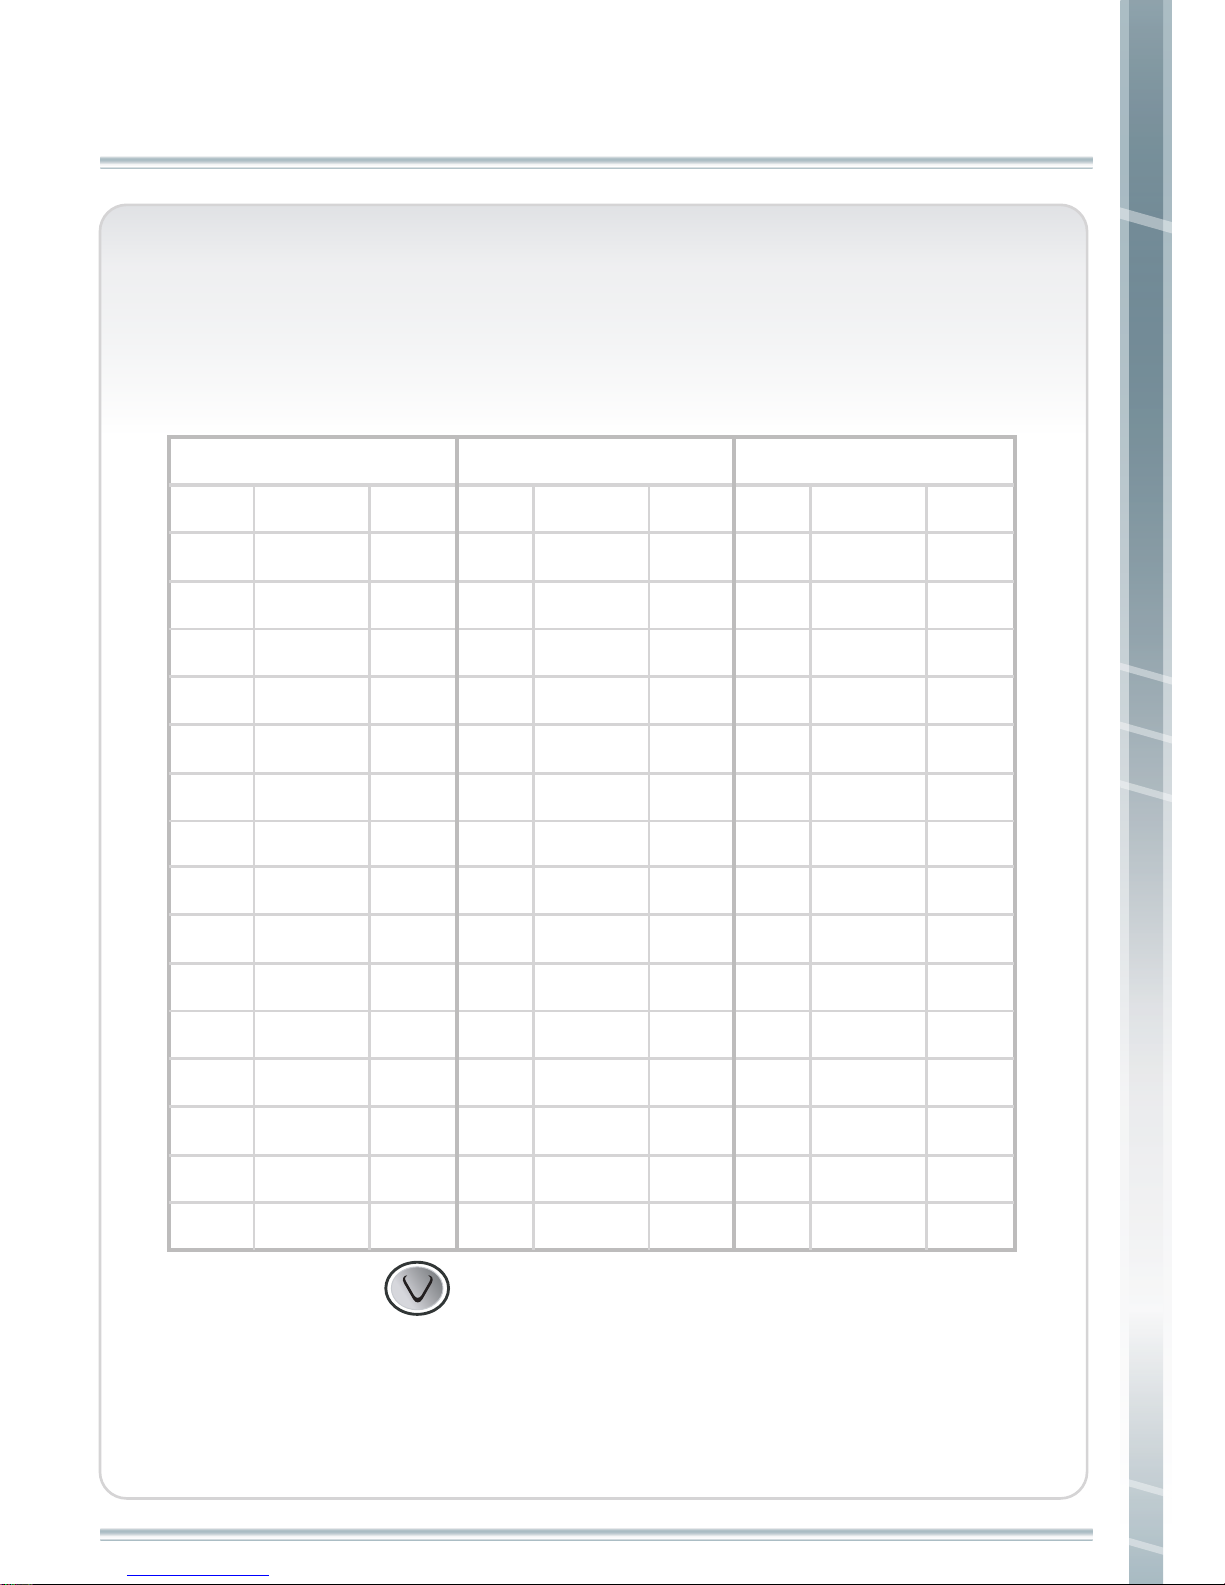
RUNNING PROGRAM PROFILES
Maximum speed allowed is 8 mph
User input is required to adjust speed
NOTE 1 -
Press “ ”, when asked in the scrolling display to enable
elevation / incline.
NOTE 2 - Elevation cannot be changed. Speed can be manually changed but all
remaining speed segments will follow manual input and not program.
NOTE 3 - Last 1:45 minutes, speed begins decreasing approximately every
10-12 seconds.
Level 1 Level 2 Level 3
Stage Elevation Speed Stage Elevation Speed Stage Elevation Speed
1
2
3
4
5
6
7
8
9
10
11
12
13
14
15
1
2
3
4
5
6
7
8
9
10
11
12
13
14
15
0
3
6
8
0
6
9
11
9
3
0
3
5
7
0
3
3
3
3
3
3
3
3
3
3
3
3
3
3
3
4.5
4.5
4.5
4.5
4.5
4.5
4.5
4.5
4.5
4.5
4.5
4.5
4.5
4.5
4.5
1
2
3
4
5
6
7
8
9
10
11
12
13
14
15
6
6
6
6
6
6
6
6
6
6
6
6
6
6
6
4
8
10
12
4
8
12
14
12
6
4
8
10
12
4
2
5
7
9
3
6
12
13
10
4
2
6
8
10
1
Page 26
25
PROGRAM PROFILE
PROGRAM PROFILE
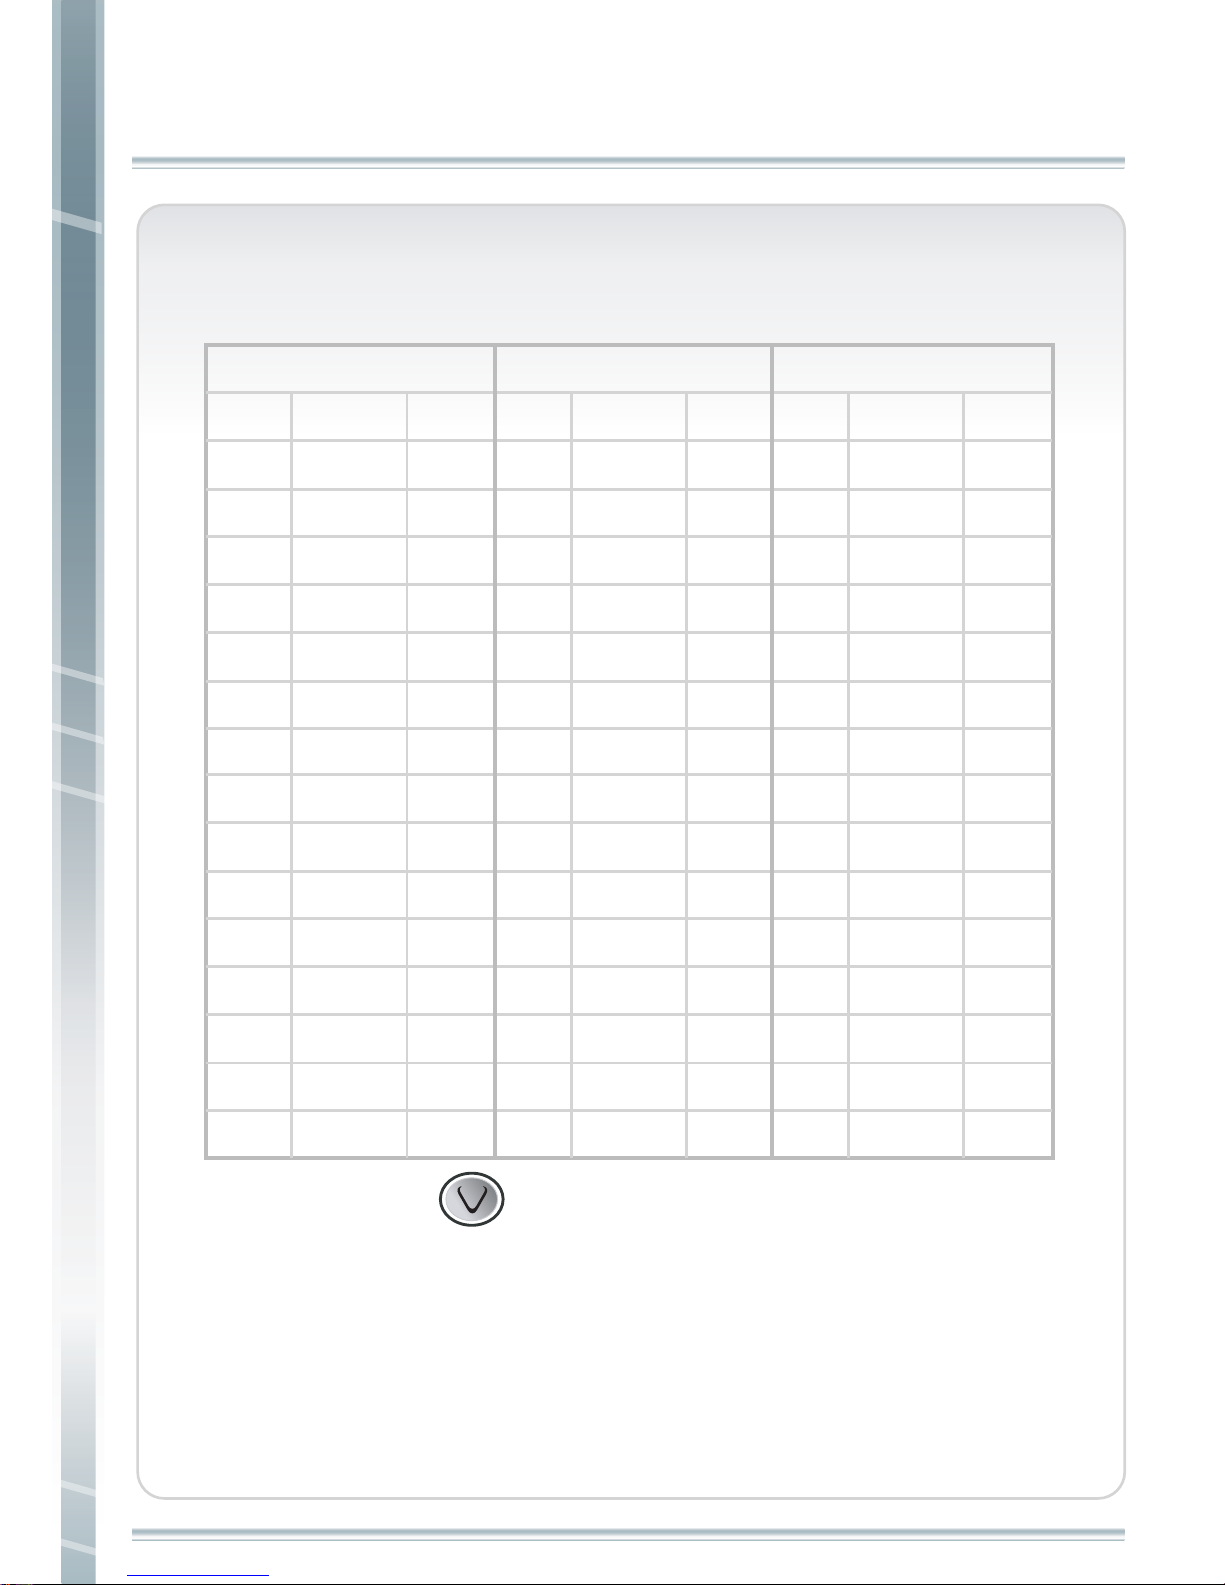
INTERVAL PROGRAM PROFILES
NOTE 1 - Press “ ”, when asked in the scrolling display to
enable elevation / incline.
NOTE 2 - Elevation cannot be changed. Speed can be manually
changed but all remaining speed segments will follow manual
input and not program.
NOTE 3 - Last 1:45 minutes, speed begins decreasing approximately
every 10-12 seconds.
Level 1 Level 2 Level 3
Stage Elevation Speed Stage Elevation Speed Stage Elevation Speed
1
2
3
4
5
6
7
8
9
10
11
12
13
14
15
1
2
3
4
5
6
7
8
9
10
11
12
13
14
15
0
4
0
6
0
8
0
10
0
8
0
6
0
4
0
1
2.5
2.5
2.5
4
4
4
4
4
4
4
2.5
2.5
2.5
2.5
1
4
4
4
5.5
5.5
5.5
5.5
5.5
5.5
5.5
4
4
4
4
1
2
3
4
5
6
7
8
9
10
11
12
13
14
15
1
2.5
4
5.5
5.5
5.5
7
7
7
5.5
5.5
5.5
4
4
4
0
8
4
10
4
12
4
14
4
12
4
10
4
8
0
0
6
0
8
0
10
0
12
0
10
0
8
0
6
0
Page 27
PROGRAM PROFILE
PROGRAM PROFILE
26
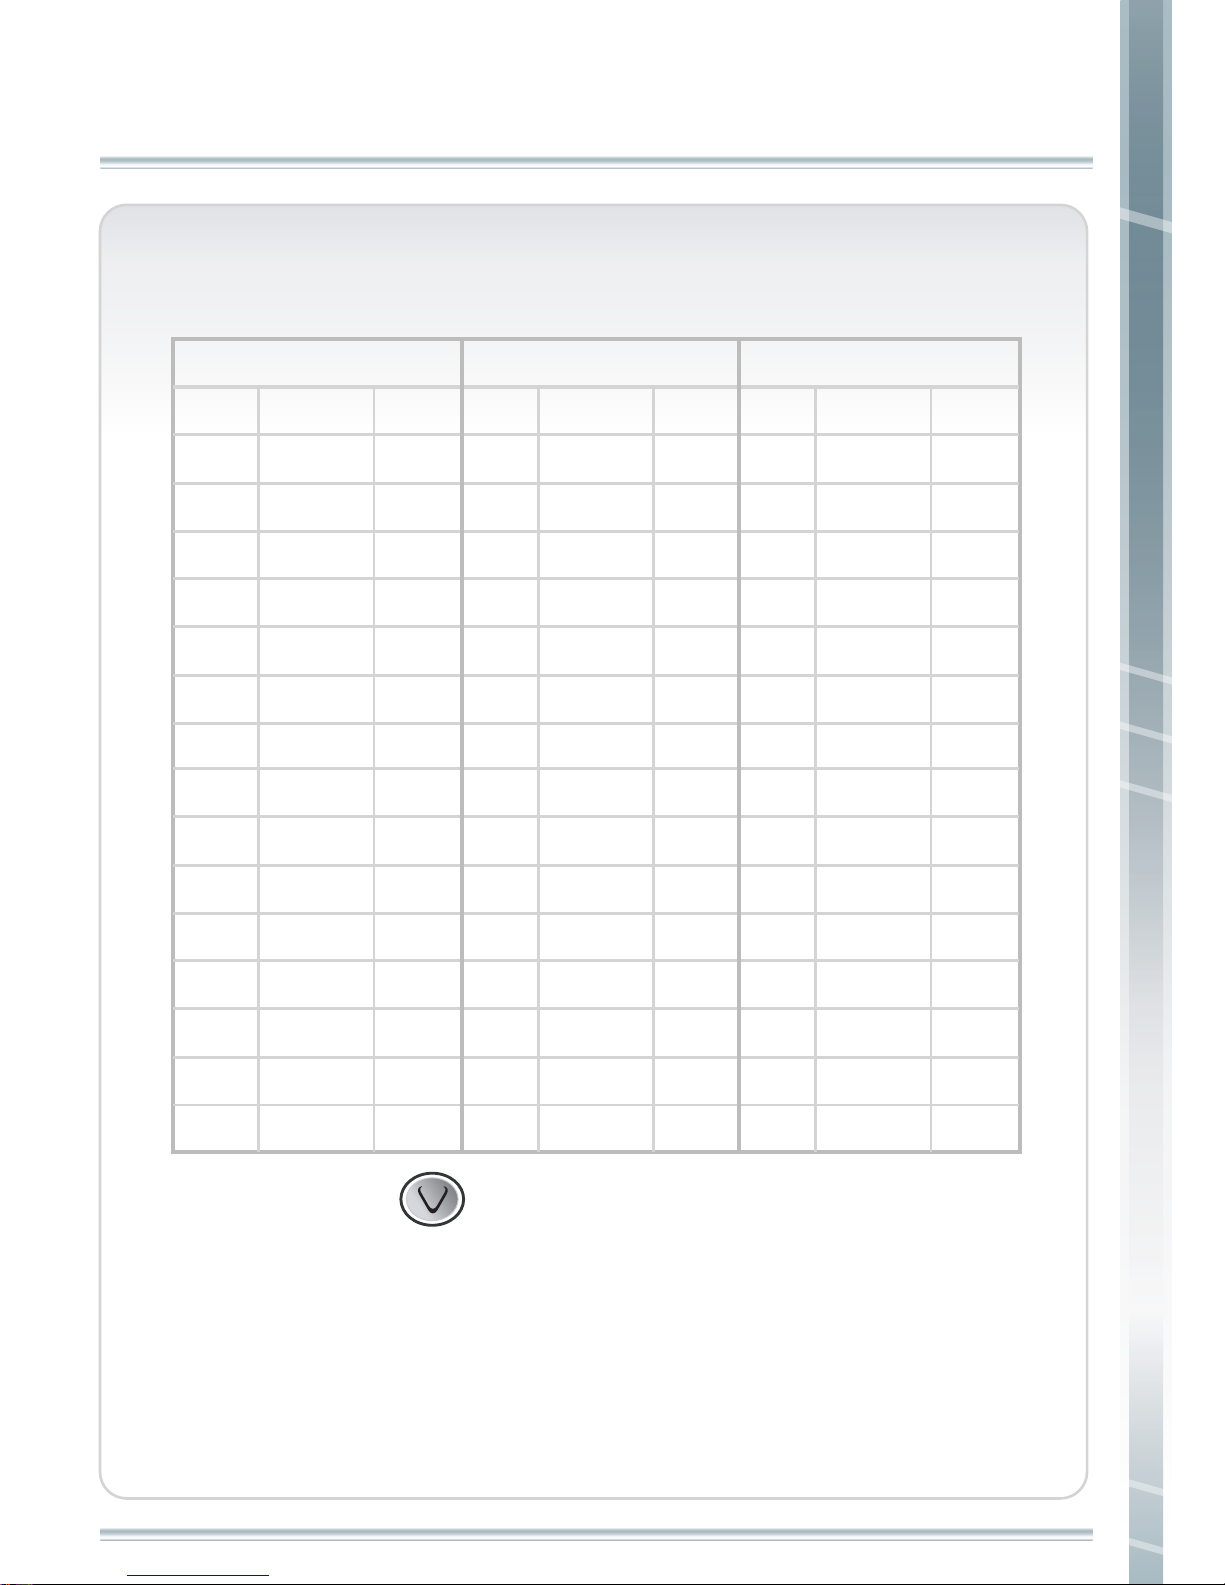
CARDIO PROGRAM PROFILE
Level 1 Level 2 Level 3
Stage Elevation Speed Stage Elevation Speed Stage Elevation Speed
1
2
3
4
5
6
7
8
9
10
11
12
13
14
15
1
2
3
4
5
6
7
8
9
10
11
12
13
14
15
0
3
5
7
5
3
0
0
0
3
5
7
5
3
0
1
2.5
4
4
2.5
1
1
1
1
1
2.5
4
4
4
4
1
2.5
4
4
4
2.5
1
1
1
2.5
4
4
4
4
4
1
2
3
4
5
6
7
8
9
10
11
12
13
14
15
1.5
2.5
4
5.5
5.5
4
2.5
1.5
2.5
4
5.5
5.5
4
4
4
0
7
9
11
9
7
0
0
0
7
9
11
9
7
0
0
5
7
9
7
5
0
0
0
5
7
9
7
5
0
NOTE 1 - Press “ ”, when asked in the scrolling display to
enable elevation / incline.
NOTE 2 - Elevation cannot be changed. Speed can be manually
changed but all remaining speed segments will follow manual
input and not program.
NOTE 3 - Last 1:45 minutes, speed begins decreasing approximately
every 10-12 seconds.
Page 28
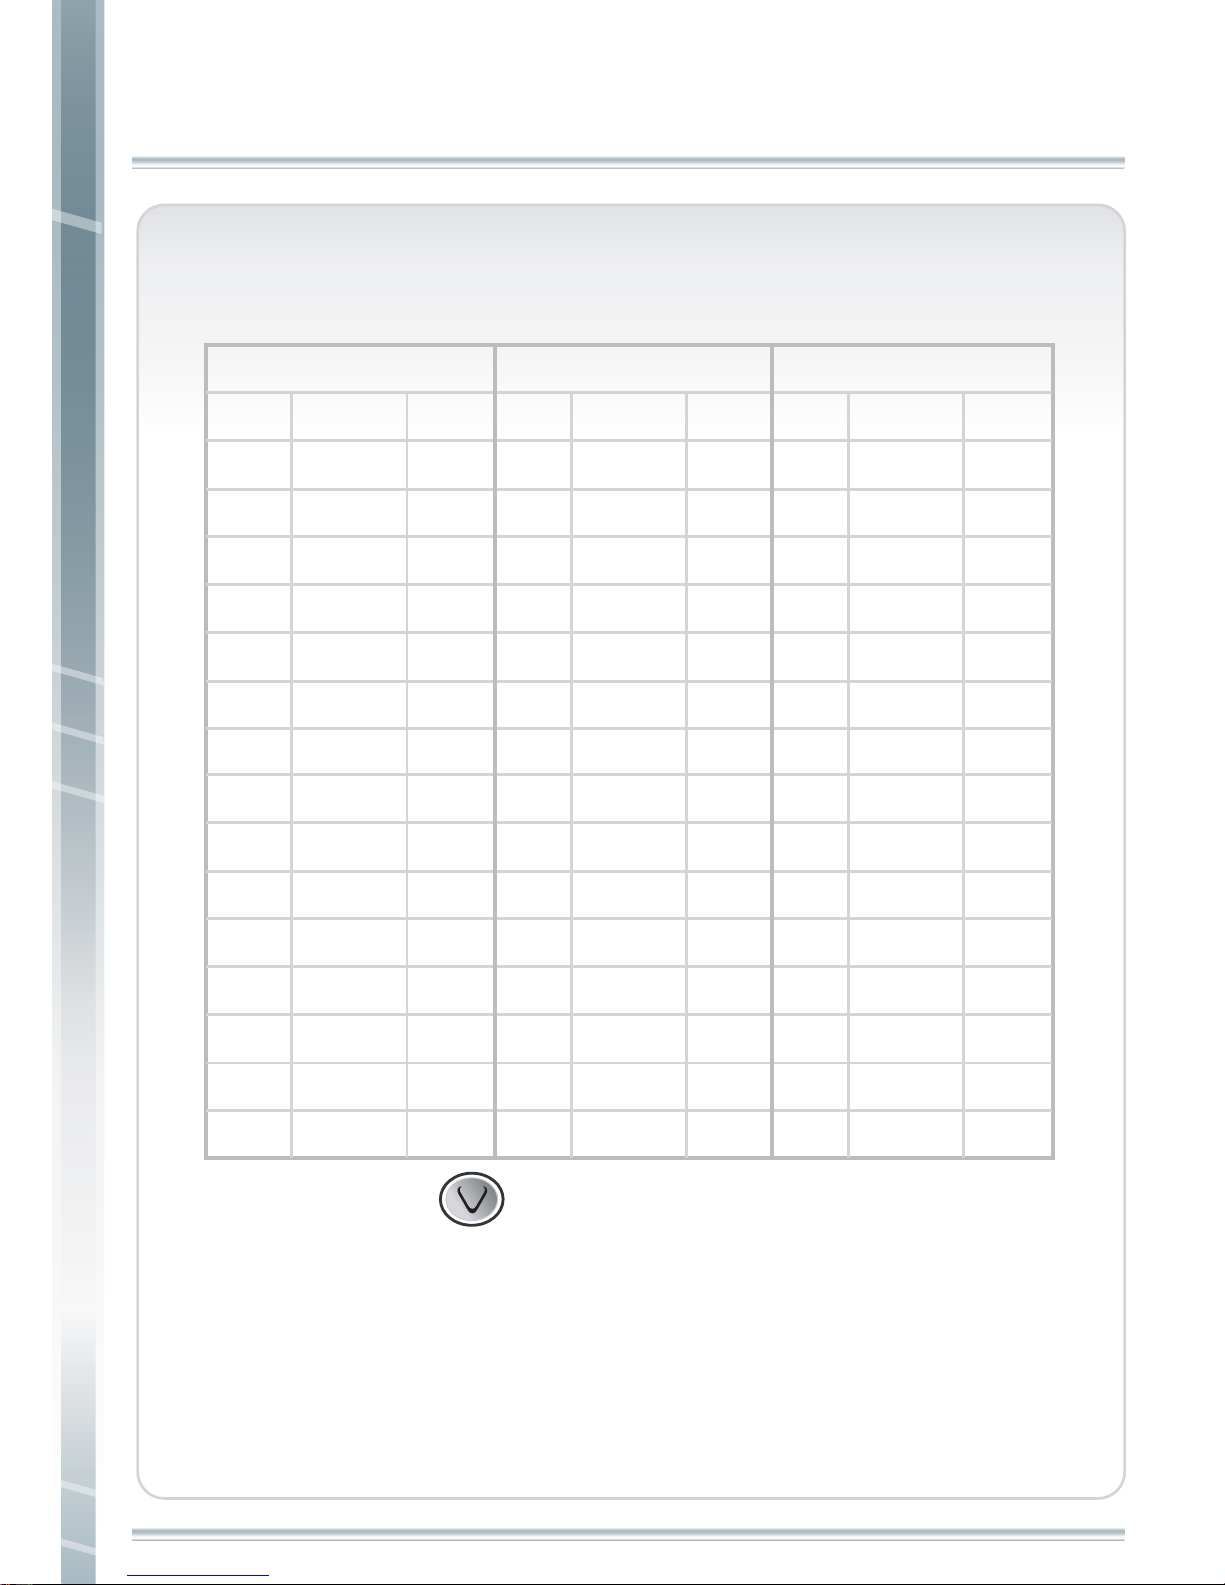
27
PROGRAM PROFILE
PROGRAM PROFILE
FAT BURN PROGRAM PROFILE
NOTE 1 - Press “ ”, when asked in the scrolling display to
enable elevation / incline.
NOTE 2 - Elevation cannot be changed. Speed can be manually
changed but all remaining speed segments will follow manual
input and not program.
NOTE 3 - Last 1:45 minutes, speed begins decreasing approximately
every 10-12 seconds.
Level 1 Level 2 Level 3
Stage Elevation Speed Stage Elevation Speed Stage Elevation Speed
1
2
3
4
5
6
7
8
9
10
11
12
13
14
15
1
2
3
4
5
6
7
8
9
10
11
12
13
14
15
0
4
0
6
0
10
0
10
0
10
0
6
0
4
0
2.5
2.5
4
4
5.5
4
5.5
5.5
5.5
4
5.5
4
4
4
4
2.5
4
4
5.5
5.5
4
5.5
5.5
5.5
4
5.5
5.5
4
4
4
1
2
3
4
5
6
7
8
9
10
11
12
13
14
15
4
4
5.5
5.5
5.5
4
5.5
5.5
5.5
4
5.5
5.5
5.5
5.5
5.5
0
8
4
12
4
14
4
14
4
14
4
12
4
8
0
0
6
4
8
4
12
4
12
4
12
4
8
4
6
0
Page 29
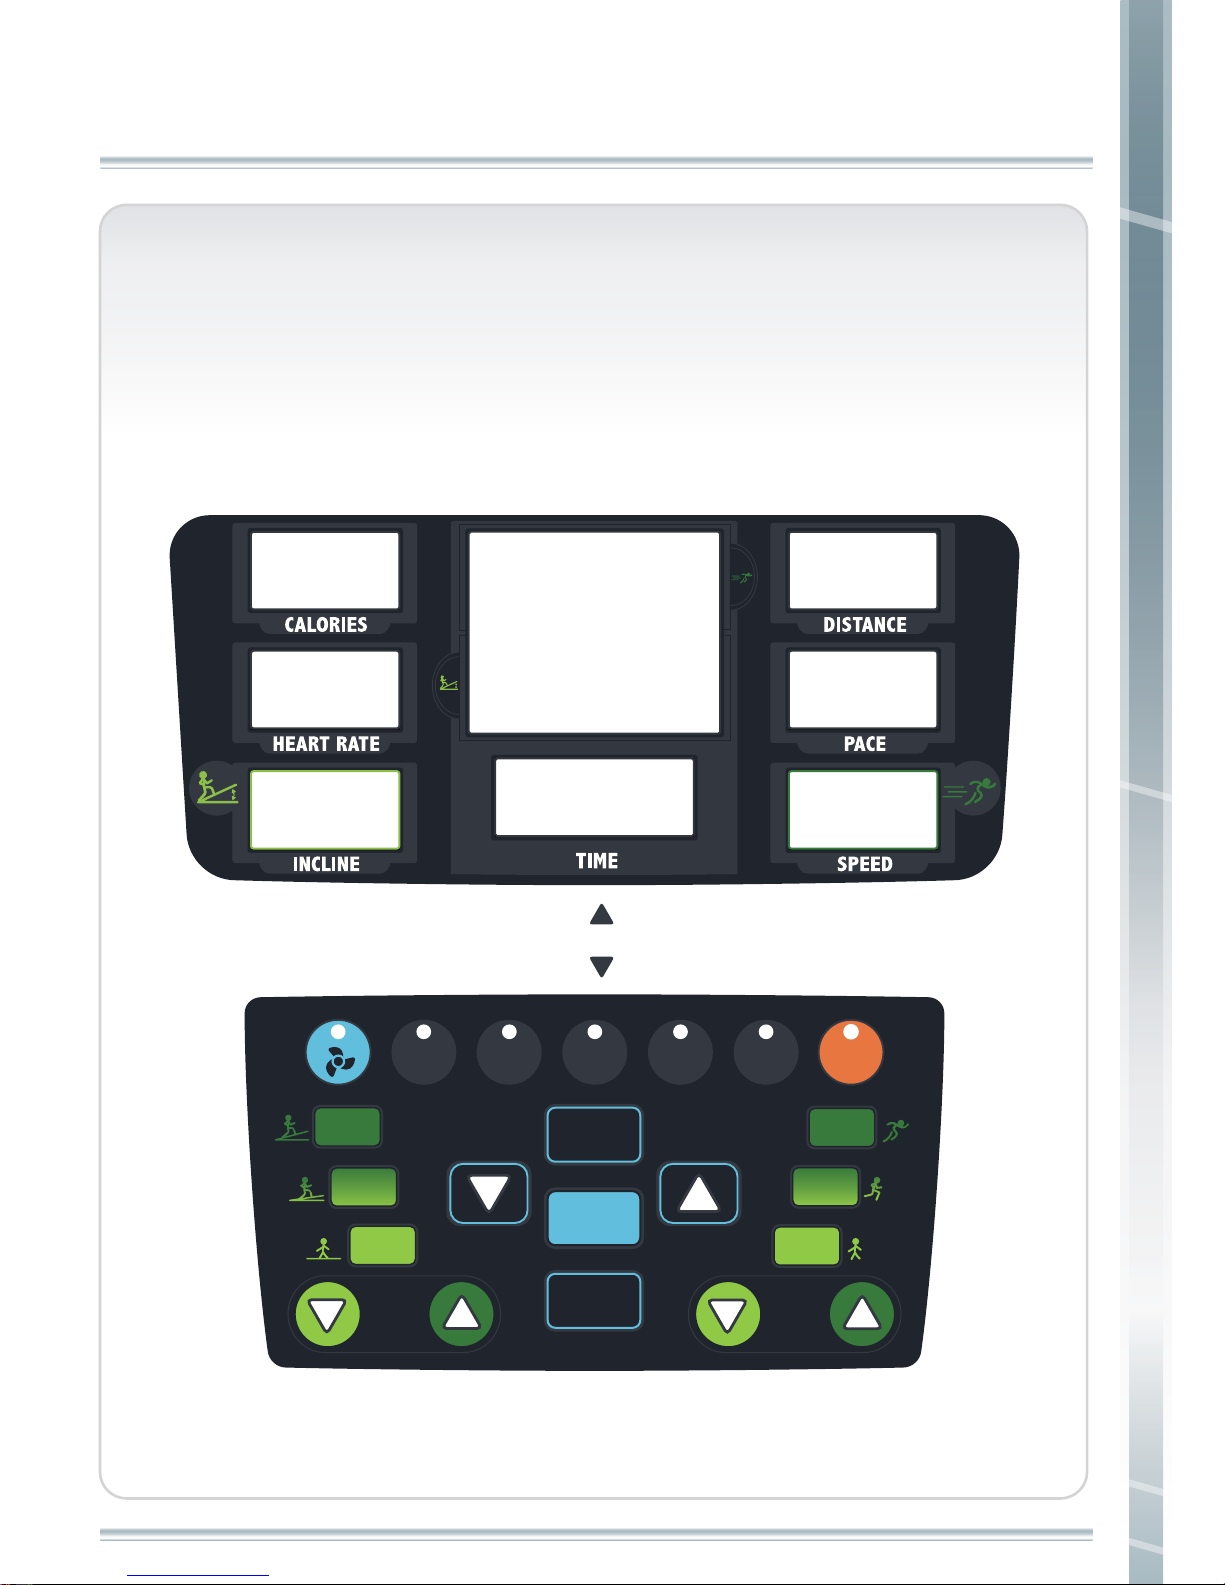
Display instruction
The display layout for your PT10 & PT7. It includes information
windows, matrix window and button location.
INCLINE SPEED
WALK
JOG
RUN
ASCEND
RISE
LEVEL
QUICK
START
COOL
DOWN
ENTER
SELECT
LEVEL
SELECT
LEVEL
GOALCLASSIC H.R.C
MANUAL TRAINING
REVERSE
Matrix window
Information Window
Button Location
28
OPERATING INSTRUCTIONS
OPERATING INSTRUCTIONS FOR PT10 & PT7
Page 30
29
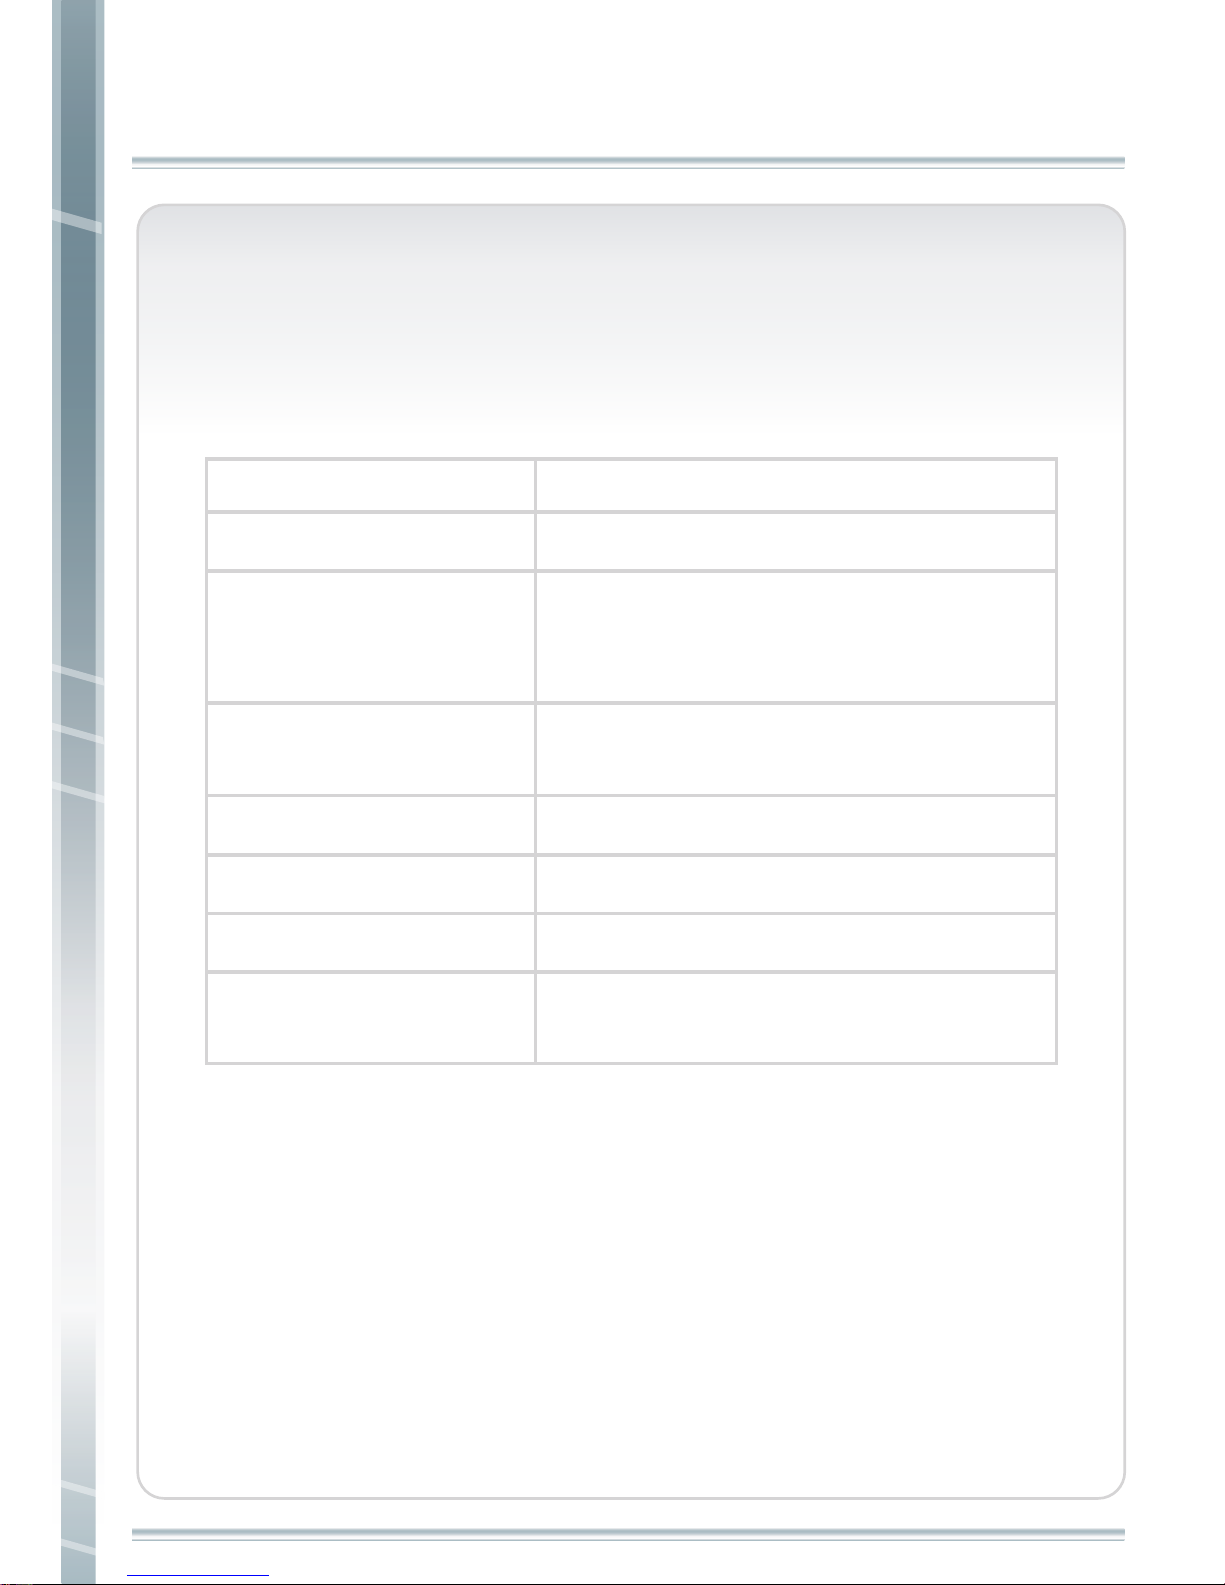
INFORMATION WINDOW
The information window provides user workout data which
includes:
Indicates speed of your workout.
(Either miles or kilometers.)
User workout data
Description
TIME
HEART RATE
CALORIES
INCLINE
SPEED
Indicates time in minutes and seconds (mm:ss).
Indicates heart rate , beats per minute during
your workout. (Only displayed if you are
using contact heart rate bar or chest belt.)
Indicates accumulated calories burned during
your workout.
DISTANCE Indicates distance of workout.
PACE Indicates time required per mile or kilometer.
Indicates current incline of your workout.
OPERATING INSTRUCTIONS
OPERATING INSTRUCTIONS
Page 31
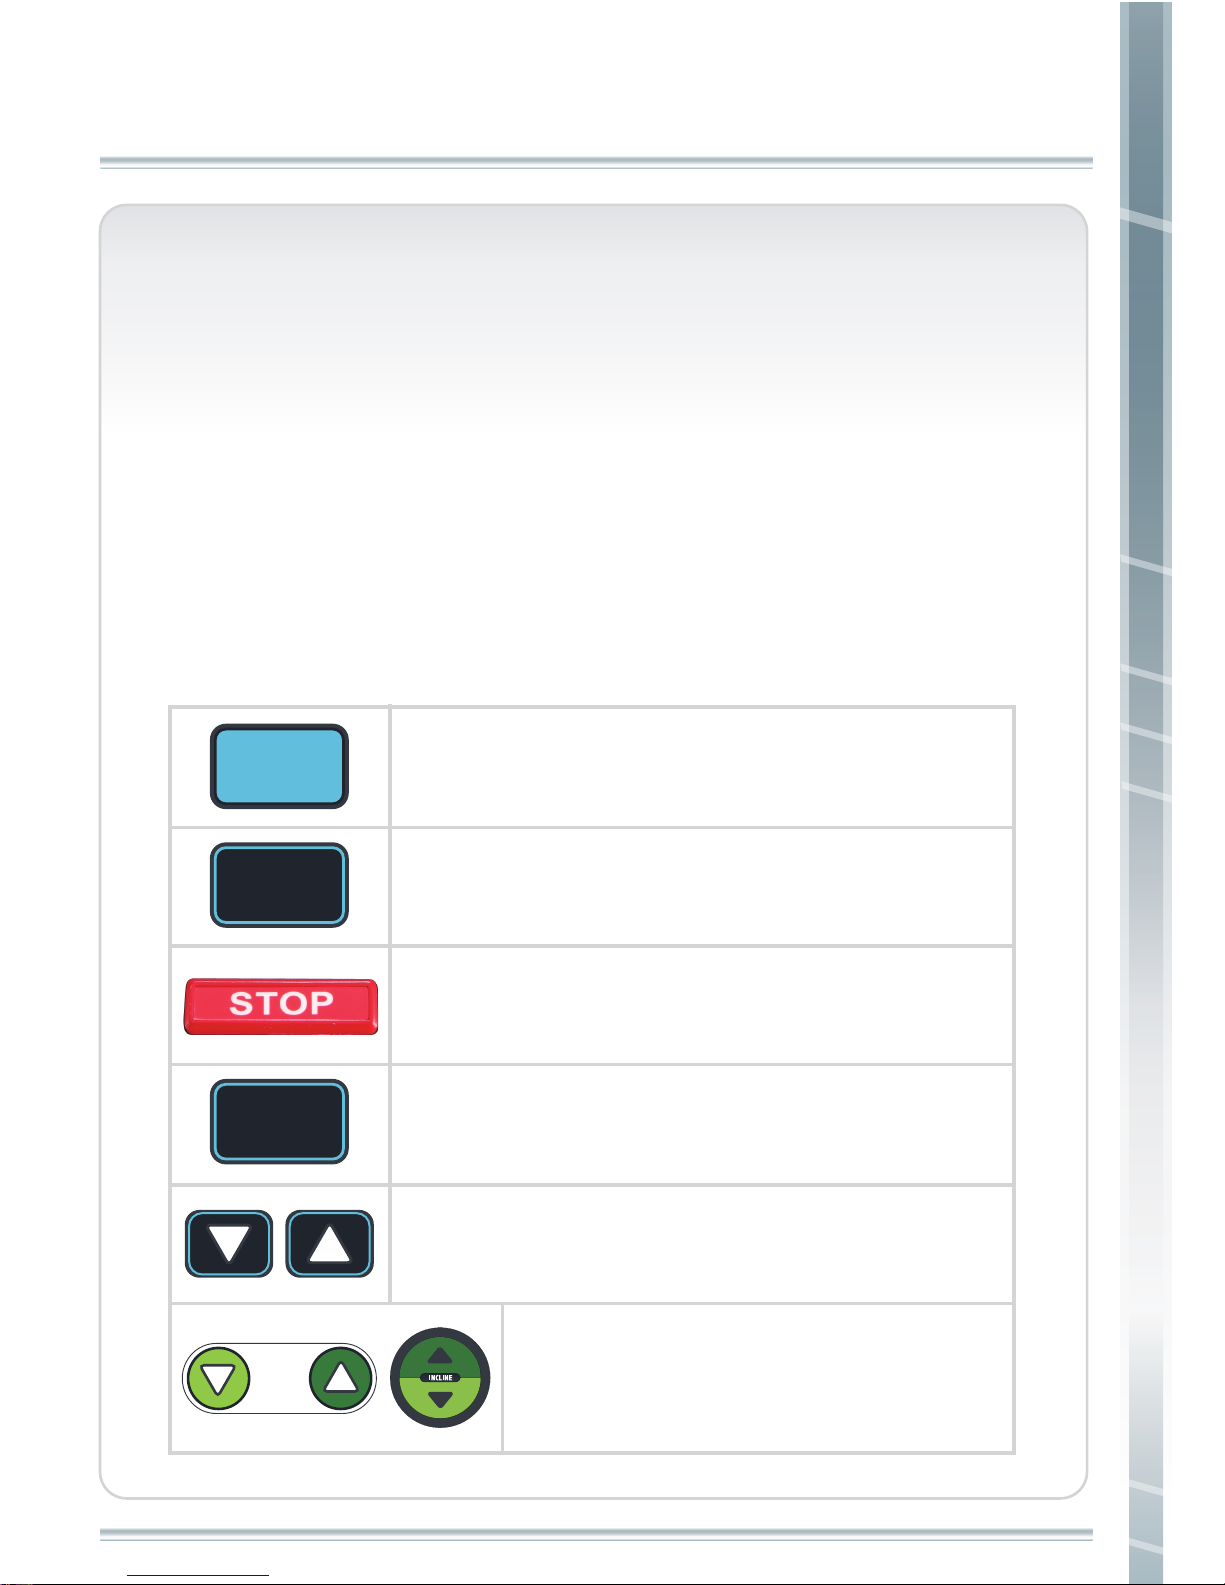
Matrix window
The Matrix Window displays the workout program you select.
Each program displays a different exercise profile. Flashing lamp
bar in the window displays your location on the exercise course.
Buttons Location
There are buttons for operating the machine, adjusting incline
level, and adjusting exercise speed. A description of each button
is listed below.
Start workout
Adjust workout level
Stop workout slowly
Enter Data
Stop workout
Adjust incline level. Every press will increase
1 level.
Press and hold the button to adjust quickly.
OPERATING INSTRUCTIONS
QUICK
START
ENTER
COOL
DOWN
SELECT
LEVEL
SELECT
LEVEL
INCLINE
30
OPERATING INSTRUCTIONS
Page 32
31
OPERATING INSTRUCTIONS
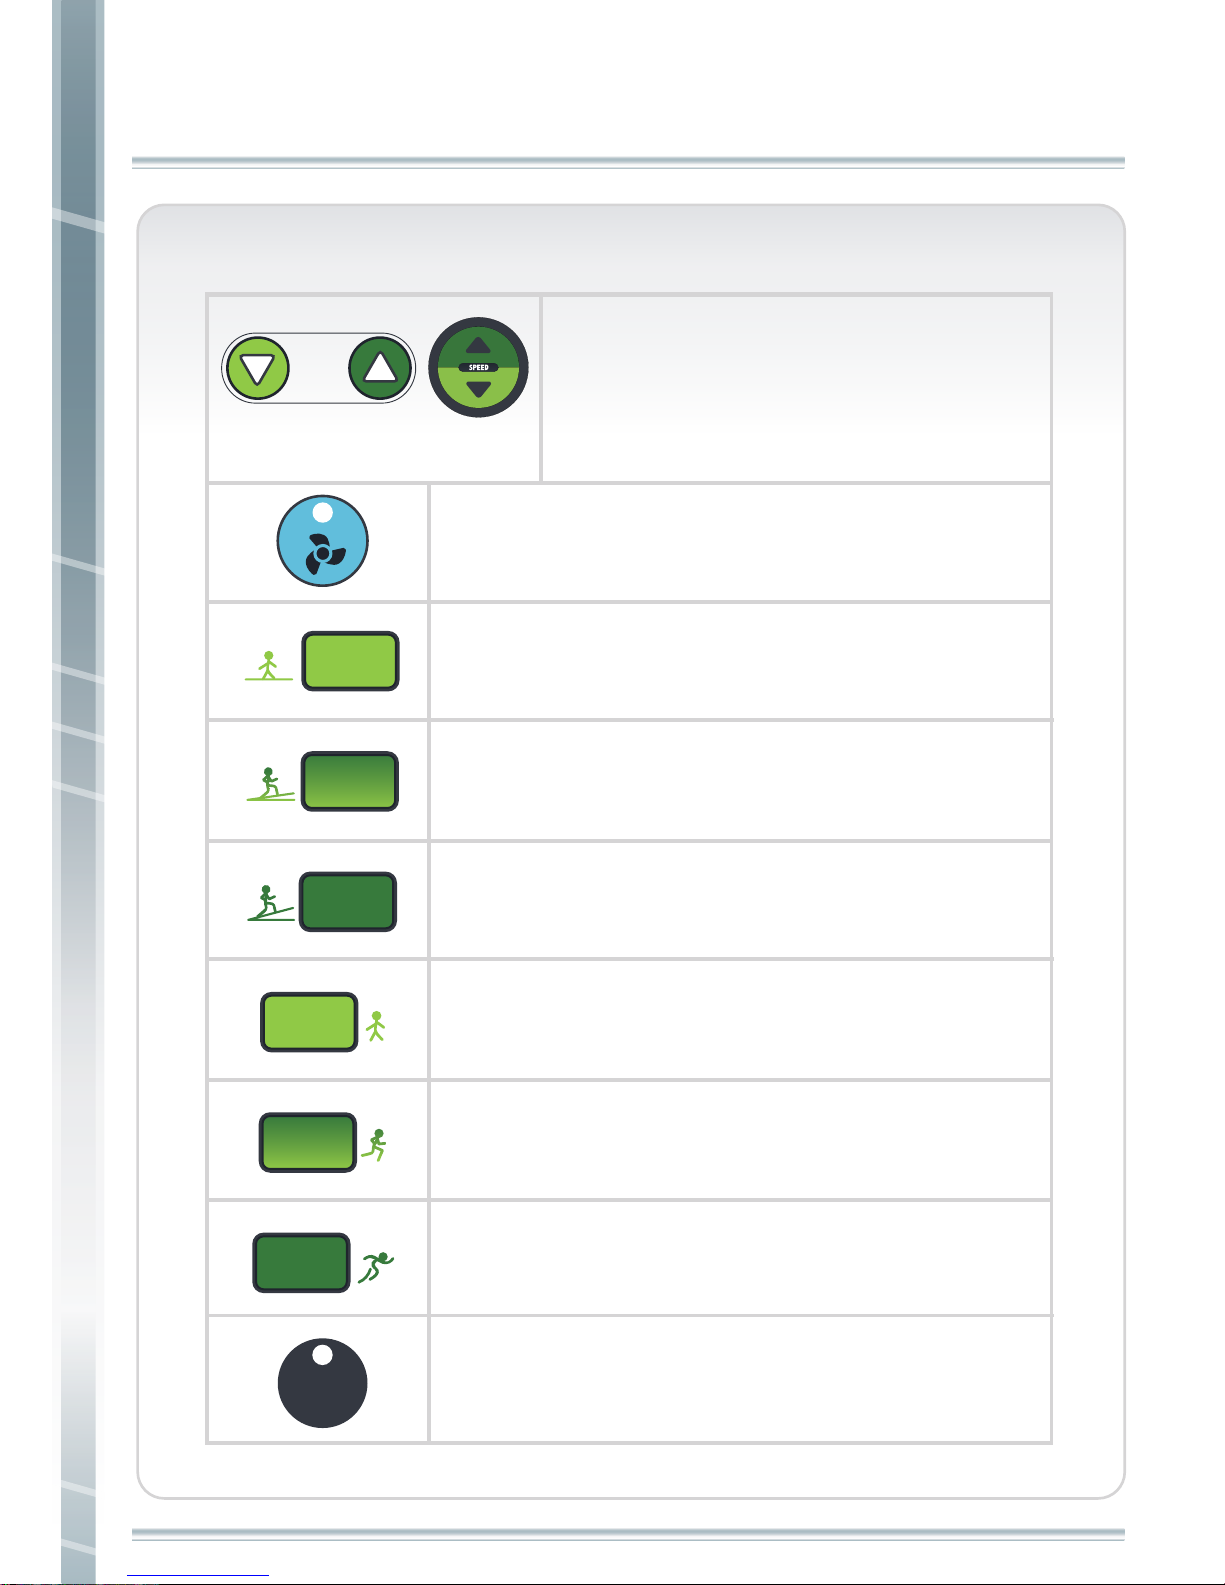
Elevation quick key for 0.
Elevation quick key. Level 8 for GEN mode and
Level 3 for SIL mode.
Elevation quick key. Level 15 for GEN mode and
Level 6 for SIL mode.
Speed quick key. 2.5 MPH for GEN mode and
1.5 MPH for SIL mode.
Speed quick key. 3.5 MPH for GEN mode and
2.5 MPH for SIL mode.
Speed quick key. 4.5 MPH for GEN mode and
3.5 MPH for SIL mode.
Adjust fan strength. There are three adjustments. off.
Low. and High. Fan can be used only when safety key
is attached.
SPEED
Adjust speed. Every press will decrease 0.1
mile.
Press and hole button to adjust in 1.0
increments.
LEVEL
RISE
ASCEND
RUN
JOG
WALK
CLASSIC
Choose CLASSIC exercise programs which include
CARDIO, FAT BURN, and INTERVAL.
OPERATING INSTRUCTIONS
Page 33
OPERATING INSTRUCTIONS
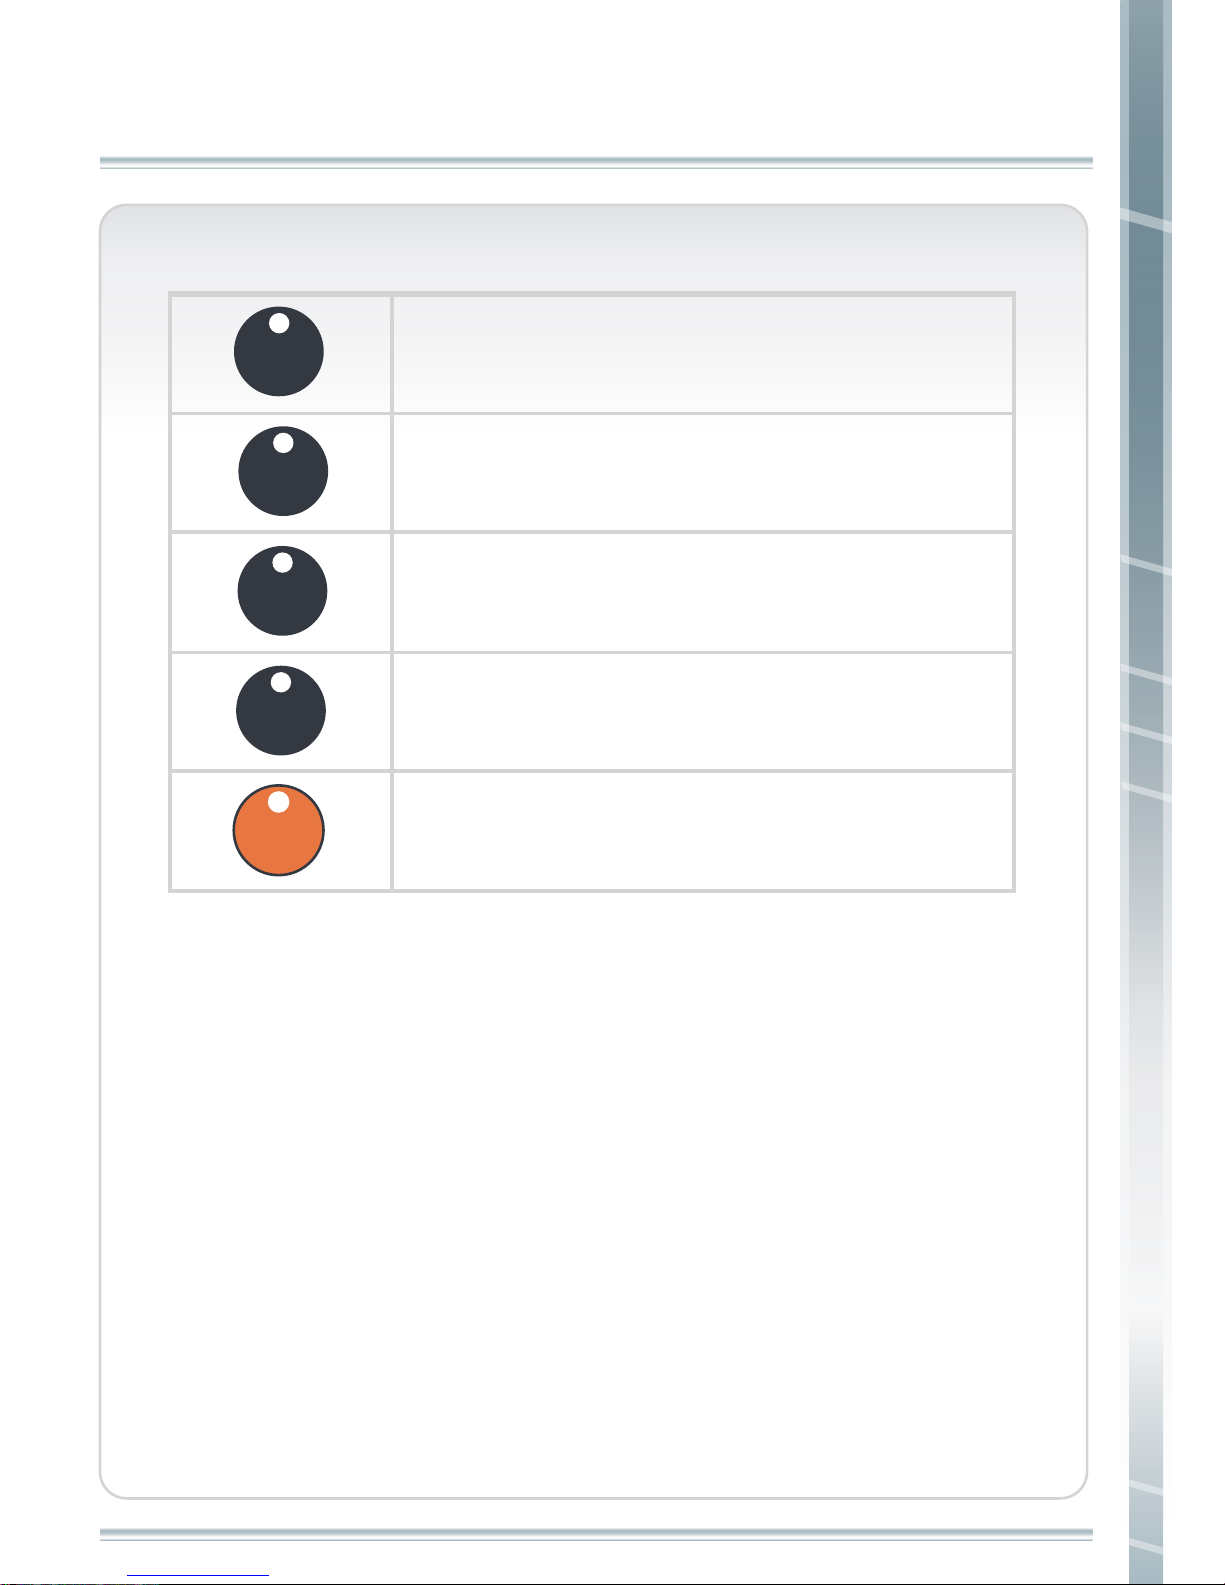
MANUAL program.
Choose GOAL exercise programs which include TIME,
DISTANCE and CALORIES.
Choose TRAINING exercise programs which include
GERKIN, USB, CUSTOM 1, CUSTOM 2 and
CUSTOM 3.
REVERSE program which belt runs backward.
(Only for PT10)
Choose Heart rate control exercise programs which
include TARGET, HILL, and INTERVAL.
H.R.C
MANUAL
GOAL
TRAINING
REVERSE
32
OPERATING INSTRUCTIONS
Page 34
OPERATING INSTRUCTIONS
33
SETTINGS
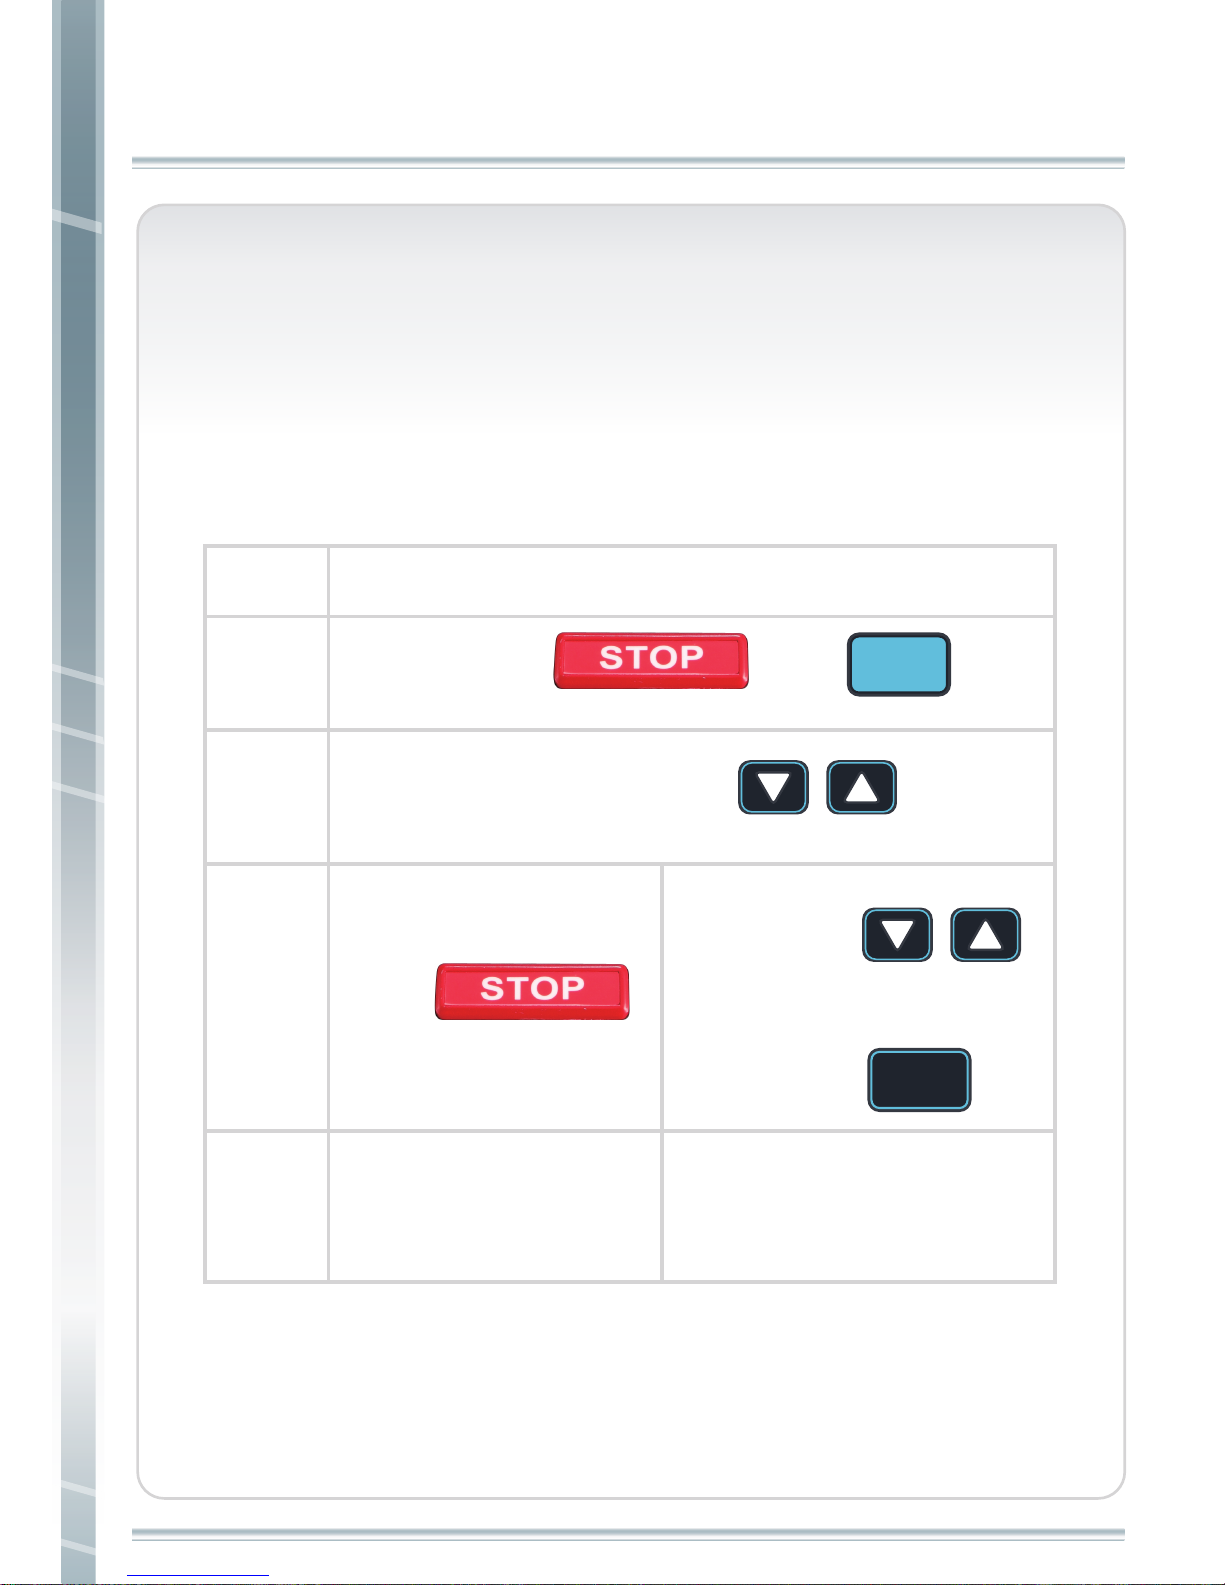
1. PT7 & PT10 are designed for general market(GEN mode) and
Rehad/Geriatric market(SIL mode). User can switch modes by
following steps.
step 1
step 2
step 3
step 4
step 5
Remove safety key.
Press and hold
“ ” and “ ” for
3+ seconds.
QUICK
START
Programs
There are different exercise programs, includes MANUAL,
CLASSIC, H.R.C, GOAL, TRAINING and REVERSE. Operations
are explained as follows.
Preplace safety key and press “ ” to
choose GEN or SIL mode.
SELECT
LEVEL
SELECT
LEVEL
Press “ ”
to go back exercise mode.
SELECT
LEVEL
SELECT
LEVEL
Keep pressing “ ”
to choose “MPH” or “KM”,
and then press“ ” .
ENTER
Light test scan, and then it
will go back to exercise mode
directly.
OPERATING INSTRUCTIONS
Page 35
OPERATING INSTRUCTIONS
34
MANUAL
Manual
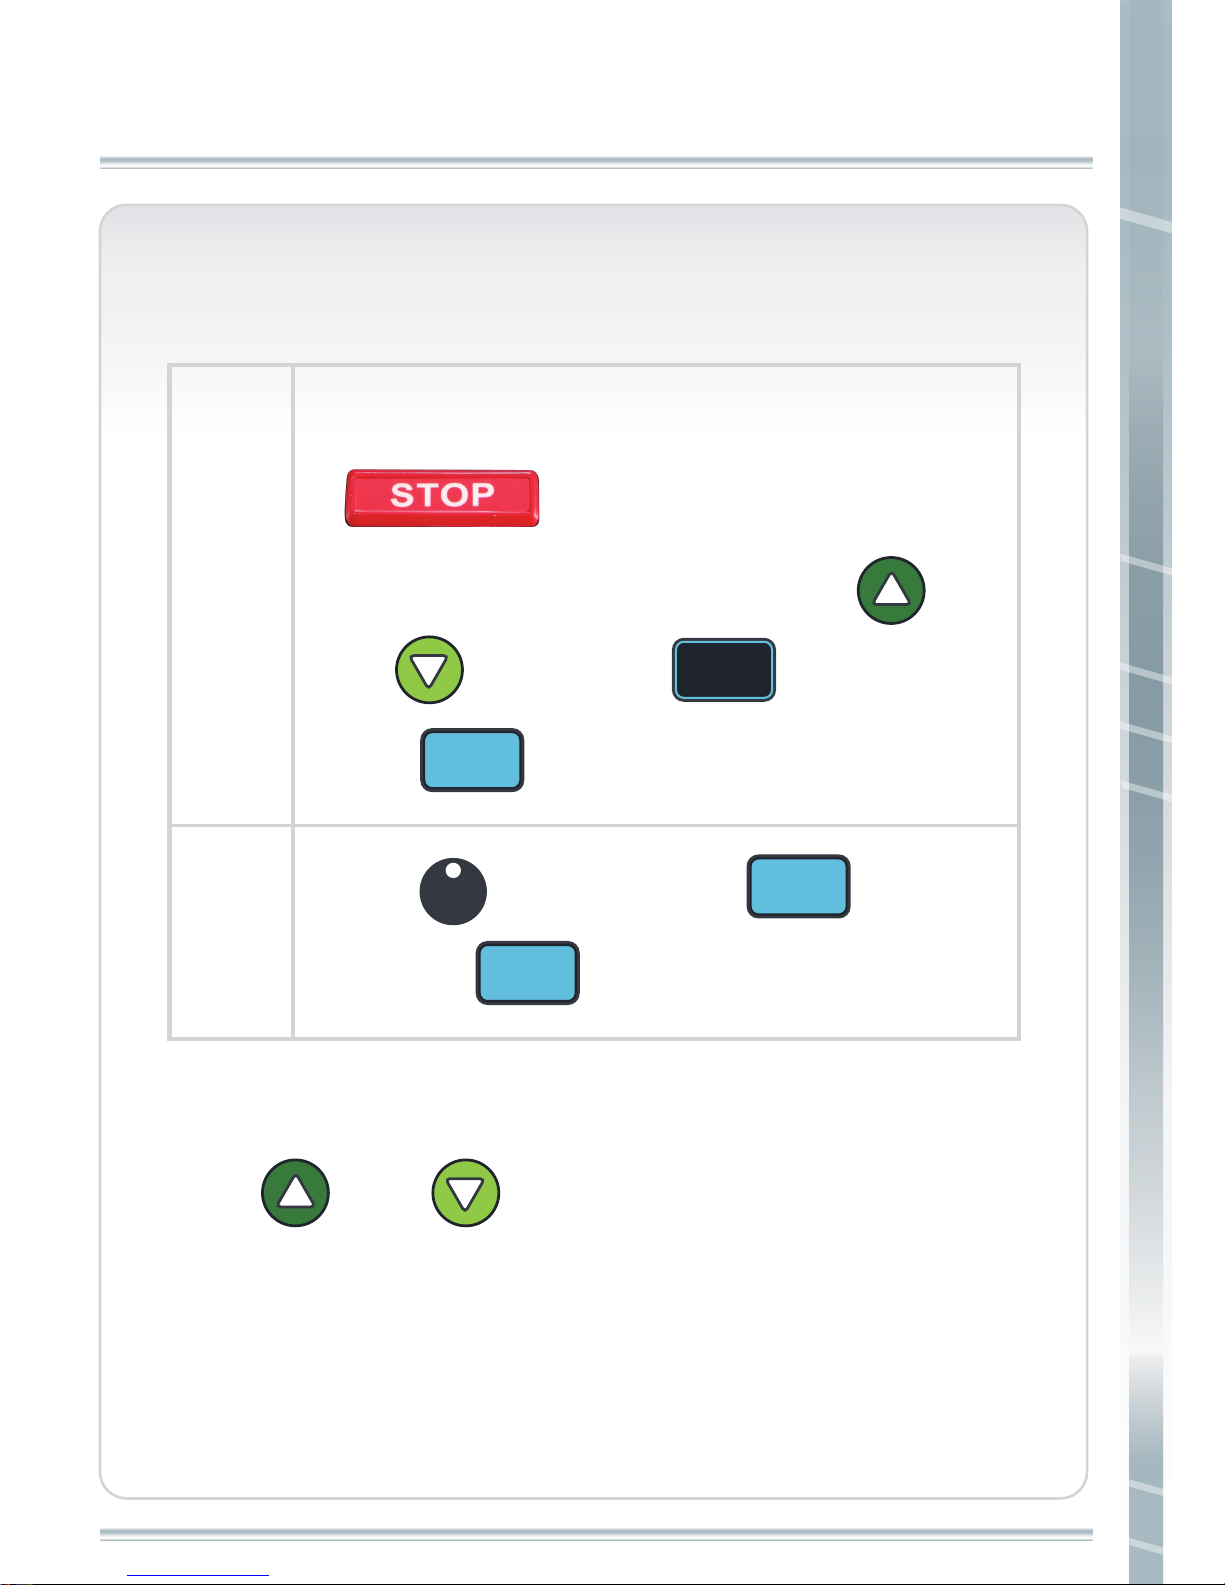
Note: During workout, user can change speed and incline by
using “ ” and “ ” .
step 1
step 2
Press “ ”, and then press “ ” .
Or press “ ” to begin.
Turn on the power, Steelflex PT10 scrolls. Press
“
”, the matrix window shows
154LBS . User can adjust weight by any “ ”
and “ ” , then press “ ” or
press “ ” to begin.
QUICK
START
QUICK
START
QUICK
START
ENTER
MANUAL
Page 36
35
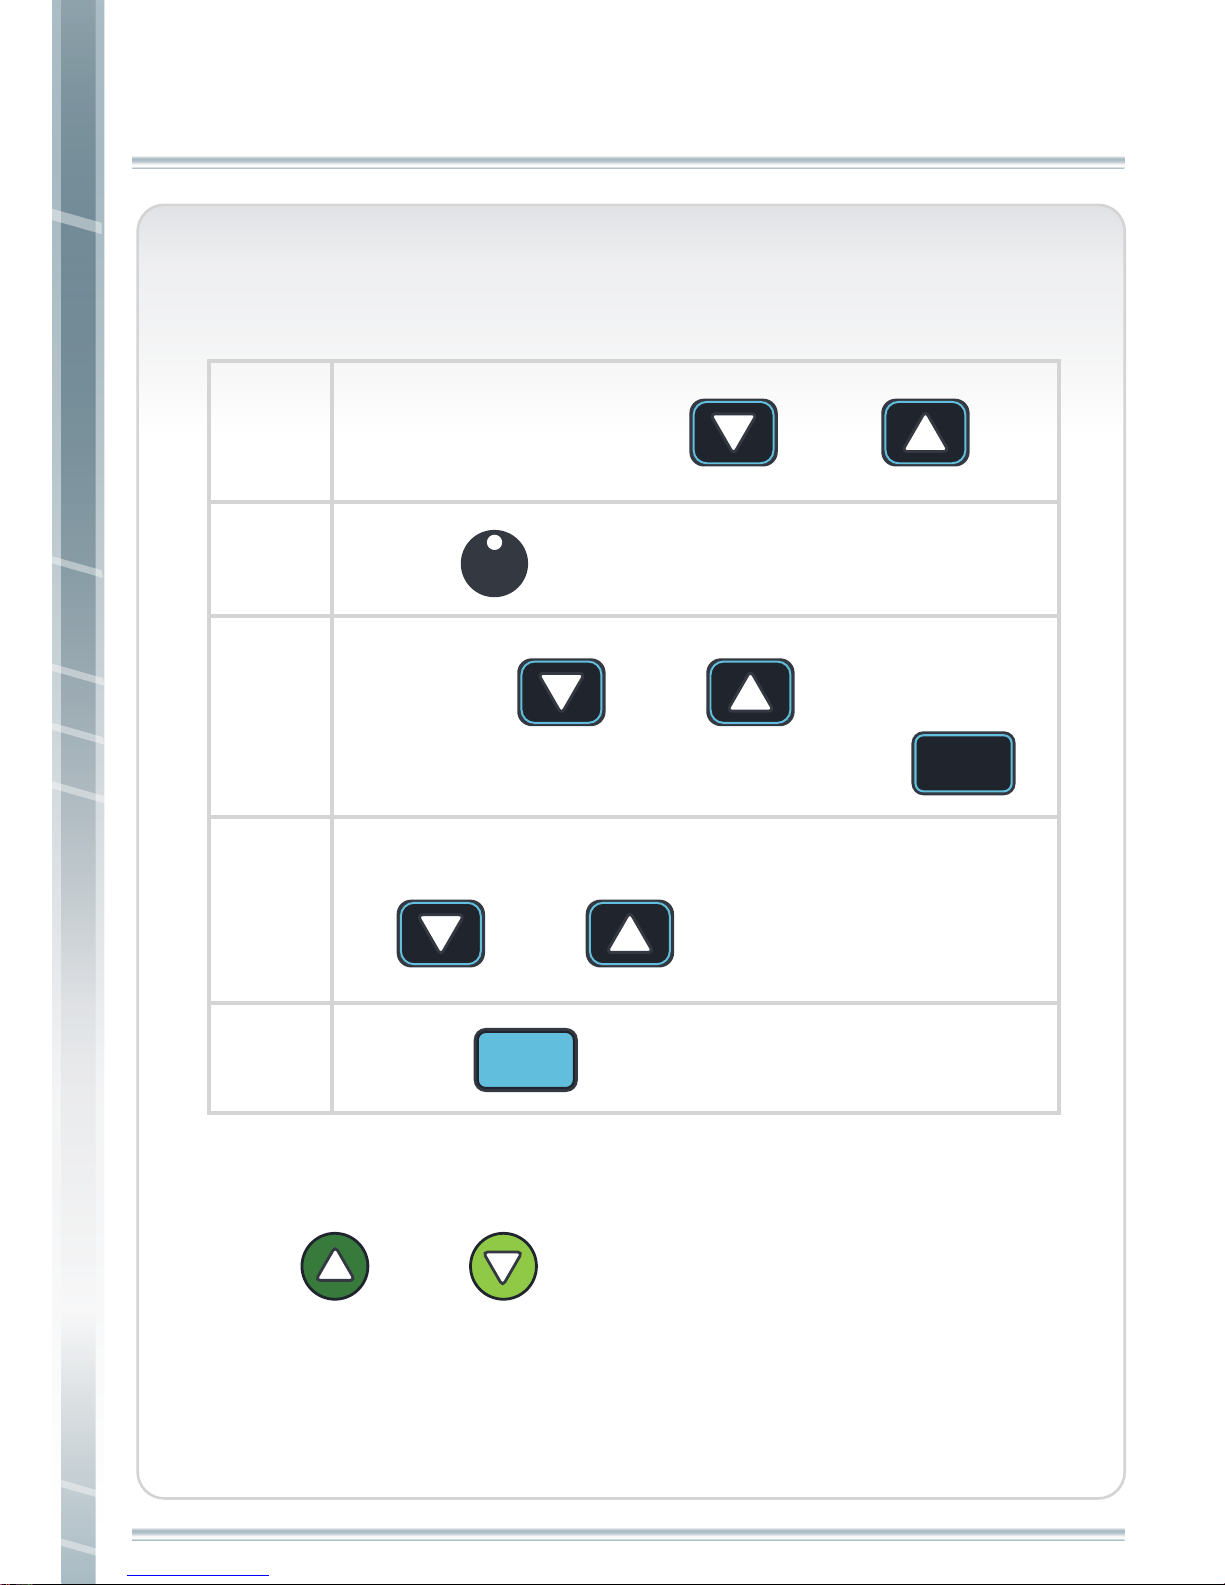
GOAL
Note: During workout, user can change speed and incline by
using “ ” and “ ” .
step 1
step 2
step 3
step 4
step 5
Pressing “ ” or “ ” to set TIME,
DISTANCE or CALORIES and then press “ ” .
Press “ ” .
Set weight by pressing “ ” or “ ” .
Press “ ” .
QUICK
START
ENTER
GOAL
SELECT
LEVEL
SELECT
LEVEL
SELECT
LEVEL
SELECT
LEVEL
SELECT
LEVEL
SELECT
LEVEL
Adjust workout time, distance or calories by press
“ ” or “ ” .
GOAL
OPERATING INSTRUCTIONS
Page 37
36
OPERATING INSTRUCTIONS
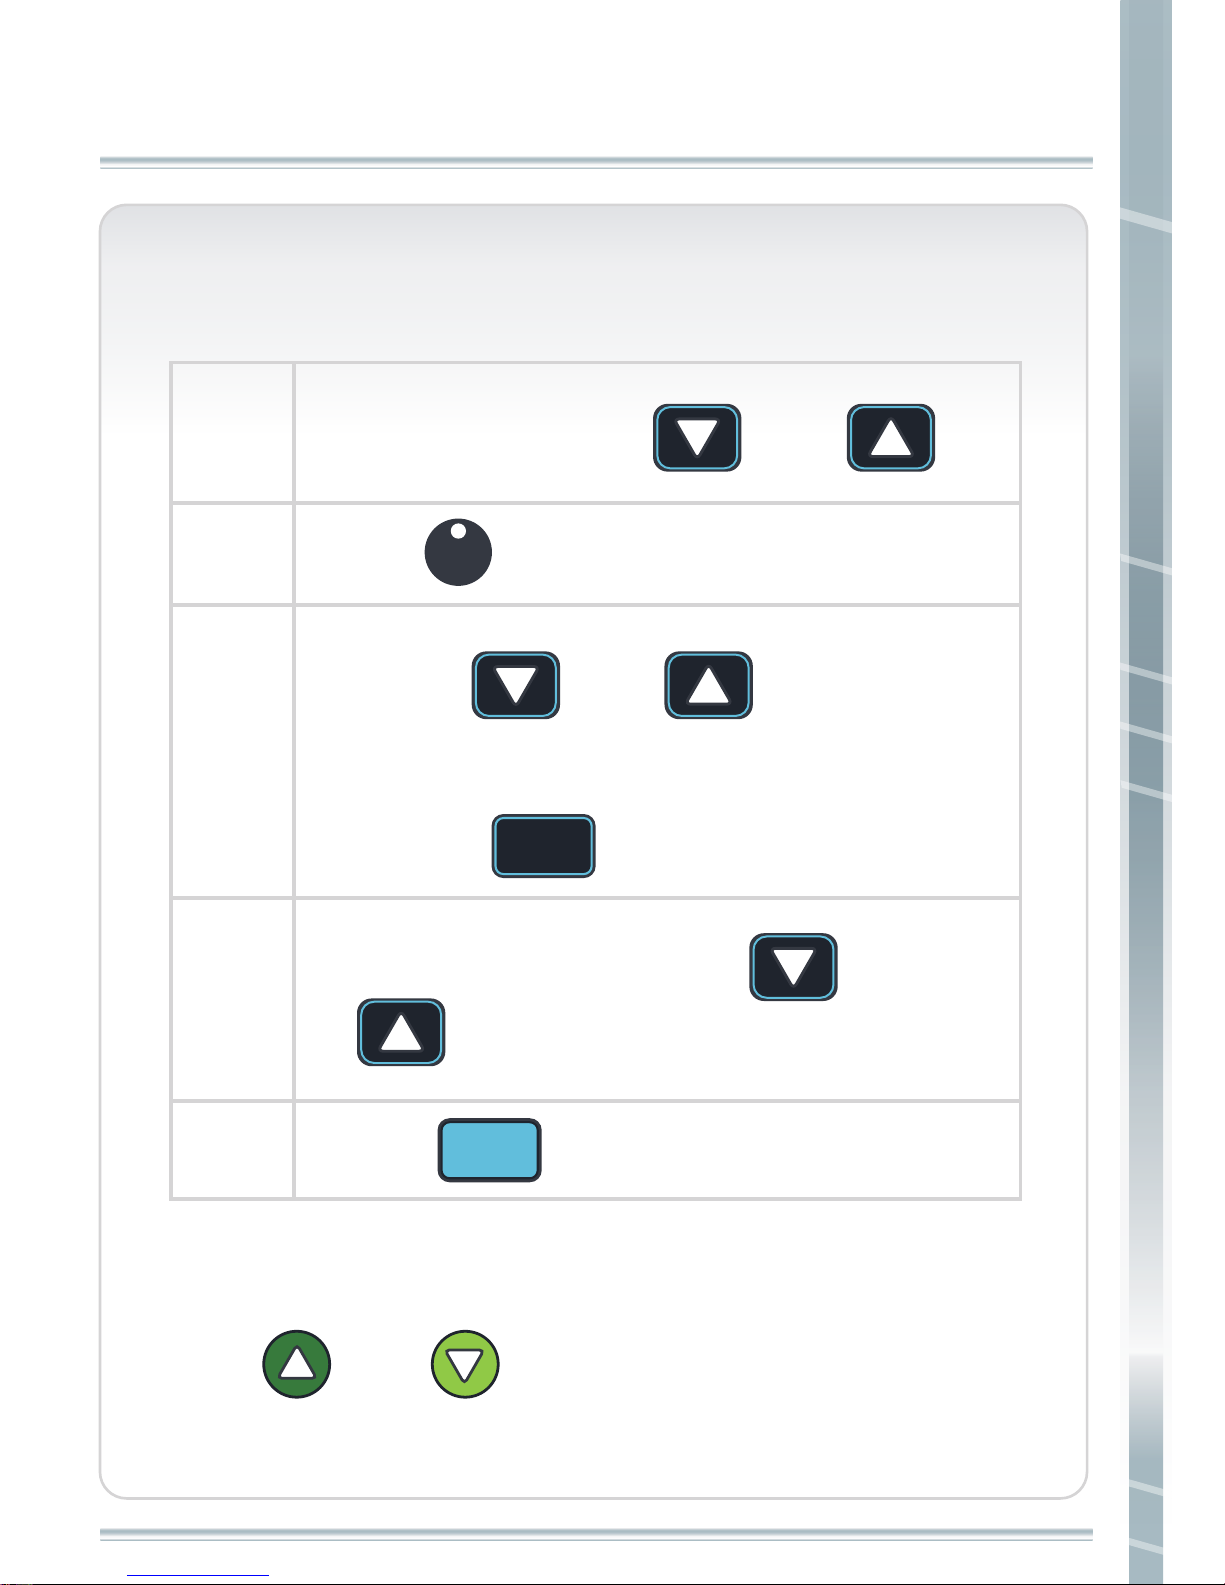
CLASSIC
CLASSIC
Note: During workout, user can change speed and incline by
using “ ” and “ ” .
Press “ ” .
Press “ ” .
QUICK
START
CLASSIC
Pressing “ ” or “ ” to choose
CARDIO, FAT BURN or INTERVAL program and
then press “ ” .
ENTER
SELECT
LEVEL
SELECT
LEVEL
SELECT
LEVEL
SELECT
LEVEL
Adjust workout time by press “ ” or
“ ” .
step 1
step 2
step 3
step 4
step 5
Set weight by pressing “ ” or “ ” .
SELECT
LEVEL
SELECT
LEVEL
Page 38
37
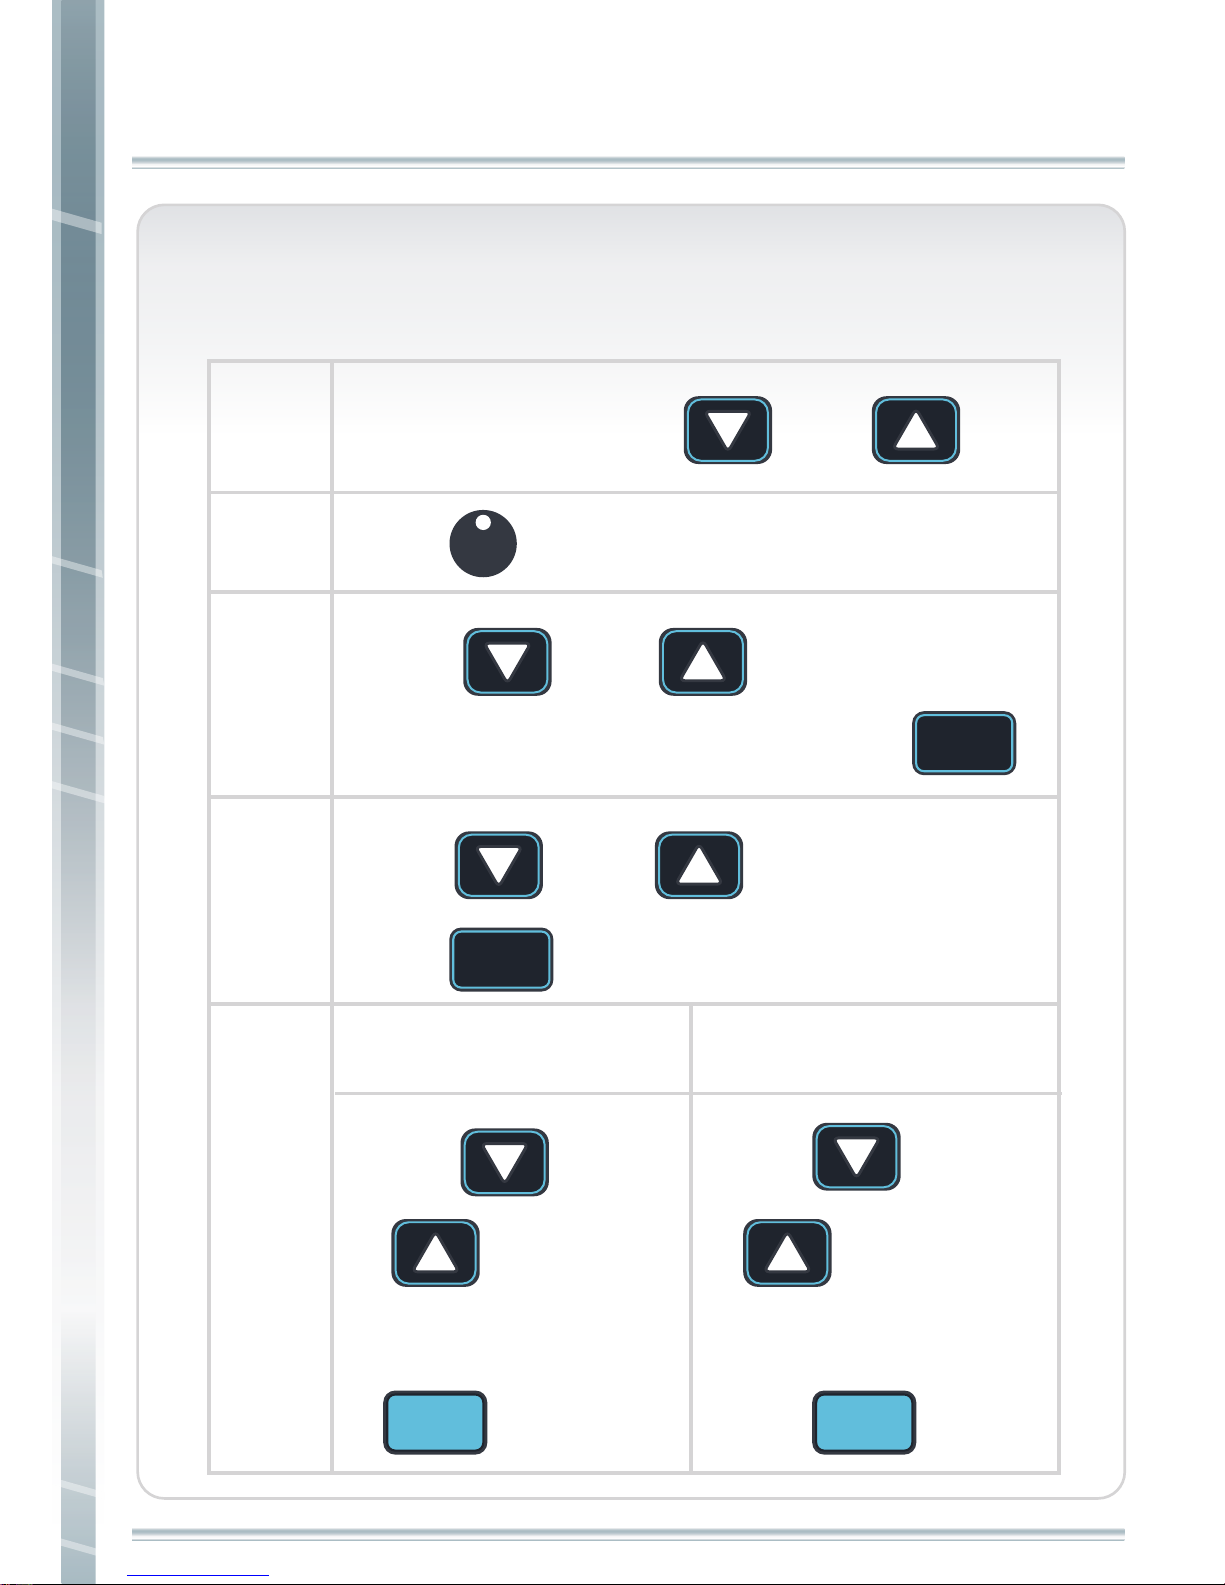
H.R.C.
step 2
step 1
step 3
step 4
step 5
Press “ ” or “ ” to choose TARGET,
HILL or INTERVAL program and then press “ ”.
Press “ ” .
QUICK
START
QUICK
START
ENTER
ENTER
H.R.C
SELECT
LEVEL
SELECT
LEVEL
SELECT
LEVEL
SELECT
LEVEL
SELECT
LEVEL
SELECT
LEVEL
SELECT
LEVEL
SELECT
LEVEL
Choose TARGET program
Choose HILL or INTERVAL
program
Press “ ” or
“ ” to set MAX
H.R.% and then press
“ ” .
Press “ ” or
“ ” to set
workout time, and then
press “ ” .
Press “ ” or “ ” to set AGE and then
press “ ”.
Set weight by pressing “ ” or “ ”.
SELECT
LEVEL
SELECT
LEVEL
H.R.C.
OPERATING INSTRUCTIONS
Page 39
38
OPERATING INSTRUCTIONS
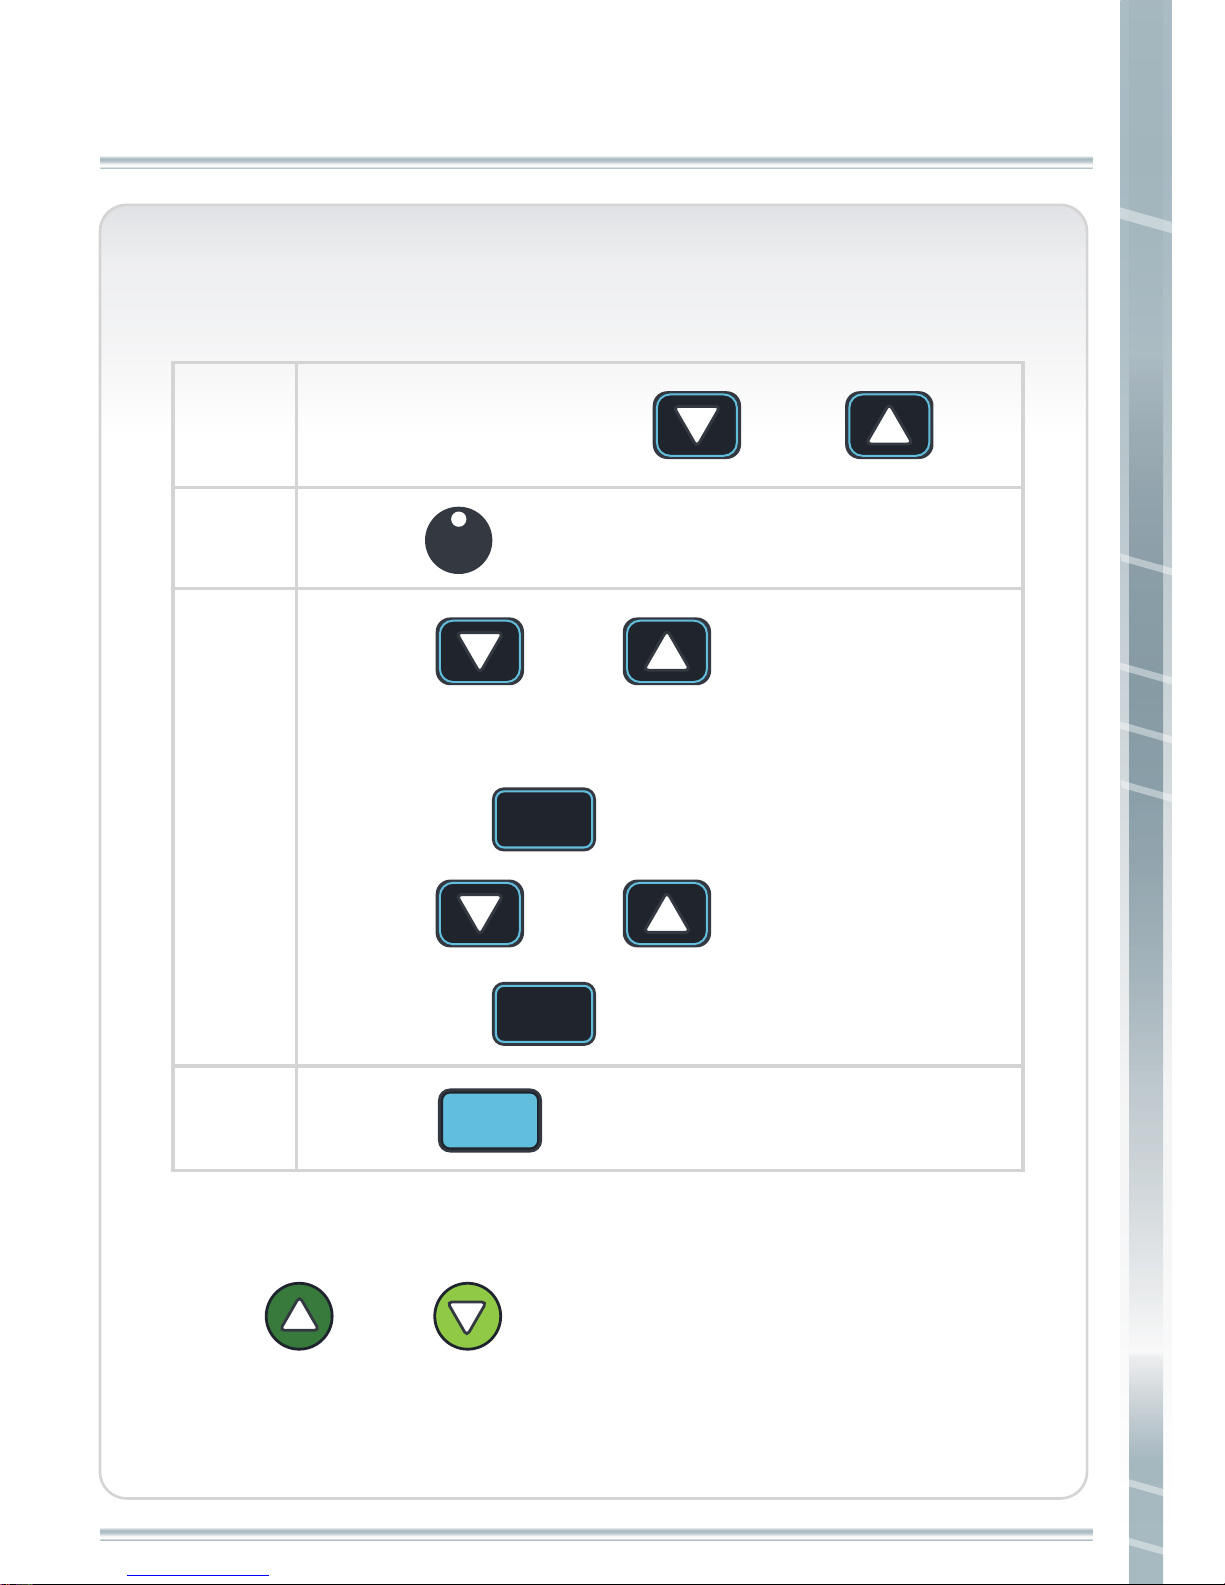
TRAINING
TRAINING
Note: During workout, user can change speed and incline by
using “ ” and “ ” .
step 2
step 3
step 4
Press “ ” or “ ” to choose GERKIN,
USB, CUSTOM1, CUSTOM 2 or CUSTOM 3 and
then press “ ”.
Press “ ” or “ ” to change time, and
then press “ ”.
Press “ ” .
Press “ ” .
QUICK
START
ENTER
ENTER
TRAINING
SELECT
LEVEL
SELECT
LEVEL
SELECT
LEVEL
SELECT
LEVEL
step 1
Set weight by pressing “ ” or “ ”.
SELECT
LEVEL
SELECT
LEVEL
Page 40
39
REVERSE ( Only for PT10 )
step 2
step 1
step 3
Press “ ” .
Press “ ” .
QUICK
START
Note:
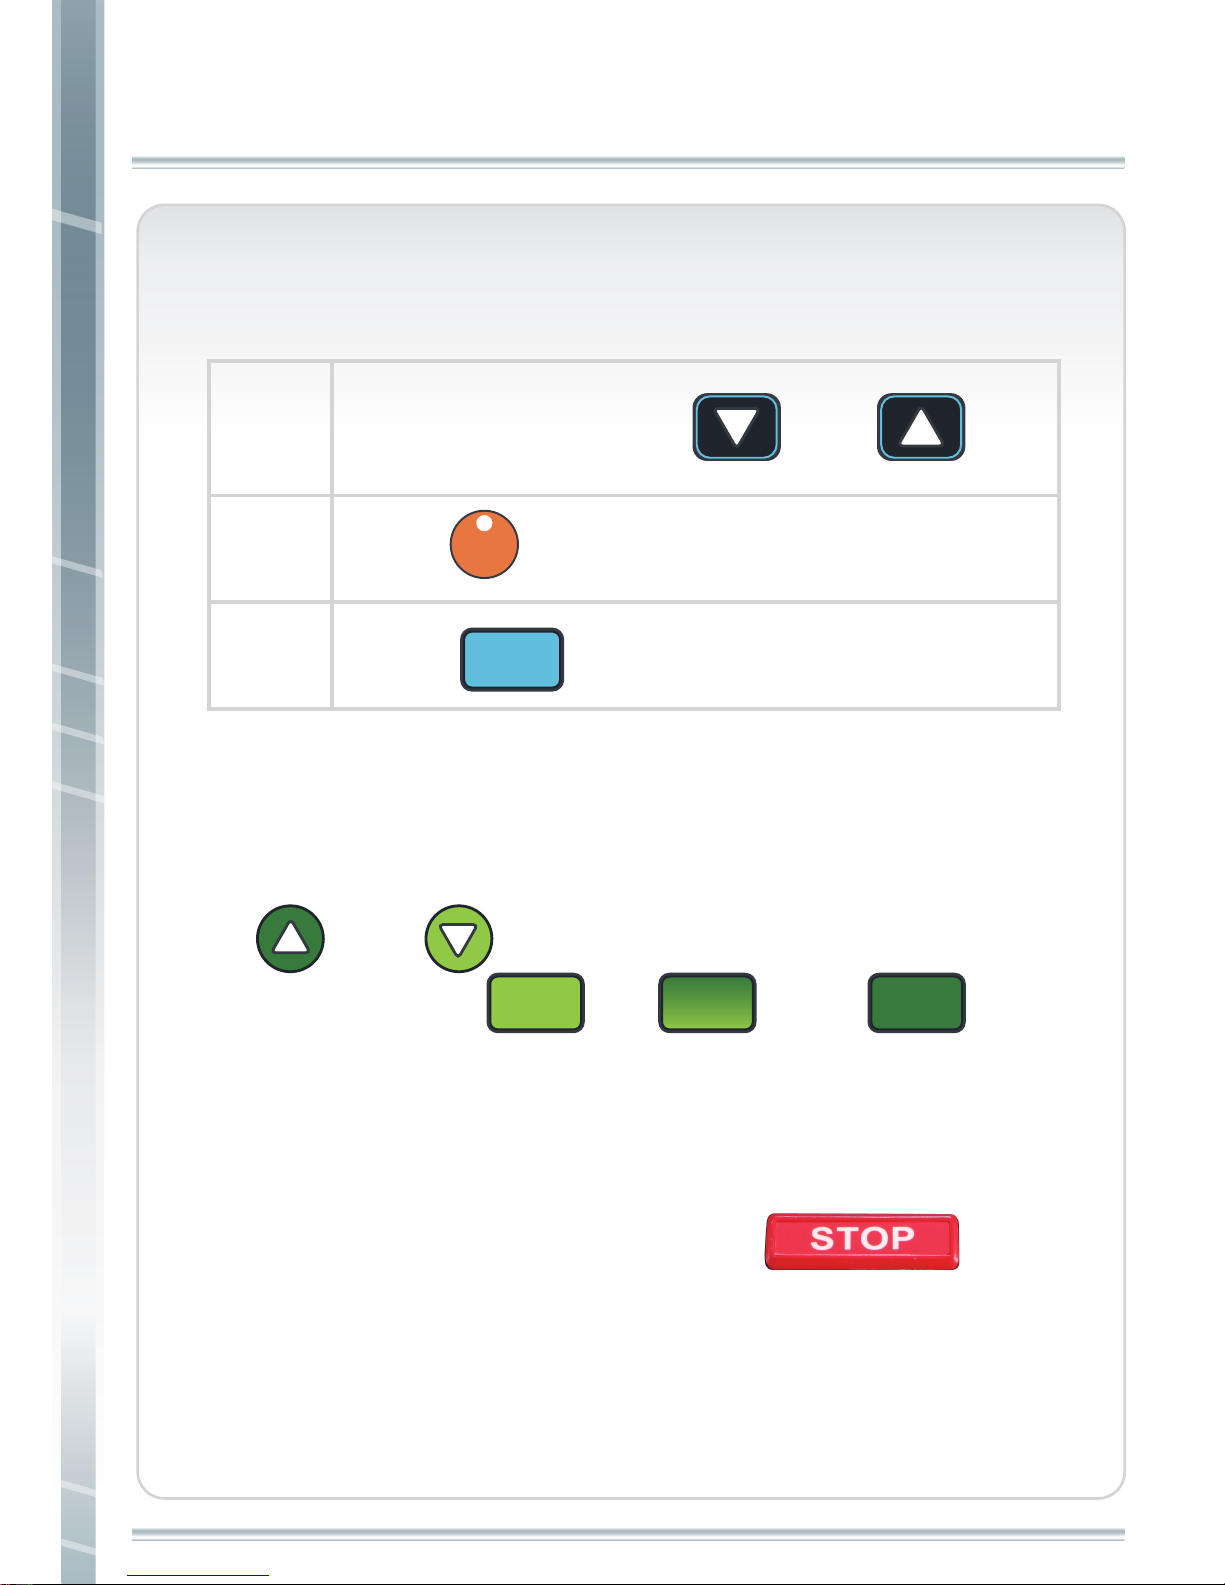
1. Under REVERSE program, max. speed is 3 MPH.
2. When exercising, user can change speed and incline by pressing
“ ” and “ ” .
3. When exercising,“ ” , “ ” and “ ” speed
quick key are locked.
User can not change speed by pressing these three buttons.
4. When REVERSE program finishes, if user wants to choose other
program, user have to press and hold “ ” to
back to standby mode.
RUN
JOG
WALK
Set weight by pressing “ ” or “ ”.
SELECT
LEVEL
SELECT
LEVEL
REVERSE
OPERATING INSTRUCTIONS
REVERSE
Page 41
40
OPERATING INSTRUCTIONS
ERROR CODE
1. When pressing “ ” , speed and elevation decrease to 0
slowly.
2. When pressing “ ”, speed decrease to 0 MPH,
but elevation will not change.
3. All exercise information will be kept for 5 minutes after
exercising. After 5 minutes, it will turn to standby mode.
4. Under standby mode, if no operation in 5 minutes, it will turn
to sleep mode which turns off display. Press any button to
leave sleep mode.
ERROR CODE
1. When the display shows E1, indicates Drive Motor Error.
2. When the display shows E6, indicates an elevation motor signal
error.
3. When the display shows E7, indicates elevation moto error.
4. When the display shows USB ERR, USB is not detected.
5. When the display shows USB DATA ERR, it means USB format
mistake. Please re-check if data format is correct.
COOL
DOWN
Page 42
MAINTENANCE
41
MAINTENANCE
All Steelflex series products are designed for heavy usage environment.
To keep your Steelflex product in good condition, we strongly
recommend some preventative maintenance tips.
Cleaning
When cleaning the exterior of the unit, a non-abrasive cleanser and
soft cotton cloth are strongly recommended. At no time should cleaner
be applied directly to any part of the equipment. Instead, place the
non-abrasive cleaning solution on a soft cloth and wipe down the unit.
Clean the console and all exterior surface regularly.
Vacuum running belt regularly to keep debris from accumulating
Inspect exterior parts regularly for wear and tear, especially the
running belt and deck
Inspect area under treadmill and vacuum regularly.
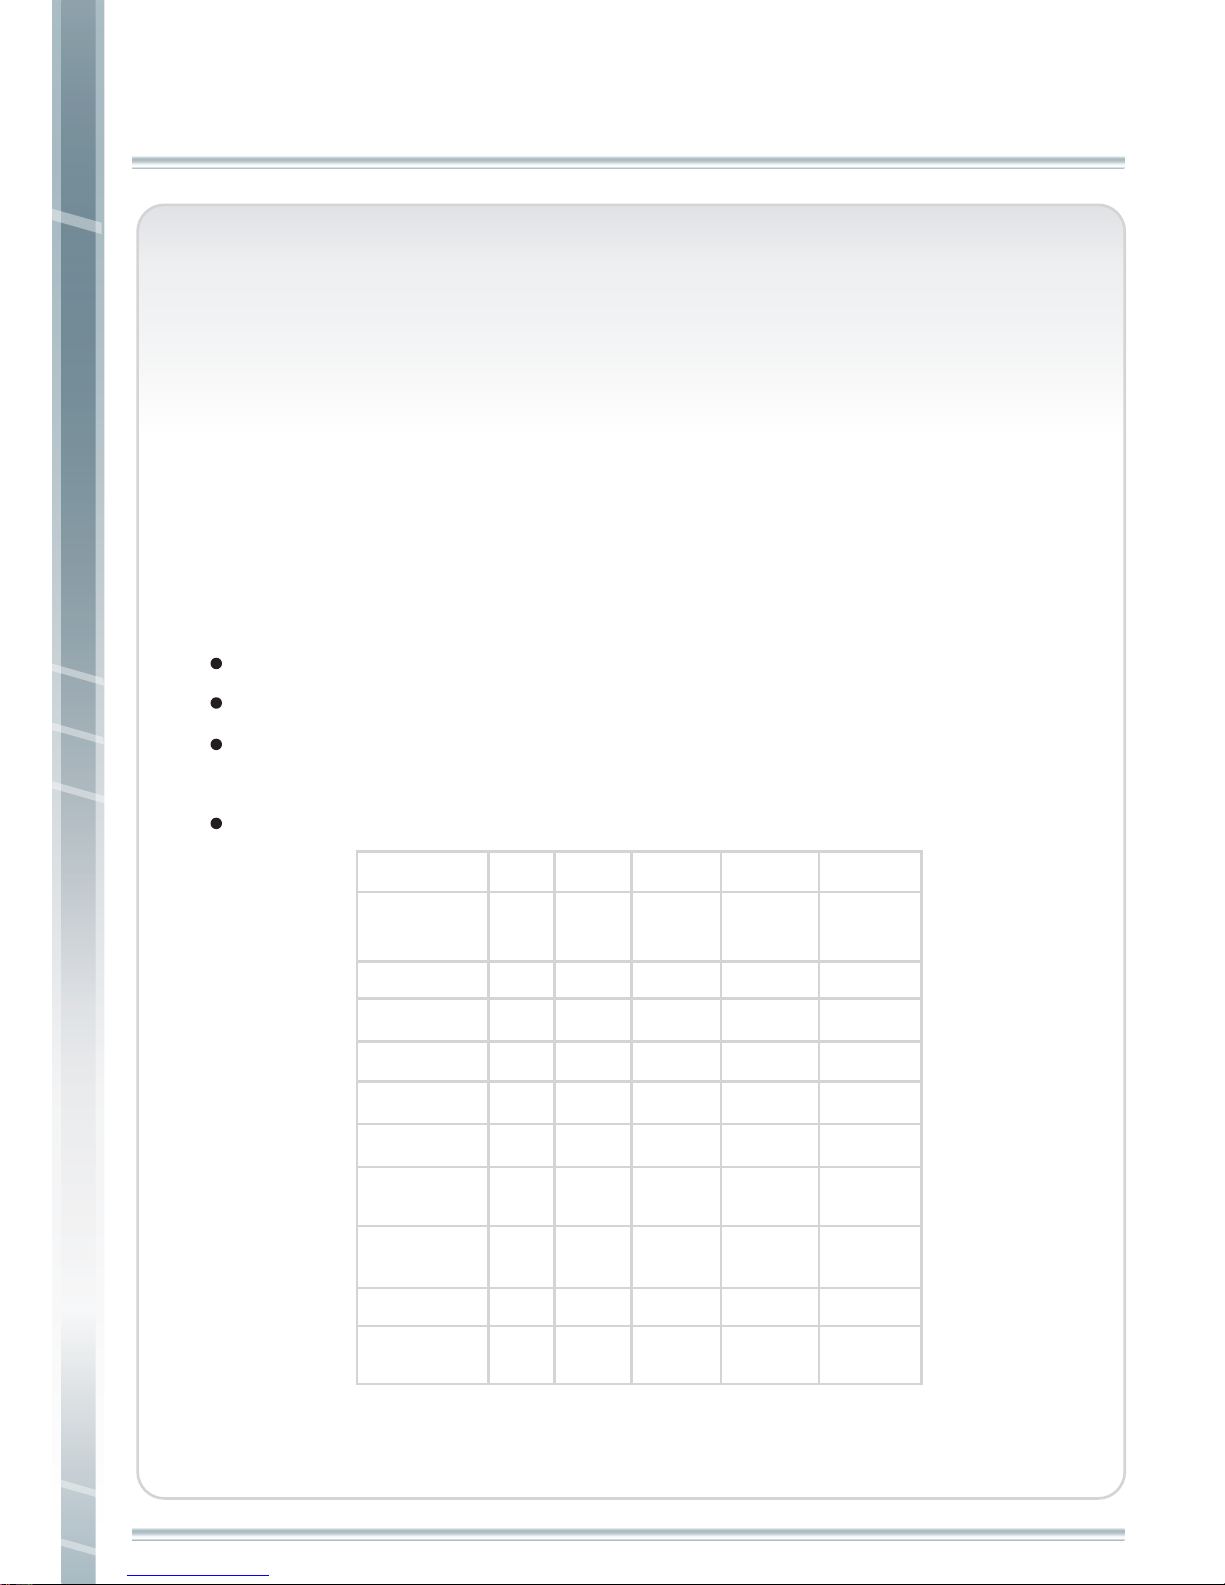
Item
Console
Mounting Bolt
Frame
Console
Safety Stop
Power Cord
Run Belt Top
Run Belt
Tension
Rear
Adjustable foot
V Belt
Daily Weekly Monthly Quarterly Bi-Annual
Clean
Clean
Clean
Inspect
Inspect
Inspect
Inspect
Inspect
Test
Clean
(Vacuum)
Adjust
Adjust
Motor
Pulley
WARNING
Always disconnect power before cleaning or working on treadmill.
Page 43

WARRANTY CONDITIONS
1. The warranty applies only to the original owner, and covers the cost
of parts repair or replacement and does not include freight charges.
Proof of purchase must be demonstrated.
2. The warranty applies only to the original owner and is non transferable.
3. If you are in US, please contact your local dealer or FMI for details of
warranty. If you are in other countires, please contact your local dealer
or JC1 for details of warranty .
4. Labor coverage is provided only by authorized dealer or by factory
authorization.
5. Any reimbursement for travel outside of the dealers' normal service or
coverage area will be the responsibility of the customer.
6. Warranty does not cover failure due to improper assembly, installation
or use.
7. This warranty does not cover customer instruction, installation, set up
or adjustment. User is responsible for reasonable and necessary maintenance.
8. The warranty will not be extended to any product whose serial number
has been removed, altered, or defaced.
9. This warranty does not cover damage or equipment failure caused by,
or resulting from accident, misuse, abuse, improper assembly or
installation, un-authorized modification, or failure to provide reasonable
and necessary care as outlined in the owner's manual.
10. If you are in US, this warranty becomes VALID ONLY when are
warranty registration form included, is completely filled in, signed by
the original owner and received by FMI WITHIN 30 DAYS of the
purchaser’s receipt of the product. If your are outside of the US,
please contact your local dealer.
42
WARRANTY
WARRANTY
Page 44
 Loading...