

Steelcraft Automotive 83300 User Manual
INSTALLATION INSTRUCTIONS
PART NUMBER 83300/83307
07 Toyota FJ Cruiser Rear Bumper Guard
PARTS LIST:
1 Rear Bumper Guard 4 10mm nuts
1 Left Mounting Bracket 4 10mm Lock Washers
1 Right Mounting Bracket 2 11mm Plastic Retainers
2 12-1.75mmx45mm Button Bolt Plates 2 12mm Lock Washers
2 12mm I.D. x 43mm O.D. x 4.5mm Thick Washers 4 10-1.5mmX40mm Hex Bolts
2 12mm Nuts 8 10mm I.D x 30mm O.D x 2.5 Thick Washers
PROCEDURE:
1. REMOVE CONTENTS FROM BOX, READ INSTRUCTIONS CAREFULLY AND VERIFY ALL PARTS
ARE PRESENT. . NOTE: Right side of vehicle will be your right hand when sitting inside your
vehicle, and not standing in front of your vehicle.
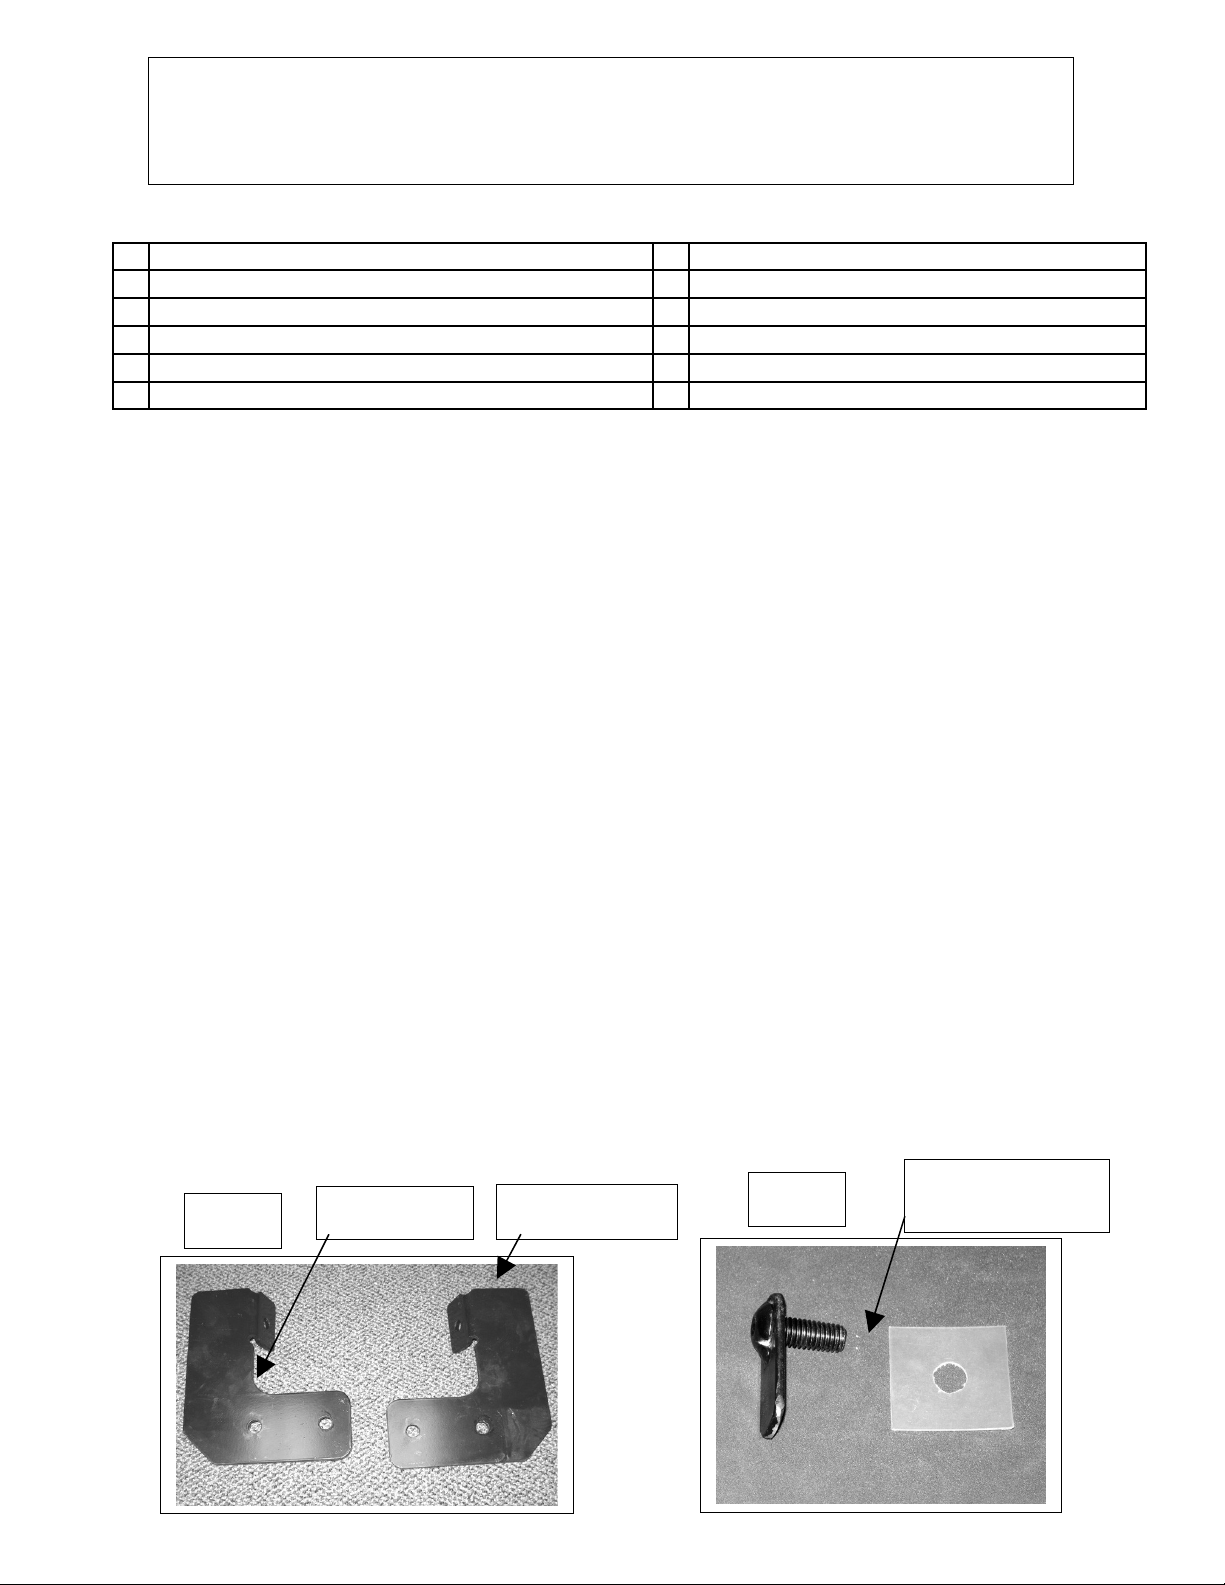
2. Locate and set aside the two brackets, and hardware. (Fig 1) NOTE: The front two holes on the pinch weld
will be the mounting location for the front bracket. In order to determine the rear mounting location for the
rear bracket, measure the distance between the inserts on the Side Bar, then measure the same distance
from the center front slotted hole towards the rear of the vehicle and that will be the rear bracket mounting
location.
3. Locate the two 12mm X 40mm Button head Bolt plates and the two 1 ½” square plastic bolt plate retaining
pieces (Fig 2). Start the plastic retainers onto the threads and turn down about ¼”.
4. Insert one bolt plate into the slotted hole on each side of the rear frame cross member. (Fig 3) Holding the
exposed thread at the end of the bolt, spin the plastic retainer all the way down to the frame, this will keep
the bolt plate from falling into the frame channel (Fig 4).
5. Locate the left side mounting bracket and place it over the threads of the bolt plate and secure in place
with a 12mm Fender washer, lock washer and nut. Tighten down finger tight. Repeat this step on opposite
side again leaving nut finger tight. (Fig 5)
6. Seating on the ground with the bumper in your lap and rest of hardware close at hand, turn bumper guard
brackets pointing up and raise into place, then put a bolt with washer into inner most holes on each side.
Put a washer, lock washer and nut onto each of the two bolts and finger tighten down. Bumper should be
hanging as in (Fig 6). Now rotate the bumper guard up and put in the two outer bolts, washers, lock
washers and nuts.
7. Snug up these four bumper guard to bracket bolts, but do not tighten them up. Now tighten down the two
12mm nuts that are holding the mounting brackets to the frame.
8. Adjust the fitment of the bumper guard on the vehicle and tighten the four bolts fastening the bumper
guard to the mounting brackets (Fig 7 & 8).
9. Double check all nuts and bolts for tightness and you are done.
10. Do periodic inspections to the installation to make sure that all hardware is secure and tight.
Fig 1
Left side
Page 1 of 2 3/5/07 (DL)
Right side
Fig 2
Bolt Plate and
retaining piece
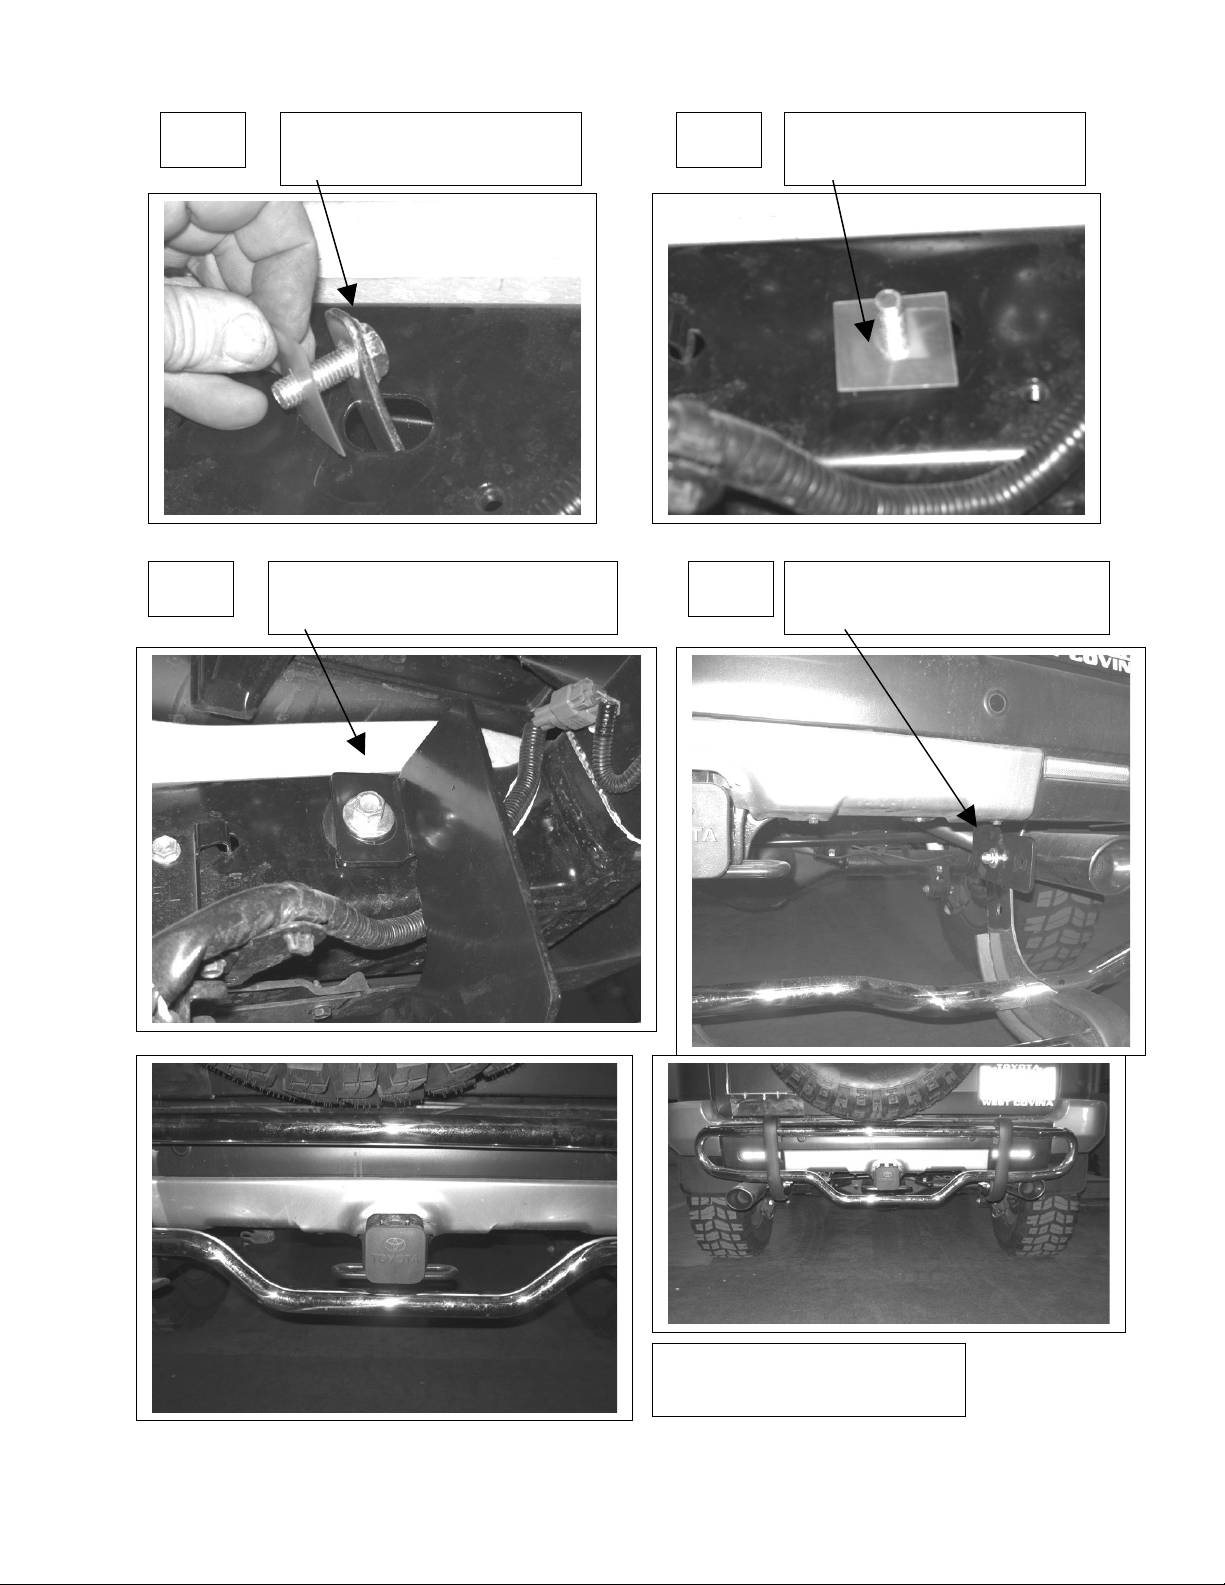
Fig 3 Fig 4Bolt Plate into Chassis
Cross member
Bolt Plate in Chassis with
retainer tightened
Left Side Bracket loosely
mounted in place
Fig 6Fig 5
Bumper Guard hanging on
two rear bolts
Fig 7 & 8 Finished install
of FJ Rear Bumper Guard
Page 2 of 2 3/5/07 (DL)
 Loading...