

Factory
Support
INSTALLATION INSTRUCTIONS
TAILLIGHT GUARD PART#
02-05 FORD EXPLORER
Step One: Locate hardware and check contents with hardware listed below.
DESCRIPTION QTY
Taillight Guards (Left & Right) 2
Support Brackets 2
M4 x 16mm Phillips Machine Screws 2
M4 Flat Washers 2
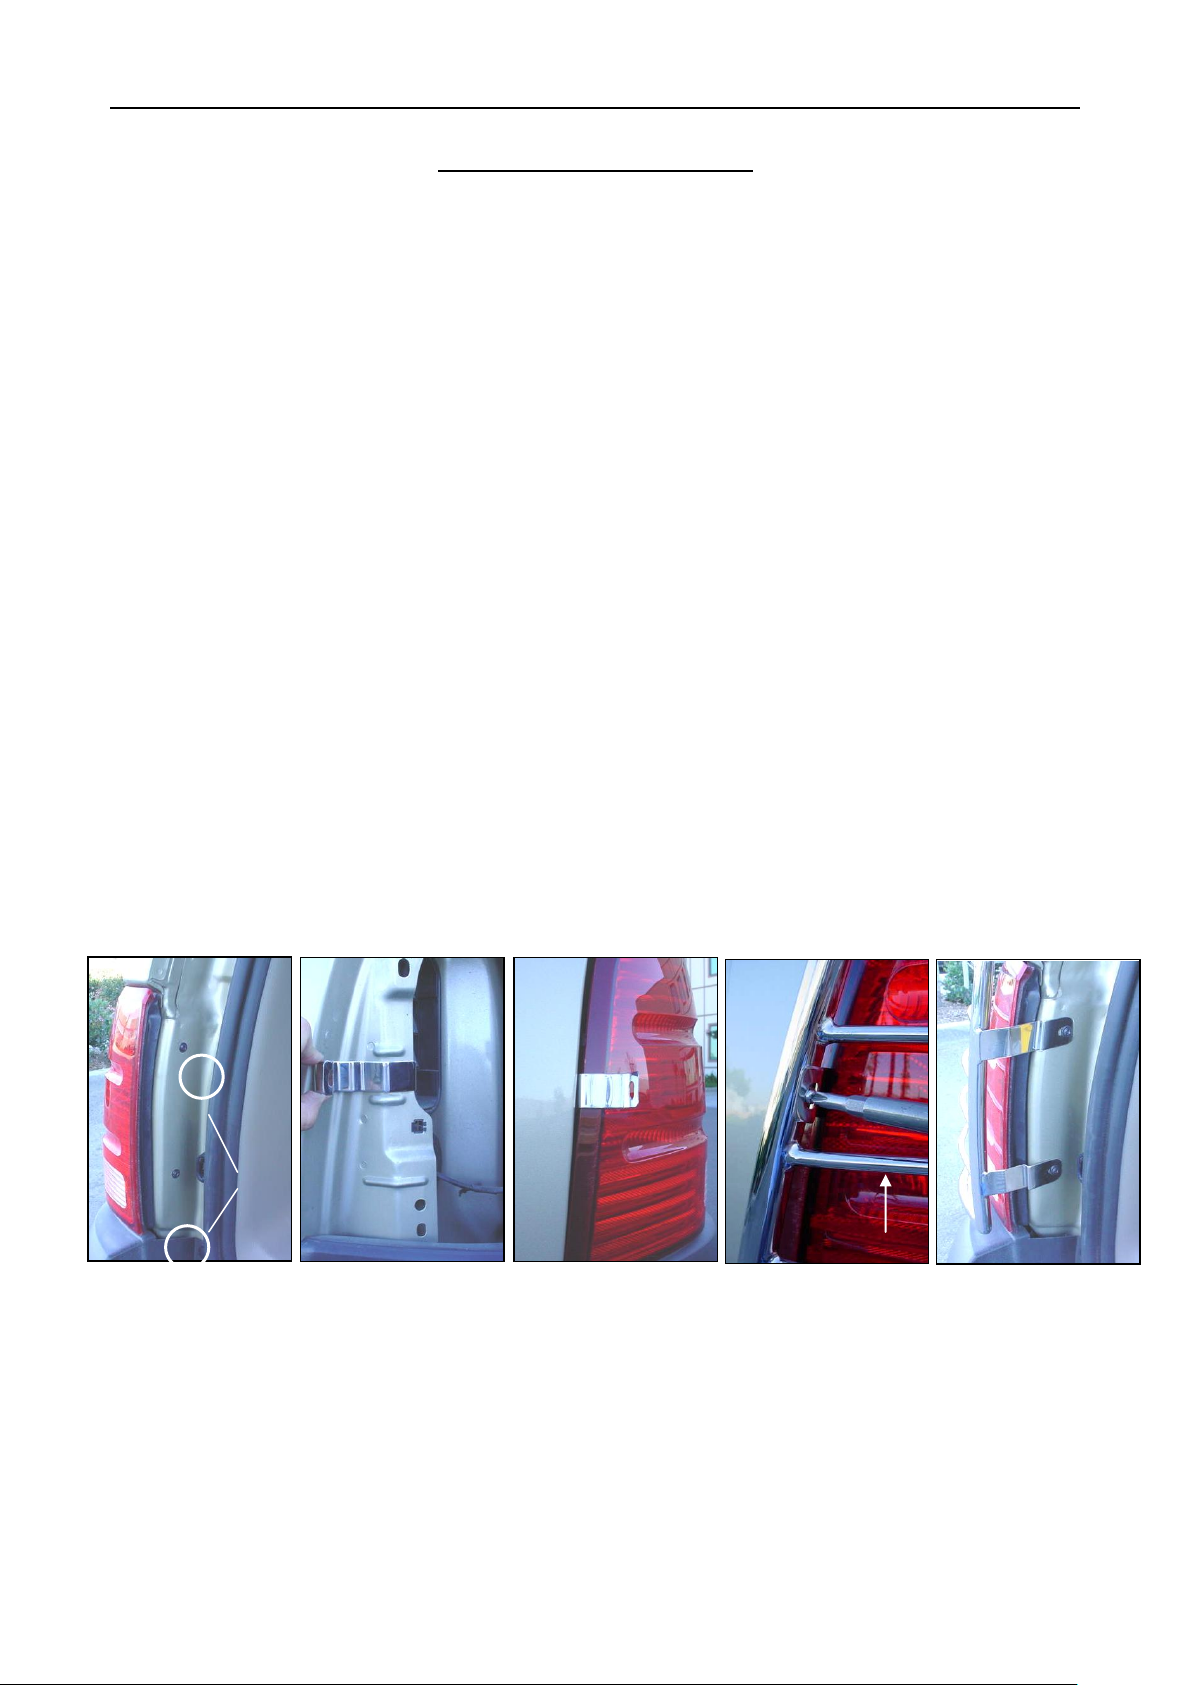
Step Two: Remove factory screws that support the taillight to the vehicle (Figure 1). Carefully unfasten clips and
remove taillight. NOTE: Save screws for later use.
Step Three: Engage Support Bracket and hold it in place, as shown in Figure 2. While holding Support
Bracket, carefully re-install taillight and fasten factory clips (Figure 3).
Step Four: Locate (1) – M4 x 16mm Phillips Screw and (1) – M4 Flat Washer. Position Taillight Guard onto vehicle
and loosely attach Taillight Guard to Support Bracket by using the hardware listed in this step (Figure 4).
Step Five: Align Mounting Brackets to factory mounting holes. Use factory screws removed in step one to attach
Mounting Brackets to the vehicle (Figure 5). NOTE: Open and close rear door/lift slowly, to be certain that the
Taillight Guard does not interfere with rear door. Tighten all hardware at this time.
Repeat steps 2-5 for opposite side
Figure 1 Figure 2 Figure 3 Figure 4 Figure 5
 Loading...