

Steelcraft Automotive 240920 User Manual
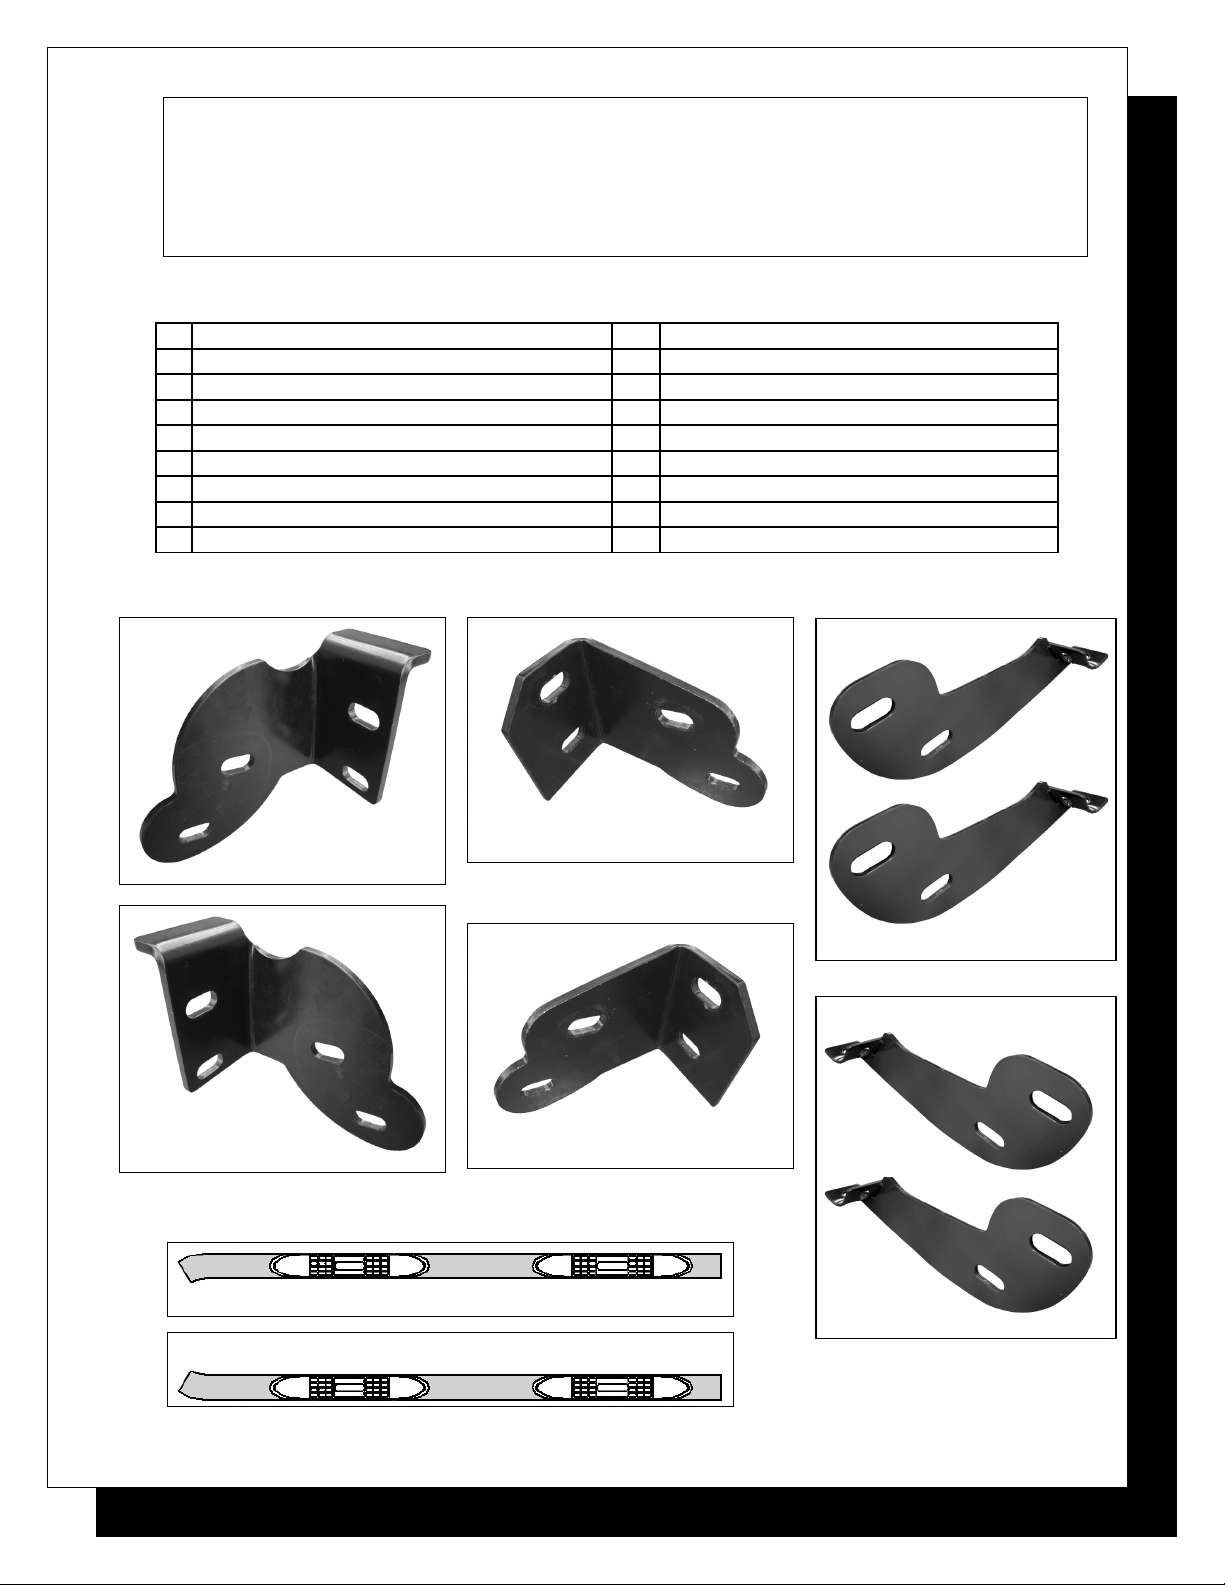
PARTS LIST:
1 Driver/Left Sidebar 8 12-1.75mm x 35mm Hex Head Bolts
1 Passenger/Right Sidebar 8 12mm Nylock Nuts
1 Driver/Left Front Frame Bracket 16 12mm ID x 29mm OD x 3mm Flat Washers
1 Passenger/Right Front Frame Bracket 8 10-1.25mm x 30mm Hex Head Bolts
1 Driver/Left Rear Frame Bracket 8 10mm Lock Washers
1 Passenger/Right Rear Frame Bracket 8 10mm ID x 26mm OD x 3mm Flat Washers
2 Driver/Left Sidebar Brackets 8 8-1.25mm x 25mm Hex Head Bolts
2 Passenger/Right Sidebar Brackets 8 8mm Lock Washers
INSTALLATION INSTRUCTIONS
SIDEBAR
00-04 NISSAN FRONTIER CREW CAB
PART NUMBER
8 8mm ID x 22mm OD x 1.5mm Flat Washers
Driver Rear Frame
Bracket
Driver Front
Frame Bracket
Passenger Sidebar
Driver Sidebar
Passenger Front
Frame Bracket
Passenger Sidebar
Brackets
Passenger Rear
Frame Bracket
Driver Sidebar
Brackets
(AM)
Page 1 of 4 8/24/07
PROCEDURE:
1. REMOVE CONTENTS FROM BOX. VERIFY ALL PARTS ARE PRESENT. READ
INSTRUCTIONS CAREFULLY BEFORE STARTING INSTALLATION.
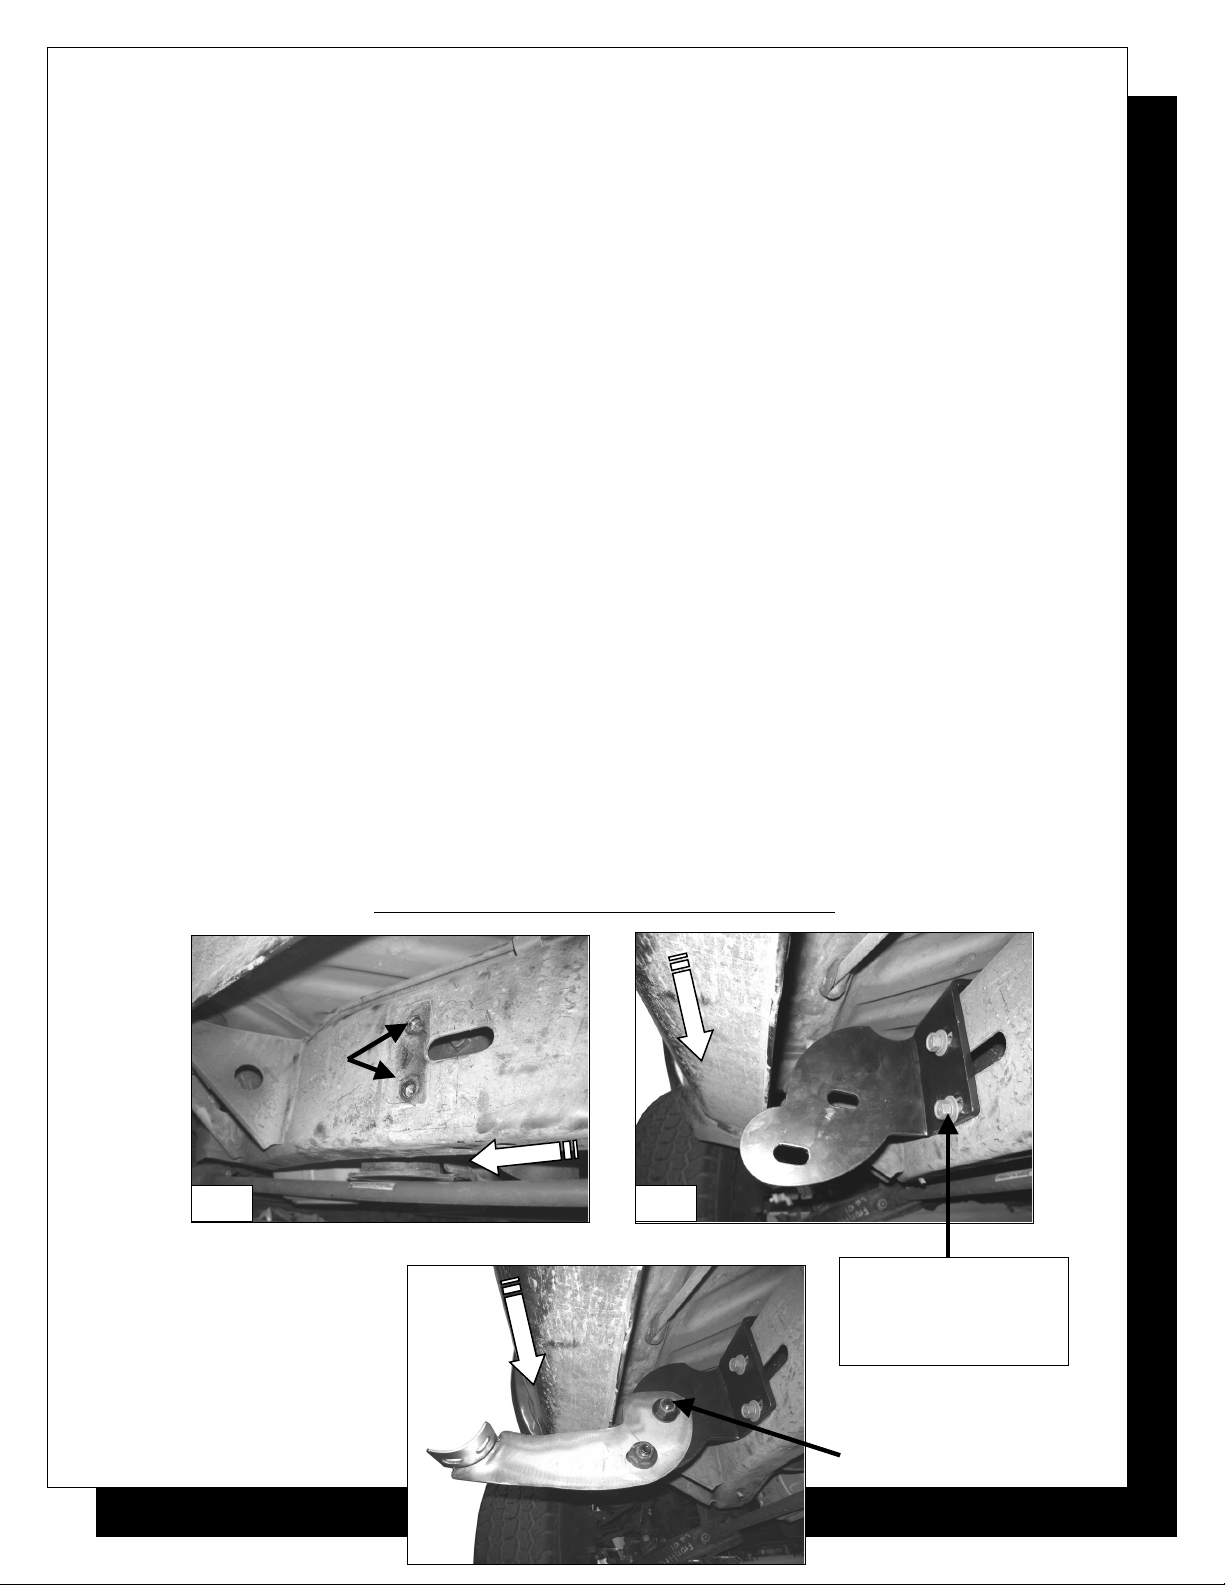
2. There are two threaded holes and a slotted hole on the frame towards the front of the vehicle. Use
the two threaded holes to partially install the driver front Frame Bracket to frame using the
included (2) 10mm x 30mm Hex Head Bolts, (2) 10mm Lock Washers, and (2) 10mm Flat
Washers (Figure 1 & 2). NOTE: If vehicle is equipped with factory sidebars, you may use the
factory bolts.
3. Proceed to attach the driver front Sidebar Bracket to the side facing the rear of the vehicle of the
already installed Frame Bracket. Use the included (2) 12mm x 35mm Hex Head Bolts, (2) 12mm
Nylock Nuts, and (4) 12m Flat Washers (Figure 3). NOTE: The cradle on the Sidebar Bracket
should be facing the rear of the vehicle. Do not tighten at this time.
4. There are two threaded holes and three non-threaded holes on the frame towards the rear of the
vehicle. Use the two threaded holes to partially install the driver rear Frame Bracket to frame using
the included (2) 10mm x 30mm Hex Head Bolts, (2) 10mm Lock Washers, and (2) 10mm Flat
Washers (Figure 4 & 5). NOTE: If vehicle is equipped with factory sidebars, you may use the
factory bolts.
5. Attach the driver rear Sidebar Bracket to the side facing the front of the vehicle of the already
installed Frame Bracket. Use the included (2) 12mm x 35mm Hex Head Bolts, (2) 12mm Nylock
Nuts, and (4) 12m Flat Washers (Figure 6). NOTE: The cradle on the Sidebar Bracket should be
facing the rear of the vehicle. Do not tighten at this time.
6. Position Sidebar onto Mounting Brackets. Attach Sidebar to Mounting Brackets using the included
(4) 8mm x 25mm Hex Head Bolts, (4) 8mm Lock Washers, and (4) 8mm Flat Washers (Figure 7).
Do not tighten at this time.
7. Adjust Sidebar properly; and then tighten all hardware at this time.
8. Repeat steps 2-7 for passenger Sidebar.
9. Do periodic inspections to the installation to make sure that all hardware is secure and tight.
(AM)
(Driver Front Mounting Brackets Shown)
Factory threaded
holes
Front of
Vehicle
Fig 1 Fig 2
Front of
Vehicle
Page 2 of 4 8/24/07
Front of
Vehicle
10mm x 30mm Hex Bolts
10mm Lock Washers
10mm Flat Washers
Or
Factory Bolts
 Loading...