

Steelcraft Automotive 212700 User Manual
INSTALLATION INSTRUCTIONS
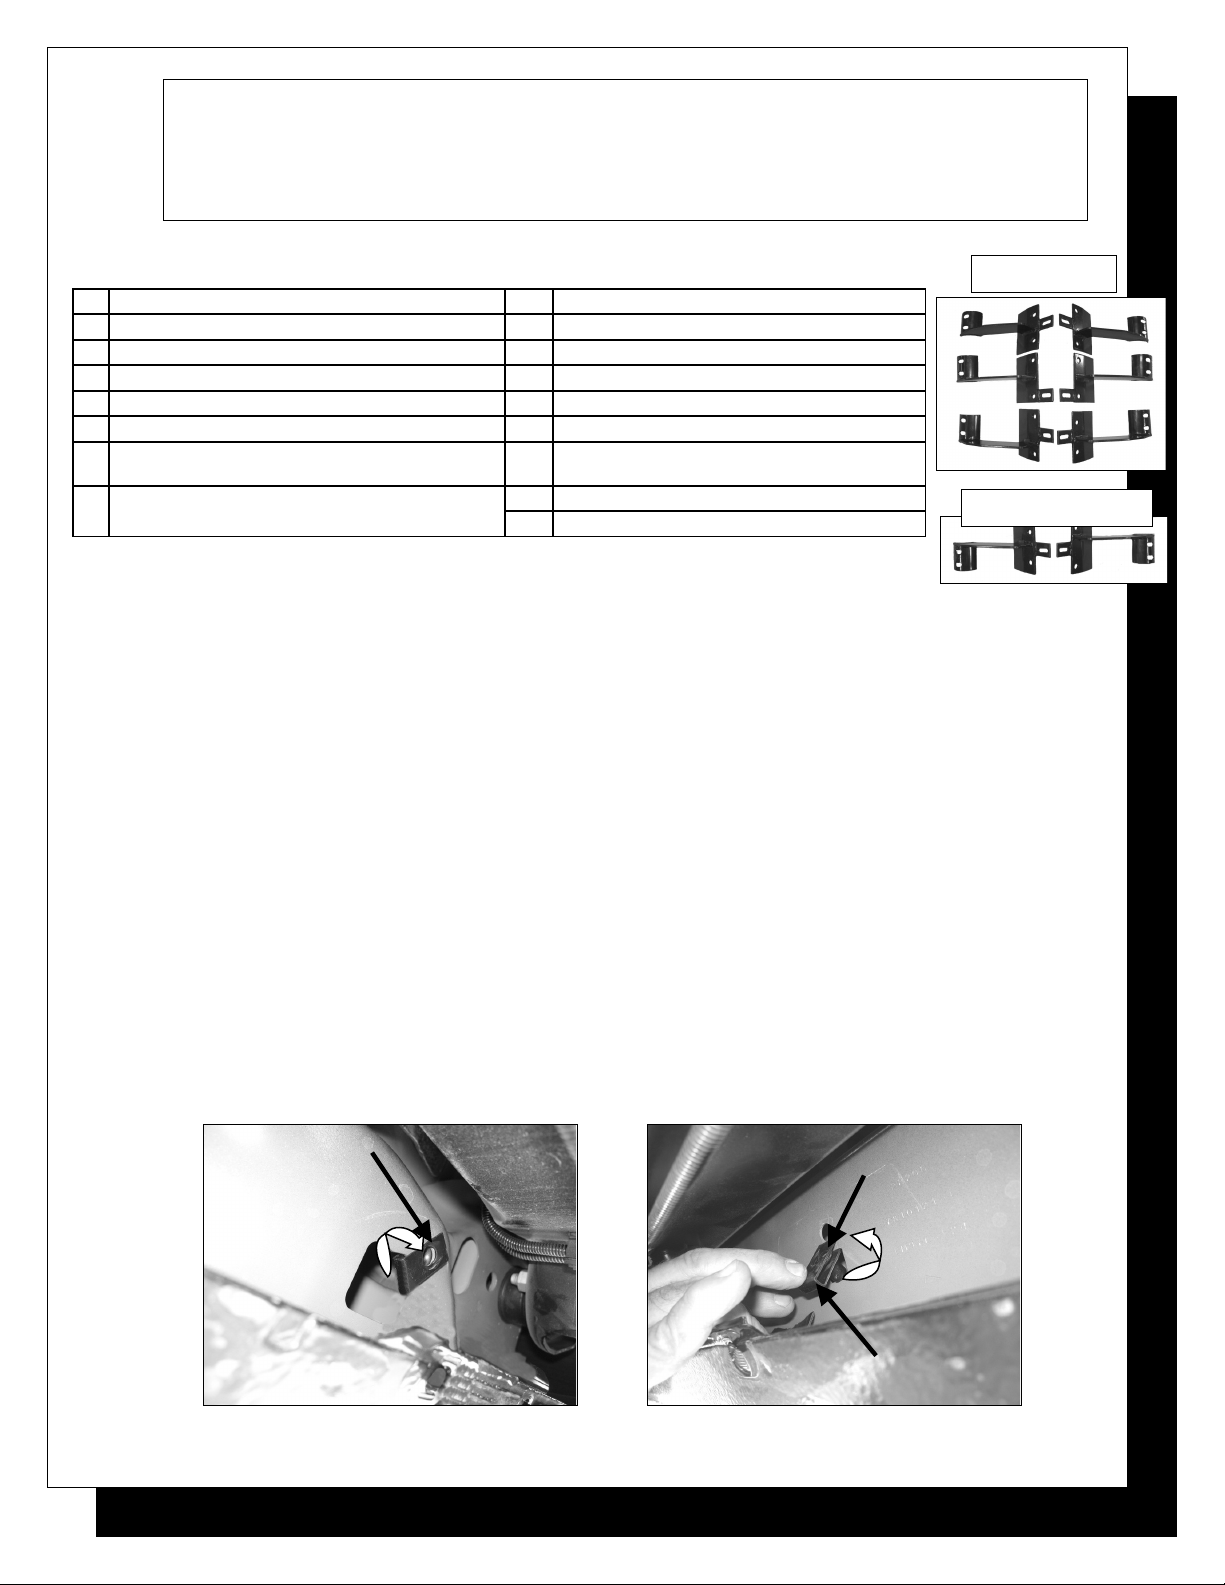
SIDEBAR
02-07 FORD EXPLORER 4 DOOR
PART NUMBER
PARTS LIST:
1 Driver/Left Sidebar 4 1” x 3 ¼” Tube Spacers
1 Passenger/Right Sidebar 2 1” x 2 9/16” Tube Spacers
1 Driver/Left Front Mounting Bracket (A) 4 10-1.50mm x 120mm Hex Head Bolts
1 Passenger/Right Front Mounting Bracket (B) 2 10-1.50mm x 100mm Hex Head Bolts
1 Driver/Left Center Mounting Bracket (C) 6 10-1.50mm Clip Nuts
1 Passenger/Right Center Mounting Bracket (D) 24 10-1.50mm x 30mm Hex Head Bolts
1 Driver/Left Rear Mounting Bracket
02-05 Explorer (E) 06-07 Explorer (F)
1 Passenger/Right Rear Mounting Bracket 30 10mm Lock Washers
02-05 Explorer (F) 06-07 Explorer (E) 12 10mm Hex Nuts
CONTENTS FROM BOX. VERIFY ALL PARTS ARE PRESENT. READ INSTRUCTIONS CAREFULLY BEFORE
STARTING INSTALLATION.
42 10mm ID x 21mm OD x 1.5mm Flat Washers
02-05 Explorer
(A) (B)
(C) (D)
PROCEDURE:
(E) (F)
1. REMOVE
06-07 Rear Brackets
(F) (E)
2. From underside of vehicle, locate the two front factory holes on the driver side floor panel located by the front tire. With
the threaded nut facing up, insert (1) 10mm Clip Nut through larger hole. Orient Clip Nut to engage in the smaller hole
(Figure 1).
3. Partially hang driver front Mounting Bracket to pinch weld using (2) 10mm x 30mm Hex Head Bolts, (2) 10mm Hex Nuts,
(2) 10mm Lock Washers, and (4) 10mm Flat Washers (Figure 3).
4. Place (1) 1” x 2 9/16” (smaller) Tube Spacer between the tab on the Mounting Bracket and the already installed Clip Nut.
Insert (1) 10mm x 100mm Hex Head Bolt through tab on the Mounting Bracket and Tube Spacer and to Clip Nut (Figure
4). Do not tighten at this time.
5. Repeat steps 2 – 4 for driver center and driver rear Mounting Brackets. Depending upon your vehicle, the center factory
hole might be too small for the Clip Nut, file the Clip Nut until you are able to mount it. NOTE: You will be using 1” x 3
¼” (larger) Tube Spacers with 10mm x 120mm Hex Head Bolts on the center and rear Mounting Brackets.
I MPORTANT! Install the rear Mounting Brackets depending upon your vehicle.
02-05 Explorer: Install the Mounting Brackets the way they’re stamped. All the cradles on both sides should be facing
the rear of the vehicle (Figure 5).
06-07 Explorer: You will need to swap the rear Mounting Brackets. The passenger rear Mounting Bracket will mount on
the driver rear, and the driver rear Mounting Bracket will mount on the passenger rear. The front and center cradles on
both sides should be facing the rear of the vehicle and the rear cradles on both sides should be facing the front of the
vehicle. Rear Mounting Brackets will mount with (1) 10mm x 30mm Hex Head Bolt (Figure 6).
6. Once all three Mounting Brackets are partially mounted, carefully position driver Sidebar onto Mounting Brackets. Attach
Sidebar to Mounting Brackets using (6) 10mmx 30mm Hex Head Bolts, (6) 10mm Lock Washers, and (6) 10mm Flat
Washers (Figure 7). Do not tighten at this time.
7. Level and adjust Sidebar; then tighten all hardware at this time.
8. Do periodic inspections to the installation to make sure all hardware is secure and tight.
6/5/07 (AM)
Front Clip Nut
File Clip Nut
Here
Center Clip Nut
Figure 1 Figure2
Page 1 of 3
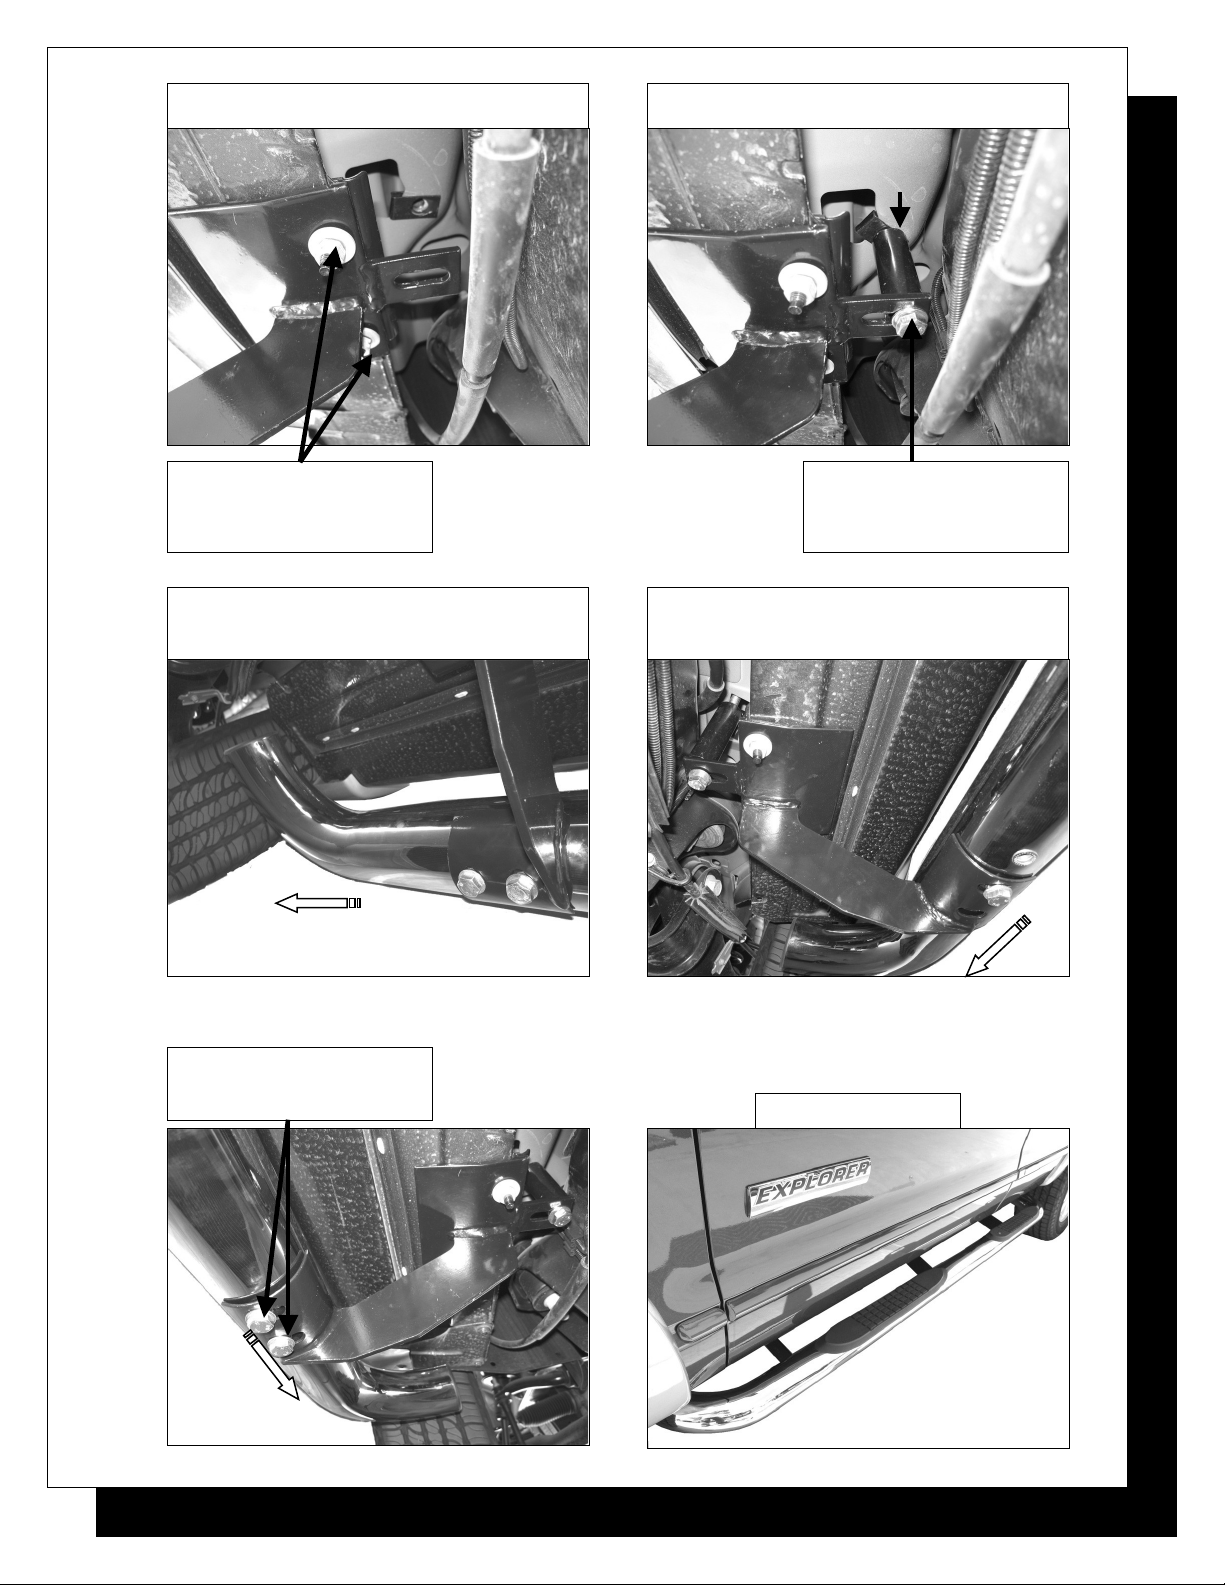
Driver Side Front Mounting Bracket Shown Driver Side Front Mounting Bracket Shown
Small Tube Spacer
Figure 3 Figure 4
10mm x 30mm Hex Head Bolts
10mm Flat Washers
10mm Lock Washers
10mm Hex Nuts
(10mm Clip Nut)
10mm x 100mm Hex Head Bolt
10mm Lock Washer
10mm Flat Washer
02-05 Explorer: Rear Mounting Brackets mount
with cradles facing the rear of the vehicle and with
two 10mm x 30mm hex bolts
Rear of vehicle
06-07 Explorer: Rear Mounting Brackets mount
with cradles facing the front of the vehicle and with
Figure 5 Figure 6
10mm x 30mm Hex Head Bolts
10mm Flat Washers
10mm Lock Washers
one 10mm x 30mm hex bolt
Rear of
vehicle
Installation Complete
6/5/07 (AM)
Front of
vehicle
Page 2 of 3
 Loading...