

Steelcraft Automotive 20320 User Manual
1
Drivers Side Tail Light Guard
1
Passenger Side Tail Light Guard
2
Support Brackets
2
4-0.7mmX12mm Screws
2
4mm Lock Washers
2
4mm Flat Washers
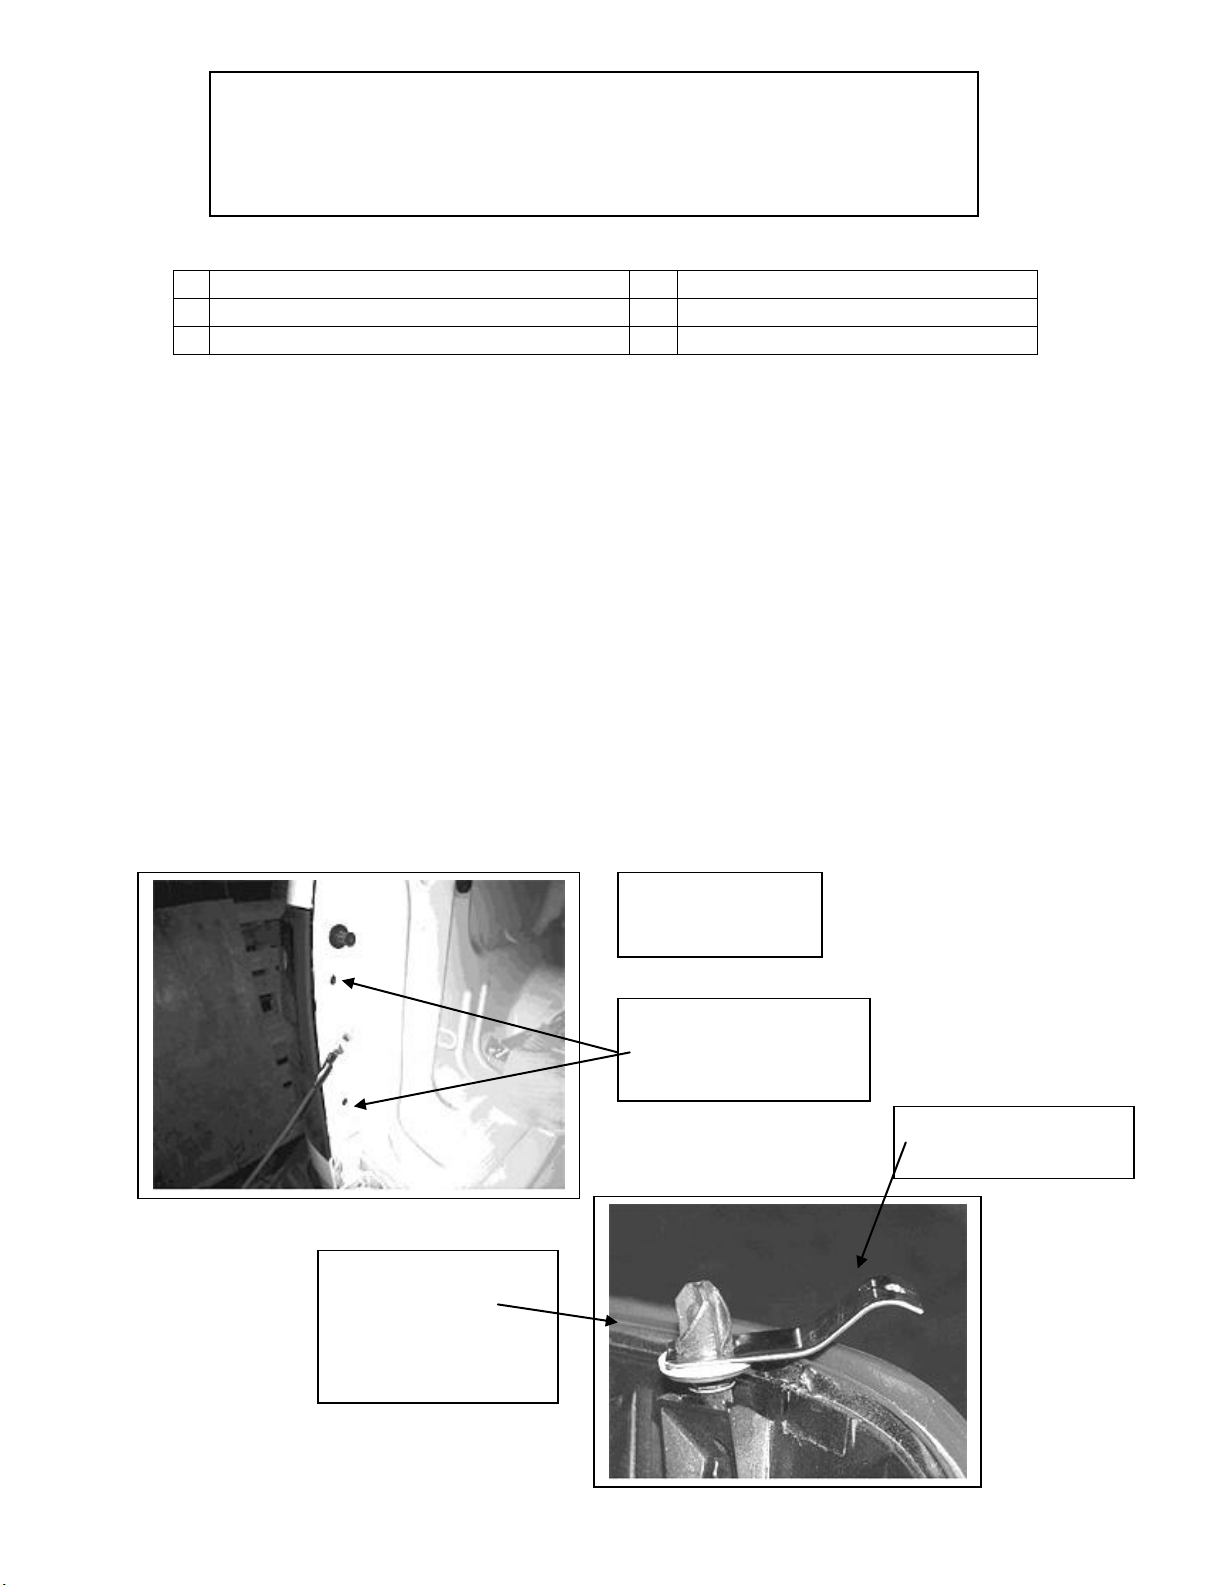
FIG. 2
PLACE FRONT
BRACKET ONTO
UPPER PLASTIC
SNAP FASTENER
FIG. 1
DRIVER SIDE
PHILLIPS HEAD
SCREWS, REMOVE
AND SET ASIDE
CURVE FACES
REAR OF VEHICLE
PARTS LIST:
PROCEDURE:
1. REMOVE CONTENTS FROM BOX. VERIFY ALL PARTS ARE PRESENT. READ
INSTRUCTIONS CAREFULLY.
2. Open tail gate and remove the two drive’s side black Phillips head screws that hold
taillight assembly in place. (Fig 1) Set the two screws aside, as they will be reused in
the guard and taillight assembly reinstallation.
3. Pull the taillight assembly out towards the rear, the same as if you were replacing a
burnt out taillight bulb. Install furnished front mounting bracket onto the upper plastic
snap-in fastener of taillight assembly, curved pocket to the rear. (Figs 2)
4. Position the taillight assembly snap-in fasteners back into position and push into
place. Place the guard over the taillight and reinstall the two stock Phillips head
screws through the guard through the bed and into the taillight assembly. Leave the
screws loose for now. (Fig 3)
5. Install one of the furnished 4mm screws through the front bracket installed in step two
and into the threaded insert in guard and tighten down. (Fig 4)
6. Repeat this procedure on the opposite side.
INSTALLATION INSTRUCTIONS
07-10 SILVERADO LD 1500 TAILLIGHT GUARDS
PART NUMBER
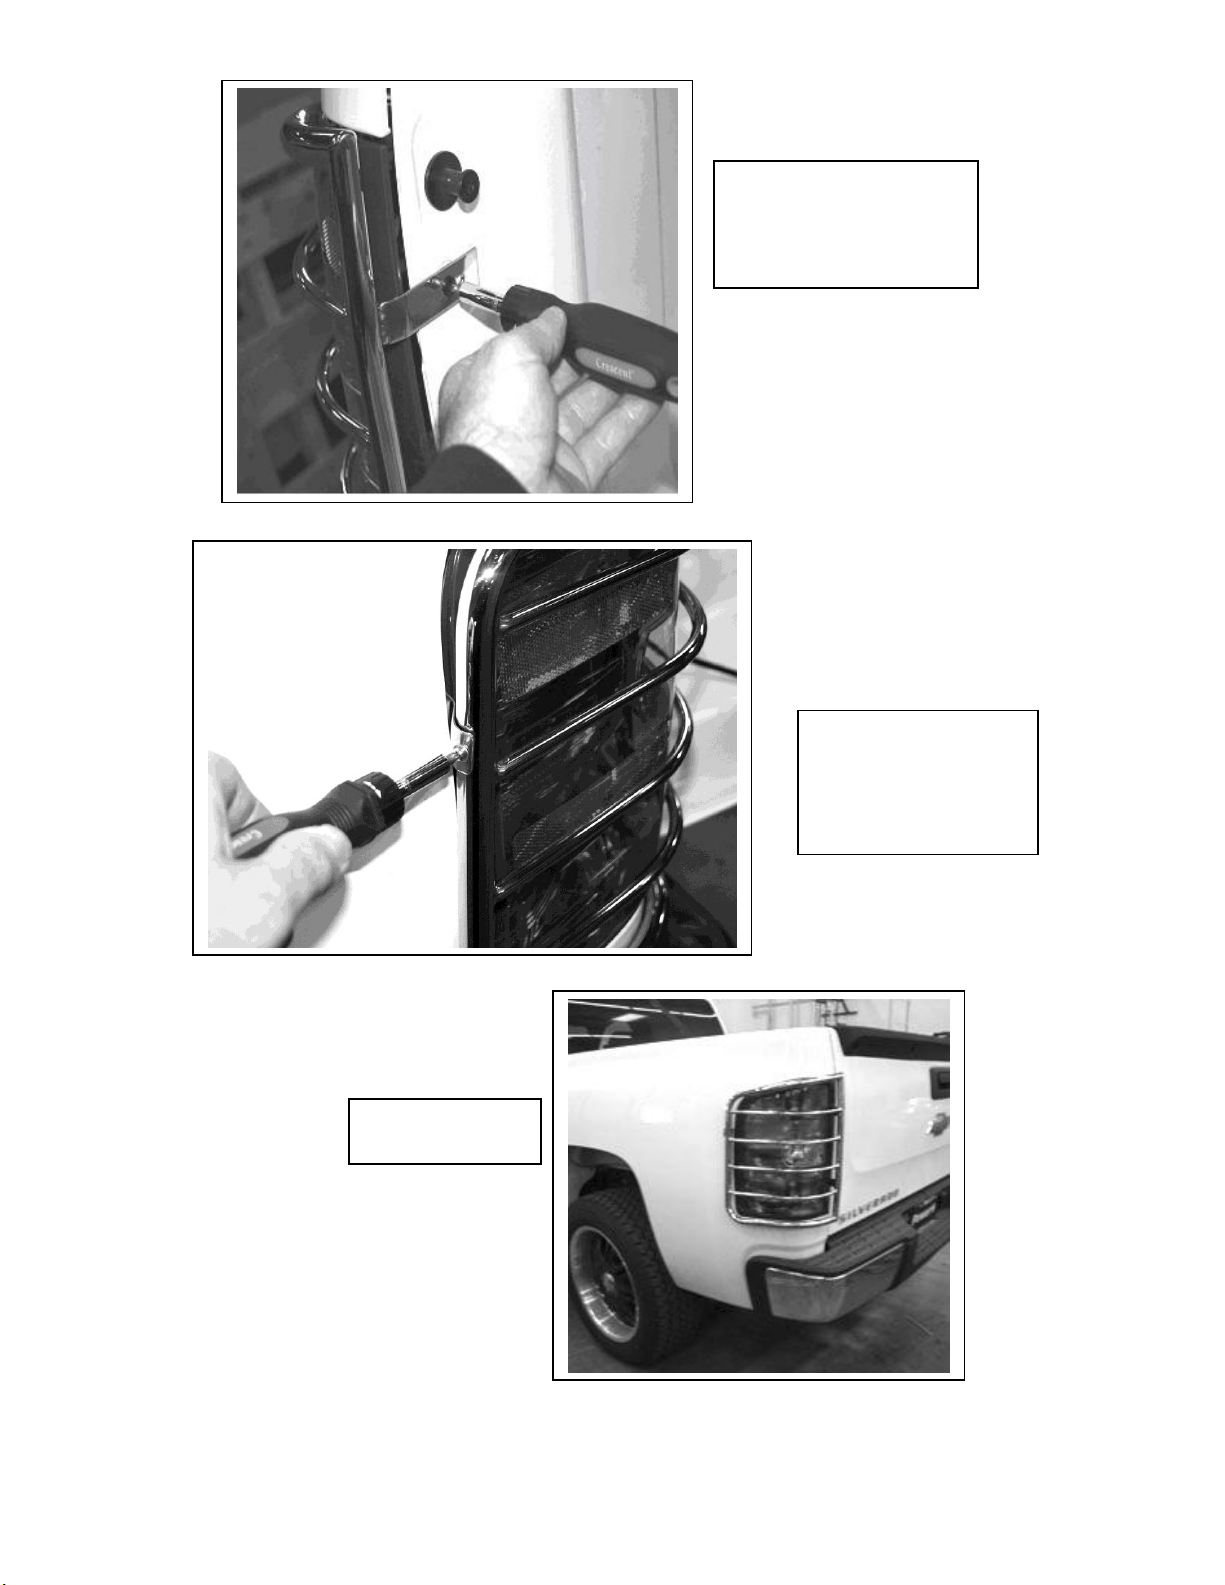
FIG. 4
4mm screw installs
through front bracket
into threaded insert
in guard
FIG. 3
Stock taillight mounting
screws reinstall through
inside brackets.
Driver’s side
 Loading...