

Page 1
3” SIDEBAR WITH BENT ENDS
1
Driver/Left Sidebar
4
1/2” x 2” Hex Bolts
1
Passenger/Right Sidebar
4
1/2” Lock Washers
1
Driver/Left front Mounting Bracket
4
1/2” ID x 1-1/2" OD x 1/8" Flat Washers
1
Passenger/Right front Mounting Bracket
2
10-1.50mm x 25mm Hex Bolts
1
Rear Mounting Brackets
2
10mm Lock Washers
2
Center Support Brackets
2
10mm ID x 27mm OD x 3mm Flat Washers
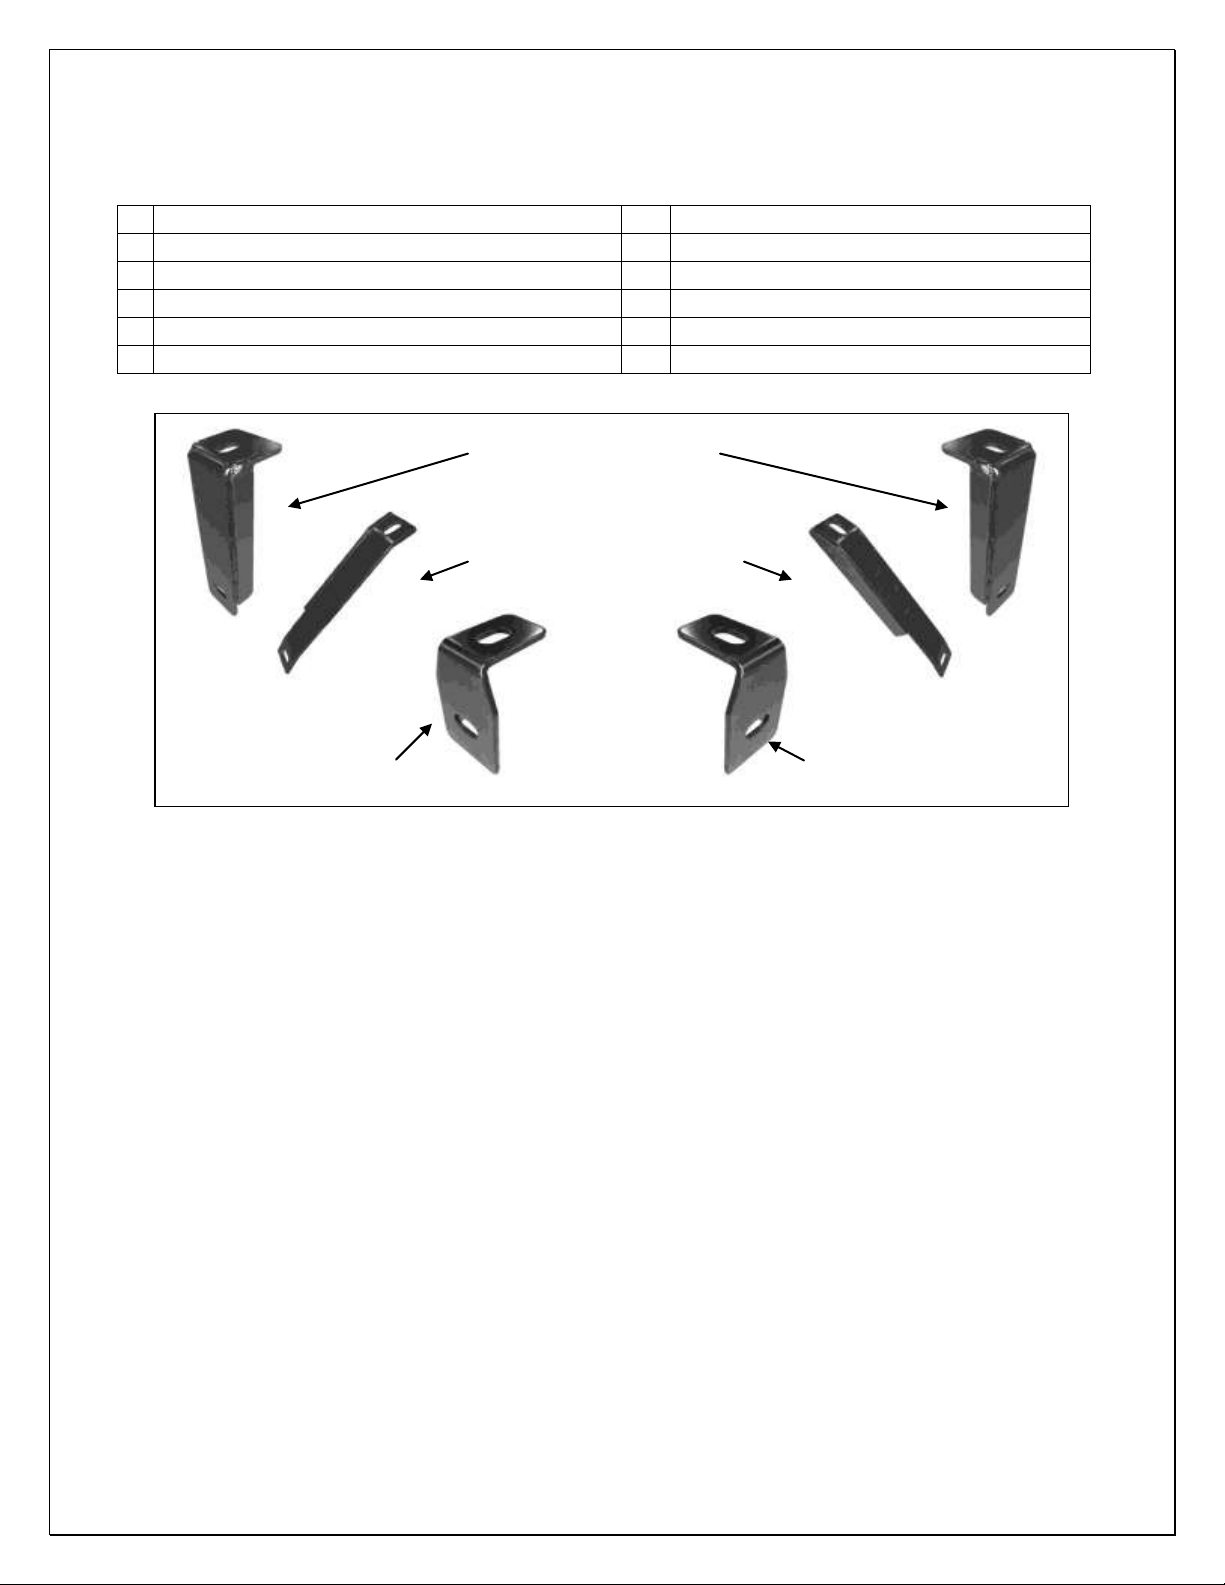
(C)
(C)
Driver/Left Front
Mounting Bracket
Passenger/Right
Front Mounting
Bracket
Rear Mounting Brackets
(2) Center Support Brackets
1999-2011 SILVERADO/SIERRA EXTRA CAB 1500/2500LD
2001-2011 SILVERADO/SIERRA EXTRA CAB 2500HD-3500
PARTS LIST:
PROCEDURE:
1. REMOVE CONTENTS FROM BOX. VERIFY ALL PARTS ARE PRESENT. READ
INSTRUCTIONS CAREFULLY BEFORE STARTING INSTALLATION.
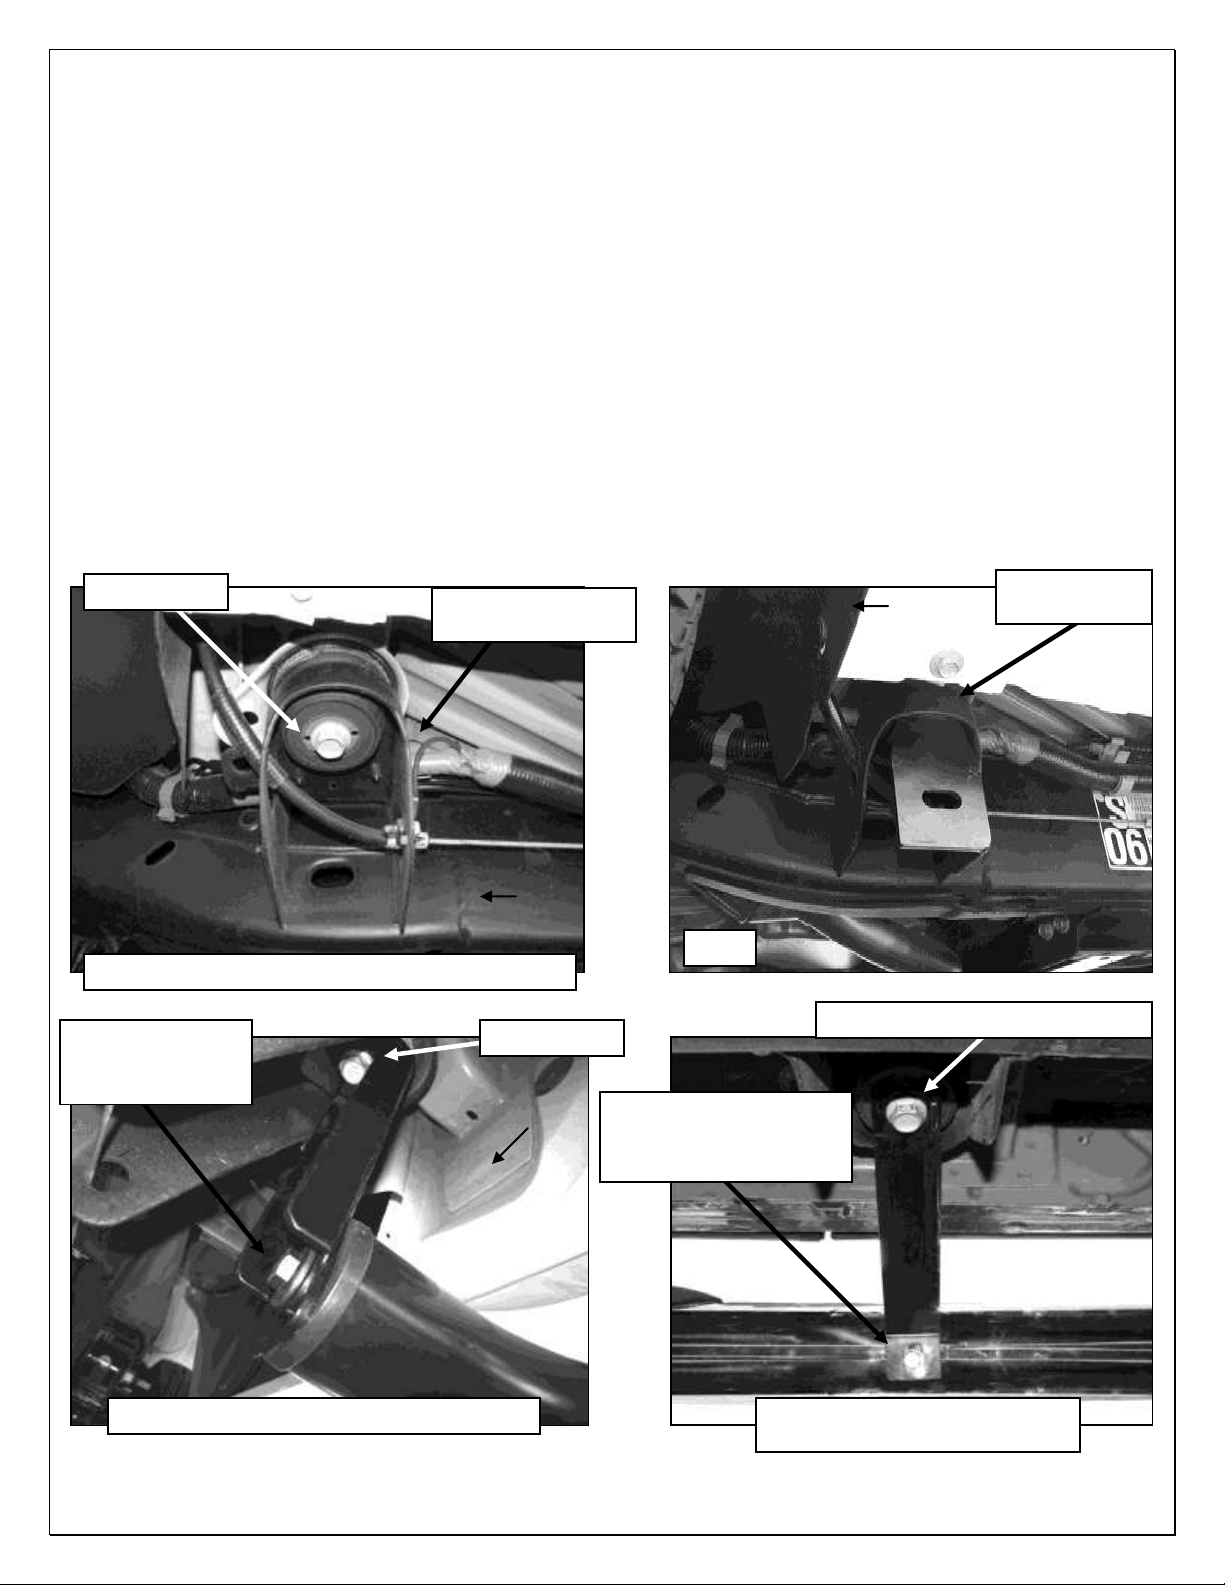
2. From underside of vehicle, remove the driver side front body mount bolt, steel washer (if
equipped), and rubber bushing, (Figure 1).
3. Select the driver side front Mounting Bracket. Insert the factory body mount bolt through the
Mounting Bracket and into the steel washer, (if equipped), and rubber bushing. Hang the
Mounting Bracket in position by partially threading the factory body mount bolt up into place,
(Figure 2). Repeat this step for driver side Center Support Bracket, (Figure 4), and rear
Mounting Bracket, (Figure 3). Snug but do not tighten hardware at this time.
VERY IMPORTANT! There are several different designs, (depending on model year),
for the factory steel body mount bracket. The front Sidebar Mounting Brackets can be
switched, driver side to passenger side, to provide additional clearance between the
gusset on the Mounting Bracket and the factory steel body mount bracket welded to the
frame. The front Mounting Brackets however, are not interchangeable with the rear
Mounting Brackets. To prevent unnecessary noise, adjust the position of the
Mounting Brackets so that the Brackets do not come in contact with the factory
steel body mount bracket.
4. Carefully position the driver/left Sidebar up to the Mounting Brackets. Attach the Sidebar to the
Mounting Brackets with the included (2) 1/2” x 2” Hex Bolts, (2) 1/2” Lock Washers and (2) 1/2”
Flat Washers, (Figure 2 & 3). Snug but do not tighten hardware at this time.
Page 1 of 2 2/1/11 Rev1 (DP)
Page 2
3” SIDEBAR WITH BENT ENDS
Fig 2
1/2” x 2” Hex Bolt
1/2” Lock Washer
1/2” Flat Washer
Factory Bolt
Factory Middle Body Mount Bolt
(Fig 1) Driver Side Front Mounting Location
(Fig 4) Driver Side Support
Bracket Mounting Location
(Fig 3) Driver Side Rear Mounting Location
Front
Rear
Factory Steel Body
Mount Bracket
Factory Steel
Body Mount
10mm x 25mm Hex Bolt
10mm Lock Washer
10mm Flat Washer
Factory Bolt
Front
1999-2011 SILVERADO/SIERRA EXTRA CAB 1500/2500LD
2001-2011 SILVERADO/SIERRA EXTRA CAB 2500HD-3500
5. Line up the slot in the Center Support Bracket with the threaded insert in the Sidebar. Bolt the
Bracket to the Sidebar with (1) 10mm x 25mm Hex Bolt, (1) 10mm Lock Washer and (1) 10mm
Flat Washer, (Figure 4).
6. Level and adjust the Sidebar, check Mounting Brackets for clearance between factory steel
body mount brackets. Once satisfied with fit, tighten all hardware.
7. Repeat Steps 2 – 6 for passenger/right Sidebar installation.
8. Do periodic inspections to the installation to make sure that all hardware is secure and tight.
To protect your investment, wax this product after installing. Regular waxing is recommended to
add a protective layer over the finish. Do not use any type of polish or wax that may contain abrasives
that could damage the finish.
For stainless steel: Aluminum polish may be used to polish small scratches and scuffs on the finish.
Mild soap may be used also to clean the Sidebar.
For gloss black finishes: Mild soap may be used to clean the Sidebar.
Driver/Left Sidebar installation pictured
Page 2 of 2 2/1/11 Rev1 (DP)
 Loading...