

Stealthbox SB-VW-GTI/10W6v2 Installation Manual
INSTALLATION GUIDE
for the
SB-VW-GTI/10W6v2
SB-VW-GTI/10W6v2
2006-Up
2006-Up
GTI MkV, Rabbit & R32
GTI MkV, Rabbit & R32
Thank you for choosing a JL Audio Stealthbox® for your automotive sound system. With proper
installation, your new vehicle-specific enclosed subwoofer system will deliver years of listening pleasure.
We strongly recommend that you have your new Stealthbox® installed by your authorized JL Audio
dealer. The installation professionals employed by your dealer have the necessary tools and experience
to disassemble and reassemble your vehicle properly. If you prefer to perform your own installation,
please read this installation guide completely
before beginning the process.
If you choose to per form the installation yourself, it is absolutely vit al that
the Stealthbox
®
be properly m ounted to the vehicle according to these
instructions. Failure to mount the enclosure properly presents two pro blems:
1) The sub-bass performance will suf fer due to the movement of the enclosure
caused by the force exerted by the woof er(s).
2) A loose enclosure presents a seriou s safety hazard in the event of a collis ion
or sudden deceleration.
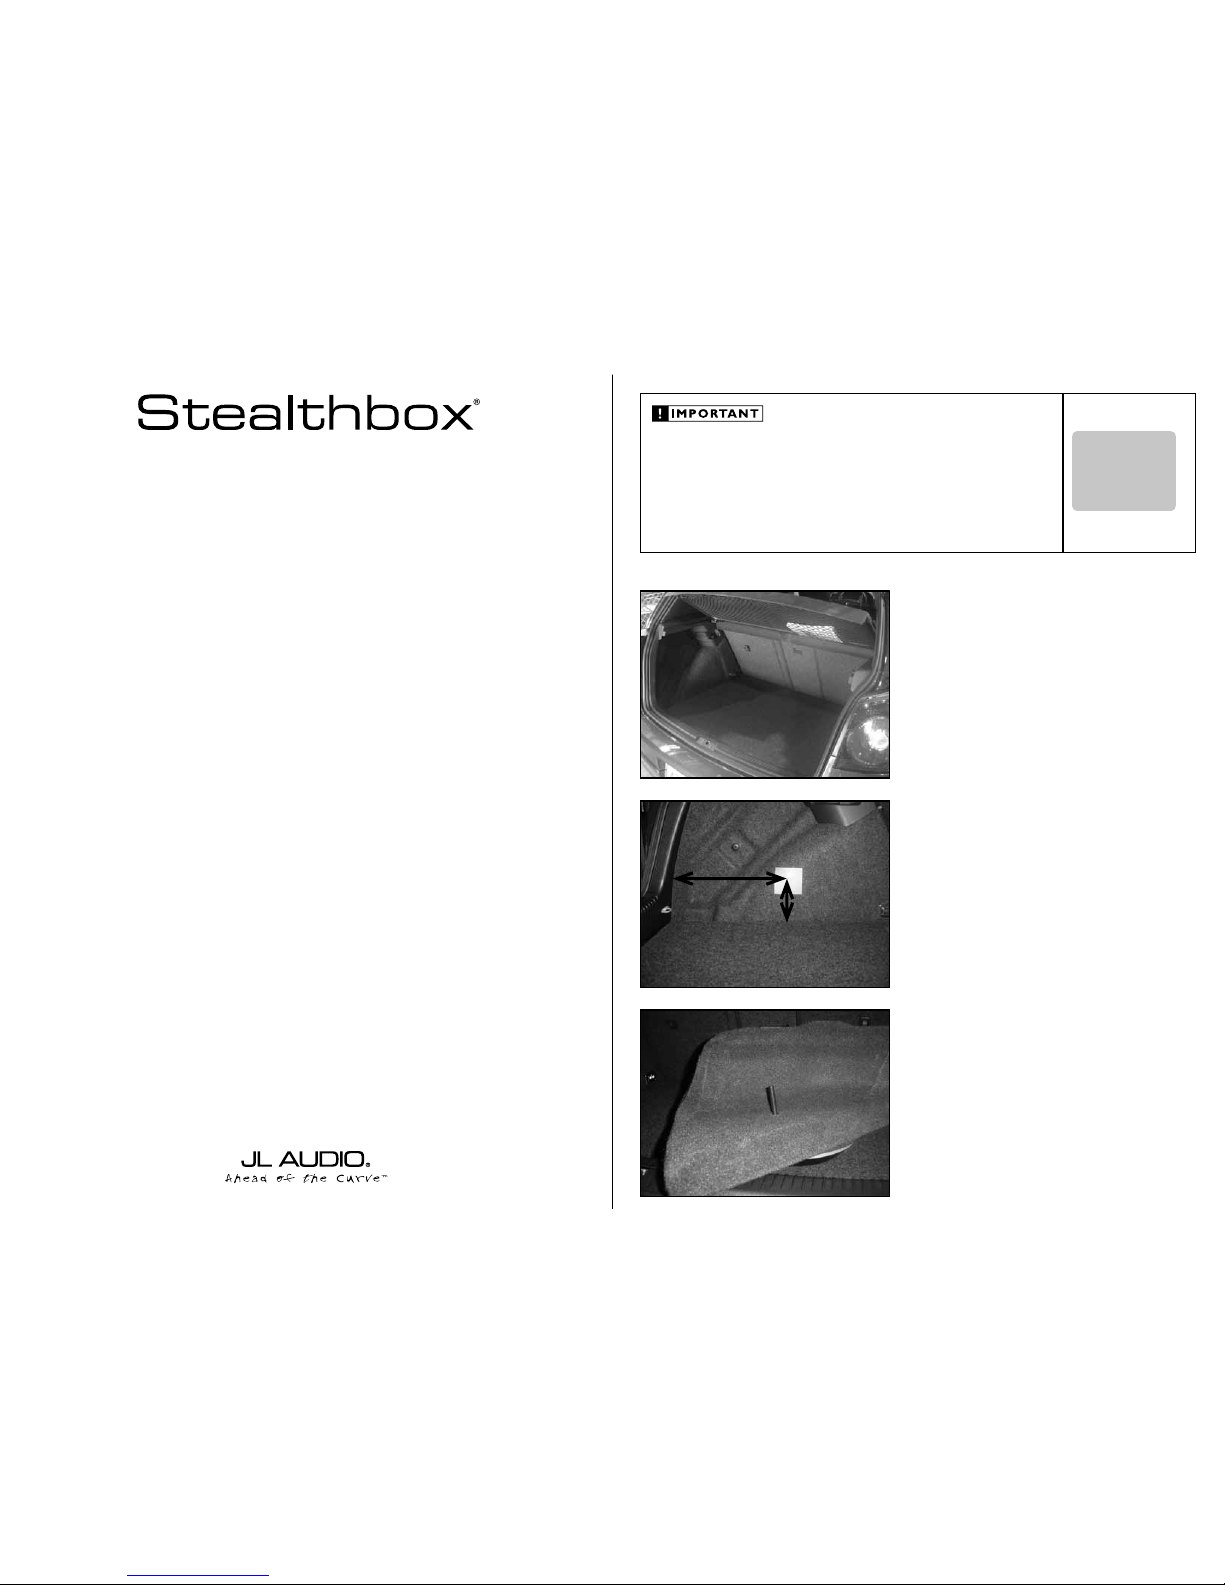
STEP 1
Remove any contents from the cargo area.
Continued on Next Page
STEP 2
Place the supplied wax square onto the driver’s side rear
cargo panel.
STEP 3
Thread the supplied socket cup screw into the rear of the
Stealthbox ®.
SB-VW-GTI/10W6v2_INSTR_SKU#011250
SB-VW- GTI/10W6v2_INSTR_ SKU#011250
13 1/2-inches
INSTALLATION
DIFFICULTY:
2
5
OUT
OF
ESTIMATED TIME:
1 HOUR
1 HOUR
6-inches
Continued on Next Page
SB-VW-GTI/10W6v2_INSTR_SKU#011250
SB-VW- GTI/10W6v2_INSTR_ SKU#011250
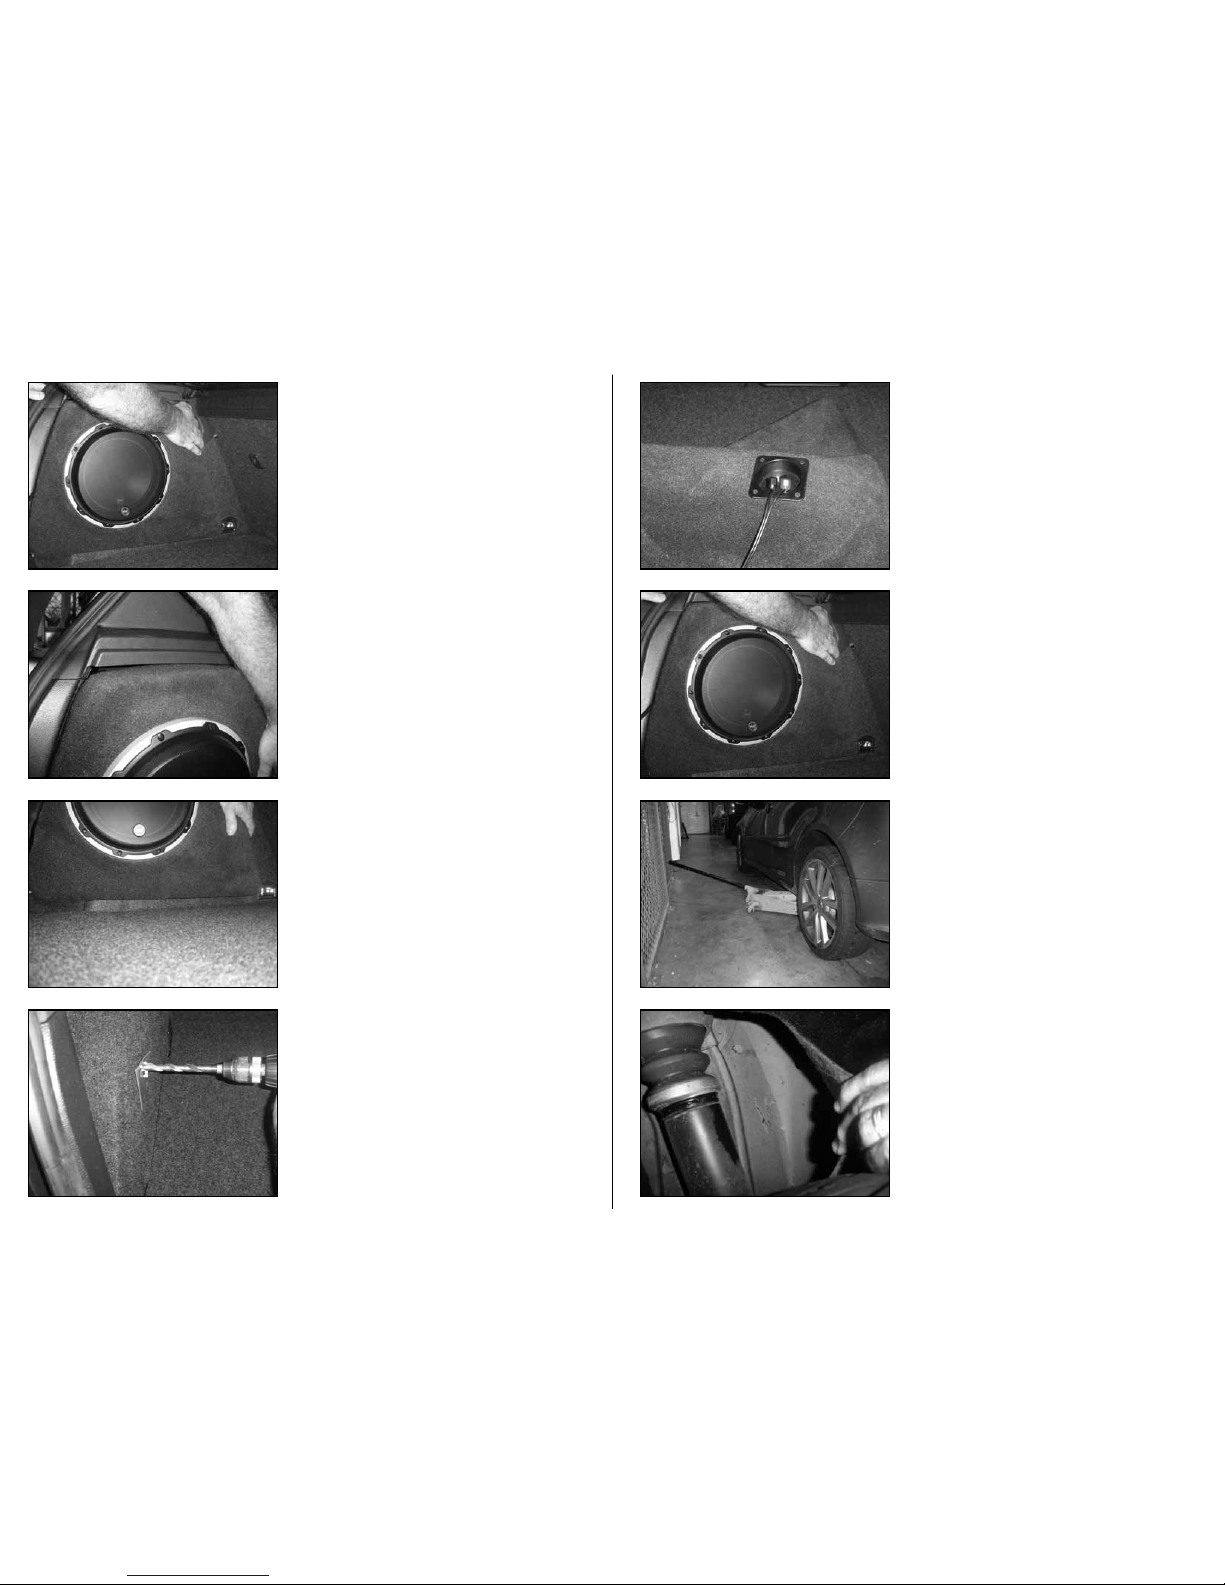
STEP 5
Note: Befo re drilling, you are dri lling into the rear
fender well . Once you protrude to the o utside, do not
go any furth er or you will be paying for a new r ear
tire. Always wear eye protection when drilling!
With a drill and a 1/2-inch drill bit, drill through the
impression made in the wax square.
Remove the wax square.
STEP 4B
The Stealthbox® will be raised off the floor. This is to allow
the factor y flooring to be pulled from the cargo area, once
the Stealthbox® is installed.
STEP 4A
The Stealthbox® needs to fit all the way to top plastic panel.
*Read the ne xt three steps to fu lly understand
this procedure.*
STEP 4
Place the Stealthbox® into the mounting location and press
firmly onto the Stealthbox®.
Page 2 • JL Audio, Inc 2007
STEP 7
Place the Stealthbox® into the mounting location. Guide the
socket cup set screw through the drilled hole.
STEP 9
Behind the strut, pull the black plastic guard to gain access to
the protruding socket cup set screw.
STEP 8
Jack up the driver’s side rear of the vehicle.
You should be able to access the socket cup set screw with
the rear wheel on the car. If necessar y, you may remove the
wheel off the car.
STEP 6
Run spe aker wire from t he ampli fier’s loca tion to th e
Stealthbox
®
location and ch e ck for pro p er operatio n of
the woofer.
 Loading...