

Stealthbox SB-F-150/10W3v3 Installation Manual
INSTALLATION
DIFFICULTY:
INSTALLATION GUIDE
for the
SB-F-150/10W3v3
SB-F-150/10W3v3
2004 - Up
2004 - Up
Ford F-150
Ford F-150
SuperCab & SuperCrew
SuperCab & SuperCrew
&
&
2006-Up Lincoln Mark LT
2006-Up Lincoln Mark LT
Thank you for choosing a JL Audio Stealthbox® for your automotive sound system. With proper
installation, your new vehicle-specific enclosed subwoofer system will deliver years of listening pleasure.
We strongly recommend that you have your new Stealthbox® installed by your authorized JL Audio
dealer. The installation professionals employed by your dealer have the necessary tools and experience
to disassemble and reassemble your vehicle properly. Also, keep in mind that your warranty coverage
extends to 1 year if your system is installed or approved by your authorized JL Audio dealer. If you
prefer to perform your own installation, please read this installation guide completely
before beginning the process.
If you choose to per form the installation yourself, it is absolutely vit al that
the Stealthbox
®
be properly m ounted to the vehicle according to these
instructions. Failure to mount the enclosure properly presents two pro blems:
1) The sub-bass performance will suf fer due to the movement of the enclosure
caused by the force exerted by the woof er(s).
2) A loose enclosure presents a seriou s safety hazard in the event of a collis ion
or sudden deceleration.
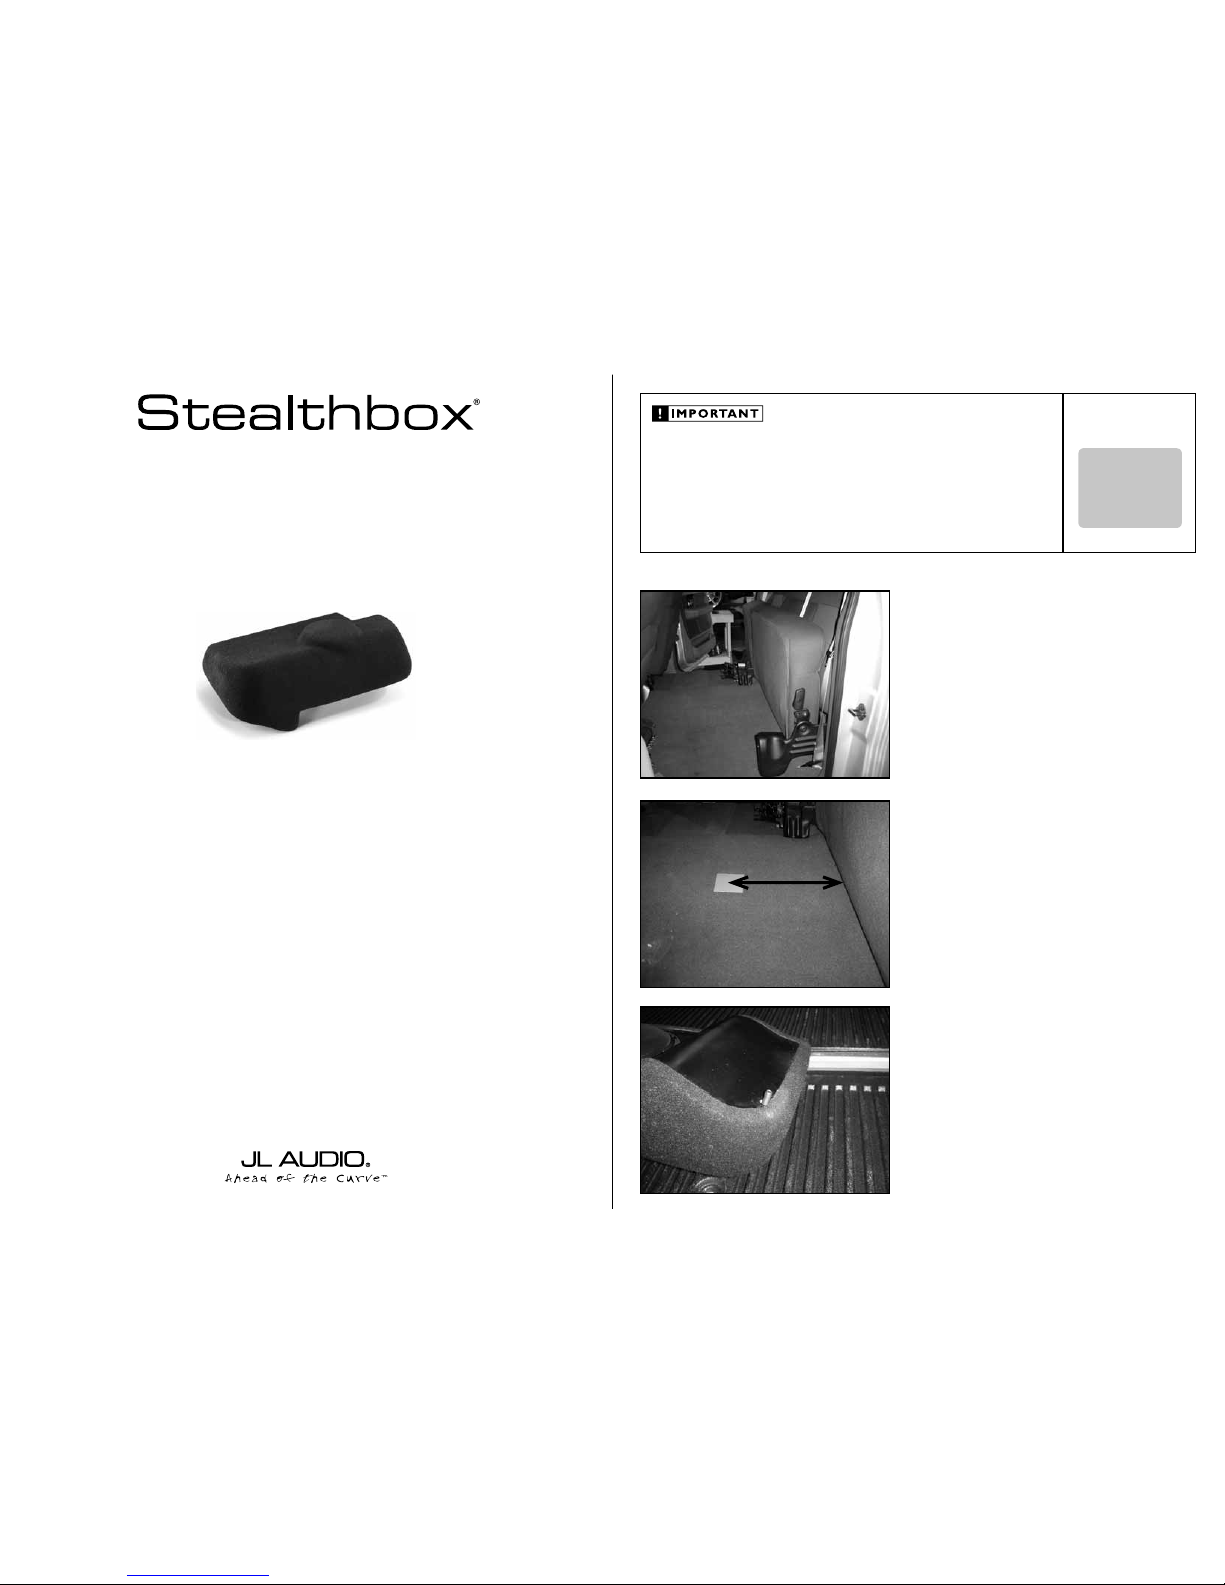
STEP 1
Remove all contents from the rear seating area.
Fold the rear seating up.
Continued on Next Page
STEP 2
Place the supplied wax square onto the transmission hump.
The mid d le of the wax squa re should measure, 5-inches
from the rear seat forward and along the driver’s side edge
of the transmission hump, as seen in the picture at left.
STEP 3
Thread in a supplied socket cup screw into the bottom insert
of the Stealthbox®, leaving 1-inch exposed.
SB-F-150/10W3v3_INSTR_SKU#011227
SB-F-150/10W3v3_INSTR_ SKU#011227
2
5
OUT
OF
5INCHES
Continued on Next Page
SB-F-150/10W3v3_INSTR_SKU#011227
SB-F-150/10W3v3_INSTR_ SKU#011227
STEP 6
Lower the S tealt hbox® onto the floo r and firmly press
down.
Remove the Stealthbox® out of th e vehicle c arefu l ly, leaving the wax square in place. The s ocket cup s et screws will
leave an impres s ion in the wax. The socket cup set s c rew
will leave an impression onto the wax.
STEP 5
Posit ion th e S teal thbox
®
into the mounting location.
Guide the side socket cup set screw through the existing
hole in the rear seat bracket. The Stealthbox
®
needs to fit up
against this seat bracket.
STEP 4
Thread in a supplied socket cup screw into the side insert of
the Stealthbox®, leaving 1 1/2-inches exposed.
Page 2 • JL Audio, Inc 2006
STEP 8
Back out the bottom so c k et cup set s c rew installed in
Step 3, leaving 1 1/2-inch e s o f threa d e xposed.
STEP 9
Cut eno ugh speaker wire to allow the run from th e
Stealthbox
®
location to the amplifier location.
Atta c h the speaker wire to the w i re ter minal on the
Stealthbox®. Check the woofer for prope r operation .
STEP 7
Note : B e fo re d ri ll i ng , m ake s ur e t ha t you a re n ot g oi ng
to be drilling into any gas lines, brake lines, transmission
lines, electrical wiring, transfer case (4x4 vehicles)
or anythi n g el se t h a t mi gh t c au se a r ed uc t i on i n you r
weekly pay. Always wear eye protection when drilling!
With a d rill and a 1 /2-inch d rill bit, drill through the
impre ssion ma de in the w ax square and i nto the vehicle’s
tran smissi o n hump. Once the drill bit breaks thr o ugh the
metal floo r, do no t f o rce it any m o re. A cro ss-me mber r u ns
on the outsid e under the flo or. Remove the wax squ are and
cut the c arpe t from th e area around the dril l ed hole.
 Loading...