

Stavoklima SHCP-182-4-AXI, SVCP-181-4-AXI, SHCP-184-4-AXI, SVCP-182-4-AXI, SVCP-184-4-AXI User Manual
...
AXI1, AXI2, AXI3, AXI4
USER’S MANUAL
STAVOKLIMA Saudi 1
AXI
EN
Air Curtain
AXI1, AXI2, AXI3, AXI4
USER'S MANUAL
Email: sales@stavoklima.com.sa
Tel: + 966 (011) 22 00 313
Fax: + 966 (011) 22 00 313 Ext. 116
www.stavoklima.com.sa

AXI1, AXI2, AXI3, AXI4
USER’S MANUAL
STAVOKLIMA Saudi 2
AXI
EN
1.0 Contents
1.0 Contents .............................................................................................................................. 2
2.0 Foreword .............................................................................................................................. 3
3.0 Introduction.......................................................................................................................... 4
3.1 Dimensions ....................................................................................................................... 5
3.2 Product info ...................................................................................................................... 6
3.3 Technical parameters ....................................................................................................... 7
4.0 Package contents ................................................................................................................. 9
5.0 Unboxing............................................................................................................................. 11
6.0 Safety precautions ............................................................................................................. 12
6.1 Fire Safety ....................................................................................................................... 12
7.0 Unit description .................................................................................................................. 13
8.0 Installation .......................................................................................................................... 14
8.1 Required tools ................................................................................................................ 16
8.2 Connection Kit ................................................................................................................ 17
8.3 Silent Blocks .................................................................................................................... 20
8.4 Electro-connection Box .................................................................................................. 22
8.5 Wall Mounting ................................................................................................................ 23
8.6 Ceiling Mounting ............................................................................................................ 26
8.7 Custom Horizontal Mounting ........................................................................................ 28
8.8 Vertical Mounting ........................................................................................................... 28
8.9 Minimal Distances .......................................................................................................... 32
8.10 Connecting the unit ........................................................................................................ 33
8.10 Commission .................................................................................................................... 36
9.0 Wall controller .................................................................................................................... 37
9.1 Features .......................................................................................................................... 37
9.2 Control ............................................................................................................................ 38
9.3 Fan Speed Regulation..................................................................................................... 39
9.4 ON/OFF Indicator ........................................................................................................... 39
9.5 Door Contact .................................................................................................................. 39
10.0 Maintenance ...................................................................................................................... 42
10.1 Fan maintenance ............................................................................................................ 42
10.2 Maintenance schedule ................................................................................................... 43
11.0 Troubleshooting ................................................................................................................. 44
12.0 Important Warnings ........................................................................................................... 45
13.0 Contact Info ........................................................................................................................ 45
AXI1, AXI2, AXI3, AXI4
USER’S MANUAL
STAVOKLIMA Saudi 3
AXI
EN
2.0 Foreword
Thank you for choosing Stavoklima!
At Stavoklima we believe in quality, performance and cost-effectiveness. All our products are
hand-build in the Czech Republic, in the heart of Europe, from the best components available.
We produce all the metal parts ourselves from carefully selected metal sheets using high-end
metal processing machines. We apply very strict quality control from the very beginning of the
production process to the moment of delivery to your door. Customer’s satisfaction is our
highest priority.
The core component of every air curtain are the fans. Inside every Stavoklima unit you will find
long-lasting maintenance-free fans from the World fan industry leader – German company
Ziehl-Abegg. All fans are ErP2015 compliant provide high energy efficiency with respect and
protection to the environment.
The custom-made control unit reflects over 25 years of experience and presents wide variety
of control options with high level of reliability ensuring a quality product with a long lifespan.
All internal electronics comply with SASO directives and the latest standards.
Stavoklima air curtains are made to last & keep occupants comfortable while minimizing
negative environmental impacts. We bring you the European standard of indoor climate
protection.
“Open your doors for the public without compromising the comfort.”
Compliance chart:
ErP 2015
Fan efficiency European norm
CE mark
Compliant with European Standards
SASO Certificate
Certified for Saudi Arabian market
STAVOKLIMA® Quality Control
Stavoklima-specific high-degree quality assurance program
AXI1, AXI2, AXI3, AXI4
USER’S MANUAL
STAVOKLIMA Saudi 4
AXI
EN
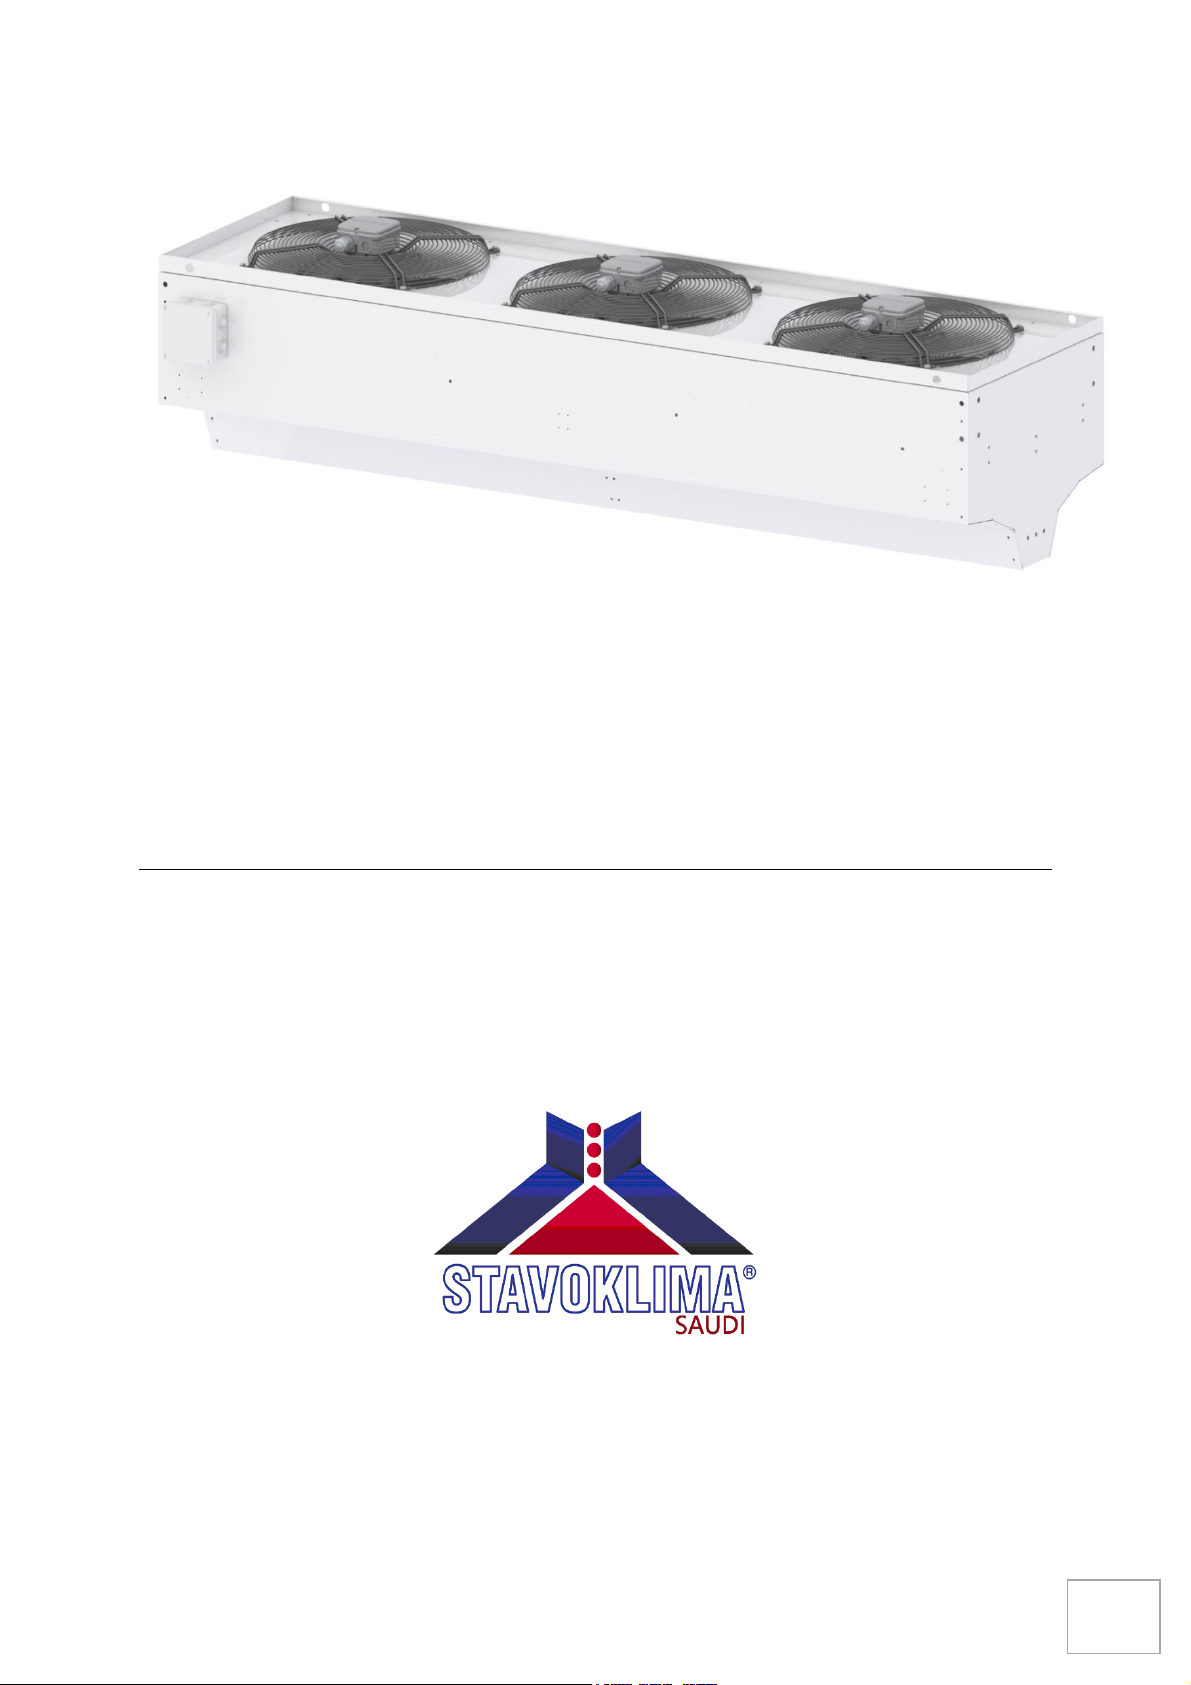
3.0 Introduction
The AXI industrial air curtains are designed for demanding situations with first and foremost
focus on performance and durability. AXI is suitable for applications where regular air curtain
would suffer from environmental effects. The air volume generated by the AXI unit is
unparalleled by standard air curtains. It is perfectly capable of covering higher entrances,
standard entrances with high protection requirements and situations where negative pressure,
chimney effect, draft, wind and other undesired effects complicate the situation. The unit can
be mounted either horizontally (wall mounting, ceiling mounting) or vertically (floor mounting).
Accessory for ceiling mounting is not part of the standard delivery.
An air curtain is a device which generates an engineered stream of guided air through a
doorway or an opening acting as a separator of two adjacent areas against energy loss,
humidity, and mass exchanges.
Every unit is equipped with directable outlet louvre for tuning of air flow vector and heavy-duty
chassis. The air curtain can be operated manually using the wall controller or automatically via
mechanical door contact. In conjunction with supplied door contact it constitutes an
autonomous system that is switched ON only when needed. The integrated delay timer
complements the longevity of the unit and provides stable operation in situations where doors
are opened and closed with high frequency.
The unit uses high-performance maintenance-free axial fans to generate air barrier in the door
area separating the indoor from the outdoor. The outlet should not be blocked by any objects
in the direction of exiting air. The unit’s electrical parts are rated IP 54 on the protection chart,
which means foreign objects impenetrability, partial dust protection and increased water
resistance (splashing water from multiple directions).
The unit is fully capable of running 24/7 in temperatures ranging from -25°C to +50°C.
The default finish is galvanized steel or RAL 7045 (telegrey) for an extra cost.
AXI1, AXI2, AXI3, AXI4
USER’S MANUAL
STAVOKLIMA Saudi 5
AXI
EN
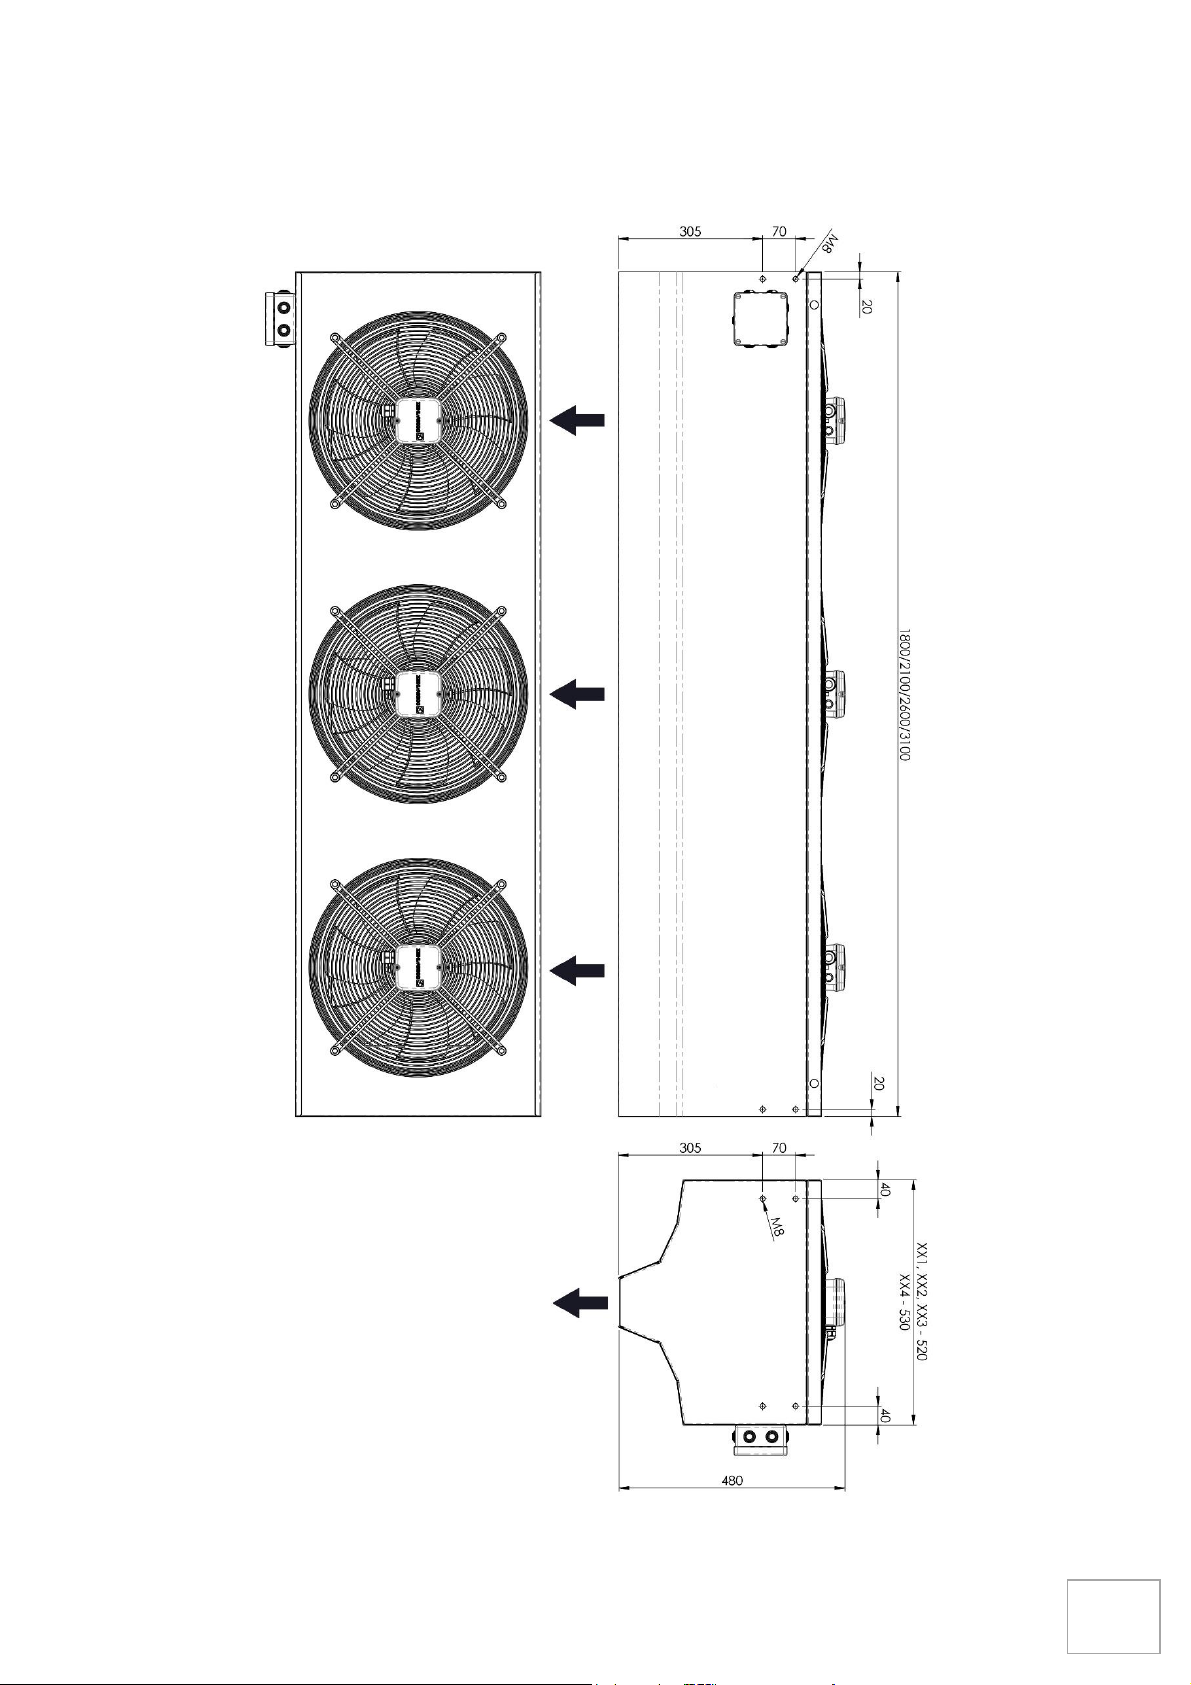
3.1 Dimensions

AXI1, AXI2, AXI3, AXI4
USER’S MANUAL
STAVOKLIMA Saudi 6
AXI
EN
3.2 Product info
There are total of 4 different variants of AXI air curtain – AXI1, AXi2 AXI3 and AXI4. Higher
number represents higher performance. It is designed for door size not higher than 3,7 meters
(AXI1), 4,8 meters (AXI2), 5,7 meters (AXI3) and 6 meters (AXI4). The same rules apply for
vertical units with regard to door width. In case of vertical units, two air curtains can be
mounted on both sides of the door facing each other, thus increasing the effective range. Units
can be joined together (horizontally and vertically) using a special connection kit.
The AXI air curtain houses axial fans with outstanding performance and industrial-grade
durability (IP protection level 54).
IP54 protection level definition (fans + electrical connector box)

AXI1, AXI2, AXI3, AXI4
USER’S MANUAL
STAVOKLIMA Saudi 7
AXI
EN
3.3 Technical parameters
Technical
specifications
SHCP-181-4-AXI
SVCP-181-4-AXI
SHCP-182-4-AXI
SVCP-182-4-AXI
SHCP-183-4-AXI
SVCP-183-4-AXI
SHCP-184-4-AXI
SVCP-184-4-AXI
Air volume
(fan speed 3, 2,
1)
m3/h
6400
8500
11200
15700
4300
5700
7500
10460
2150
2850
3750
5230
Length
mm
1800
1800
1800
1800
Power
V
220
220
220
220
Number of fans
pcs
2 x 350 mm
fan
3 x 350 mm
fan
3 x 400 mm
fan
3 x 450 mm
fan
Nominal power
kW
0,3
0,5
1,0
1,7
Nominal current
A
1,6
2,4
5,0
8,3
IP protection
level
IP
54
54
54
54
Controller
type
Industrial
industrial
industrial
industrial
Outlet width
mm
100
100
100
100
Noise level at 5
m
dB
58
59
67
67
Weight
kg
56
60
61,5
71,5
fan speed voltage: stage 3 - 220V, stage 2 - 160V, stage 1 - 120V
fans: safety margin 15% for 60 Hz voltage frequency
Technical
specifications
SHCP-211-4-AXI
SVCP-211-4-AXI
SHCP-212-4-AXI
SVCP-212-4-AXI
SHCP-213-4-AXI
SVCP-213-4-AXI
SHCP-214-4-AXI
SVCP-214-4-AXI
Air volume
(fan speed 3, 2,
1)
m3/h
8800
11250
14200
16800
5880
7500
9480
11200
2940
3750
4740
5600
Length
mm
2100
2100
2100
2100
Power
V
220
220
220
220
Number of fans
pcs
3 x 350 mm
fan
4 x 350 mm
fan
4 x 400 mm
fan
3 x 450 mm
fan
Nominal power
kW
0,5
0,6
1,3
1,7
Nominal current
A
2,4
3,2
6,7
8,3
IP protection
level
IP
54
54
54
54
Controller
type
Industrial
industrial
industrial
industrial
Outlet width
mm
100
100
100
100

AXI1, AXI2, AXI3, AXI4
USER’S MANUAL
STAVOKLIMA Saudi 8
AXI
EN
Noise level at 5
m
dB
59
59
68
68
Weight
kg
66
71
72,5
78
fan speed voltage: stage 3 - 220V, stage 2 - 160V, stage 1 - 120V
fans: safety margin 15% for 60 Hz voltage frequency
Technical
specifications
SHCP-261-4-AXI
SVCP-261-4-AXI
SHCP-262-4-AXI
SVCP-262-4-AXI
SHCP-263-4-AXI
SVCP-263-4-AXI
SHCP-264-4-AXI
SVCP-264-4-AXI
Air volume
(fan speed 3, 2,
1)
m3/h
12000
14000
17500
21900
8000
9310
11660
14600
4000
4660
5830
7300
Length
mm
2600
2600
2600
2600
Power
V
220
220
220
220
Number of fans
pcs
4 x 350 mm
fan
5 x 350 mm
fan
5 x 400 mm
fan
4 x 450 mm
fan
Nominal power
kW
0,6
0,8
1,7
2,2
Nominal current
A
3,2
4,0
8,3
11,0
IP protection
level
IP
54
54
54
54
Controller
type
Industrial
industrial
industrial
industrial
Outlet width
mm
100
100
100
100
Noise level at 5
m
dB
59
59
68
68
Weight
kg
81
85,5
87,5
96,5
fan speed voltage: stage 3 - 220V, stage 2 - 160V, stage 1 - 120V
fans: safety margin 15% for 60 Hz voltage frequency
Technical
specifications
SHCP-311-4-AXI
SVCP-311-4-AXI
SHCP-312-4-AXI
SVCP-312-4-AXI
SHCP-313-4-AXI
SVCP-313-4-AXI
SHCP-314-4-AXI
SVCP-314-4-AXI
Air volume
(fan speed 3, 2,
1)
m3/h
14400
16600
21150
27800
9600
9000
14100
18530
4800
4500
7050
9270
Length
mm
3100
3100
3100
3100
Power
V
220
220
220
220
Number of fans
pcs
5 x 350 mm
fan
6 x 350 mm
fan
6 x 400 mm
fan
5 x 450 mm
fan
Nominal power
kW
0,8
1,0
2,0
2,8
Nominal current
A
4,0
4,8
10,0
13,8
AXI1, AXI2, AXI3, AXI4
USER’S MANUAL
STAVOKLIMA Saudi 9
AXI
EN
IP protection
level
IP
54
54
54
54
Controller
type
Industrial
industrial
industrial
industrial
Outlet width
mm
100
100
100
100
Noise level at 5
m
dB
60
60
69
69
Weight
kg
96,5
101
103,5
115,5
fan speed voltage: stage 3 - 220V, stage 2 - 160V, stage 1 - 120V
fans: safety margin 15% for 60 Hz voltage frequency
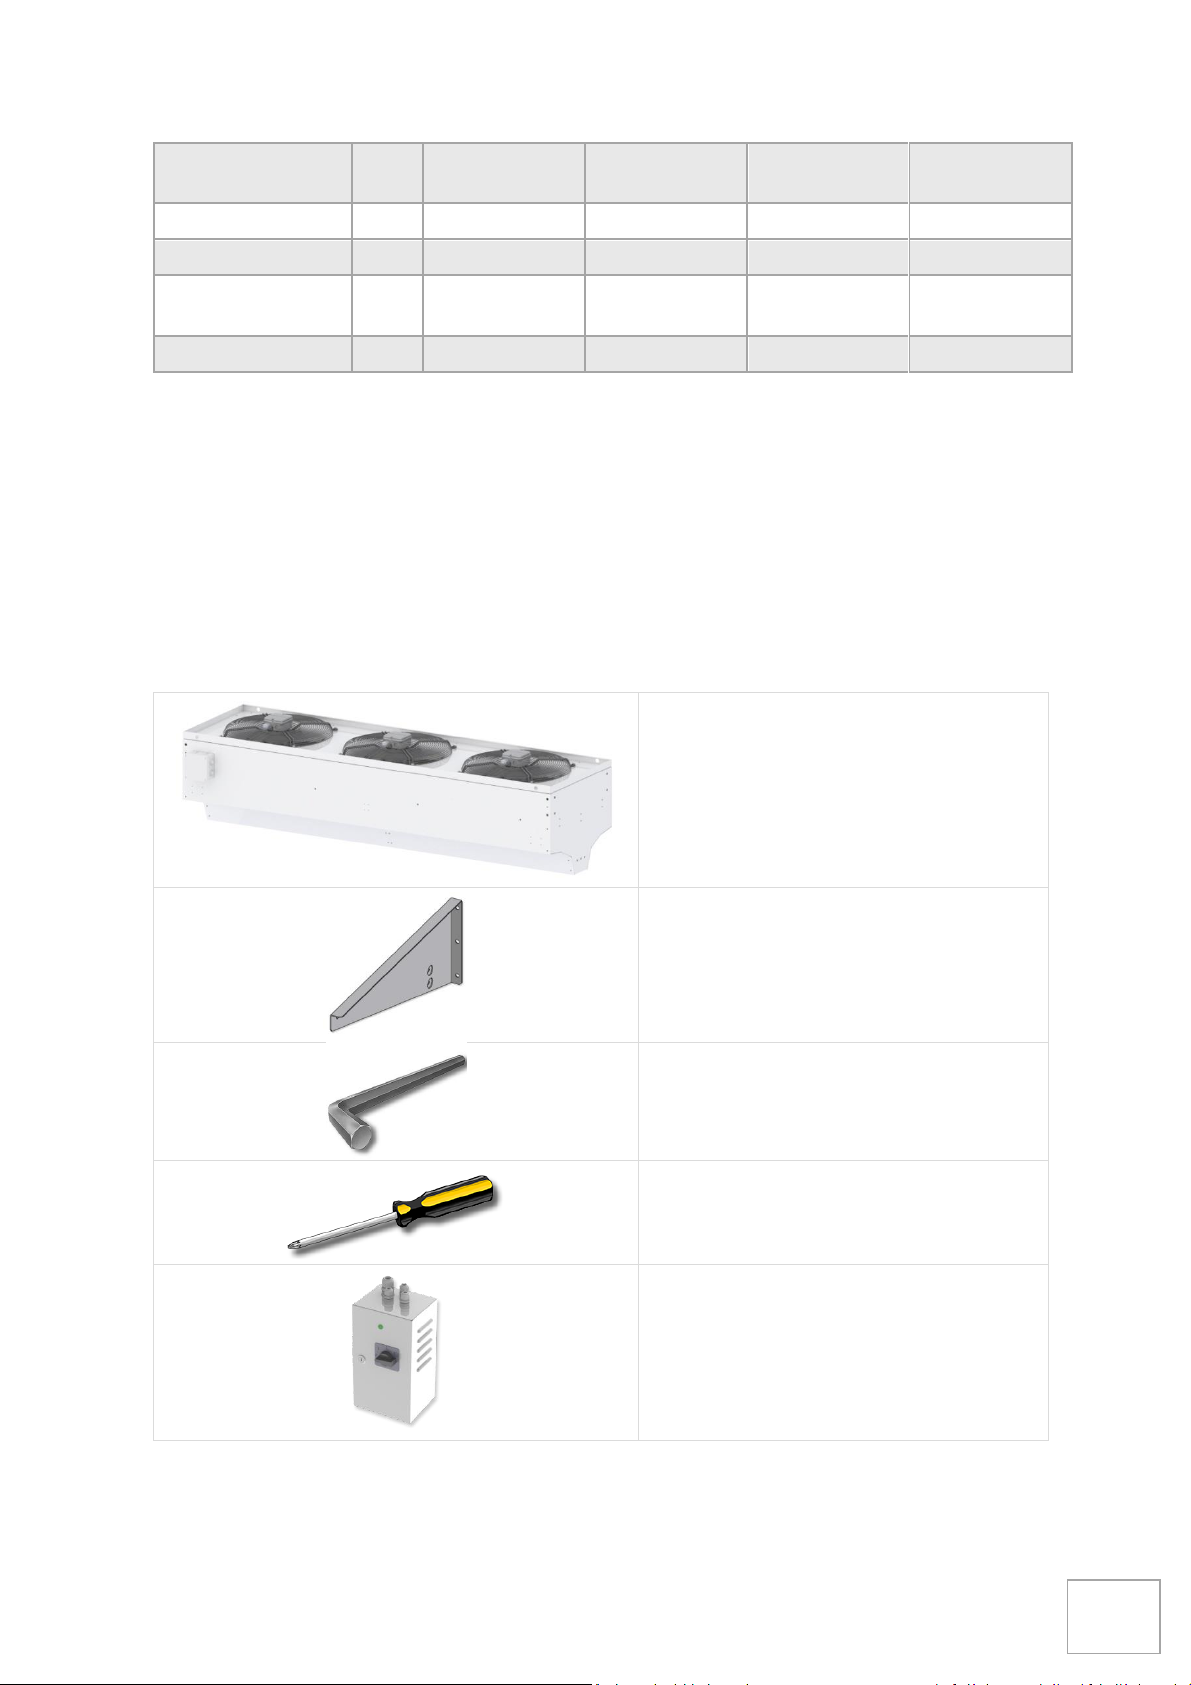
4.0 Package contents
Every unit is packed in a paper box made of recycled cardboard protected by polystyrene foam.
The air curtain housing is wrapped around in a LDPE bag for additional moisture protection.
The contents of the packaging are the following:
AXI air curtain (1x)
Wall suspension (2x) with M8 screws
(4x)
Allen key – size 6 (1x)
Screw driver (1x)
ROJ light industrial wall controller (1x)
AXI1, AXI2, AXI3, AXI4
USER’S MANUAL
STAVOKLIMA Saudi 10
AXI
EN
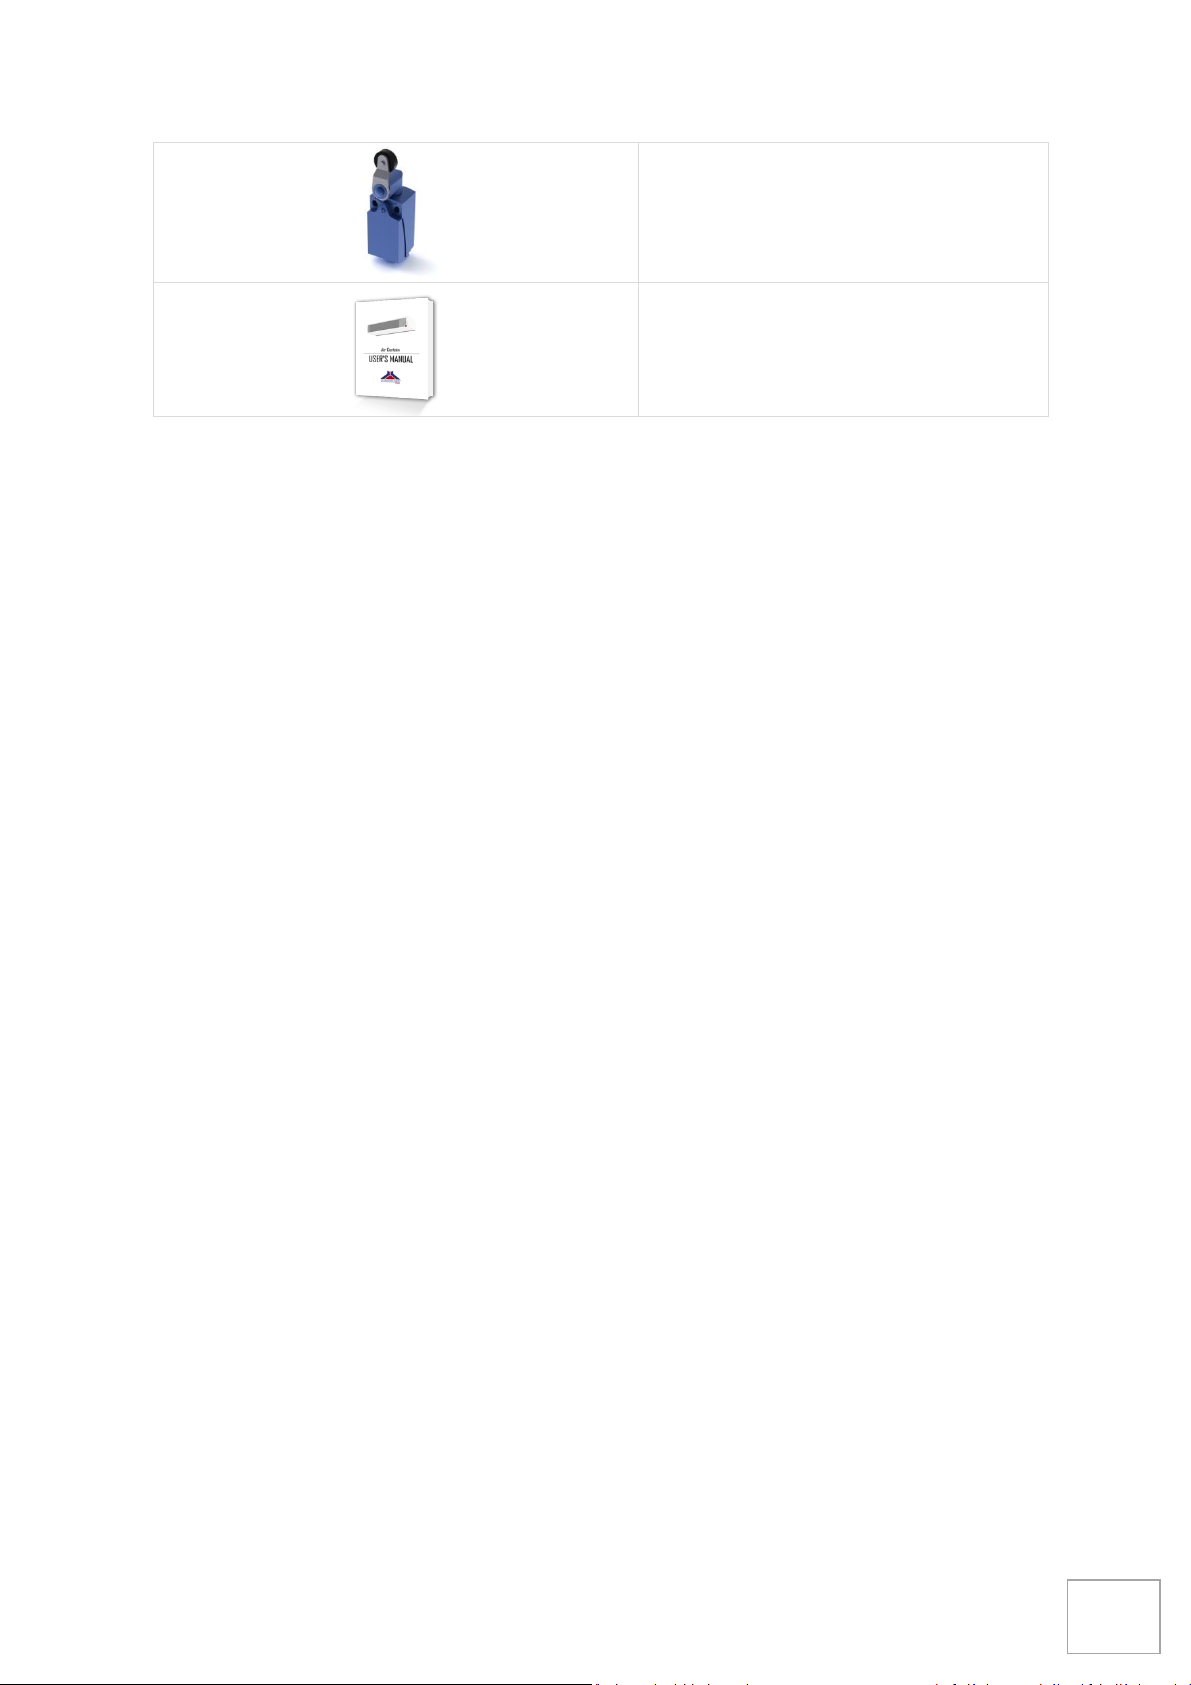
Mechanical door contact (1x)
User’s manual (1x)

AXI1, AXI2, AXI3, AXI4
USER’S MANUAL
STAVOKLIMA Saudi 11
AXI
EN
5.0 Unboxing
Before unboxing, please check the integrity of the packaging itself. If you spot any visible
damage (dents, creases, deformations, bent corners, etc.) do not continue the unboxing
process and report these to the supplier. Unboxing a damaged packaging without reporting
back to the supplier passes the responsibility for the condition of the contents of the packaging
onto the end user.
During unboxing, check carefully the contents of the packaging and inspect all the parts
identified in the previous chapter. If you received extra accessories (aside of the packaging),
use common sense and/or supplier’s instructions to unbox & inspect these.
Make a record of any damaged parts and report back to the supplier.
Transport and handling must be performed with a relevant equipment with adequate capacity.
The packaging should be handled with care and by personnel with relevant qualification only.
WARNING: Follow the instructions on labels placed on the unit. Packaged
units must not be tilted or placed in positions other than as delivered or
recommended by the manufacturer. The packaging also bears the serial
number and type of the unit for easy identification of the unit type.
RECYCLING: Please recycle the packaging in compliance with your local
environmental standards.
STORAGE: Storage conditions for unopened packaging is temperature range
from -10 °C to+50 °C, humidity 50-85% non-condensing.

AXI1, AXI2, AXI3, AXI4
USER’S MANUAL
STAVOKLIMA Saudi 12
AXI
EN
6.0 Safety precautions
Observe the generally applicable country-specific regulations, in particular CSN 12 2002 and
other related regulations. The unit must be disconnected from the mains when performing any
service. Connections and grounding of the unit or its parts must comply especially with CSN
332190, 332000-5-51, 33 2000-5-54. Any electrical servicing must be performed by personnel
with professional qualification in accordance with Section 6 of CBU Regulation
no. 50/78 Coll.
6.1 Fire Safety
Observe the country-specific standards and applicable regulations. In particular, CSN 061008 –
Fire safety of appliances and heat sources, CSN 730823 Fire-technical properties of materials –
degrees of combustibility. Install the unit 150 mm from combustible materials of classes B, C1,
C2, 400 mm from easily combustible materials (class C3), and 1000 mm in the direction of
radiation (air outlet of the unit).
AXI1, AXI2, AXI3, AXI4
USER’S MANUAL
STAVOKLIMA Saudi 13
AXI
EN
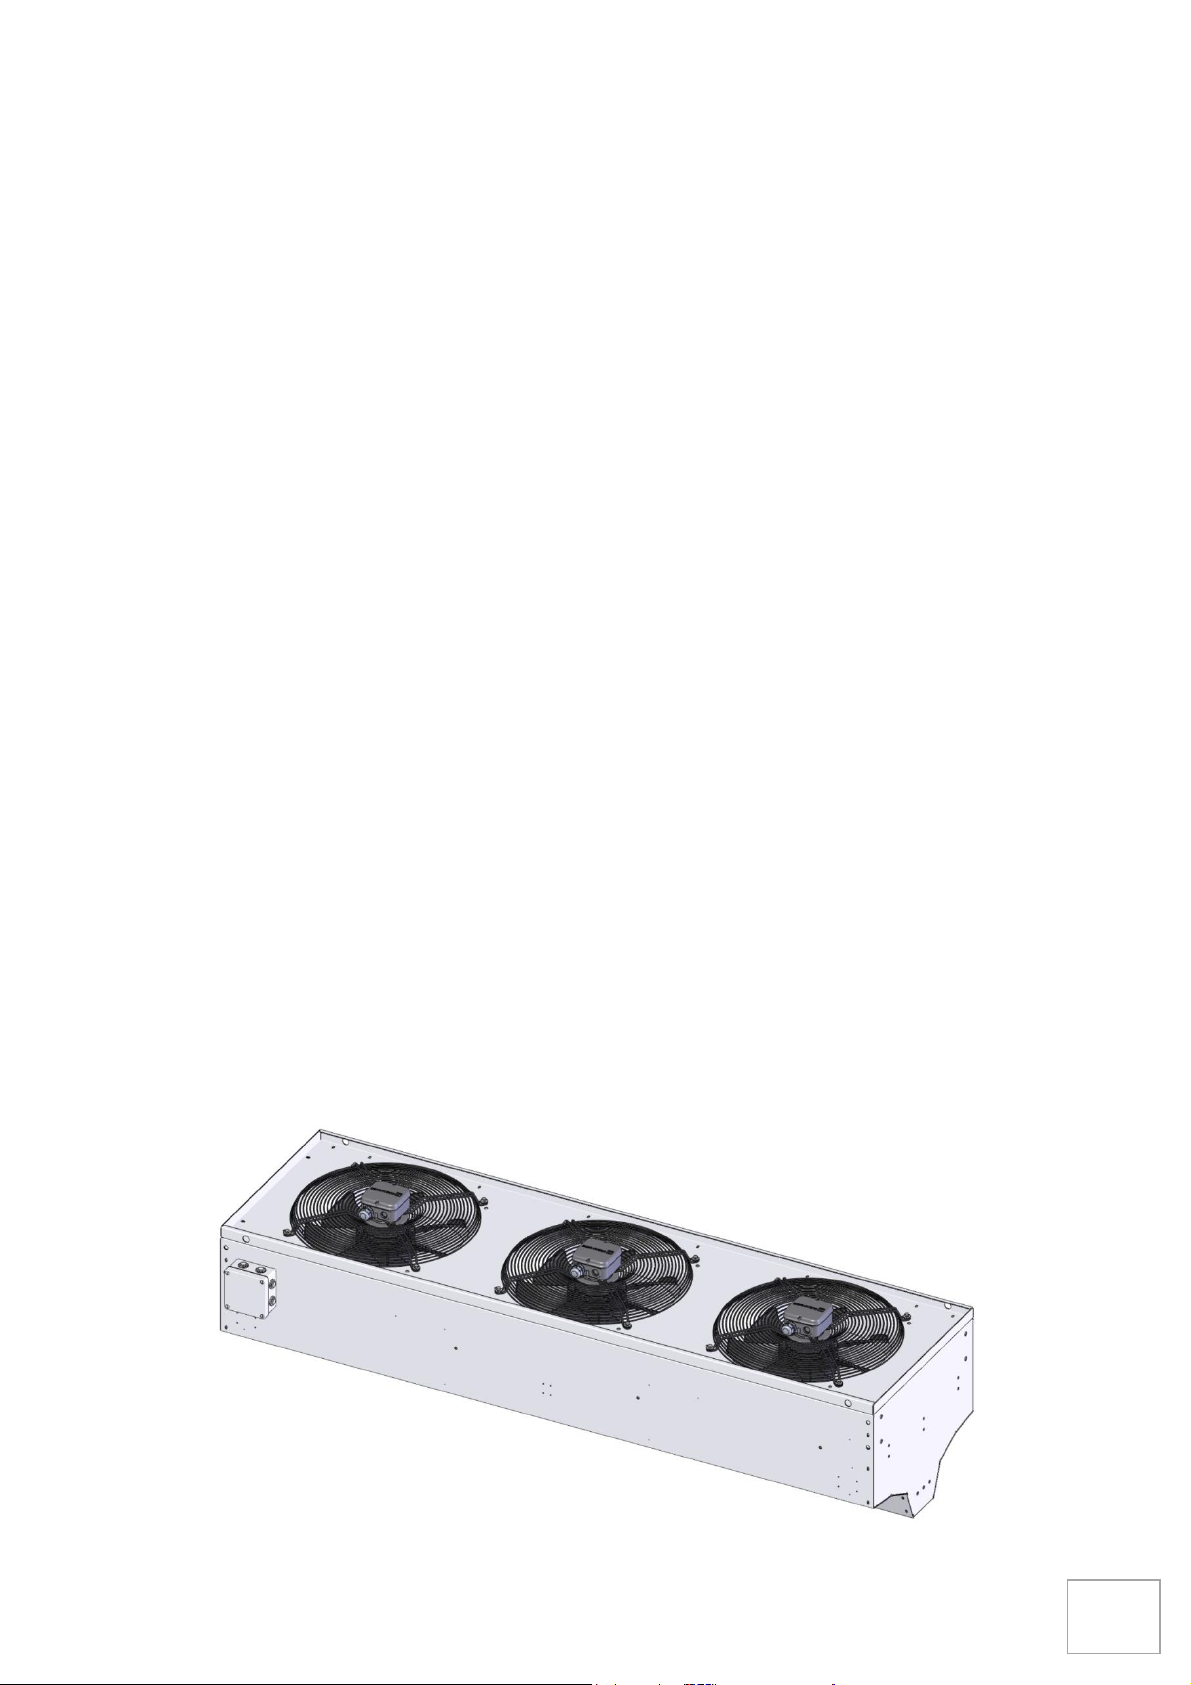
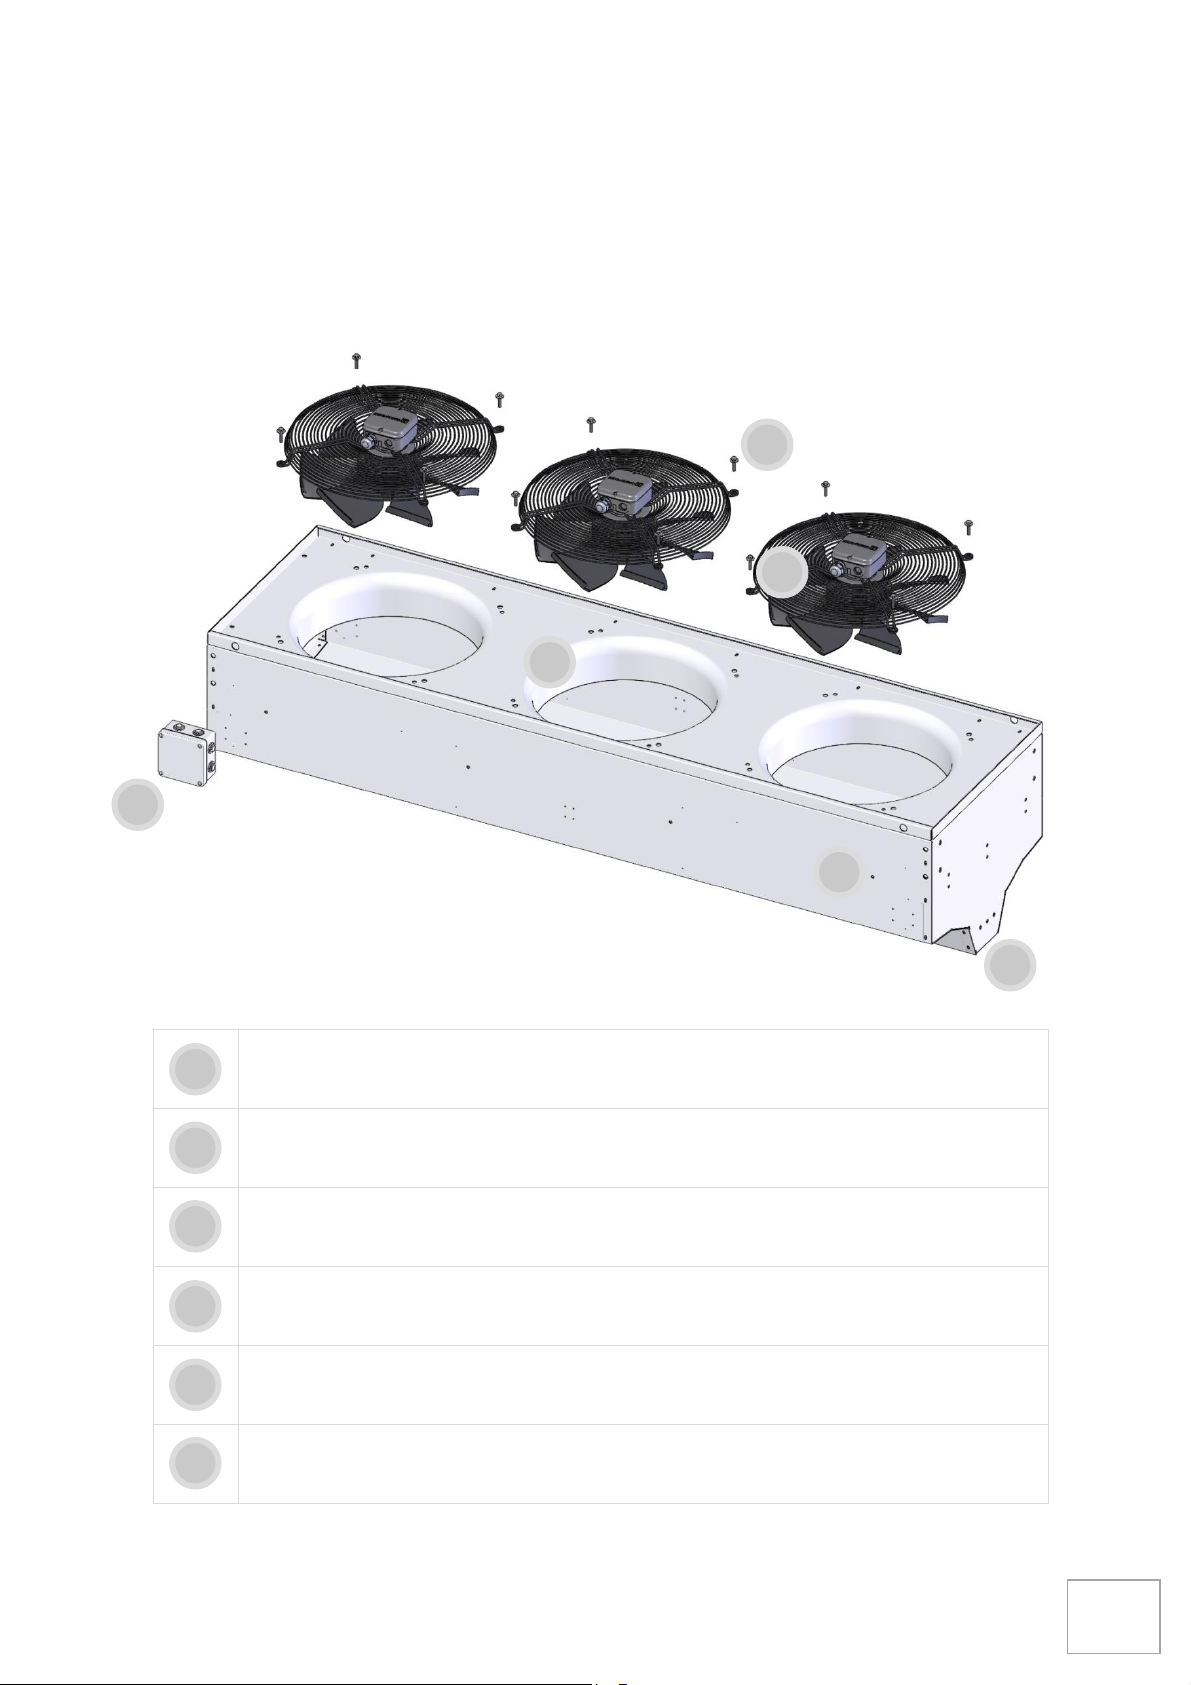
7.0 Unit description
The description of the individual parts of the unit is for informative purposes only. Disassembly
of the unit should be performed by authorized personnel only!
Air curtain backplate with fan collars for better airflow and ErP 2015 compliance
Air curtain chassis
Axial fans with connector boxes
Main connector box (loosely stored within the packaging)
Connecting material (screws)
Air curtain outlet with positionable louvre
1 2 3 4 5
6
1
2
3
4
5
6

AXI1, AXI2, AXI3, AXI4
USER’S MANUAL
STAVOKLIMA Saudi 14
AXI
EN
8.0 Installation
In case of a horizontal installation, the air curtain is suspended at four suspension points located
on both sides of the unit ‒ two on top right and two on the top left side. Connection is
performed using 4 screws with standard M8 threads. These screws are included. In case of
vertical installation, the unit is attached to the floor using a connection kit. Fastening material
for floor mounting (screws, plugs, anchors, etc.) is not included. During the installation, always
make sure all screws and fasteners are used and properly tightened.
Use adequate wall/floor plugs and anchors only. Consider carefully the installation situation
and the suitability of used fasteners and anchors as well as the strength of the structure. Make
sure the wall or floor is stable and capable of supporting the weight of the unit. The
manufacturer is not liable for improperly used wall/floor plugs or other inappropriate fastening
or suspending material.
Follow all local safety regulations and use common sense to avoid injury of self or others.
For proper performance, please respect recommended maximal mounting heights/widths.

AXI1, AXI2, AXI3, AXI4
USER’S MANUAL
STAVOKLIMA Saudi 15
AXI
EN
WARNING: Installation is performed at one's own risk. Any damage resulting
from inappropriate handling is not covered by the warranty.

AXI1, AXI2, AXI3, AXI4
USER’S MANUAL
STAVOKLIMA Saudi 16
AXI
EN
8.1 Required tools
In order to successfully install the air curtain, additional tools are needed. Make sure the
selection of the tools corresponds to the material of the wall. If not, alter the required tools list
accordingly.
List of recommended tools:
Electric drill tool (1x)
Not part of the packaging
Wall/floor plug and corresponding screw
(6x)
or other fasteners suitable for given
situation
Not part of the packaging
Allen key – size 6 (1x)
Chemical anchor (1x)
Not part of the packaging
Water Level (1x)
Not part of the packaging
Screwdriver (1x) or multi-purpose tool
Meter measure (1x)
Not part of the packaging

AXI1, AXI2, AXI3, AXI4
USER’S MANUAL
STAVOKLIMA Saudi 17
AXI
EN
WARNING: Any damage resulting from the use of unsuitable tools or
inadequate fasteners is not covered by the warranty.
8.2 Connection Kit
All industrial AXI units support joining of the units. Any number of horizontally-mounted units
can be combined together in order to cover doors wider than a single air curtain. Such set of
units may need additional support and each of the units be suspended on all four suspension
points.
Connecting multiple units vertically is limited to two air curtains due to limited weight carry
capacity of the air curtains.
The connection kit offers three different mounting positions depending on the desired
tolerance between joined units or distance from the wall (vertical mounting).
The connection kit consists of 4 pieces of triangle-shaped profiles, 12 pieces of M8x30 screws,
4 pieces of M8 nuts, 12 pieces of spring washers – size 8 and 12 pieces of washers – size 8.
4x
connection
profile
12x
fastening
material

AXI1, AXI2, AXI3, AXI4
USER’S MANUAL
STAVOKLIMA Saudi 18
AXI
EN

AXI1, AXI2, AXI3, AXI4
USER’S MANUAL
STAVOKLIMA Saudi 19
AXI
EN
For joining the units together, a connection kit is required (not part of a standard delivery). Each
connection kit consists out of four triangle-shaped profiles that can be combined together.
The connection kit fills multiple roles:
- Joining AXI air curtains together (horizontally and vertically)
- Mounting vertical AXI units to the floor
- Securing the top of the vertically-mounted unit to the wall
The connection kit is assembled using supplied screws and attached to the air curtain using
supplied screws. The air curtain has threaded rivets at designated spots for connection kit.

AXI1, AXI2, AXI3, AXI4
USER’S MANUAL
STAVOKLIMA Saudi 20
AXI
EN
8.3 Silent Blocks
Vertically-mounted AXI industrial air curtains may tend to transfer vibrations generated by the
axial fans to the surface they are mounted to. In order to reduce this effect, install a set of
silent blocks (not part of a standard delivery) between the floor and the connection kit. This
step is optional and case-dependent.
The connection kit consists of 4 pieces of M8x30 silent blocks, 4 pieces of M8 nuts, 4 pieces of
spring washers – size 8, 4 pieces of washers – size 8 and 4 pieces of cylindrical spring.
4x
nuts and
washers
4x
silent
blocks

AXI1, AXI2, AXI3, AXI4
USER’S MANUAL
STAVOKLIMA Saudi 21
AXI
EN
The silent blocks have M8 thread that requires corresponding connection diameter in the floor.
Use equivalent form of floor anchor with M8 nut to establish a firm connection to the silent
blocks.

AXI1, AXI2, AXI3, AXI4
USER’S MANUAL
STAVOKLIMA Saudi 22
AXI
EN
8.4 Electro-connection Box
In order to minimize the space requirements for the AXI packaging, the electro-connection box
of the air curtain comes freely put inside the packaging and needs to be attached to the side of
the unit prior to mounting. Use the supplied self-tapping screws to mount the electroconnection box onto the unit at a suitable location.
Screwing in the self-tapping screws

AXI1, AXI2, AXI3, AXI4
USER’S MANUAL
STAVOKLIMA Saudi 23
AXI
EN
8.5 Wall Mounting
Horizontal mounting is more suitable for situations where the width of the door exceeds the
height and the horizontal installation is not compromised by insufficient loading capacity of the
wall or ceiling, suboptimal offset or other factors (e.g. sectional doors).
Please follow these steps in order to mount the air curtain on the wall:
1) Attach the electro-connection box on the air curtain using supplied screws.
2) Using the meter measure and water level, mark the drilling points for the wall brackets
on the wall. Follow the drilling spacing at the bottom of this page.
3) Drill the holes for wall plugs and anchors. Always use adequate drill bit for selected wall
plugs.
4) Apply chemical anchor inside the drill holes or insert the wall plugs into the wall.
5) Screw in the screws or equivalent fasteners (e.g. threaded rod).
6) Allow the chemical anchor to harden (if used).
7) Lift the air curtain using appropriate handling tools.
8) Attach the wall brackets onto the air curtain using the supplied M8 screws.
9) Tighten the screws. If done properly, the wall bracket should be tightly attached to the
wall.
10) Use supplied screws to attach the air curtain to the wall bracket and tighten all the
screws using the supplied Allen key.
Drilling spacing and recommended mounting

AXI1, AXI2, AXI3, AXI4
USER’S MANUAL
STAVOKLIMA Saudi 24
AXI
EN
The supplied wall brackets offer two
mounting options (standard and reversed)
depending on the desired mounting place.
The unit should be supported for the entire
time until all four screws are properly
fastened.
Use the supplied Allen key to fasten the
screws.
When mounted, make sure the unit is stable
and fit for operation. Check the wall around
the mounting points regularly.
WARNING: Use suitable lifting equipment and keep the unit secured for the
entire time of the installation. Any damage resulting from the use of
inadequate lifting equipment or handling is not covered by the warranty.
OPTIMAL MOUNTING: In order to achieve the best performance, make sure
the unit is centered above the door, it covers the entire width of the door
and it is mounted in proximity of the top of the door. The offset of the door
should be minimal.

AXI1, AXI2, AXI3, AXI4
USER’S MANUAL
STAVOKLIMA Saudi 25
AXI
EN
There are two alternative mounting options for the supplied wall brackets:
Standard mounting
Reverse mounting

AXI1, AXI2, AXI3, AXI4
USER’S MANUAL
STAVOKLIMA Saudi 26
AXI
EN
8.6 Ceiling Mounting
Horizontal mounting is more suitable for situations where the width of the door exceeds the
height and the horizontal installation is not compromised by insufficient loading capacity of the
wall or ceiling, suboptimal offset or other factors (e.g. sectional doors).
Please follow these steps in order to mount the air curtain on the ceiling:
1) Attach the electro-connection box on the air curtain using supplied screws.
2) Using the meter measure, mark the drilling points for the M8 threaded rods. Follow the
drilling spacing at the bottom of this page.
3) Drill the holes for the threaded rods. Use adequate (preferably M9) drill bit for supplied
threaded rods.
4) Apply chemical anchor inside the drill holes.
5) Insert the threaded rods into the ceiling.
6) Allow the chemical anchor to harden.
7) Make sure the intersections of opposing hinge eyes are in level. Use adequate metal
cutting tool to shorten the threaded rods, if necessary.
8) Lift the air curtain using appropriate handling tools.
9) Attach the hinge eyes at the ends of threaded rods to the air curtain using the supplied
screws and tighten all the screws using the supplied Allen key.
The ceiling threaded rods use 4 connection points (threaded rivets) located on the top of the
left and right side panel:

AXI1, AXI2, AXI3, AXI4
USER’S MANUAL
STAVOKLIMA Saudi 27
AXI
EN
The threaded suspension rods are
1 meter long and are not part of a
standard delivery. Please consult the
availabiltiy of longer suspension options
with your local supplier.
The unit should be supported for the
entire time until all four screws are
properly fastened.
Use the supplied Allen key to fasten the
screws.
When mounted, make sure the unit is
stable and fit for operation. Check the
ceiling around the mounting points
regularly.
WARNING: Use suitable lifting equipment and keep the unit secured for the
entire time of the installation. Any damage resulting from the use of
inadequate lifting equipment or handling is not covered by the warranty.
OPTIMAL MOUNTING: In order to achieve the best performance, make sure
the unit is centered above the door, it covers the entire width of the door
and it is mounted in proximity of the top of the door. The offset of the door
should be minimal.

AXI1, AXI2, AXI3, AXI4
USER’S MANUAL
STAVOKLIMA Saudi 28
AXI
EN
There is only one mounting option for the threaded rods:
Ceiling mounting
8.7 Custom Horizontal Mounting
In situations where none of the above-described methods is applicable, a custom solution may
be required. Contact your local Stavoklima supplier for more information.
8.8 Vertical Mounting
Vertical mounting is more suitable for situations where the height of the door exceeds the
width and the vertical installation is not compromised by insufficient space around the door,
suboptimal offset or nature of the door (e.g. winged door).
Since industrial door often serve as a passtrough for cars, forklifts, carriages and other means
of transport that can effectively block the airstream, it is highly recommended to install the
vertical air curatins on both sides of the door rather than covering the entire width of the door
using a single-sided unit with higher performance.

AXI1, AXI2, AXI3, AXI4
USER’S MANUAL
STAVOKLIMA Saudi 29
AXI
EN
A connection kit and silent blocks (optional) are required for floor mounting (not part of a
standard delivery).
Please follow these steps in order to mount the air curtain onto the floor:
1) Attach the electro-connection box on the air curtain using supplied screws.
2) Using the meter measure and water level, mark the drilling points for the floor and the
wall. Follow the drilling spacing at the bottom of this page.
3) Drill the holes for plugs and anchors. Always use adequate drill bit for selected wall
plugs.
4) Mount the connection kit on the bottom and on the top of the air curtain using the
supplied M8 screws. Use supplied Allen key to tighten the screws. Select appropriate
set of mounting holes on the connection kit depending on the offset from the wall.
5) Apply chemical anchor inside the drill holes and push in the threaded rods or insert the
plugs into the floor and the wall.
6) Allow the chemical anchor to harden.
7) Position the air curtain with the connection kit attached over the drill holes.
8) Screw in the screws, equivalent fasteners or nuts on threaded rods and tighten them. If
done properly, the air curtain should be tightly attached to the ground and the wall.

AXI1, AXI2, AXI3, AXI4
USER’S MANUAL
STAVOKLIMA Saudi 30
AXI
EN
A connection kit is required to safely secure the vertically-mounted unit in place. The top of the
unit needs to be attached to the wall in order to prevent knocking the unit down.
The unit should be supported for the entire time until all screws are properly fastened.
Use the supplied Allen key to fasten the screws.
When mounted, make sure the unit is stable and fit for operation. Check the floor and the wall
around the mounting points regularly.

AXI1, AXI2, AXI3, AXI4
USER’S MANUAL
STAVOKLIMA Saudi 31
AXI
EN
WARNING: Use suitable lifting equipment and keep the unit secured for the
entire time of the installation. Any damage resulting from the use of
inadequate lifting equipment or handling is not covered by the warranty.
OPTIMAL MOUNTING: In order to achieve the best performance, make sure
the unit or units are installed as close to the door as minimal distances allow.
Make sure the air curtain covers the entire height of the door. The offset of
the door should be minimal. If units are installed on both sides of the door,
the outlets are to be positioned directly against each other.

AXI1, AXI2, AXI3, AXI4
USER’S MANUAL
STAVOKLIMA Saudi 32
AXI
EN
8.9 Minimal Distances
Respect the minimal distances from the ceiling and the wall in order to use the full potential of
the unit. Regardless the mounting orientation, always make sure the inlet of the air curtain is
at least one fan diameter distant from the wall or ceiling:

AXI1, AXI2, AXI3, AXI4
USER’S MANUAL
STAVOKLIMA Saudi 33
AXI
EN
8.10 Connecting the unit
The air curtain requires connection to electrical network of 220 V (AC) at 60 Hz using hardwired
cable connection. Only authorized electrician is permitted to perform connecting of the air
curtain.
Connecting points are located on the front of the unit. Please use only adequate power cable –
CYKY J3x1,5 mm2.
WARNING: Connecting is performed at one's own risk. Prior to connecting
the air curtain to the electrical network, check the integrity of all supplied
cables. If you detect any damage, do not connect the unit and contact the
supplier. Any damage resulting from inadequate handling is not covered by
the warranty.
Connection points (Industrial wall controller)

AXI1, AXI2, AXI3, AXI4
USER’S MANUAL
STAVOKLIMA Saudi 34
AXI
EN
Wiring diagram

AXI1, AXI2, AXI3, AXI4
USER’S MANUAL
STAVOKLIMA Saudi 35
AXI
EN
The supplied door contact can be used with both ‒ sliding door and standard door. The
mechanical door contact reacts to door opening by angling the contact wheel. Once derailed
from its centered default position, the door contact signals open door status to the controller.
It is meant to be mounted on the door frame with the wheel intersecting the opening radius
of the door. The distance of the sensor wheel and the door edge should be as close as
conditions allow.
Installation spots on sliding and standard door
Mechanical Door contact

AXI1, AXI2, AXI3, AXI4
USER’S MANUAL
STAVOKLIMA Saudi 36
AXI
EN
OPTIMAL MOUNTING: Use self-tapping screws for mounting the door
contact into position. If the situation doesn't allow solid fastening method,
use heavy duty glue to secure the door contact in place. Prior to permanent
mounting, tape the door contact to the door and test the functionality.
8.11 Commission
Prior to the first startup of the unit, check the following:
▪ integrity of the unit’s chassis
▪ stability of mechanical mounting and anchoring of the unit
▪ proper connection of the power cable and the door contact
▪ sufficient circuit breaker in the electrical cabinet supervising the electrical slot the unit
uses
▪ absence of mechanical objects or debris in and around the unit
After positive checkup of the unit the air curtain can be turned ON by turning the fan speed
selector clockwise. From this point the fans of the unit should be working and air should be
coming out of the unit’s outlet.
STARTUP ISSUES: If you encounter difficulties commissioning the unit, refer
to the Troubleshooting chapter (11.0) prior to contacting the supplier.
Follow the steps!

AXI1, AXI2, AXI3, AXI4
USER’S MANUAL
STAVOKLIMA Saudi 37
AXI
EN
9.0 Wall controller
The air curtain is controlled using a hardwired wall controller that is supplied with the unit. For
reliable control, install the wall controller on a place with visual contact between the unit and
the wall controller. The air curtain reacts to turning of the fan speed controller switch.
The controller is universal and can be used to control multiple Stavoklima air curtains, provided
that the total amperage capacity of the controller is not exceeded.
ROJ 14-10 light
Basic industrial wall controller
Limited to 14 A (total amperage of units connected to the controller)
ROJ 30-20 light
High-capacity industrial wall controller
Limited to 30 A (total amperage of units connected to the controller)
9.1 Features
The command is repeated as long as a button is pressed. The buttons have the following
functions:
power connection & connection to
the air curtain
ON/OFF indicator
Fan speed controller with ON/OFF
switch
Wall controller access door with a
lock

AXI1, AXI2, AXI3, AXI4
USER’S MANUAL
STAVOKLIMA Saudi 38
AXI
EN
9.2 Control
For optimal use, make sure the wall controller is installed in the vicinity of the air curtain and it
is installed on a visible place. Make sure all the personnel operating the unit have been properly
instructed.
WARNING: The wall controller houses transformer and high voltage
controller which powers the unit’s fans. Only authorized electrician is
permitted to open the device and perform maintenance, connection or
repairs. Any damage resulting from inadequate handling is not covered by
the warranty. Interaction with the device internal components is performed
at one's own risk. For safety purposes, keep the wall controller locked and
keep the key in the safe location.

AXI1, AXI2, AXI3, AXI4
USER’S MANUAL
STAVOKLIMA Saudi 39
AXI
EN
9.3 Fan Speed Regulation
Three different fan speed levels can be selected using the wall controller allowing the end user
to change the air volume of the air curtain depending on site conditions. Higher fan speed levels
entail decreased sound comfort and vice versa. Changing fan speed levels with door contact
enabled does not require the door to be opened.
Zero fan speed level
The fans are set OFF
Fist fan speed level
The fans are set on low speed
Fist fan speed level
The fans are set on medium speed
Fist fan speed level
The fans are set on high speed
9.4 ON/OFF Indicator
The wall controller is equipped with ON/OFF LED indicator that provides visual confirmation
that the unit is ON or OFF. This is especially practical in loud environments.
The LED indicator is lit
The air curtain is running
The LED indicator is dark
The air curtain is powered down
9.5 Door Contact
Once the door contact is connected to the contacts of the wall controller, the automatic mode
is enabled. From this point on, the door contact switches the air curtain’s fans ON and OFF
based on the position of the door and selected speed level. To preserve the longevity of the
fans, the door contact has integrated timer that keeps the air curtain running for 60 seconds
after the door close. If the door is opened during this period, the 60 seconds’ interval resets
and starts over.
The default time interval of the timer can be adjusted by accessing the timer relay inside the
wall controller. Only authorized electrician is allowed to perform this procedure. Using the
screw driver, the timer can be set anywhere between 50 milliseconds and 100 hours.

AXI1, AXI2, AXI3, AXI4
USER’S MANUAL
STAVOKLIMA Saudi 40
AXI
EN
Use the top control wheel to set the amount of time within the
selected range. The middle wheel changes the preset of the time
range:
1 s
Finest setting – milliseconds
Range from 50 milliseconds to 1 second
10 s
Fine setting – seconds
Range from 500 milliseconds to 10 seconds
1 m
Basic setting – seconds
Range from 3 seconds to 60 seconds
10 m
Extended setting – minutes
Range from 30 seconds to 10 minutes
1 h
Minute setting – minutes
Range from 3 minutes to 60 minutes
10 h
Long-lasting setting – hours
Range from 30 minutes to 10 hours
100 h
Ultra-long setting – hours
Range from 5 hours to 100 hours
OPTIMAL PRESET: Change the timer only in case of different requirements
dictated by the situation. Recommended delay range for standard operation
is between 15 seconds and 15 minutes. Do not use unnecessarily short or
long intervals. The timer’s sole purpose is to prevent unit from frequent
switching ON and OFF in situations where the doors are repeatedly opened
and closed in short intervals.

AXI1, AXI2, AXI3, AXI4
USER’S MANUAL
STAVOKLIMA Saudi 41
AXI
EN
WARNING: Only authorized electrician is allowed to interfere with the unit’s
timer. Do not change the time presets without well-defined requirements
and always record the default state for cases, when the default setting need
to be restored. Any damage resulting from inadequate timer setting is not
covered by the warranty.

AXI1, AXI2, AXI3, AXI4
USER’S MANUAL
STAVOKLIMA Saudi 42
AXI
EN
10.0 Maintenance
All the units are always factory-checked and tested carefully prior to dispatch. The most
frequent errors stem from misunderstanding the function of the unit or from incorrect
connection. Therefore, observe carefully the manufacturer’s instructions to avoid complicated
troubleshooting. Under no circumstances operate the unit in contradiction with the User’s
manual.
The unit is designed for electrical networks of 220V/60 Hz (alternatively 230/50 Hz). Running
the unit under different conditions may result into irreversible damage to the unit. Such
damage is not covered by the warranty.
WARNING: Disconnect the unit from electrical supply prior to any work on
the device. Risk of electric shock and/or injury.
10.1 Fan maintenance
Every air curtain from AXI product family is equipped with maintenance-free axial fans. It is
recommended to frequently check these fans and keep them clean. Use compressed air to
clean the fan and wet towel to clean the area around the fans.
WARNING: Do not insert any foreign objects into the fan area. Never attempt
to clean a powered fan. Any damage resulting from improper maintenance is
not covered by the warranty.

AXI1, AXI2, AXI3, AXI4
USER’S MANUAL
STAVOKLIMA Saudi 43
AXI
EN
10.2 Maintenance schedule
The AXI air curtains are made of high-quality components that do not require any special
maintenance. To ensure long life of the unit, we recommend maintaining it in the specified
intervals or more often. If the unit is operated for a long time continuously, periodic
maintenance (once a month) is recommended. The environments with high density of airborne
particles would require more frequent maintenance. Do not use a chemically-treated duster,
benzene, thinner, polishing powder, or similar solvents for wiping. It may damage or fade the
surface of the unit.
Every 3 months
Wall/floor mount check
Check the wall bracket, ceiling suspension or the floor mounting and their
surroundings for signs of structural instability (cracks, unevenness, compromised
integrity of the wall, loose wall plugs, etc.). Check tightening of all the fasteners and
bolted connections. In addition, check tightening of the bolts of the outlet louvres –
they are accessible on the inner sidewall of the curtain. Tightening of the central
vanes is done by turning the louvres (by tightening the internal threaded pin).
Every 3 months
Unit check & cleaning
Check the fan housing and the internal/external parts of the unit and clean them,
where possible. Do not wash the fan body with water! Use a damp cloth to remove
the dust from the surfaces – otherwise the fan windings may be damaged. Work
carefully when wiping the outlet louvres. Fragile – risk of damage!
Every 3 months
Safety check
Check the safety of the unit in terms of electric-shock protection in accordance with
applicable country-specific standards, incl. checks of the grounding system.
Every 3 months
Wall controller check
Check the integrity of the wall controller body, secure connection, functionality of the
ON/OFF LED indicator and fan speed controller.
Every 3 months
Door contact check
Check the mounting of the door contact. If necessary, relocate it to a more secure
position.
WARNING: Disregarding the maintenance schedule may result into poor
performance or irreversible damage to the unit. Such damage is not covered
by the warranty.

AXI1, AXI2, AXI3, AXI4
USER’S MANUAL
STAVOKLIMA Saudi 44
AXI
EN
11.0 Troubleshooting
Please refer to the following list of situations before contacting the supplier:
The unit won't
start upon
turning the fan
speed controller
to position 1, 2
or 3
1) Door contact check
If door contact is enabled, open the door to activate the unit or turn the door contact
OFF. The unit should respond immediately.
2) Power cable check
Check whether the power cable is connected to the circuit breaker in the electrical
cabinet and make sure it is connected to the air curtain’ connector box
3) Circuit breaker check
Check the circuit breaker inside the electrical cabinet and make sure it matches the
minimal requirements for operating the air curtain.
The unit won't
stop upon
closing the door
(with door
contact
connected)
1) Timer check
The air curtain is programmed to switch the fans OFF 30 seconds after closing of the
door. Make sure the door stay closed for more than 30 seconds.
2) Door contact check
Check thoroughly the door contact, it's integrity and mounting position. The sensor
wheel is very likely too close to the door and the state of the door is constantly OPEN.
Mount the door contact further away from the door edge.
3) Door check
Check the door for objects blocking the door from fully closing and remove them.
The strange
noises are
coming from
inside of the
unit
1) Internals check
Check the internals of the unit including the outlet. Remove any foreign objects.
2) Fans check
Check the fans for signs of wear and damage. If you detect any signs of a faulty fan,
contact your supplier of air curtains.
The unit's
performance is
low
1) Fan speed check
Switch the unit into higher fan speed level.
2) Fans check
Check the fans for signs of wear and damage. If you detect any signs of a faulty fan,
contact your supplier of air curtains.
3) Specifications check
Check the User's manual for maximal recommended mounting height and make sure
this height is not exceeded.
4) Negative conditions check
There are factors that can have negative impact the air barrier generated by the air
curtain ‒ for example chimney effect, pressure difference, draft, etc. These factors
need to be minimized in order to provide best conditions for the air curtain to
function properly.
The power
shortage
occurred and
the stopped
working
1) Restore the power supply
Once the power supply is restored, the unit will continue operation with last active
setting loaded in the memory before the power down.

AXI1, AXI2, AXI3, AXI4
USER’S MANUAL
STAVOKLIMA Saudi 45
AXI
EN
12.0 Important Warnings
Door air curtains are designed to prevent losses of heat or cold, to ensure filtration and heating,
or to ensure ventilation with mixing facilities. Any other use is not the intended application. The
manufacturer cannot be held liable for any damage resulting from misapplication. Observe this
manual when operating these units.
Installation, wiring and repairs must be performed by qualified personnel in accordance with
applicable country-specific regulations and standards.
13.0 Contact Info
STAVOKLIMA Saudi
Email: sales@stavoklima.com.sa
Tel: + 966 (011) 22 00 313
Fax: + 966 (011) 22 00 313 Ext. 116
www.stavoklima.com.sa
 Loading...