

Page 1
SM-CEILING-TM
Strong™ Truss Mount Adapter for Ceiling Mounts
with 1-1/2 in. NPT Threading (Black)
INSTALLATION
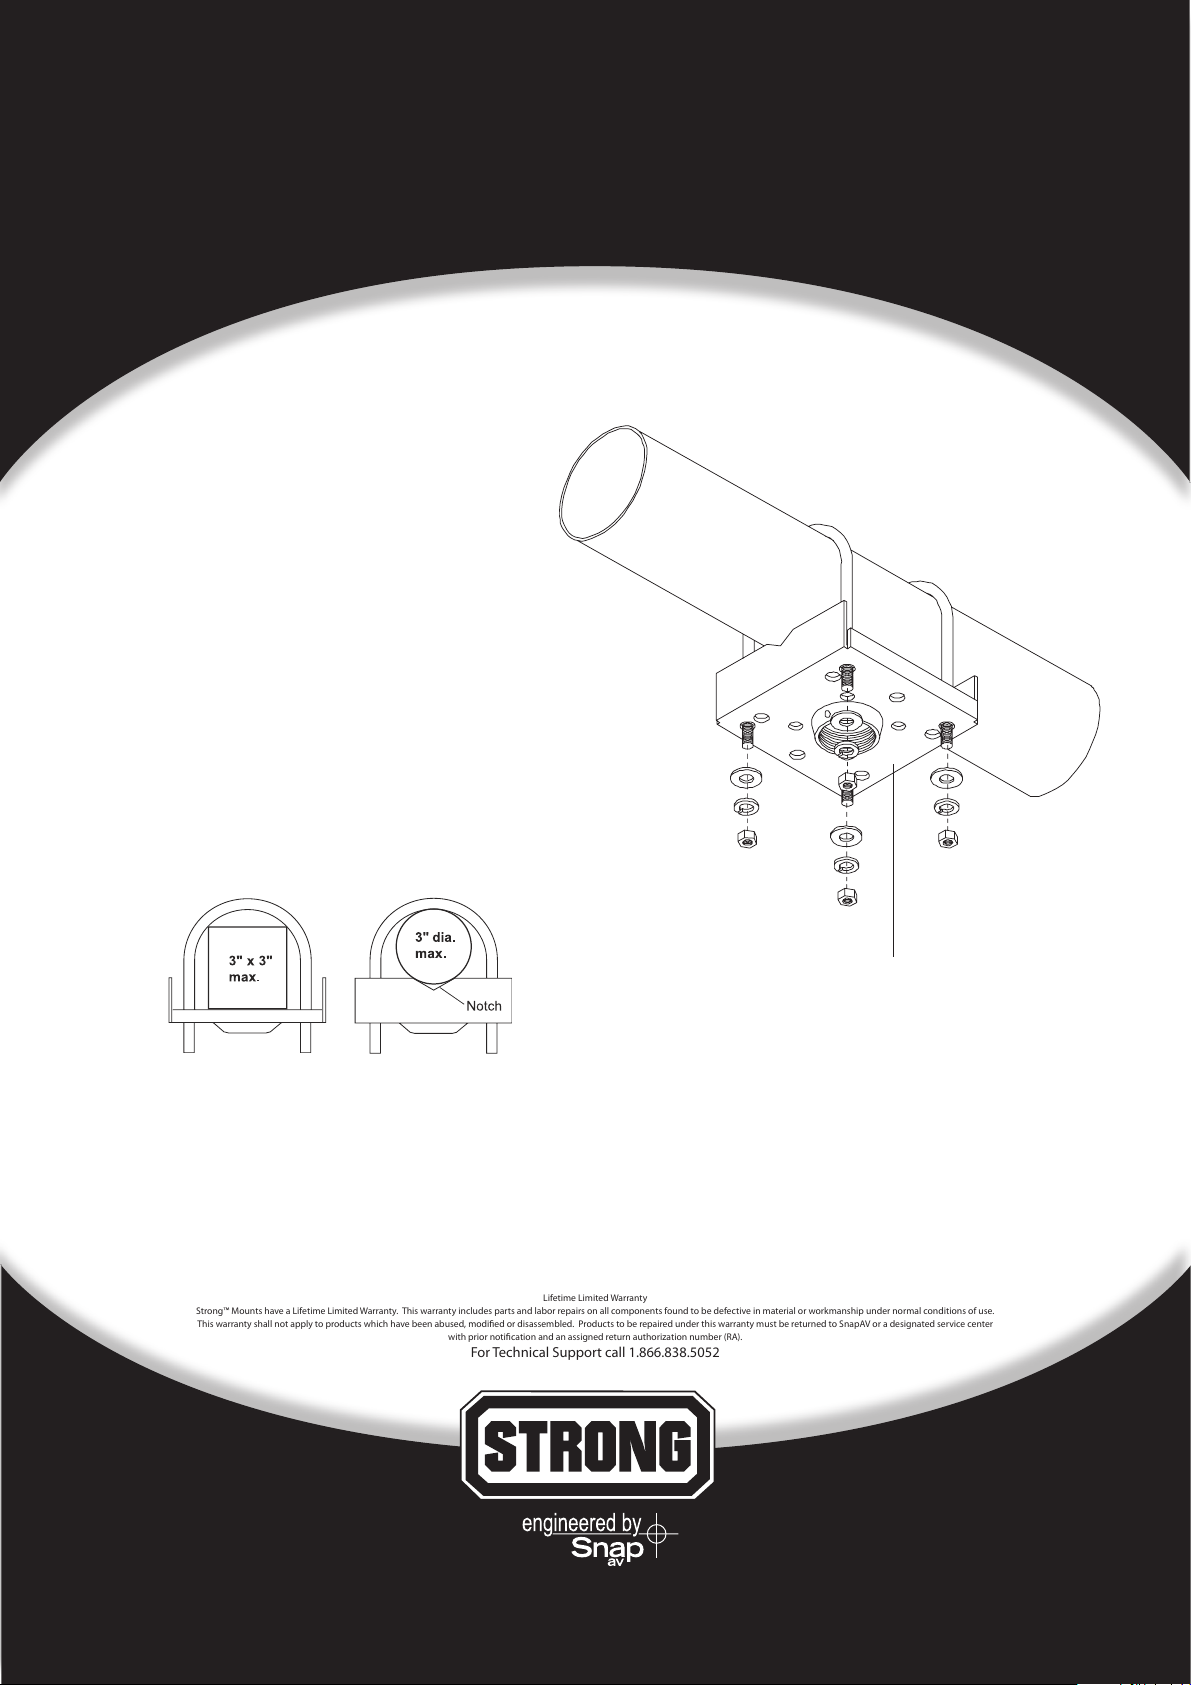
1. Position the “U” Bolts over the top of the truss
in the desired location
2. Slide the Adaptor Plate onto the “U” bolts - under
the truss - and attach with the Hex Nuts, Lock Washers
and Washers (Fig 1).
Note: The orientation of the plate is determined by the
shape of the truss (Fig 2). For square beams, the beam
will sit in between the two side pieces. For round beams,
the beam will sit in the notch.
Fig 1
Adapter Plate
Fig 2
3. Attach the extension column using a level to ensure
the column is straight.
4. Attach the desired mounting plate to the end of the column.
Strong™ Mounts have a Lifetime Limited Warranty. This warranty includes parts and labor repairs on all components found to be defective in material or workmanship under normal conditions of use.
This warranty shall not apply to products which have been abused, modied or disassembled. Products to be repaired under this warranty must be returned to SnapAV or a designated service center
with prior notication and an assigned return authorization number (RA).
For Technical Support call 1.866.838.5052
Lifetime Limited Warranty
 Loading...