

Page 1
PAINTING
The subwoofer grill can be painted to match the wall color and room decor. Only paint the grill when
it has been removed from the subwoofer. Remove the scrim cloth on the back of the grill before
painting and reapply after painting. The cloth is adhered using repositionable spray adhesive, so there
is no need for additional adhesive when reapplying.
The grill should be painted carefully so not to clog the ne holes with paint. Optimal painting options are:
• Spray paint (‘dust’) several thin layers instead of a few thick layers.
• Use a ‘dry’ brush or roller to minimize the amount of paint applied in each layer.
OWNER’S MANUAL >> IN-WALL SUBWOOFER
TROUBLESHOOTING
Episode® speakers are designed to function trouble-free. Most problems that occur are due to simple
issues. If you have trouble, check the list of simple xes below. If the problem persists,
contact Episode® Technical Support at 1.866.838.5052.
NO SOUND
1. Verify that there is audio coming from the source selected. Select another source if necessary.
2. Ensure that any power ampliers are turned on and connected properly.
3. Check any connections at all devices, such as a volume control. Temporarily bypass the control if needed.
4. Check wire connections at each subwoofer not producing sound for good contact to bare wire, not
wire insulation.
WARRANTY
Limited Lifetime Warranty
Episode® In-wall, In-ceiling, and Bookshelf Speakers have a Lifetime
Lifetime
Limited Warranty. This warranty includes parts and labor repairs on
all components found to be defective in material or workmanship under
normal conditions of use. This warranty shall not apply to products which
have been abused, modied or disassembled. Products to be repaired
under this warranty must be returned to SnapAV or a designated service
center with prior notication and an assigned return authorization number (RA).
ES-SUB-IW-SNGL8
111005
© 2011 Episode
Thank you for purchasing a great product from one of the best sounding
speaker lines available today, Episode®. We appreciate your purchase and
are committed to providing the highest quality products possible.
The Episode® In-wall Subwoofer model is a superb choice for home theater
and Multi-Room installations. It has been designed with advanced technological
components that allow for high performance and a lifetime of enjoyment.
Page 2

IMPORTANT INSTRUCTIONS AND CONSIDERATIONS
EA-AMP-SUB-1D-110
• Read and understand all instructions.
• Before beginning installation, carefully plan locations accounting for potential
electrical, plumbing or other obstacles.
• Contact a suitable contractor if you are unsure of how to best install.
• When mounting next to a stud, ensure there is enough
room for the dog legs to swing out and catch the stud.
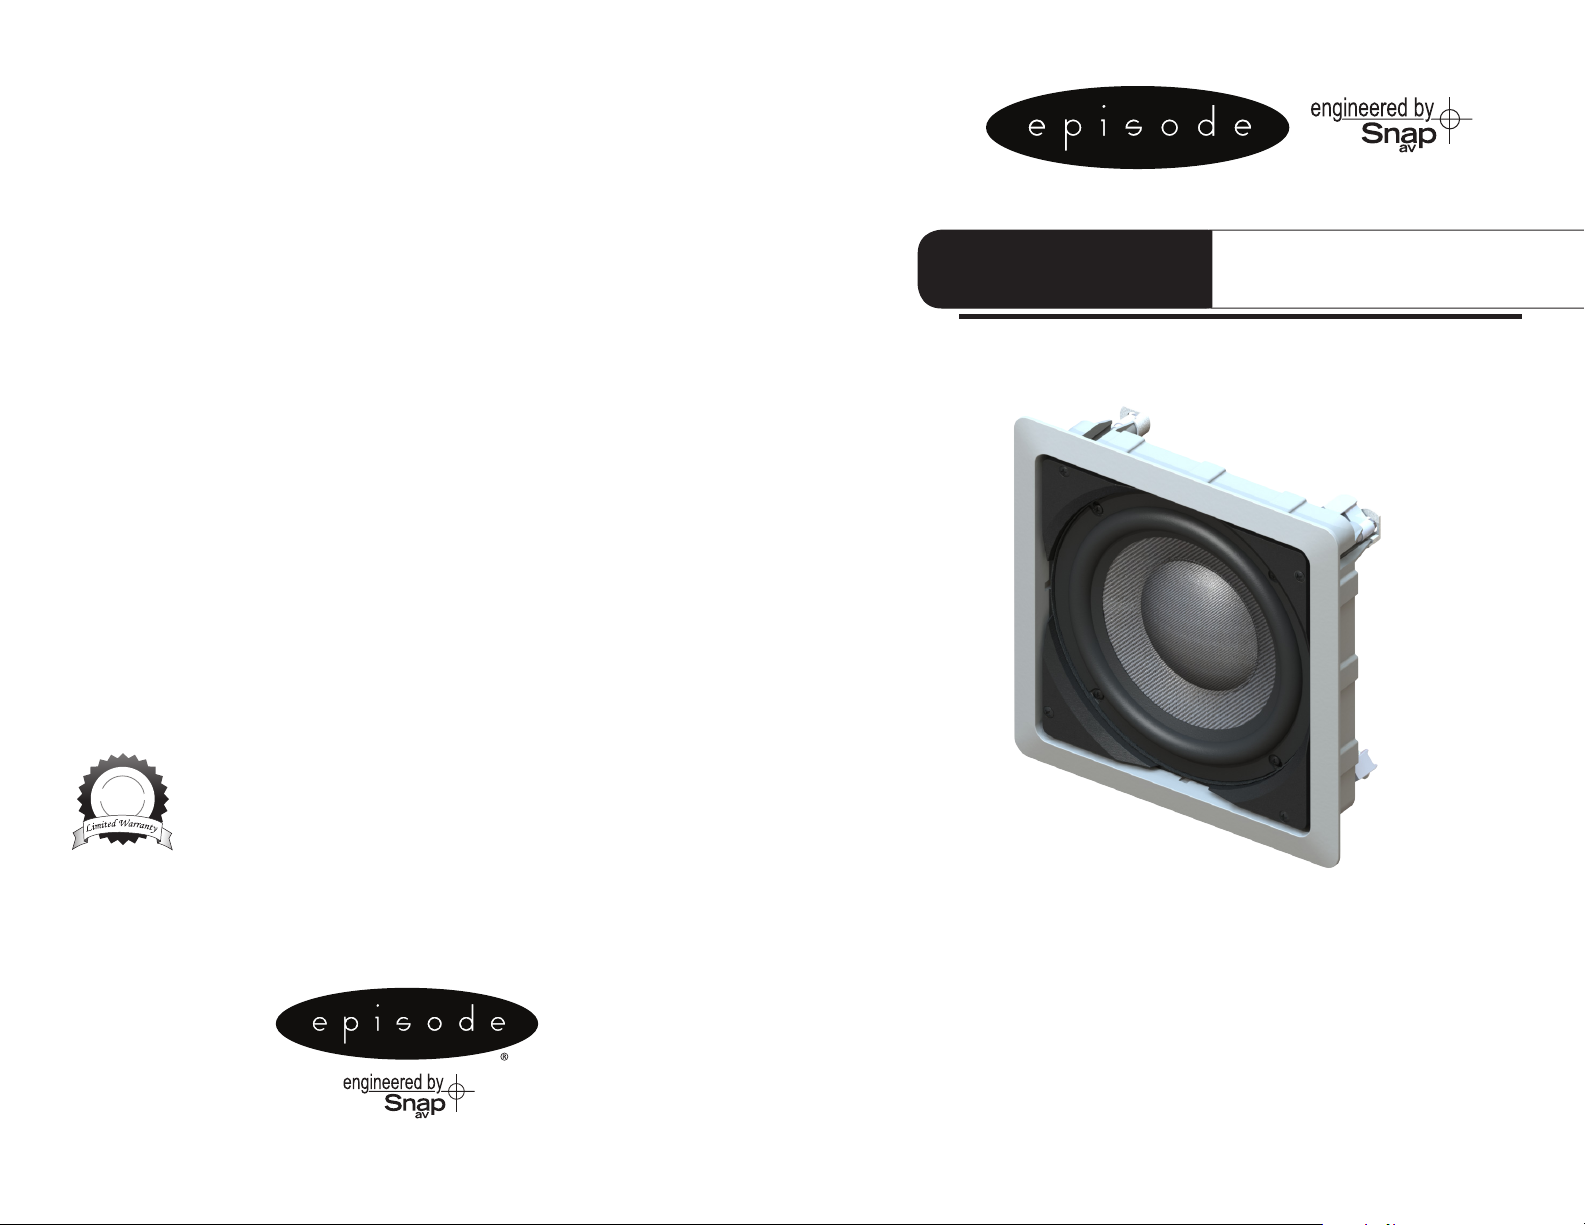
• Place the friction-t grill over the subwoofer.
Make sure it is ush against the wall.
SUBWOOFER PLACEMENT
• Episode® subwoofers are designed to make your music and movies come alive. However, where
you place the subwoofer can have an effect on the performance that you receive. All rooms are
different, but the strongest output will likely occur if you place your subwoofer in the front of the
room on the same wall as your front channel speakers.
• Keep subwoofer about 2 feet away from corners and other surfaces that might interfere with or
reect sound, such as tall furniture.
INSTALLATION
EXISTING CONSTRUCTION
• Speaker wire must be run from the equipment to the subwoofer location. High-quality 14 gauge
or thicker speaker wire is recommended.
• Once you have determined your locations, mark the hole to cut out for the subwoofer using the
supplied template. Don’t forget to allow for the size of the subwoofer bezel if you are choosing to
install the subwoofer near a side wall or other item that could become an obstacle.
• If you are unsure of potential obstacles,
carefully cut a small hole at an angle to
the inside of the template line as illustrated.
This will allow you to ‘plug’ the hole easily
if needed. If the area is clear and is a good
location for the speaker, cut the edges of
the opening at 90 degrees to accommodate
the subwoofer.
• Strip the insulation on each conductor approximately ¼” and insert into the subwoofer terminals.
Ensure that there are no stray strands of wire protruding from the connectors. Observe proper
polarity (+ to + and – to – for the subwoofer and at the amplier).
• Insert the subwoofer into the wall and tighten each of the four screws for the subwoofer ‘dog’ legs
enough to clamp the subwoofer against the wall.
TOP VIEW OF WALL
First Cut
45°
Second Cut
90°
CAUTION: Do not overtighten screws.
This could result in damage to both
the subwoofer and wall.
CONNECTING THE SUB
Engineered in the USA
Manufactured in China
ES-SUB-IW-SNGL8
+
-
VERIFYING PROPER PHASE
• When proper polarity is not maintained, the speakers play at the opposite ‘time’ from each other, or out
of phase. The result is audio with lack of bass and vocals that sound thin or distant.
1. Sit in the normal listening position for the system.
2. Play some music with your receiver set to Mono.
• Listen to the music and observe the audio.
– Does the bass sound full and even with the other audio?
– Do the vocals sound centered and even in volume?
– If any of the answers are YES, follow steps 3 and 4.
3. Turn off your receiver and reverse the connections for one of the speakers.
4. Repeat your test at the same volume level. When the sound has the loudest and best sounding
bass, and vocals are centered and clear, your connections are correct and in-phase.
 Loading...